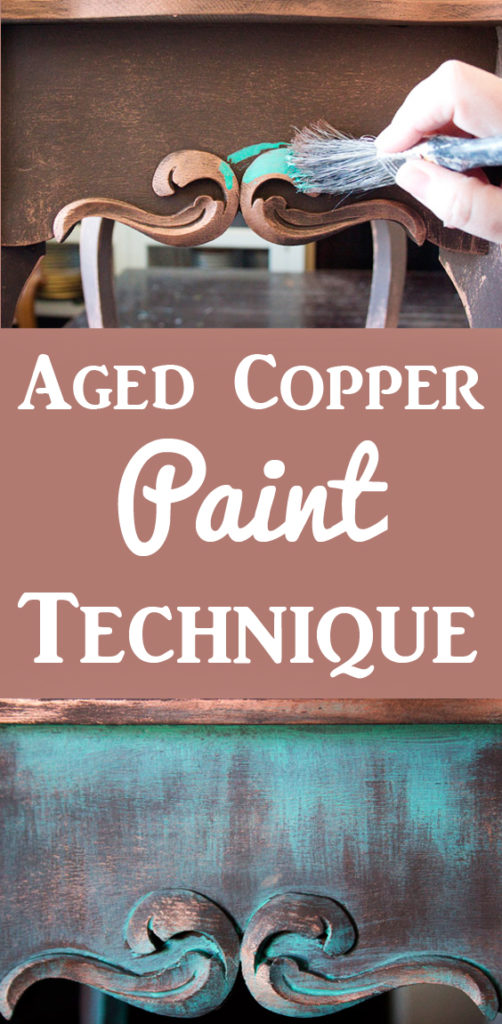
It’s simple and easy to create an Aged Copper Paint Finish.
Today, we’ll go through the simple steps together, and you’ll be able to transform any of your furniture with confidence!
Hello, dear Graphics Fairy Friends! It’s Heather from Thicketworks, and we’re going to have some fun!
This post was sponsored by Heirloom Traditions Paint, because
helping others create amazing DIY Decor is their passion!
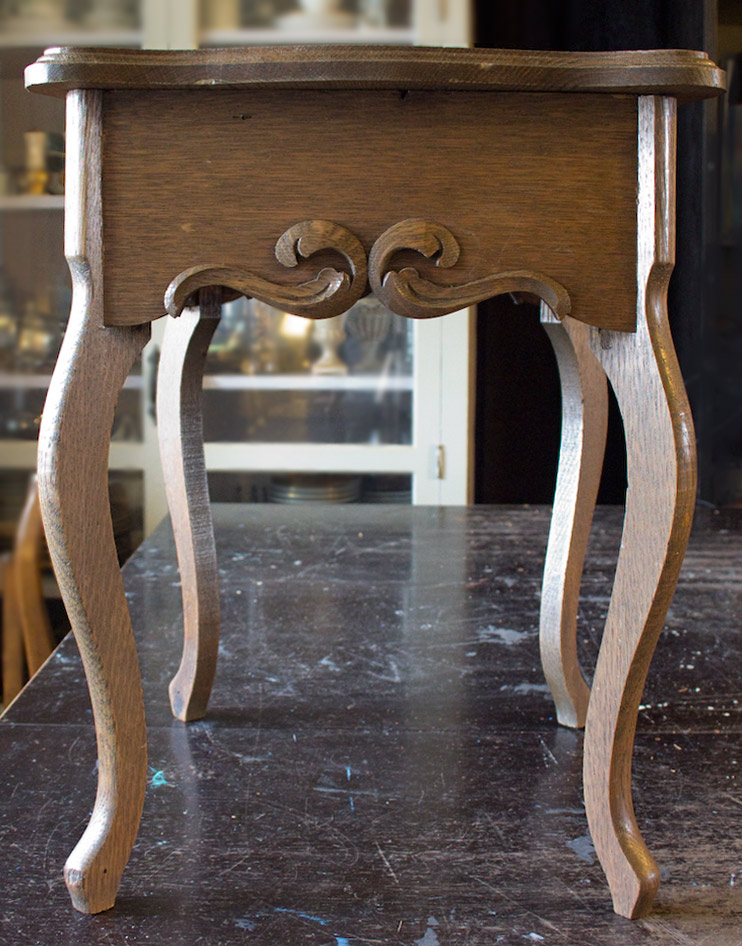
Let me introduce you to my latest find.
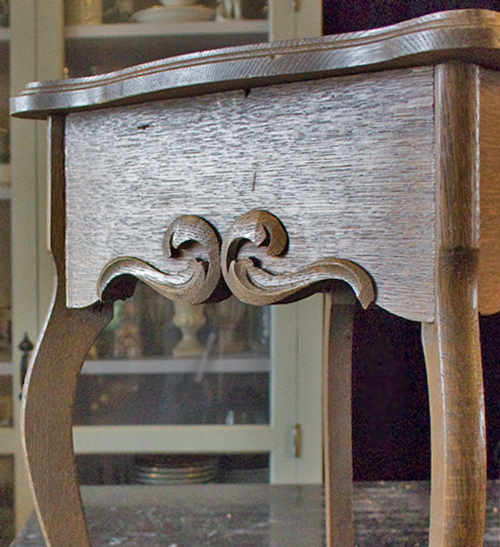
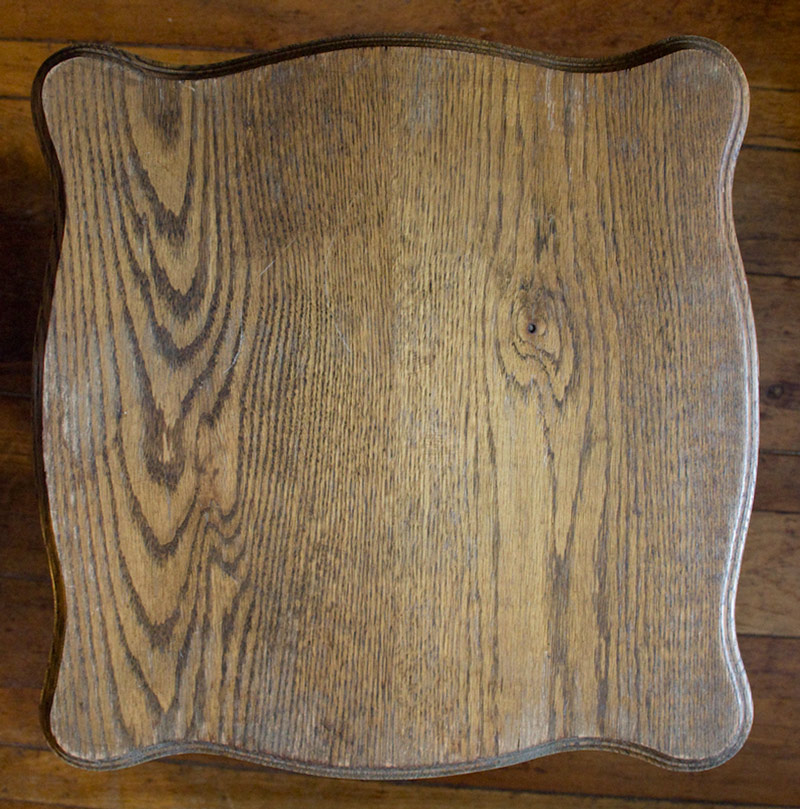
This sturdy little fellow, created from oak, had a kind of elegantly primitive charm:
The original finish wasn’t in terrible shape, but it really did nothing for me.
(Wood purists may not enjoy this post. Just sayin’)
He had sweet details, and chunky charm.
However – what he also had was potential.
If you see potential in pieces like this, follow along and learn a trick or two to bring out the hidden glory.
To create this finish, you’ll need the following:
Supplies:
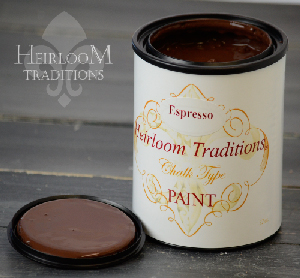
- Heirloom Traditions Chalk Type Paint: Espresso
- Heirloom Traditions Venetian Texture Medium
- Heirloom Traditions Metallic Gel Wax: Copper Sunset
- A container to mix your Texture Medium in
- A spoon
- An implement to mix your Texture Medium with
- A palette knife, or other spreading tool
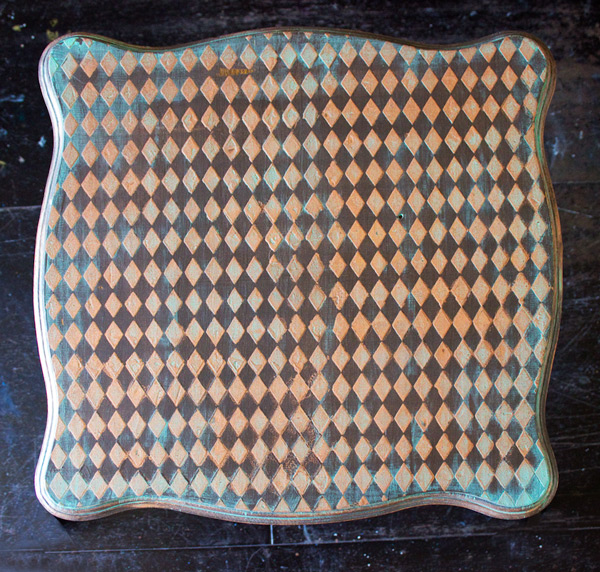
- Your favorite stencil (I used a simple Harlequin pattern)
- Heirloom Traditions Wax: Clear
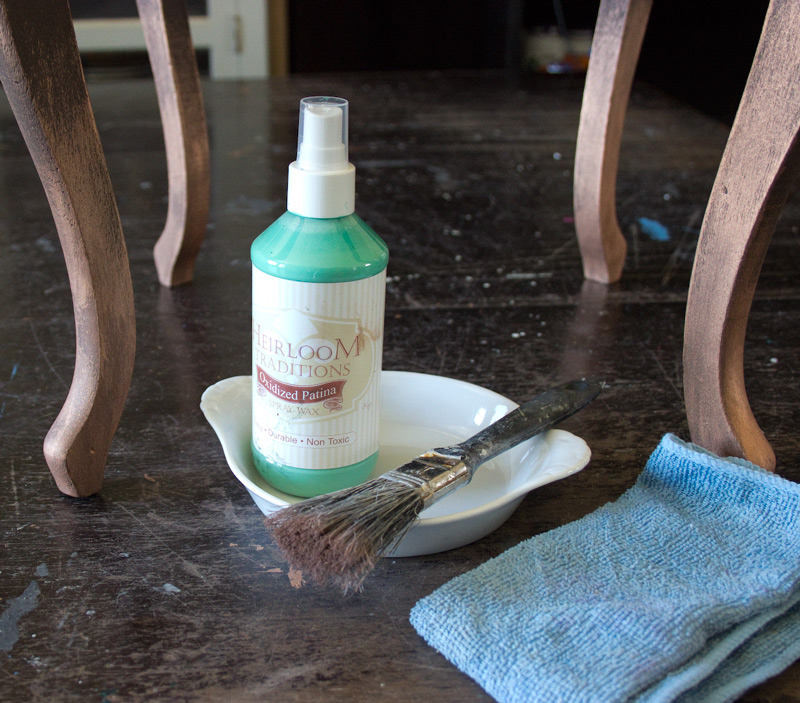
- Heirloom Traditions Wax: Oxidized Patina
- Your favorite paint brush
- A scruffy old paint brush
- Damp rags
Optional:
- A hand sanding block (rough grit will do)
To prepare the surface for painting, I gave him a very quick hand sanding.
Nothing intense. He was just a bit rough around the edges, and needed a little smoothing.
After sanding, a thorough wipe down with a damp cloth, and he was ready for his face lift!
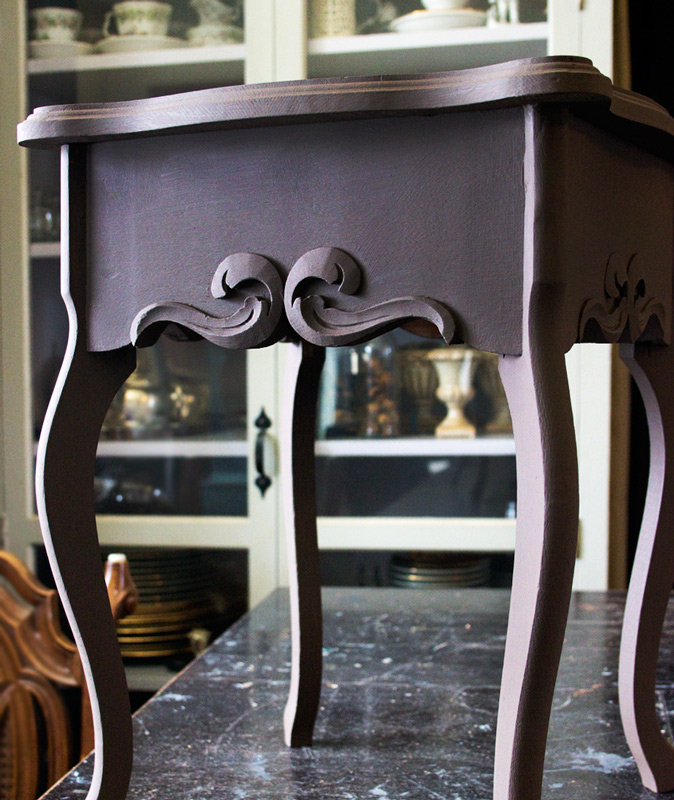
Two coats of Heirloom Traditions Chalk Type Paint in Espresso, and phase one is complete.
The photo of this color is ‘off’– it’s a truly deep dark brown, like chocolate. Delicious!
I love experimenting.
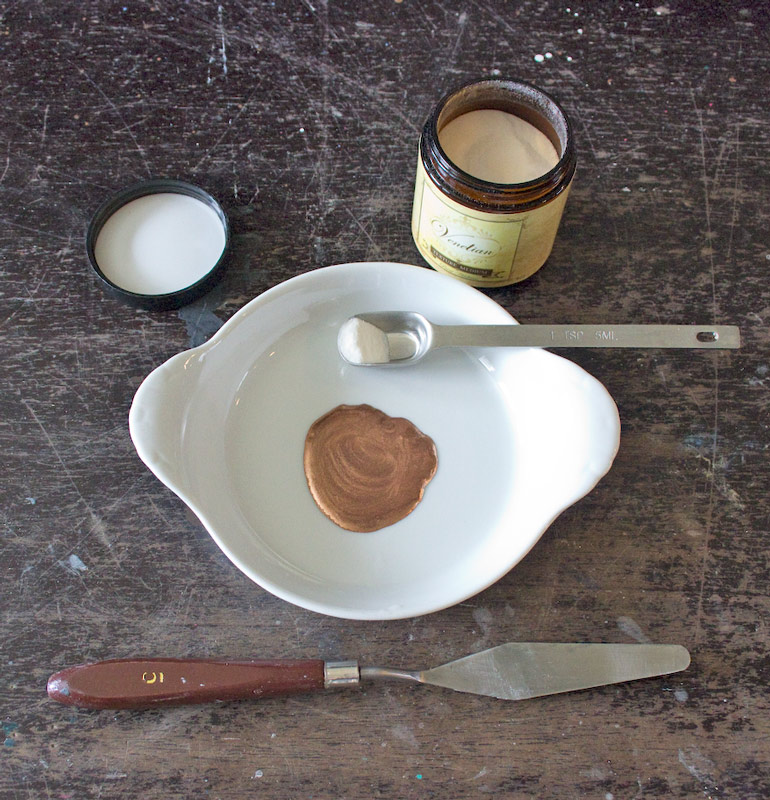
It seemed to me that the rich metallic of Heirloom Traditions Copper Sunset Gel Wax might work well with the Heirloom Traditions Venetian Texture Medium. I was determined to find out!
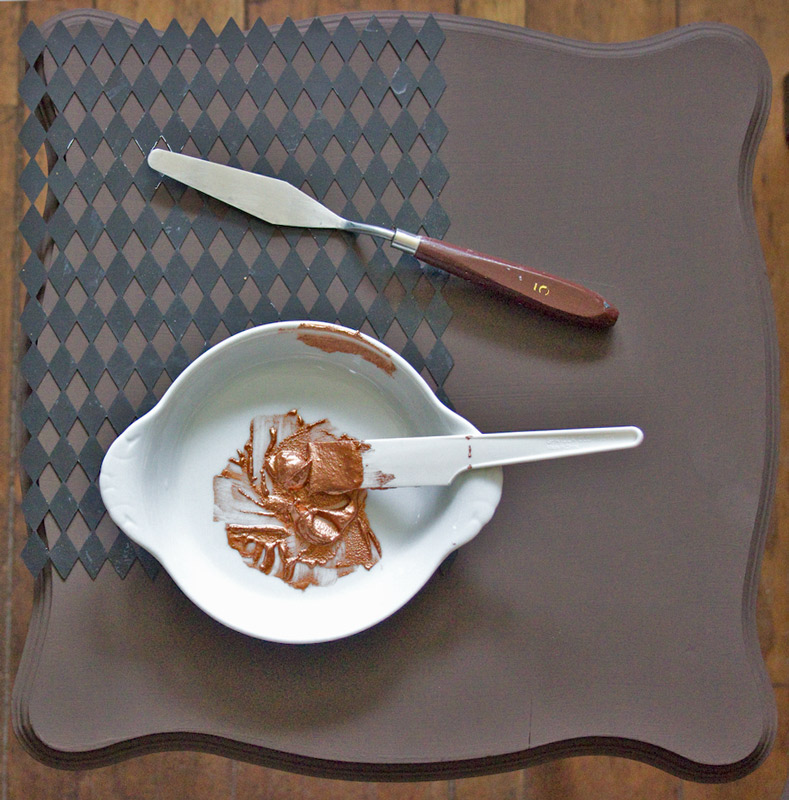
Add a bit of the Gel Wax to your mixing container, and sprinkle a small amount of Texture Medium into it:
Mix thoroughly, until the Texture Medium is the consistency of frosting.
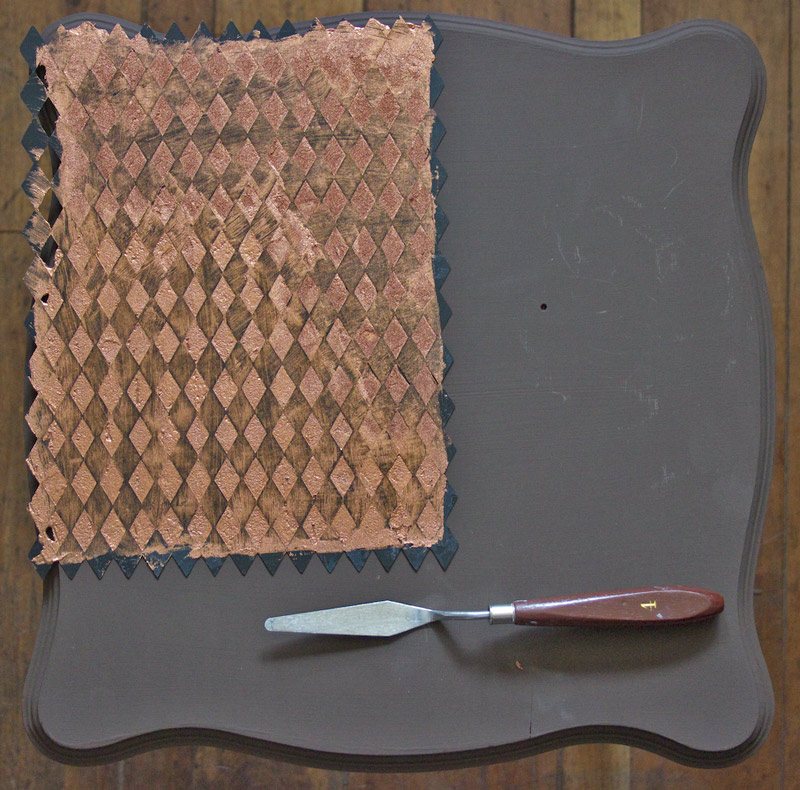
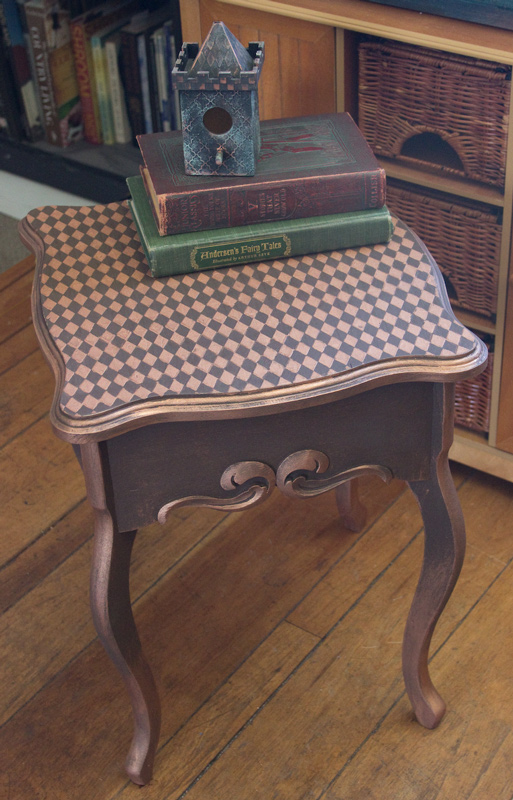
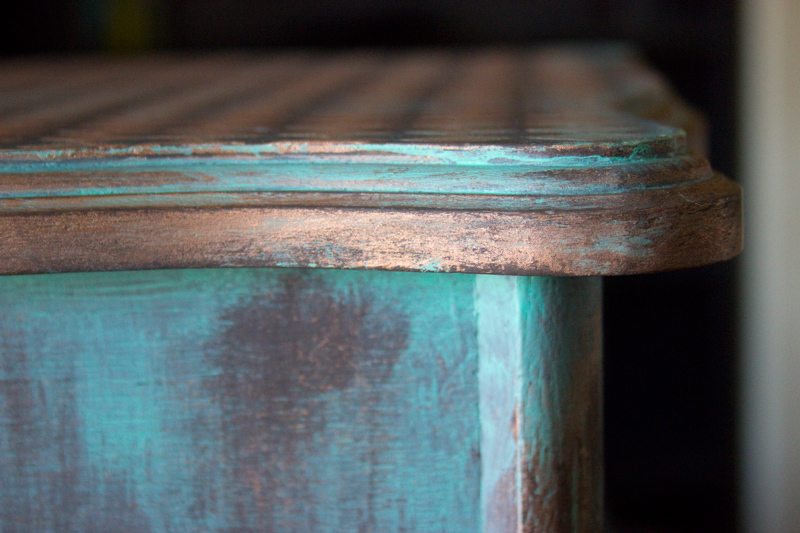
Place your stencil on the surface of the painted table, grab your spreading tool, and apply the Texture Medium through the stencil.
When you have completed one area, carefully lift the stencil off, clean and dry it.
Repeat the pattern until the entire surface is covered.
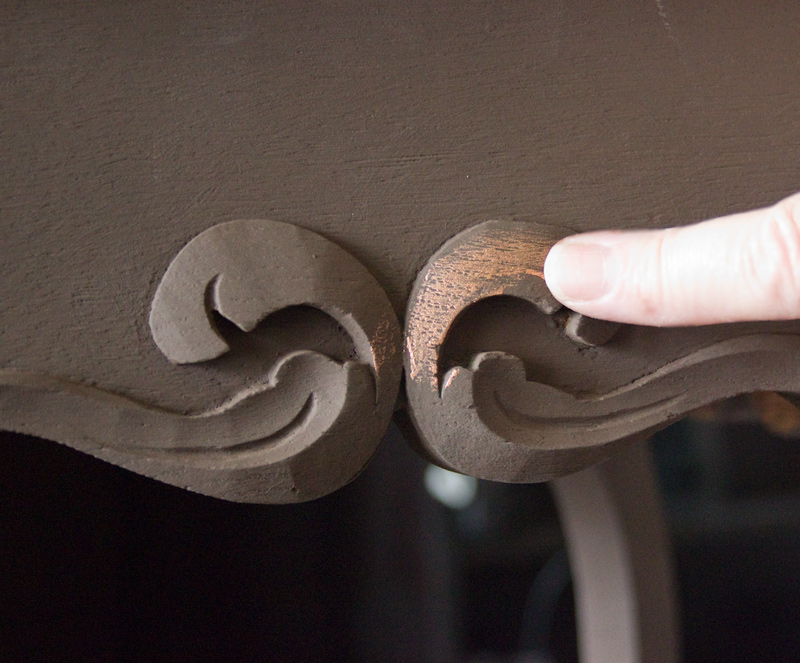
Next, add copper highlights to the details. I just used my finger dipped in a bit of the Copper Sunset Gel Wax (no Texture Medium necessary for this part):
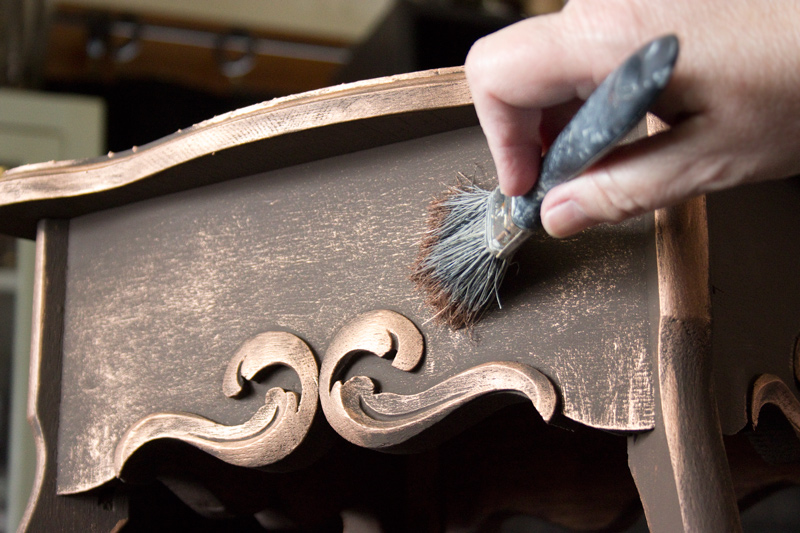
Then dry brush a bit of Copper Sunset onto the flat surfaces of the piece:
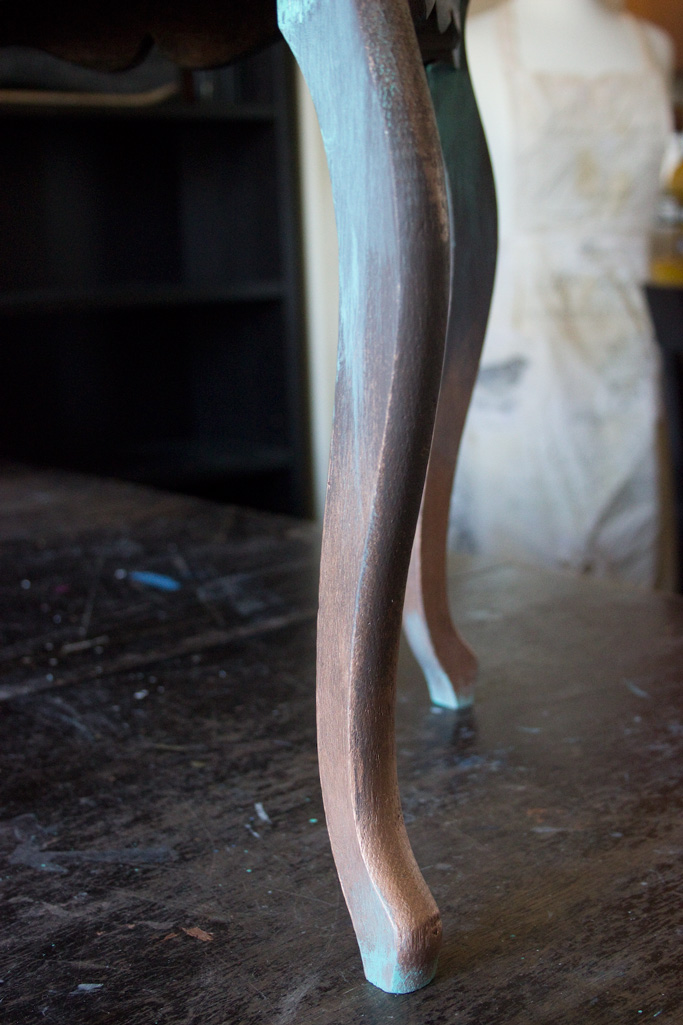
I added a touch of Copper Sunset on the tips of the legs, just with a finger.
No need to be terribly careful for this look.
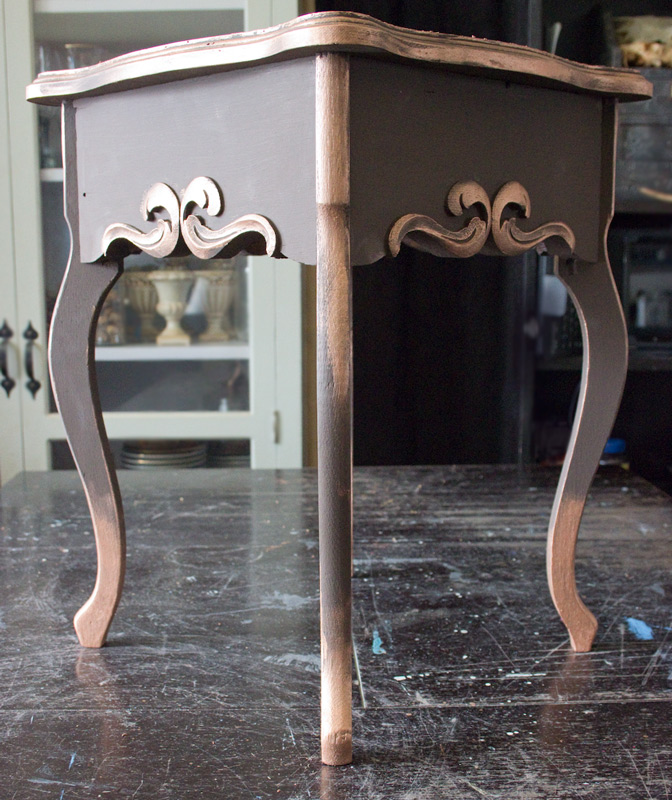
You’re creating a hand made finish, and the maker’s touch is an integral part of the beauty of this piece:
Allow the Venetian Texture to cure overnight.
Sand the surface gently, to remove any roughness.
Wipe away the dust with a damp cloth.
To seal and protect this finish, pour a small amount of Clear Wax into a container, and use a brush to apply it to the entire surface.
If you are happy with the finish as is, you can stop right here.
This Wax provides a permanent finish, and will not need to be renewed, like soft waxes:
Because, well, I just love to push things a bit further than is quite reasonable.
And, because I know how awesome the Heirloom Traditions Wax: Oxidized Patina is, and I couldn’t resist!
Note: The previous layer of Clear Wax will allow you to add the Oxidized Patina Wax and wipe it back easily, while protecting the underlying layers of pigment.
Have a damp rag handy!
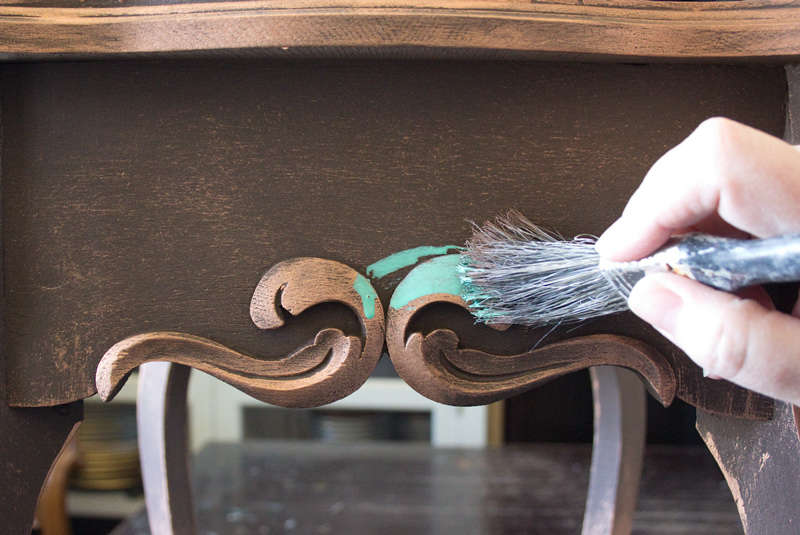
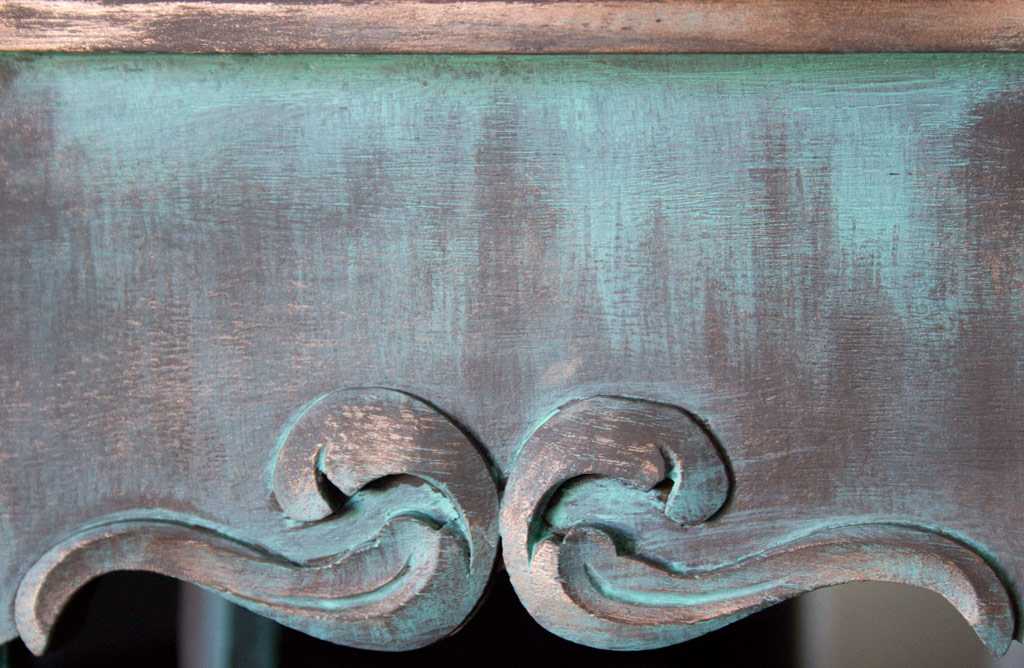
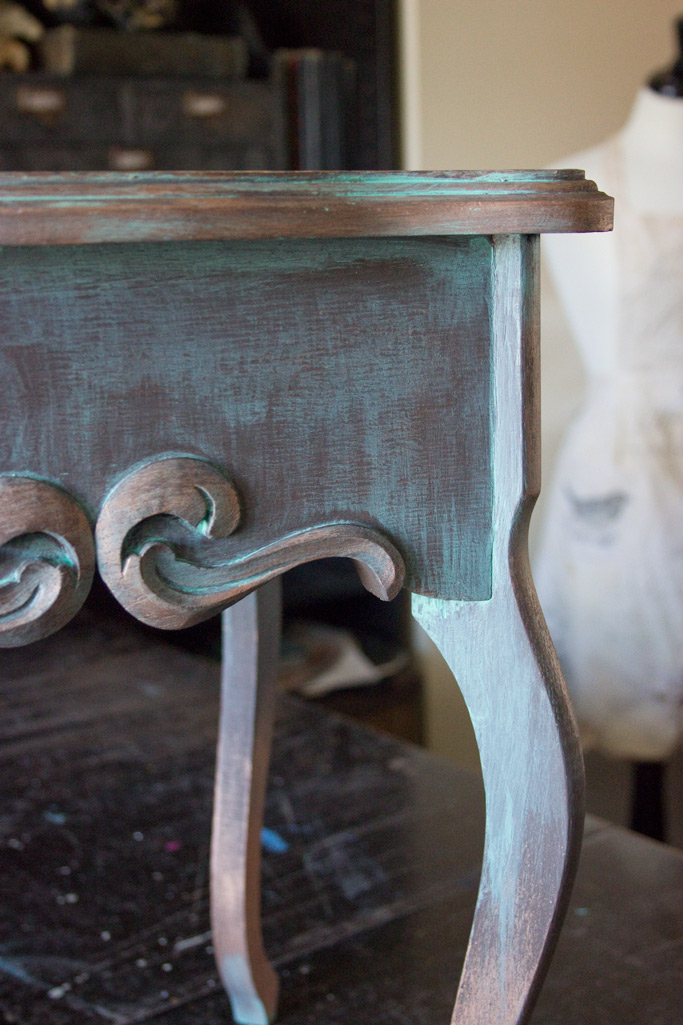
Pour a bit of Patina into your container, and paint a messy layer onto the details of the piece, concentrating on areas that have a fair amount of the Copper Sunset finish:
Give the Patina a few moments to bind to the surface, and then wipe back with your damp rag, making sure to leave a generous amount of pigment in the nooks and crannies:
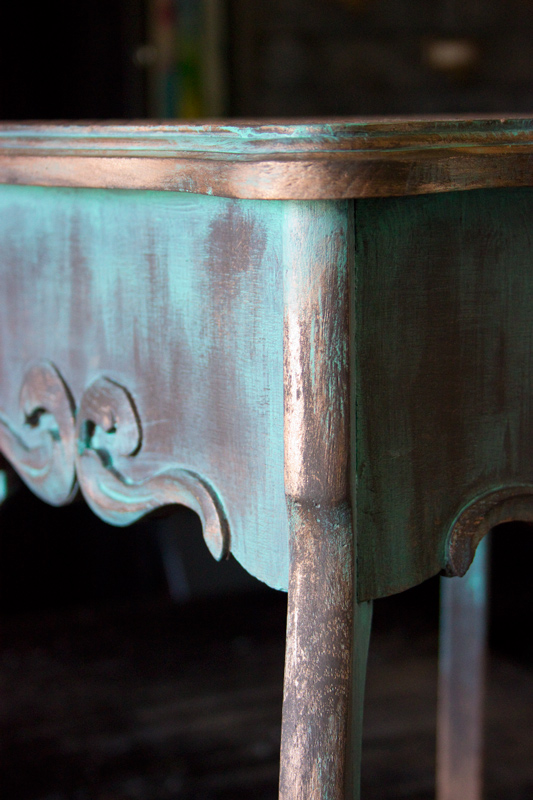
If you choose, you can swipe a wet streak of Patina across the top of the apron, then dry brush it downward to create a streaky effect.
Just whisk your brush downward quickly, and wipe away any excess:
You can add more streaks to the legs, mimicking the action of patina in ‘the wild’ as it slowly creates a drippy effect over the years.
A tiny touch of Patina at the base of each leg completes the look:
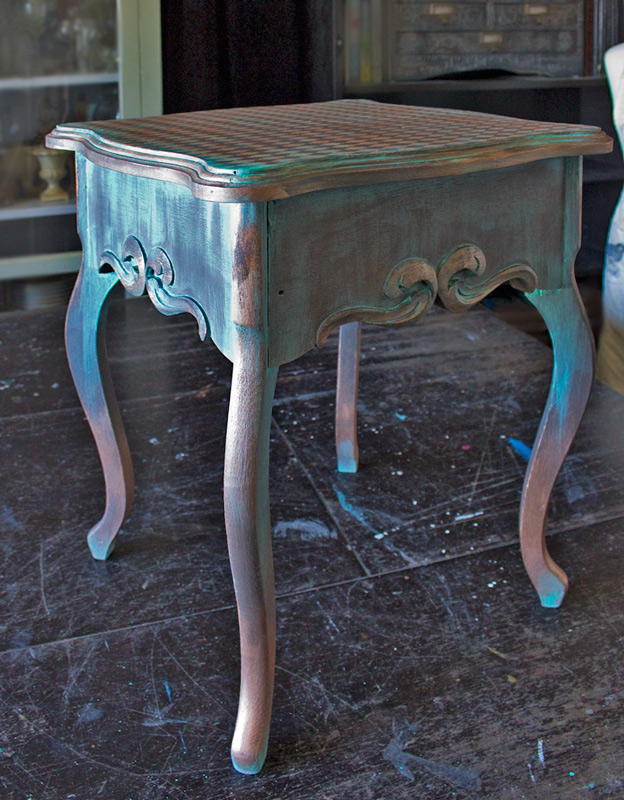
It’s the layers of pigment and distress that combine to create a finish that has richness and depth.
The process of adding and removing the patina results in an organically complex surface that was super-easy to achieve:
I adore the way that the Espresso, Copper Sunset and Oxidized Patina work together:
This look is one I’ll turn to again and again.
I can see an entire bedroom suite treated this way…
What can you see?
Every inch of the finish reveals multiple colors and textures, adding to the overall effect.
I’m happy with the results of this experiment, and encourage you to use your imagination to cook up unconventional applications for these amazing products!
You may just surprise yourself with the outcome!
For more information on Heirloom Traditions Products, please visit www.heirloomtraditionspaint.com
* Full Disclosure: Heirloom Traditions supplied their products to be used in this project, and they sponsored this post – however, I supplied the elbow grease, rescued furniture, design concept, and experimental insanity! All of which reflect my own point of view, regardless of affiliation…
Thanks for visiting The Graphics Fairy today! I hope you’ve found a bit of inspiration, and feel confident that you can achieve wonderful results like this Aged Copper Paint Finish Technique with a few simple tools and supplies.
You CAN!
I’m always hanging out at Thicketworks, and the door is always open…stop by and poke around sometime. I’d love to hear from you!
Take Care,
Heather



Barb says
Fabulous! After the patina treatment did you seal with clear coat again?
Heather Tracy says
Hi Barb! So glad you like it, my friend.
The entire piece was sealed with Liquid Clear Wax after adding the Copper Mine Aurora Staining Gel, and prior to adding the Oxidized Patina Liquid Wax. So, no need for an additional top coat. Hope this helps!
Julie says
Absolutely stunning! You took “meh” and made it a unique and amazing piece of furniture! Outstanding!
Heather Tracy says
Why thank you, Julie! I love this finish…and it’s a blast to do! Thank you for stopping by, my friend!
Madison says
Beautiful piece! Is there a similar brand close to heirloom that you would recommend? Heirloom is hard to find and also not much available on amazon
graphicsfairy says
Madison,
You can use any of the chalk paint brands out there, these days they are all very good quality. Annie Sloan is a favorite of many but even Lowes has it’s own brand now. Heirloom is a wonderful brand but your project will be just as magnificent with another brand that is easier for you to find.
Madison says
It’s very neat that Heirloom supplied you with their products, I just saw that. Very creative work from you as well 🙂 I looked at the Heirloom products on their site, I’m a college student who was assigned an independent study and so I’m focusing on refurbishing retired things. If you could recommend any products that are close to the ones used in your finished product, that would be so helpful! Thanks for the response!
Heather Tracy says
Hi Madison! Oohhh…I love what you’re studying – we need more of that type of thinking, my friend. As to my product recommendations – I’m a little confused (not unusual for me!) – are you asking what comparable products one could use, if you don’t want to purchase the Heirloom Traditions products detailed in the Supply List?
If so, I would be completely guessing, and wouldn’t want to steer you wrong! But here’s my best guess: any good quality Chalk Type Paint in a rich brown tone, for the basecoat.
Perhaps a good quality Acrylic Copper Paint mixed into a clear Texture Medium, such as Fine Art Painters use to create Impasto effects.
And then that same Copper paint used to highlight the raised areas.
Unfortunately, I can’t think of another product that is comparable to the HTP Oxidized Patina.
Other than that, you could seal the piece with a good quality Water-based product like Polycrylic.
Hope this helps!
Madison Barnard says
That helped a ton! And you had the right guess 🙂 thanks so much for your input and time-for responding! If I have anymore questions I will be sure to ask 🙂
Heather Tracy says
Yay! So glad – have fun, Madison!
Cathleen says
I wanted to use copper sheeting on my art nouveau kitchen ceiling, but the $2400 price tag for the copper alone killed the idea. However, your faux painting is just the ticket! What a fabulously beautiful idea!
Heather Tracy says
Wow! That’s quite the pricetag, Cathleen! Yep…I’d say a little Faux Painting is in order! I’m so happy that you like it.
Annie says
Thank you so much for sharing I love it, do you think it would work on rattan?
Heather Tracy says
Hi Annie! You are welcome, my friend. This would definitely work on rattan…in fact, I suspect that the patina would look amazing due to the underlying texture it will provide. I would go for it!
Ellen says
Love this! I would love to do this on an exterior door of an old house we are restoring. One question, do you think the finish would withstand the weather?
Heather Tracy says
Hi Ellen – I love your idea! And I realize that my previous response made NO sense at all because I was addressing a completely different technique! I apologize, my friend. I think this finish would need to have several tough clear-coats to withstand the weather, but I would totally go for it. It will be STUNNING!
Ellen DeMoor says
Thank you for your response. I’ve been searching for something that would do exactly that, give it what was missing…..soul!
Heather Tracy says
Oh, dear. Ellen, please see my amended response to your original question. One gets a tad CONFUSED from time to time. Silly me.
Autumn Garrett says
This really helped me. I really like the look of wood but when I sanded and sealed it, it looked a old penny threw up in there. I was so disappointed, I think if I accent the trim in this, I’m hoping it’ll look on purpose. Thank you for posting this 🙂
Heather Tracy says
Hi Autumn…oh, I know that feeling so well. Yes! Go back to your piece and give the details some love. That may just be the thing that pulls it all together. If you’re still not happy, well, we’ve all been there, and there’s no shame in starting over. So happy that this helped. Fingers crossed…
Tracy says
Yikes!
Heather Tracy says
Hi Tracy! Not sure if “Yikes!” means you love it or hate it, but either way, thanks for commenting. 🙂
Mar says
Me gusta muchisimo, el próximo mueble que pinte intentaré hacer algo parecido.
Un saludo.
Heather Tracy says
Gracias, Mar, me deseo suerte con su proyecto del gabinete !
Rupa says
Oh Heather, this is downright G.O.R.G.E.O.U.S!! I love copper, I love Patina, I love copper patina even more! The piece is extremely elegant as usual. Mother nature is really jealous that you were able to create this stunning effect a lot quicker than she ever could 🙂
Heather Tracy says
Hi Rupa! Oh, thank you so much. I love copper, too…Mother Nature does a better job than a human hand ever could, but I’m happy to have achieved a reasonable facsimile!
dawn says
Very nice,, dawn
Heather Tracy says
Thanks Dawn!
Pau says
Love the idea of mixing staining gel and texture medium then applying it thru a stencil. Great way to cover up a bad surface and it looks beautiful!
Heather Tracy says
Hi Pau – Thank you, I love the idea too! It’s works beautifully, and the metallic gleam is a total bonus. Thanks for your kind words!
Stephanie says
Love every inch of this!!
Heather Tracy says
Hi Stephanie! It makes me happy that you like this one…Thank you so much for taking the time to visit, and leave a sweet comment. Have a wonderful day!
tracey says
Heather this piece is stunning! Looks just like th finish on an old copper tub! You really did it this time!
Heather Tracy says
Hi Tracey! Wow – thank you so much, that’s precisely the look that I was aiming for…Yay!
Lori says
Absolutely gorgeous! I love getting notifications of your postings! Beautiful, Heather!!
Heather Tracy says
Hi Lori! Thank you so much…this one was fun. Hope all is well at Thee Velvet Glove – talk about loving to see new posts: yours always make my day. xoxo
Lady Tee says
Heather like you already. One my sister is named Heather. And i love the simplicity of your projects. You take the fear and anxiety out of trying something new. Your Artistic talent, is breathtaking. Thank you, I can’t wait to get started.
Heather Tracy says
Oh, that’s so sweet, Lady Tee! You make me blush…see, I want EVERYBODY to have as much fun as I do…and it is my goal to try to demystify the processes so they aren’t intimidating. So, you’ve given me a huge gift with your words. Thank you, my friend! xox