DIY Homemade Mother’s Day Card
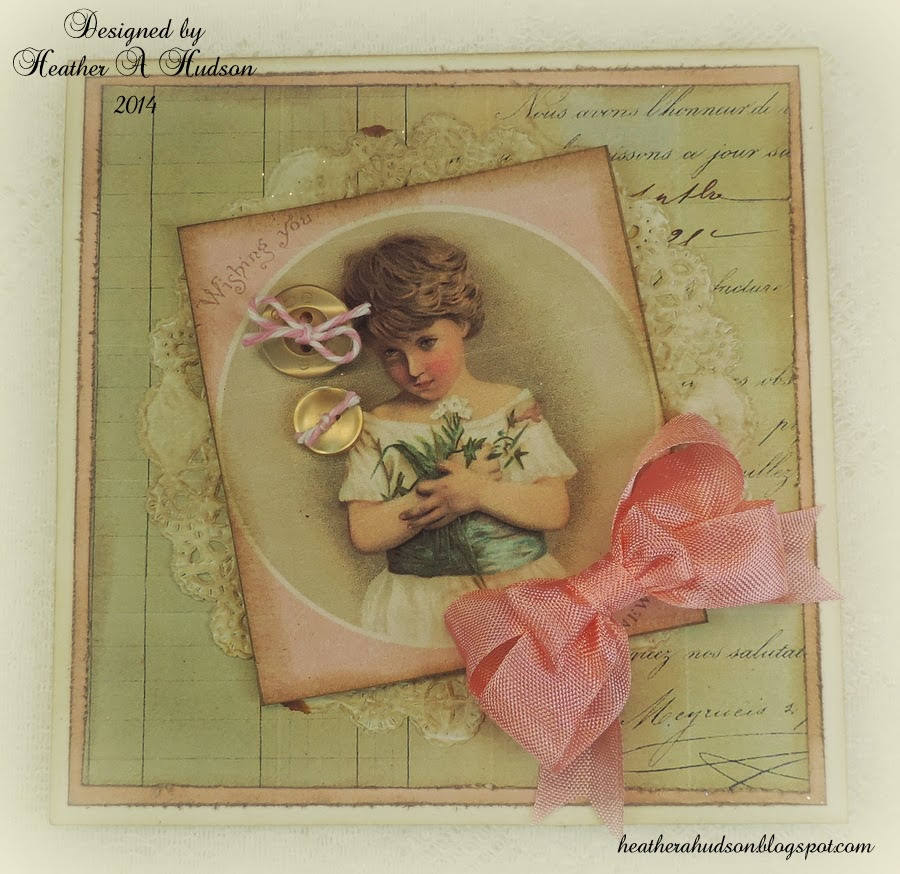
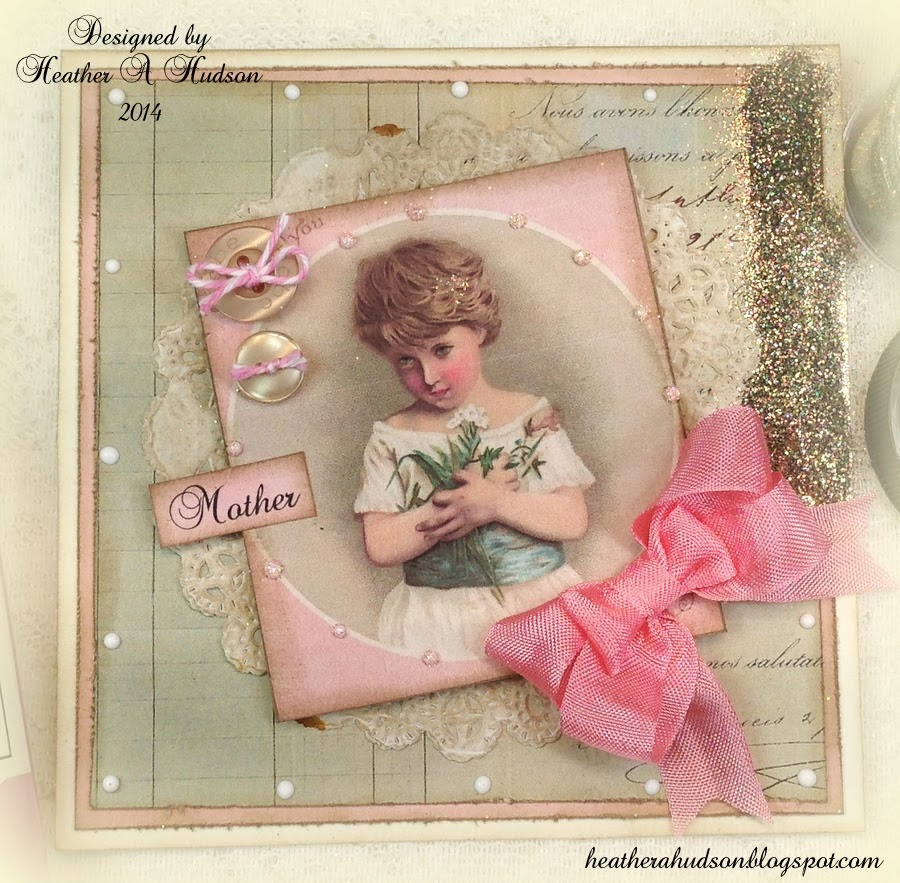
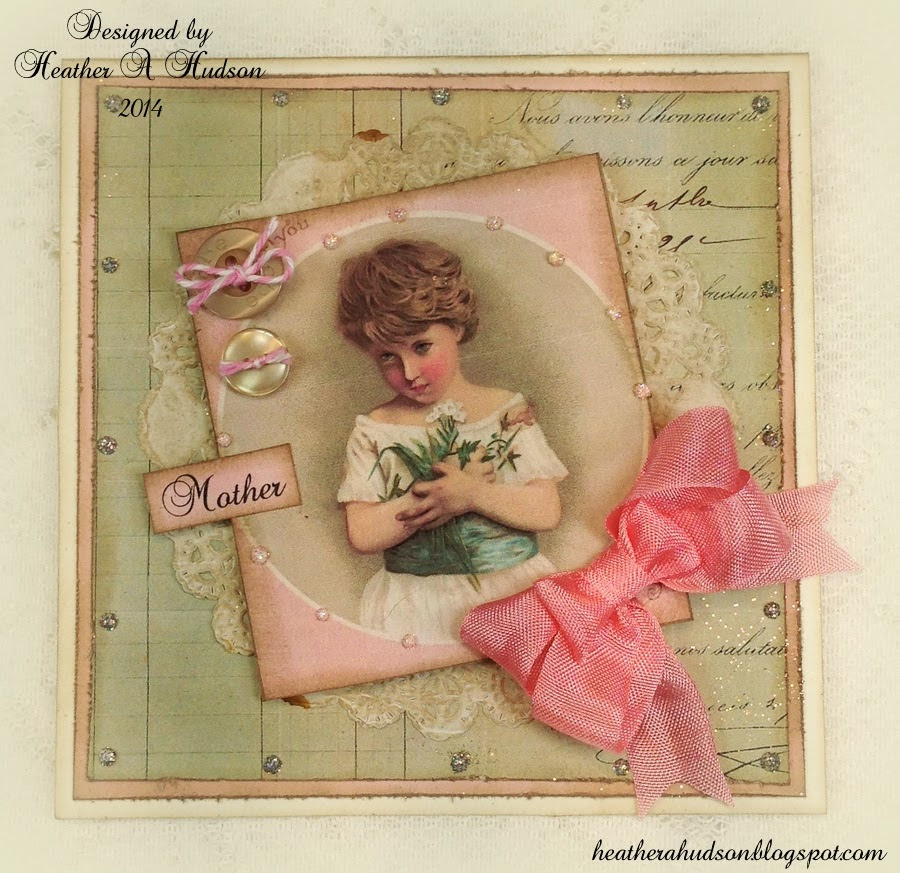
This post was originally written back in 2014. I’ve dusted it off and updated a bit. This is a lovely DIY Mother’s Day Card that was created by guest poster Heather, from My Artistic Adventures. She shared a full tutorial and a beautiful printable so that you can make this beautiful Homemade card for Mom on her special day …what a treat!

Supplies for DIY Homemade Mother’s Day Card:
- 5.0″ by 6.5″ ivory card base
- 4.75″ square piece of pink card stock
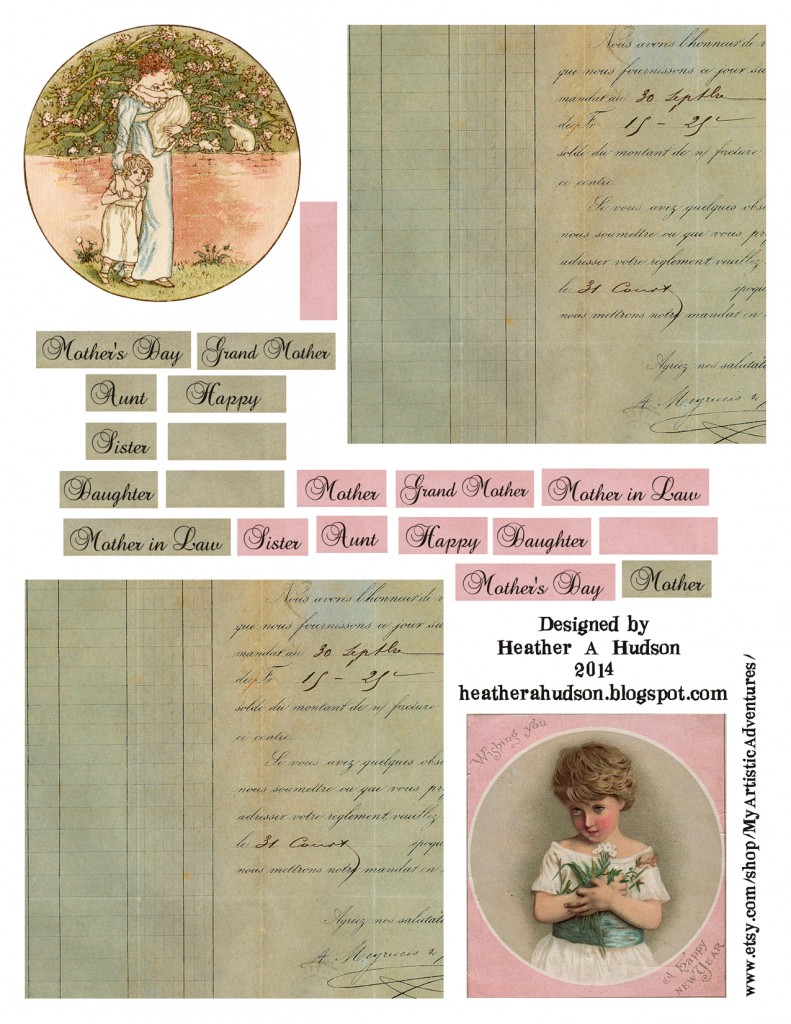
- Free digital collage sheet
- 3.5″ Paper doily
- Ranger’s Frayed Burlap Distress Ink
- Foam Applicator for the ink
- Glue Stick
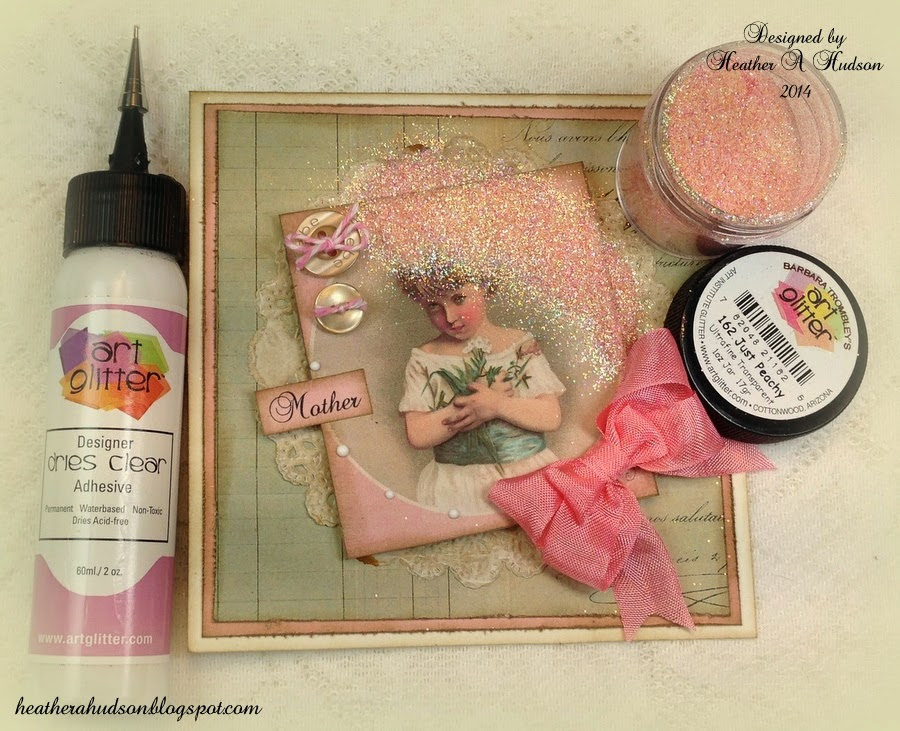
- Designer Dries Clear Glue and Fine Tip Applicator
- 2 vintage buttons
- Cotton Candy Baker’s Twine
- Pink Seam Binding
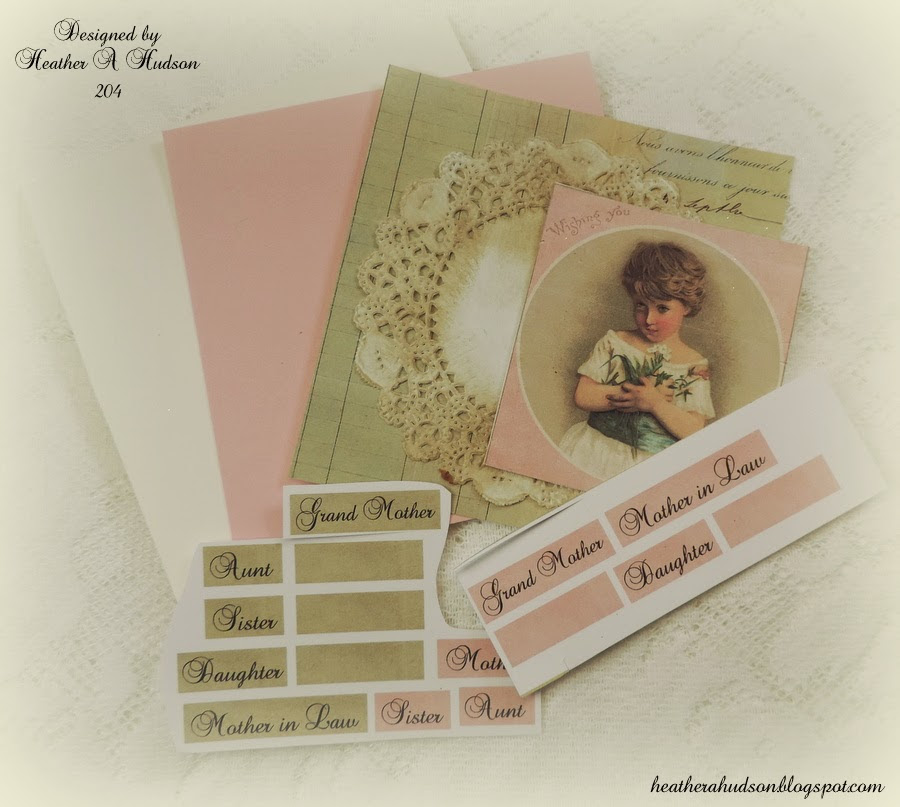
- Dimensional foam tabs
- Bayou and Just Peachy glitters or a green mix and pink glitters
Free Printable:
Click HERE for the Full Size Printable PDF of the Mother’s Day Card Elements
Full Tutorial:
Step One:
I used my paper trimmer to cut my 5″ by 6.5″ card base down to a 5″ by 5″ square card base. Cut out all of your collage sheet pieces. I used a kraft knife to slightly distress the edges of my pieces.
Step Two:
Using my foam applicator, I inked all of the edges of my piece as well as all of the doily edges with Ranger’s Frayed Burlap Distress Ink.
Step Three:
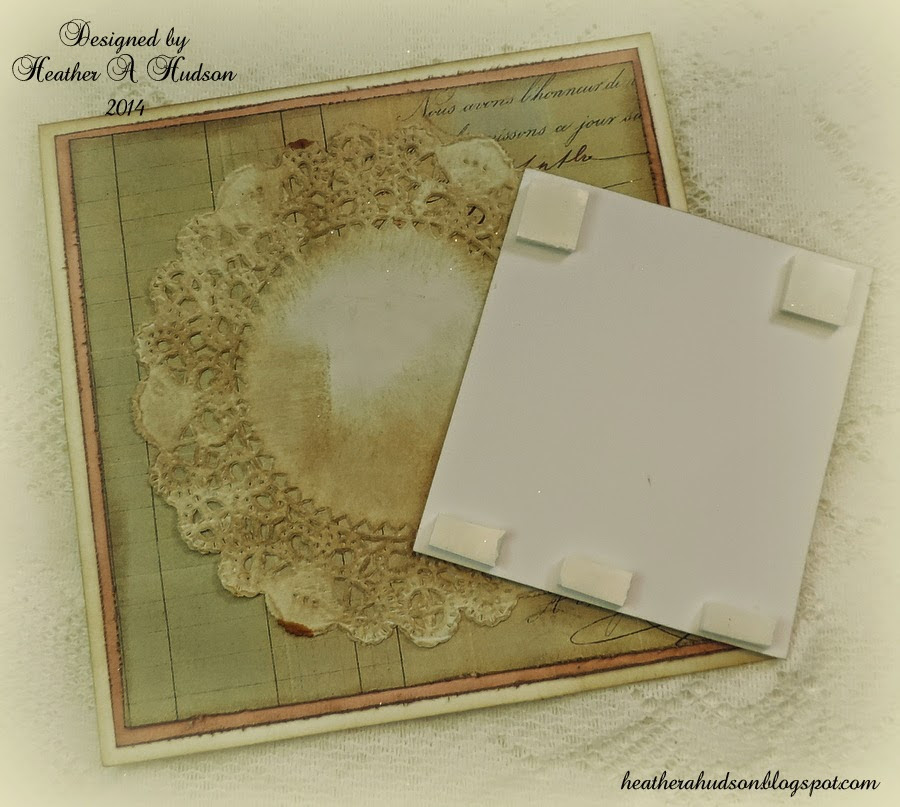
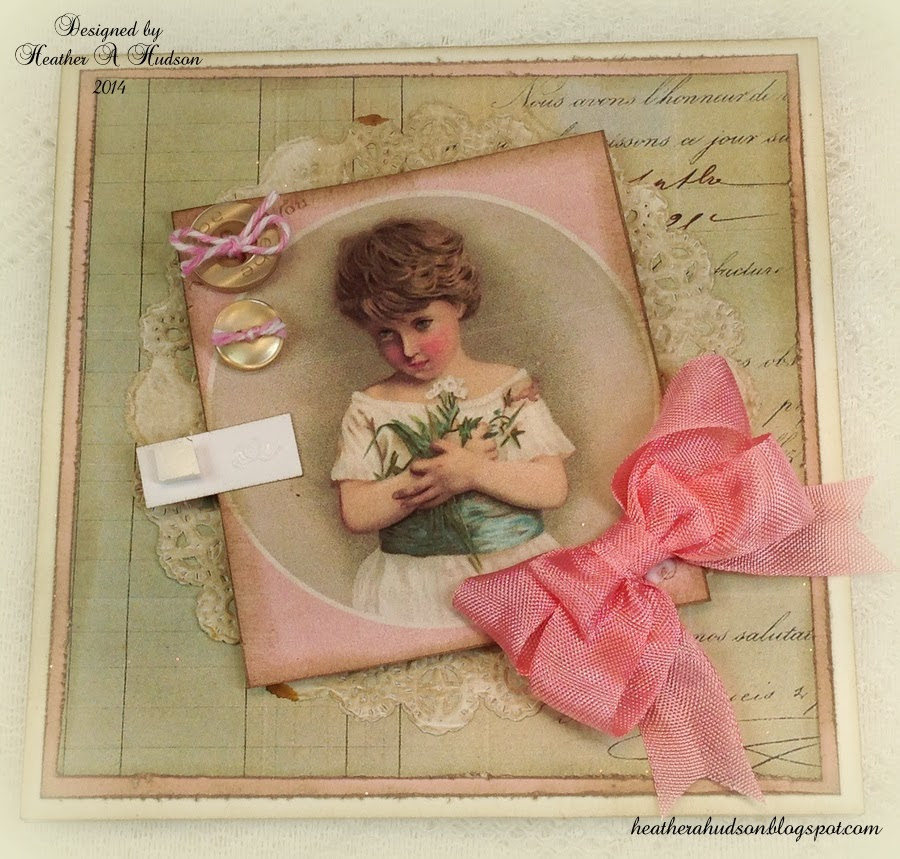
I used a glue stick to add glue to the back of my pink cardstock and then centered it on my card stock base. I did the same think with the ledger paper image and doily. Please refer to the photo below for placement. I also added Tombow foam tabs to the corners of my card, now…if you want to add a hidden tag later, then you will want to use a smaller tab, or just half of a large one and keep it close to the edges of the piece. I have applied 3 half pieces across the bottom. If adding a hidden tag, just do this same thing to the sides as well…leaving the top open.
Step 4:
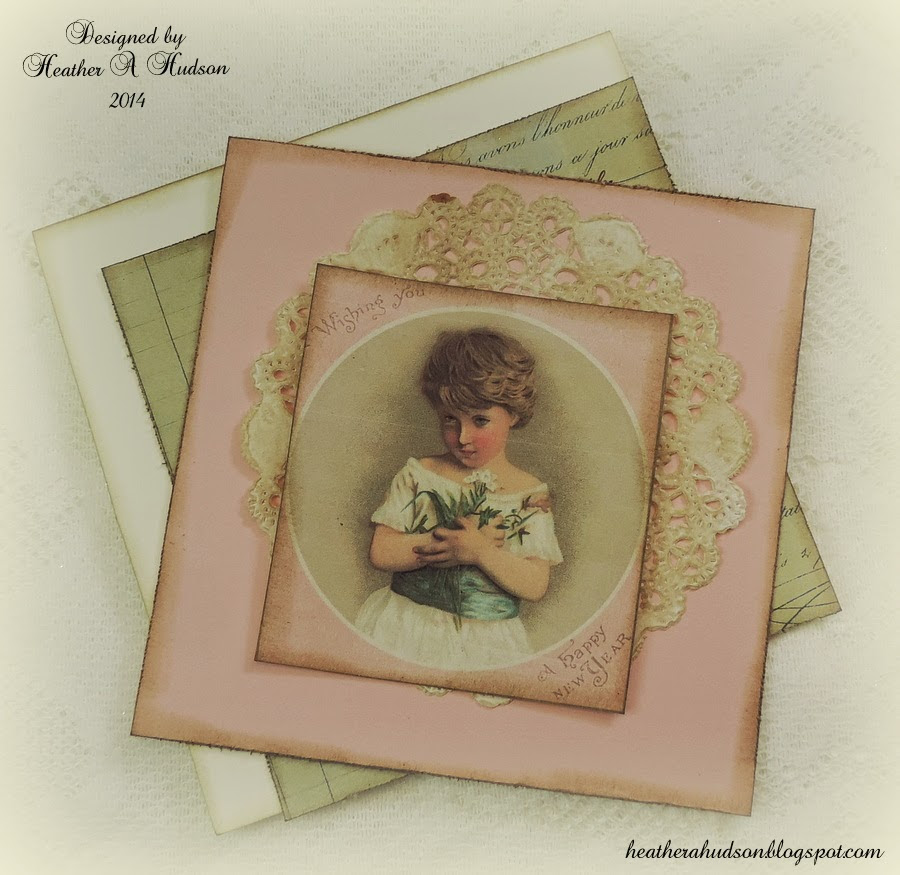
I placed my focal image on my card base, slightly turned to the left. I have found two buttons and created a bow in one button and a knot in the other with Candy Cane Baker’s twine from Really Reasonable Ribbon. I also created a double bow with pink seam binding and my Bow It All Tool!
Step Five:
I used my Designer dries clear glue and adhered my buttons and bow to my focal image. I also added a small foam tab to the back of my “Mother” text box, and glue to the other end. This way the piece will come in contact with the card base and the raised focal image. Please refer to the photo below for placement. You will notice that the buttons and bow cover up our “Wishing you a Happy New Year” sentiment. Figured I would leave that on the image, because it would make a cute New Year’s card too.
Step Six:
Next I used my fine tip applicator and designer dries clear glue to apply dots of glue in a circle around my focal image. (I just followed the line already there to keep things easy). I added Just Peachy Art Glitter.
Step Seven:
I applied more glue in the same manner to the ledger paper background and added Bayou glitter.
Let everything dry and you have a beautiful Mother’s Day Card in under 10 minutes!
Thank you so much for sharing with us, Heather… this is such a pretty project! You might also like our Mother’s Day Tea Card Tutorial HERE?


Maria Regina Zanetta Simoni says
Obrigada por compartilhar. Está maravilhoso!!!!…<3…
Sandy says
This card just knocks my socks off! And to think I can make one just like it . . . WOWweeee!! I will proudly send this to my oldest sister on Mother’s Day (our Mom is gone, too), and I know she will be absolutely thrilled. Thanks so much!
Pendra says
Beautiful card! I love the graphic she chose to put on the front of it. My Mother has passed as well, but my Daughter is a great Mom and I think this would be a lovely card to send her. Thanks Karen and Heather for the gorgeous printable!
Joey says
Just stunning! Thank you for the tutorial and the pdf to print it out. It is amazing.
Steven Narbonne says
I very much advise creating and sending a card like this to your mothers. My own mother made the transition years ago and I no longer can. I am glad I was able to assist her in her final years but to this very day miss her terribly.
Don’t wait. Do it and send it. Don’t wait for Mother’s Day either. Just tell her it is because you love her.
Karen Watson says
I’m sorry for your loss Steven. You make a great point though.
Bill says
Where did the doily come from? It’s not part of the PDF.?.?.
Karen Watson says
Hi Bill,
You can get paper doilies at most craft stores or Walmart. According to the supply list, Heather used a 3.5″ paper doily. I hope that helps!
Bill says
Yep. Missed it on the supplies list. And she obviously used the distress ink to make it match. I have a whole stack of Walton doilies that should work great. I really appreciate all the ideas and art that you promulgate. Thanks very much!
Heather A Hudson says
Yes, as stated in Step Two…I did use the Frayed Burlap to ink my doily :0) I love the vintage look that it adds to the doily :0)
Bill Burton says
OK. Thanks. What was the font that you used?
Heather A Hudson says
I used the Baroque Script font :0)