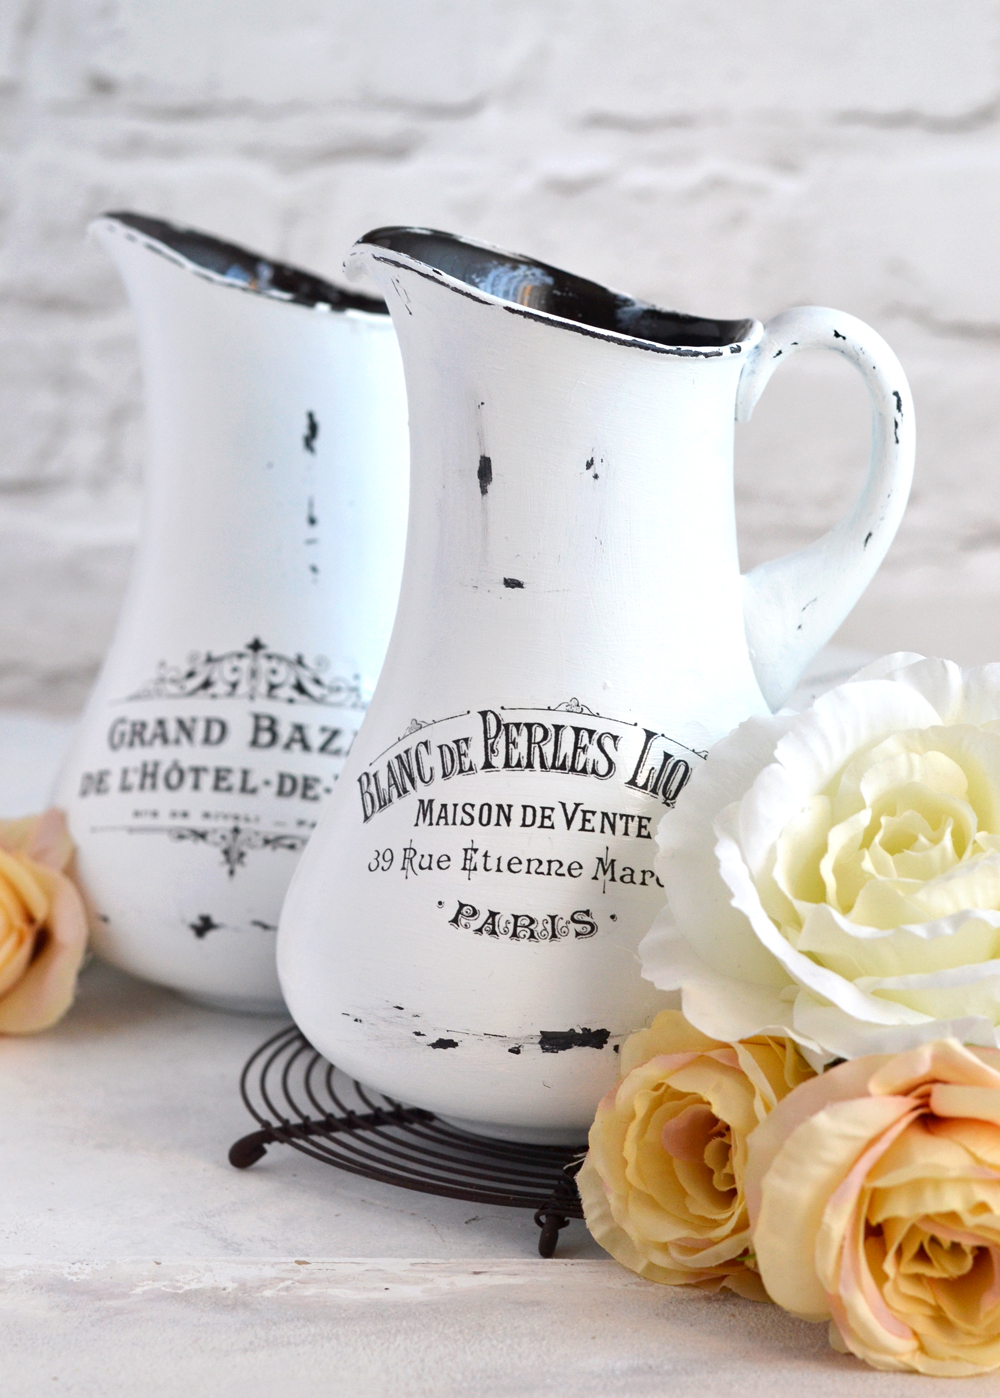
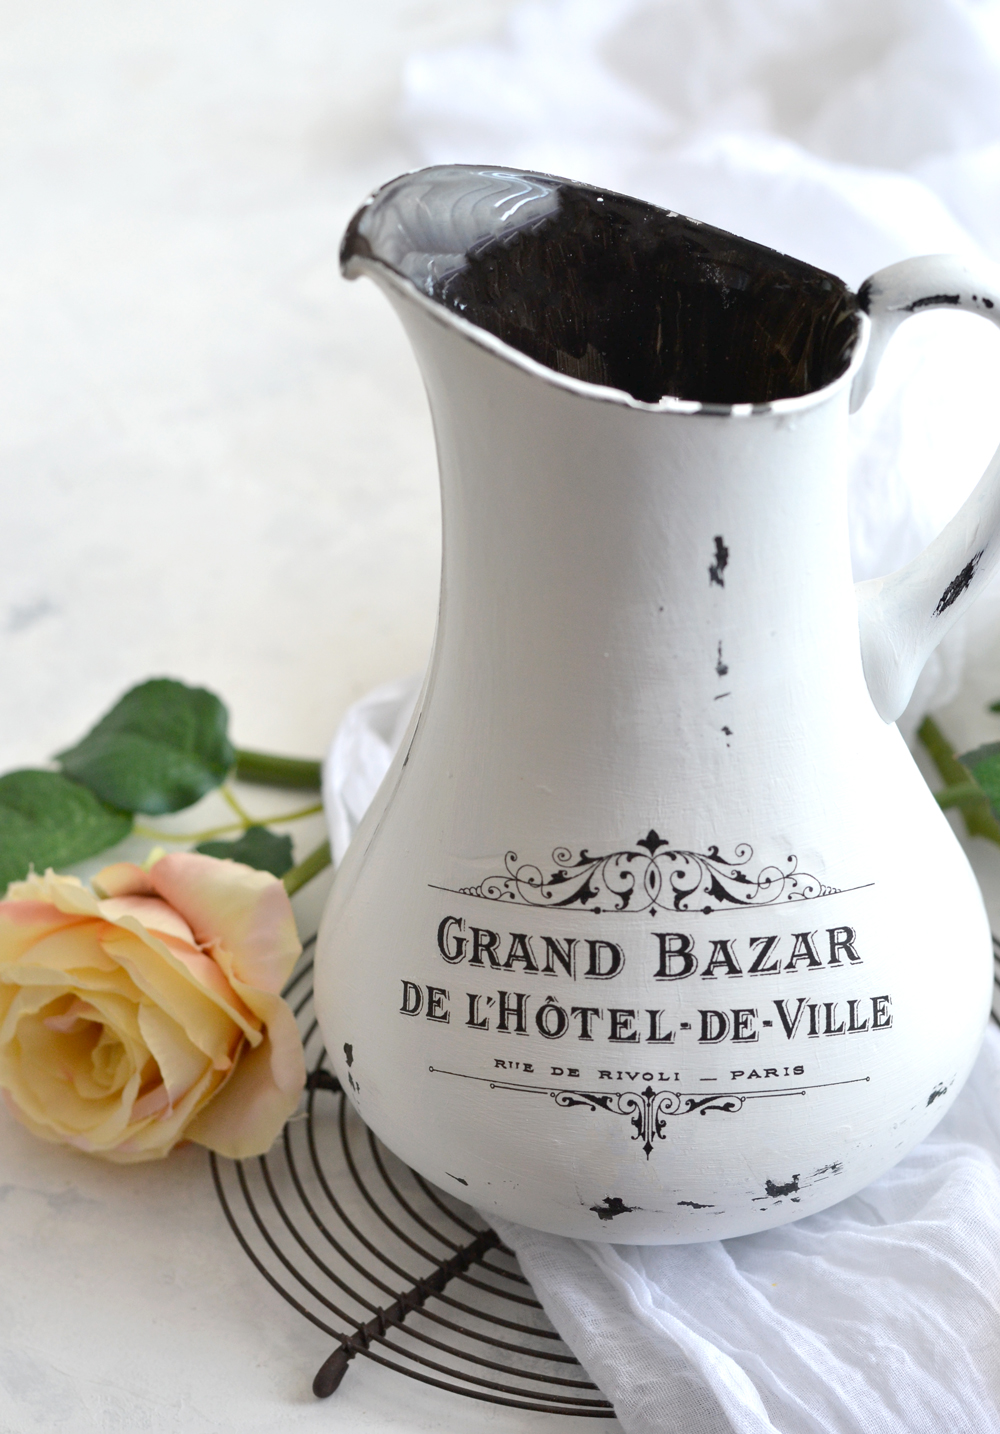
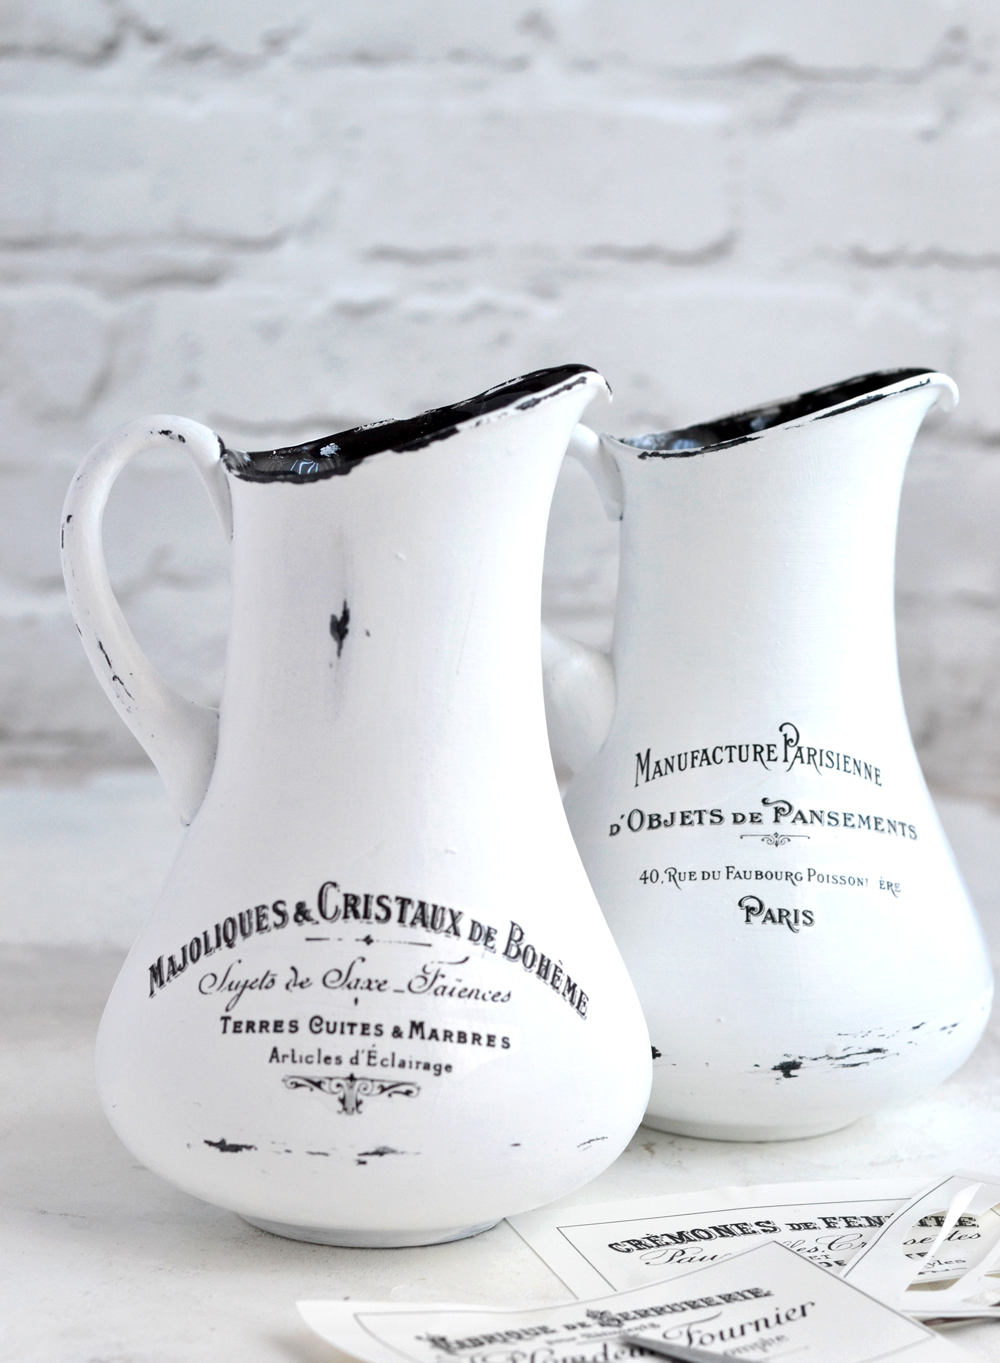
Hello creative friends, I’m Diana from Dreams Factory and I’m bringing you another DIY project! This is actually my first DIY for 2019 and I thought we should start the year in style! 🙂 If you’ve been following my DIY tutorials, you already know how much I love finding unique items to decorate. Everyday items that we already have around the house definitely qualify as my favorites! So today we are giving a new life to regular, boring glass pitchers and we are turning them into super chic DIY Aged French Pitchers!
Yes, you’ve heard that right, these are actually GLASS pitchers and I’m going to show you how to easily give them a makeover.
There will be some painting and distressing involved – as you might have already guessed – to create this stunning faux enamel chippy effect. And some French decorating … obviously! 🙂
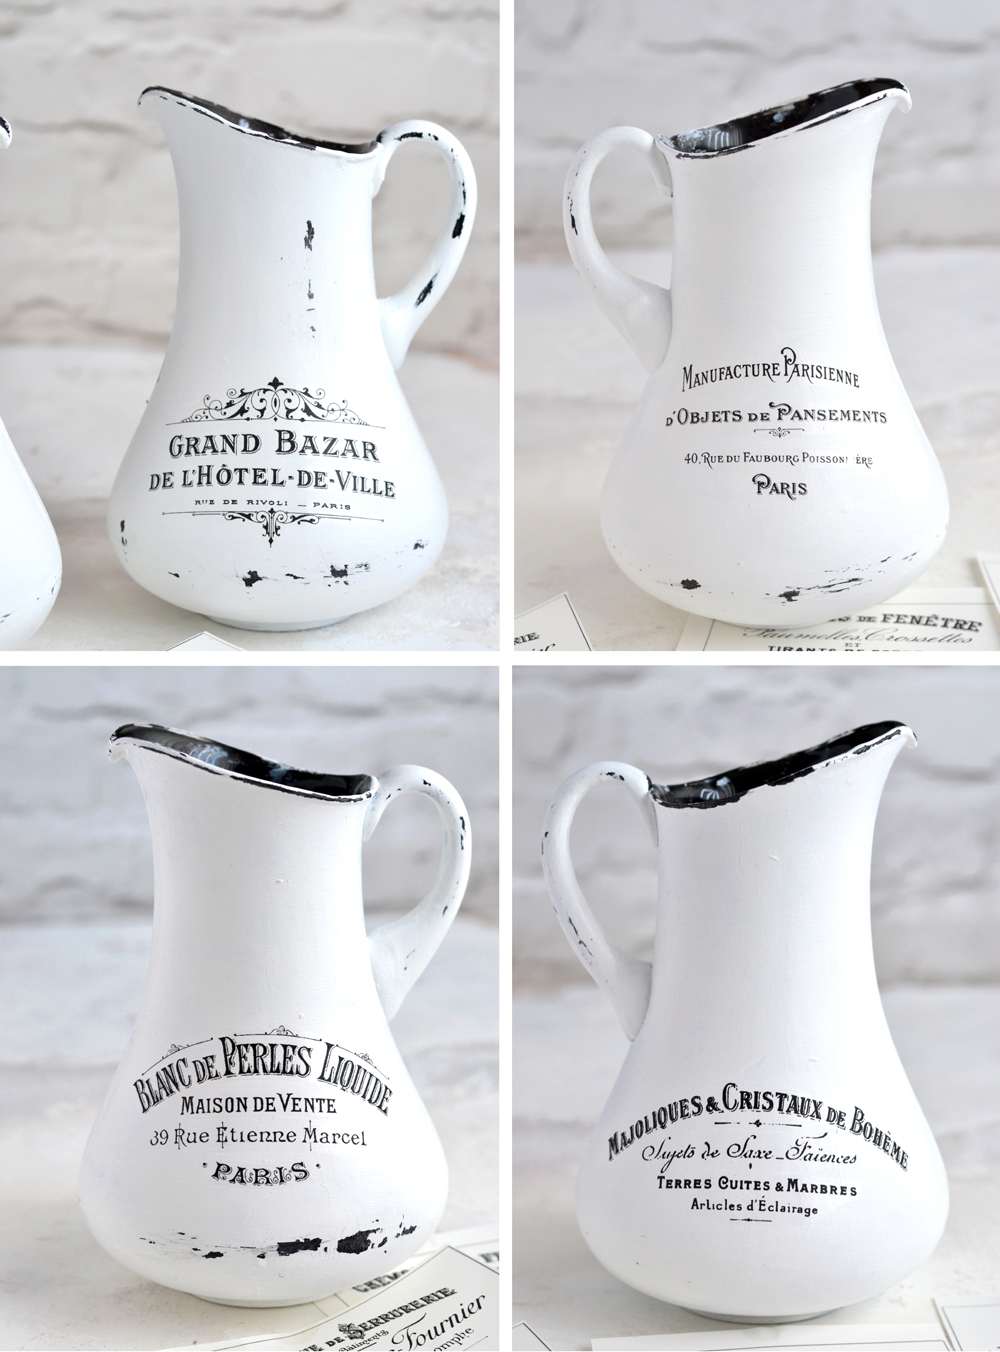
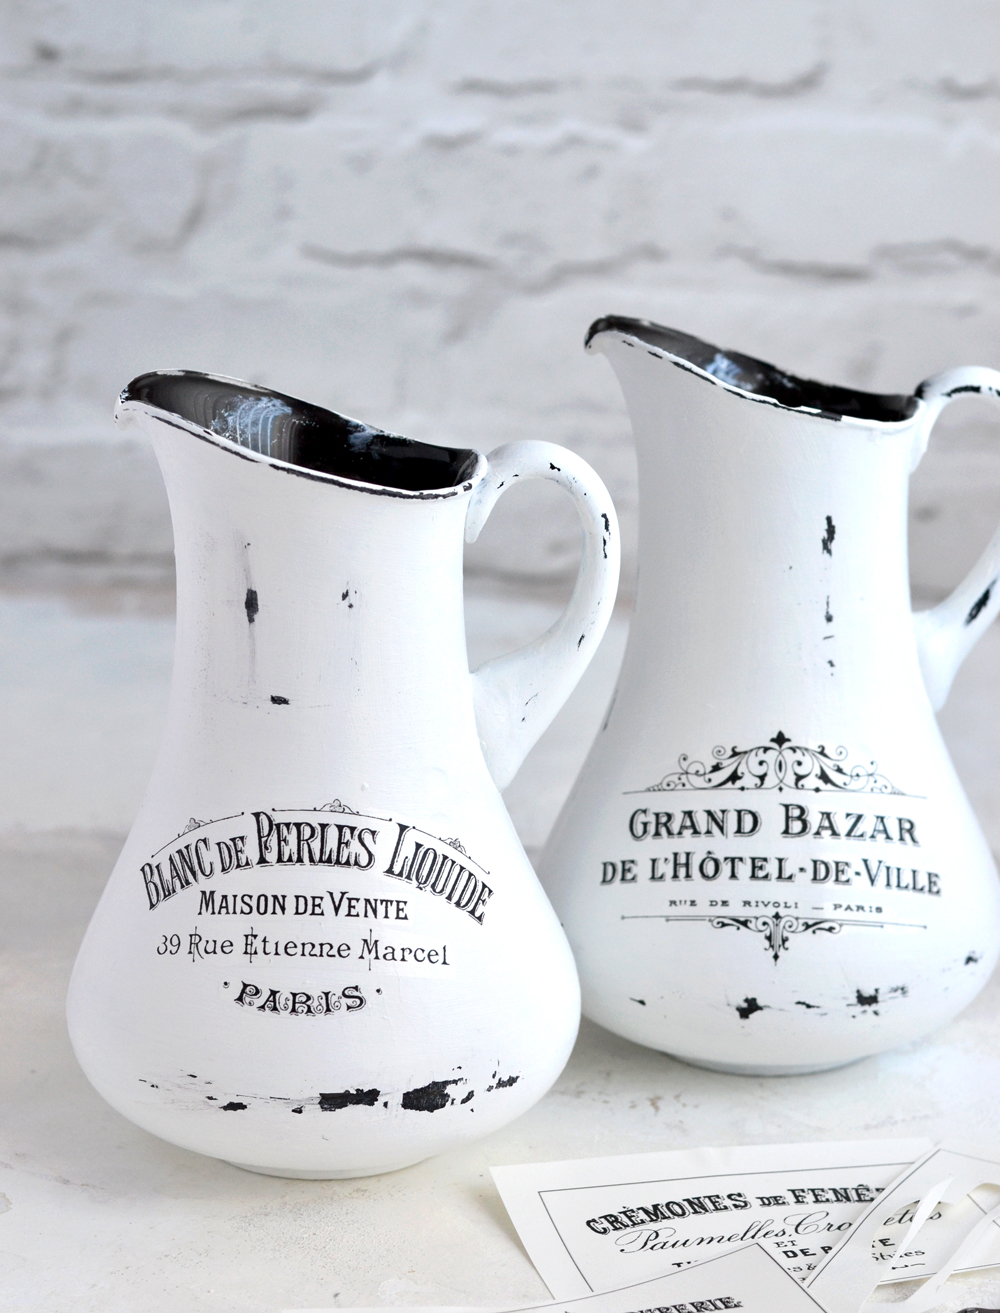
To make things easier for you, I’m also sharing the free printable with all the French graphics I had in mind for this project. I have to tell you that choosing these French ephemera graphics was not a random task at all. I actually ‘hand picked’ each design so they would match the curvy shapes pitchers usually have!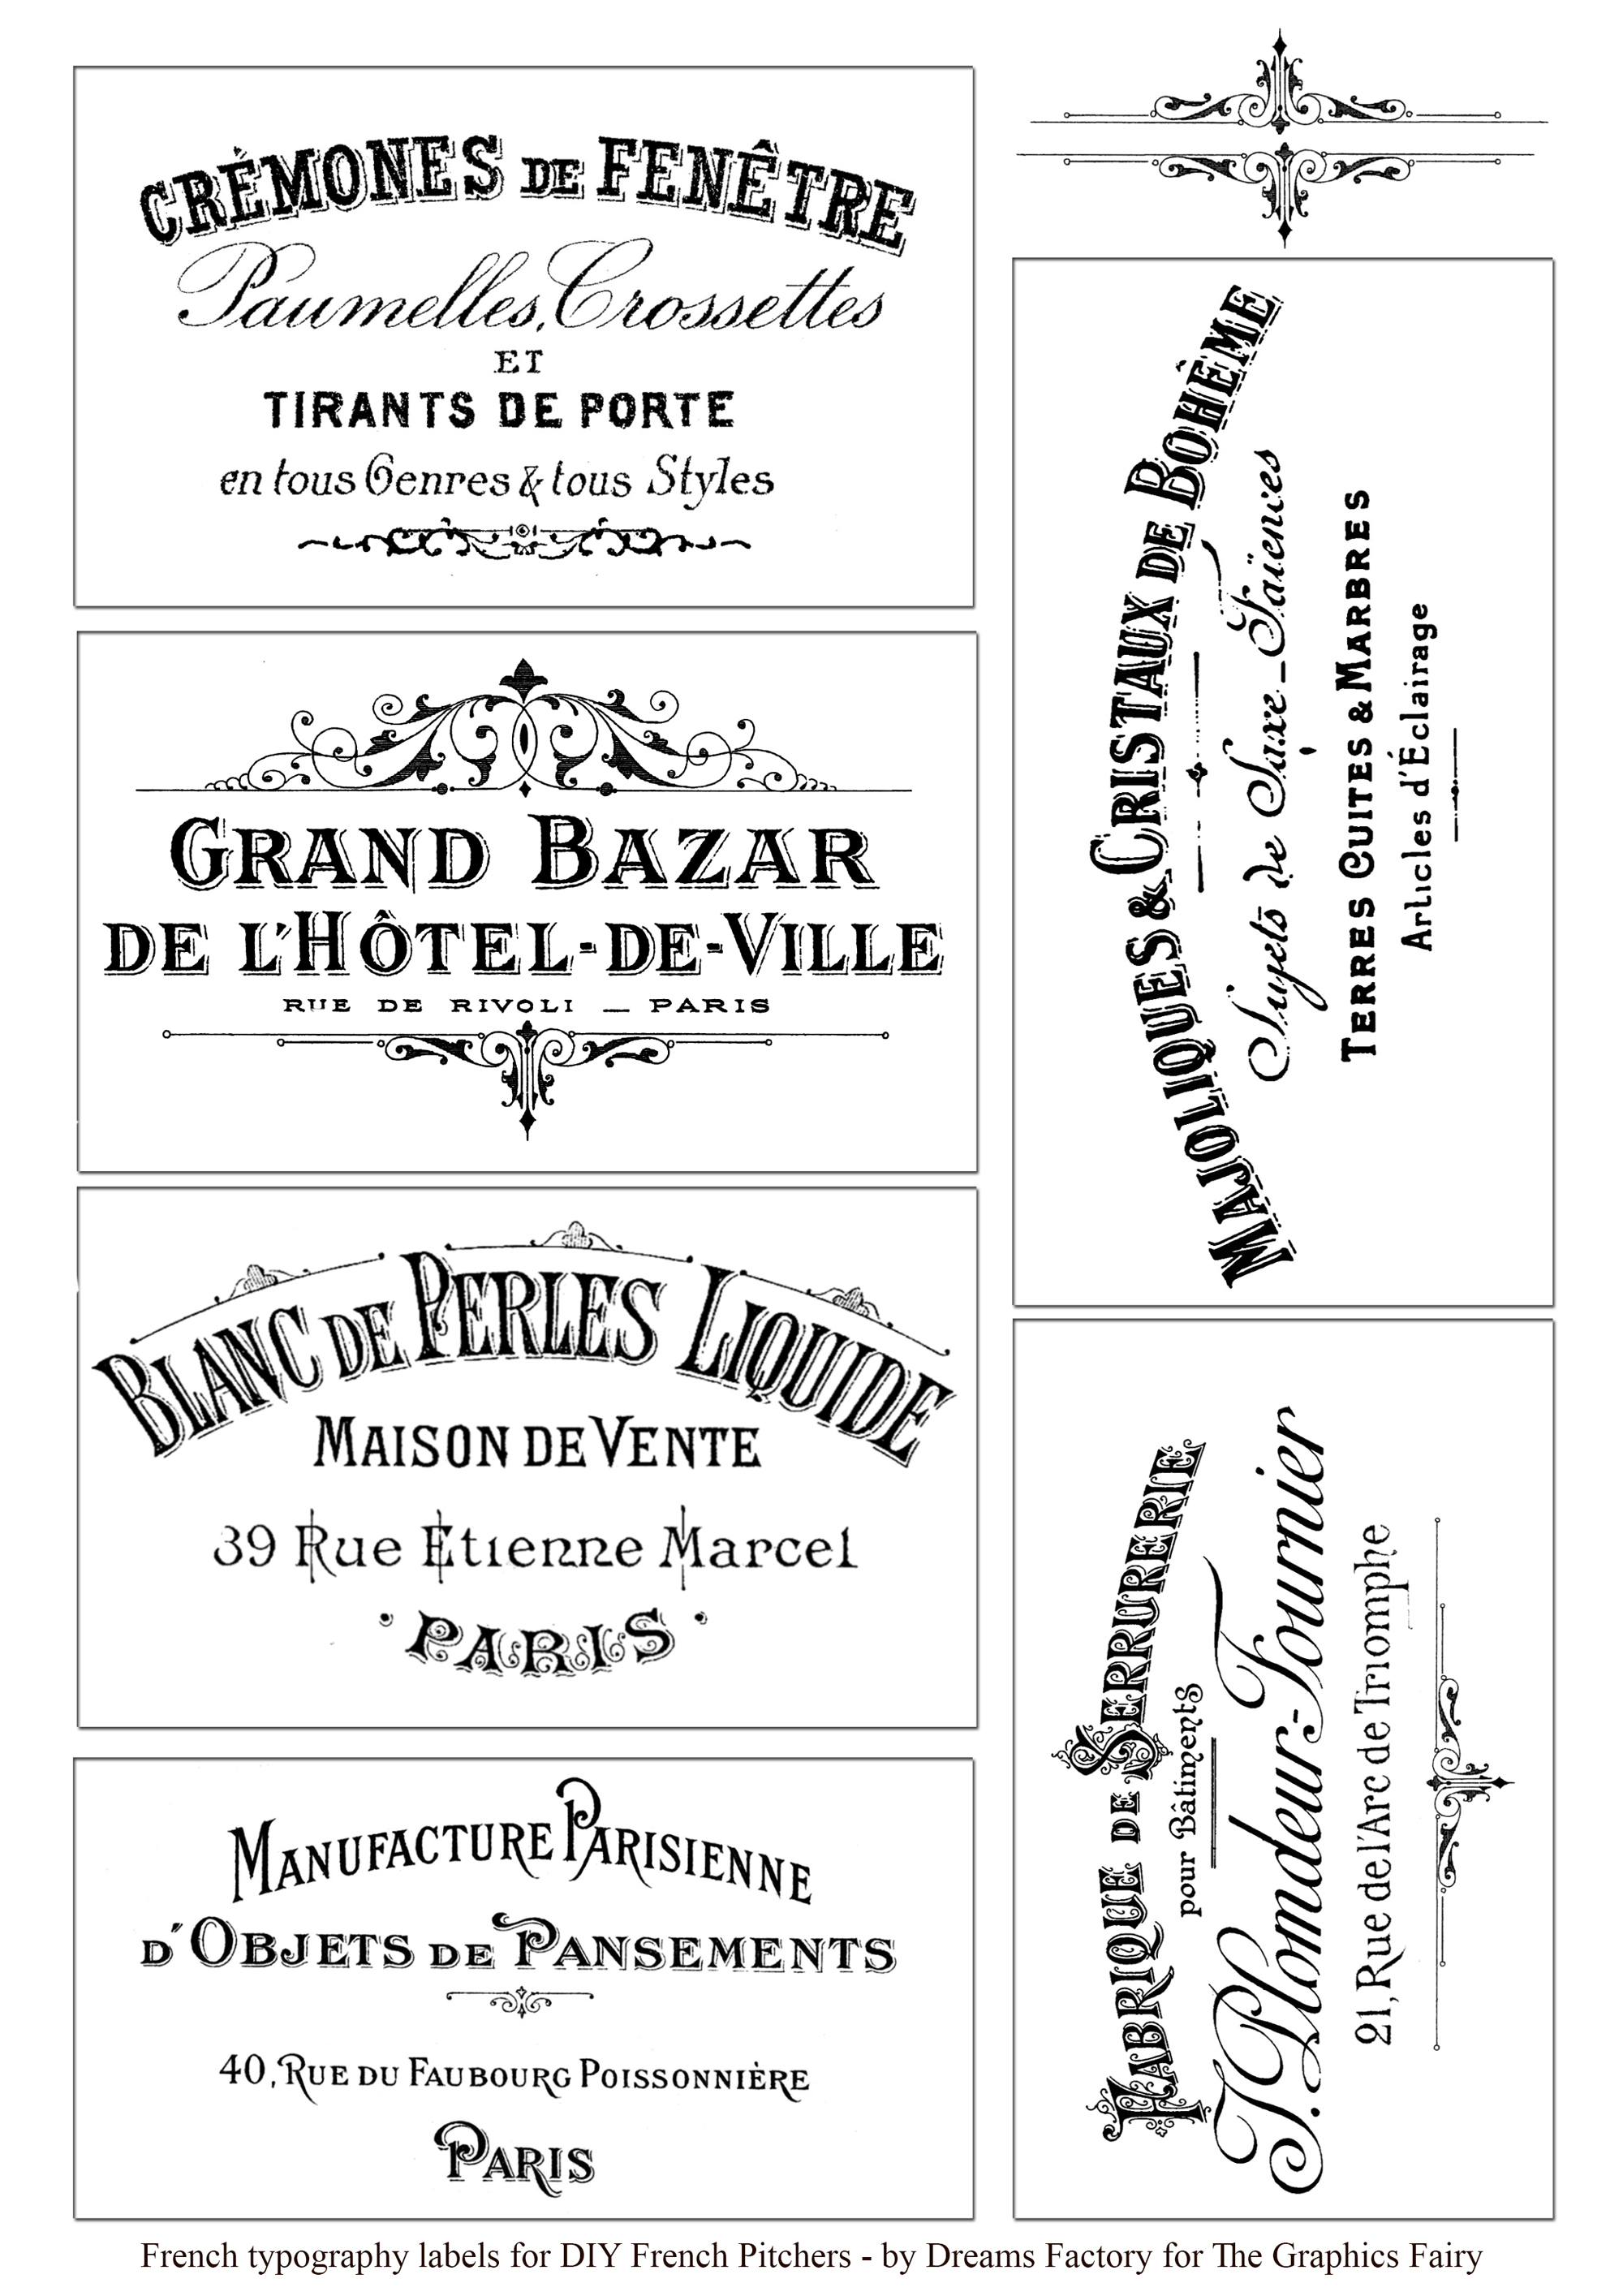
—-> Click HERE to Download the Full Size Printable PDF <—-
You will see how every single one of these amazing French graphics will manage to perfectly complement the shape of each pitcher. Even yours! 🙂
Old glass pitchers are ideal for this project, but if you don’t have any and you need to buy (or ‘borrow’ some from your grandma), try finding pitchers that have beautifully curved shapes and an interesting design.
SUPPLIES:
- glass pitchers (one size or different sizes) – example
- white acrylic paint
- black acrylic paint
- brushes
- 120 or 180 grit sand paper
- candle wax
- scissors
- waterslide decal paper (this is the one I’m using with my laserjet printer)
- ink or laserjet printer
- small bowl with water (for applying the decals)
- matte finish spray or a clear gloss spray
- paper towels
How to make the DIY Aged French Pitchers
PAINTING AND DISTRESSING
Let’s start with the painting and distressing part! I’ve used again my ‘go to technique’ for painting and distressing an object – two contrasting colors added in layers and candle wax! You can use this technique on all sorts of objects. The best part is that it’s highly adaptable to almost any surface … and glass is no exception!
Important things you need to consider before trying this technique on glass:
- always use UNDILUTED paint
- let the paint COMPLETELY dry before moving to the next steps
1. Wash your glass pitcher really well using dish soap and hot water and let it dry completely. You can start with one pitcher or you can make two, three … or even more at a time! 😉
2. Use UNDILUTED black acrylic paint and a brush and paint the exterior surface of the pitcher. One layer of black paint should be fine, but if your black paint is too thin and is not fully covering all the surface, you might have to paint another layer. Try not to insist too much in one area while the paint is still wet, it is best to let one layer dry before adding another black layer – if necessary.
3. After the black paint has COMPLETELY dried, use a white regular candle and rub it on the surface of the pitcher. The candle wax will help us achieve that beautiful chippy look, so insist on the areas you want to distress more afterwards. I usually add more candle wax to the edges and the margins to get a more ‘naturally distressed look’. If you are not sure where you will be distressing afterwards, just rub candle wax on all the surface. Be gentle and try not to scratch the surface of the black paint, we only want to add some wax on top of it!
4. Use your brush to apply the next layer – the UNDILUTED white paint. Again, if you feel your pitcher might need another white layer for full coverage, let the initial white layer COMPLETELY dry first.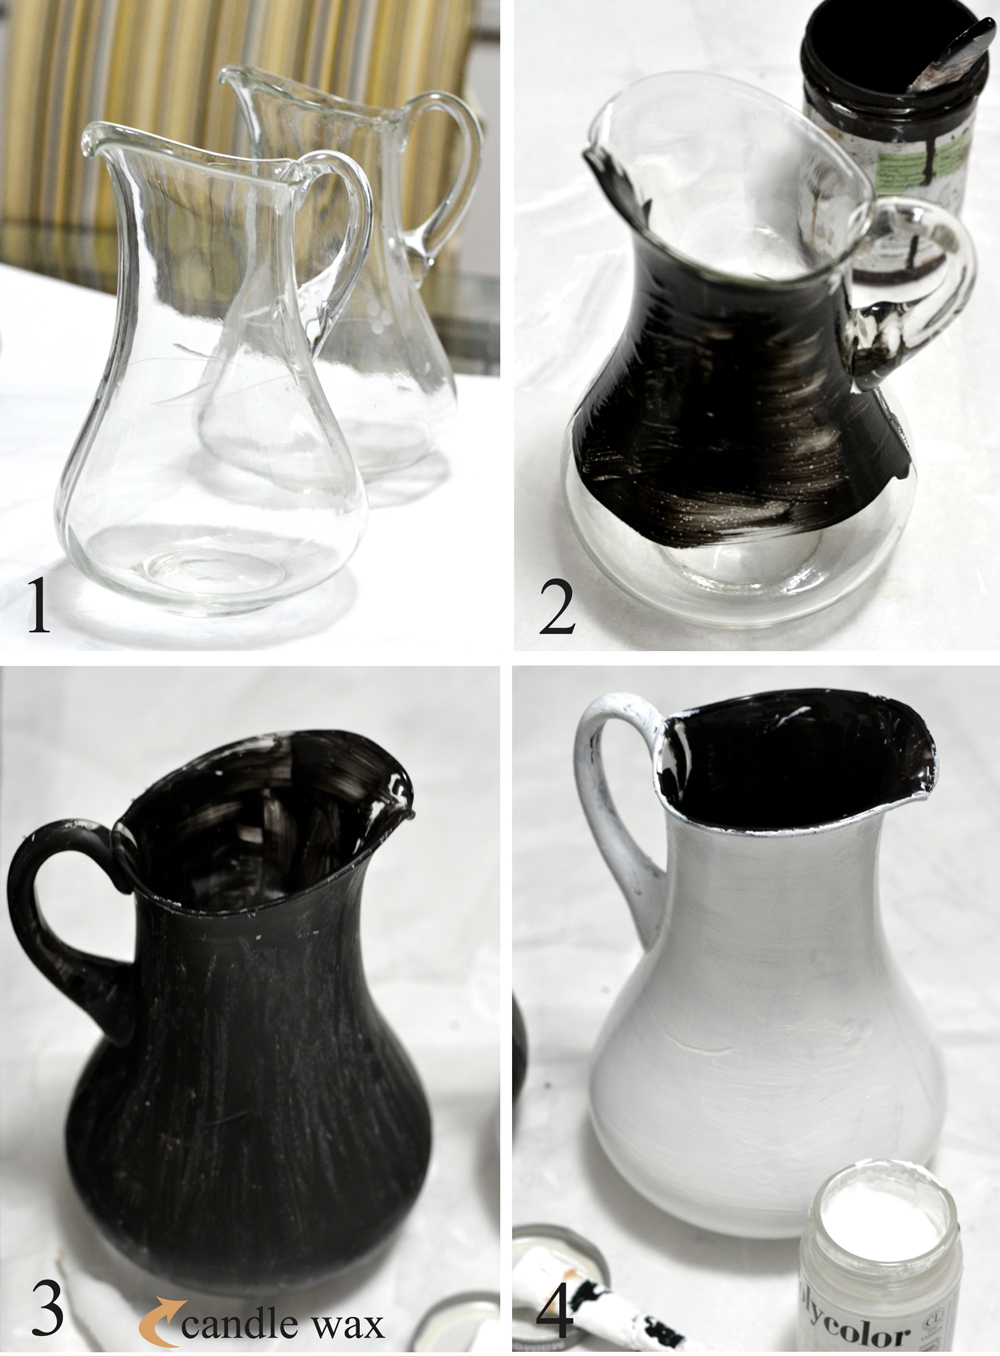
5-7. After the white paint has dried, get your sandpaper ready … and have fun distressing! Use paper towels to protect your working surface … things might get a little messy! 🙂 Start with the edges, the margins and the handles, then continue to distress any other area. This is the part when you basically dictate the ‘age’ of your pitcher. The more you distress it, the more worn and chippy it will look, so use your imagination and set your own ‘aging terms’ 🙂
I usually prefer not to distress the exact area where I will be adding the graphics, so that the writing is perfectly readable. But if you are not sure yet where you will be placing your French design, stop the ‘aging process’ for now and continue after applying the decals.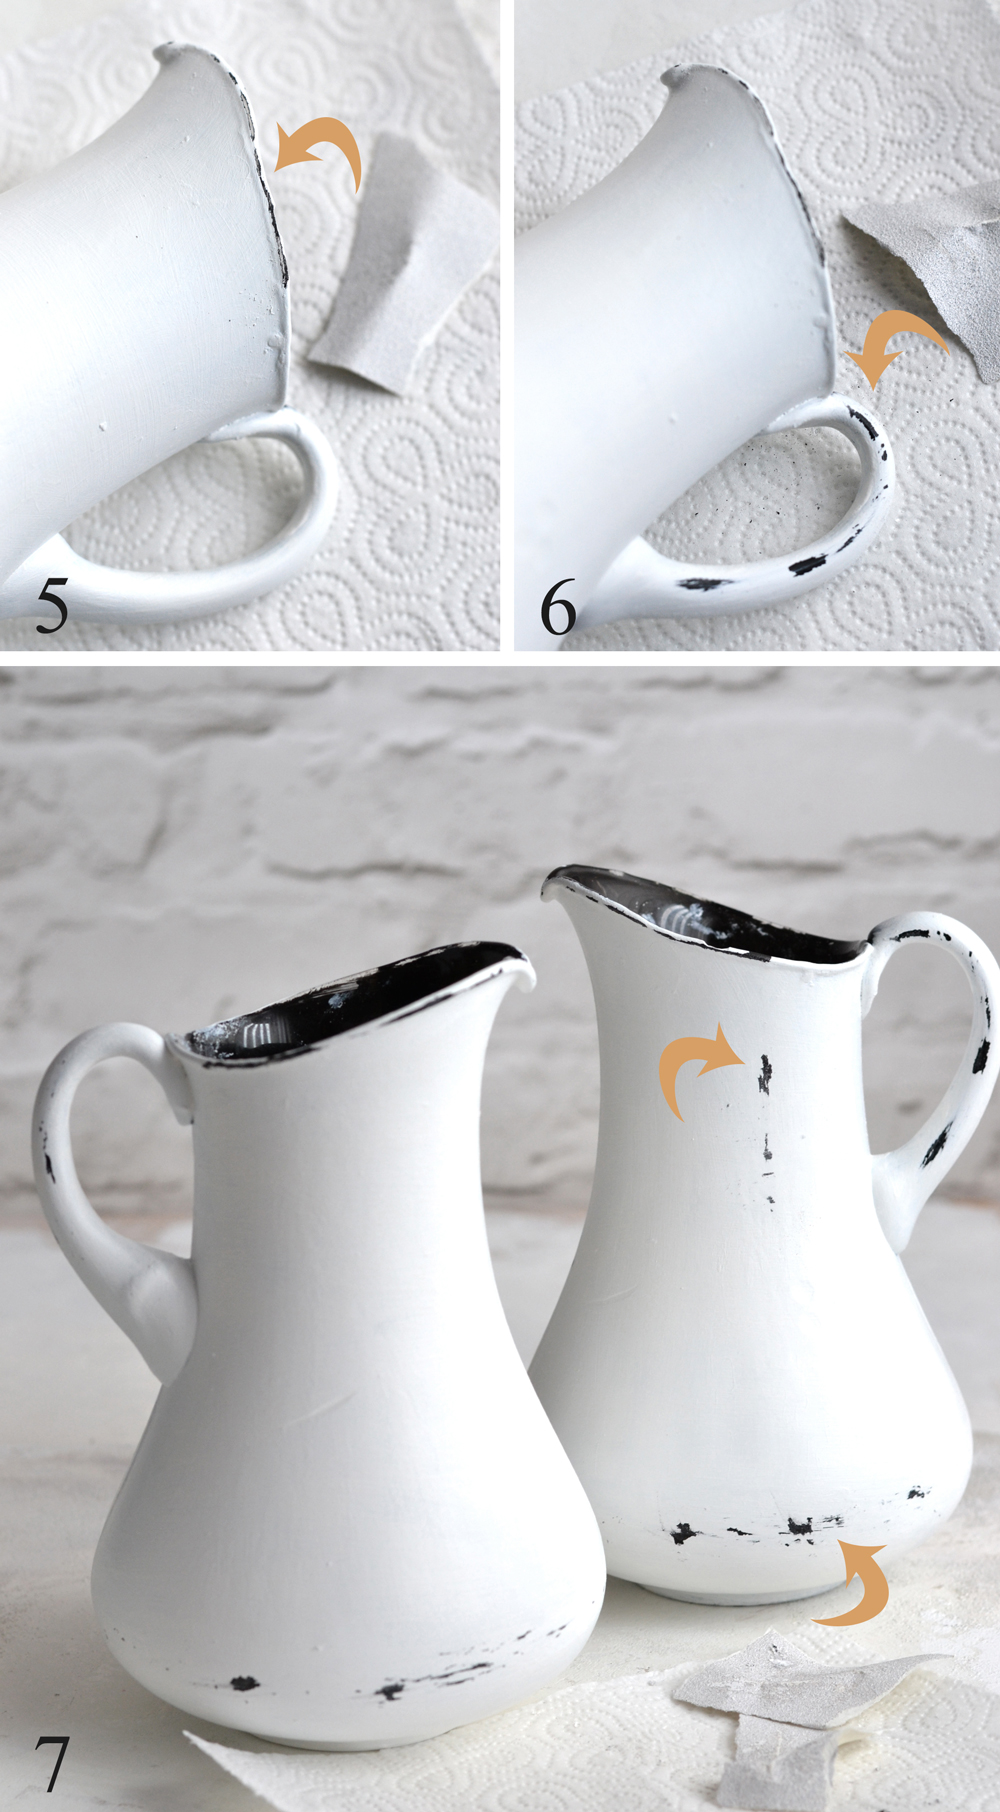
Cutting the graphics and applying the waterslide decal paper
Just a quick note before moving to this step – I will be using here the waterslide decal paper for laserjet printers. For inkjet decals just use the instructions that came with your package!
8. Print the French graphics specifically designed for this project and roughly cut all the images.
9. Decide on one image first (that might be a tough decision!) and remove as much white space as you can, cutting as close to the image as possible.
10-11. Now use your scissors to cut your French ephemera in several smaller horizontal lines. We will be ‘deconstructing’ the graphic before applying it to the pitchers, and we will reassembling each element of the image on the pitcher! This step is really important because it will help the graphics perfectly curb onto the curvy shape of the pitcher! If not applied like this (deconstructed in several pieces), you won’t be able to apply the decals on such a curvy surface!
NOTE: If your pitcher is completely flat, you don’t have to deconstruct the image, you can just apply it as a whole (as shown on image 9).
12-13. Individually apply each piece of decal paper onto the pitcher and ‘reconstruct’ the whole image there. Use paper towels to completely remove all the air bubbles and the excess water and let the decals dry for a while. I added the images on the lower part of the pitchers, but you can add them wherever it looks more appealing to you.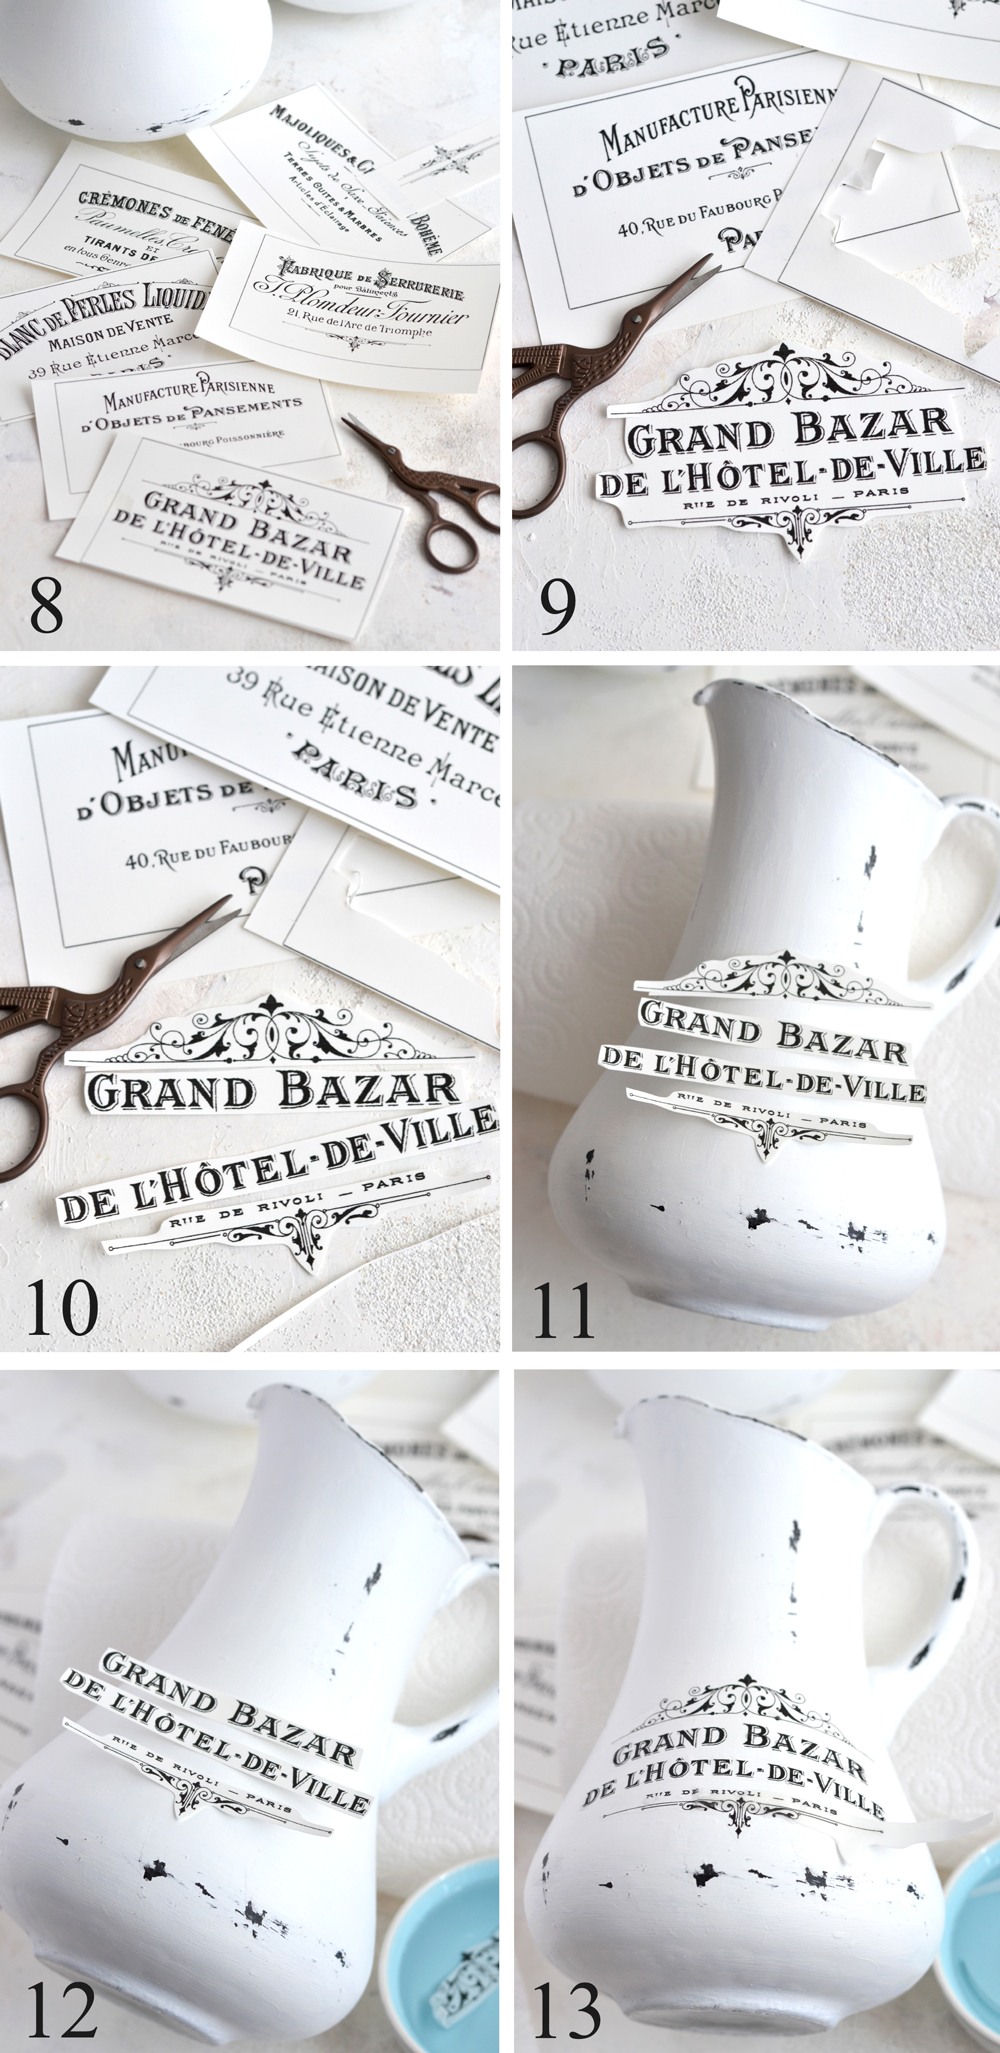
I decided to decorate both sides of the pitchers … and I instantly fell in love with all of them! 🙂
If you feel your DIY Aged French Pitchers might need a little more distressing, now it’s the time to do it! Just try not to touch the decals, we don’t want to mess things up now that we are almost finished, right? 🙂 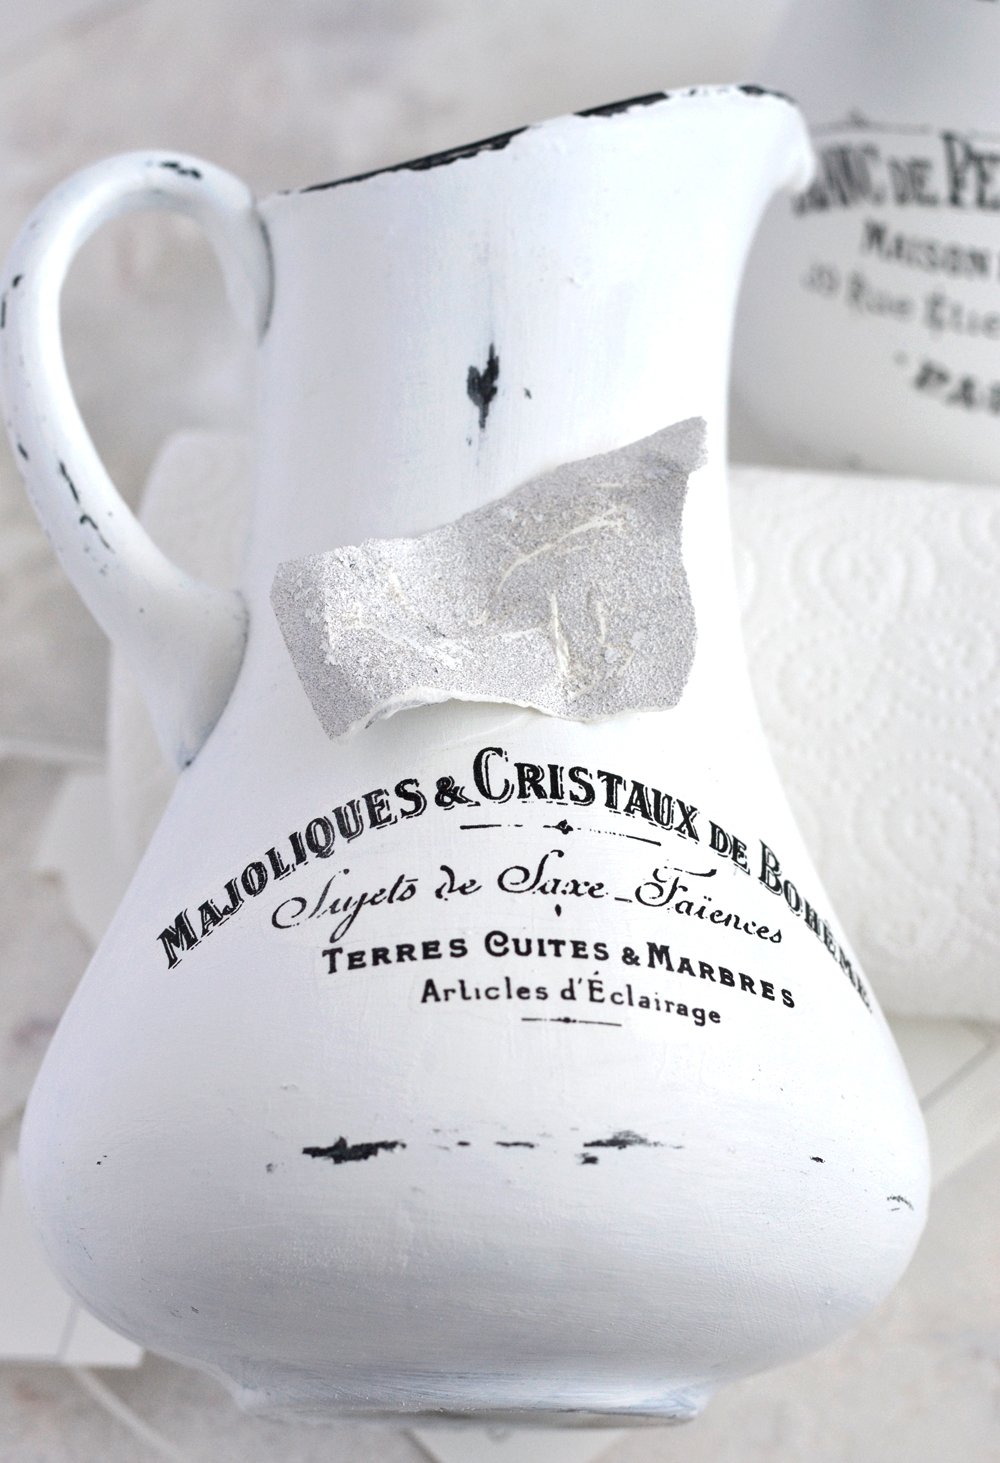
As our final step, use a matte or a gloss Krylon spray (in a well ventilated area) and seal the whole surface of your pitchers – both the painted area and the decals. Let them dry completely and you are all done!
Now it’s time to admire your new beautiful, simply amazing and stylish DIY Aged French Pitchers! 🙂
And I know I mentioned this on other projects, but please don’t feel intimidated by all these instructions! The process itself is so easy! And fun! And relaxing! And you’ll just feel incredible well and rewarded while holding one of these beautiful creations in your hands! 🙂
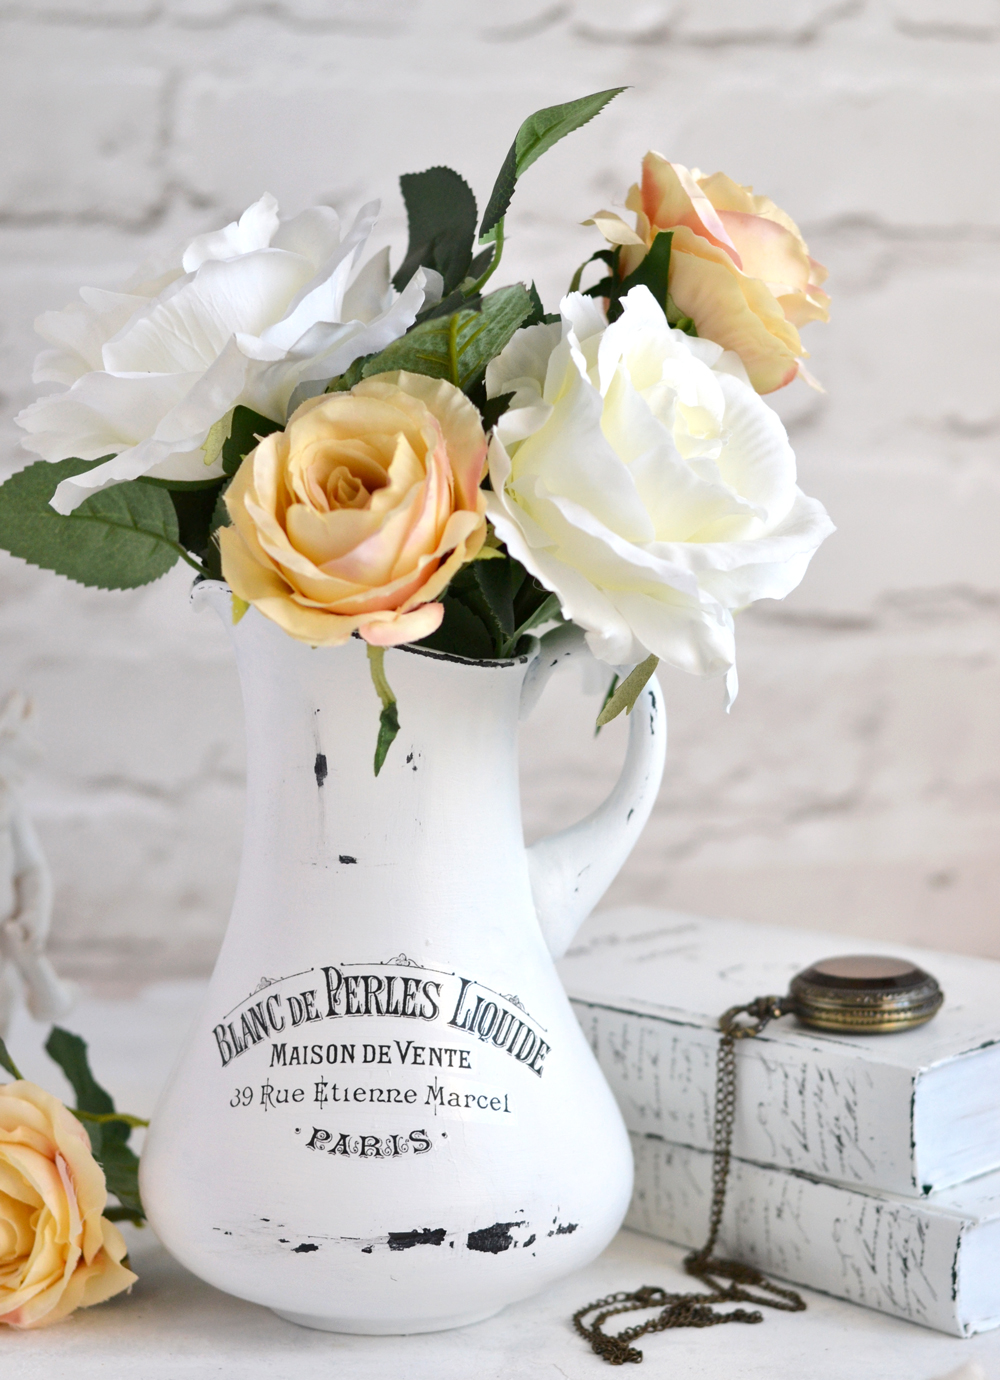
When it comes to using the DIY Aged French Pitchers, I’m sure you will come to realize that there are so many spaces in your home that just NEED one of these beauties! 🙂
You can seasonally adapt them to your homes with fresh or dried flowers, greenery, natural branches, there is an infinite number of possibilities.
Go for a farmhouse neutral or vintage look and use them with eucalyptus branches (from Ikea).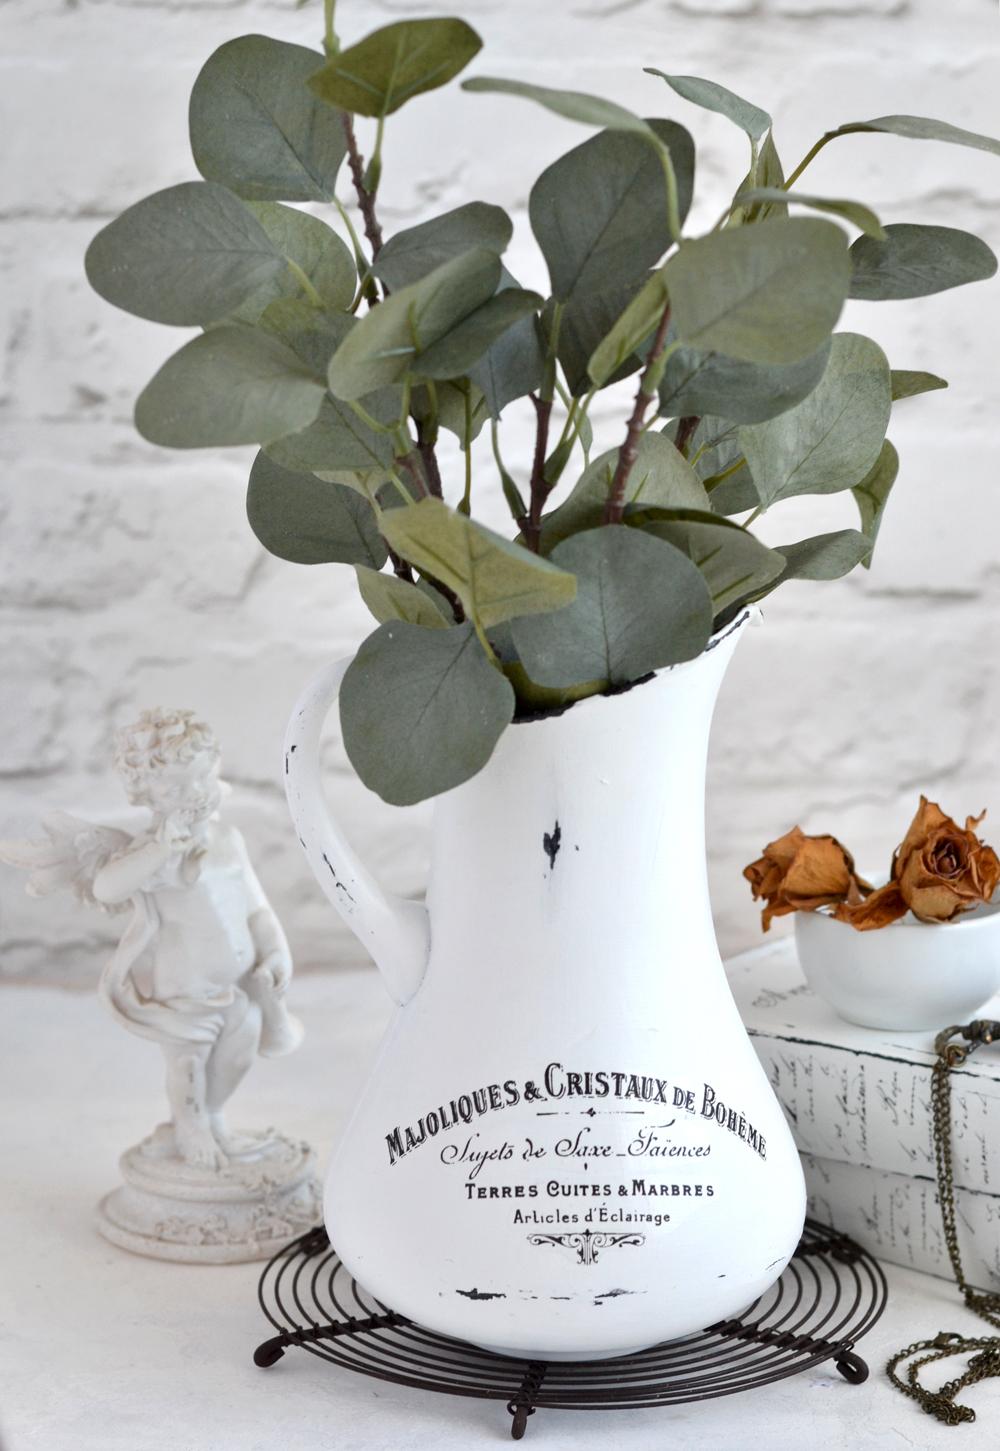
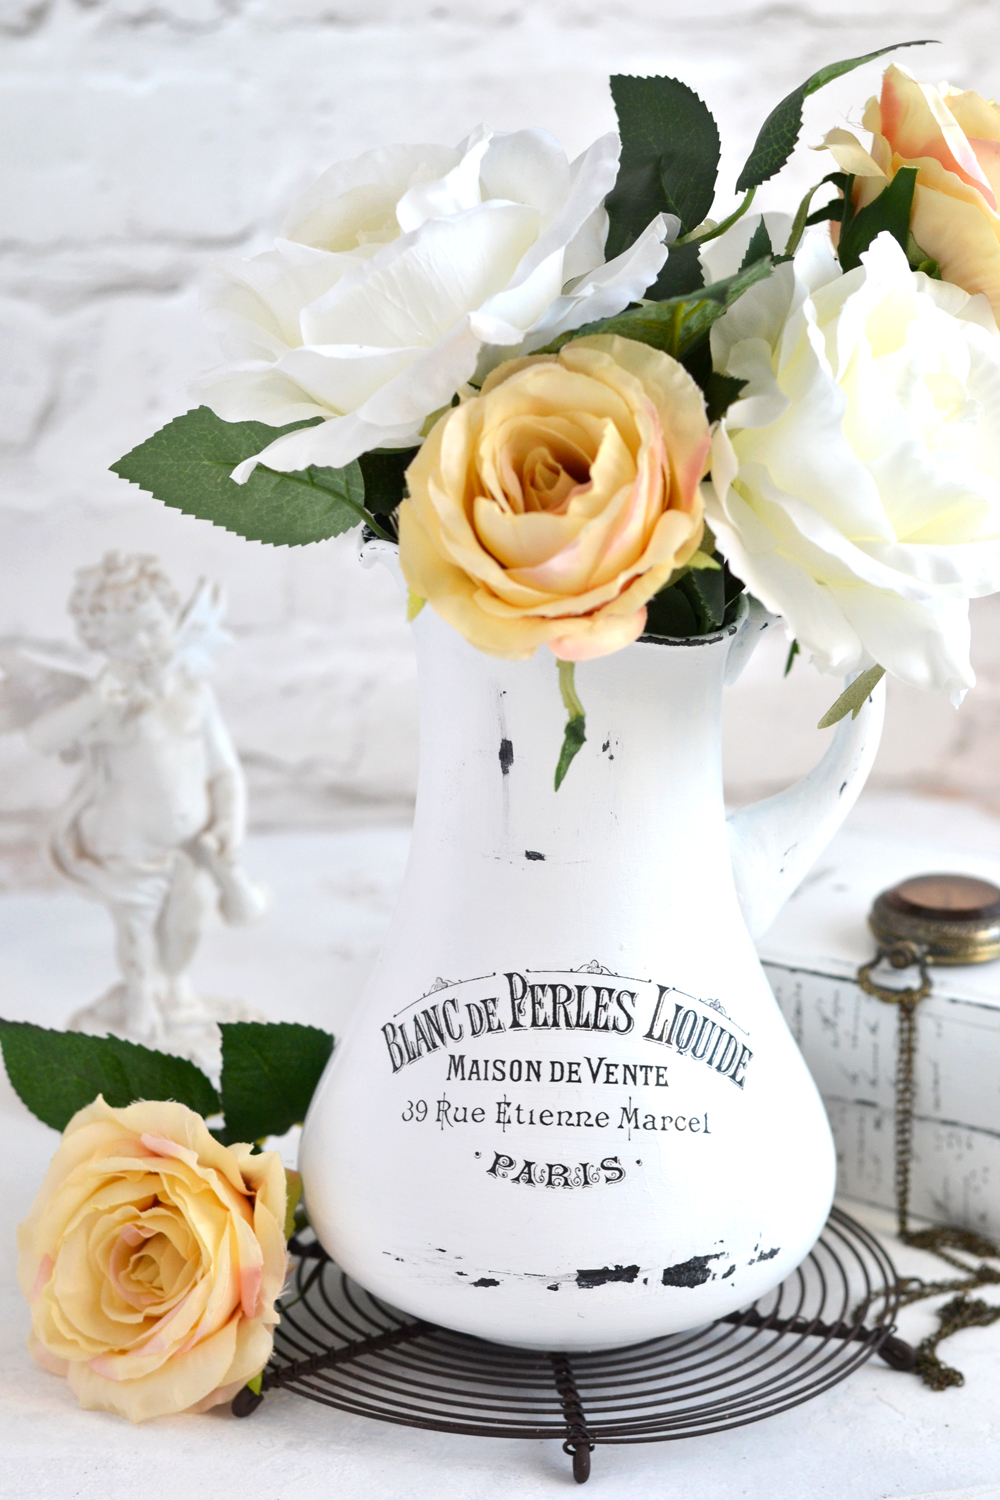
Or simply add fresh or dried roses for a more romantic, Shabby Chic look.
The DIY Aged French Pitchers are also perfect for gifting, you can easily turn them into stunning gifts for family and friends! 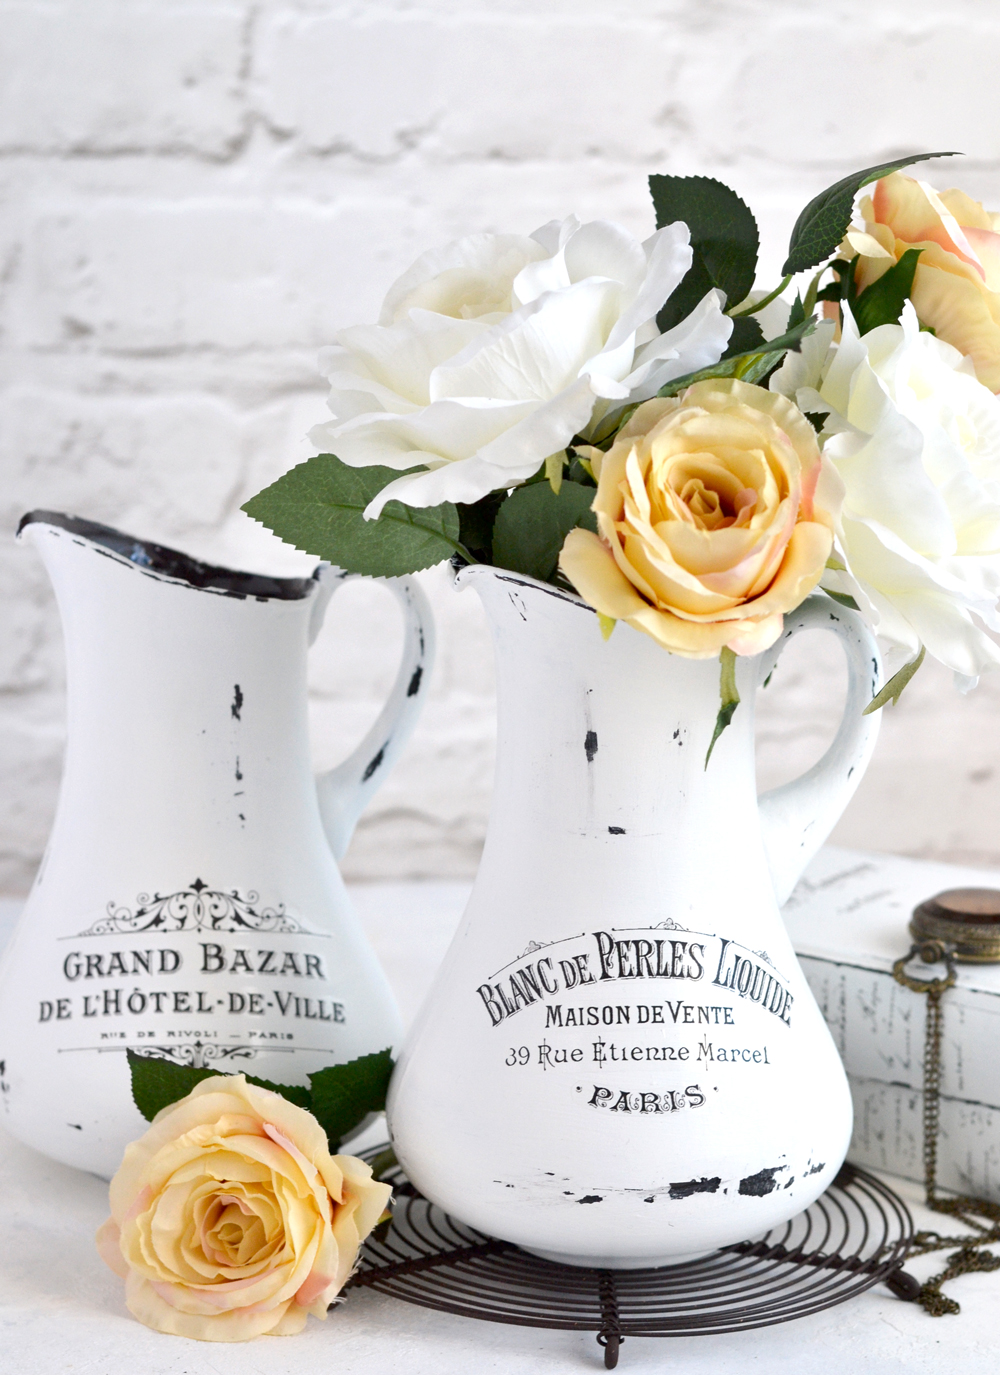
Now it’s your turn! Get your glass pitchers ready and prepare them for the makeover of their lives! 🙂
Have fun creating!
Diana / Dreams Factory




Aileen Nickel says
These are gorgeous. Made my first one, but my white paint just wasn’t giving me a very good coverage. Removed it all and will look around for another white acrylic with better coverage.. I won’t give up. Thanks for your excellent instructions and creative idea.
graphicsfairy says
Good for you Aileen, I always say “practice makes perfect” 🙂
Nina! says
I love this idea. But I’m having trouble with it. I painted a coat of black paint using apple barrel paint and a paint sponge. It didn’t cover all that great, so I waited 24 hours later ( since the drying time was 1 hour, I figured 24 was a safe bet) and applied a second coat, but it peeled up the first coat leaving a very uneven surface. Glass pitcher was cleaned with soap and water, followed with rubbing alcohol. Any ideas on why this happened, and how to prevent it?
Thanks
graphicsfairy says
Sorry it isn’t working for you Nina, perhaps it is the paint?
Moog says
Is the candle wax melted to apply or cold? Does the white paint still stick despitethecwax? Can’t wait to try it.
graphicsfairy says
The candle wax is cold and just rubbed all over the dried black paint on the pitcher then the white paint is applied and yes it does still stick. If you read the blog post Diana goes through the process step by step so it is very easy to follow and as usual she ends up wit a beautiful project!
wilna says
thanks, this is a fantastic tutorial. Love all your ideas
Thanks for sharing
graphicsfairy says
Thanks so much Wilna 🙂 It is our pleasure!
Susan says
These are so cute!! Thank you for the great instruction!! Just in time for romantic Valentine’s Day flowers!!
graphicsfairy says
Thanks Susan, have fun!
Kimberly says
These are beautiful! Can spray acrylic paint be used for this project?
graphicsfairy says
Hi Kimberly, I am not sure it will have the same effect, the best advice I have is to try it on a sample/scrap piece and see if you like the look. Diana uses, regular Acrylic paint and stresses not to dilute it so take that into consideration. Good luck 🙂
Berni hickey says
This is amazing thank you so much for sharing xx
graphicsfairy says
It is my pleasure Berni 🙂
Lisa McD says
Oh my gosh! LOVE LOVE LOVE! Thank you for the awesome tutorial. I have some glass containers laying around that I can use this technique on to spruce up my house for Spring – so excited. 🙂
Sheryl Carman says
This is a lovely project. Thank you so much. Can’t wait to give it a try. Just discovered this site, and so glad I signed up…love it.
graphicsfairy says
Thank you Sheryl and welcome! We hope you enjoy it!