DIY Christmas Crackers
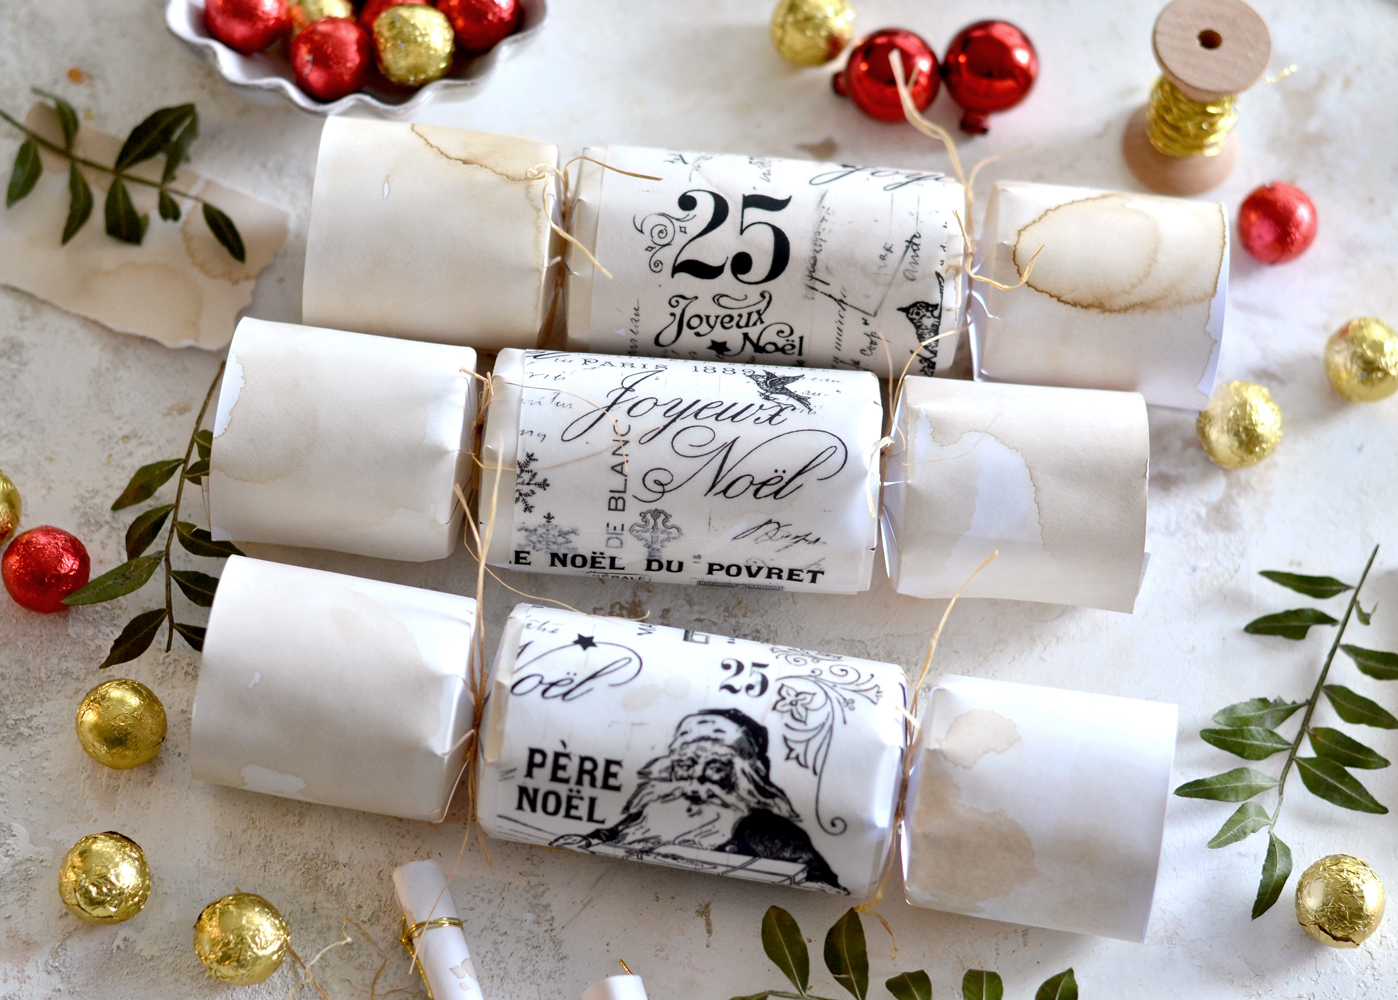
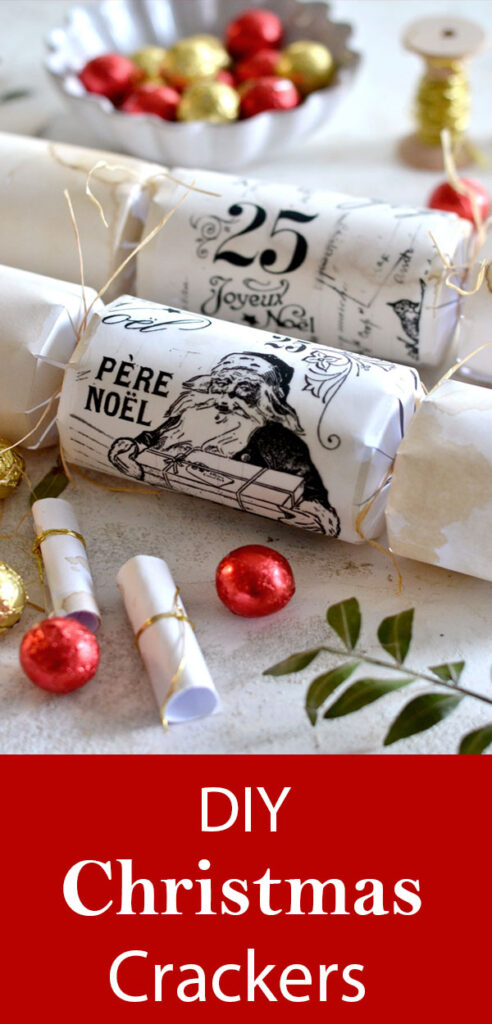
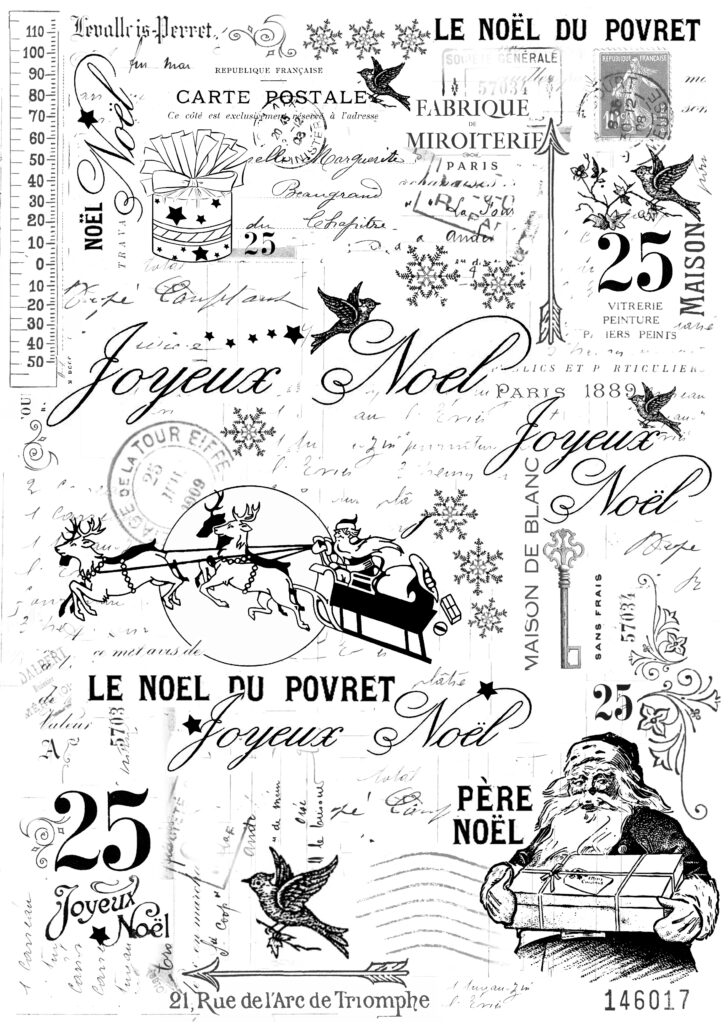
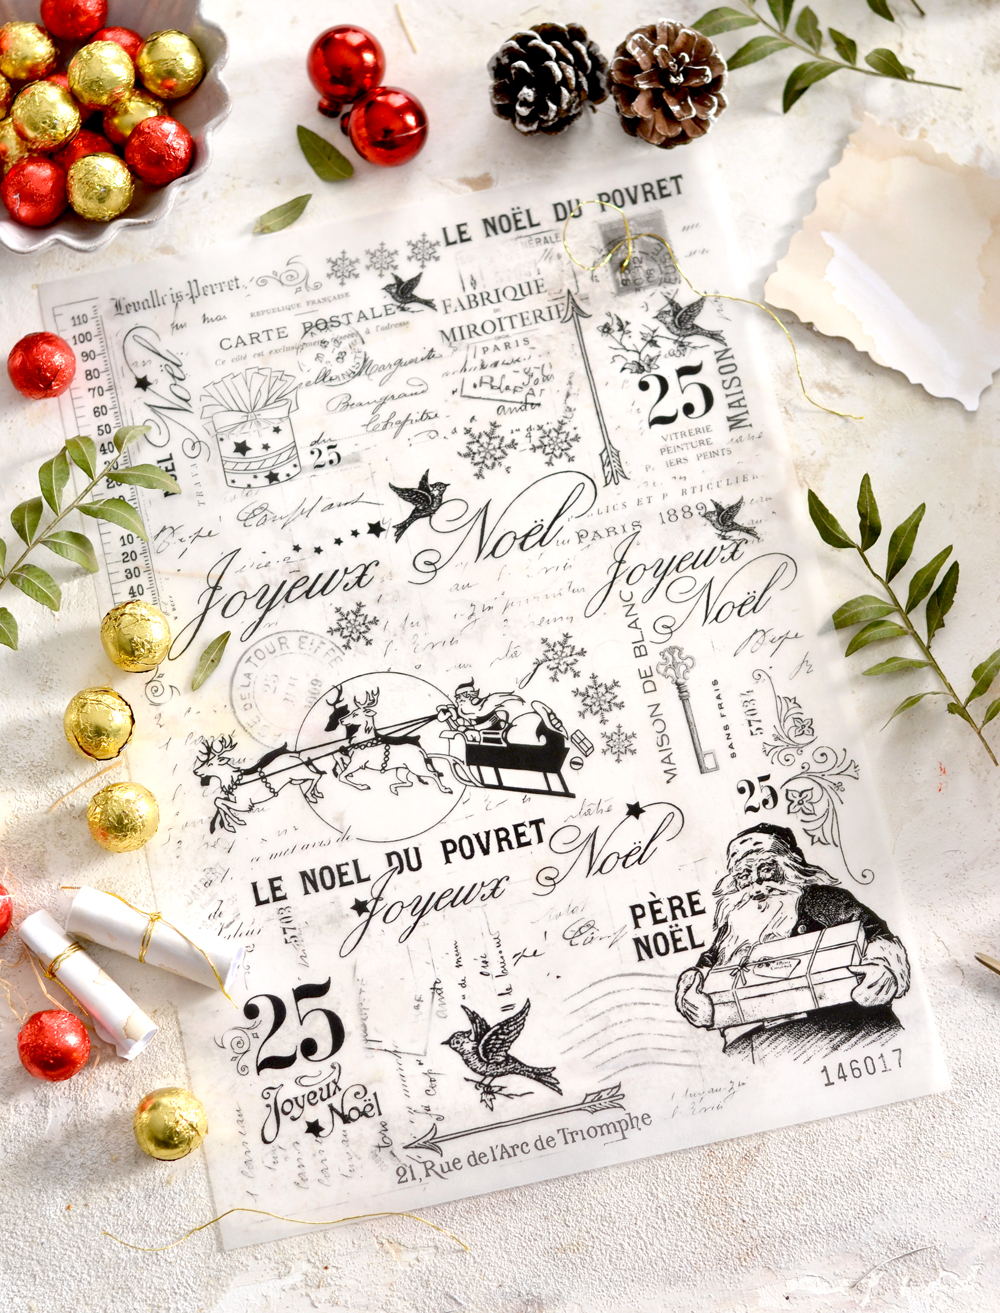
Hello Graphics Fairy friends! Diana from Dreams Factory here, and today we are continuing our DIY Christmas series with these absolutely beautiful DIY Christmas Crackers! This is a fun project that you can make for your friends and family. They are like traditional English Crackers but with a French flair! I will show you my technique for making these beauties and I’m also sharing a super chic French Christmas collage that will perfectly match these, as a bonus! An early Christmas gift from me to you!
If you are not familiar with DIY Christmas Crackers, they are more of a British tradition and are usually used on Christmas Eve during dinner as a fun activity. Everyone at the table will get one cracker, but to make things more fun, there are usually two people holding the two ends of a cracker, then pulling them hard in opposite directions. The cracker will make a popping sound because of the paper snap that is usually inserted inside and will tear unevenly. This will leave one person with all the goodies inside while the other person gets … well, nothing! You can tuck expensive or inexpensive gifts inside a cracker, I believe the idea behind it is more fun than the present itself, but you can personalize them as you want. You can usually find inside a tissue paper hat that you have to wear during Christmas dinner, a corny joke written on a piece of paper and a small inexpensive novelty – a small deck of cards, a small Christmas ornament, small coloring pencils and a miniature coloring book, a small jigsaw puzzle or a game, balloons, something small that will bring a lot of fun to your dinner table and will keep everyone amused, no matter the age. Of course, you can add small sweet gifts inside like gingerbread cookies, chocolate or candies, they are usually quite appreciated no matter the occasion!
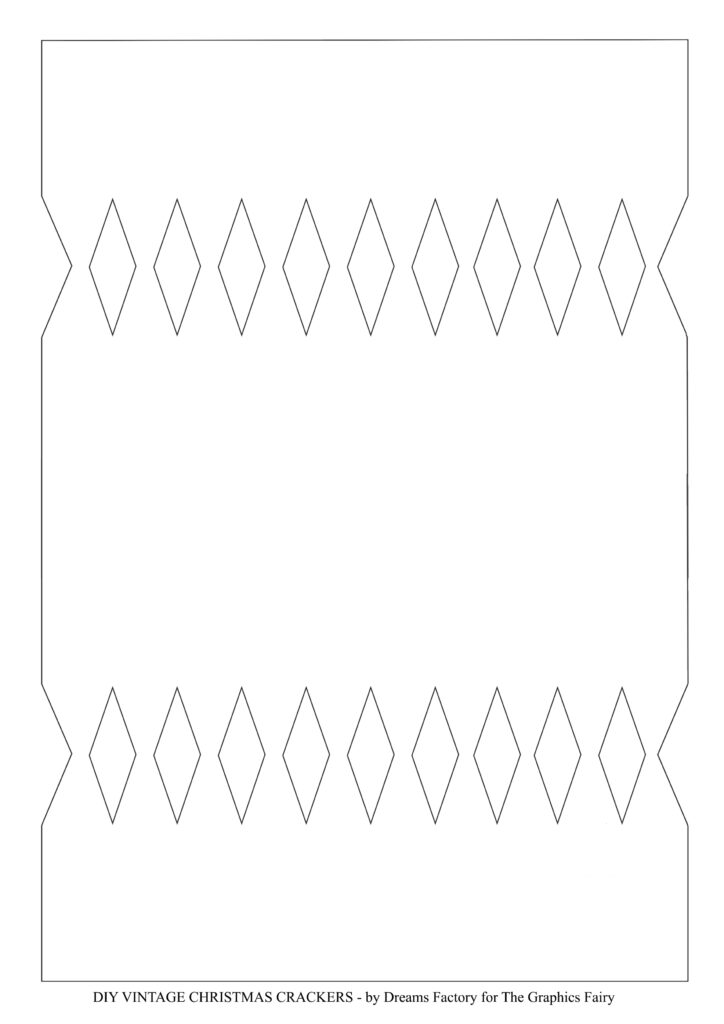
The crackers are usually made using wrapping paper and of course, you can totally use that if you want. But you know me, I love finding ways of personalizing things as I want, so I decided to go with regular cardstock paper for the crackers, and to make things easier, I even designed a template that will help you make your own PERFECT crackers for Christmas. I used coffee to stain the paper, just enough to give it a chic vintage look and imprint a subtle, quite heavenly aroma. I used tracing paper for printing the Christmas collage because I wanted to add a little bit of delicacy and sheerness, but you can also use tissue paper – if you can feed it through your printer. Regular paper can also be used for printing the collage, but you will get a slightly different final look.
P.S. Just so you know, both your template and your collage paper might look ever so slightly different than mine, I’ve made a few minor changes after completing the tutorial, to perfect things up!
Free Printable for DIY Christmas Crackers
—> Click here to download the full size PDF (the template) <—
—> Click here to download the full size PDF (the collage) <—
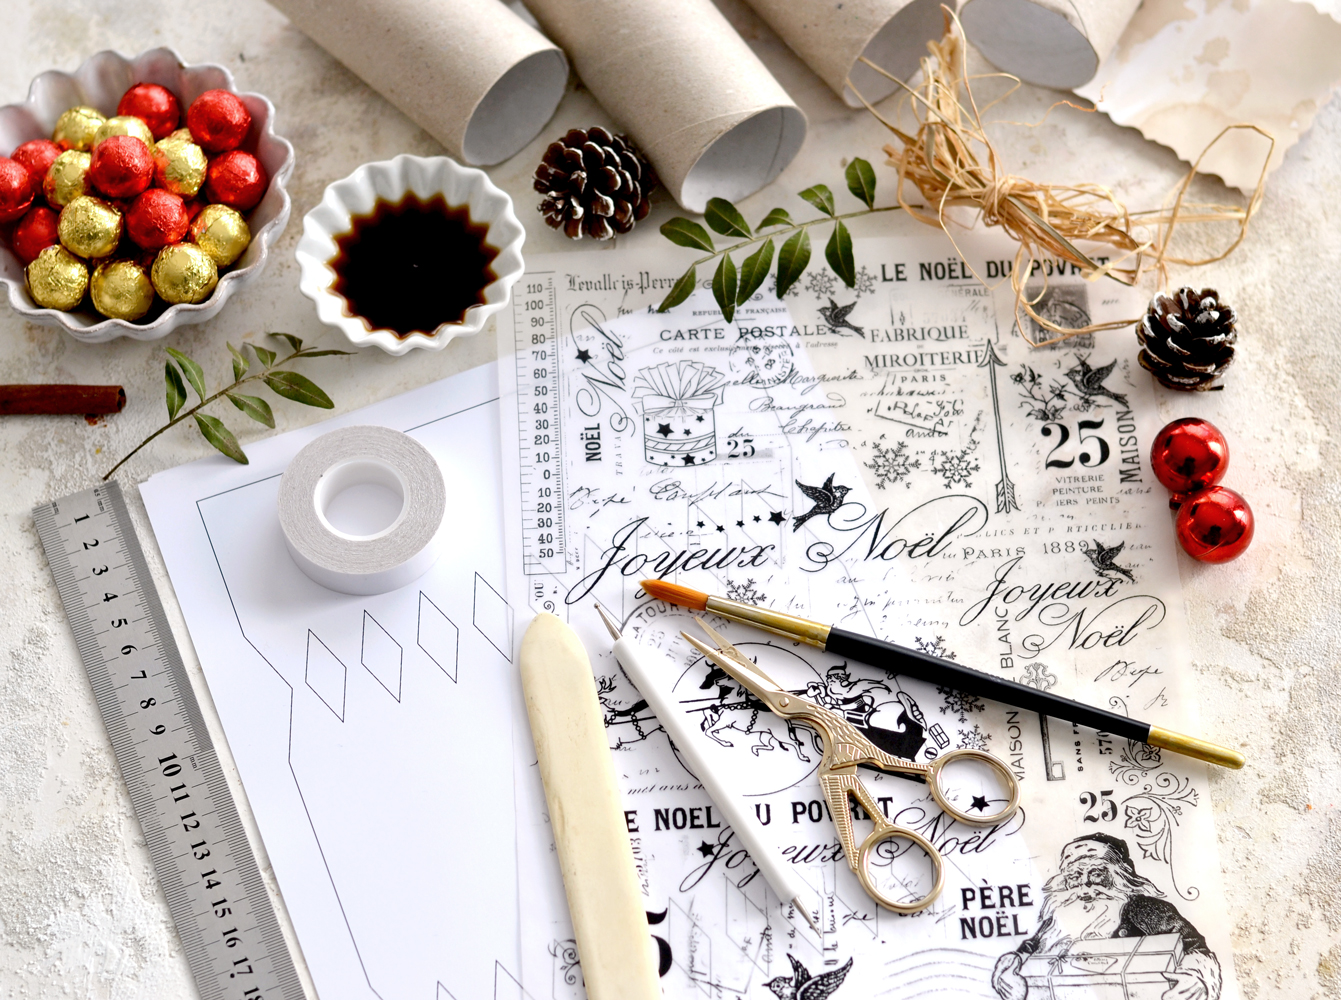
We will also need some paper rolls to make the DIY Christmas Crackers, you can use kitchen towel paper rolls, toilet paper rolls or even cardboard tubes for crafting if you can find them online or in craft stores. I love recycling, so I decided to use kitchen towel paper rolls that I cut in half.
Supplies for DIY Christmas Crackers:
- the free printable with the cracker template
- the free printable with the collage paper
- Paper Snaps (to make the popping noise!)
- cardstock paper – to print the crackers
- tracing paper (or tissue paper) – to print the Christmas collage
- scissors
- paper rolls – I used kitchen paper rolls cut in half
- coffee and a brush
- a non-absorbant surface (teflon, plastic sheet, craft mat, etc.) or an old book
- a cutting mat
- a regular pencil
- a ruler
- a bone folder or an embossing pen
- double-sided tape OR a quick-drying paper glue OR a hot glue gun
- raffia paper ribbon (or use what you have around)
- gold metallic thread (or use what you have around)
- small gits to tuck inside
P.S. You will need to print one cracker template on a regular cardstock sheet to make one cracker.
You can print the Christmas collage on one sheet of tracing paper and use it to make the decorative top for two crackers. You can use the excess collage on other fun projects!
Brew your coffee, print as many cracker templates and collages as you want, gather all the other supplies and let’s get started!
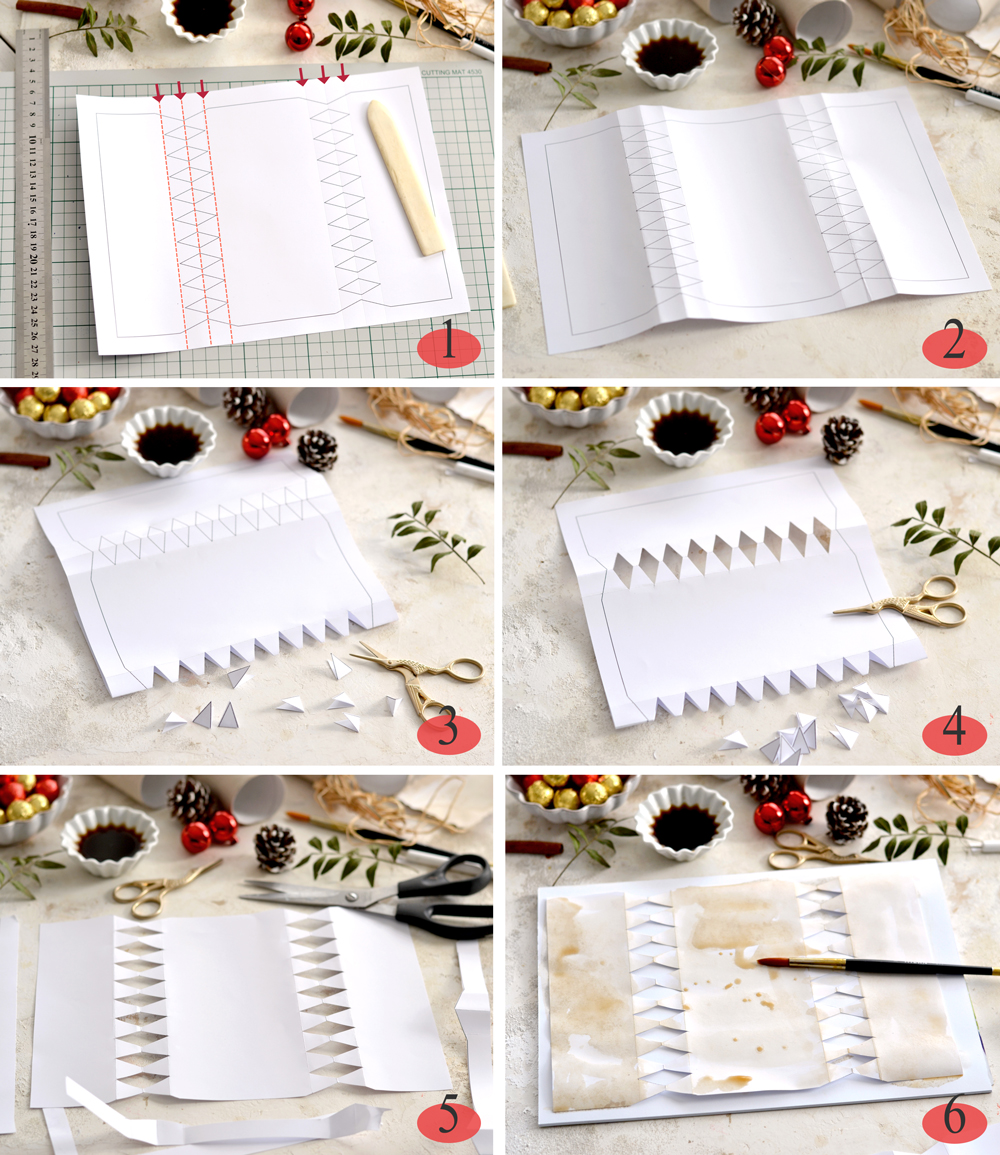
How to cut and distress the crackers
1. Place your cracker template on a cutting mat and use a ruler and a bone folder (or an embossing pen) to score lines along the diamond shapes (on their left, exactly in the middle and on their right) – the red lines are only for guidance, they are not actual drawn lines.
2. Fold the paper using the lines that we just scored as guidance, the cracker template should look like this.
3. Fold one part of the paper right in the middle of the diamond shapes, then place it towards you and use a pair of small scissors to cut the black diamond shapes out.
4. Do the same on the other side. Depending on how well you scored and folded the paper, you should be able to remove all the black borders around the diamonds.
5. Unfold the cracker template, then use larger scissors to cut the outside shape, trying again to completely remove the black border. Follow the same steps to make as many crackers as you want.
6. Place your template on a non-absorbant surface (I used an old sketchbook) and use coffee and a brush to distress the paper. Add more or less coffee to create interesting aging effects. Let the paper dry COMPLETELY before moving on to the next step – if not, the paper might tear.
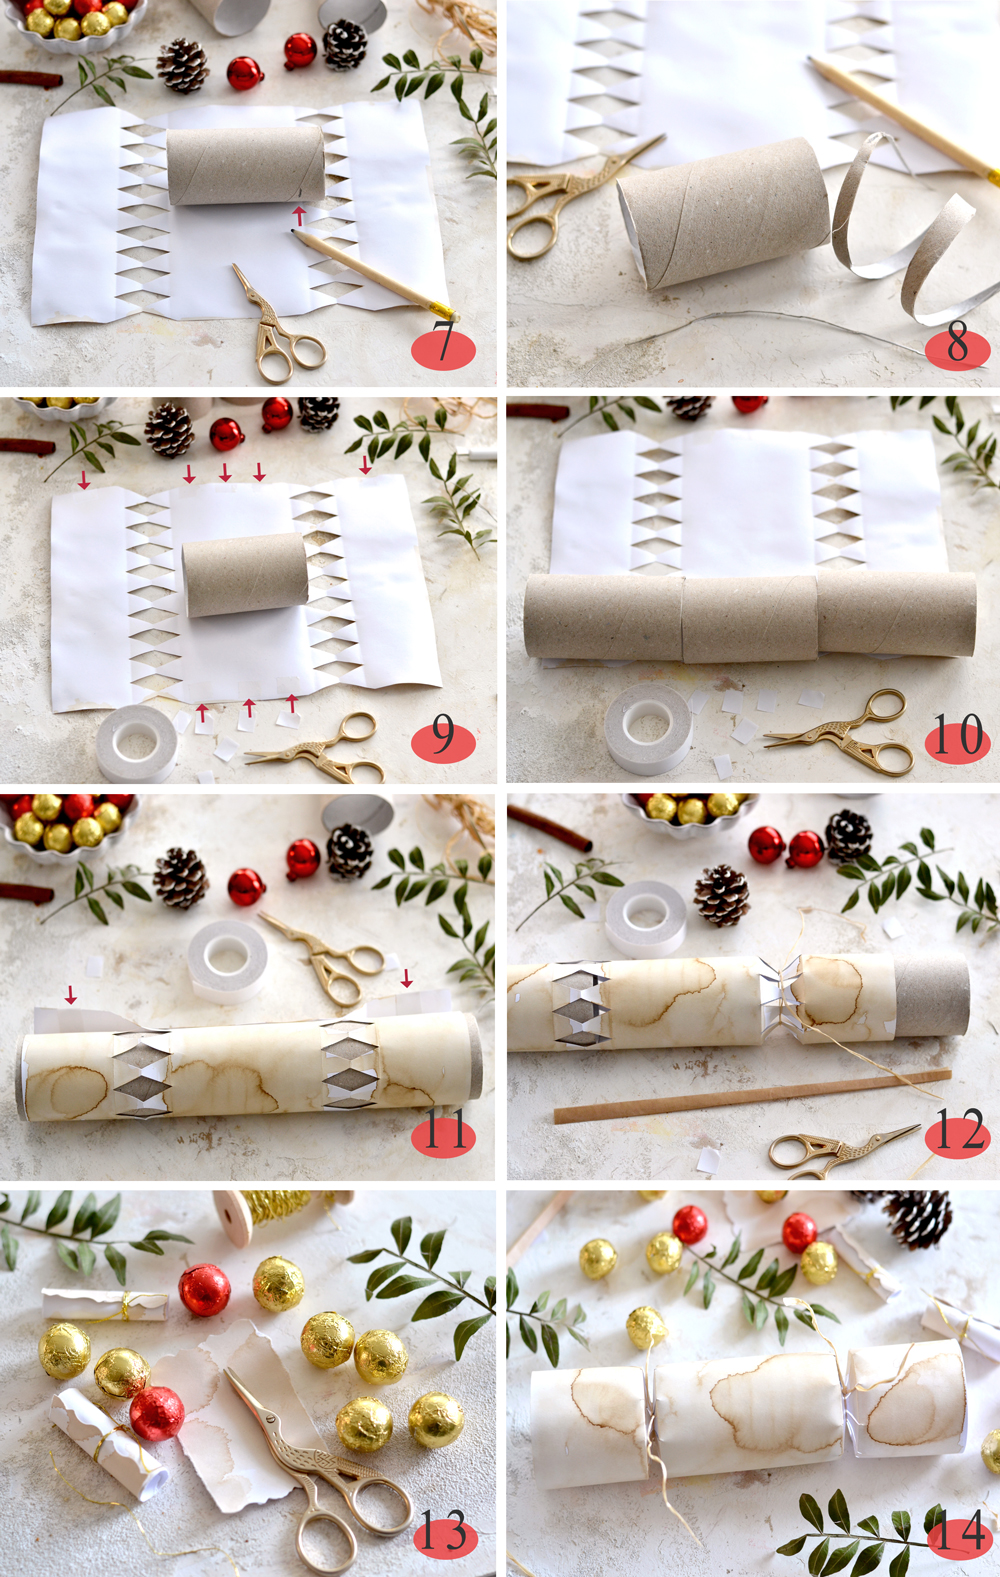
How to assemble and fill the crackers
7. Place a paper roll inside the template and measure to see if you need to cut some of it out. I used a pencil to mark the size I needed.
8. Use a pair of scissors to cut the excess paper roll – use a spiral cutting motion and gradually go all around the paper roll until you get to the pencil mark.
9. Add small pieces of double-sided tape on the middle part of the cracker template on the bottom, then on the middle part and on the sides on the top – follow the red arrows for guidance.
10. Place your cut to size paper roll in the middle bottom of your template and glue it on the double-sided tape that you added there, then place two more paper rolls on the sides. The paper rolls on the sides will help us roll the cracker easier but make sure they are not adhering to the paper in any way, we’ll be removing them after rolling.
11. Roll the cracker using the three paper tubes assemble, making sure the sides are perfectly aligning. Glue the middle when you reach the end of the paper, then glue the other two sides of the overlapping paper, making sure again everything is perfectly aligned.
12. Half remove one of the paper tubes from one side, then add the paper snap inside. Use your preferred twine or ribbon to tie it up as tight as you can, then remove the paper tube from the side completely.
13. I’m guessing you have already prepared the small gifts you want to add inside, now it would be the perfect time to tuck them in! You can use coffee-dyed pieces of paper to write jokes or Christmas wishes, then turn them into mini scrolls using gold metallic thread.
14. Half remove then tie and secure the other end of the cracker to finish the assembling.
The DIY Christmas Crackers can also be used like this, if you want, I just LOVE their simple and beautiful distressed look! In this form they can also be personalized as you wish, maybe you’ve always wanted to learn how to draw or paint a Christmas tree or a winter scenery. These crackers are like a blank canvas, they can be perfect for practicing your skills! You can also practice your calligraphy skills and personalize them with names. Why not, right? The sky is the limit!
How to decorate the crackers
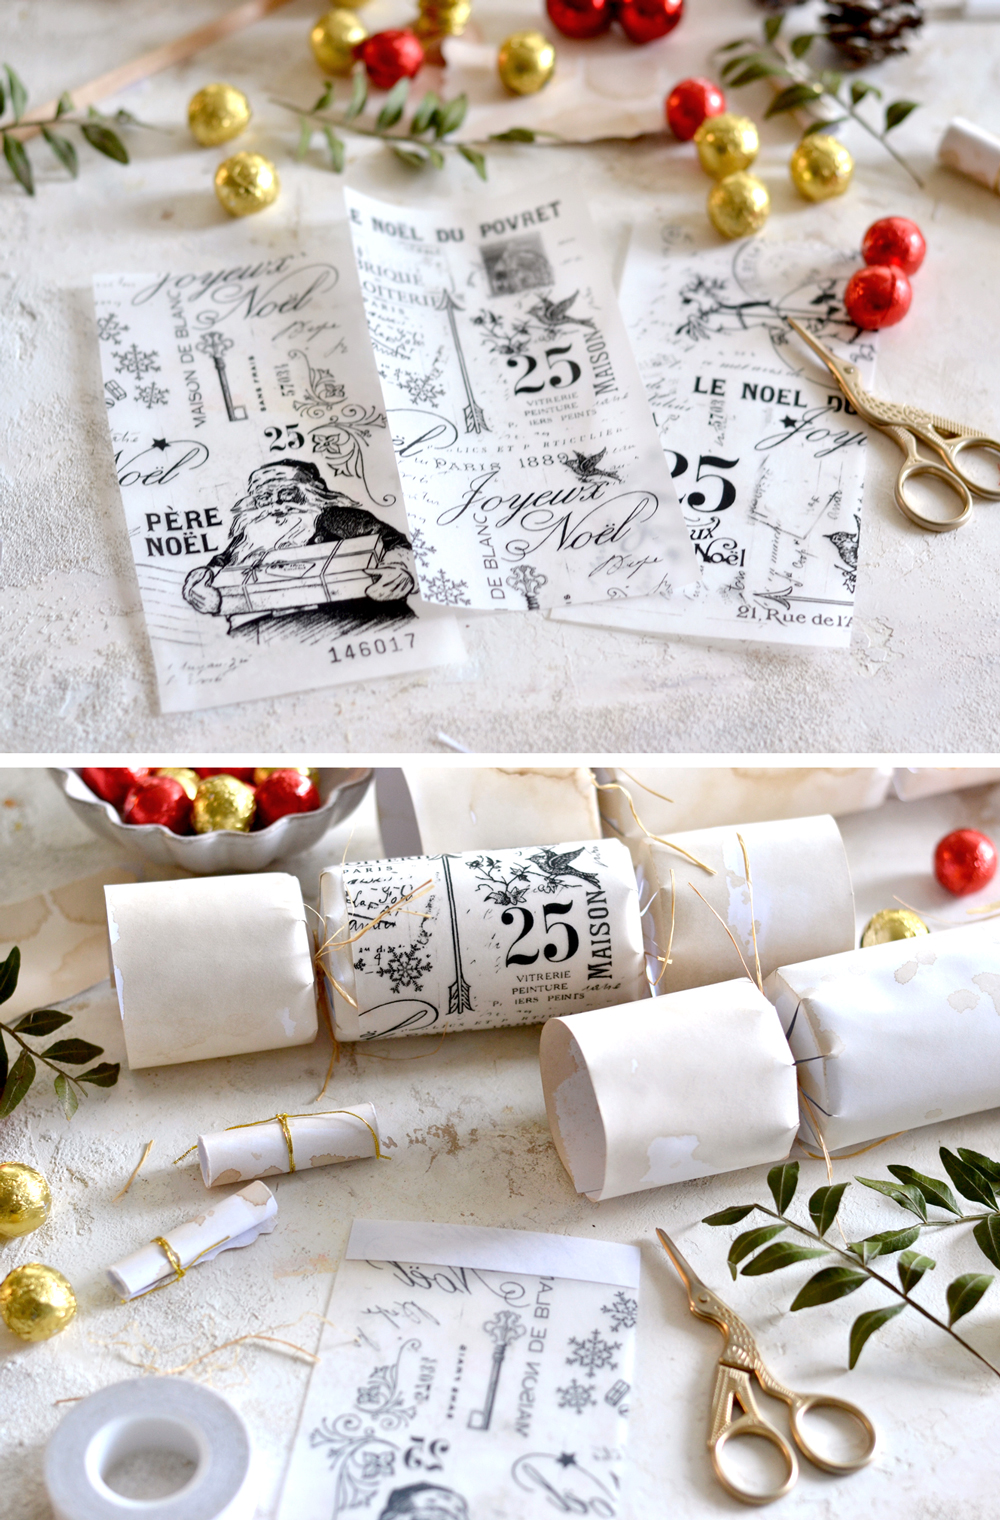
If you want to use the chic French Christmas collage paper that I designed for you, it’s really simple – you just need to spot the area that you love the most, then cut it! Measure the width of the middle part of your crackers – that will give you the width of your collage paper. As for the length, make sure the collage paper is slightly overlapping when rolled onto each cracker. Use double-sided tape again to adhere the overlapping part of the collage paper or glue it directly on the crackers.
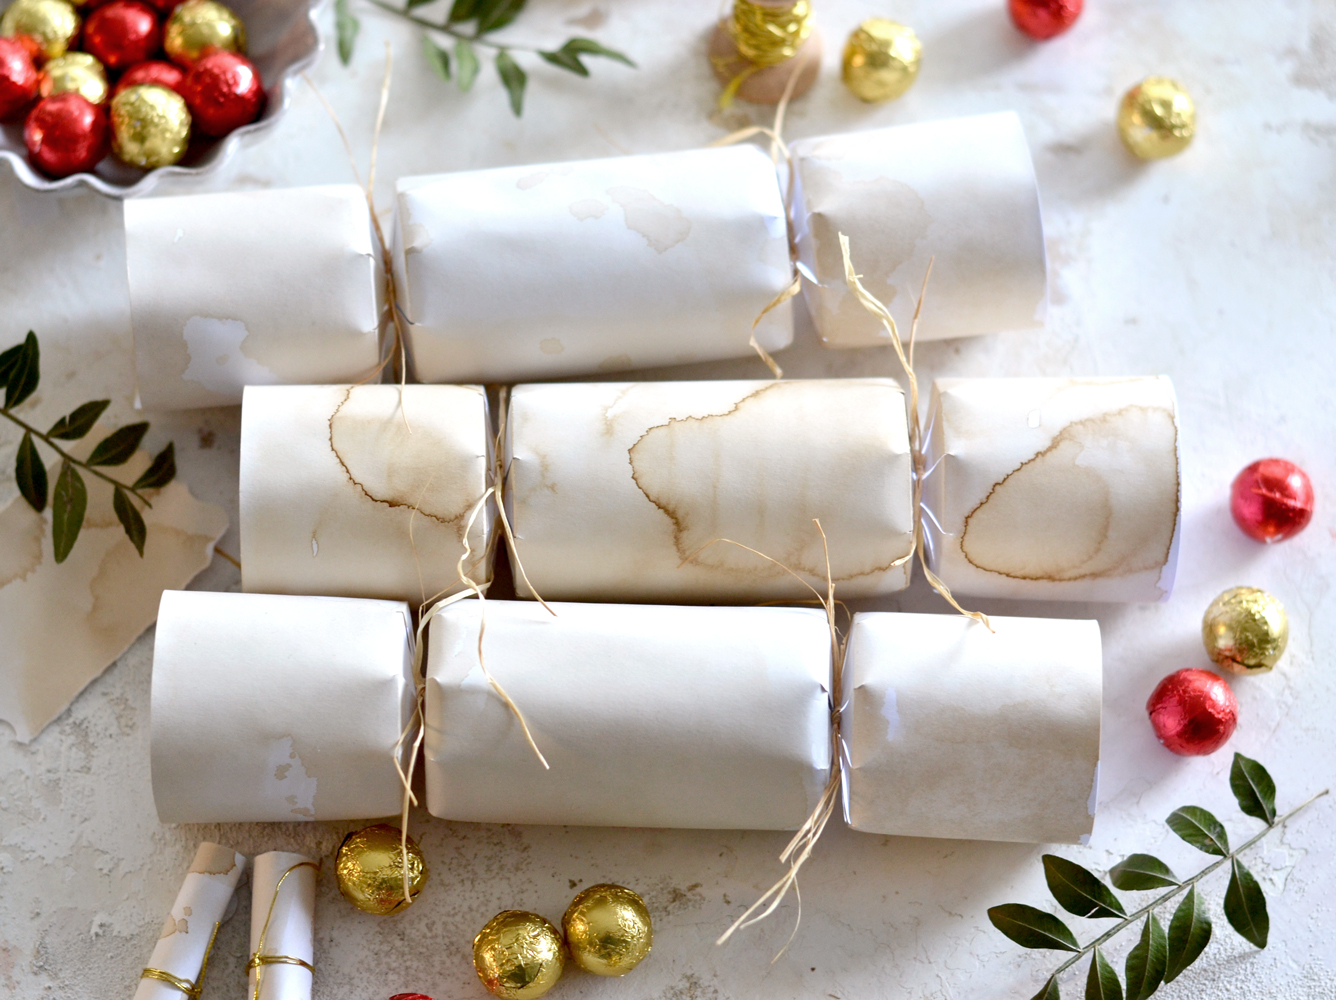
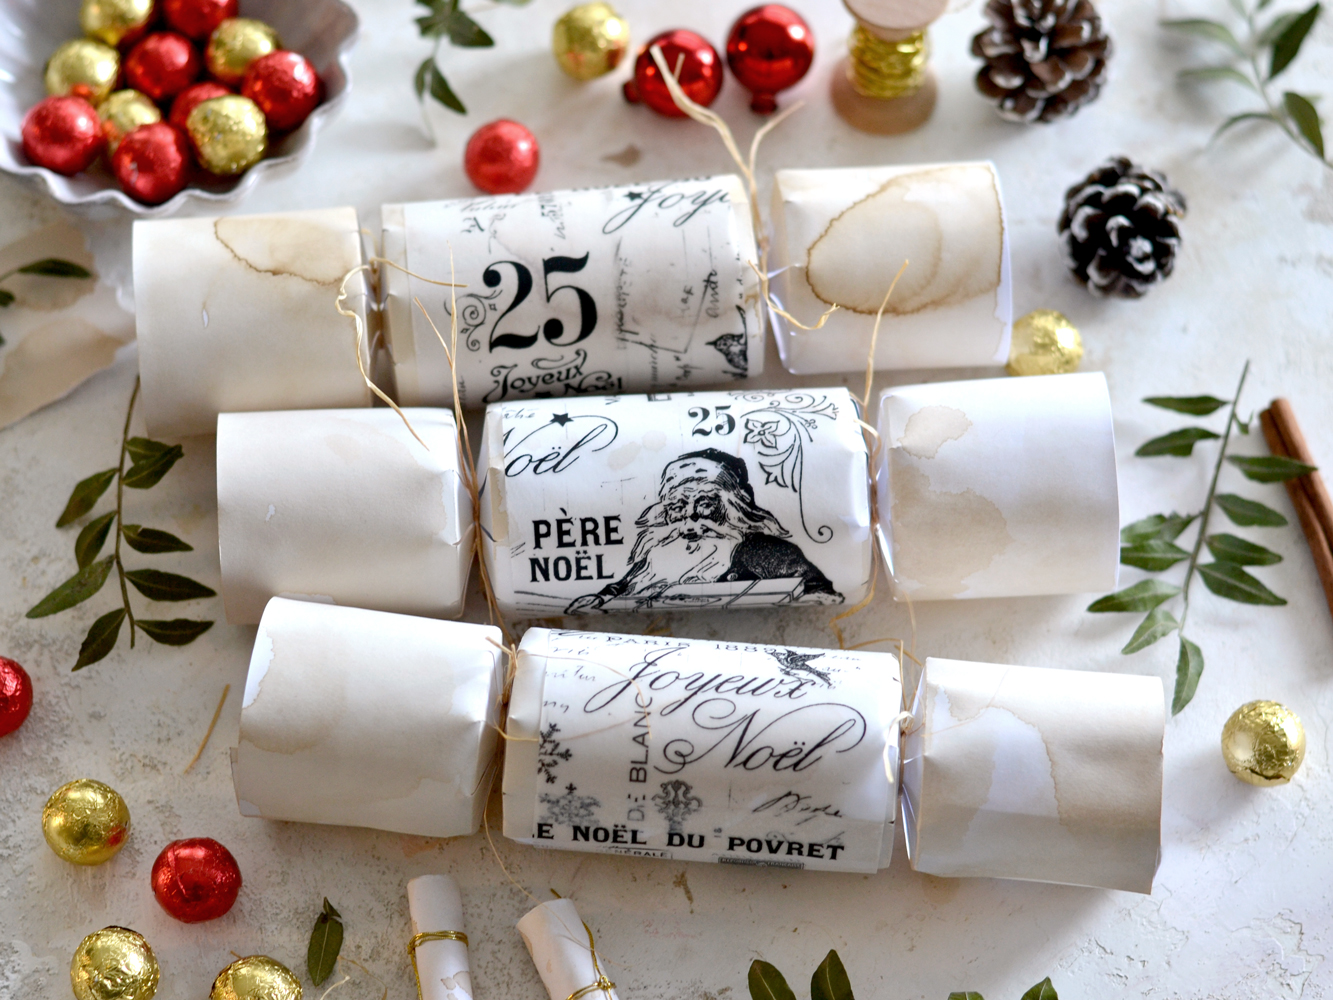
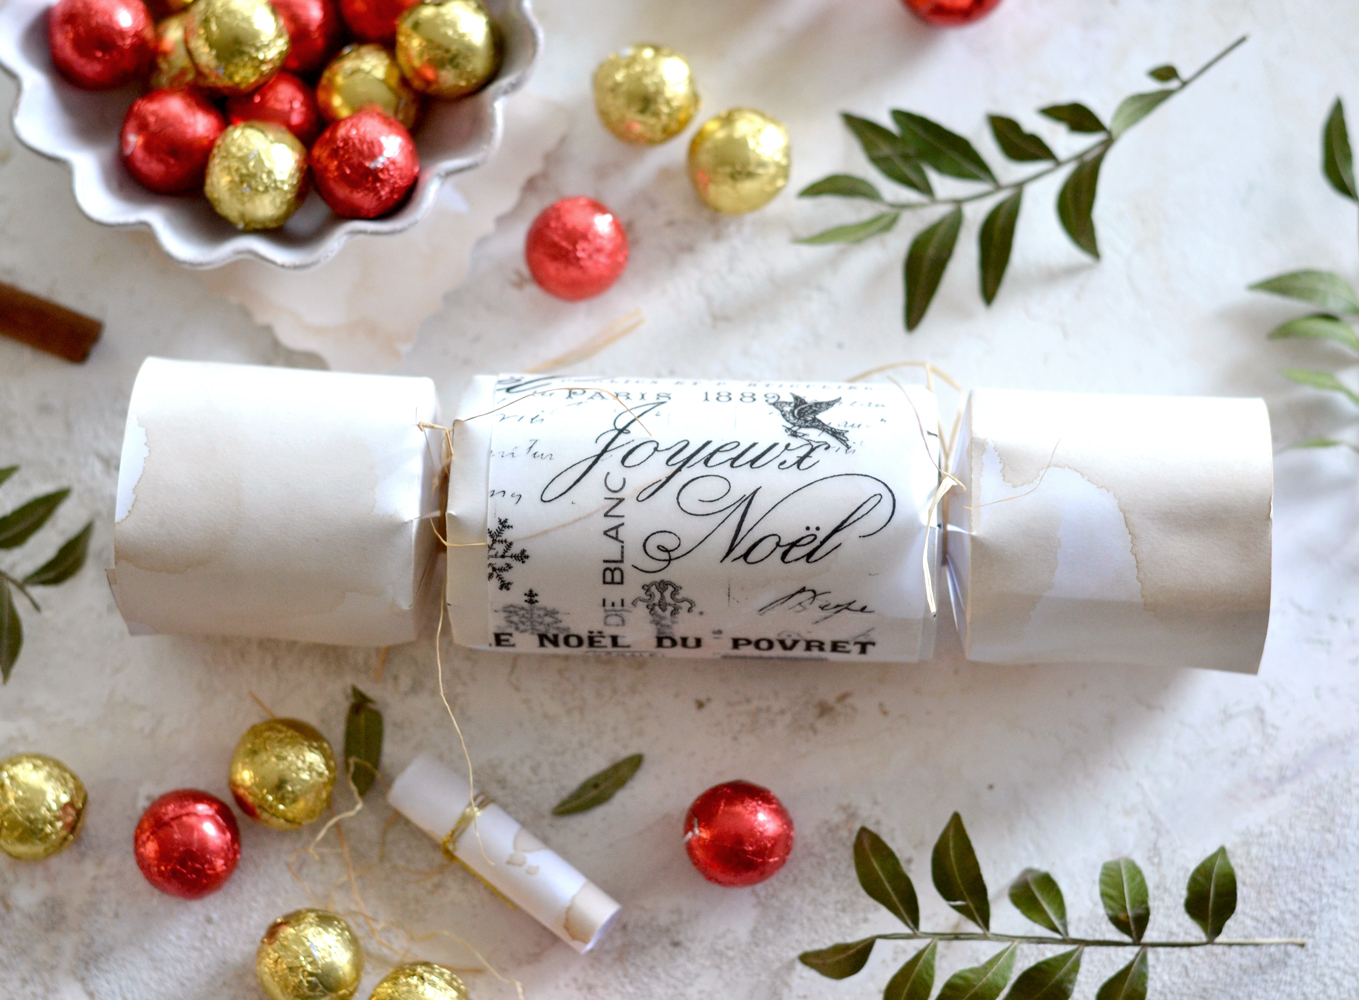
And you are done! How gorgeous are these?! I’m loving both the vintage feel in the cardstock paper and the chic tracing paper collage that adds that extra sheer and gorgeous element to the whole assemble. You can add other festive elements to your beautiful DIY Vintage Christmas Crackers, feel free to embellish them as you want.
I included so many gorgeous elements in this French Christmas collage, you just have to roll the same crackers a little bit to get a new absolutely amazing design!
You can also use this super Christmas collage paper on other projects too!
I’m hoping you will include this DIY Christmas Crackers project on your Christmas list this year, it’s not only a really fun project to make, but it will bring so much joy to everyone receiving it!
You can include the crackers in your decorating sessions in your home, hang them in your Christmas tree, include them in seasonal vignettes. Or on Christmas gifting for friends and family, handmade gifts are always the best, especially when they are intentionally crafted for someone you love!
I hope you enjoyed this DIY Christmas Cracker. You may also like DIY Christmas Banners HERE.
Happy crafting,
Diana / Dreams Factory



JULENE NIKOLAC says
These are a tradition in our family! I am looking forward to making them this year. I also ordered the tissue hats…those are a must! As a child, I thought it was so funny to see all the adults sitting around the table wearing them. Thank you for sharing this,
Karen Watson says
Yes, I loved the tissue crowns! So fun! Have fun creating these and putting your own little surprises in them! 🎄
Margaret Schmidt says
In the directions for assembling you say to add the ‘paper snap’. I don’t see what that is, can you please explain.
Karen Watson says
Hi Margaret, We’ve updated the supply list to add a link to the paper snaps. If you click on the link you can see what they look like. They make a fun little bang or popping noise, when you pull on the each end of the snap. That’s why they’re called “crackers”. So fun! 🎄
Roberta says
Brilliant idea, thank you for sharing
Karen Watson says
We’re glad you enjoyed Diana’s lovely project Roberta! 😊
maureen says
Maybe I missed it, but you don’t mention where to get the paper snap for the Christmas crackers.
Karen Watson says
Hi Maureen, We’ve updated the supply list to add a link to the paper snaps. As Diana lives in Romania, I’m not sure she can buy them there.
David says
but.. what about the little ‘bang!”
Karen Watson says
Hi David, we’ve added a link in the supply list to the paper snaps, for the bang!