Easter Cards to Make
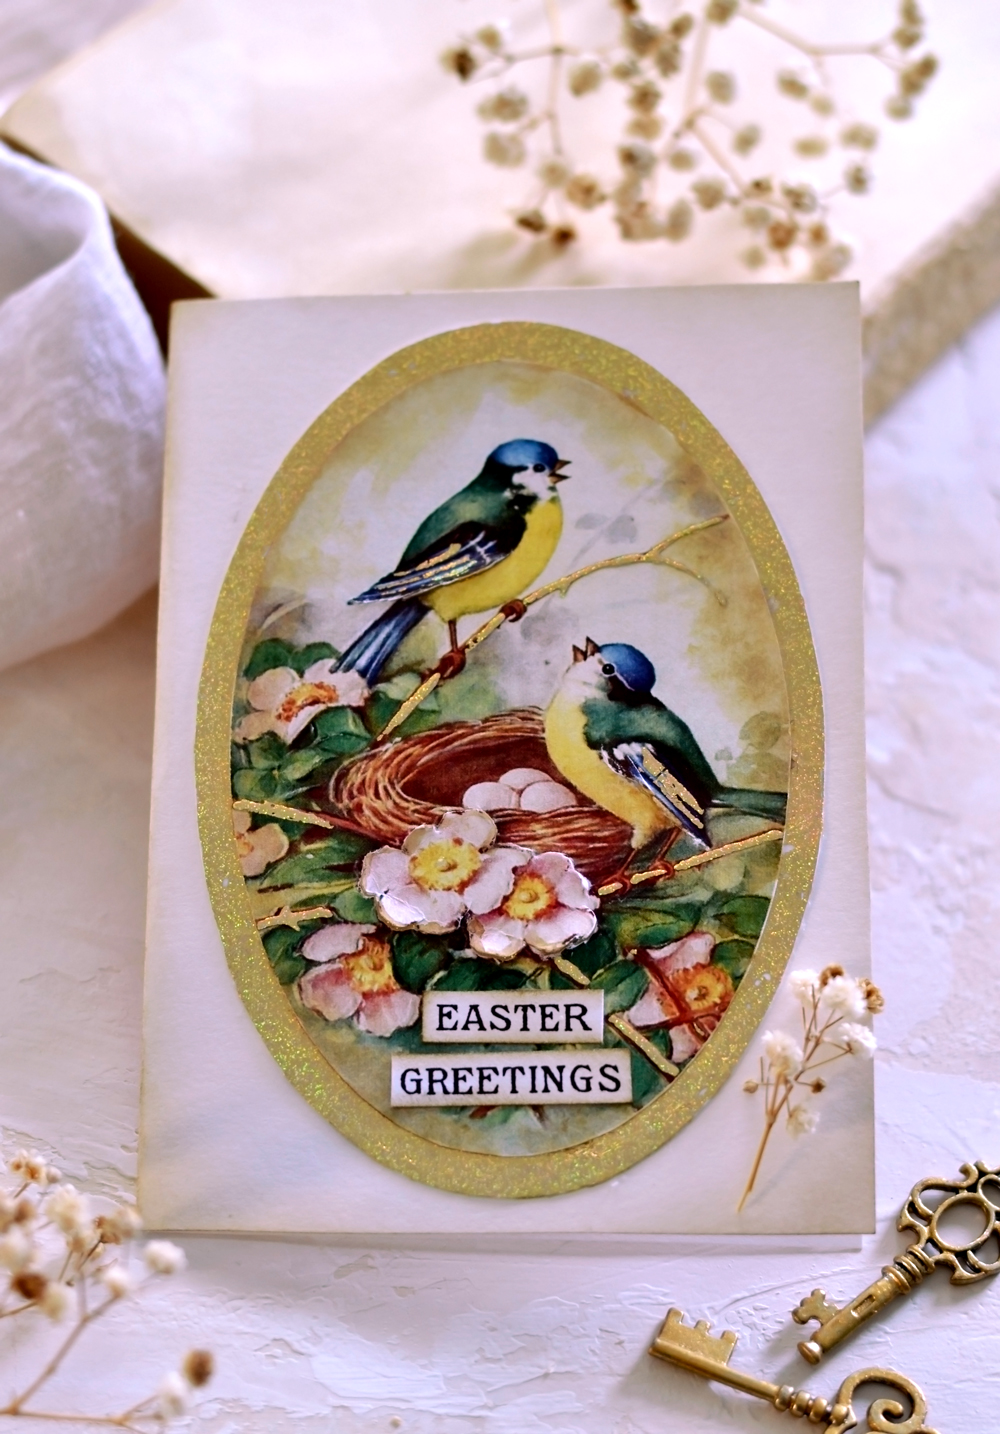
Hello Graphics Fairy friends, it’s Diana from Dreams Factory here, happy to share another DIY project with you! Today I will show you some beautiful Easter Cards to Make, using just a handful of supplies, while paying close attention to all the small details to create something simple, but oh so chic! We will be using a touch of gold (using two different techniques) that will imprint elegance to these homemade cards by adding a metallic frame. I hope you enjoy this DIY Easter Card Tutorial.
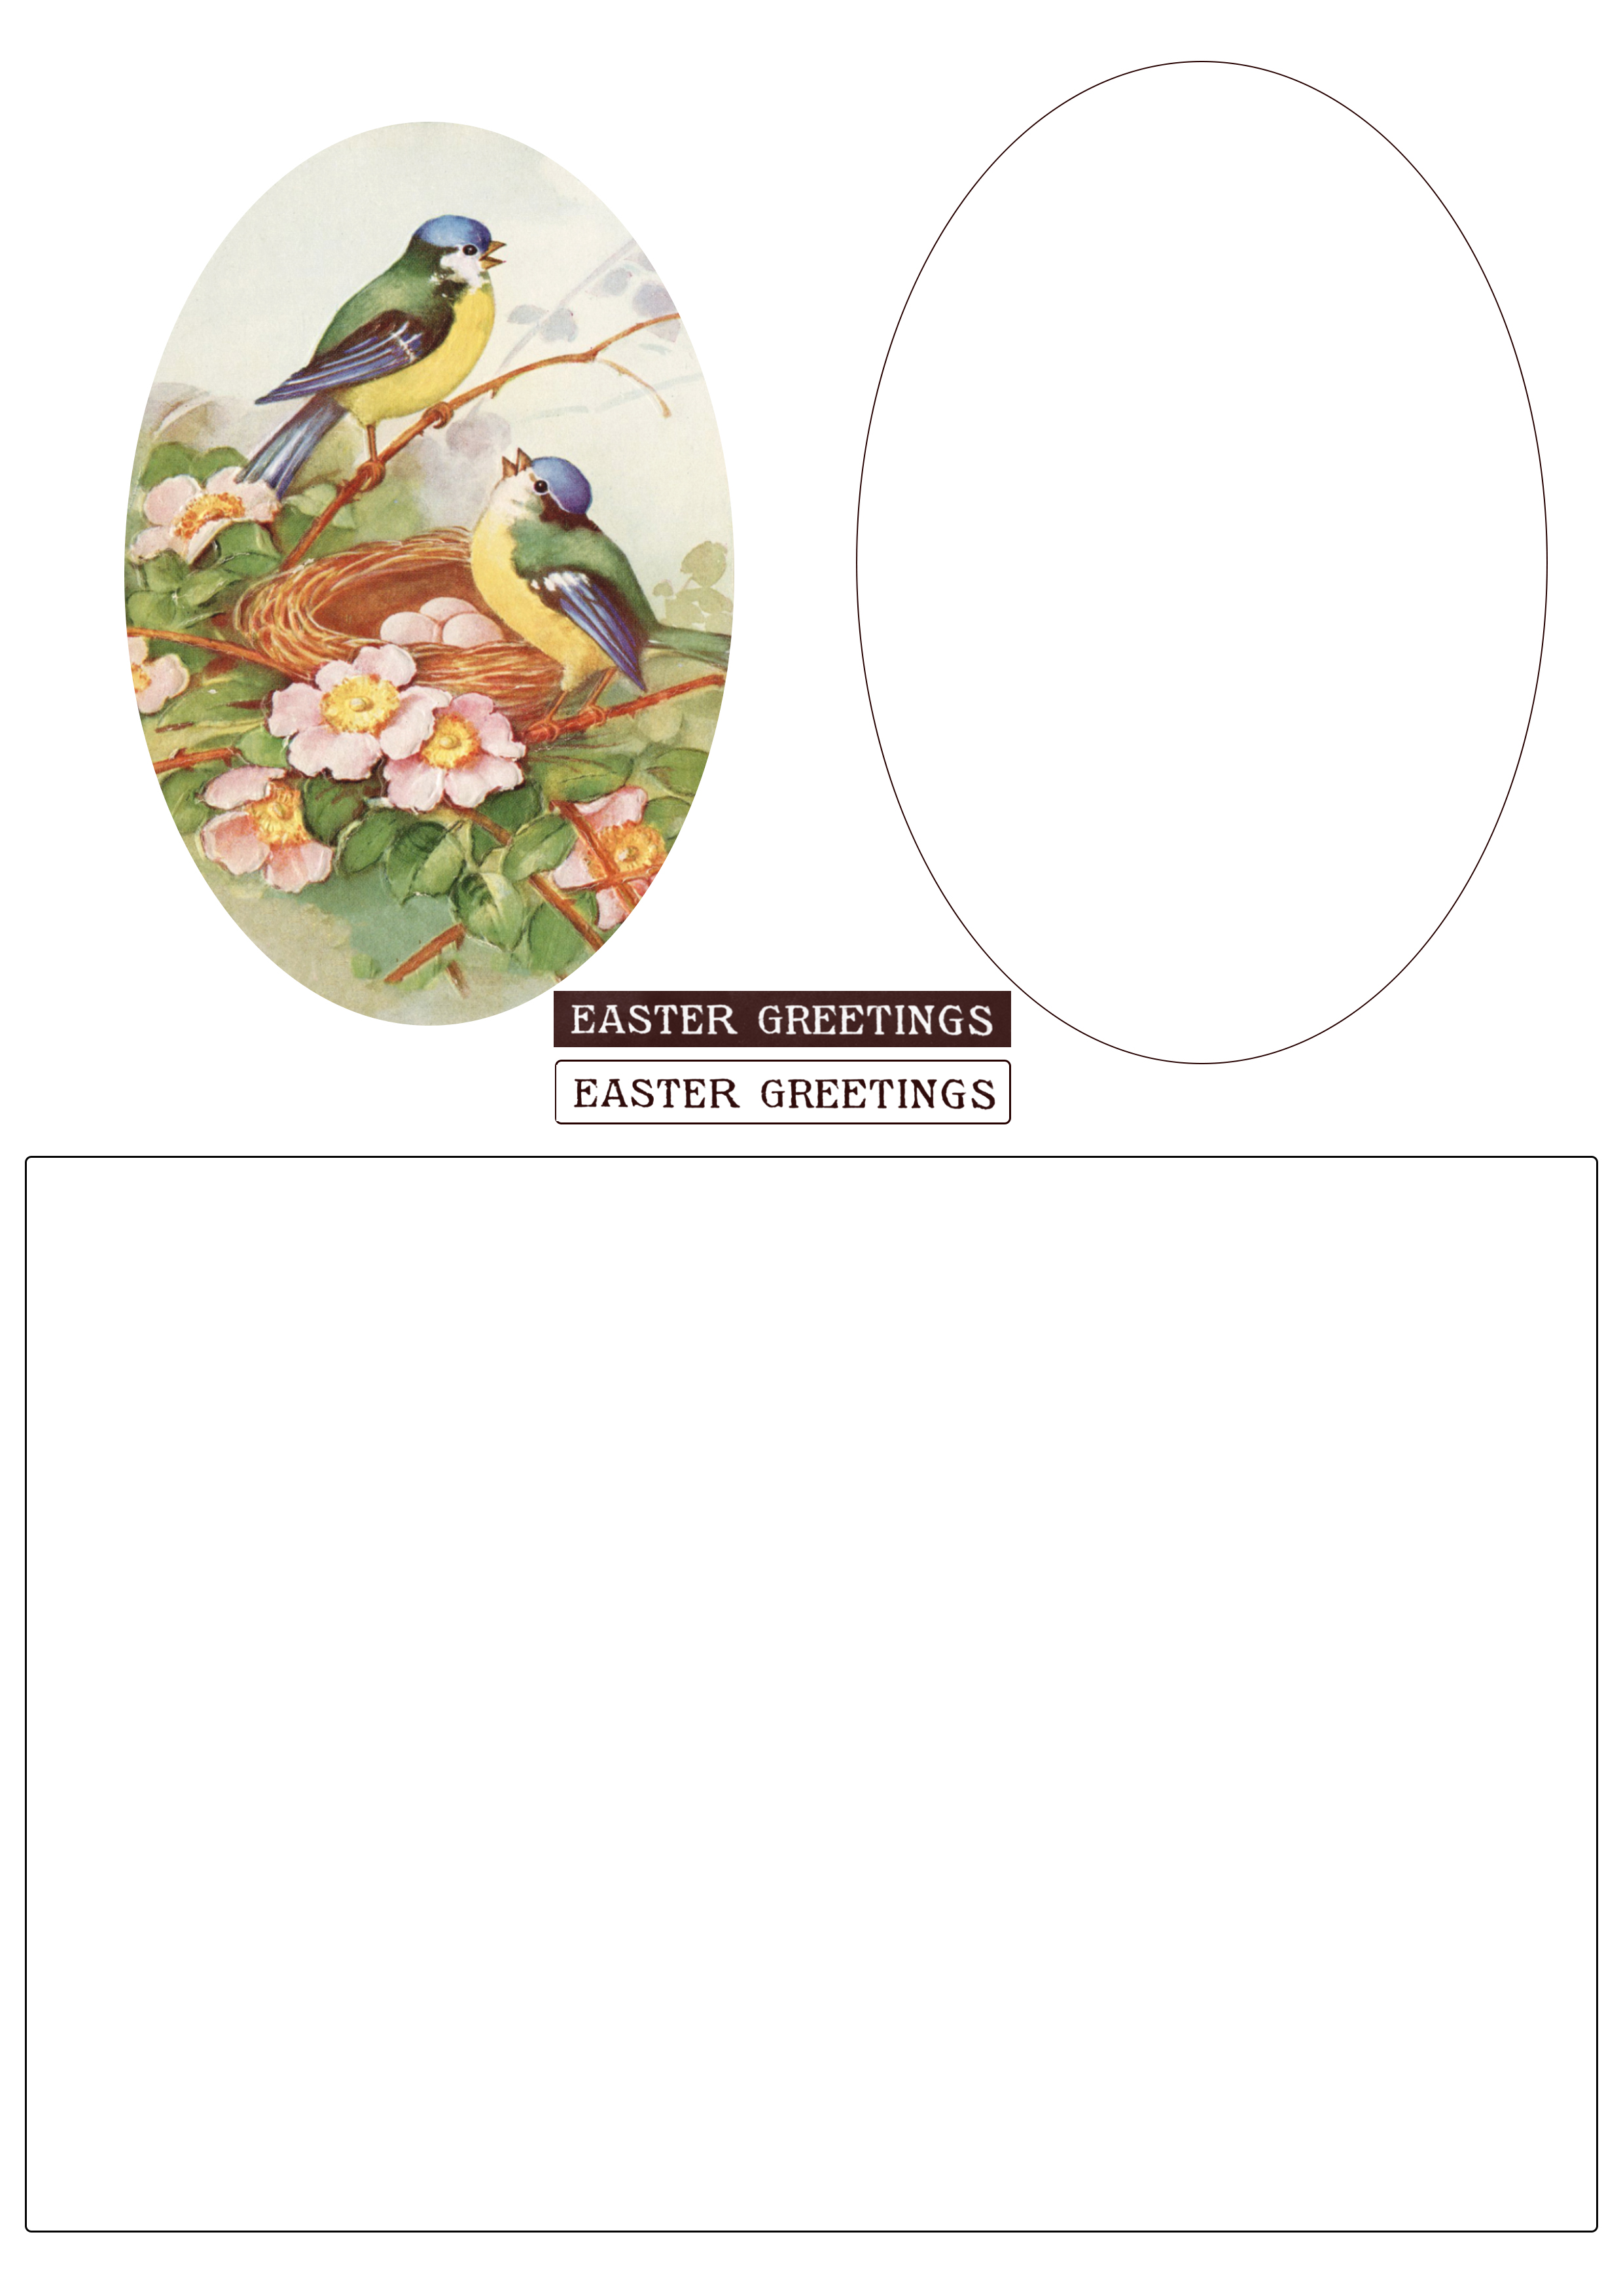
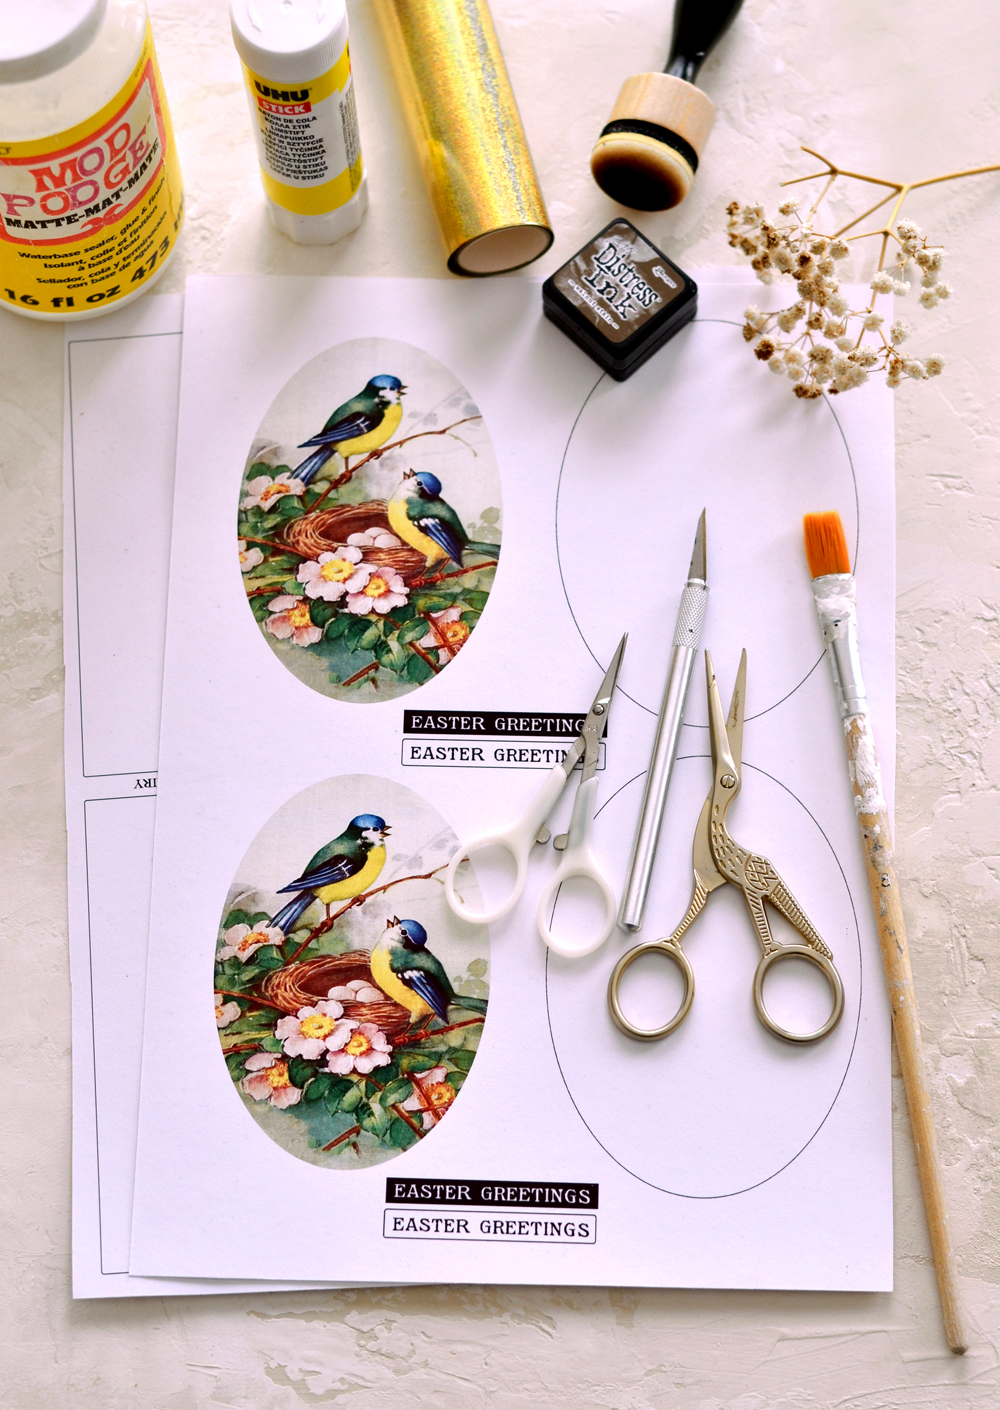
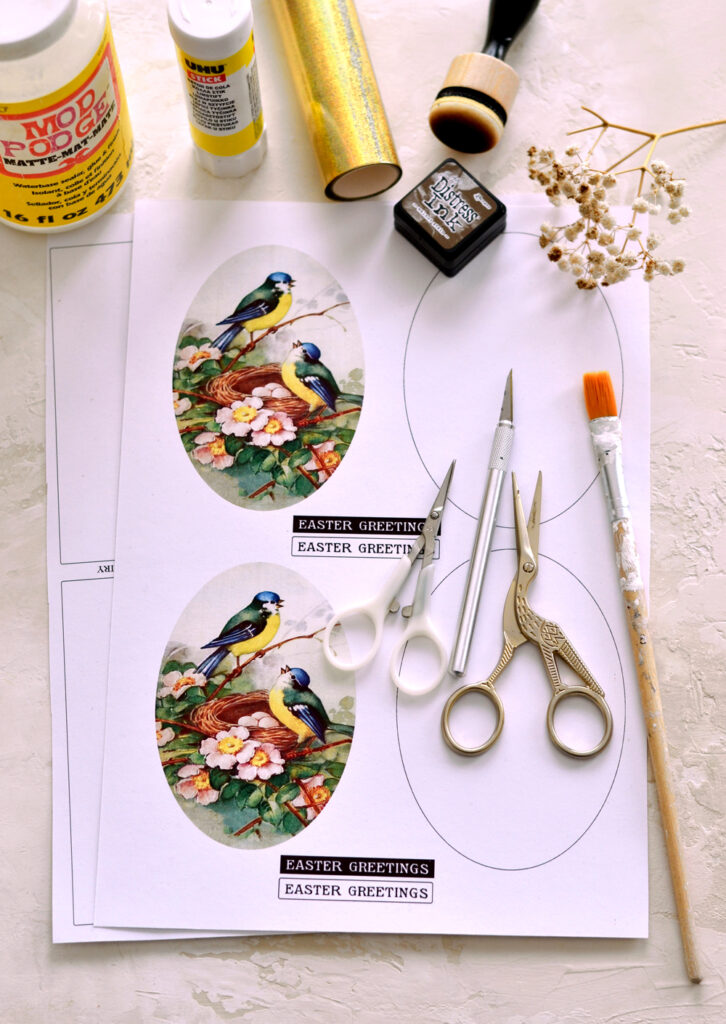
You will simply love the printable that I’ve created for this project, this chirpy birds image is one of my favorites from The Graphics Fairy! I believe it’s perfect for Easter, but it has so much potential and versatility that it could be used in many other Easter projects. And speaking of versatility, I totally see this image integrated into all sorts of spring, but also more general, all-year-around projects! One way to quickly imprint our DIY Easter card a 3D effect is to layer the separate elements from our printable. You will find as separate elements a blank card base, a stunning bird image, a large white oval shape that will be placed underneath our bird image and the ‘Easter Greetings’ writing that will be placed on top of our bird image. You’ll find two ‘Easter Greetings’ writings – one with a black background and one with a white background – just use the one that you love the most. Of course, if you would prefer to use your own Easter wishes or decide to change the Easter direction into something more spring-y or general, feel free to just do that!
NOTE: I initially created two separate free Easter printables for this project, but then I’ve decided to simplify things, so now you’ll be able to find everything that you need to make one card on one printable.
—> Click here to download the full size PDF of the DIY Easter Card <—
CRAFT SUPPLIES FOR DIY EASTER CARD
- cardstock paper (I used the 220 gsm all media cardstock from Seawhite of Brighton)
- laserjet printer or inkjet printer
- heat transfer metallic foil
- gold foil glue
- fineline glue applicator
- Mod Podge
- glue stick
- scissors
- x-acto knife or small manicure scissors
- mini distress ink – I used Walnut stain
- blending tool with foam (I prefer the domed one)
- brushes
- parchment paper or a plastic sheet or a non-absorbent surface (to protect your working area while gluing)
- bone folder or a scoring board
- paper trimmer (optional)
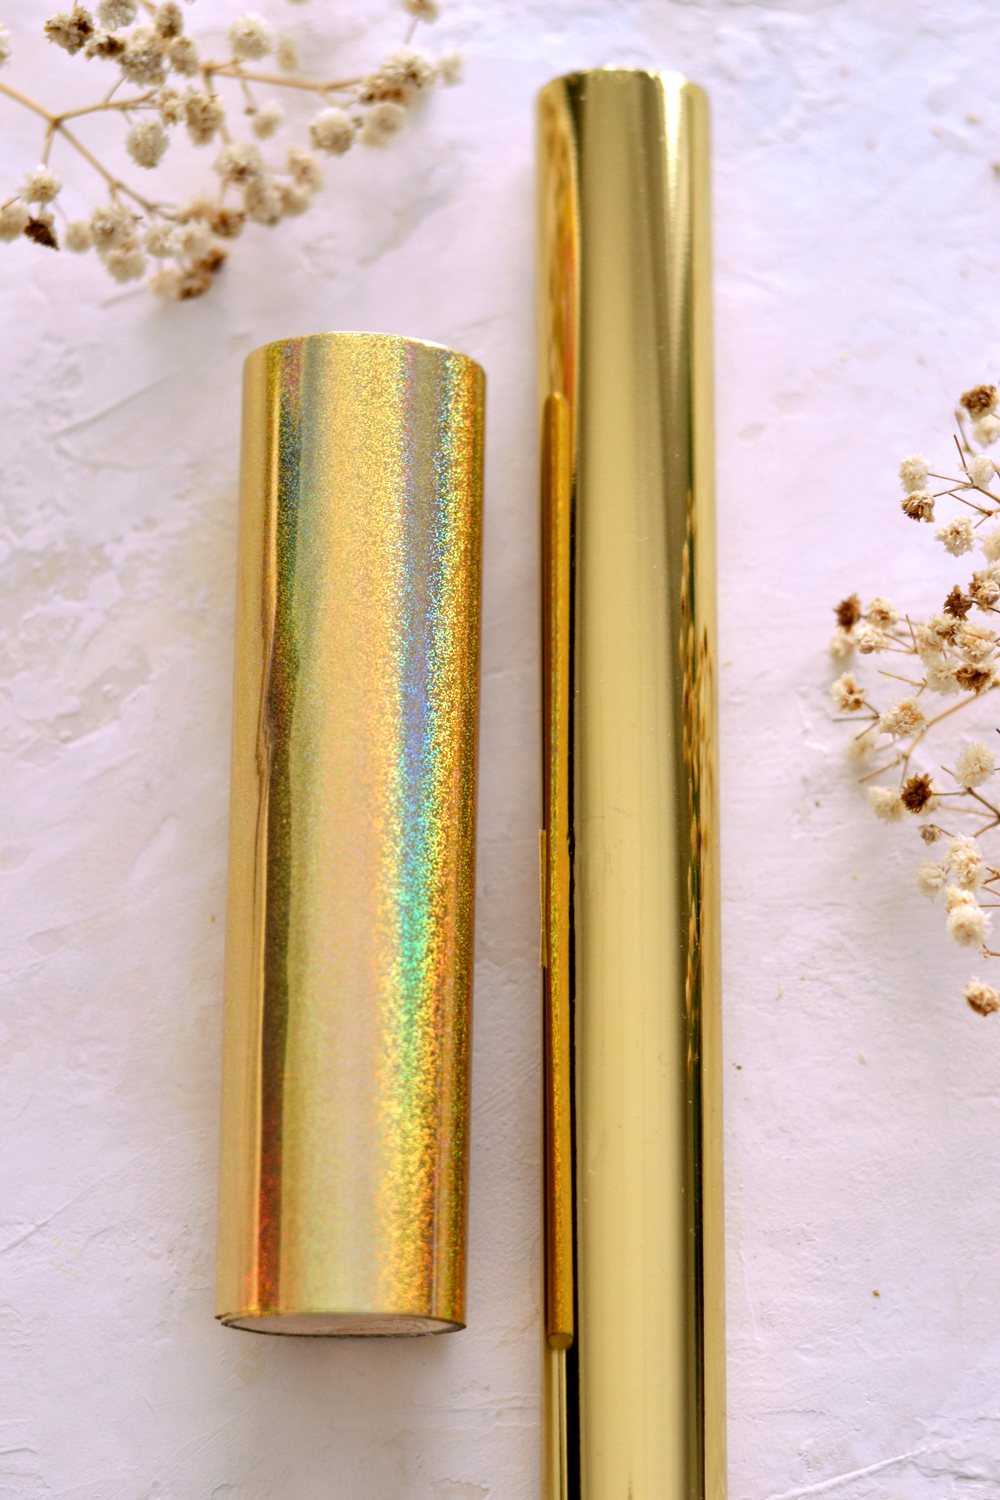
Before we jump right in with out DIY Easter Card project, I wanted to show you a quick comparison between the metallic gold foil that I’ve used today (the one on the left) and the gold foil I’ve used so far in my projects (the one on the right).
As you can see, even though the one I picked for today has that beautiful metallic shine gold foils usually have, it also reflects a gorgeous glittery shimmer and a stunning holographic effect that looks absolutely amazing, depending on the lighting.
NOTE: If you are not familiar with gold foil and how it differs from gold leaf, you can check these projects first: DIY Gold Foil Butterflies Stickers and DIY Gold French Rose Tags.
Instructions for Easter Cards to Make:
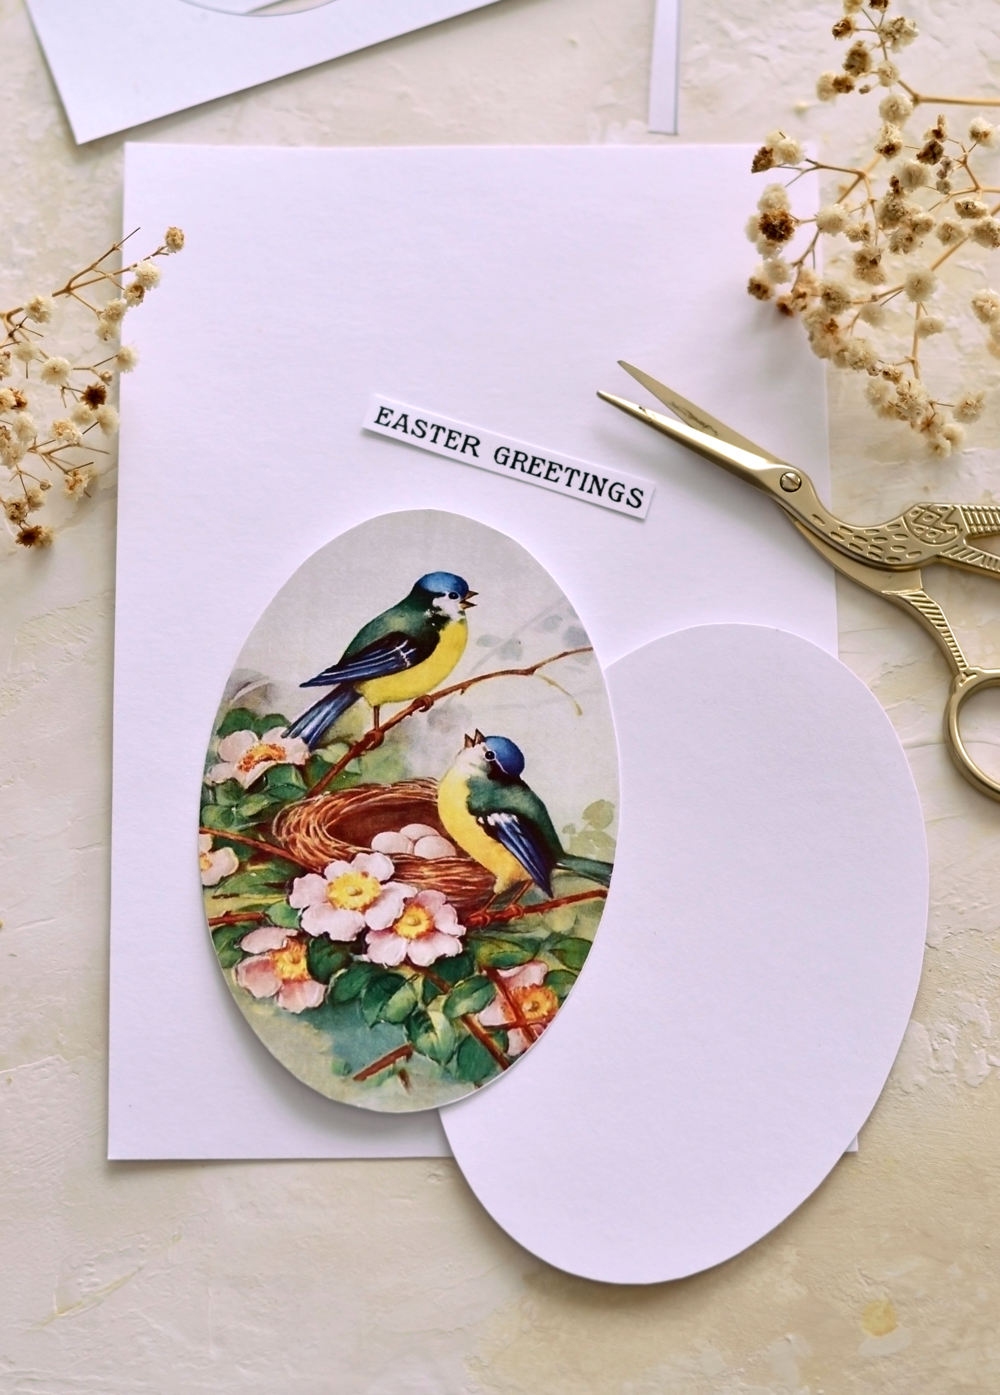
1. Start by carefully cutting all the separate elements from our printable.
You’ll have:
– the blank card base – use scissors or a paper trimmer to cut it inside the black borders
– the lovely birds image – use scissors to cut it following the shape of the image
– the white oval shape – use scissors to cut it inside the black borders
– the ‘Easter Greetings’ writings (I loved the white one better) – use scissors to cut your preferred one inside or outside the black borders
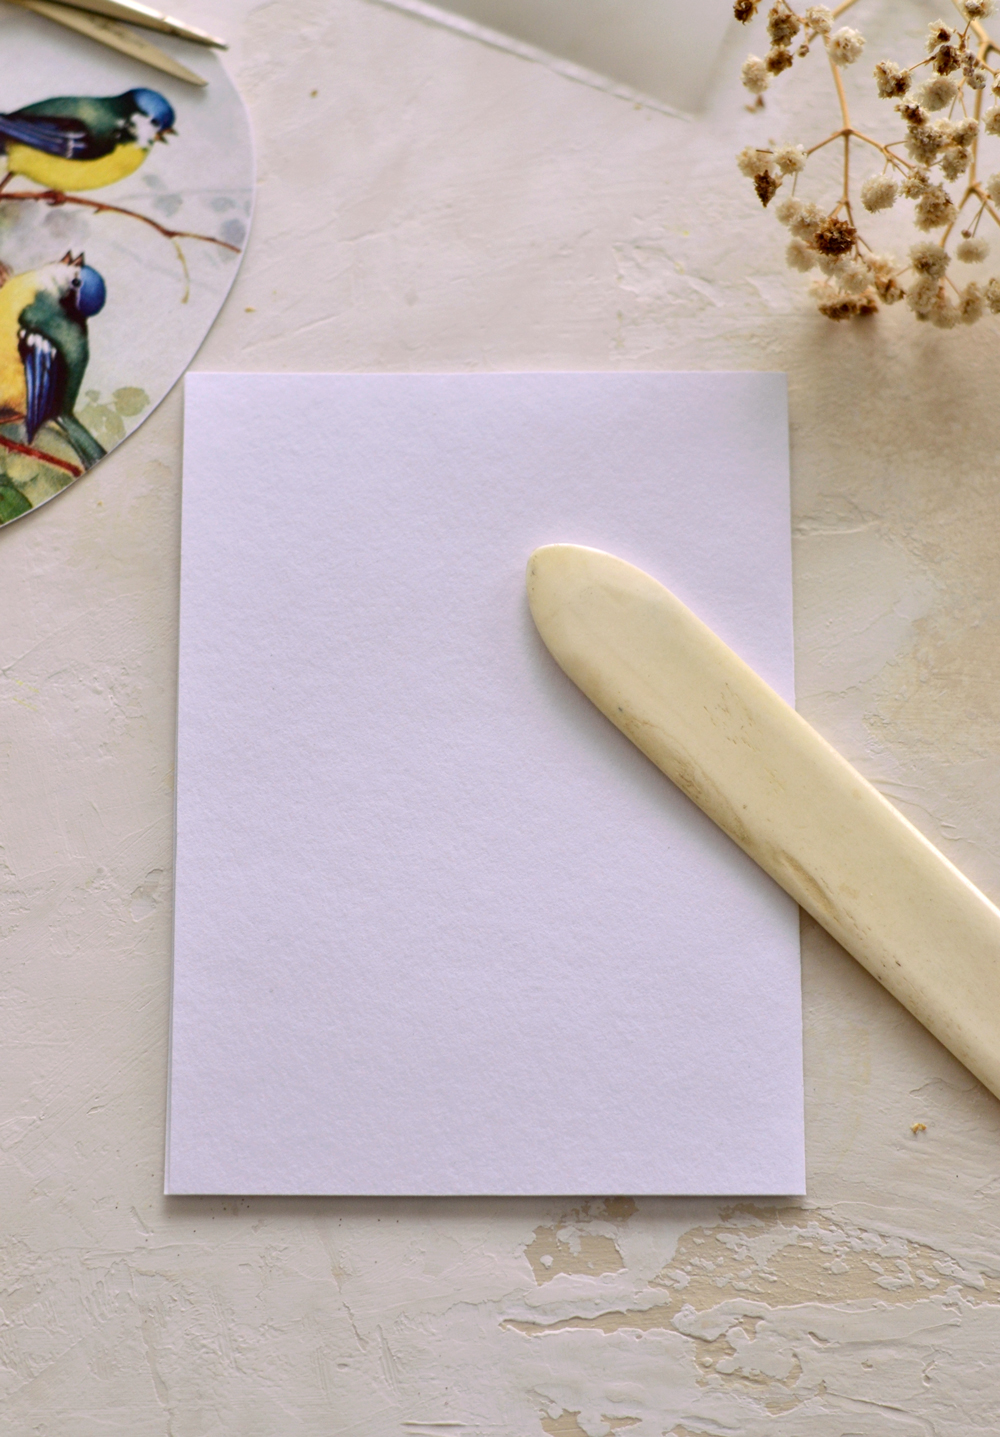
2. Fold the blank white cardstock base in half and use a bone folder or a scoring board (even your fingers might work) to score it, making sure all the edges are perfectly overlapping.
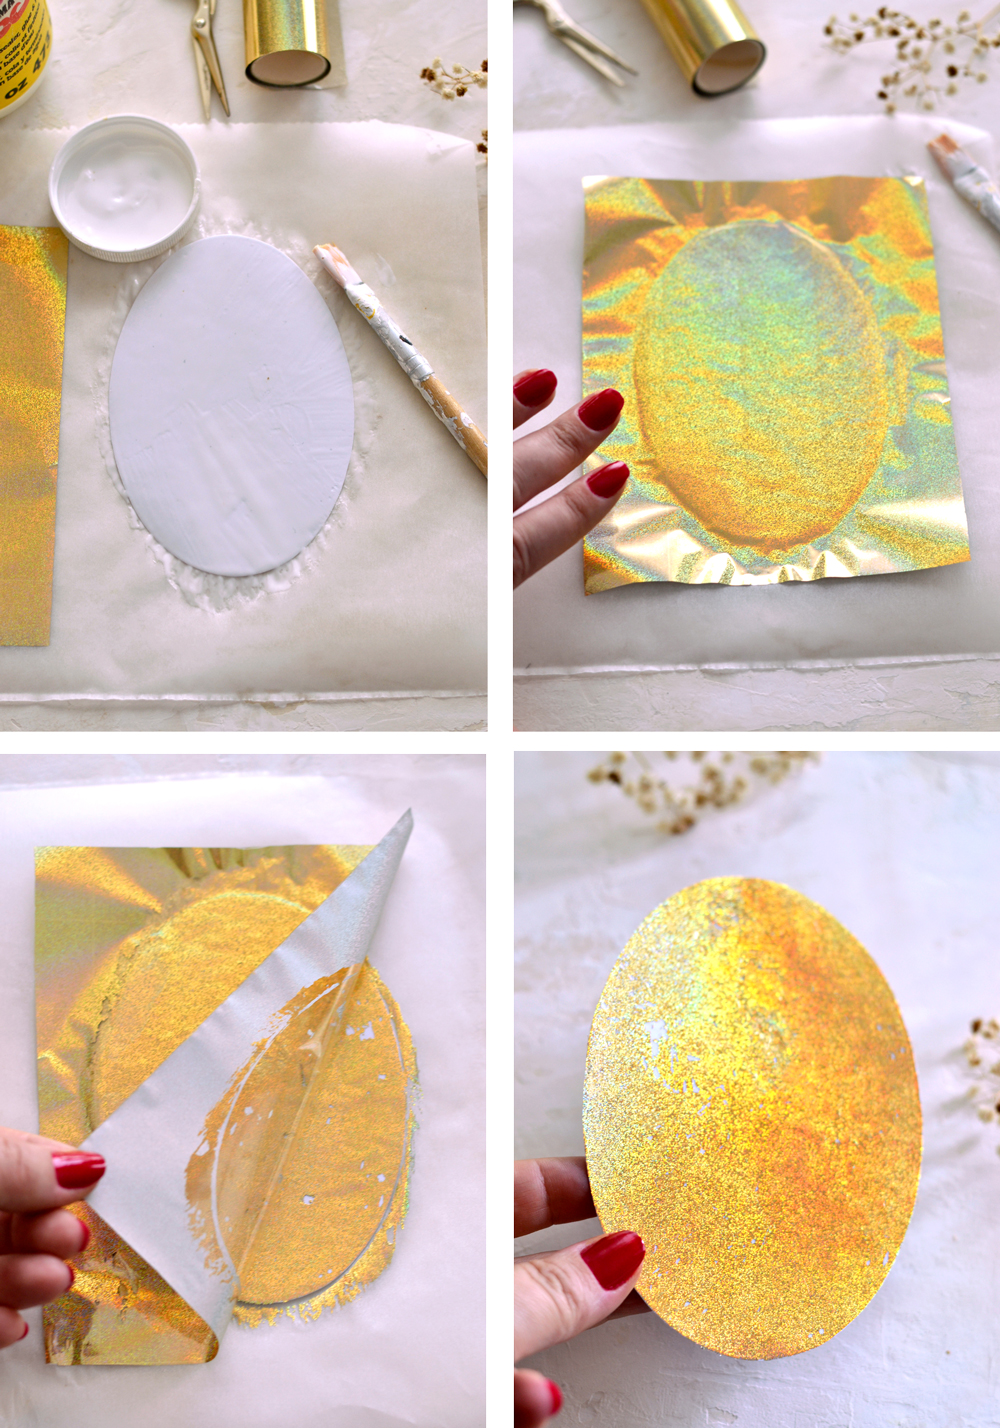
3.1. Protect your surface with some parchment paper (or a plastic sheet, a plastic bag) and brush an even layer of Mod Podge all over the surface of your white oval shape. You want this layer to be not too thick (because it will take forever to dry) but not too thin either (because it might dry too quickly without bonding to the foil).
3.2. Let the paint ‘relax’ for about a minute, then cut a piece of metallic gold foil and place it on top. You need to do this while the paint is still wet, otherwise this won’t work! Press the gold foil with your fingers, but try not to move it anymore, so it doesn’t smudge!
3.3. This Mod Podge technique of applying the gold foil is not a common way of applying this type of foil! It only works if you apply enough glue and leave the gold foil on top until the glue is completely dry! This is really important, so just let everything dry before removing the foil on top.
3.4. After removing the top of the foil, you will be left with an absolutely gorgeous oval shape. You won’t get perfect results all the time, but the small imperfections will add to the vintage overall vibe.
You can use this ‘unconventional’ technique to apply gold foil decoration to other shapes or cutouts, then include them in your projects, the sky is the limit!
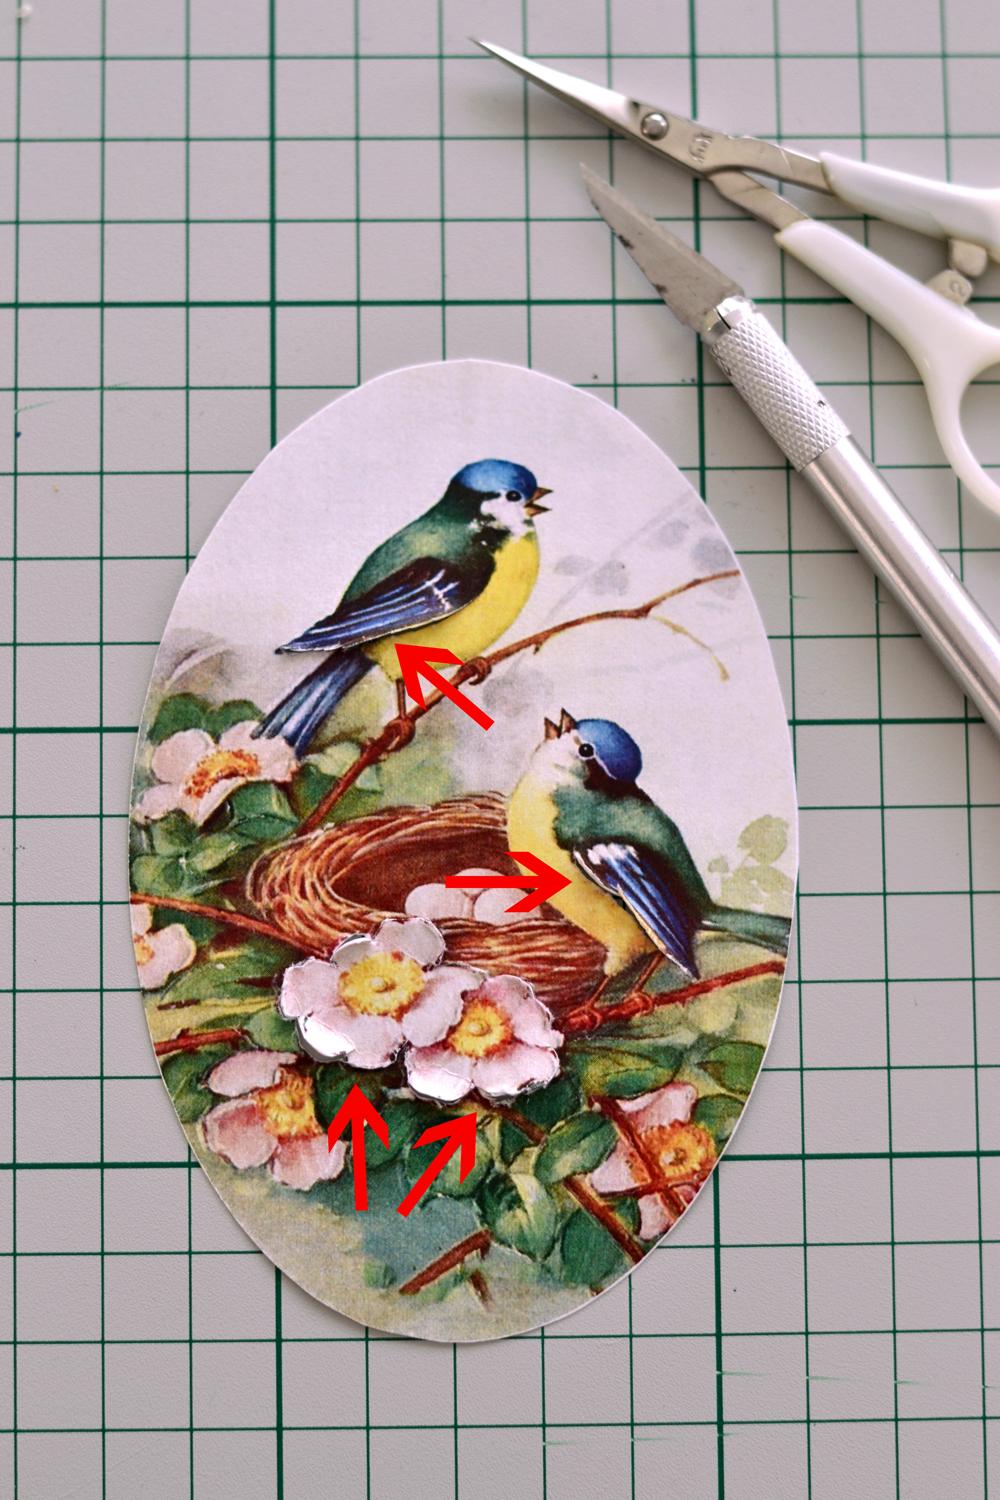
4. Now I want to show you another way of bringing a little bit of that 3-dimensional feel in. We will do that simply by making a few cuts here and there on our bird image! You can use an x-acto knife (don’t forget about your cutting mat) or small manicure scissors, just use what you feel most comfortable with – I used them both but I preferred the manicure scissors! Make cuts on the lower part of the birds’ wings following the shape of the wings, then move to the flowers and follow the shape of the petals. The idea is to make cuts following the shape of the petals so we can roll them up, towards the middle of each flower. Make sure you don’t cut all around the petals, we don’t want to completely cut them out!
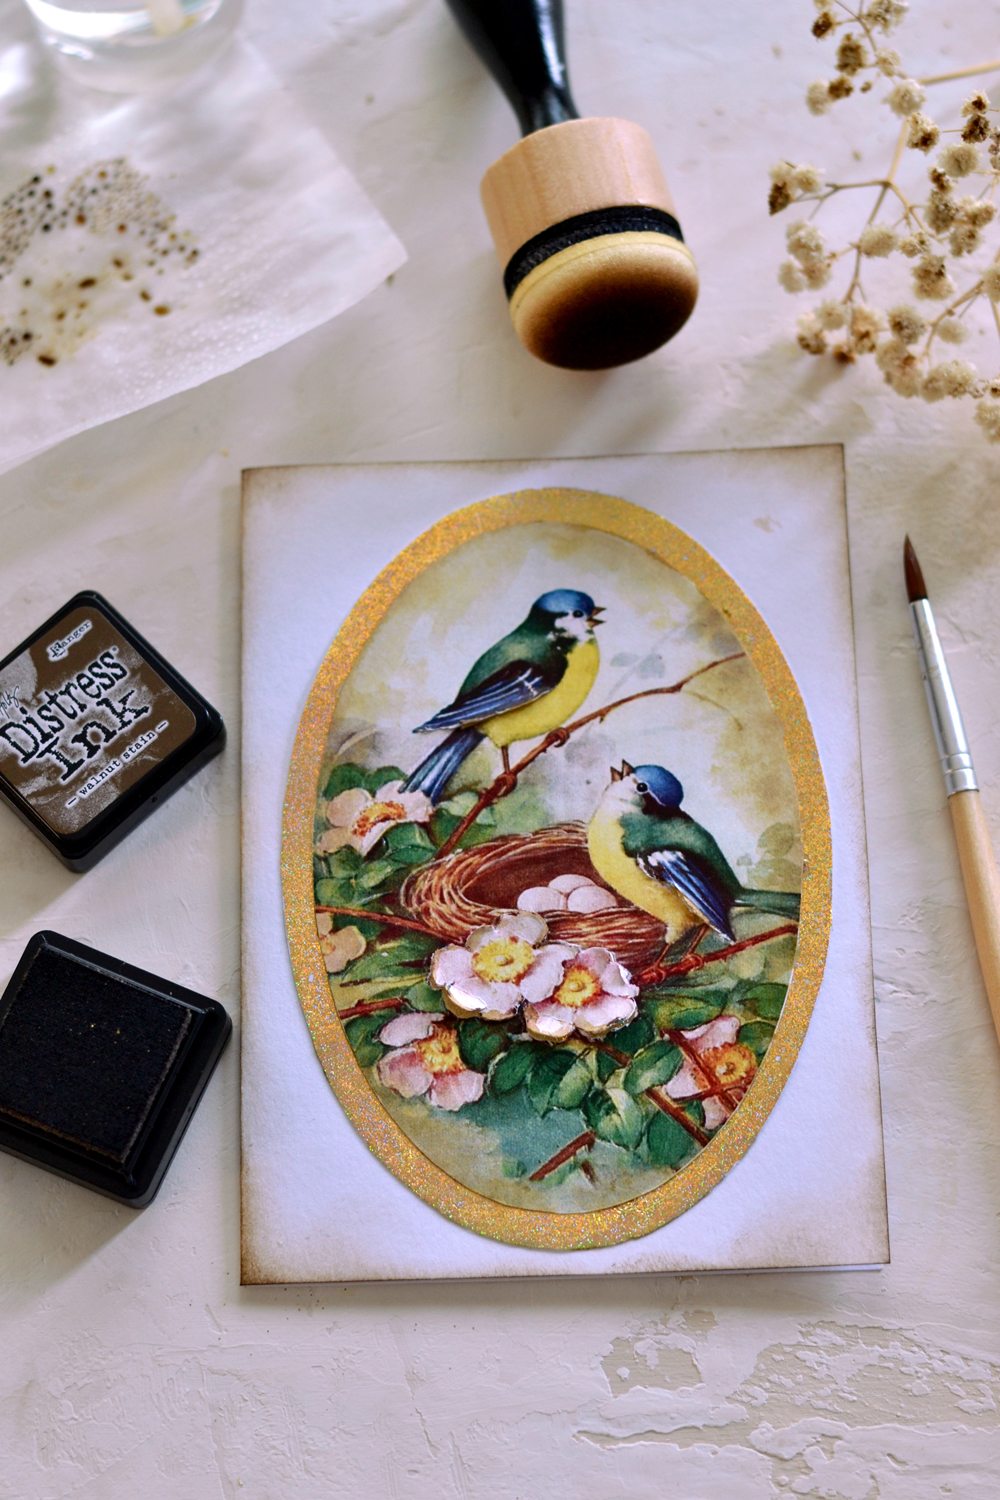
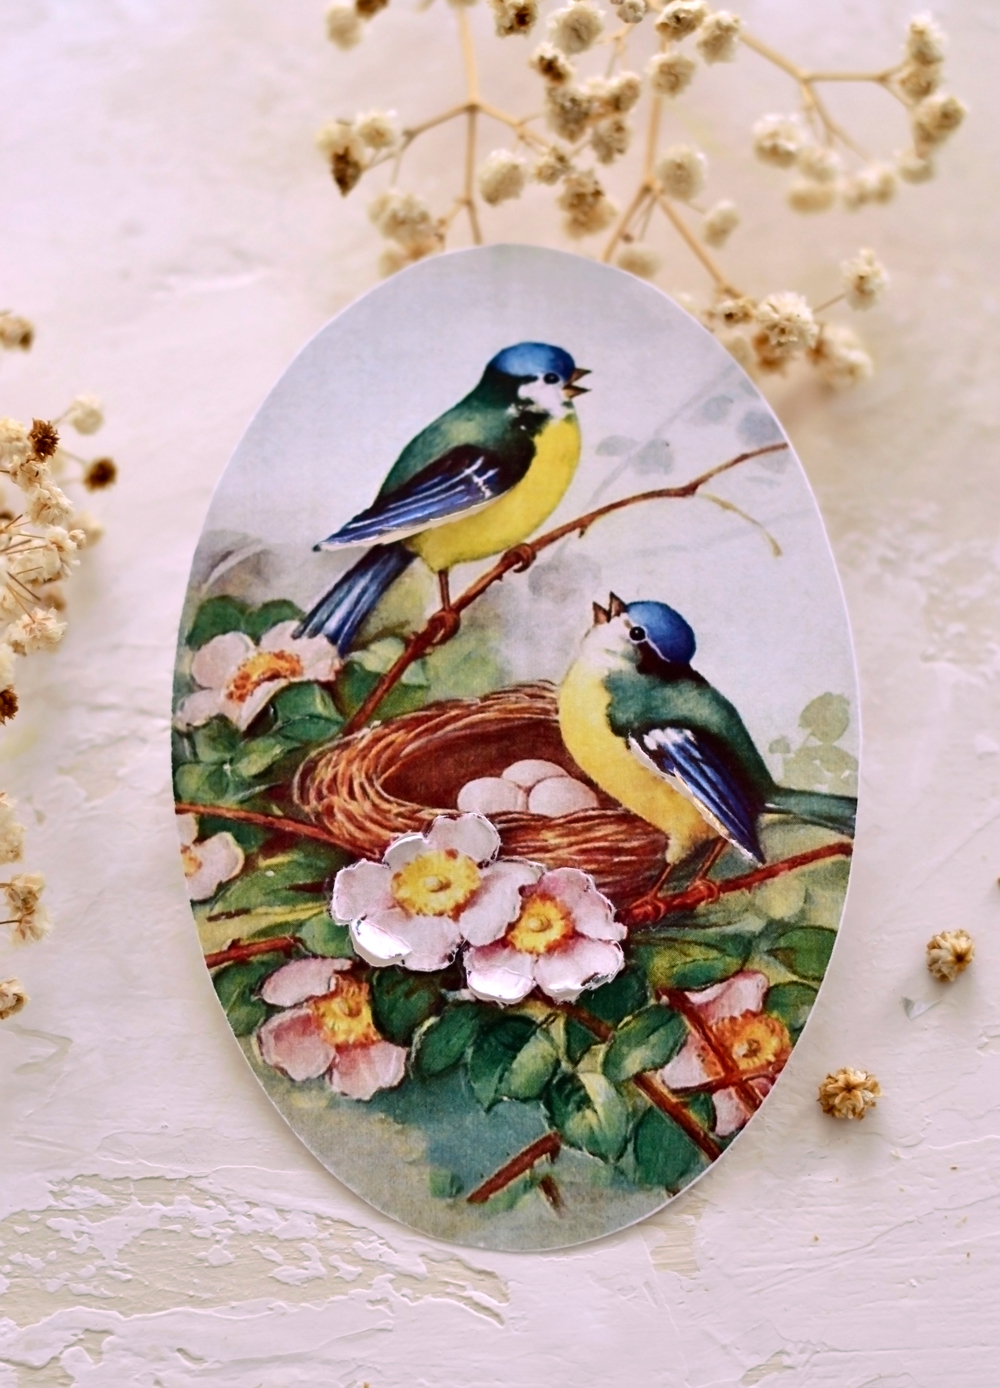
This is how my final bird image looked after creating the 3D effect on the wings and on the petals, such a sweet embellishment. So gorgeous right? Don’t worry if the cuts are not perfect, we will be using a little bit of distress ink to ‘hide’ all the small imperfections. Now it would also be the perfect time to go with a little bit of distress ink all around the edges of the bird image. I totally forgot to do that here, so I had to improvise a little on the next step, after already gluing the image on the DIY Easter card.
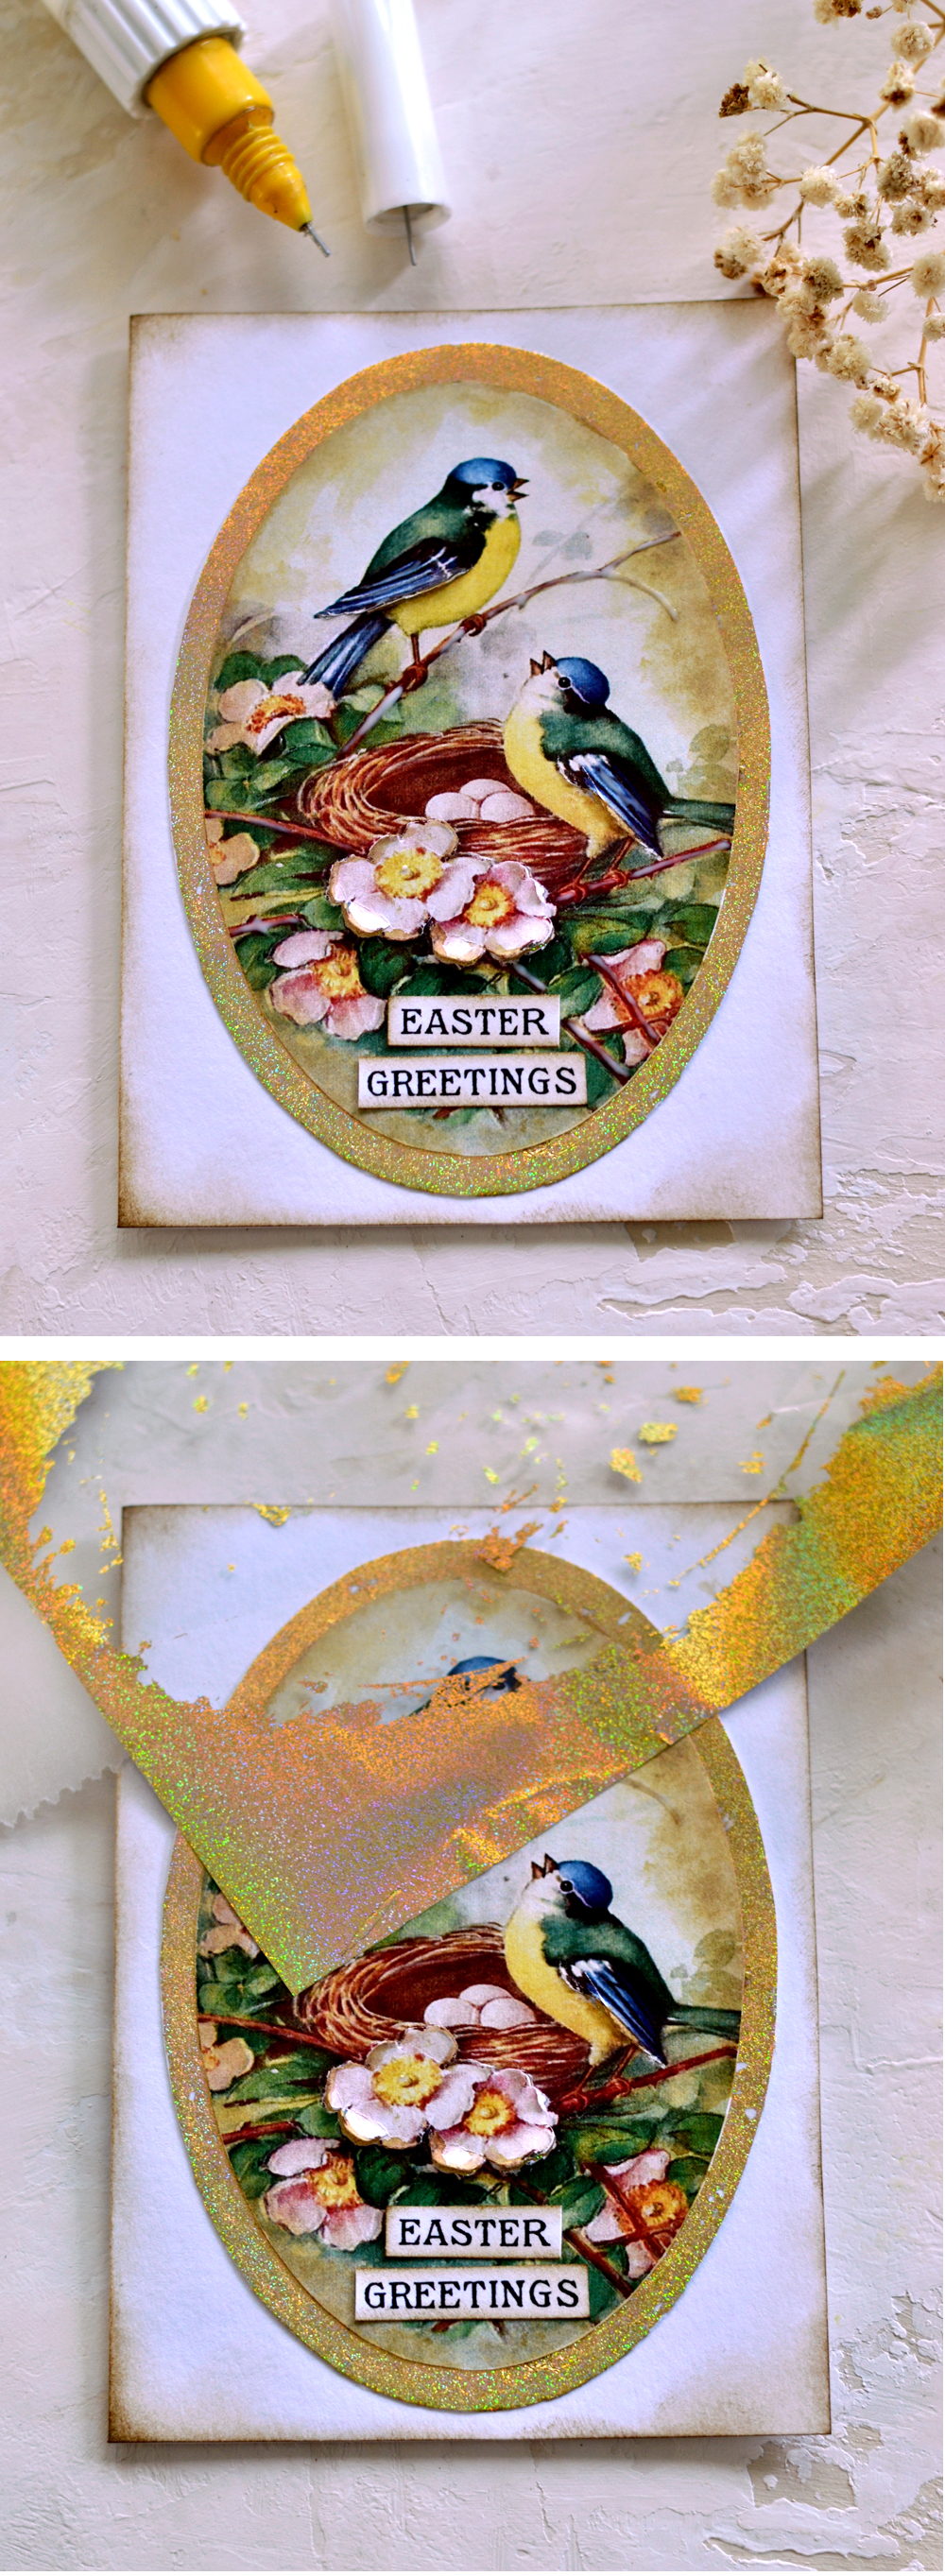
5. Use a paper glue stick to adhere the bird image on top of the gold foil oval shape, then use some more glue to adhere them on top of our blank card base. You can use distress ink to distress the white paper base all over the edges if you want – using a distressing tool with foam.
If you, like me, somehow forgot to also distress the edges of the bird image before adhering it to your card, here is a little trick that you can try at this stage, without completely ruining your work. Dab your distress ink on a piece of parchment paper one or two times, then spritz some water using a spray bottle on top – this way we will be turning our distress ink into a liquid distress ink! Use a brush to pick some of this liquid distress ink and lightly go over the edges of the bird image. Work in small sections and brush small amounts of ink on the inside of the edges of the image using your brush, then quickly use your fingers to dab it and spread it on that area, creating a watercolor effect. As mentioned, work in small sections and gradually brush then dab with your fingers all around the inside edges of the image. You can also use your brush to apply some on the 3D petals that we cut earlier.
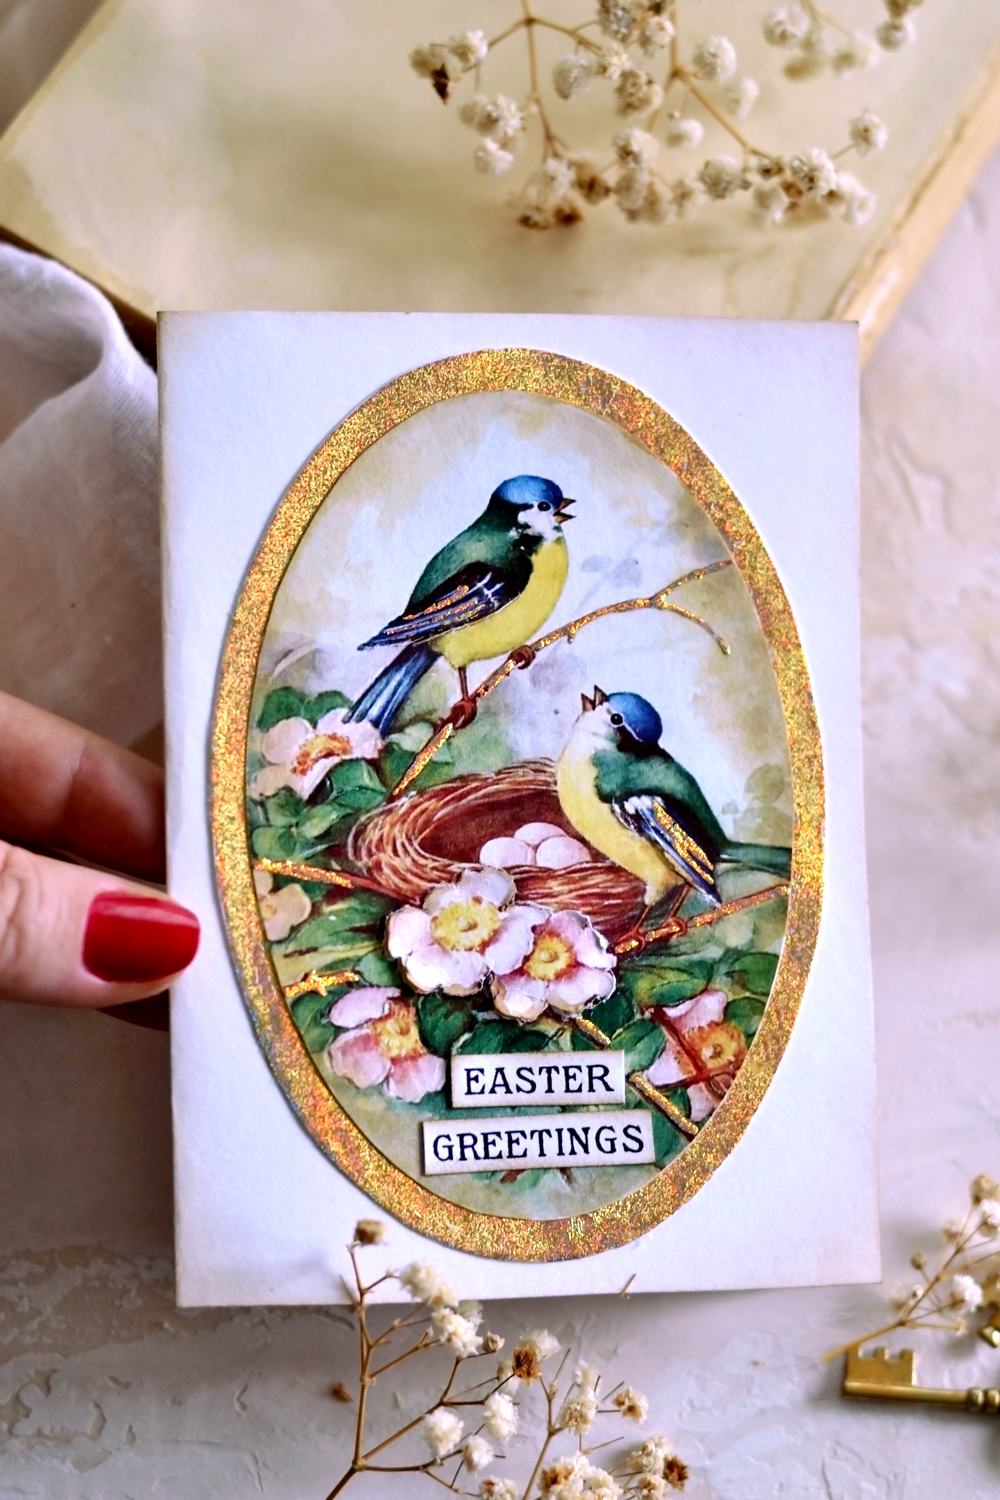
 6.1. As a final step, you can use a fine tip glue applicator to draw with gold foil glue all over the branches in our image. You can also paint some glue on the wings of the birds. This technique is different than the Mod Podge technique that we used before, when using a special gold foil glue we need to let the white glue dry and turn transparent before applying the gold foil!
6.2. This type of gold foil glue dries tacky and you’ll be able to place some of the leftover corners foil from before on top to also gild the branches and the wings on the front of the card!
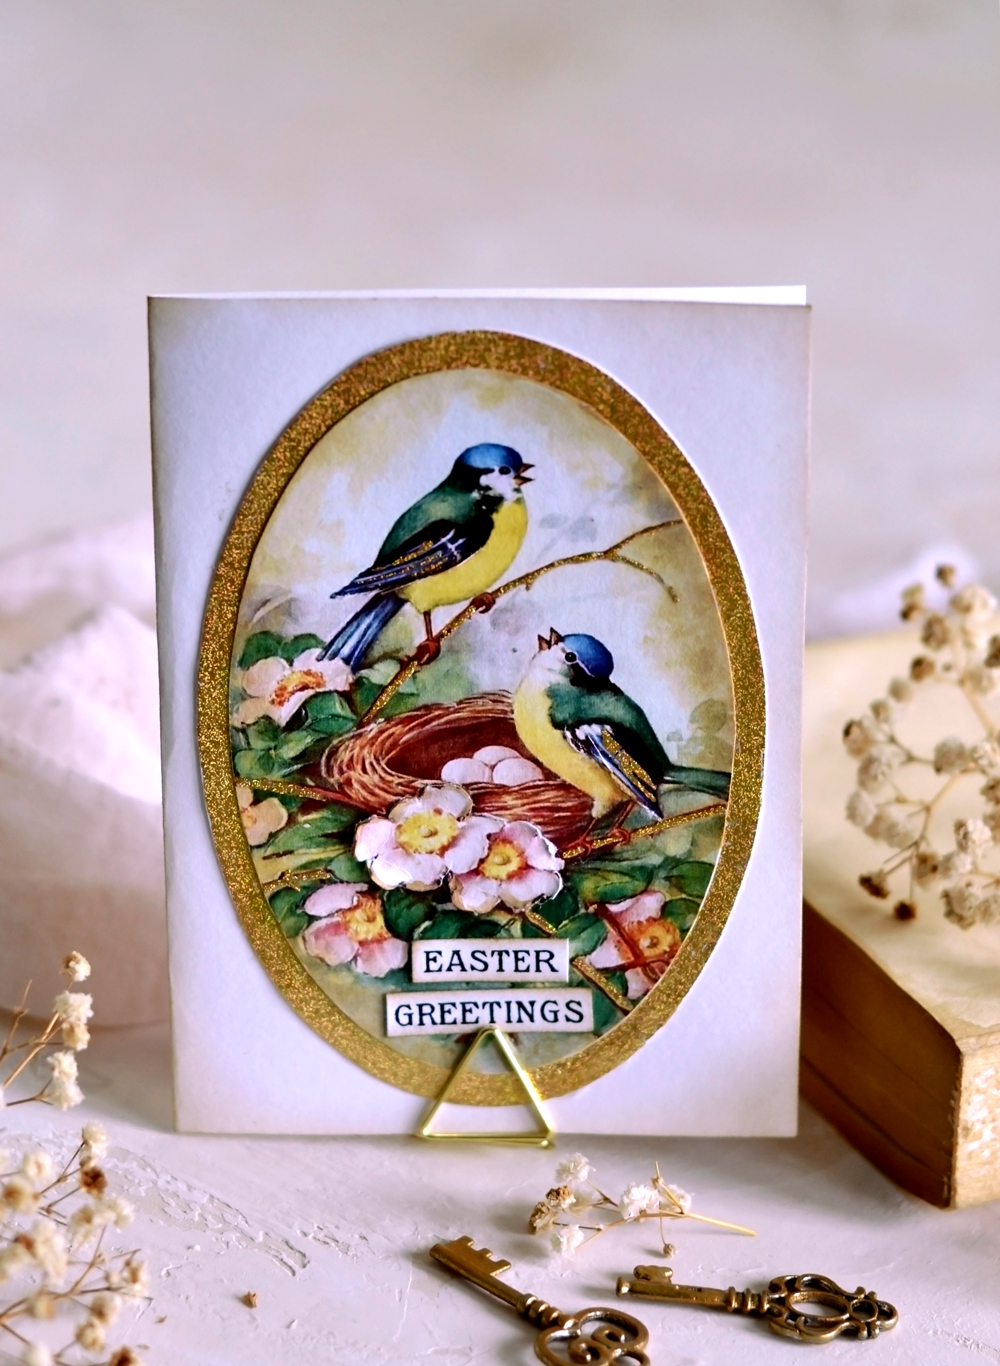
And that’s pretty much it! Don’t forget to also glue the ‘Easter greetings’ writing or just go with a different message if you want! And if you feel like you’ve maybe distressed the blank page edges a little bit too much (like I did), use a baby wipe to remove some of the excess ink!
This amazing DIY Easter Card could be turned into a great seasonal gift, don’t you think? You could send one to your friends or family, a small gift like this is sometimes much more appreciated when handmade by you! Especially if you write something thoughtful inside – with Easter around the corner, not to mention current events, it just feels like the timing is perfect to show your appreciation to those that you love. You could even add some ribbon and tie it to an Easter Basket.
P.S. You can also include with your gift one of these lovely inexpensive place card holders that you can find online, this way the receiver of your DIY Easter Card will be able to display your gift in a chic way and enjoy it throughout Easter, along with their Easter Decorations!
 Romanian Easter Traditions
Many of you may not know, but I’m from Romania (Europe) and here, in this part of my world, Easter is really important! The Resurrection of Christ is actually our most important holiday and as a Christian Orthodox country, we are usually celebrating it following all sorts of traditions. Karen challenged me to share some of these traditions with you, so here they are!
In our culture, it is accustomed to fast for seven weeks before Easter. This fasting period is considered to be a purification both on a physical and a spiritual level. We go to church with our families on Easter Eve to get the Holy Light and after the sermon, we bring the Holy Light into our homes as a symbol of renewal. And then we can feast! I don’t think there is a home in our country that doesn’t have red-dyed eggs on their tables at Easter! When we were little, my sister and I used to LOVE helping our mom to dye them (mostly red, but we loved all the other colors, too), then use pantyhose and parsley leaves to decorate them! Did you try this technique while growing up? I could say Romanian moms are quite creative, they take particular joy in finding unique ways of decorating our food in a festive way. This happens especially during the holidays when all the family gathers around the table and enjoys all sorts of homemade goodies. On Easter, our family’s favorite foods are red-dyed eggs (obviously), ‘cozonac’ (a highly laborious, really delicious sweet bread traditionally filled with chopped walnuts and cocoa or poppy seeds), ‘pasca’ (a rounded sweet bread pie decorated with braided pieces of dough and filled with ricotta-like-cheese and raisins) and ‘sarmale’ (stuffed cabbage traditionally made with rice and meat – my mom makes the best ‘sarmale’ for us, she replaces the meat with mushrooms) to name only a few. There are a lot of meat steaks and other specialties like lamb ‘drob’ that people in my country are enjoying on Easter, but Mr. Dreamy and I have been vegetarians for about 10 years, so I’m not particularly fond of that department.
We also have a Romanian Easter tradition called ‘egg tapping’. It’s like a family competition where every member of the family chooses a dyed egg, then tap it on one or both ends with another member of the family. It’s a really fun family activity for children and adults alike, the strongest egg that breaks all the other eggs is declared the winner! Then everyone gets to eat their ‘losing’ cracked eggs … except for the winner who doesn’t feel like a winner anymore, because it doesn’t have a cracked egg to eat!
Speaking of getting creative during the holidays, Romanian women from rural areas are well known for painting eggs using national motifs and symbols during this time of year. It’s an amazing technique called ‘incondeiat’ that I would love to try someday that uses a special handmade tool called ‘chisita’ (it’s spelled something like qui-she-tsa) and melted beeswax. This symbolic egg painting technique is mostly used in the rural part of our country (the people there are doing a much better job at keeping our traditions alive) and is something that is passed on from generation to generation. It’s a tedious work of art that is highly appreciated by natives and foreigners alike, because it can take several hours to paint an egg this way, depending on how intricate the design is. The motifs chosen for painting have some similarities, but they also have more specific elements, depending on the regions they are coming from – they basically follow the particularities of that region. You will find the sun, the moon, the cross or the wheat represented on these artistic Easter eggs, but also other symbols or geometrical motifs, both religious or from day to day life. A straight vertical line represents life, while a straight horizontal line represents death. A line with rectangles represents knowledge and a double straight line represents eternity. A rippled line represents water and purification, a spiral represents time or eternity. A double spiral is considered to be the connection between life and death. You can click this link for Romanian Easter traditional eggs if you want to check them out, they are absolutely stunning pieces of art!
I hope you’ll love these Easter Cards to Make for your family and friends, and the fact that I shared a few Romanian Easter traditions here with you Would love to know if you have some beloved traditions that you and your family follow for Easter or specific memories from your childhood that still bring you joy! Wishing you all a very Happy Easter!
You might also like my DIY Spring Postcards HERE.
Happy crafting,
Diana | Dreams Factory


Lavonne Back says
Thanks for sharing how to make this pretty Easter card and many thanks for sharing your country’s Easter traditions. They are very interesting.
Karen Watson says
Thanks for your sweet comment on Diana’s post Lavonne! Hope you have a lovely Easter! 🐇
Laura says
Thank you for your beautiful tutorial. I learned a lot about this metallic foil and ways it can be used from you. I hope someday to re-create this. Always been interested in gilding but this is so easy to try.
Karen Watson says
For sure a good technique to put on the try list Laura! So glad you enjoyed it.🐇
SueSchneid22 says
Love this post! My husband’s family had an egg tapping tradition, too. They called it “picking” eggs. His mother’s family was Polish and Father’s was German. I am thinking that the tradition may have come from the Polish influence. Sound logical? It is now my Grandkids’ favorite part of Easter. Thank you for the information on the Romanian tradition of “egg tapping!”
Karen Watson says
I’m so glad you enjoyed it Sue! It was really fun for me to read about the traditions in Diana’s country too. I would imagine that you are right that your family tradition probably came from the Polish side. So interesting! 🐇