How to Make Tassels
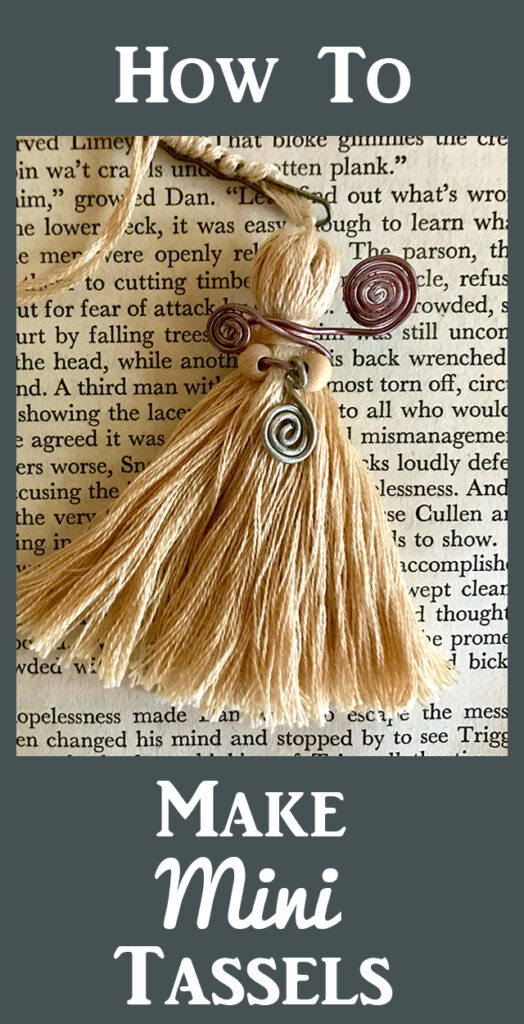
Hello Graphics Fairy friends and makers! It’s Rebecca E. Parsons, sharing a fun craft and DIY tutorial with you – How to Make Tassels for Paper Projects. These are cute mini tassels to use for your Junk Journals, Handmade Cards, Bookmarks, Tags, etc. I promise to include my hard earned tips and hints throughout the tutorial to help you achieve great results!
What are Tassels Made of?
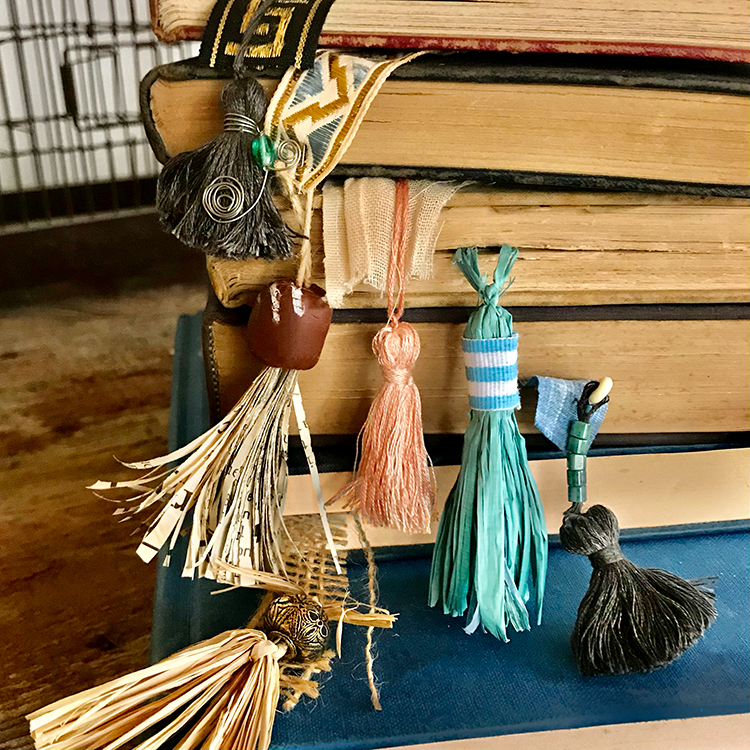
You can make these charming little decorations from just about any fiber or paper. Once Karen challenged me to make some, I started looking at all my things with new eyes. I kept coming across items saying to myself, “Ohhhhh. I could make a tassel with that!” or “Could I use that to make a tassel?” I am in the middle of packing for a move. I had a whole garden size trash bag of shredded paper. When I pulled out a handful, I abandoned packing (any excuse for a break) and created a tassel that I really love. It will find its way into my future junk journals and art books for sure.
DIY tassels can be made with yarn, crochet or lacemaking thread, twine, cord, leather, cotton embroidery thread and much more. Perhaps the easiest and most common tassels are made with a simple skein of embroidery floss. Fibers with texture, like rabbit yarns, make beautifully fluffy tassels. Silk and wool have a great hand. I am all about how they feel or the tactile sensation. YUMMM Fabric that you can cut or tear works beautifully too. Thin ribbons can be used as well as dangly bullion trims. Oh the possibilities! Oh the fun!
What are Tassels Used For?
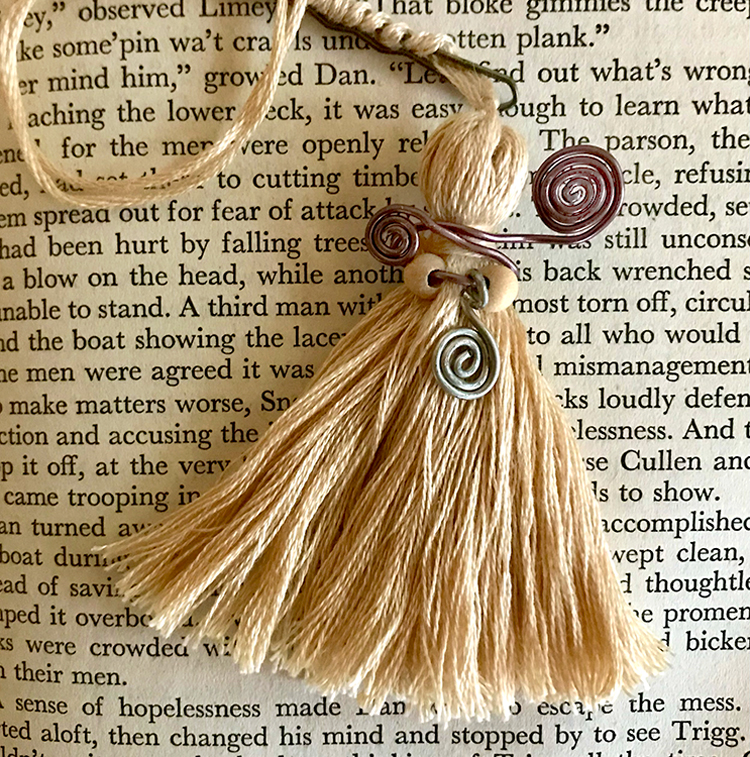
Paper crafters here at The Graphics Fairy will most often use these tassels to embellish handmade items like tags, envelopes, cards, and bookmarks (see photo below). Close to my creative heart is attaching one to the edges of my junk journals and books. You can also use them as pull elements from pockets and hiding spots. They even make great jewelry or fashion accessories. Add a tassel to necklaces, bracelets, scarves, shawls, a keyring, or even a the zipper on a purse. I am sure there are many more uses for these tiny wonders. Please share what you use them for in the comments below.
How Tassels are Made: Step-by-Step Instructions
Method 1: How to Make Embroidery Floss Tassels Tutorial
Supplies
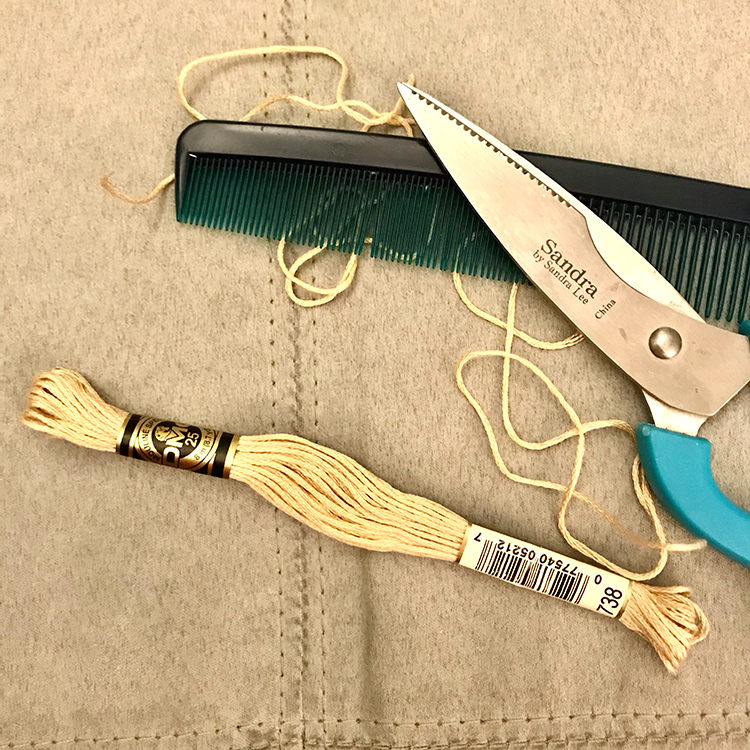
1 Skien of Embroidery Floss (any color) Wrappers on
Scissors
Fine Tooth Comb
Optional Large Tapestry Needle
With this method, we can make one 2-1/2″ tassel. You can trim these shorter to make a 1″ tall tassel if you like. I love to make these with the multi-colored floss that is available now. Yummy. If you don’t have any multi-colored floss, you can make these by using Method 3 below with two or three colors of floss.
Directions
Step 1 – Do not remove the wrappers from your floss. Pull out a 24″ piece of floss from your package. Use scissors to cut it in half, creating 2 12″ pieces. Lay the package of floss flat on your table.
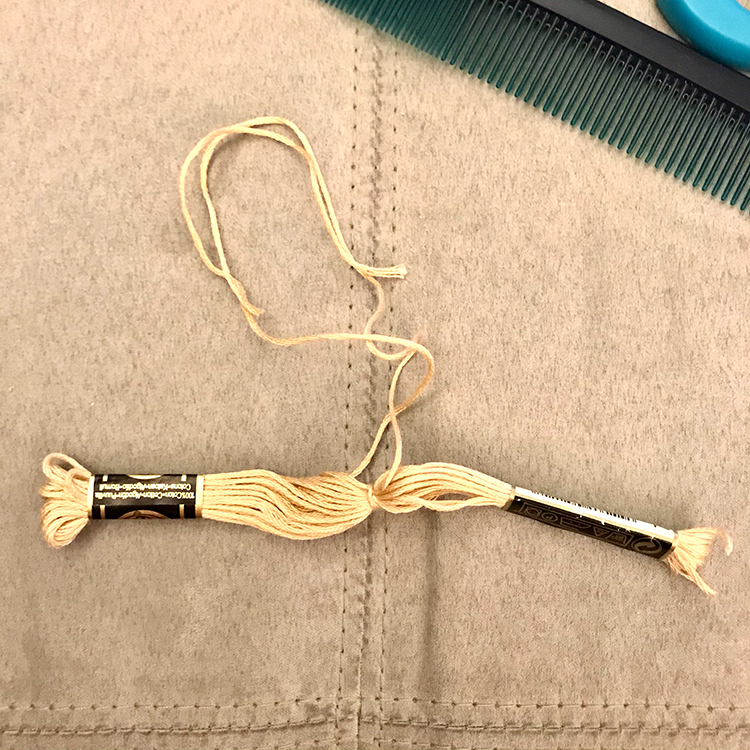
Step 2 – Tie a 12″ piece of thread in the middle, knotting it tightly. I make three knots to secure it. Remove the wrappers.
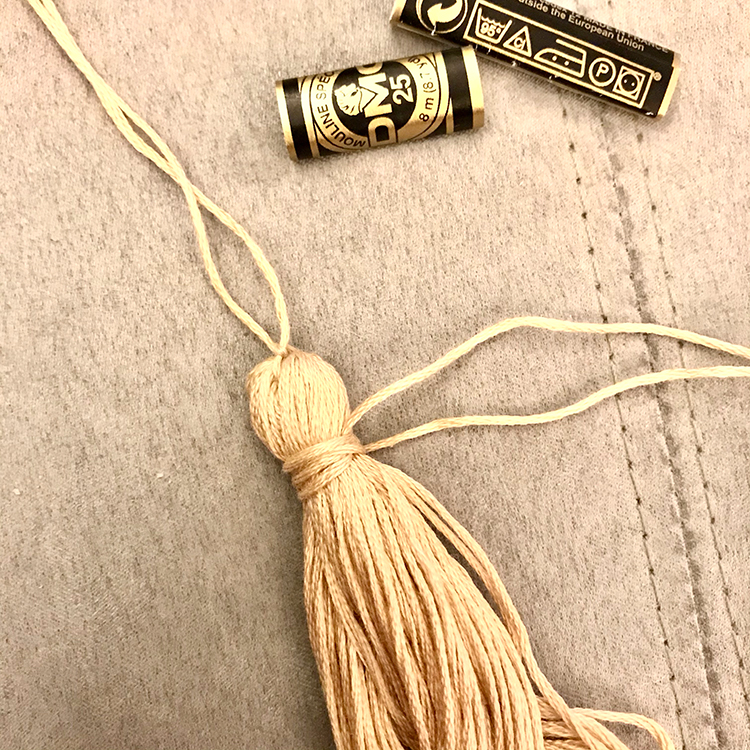
Step 3 – Fold one tassel in half. TIP: If you need to adjust the center wrap, now is the time. Wrap another 12″ string of floss around the tassel about 1/2″ from the fold. Wrap it around about 5 times. Next tie it off several times. This forms the head of the tassel. The wrap is called a head band.
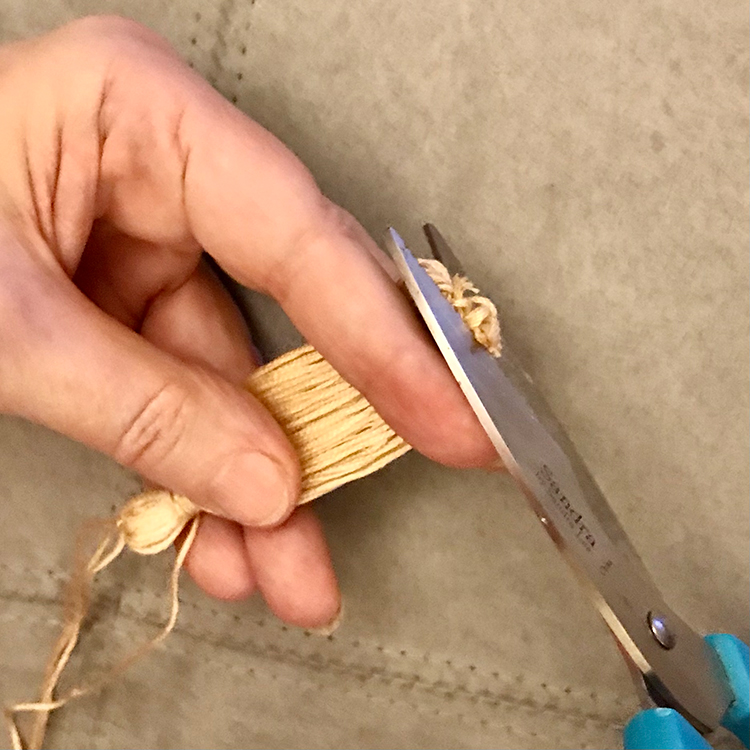
Step 4 – Trim the bottom threads neatly. Don’t cut yourself ! TIP: Pinch the threads tightly between the fingers of your holding hand. Reposition it and trim again.
Step 6 – Hide the ends and tidy up the threads. TIP: I use a tapestry needle to work the ends into the middle of the tassel.
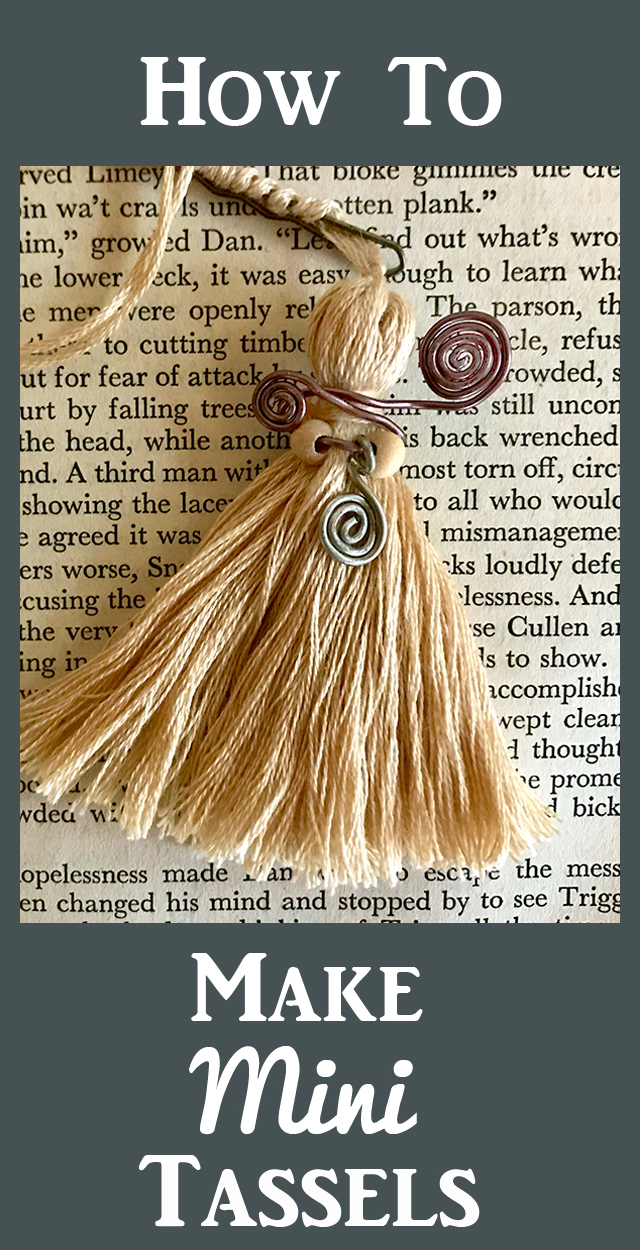
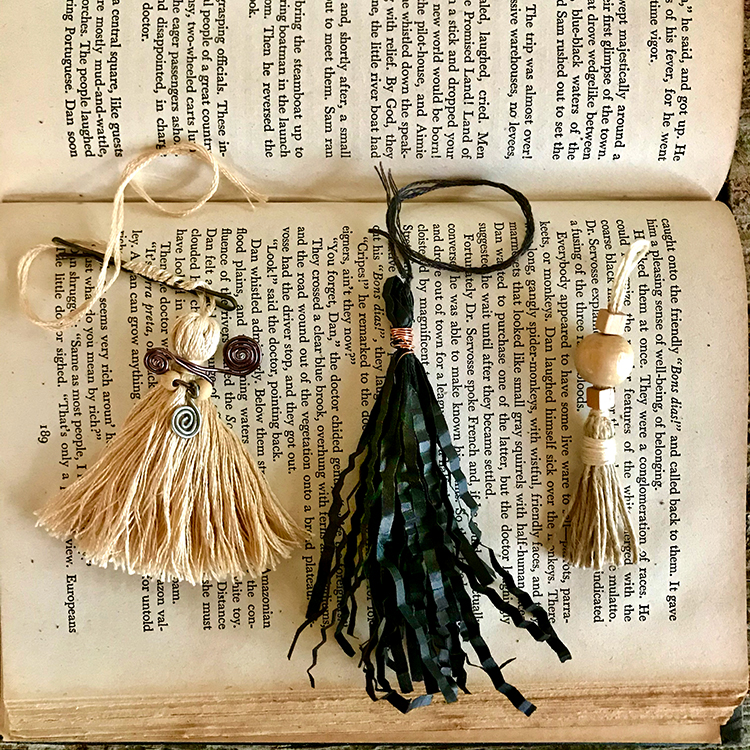
Step 7 – Comb through the threads from the wrap point to the cut end. Do this three or four times. This will fluff the threads. TIP: Trim any threads that are too long if necessary. My finished tassel has a wire and bead embellishments. You can learn how to make these in my Wire Embellishments for Paper Crafts Tutorial HERE!
Method 2: How to Make Paper Tassels Tutorial
Supplies
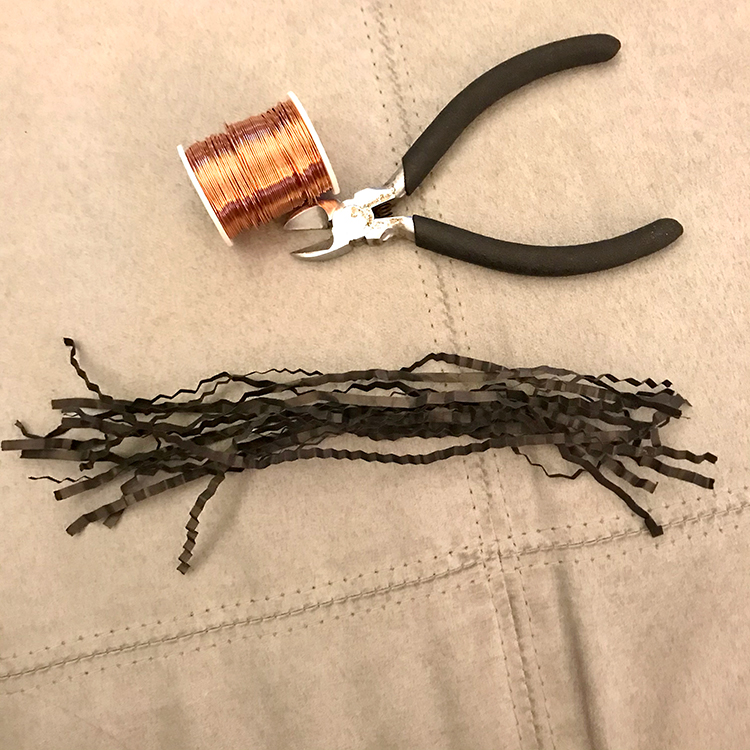
15-20 Strands of Black Shredded Crinkle Paper for Gift Baskets or Bags
Scissors
Thread to match color of paper
24 gauge Copper Wire
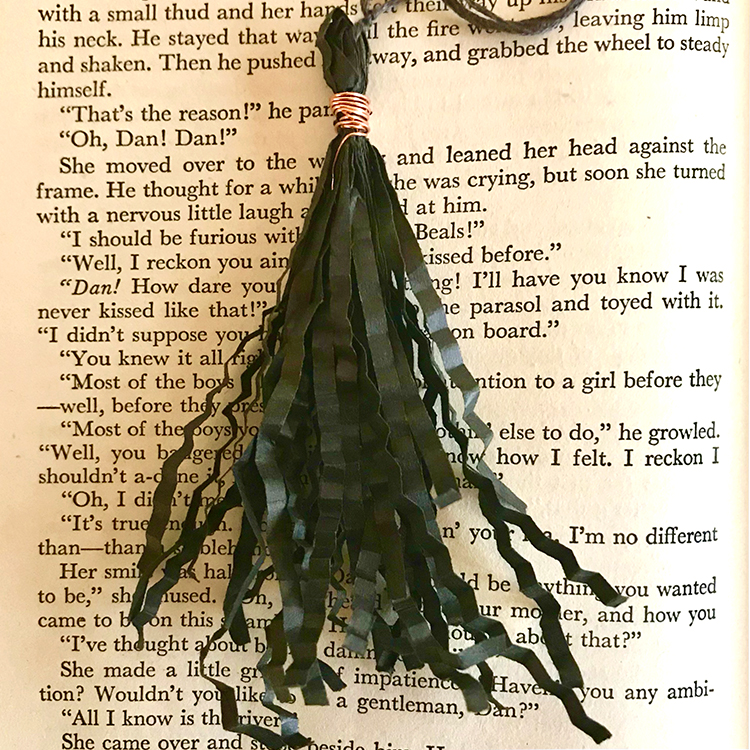
With this method, we can make a tassel that measures 4″ long. I love the look and feel of these little wonders. I do not trim the ends, rather just let them fall naturally. They are slim and work beautifully inside Junk Journals. They don’t add a lot of bulk!! You can also use this method for other papers, like paper from your shredder.
Directions
Step 1 – Lay the individual crinkle strands on your table as shown below. TIP: Don’t spend a bunch of time trying to get the ends perfectly lined up. Just get close.
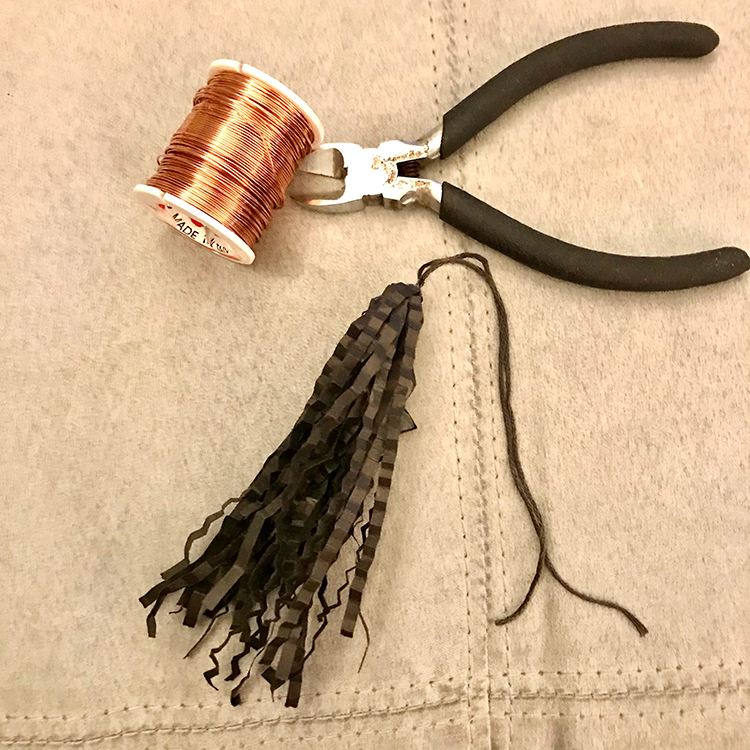
Step 2 – In the middle of the bunch, tie a 10″ piece of thread, knotting it tightly. Tie it three times to secure. Fold the bundle in half.
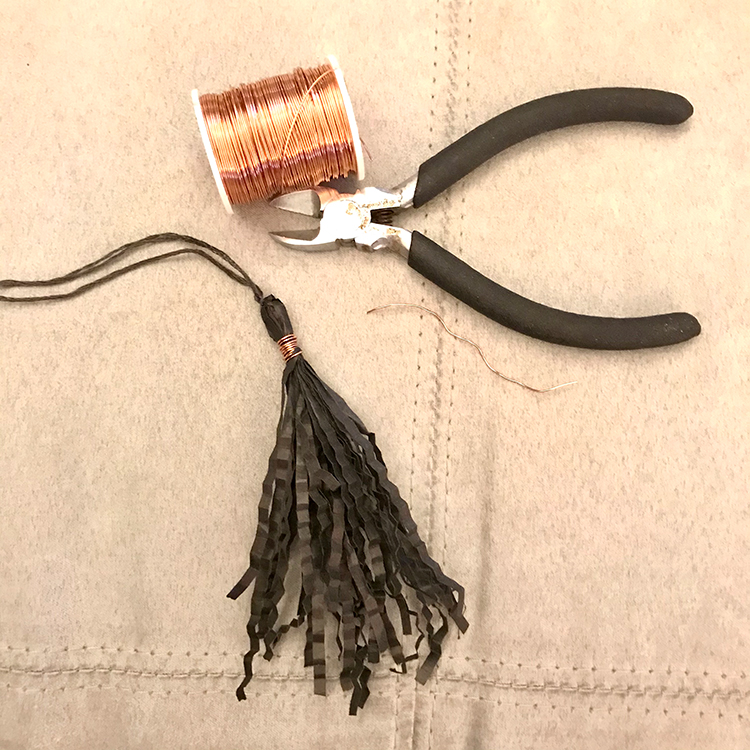
Step 3 – Wrap the copper wire around the paper 6-8 times. I try to keep the wire wraps close to each other as shown below. Of course, you can just wrap it willy nilly. It will look good regardless of the method you employ. WINK!
OPTION: You can wrap this with thread or floss as well. Paper will tear. If you want paper to show around the tassel, just warp a piece around the thread used to secure the top. Glue in place. Below is the Crinkle Paper Tassel on a Journal Card.
Method 3: How to Make Twine Tassels Tutorial
Supplies
72″ of Twine, plus 2 pieces 7″ long and 2 pieces 14″ long
Piece of Cardboard trimmed to 4″
Scissors
With this method, we will make two, approximately 2″ tassels. Of course you can cut your card to any size and make a larger or smaller tassel. TIP: I often use 3 or 4 of my fingers to create the wrap if I don’t have a card.
Directions
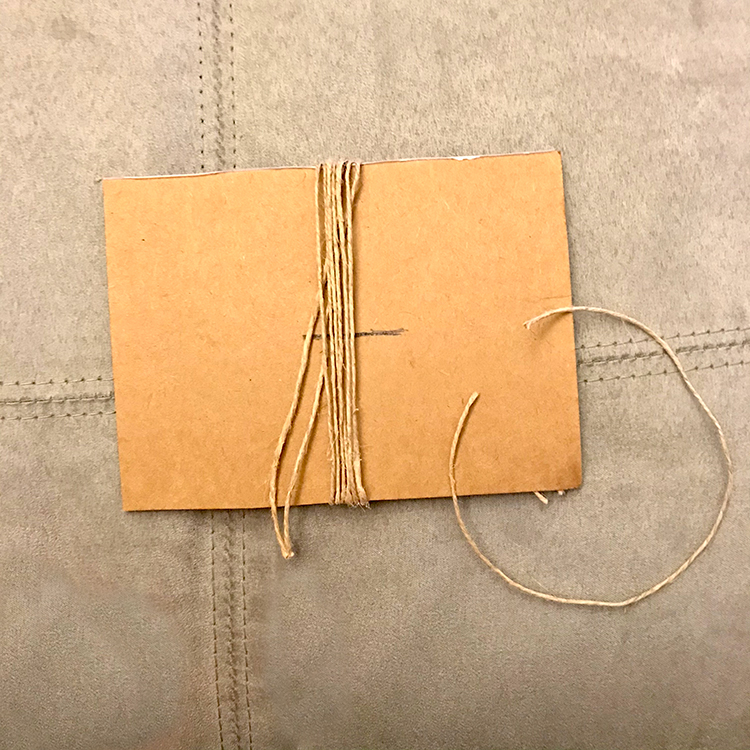
Step 1 – Cut a Cardboard Template to 4″ width. Draw a dark line at the 2″ midpoint of the card. This will help you line up the middle knot. TIP: The card should be sturdy so it doesn’t bend as you wrap. That’s annoying! See the card in Step 2 below.
Step 2 – Wrap the twine around the 4″ side of the card. It does not have to be neat, just wrap. I used a stiff twine, but you can use a finer version or even Barker’s Twine.
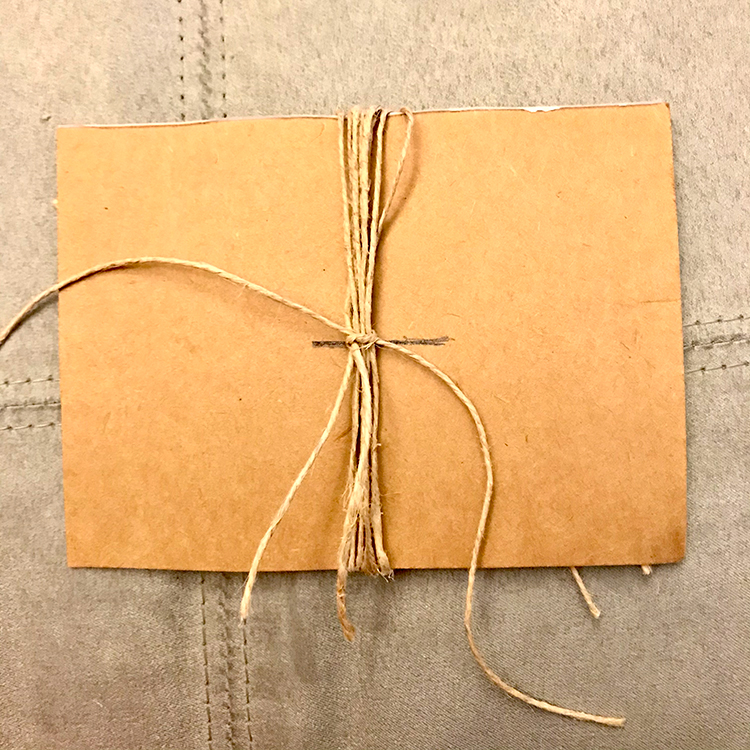
Step 3 – When all the twine is wrapped, thread one 7″ piece of twine in the middle of one side and tie it securely. Repeat on the other side. This will be the top cord.
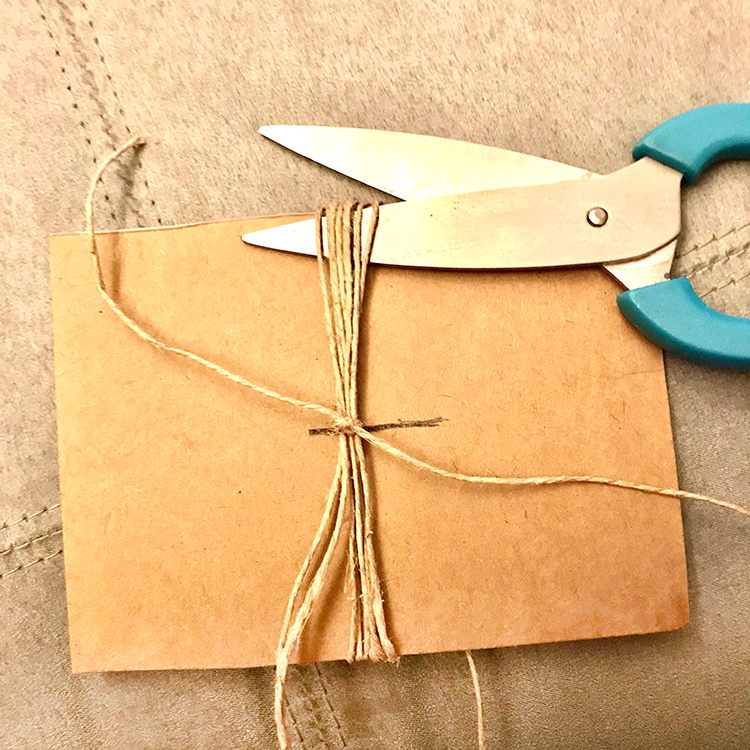
Step 4 – Cut the twine at each edge of the card. You will have two twine bundles.
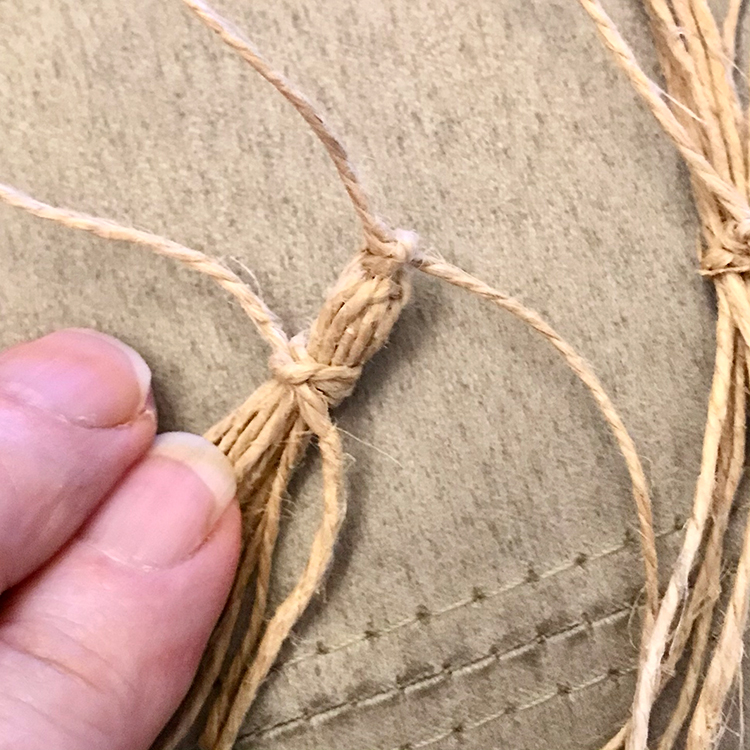
Step 5 – Fold the tassel in half. Wrap a piece of 14″ twine around the tassel about 1/2″ from the top. Tie 2-3 times to secure. You can also use thread, wire, ribbon, etc. to secure. TIP: A twine wrap causes some bulk. You can cover it by gluing a ribbon over the tassel neck if you wish.
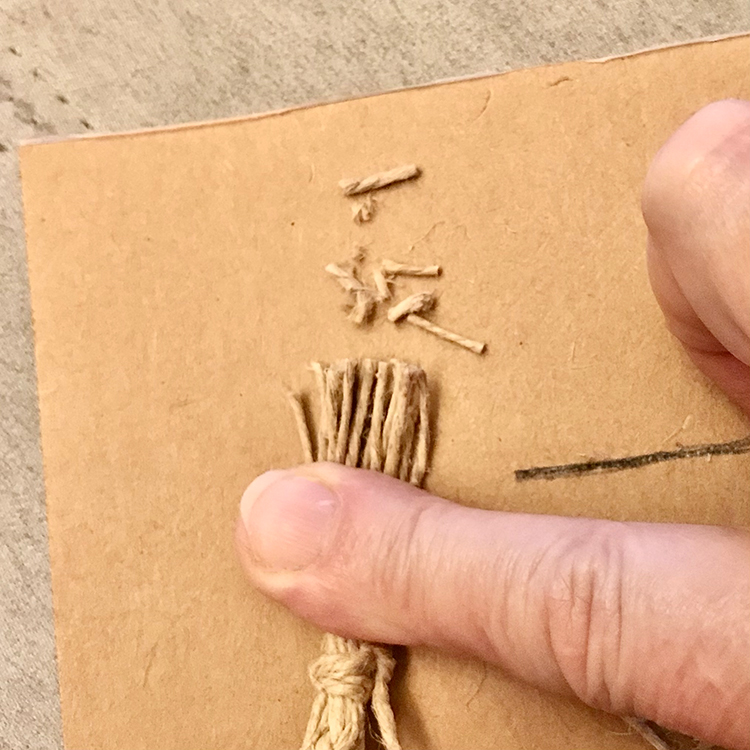
Step 5 – Trim the bottom neatly. TIP: Pinch the threads tightly between the fingers of your holding hand. Reposition it and trim again.
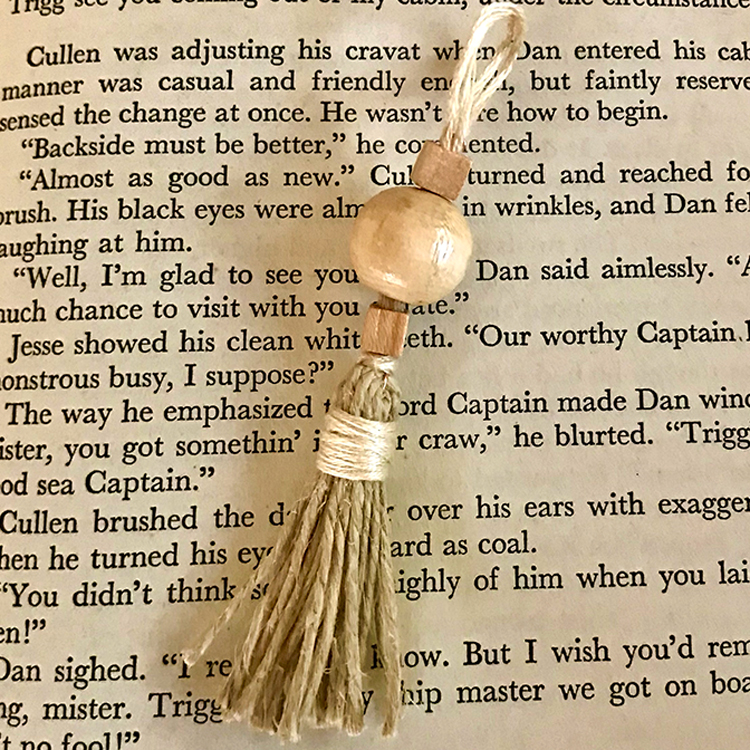
Step 6 – Hide the ends and tidy up. Embellish as desired. For my version, I topped the tassel with wooden beads and wrapped the head band with natural raffia. Here it embellishes a Tag.
Finishing the Tassel Ideas
Of course you can leave the tassel as is. They are beautiful without embellishment. But if you want to ‘deck them out’ here are a few ideas.
- Add beads to the top of the tassel.
- Add a top cap, (sometimes called tassel, cord, or bead caps). These fit over the head.
- Thread beads on a thread and wrap it around the head band.
- Insert floss through bottom of tassel head. Thread beads on the thread. Insert back through and tie off inside.
- Wrap a contrasting color or metallic thread around the head band.
- Wrap a ribbon around the head band.
- Wrap lace around the head band.
- Wrap washi tape around the head band.
- Dangle a charm from the head band.
- Wrap wedding floral wired pearls around the head band.
I hope that you had fun learning my methods for How to Make Tassels!! I made way too many. Once I got started everything became a possibility! You might also want to check out how to make Mini Pom Poms HERE.
When I am not exploring new and old Techniques for Mixed Media in my Graphics Fairy sandbox, I also create Photoshop Elements tutorials and craft project videos over on The Graphics Fairy Premium Membership site. You can find even more of my books, junk journals, mixed media art, classes, and whimsical shenanigans on Rebecca E Parsons Dot Com.



Jch says
What a fun post! Pretty easy but limitless and so creative. Have to get busy. 🙂 thanks
graphicsfairy says
Thanks so much! Have fun 🙂