Easy Gel Printing Techniques
Hello Graphics Fairy friends! I’m Diana from Dreams Factory, ready to rock’n roll with another DIY project- Easy Gel Printing Techniques! I thought it would be fun to try something different, so today is all about experimenting with my new found love – the oh-so-amazing gel plate! I will be showing you a few ideas on how to easily add texture to your monoprints – we will be making textured gel printing plate backgrounds … using a packing tape technique!
The gel plate printing is definitely not a new invention. This technique has been around for centuries, in different forms – the hectograph, the jellygraph or the gelatin duplicator. In more recent times, there are companies that sell permanent gel plates, ones that you can always have near by for when inspiration strikes.
The only downside is that the gel plates can get quite pricey, especially the larger ones, so of course DIYourselfers had to find a way to recreate them at home! I am one of those people right now, mainly because I can’t find the gel plates in my country and buying them abroad can really add up to one’s pandemic budget. I still need to perfect my gel plate recipe – I used water, agar-agar and glycerin to make it – and I was happy to pull up some REALLY amazing prints using this very first gel plate (including the ones from this project). I will be sharing the gel plate recipe on Dreams Factory, I just need to run a few more tests before!
Tips and ticks:
Use a piece of paper that has the same size of the paper you will be monoprinting on and secure it on your table with some tape. Center and place your gel plate on top of that paper. This way, when you will be printing, you can easily align the corners of the two pieces of paper, making it so much easier to center your gel plate print on your top paper.
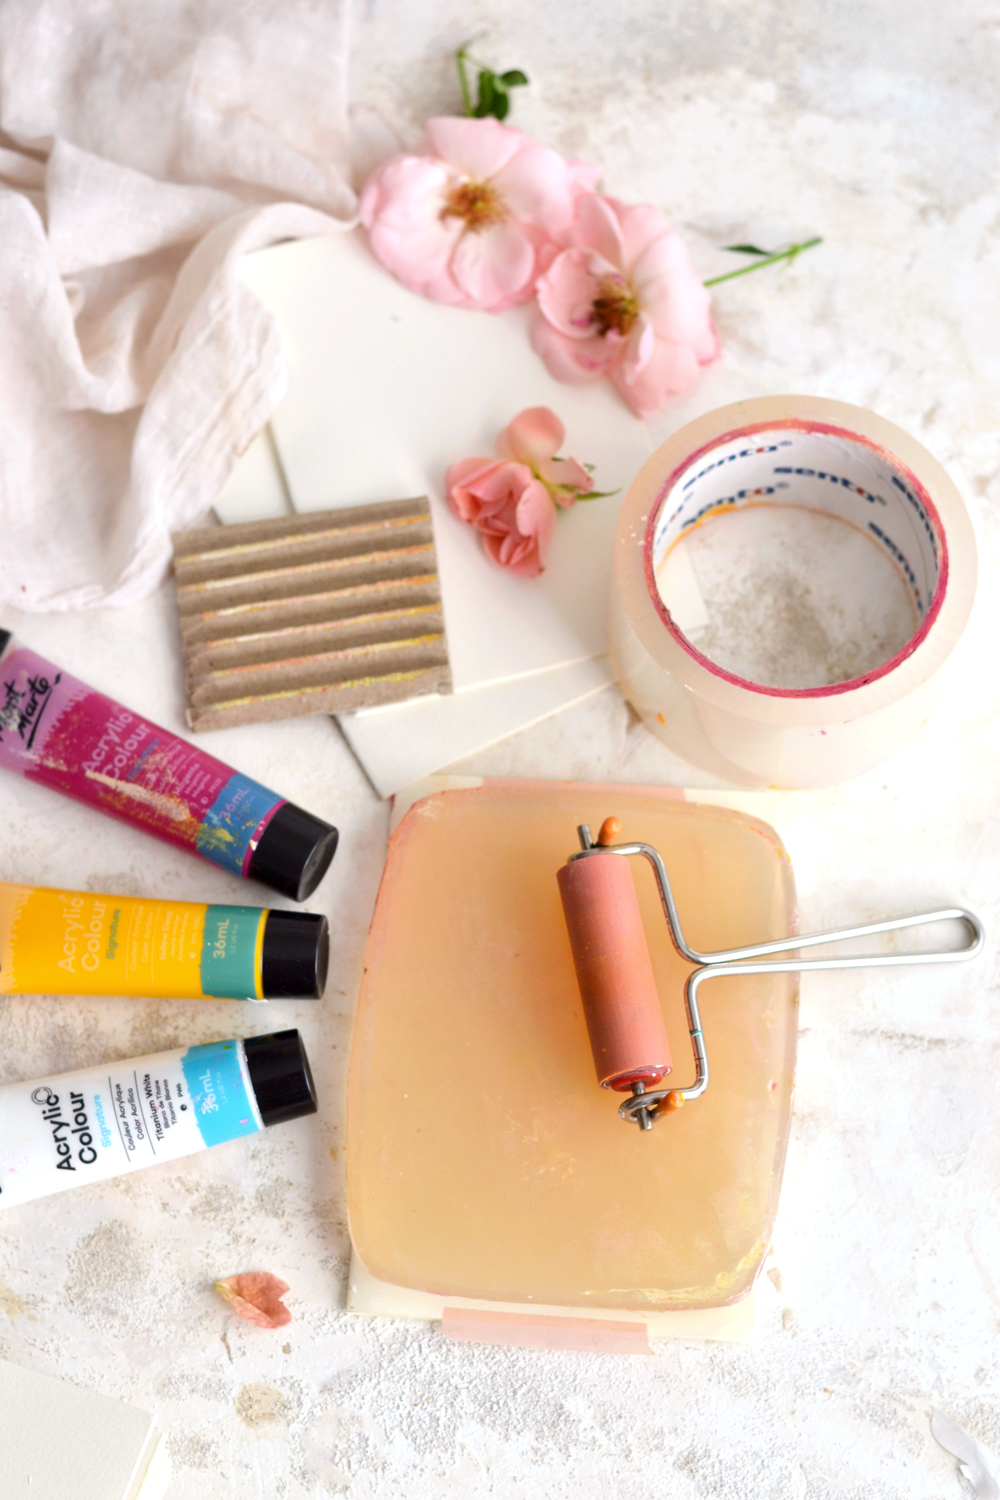
Packing tape will definitely be our star ‘ingredient’ today, it really amazes me how everyday items can be turned into such unique and creative tools in a mater of seconds! I also used corrugated cardboard, plastic shelf liner, folded paper, a brush and even my fingers to create interesting effects on my gel plate. You can also use bubble wrap, stamps, stencils, paper masks, pretty much anything with an interesting texture, the sky is the limit.
I didn’t use just the leftover cardboard from the middle of the packing tape, but the whole roll! You can use any other rounded shapes you have around, but I found that packing tape imprints some really cool effects on the gel plate. If you place it on your plate and rotate it just a bit it will create a beautiful, dimensional circle with interesting lines and textures. You don’t have to move it around or slide it on your plate, just slightly rotate it.
Furthermore, you have a few other options:
– to use the packing tape on its own, without any paint – if used like this, it will remove some of the paint that is already on your plate creating this beautiful circle where you’ll be able to see the initial paper after gel printing
– to paint the edges of the packing tape with one or several colors before applying it on your gel plate – if used like this, it will remove the paint that is already on the plate but it will also add some more colors to it. You can use this method to create more contrast and add more interest.
After a few prints, the packing tape will be loaded with all the colors that you used, which can only add more cool effects! But just so you know, if you want to switch colors or want to try something different, you can decide at any point to wash the packing tape and reuse it, the paint will come off (almost) completely. Do that while the paint is still wet, it will be more difficult to remove it after completely dried.
Before we jump right in, I have to confess that the most predominant fear I have when experimenting with my gel plate is that I might ran out of paper for my gel plate printing. Haha, don’t you just feel the same? That’s not usually the case, because you can basically use any type of paper that you have around! I tried regular printing paper, cardstock paper, tissue paper, wrapping paper, then I moved to dictionaries, paper bags, old and new books. I really love the different effect you get with each and every one of these!
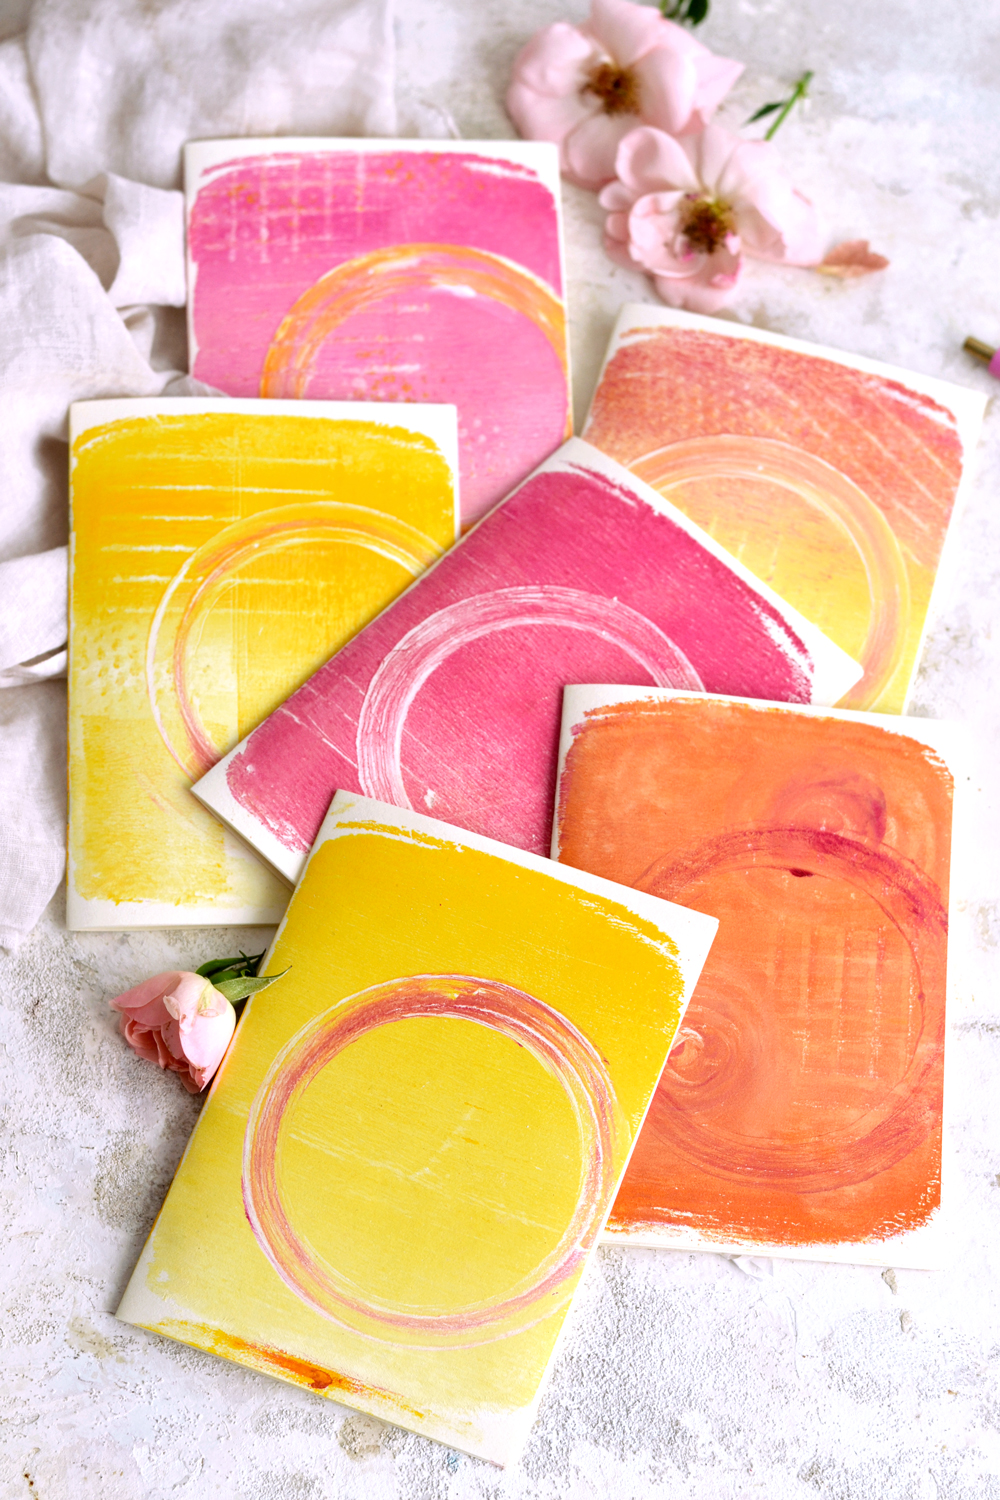
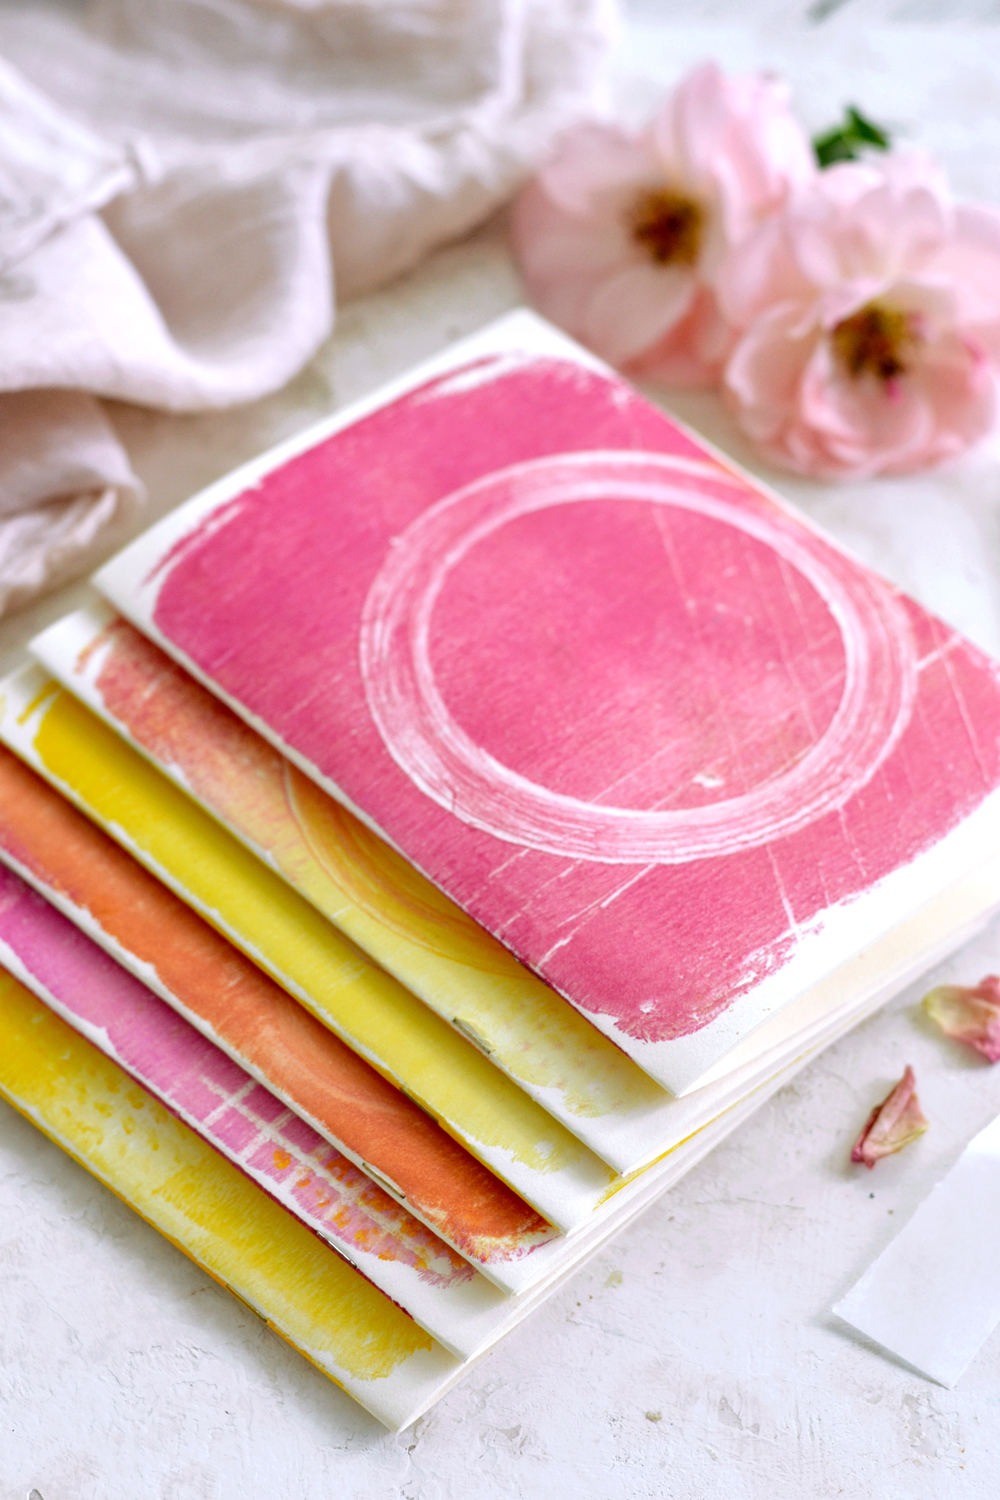
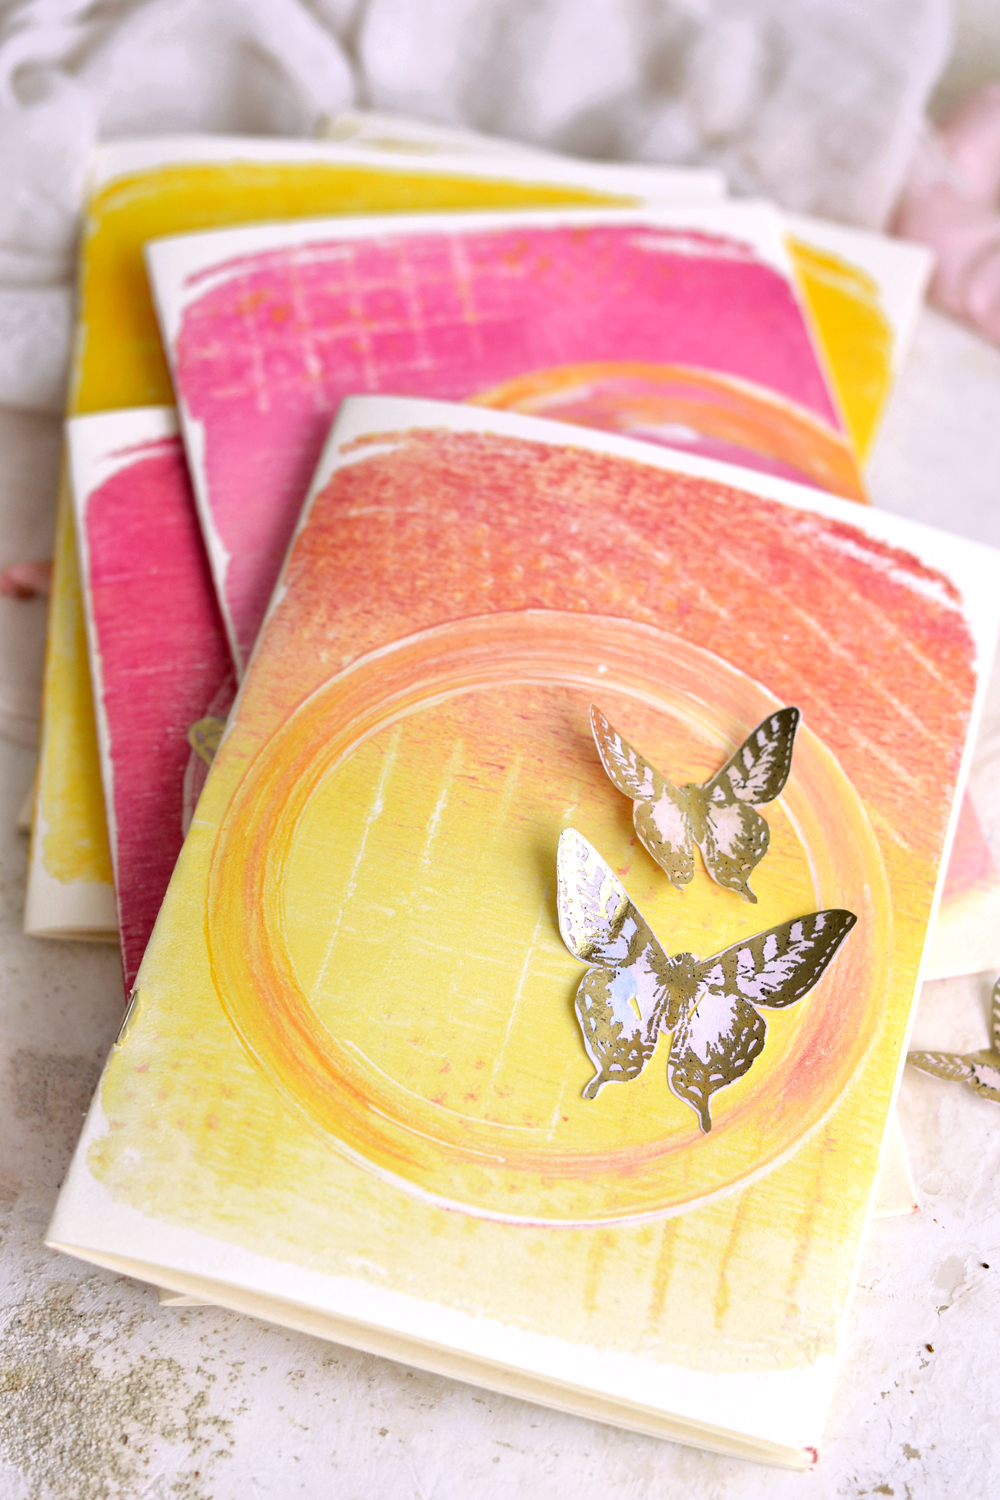
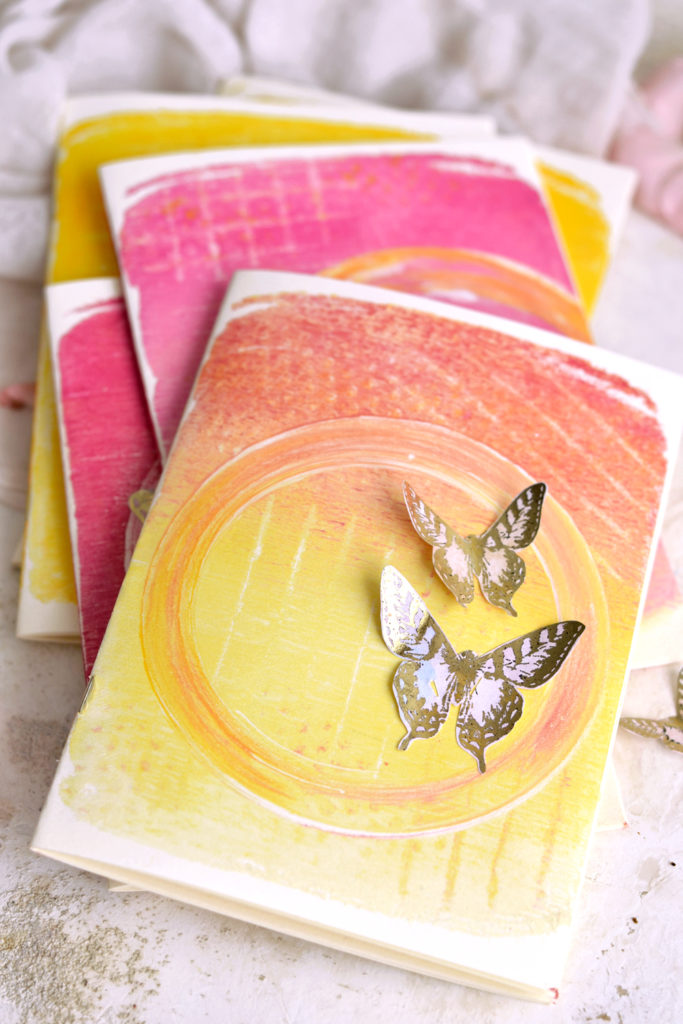
I even made my own notebooks using folded sketchbook paper and that’s what I used for today’s project. I guess we could have also be calling these Textured Gel Plate Notebooks. Or art journals, junk journals or any type of journals, these beauties can have so many uses! I only printed the covers for now, but you can also go wild on the inside too. Maybe turn them into collage journals for other future adventures? So many possibilities here!
Speaking of paper, just adjust this tutorial to your needs – your paper and your gel plate. My paper was a little bit larger than the gel plate so I was able to get some lovely, almost vintage-y and grungy effects on the edges, where there was no paint. If you want to recreate this effect, use a torn piece of tissue paper and lightly blot it all over the gel plate’s edges. Do that AFTER applying the paint and right BEFORE pulling your print.
I kept things relatively simple in terms of colors and only used white, yellow and magenta because I wanted to create a subtle ombre effect, but you can get as crazy as you want!
Easy Gel Printing Techniques Supplies:
- gel plate
- your paper of choice
- acrylic paint – I used titanium white, medium yellow and magenta
- brayer
- brush
- packing tape
- corrugated cardboard, plastic shelf liner, folded paper and your fingers – to create textured effects
- plastic sheet or silicone mat to protect your surface
Easy Gel Printing Techniques Instructions:
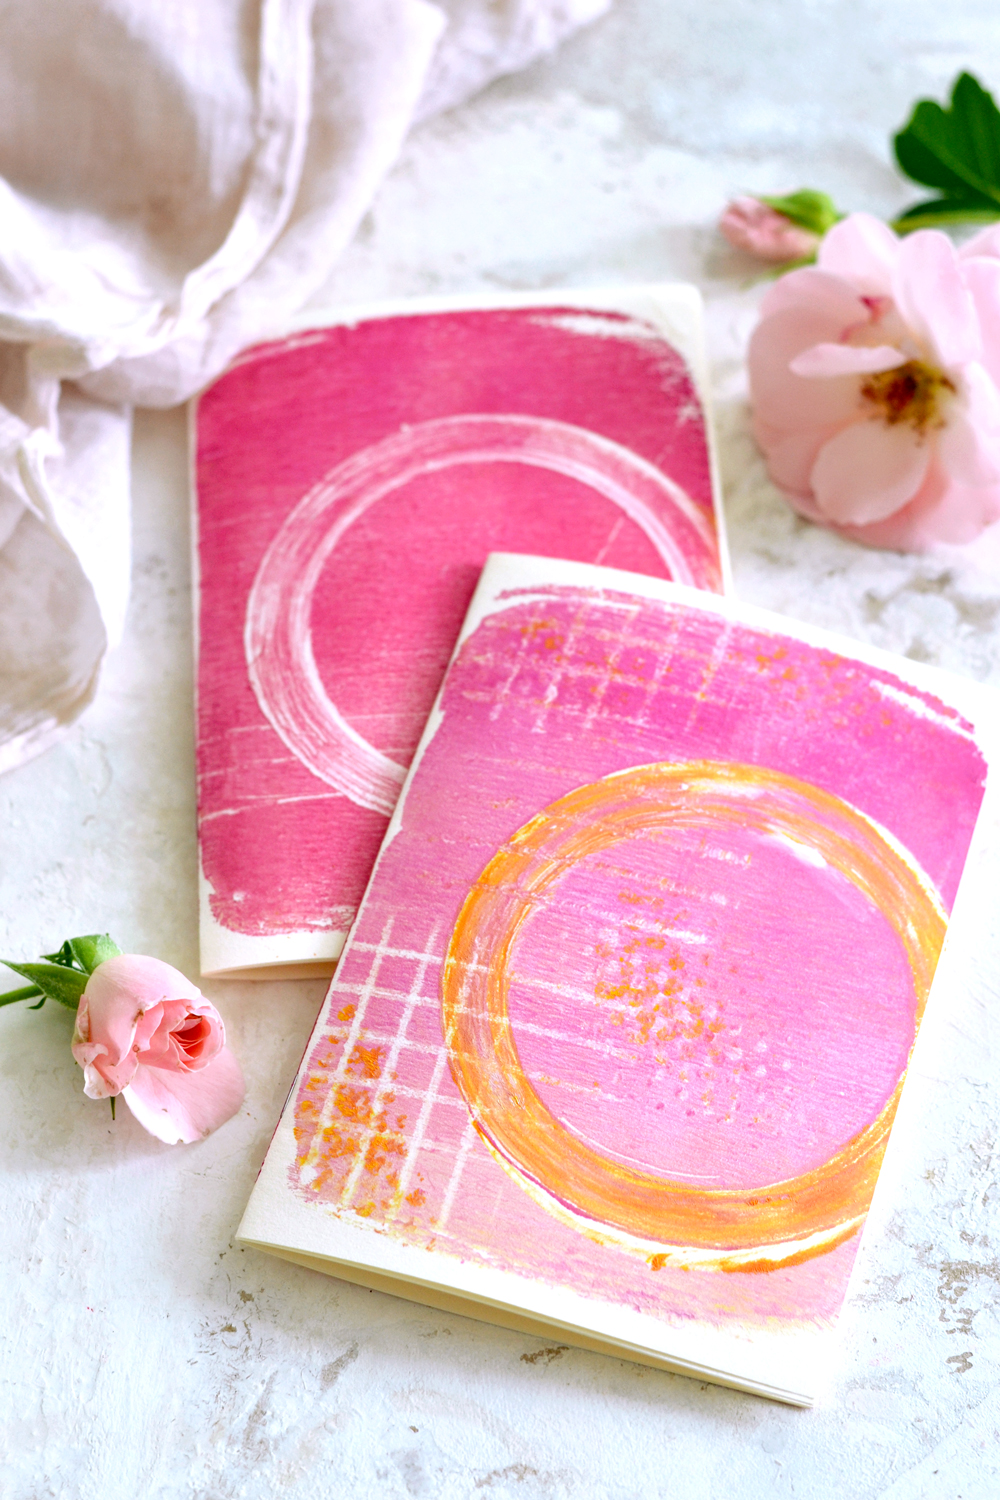
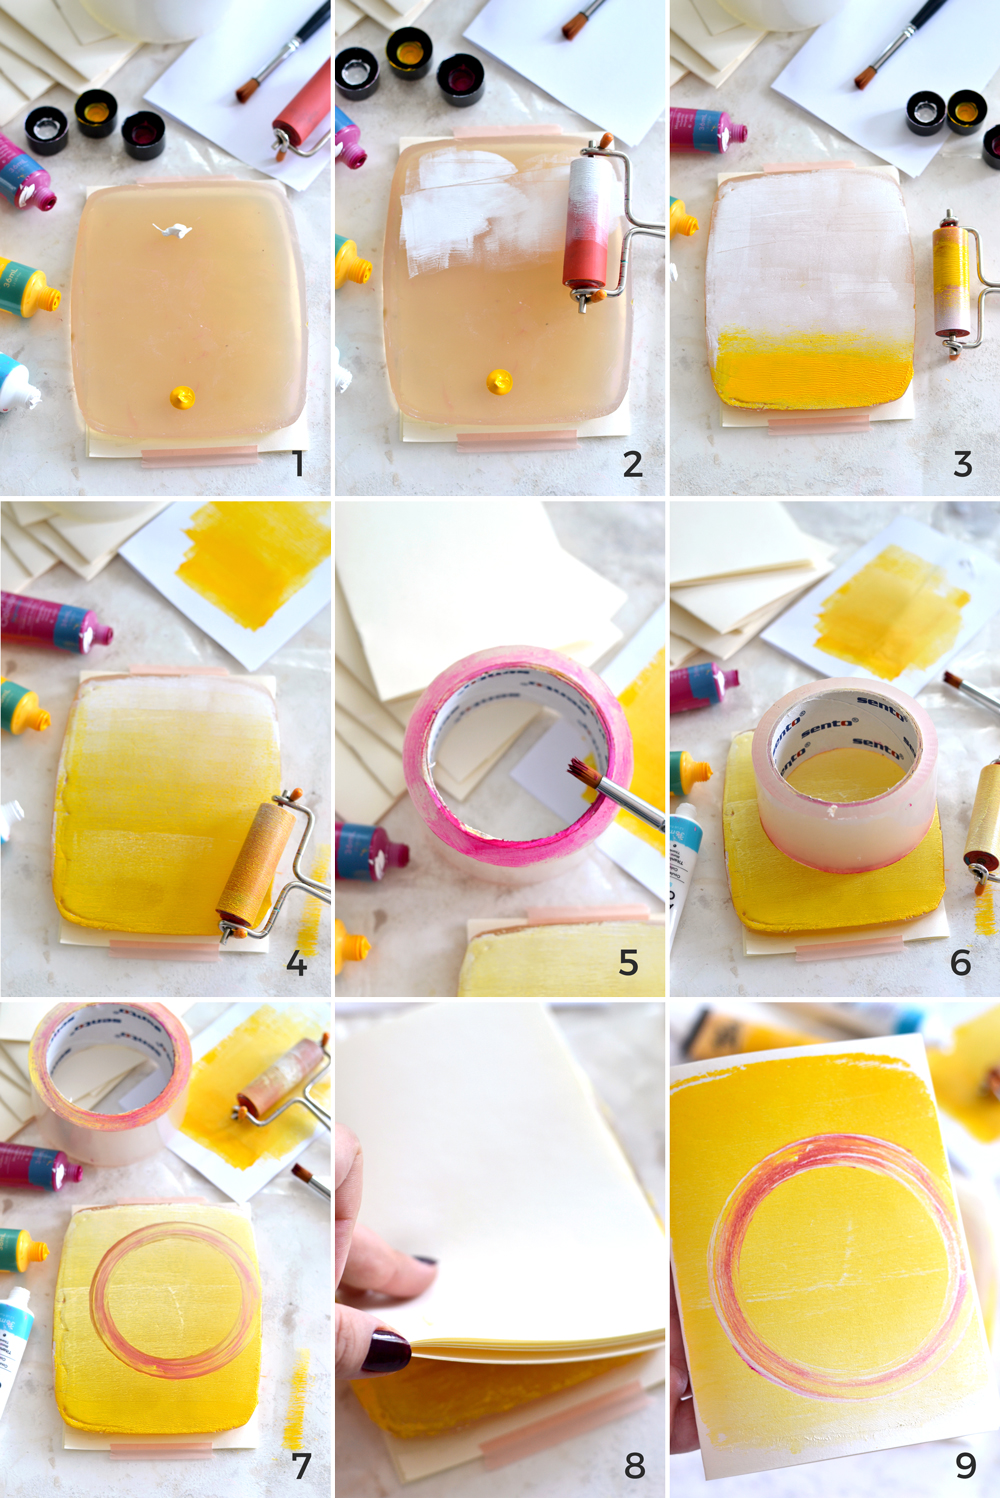
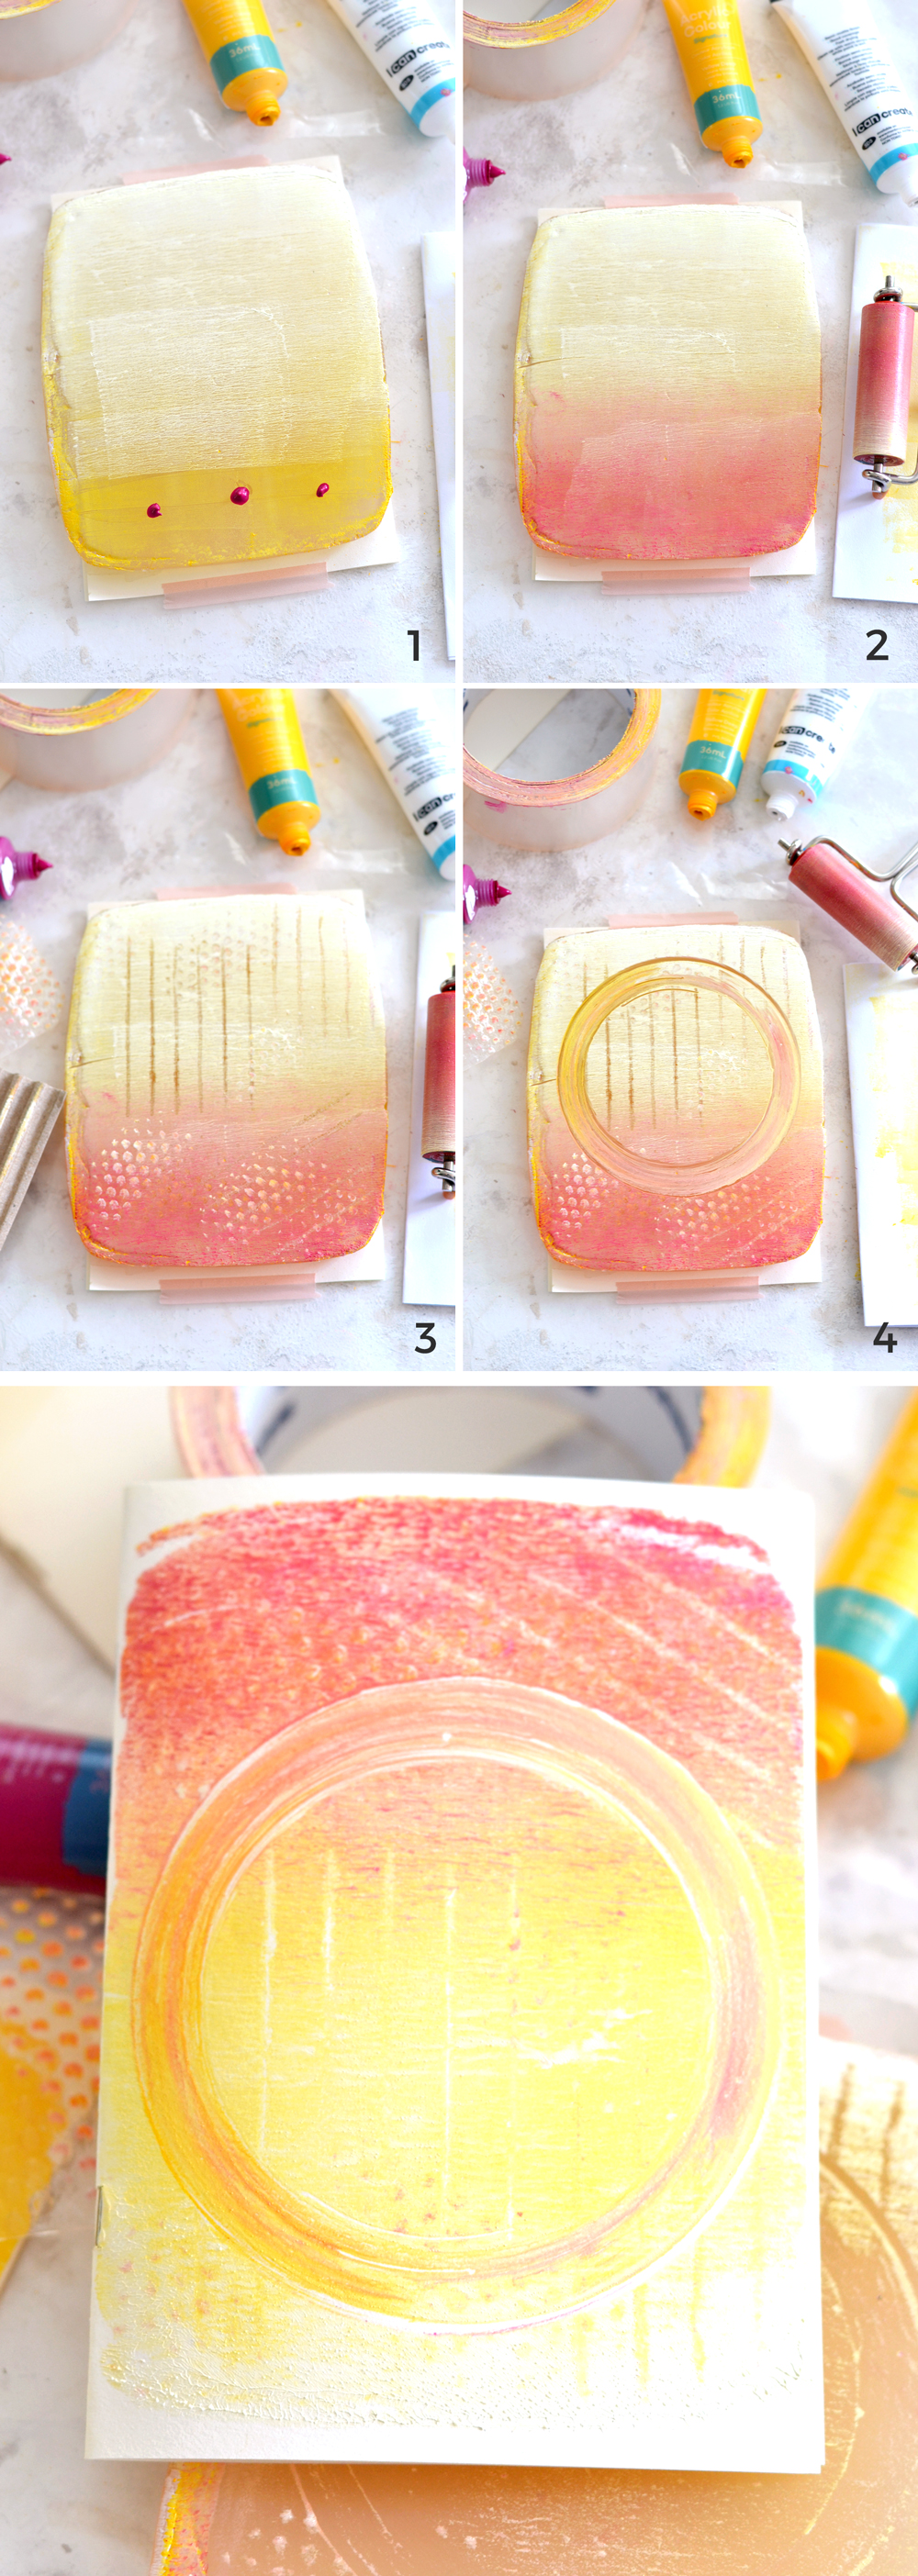
1. For the first gel plate background I used a small dash of white acrylic paint on the top part of the plate and some yellow on the bottom.
2-3. I used my brayer to brush the white paint on the top first, then gradually incorporated the bottom yellow paint to create an ombre effect. Here the white paint is predominant.
4. If you want to completely switch the dynamic and make the yellow the predominant color, you can gradually move upwards again with your brayer (that is now loaded with yellow paint) and start to cover some of the white again, creating a reversed ombre effect.
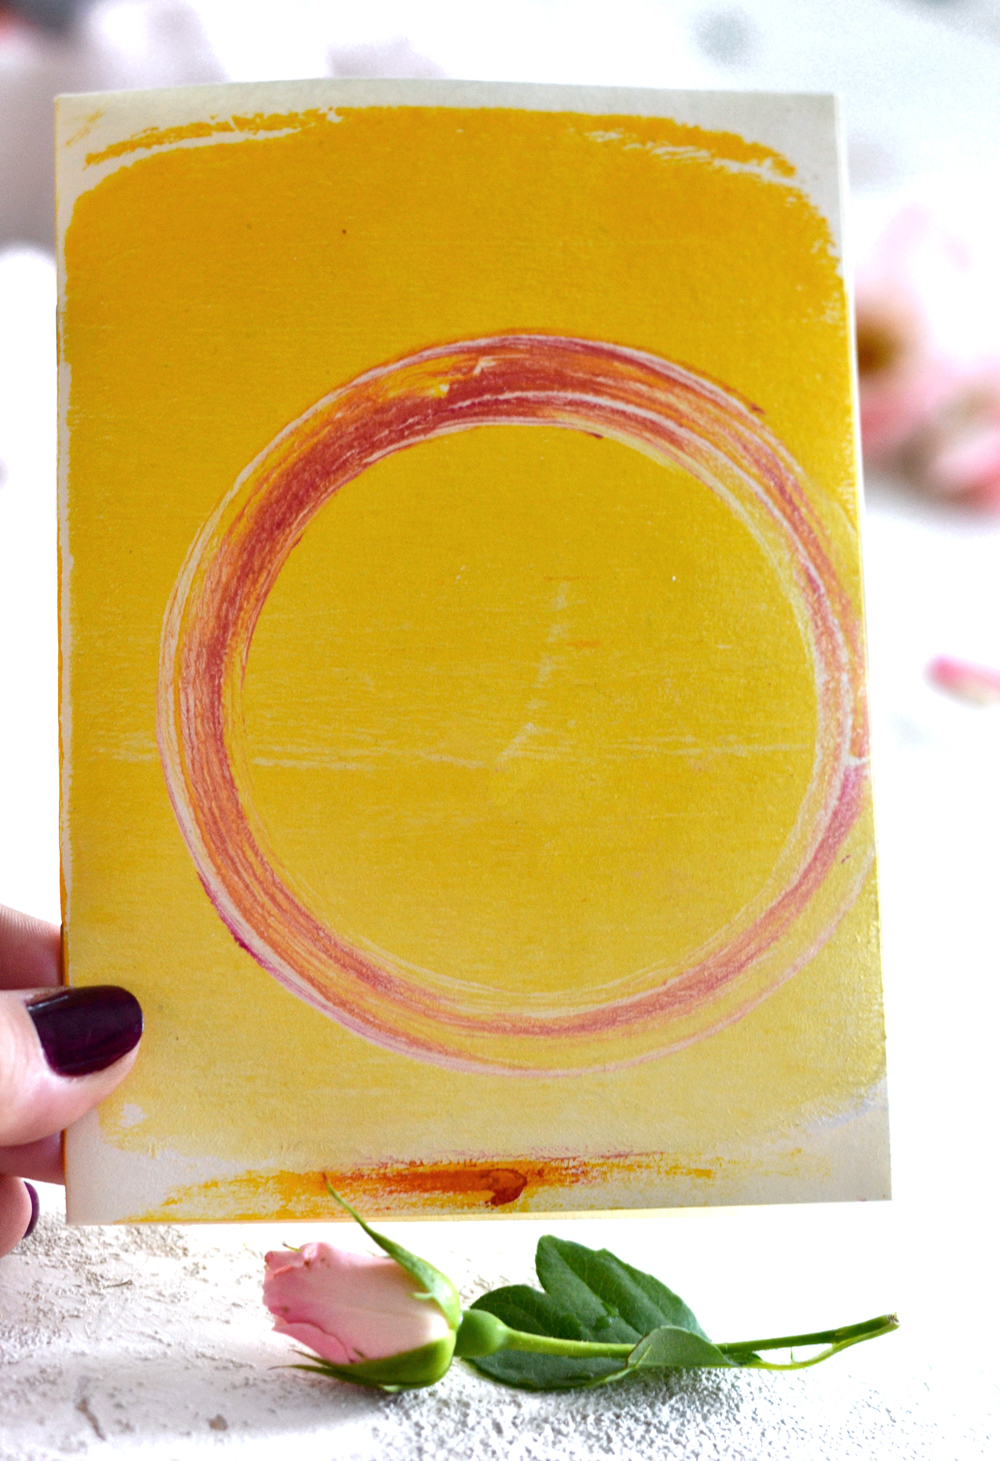
5-7. To create the beautiful textured circle I randomly brushed some magenta paint on the packing tape, placed it on the gel plate, rotate it a little bit and then lifted it.
8. I placed the paper on my plate, pressed it with my hand going all over its surface and then lifted it.
9. I really loved this stunning print!
For the next print I used my brayer again to create a similar ombre effect.
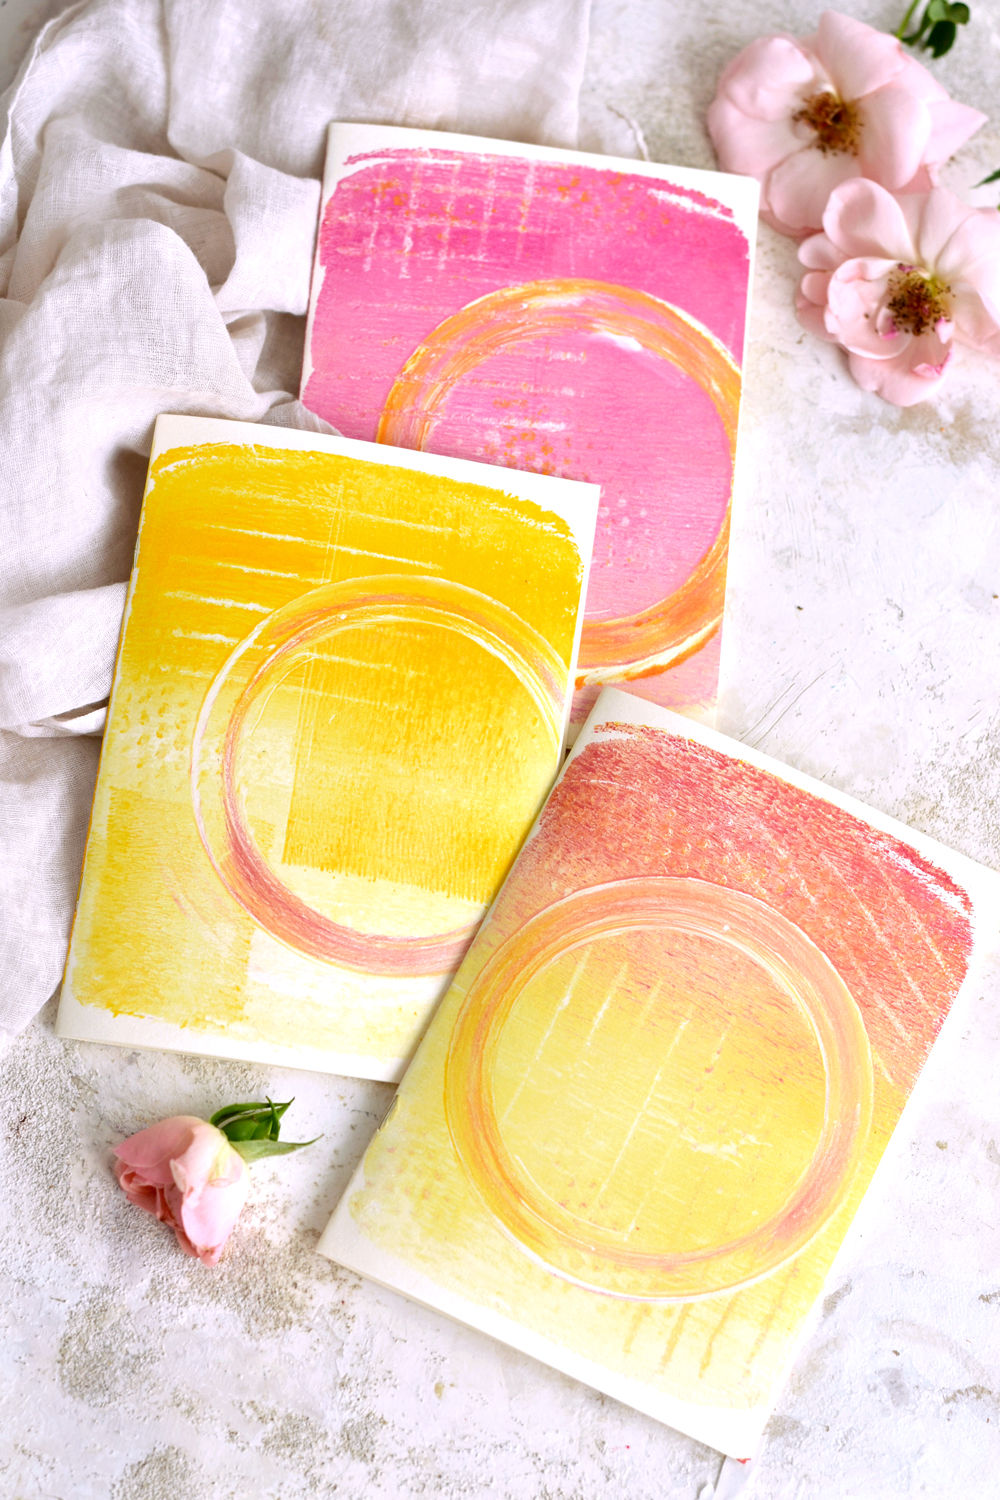
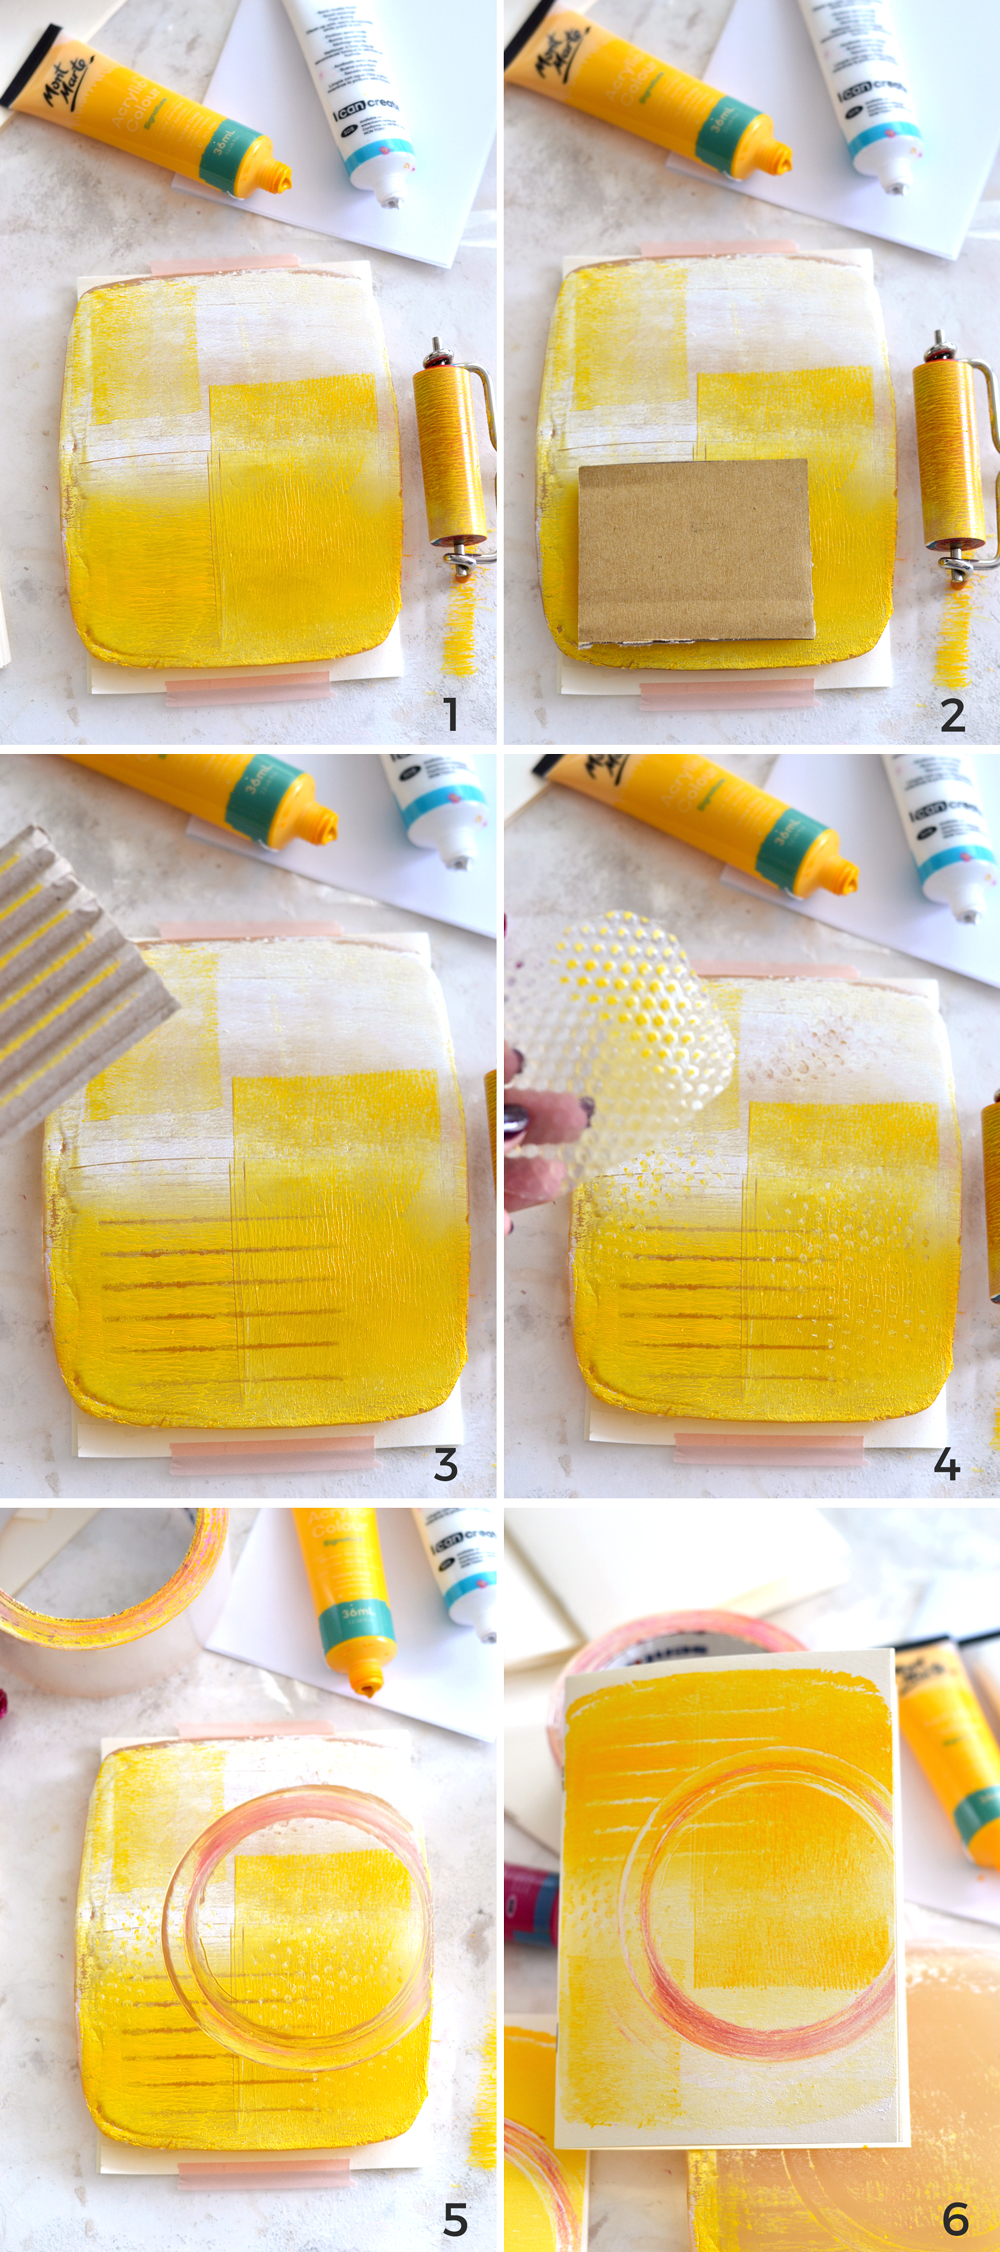
1. I followed the initial steps as for my first print, but this time I moved the blended line more to the middle of the gel plate. Then I used my loaded with yellow paint brayer to make some square impressions on the white paint.
2-3. To create texture I used some corrugated cardboard and only placed it on the yellow paint.
4. Then I used a piece of plastic shelf liner and I ‘stamped’ it on both the white and the yellow paint.
5. I used the packing tape without adding any more paint to it, just with the leftover paint from before.
6. I really loved this more geometrical print too!
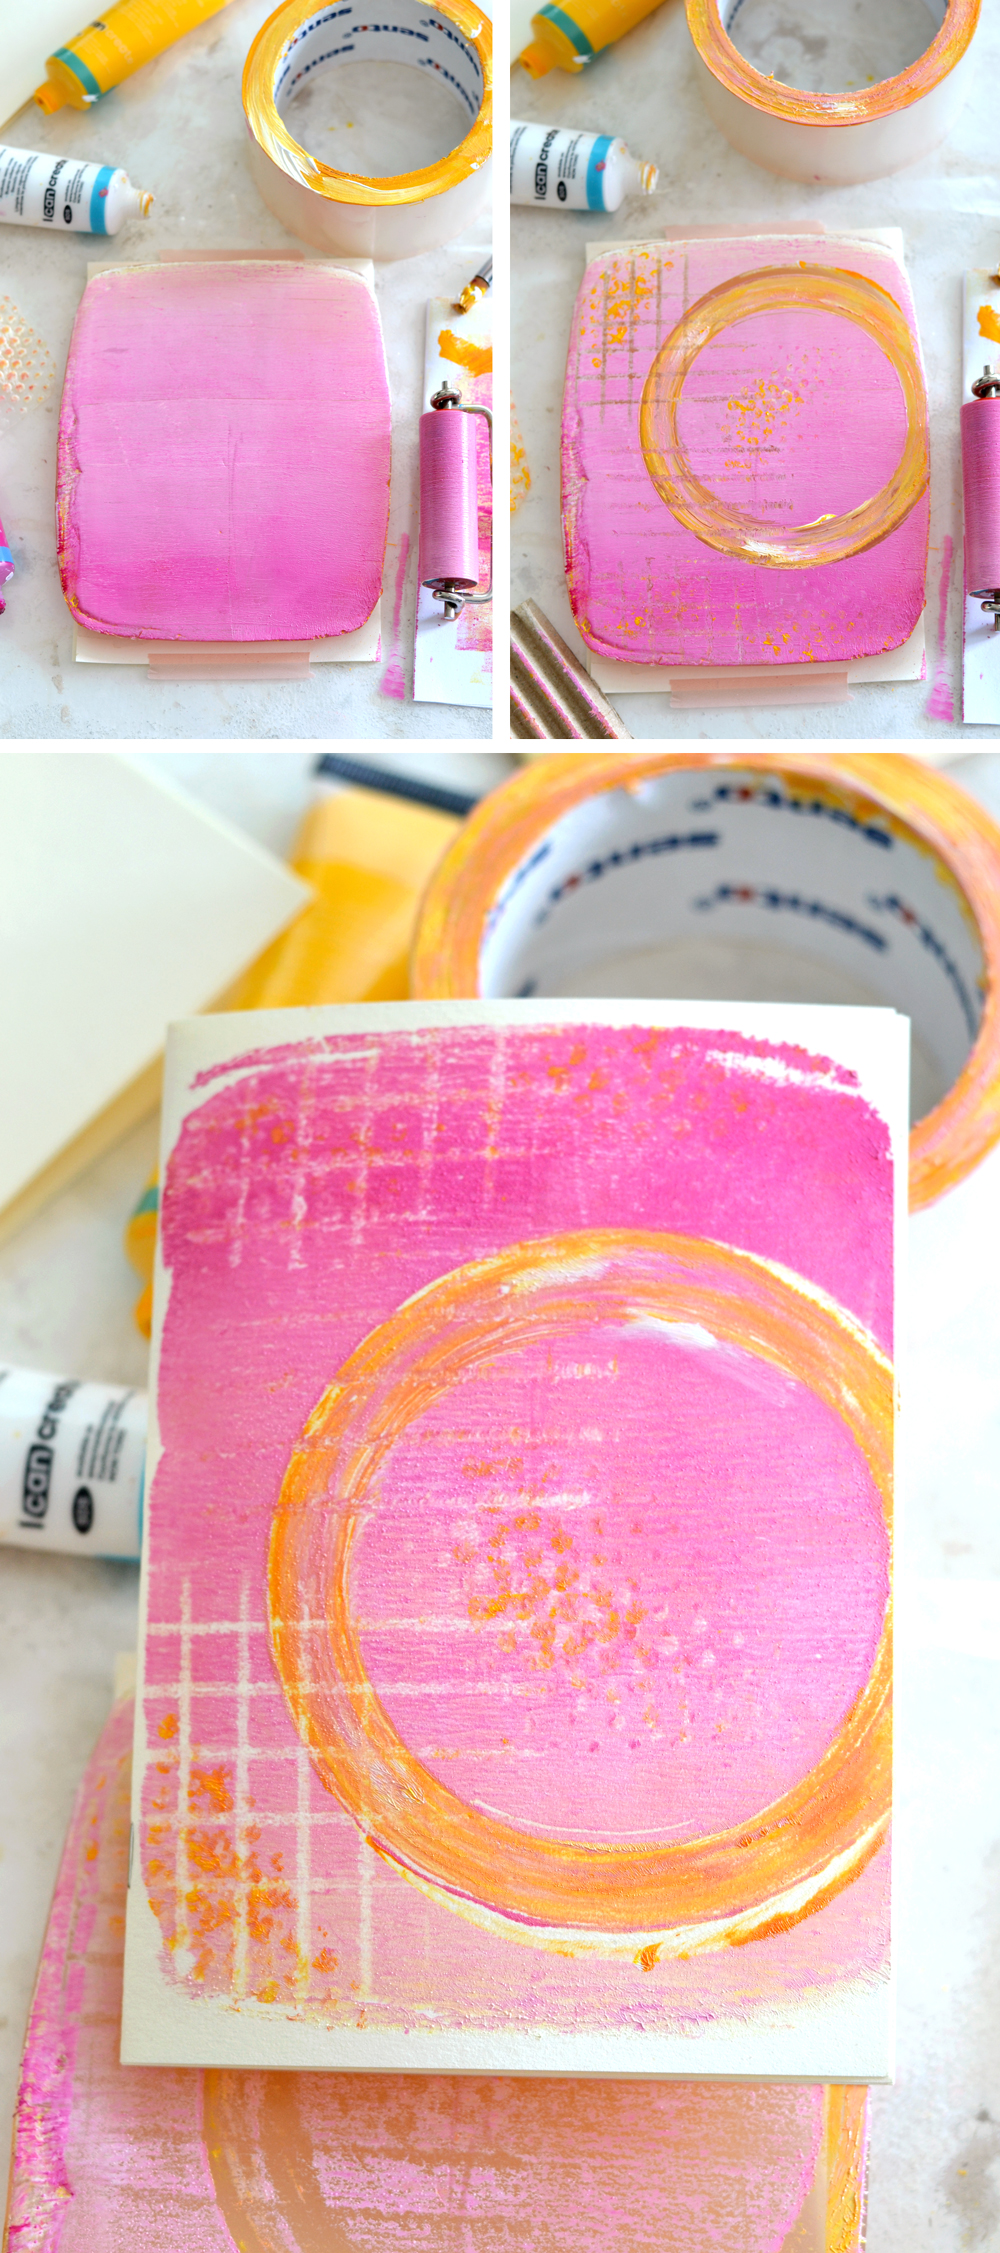
1. Next I went with a blended white – magenta ombre background and I loaded my packing tape with a lot of white and yellow paint.
2. I placed the packing tape on the gel plate, I lifted it to create the impression and only afterwards I used the other tools to create the textures. This time I added some yellow paint to the shelf liner, before placing it to the plate and I used the corrugated cardboard both horizontally and vertically, to create a different effect, then I pulled the print.
3. Another simply amazing background, the circle almost look like a beautifully painted sun!
For the next one I blended the colors a little bit too much on my plate, but that was OK! And instead of creating a yellow-magenta ombre effect like I initially wanted, I got a beautiful orange instead!
This time I stamped the textured cardboard effect, then used my brush with some yellow paint, then my fingers, to draw some irregular circled shapes. I loved this one too, I believe is has potential for even more experimenting in the future. It almost look three dimensional, don’t you think?
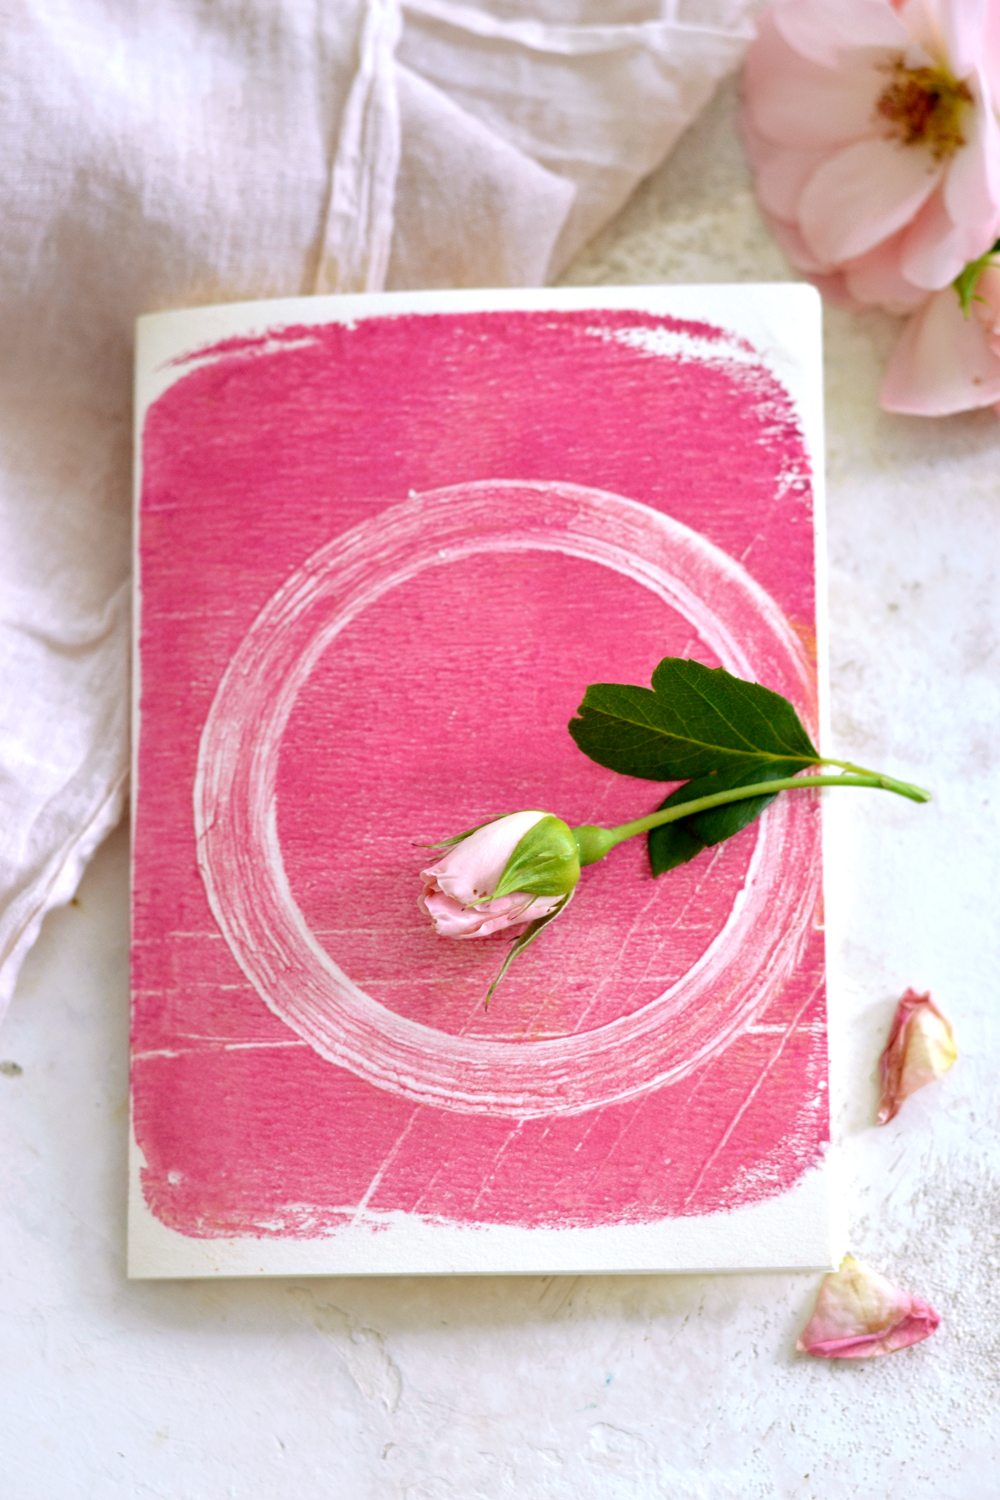
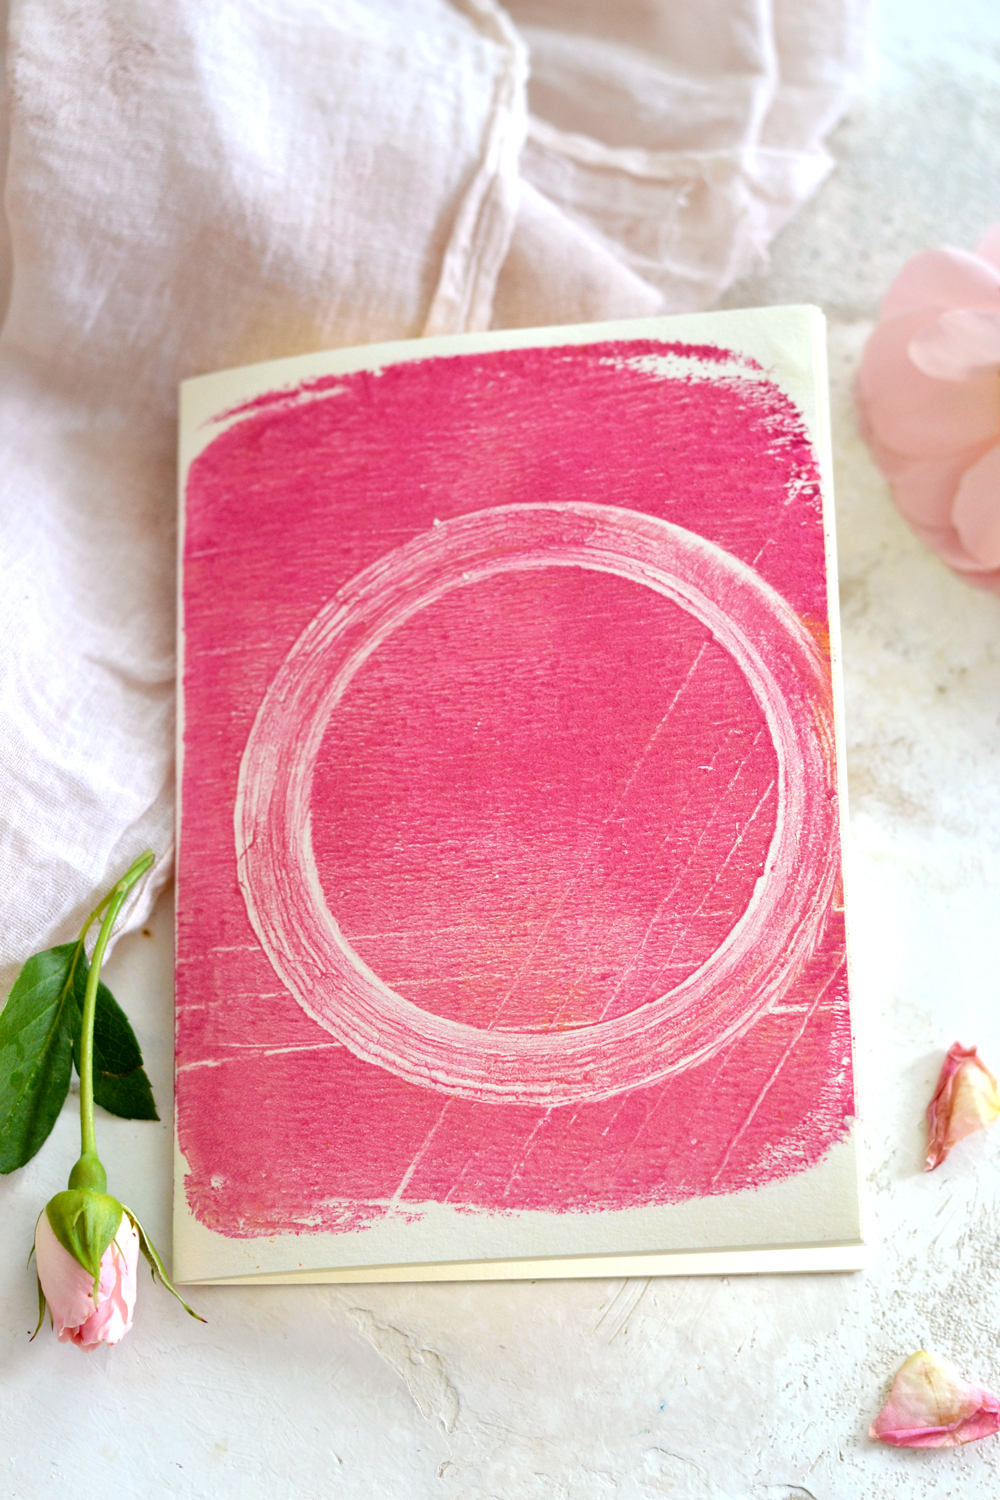
I’m a huge fan of everything magenta, so I just HAD to have a simple mono colored magenta background! I used the other clean side of my packing tape to make the round ring like impression (without any paint) and then I tapped some folded paper on top, to create some simple lines on the plate. You can do this with any folded paper, old credit cards, rulers, etc.
Can I just say that this simple one is among my favorites? I simply adore it!
I’m saving the best for last and I’m calling the next one ‘Summer at the beach while relaxing with a Tequila Sunrise in your hand. Who’s with me?
1-2. I used white and yellow paint to create the ombre effect first, then I added a tiny amount of magenta and blended it in.
3. I created all the additional textures, just like before.
4. Then I placed the packing tape right in the middle, I rotated and lifted, just like before.
Simply stunning!
I had so much fun creating these gel plate backgrounds, with all the layers and textures added directly on the plate and I believe this whole packing tape dimensional circles idea really took them … to a new dimension. I didn’t wash my plate or my brayer between pulling any of these prints, I just used a scrap piece of paper to roll some of the paint off my brayer from time to time.
Gel plate printing is quite addictive, I could just spend hours and hours trying new ideas.
Fun fact:
Have you noticed how clean and tidy is everything when you start and how once you start, things get really messy in no time? But hey, messy is fun, right? Especially when monoprinting!
The circle is considered to be the perfect geometric shape since ancient times and I’m really curious what my Textured Gel Plate Backgrounds inspire you – beside the dreamy vacation, watching a sunset on an island with a cocktail in your hand picture, that I mentioned earlier.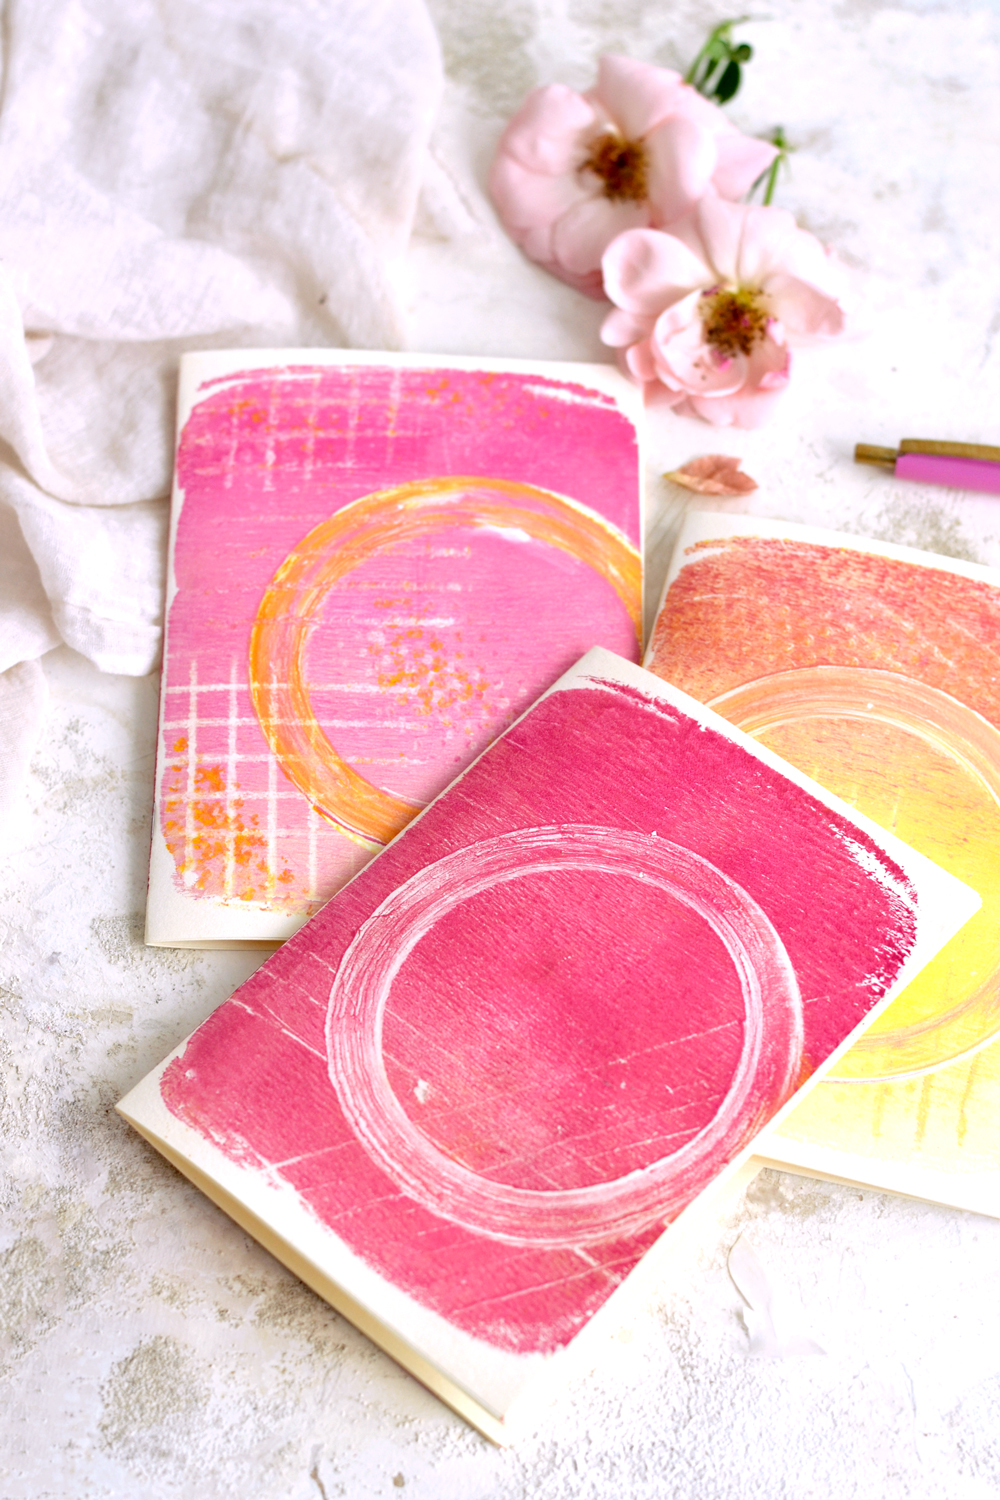
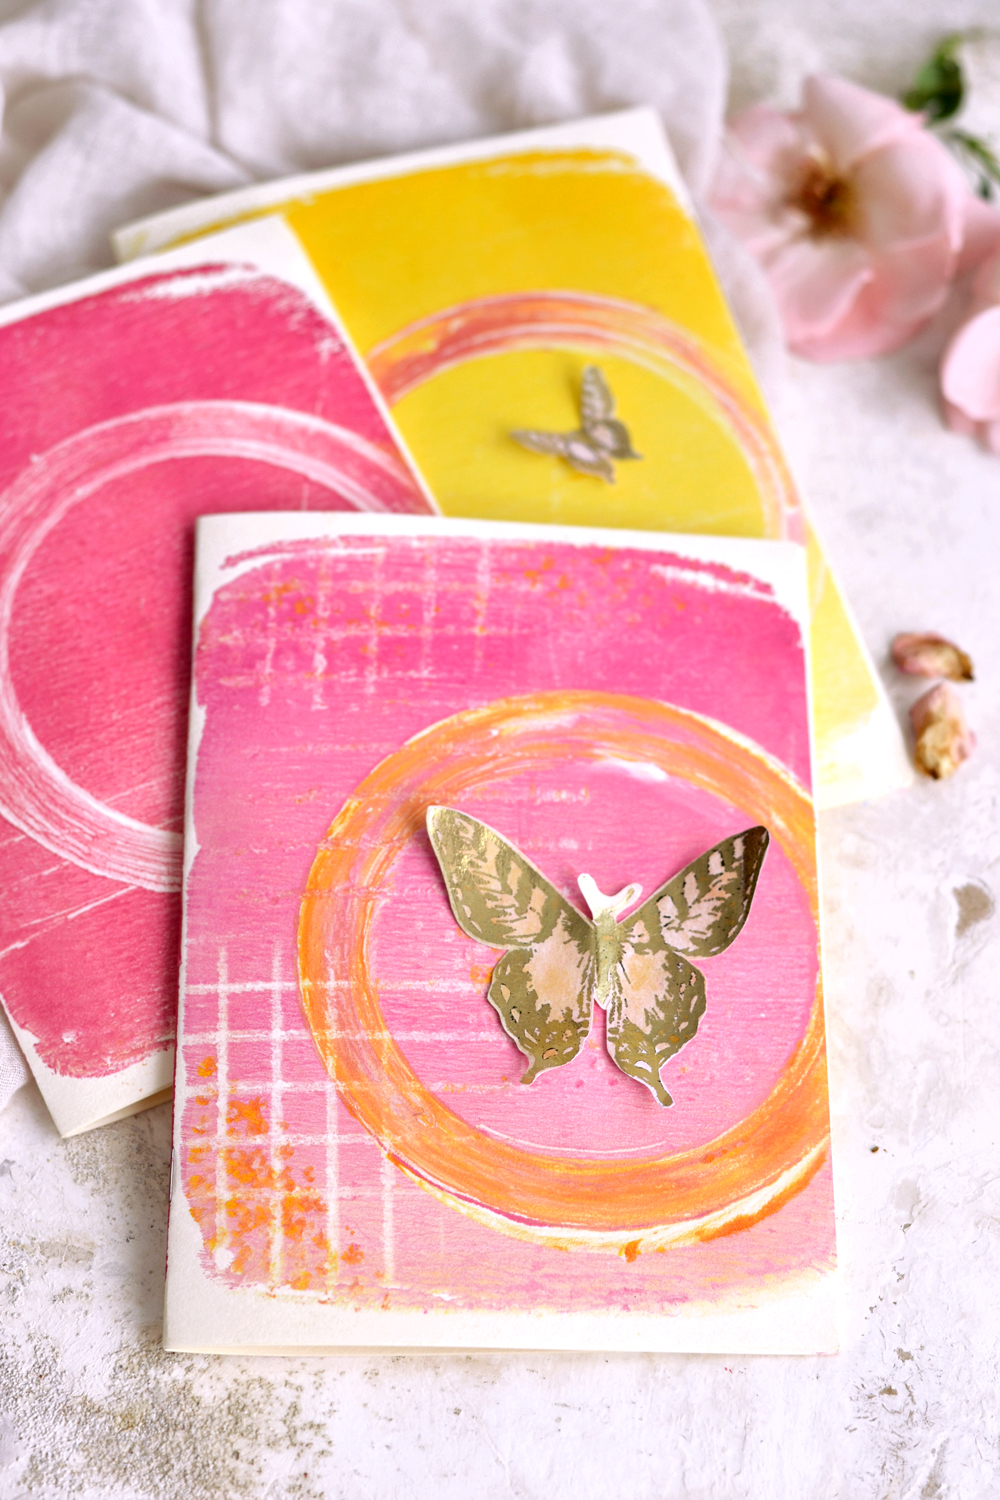
You can use the chic gold foil stickers that I shared with you not so long ago to quickly embellish the backgrounds (or the notebooks). I’m thinking metallic acrylic paint could also work so great to create the packing tape circles! Off for now to try that one too!
I hope you enjoyed this Easy Gel Printing Techniques, using packing tape and other household items to create texture! Try this project and make tons of Textured Gel Plate Backgrounds … until you run out of monoprinting paper! Just kidding, but I’m sure you won’t run out of ideas on where and how to use them! They are easy to love and so easy to integrate into your creative adventures!
You may also like my Decorative Book Bundles HERE.
Happy crafting,
Diana / Dreams Factory




Linda Cardillo says
Diana, I love your ingenuity! I don’t know where you are, but on Amazon an 8×10 Gelli Plate is about $20 (US currency). I would be happy to send you one although something tells me you’re determined to perfect your DIY recipe! The offer is open for whenever. During this time of a global pandemic that feels like it’s never going to end, we have to help each other out. I’ve been distressed at times myself at the price of the creative process. Be well. Stay safe. Keep dreaming.
Karen Watson says
Oh wow Linda, what a sweet offer! I will pass your message along to Diana, so that she can pop over and respond to you. So kind!
Marilyn Kennedy says
How exciting, I have seen this dome for a steam punk journal.. The cost of these pads are around 25 dollars, I am trying to justify this as the supplies are around 10.. I do remember in our marriage classes long legal sized sheets run off with a blue purplish colour, hand written these were done in this manner!
graphicsfairy says
Oh thanks for sharing Marilyn 🙂 Have a great weekend!
Jen Mullen says
I really like the effect of your prints.
Karen Watson says
We’re so glad you enjoyed Diana’s Gel Print Tutorial Jen! We hope you give this technique a try. 😀