DIY Eiffel Tower Tags
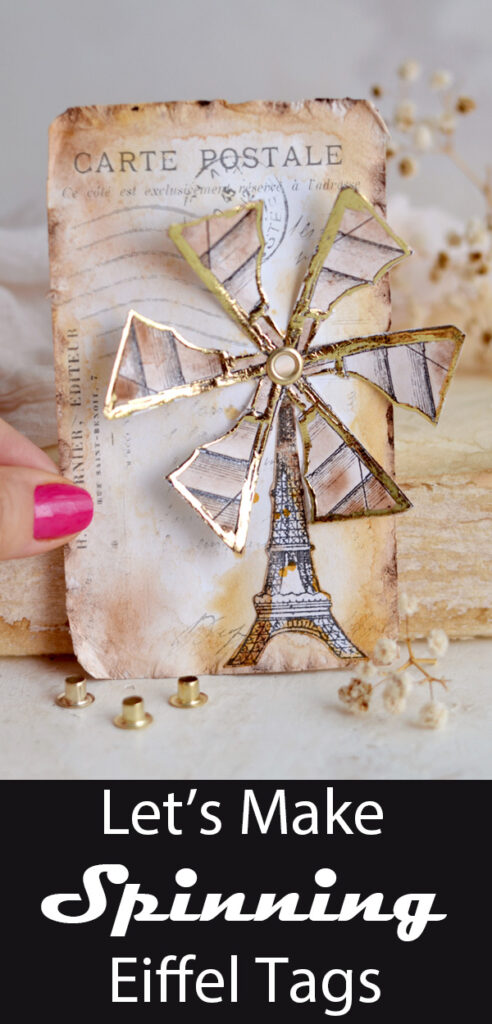
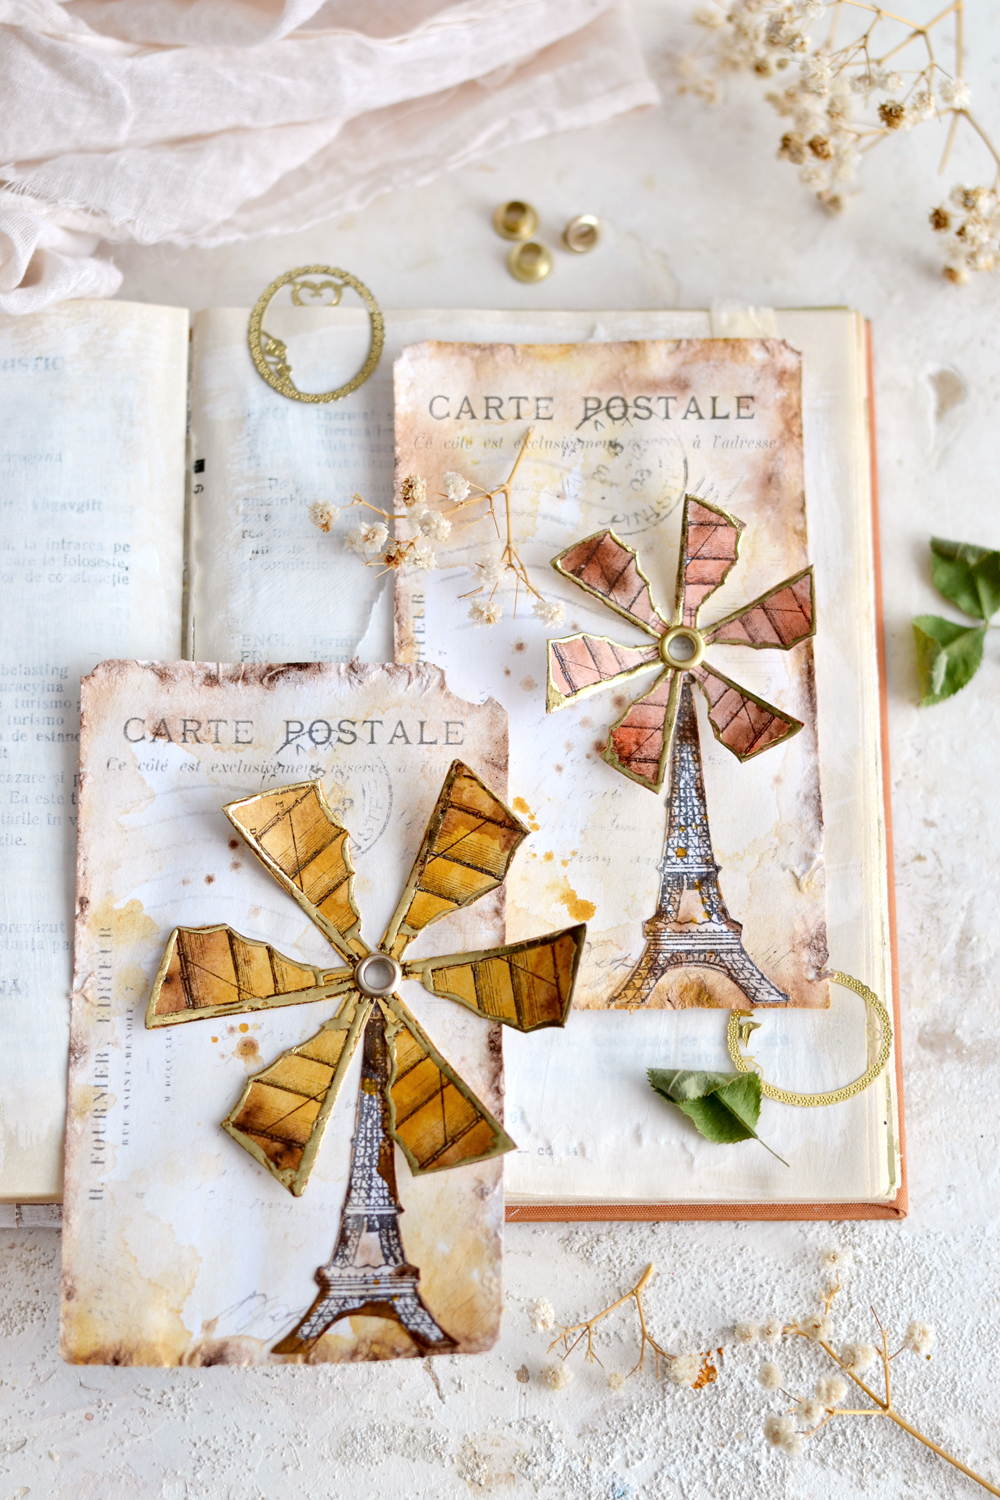
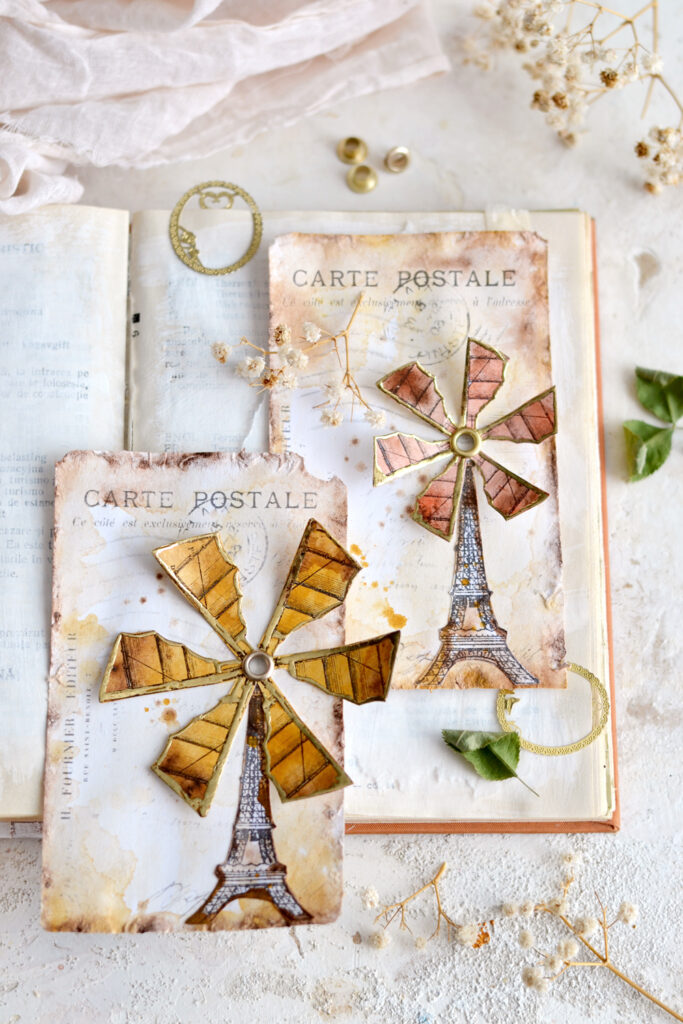
Hello, Graphics Fairy friends, Diana from Dreams Factory here, and, today we are making these gorgeously DIY Eiffel Tower Tags, a fun and easy project! The tags have a touch of whimsy, a sprinkle of gold, a splash of watercolor and a little bit of a vintage French flair. They are simply perfect on their own but of course they can be easily integrated into other decorative crafting sessions, feel free to go wild and find millions of uses for these beauties!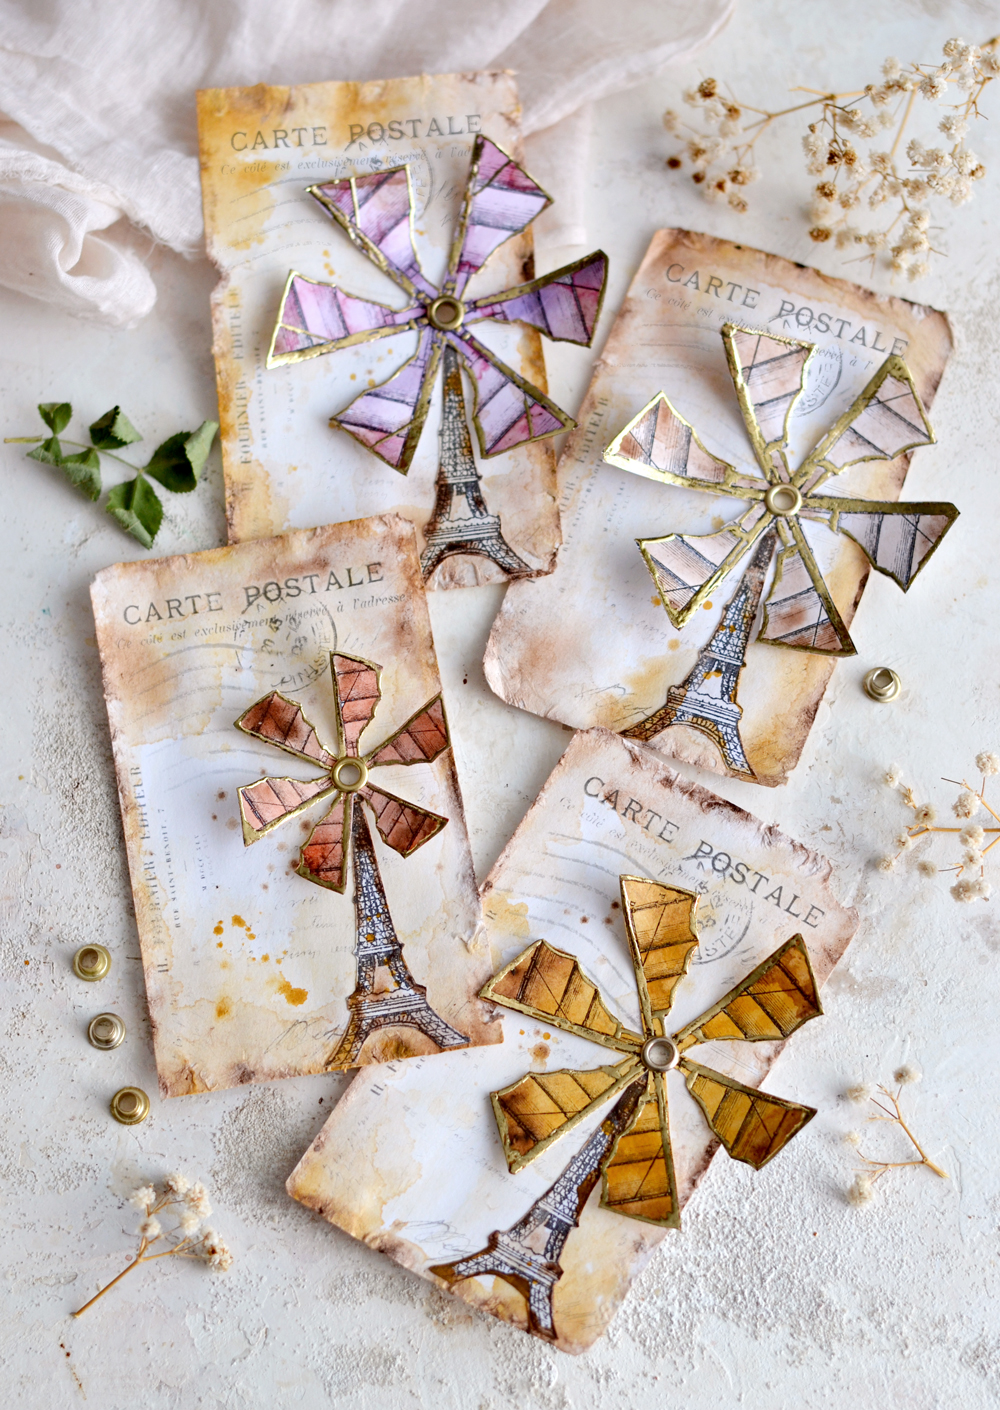
As you might have already noticed by now, I have a thing for adding some sort of a 3D element to my paper creations. I love the idea of using a 3D element to bring dimension and depth to my work and I thought why not add some vintage propellers to THE Eiffel Tower? Quirky, I know! It’s an unexpected element that totally takes you by surprise. But that’s a good surprise, who would have ever thought these two would actually work so good together?
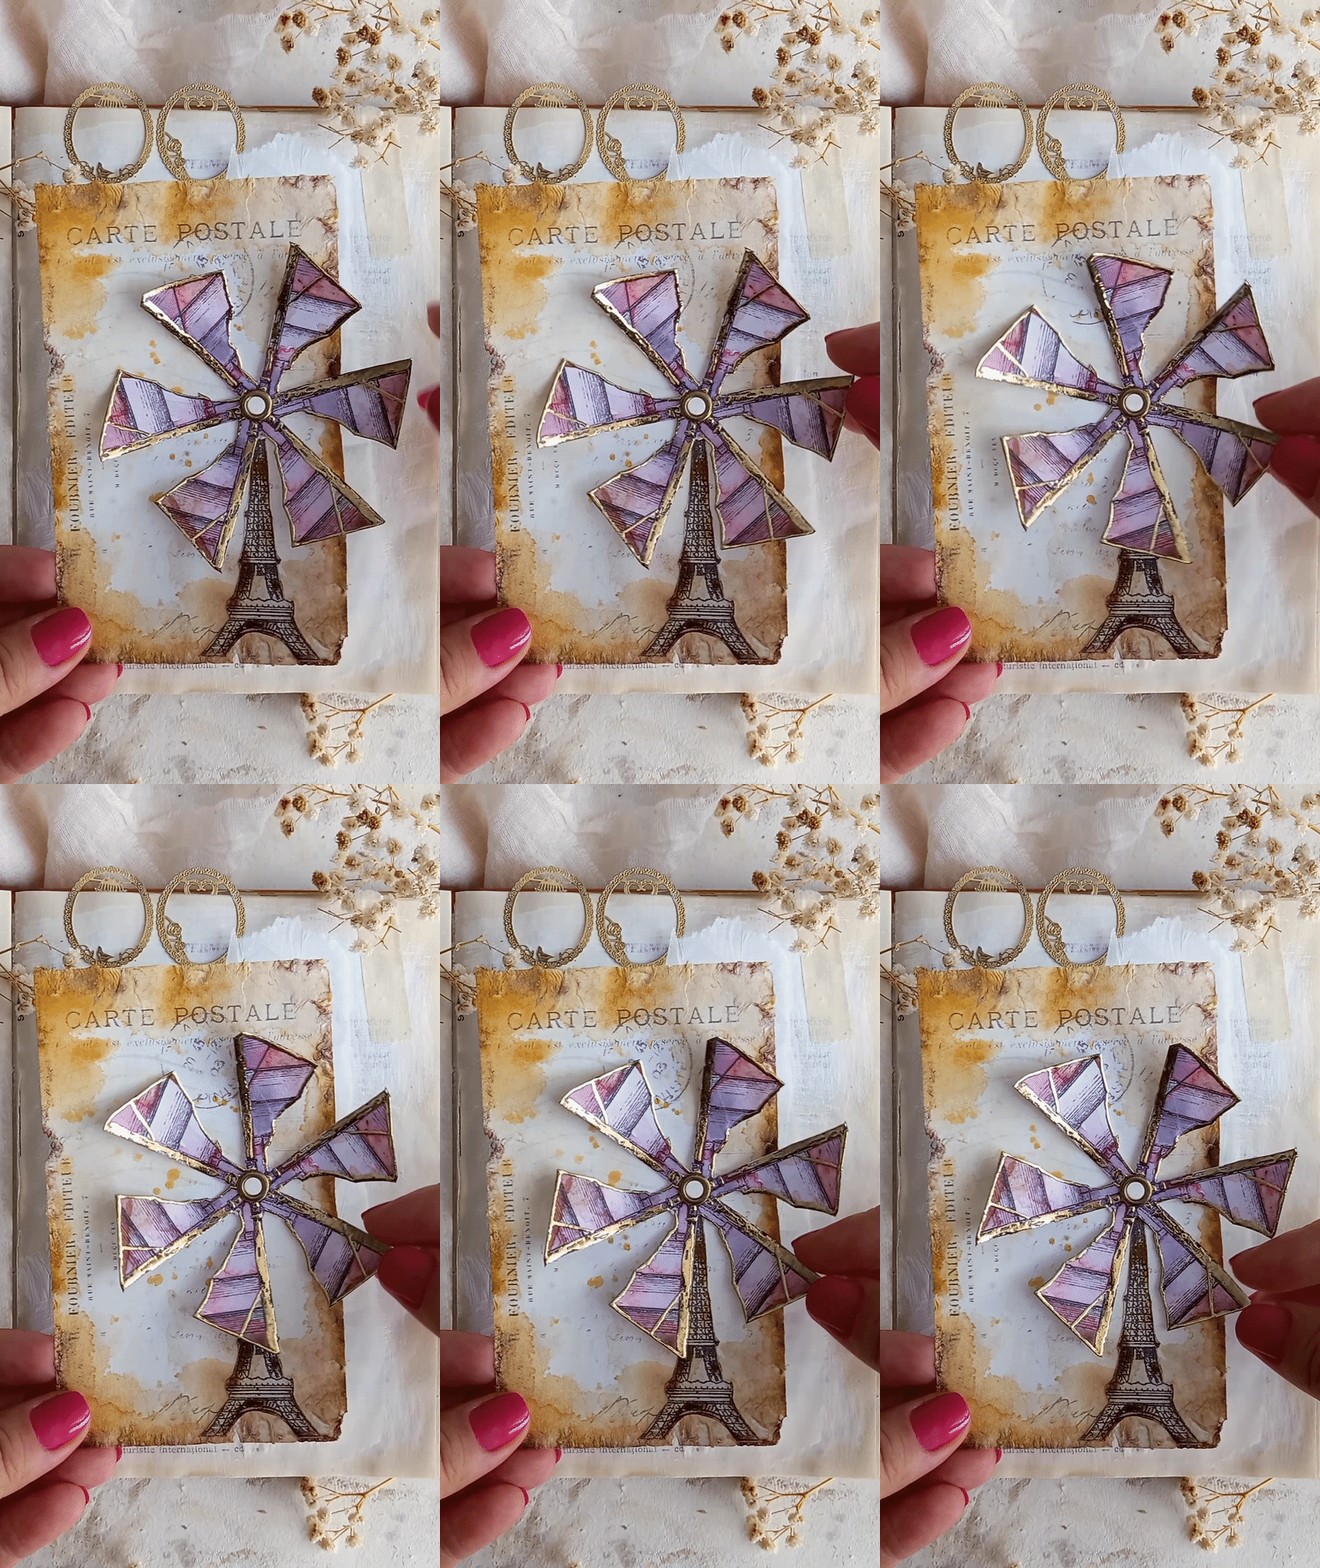
To take things even further, I thought it would be fun to actually make the propellers spin, so I used some golden eyelets I happen to have around. You can’t imagine my excitement when I realized these actually work! Or maybe you can, if you are quirky like me! I was over the moon in love with both their aesthetics and their magical propellent powers!
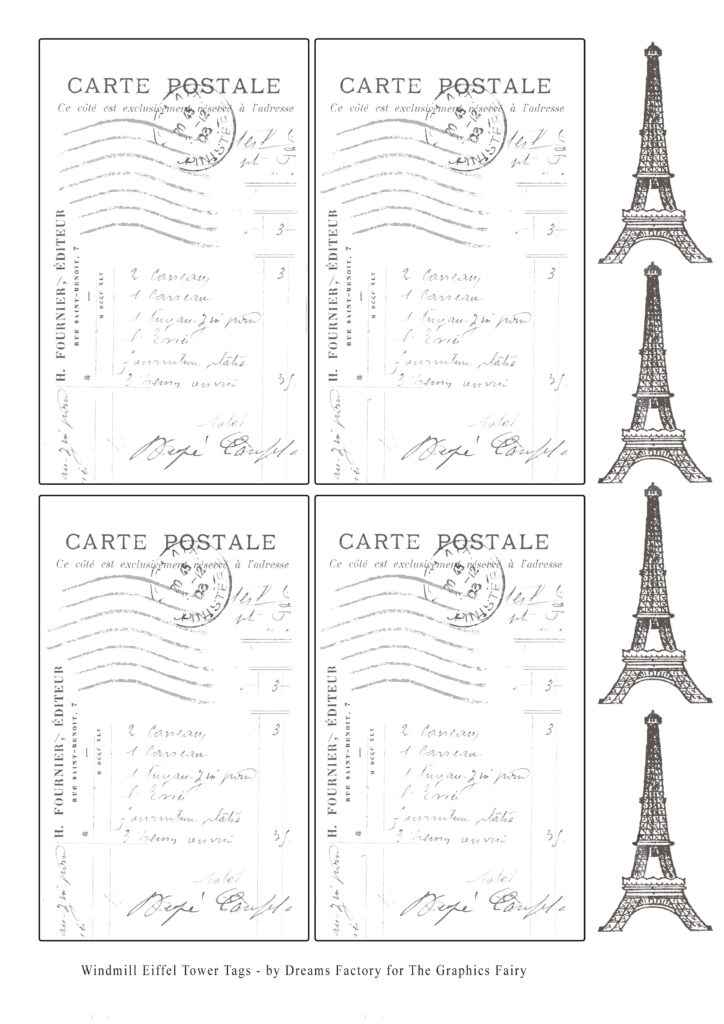
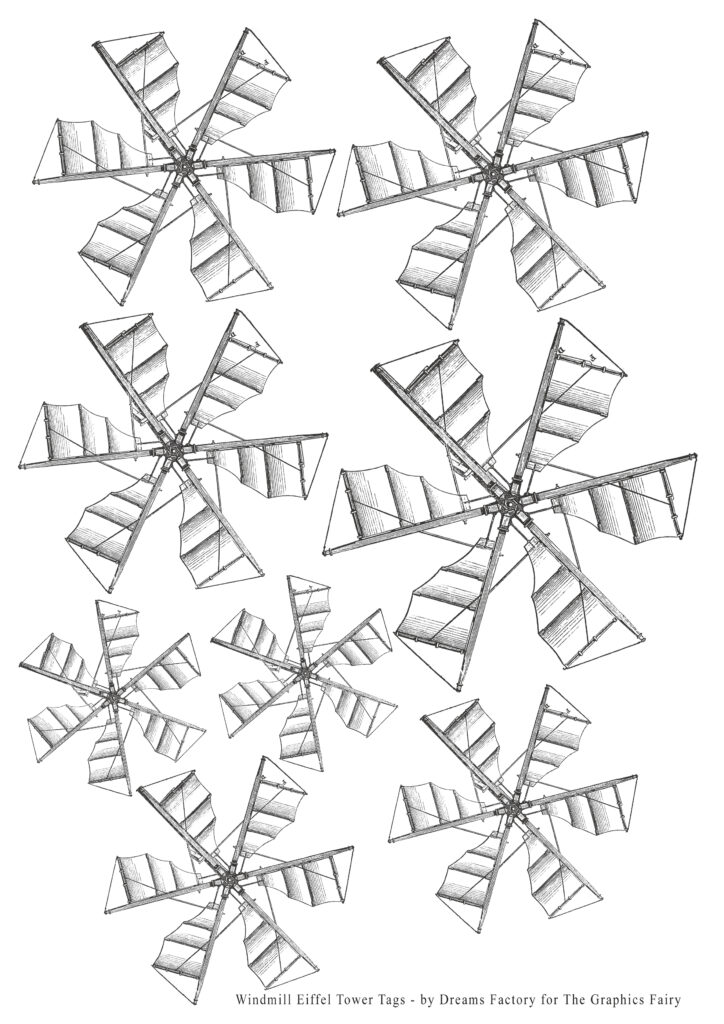
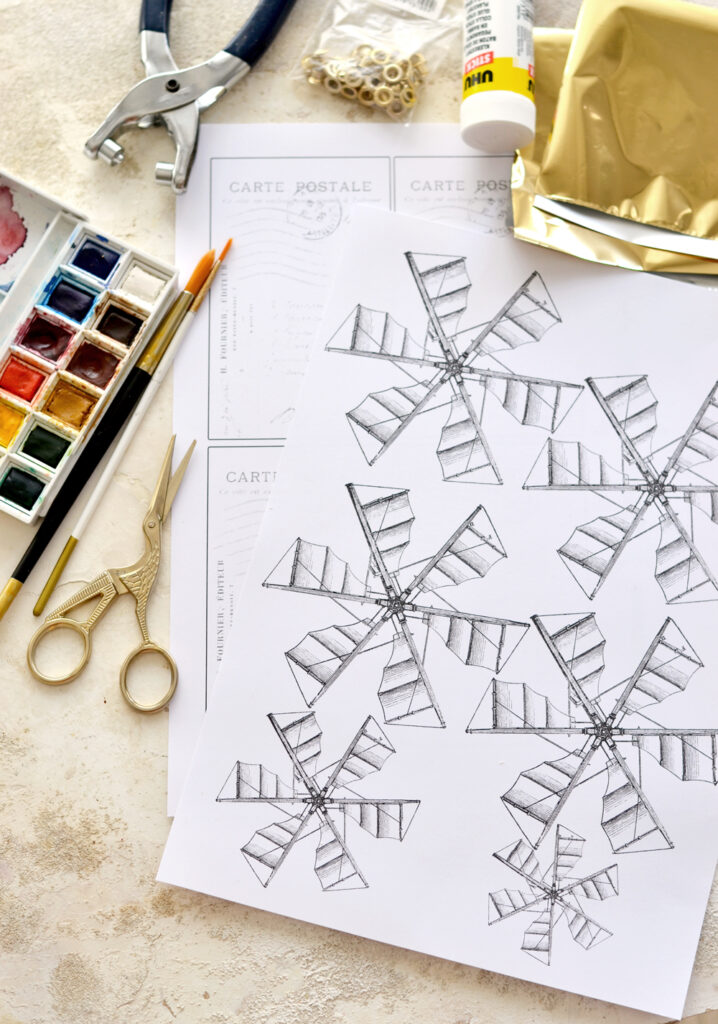
The base for our tags is this super chic French ephemera collage. I added the Eiffel towers as separate elements, just in case you want to have fun and glue them anywhere else on your tags. Or anywhere else on your other projects, that would be fine, too! You will see that the windmill propellers printable that I used is a little bit different than the one I’m sharing with you today – I initially made the propellers too big and I had to cut them along the way (you will see in the tutorial below what I’m talking about). So I made a few changes to make things easier for you.
Free Printable for DIY Eiffel Tower Tags
—-> Click HERE to Download the Full Size Printable PDF <—-
Supplies for DIY Eiffel Tower Tags:
- Eiffel Tower windmill printables
- laserjet printer
- watercolors (I used the Winsor & Newton Cotman pocket box watercolors)
- regular round brush
- small brush
- small plates (to use as watercolor palette)
- paper glue or Mod Podge
- scissors
- round paper puncher (I have something similar, for leather, but works for paper too)
- eyelets and an eyelet tool (or a Crop-a-Dile)
- gold foil
- gold foil glue
- fineline glue applicator
- pocket binders (or a silicon mat, a plastic sheets or a non absorbent material) to protect your working surface
Watercoloring and distressing:
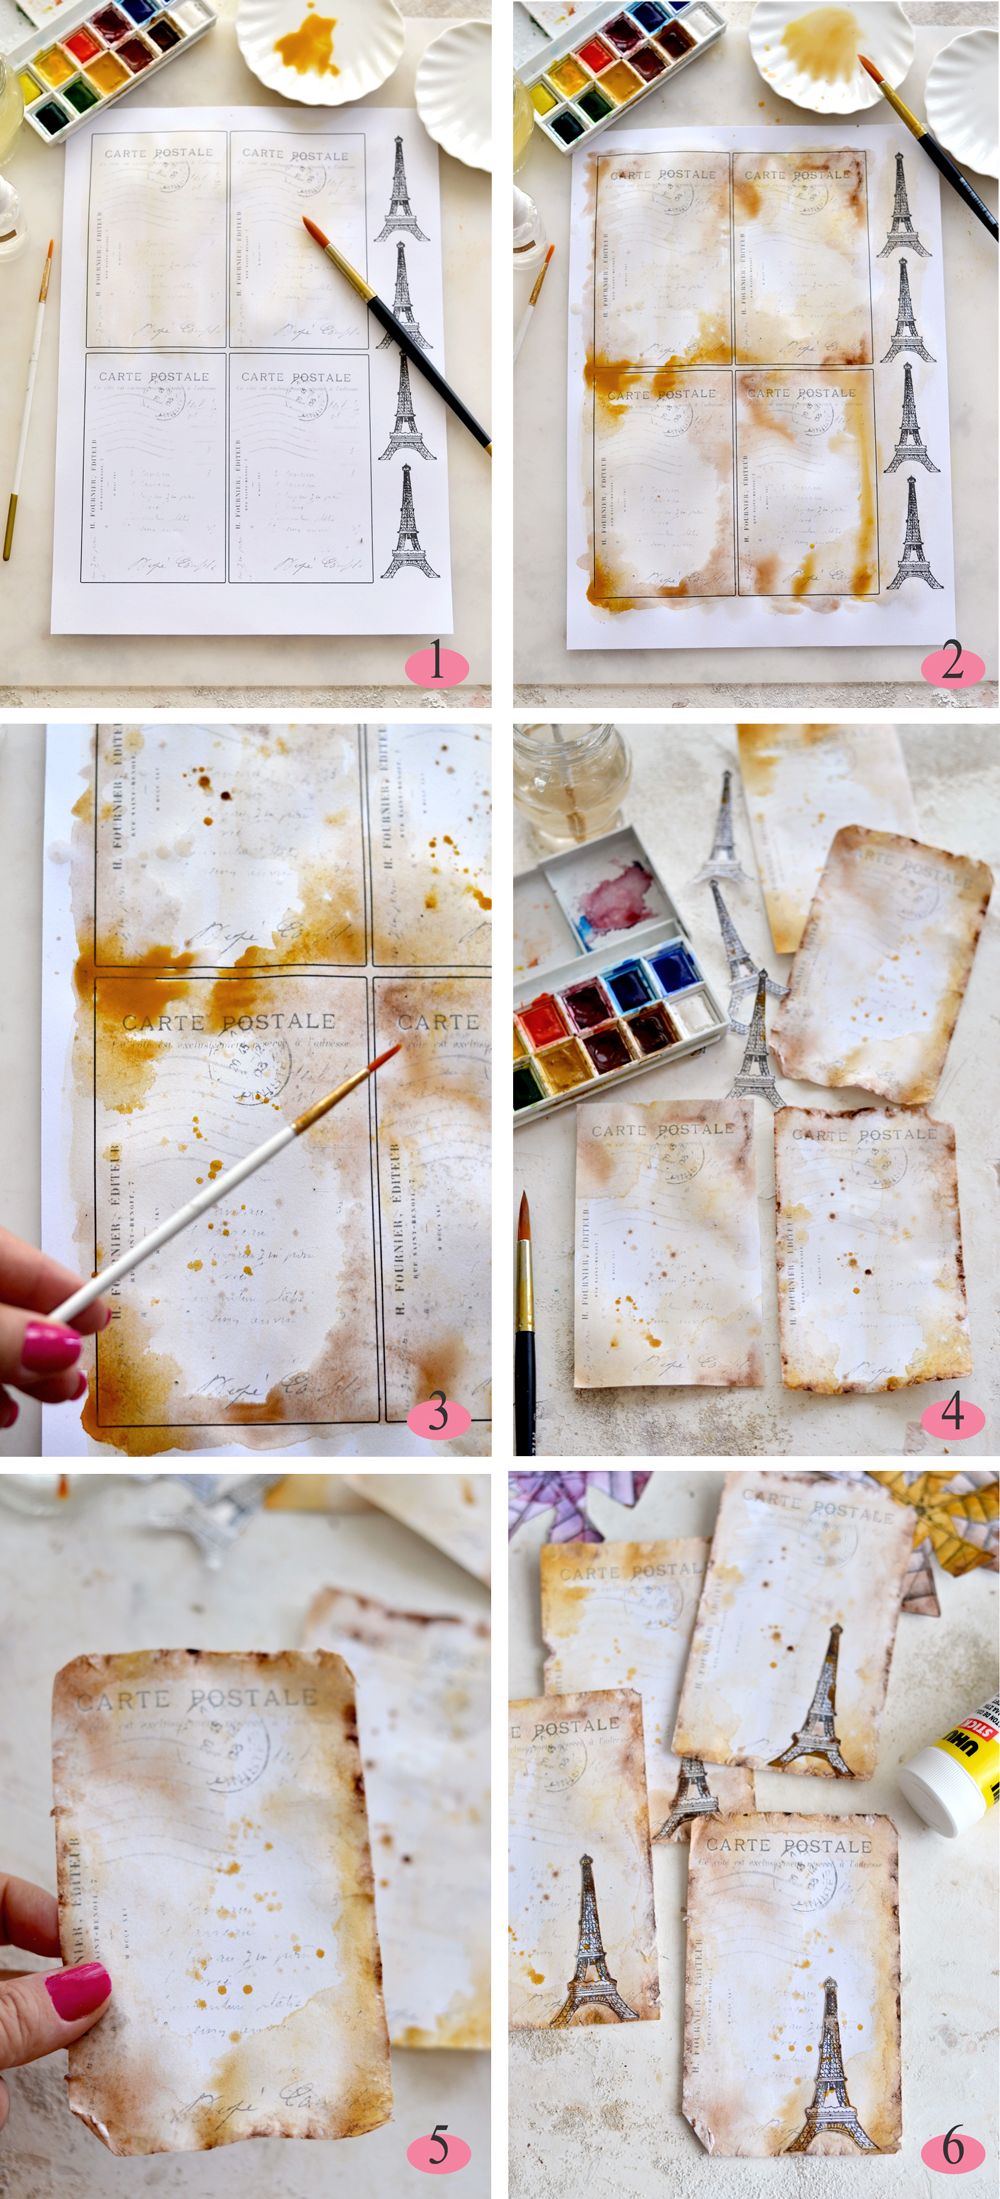
To distress the tags, I used watercolors (you can also use other mediums like distress inks, ink sprays, highly diluted acrylic paint, coffee, avocado dye, etc. ) and the same technique I used to make Antique French Ephemera Paper (<-click to check the tutorial). My idea was to use neutral colors for the tags (Yellow Ochre and Burnt Umber were my choices) and use a pop of color for the propellers. Of course, you can always have fun in your own way and decorate the tags as you want.
1. I started by waking up my watercolors with a little bit of water (using a spray bottle) and using my round large brush, I abundantly brushed highly diluted paint on the paper – I used Yellow Ochre for this step. I like to do that first, to change the white of the paper, but also moisten it so it would better take on the following colors. Don’t forget to brush the Eiffel towers too!
2. Then I dipped my brush in a more pigmented Yellow Ochre and went in again with the paint, starting from the edges of each tag, then adding more water towards the middle. The water does half the job here, so make sure you add plenty, so the watercolors flow freely and create interesting distressing effects. Then I used small amounts of Burnt Umber watercolor – my favorite when it comes to adding that beautiful aged look that we love. I brushed the Burnt Umber watercolor especially on the edges and on the corners and let the paint slightly go towards the middle, just like before.
3. Use the same two colors (to keep the neutral palette) and a small brush to create splattering effects. Dip the small brush into the paint and keep it over your paper with one hand. Then use your index finger from your other hand to tap the small brush, moving it above the tags (and the Eiffel Towers if you want). You can also use other colors at this splashing stage, if you want. Let the paper dry for now, so that the paint has the chance to soak in and create the beautiful watercolory ‘rust’ that we want.
4. Cut the tags and the Eiffel towers using small scissors. If you want to give the paper more oomph and really distress the heck out of it, use more water and a brush and damp the edges again. Then go all over the edges with your finger nails and gradually scratch to break some of the fiber in the paper. You will be able to create interesting ageing effects this way, if you want to know more about this technique, just visit the Antique French Ephemera Paper and follow the steps mentioned there. Tear the paper here and there, rip off or curl the corners, this will give paper a more authentic aged look.
5. Brush some more water and pigment on the edges, where you distressed the paper and be amazed by how you managed to completely distress-beautify it!
6. Let everything dry completely, then glue the Eiffel Towers on the tags. But first, don’t forget to check how much room your eyelets tool gives you – mine is quite small so I had to glue the Eiffel towers on the right, because the tool didn’t reach the middle. After drying, you can place the tags between the pages of a book if you want to flatten them just a little.
Watercoloring, distressing and gold foiling the propellers:
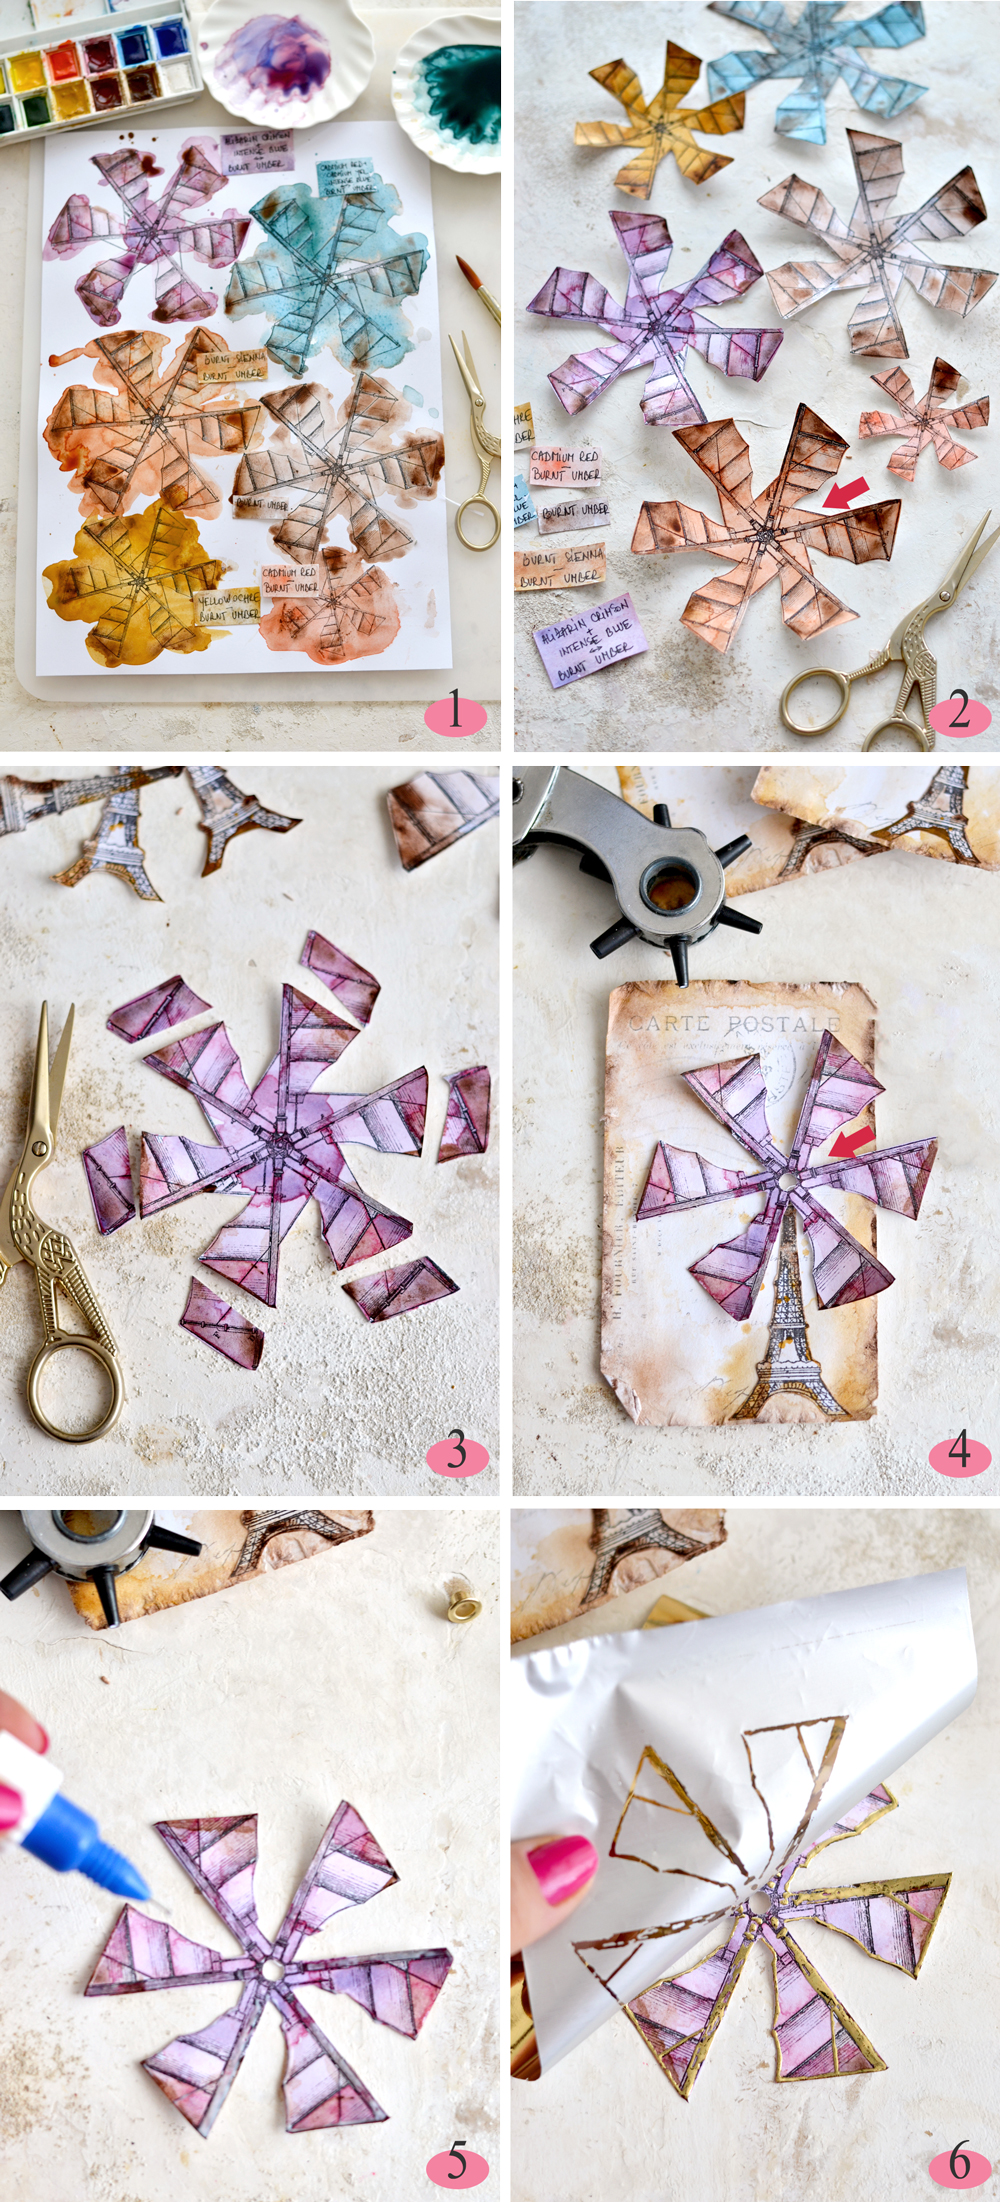
1. To color the windmill propellers, I used colored watercolors. I even made my own mixes on my small palette plates, just use the colors that you love the most. No matter the colors I used on the blades, I went with some Burnt Umber again, on the edges, just to give them a more vintage, rusted look. I even made small swatches with the colors I used – this can also be included in your creations as small fun embellishments.
2. I let the paper dry, then used small scissors to cut the propellers. I initially left uncut the larger space around the middle (see the red arrow), but then I cut it off. After that I wish I hadn’t. The middle portion of the paper was a little bit small for my eyelets, so it would be best to leave it for now and cut it later!
3. I mentioned in the beginning that some of my initial propellers were a little bit too large, so I had to improvise and cut off some of the edges. It was not such a big issue after all, just know that you have this option if you want to get smaller blades.
4. Measure again the size of your eyelets and cut off that excess portion in the middle if everything fits (check the red arrow again). Then place a propeller on a tag and use a hole puncher and pre cut a hole in the middle, that would have the same size of your eyelet.
5. Use a fine glue applicator and apply the gold foil glue all around the edges of the propellers.
6. Apply the gold foil and use your fingers (not your nails) to burnish it, then lift it off and admire the lovely gilded edges!
P.S.
If you are not familiar with gold foil (which is different than gold leaf), I would suggest checking these projects first: DIY Gold French Rose Tags and Easy Gold Foil Decor.
You will find more valuable information about what to take into consideration while working with this type of foil.
7. Finally, use an eyelet tool to secure the eyelets in place, making sure you don’t apply too much pressure – if you do, the propellers won’t spin!
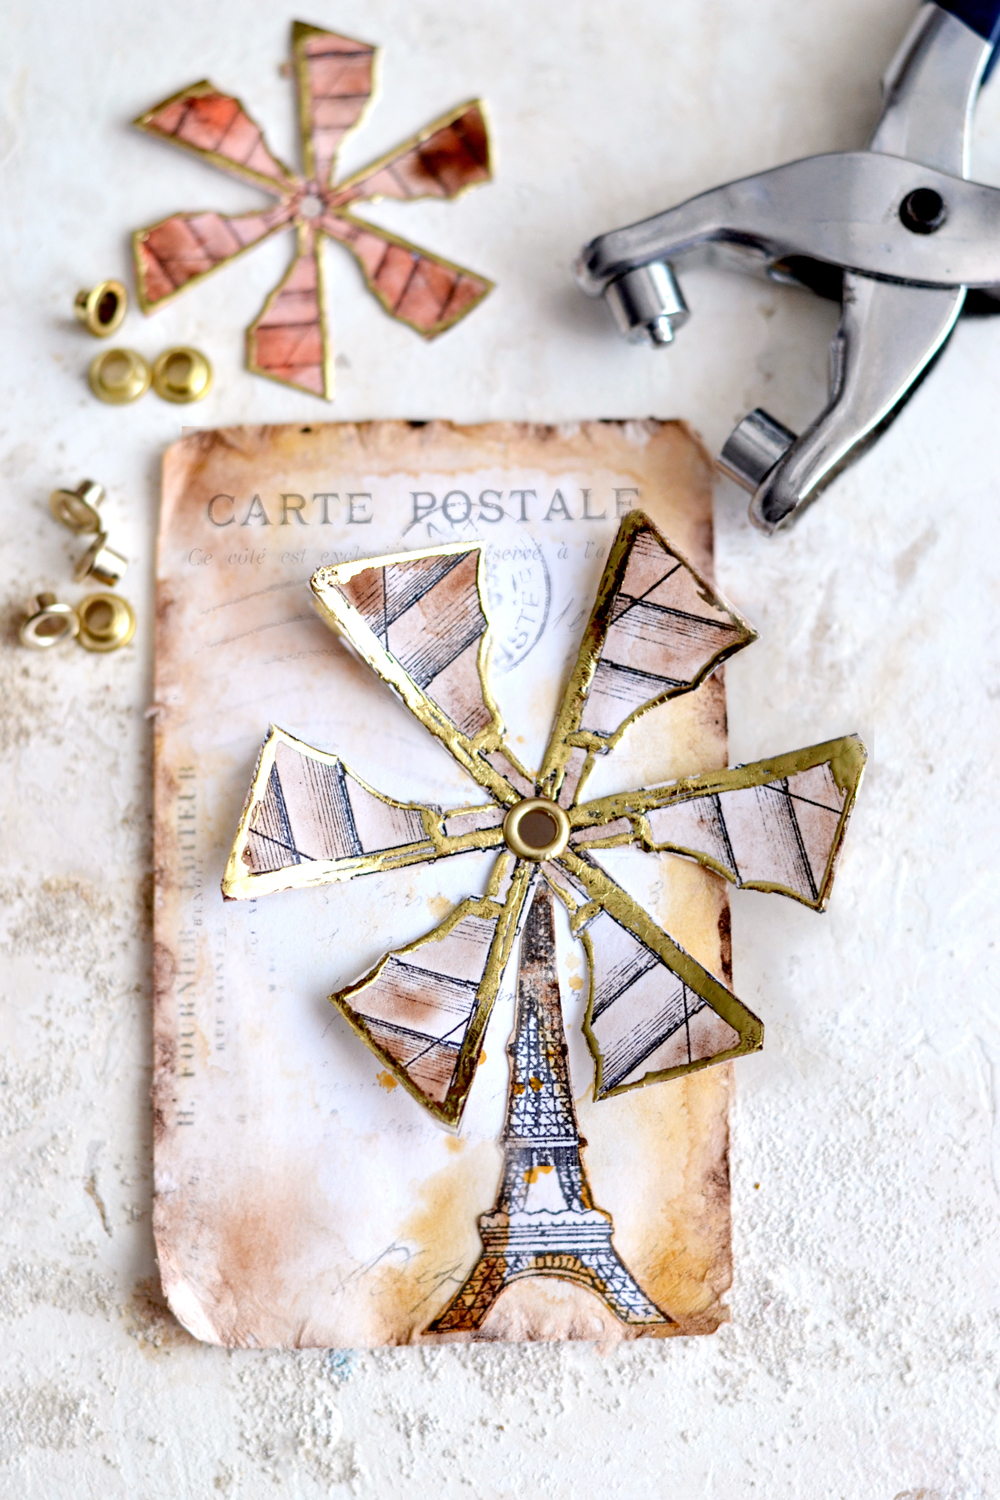
How gorgeously antiquey, glowy and windmilly is thaaaaat?!
I’m loving every single element of these AH-MAZING Spinning Eiffel Tower Windmill Tags, they would be the perfect embellishment for quirky gifts, quirky anniversaries or any quirky special occasions for the very quirky people in your life! I would use them everywhere, to be honest and I’m hoping you will love them too! The propellers idea can be adapted and directly integrated into your art or junk journal pages (even covers, why not?), there are so many ways to have fun with these beauties.
Other DIY projects with 3D elements that you can try:
Vintage Butterfly Bookmarks | Gold Foil Honeycomb Bee Tags
Mixed Media Bee Tags | Vintage Poppy Tags
As you can see in the image below, my eyelets were a little bit bigger for my smaller propellers and two of the blades were cut off while punching the holes. I was able to stuck them under, right before securing the eyelets, but this one’s spinning days are over! I hate when that happens, but hey, that’s life in the crafting room, you just have to adapt and improvise! To prevent this from happening to you, you can leave a larger portion of paper around the middle or just buy smaller eyelets! As a tip, if you don’t have that special eyelet tool around, you can just buy the eyelets (which are quite inexpensive), pre-punch the holes and use a small hammer to secure them in place. You will have to carefully flip the paper over and use the hammer on the back of the eyelets, if doing this. If you have any other quirky ideas on how to make the propellers spin, just leave a comment below, would sure love to hear it!
P.S. Too bad these beauties don’t spin on their own, we could sure use some cooling fans on these hot summer days!
Happy crafting,
Diana / Dreams Factory


Leslie Woelk says
You could use brads to hold them in place and spin.
graphicsfairy says
Thanks Leslie, that is a great idea! Have a wonderful weekend 🙂
Diane says
Great project! Very creative. Thank you.
graphicsfairy says
Thanks so much Diane, so glad you liked it!