DIY Faux Metal Number Tags
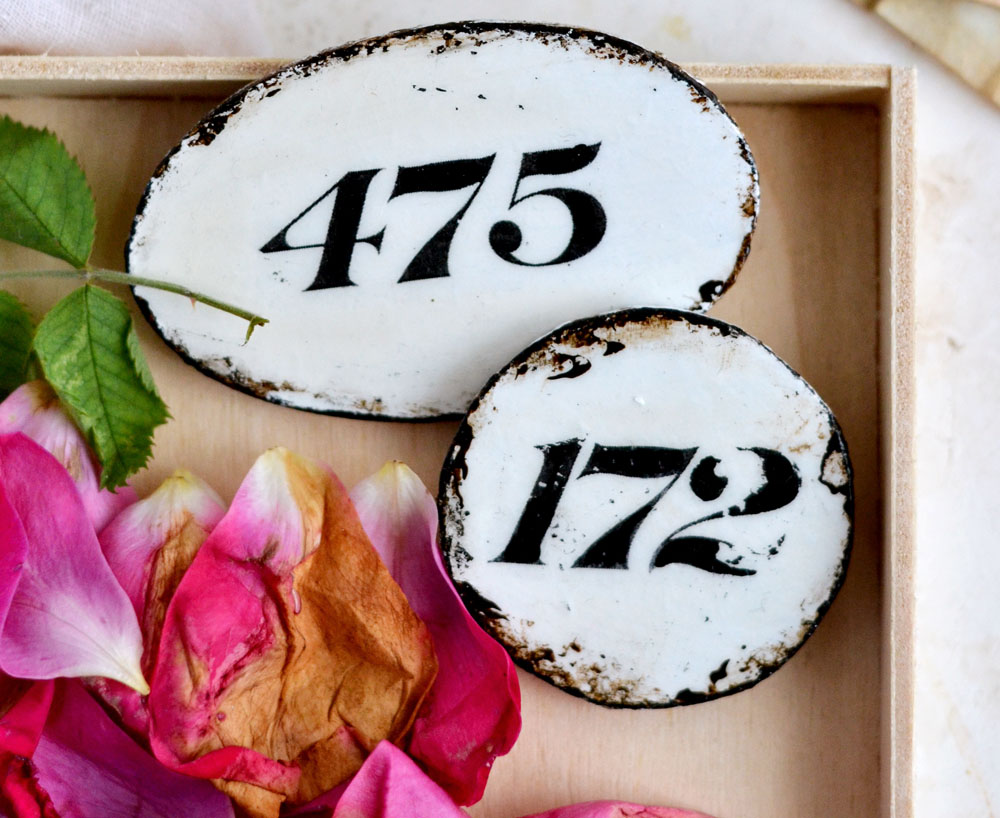
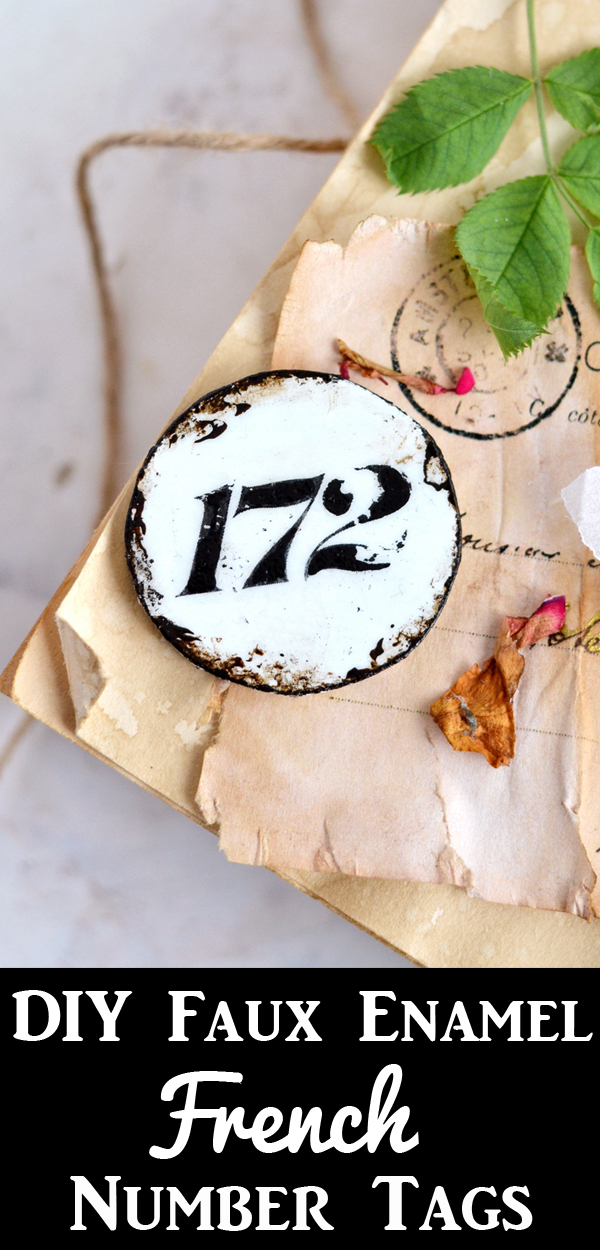
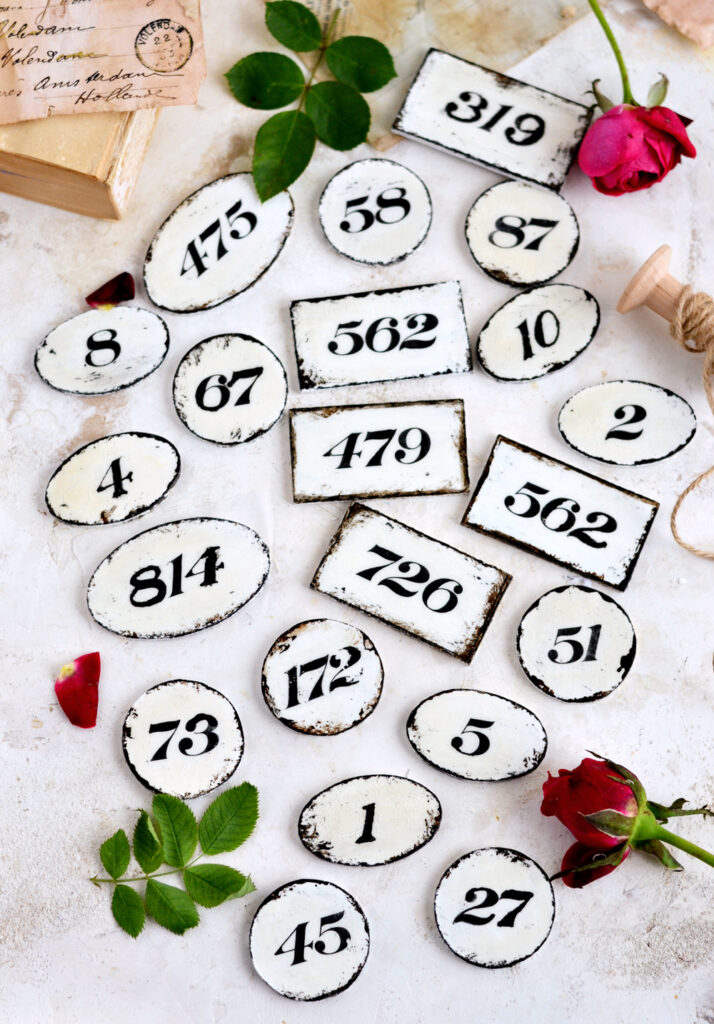
Hello, Graphics Fairy friends! Diana from Dreams Factory here and today I’m going to show you how to make these super chic DIY Faux Metal Number Tags! I would say these beauties are a must in any home, they can be ‘that special something’ that could add a little bit of chicness to your decor. Not to mention they are simply perfect for organizing … all in a stylish way!
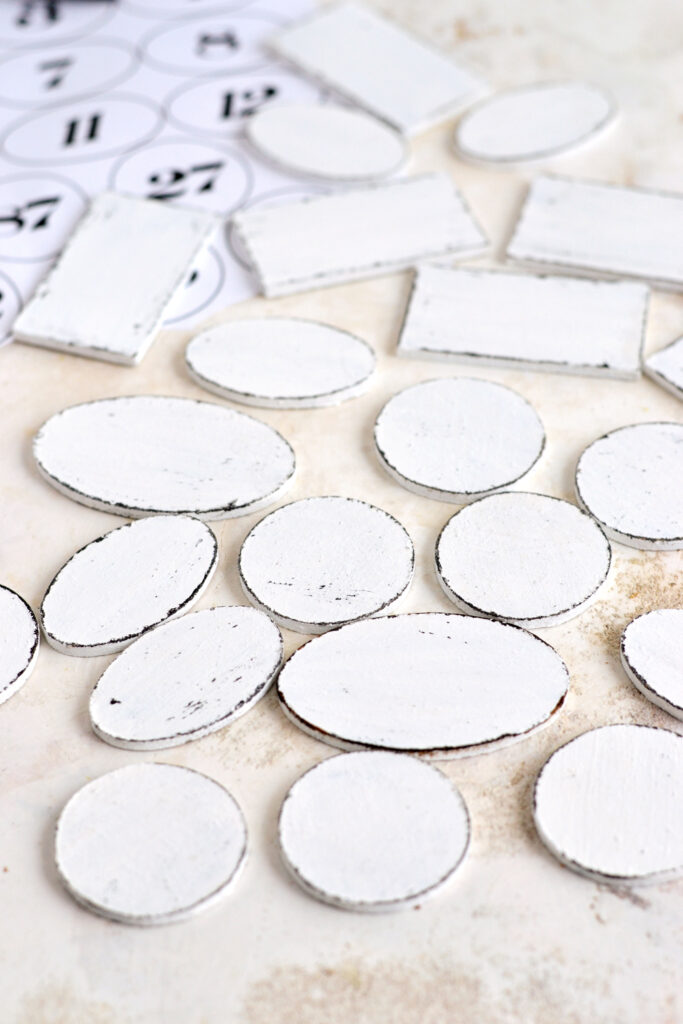
 Confession time! I actually started a draft version of this project -so to speak- a couple of years ago, but I completely forgot about it. I initially designed the shapes for the tags and I kindly asked Mr Dreamy to cut them for me from MDF scraps (he used a jigsaw to cut them). I painted and distressed them using my two contrasting colors and candle wax method, then I put them in a small box and made a mental note that I would search for some beautiful French looking numbers to go with them…
But life happened and I completely forgot about them, the small box somehow got ‘lost’ in the universe of my atelier! I’m sure that has happened to you on quite a few occasions!
But a few days ago, while I was perusing the virtual pages of The Graphics Fairy, this vintage typography from the early 1900 REALLY got my attention! It included some amazing calligraphy letters (new projects are swirling in my mind) and these numbers, that were simply PERFECT for the tags I suddenly remembered I had! And then this beautiful free printable and this project was born!
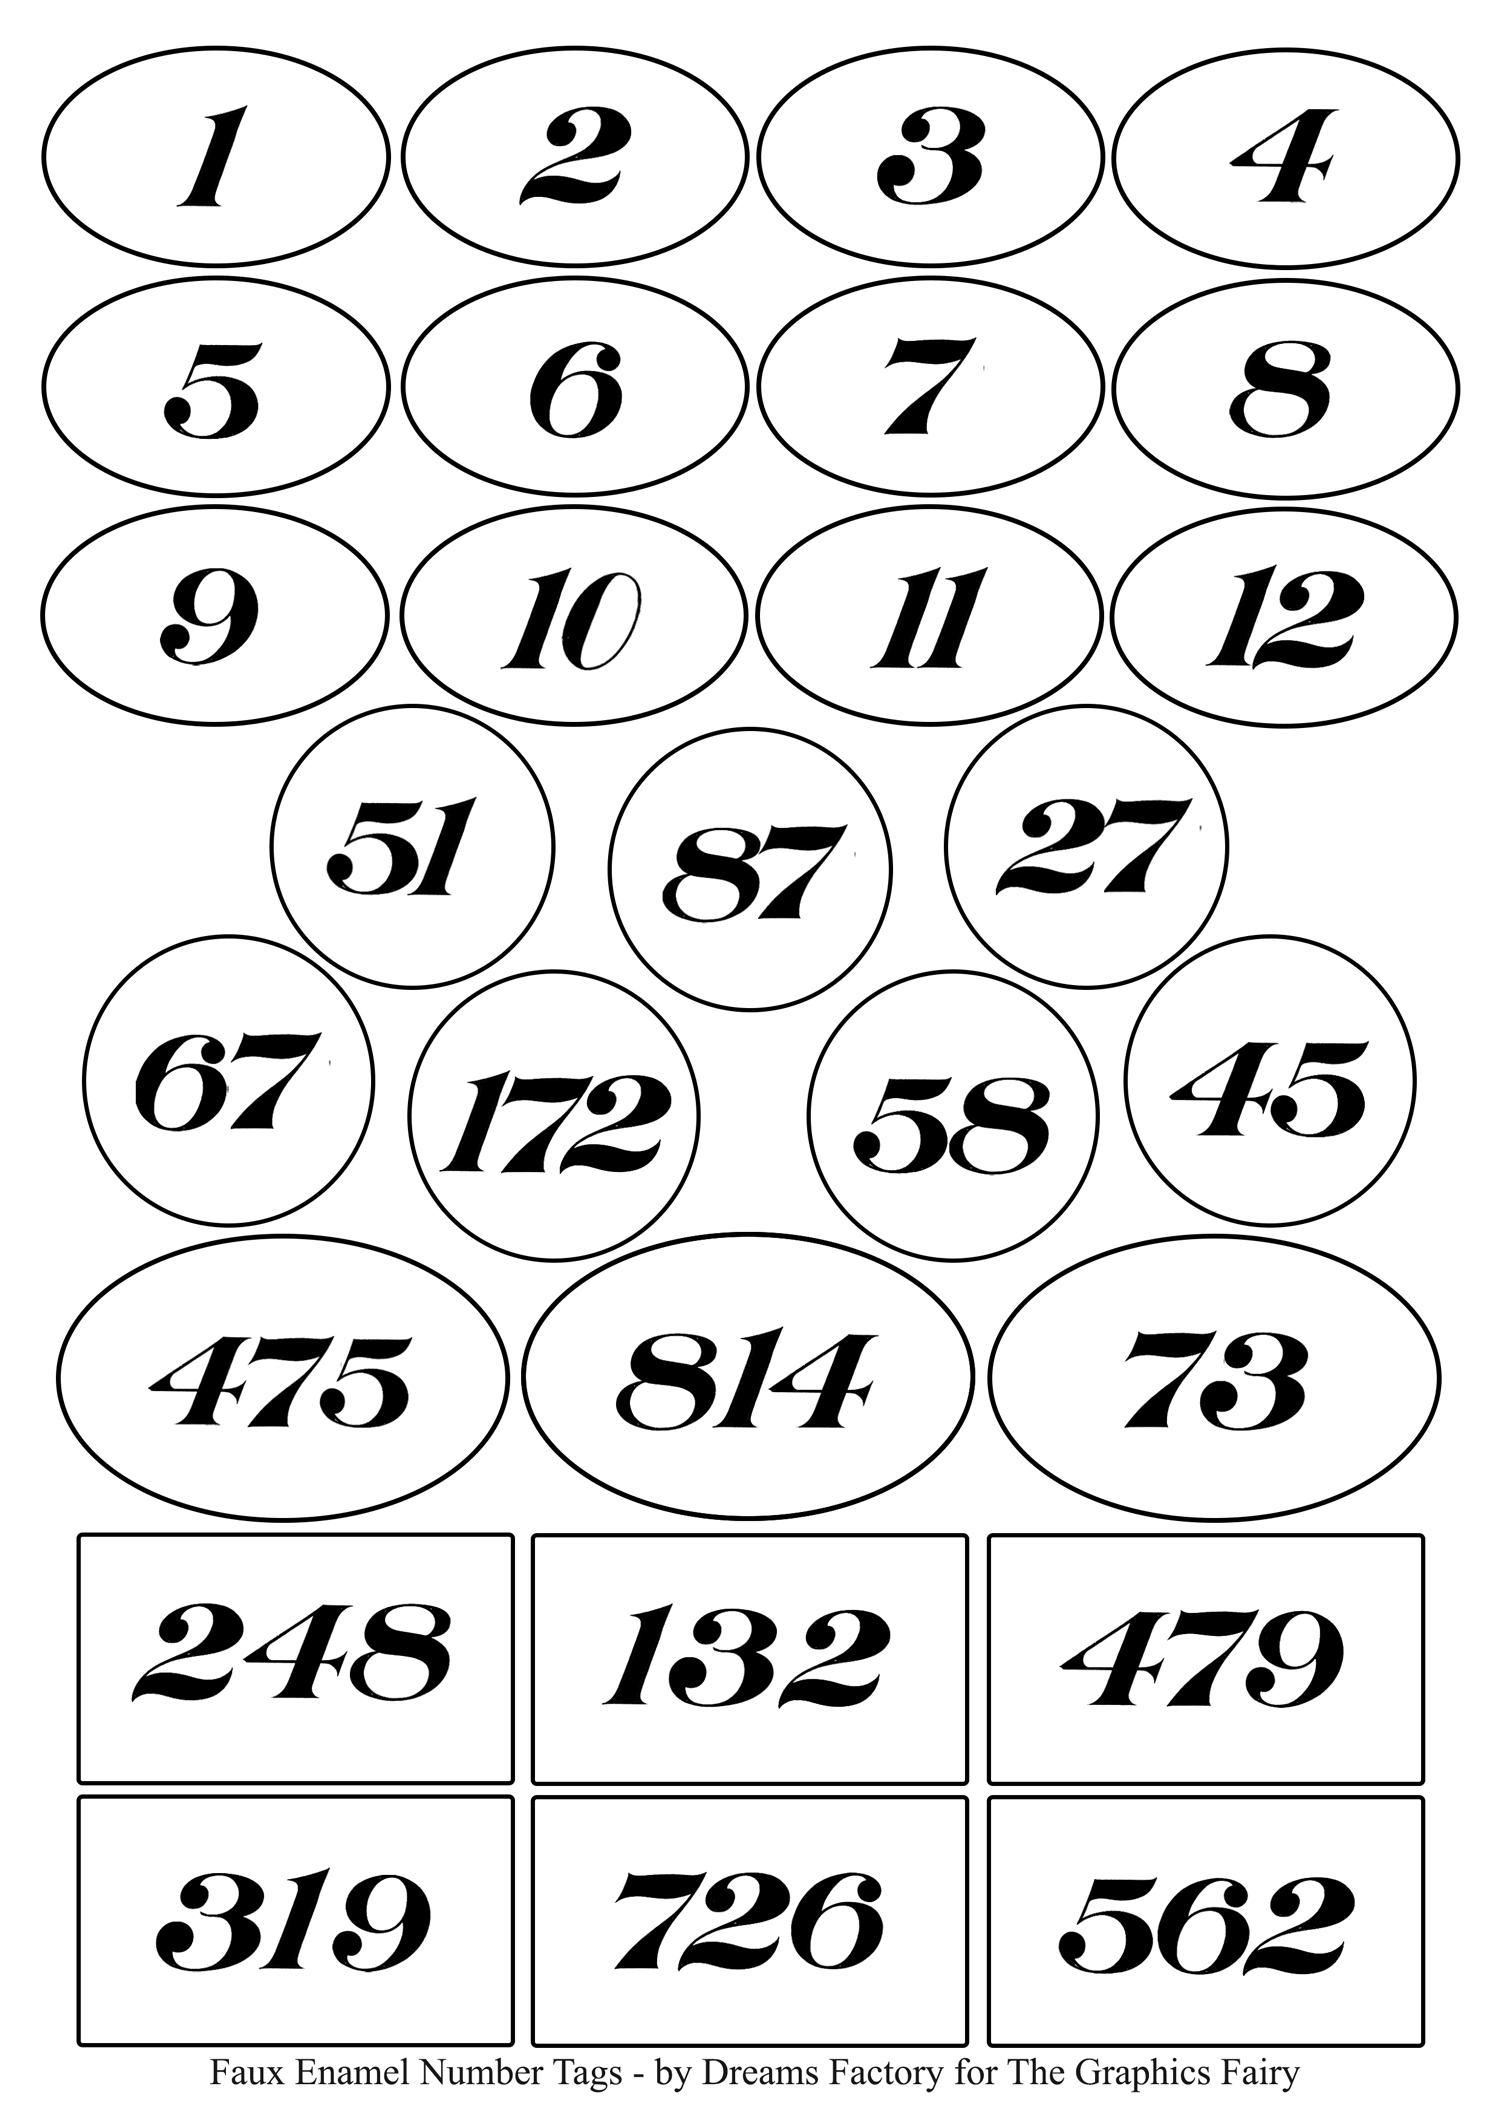
—-> CLICK HERE TO DOWNLOAD THE FULL SIZE PRINTABLE PDF <—-
(regular image)
—-> CLICK HERE TO DOWNLOAD THE FULL SIZE PRINTABLE PDF <—-
(mirror image)
Of course you can print and use these number tags as regular paper tags or labels (you will need the regular image in this case), or you can use your preferred image transfer and transfer the numbers on your preferred surface (you might need the mirror image in some cases). I went with a gel medium transfer this time and I printed the mirror version of the printable for this.
DIY Faux Metal Number Tags
SUPPLIES:
- number tags – free printable
- regular paper
- MDF (I used the 0.3 cm / 0.10 inches width)
- jigsaw (And appropriate protective gear) (Or skip the MDF and Saw and use these Precut Wood Ovals HERE)
- laserjet printer (the gel medium transfer won’t work with an inkjet printer)
- acrylic paint (2 contrasting colors for first distressing – I used white and black)
- candle wax
- 120 or 180 grit sand paper
- acrylic paint (black or dark brown for second distressing the edges)
- Liquitex gloss gel medium (or use what you have)
- brushes
- scissors
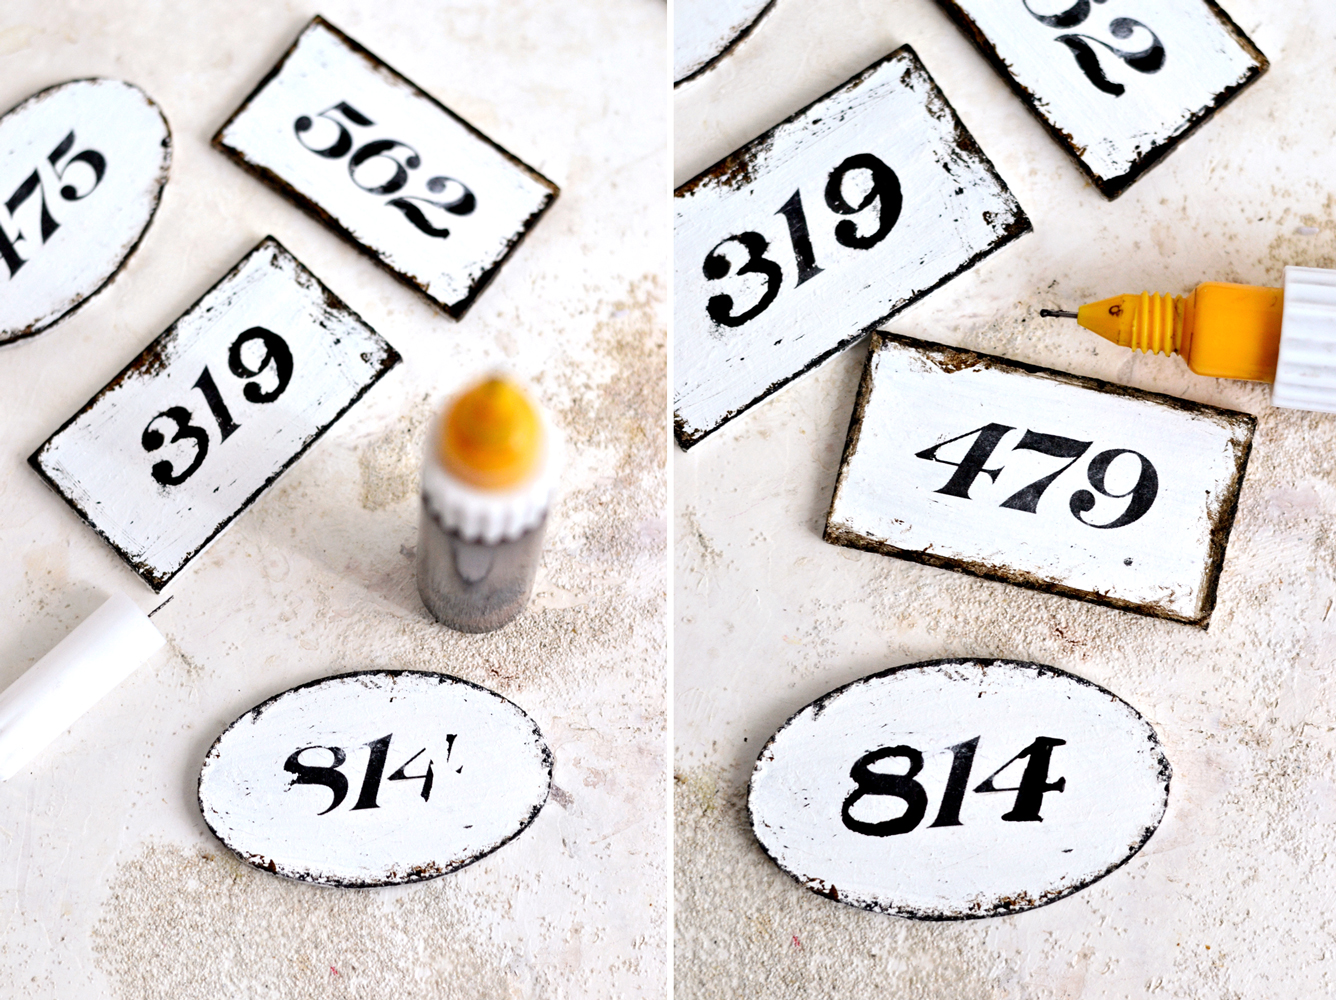
- a thin glue applicator with black paint (optional)
- gloss varnish
- a bowl with water
- paper towels
DIY Faux Enamel Number Tags – cutting the shapes
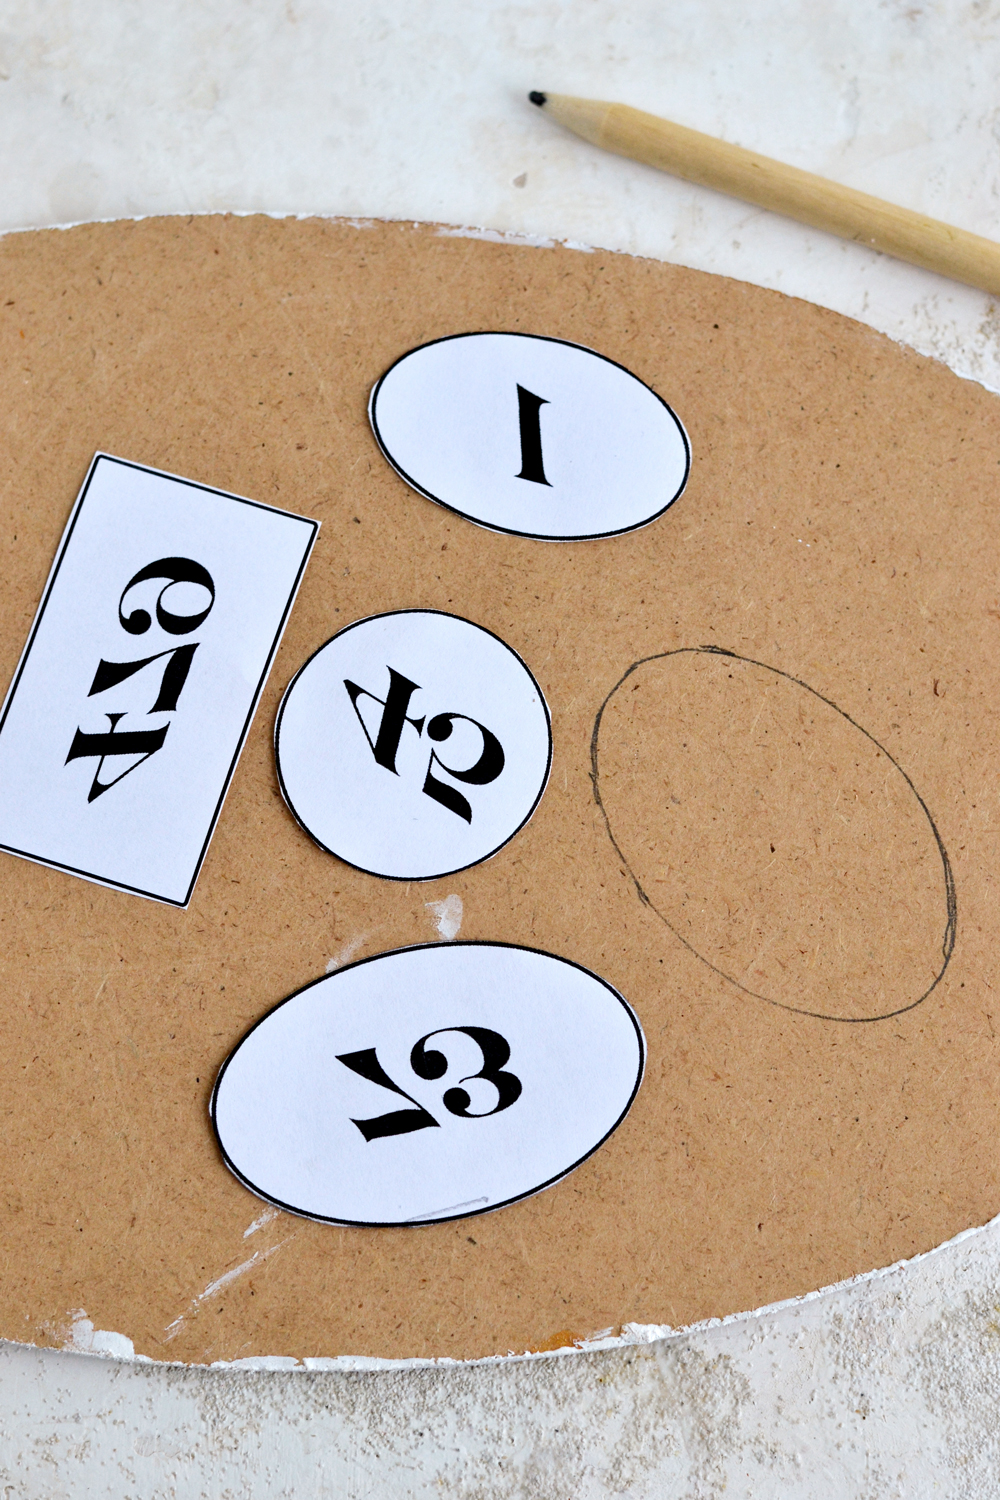
You can use the paper tags as patterns first, to draw and cut the shapes. I used MDF for this project, because I wanted to get that raised effect enamel tags usually have, but you can also use other materials like thick cardstock, paperboard, plastic sheets if you want to keep things simpler. Depending on your material, you might have to adjust some of the steps to better fit your needs. If you prefer you can probably find precut oval shapes at your local Craft Store. I found these precut Wood Ovals on Amazon that I think would work well, they come in a variety of sizes.
First distressing
When I made these shapes, I used my go to technique for painting and distressing them, you’ve seen me using it over and over again in my projects. If you want, you can skip this first distressing part and just paint the tags all white.
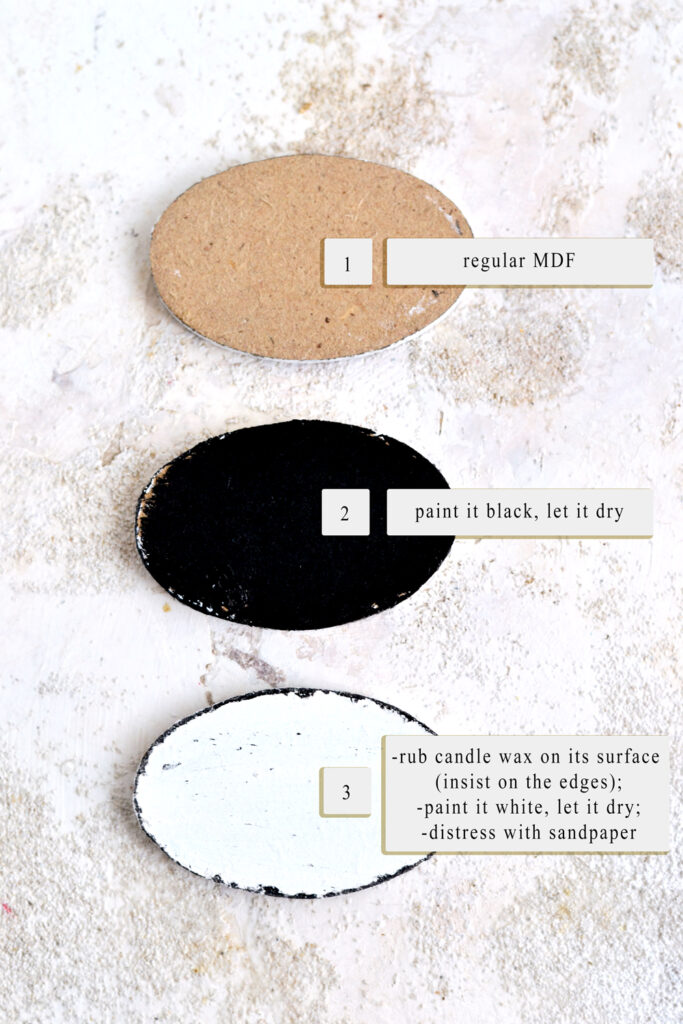
But if you want to give your tags more depth, you can use my technique, here is a short recap:
1. Choose your surface and cut your desired shape.
2. Paint the surface with black or dark brown acrylic paint, let it dry.
3. Rub candle wax on the surface (here and there) and insist on the edges. Paint the surface white (one or two layers), let it dry completely. Distress with sandpaper.
The gel medium image transfer
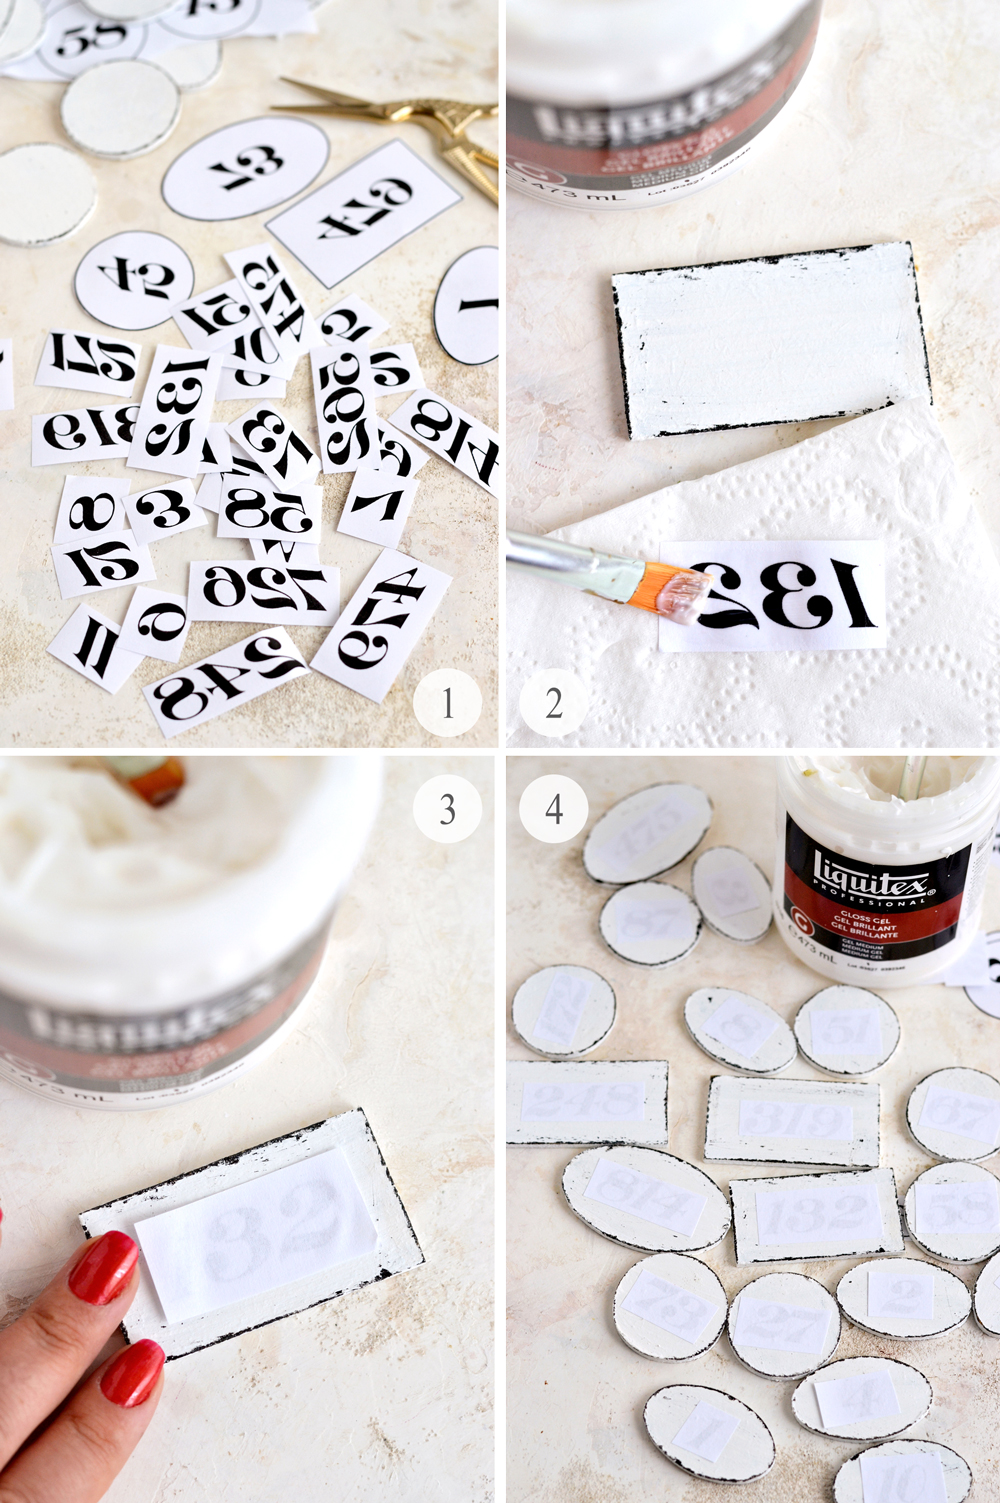
- Cut your paper numbers first. You can choose to transfer the whole image (with the border) if you want, or you can only use the numbers, like I did. If you only use the numbers, make sure you leave some white space around them.
- Place your image on a piece of paper towel and add a uniform layer of medium gel on top.
- Carefully pick your number and place it facing down in the center of your MDF tag. Try to air center it as well as you can, before placing it on the tag and really important, don’t move it afterwards! If you move it, you will get a smudged image, we really don’t want that! Make sure you have a few clean paper towels around and clean your fingers after placing the image on the MDF. This is really important too, we don’t want any of the gel medium on top of the paper. Now go over the image and press it gently at first to properly adhere, then apply some pressure and try to remove all the air bubbles (starting from the middle then going towards the edges).
- Do the same with every image and let them dry for at least 1-2 hours.
Note 1: Please remember – if you are using the medium gel transfer, you will need to use the mirrored image printable!
Note 2: You can also use other image transfer techniques, for more inspiration you can check this article – 12 Easy Image Transfer Techniques.
Tips and tricks: If you want to easily keep track of where each number should go, save or print screen the free image on your phone! 🙂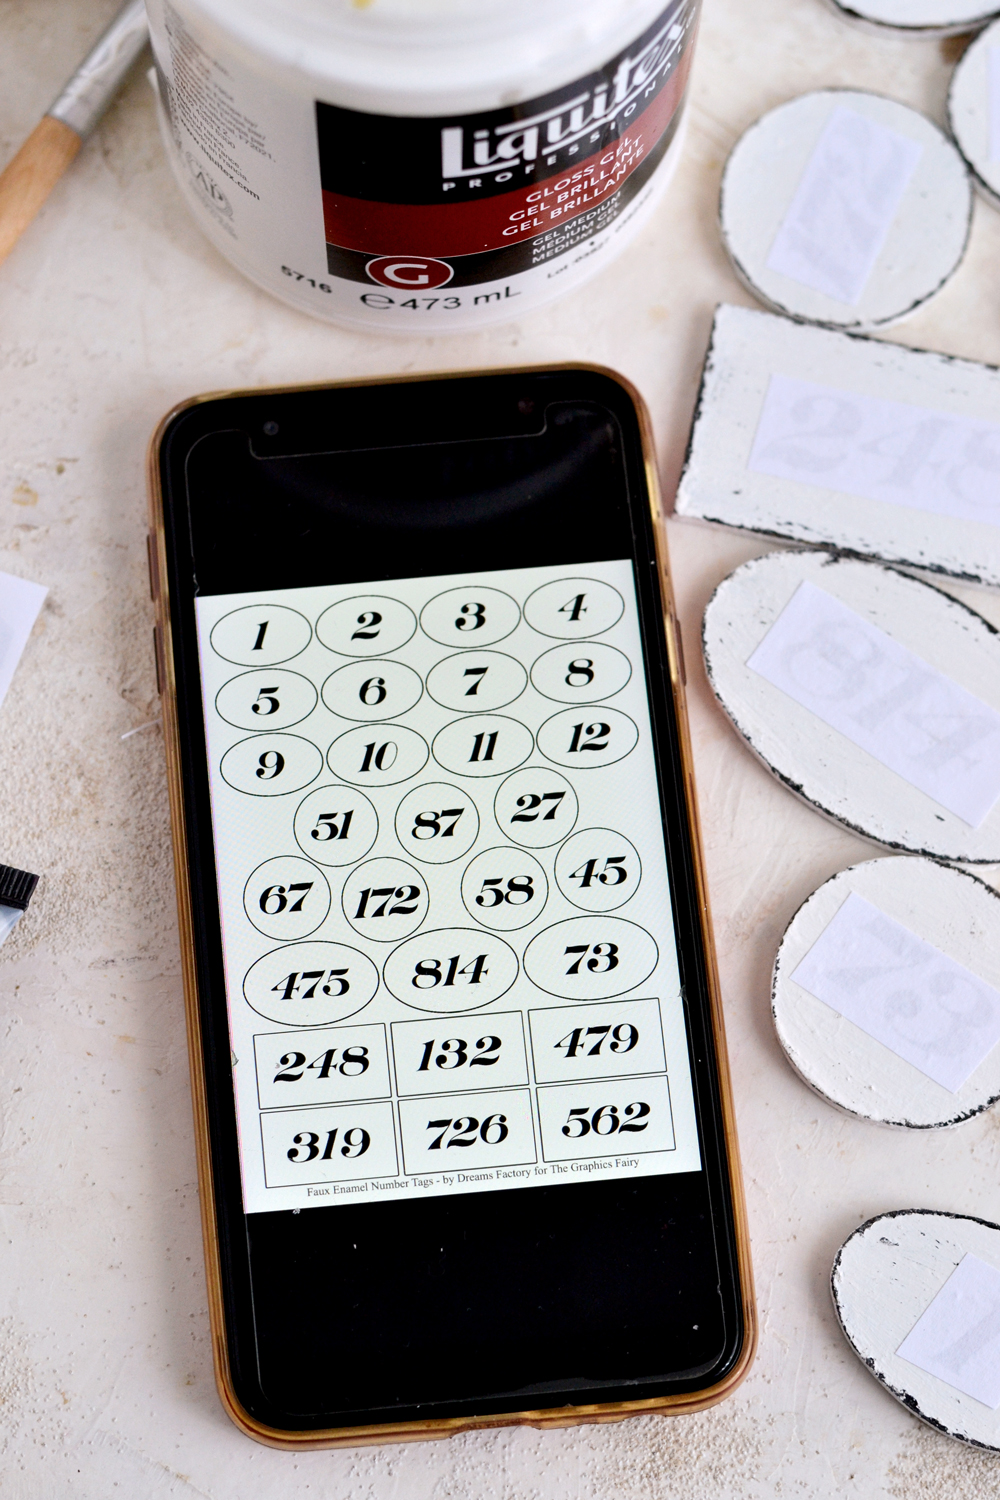
The second distressing
To minimize the waiting time, you can already start working on your second distressing. Just make sure you don’t get any paint on the paper, we only want to distress our edges this time! 🙂
1-2. Use black acrylic paint or a mix of black and dark brown (I used Mars Black and Burnt Umber) and a paper towel to distress the edges as much as you want. I poured some paint on a piece of scrap paper, I dabbed the paper towel in the two colors and then went dabbing all around the edges. I actually let the paper towel do all the work because I wanted to create more of a natural and organic distressed edge.
3. Each tag will be truly unique, some will have paint on their sides too.
4. Distress each tag according to your own preference, then let everything dry until you reach at least the two hours needed for the medium.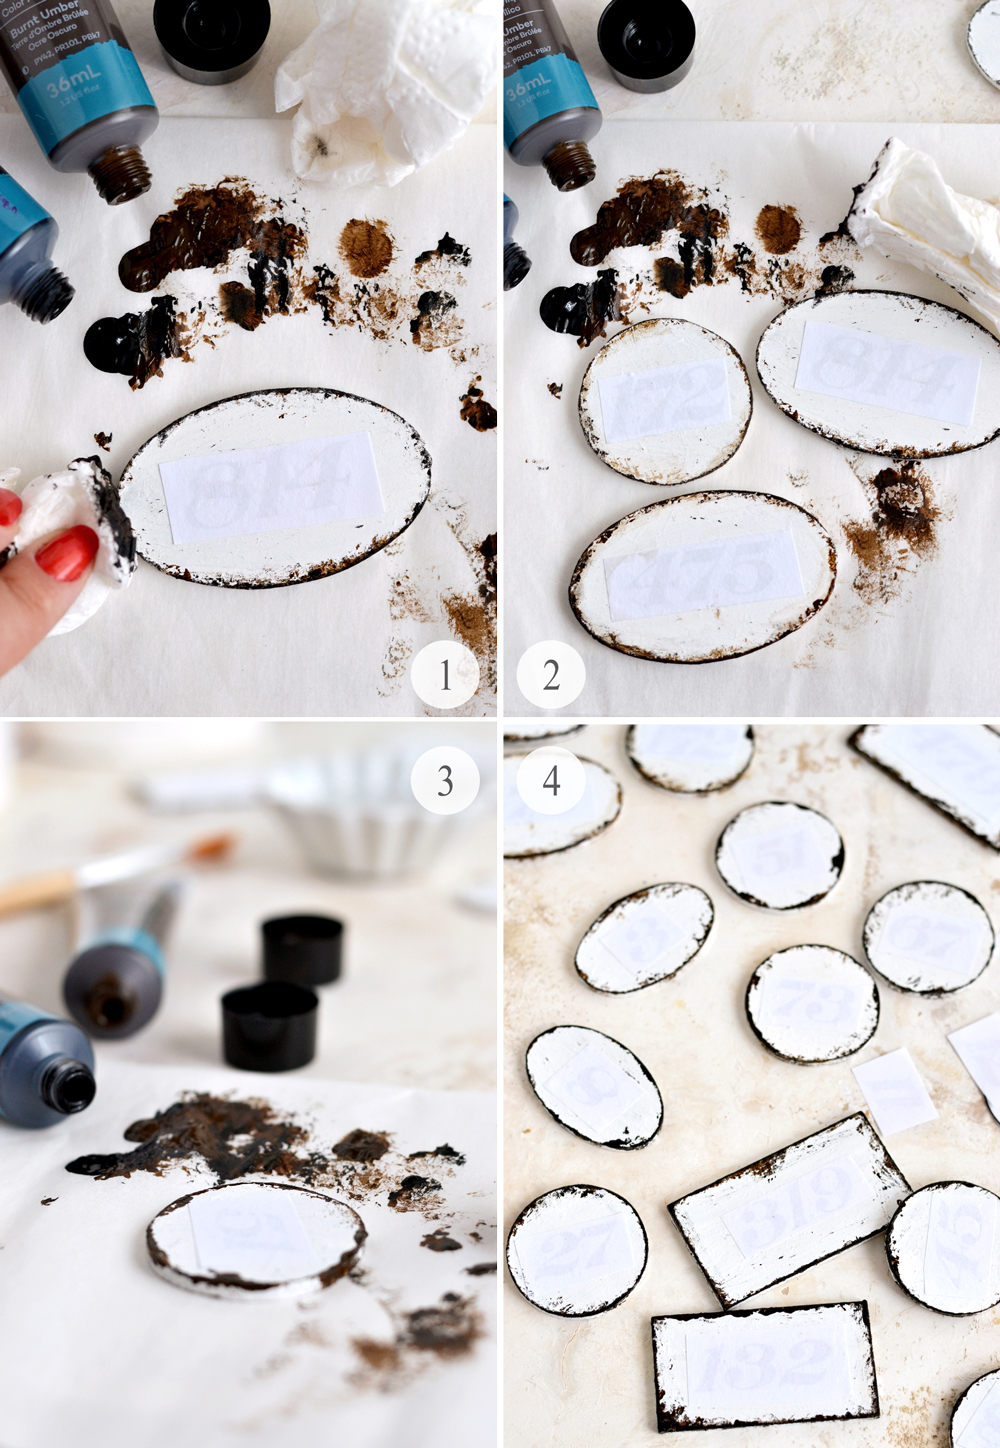
DIY Faux Metal Number Tags – completing the image transfer
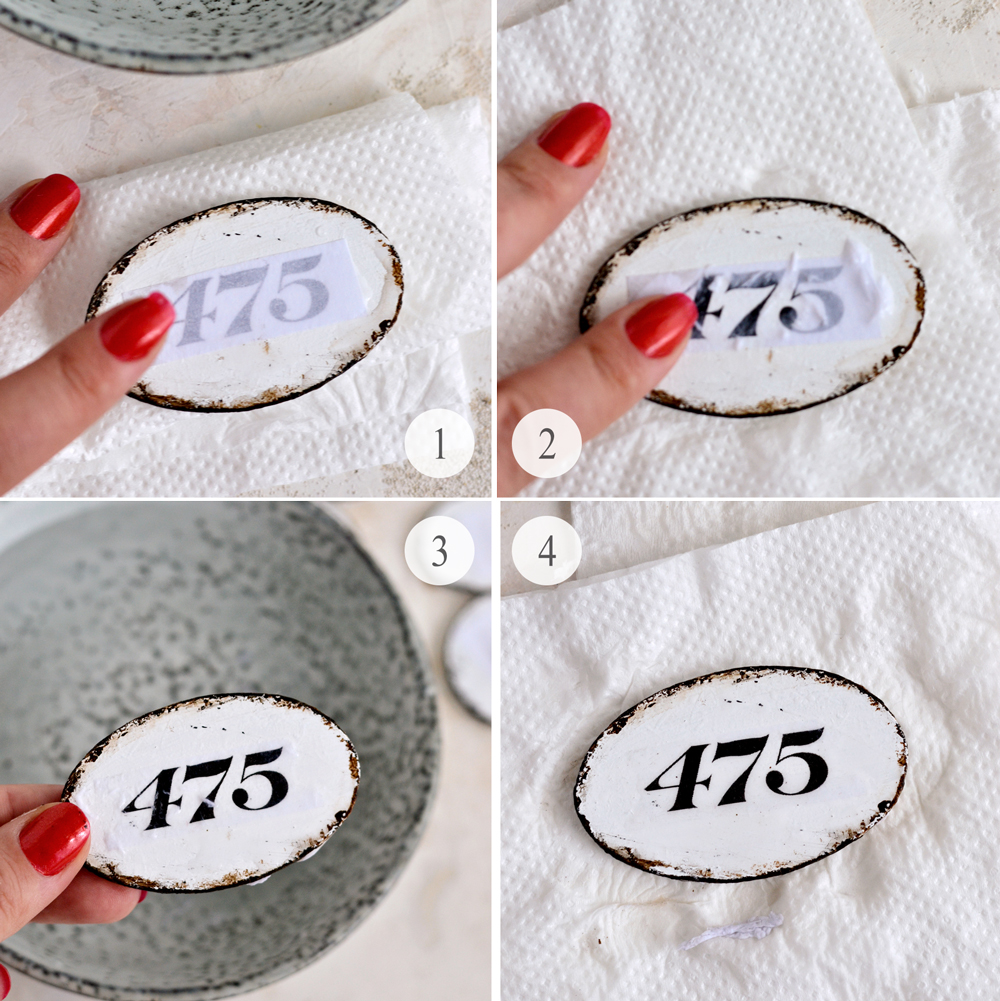
- To complete the image transfer, we need to add some water on top of the image first. This will start breaking the fiber in the paper and will ease its removal.
- Gently start to rub all over the image, gradually removing all the excess paper.
- You will need to come back with some more water until all the white paper is removed and the transferred image is revealed.
- Remove all the excess paper using your fingers and wipe clean the surface using a paper towel.
If the image transfer is done properly, the excess white paper should come off easily, without leaving too much residue behind. IF done properly! 🙂
I must confess I might have rushed things a little bit when it comes to drying times and some of my images didn’t turn out as expected. But I didn’t mind, not everything has to be perfect all the time, right? 😉 I used a small glue applicator with black paint and tried to reconstruct the glitchy numbers. Some of the really small paper particles left on the tags made things a little bit trickier and created a bleeding effect, but I decided to go with the half full part of the glass and see all these small imperfections as character builders for my tags! You should do the same!:)
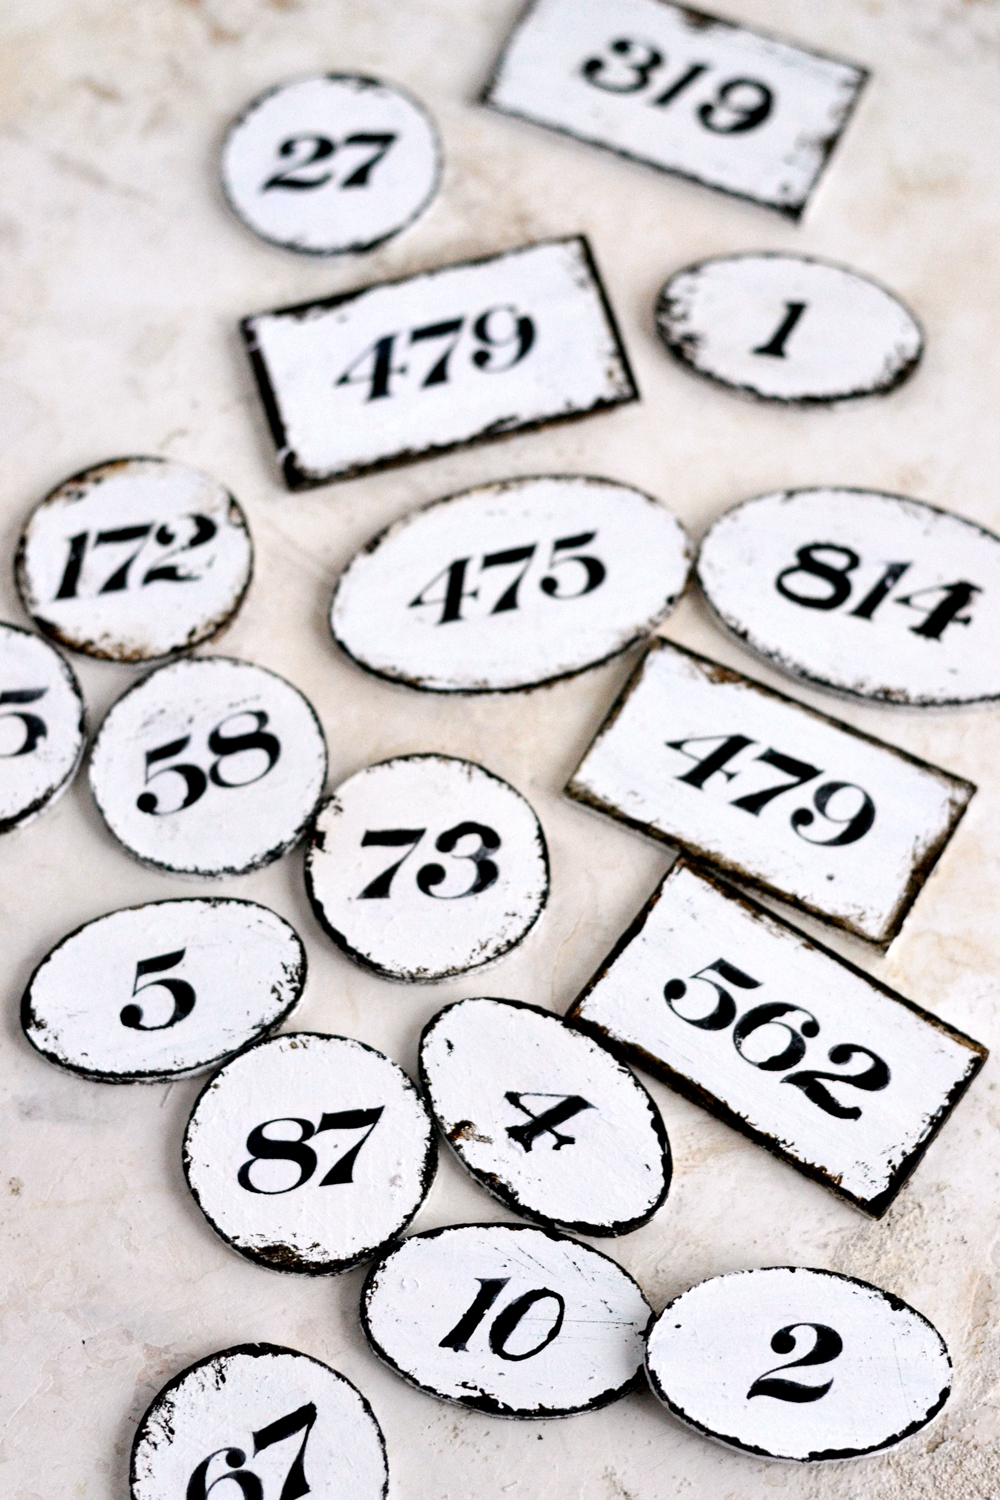
I really love how they turned out, I would say their small but beautiful imperfections made them truly unique!
You can already use the tags as they are, but if you want to take them to a new level of gorgeousness, go ahead with this next step.
Creating the faux enamel effect
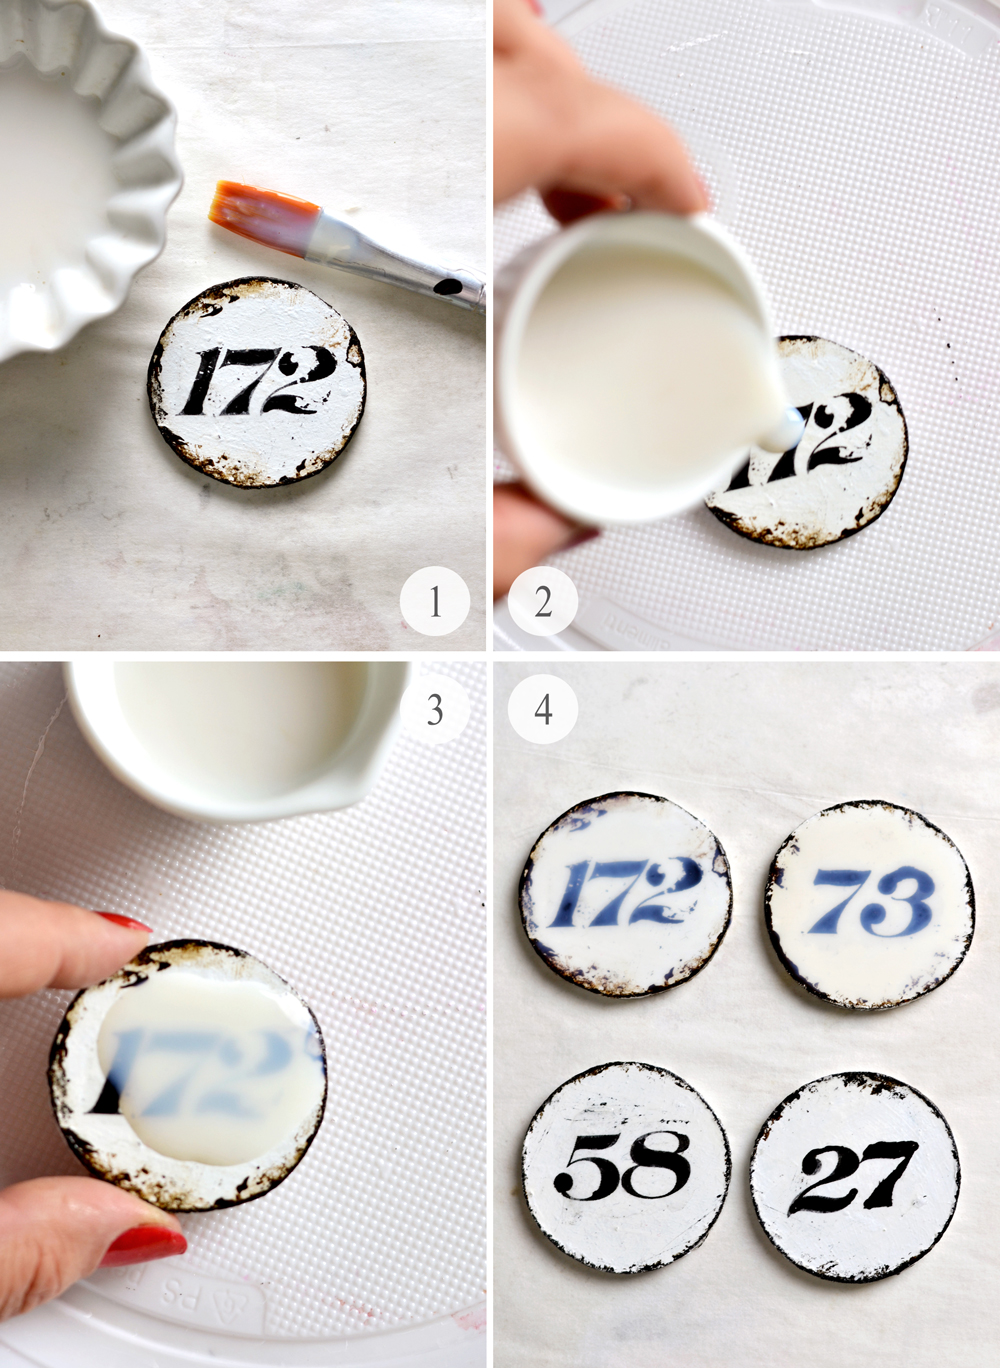
- I initially started with applying a uniform layer of water based gloss varnish on all of the tag. I let the varnish dry for about half an hour. The tags looked ‘sealed and protected’ but I wanted to also give them that raised enamel effect.
- So I added some varnish in a small measuring pouring cup and poured it over the tag. Make sure you use something underneath your tag (I used a plastic disposable plate), things will get messy again! You’ve been warned! 😉
- Swirl the varnish around until the whole surface is completely covered. If you have too much varnish, just tilt the tags and let the excess drip back into the pourer.
- You can see how the varnish created a somehow gloomy surface and image. Now that’s the faux enamel effect I was looking for! 🙂 This time I let everything dry until the next day!
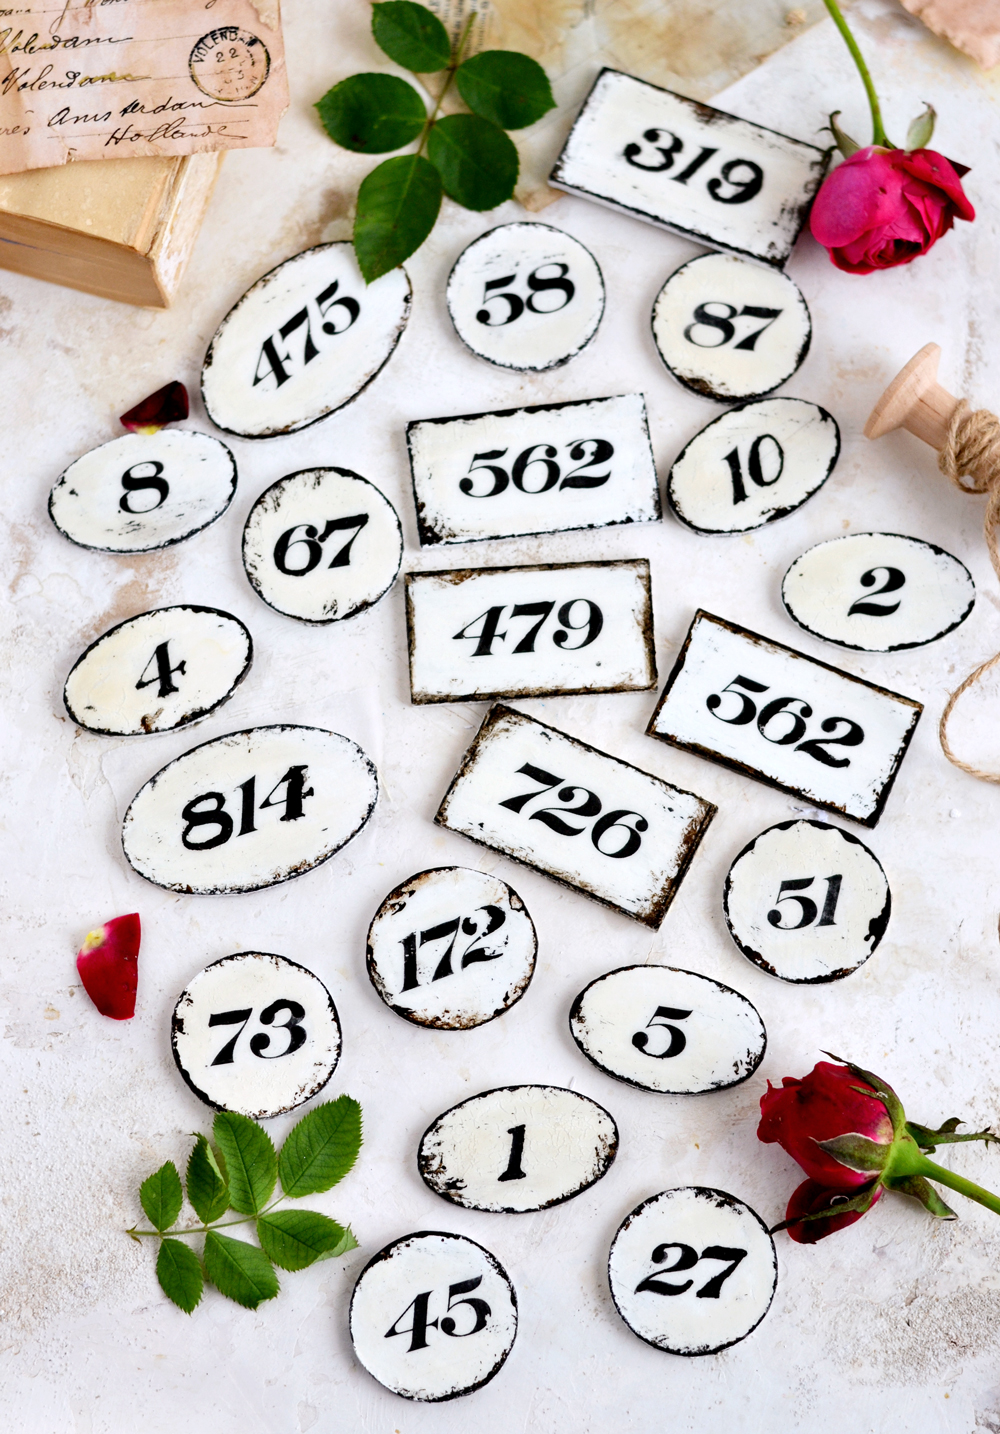
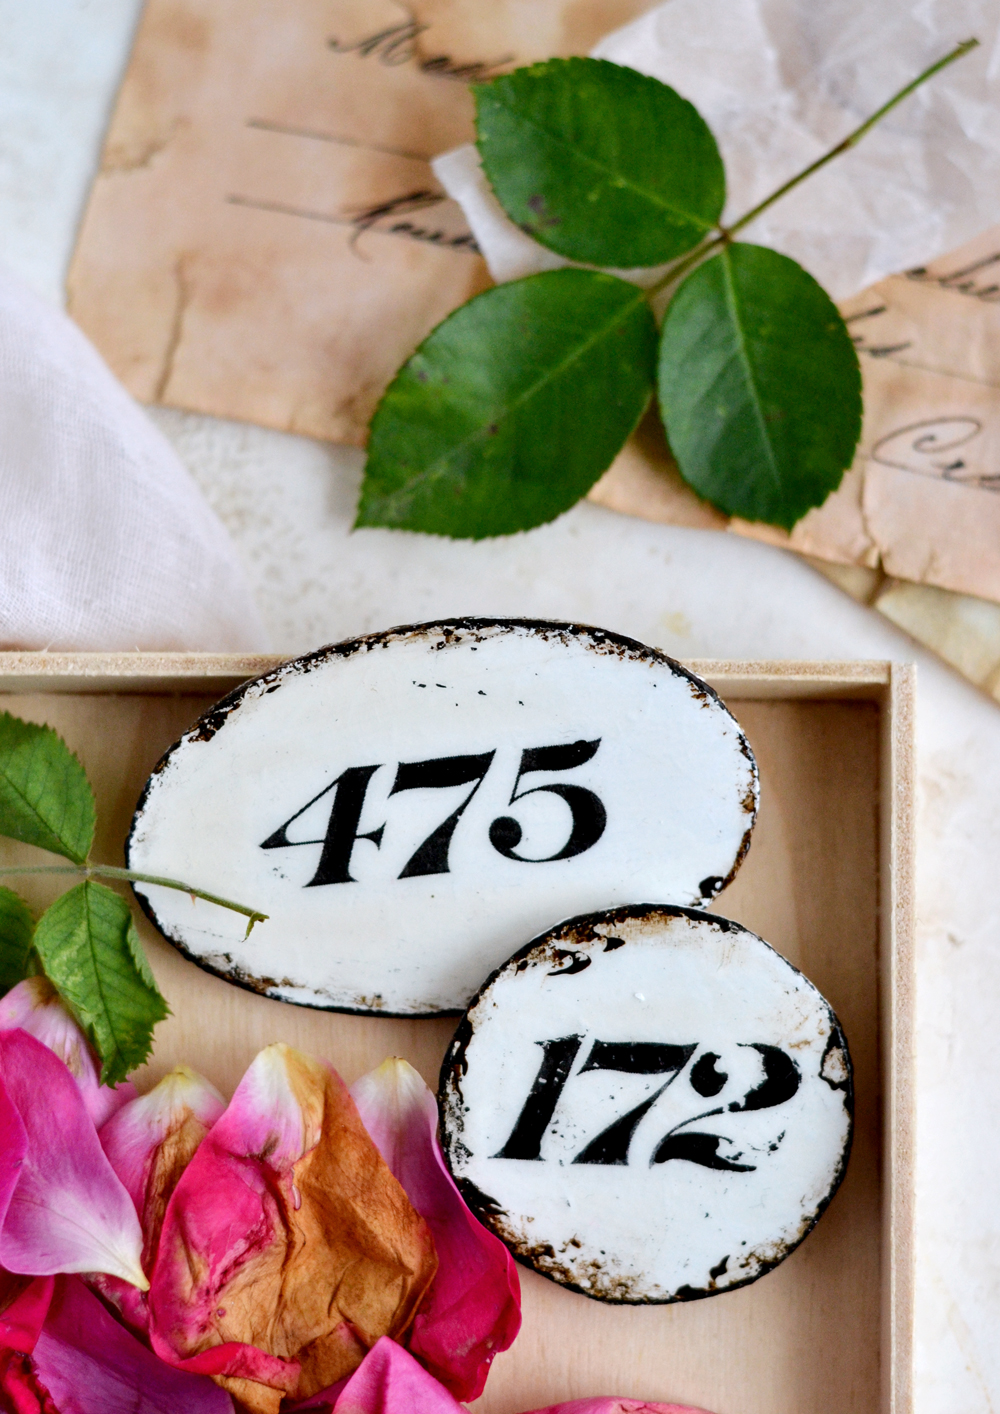
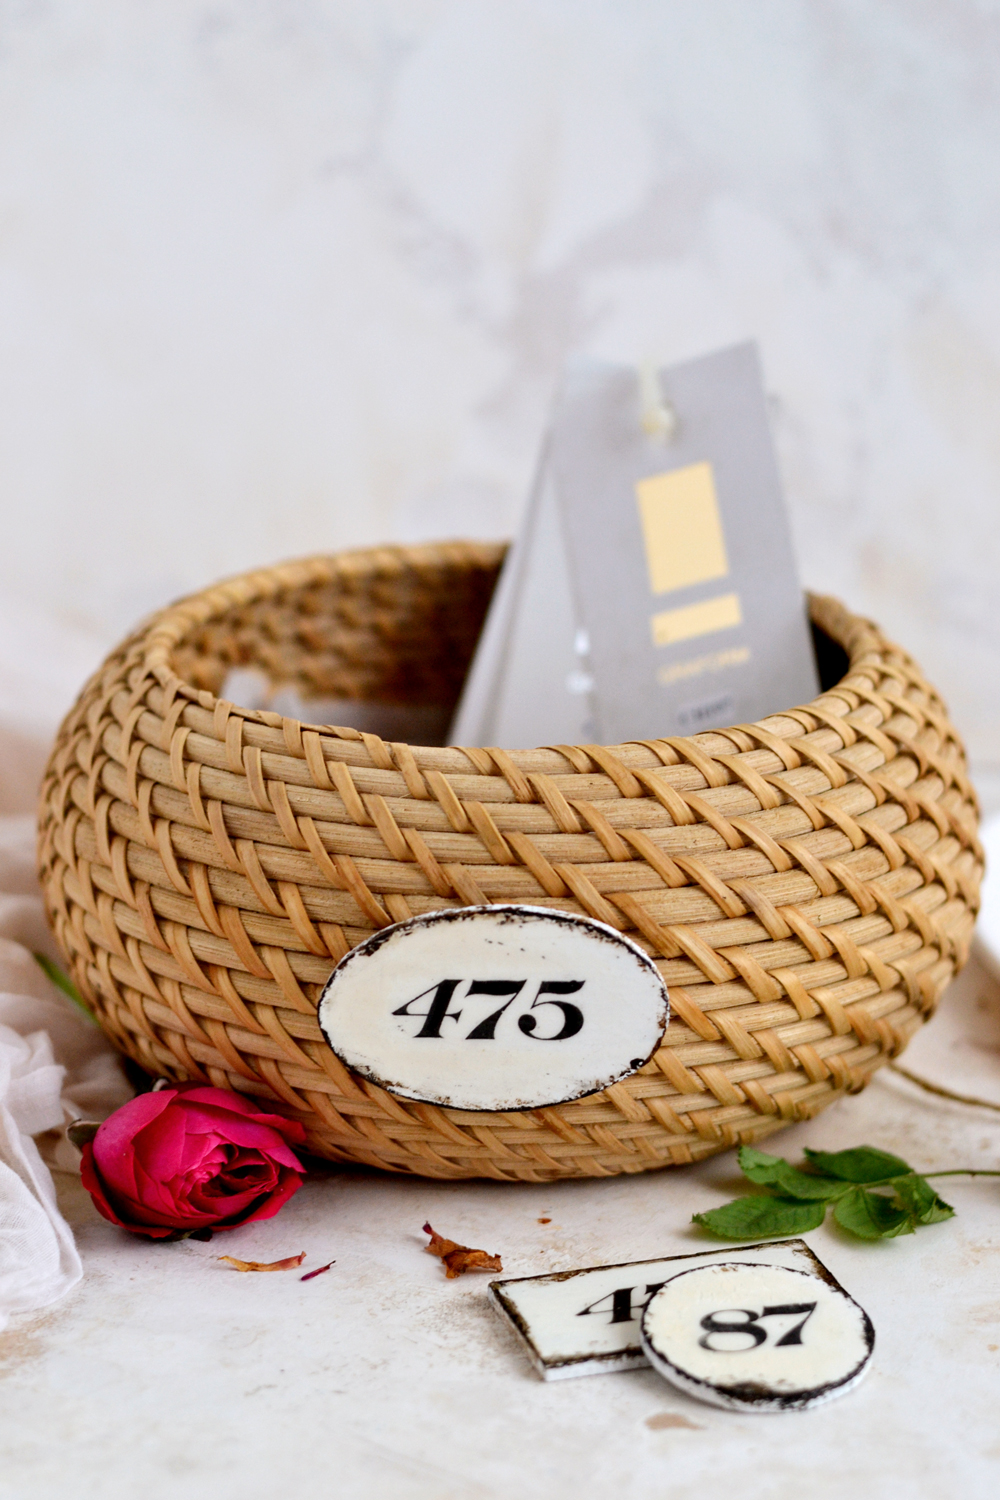
After drying, the raised effect was not as obvious as when I applied the varnish, but I was over the moon with how gorgeous these turned out! Now be honest, aren’t these the most amazing DIY Faux Enamel Number Tags that you have ever seen? 🙂
Not sure if you can see it in my pictures, but depending on how thin or thick I applied the varnish, it created some really amazing vintagey effects on my DIY faux enamel tags after drying. Some of the varnish got soaked into the surface, some created uneven crackled effects, it even slightly yellowed the images here and there. Simply unexpected, but perfect for what I envisioned! 🙂
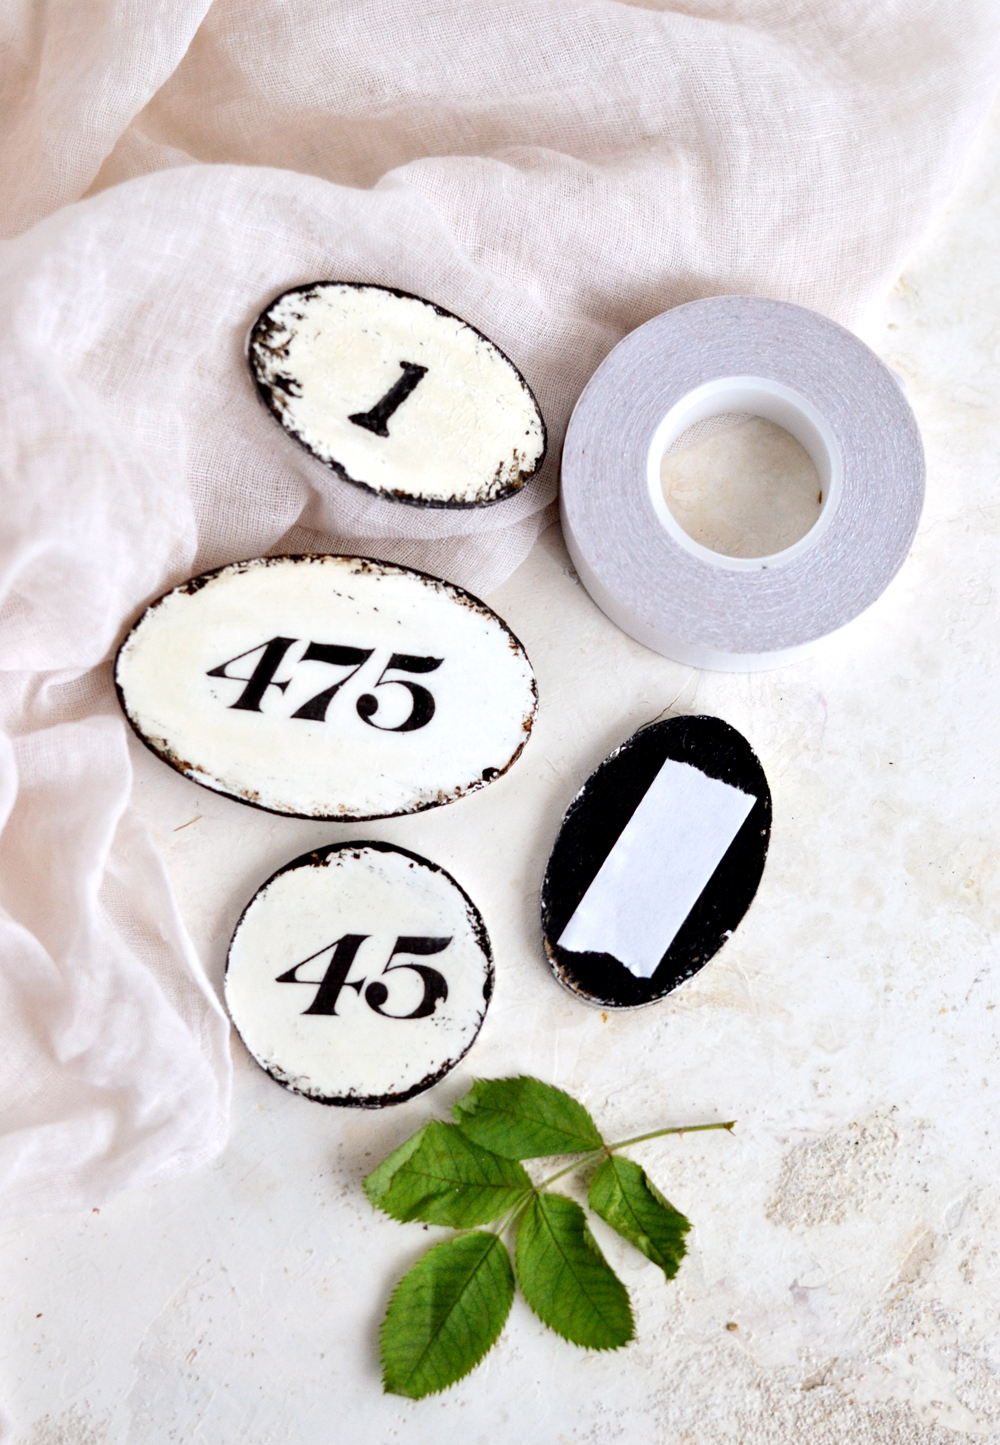
You can choose to drill holes into the tags – on the sides or on the top – and hang them using twine or anything else that you have around. But if you want to have them ready to be used for any occasion, double sided tape will be your best friend! 😉 Just add a strip of tape on the back of each tag and quickly use them when in need!
I’m sure using these magnificent DIY Faux Metal Number Tags won’t be a problem … just add them everywhere in your home for that extra touch of chicness. Or include them in a set of goodies, they would make the perfect gifts for the holidays!
Happy crafting,
Diana / Dreams Factory


Marie-Laure says
Formidable tutoriel, merveilleusement expliqué et illustré ! Merci beaucoup pour ce partage ! Marie-Laure (France)
graphicsfairy says
Merci Marie 🙂
Robin Dudley Howes says
What great ideas. I’ve been crafting for several decades and I still learned a few new things from this tutorial. Thanks for sharing!
graphicsfairy says
That is wonderful Robin! So glad you enjoyed it 🙂