Gift Tags Printable
Hello, Graphics Fairy friends, Diana from Dreams Factory here, and today we are making an amazing DIY project, I’m really excited to share these beautiful gift tags printable with you! These Violet Flower tags are not only full of charm and simply gorgeous on their own but are also a part of a fun experiment – how to distress paper with makeup!
I have to confess that this has got to be one of the easiest tutorials that I have ever shared here, on The Graphics Fairy. You will be amazed to see how quickly you can add a little bit of distressed charm to these tags! They will look absolutely gorgeous in no time and the best part is that we won’t be needing any special tools – we will be ‘painting’ and blending the makeup colors with our fingers! How fun is that?!
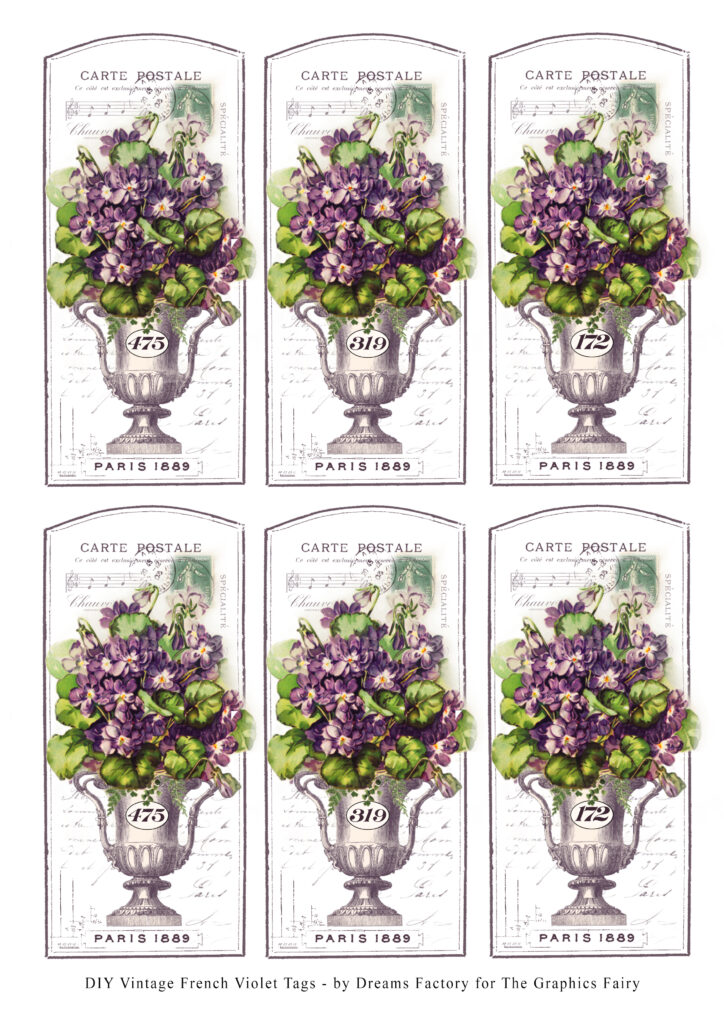
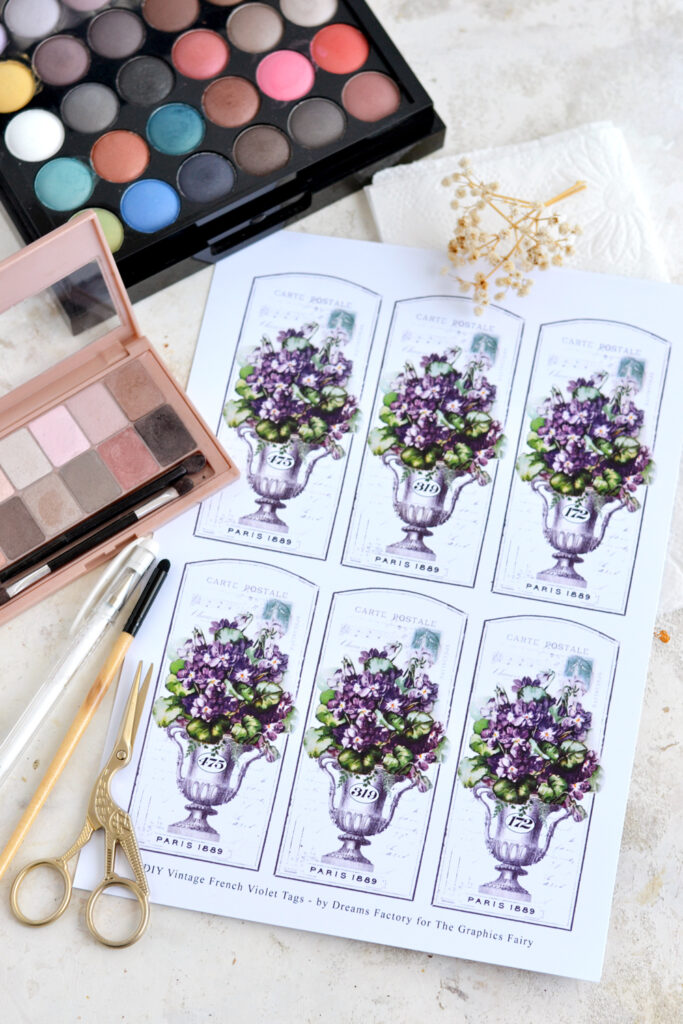
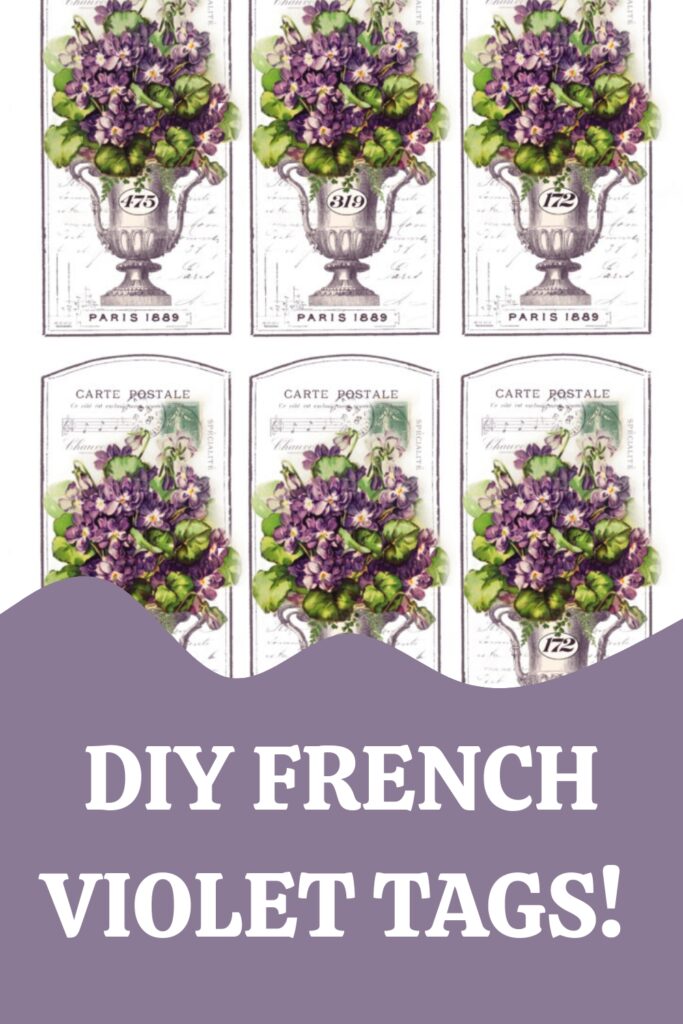
But first, let’s talk about the free Gift Tags printable that I created for you! My starting point for each tag was a beautiful vintage frame – a French ‘carte postale’ to which I added a few elements like music notes, a stamp, French ephemera words and some French handwriting – all these became my background. I went ahead and added a beautiful vintage urn, then ‘arranged’ the lovely violets in it. I added a few other elements, like a few ferns and leaves, to make it more vibrant and realistic. Then I thought about adding some ‘enamel’ tags (remember my faux enamel number tags?) and I really LOVED how they all looked together. Simply perfect, don’t you think?
Free Beautiful Gift Tags Printable
—-> CLICK HERE TO DOWNLOAD THE FULL SIZE PRINTABLE PDF <—-
Gift Tag Printable Supplies:
-
- Gift Tags – free printable
- cardstock paper (or regular white paper, sticker paper, etc.)
- laserjet printer or inkjet printer
- eyeshadow makeup kit
- scissors
- a plastic sheet or a piece of paper (to protect your working area)
- paper towels or baby wipes
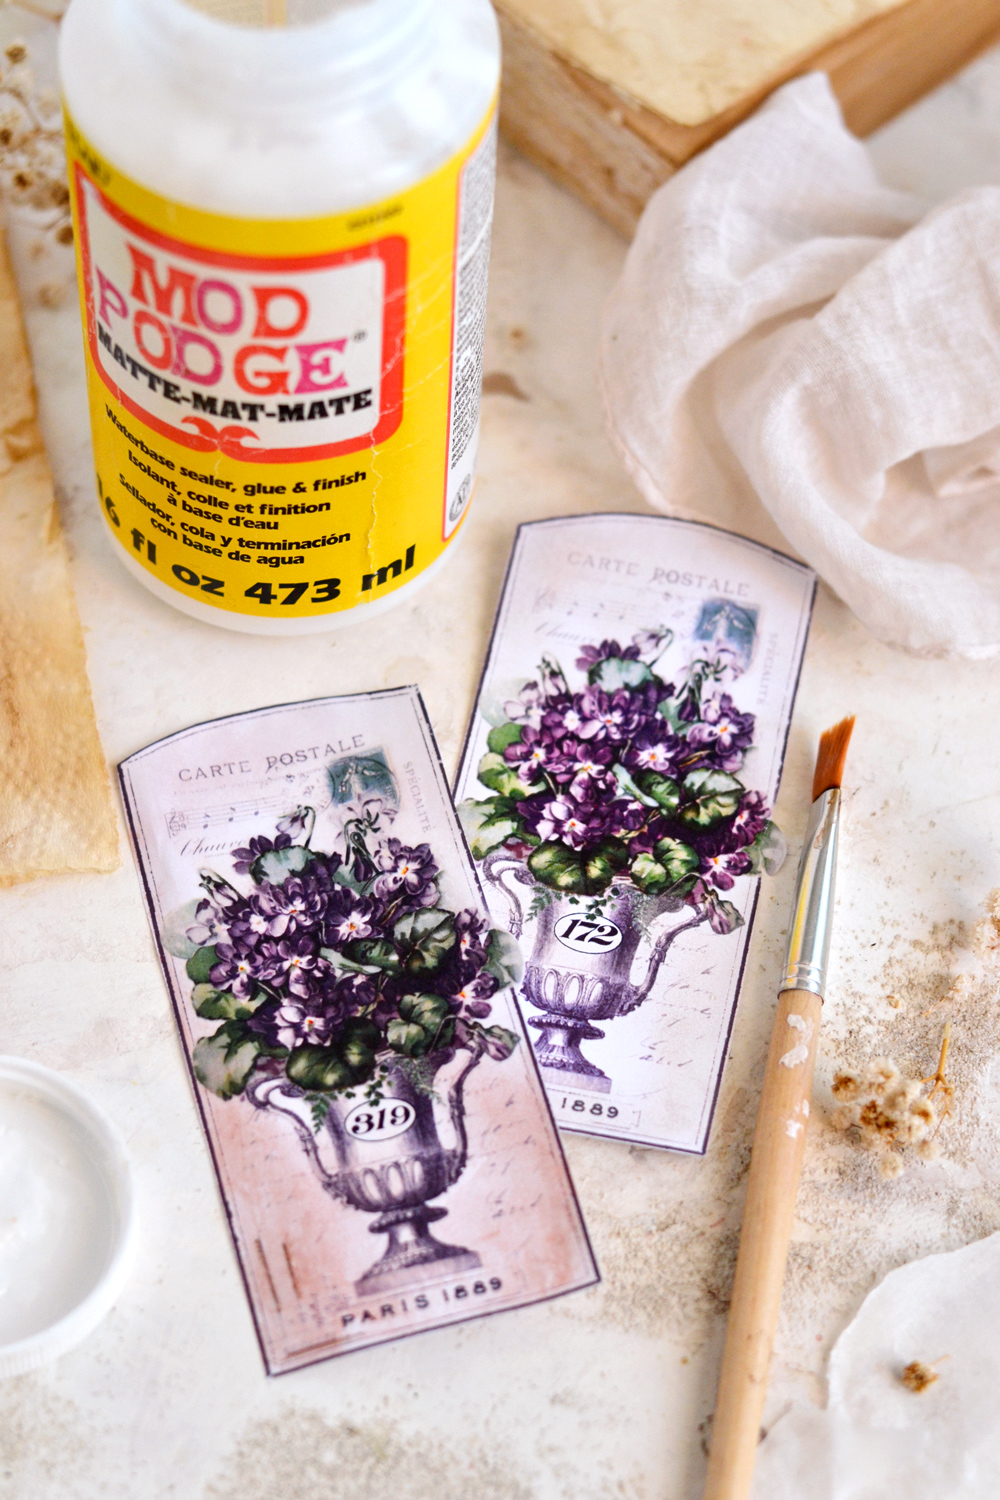
- a small brush + Mod Podge (optional)
- a white pen (optional)
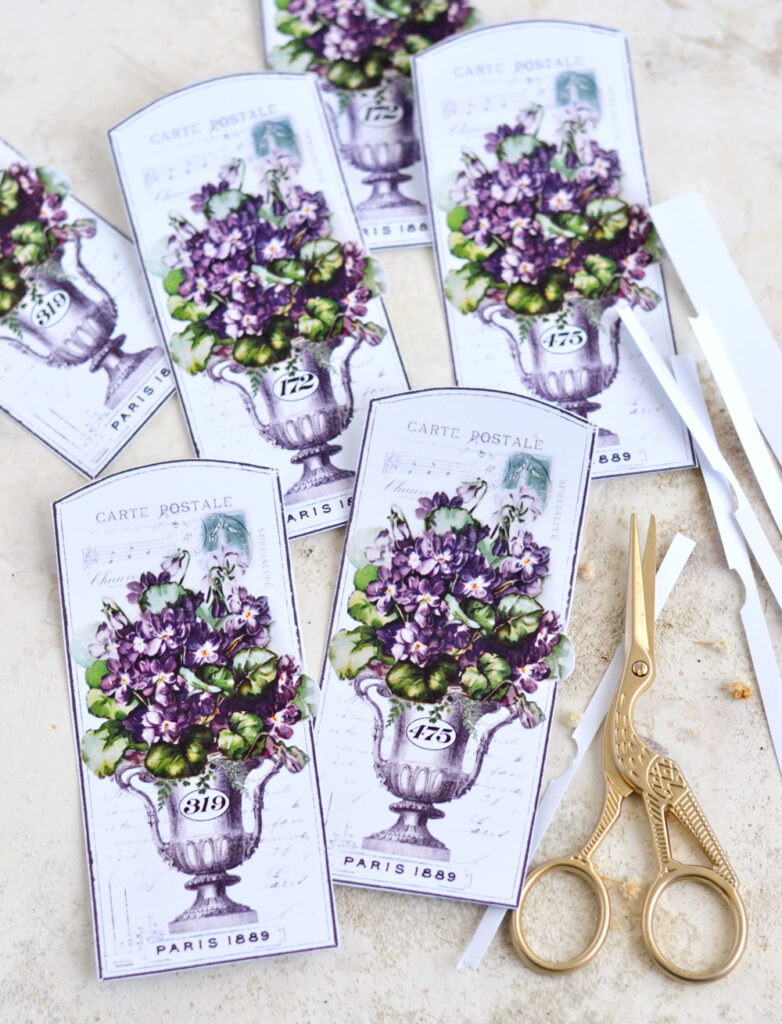
Use your scissors to cut each of the Vintage French Violet Tags first and remove all the white excess paper outside each frame.
How to distress with makeup
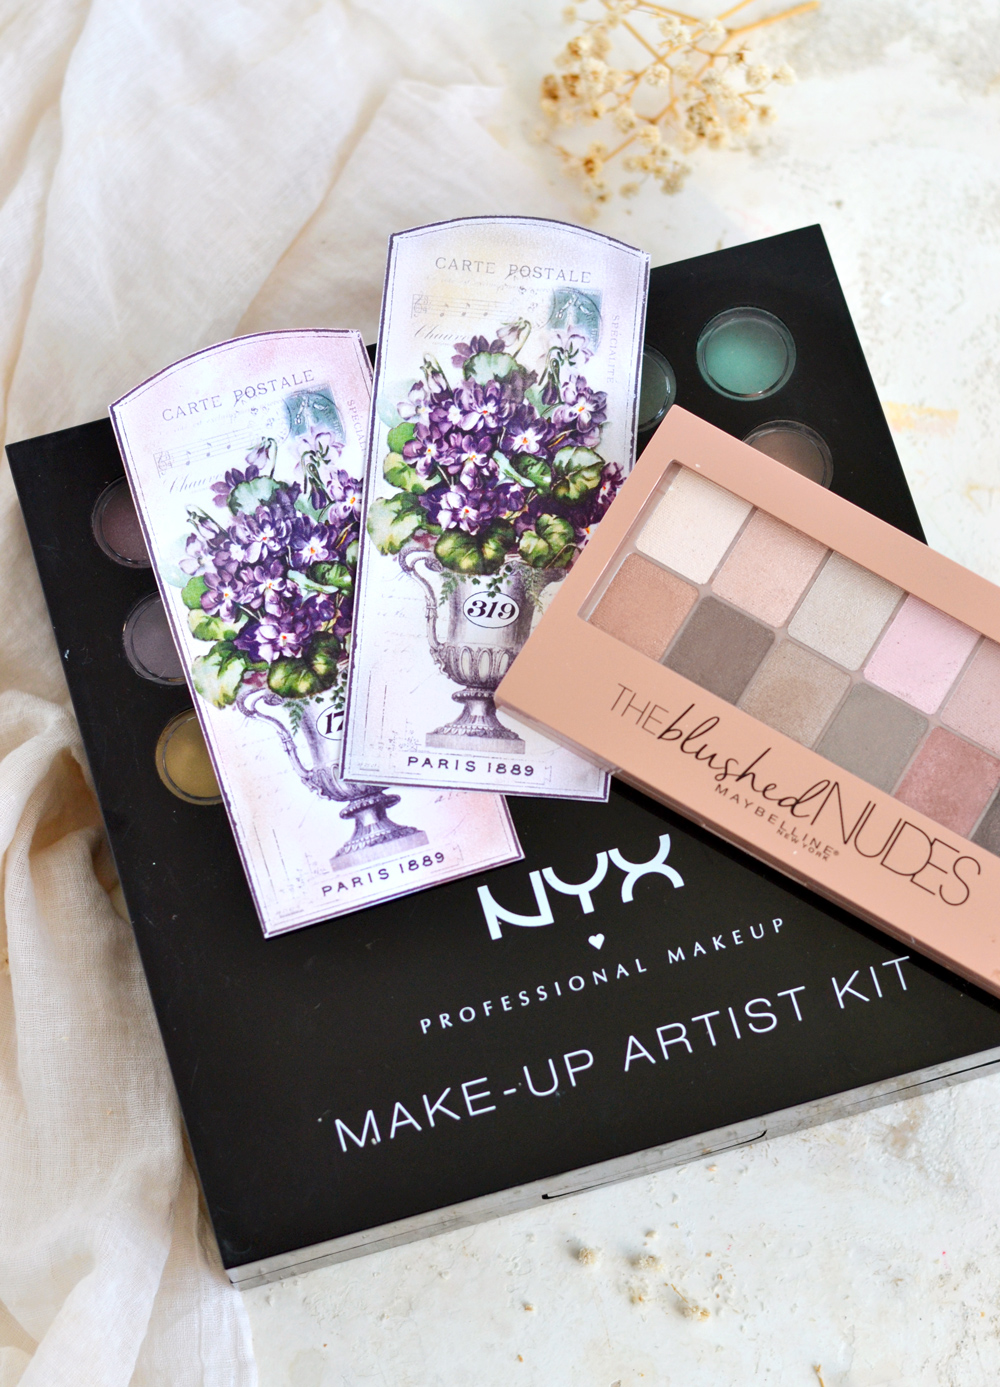
Now it would be the perfect time to bring your old makeup to light … it’s like all those unused colors were patiently waiting for a project like this! You can use any makeup kits you have around – I had a NYX makeup set with a gorgeous color palette (that I haven’t been using for years) and a Maybelline smaller set (that I actually use).
I’ve also tried this with a really old Ruby Rose makeup set (that I didn’t know I still had) and noticed that some of the colors that had glitter in them didn’t really adhered to the paper. So just try it with what you have, make small patch tests before – some colors will work, some will not, depending on their pigmentation and other mixed-in ingredients.
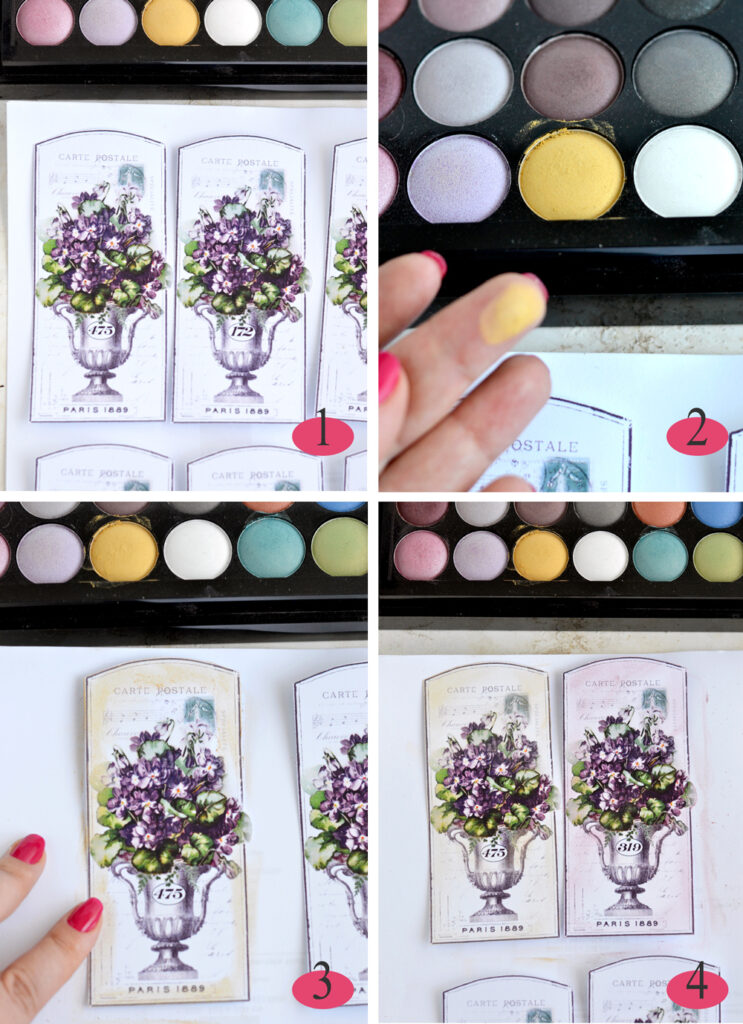
1. Start by placing your tags on a piece of paper or other protective surface.
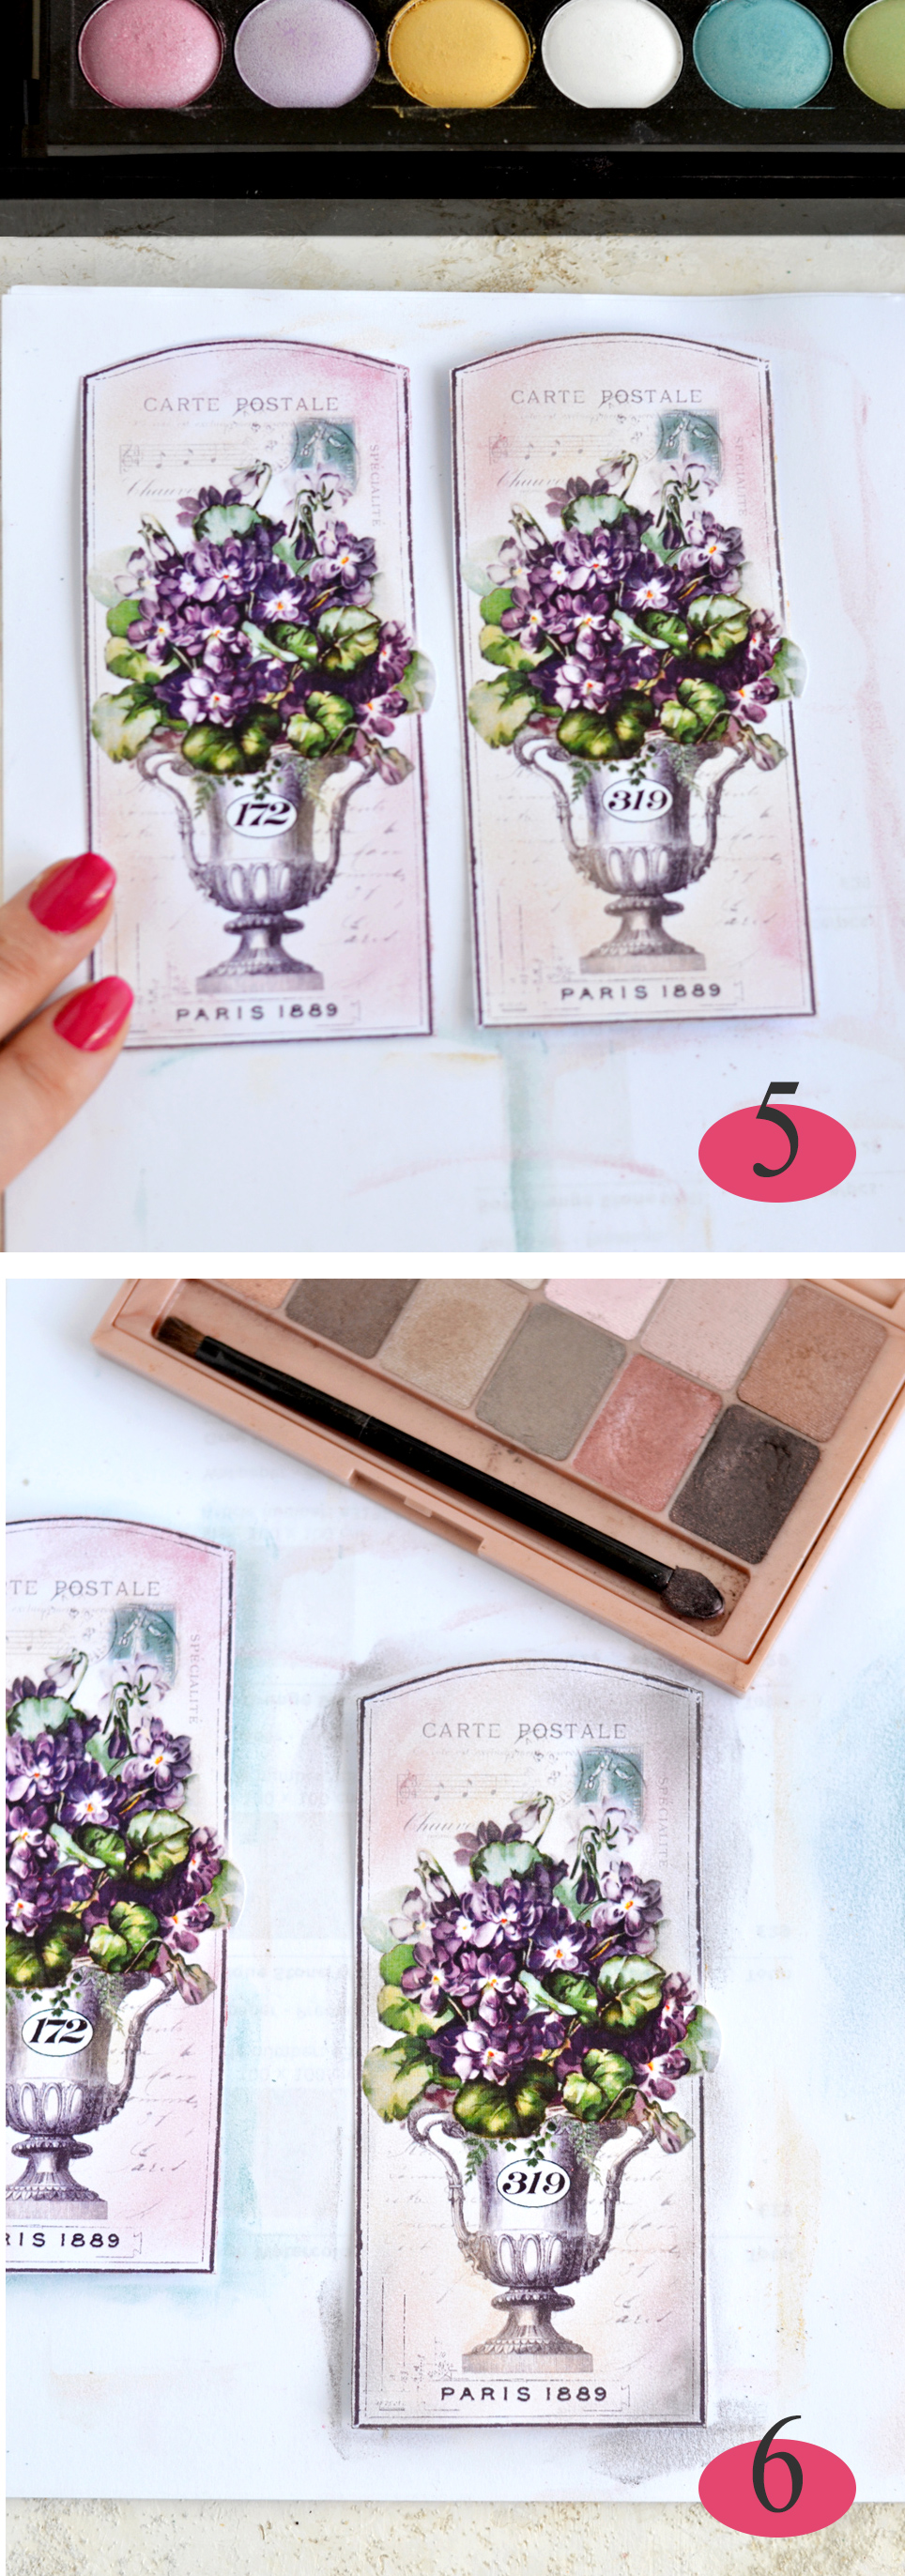
2. Choose your first color – I went with yellow – and gently rub your finger onto the surface of the eyeshadow a few times. The general rule is to get enough color on your finger, but not to overdo it. Start with a smaller amount at first, to see what you like, you can always get back for more!
3. Rub the color all over the edges.
4. Then, starting from the edges, without adding more color, use your finger again to gently rub the color into the paper. I went with small circular moves and I spread the color all over the surface, except for the urn and the flowers – always going from the edges to the center. I wanted to get a lighter yellow around the flowers and the urn and a darker yellow on the edges. Choose another color for the next tag and follow the same circular moves towards the center.
NOTE: I noticed that if I added too much color at a time, the powder didn’t adhere to the paper well. For me it worked best to start with a smaller amount of color and gradually add more. Just use your best judgement (according to the makeup powder you are using) and see what works for you.
You can use your finger to ‘brush’ uneven strokes, leave some white spots here and there, try new things. These are just guiding lines that you can try, but please don’t stress too much about this. Enjoy this whole process and don’t forget – the makeup distressing is supposed to be fun and imperfect! Imperfect is fun!
NOTE: Keep a paper towel close by so you can clean your finger in between colors, if you don’t want to mix them on the paper.
5. To add more interest to our makeup tags, you can choose to add more color at any given time. You can use the same color to distress the edges and highlight everything even more or you can choose a different color – it’s all up to you.
6. For more of a vintage distressing of the edges you can choose a dark color like black or brown or really a darker shade of a specific color. Don’t be tempted to use too much of this color and go gradually when adding and rubbing it in, we only want it here and there, on the edges. At least this is how I wanted it, you can go as crazy as you want with yours!
The paper underneath your tags will help you to finger brush only a small amount of the darker color on the edges – while making the rubbing motion move your finger more on the blank supportive paper rather then on the edges of the tags.
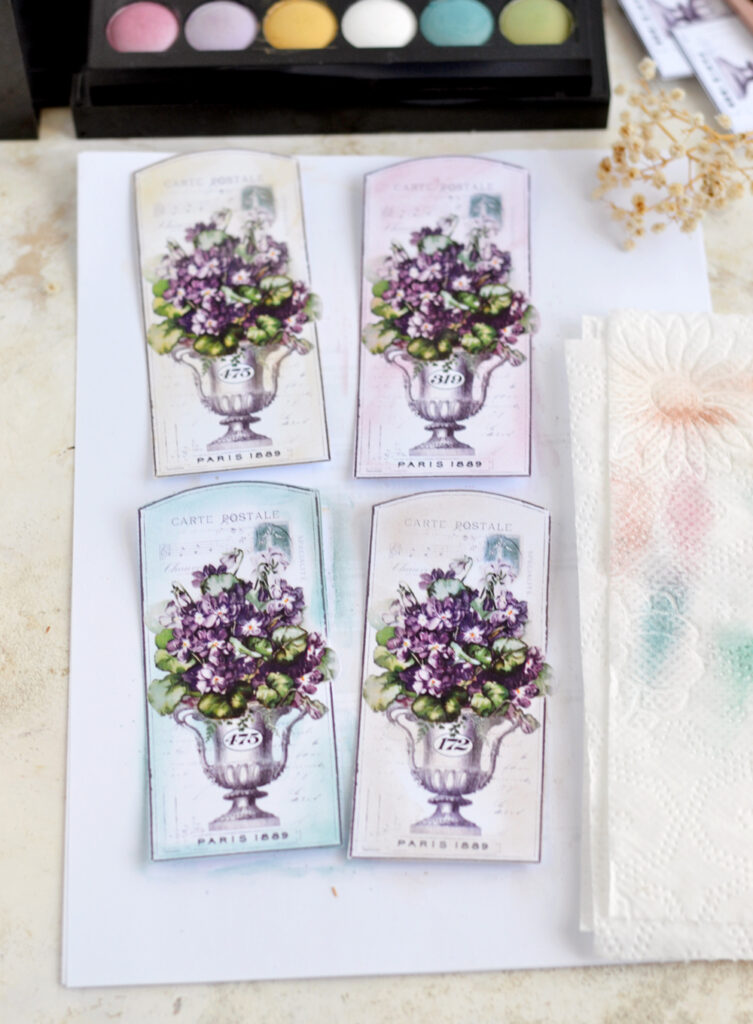
7-8. And, just like I mentioned before, feel free to add more color if you want or – why not – use a paper towel to take some of the color off. You could even use a baby wipe, but be careful not to damage the tags. I actually used some paper towel here to gradually take off some of the color around the violets and the urn, to create a white aura effect all around the image.
Optional, you could even use a white pen to highlight the white of the flowers even more.
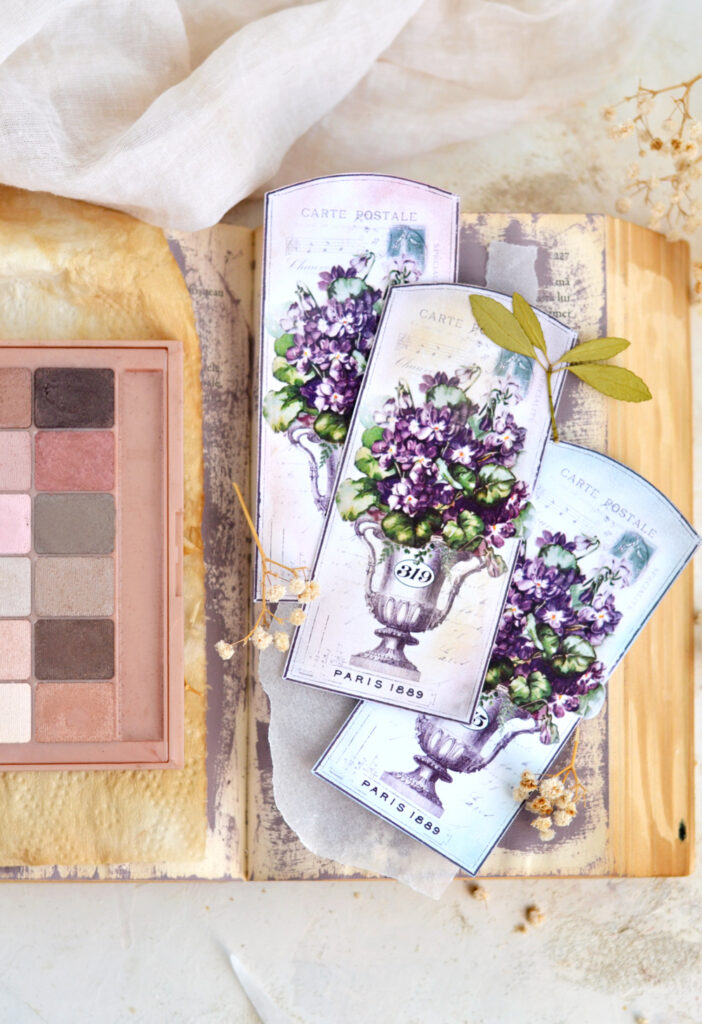
And that’s pretty much it! I’m in love with these beautiful Gift Tags Printable, all beautified and distressed with makeup and I’m confident you will love them too! As you can see I went for more of a chic & charming subtle pastel look with mine, you can adapt yours to your needs!
Let me just say – maybe this technique will not give you perfect results, but it sure is a fun and joyful experience! Some of the makeup might wear off while handling the tags, so if you want to seal in all that colorful and beautiful pigment, feel free to brush Mod Podge all over the surface to further protect it. A uniform layer of Mod Podge will create a transparent skin on the tags and will enhance the colors even more.
This was not my first attempt of using unusual ‘ingredients’ to create something unique, you can check my DIY French Apples (I used gold nail polish), my DIY Vintage Poppy Tags (I used red nail polish) and my Vintage Keys Makeover for other fun projects too.
And these are the eyeshadow makeup kits that I used today – just in case you want to give them a try.
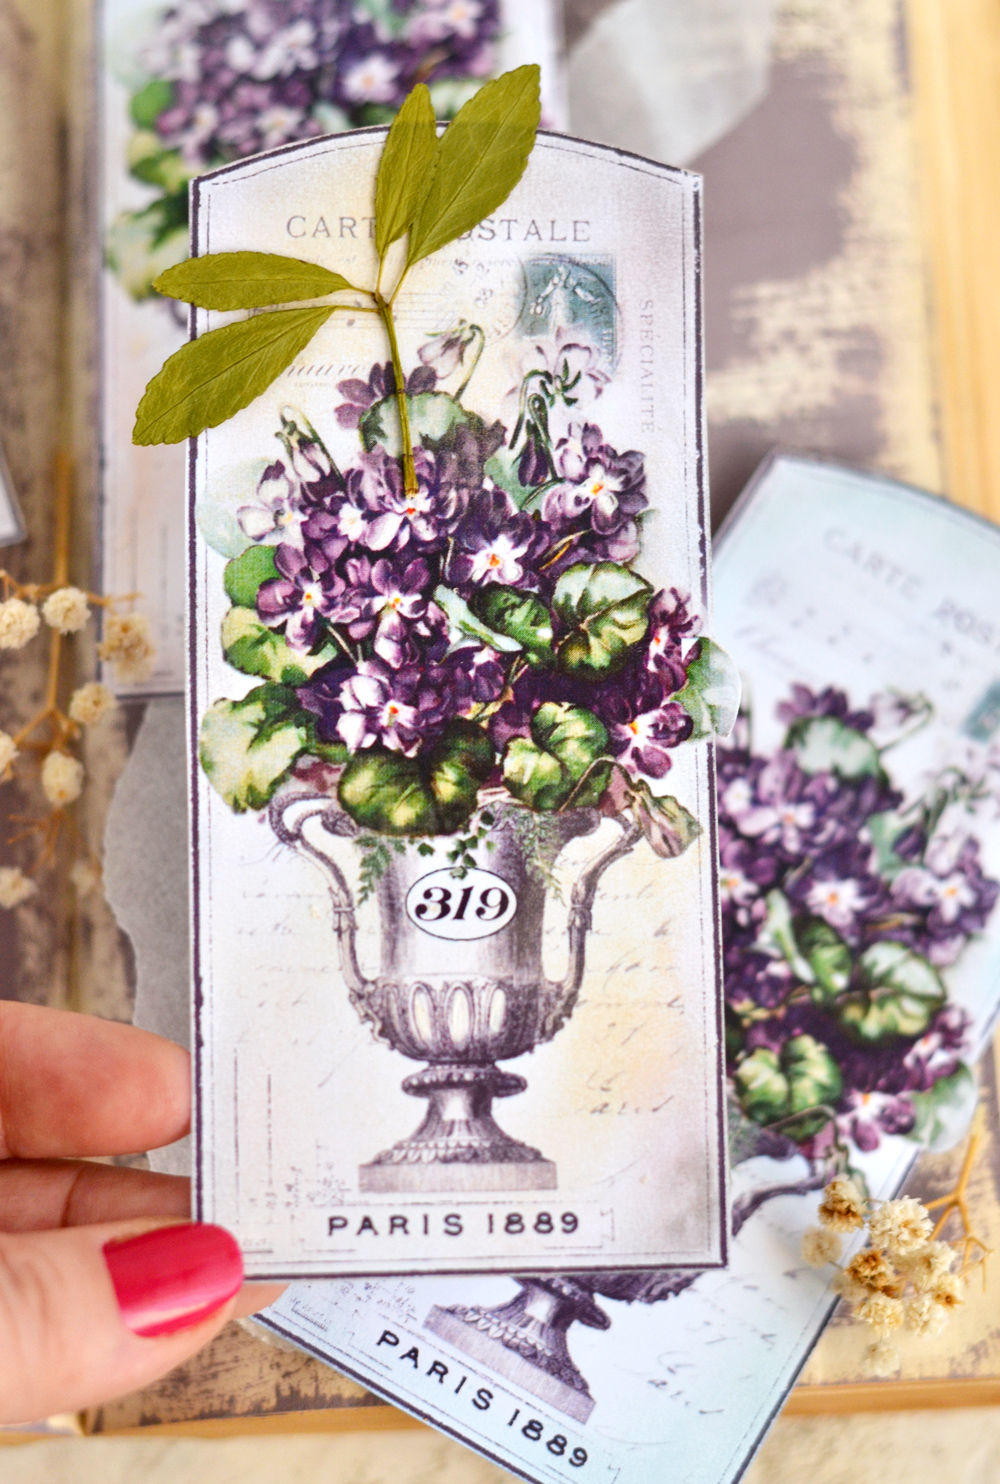
I found these lovely pressed leaves between the pages of my coffee stained vintage book, while photographing this project, aren’t they JUST beautiful? Not sure when I even put them there, but I instantly fell in love with the idea of adding some pressed leaves to these tags, for a 3D-going-outside-the-edges-embellishment. The leaves almost look like a dragonfly that is trying to start a conversation with our gorgeous flowers. What do you think are they whispering about?
I’m planning of experimenting with makeup distressing even more, I really loved how quick and easy this whole process went. You could try this technique in your art journal, junk journal or other crafty experiments – I’m really curious to try it over layers of gesso, ink, paint or other mixed media goodies. It could be that ‘special something’ an unfinished project or a page in your journal needs!
I hope you loved this Gift Tags Printable craft and you give it a try, they are beautifully wearing all their makeup!
Have fun creating,
Diana / Dreams Factory




Bev Wilson says
Hi Diana! great tags – thank you – and the old makeup works so beautifully! 😀 <3
Karen Watson says
I’m glad you enjoyed Diana’s makeup tip for crafts Bev!
Christine says
Wow…I love your idea. This will be so much fun to do. Thank you for your tutorial.
Karen Watson says
Have fun making these Christine!
Lynda Fullen says
Love these! I’ll be using these soon. Thank you.
graphicsfairy says
Thanks Lynda, I am so glad you will be using them, have fun!
Cynthia Murphy says
These tags are just beautiful! Can’t wait to try this. Thank you.
graphicsfairy says
Thanks so much Cynthia, I am so glad you enjoyed them!
Linda Dow says
This looks like a fun project. I have some old make up I’m not using anymore and can’t wait to give this a try.
Thank you for sharing this project. xx
graphicsfairy says
Thanks so much Linda, I am so glad you will be giving them a try, have fun!!