Handmade Gift Tags
Hello, Graphics Fairy friends! I’m Diana from Dreams Factory and I’m ready to share another fun project with you! Today we are taking out our nail polish colors from our drawers and start making these beautiful Handmade Gift Tags. A unique way of getting creative and having fun while experimenting with unconventional supplies, who would have thought nail polish and their small brushes would be the perfect replacement for regular paint and paint brushes?
These colorful small bottles actually turned out to be perfect for this project and I was able to use their small size and their ‘enamel’ look to my advantage. This thing alone considerably narrowed down the supply list to only a few items.
This was not my first experiment with nail polish. You might remember my DIY Vintage Poppy Tags where I used red nail polish to color some of the petals of the flowers. Or my DIY French Apples Decor where a coat of gold nail polish on the stems really completed the whole makeover. I even used it on our last project together – the Gold Foil Honeycomb Bee Tags, where I filled some of the hexagons with more of that lovely gold nail polish.
And for today I wanted something similar, but I also wanted to push things further and try something different. So I used several nail polish colors to add a touch of color to the flowers, two darker colors to create the faux enamel ‘chippy’ effect on the edges and finally, I used a coat of transparent nail polish as a varnish on the whole surface of each tag. I have to confess I was amazed by how beautiful they all looked in the end, so I would say it was definitely a successful experiment! I love when that happens!
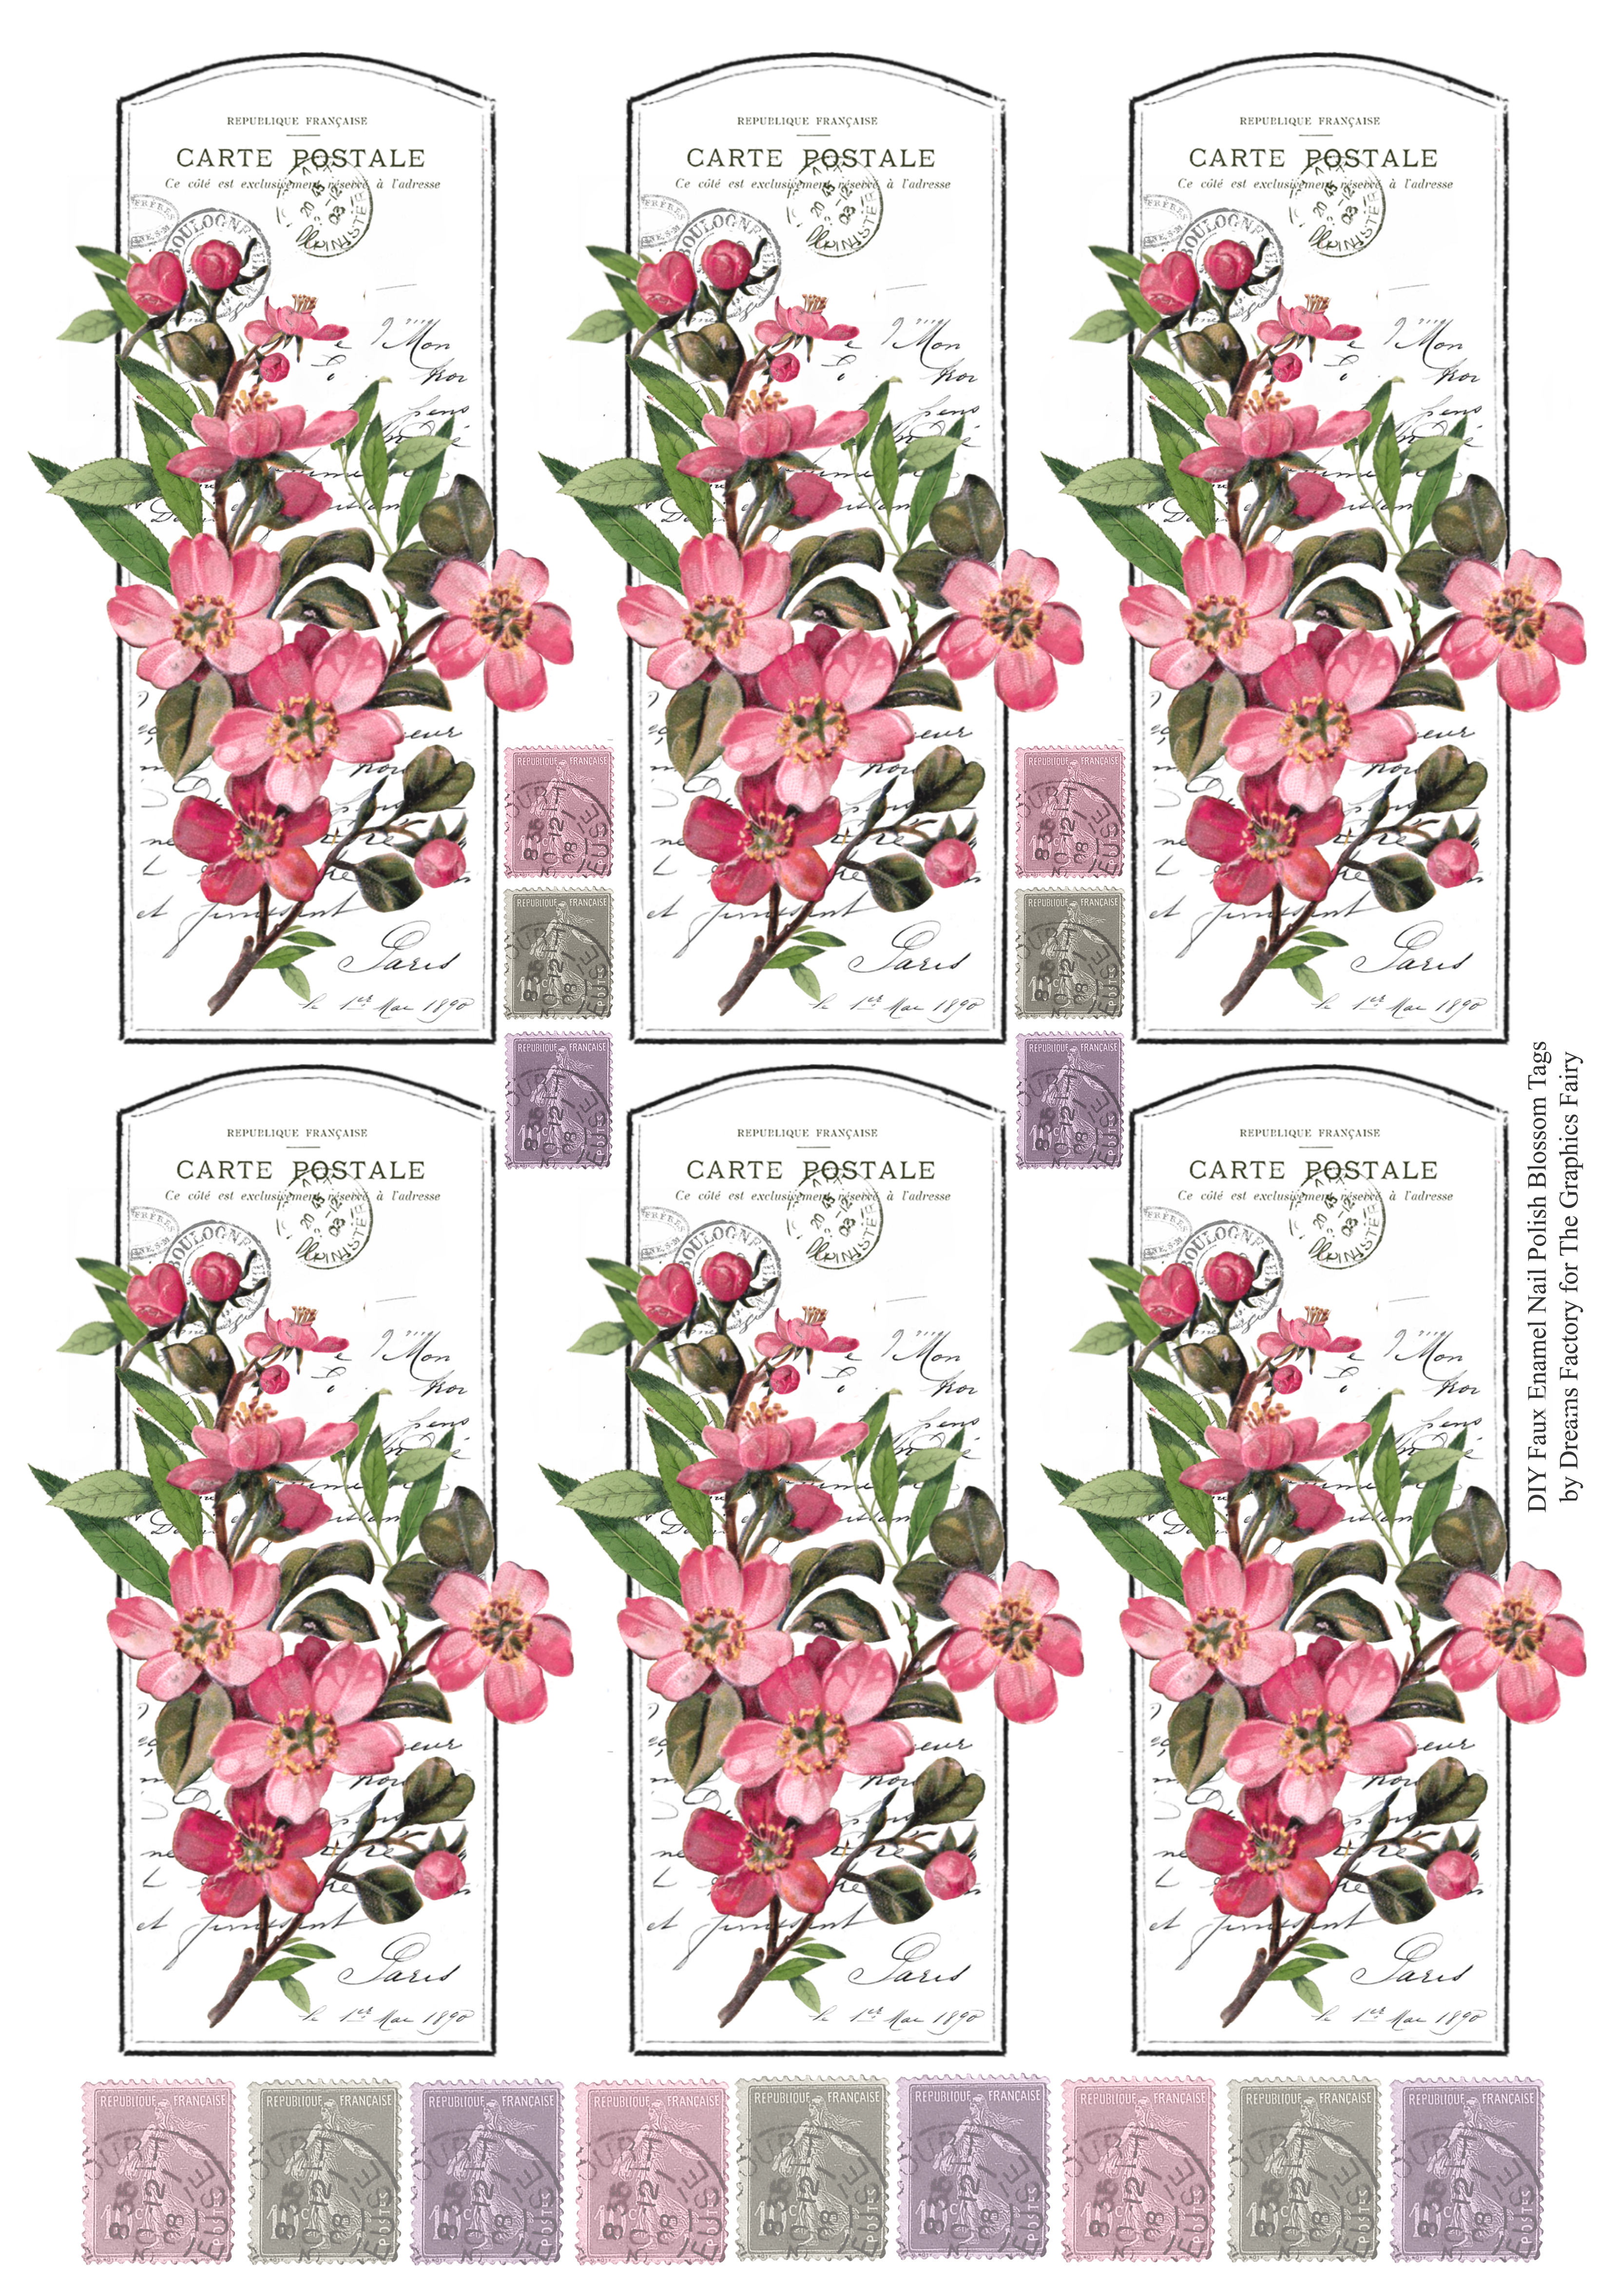
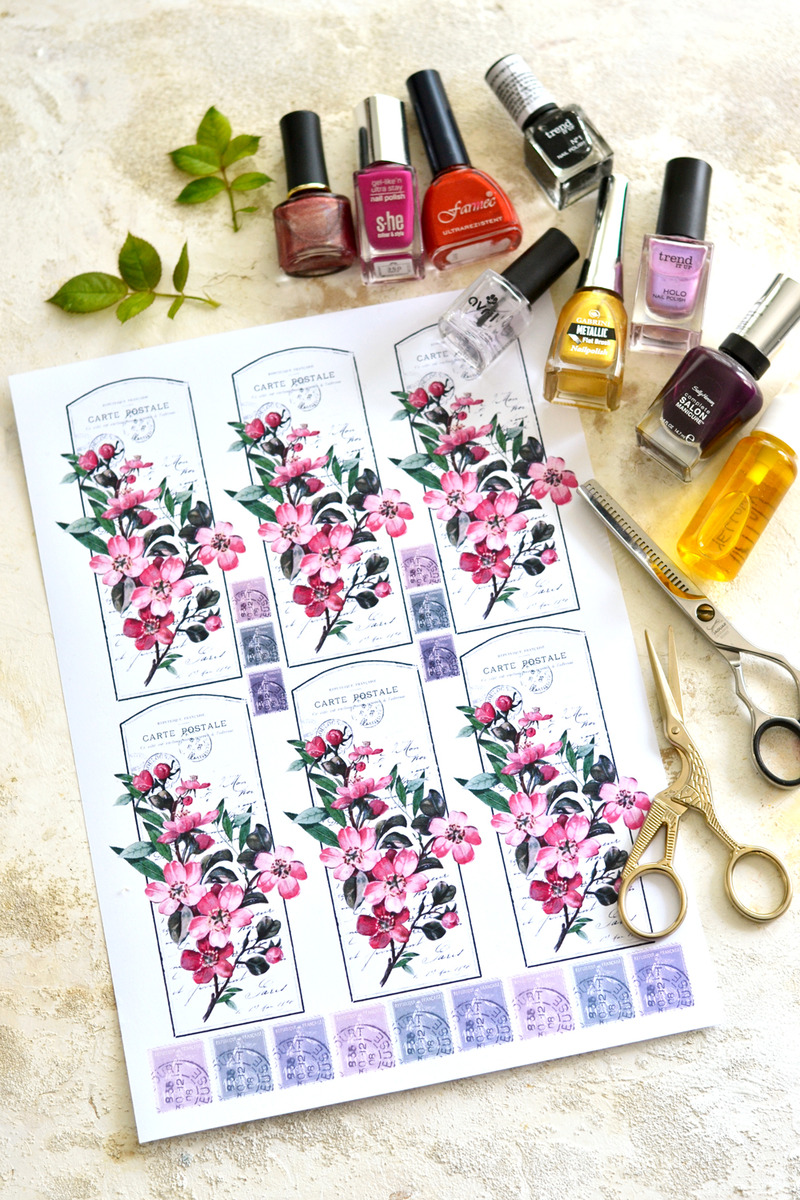
The starting point for the tags is this chic vintage frame that I love using and reinventing over and over again. I cannot seem to get enough of this beauty, I think it works really well with all the other lovely French elements that I used and the gorgeous pink blossoms – the star image for today’s project. You can see how I intentionally went a little bit over the edges with some of the flowers and the leaves and I was able to create this amazing – almost 3D – effect on the edges. Because I wanted to add a little bit of depth to my Handmade Gift Tags, full instructions included as well as a free printable to make these pretty Tags. Perfect for giveaways!, I decided to also add a few colorful postage stamps as separate elements on my printable. This will give you even more room for experimenting, because the postage stamps come in two different sizes and you will be able to choose the ones that you love the most. And don’t worry, I added a few extra ones, just in case you want to use them in other projects too!
Free Printable Handmade Gift Tags
—-> Click HERE to Download the Full Size Printable PDF (large) <—-
Handmade Gift Tags Supplies:
- the lovely blossom printable with the tags
- cardstock paper
- home printer
- ink spray – I used yellow
- nail polish in different colors (your favorite colors for the petals, darker colors for the edges and a transparent one)
- scissors (to cut the tags)
- thinning shears (to create that specific postage stamp edge)
- paper glue
- a plastic sheet or a non absorbent surface (to protect your working area)
DIY Faux Enamel Nail Polish Blossom Tags
I really loved how the printable turned out and I was really excited to get things started!
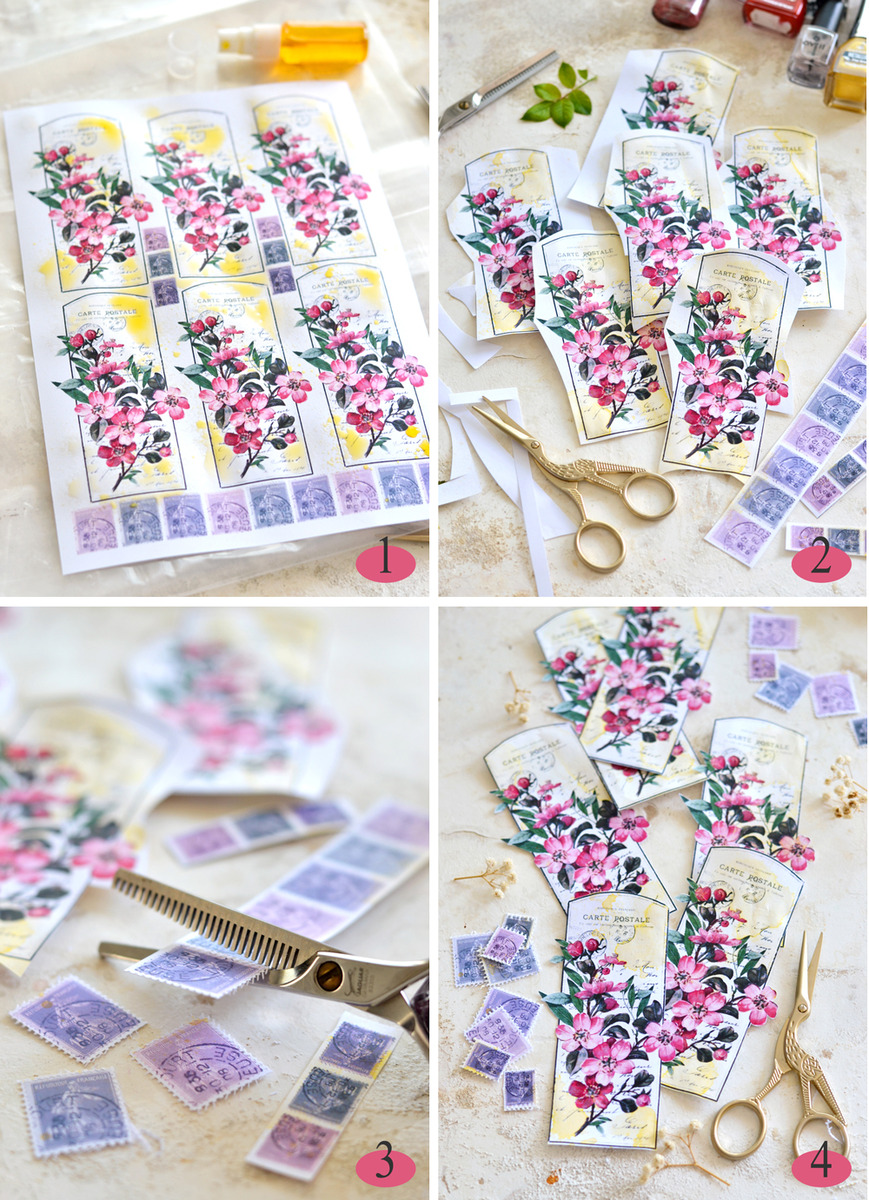
1. The first thing I did was to print the printable on cardstock paper using my laserjet printer. I placed the printable on my table (it has to be a protected surface) and I used a yellow ink spray to add pops of color here and there. I only wanted to ‘break’ the white initial color of the paper in some places so I didn’t completely cover it with the yellow ink. I used yellow because I thought it would be perfect to create a subtle contrasting background for my pink blossoms, but it would also work with the leaves and the additional postage stamps. You can replace the yellow with other colors, but try not to use something too bold or intense – we want something that would emphasize the beauty of our flowers, not compete with them. Let everything dry completely before moving on.
2. Next I used some small scissors to roughly cut each tag. As for the postage stamps, I cut them in long strips at first using regular scissors.
3. Then I used my revolutionary technique for cutting that specific edge on my postage stamps and my trusted friend – the thinning shears – vividly completed that task for me. Just remember to always keep the serrated blade on top when cutting – check my DIY Faux Vintage Postage Stamp project for more details about this technique.
4. Now use your regular small scissors to cut the tags along the edges and be careful around the flowers and the leaves that are going outside the borders.
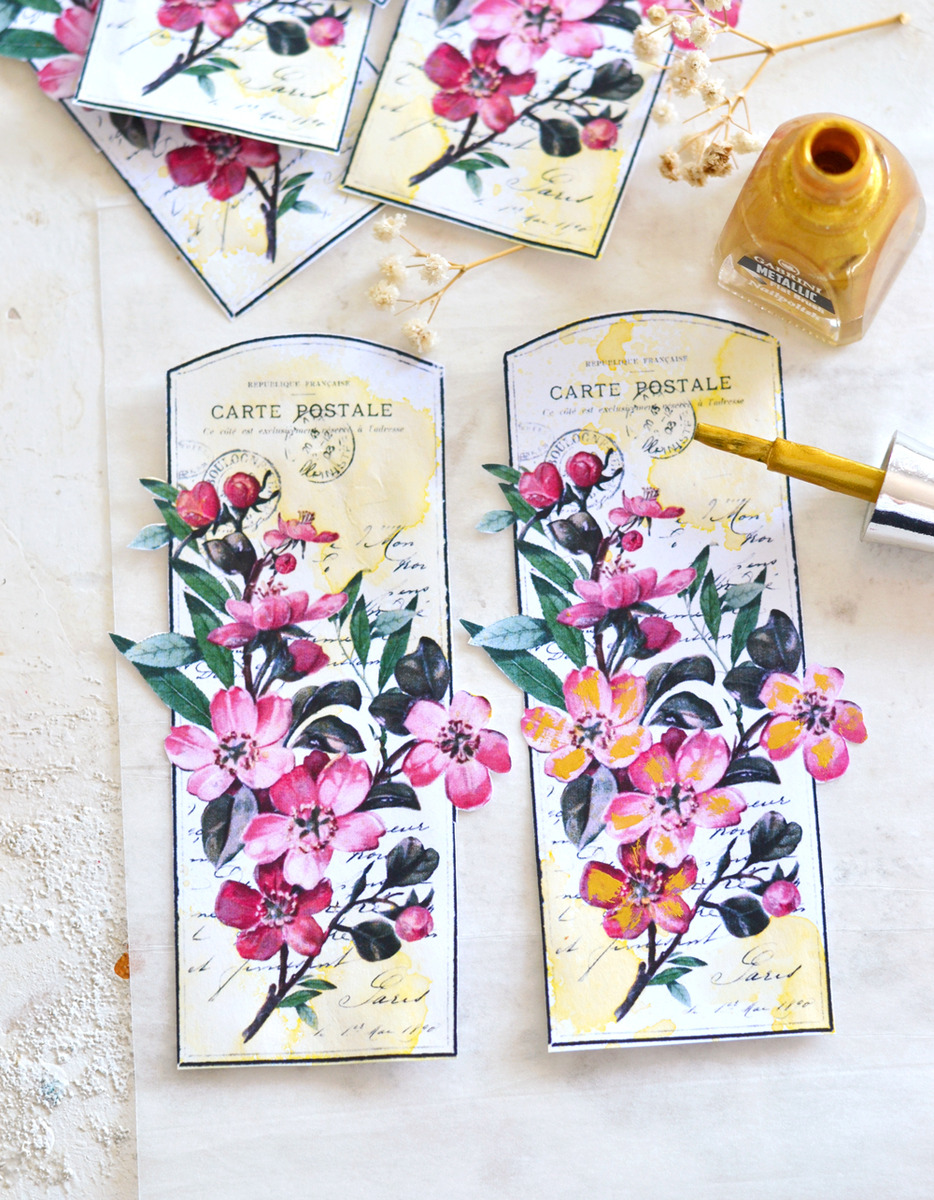
Now comes the really fun part, when we start experimenting and playing with the colored nail polish! Yay! This part is my favorite, because depending on the colors you are choosing, you will be able to create extremely beautiful and quite different effects. I used nail polish in different colors and finishes – metallic, holographic and matte.
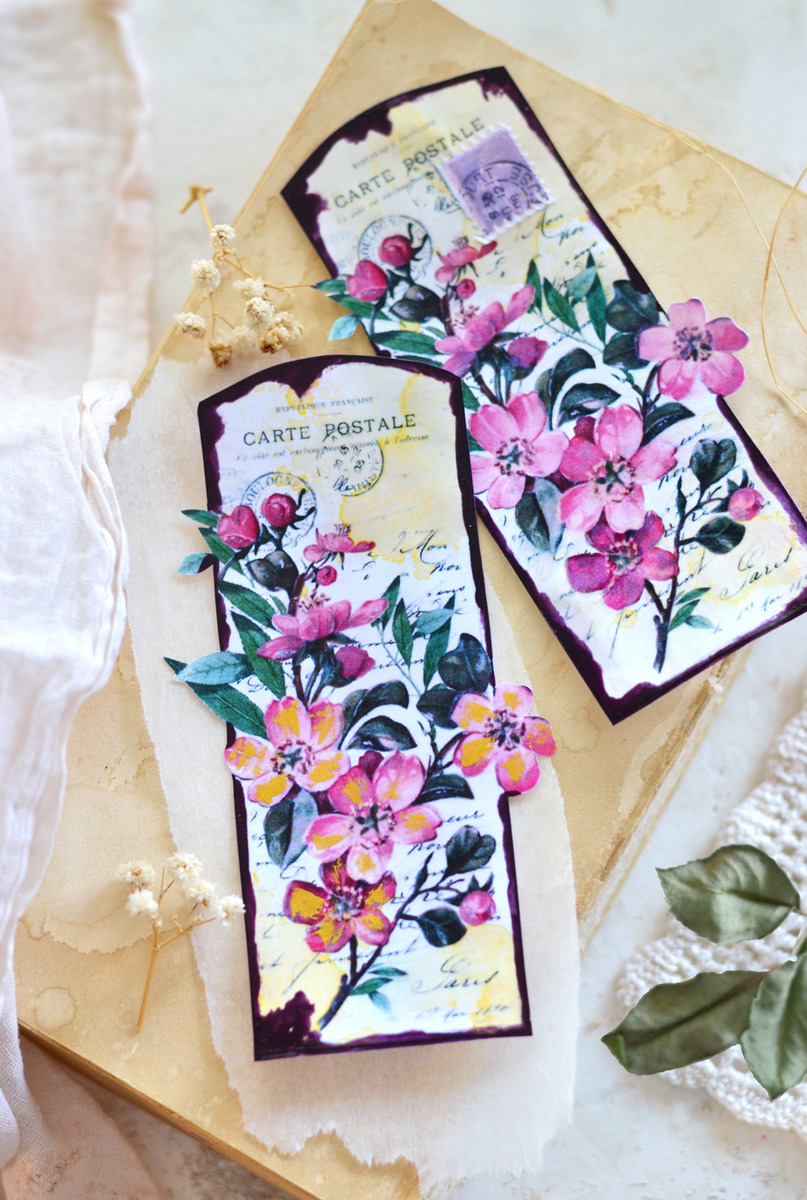
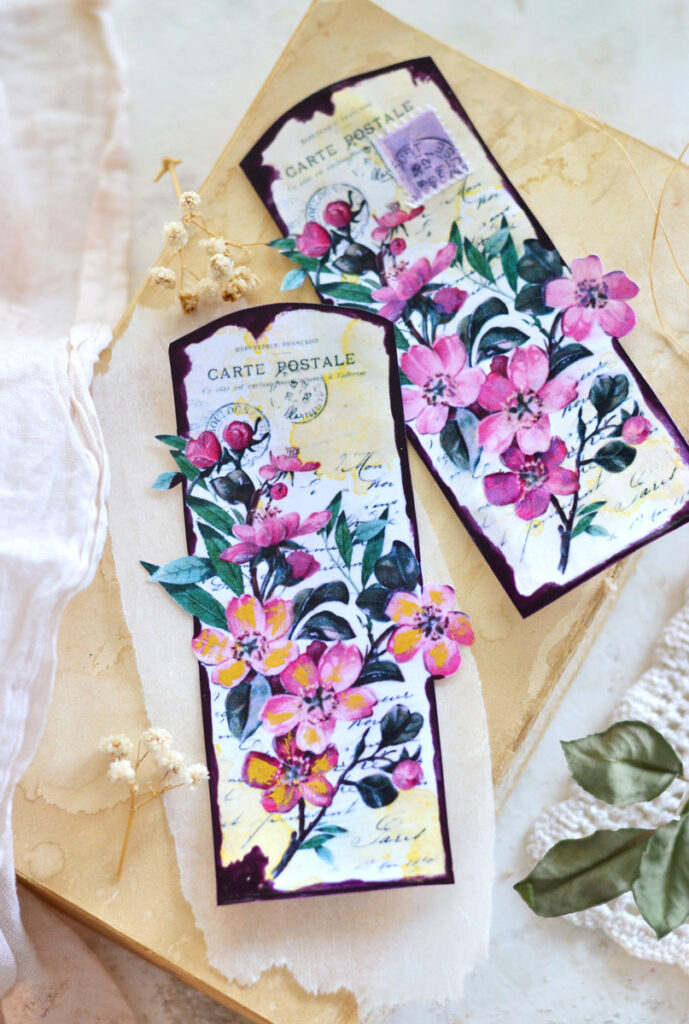
For example, I was surprised to see how brushing a little bit of metallic gold nail polish on the petals enhanced the look of my blossoms and completely moved them into a new dimension. Metallic nail polish also creates some lovely shimmering effects, depending on the light, it’s always great to discover the depth of this unconventional nail polish painting technique.
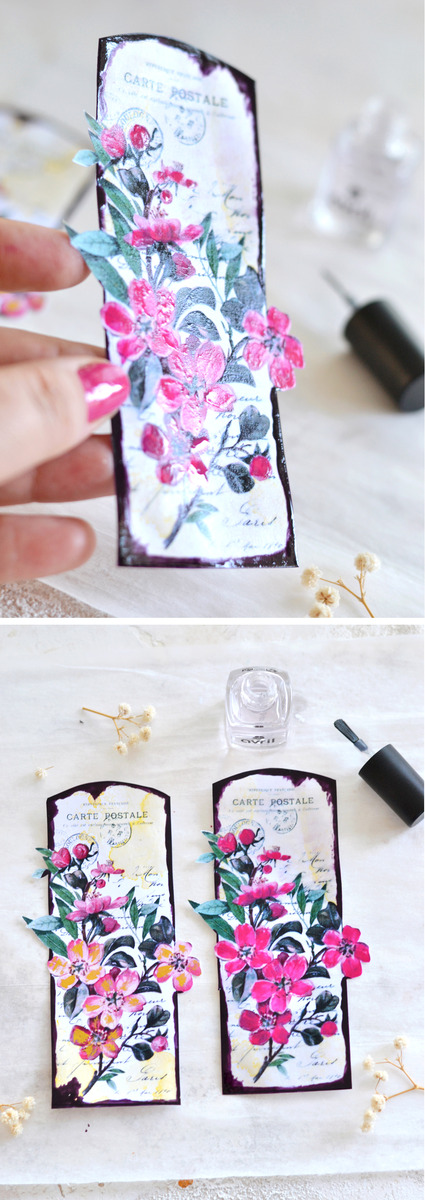
P.S. The tag on the left is an unaltered initial tag, you can use it for visually comparing it with the altered one on the right.
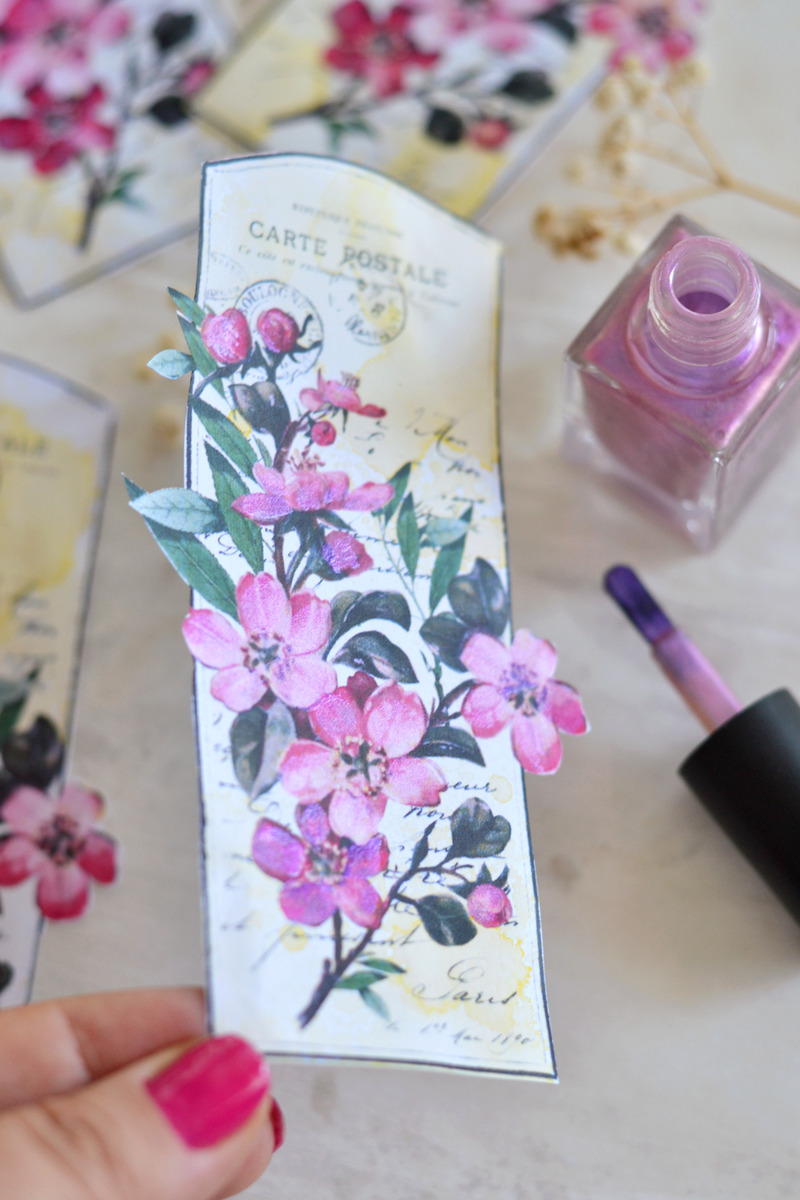
The holographic nail polish turned out to be a great surprise too because it is almost like a tinted transparent paint and it is quite chameleonic, for the lack of a better word. It also created really beautiful effects when hitting the light and it managed to enhance the look of my flowers while lightly tinting them in a truly delicate way.
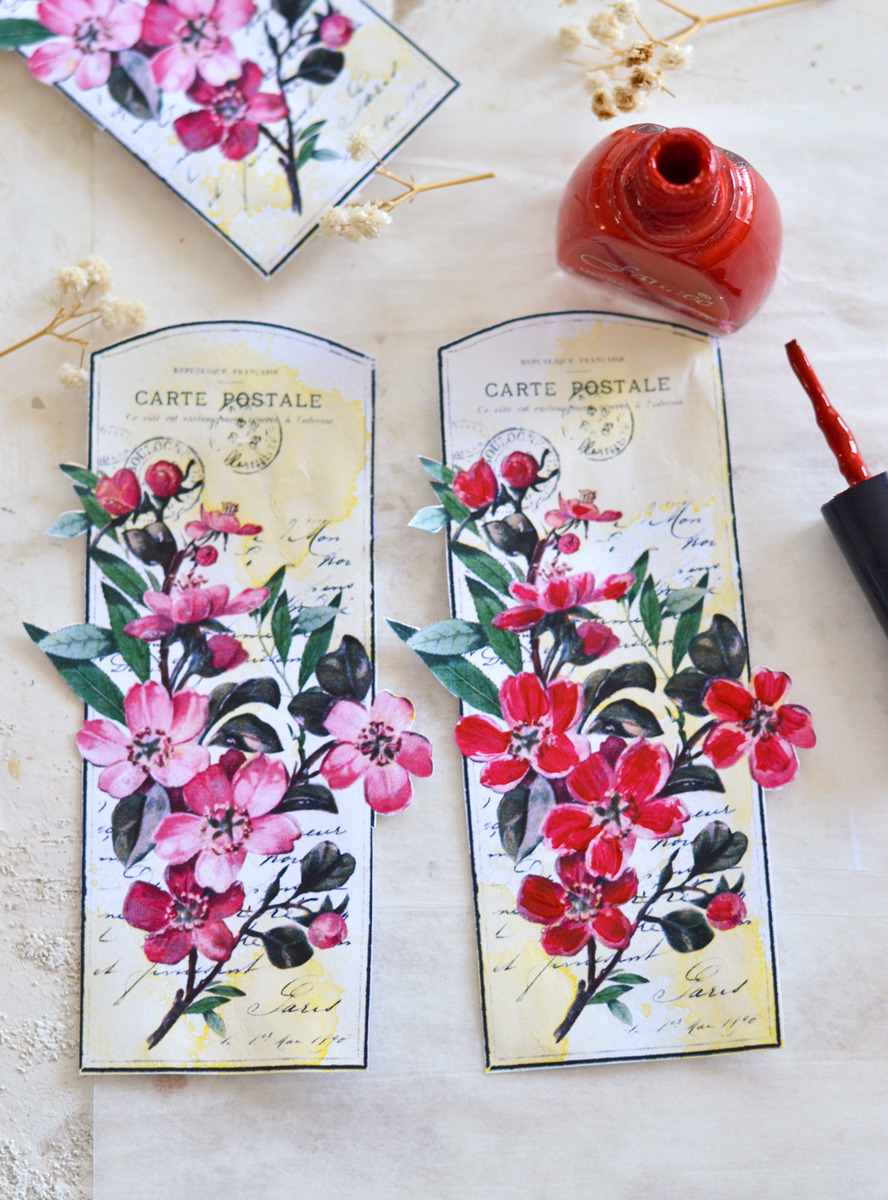
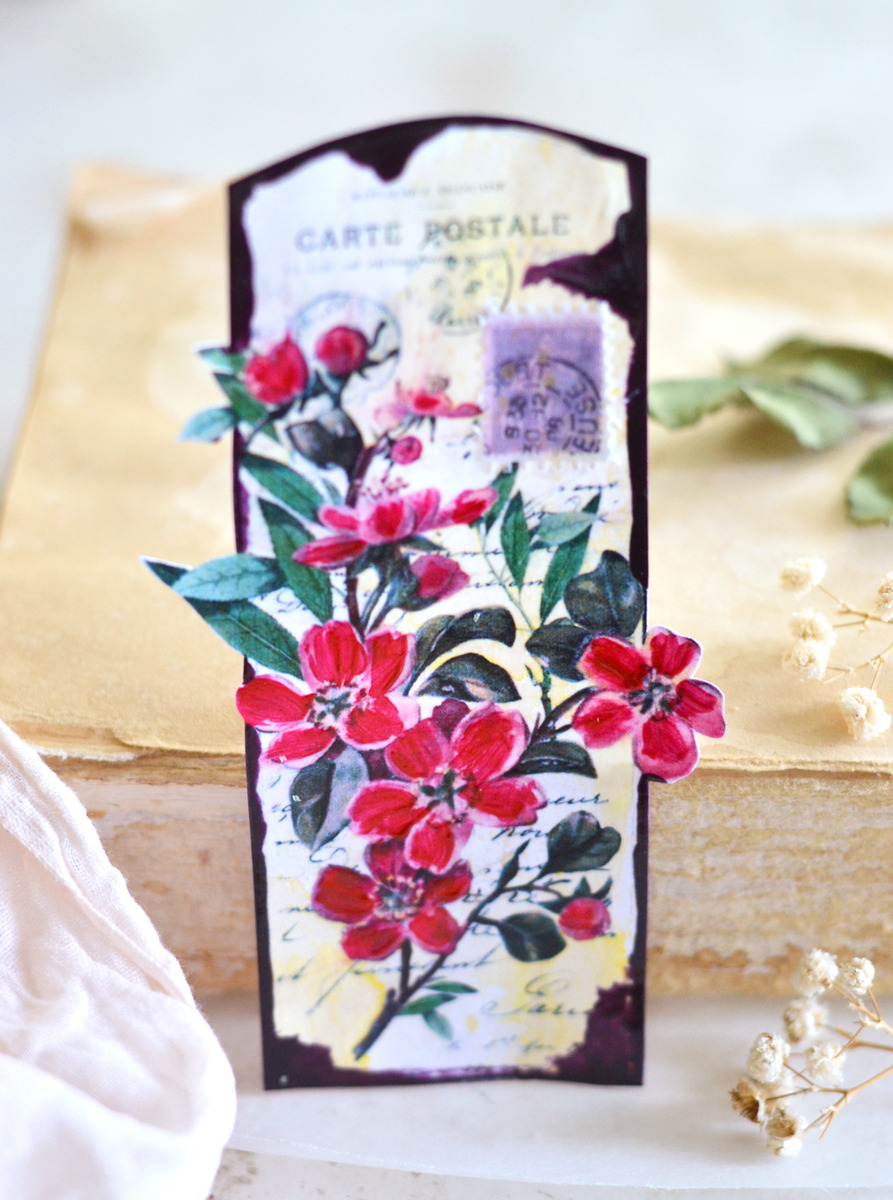
Next on my list was this retro red nail polish paint, in a matte finish and I was so pleased to see how it completely changed the initial pink vibe of the image. This matte finish was more intense then the others and even though I haven’t completely covered the petals with the ‘paint’ it was visually, the most powerful.
P.S. The tag on the left is an unaltered initial tag, you can use it for visually comparing it with the altered one on the right.
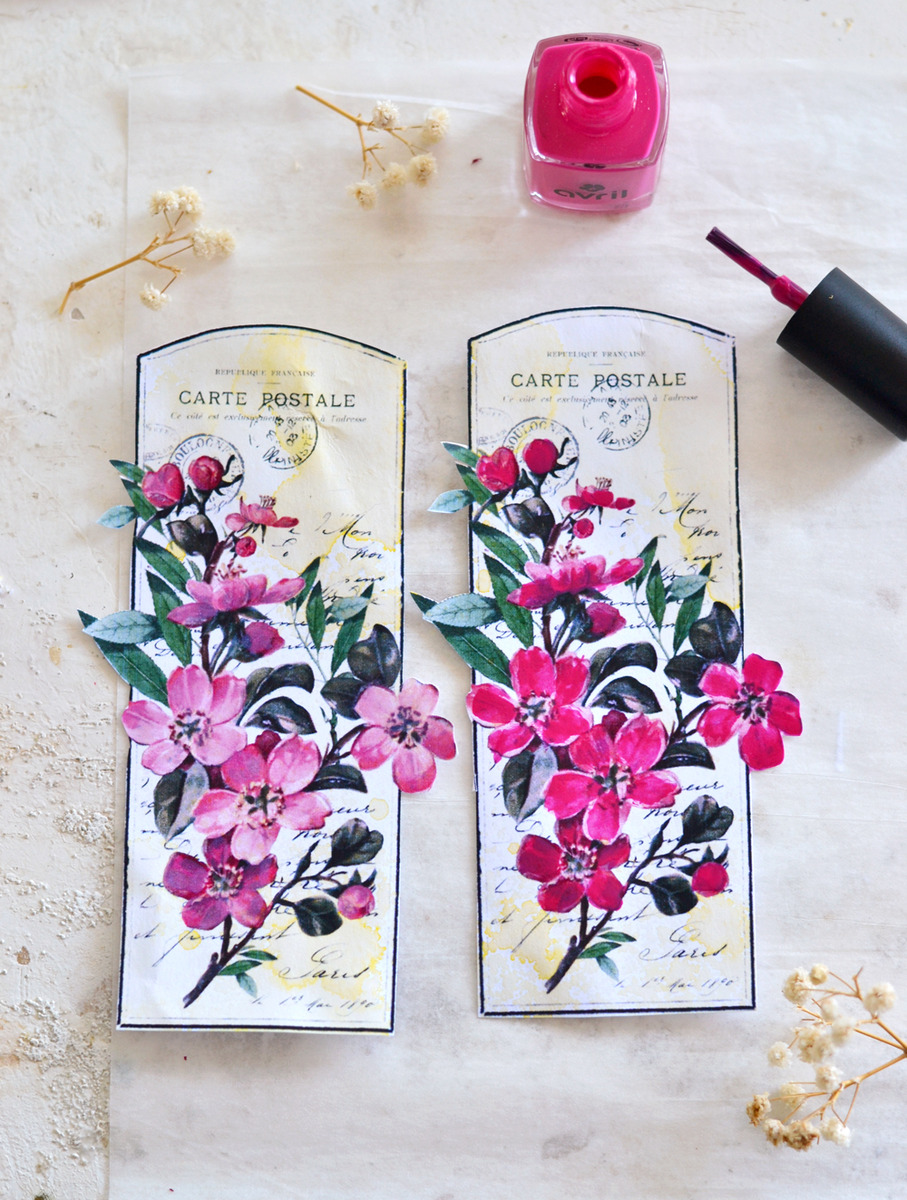
Here is another example of a strong, matte finish. I used my favorite nail polish, a really beautiful Raspberry color that I just love using on my nails lately! Can you see how it really sets the tone of the overall image and steers it into a completely different direction?
P.S. The tag on the left is an unaltered initial tag, you can use it for visually comparing it with the altered one on the right.
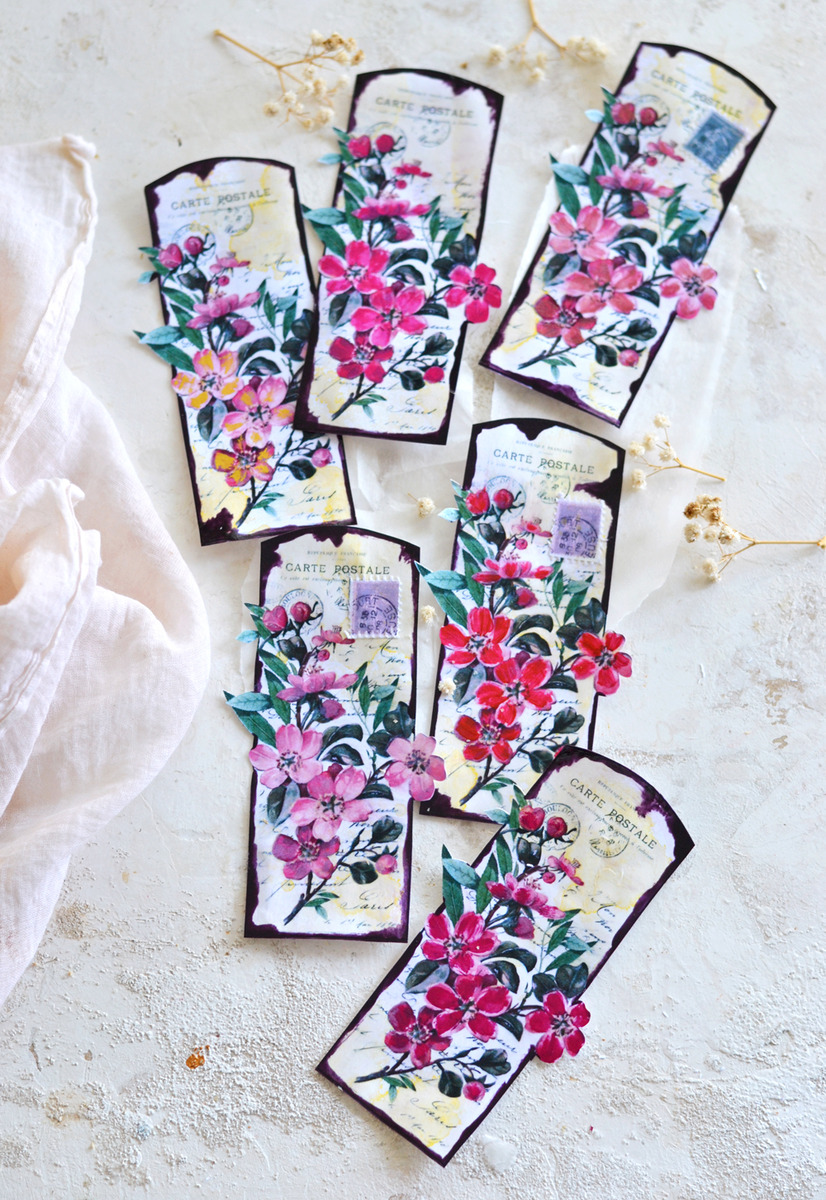
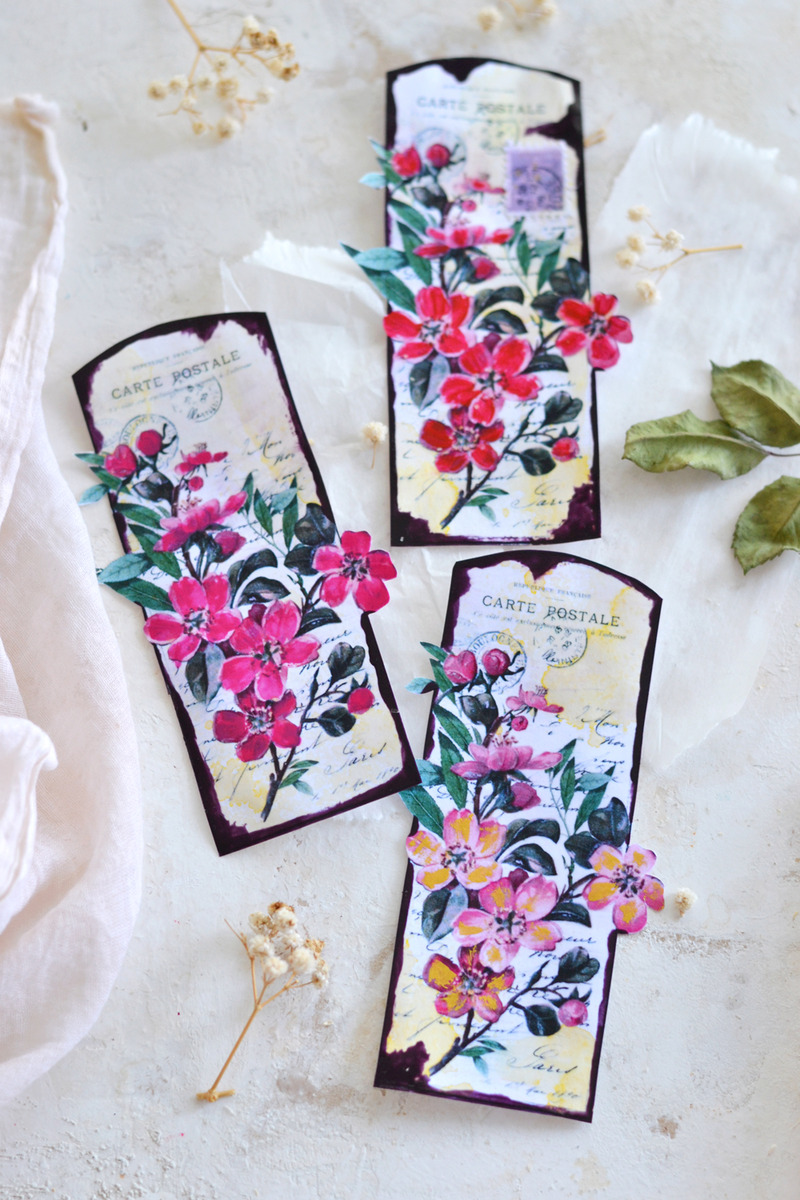
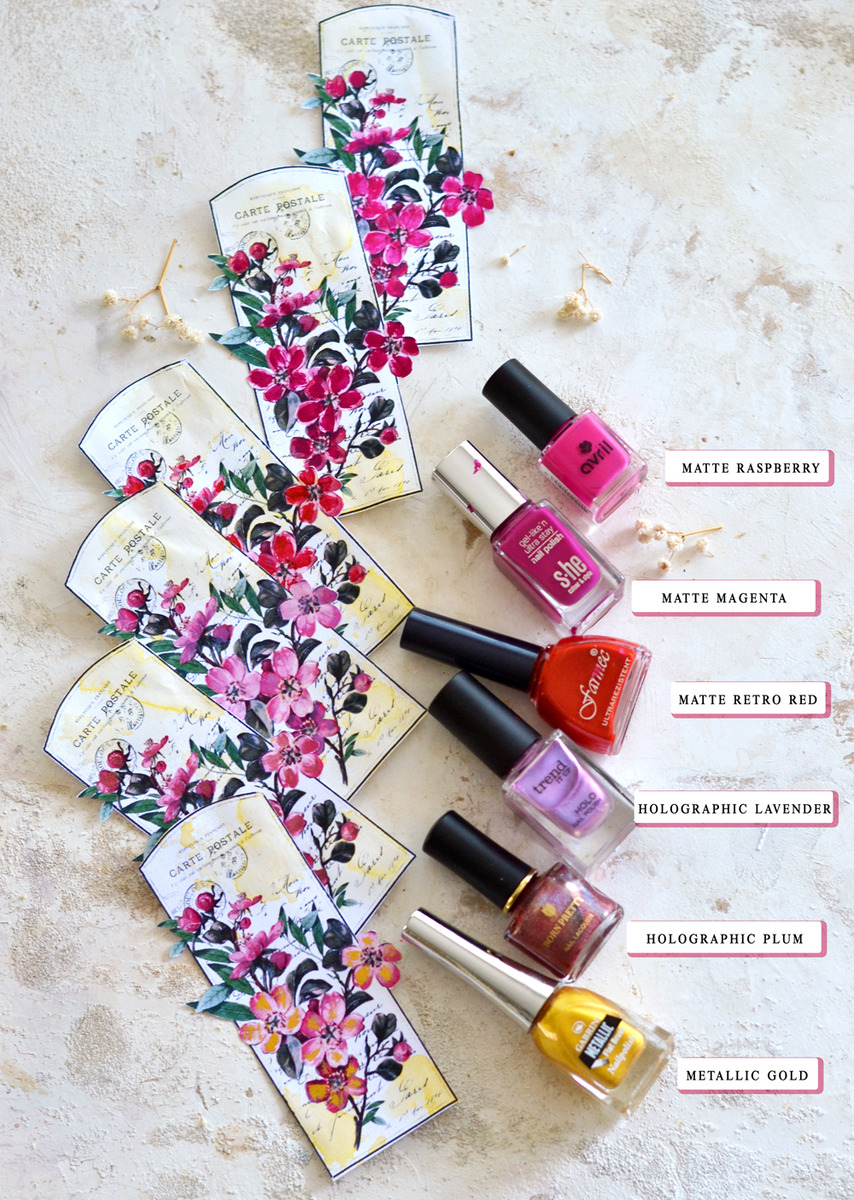
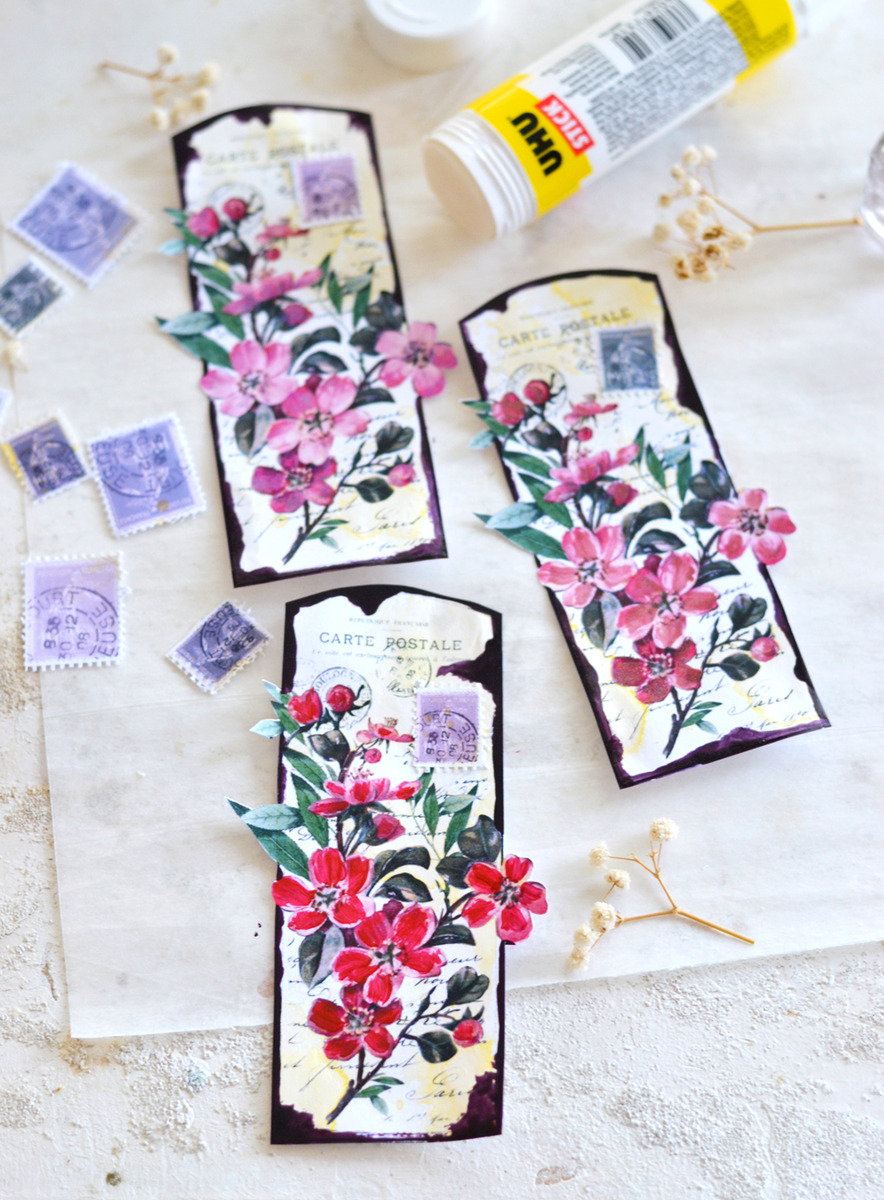
I actually ended up using a different colored nail polish for each tag and I was really happy with how they all turned out. I used a lovely metallic gold, a holographic plum, a holographic lavender, a matte retro red, a matte magenta and a matte raspberry nail polish. You can have fun with different colors and finishes, like I did or go with only one or two colors if you are maybe looking to get a specific effect.
The choice is all yours!
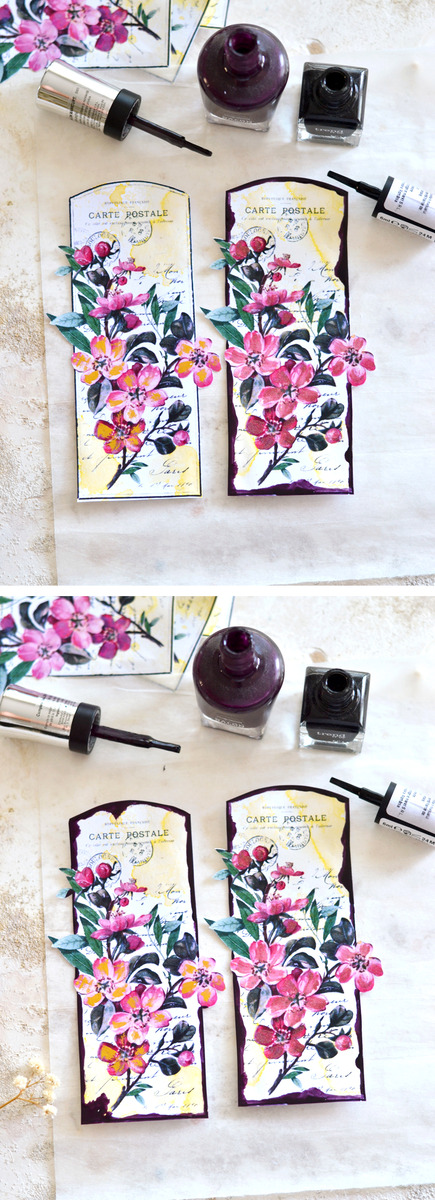
You could stop at this point and just use the tags as they are or you can proceed with the next steps and go more into deep with the whole faux enamel effect. You will need really dark colors to create that beautiful chippy enamel effect on the edges. I (mostly) used a really dark plum color and some black (here and there) at this stage and I applied a quite generous amount of this nail polish paint all around the edges. There is no right or wrong, no perfect patterns to follow, just let your brush flow freely and insist in some areas to create a more intense effect.
Try to think that your tags are actually small enamel vintage signs and your dark nail polish paint is the rust you usually see on these after years and years have passed. It’s really amazing to see the magic rusted effect this dark nail polish paint can create on the edges and how it totally transforms the whole appearance of the tags.
At this point I absolutely loved how enamel-y my tags started to look and I couldn’t help but notice how they actually morphed into these gorgeous faux mini signs!
Now it would be the perfect time to glue your postage stamps! I decided to only add them to three of the tags and left the other three without any stamps. Let the glue dry before moving to the next step.
For our final step I decided to completely cover the tags with a clear nail polish coat – I thought this would enhance the faux enamel look even more. And I was right, this last step really closed the circle and completed the whole final look, giving our DIY Faux Enamel Nail Polish Blossom Tags a new dimension, both in visual and tactile terms.
I started from the top of each tag and gradually brushed the clear nail polish with left and right moves, moving downwards.
I would suggest working in a REALLY well ventilated area (even outside, if possible) while ‘painting’ and finishing these beauties, the nail polish smell – especially on this final step – can get quite overpowering!
If you try this project you will witness the transformation of these Handmade Gift Tags right before your eyes! You will be amazed to see how a simple cardstock tag can be turned into something so beautiful! The colored nail polish brushed on the petals will beautifully enhance or completely change the color of the flowers.
And that final coat of clear nail polish will actually work it’s magic on so many different levels. I noticed how it somehow muted the French ephemera elements on the background giving them a more subtle and sheer look, but in the same time making the flowers in the front look more vivid and alive. It’s quite fascinating!
Also, do you want to know another super magical trick that this final clear nail polish managed to performe? It created a waterproof coating on our tags! How amazing is that?!
The Handmade Gift Tags can be easily included into your life, no matter if it is for decorative purposes around your home, gift wrapping sessions for special friends (a handwritten message on the back could be a nice personal touch) or other creative adventures (like maybe decorating your art or junk journal). They can also be turned into long lasting bookmarks that would accompany you (or your friends) in all your beautiful reading experiences, so I really hope you will give this project a try!
 Video Tutorial:
You might also enjoy another pretty tag tutorial in this video!
Happy crafting,
Diana / Dreams Factory



Mona says
When you start off with such beautiful graphics, it’s easy to see how just a small touch like nail polish can really make the images pop! Loved the idea for thinning shears. You are a treasure!
Karen Watson says
We’re so happy that you enjoyed Diana’s beautiful project this week Mona!
Lyric says
Really nice. Thank you for sharing these instructions I just may do this one; this time.
graphicsfairy says
Oh yea, I hope you give it a try and have fun!!
Rurh Ann Bryant says
Thank you. Unique and fun!
graphicsfairy says
Thanks, so glad you liked it!!
Linda Dow says
Thank you so much for these. I can’t wait to print them and try this technique. The look so pretty, thanks again. x
graphicsfairy says
So glad you like it Linda, have fun!!
Kate says
I love your ideas! Thank you for sharing as well.
Karen Watson says
We hope you have fun making these Kate!
Cynthia Murphy says
I love these. Can’t wait to print and use my nail polish!
Karen Watson says
We’re so glad you enjoyed Diana’s tutorial Cynthia!