
DIY Paper Bag Flower Tags
Hello Graphics Fairy friends! I’m Diana from Dreams Factory and I’m happy to be here again to share another DIY project with you! Today I will show you how to make these gorgeous Paper Bag Flower Tags in no time, using only a handful of supplies. Such a fun recycled craft!

We’ll use distress ink and perform a few other techniques to give the paper an aged look and feel. And then we’ll use some gold to add a touch of whimsy and make our vintage tags even more charming.
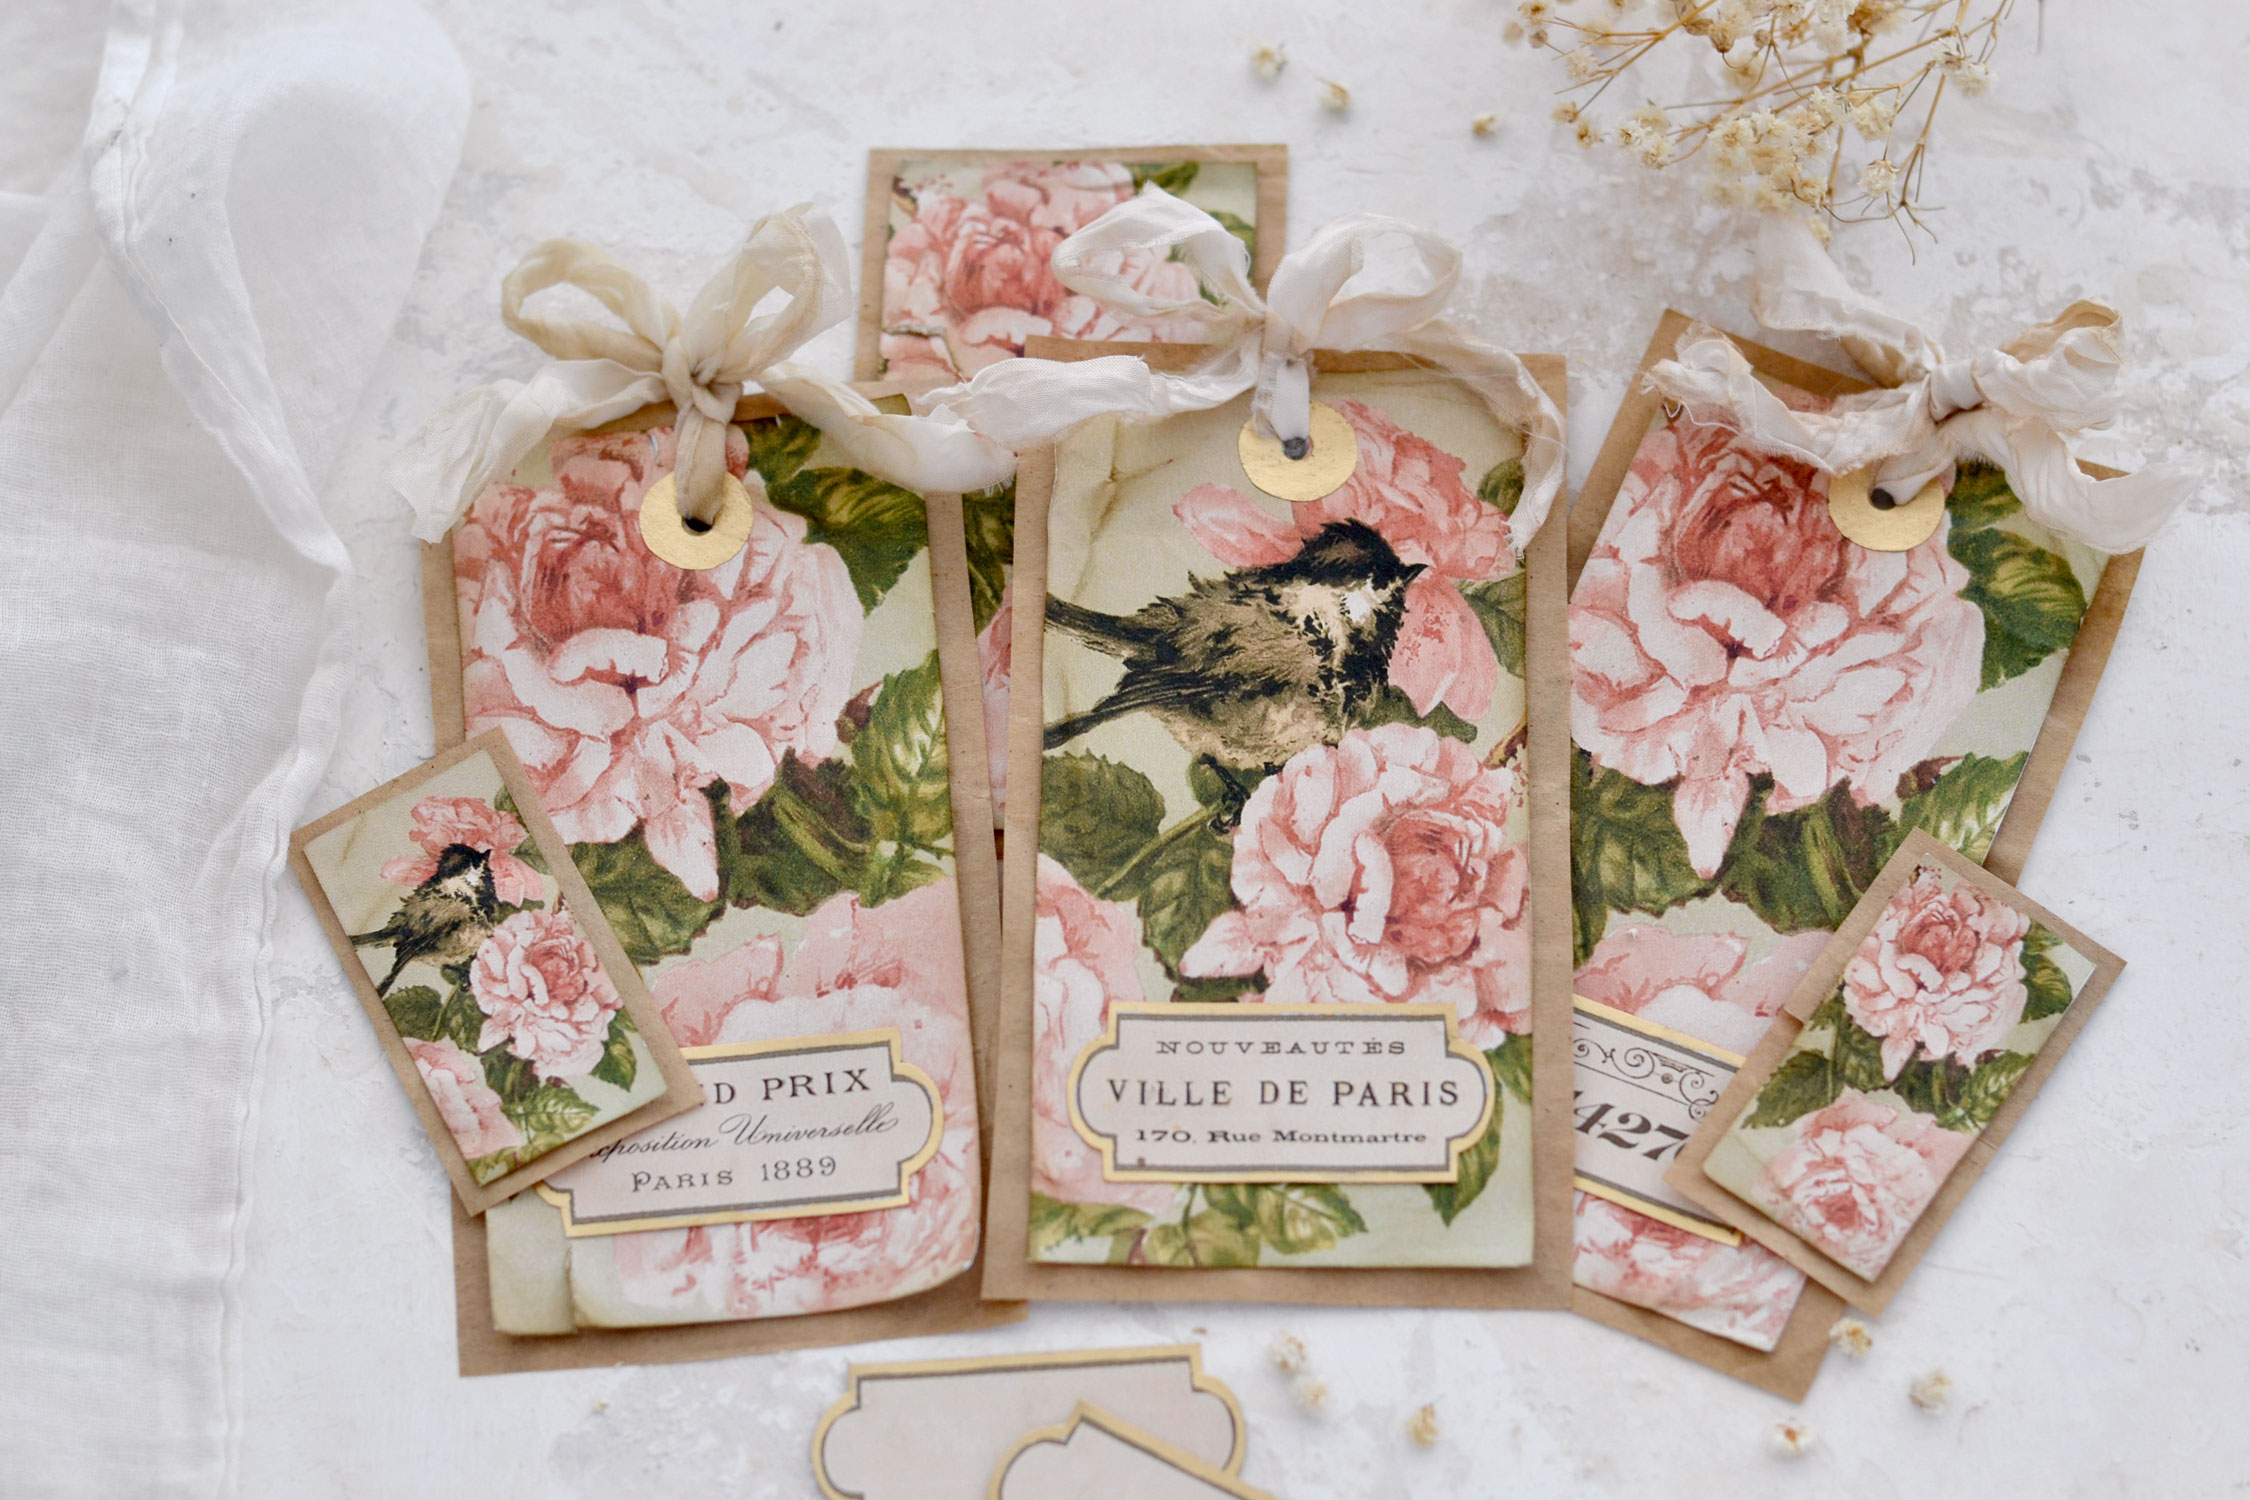
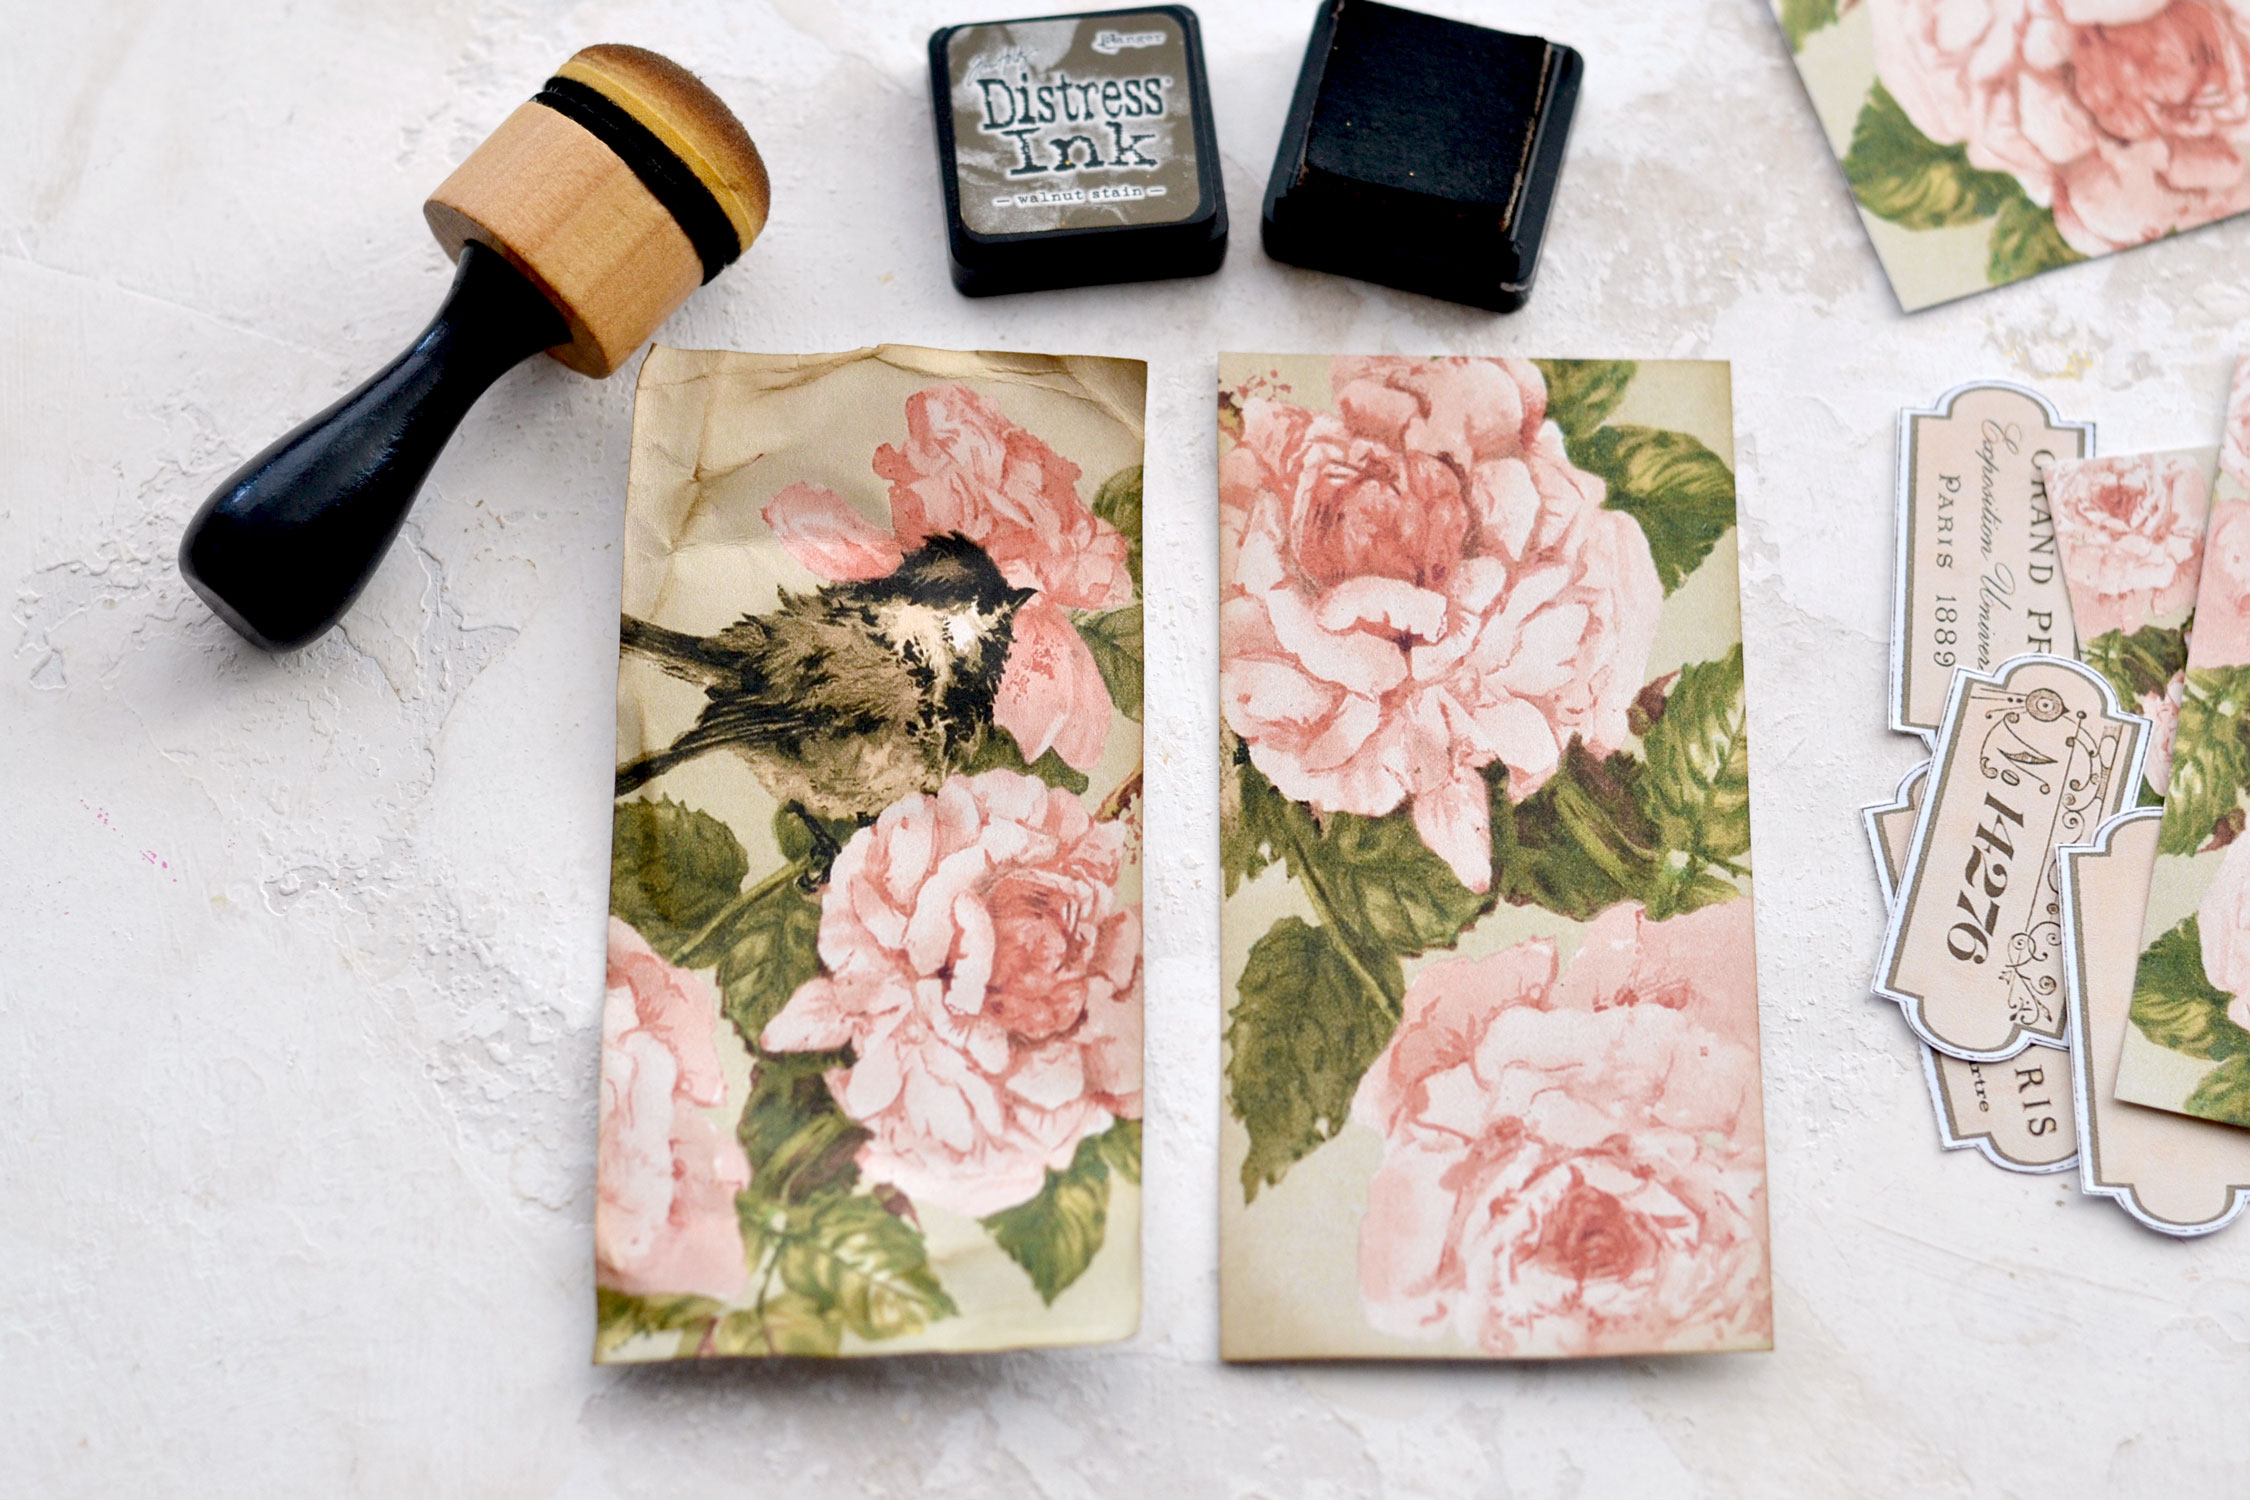
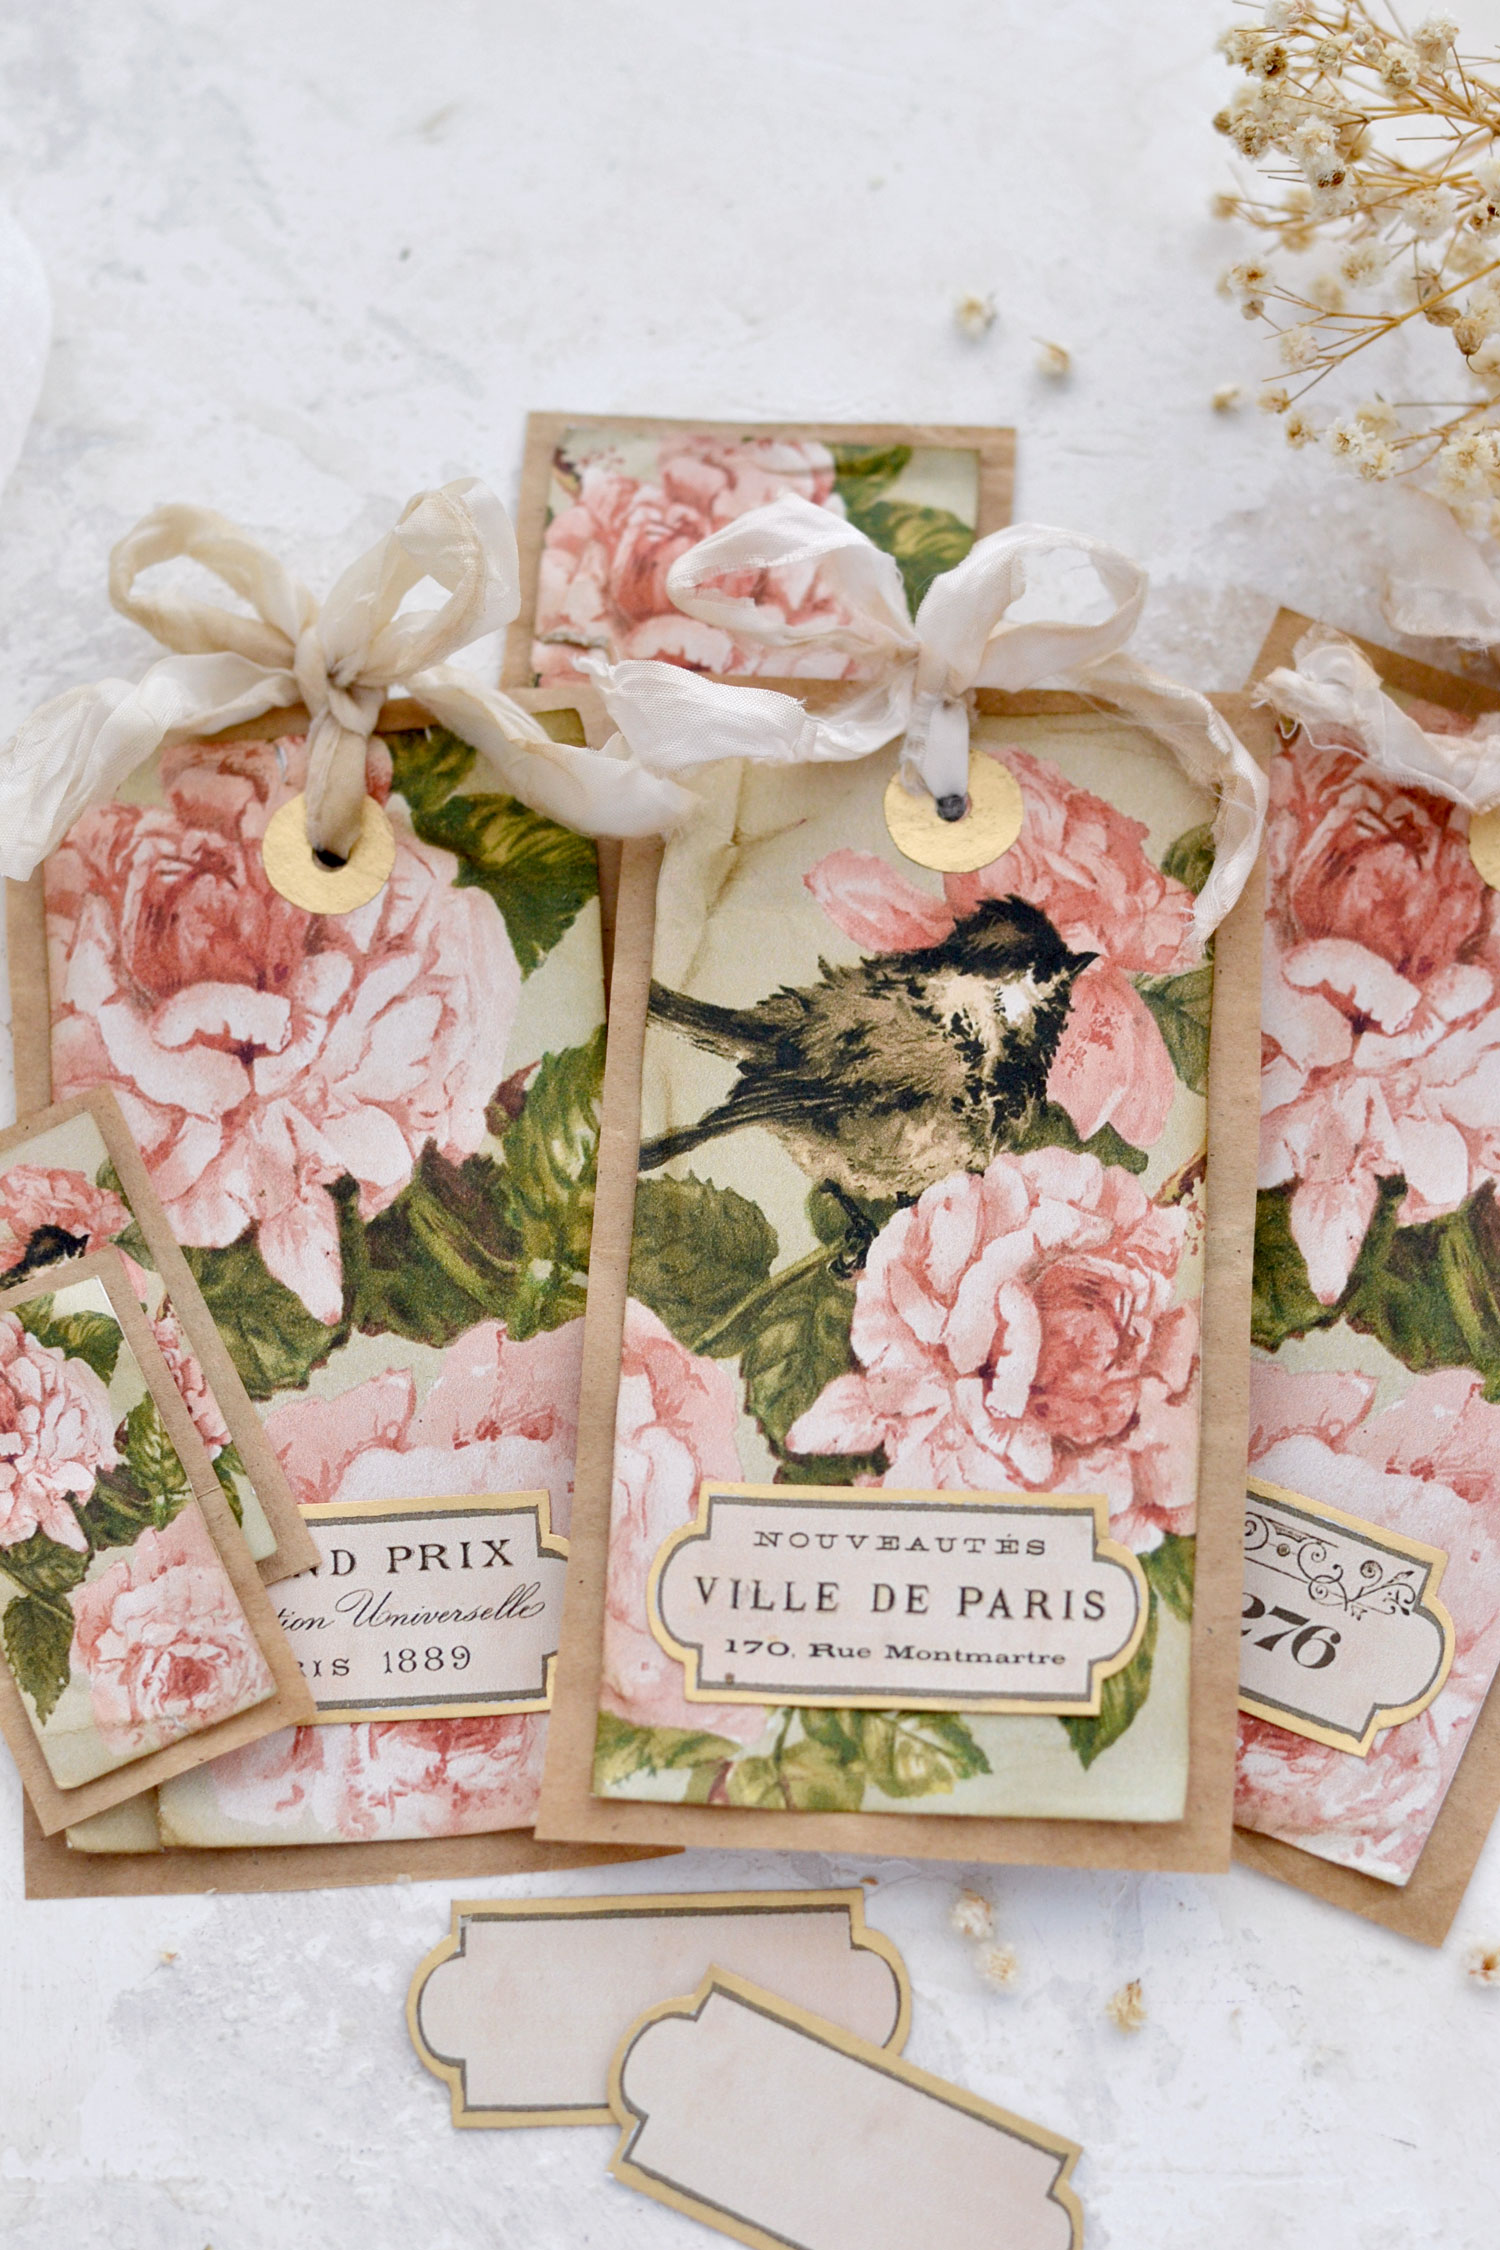
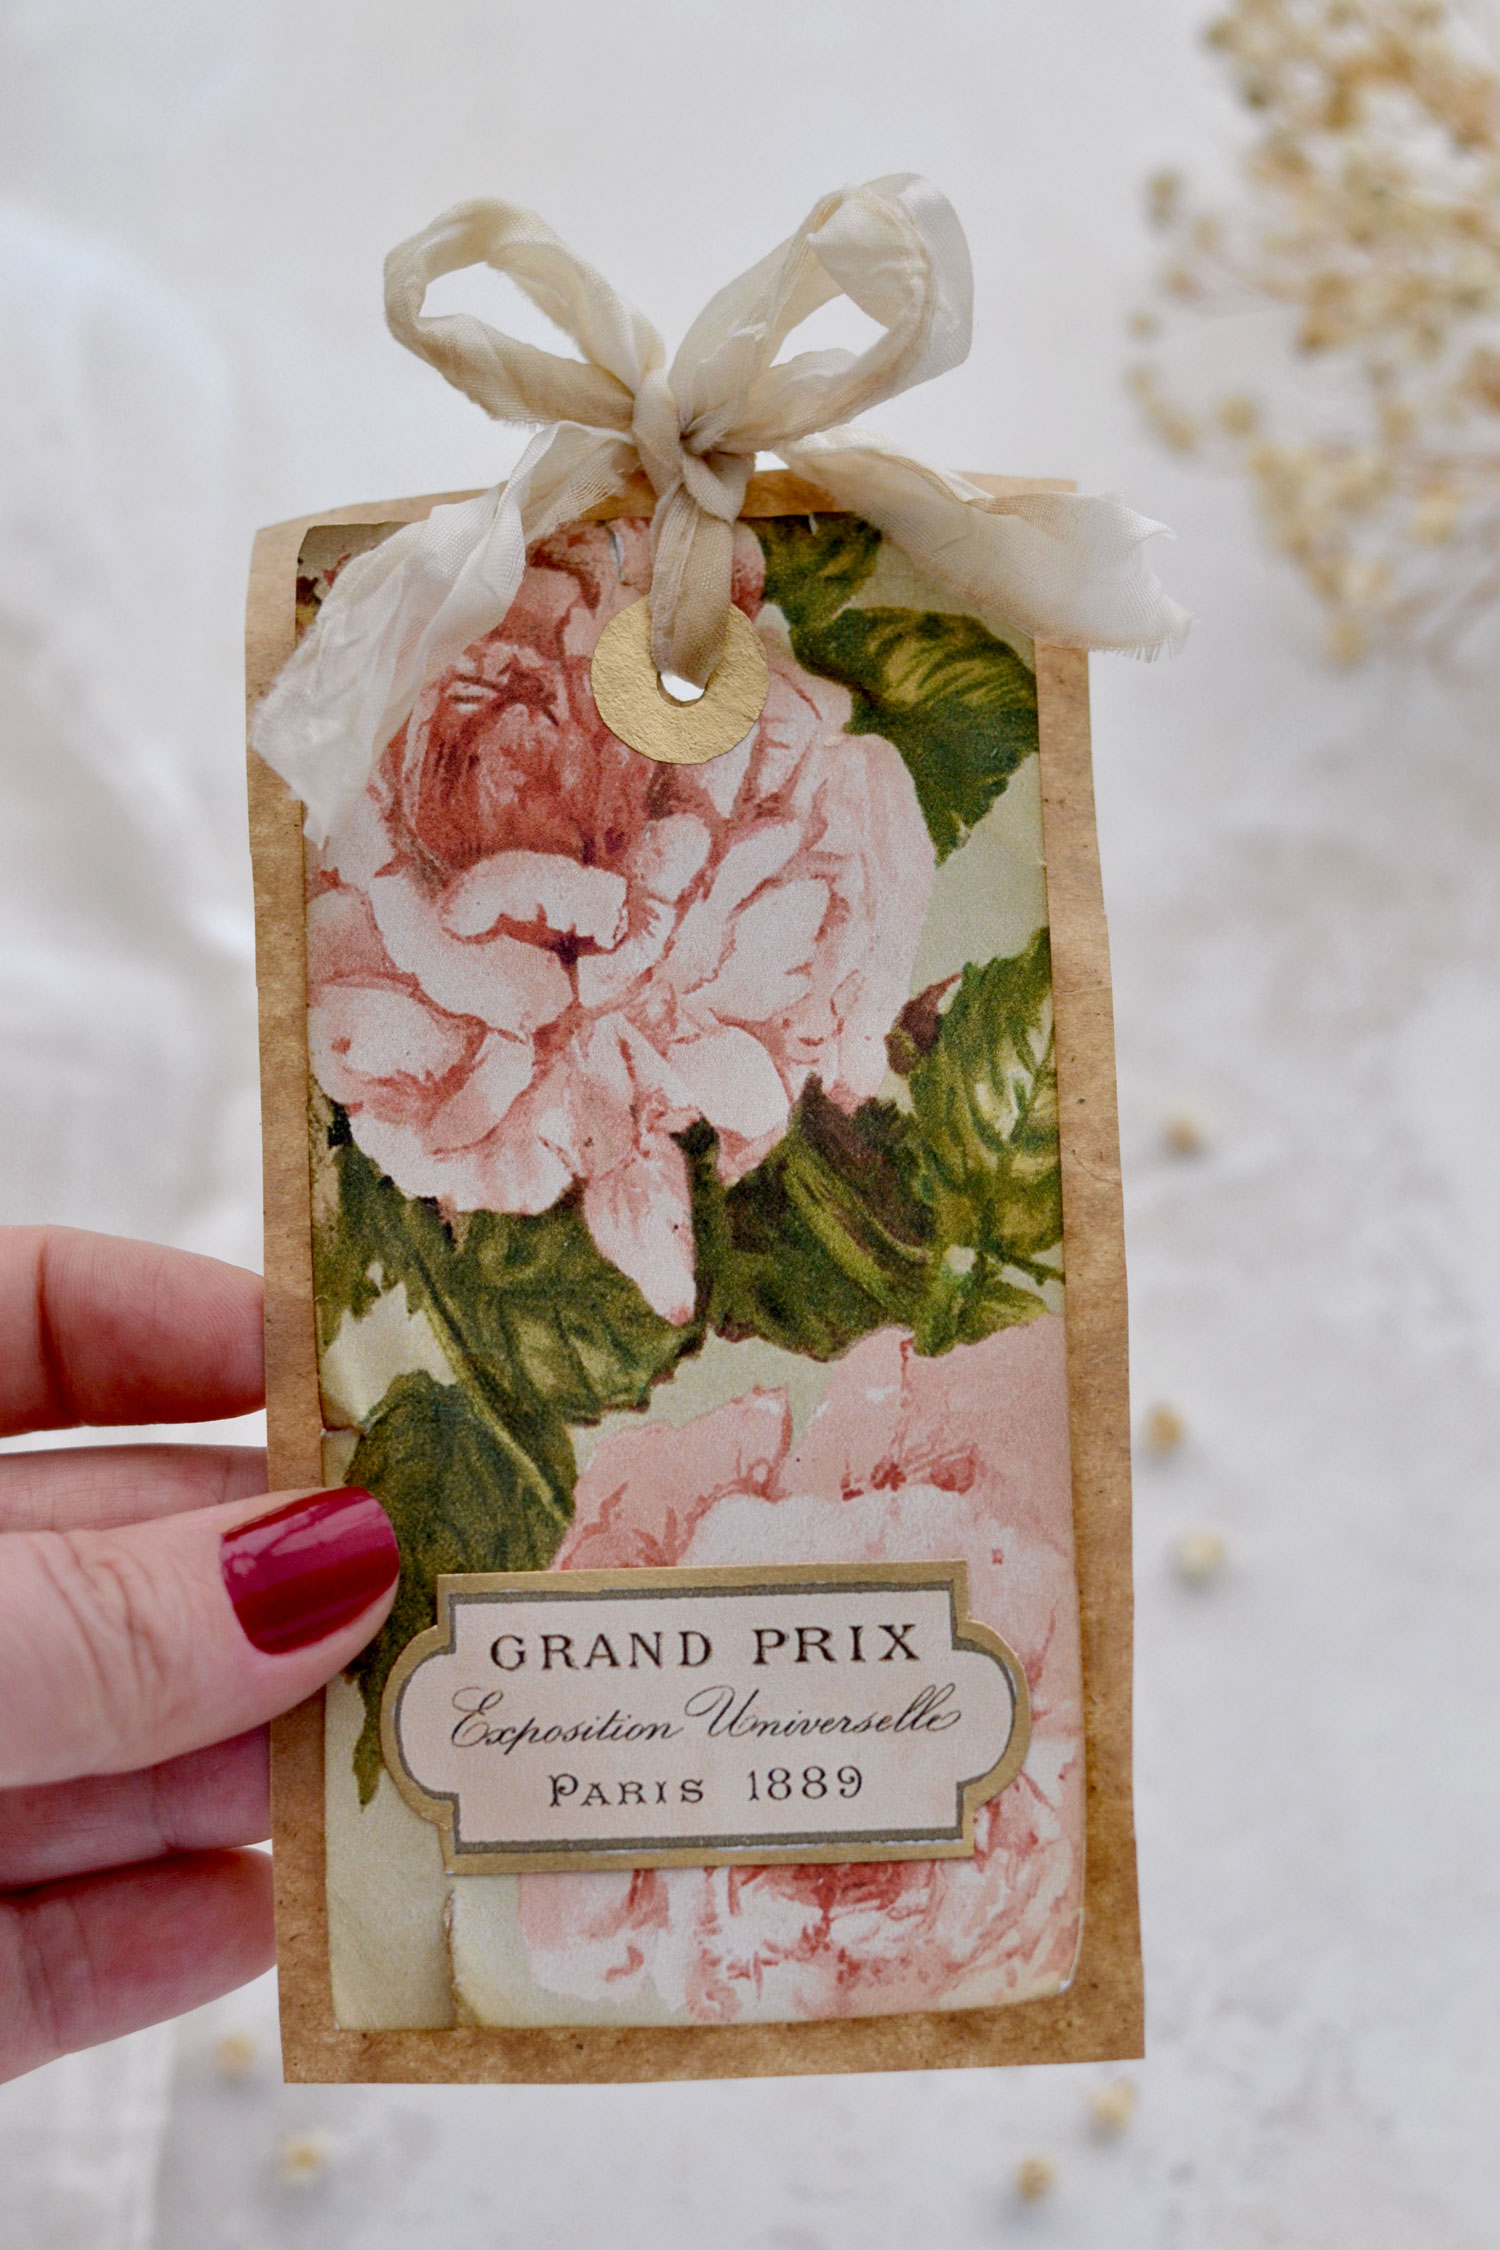
I used this beautiful image with a tousled bird and stunning pink flowers to design the tags. I can’t believe I haven’t used this one until now, it is simply amazing! I was initially convinced that the pink flowers were peonies until I took a closer look and noticed that the leaves looked more like rose leaves. Anyway, it’s their overall charm that got me completely mesmerized in the first place, so I guess that’s what really matters!

Free Printable
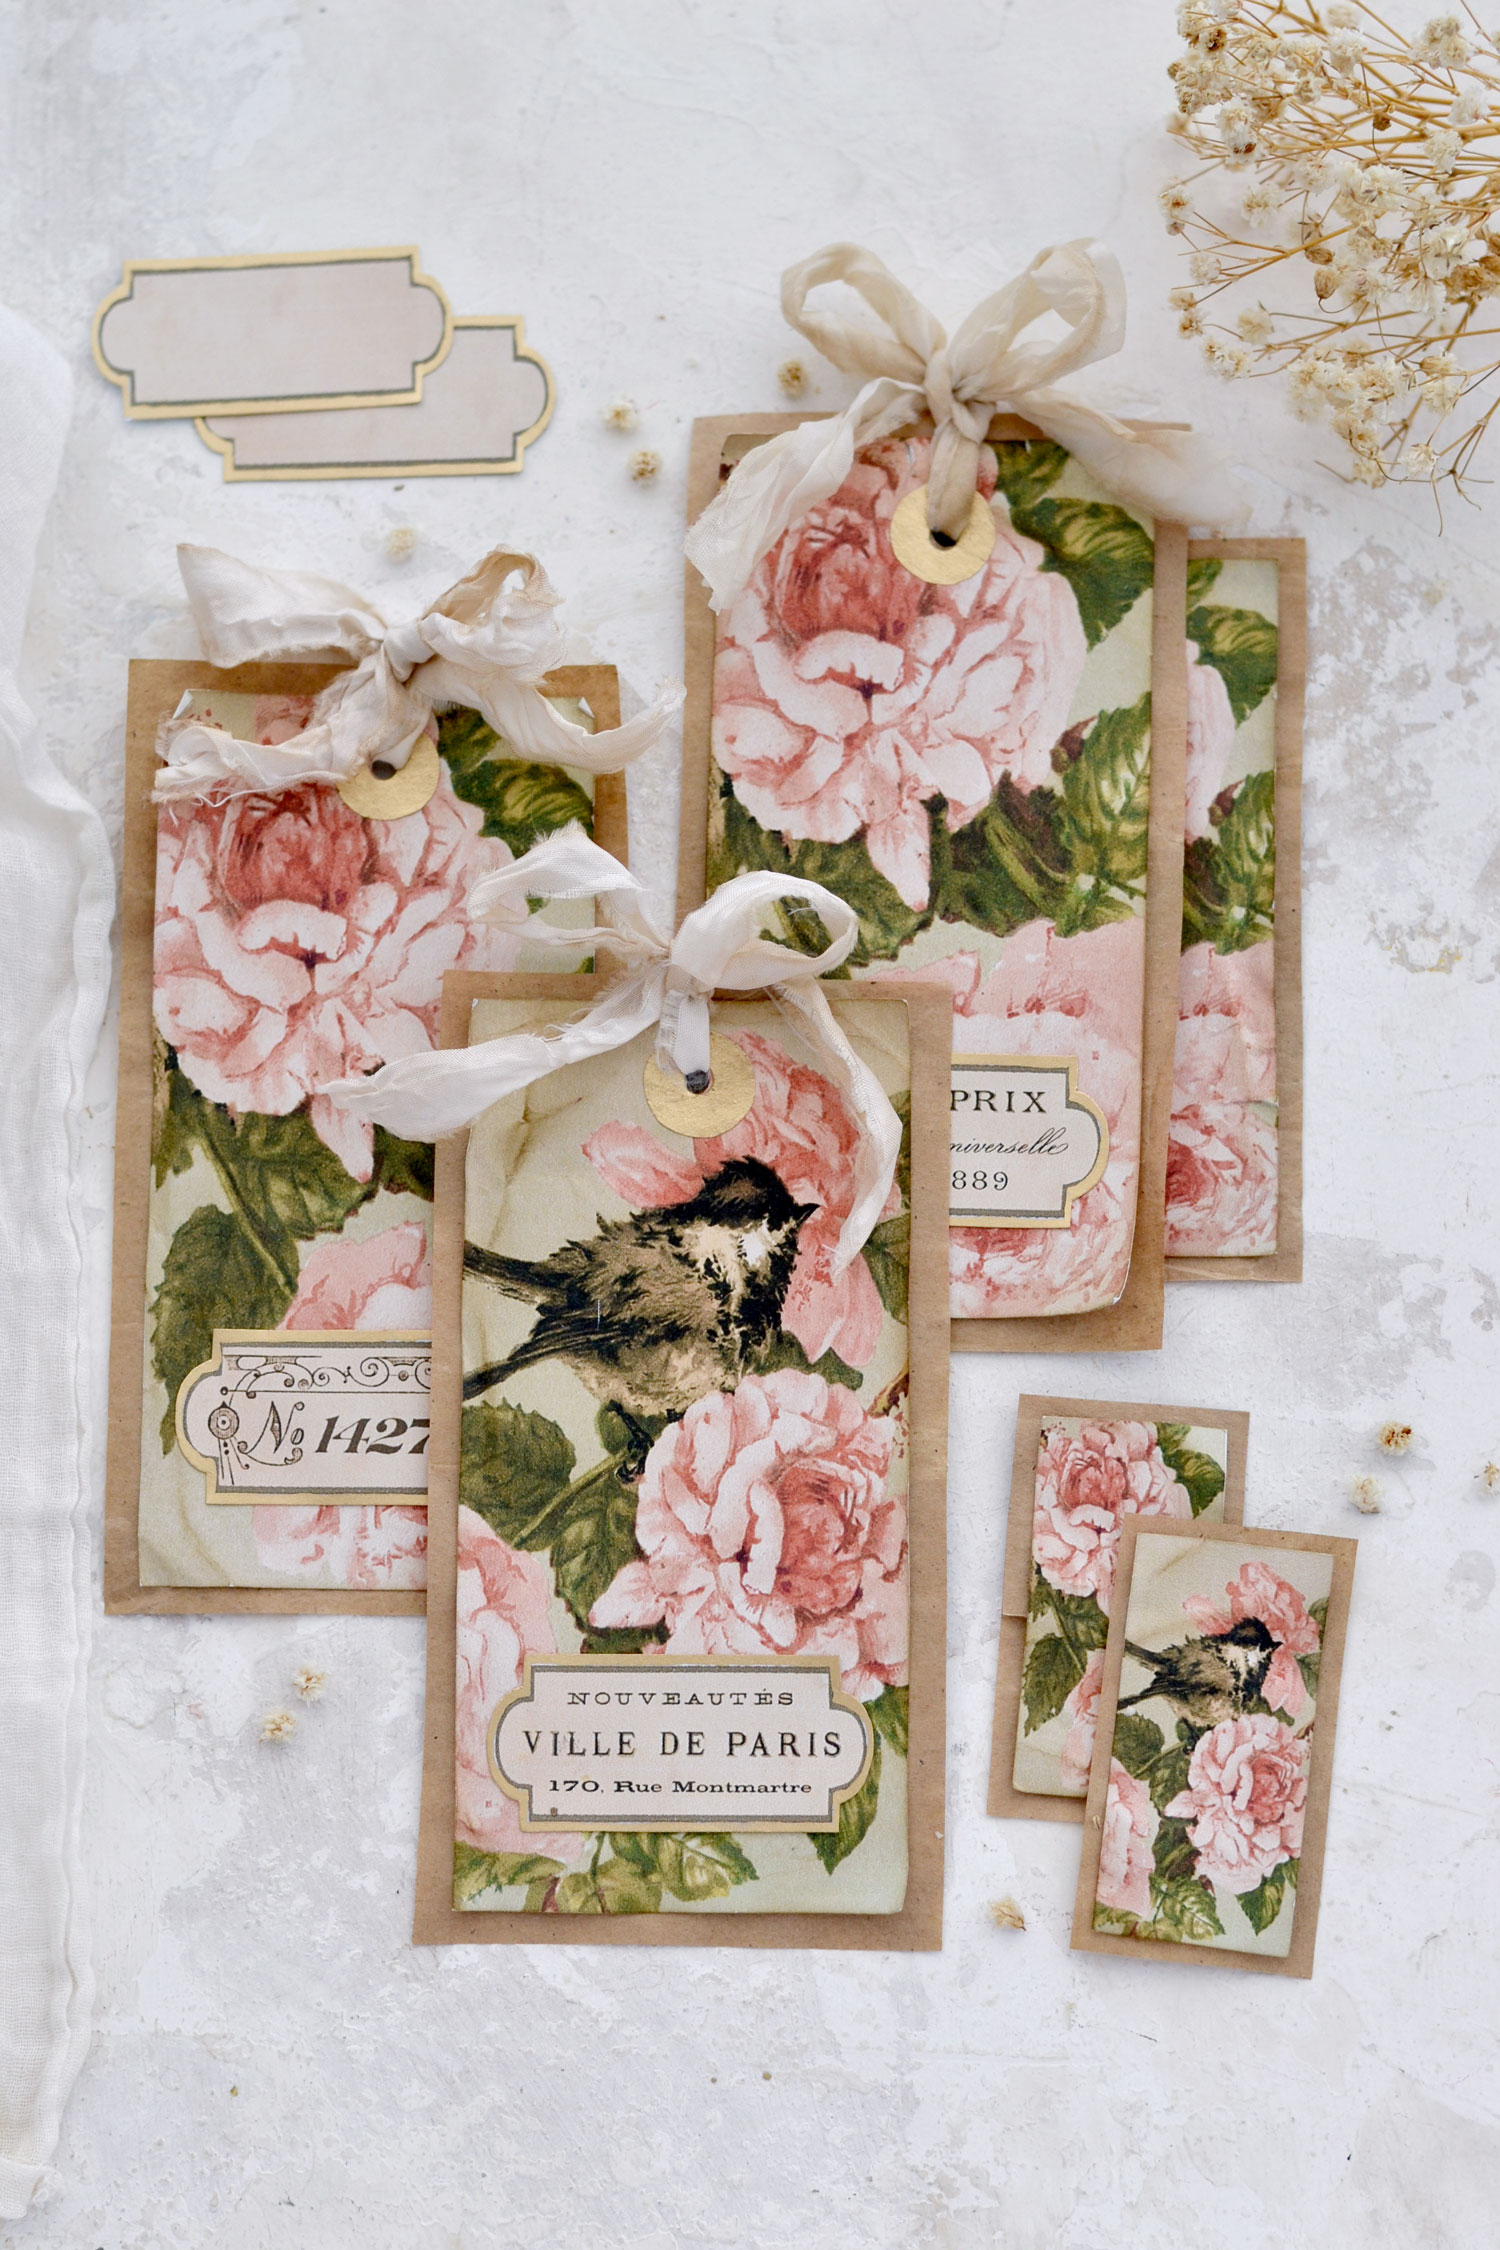
You will find below the printable that I created for this project. I initially included the top three tags, and the white template needed to create the paper bag backings. But then I thought it would be fun to also have a few other versions, so I included a few smaller ones.
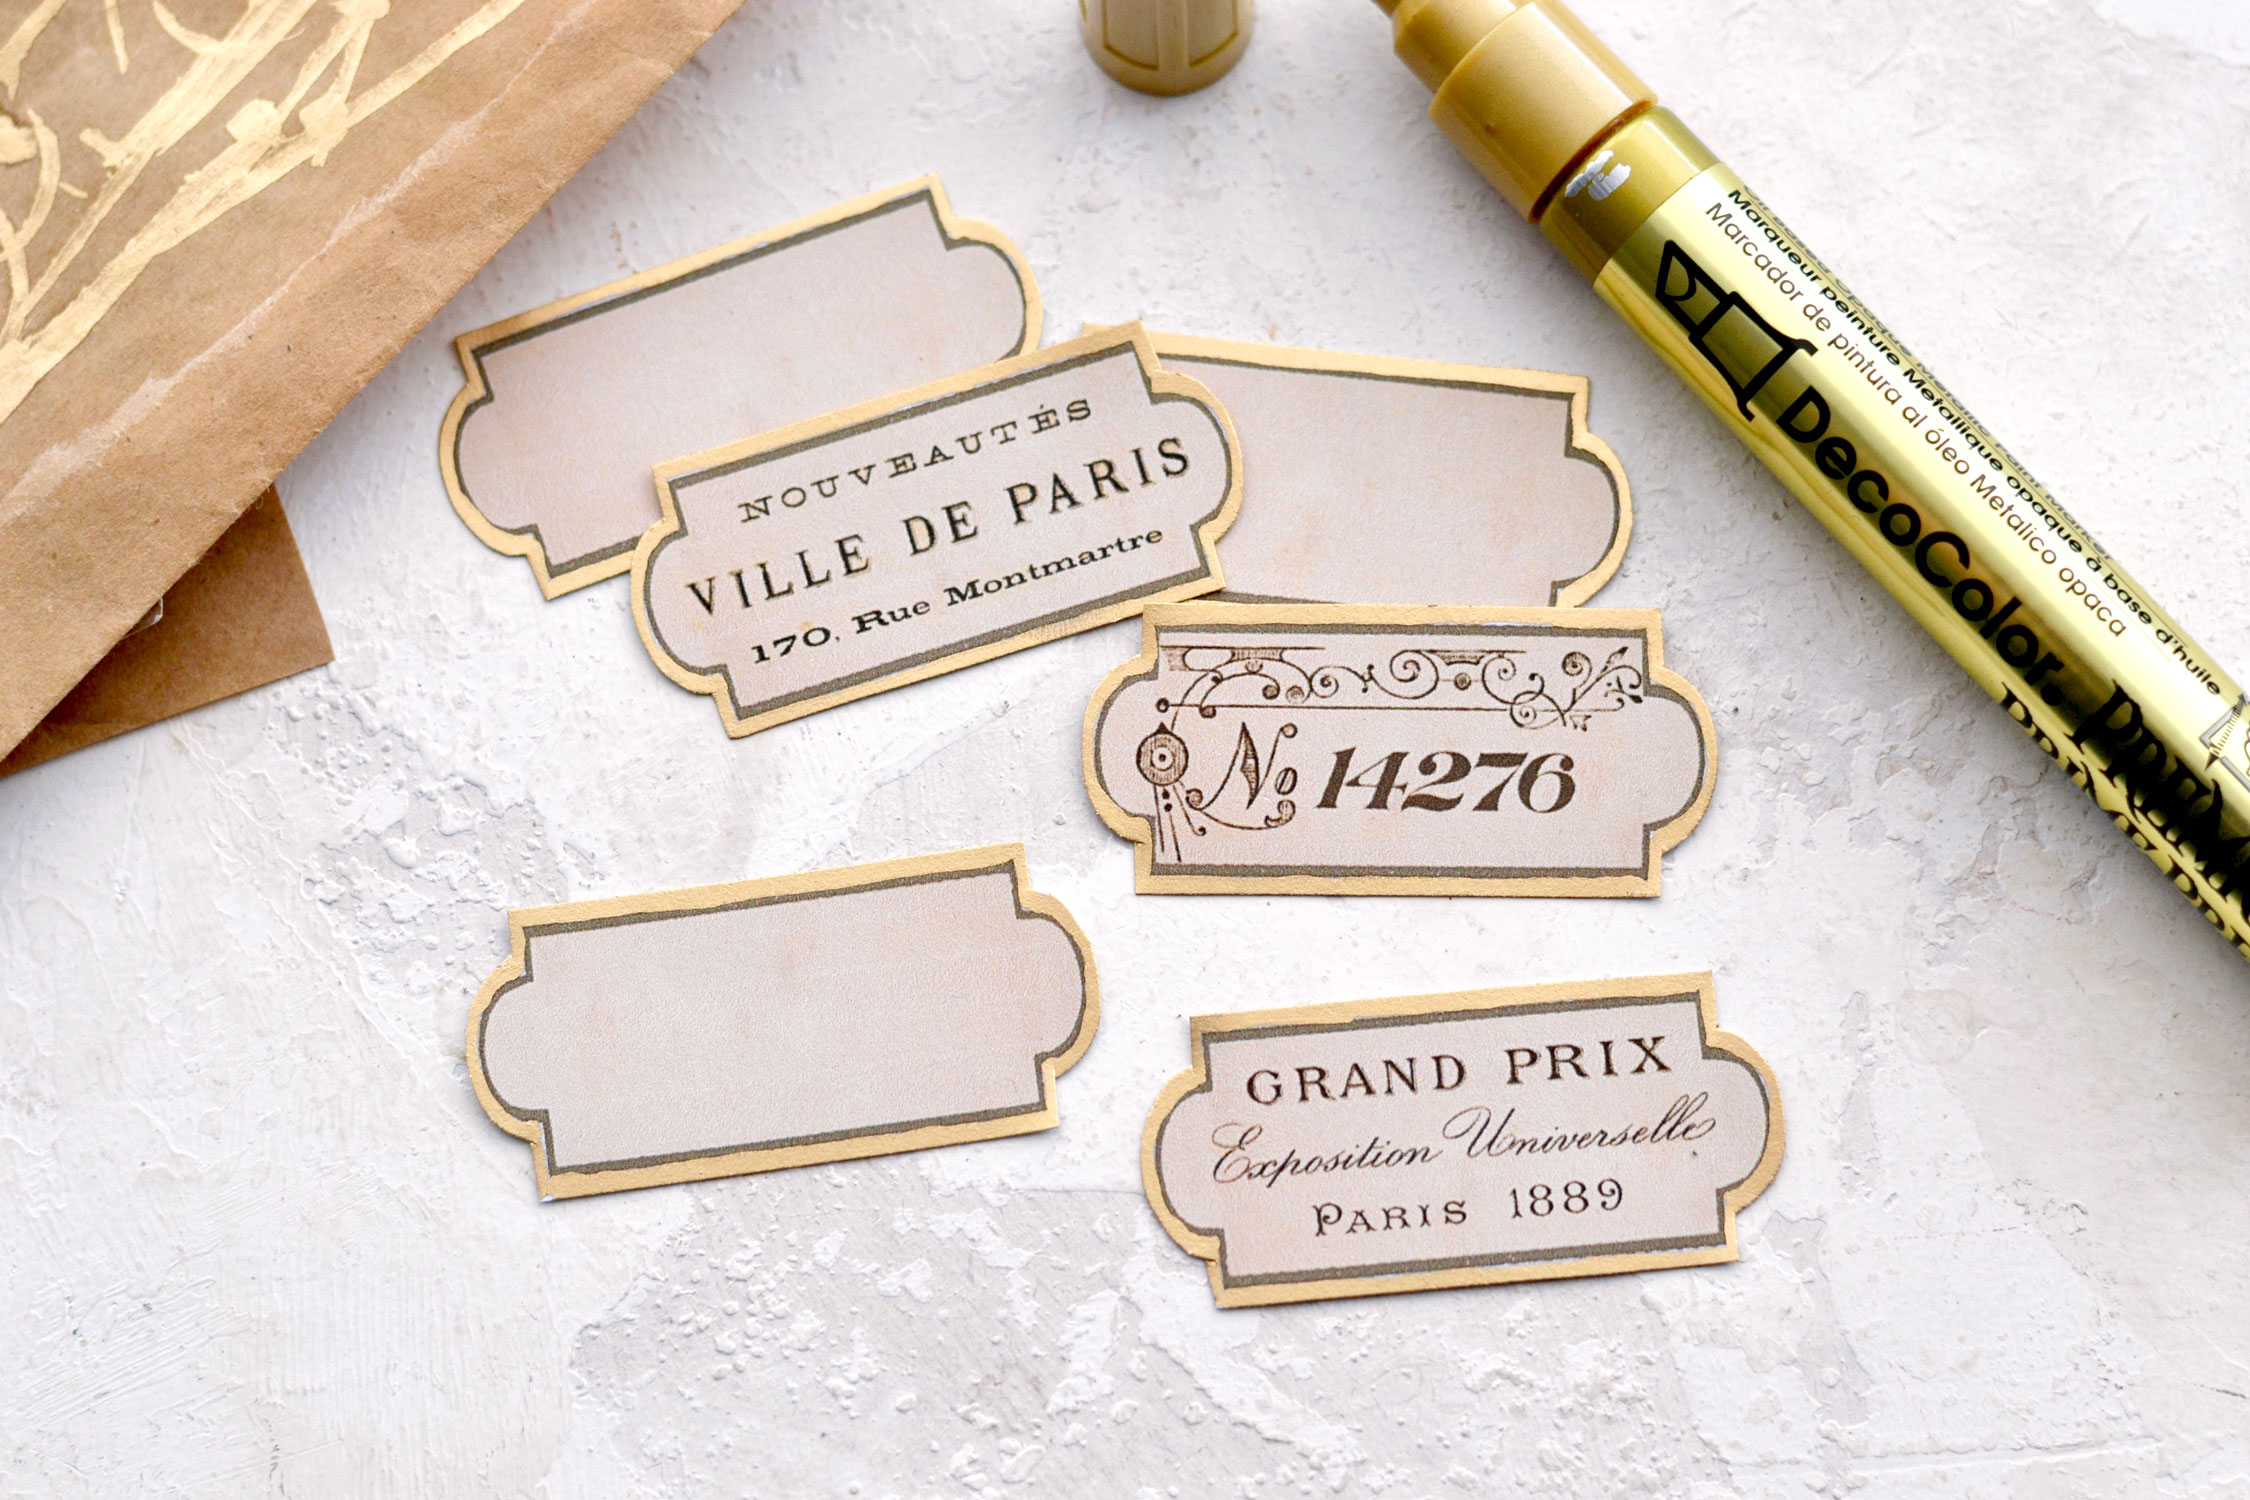
You will also find three French ephemera mini labels and three additional blank ones which can be personalized as you want.
P.S. Keep in mind that the white template can only be used to create the backing for the larger tags.
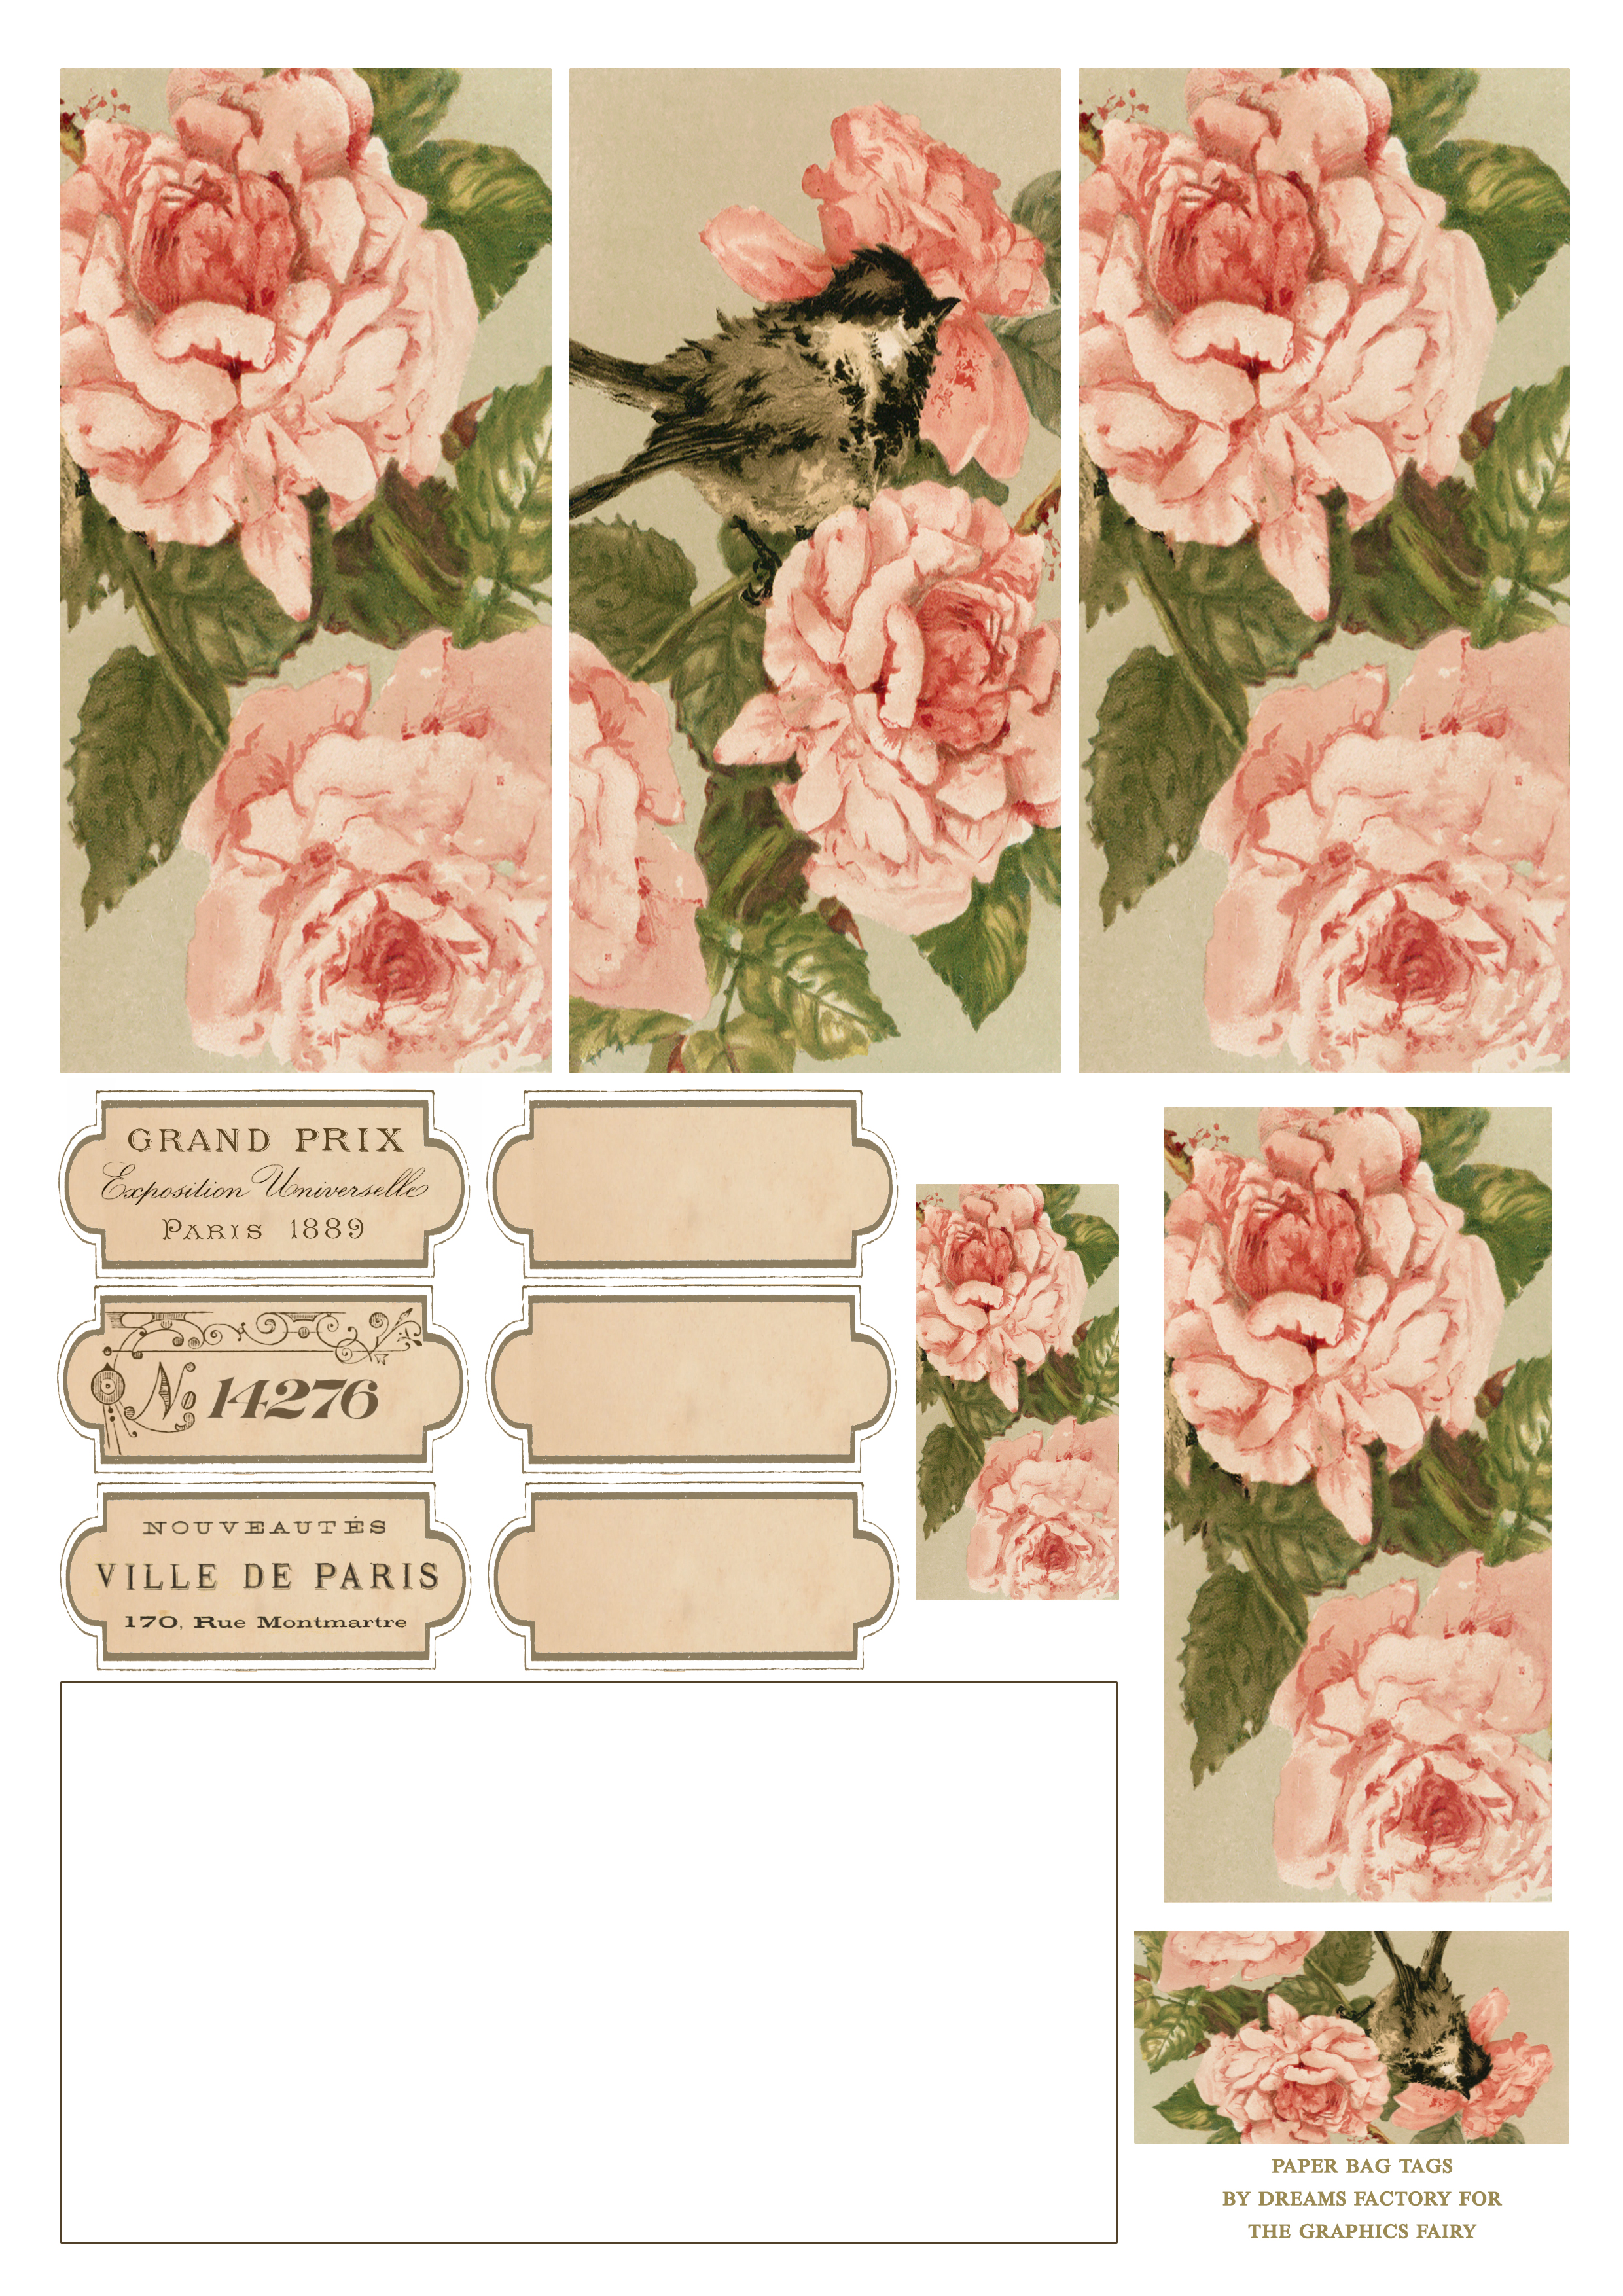
—> Click here to download the full size Printable PDF <—
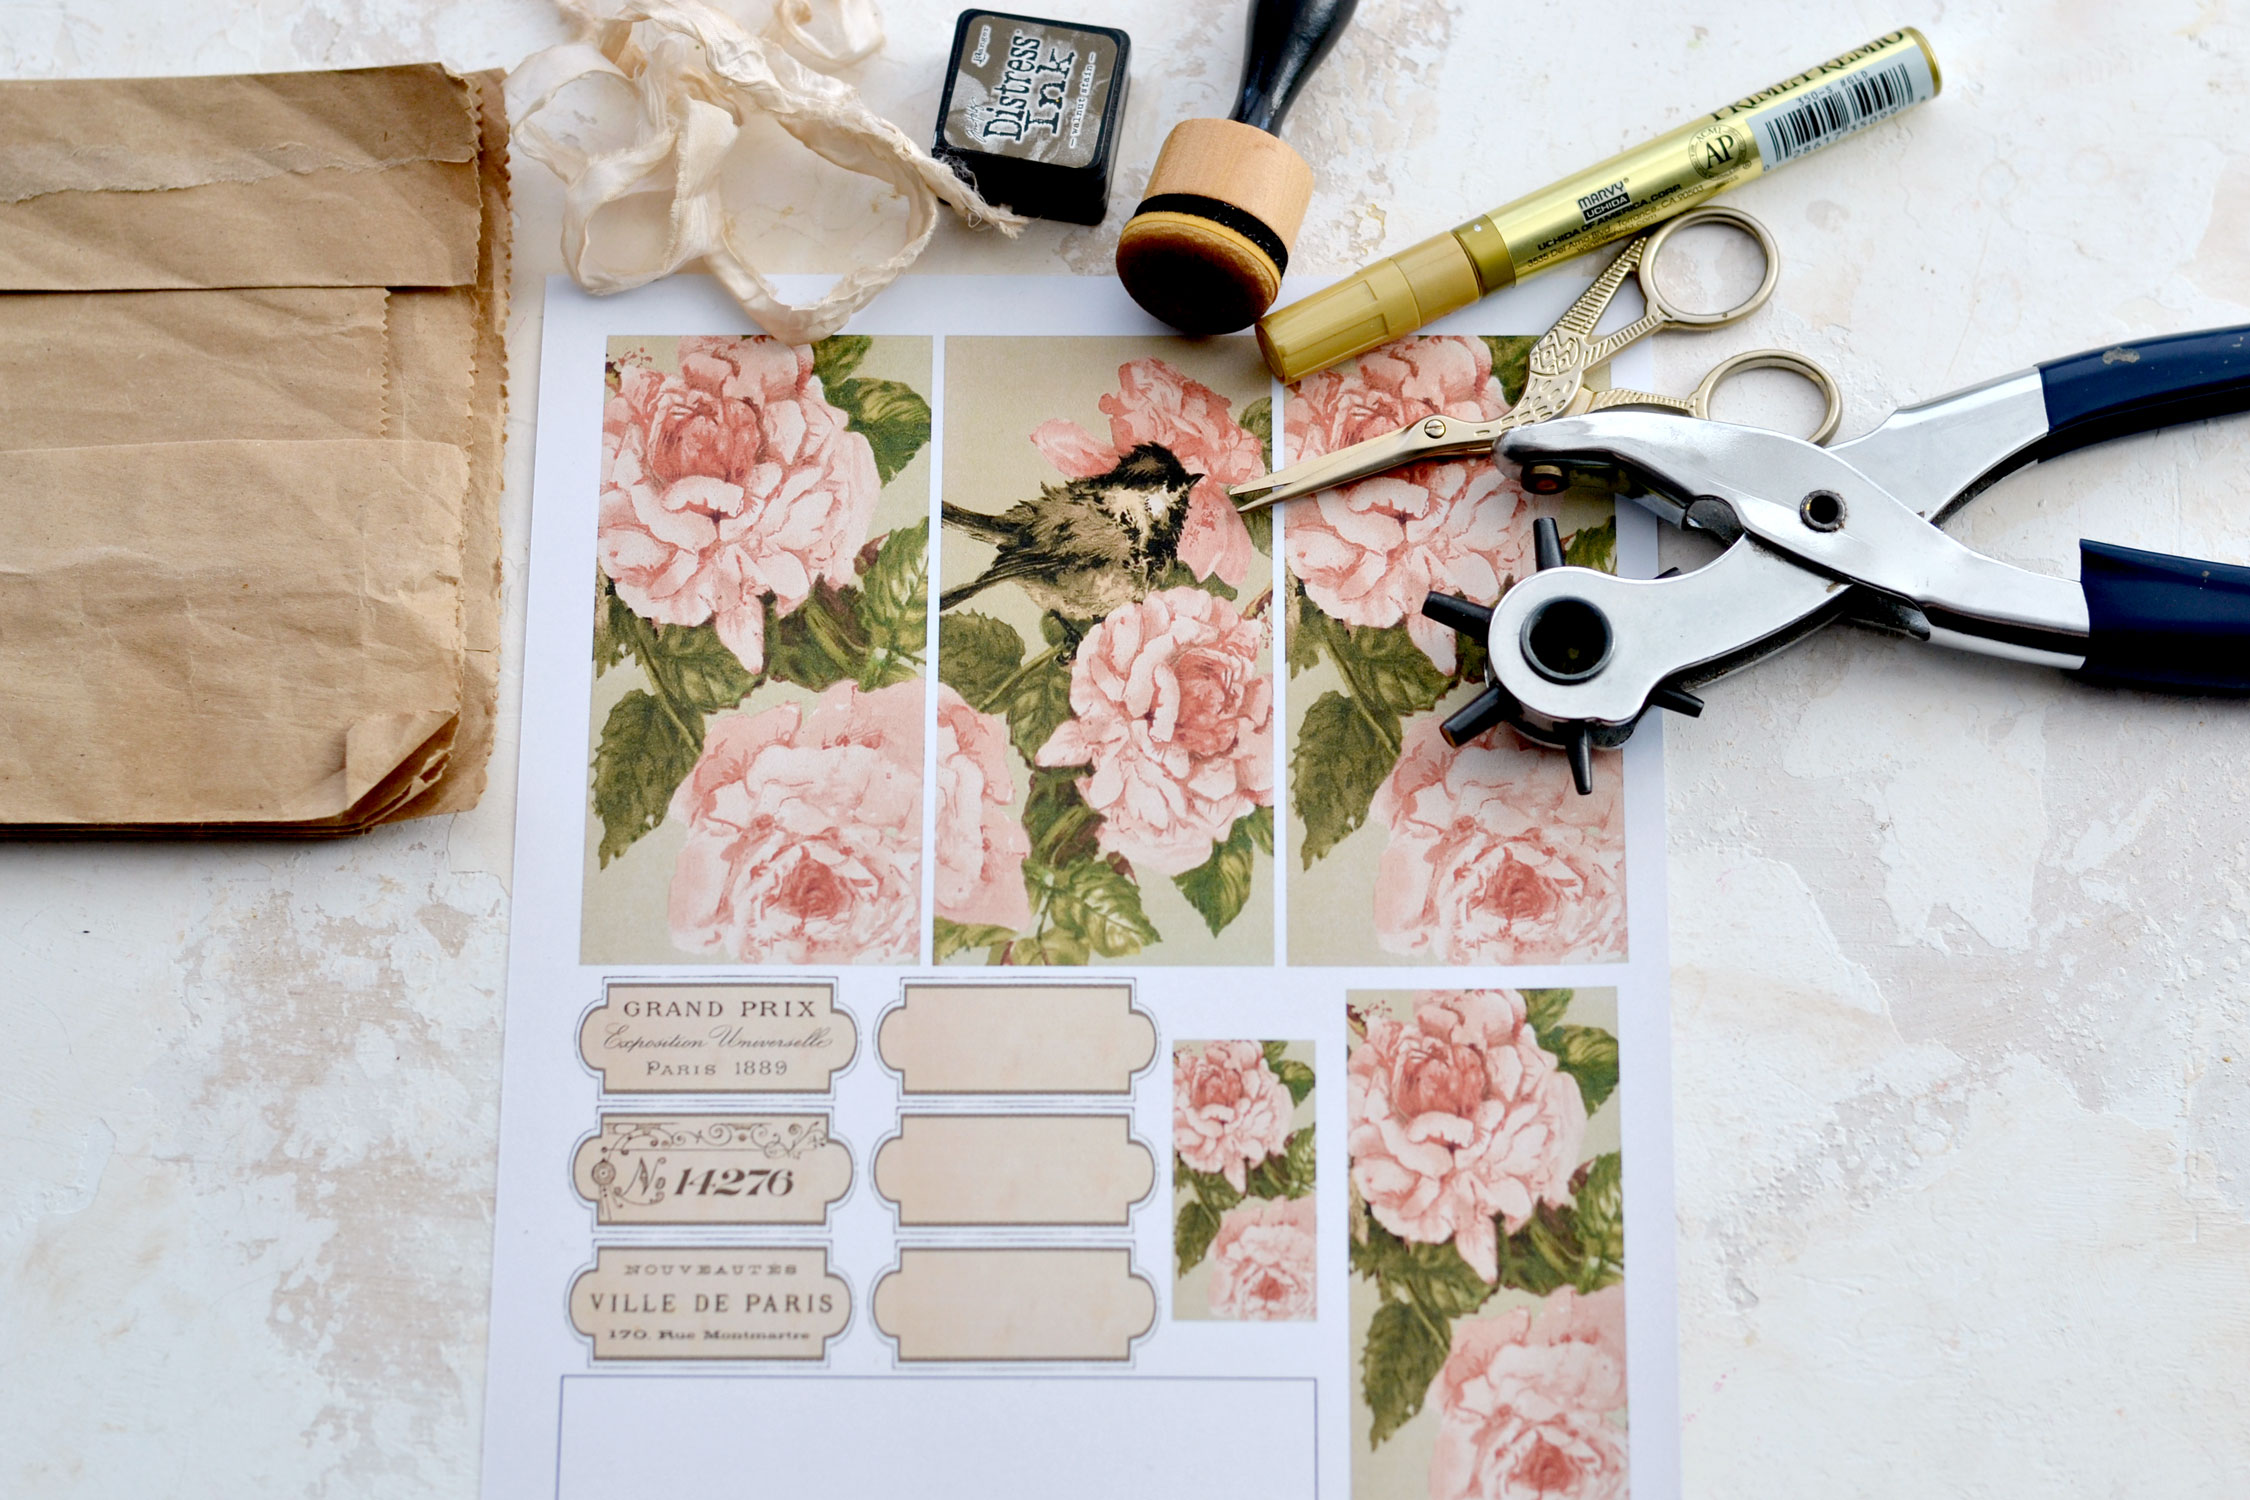
DIY Paper Bag Flower Tags Supply List:
- new or recycled brown paper bags
- white cardstock paper
- home printer
- scissors
- bone folder
- mini distress inks
- blending tool with foams
- DecoColor gold marker or gold watercolors, gold acrylic paint, gold wax, gold nail polish
- glue stick or any other paper glue
- hole punch
- pencil
- crinkle ribbon or any other ribbon that you love
Step by Step Tutorial:
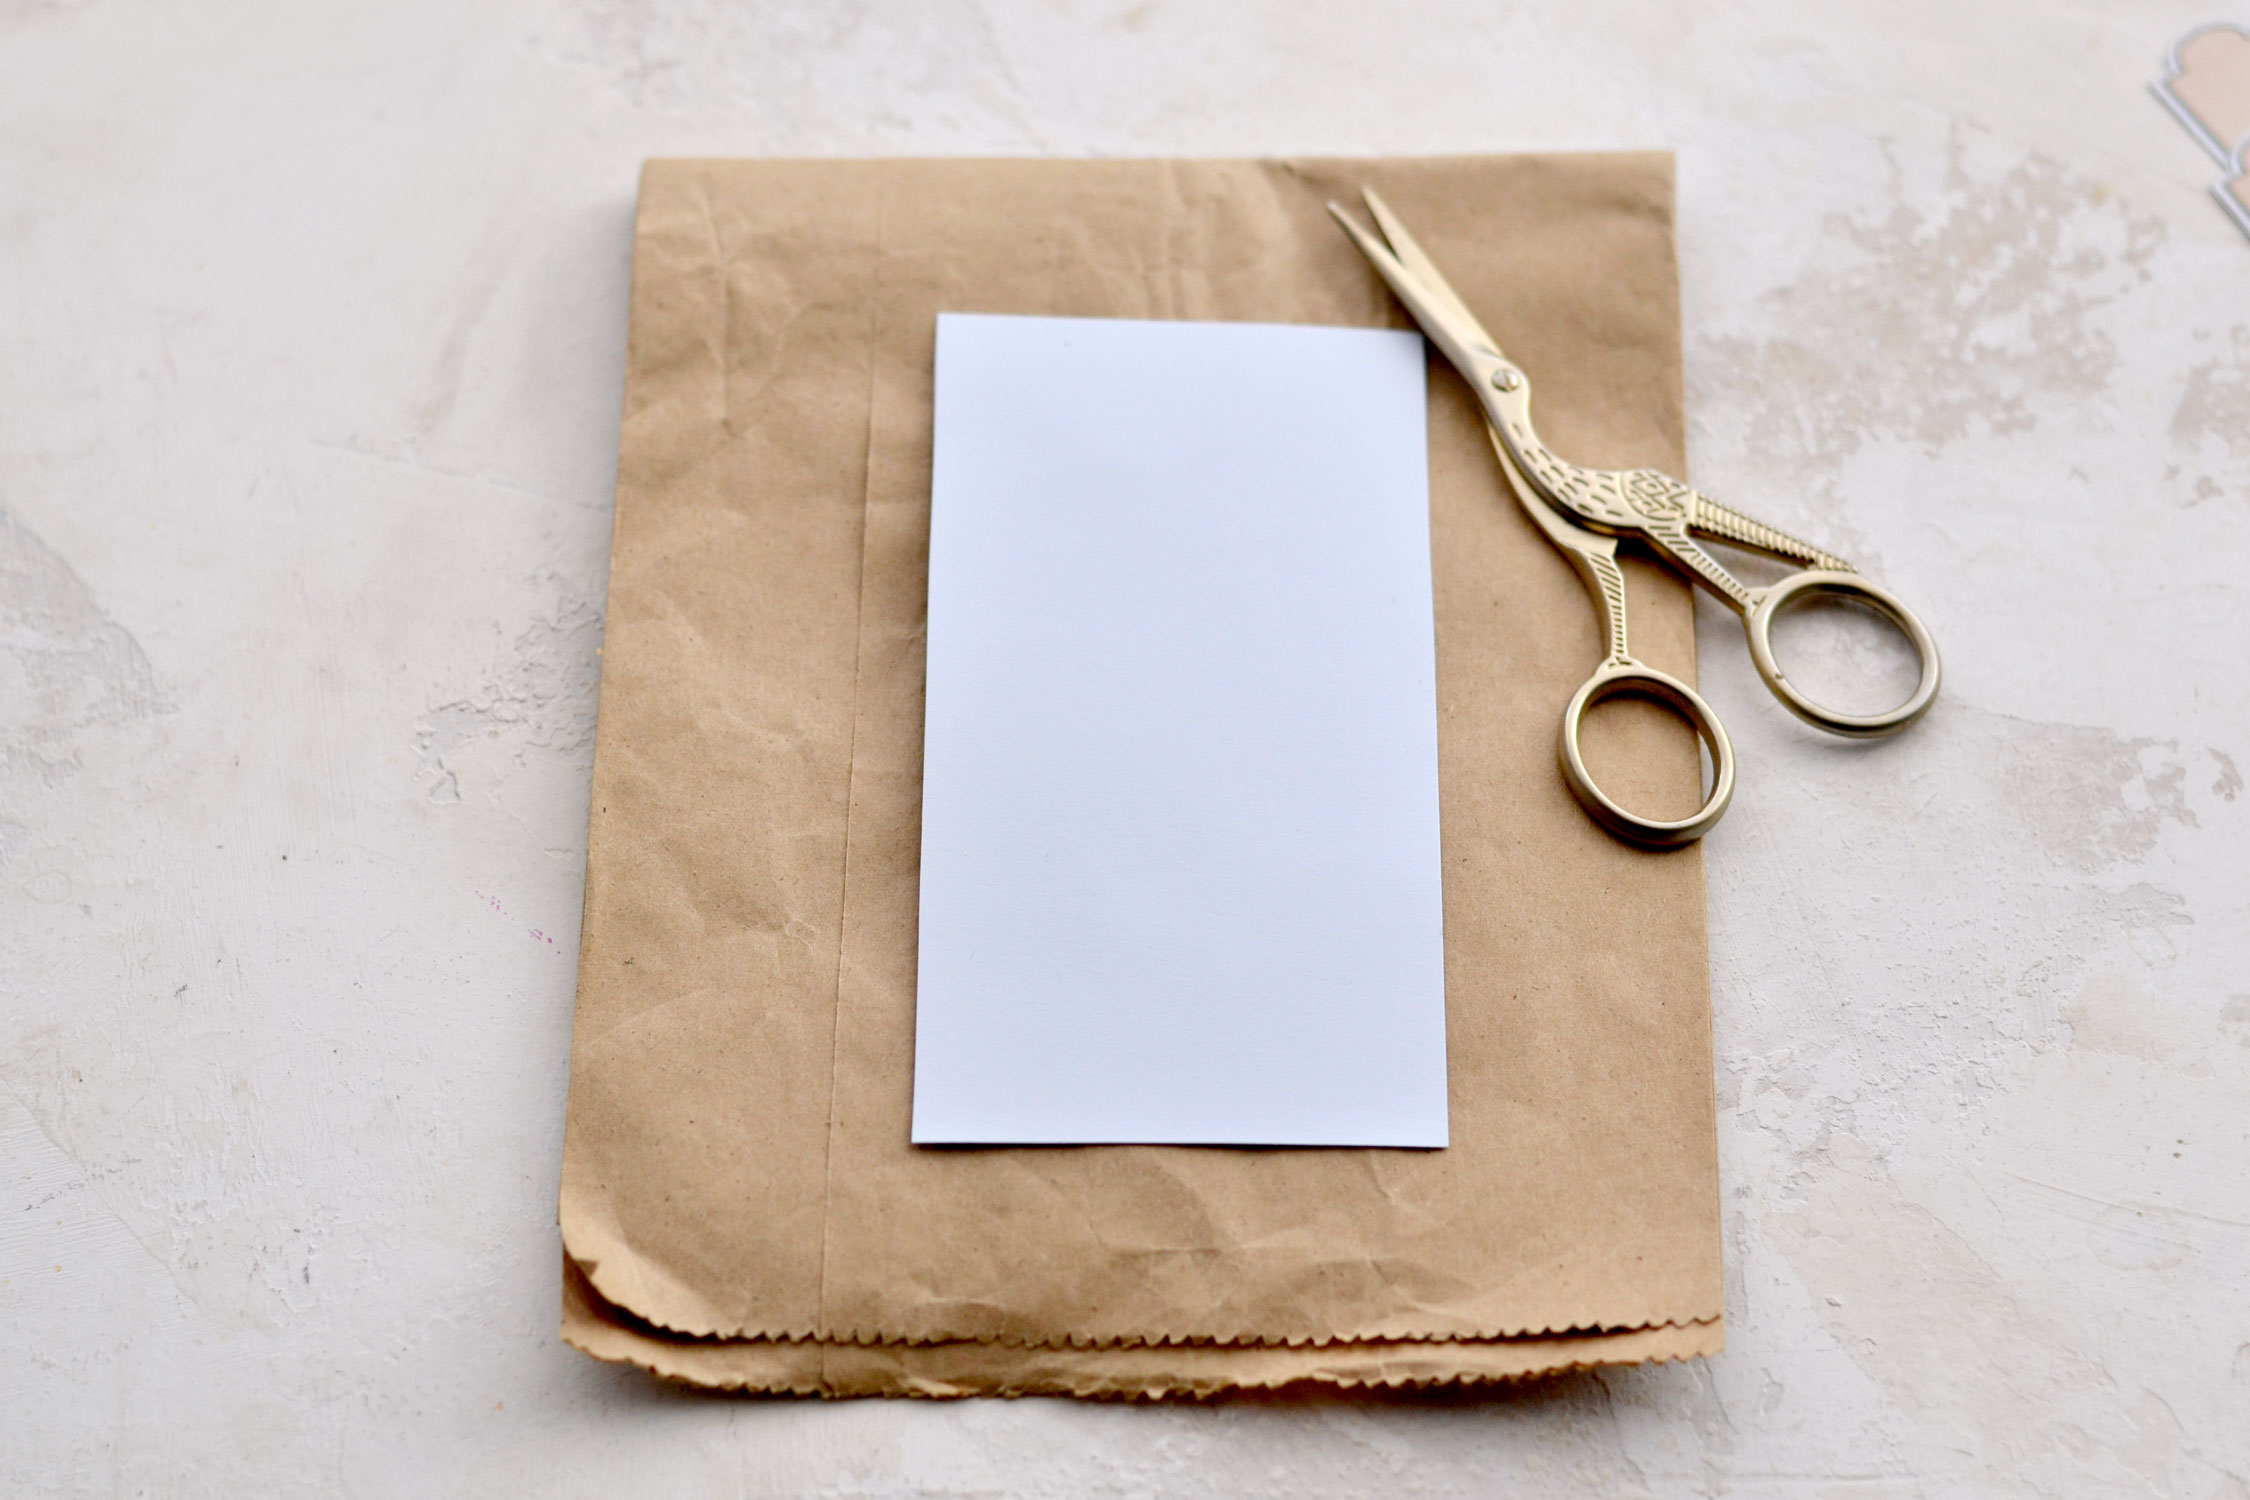
Start by printing your printable on cardstock paper.
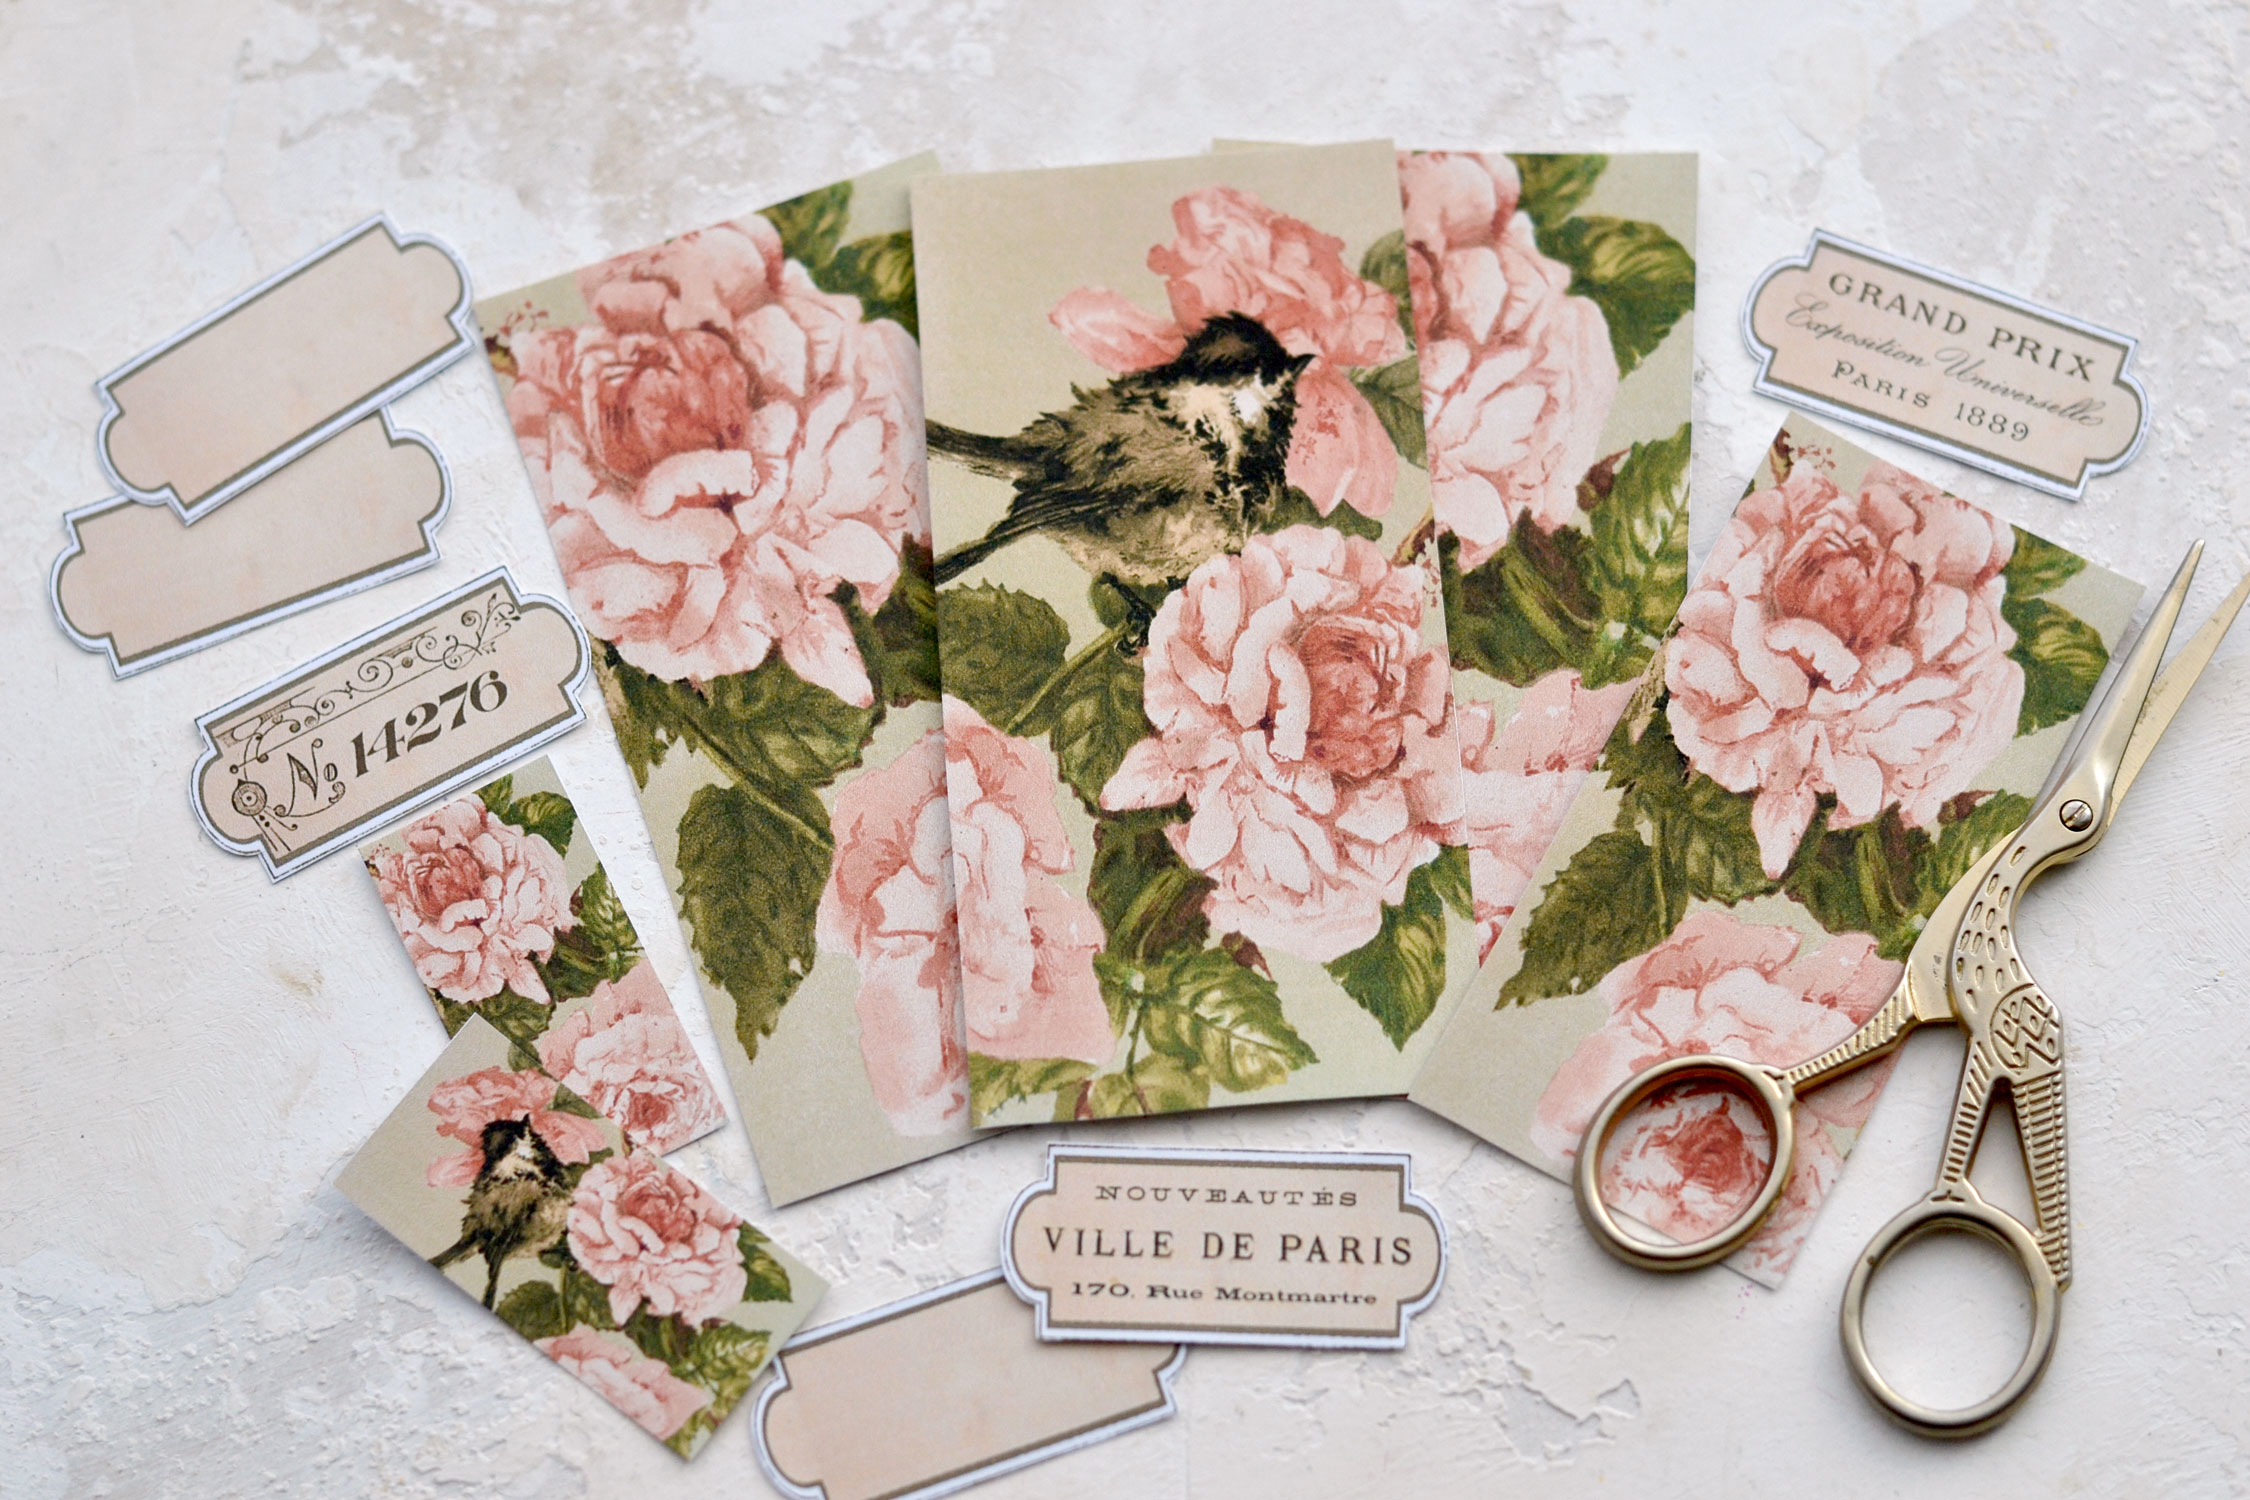
Use your scissors to cut each of our beautiful elements. You can choose to keep or remove the small white border outside the mini labels. I’ve decided to keep it so I can use it as guidance to add some gold touches afterward.
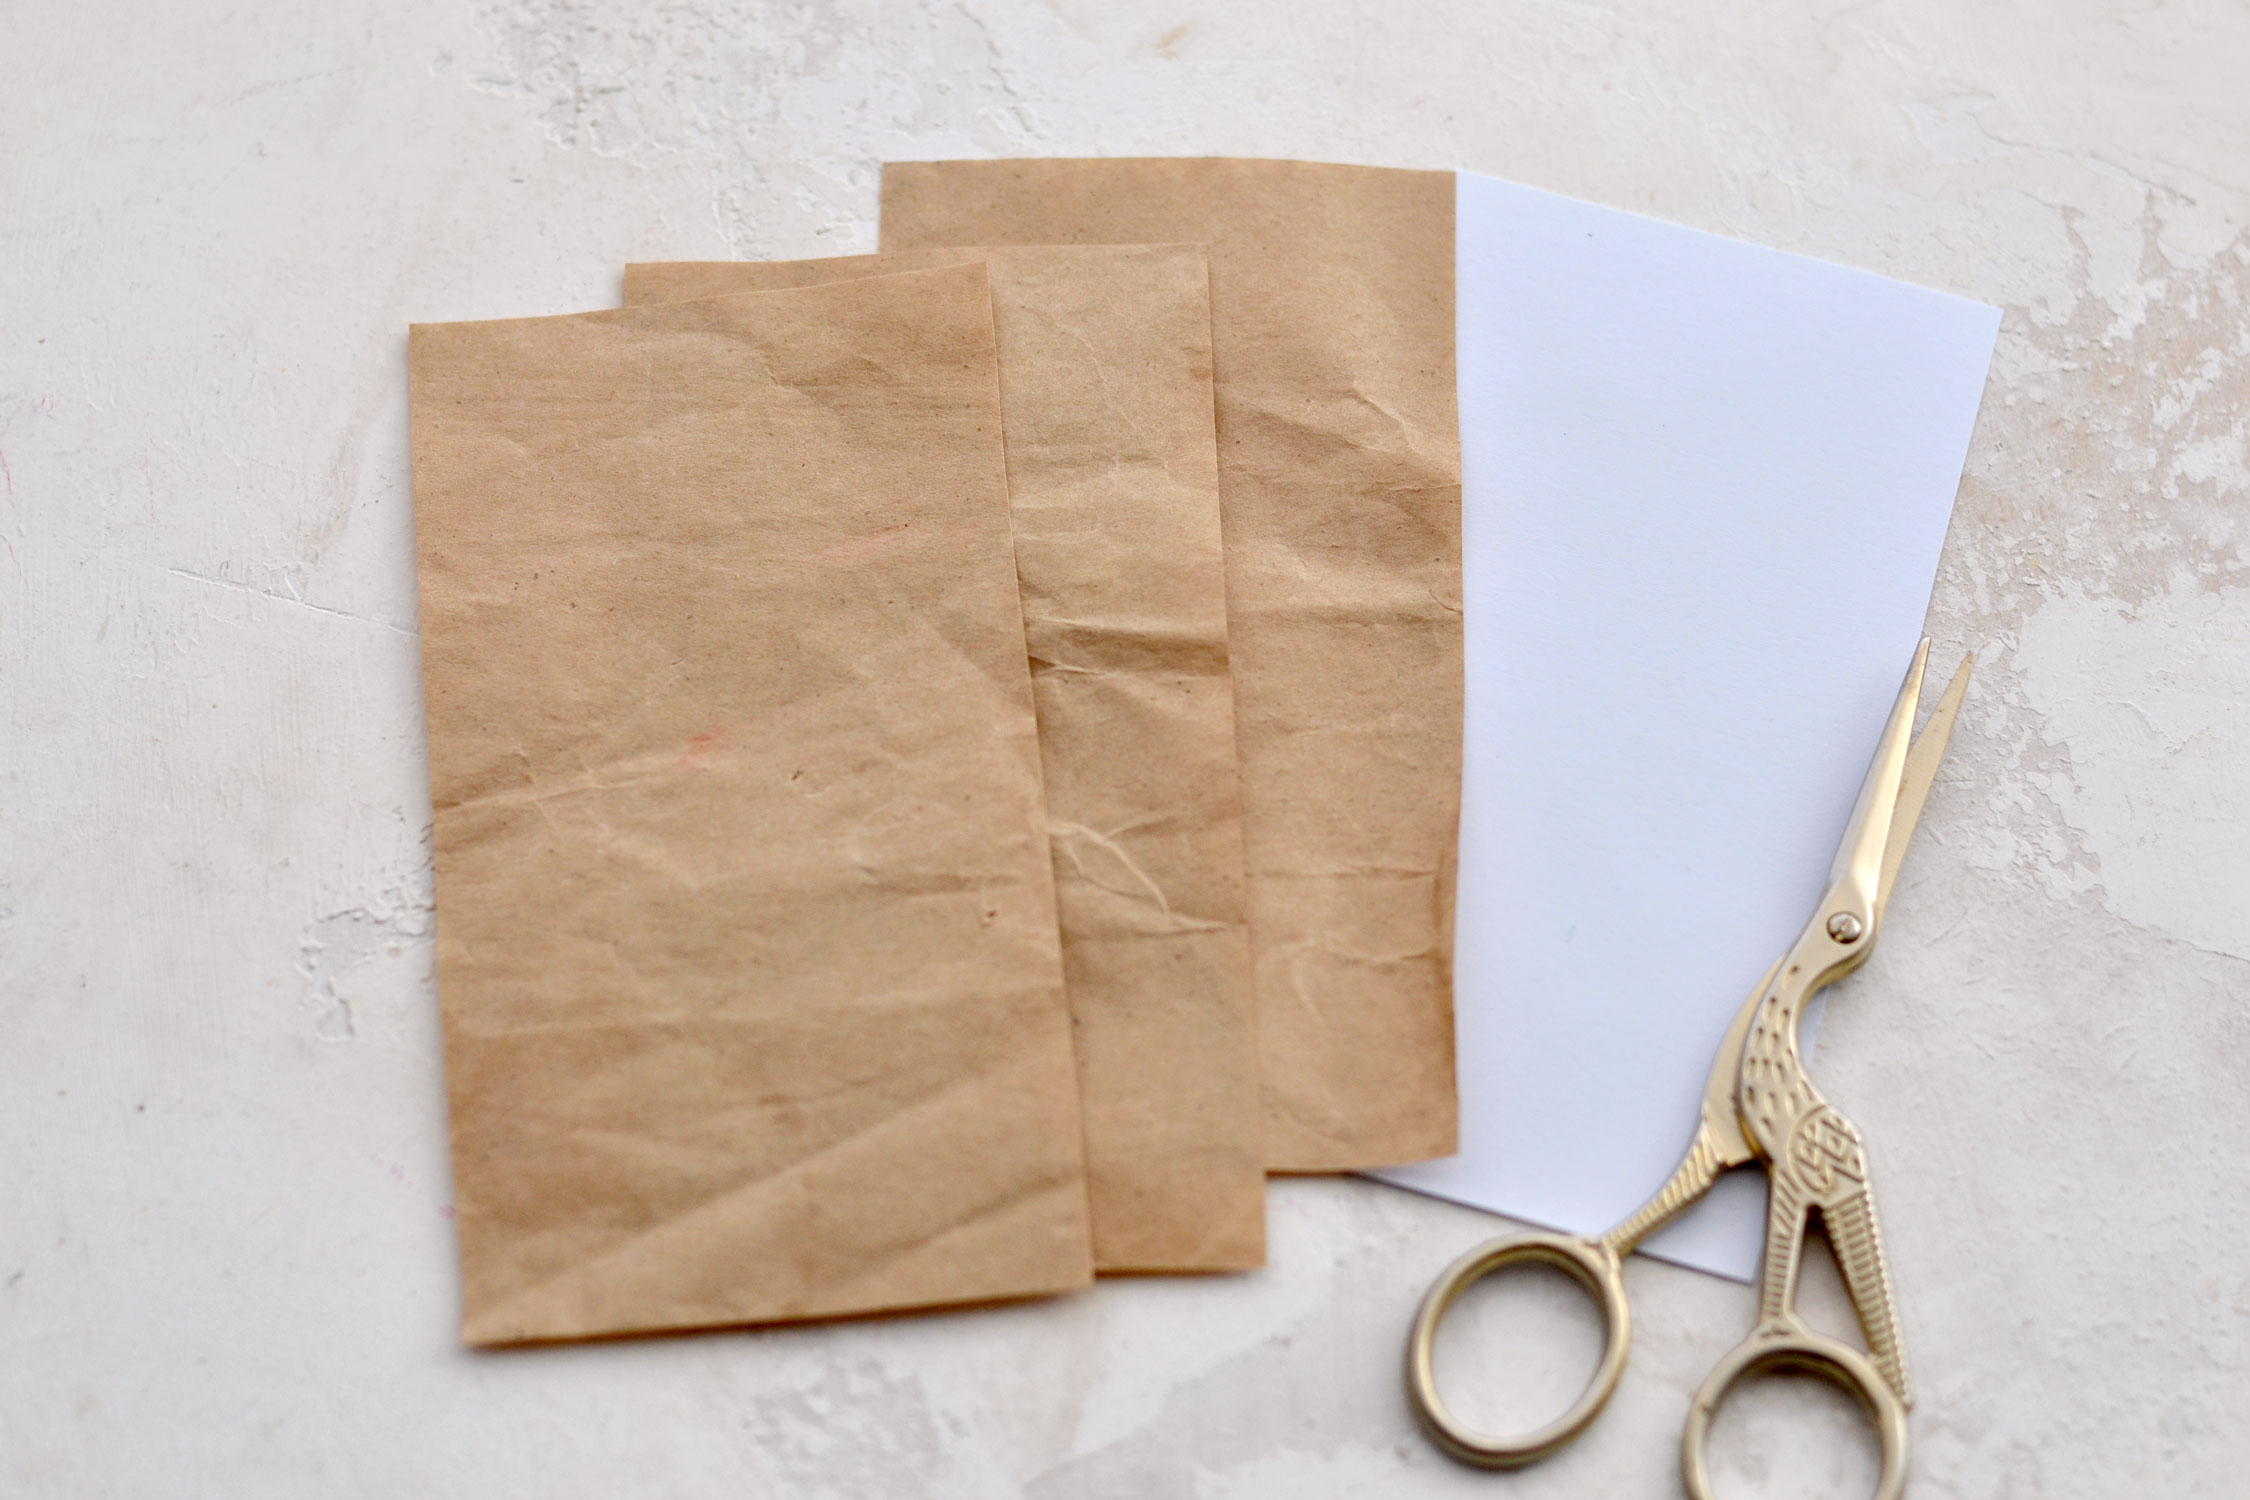
Don’t forget to also cut the template for the paper bag, just put it aside for now, and we’ll use it later on.
Use distress ink to give the paper a beautiful, aged look. You can also perform a few additional distressing techniques on your paper – like rolling and then unrolling the corners, folding and unfolding the edges in some areas, and crumpling the paper here and there. This will break the fiber in the paper, making it less crisp.
Below you will find a side-by-side comparison of a highly distressed paper (the one on the left) and another one to which I only ink-dressed the edges (the one on the right). I think both are beautiful, so we could say it’s a matter of personal choice when it comes to how much you want to distress them. It also depends on how you are planning on using them. Of course, if you can’t decide, you can give them both a try and see which one you love the most!
Distress all the tags with the flowers and keep the mini labels as they are for now.
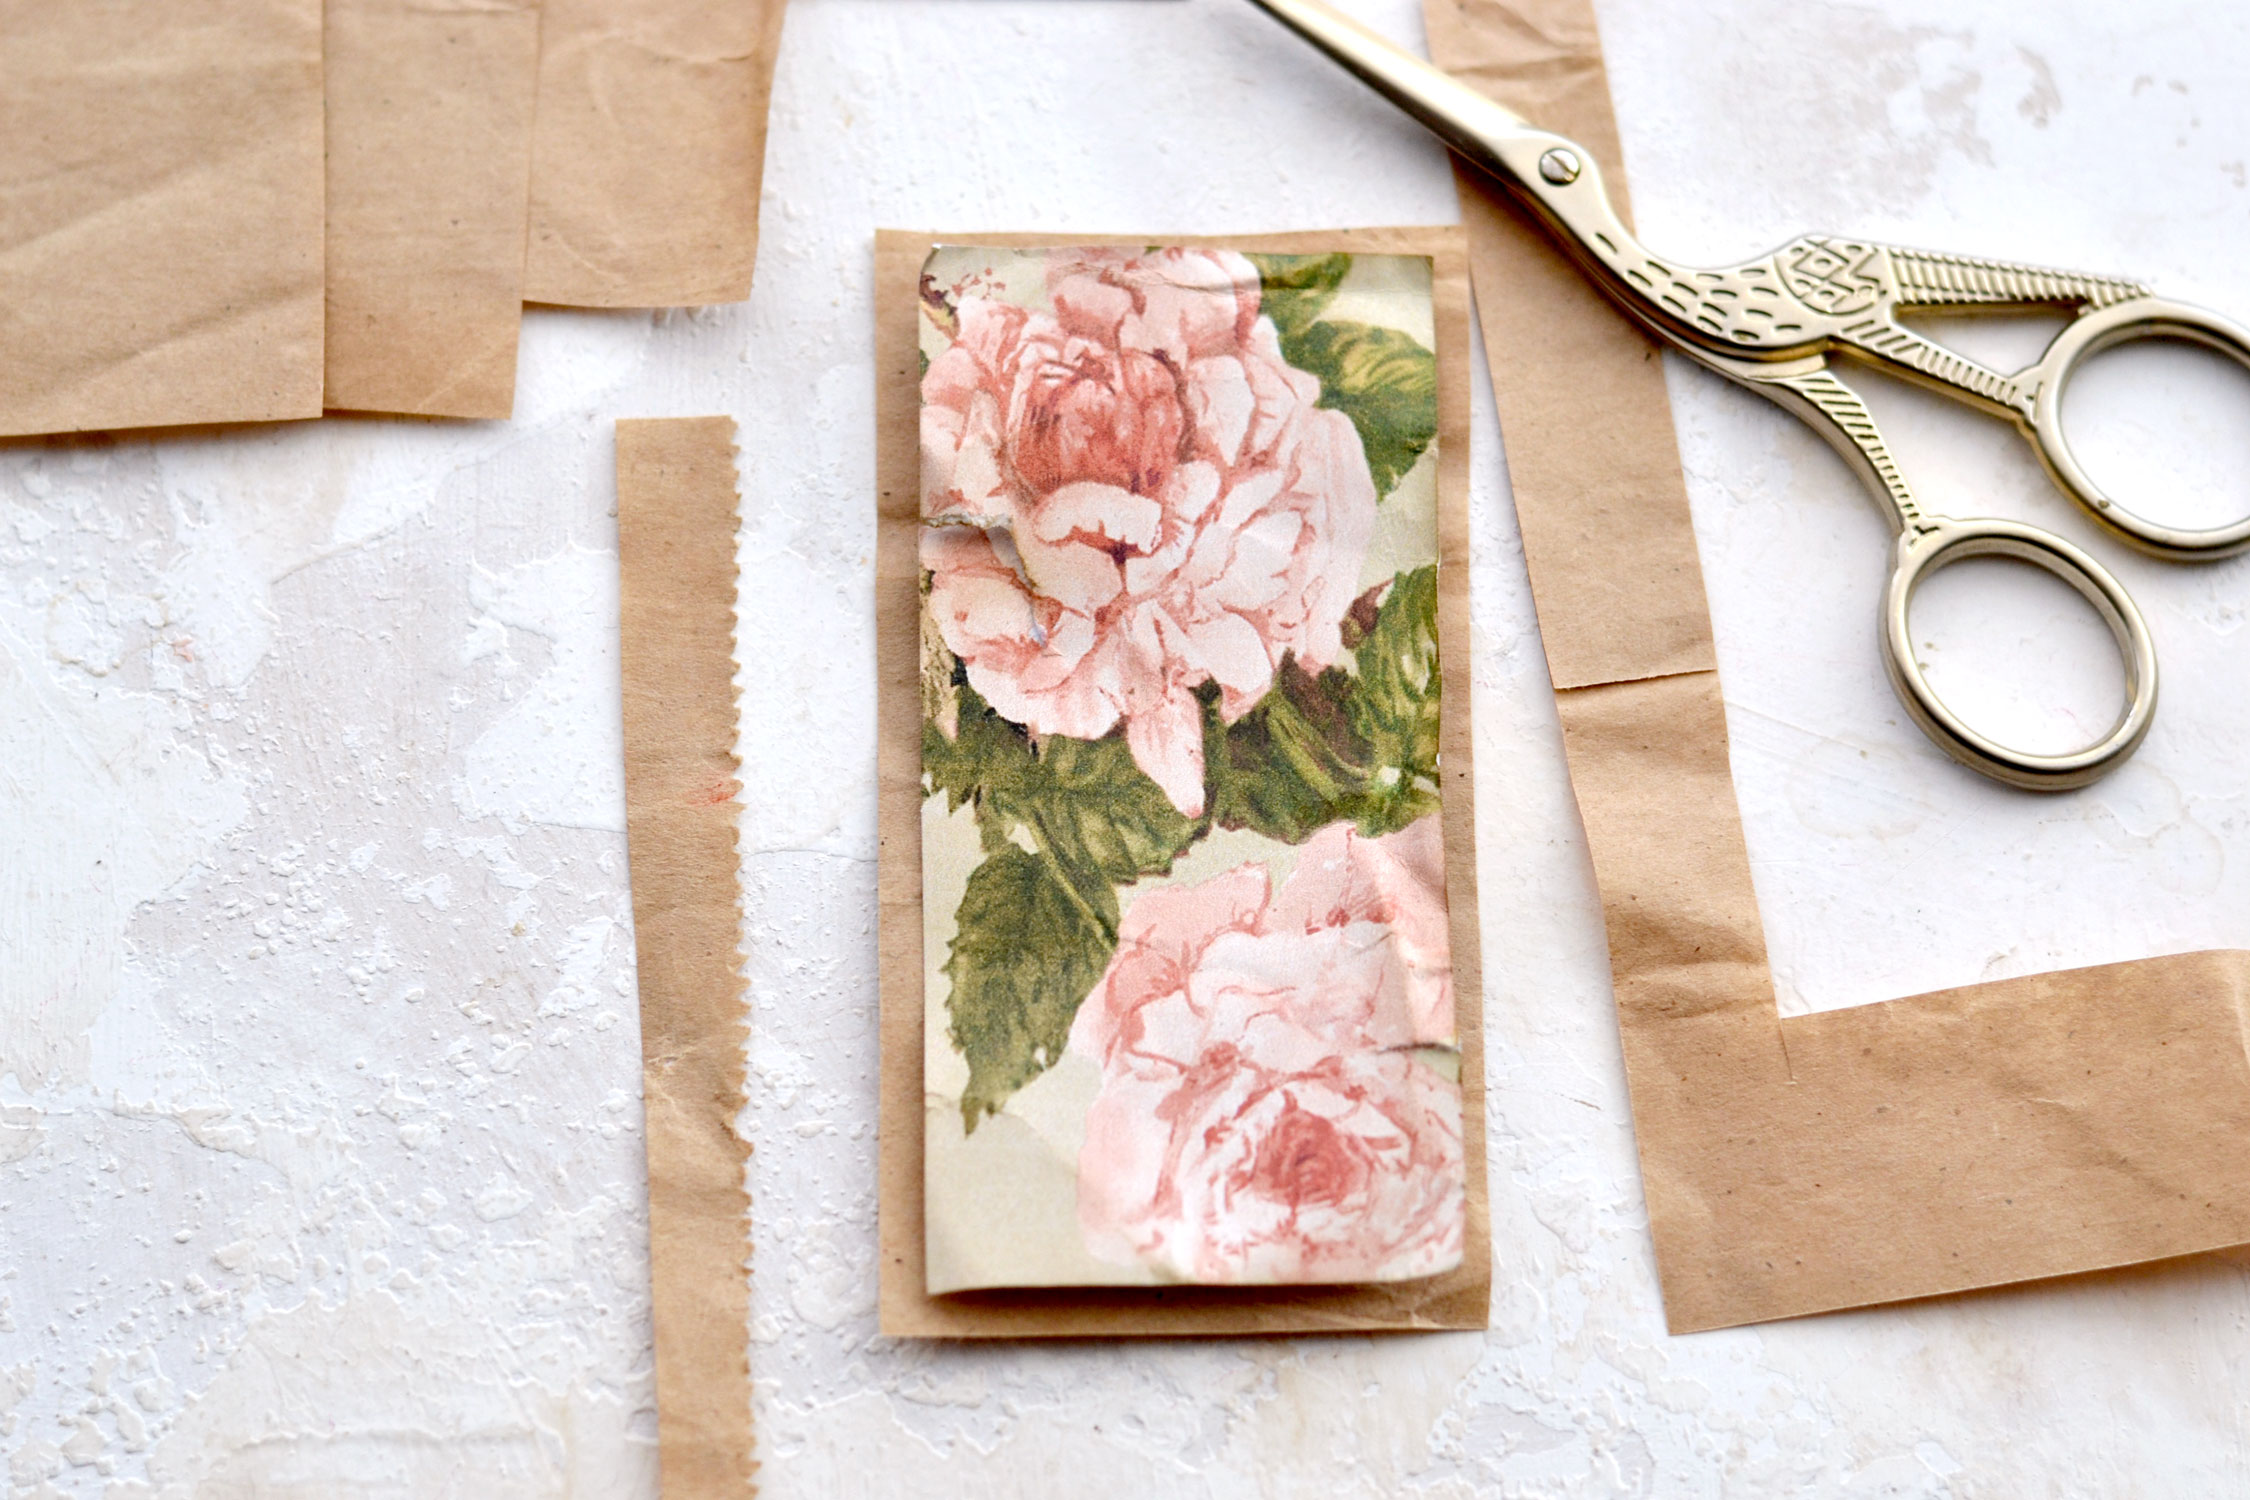
It’s time to use our template to cut the brown paper bag backing for our tags! Place the template on top of new or recycled paper bags and use your scissors to cut as many pieces as you need. You could also use a pencil to trace the shape on your bags first.
My paper bags were quite crinkled because of how they were stored so I just kept them like this without further distressing them. If you want, you can lightly fold or crinkle yours here and there.
If you want to create a brown paper bag backing for the smaller tags, you can! Simply place one of the tags on top of the brown paper and cut it while leaving a small border around the edges.
I wanted to add a small, gilded edge around the mini labels, so I used my trusted friend, the DecoColor gold marker for this. I placed the mini labels on a scrap piece of paper and went all around the edges with the marker. To keep the line straight and sharp, I only let the tip of my marker touch the labels while performing this operation, leaving the brown paper underneath to catch all the excess paint.
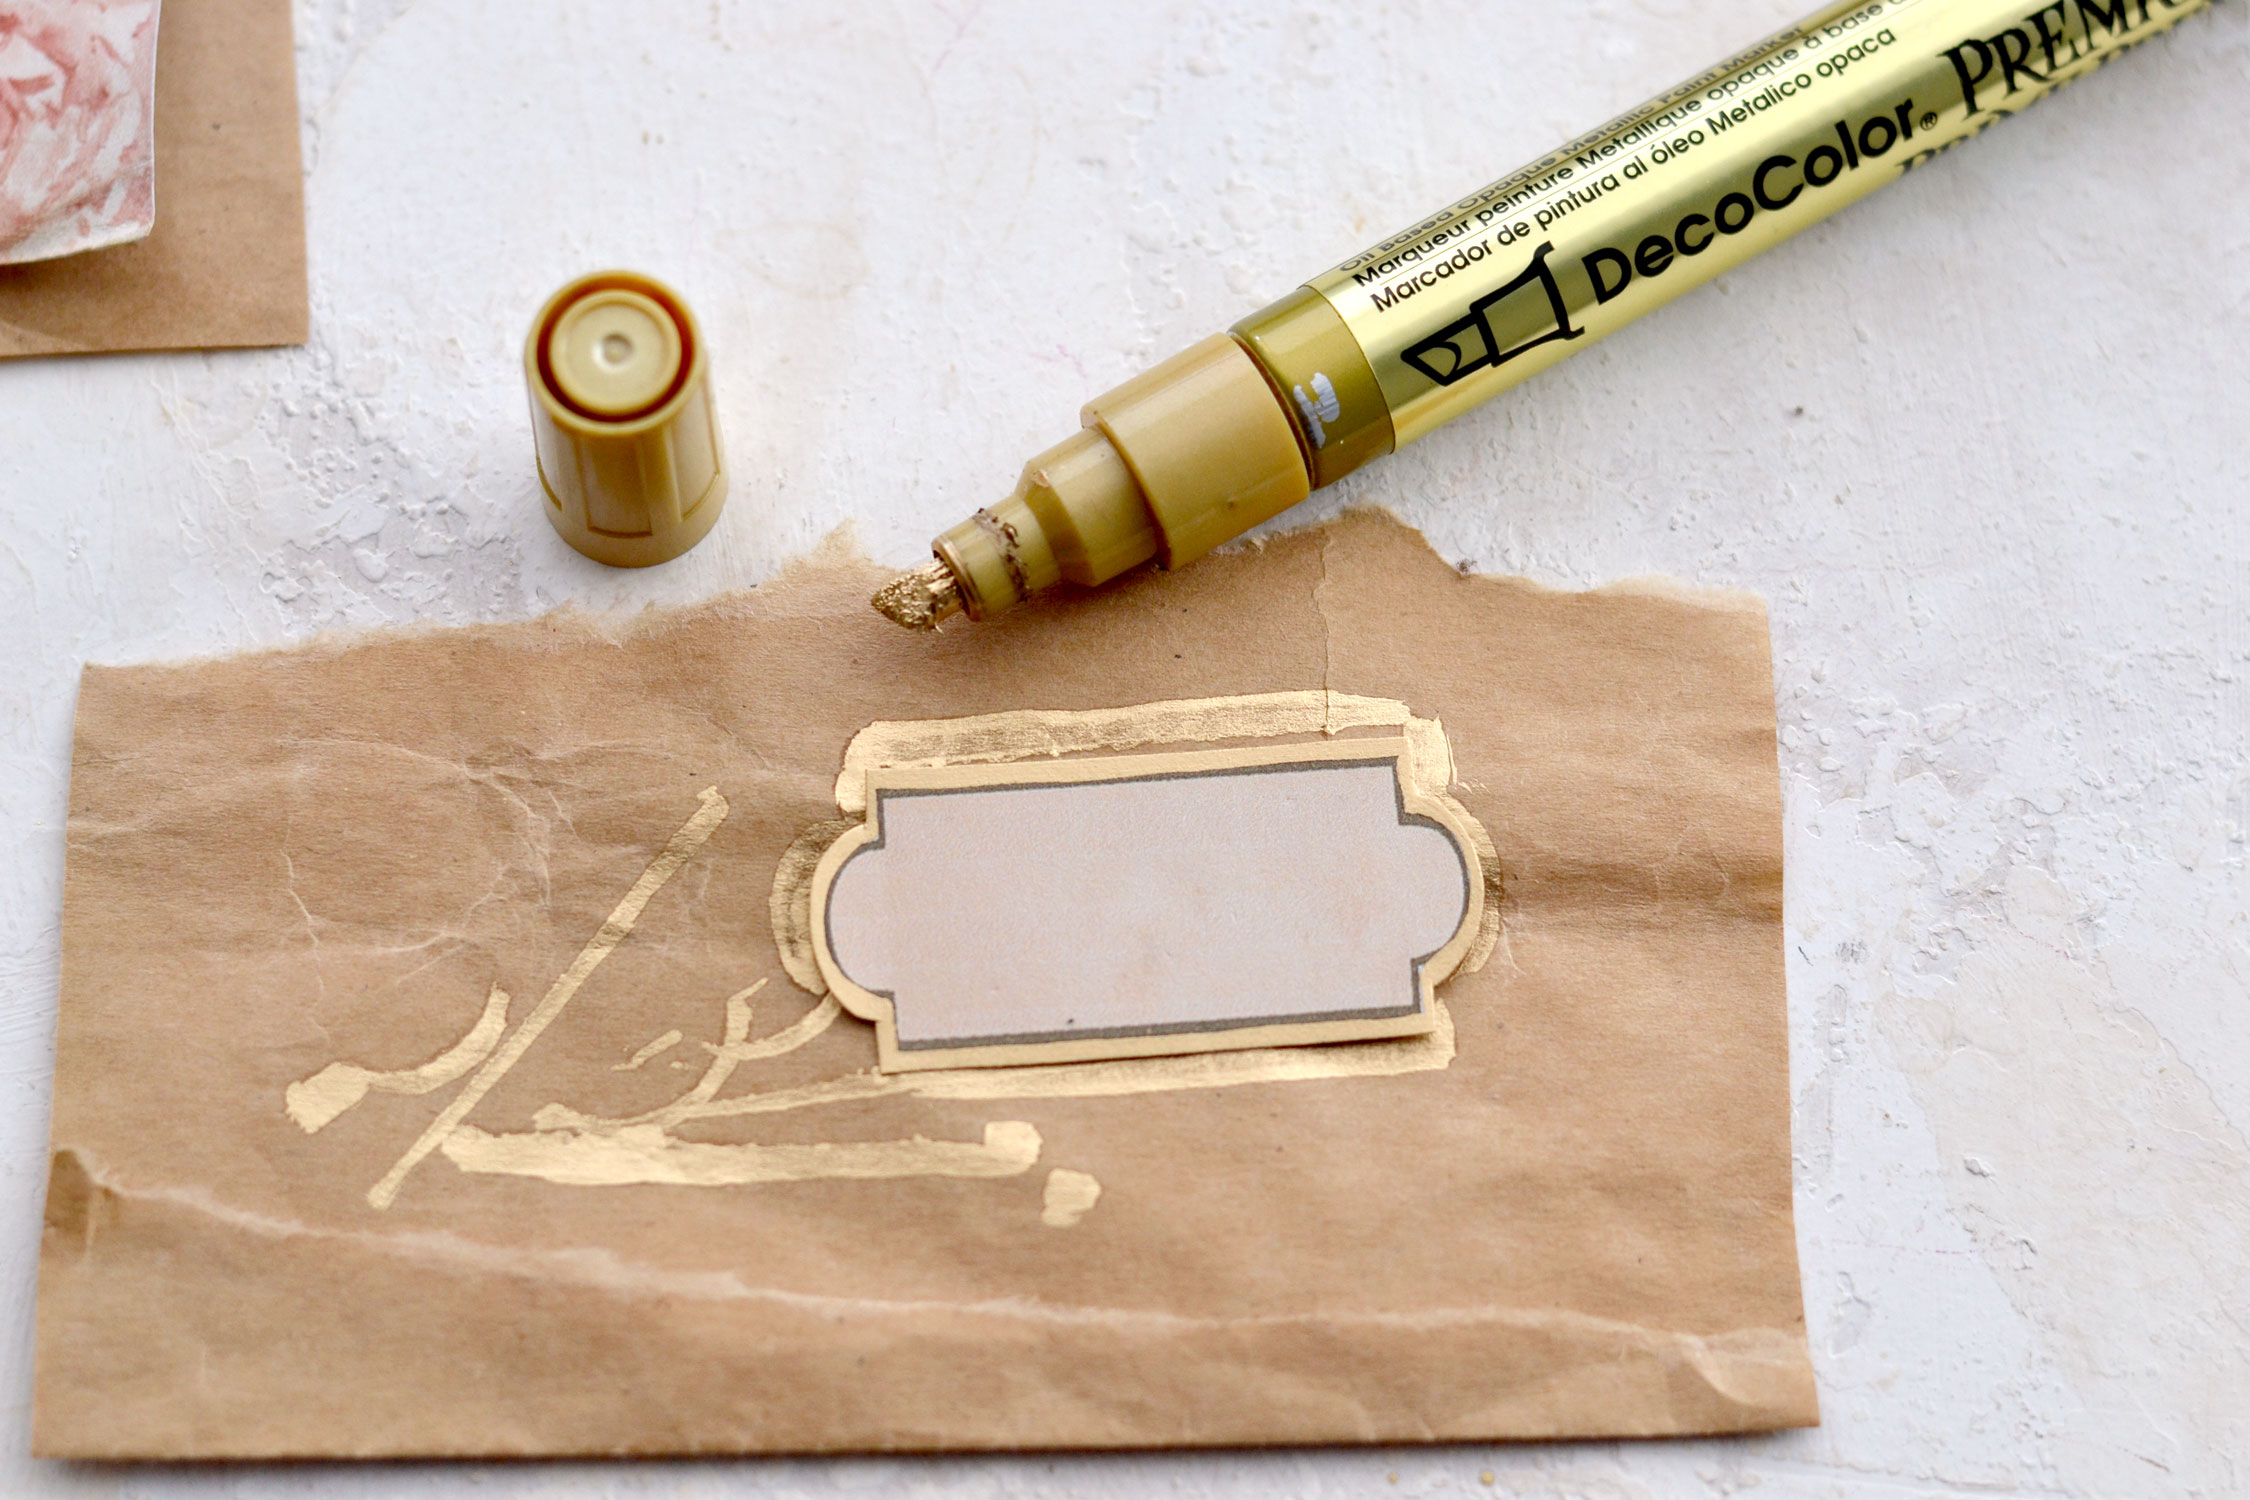
I love how these beauties turned out, the gold gives them such a sophisticated feel, don’t you think?
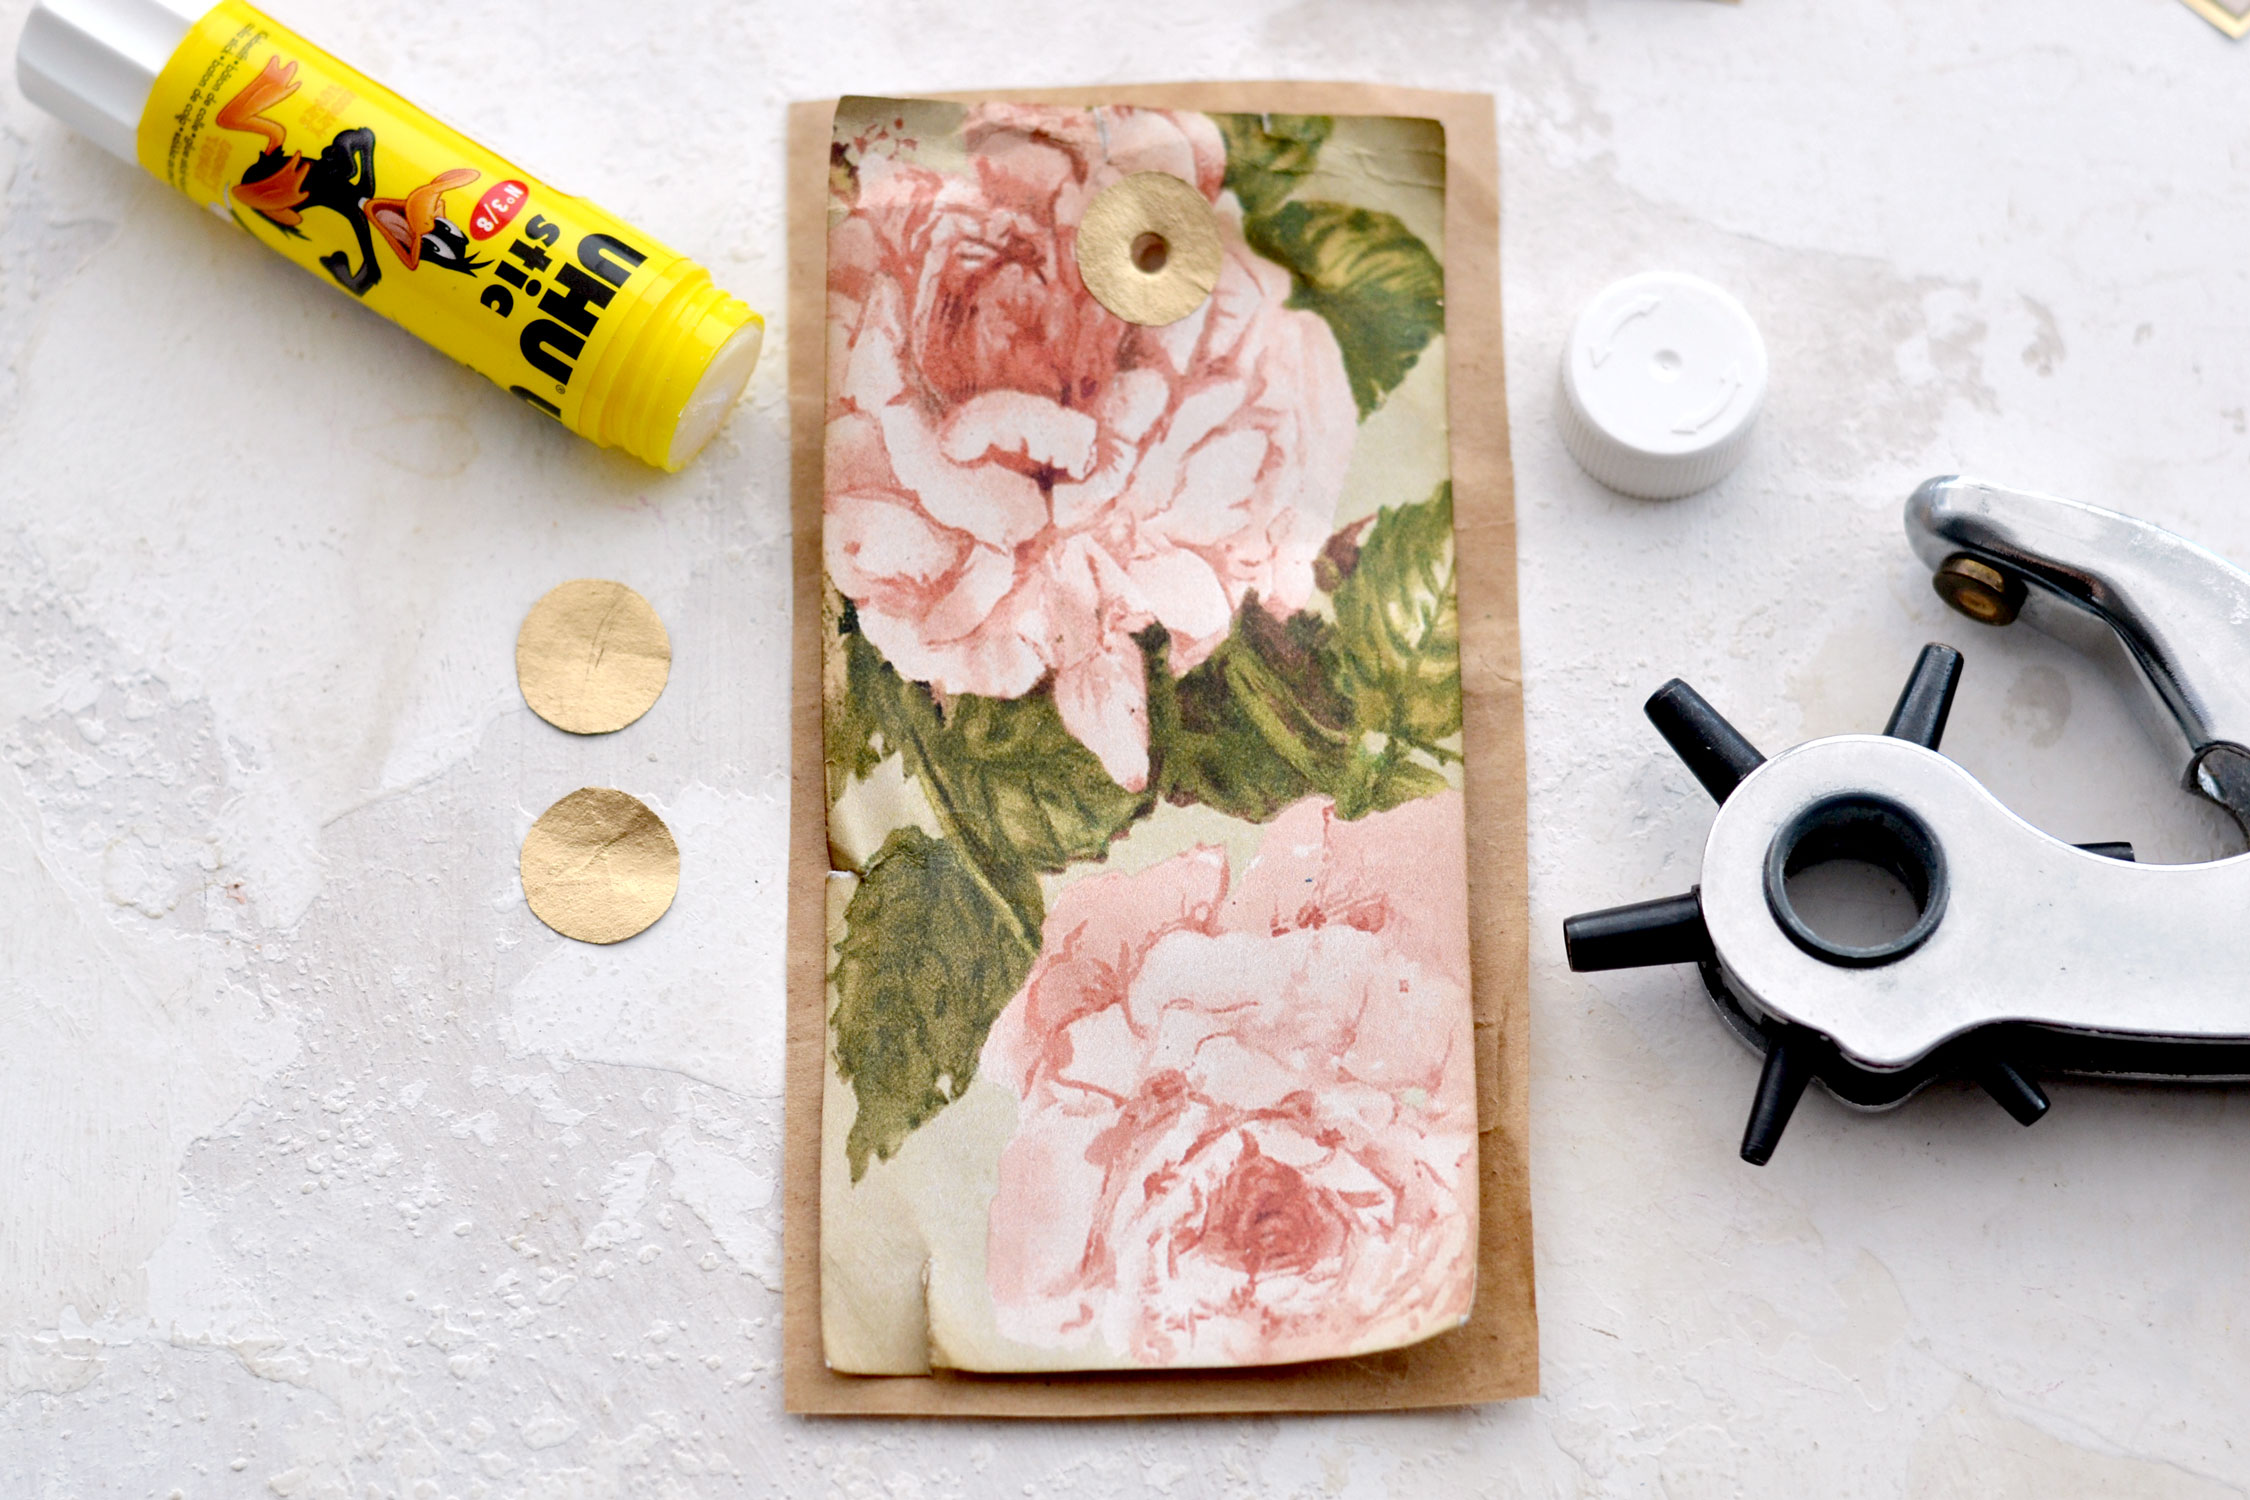
At this point, I thought it would be fun to also make a few gold reinforcers for my tags, so I used the cap of my marker and a pencil to trace a few circles. I wanted my reinforcers to have more of a decorative role here, so I used brown paper bag scraps. If you want to make them sturdier just use cardstock paper instead.
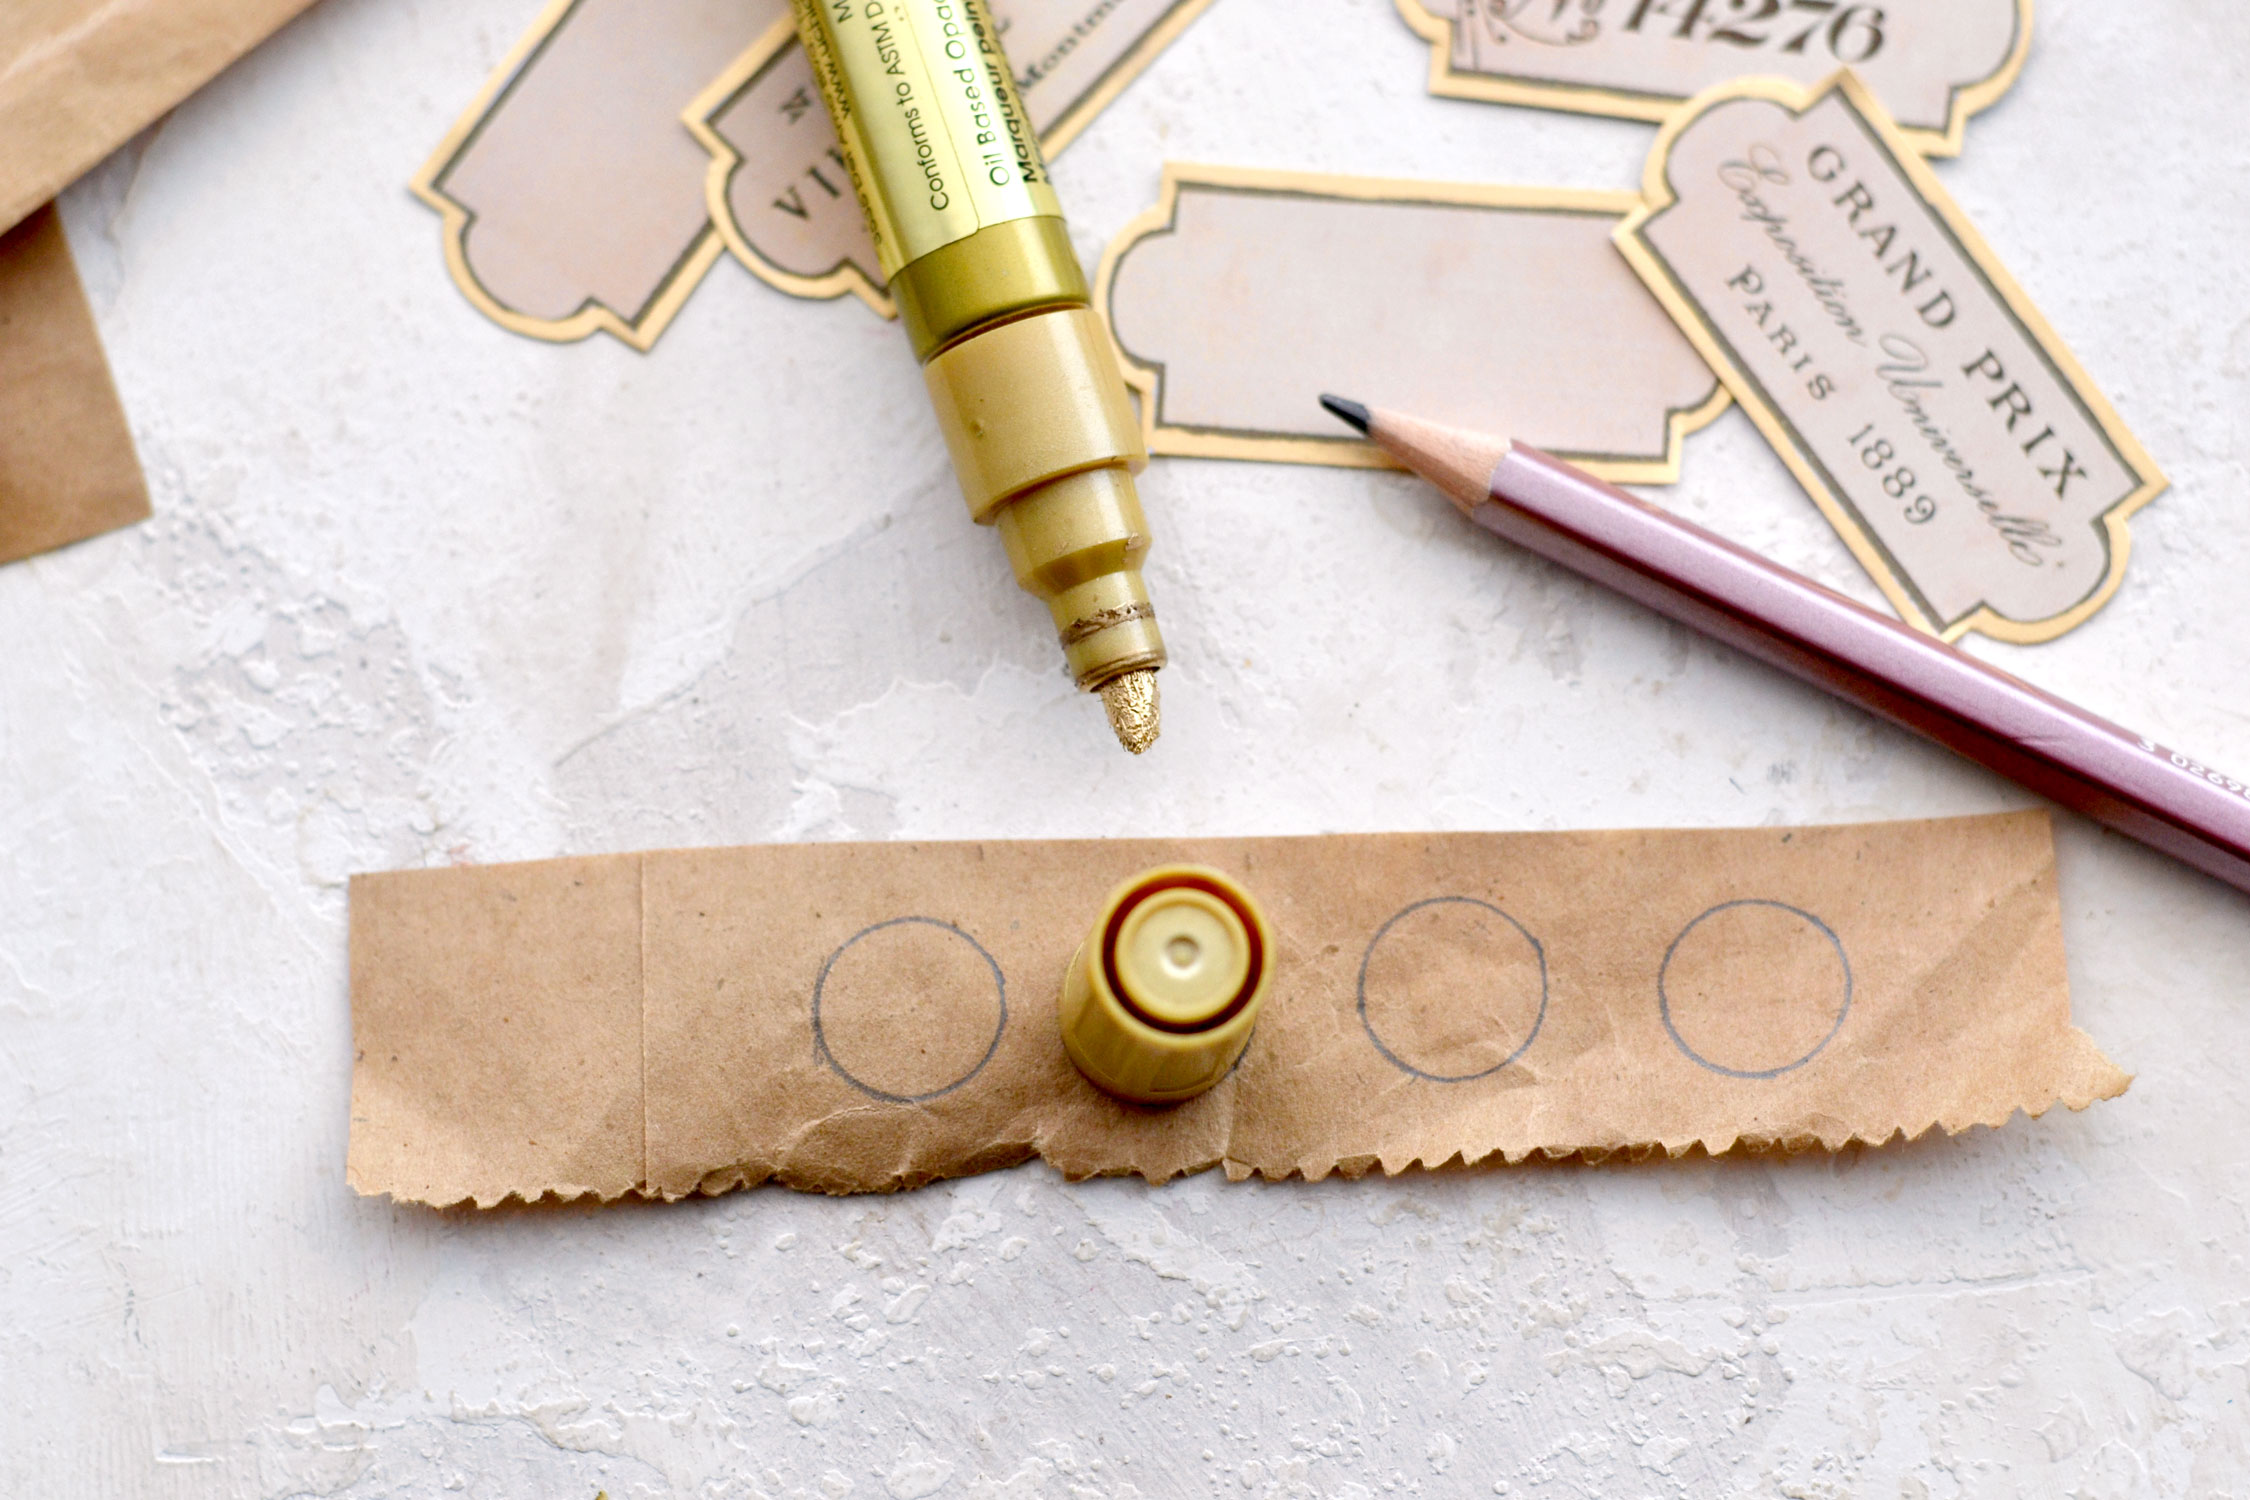
I then cut the circles and painted them using the gold marker one more time.
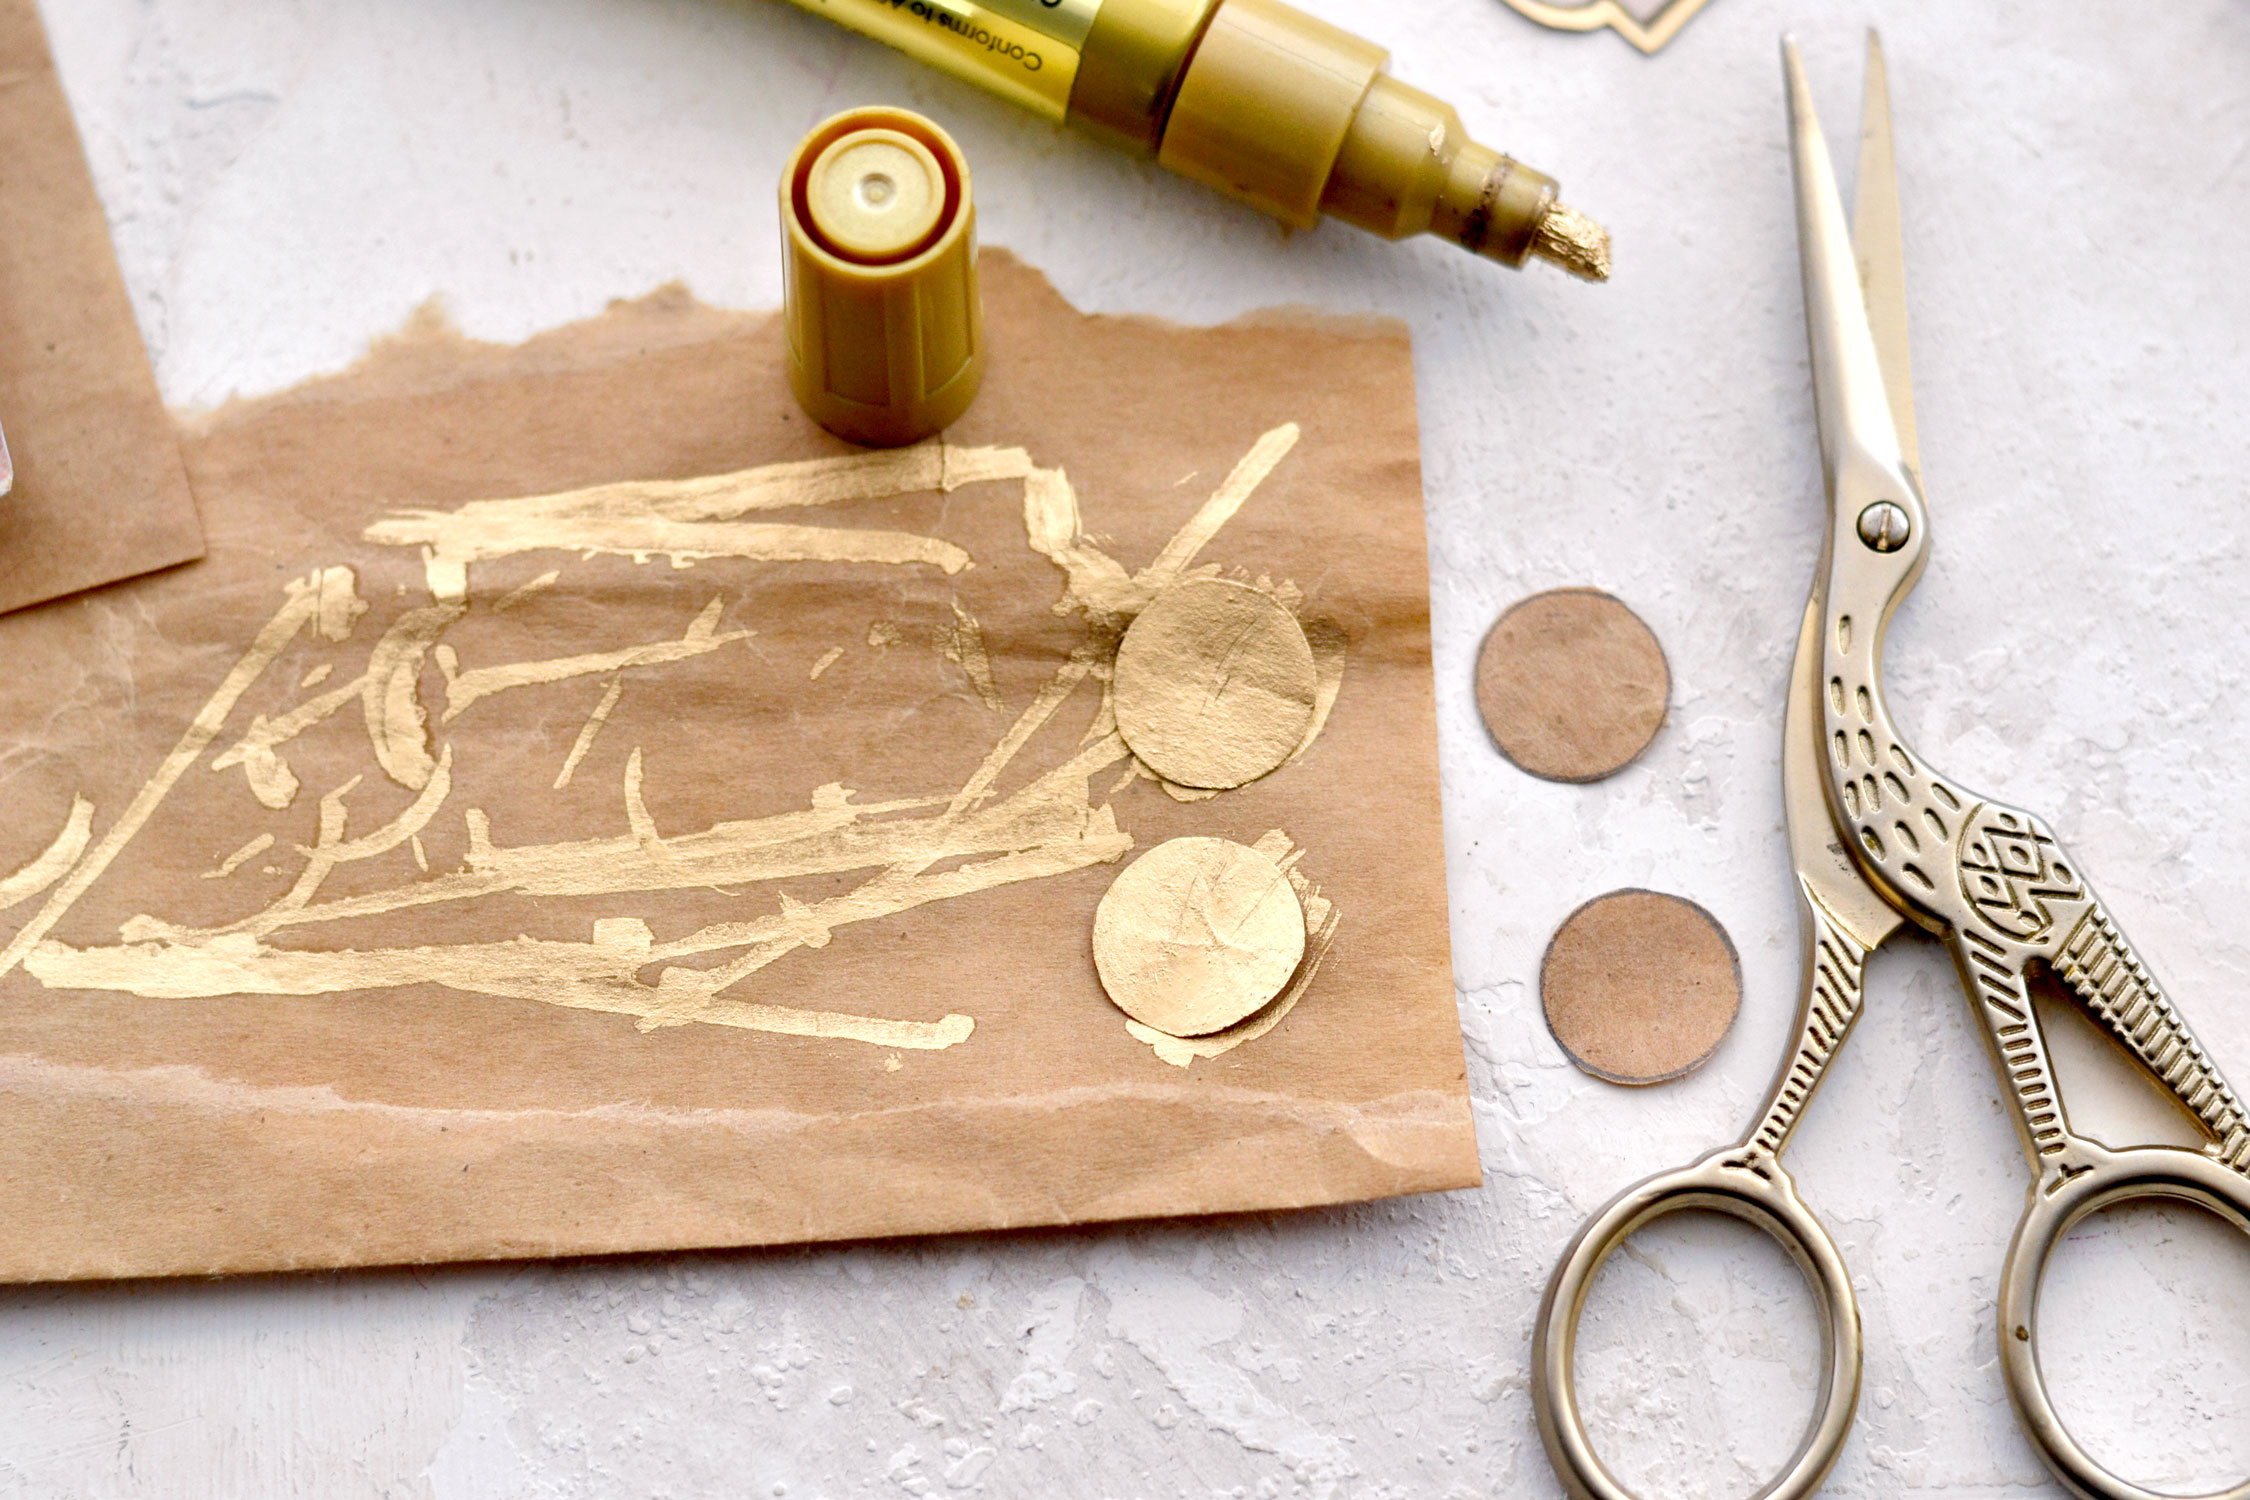
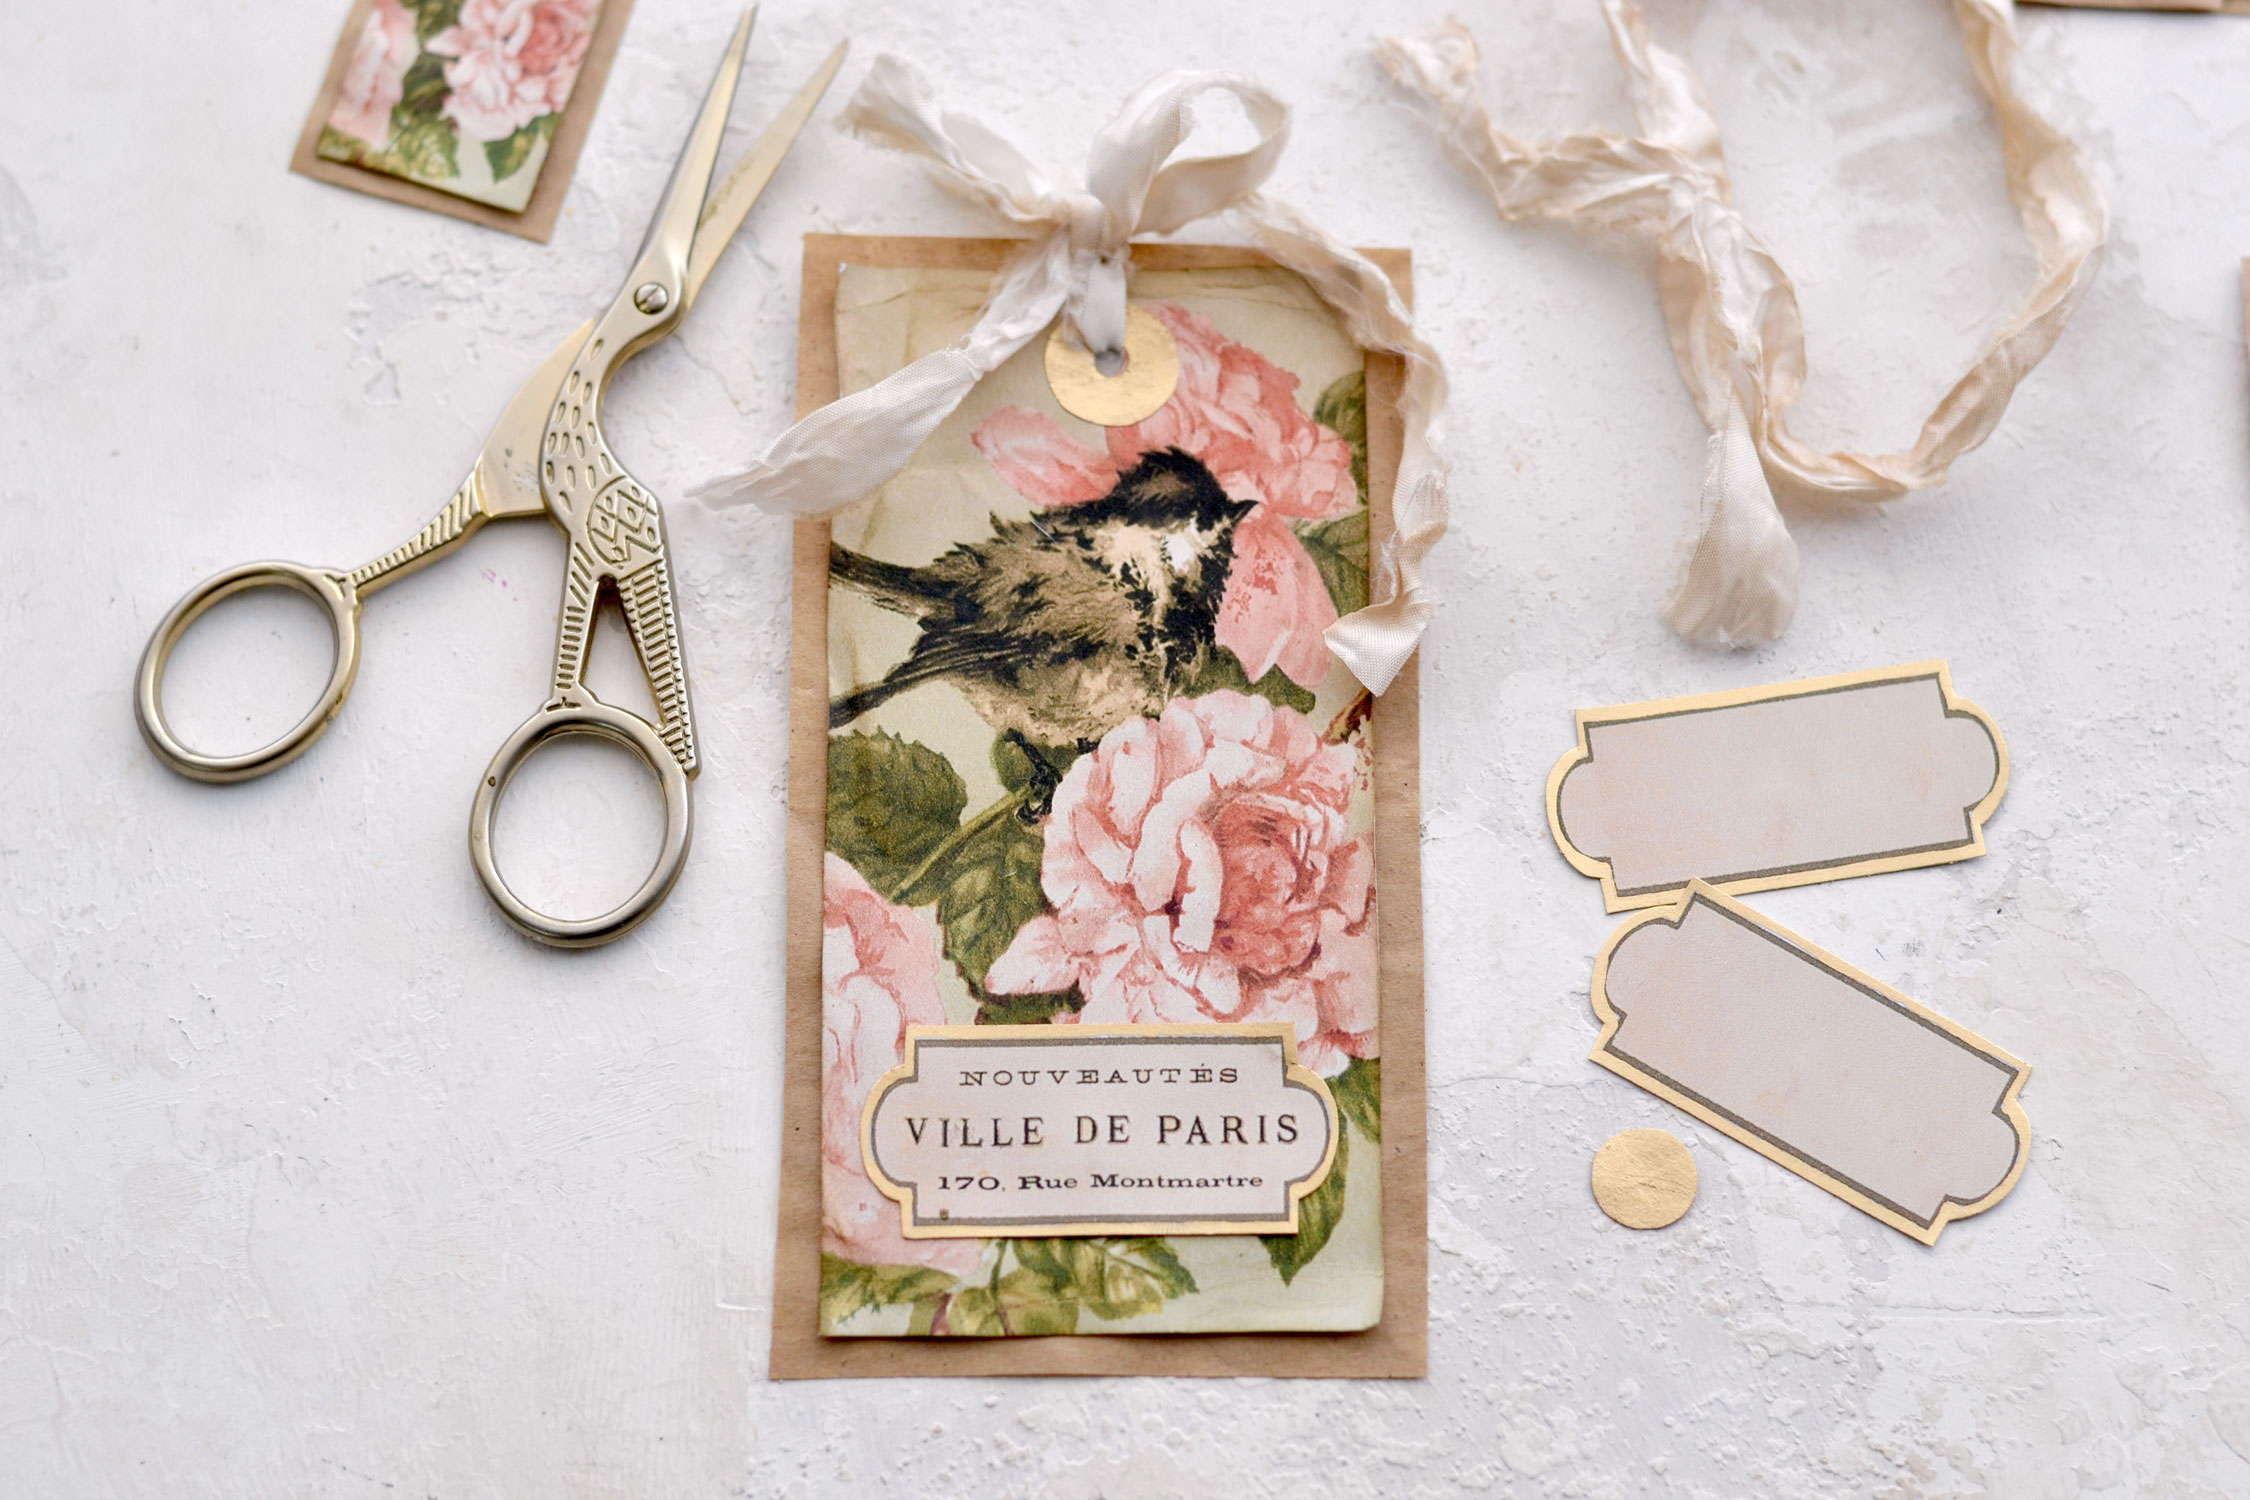
Use paper glue to adhere the reinforcers on the flower tags, then overlap them with the brown paper backing underneath. Use a paper punch to make the holes for the ribbon.
You have two options next – you can either choose to glue your tags to the brown paper underneath or keep them both as separate elements and let the ribbon hold them in place. I actually decided to choose a middle ground and partially glued the flower tags. I added four horizontal lines of glue that were somehow centered, starting from the top. My idea was to keep their beautifully distressed edges glue-free so I could still keep their dimensional feel.
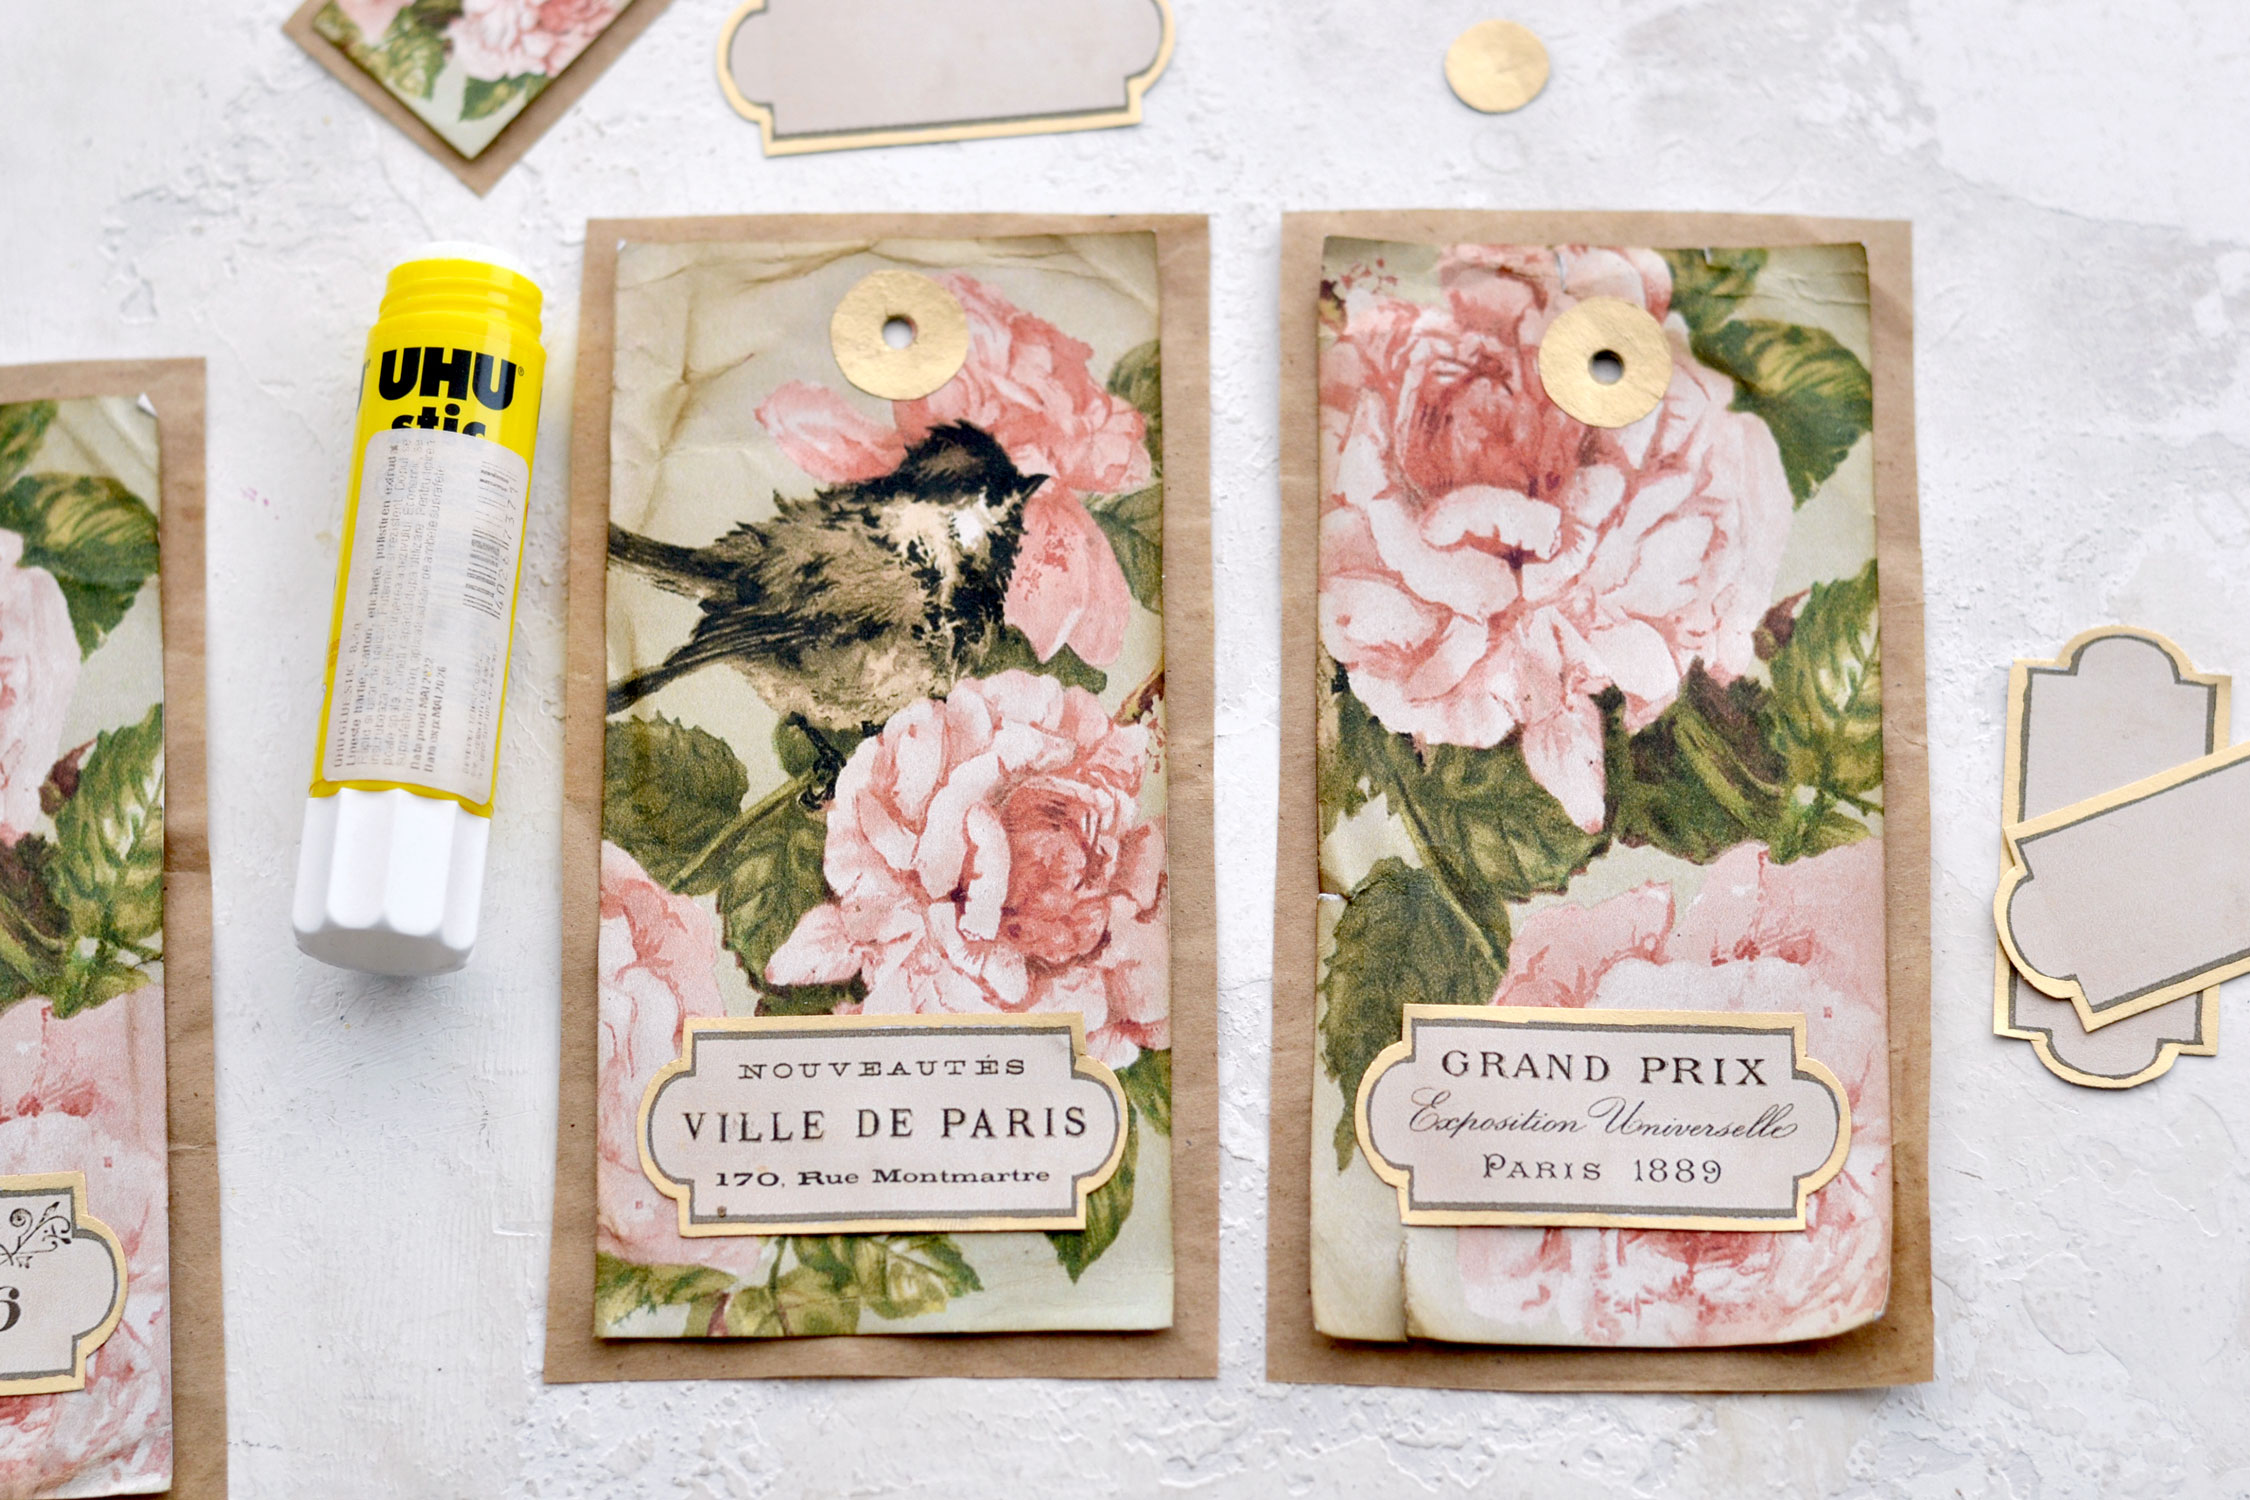
After adding the ribbons, you can decide which of the mini labels you would love to use for your tags. I went with the French ones (obviously), but you can choose the blank ones if you prefer.
The finished pieces turned out absolutely gorgeous, don’t you think?
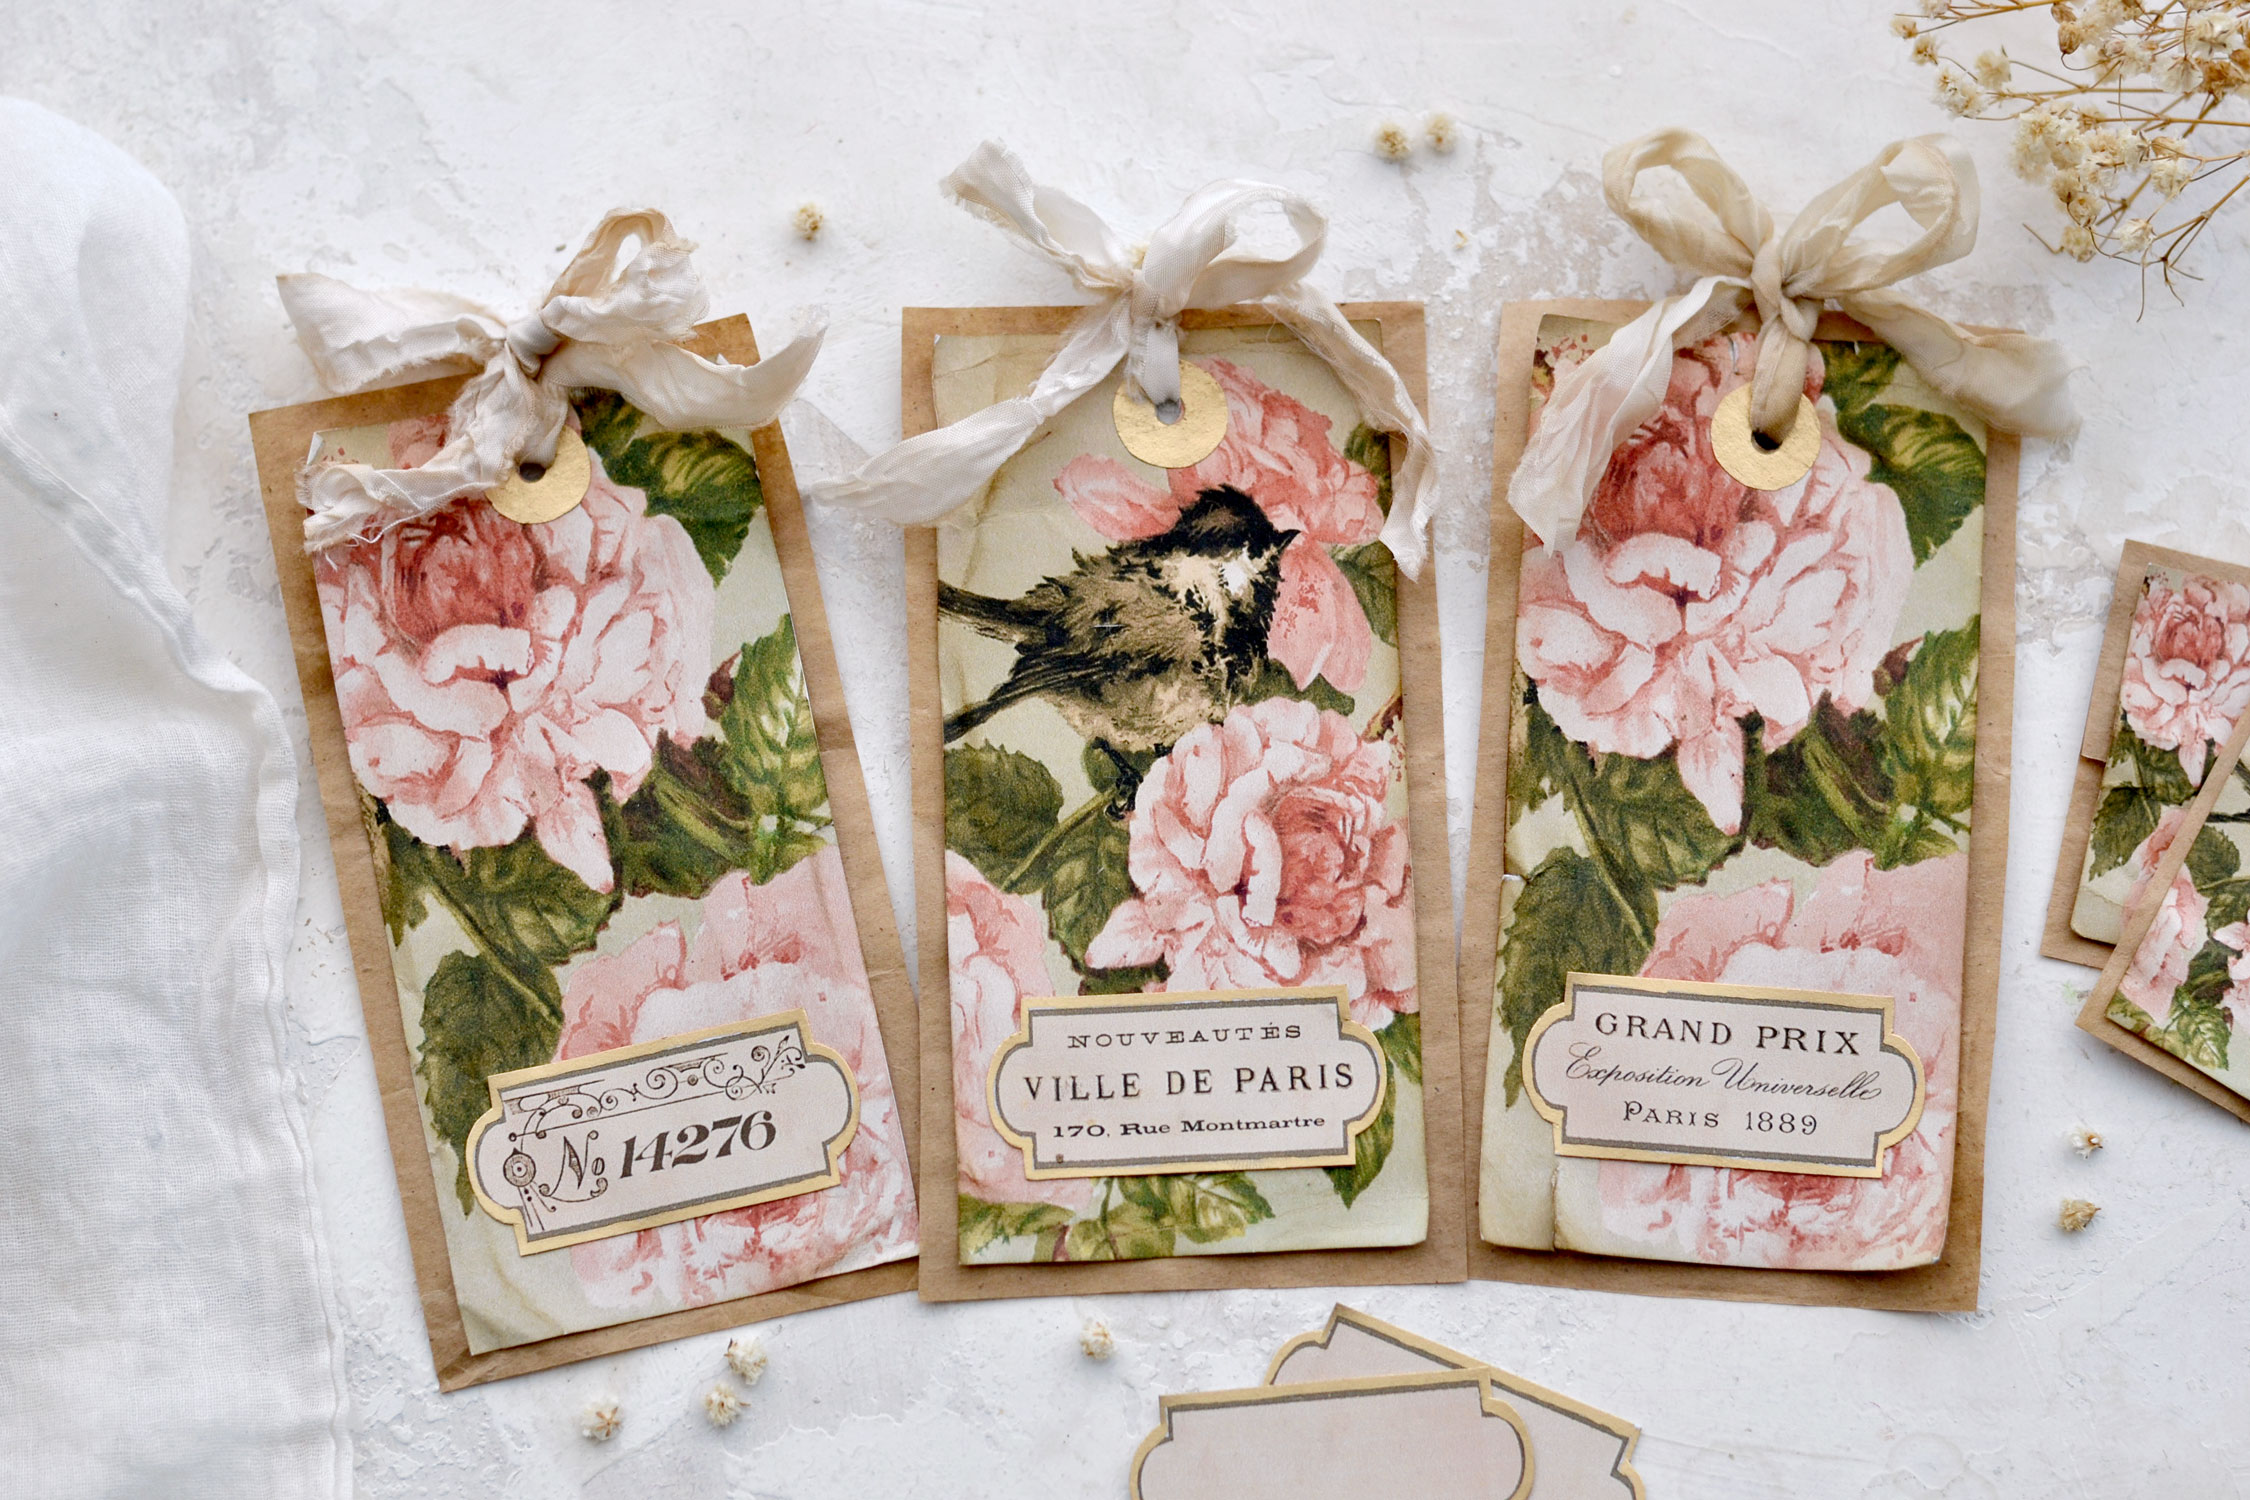
I feel like all the elements that we added to our tags and all the steps that we performed turned these into real gems! You can choose to add small reinforcers and even some ribbons to the smaller tags if you want. Or just keep them as they are to create a little bit of variation.
One thing to keep in mind while choosing the brown paper bag is that the color of the bag and even the texture will make or break this project! I initially had a sturdier paper bag prepared for this, but I did a few tests, and I didn’t like their overall look. That bag was darker in color and had more like a yellowish tint to it. I was super excited when I stumbled upon the one, I ended up using in my save-all-that-you-can-find-never-throw-anything paper stash. This one had almost a neutral feel to it and was quite thin. It also had sort of a swish, which I really liked because it reminded me of glassine bags.
Just to give you an idea, you can easily turn these into super chic small bags if you leave the ribbons out, or even some charming pockets for your junk journals. You could also use them as scented bags that you can give to friends or just hang on your drawers, so many options for experimenting and getting creative with these!
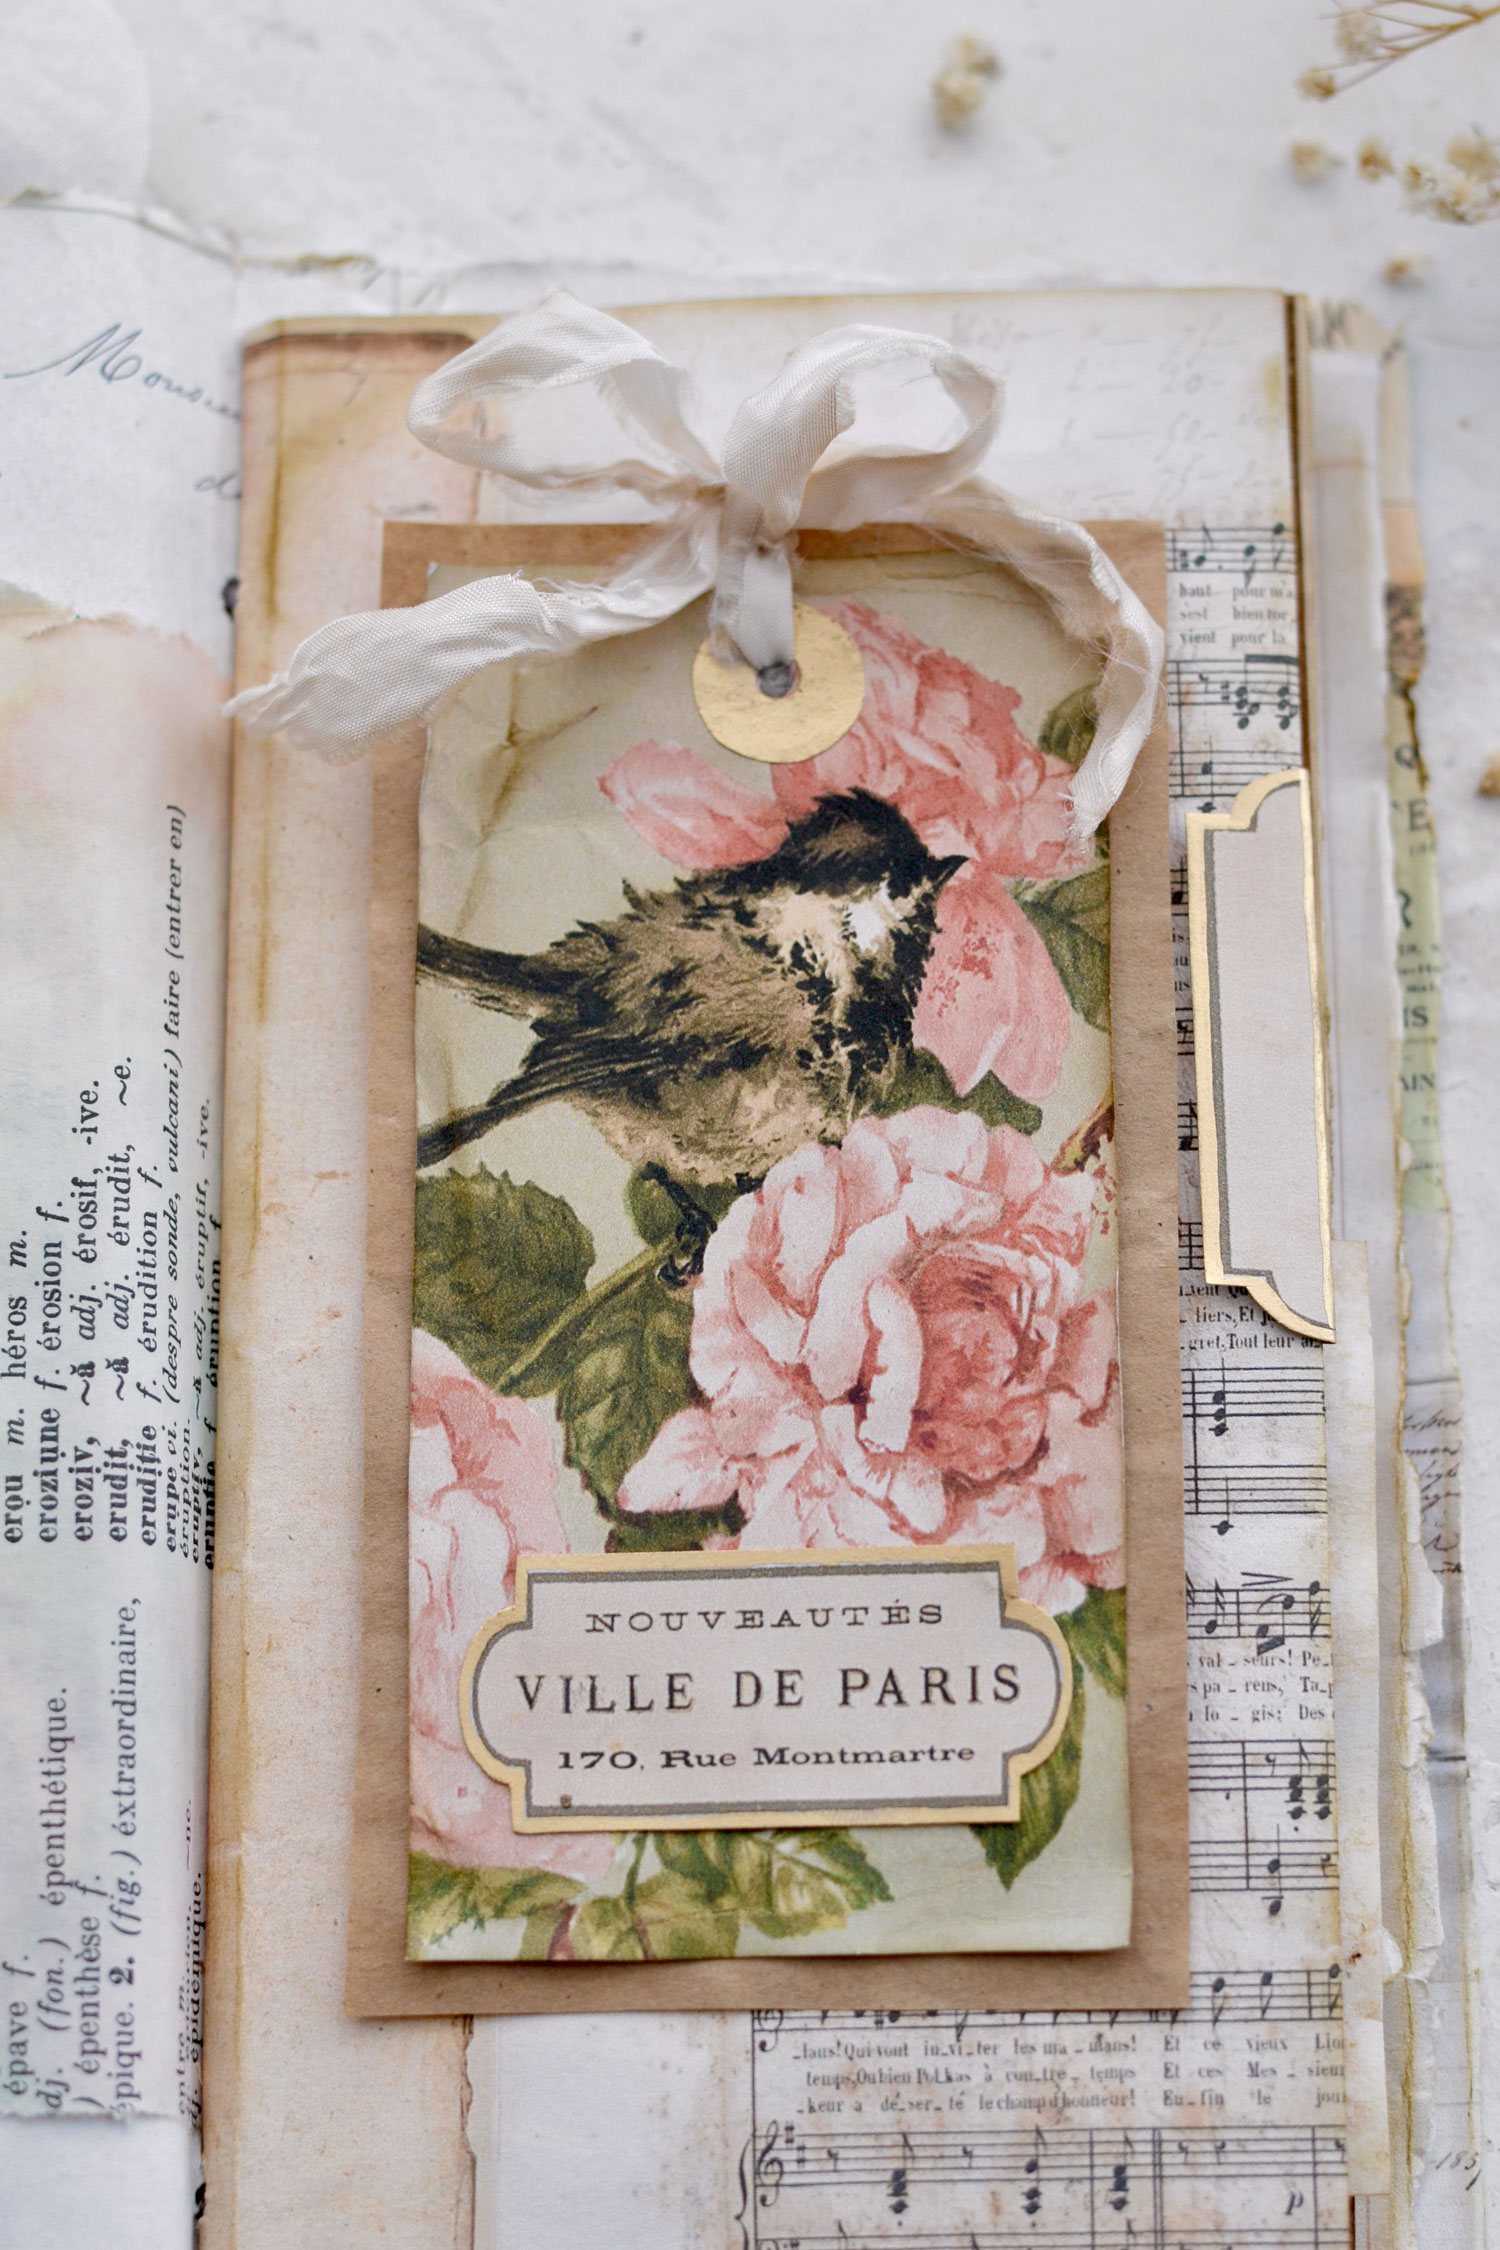
The small blank labels can be used with the tags if you prefer to personalize them on your own terms. You can write the recipient’s name if you are planning on using them as gift tags, you can stamp or even decoupage your preferred images or ephemera. You can also use them as small embellishments for your junk journals, along with the tags, or just fold and use them as tabs, as I did below.
These beautiful paper bag flower tags can be included in all sorts of creative projects, I’m sure you’ll find so many ways of using them. I feel like they are somehow universal and could definitely become your go-tos for when you need something quick, but absolutely gorgeous! You cannot go wrong with these, so I hope you’ll give this project a try!
 I hope you enjoyed this upcycled paper bag craft! You might also like my Paper Bag Flower Cards Project HERE.
Happy crafting,
Diana | Dreams Factory


Janie says
Absolutely beautiful!!! I love this project! Thank you 😊 Hugs….Janie
Karen Watson says
Thanks for your sweet comment about Diana’s project Janie!
Jan W says
Love these! SO pretty and seems to be quite easily accomplished. I always love seeing recycled/upcycled items being used. Thank you for sharing your process as well as the graphics.
Karen Watson says
Have fun making Diana’s pretty tags Jan!
Karen says
This looks really lovely. I love how you always manage to add a little “gold” something or other to your projects. They really sparkle!! Can’t wait to try this one.
Karen Watson says
Diana does love her gold touches! So glad you enjoyed her project this week Karen.