
How to Make Pins
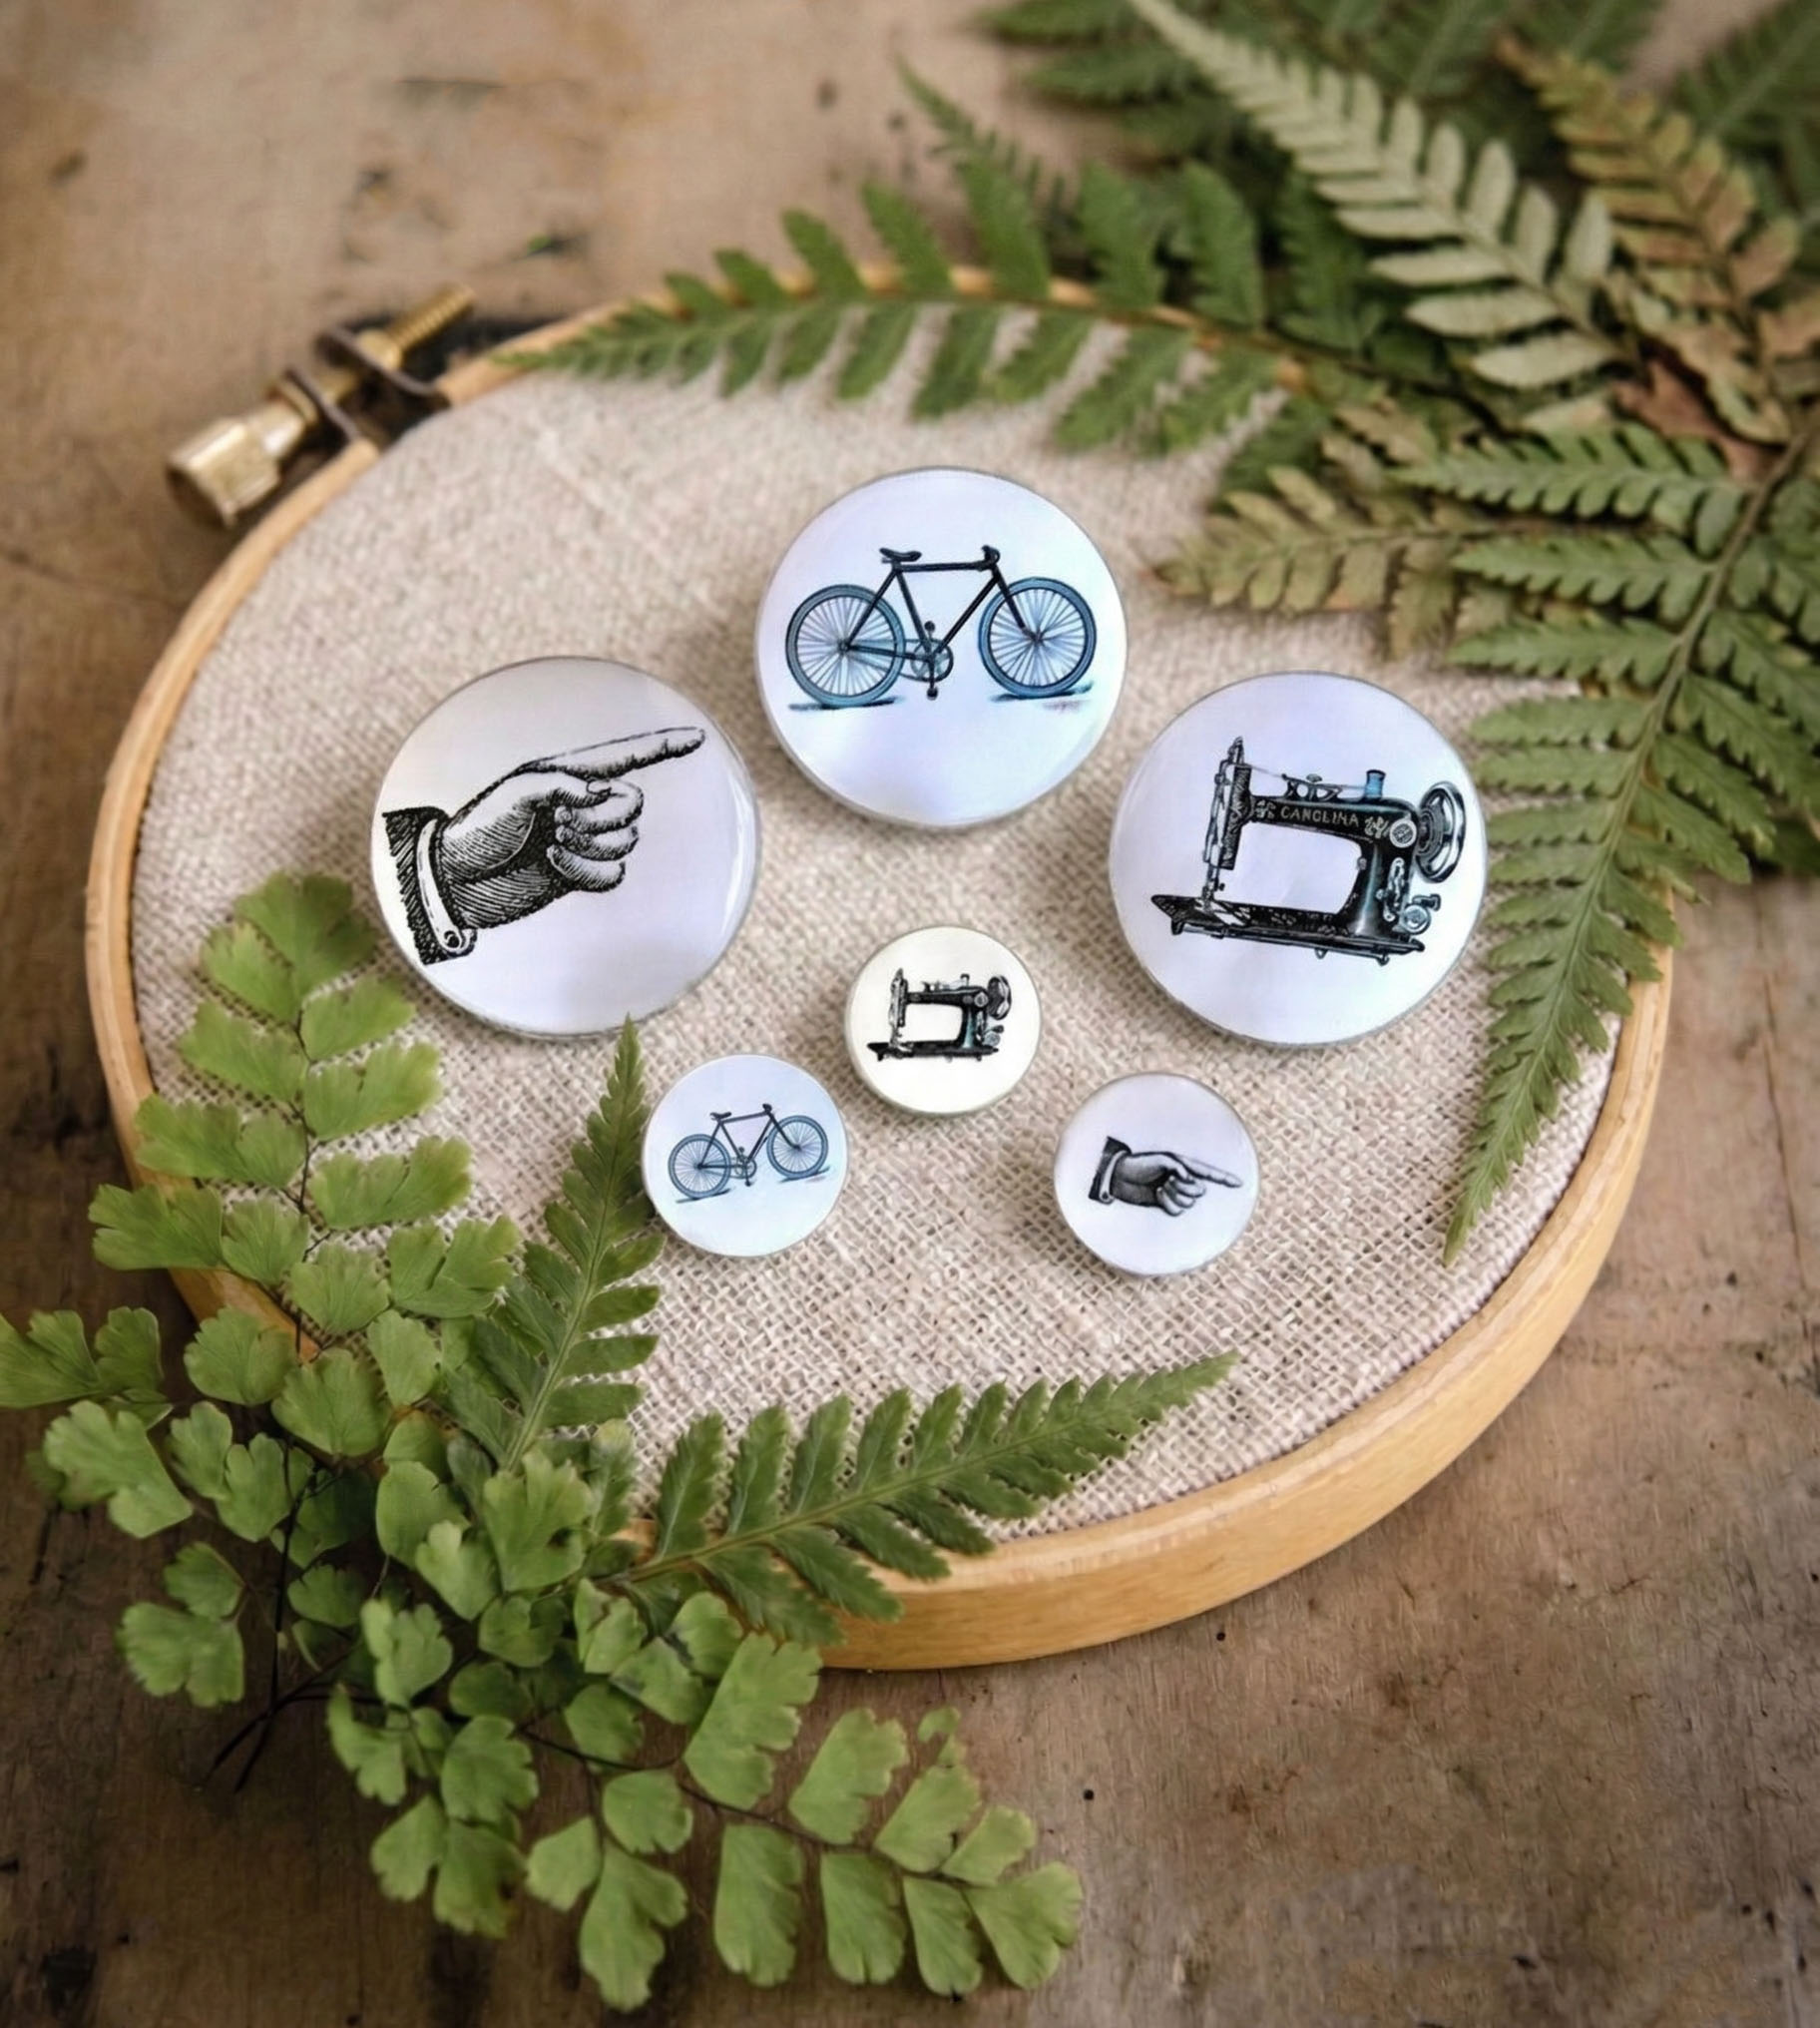
Hello, my favorite crafters. It’s Rebecca E Parsons back today with an easy and inexpensive Mixed Media technique tutorial – How to Make Pins (and Clips)! Handmade Pins are all the rage at the moment. These tiny wonders can be used in so many ways in junk journals, books, card making, scrapbooking, and just about every art and craft that we make here on The Graphics Fairy. You can see round pins and fussy cut pins below. I also colored a few with colored pencils. There are so many options with these Hot Glue pins.
This post may contain affiliate links which won't change your price but will share some commission, you can find our privacy policy here.

Supplies:
All you need to create your own pins, are a few simple supplies and basic materials that you probably already have in your stash.
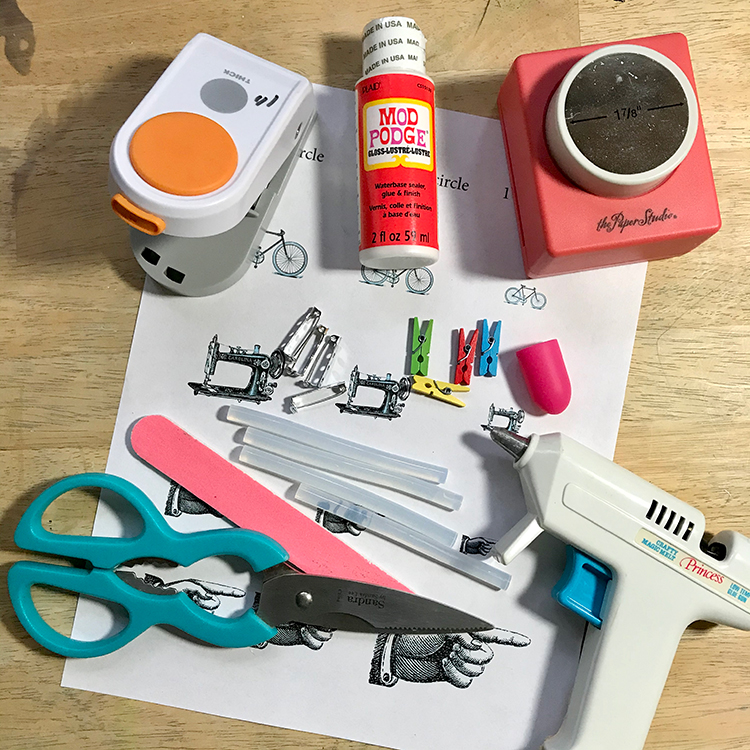
Cardstock – The heavier the better
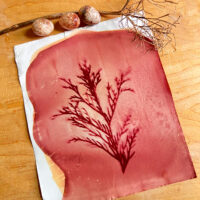
Image from The Graphics Fairy printed on heavy cardstock (I used my inkjet)
Punch(es) – Circle, Square, Oval
Hot Glue Sticks
Hot Glue Gun
Parchment Paper
Mod Podge Finger Protectors – Best thing ever!!
Kitchen Shears
Emery Board
Mod Podge – and sheen will do, I used matte for camera purposes
Brush for Mod Podge
Jewelry Pin Backs
Tiny Clothespins – I used colored pins, but they come in natural and white also
How to Make Pins Printable:

I made a little printable in several sizes so that you can choose the design based on the size of your pins. You can make larger pins, medium ones or small.
You can download the Simple Pin Design Printable PDF HERE.
Step-by-Step Tutorial:
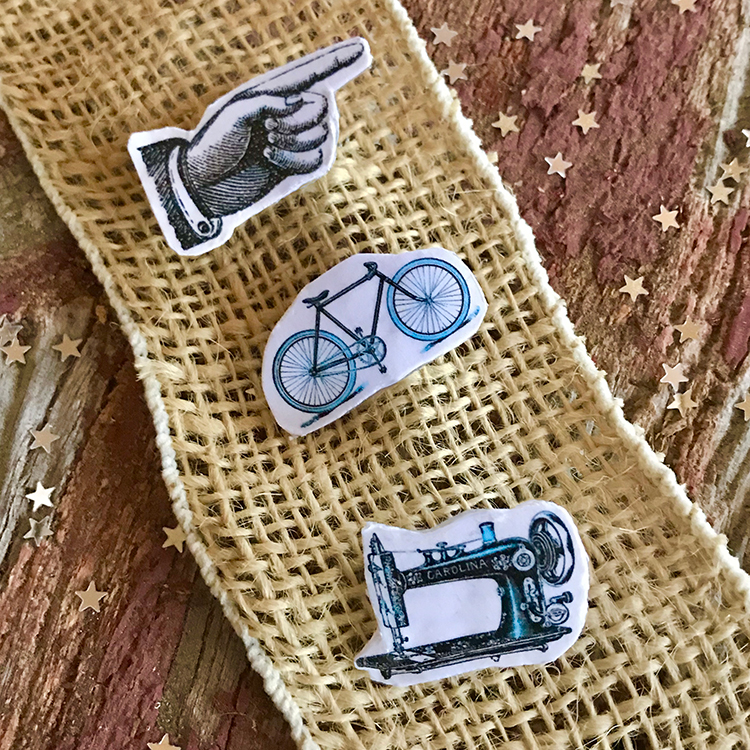
Step 1: Print Images. For this first step select images for your pin design! (That’s the hardest part.) I think simple designs are the sweet spot for this craft project, but you could do a more intricate design with fine details if you prefer. Print images on heavy weight cardstock. I used my inkjet printer for these designs, but you can use a laser printer or photocopy if you like. You can even use your own designs. TIP: (Lesson Learned) I printed my first set on regular copy paper and glued them to lightweight cardstock. They worked somewhat, but they had a tendency to delaminate. The images printed on heavyweight cardstock worked beautifully. Optional Color. You can add color with pencils or permanent markers at this time. Make sure to use permanent ink or seal them before you move to the glue step.
Step 2: Punch or Cut Images. For the next step, punch out circle shapes or use scissors to fussy cut around your images. You can also use an oval or square punch. TIP: If you want them perfectly round, square, or oval shapes use a punch. If you are great with scissors, you can cut the images. I actually preferred fussy cutting around the image after I applied the hot glue to the back. It is up to you.
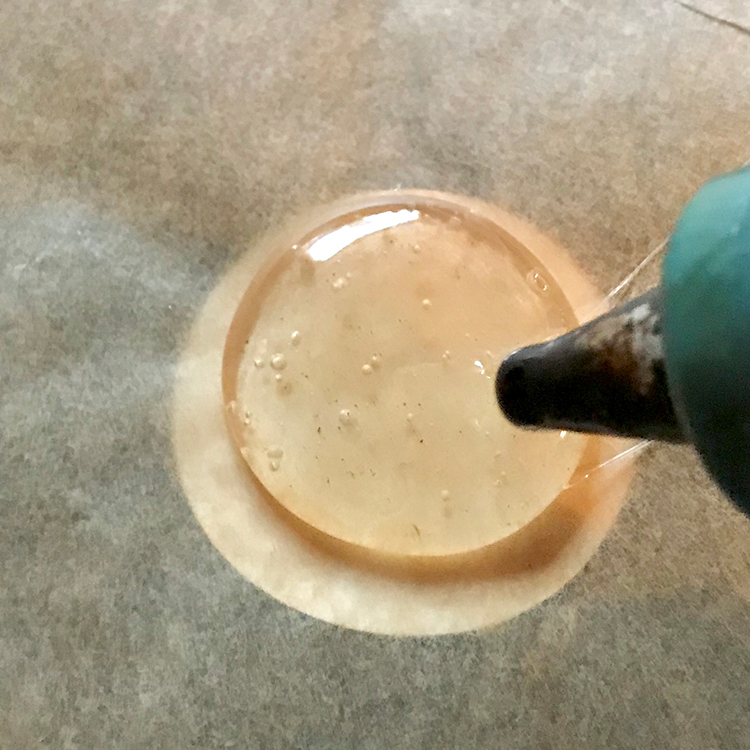
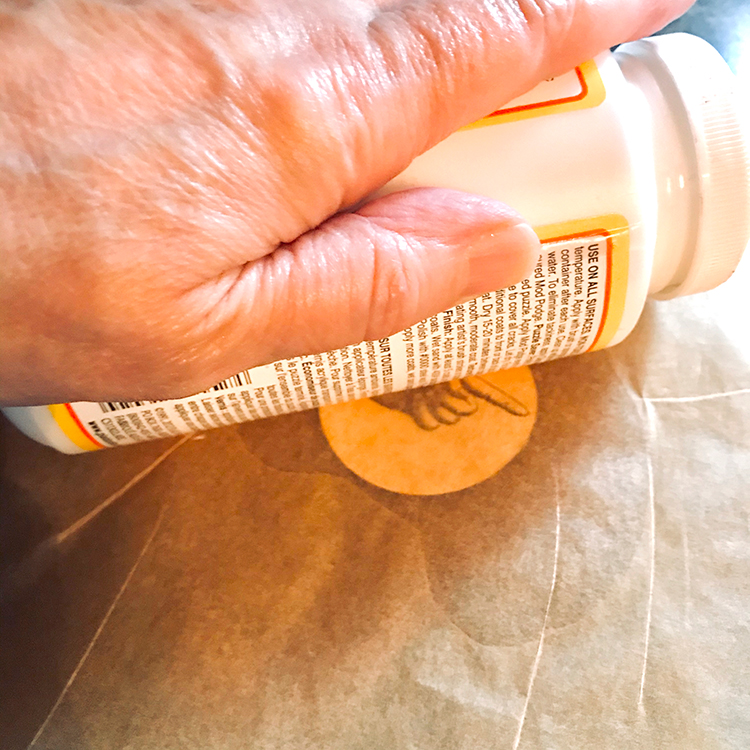
Step 3: Hot Glue Pin Backing. This is messy but makes the pins and clips sturdy and waterproof. Place parchment paper on a flat surface. DO NOT USE WAX PAPER! It will melt. You could use a silicone mat also. Do 1 image at a time!! Trust me. Squirt a blob of glue on the parchment. TIP: I punched a circle from an index card the same size as my pin. I placed that under the parchment paper to use as a guide for how much hot glue to use. You can see in the photo below the amount of glue I used compared to the circle size.
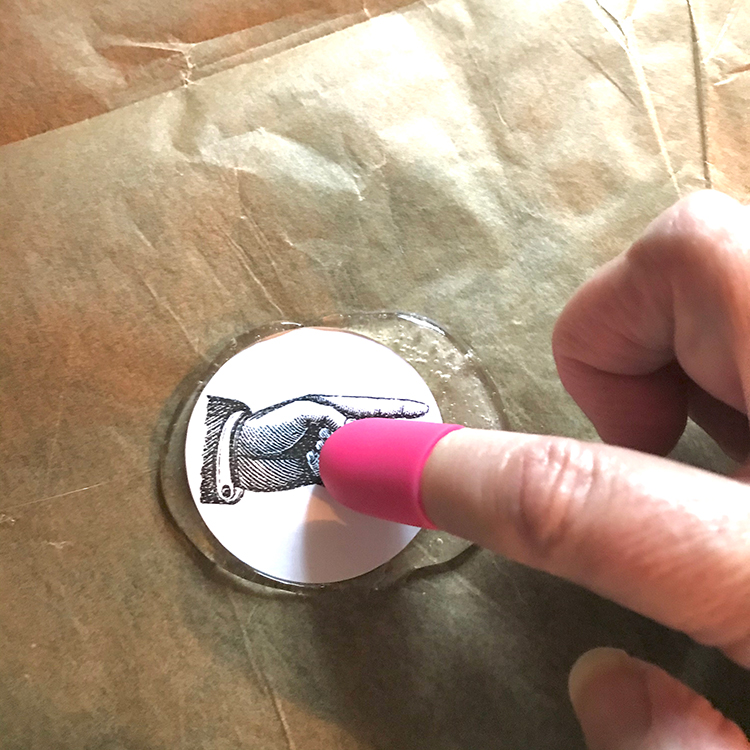
Step 4: Press Image Into Glue. Immediately press the back of your image into the puddle of glue. Press it in until the glue spreads outside the circle shape, but not hard enough that it flows over the edge to the front of your image. I am using a Mod Podge Silicone Finger Protector. I love these. No more burnt fingers! YAY!
Step 5: Roll The Glue. Cover with parchment paper quickly. Roll over the image with something round. I used my Mod Podge bottle. Flip the image and roll from the back also to ensure that it is as flat as possible.
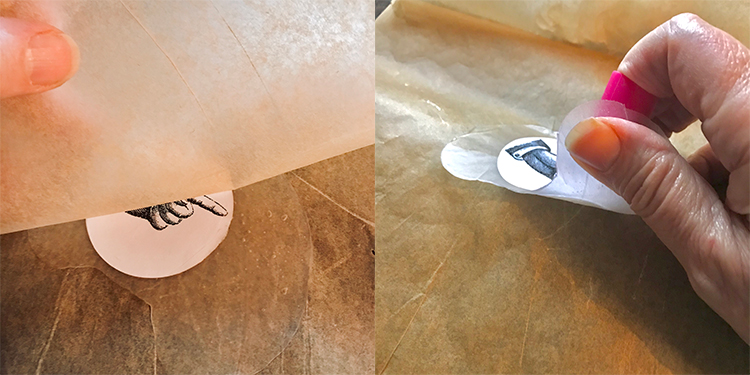
Step 6: Peel Parchment. Once the image is cool to the touch, slowly peel the parchment off the image. (below left) TIP: Of course, I peeled the parchment back too quickly on my first attempt. The glue was stringy and still wet and spread over the front of my image. ARGH! My bad. Let it cool! Then peel the image off of the parchment. (below right) Repeat with other images. If you find that you miss a spot of glue on the back, you can add more glue and roll again.
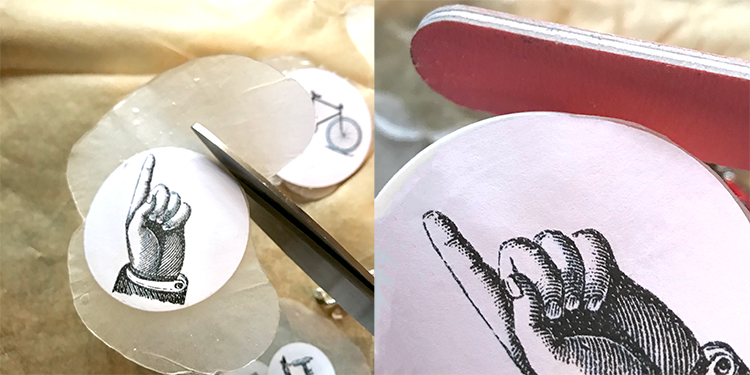
Step 7: Trim Excess Glue. With heavy duty scissors (I love to use kitchen shears), trim away an excess glue around the image. (below left) Do this carefully to maintain the shape. If you have any fiddly bits, you can use an emery board to clean them away and smooth the edges. (below right) Don’t throw the excess glue away. You can melt it inside the parchment with an iron.
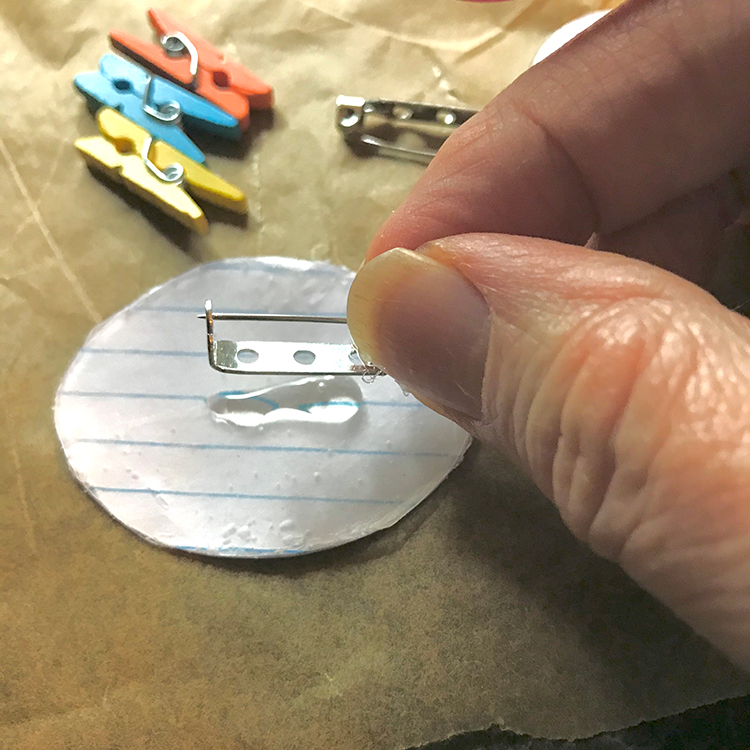
Step 8: Apply Pin Backs or Clothespins. Apply the clips to the back of your pin before you seal them. This gives you something to hold when you brush the sealer on. WINK! Make sure that your image is facing the right direction. Place it face down. Drop a small bit of glue on the back where you want to place the pin base or clothespin. Make sure the pin back is oriented in the correct position. You want it to open right! Press the finding into the glue. Let cool. TIP: For pins, I prefer to place them closer to the top on the larger circles. This way, they lay down better than they do if the pin is in the middle. You can find the metal pin blanks in a variety of sizes at the craft store or on Amazon, I have some linked in the supply list above.
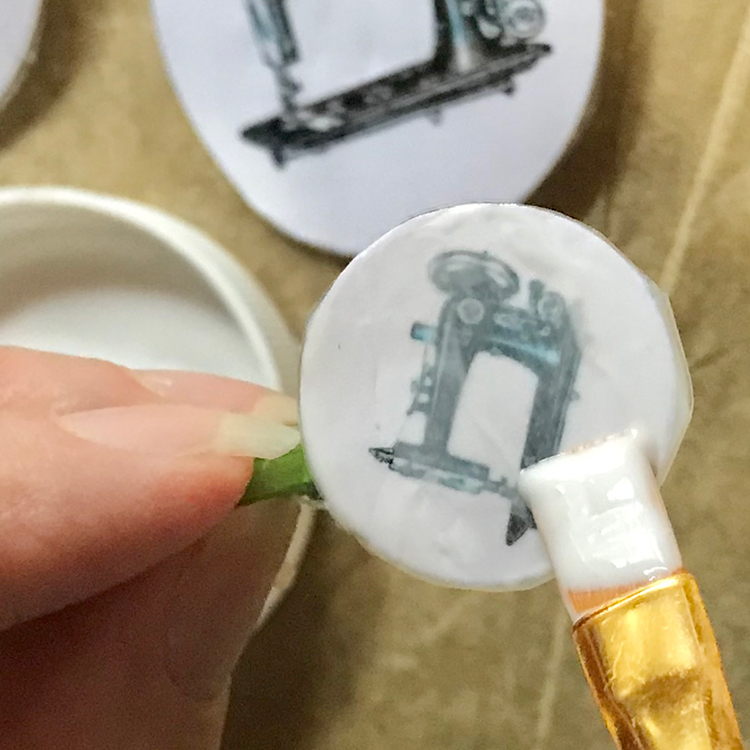
Step 9: Final Step Protect Image with Mod Podge. Hold the pin or clip between your fingers, image up. Brush a light coat of Mod Podge over the image. Let dry. Brush another coat on top of the first. TIP: I alternate the direction of my sealer coats. (It is an old habit from my furniture painting days.) This makes sure that all areas are covered evenly. I brush my first coat horizontally and my second coat vertically. You can add as many coats as you like. I do three.

How I Use My Pins and Clips
I am a book maker, so these find their way into my creations. I clip the tiniest 1″ image to the side of a book page for decoration of to hold a small tag. You can also clip or pin it to a tag or pocket for embellishment. These are so much fun to use.
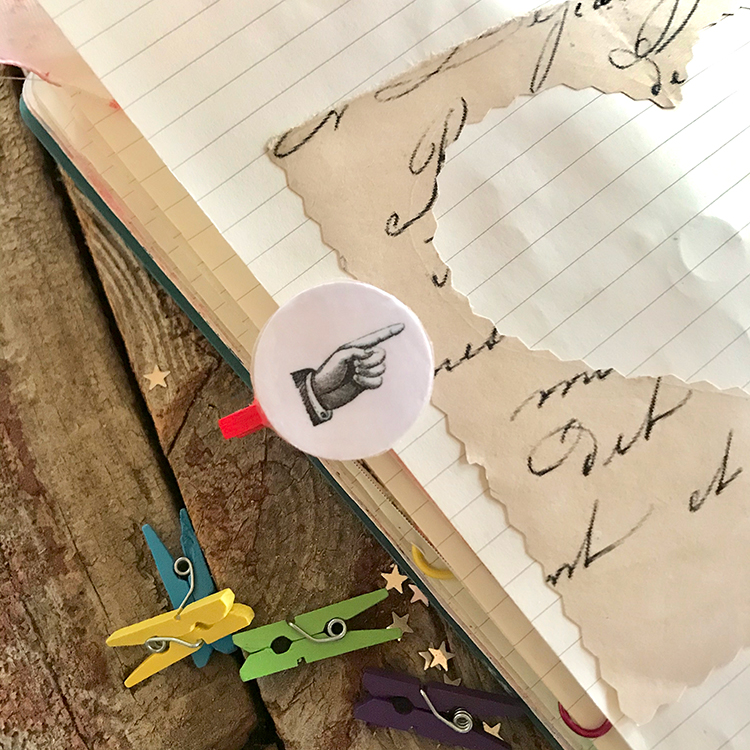
Place a ribbon through the pin back and use as an embellishment in an altered book or a handmade card. They make fun gifts as well.

They would even be cute for planner charms to add a little bit of creativity to your planners!
I hope that you had fun learning how to make your own custom pins with me! You might also like this Shrink Plastic Button Tutorial HERE. When I am not exploring with new and old Techniques and DIY Methods in my Graphics Fairy sandbox, I also create Photoshop Elements tutorials and craft project videos over on The Graphics Fairy Premium Membership site. You can find even more of my books, mixed media art, and whimsical shenanigans on The Bookery.


Debs says
Thank you so much for your amazing tutorial. You made it so easy to follow. I look forward to trying this out.
Many Thanks
Debs.
Karen says
You’re welcome, Debs! Always happy to share 🙂