Vintage Bird Pendant Mixed Media Project
Hello my friends. Tejae Floyde from Tejae’s Art, one of our talented Mixed Media Design Team Members, is sharing this week. She has created a delightsome Vintage Bird Pendant for us. As you know, we feature a new Mixed Media project each week created by one of our extraordinary artisans.
Our goal is for you to be creatively inspired by this series! Be sure to check out her Video Show and Tell at the bottom of the page…you will need to scroll all the way down to see it. Are you ready to be inspired? I will let Tejae tell you all about her Mixed Media project in her own words…
About the Vintage Bird Pendant
Hi again, this is Tejae from Tejae’s Art. Today I’ll be sharing my vintage bird pendants using the Birds on Branches bundle available on The Graphics Fairy Premium Site.
Recently, a friend who was downsizing and moving to Florida was getting rid of some of her art supplies. When she showed me these large glass pebbles, I immediately envisioned the perfect vintage pendant project! Once I found the bird images in the birds and branches bundle I knew this was going to be a fun project.
Backgrounds Make a Difference
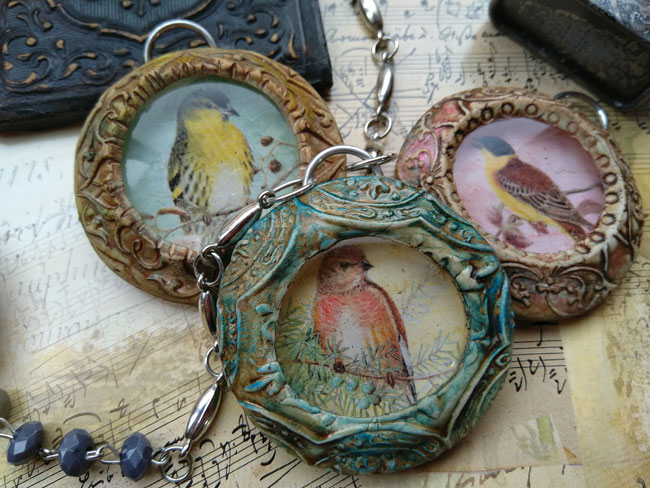
The Bird on Branches bundle includes a variety of birds on several colored backgrounds. I love having a variety of backgrounds when doing a collection like this. It adds a touch of whimsy and cohesiveness to the designs. Each image depicts either one or two birds resting on branches. There are small and large images included. I reduced the image size slightly so the images would fit better on the 1 1/2″ glass pebbles. While I had the images in photoshop, I used the Graphics Fairy French ephemera photoshop brush from the French Ephemera bundle. It is very subtle using the soft light blending mode and layering it on top of the image. Then I printed them out onto a color laser printer.
Polymer Clay Frame for the Pendant
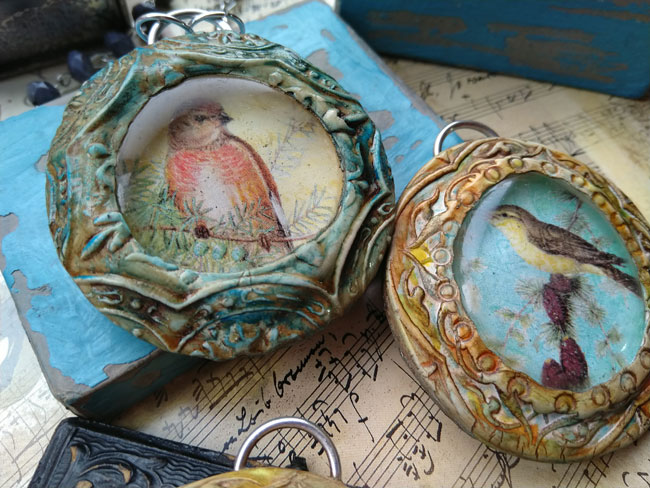
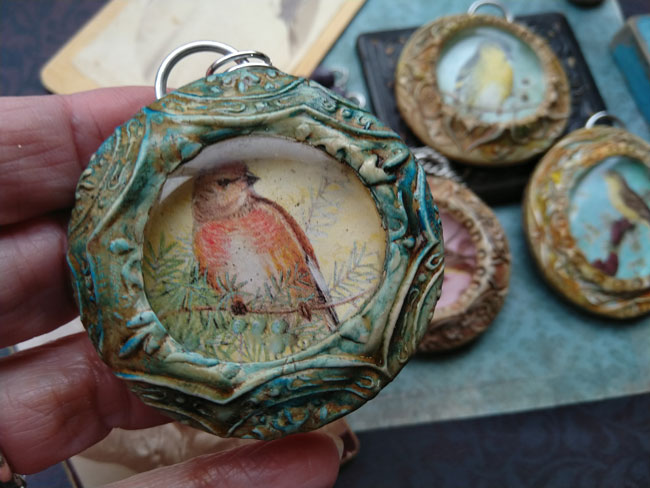
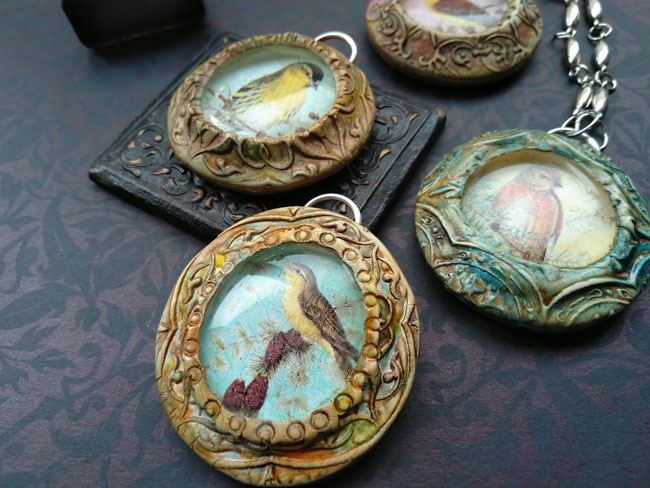 For the pendant, I started with a large glass pebble and a bird image. I enclosed those with a frame made from polymer clay and added a large jump ring. This process took several repeated steps of adding clay, baking, and cooling. Once the shaped frame was cured, I added a thin stamped sheet of clay with a nice pattern. Then I baked a final time.
I wanted the piece to have a shadow box effect with some depth. I think I achieved that with the glass pebble. A note about the glass pebbles: one side is puffy or raised and the other side is flat. They do have imperfections, which I think only adds to the vintage charm I am going for. By the way, if you search for the large pebbles, be sure to avoid iridescent ones as they are not clear enough to see the image below. Using CLEAR glass pebbles is best.
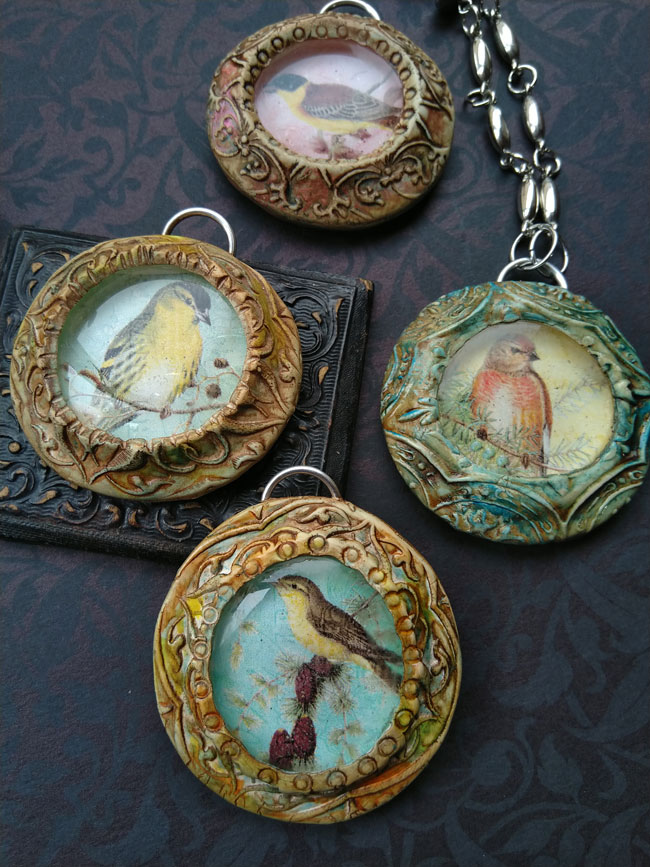
I layered on painted colors, wiping some of the color off at each stage. Then I finished by adding a patina to give it a vintage look. Do you like the slight hint of a bird’s nest for the frame? From a distance, I at least thought it looked similar to a nest. The back side includes the same pattern as the front side. It is a hefty little piece and about the size of a pocket watch.
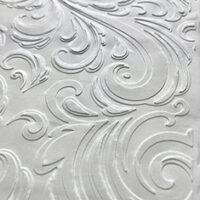
Look at this lovely detail of the raised pattern I used. Isn’t it great?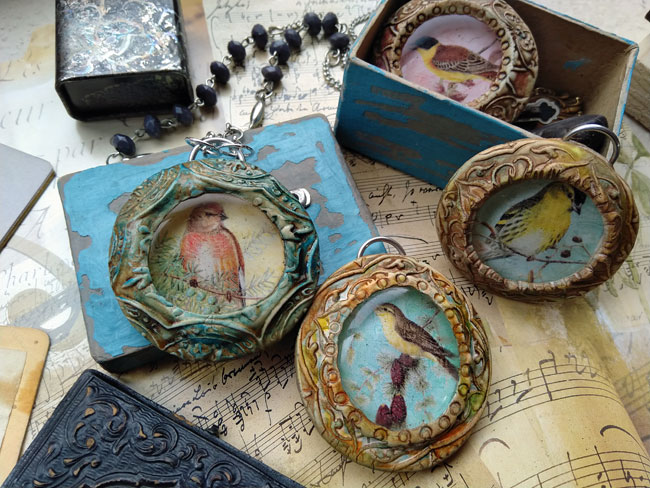
The glass pebbles have slightly different shapes. Some are more rounded than others. It therefore adds to the charm of the vintage pendants and makes each one unique in its own way. I used silver components for the necklace but antique gold would have been fun to try as well.
I hope this project inspires you to make your very own vintage bird pendant!
Vintage Bird Pendant Show and Tell
Please watch my video on The Graphics Fairy YouTube channel where I share a couple of more secrets with you.
Tejae


Daphne says
Great technique and beautiful pendants! Thank you.
Tejae Floyde says
You’re welcome Daphne. It was my pleasure to share them with you. -tejae