Hello there, it’s Heather from Thicketworks! Today we’re going to test out a recipe for aging galvanized metal that has been making the rounds, and I’ll share one with you that I’ve used for awhile.
Hazardous materials: Be sure to follow all safety warning on product labels…protect your skin and eyes. Work in a well ventilated space (preferably outdoors), and keep all chemicals away from children and pets.
Do not mix the Lysol with the home-made patina solution: bleach and ammonia in combination are dangerous. Work with each method separately.
If you are especially sensitive to odor, skip the home-made patina solution. Your safety is more important than any faux finish!
How to Age Galvanized Metal:
I’m always looking for great patina formulas, and am thrilled with the results of this experiment!
It’s exciting to get to share this with you today – I did a comparison test for us, so you can determine which method you prefer.
We’ve updated this post with a Video Tutorial! You can watch it below or get the step by step written tutorial further down the page:
Materials & Supplies:
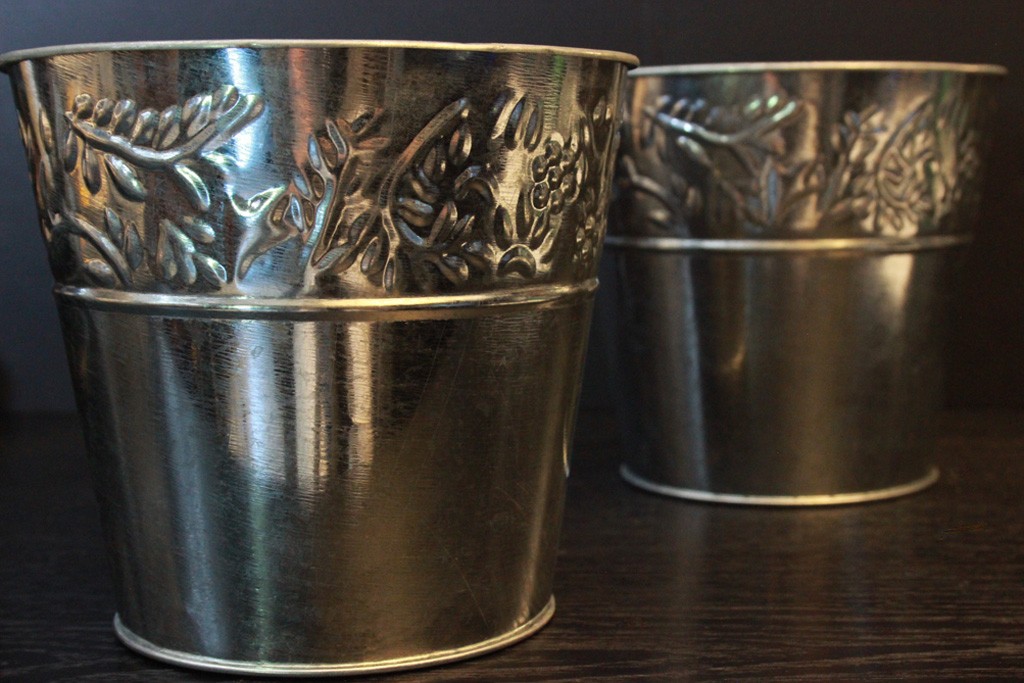
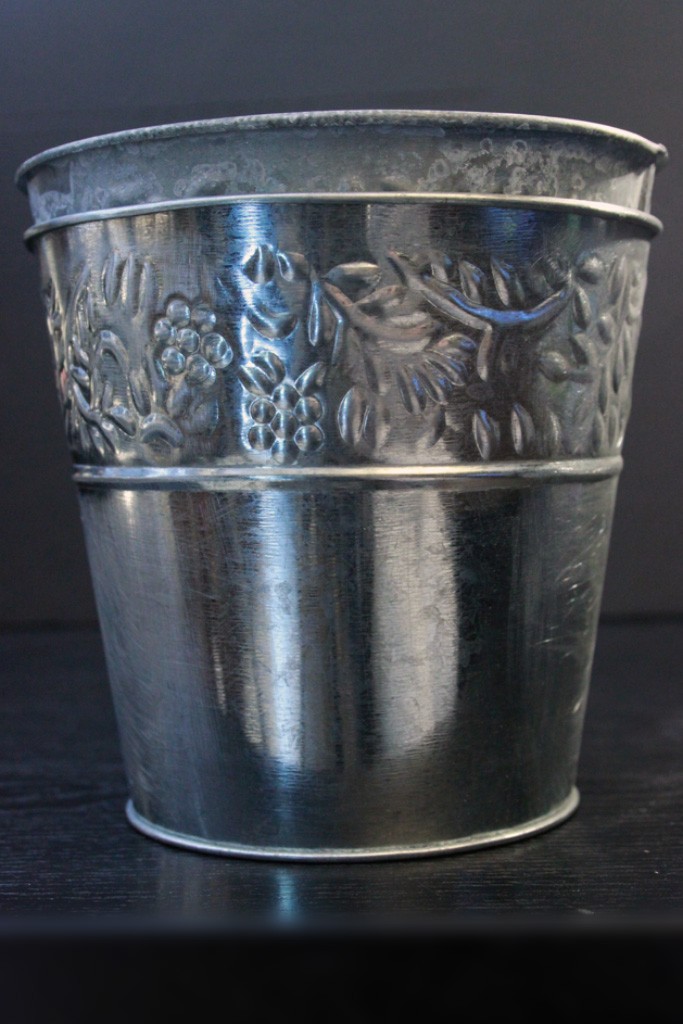
- Galvanized item (I found these two pails at the dollar store)
- 220 grit sandpaper
- Optional: sanding block
- Plastic bin large enough to place your metal item in
- Rubber Gloves
- Eye Protection
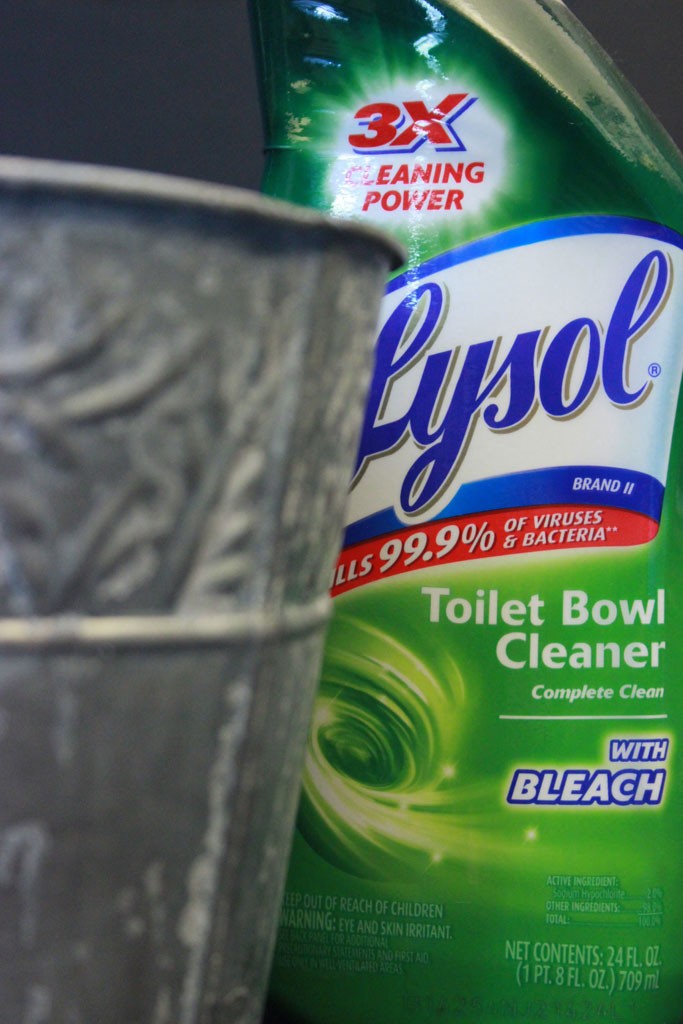
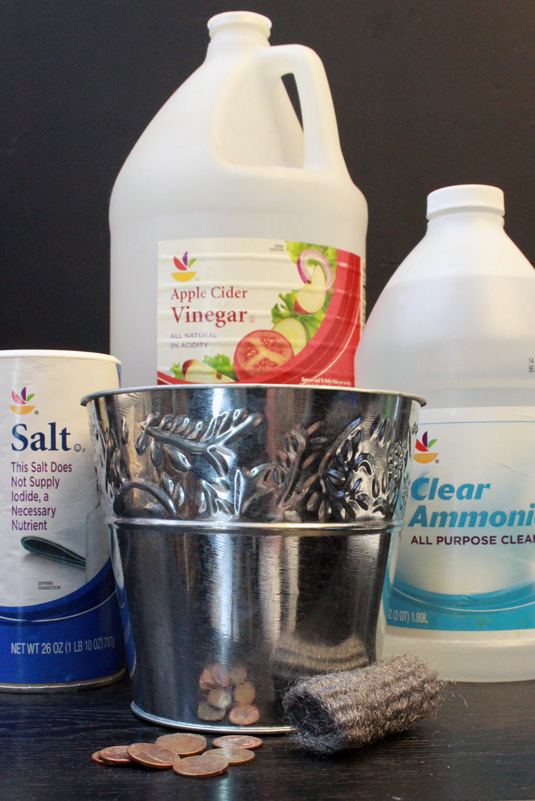
- Method I: Lysol Brand II Toilet Bowl Cleaner with Bleach
- Method II: Old Rag, plastic mixing bowl, household Vinegar (either White or Apple Cider), Steel Wool, Pennies, Salt and Ammonia – Optional: Industrial Strength Spray Bottle
Both methods begin with the same process:
- Rough up the surface of your item with the sandpaper. Try to get into all the nooks & crannies as best you can.
- NOTE: Be sure to wear a dust mask – we don’t want to breathe the dust created by sanding!
- Once your item has been sanded, wipe the surface down with a damp rag.
Method One:
- Wearing your rubber gloves, spread an even coat of Lysol Cleaner over the sanded surface. For my experiment, once the pail was coated, I slipped it inside of the other pail to contain the mess.
- Place the coated item somewhere safe, where pets & little ones can’t access it
- Wash your hands, and go about your business for at least 8 hours. (I left mine for overnight, so as to resist temptation). You probably have WAY more willpower, so exercise it!
- When you can’t stand it any longer, wash your pail thoroughly, dry it and be amazed! (I was thrilled, but then a simple patina method is always cause for celebration ‘round here)
Method Two:
- Grab your plastic mixing bowl, don your rubber gloves and eye protection and assemble your ingredients. Put on your best mad scientist face..
- Carefully mix together about a cup of vinegar, a cup of ammonia, two tablespoons of salt, a clump of steel wool (this will dissolve over time, adding oxidized steel to the mix), and a few pennies. (the pennies add a bit of a darker finish, as some of the copper leaches out of them and into your disgusting mixture.)
- Cover this vile smelling concoction with a lid, or seal loosely with plastic wrap and let it stew in a safe place for a couple of hours. This gives the steel wool time to break down a bit, and the copper will begin to leach from the pennies. Note: I keep this all-purpose aging solution in a clearly labeled industrial strength spray bottle, and use it all the time, so it’s worth it to me to go through all this mixing/stewing nonsense. You may not be as obsessed with these things. If so, your therapist will be pleased…
- Once your evil smelling stew has brewed for a couple of hours, it’s time to put it to good use: place your prepped galvanized item in an open plastic container. Working outside, away from pets and little ones is a good idea. Note: the mixture can harm plants, so be careful!
- Grab an old rag…make sure it’s large enough to drape comfortably over the entire surface of your galvanized victim.
- Soak the rag in the patina solution, wring it out just a bit, and cover your item with the wet rag. This solution will discolor wood surfaces, and probably many other things, so be careful. Make sure that the edges of your rag are safely tucked within the plastic container, so that all the drips are safely contained.
- Exercise that willpower and watch a couple of movies, or something.
- Unveil your freshly aged pail, wash your rag & plastic container, wash the pail carefully, and do a happy dance!
Results:
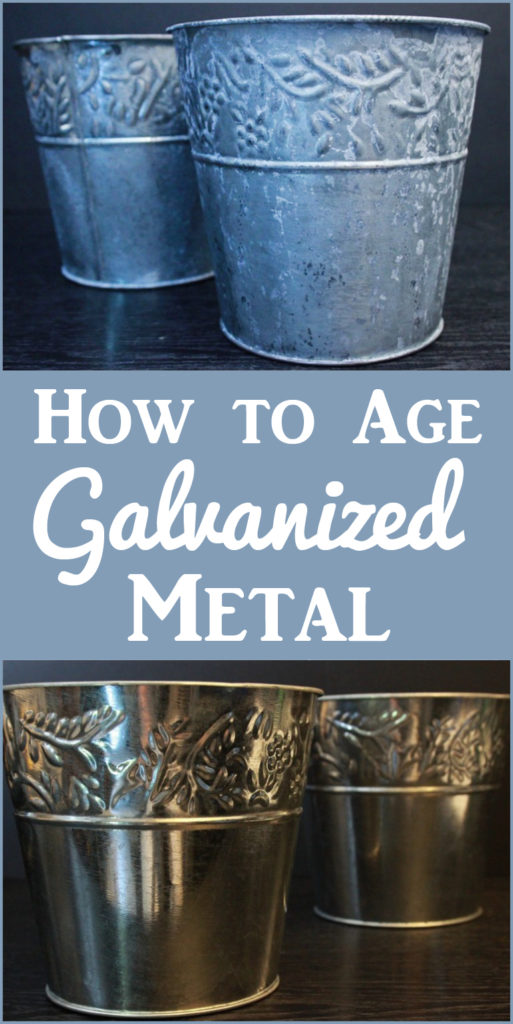
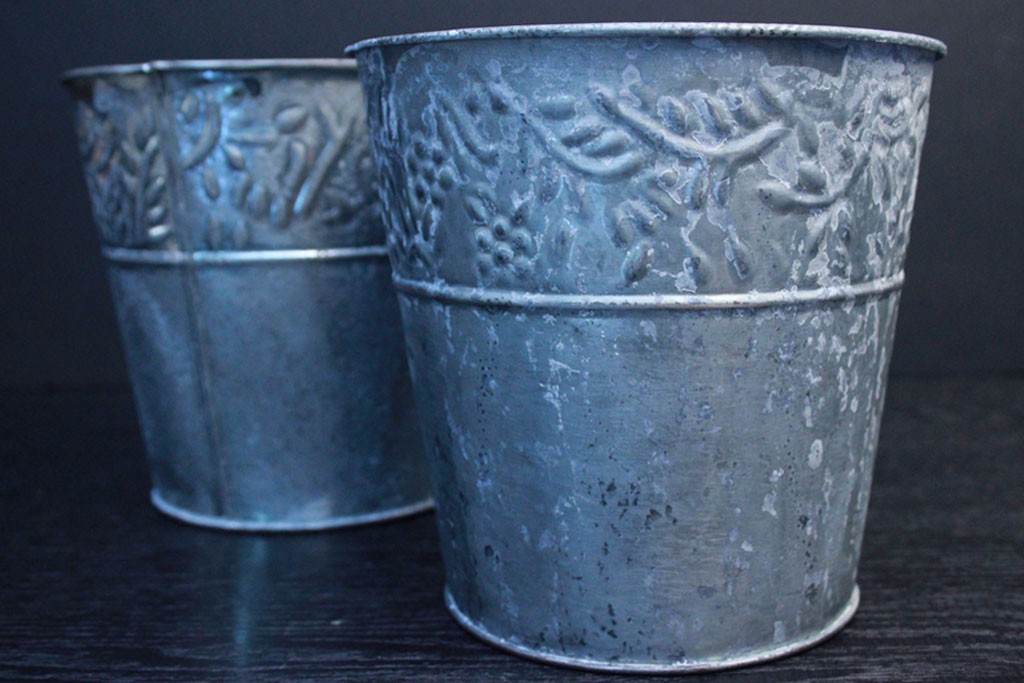
The pail in the foreground below was aged using the Lysol method.
Pros: the oxidization created a lovely white chalky glaze in the nooks & crannies
Cons: You have to explain to your friends that the Toilet Cleaner really belongs in your crafting space…
Results:
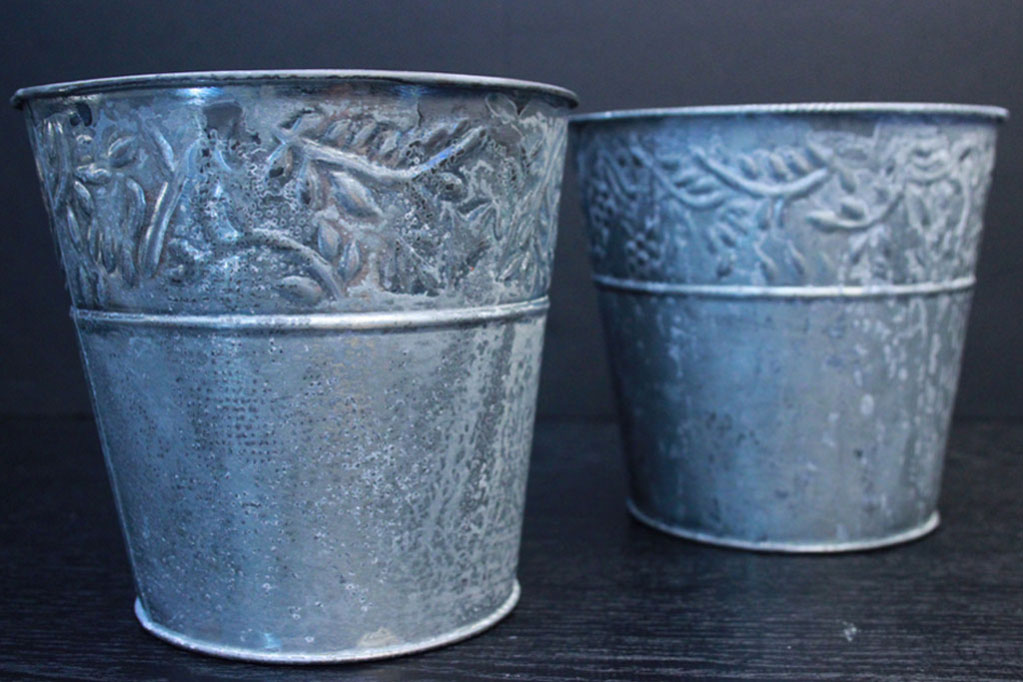
The pail in the foreground below was aged using the evil smelling vinegar concoction.
Pros: You get to make a patina solution that will help age many surfaces. You probably have all the necessary ingredients in your cupboard right now!
Cons: I found that the weave of the rag left a distinct pattern, and the oxidization stayed more on the upper surface of the item…basically, where the fabric touched, great patina, where it didn’t, not so great. Oh, yeah…and it’s stinky. (only until you rinse it off!)
Conclusion: each method results in what I would call a great patina, and each will continue to oxidize over time. If you want to ‘halt’ the oxidization process, seal your item (inside & out) with a high quality spray sealer. It’s up to you which method you prefer.
It’s just so great that we can harvest all that shiny galvanized goodness, and transform it into pieces with history!
Thanks for joining me for this little experiment, and I hope you enjoy the results as much as I do.
If you appreciate patinas and faux-finishes, stop by Thicketworks – I’m always cooking up some new process to transform the normal into the abnormal extraordinary!
Take Care,
Heather


Judy Riechmann says
This is my first time reading/ seeing this wonderful page, I have more than enjoyed it. Thanks so very much!!!
graphicsfairy says
Oh welcome Judy, so glad you enjoyed it!
BILL WORDEN says
just fyi…Vinegar is an Acid (Acetic Acid 3-4%) and Ammonia is a Base (Alkaline). They effectively cancel each other out, with the stronger of two leaving it’s acidic or alkaline properties.
You could accomplish the same thing with one or the other, but mixing them just brings the pH closer to neutral (7.0pH).
My guess is the Ammonia is the catalyst for the resultant patina, since Vinegar is such a weak acid.
The Lysol Method could be replaced by Sodium Hydroxide (LYE), for a lot less money.
My favorite method is Muriatic Acid, mixed with Water 1:1 and sprayed on. Much quicker…basically 5-10 minutes and you’re done. Also gives a deeper, almost rusty patina look. Hope that helps. Great Site…Lots of Info! Thanks!
graphicsfairy says
Wow!! Thanks so much Bill, will give it a try 🙂
Linni says
Could you clarify in the results section of the tutorial, which pail is which. Both results claim that the one in the foreground is .
graphicsfairy says
They both are 🙂 The before picture shows 2 pails, shiny and new, the after shows them both after the galvanization technique. I hope that helps.
Rob says
I don’t mean to alarm you but sanding galvanized metal can be very hazardous to your lungs. Google ” metal fever”
Heather Tracy says
Hi Rob – and thank you for the useful info. The post has been updated to advise wearing a dust mask during the sanding procedure – good catch!
Dodigirl says
Hello Heather and fellow crafters,
I have heard that burying a sellected project in dirt for about six months will “age” it quite nicely. Although by then, it would be aged truly proper and HA who has that kind of time? Patience is a virtue that artists do not share; thankfully creativity is. Thank you for just being here.
–Laurie
Heather Tracy says
Hi Laurie! You are oh-so-right about the patience issue (at least in my case!) I’d forget where I buried the darn things, no doubt – 6 months is an eternity! Thank YOU for being here – you are the whole reason we do what we do! xox
rupa says
hm, I have a LOT of Miracle Grow in my home. I even over dosed the flower pots yesterday to start liquidating some. I may have other uses for it here it appears, gotta a try. What a wonderful forum this is to share ideas and brain storm!
Heather Tracy says
Love the way you think, Rupa! Isn’t it great how all can contribute to the ideas? I love that. xox
Adam says
I am trying to patina some large 4′ x 3′ galvanized panels to be used as a Waynes coding in my bathroom kind of vinegar and ammonia recipe double be doubled or tripled or quadrupled I don’t think the amount would be enough to completely soaked the bed sheet I’m going to use to cover it
graphicsfairy says
Sure Adam, just follow the recipe and add to it in the appropriate measurements. Sounds like an awesome project, good luck!
Julie Blake says
Wow – brilliant results and with little difference. I would say I might attempt the first, Lysol, method, but would be much too scared (read clumsy) to attempt the second!
Thank you for your clear and precise instructions, but even more, thank you for your humor!
Julie
graphicsfairy says
Thank you Julie, I appreciate your humor as well 🙂
John Arot says
Fantastic article. I am going to try the lysol method on the edges of 12 panels of metal on an antique Pie safe I just purchased. Some idiot stripped the paint off of the Wood and did not cover the the panels. It removed about 2″ of original Patina on all 4 edges of the panels right down to a shine. I will post pics of before and after when I am done. I will be happy if it just gives a nice tapered blend. Otherwise I will either have to paint them or remove the Patina. Since I am keeping it, I would be OK with having them shiny with trace amounts of Patina. Of course I’d rather have it look mostly original. Ughh I cannot believe someone did this. Bargain at $75 so I really cannot complain no matter what I have to do.
Heather Tracy says
Wow! Hey John – I can understand how sad it is to lose that glorious patina – if this method doesn’t fade the shiny areas sufficiently, it might be worth stripping the entire surface of the tin panels, THEN attempting a ‘fresh’ attempt at aging them, in order to harmonize the finish. So glad you found such a treasure! Good luck!
mike says
This is excellent i have a vintage show coming up and I need lots of Galvanized tins
graphicsfairy says
That’s awesome Mike, perfect timing! Good luck 🙂
Suzanne Jeuck says
Tried the Lysol method and virtually no change on the Michael’s milk pail. Let it sit for 24 hours too-very disappointed! Guess I’ll try the second option with the ammonia & vinegar. Fingers crossed!
graphicsfairy says
Oh no!! Did you sand the pail really well first? Let us know how the second method works for you 🙂 Good luck!
Suzanne Jeuck says
I’m not sure that these particular containers are actually galvanized, rather they are a cheap metal version from China which resists these treatments. I actually re-sanded the pail with 100 grit sandpaper & coated it with the Lysol and let it sit for 7 hrs today-same result, definitely not like your photos, no “aging”
When compared to the untouched pail, only a slight dulling of the shiny surface on the re-done item. ☹️
I may opt to use acrylic paint to simulate aging on the barely etched surfaces.
graphicsfairy says
Good luck Suzanne, I applaud your persistence 🙂
Diana says
Hi again Heather. Have you heard of the Miracle Grow technique? I mix about 2 tbs or more if you like with plain ole tap water in a rubber made container. Throw any copper or galvanized metal in it and let it soak over night. The copper will pick up a green patina and the shiny metal will get rusty. I always keep a tub of it at the ready. It’s fun to experiment.
Heather Tracy says
Hi Diana – I have heard of the Miracle Grow technique, but it’s been on my list of things to experiment with. Now I’ve got to run to the store for Miracle Grow! Thanks Diana!
Carolyn O'Toole says
Hello, Heather – I tried the Miracle Gro method and it worked. Thank you for sharing. I have a couple of questions though, did you sand your metal first and did you put a lid on your container? I sanded mine and it didn’t really rust but did dull down. Also, I discovered a lid kept my dogs away from it. Just wanted to update this post with my experiences. Thanks again!
Heather Tracy says
Hi Carolyn! I didn’t put a lid on my container, but I did sand prior to using the chemicals. I’m glad the Miracle Gro method worked well. I didn’t get a rusty result, either, but I did appreciate the aged appearance of the final finish. Thanks for sharing your experiences! xox
Hheather says
How much miracle grow vs water, what is the ratio please? I have several pails for a wedding and it sounds like if I use a large tub with 5 gallons of water it may work best. I just don’t know how much miracle grow to add. Thanks!
gail says
Great tute heather! I’ve tried aging patina, but I think I lacked one very important ingredient — patience. LOL
gail
Heather Tracy says
Hi Gail! Yay – the only thing better than an awesome comment is an awesome comment from your Hero!
The only way I can muster enough patience for these techniques is to have another project in ‘waiting’ that I can focus on while the necessary time passes. Or else, if I do these things right before bedtime, SOMETIMES I can sleep long enough to let the requisite interlude elapse!
JJ Crouch says
Wonderful that you compared the two methods. Also you did a wonderful explanation of both processes.
Thank you.
gabrielle says
Therapists are easy to come by – but THIS looks like FUN!!! Consider yourself bookmarked…
Just for clarification: is this specifically for galvanized coated metal, or does any steel-type metal work? I ask because I wouldn’t have guessed your pails were galvanized. Is there a way you can tell?
Heather Tracy says
Hi Gabrielle,
Excellent question…I’ve done some Googling, and it turns out that only laboratory testing can prove whether or not something is galvanized. Since I’m not going to pay for lab testing, and I’m pretty sure you won’t either, look for the tell-tale ‘cross hatch’ pattern on the surface. It doesn’t show clearly in these photos, but in person it’s pretty distinctive. Galvanization is a surface treatment meant to discourage rust and corrosion, (ironically) and you can see the layers of material if you look closely.
You can totally oxidize steel – just make sure it’s not stainless, and doesn’t have a clear coat. If it is coated, sandpaper will take care of it, and rust is just around the corner!