{This post contains affiliate links}
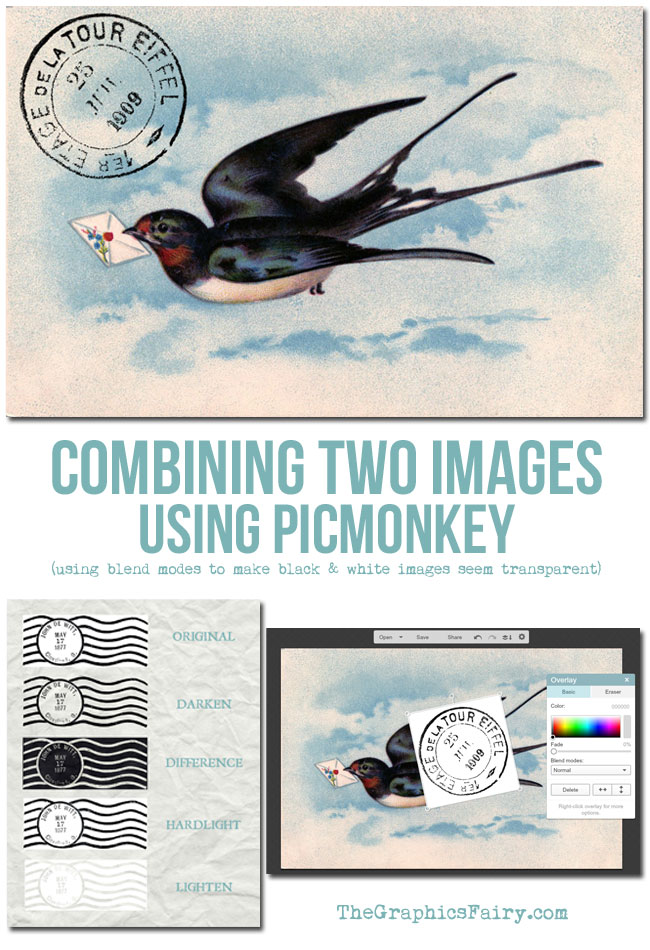
Today I wanted to share how to combine two images using PicMonkey; specifically a background image and a black and white image. This tutorial will help make your black and white image look layered or stamped on top of your background image by using a tool called “Blend Modes” in PicMonkey.
For this project, I used the Eiffel Tower postmark and a Flying Swallow graphic.
Open Your Background / Main Image
Go to PicMonkey and click Edit. Choose the file that will be your background and hit Open.
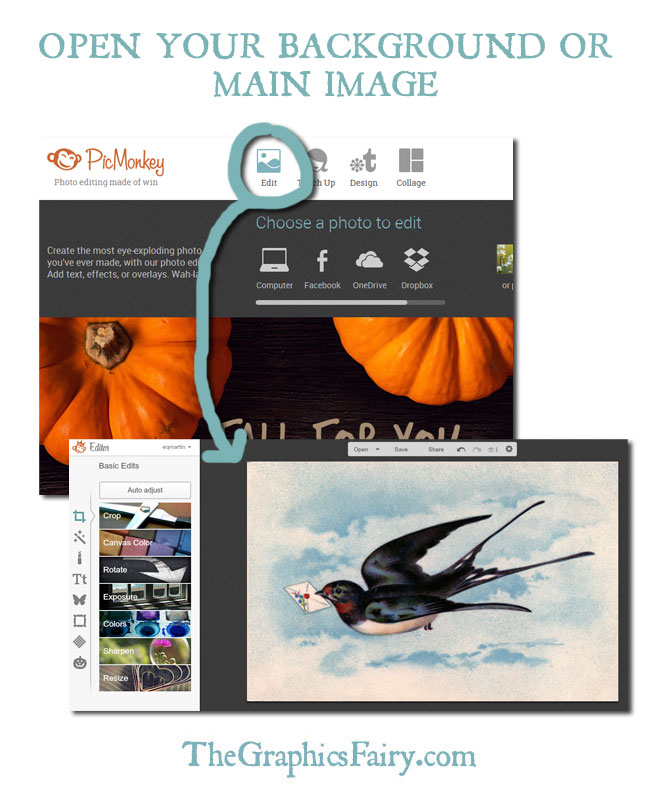 My image had some white around it, so I went to Basic Edits > Crop in order to crop the white background. (Basic Edits is the first square button icon on the left).
Add Your Black and White Image
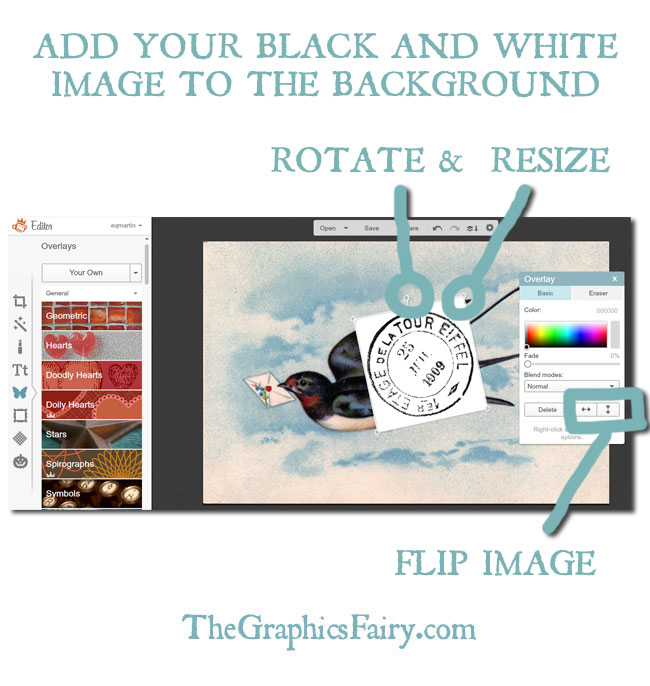
Now that we have a background image, let’s add our image. Go to Overlays > Your Own. Select your file and hit Open. You’ll notice below that your .jpg image has a white background, and you would like to just show the dark parts so it has a layered look.
Note: You can use the corners of the image to rotate it. You can use the pop-up Overlay menu to flip the image as well.
Make the Black & White Image Transparent with Blend Modes
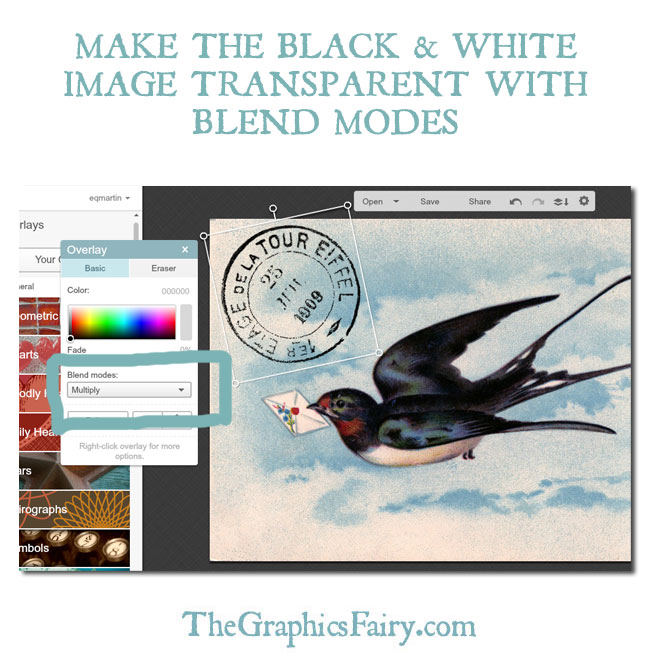
PicMonkey’s Blend Modes option in the pop-up Overlay menu can help disguise the white background for your black and white images (when they’re placed on a background image). In the pop-up Overlays menu, select one of the Blend Modes from the drop down box (I chose Multiply). Hit Save when complete.
Note: The blend effects will depend on both your background image and your black and white image. The Multiply selection worked well for this pair of images, but there may be a better blend option for the images you use. You can see some examples below, but remember the results you can get will depend greatly on the images you use.
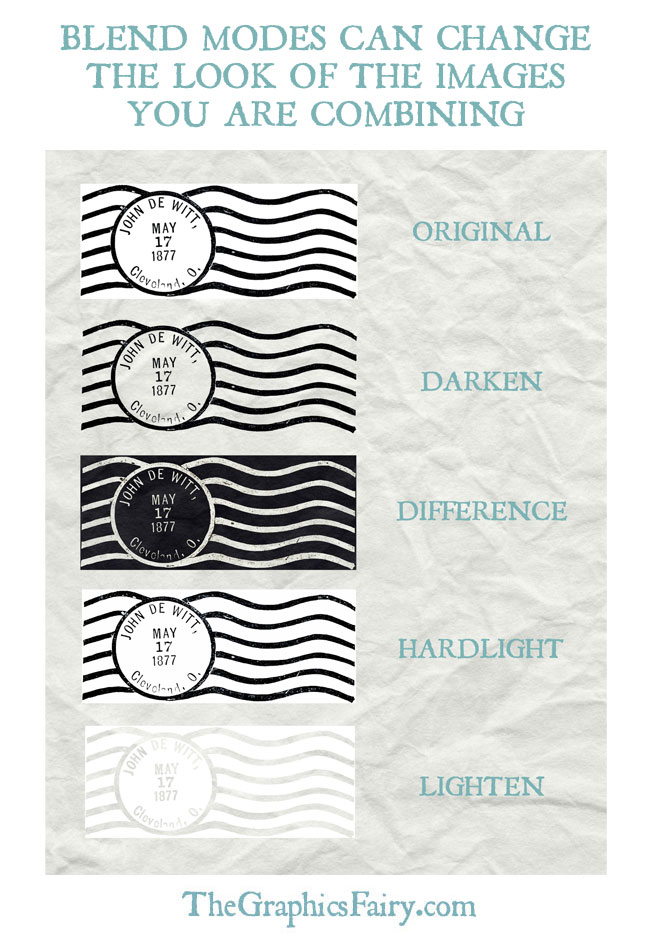 This technique works well for black and white images layered on an image with an opaque or textured background. If you use the Blend Modes option with photos or colored images, the results will look almost like photo filters.
If you’re brand new to PicMonkey, you may want to start here. There are several other tutorials on the blog that share different tips and tricks for using PicMonkey, which is free digital editing software.
Welcome, I’m so glad you’re here! Browse around to find thousands of Stock Images that you can use in your projects or designs! I post new Vintage images every day. Need more info about my site? Try my FAQ page.



Karen says
Hello, I am new to graphic transfers. After a few days of searching I’m so glad I found you on Pinterest. I just downloaded PicMonkey and I love it. My question is, I have uploaded two pictures off of Google images. Can I can bind them to make a transfer to put on a dropcloth for a piano bench? Will the quality be OK?
graphicsfairy says
Hi Karen and welcome! The quality depends on the resolution of the images you downloaded, your printer, etc. I always recommend practicing on scrap materials first until you get the process down before attempting it on your actual project. Have fun and good luck!
Abby says
This tutorial made my day. Hadn’t taken the time before to go through your pic monkey tutorials. So happy I did. Thanks so much, this was easy to do and easy to follow. Much appreciation.
Karen Watson says
Thanks Abby! I’m so glad you found it useful!!
DAwn G says
THANKS!!! I have been using design software like Photoshop and Fireworks for years but am a little rusty (I’m actually a computer developer, not designer), and i never knew this simple trick!! All those overlay modes always were way over my head. THANKS so much for your help!
Eva Peterson says
I have learned so much from you! You have definitely sparked my creative side! Thanks xoxo
Denise Wynn says
Thank you! Thank you! Thank you! This is probably one of the most valuable tutorials I have seen in many moons! Very Helpful!
debbi says
Thanks Emily so much for this tip! Keep the pic monkey tutorials coming! I have been following and learning so much from you 🙂
Eva Peterson says
Me too! I didn’t even know what it was until today 🙂
Kristi says
Thank you! I’ve used picmonkey quite a bit, but somehow couldn’t figure out how to combine images like that. Your explanation was clear!