Glittered Paper Butterfly Ornaments
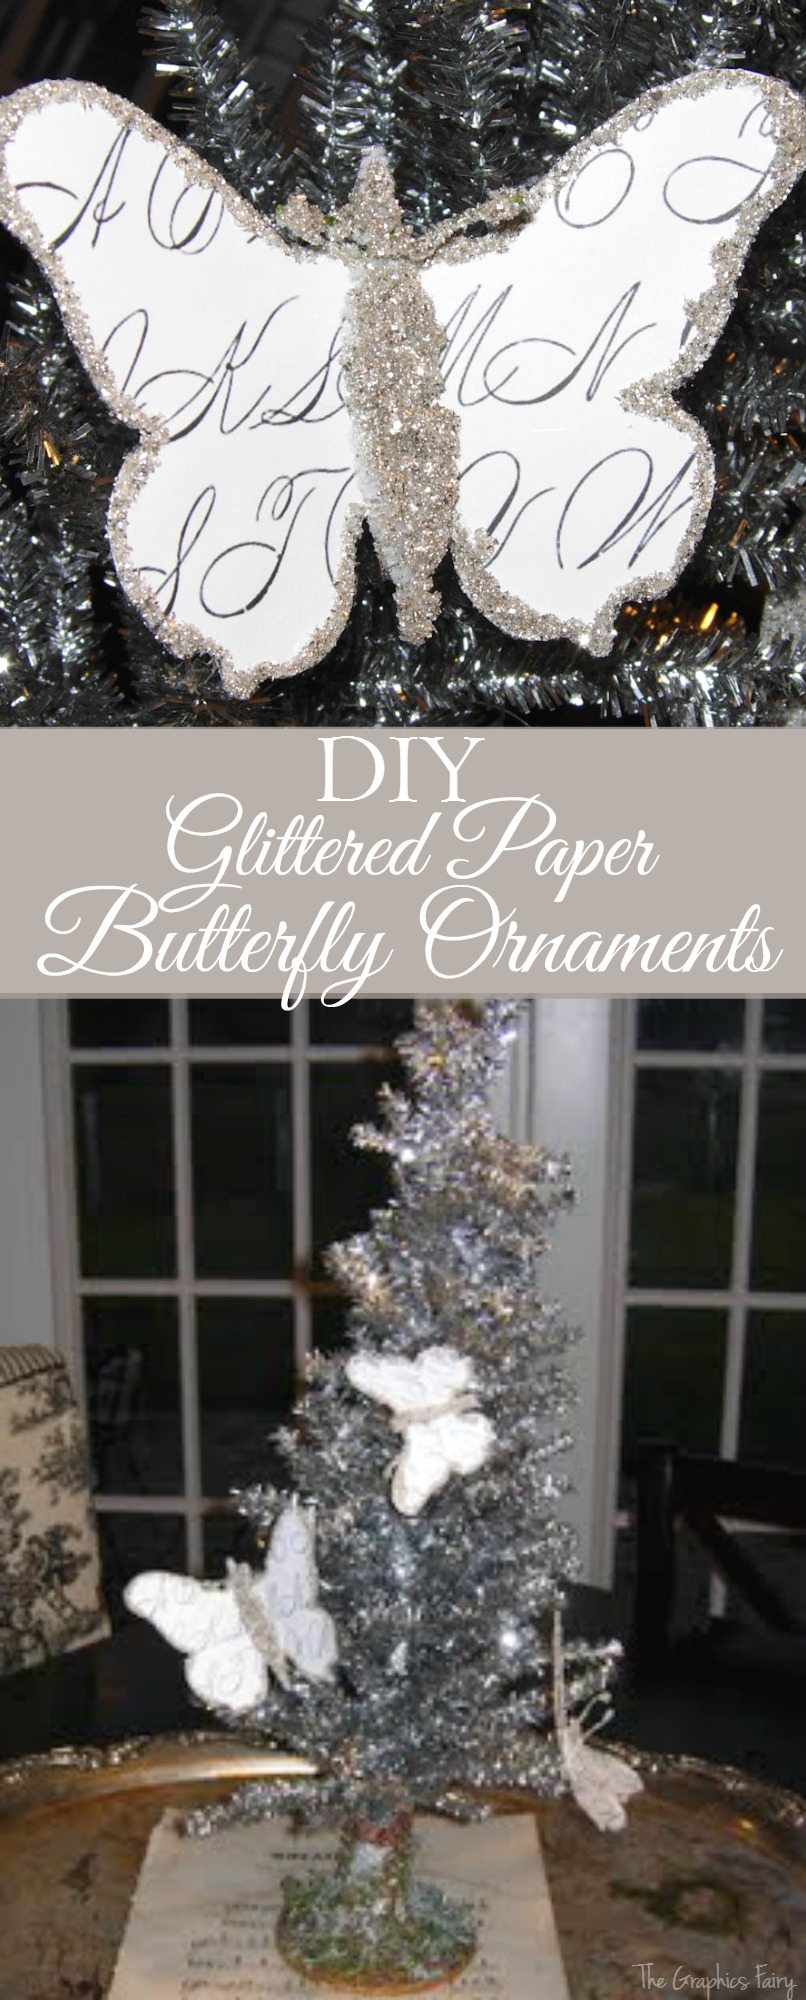
This weeks project are these darling glittered paper butterfly ornaments, made from antique scripty writing . So pretty for your Holiday tree, or to top off a package!
This is the digital collage sheet that I created for this project. You can click here for the PDF of the Printable Butterflies .
I’ve included a supply list and instructions below:
Supply List:
1) Glitter – I used German Glass glitter, because I love it!
2)Cardstock – Plain white works just fine
3)Mod Podge Dimensional Glue
4) Regular Mod Podge (I used Matte)
5) Thin Wire
6)Glue Gun
7)Florist Wire
8)Chenille Stems (bump for the large butterflies and regular for the small, I used white but you could use silver too)
9) Bone folder (Or something sturdy to press a fold with)
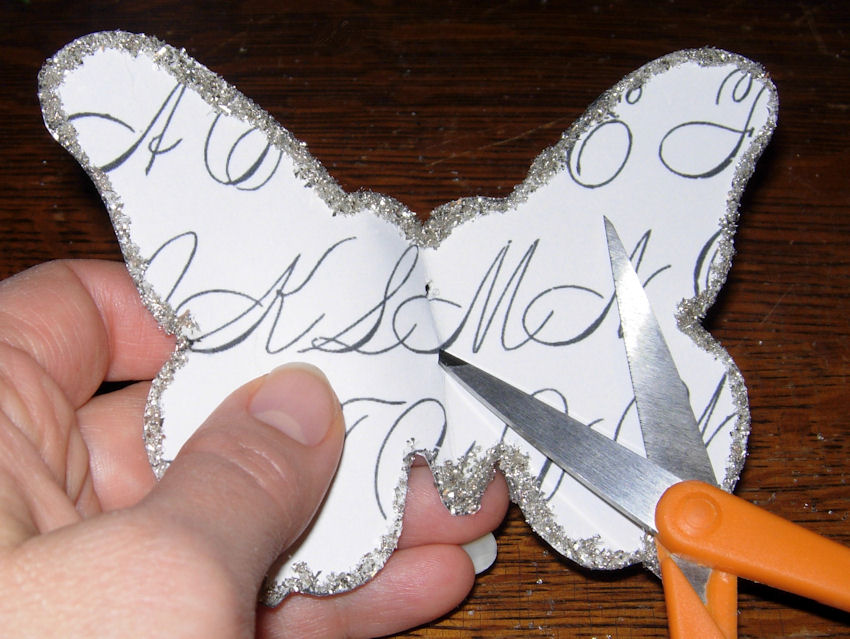
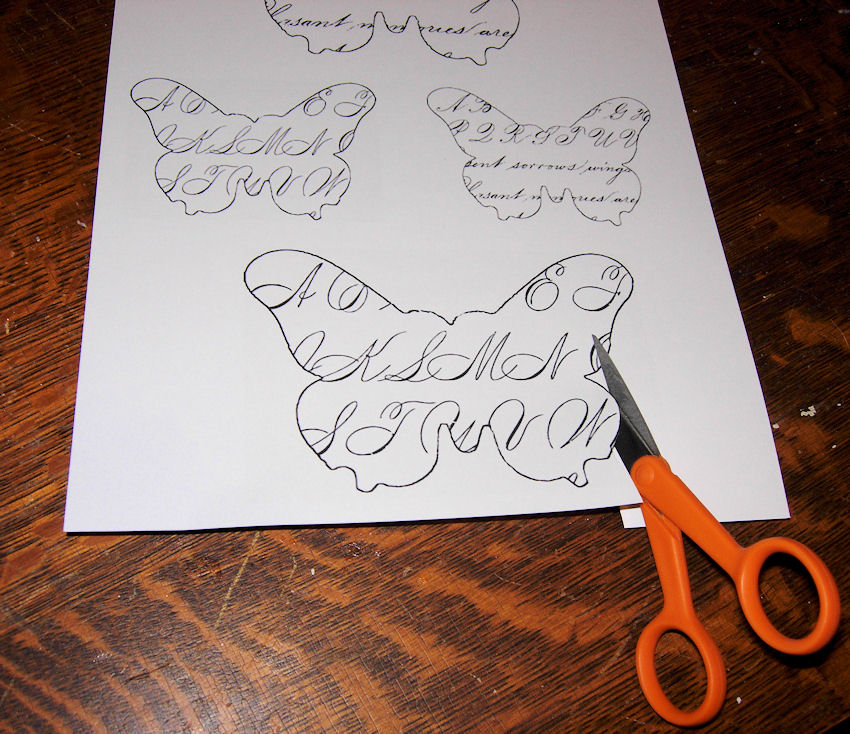 1) Print the PDF onto the card stock and cut out the butterflies. I like to use these tiny fiskar scissors, they work the best for me.

2) Fold butterflies in half and press with the bone folder, or whatever you have.
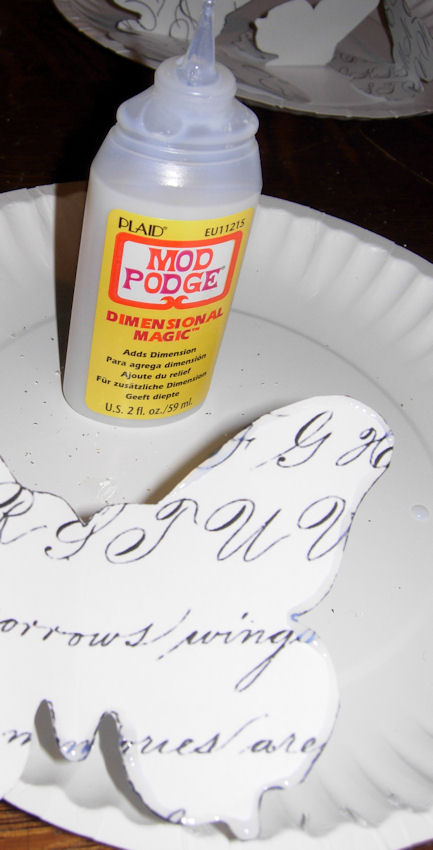
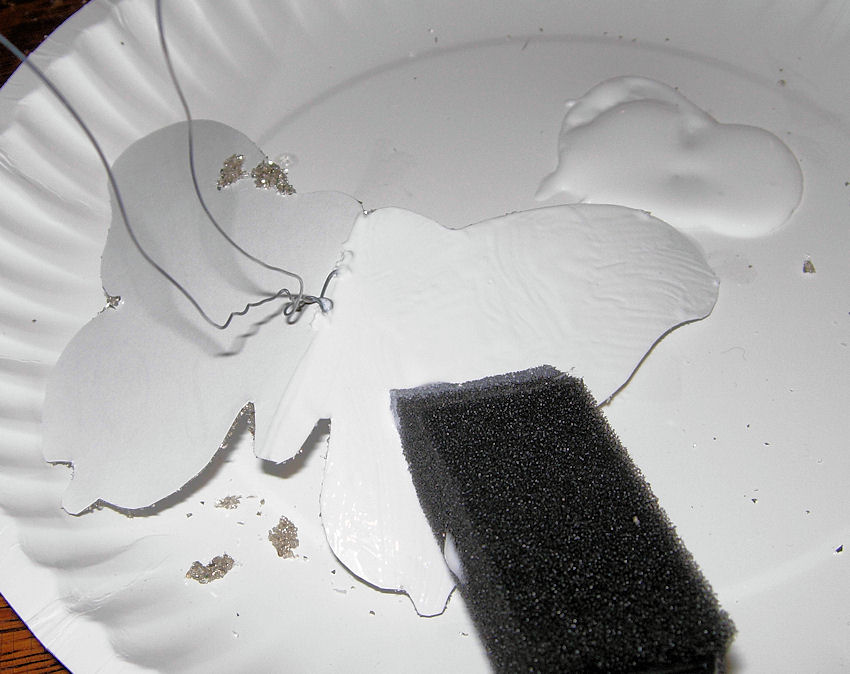
3)Using the dimensional glue, add glue around the edges, or wherever you want some sparkle.
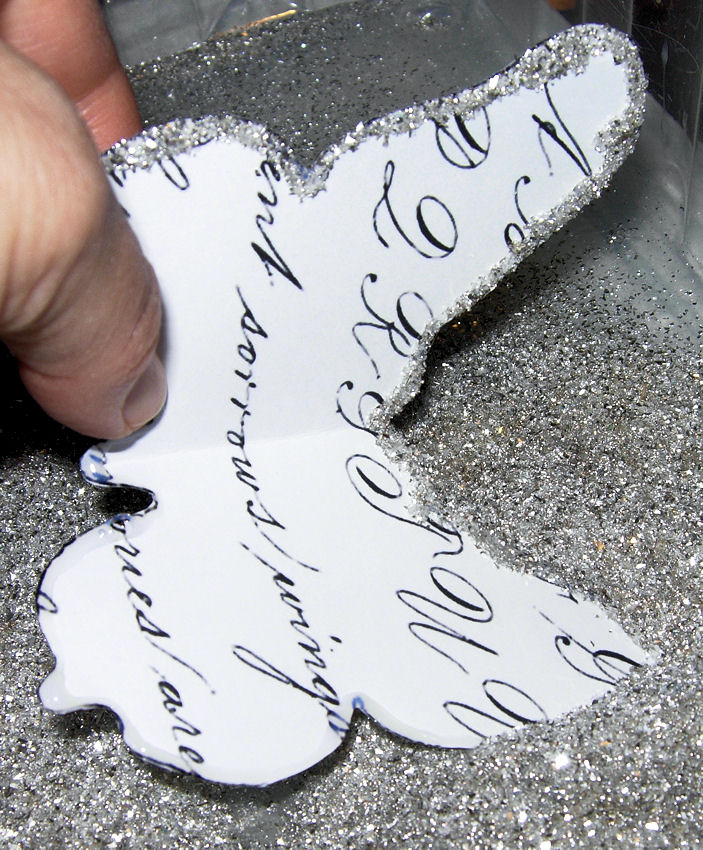
4) Dust the wet glue areas with glitter and allow to dry.
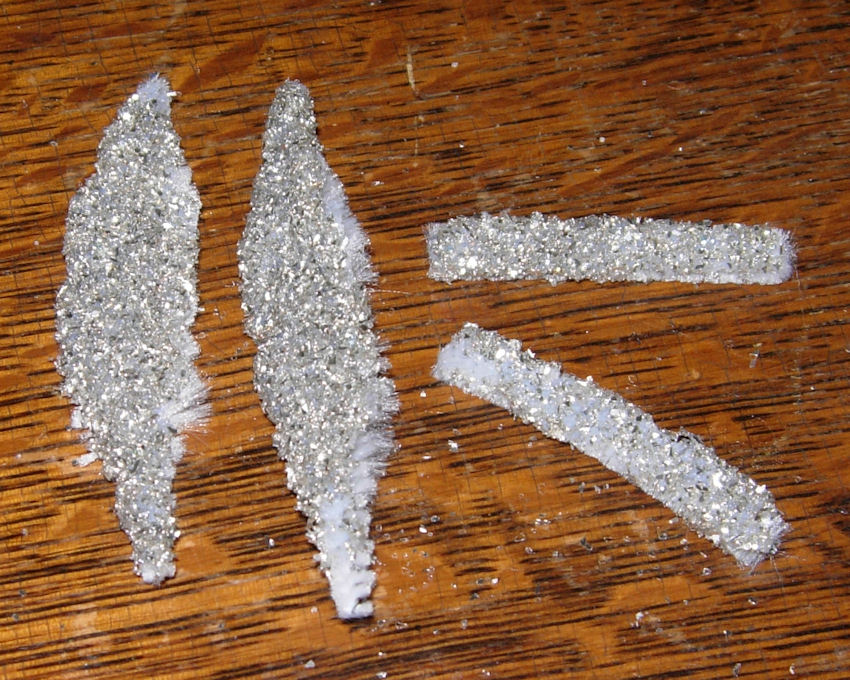 5) Next cut your chenille stems to fit your butterly wings (these will be the bodies) and use Mod Podge glue (dimensional or regular are fine) and glitter onto one side and dry.
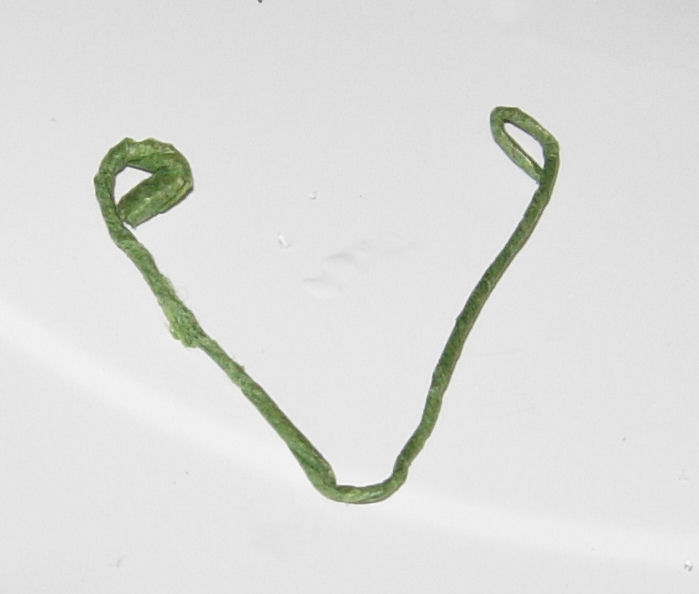
6)Using your florist wire, make a bend in the center and then fasten the ends into curly cues for the antennas. (Next time I make these I will probably paint these silver first, as the green showed through a tiny bit, not too bad though since they are mostly covered with glitter)
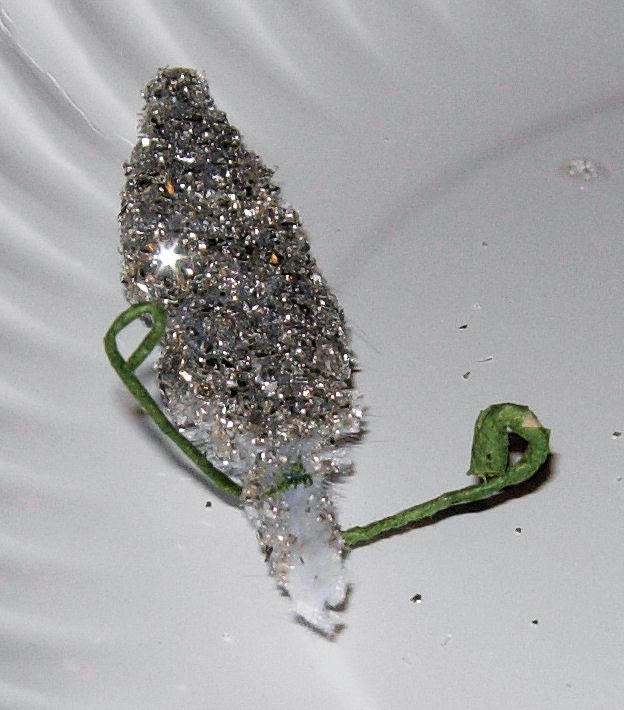
7) Wrap the wire antennas around the top of the chenille stem. Next glue and glitter the antennas as well. (You need to wrap them around the body before you glitter or the glitter will come off)
 8) Make two perforations in the center of your butterfly.

9)Cut the thin wire to desired length (this is what you will use to fasten the ornament to the tree) and pull through the holes and fasten in the back.
10) Apply a coat of regular Mod Podge to the back of your wings.
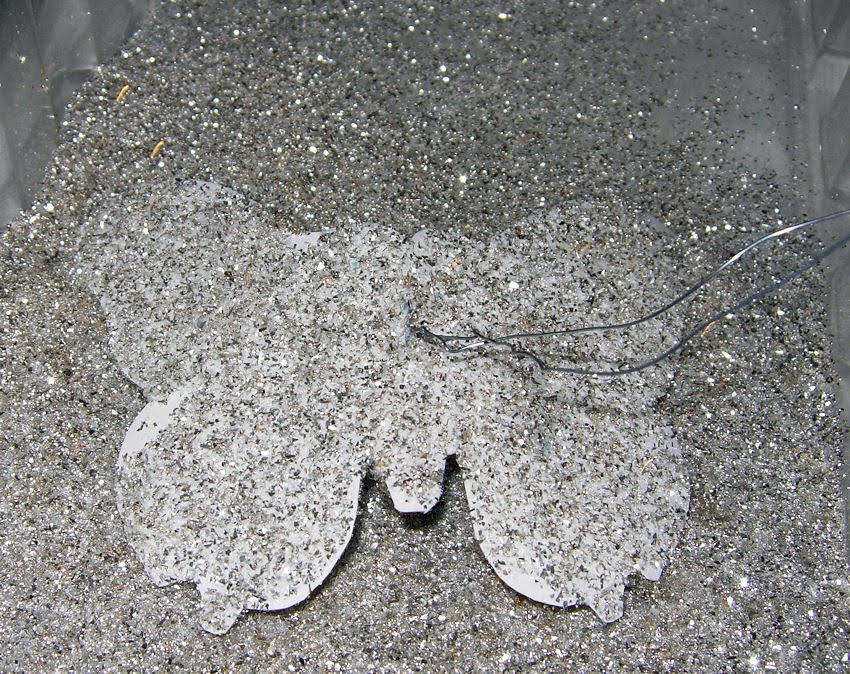
11) Dust the glued wings with the glitter and dry.
12) Finally when all pieces are dry, hot glue the body to the center of the wings (Sorry that photo didn’t turn out)
And your done!

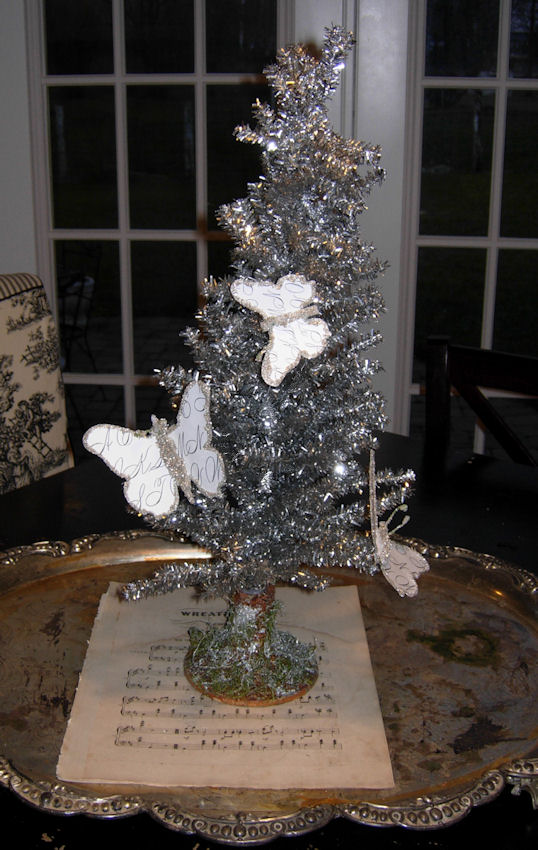
I hope you liked this fun and frugal crafty project!


kirstin & jordan says
Umm, I love this… Easy and gorgeous- right up my alley!
Rita Kent at TesoroFino.Com says
Love everything about them…from the paper selection…to using silver sparkles…to applying them throughout the tree. They’re darling! Come visit me & see what I’ve created this week. Be sure to leave a comment!
Lululiz says
Oh, they are perfect for our Christmas tree, they could keep the white birdies company. When I was decorating the tree earlier, I had this sinking feeling that there were empty spaces on the tree, now I know how I can fill them. Thank you so much.
Tea Potty says
A pretty and easy idea! My daughter has a butterfly mobile in her room — a few of these would make a glamorous addition.
nonizamboni says
This is so beautiful, festive and do-able. Thanks!
Alison Gibbs says
Karen what a cute decoration
Alison
JAN says
wonderful ty for sharing
FILIGREE MOON says
Precious! Thanks for the tutorial and images! ~ Angela
Mod Podge Amy says
Karen! Awesome, as usual. Love the use of Dimensional Magic.
Jane says
These are very cute. I love the script paper that you used. Thanks for the tutorial.
Jane
Nancy @ La Chambre Rose says
I do like it. There’s that Modge Podge again. I really must start using it.
Atticmag says
The script writing makes the ornament so unique. Love the sheet music too, what a sweet ornament that would make!
Jane T.
Miss Mustard Seed says
Ah, a fellow German glass glitter lover. That stuff sparkles like no other. Great project!
One Cheap B*tch says
Soooooooooo cute!
Kathy-Catnip Studio says
Karen, Those sparkly butterflies are darling, and so perfect for a vintage tinsel tree!