Easy Paper Clay Recipe
Hello, my creative friends! It’s Rebecca Parson’s here I’m back and today we are going to have oh so much fun with this DIY Easy Paper Clay Recipe! This is a very versatile recipe that can be used for all sorts of crafts during different holidays in any Season, or for everyday projects too. Try creating your own festive tags and ornaments for Christmas, Easter, Valentine’s Day and more. My DIY Clay recipe is simple enough to do with your kids and grandchildren as well. Fun for the whole family! It’s also a fairly frugal craft and you may find that you already have most of these ingredients in your home! This post will show you how to make some simple Paper Clay ornaments, but of course you can use this recipe to create whatever you like.
You might already be familiar with Paper Clay. It is a versatile tool for DIY, crafts, and art making. Our DIY version can be molded, sculpted, and formed into many shapes and items. Why buy it from the craft store, when you can make it yourself. From bowls and masks to ornaments and embellishments, Paper Clay can do it all. After drying, it has natural creamy color. You can paint and stain it if you like! Best of all, you can also transfer or decoupage your favorite Graphics Fairy images onto it. YAY!! Oh the possibilities!!!
Materials for Paper Clay Recipe
- 1/2 Cup Paper Pulp (1/4-1/2 roll white toilet paper with no lotion)
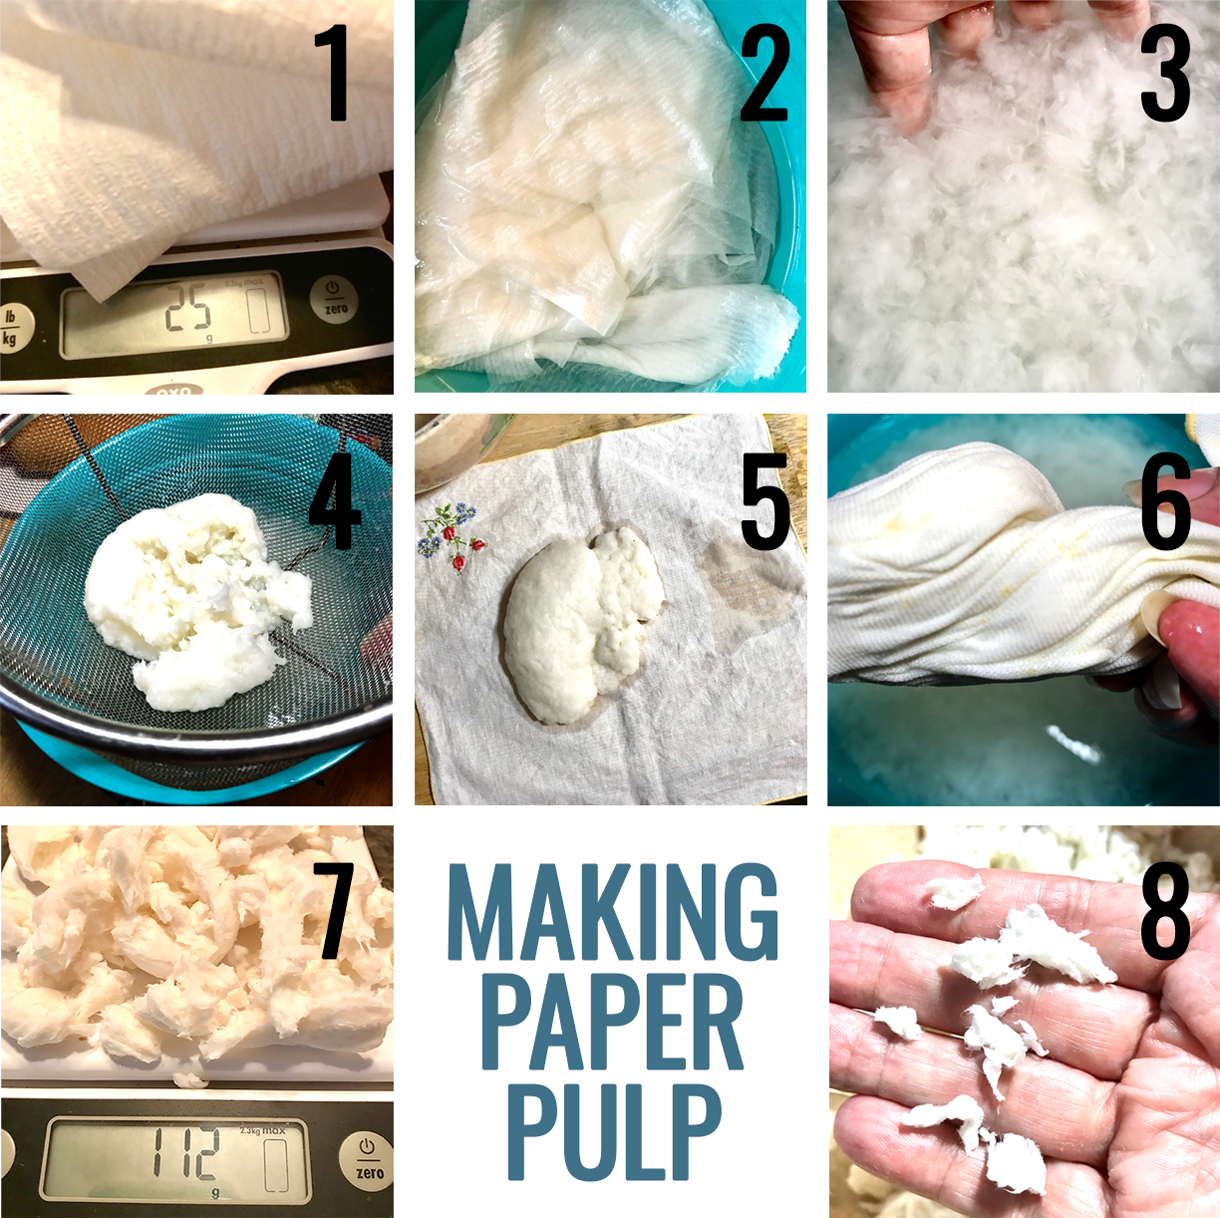
Use about 1 ounce (25-28 g) of dry TP – It should weigh about 4 ounces (112 g) when wet - Digital Food Scale
- Warm Water in Large Bowl
- Old Cotton Napkin or Handkerchief
- 1/2 Cup White School Glue
- 1/2 Cup Drywall Joint Compound (Any brand except DAP)
- 1/2 Cup Cornstarch
- 1 cup All-purpose Flour divided in half
- 3 Tablespoons Mineral or Baby Oil
- Large Mixing Bowl (craft use only)
- Measuring Cups and Spoons
- Votive Candle Holder
- Small straw for making holes in ornaments (a round coffee stir straw is perfect)
- Soft artists brush
- Fine grit sandpaper (I used 150 grit)
How to Make Paper Clay Directions:
Making Paper Pulp
Step 1- Weigh out about 1 ounce of dry toilet paper (25-28 grams). Step 2- Place TP in a large bowl of warm water. Let stand for a few minutes. Step 3- With your hands, swirl and break the paper apart.
Step 4- Once it is thoroughly soaked, drain off excess water. Step 5- Place the pulp in the center of a piece of a cotton napkin. An old handkerchief works well for this. Step 6- Squeeze this until no more water flows out.
Step 7- Remove from the cloth and measure out 1/2 Cup. Pulp should weigh about 4 ounces or 112 grams now. TIP: You may have some left over TP pulp depending upon the type of tissue you used. This is great to use as texture in your art or to make a sheet or two of paper. Step 8- Place the pulp in large bowl. TIP: Take the time to tear any large lumps apart with hands. The pieces should be pea size or smaller before you mix in other ingredients. Trust me, this will be worth it in the end. WINK!
Mixing the Ingredients
Step 9- Mix the glue in first. Step 10- Get your hands in there and work it into the fibers. It will be sticky! Step 11- Add the joint compound next and work it into the mixture with your hands. Then add in the dry ingredients and the oil, reserving 1/2 C of white flour. I prefer to mix this by hand. DISCLAIMER: Some recipes say that you can use a mixer with a dough hook… if you are willing to get craft materials on your appliances. I was not keen on this, but if you decide to do this: DO NOT work your mixer too hard. If it feels too heavy STOP!!! You do not want to burn out your motor.
Step 12- Mix in the remaining flour 1/4 C at a time until the consistency feels right to you. Step 13- Add more flour or cornstarch into the bowl for kneading. Step 14- Knead the mixture until it becomes the consistency you want. You will have an ample handful of clay with this recipe!!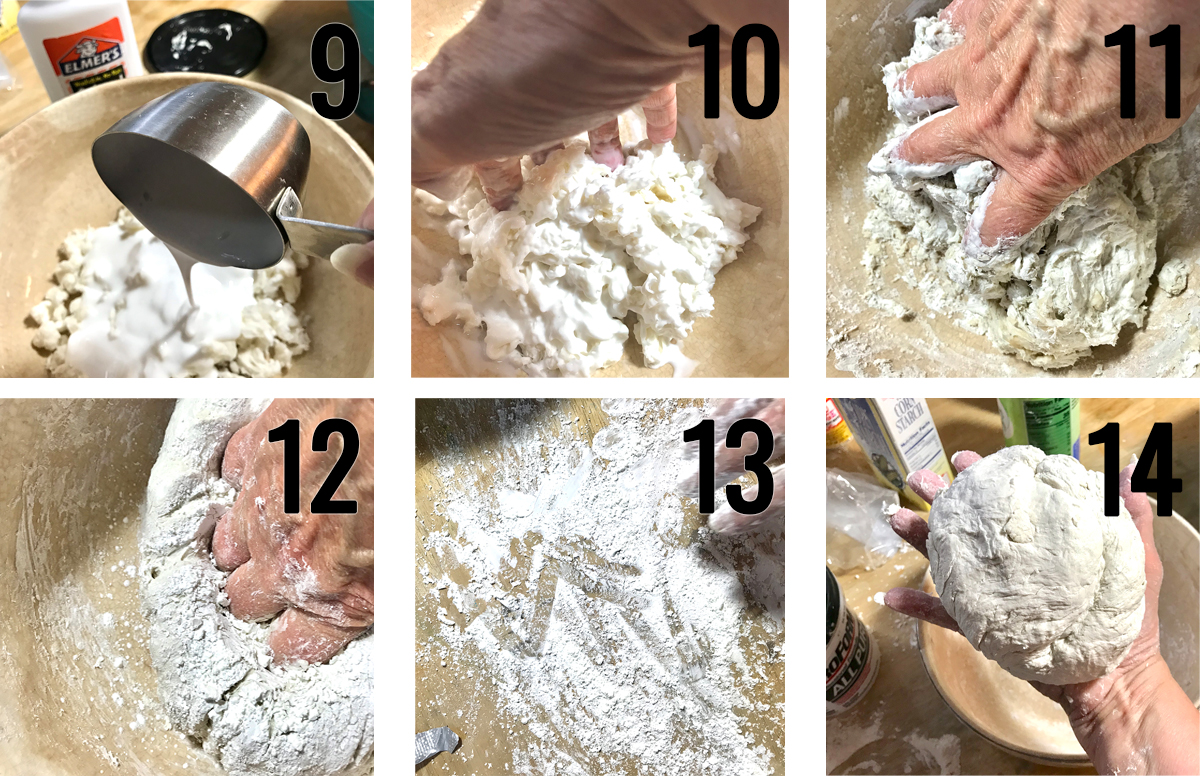
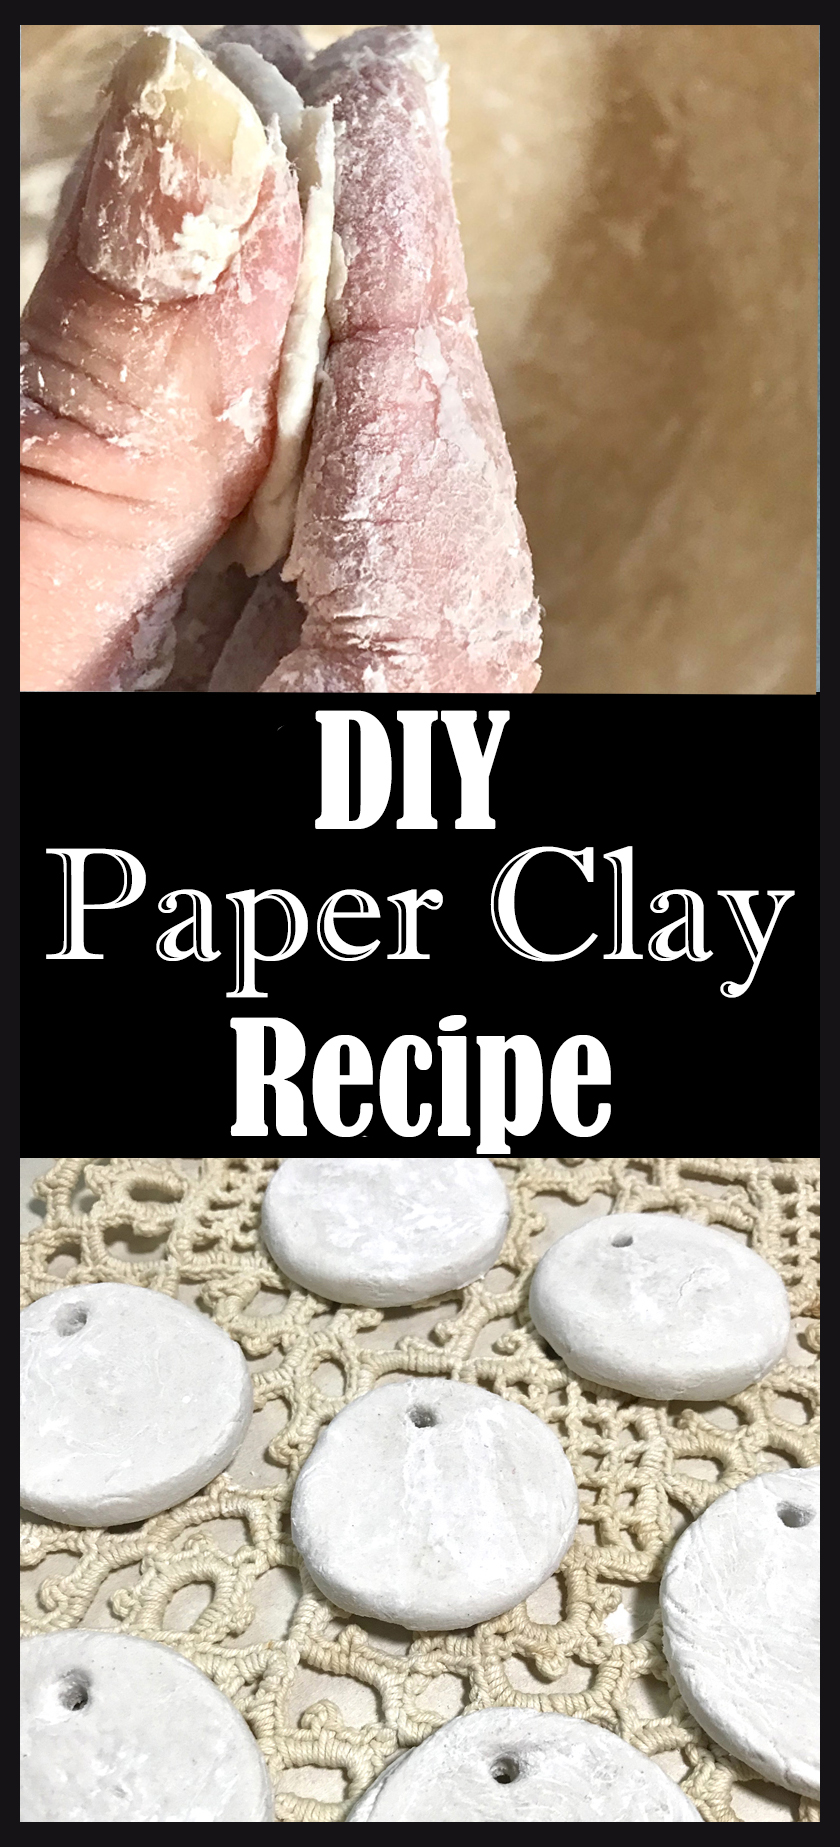
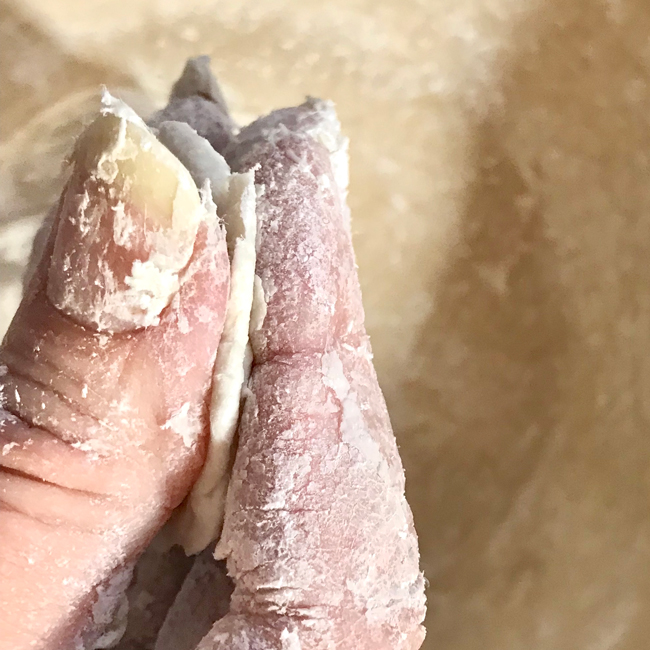
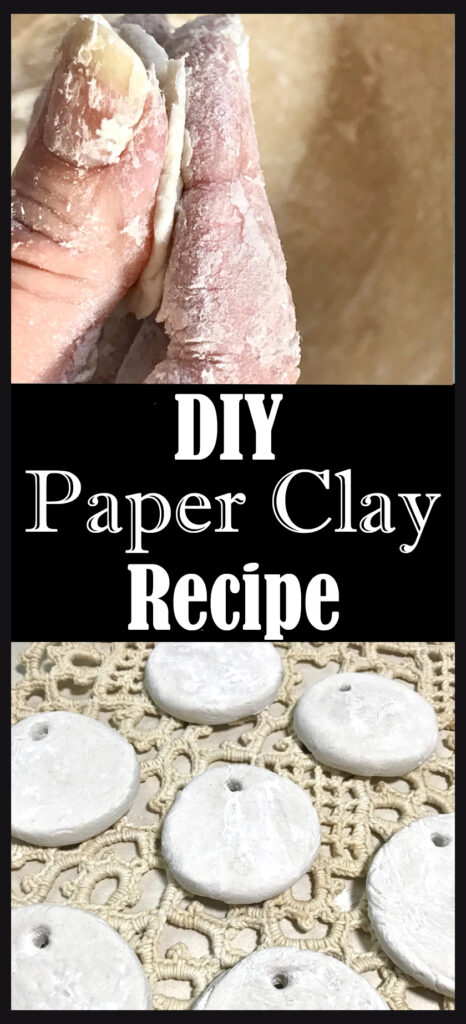
If you squeeze a little of the dough in between your fingers and it holds a thin piece like below it is ready to use for ornaments.
Forming Round Ornaments
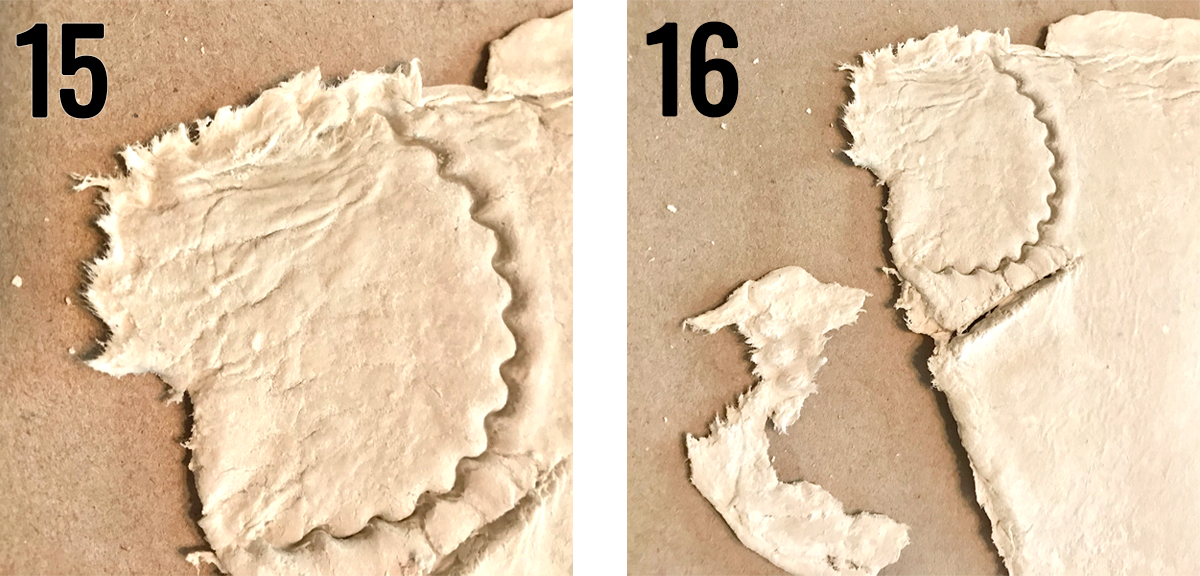
I wanted round disk ornaments that Graphics Fairy images could be decoupaged on. Step 15- I had a dream of rolling out the Air Dry Paper Clay and cutting it like sugar cookies. After hours (and I do mean hours) of trying – Not happening!!! INSERT SAD FACE Step 16- The paper fibers prevent cutting a crisp edge, even with a knife as you can clearly see in the photos below. However, I found a workaround thanks to my daughter and husband brainstorming with me. YAY!
When Things go Wrong – Get Creative!
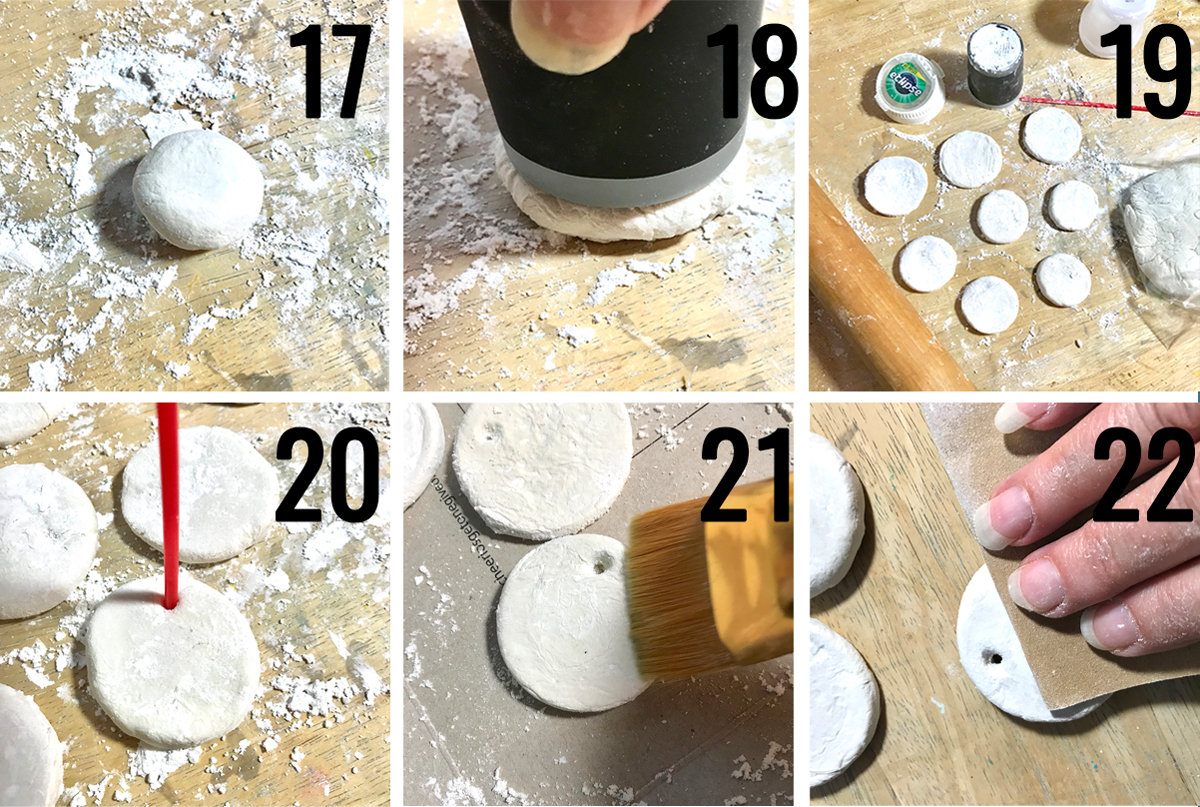
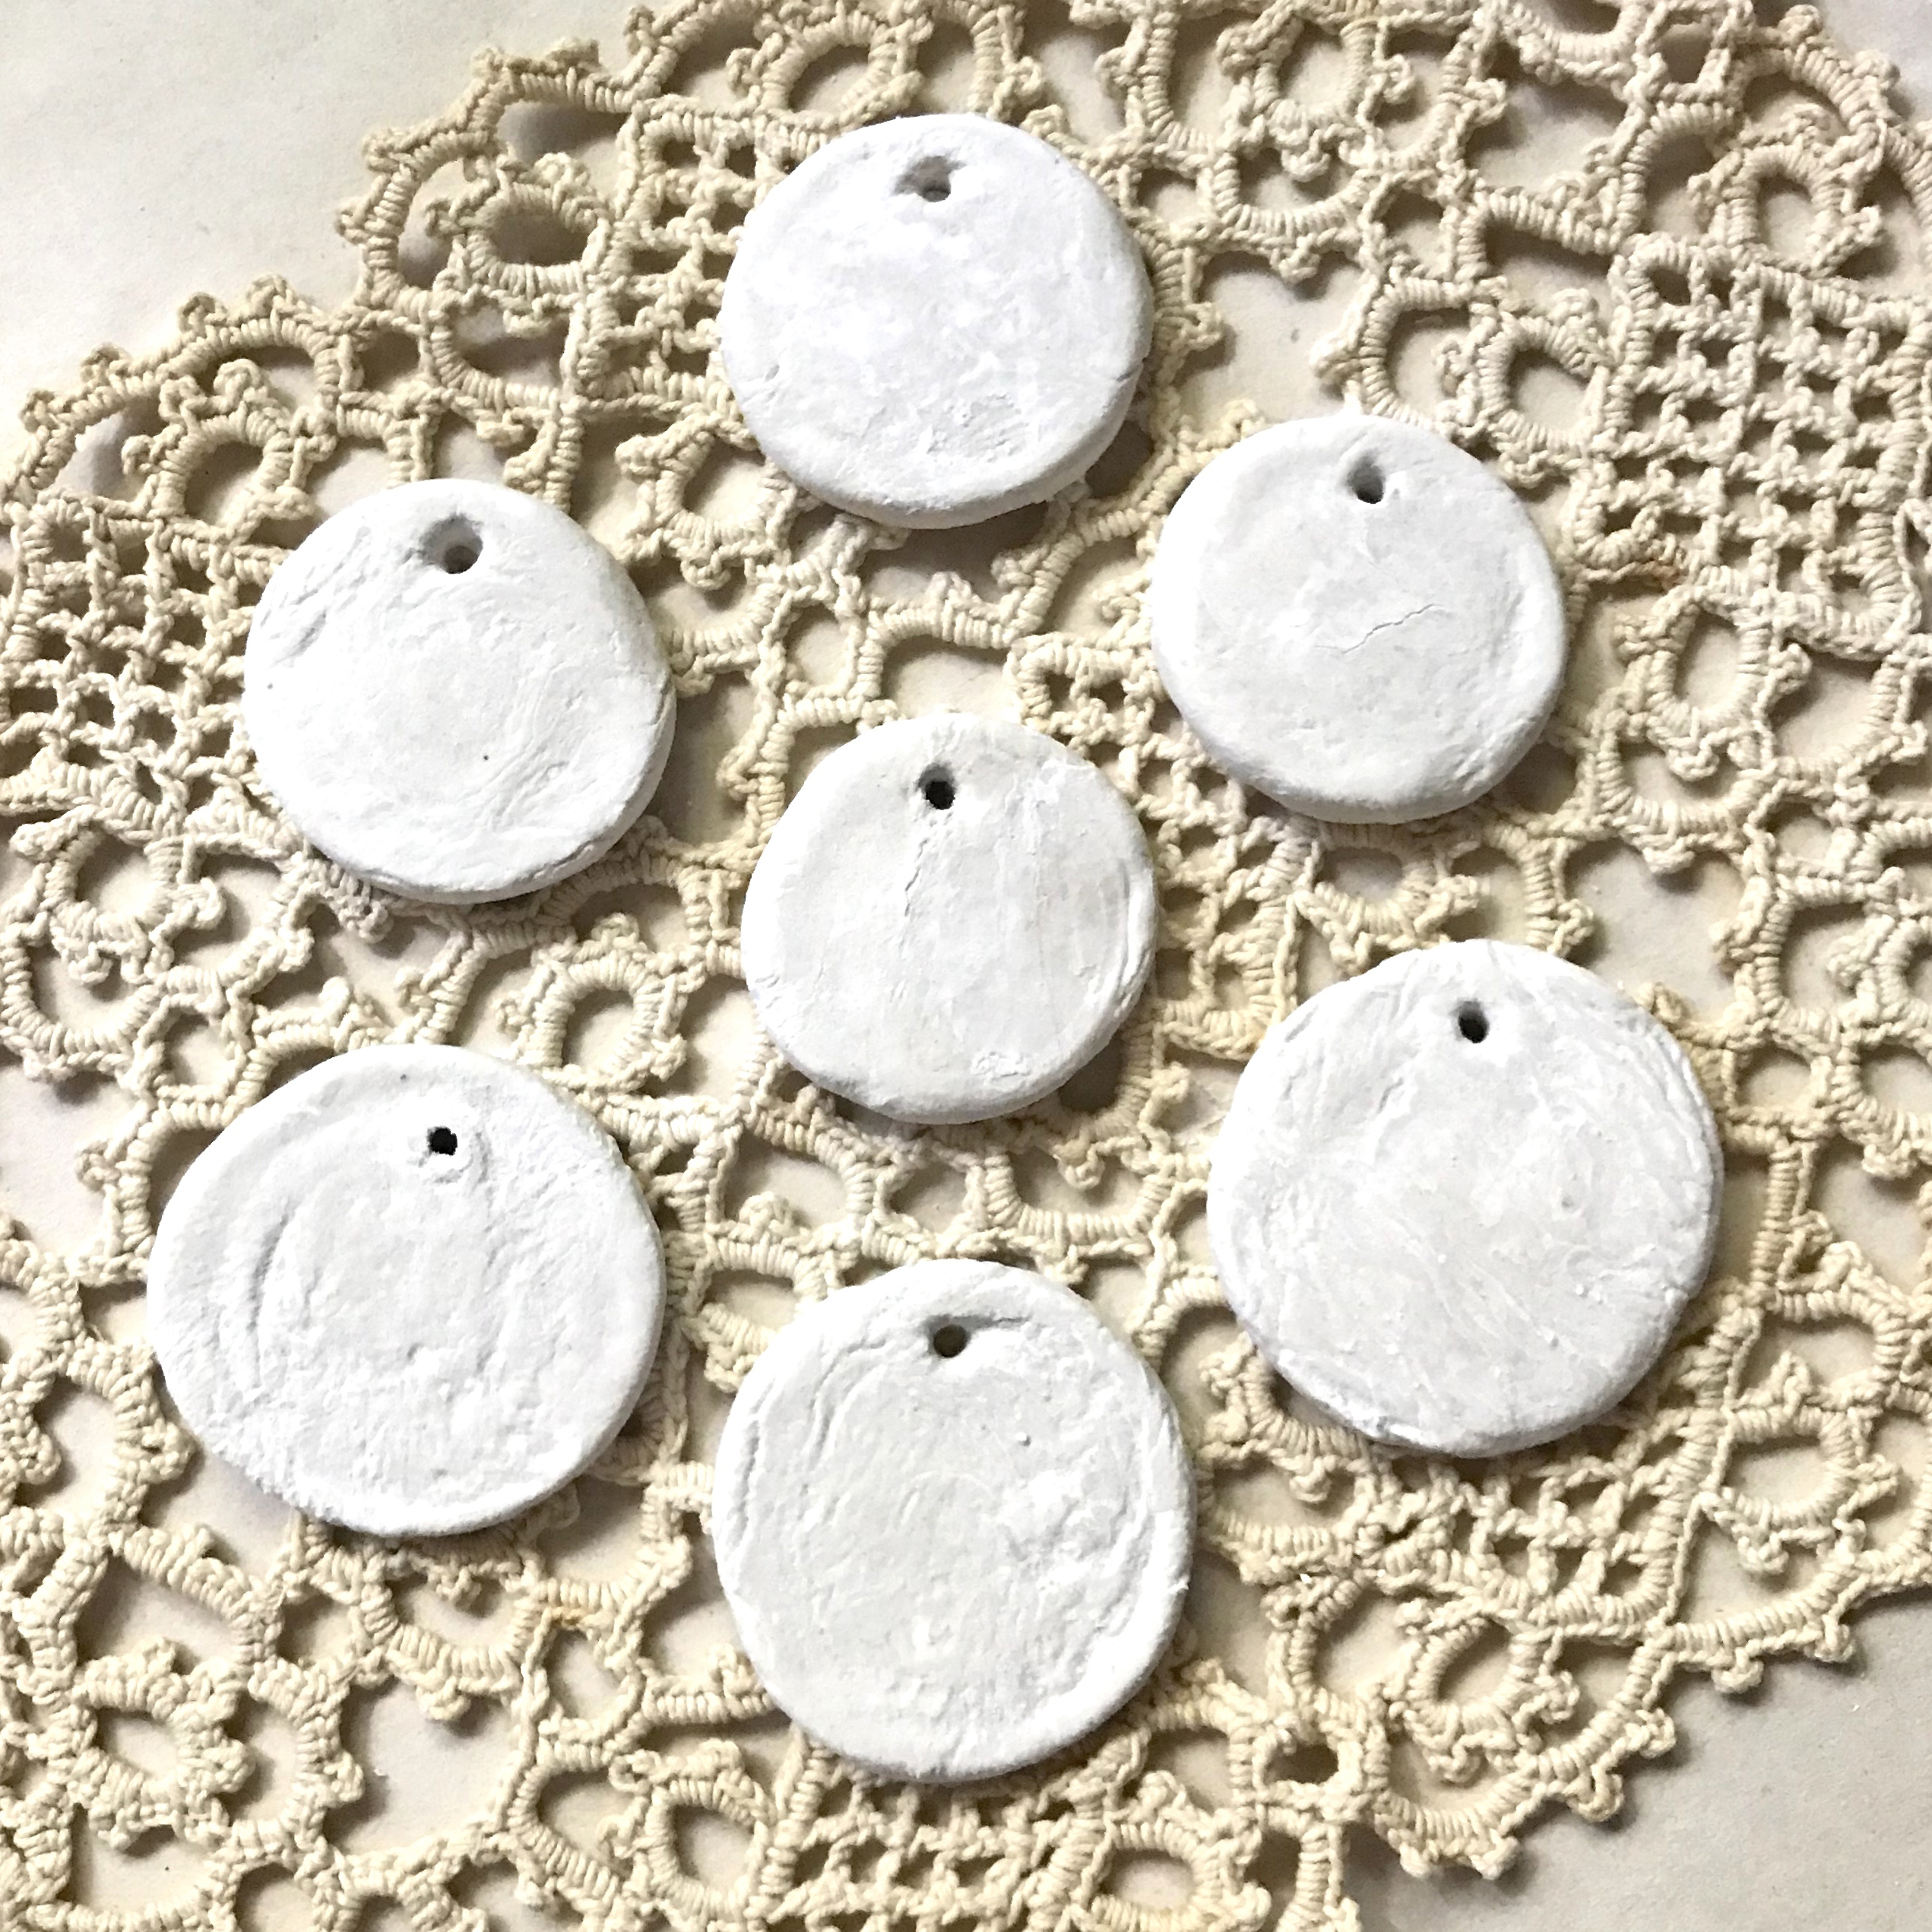
Instead of rolled ornaments, I decided to make ornaments with the method I use to make peanut butter cookies. Step 17- Pinch off about a heaping teaspoon of clay and roll it into a ball in the palms of your hands. Step 18- Place it on a hard surface and smash it with the bottom of a sturdy votive candle holder. TIP: Don’t press so hard that it becomes larger than the votive. Place the open end of the votive candle holder over the smashed clay. Move the votive around in a circle several times. This gives a nice rounded shape to the clay. It is really easy once you get the hang of it. Step 19- Note that paper clay will not create perfect shapes every time. However, these imperfections are totally normal when making handmade items!
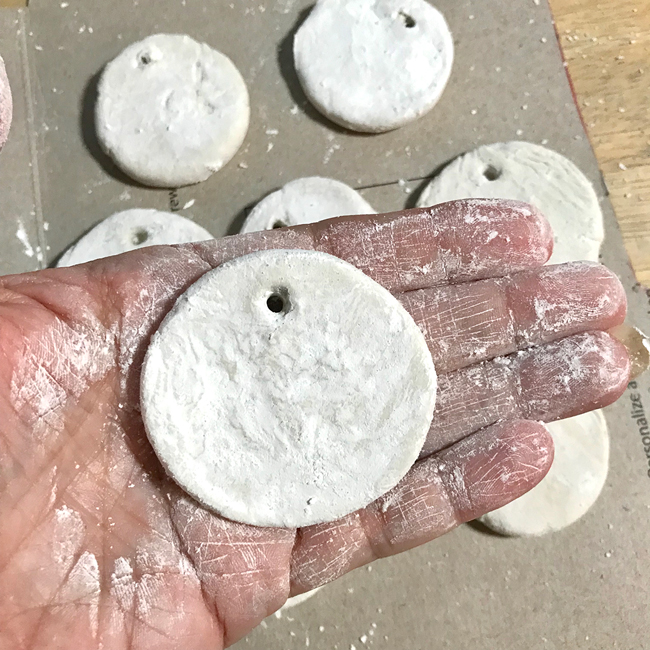
Step 20- Pierce the clay round with the straw to create a hole. Place on a wire rack and allow to dry several hours or overnight. I turned mine several times to make sure they dried on each side. Step 21- Brush off the excess cornstarch with a soft brush. Step 22- Sand with fine grit sandpaper if you like.
Finishing Touches
The ornaments are now ready for you to decoupage or transfer your favorite Graphics Fairy image onto them, of course you could also paint them, or rubber stamp them or do whatever you like with them! I’m sure you will come up with all sorts of ideas of your own.
There will be some inconsistencies in the surface, but that will just add interest to your final piece. Over the years, I have learned to embrace small imperfections and see them as lovingly unique aspects of my handmade items. They truly add character.
I think I will make these for my Thanksgiving Gratitude Tree this year and also for my little Easter Tree. Please share with me what you will you do with them in the comments below?
Thank you for visiting The Graphics Fairy today! I hope you enjoyed playing with me in my Graphics Fairy sandbox! This DIY Air Dry Paper Clay Recipe is so much fun to do and so versatile. I also create Photoshop Elements tutorials and craft project videos on The Graphics Fairy Premium Membership site. You can find even more of my art, DIYs, books, and whimsical shenanigans on Rebeccaparsons.com


Anita D says
Hi Rebecca – I am excited to try out this recipe. I have an idea for crisp edges that I have tried with other clays. Place the cookie cutter down on the flat surface. Insert the clay and press into the edges. You’ll have to play around with how much smoothing to do before vs. after removing the cookie cutter.
Karen Watson says
Thanks so much for sharing your tips with us Anita!
Jackie P says
Hi. Regarding ingredients, you state 1/2 corn starch. 1/2 of what? Thanks!
Rebecca E. Parsons says
Sorry Jackie. It is 1/2 CUP Cornstarch. Thanks for letting us know to fix the recipe!!
maria elena blecha says
Thanks I will try this for sure, it would make really cute Christmas ornaments! What is a gratitude tree, would love to know and make one!!
graphicsfairy says
Thanks Maria,
A gratitude tree is just a way to display things you are grateful for especially in the month of November (Thanksgiving) 🙂
Rebecca E. Parsons says
Hi Maria:
Thrilled you will try this clay. It is fun to play with. My Gratitude Tree is a big part of my Thanksgiving Day. Everyone who attends the feast receives a little bobble to write something they are thankful for this year. Then they hang it on the tree, which is usually a bunch of large bare branches with loads of room to hang things. It is a family tradition!! Would love to see yours!! Rebecca
Heather K Tracy says
What a useful recipe and demo! Thank you, Rebecca – I’m going to try this one. xoxo
graphicsfairy says
Thank you Heather 🙂 xoxo
Rebecca E. Parsons says
That’s a big compliment coming from you sweet Heather!! Can’t wait to see what you create!! XOX