DIY Book Page Paper Leaves
Hello Graphics Fairy friends! I’m Diana from Dreams Factory and I’m happy to be here again to share another DIY project with you! Today I will show you how to make these gorgeous DIY Book Page Paper Leaves that can be used in all sorts of craft projects but can also bring so much charm to your home decor. To make things easier, I’m actually sharing a printable with the leaves that I’ve created using some antique dictionary pages, so you’ll be able to just download and use them as you want!
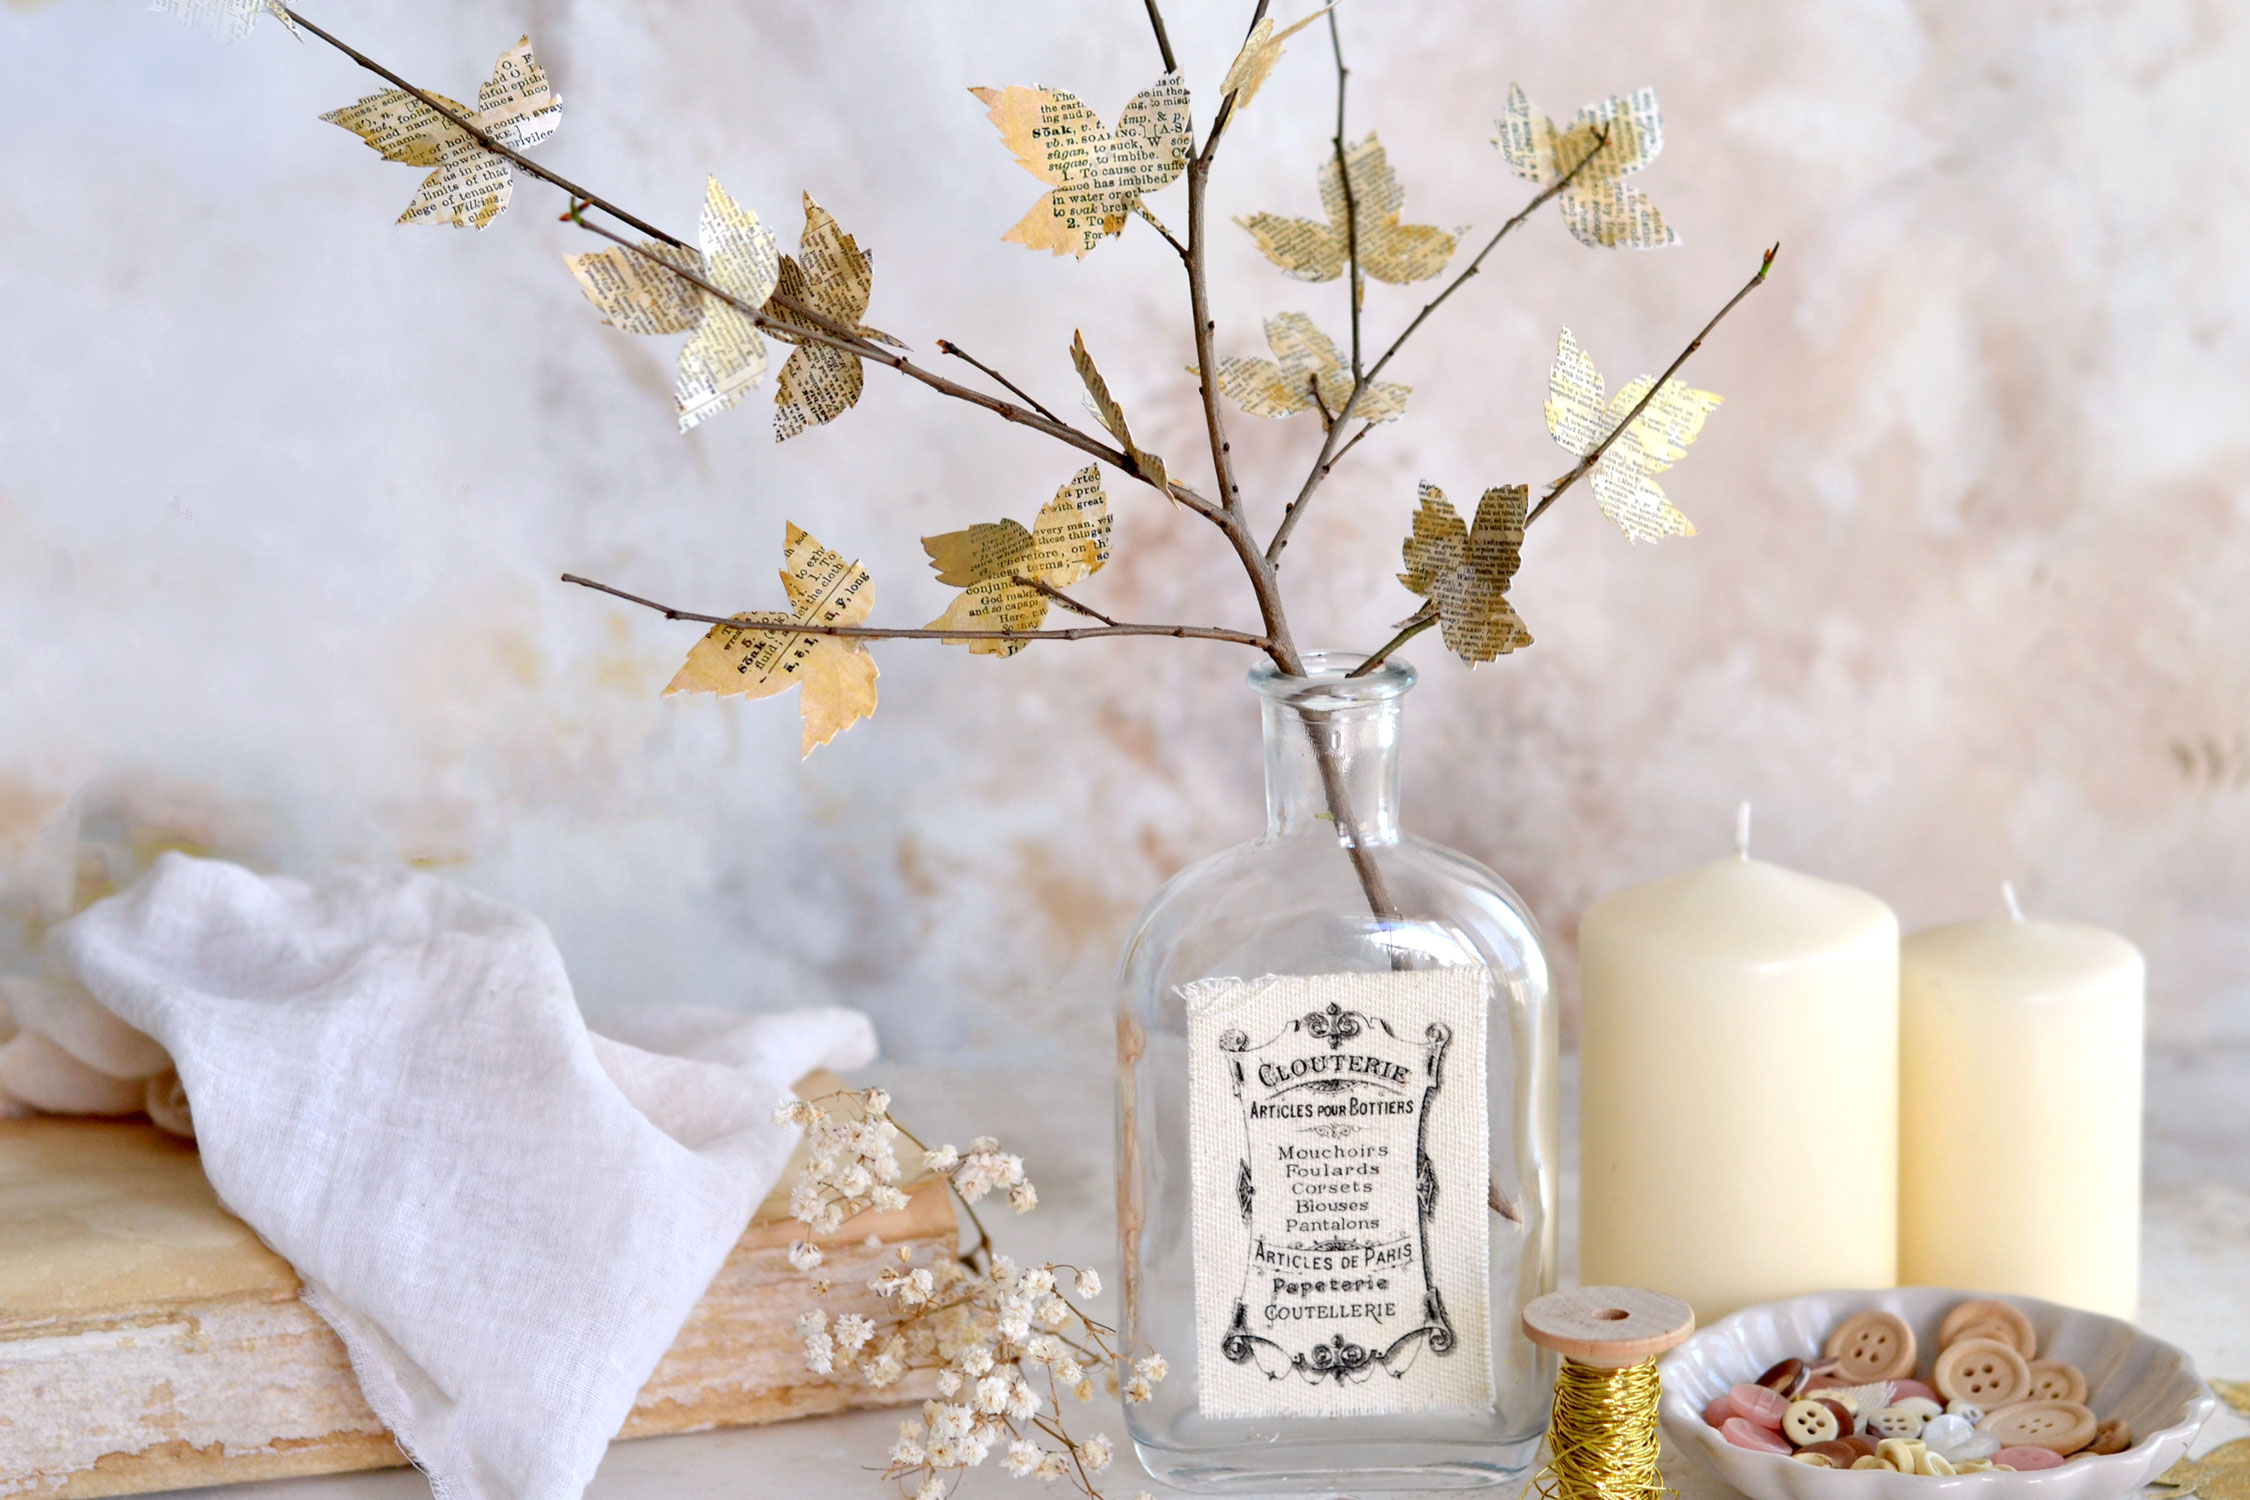
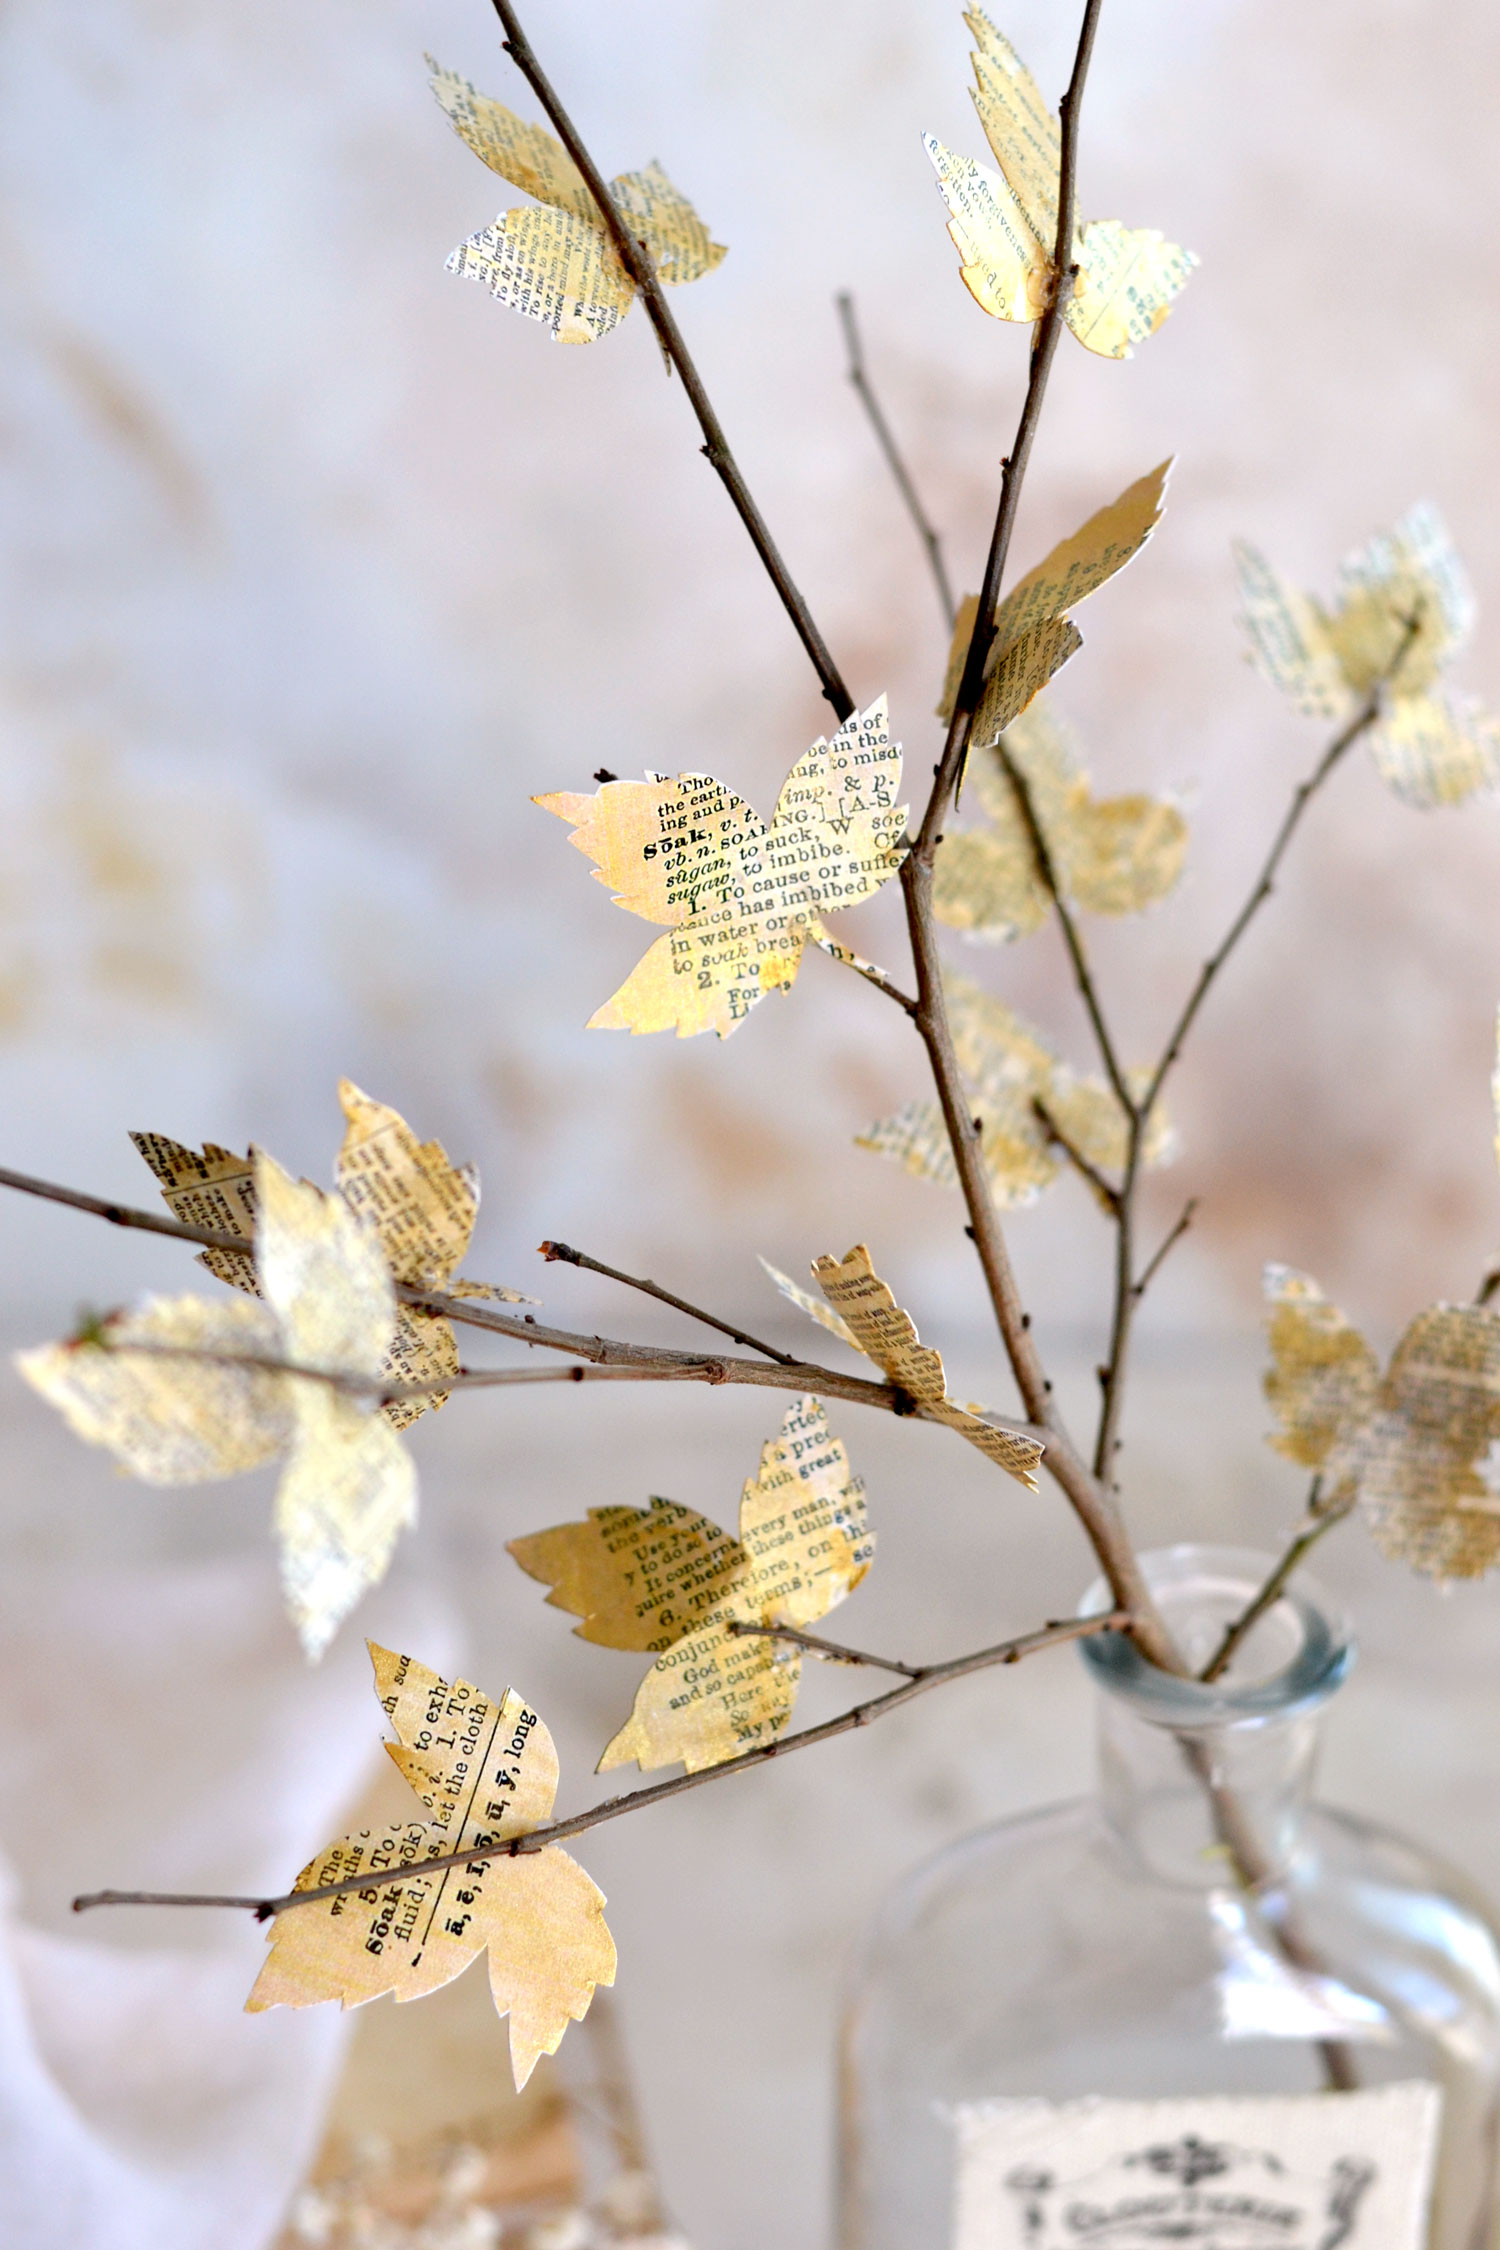
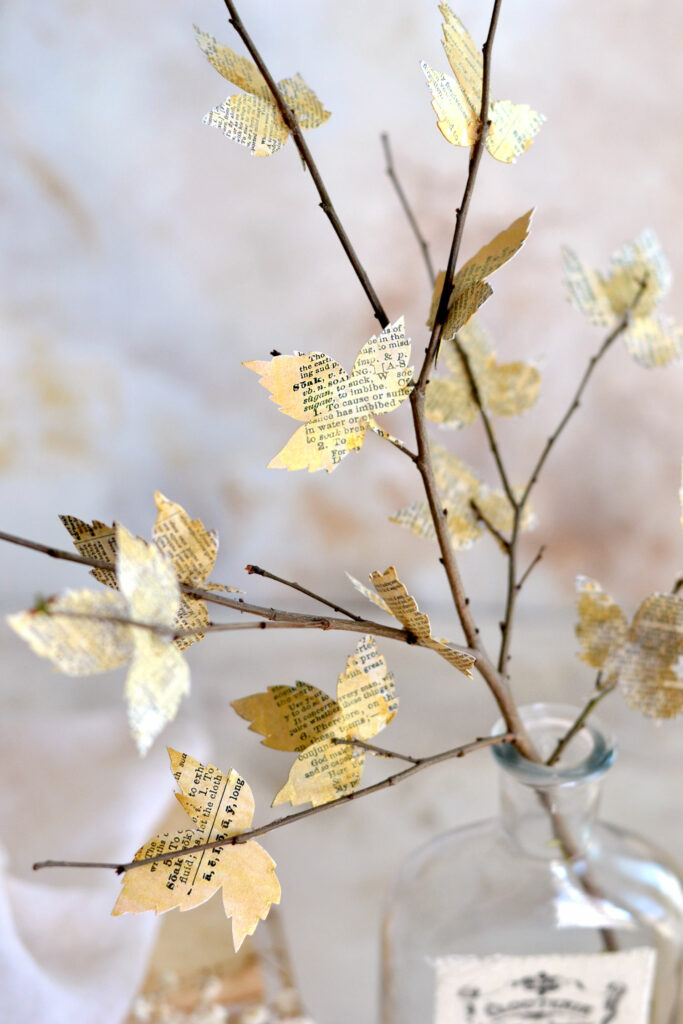
I’m adding a few golden touches here and there, just to bring some more charm to these beauties! I’m using natural tree branches to keep the whole appearance more organic, but you can also use wire if you prefer to make the branches yourself.
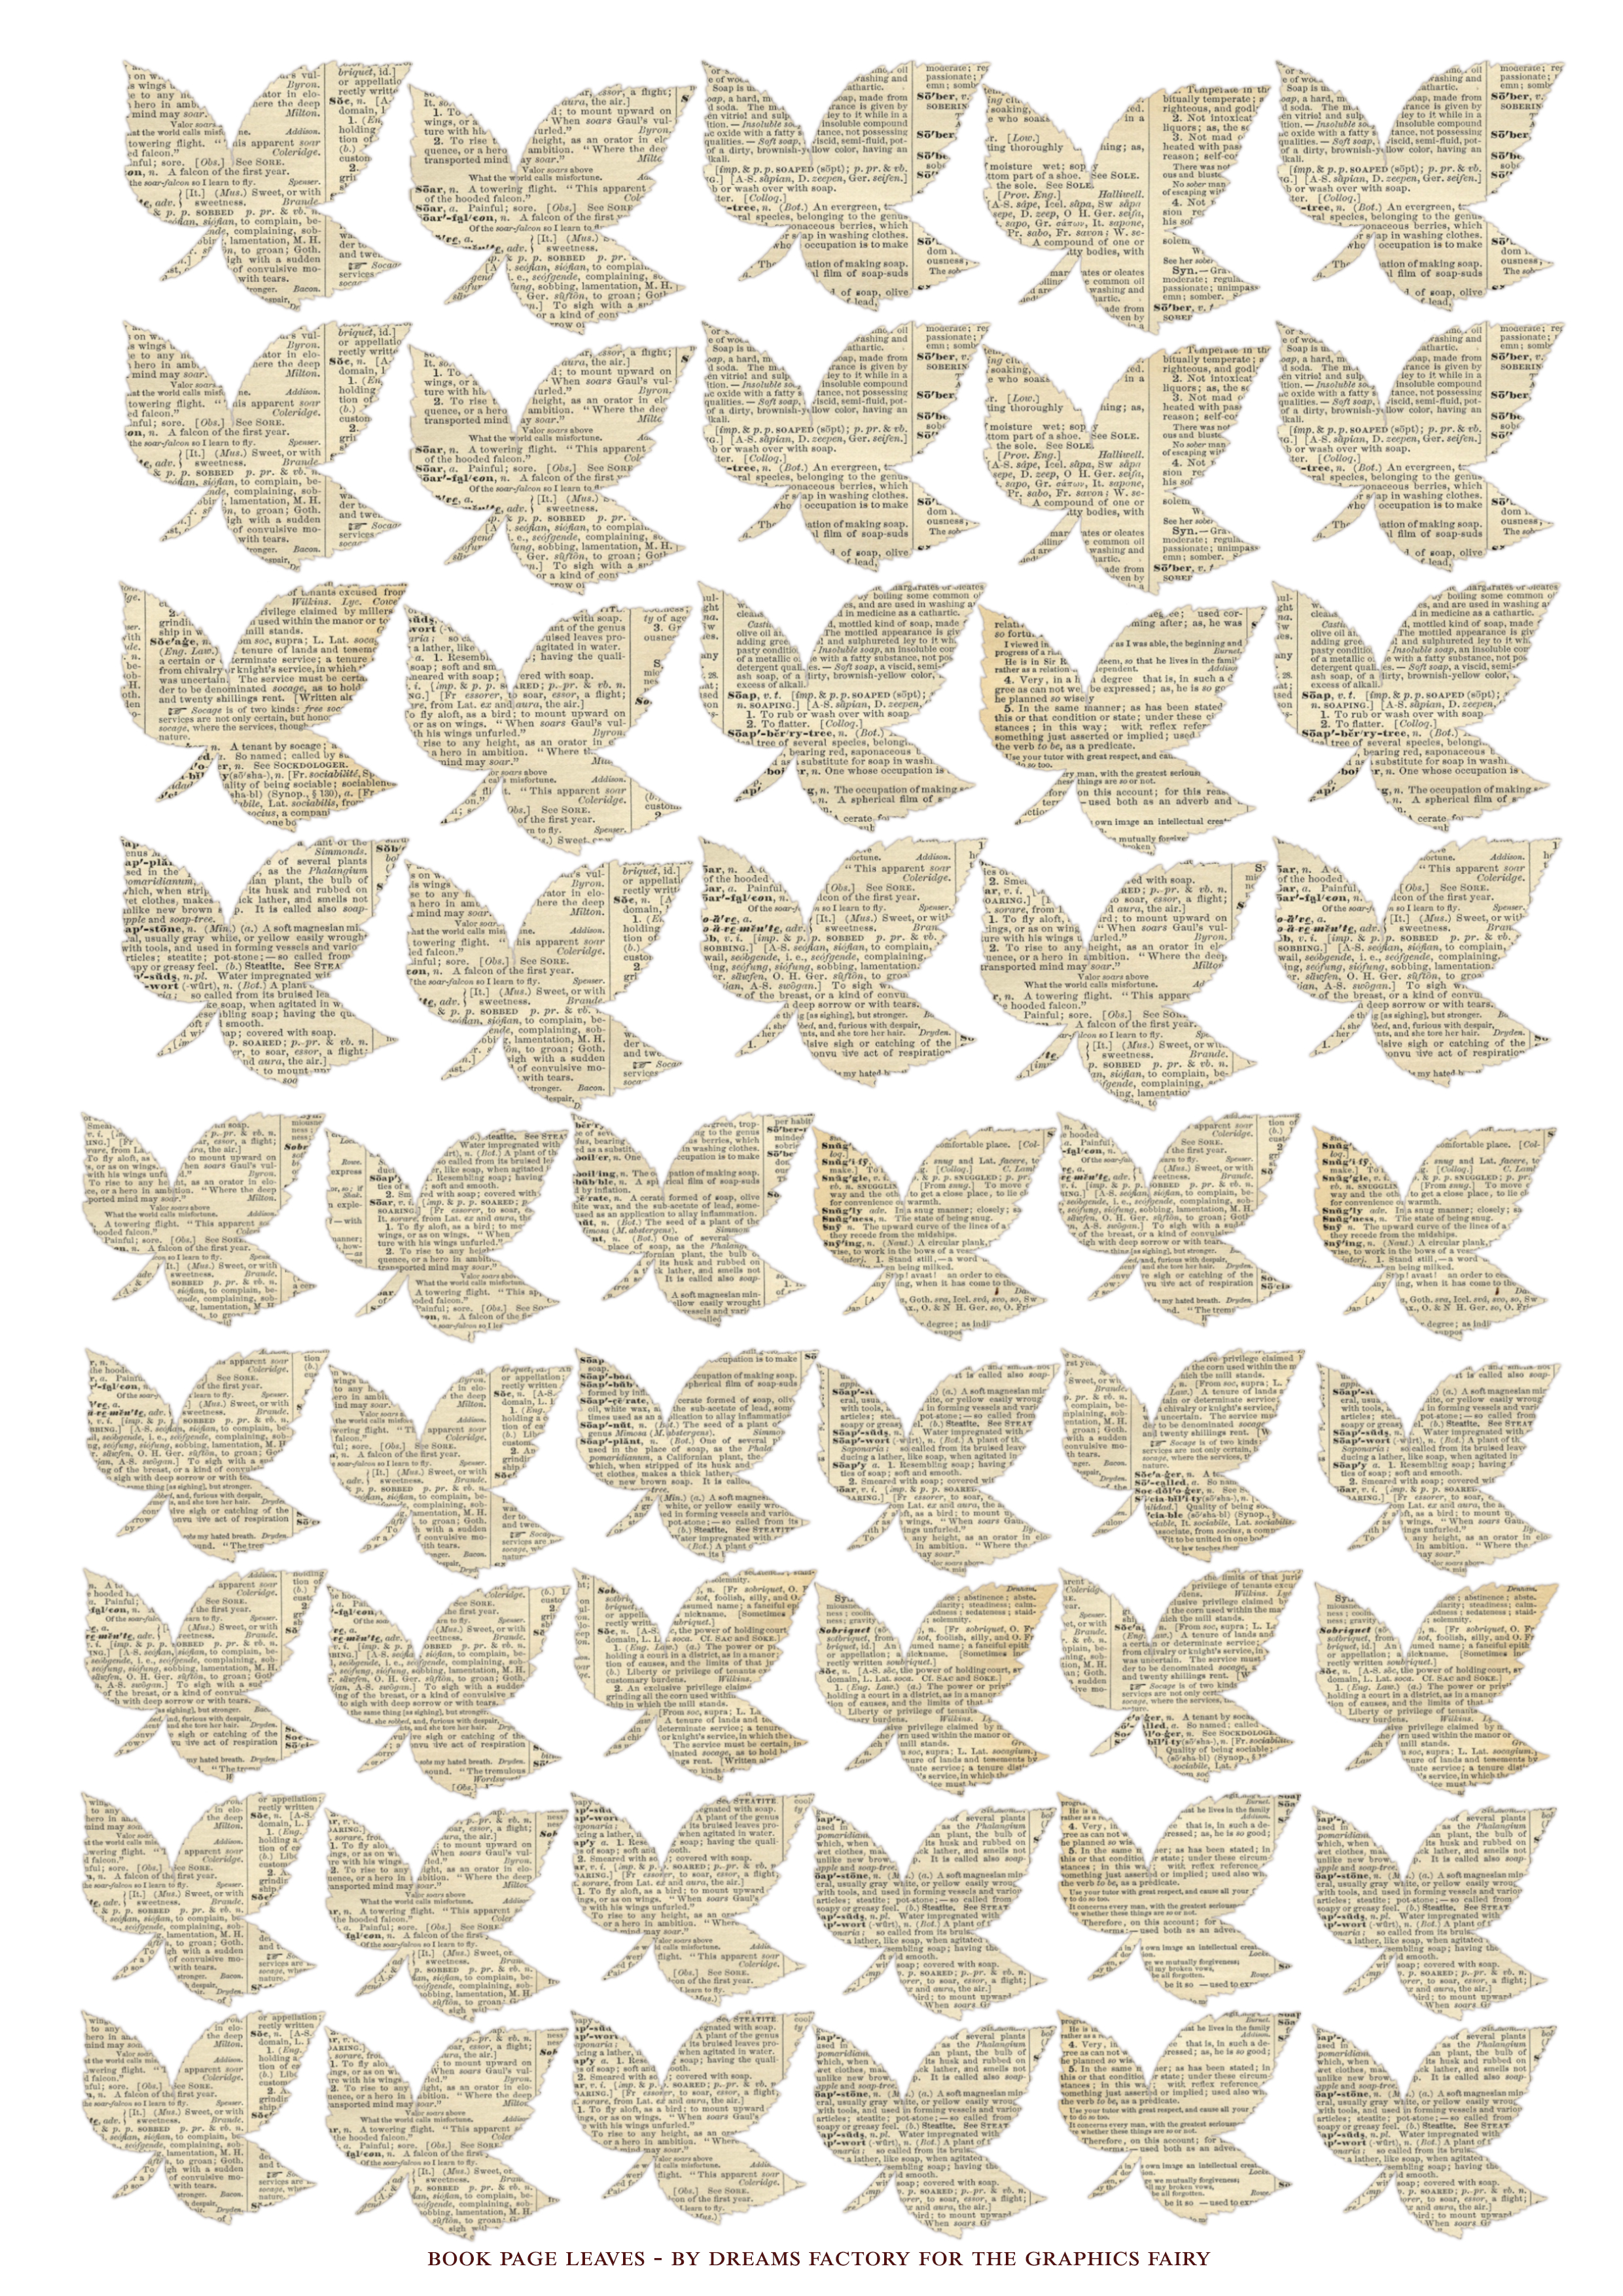
I actually created two leaf printables – one with larger leaves and one with smaller leaves, you can find them both below. You will find two different size leaves on each printable, so you’ll have a total of 4 different sizes. You can print them as many times as you want. 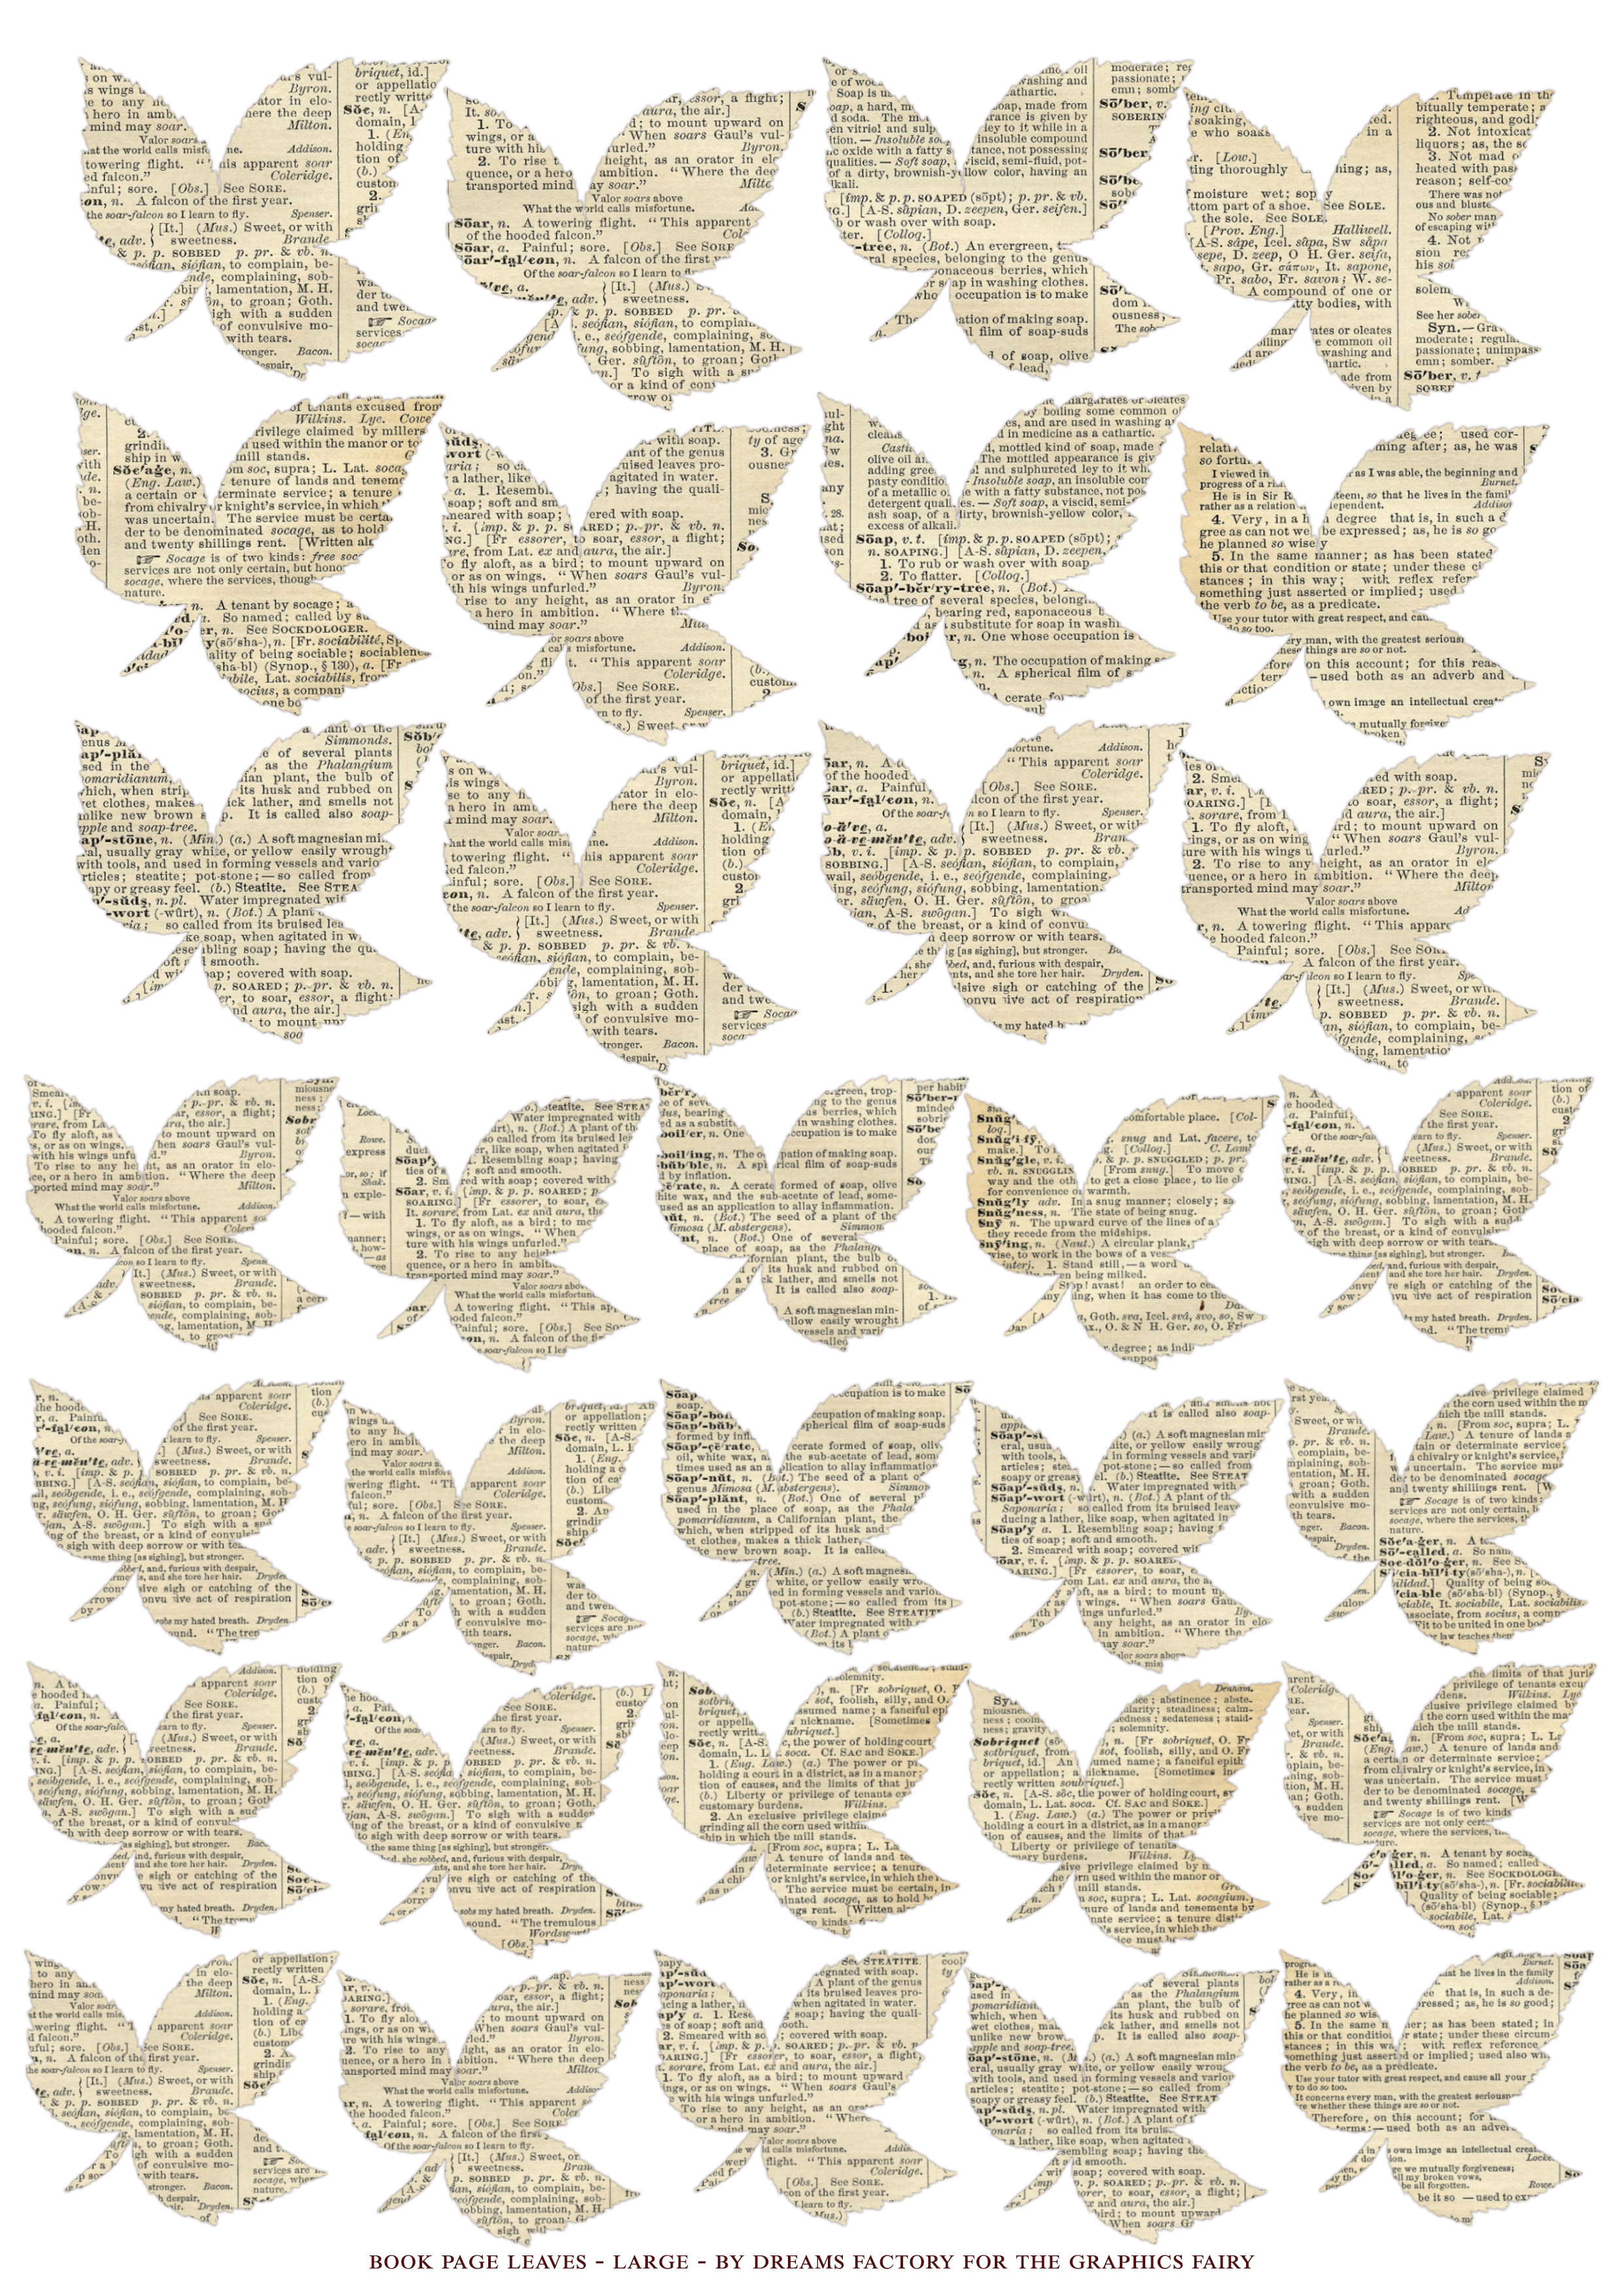
—-> Click HERE to Download the Full Size Free Printables PDF <—-
—-> Click HERE to Download the Full Size Free Printables PDF <—-
Because I wanted my leaves to have a double-sided book page appearance, I printed a large dictionary page on the back of the leaves printable. You can save this one too on your computer, just make sure you make a few tests before double printing. You can print the leaves printable first, then you can flip the page and run it again through your printer to print the dictionary page on the other side.
—-> Click HERE to Download the Full Size Free Printables PDF <—-
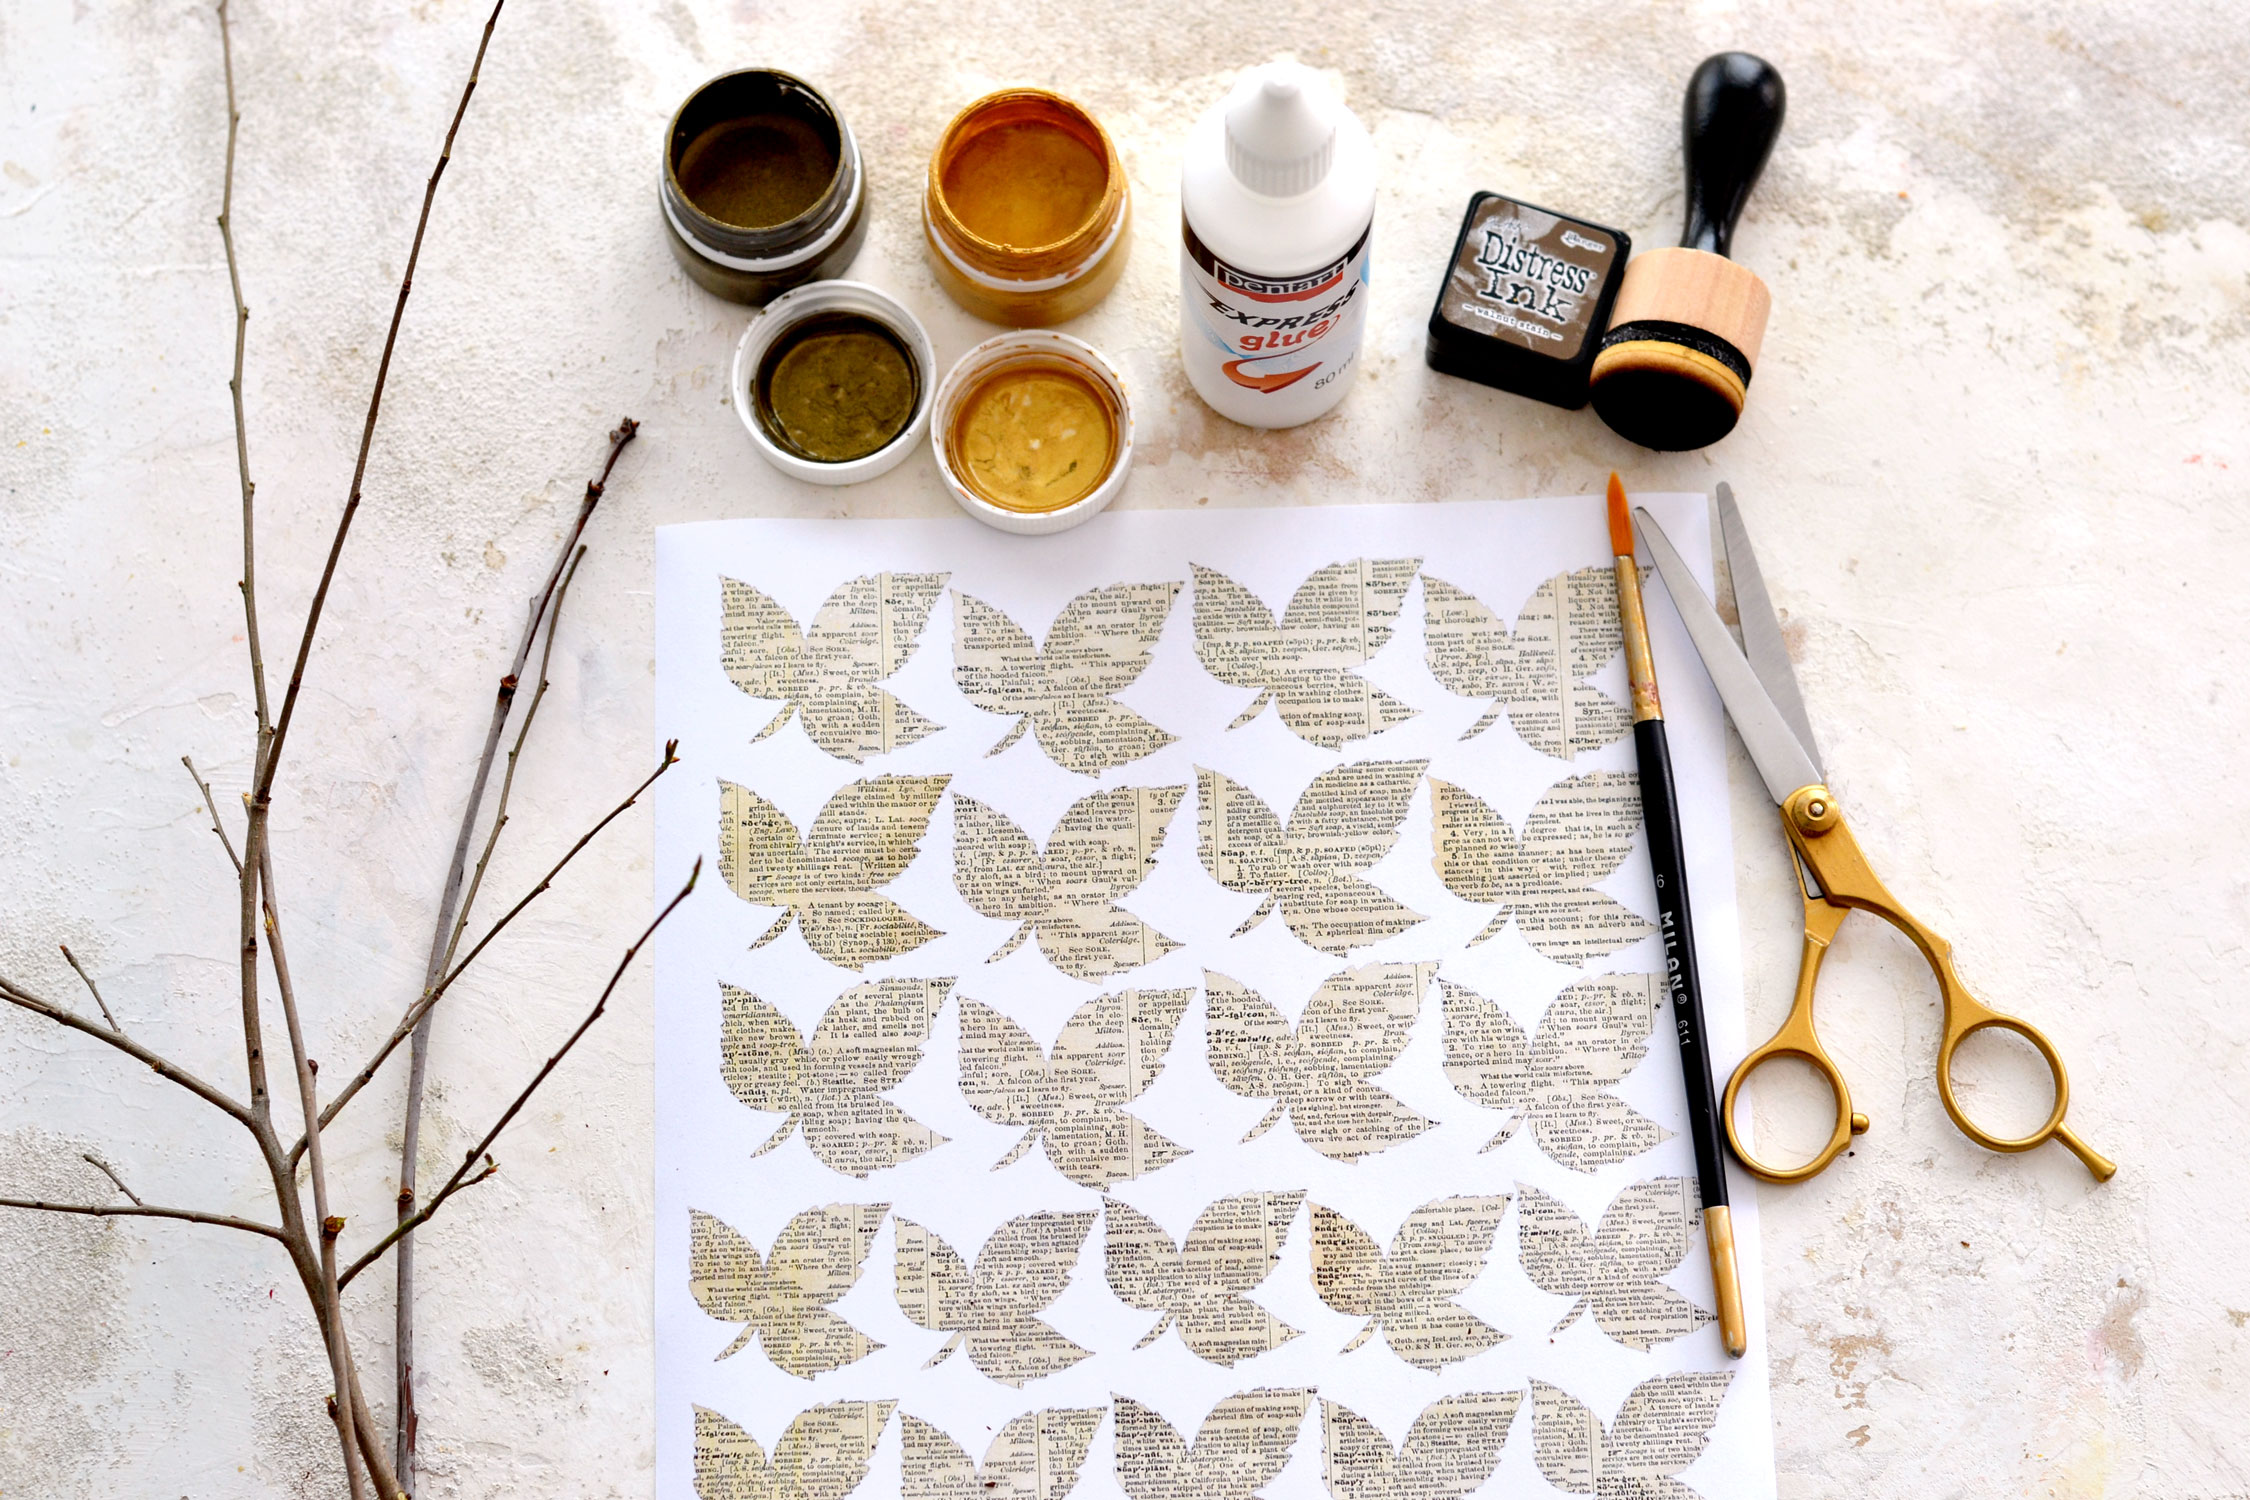
SUPPLIES FOR BOOK PAGE LEAVES:
- cardstock paper
- home printer
- scissors
- silicone glue gun or Mod Podge or paper glue
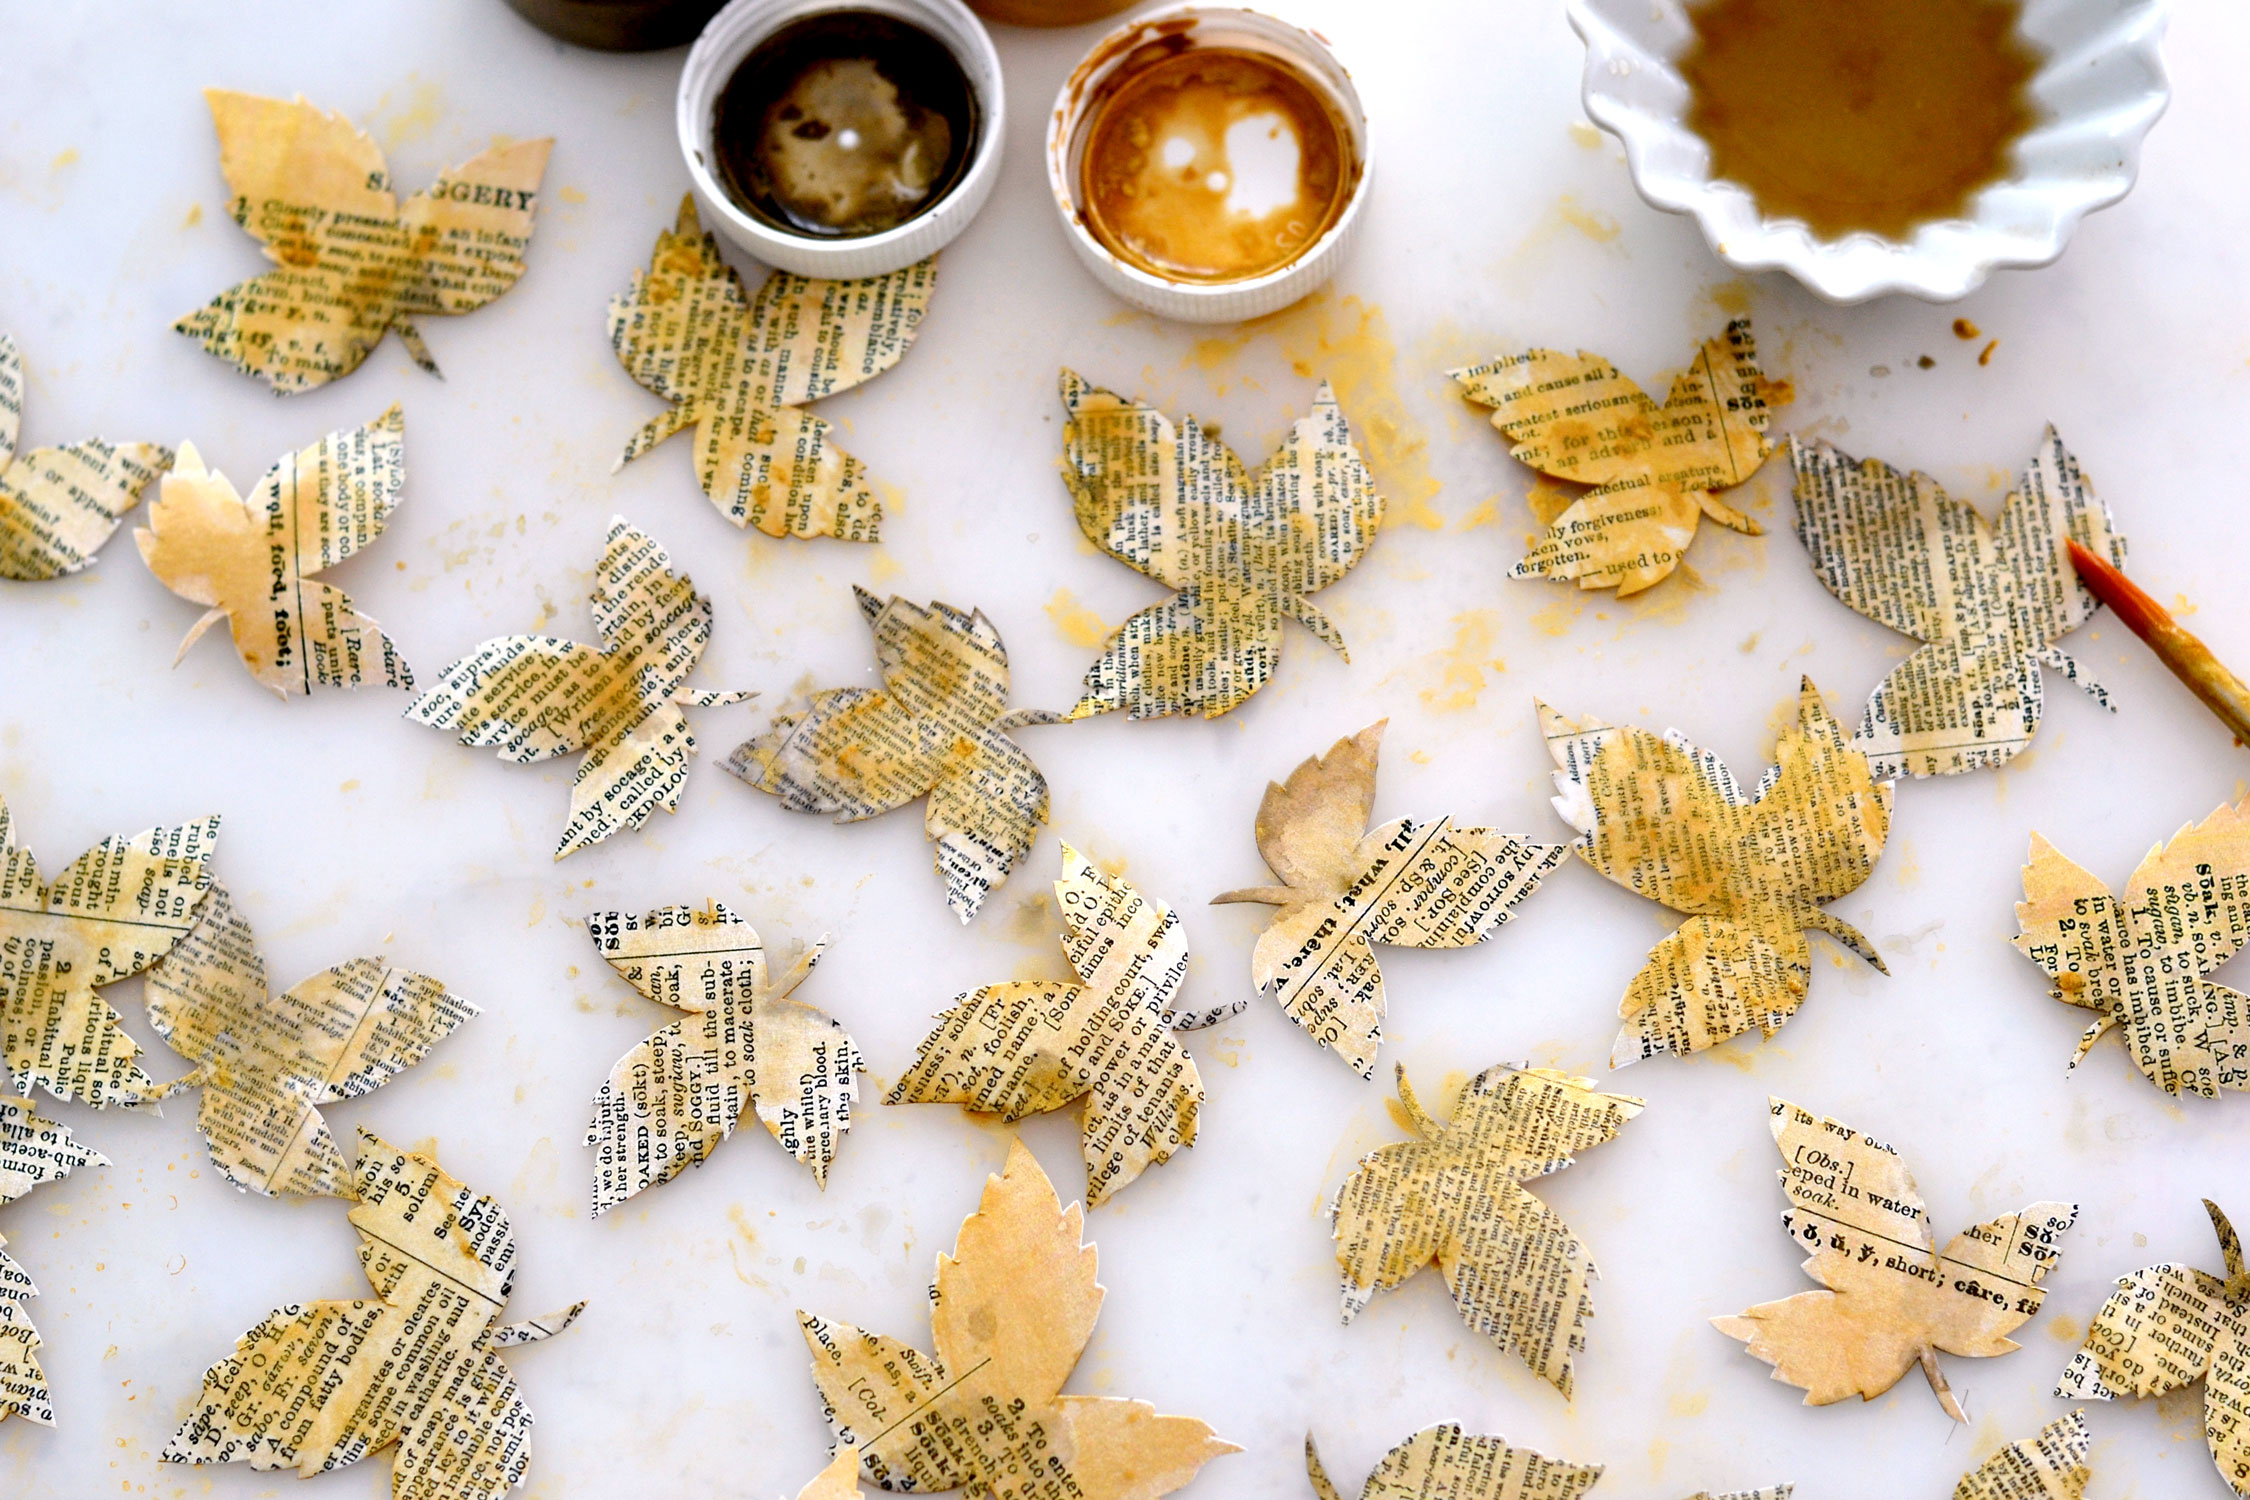
- gold watercolors or highly diluted gold acrylic paint or gold gouaches – I used gold and green gold gouaches
- brush
- natural tree branches
- mini distress inks
- blending tool with foams
- a silicone mat or a non-absorbant surface to protect your working space
STEP BY STEP TUTORIAL:
Start by printing the double-sided leaves – the leaves printable on one side and the dictionary page on the other.
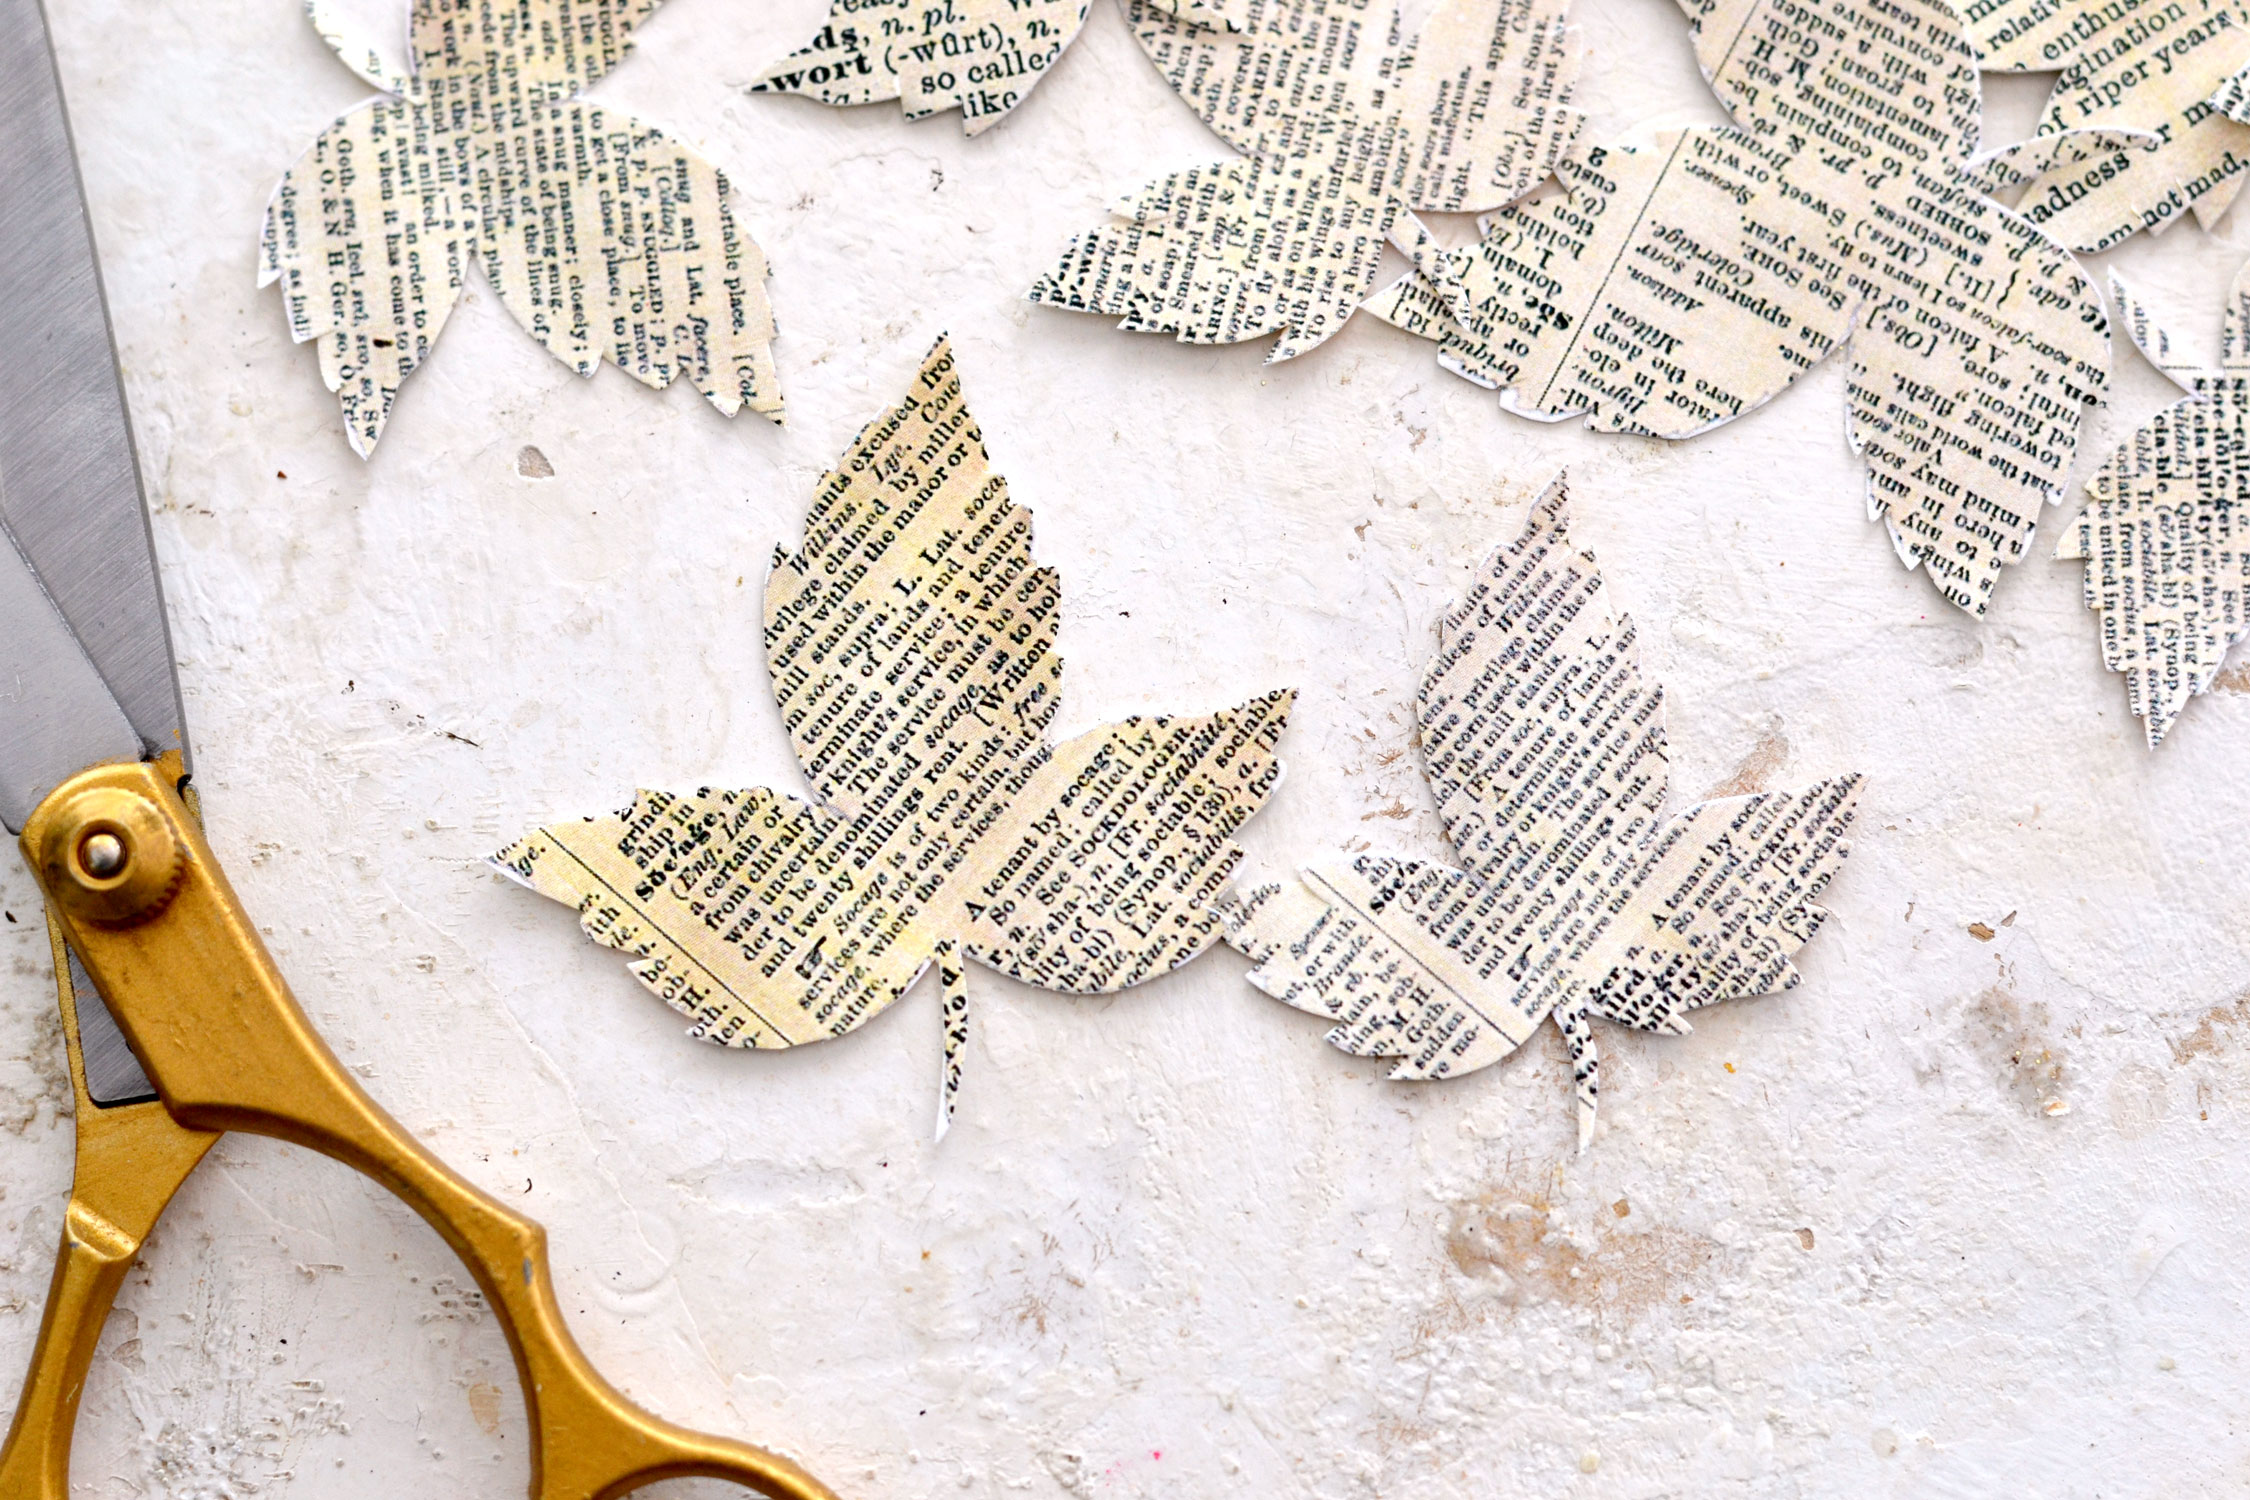
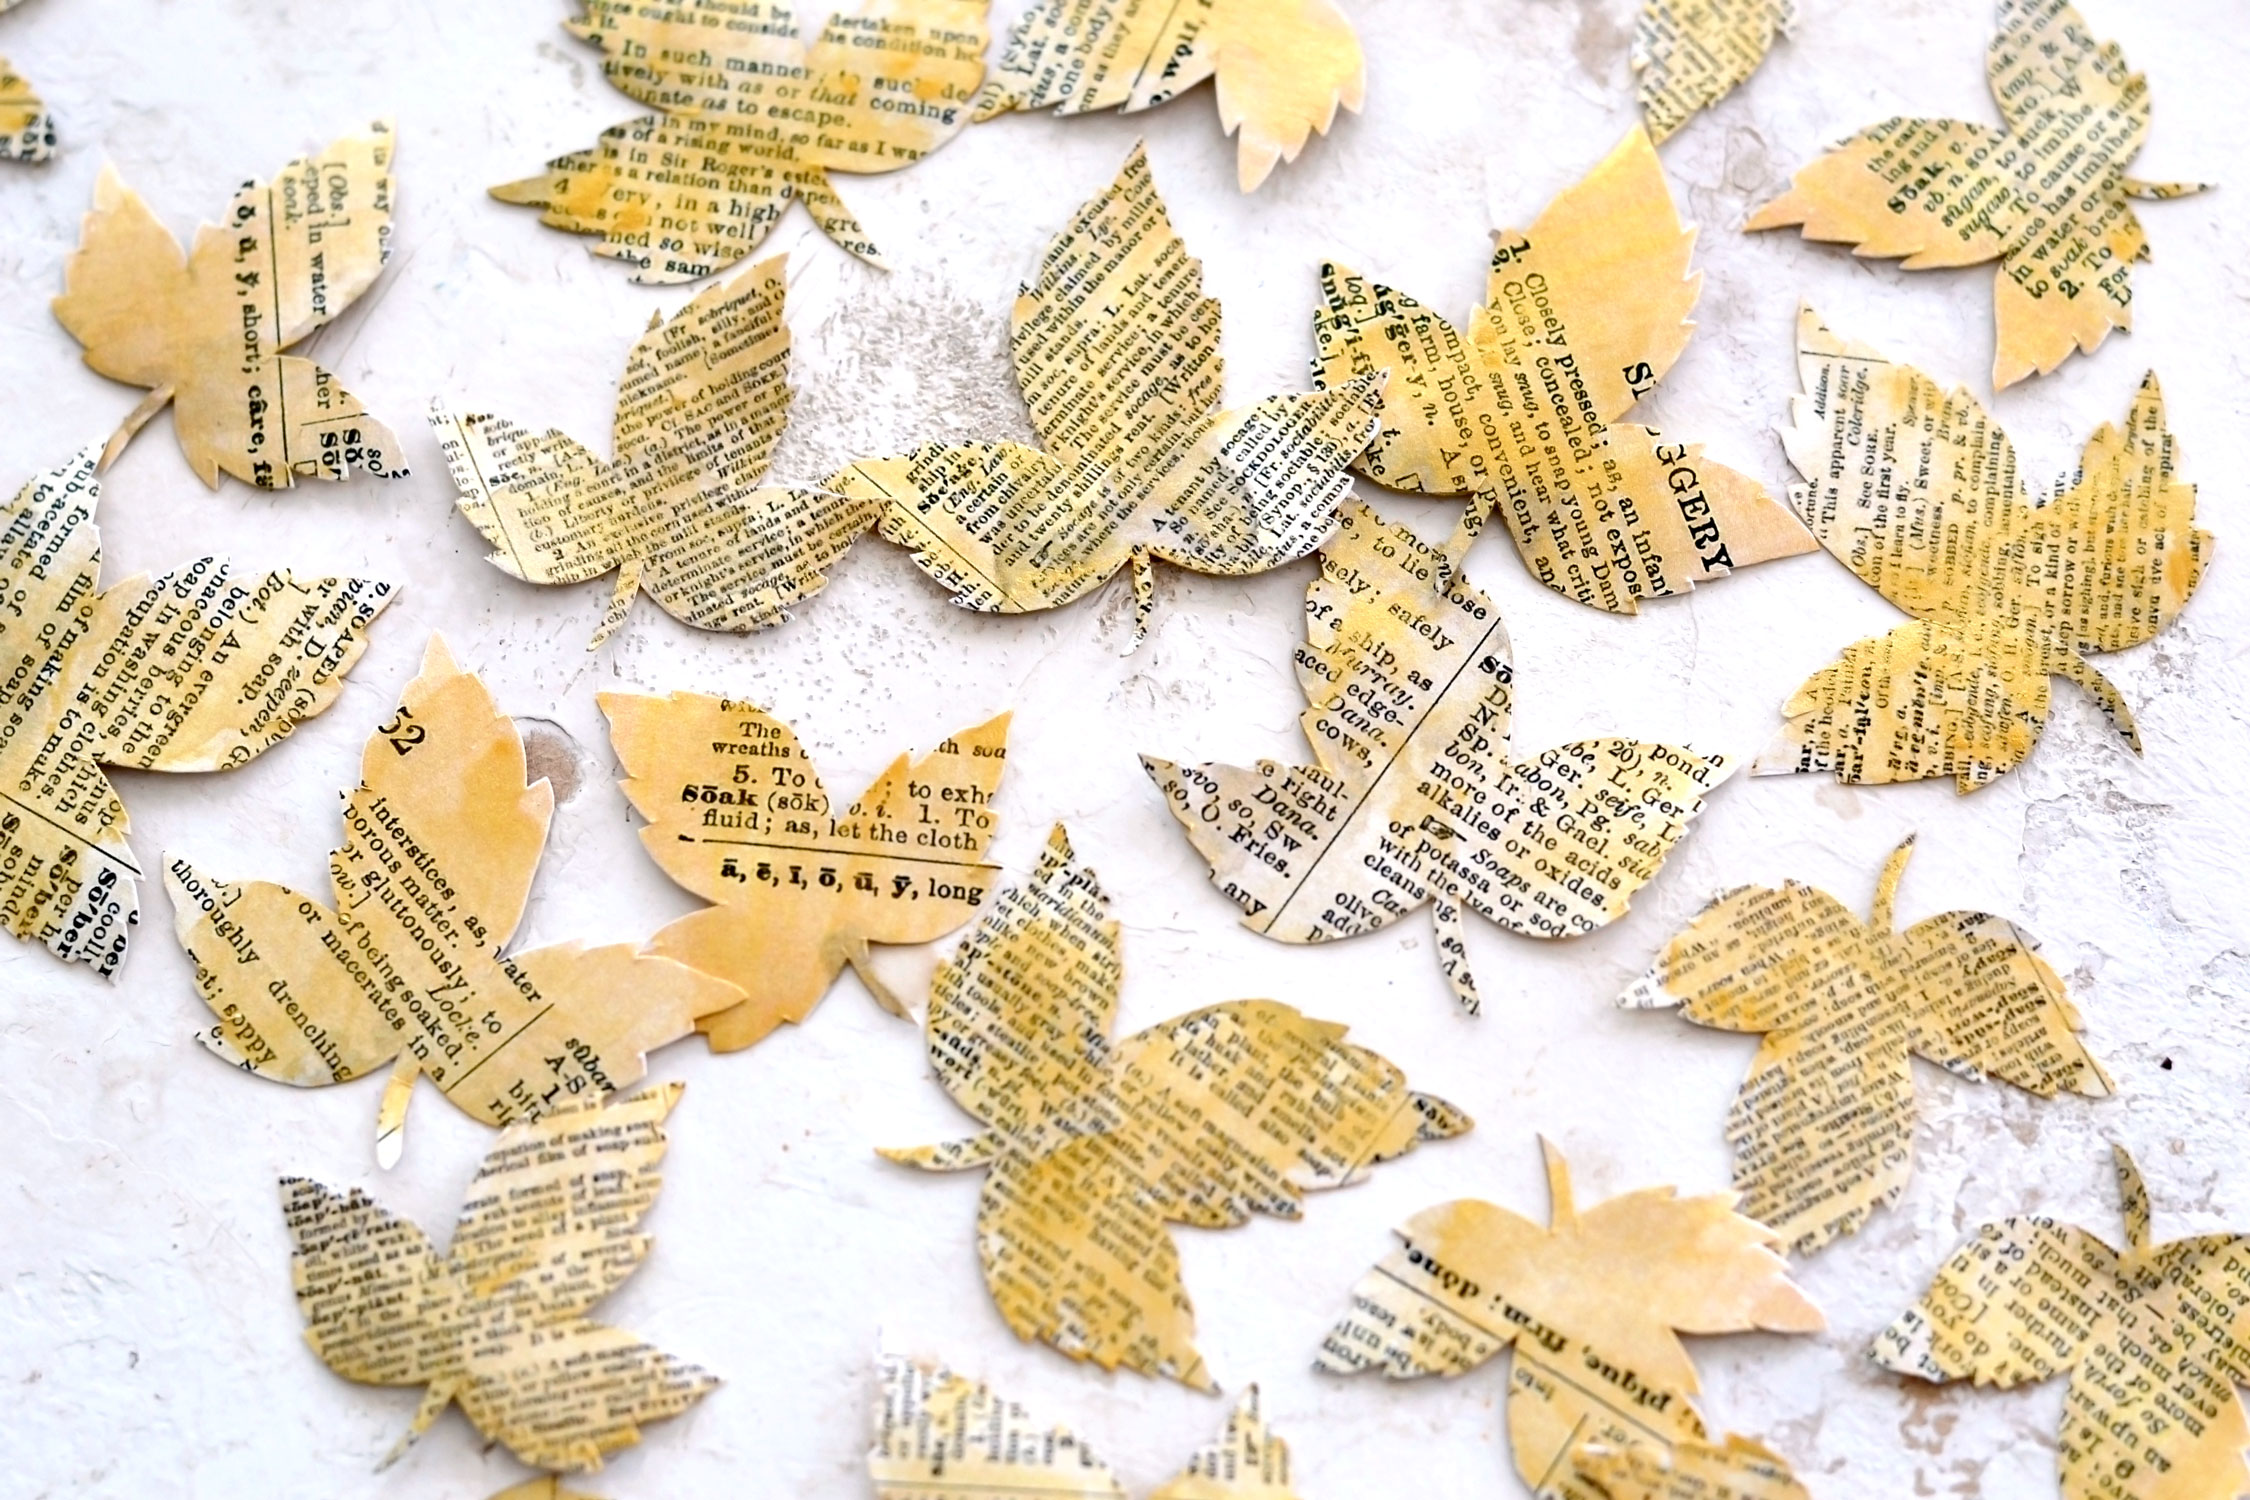
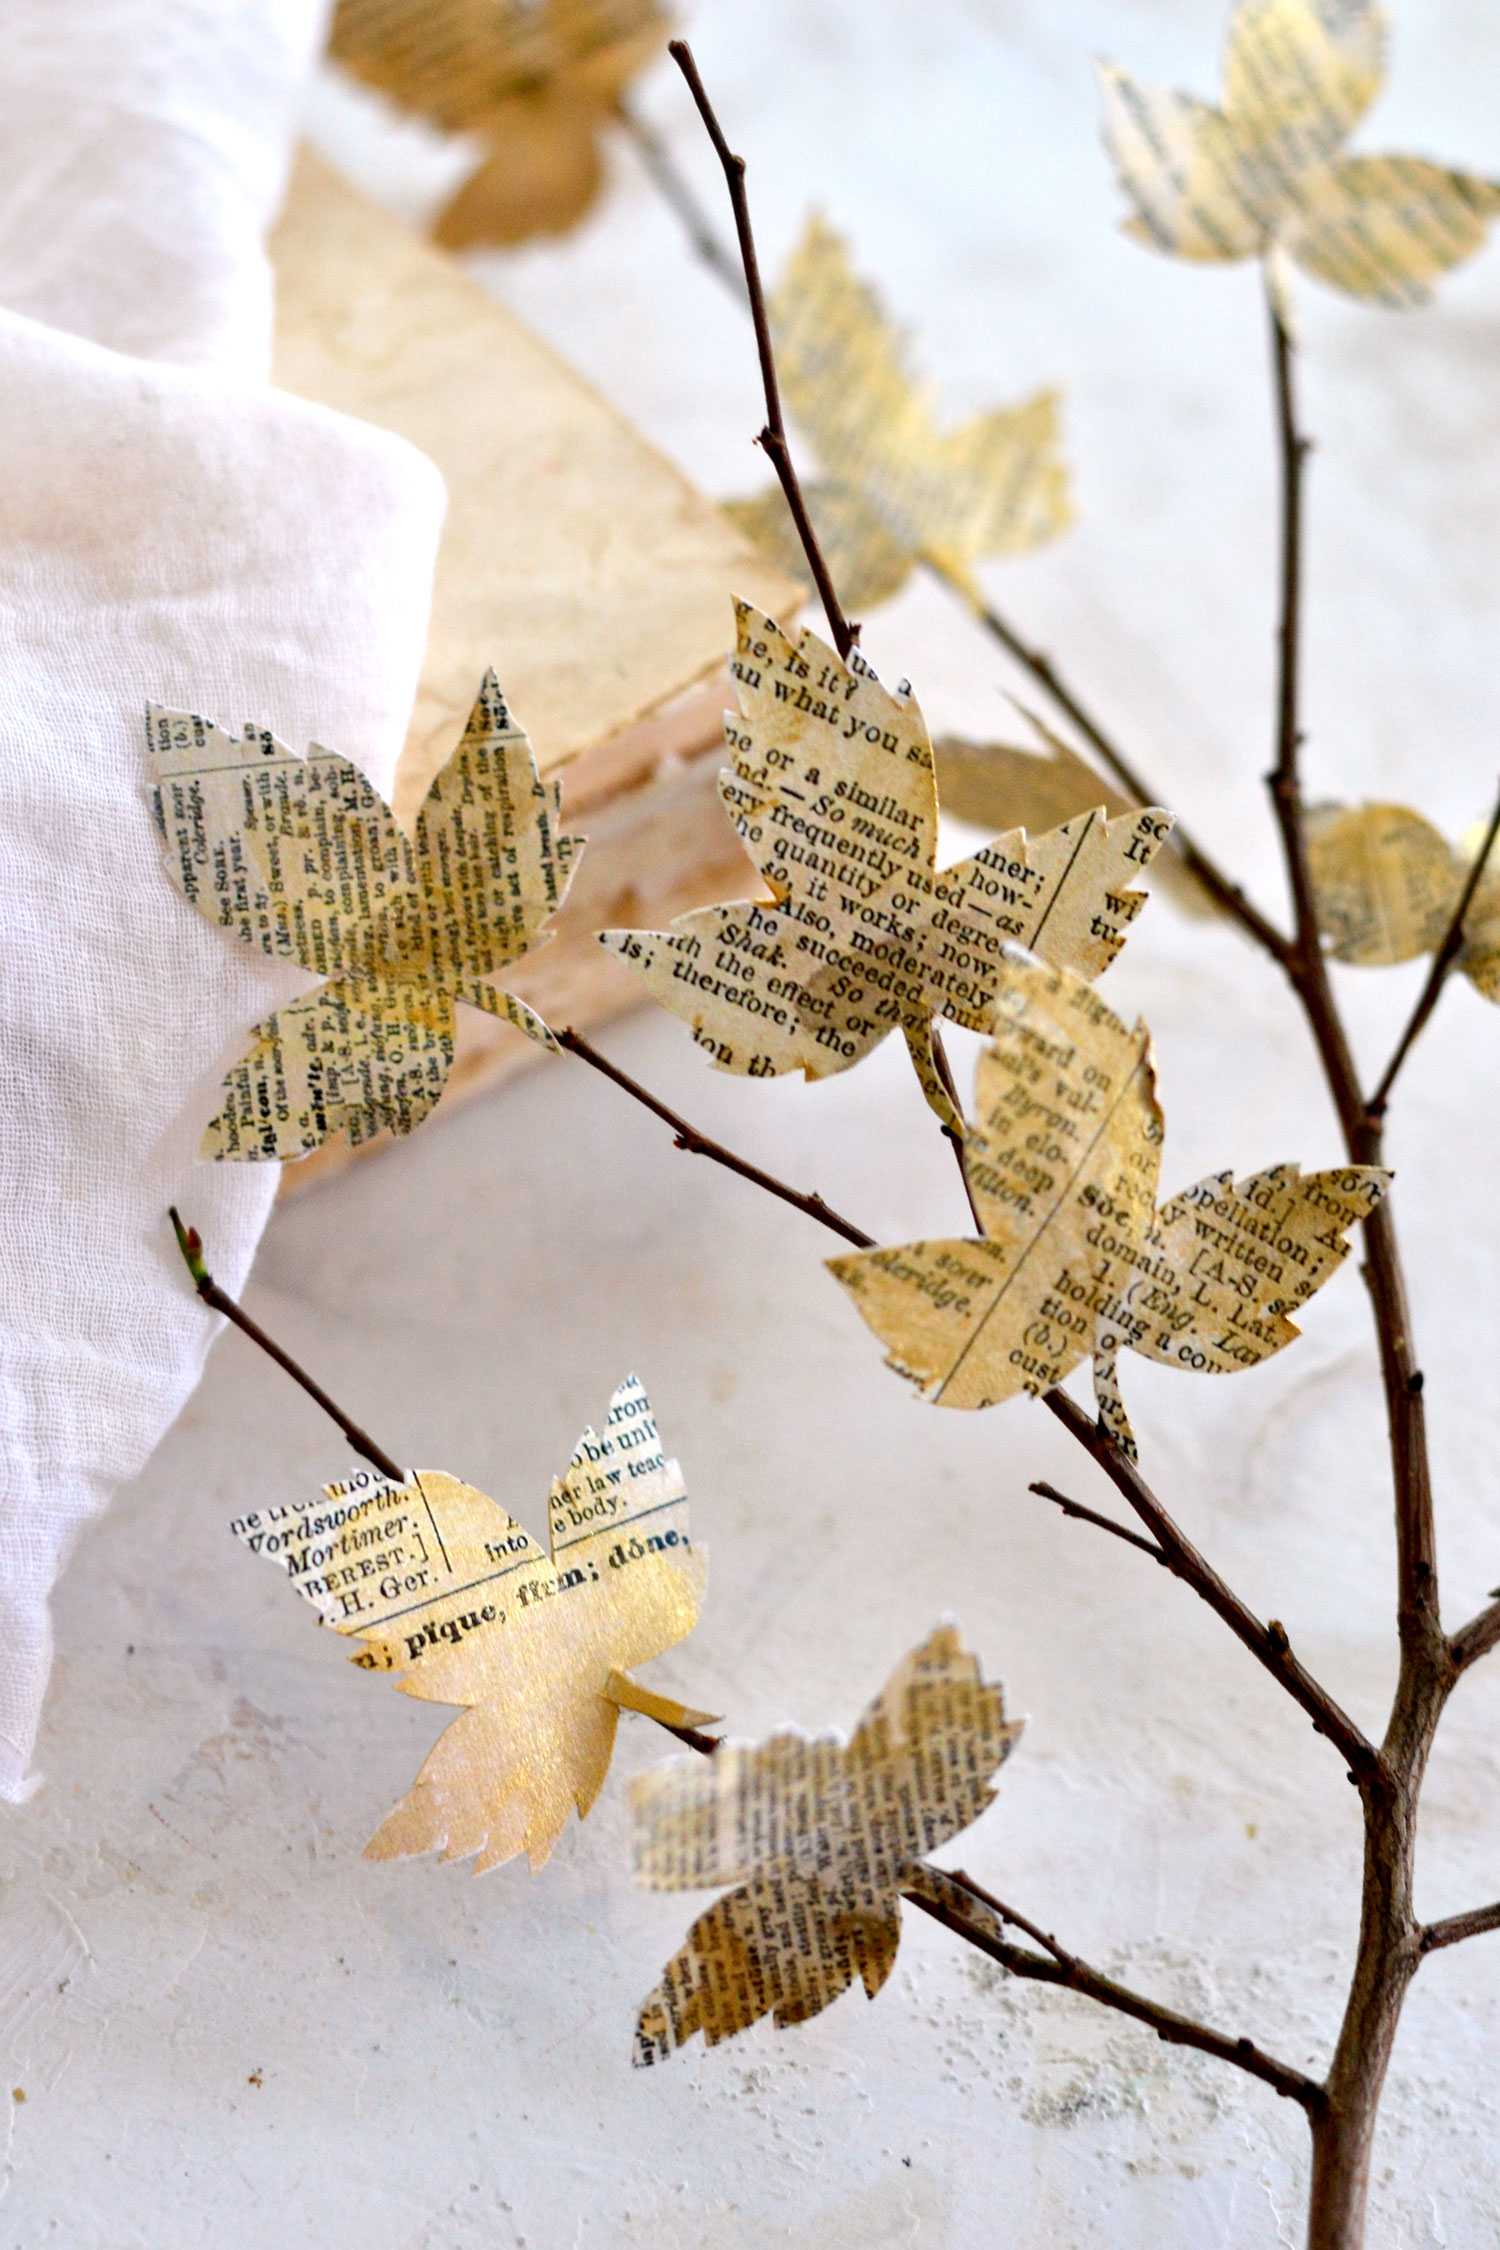
Use your scissors to cut each leaf following its beautiful shape. I found it easier to keep my scissors straight and to rotate the paper while cutting. I followed almost a zig-zag line across the edges, but I didn’t stress too much to make the lines ‘perfect’. You can even create your own leafy edges, you don’t have to follow the design exactly as it is. Small imperfections are OK here and there!
This step will take a little bit of time, but I actually love cutting paper, I find it quite soothing and relaxing. If you want, you can listen to some music or even play your favorite podcast while cutting.
For the next step, you can use any type of gold paint that you have around. Gold acrylic paint, gold watercolors, gold gouaches, all are fine! I used a little bit of water while applying the paint and I quickly brushed the gold all over the surface of the leaves. I like moving quickly here because I love creating irregular effects!
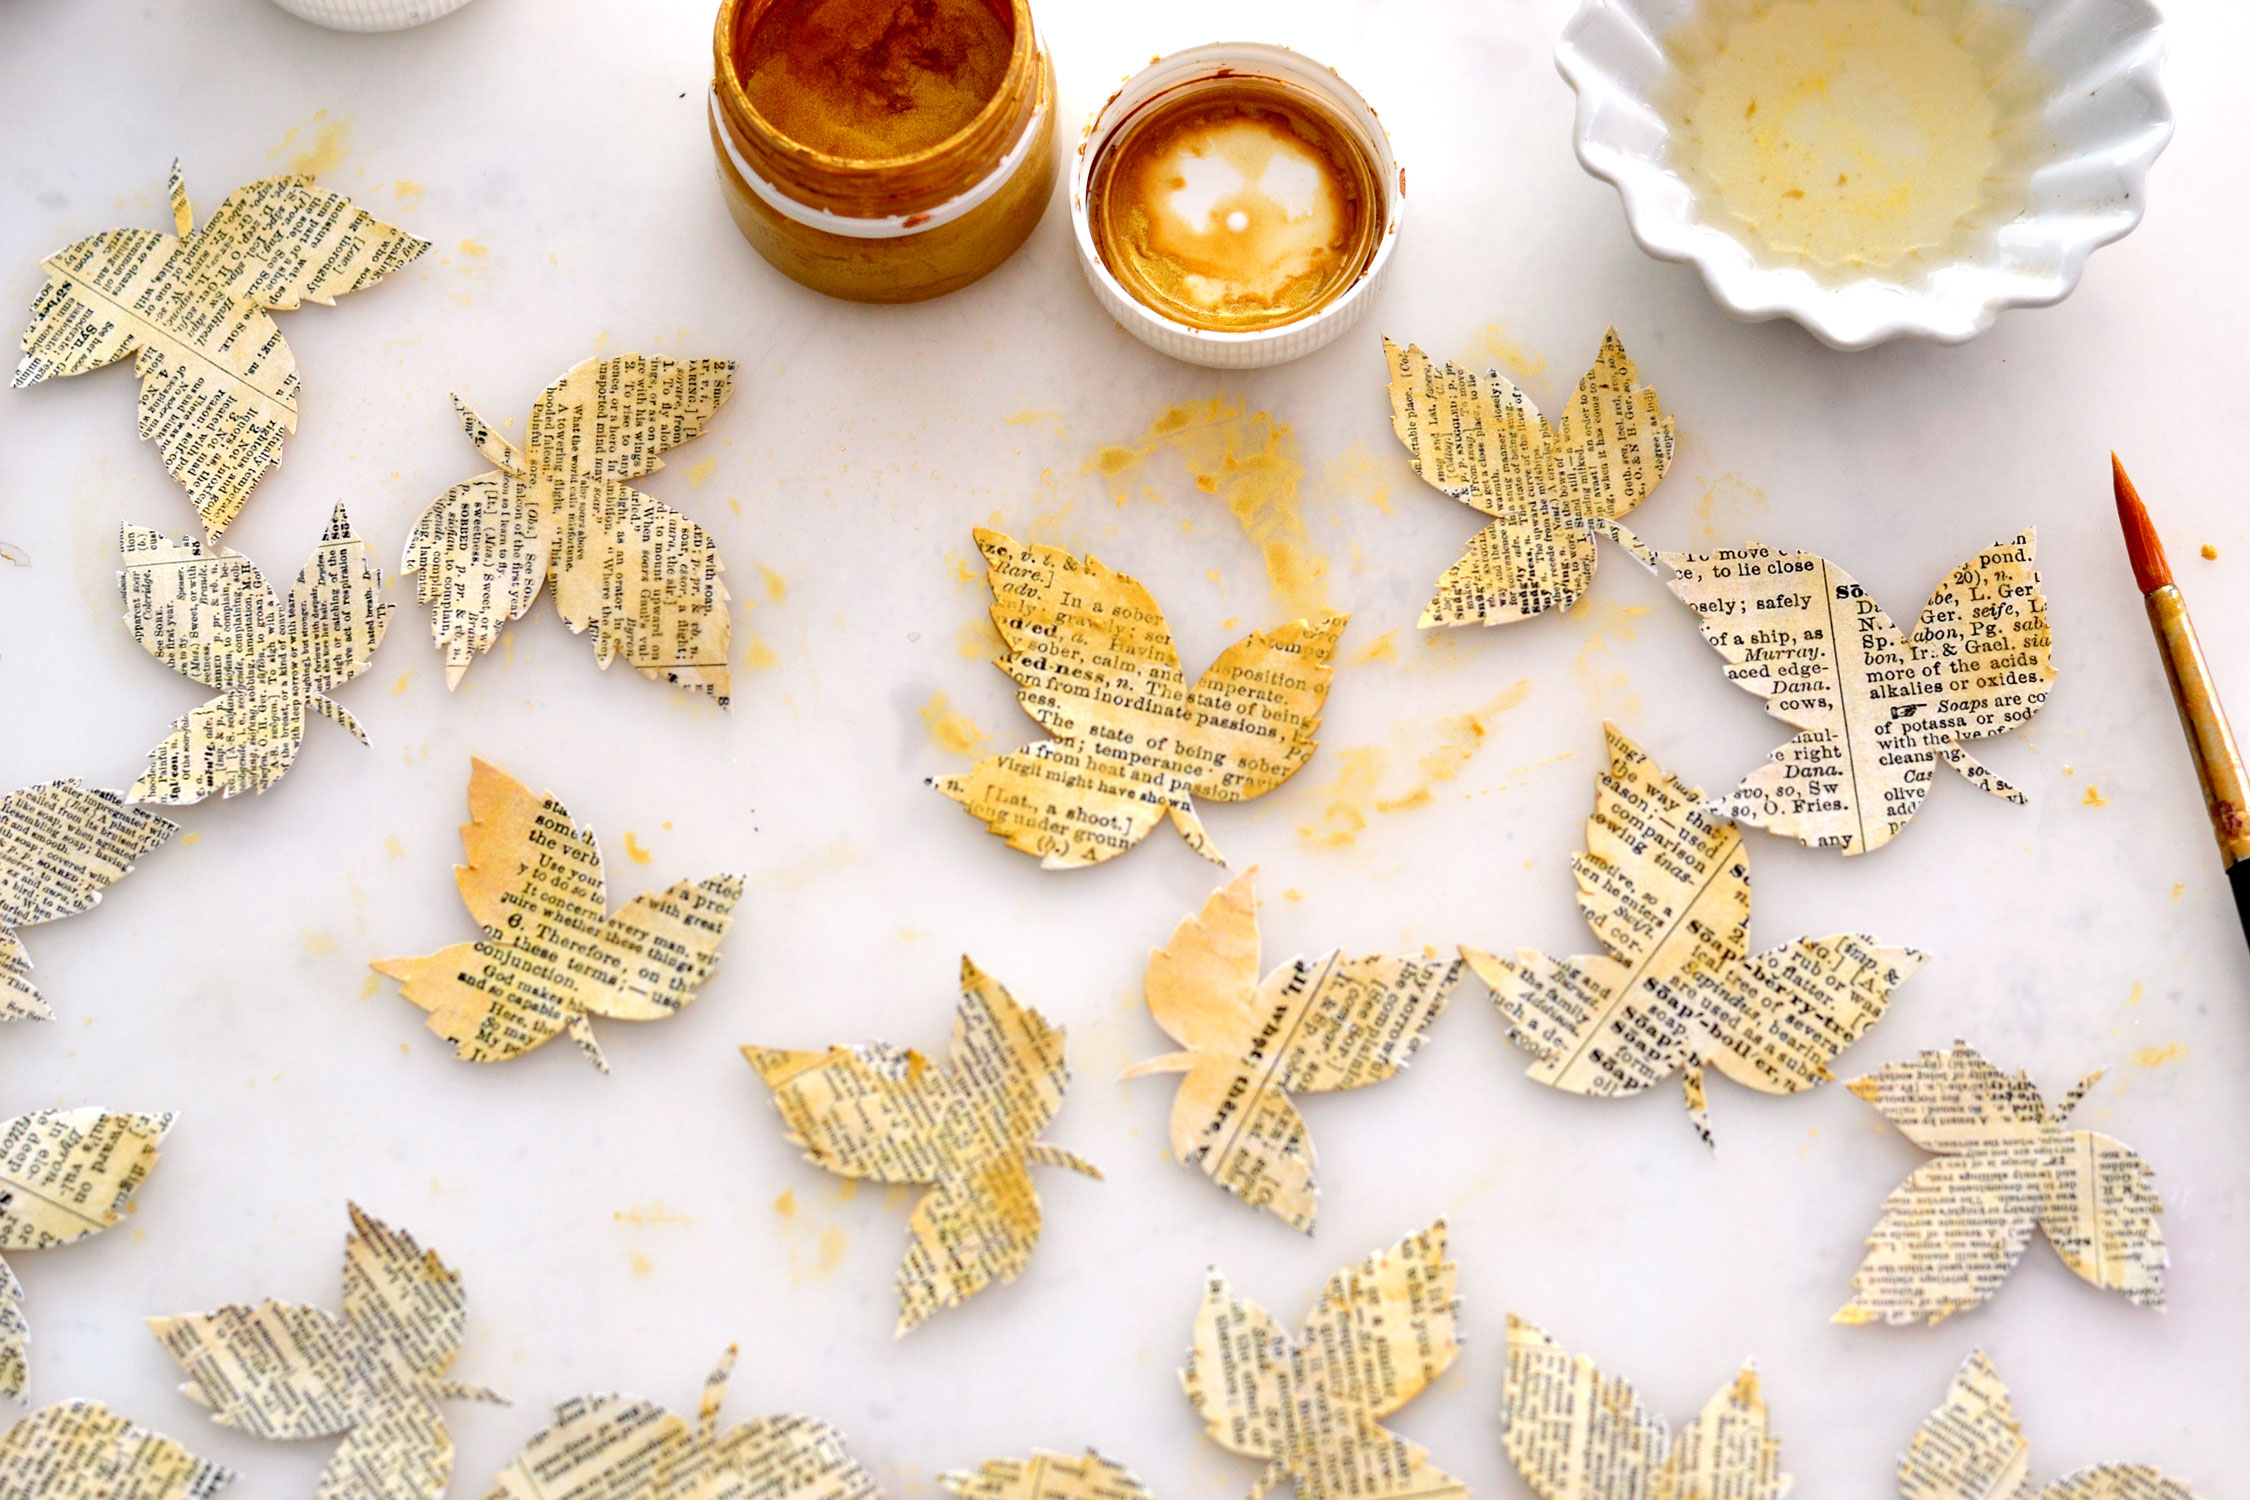
To add some highlights you can use a darker gold (I used a beautiful dark green gold), but you can also use regular brown acrylic paint mixed with some gold. At this stage, I brushed the darker color on the leaf stalk and on the lower part of the leaf, but also randomly here and there. Let the water create beautiful organic highlights, but don’t add too much water, we don’t want to completely break the fiber in the paper.
Don’t forget to flip the leaves and also paint their backs following the same steps, then let everything dry completely.
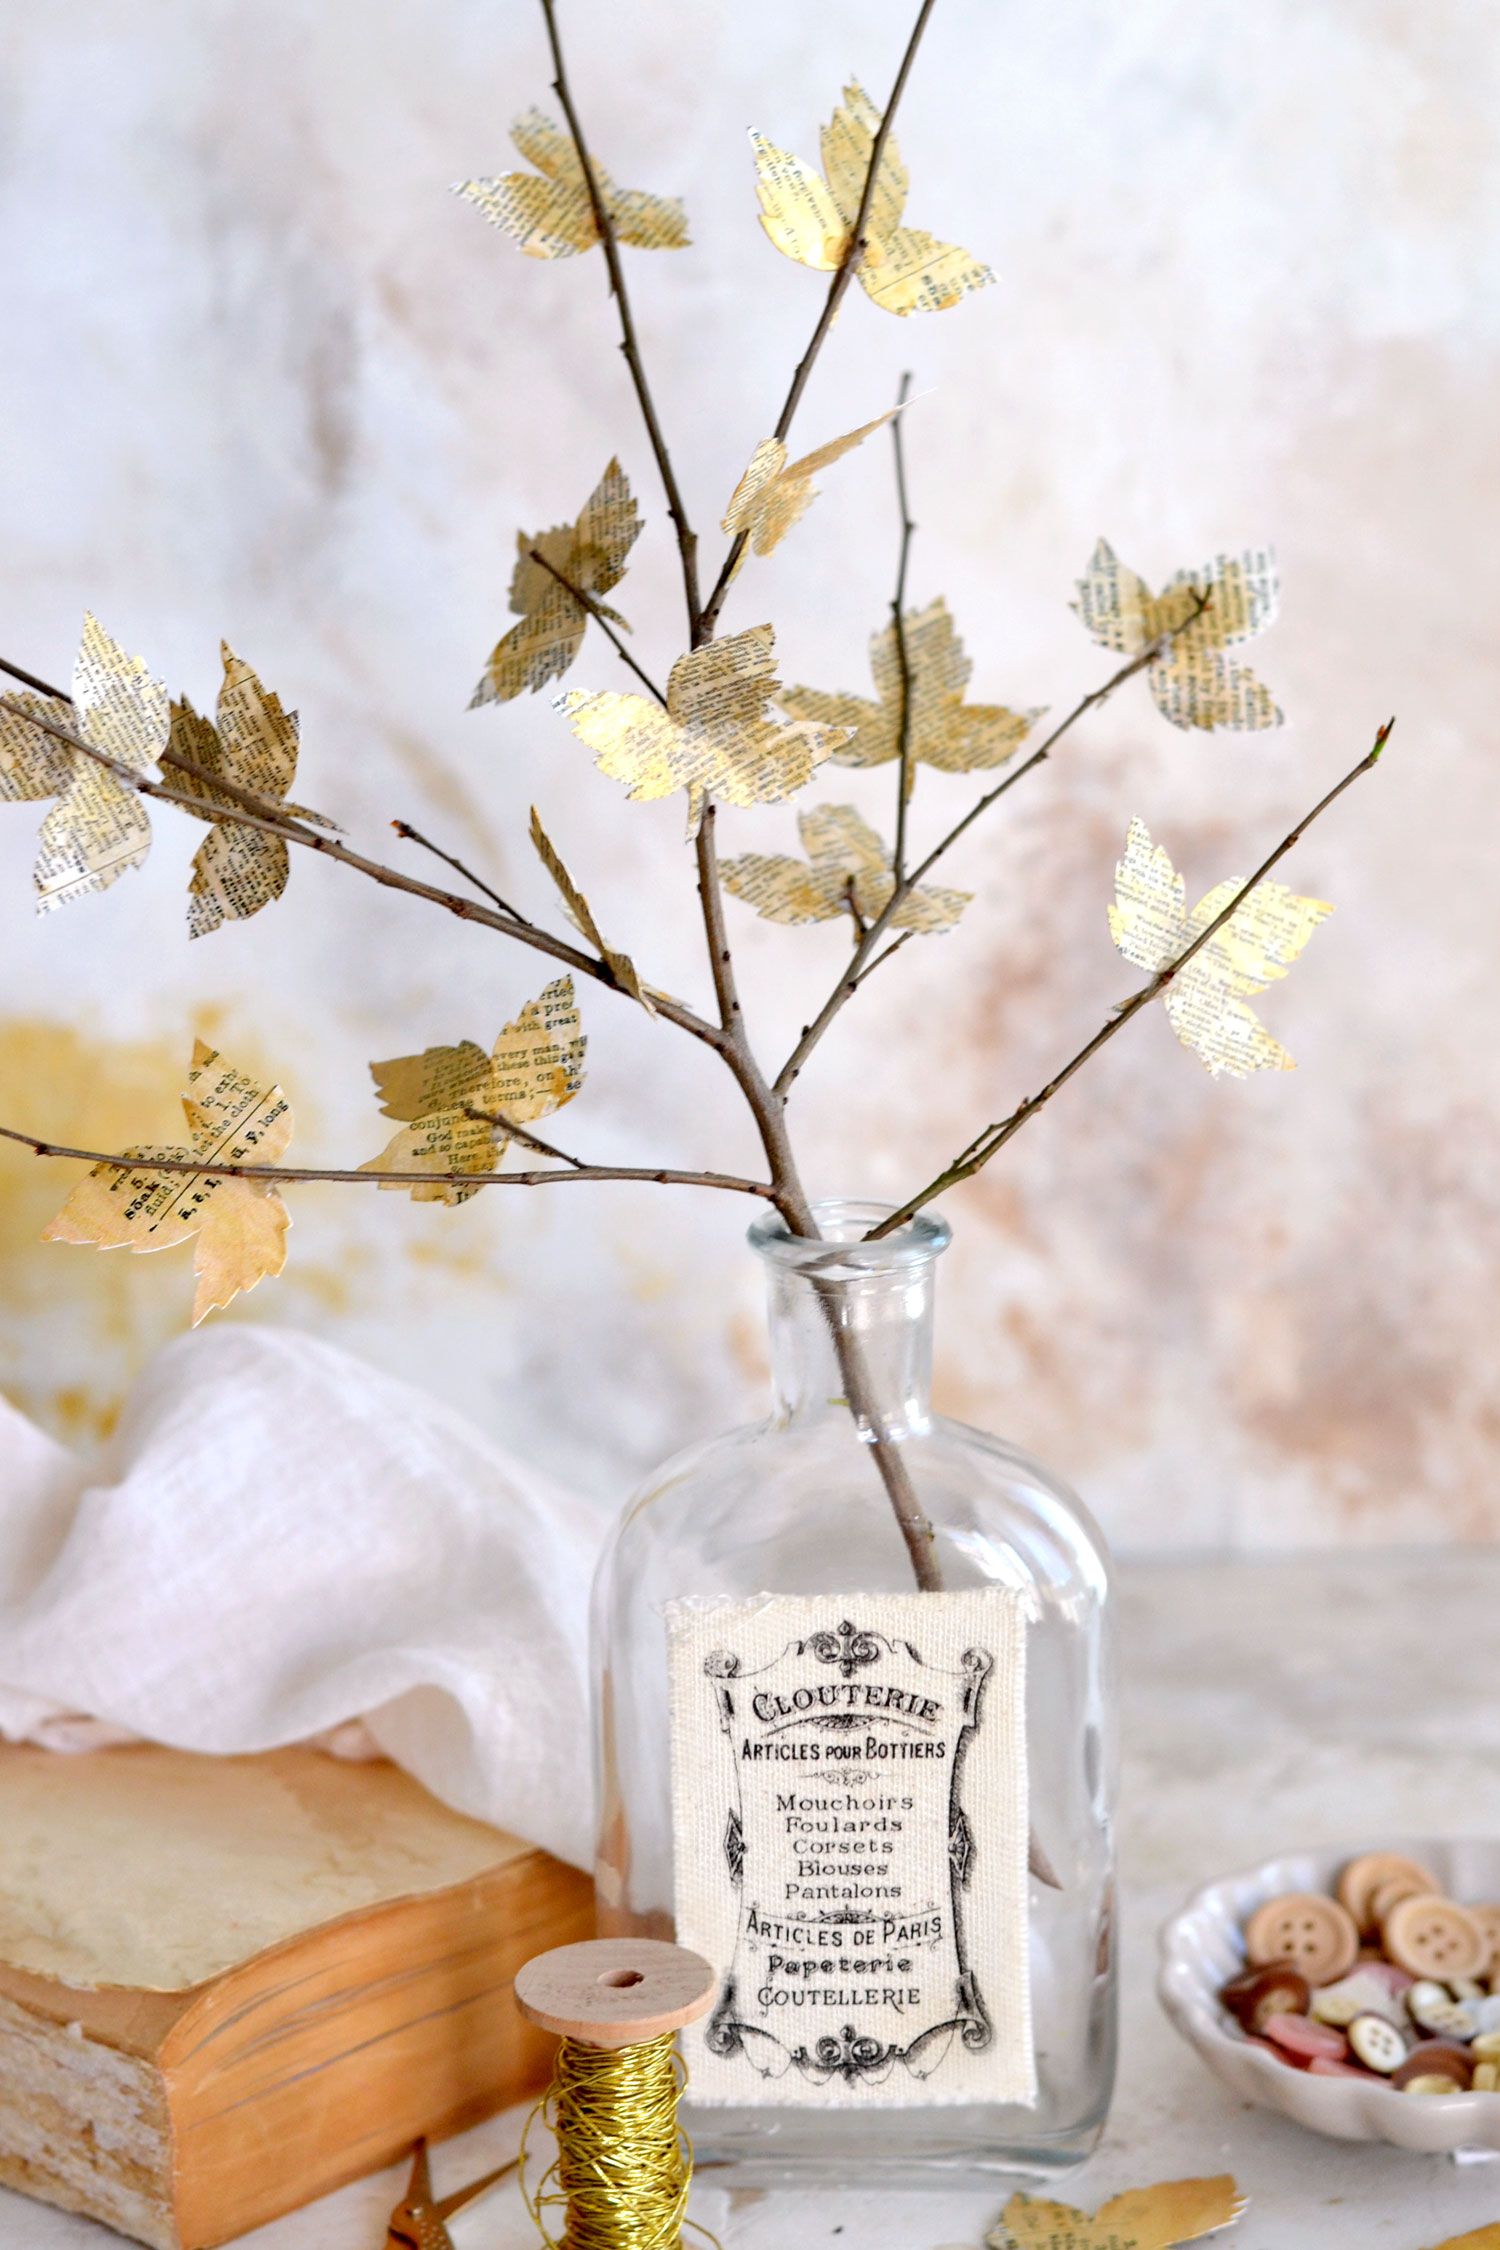
For the next step you can use a silicone glue gun to adhere the paper to the branches, but you can also use craft glue if you want. I took the craft glue route and to make sure the glue won’t take forever to dry, I added the glue on the paper first, while the leaves were still on my silicone mat. I let the glue dry for about 10-15 minutes and when it started to partially dry, I gradually adhered the leaves to the branch.
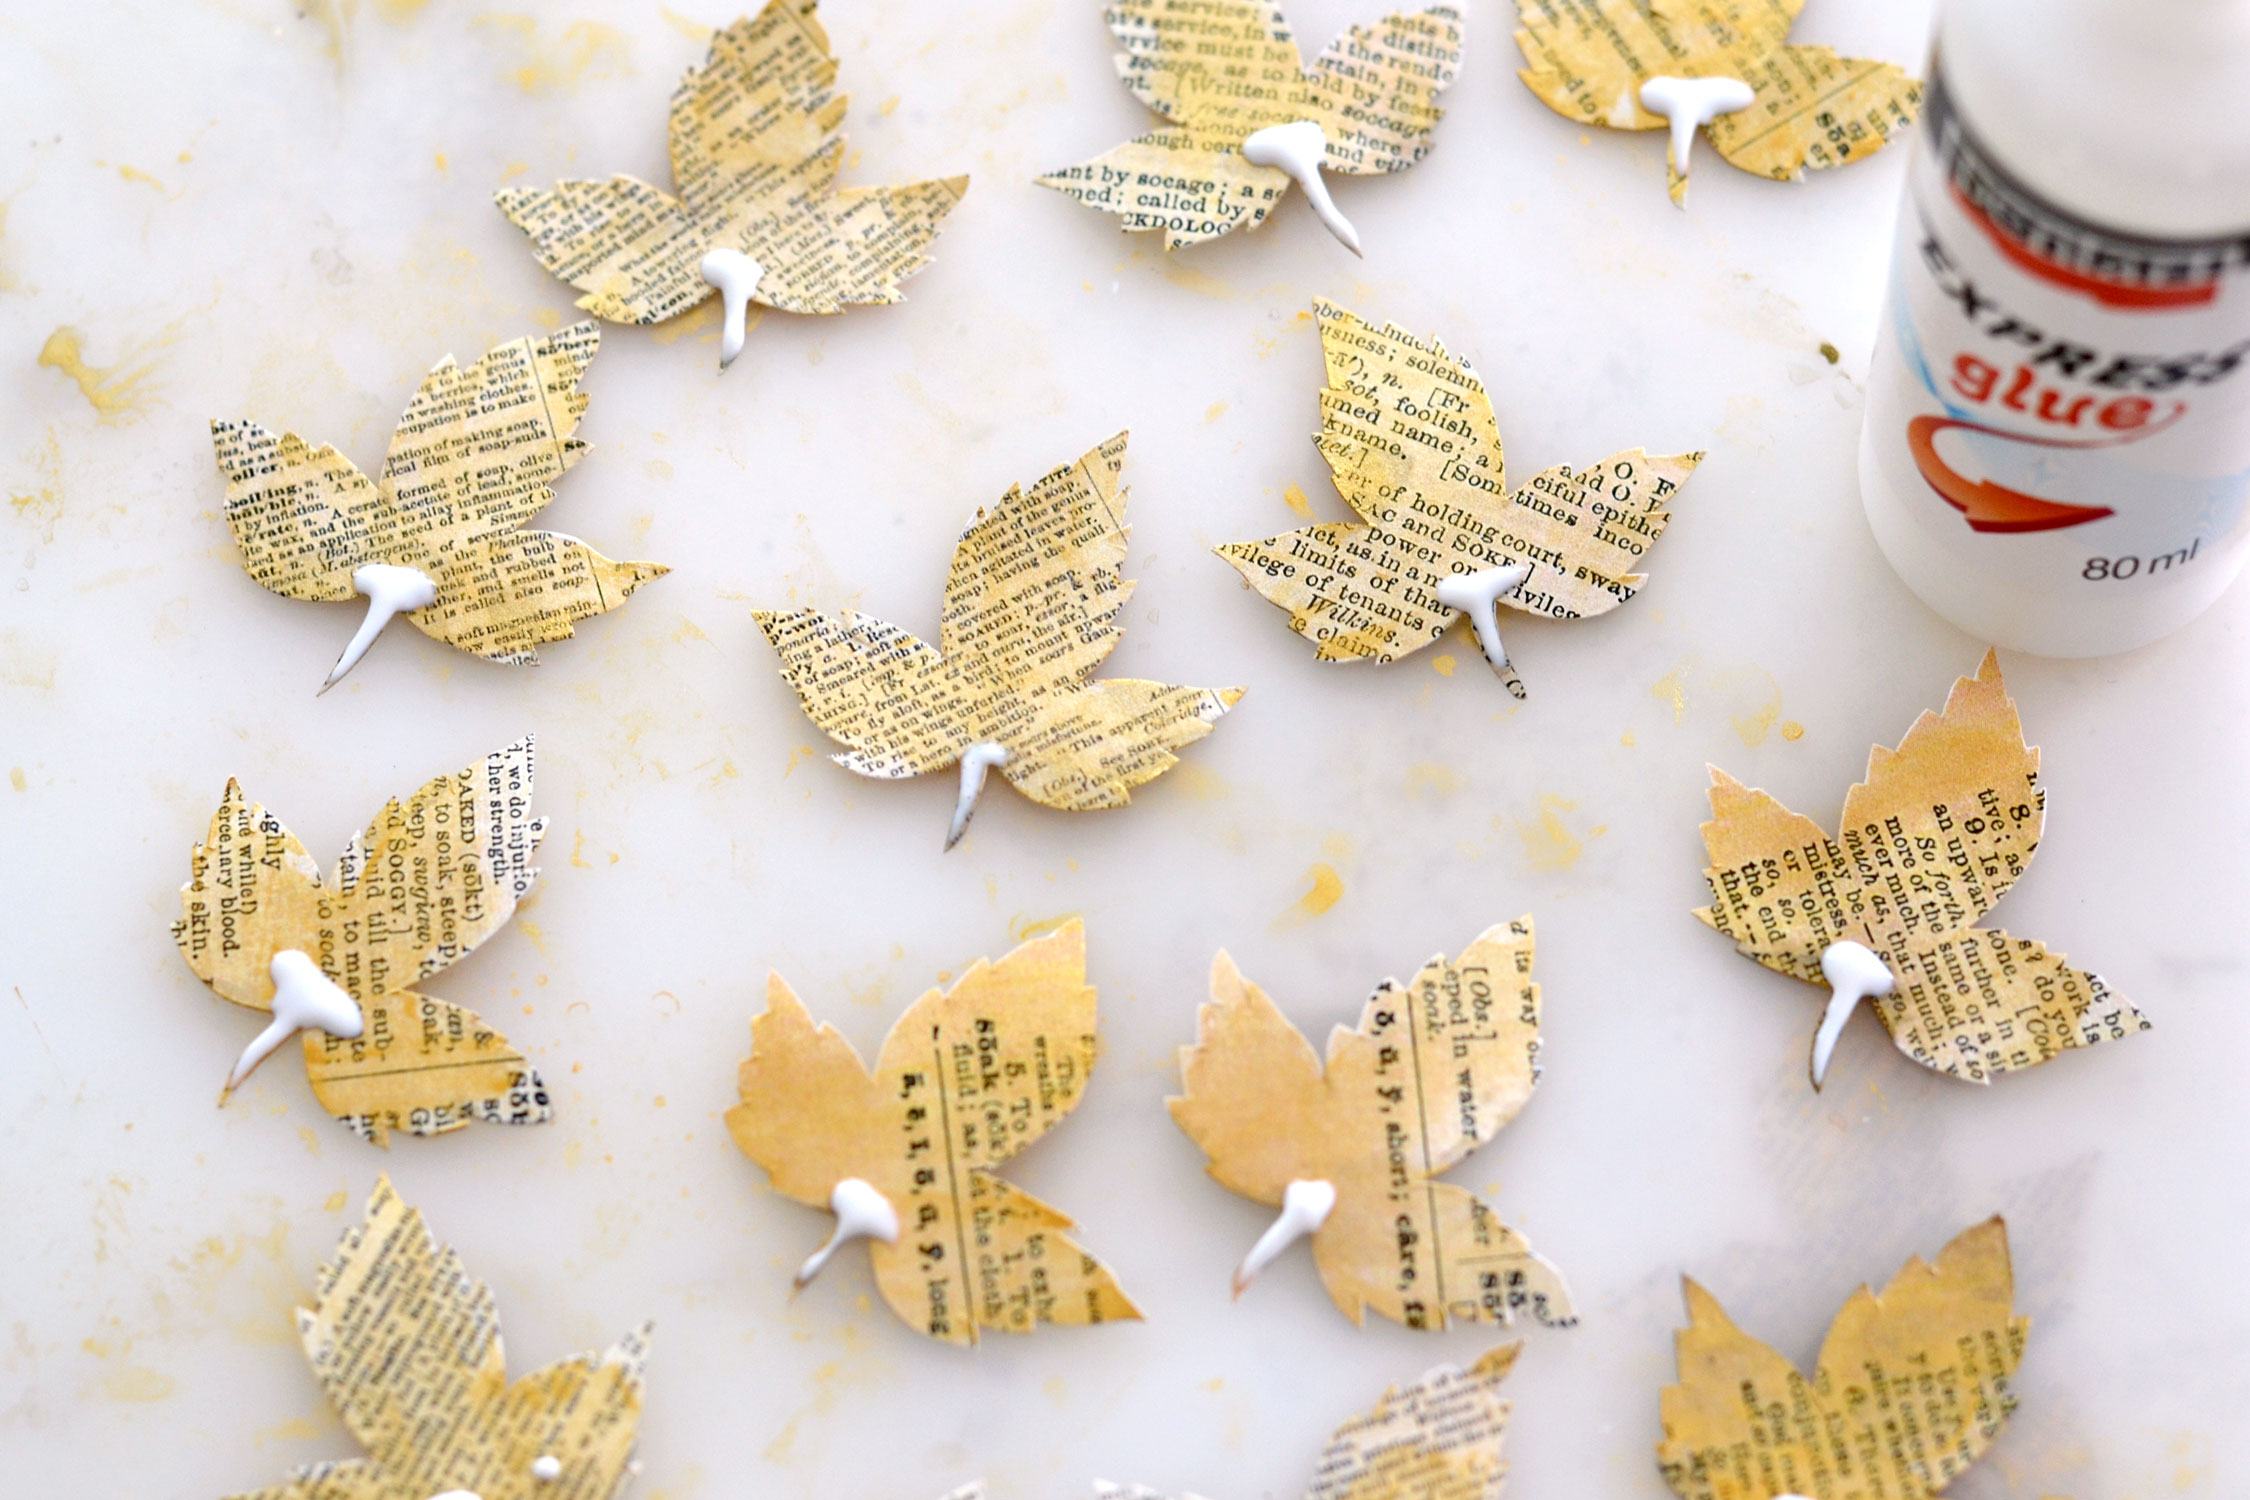
Just make sure the glue doesn’t turn completely clear and is still white, we don’t want it to completely dry before adding the leaves to the branches.
Randomly adhere the leaves here and there while pushing with your fingers the lower part (the one with the glue) on the branches.
You might need to come back in again to press the leaves after a few minutes, just to make sure all of them are sticking to the branches.
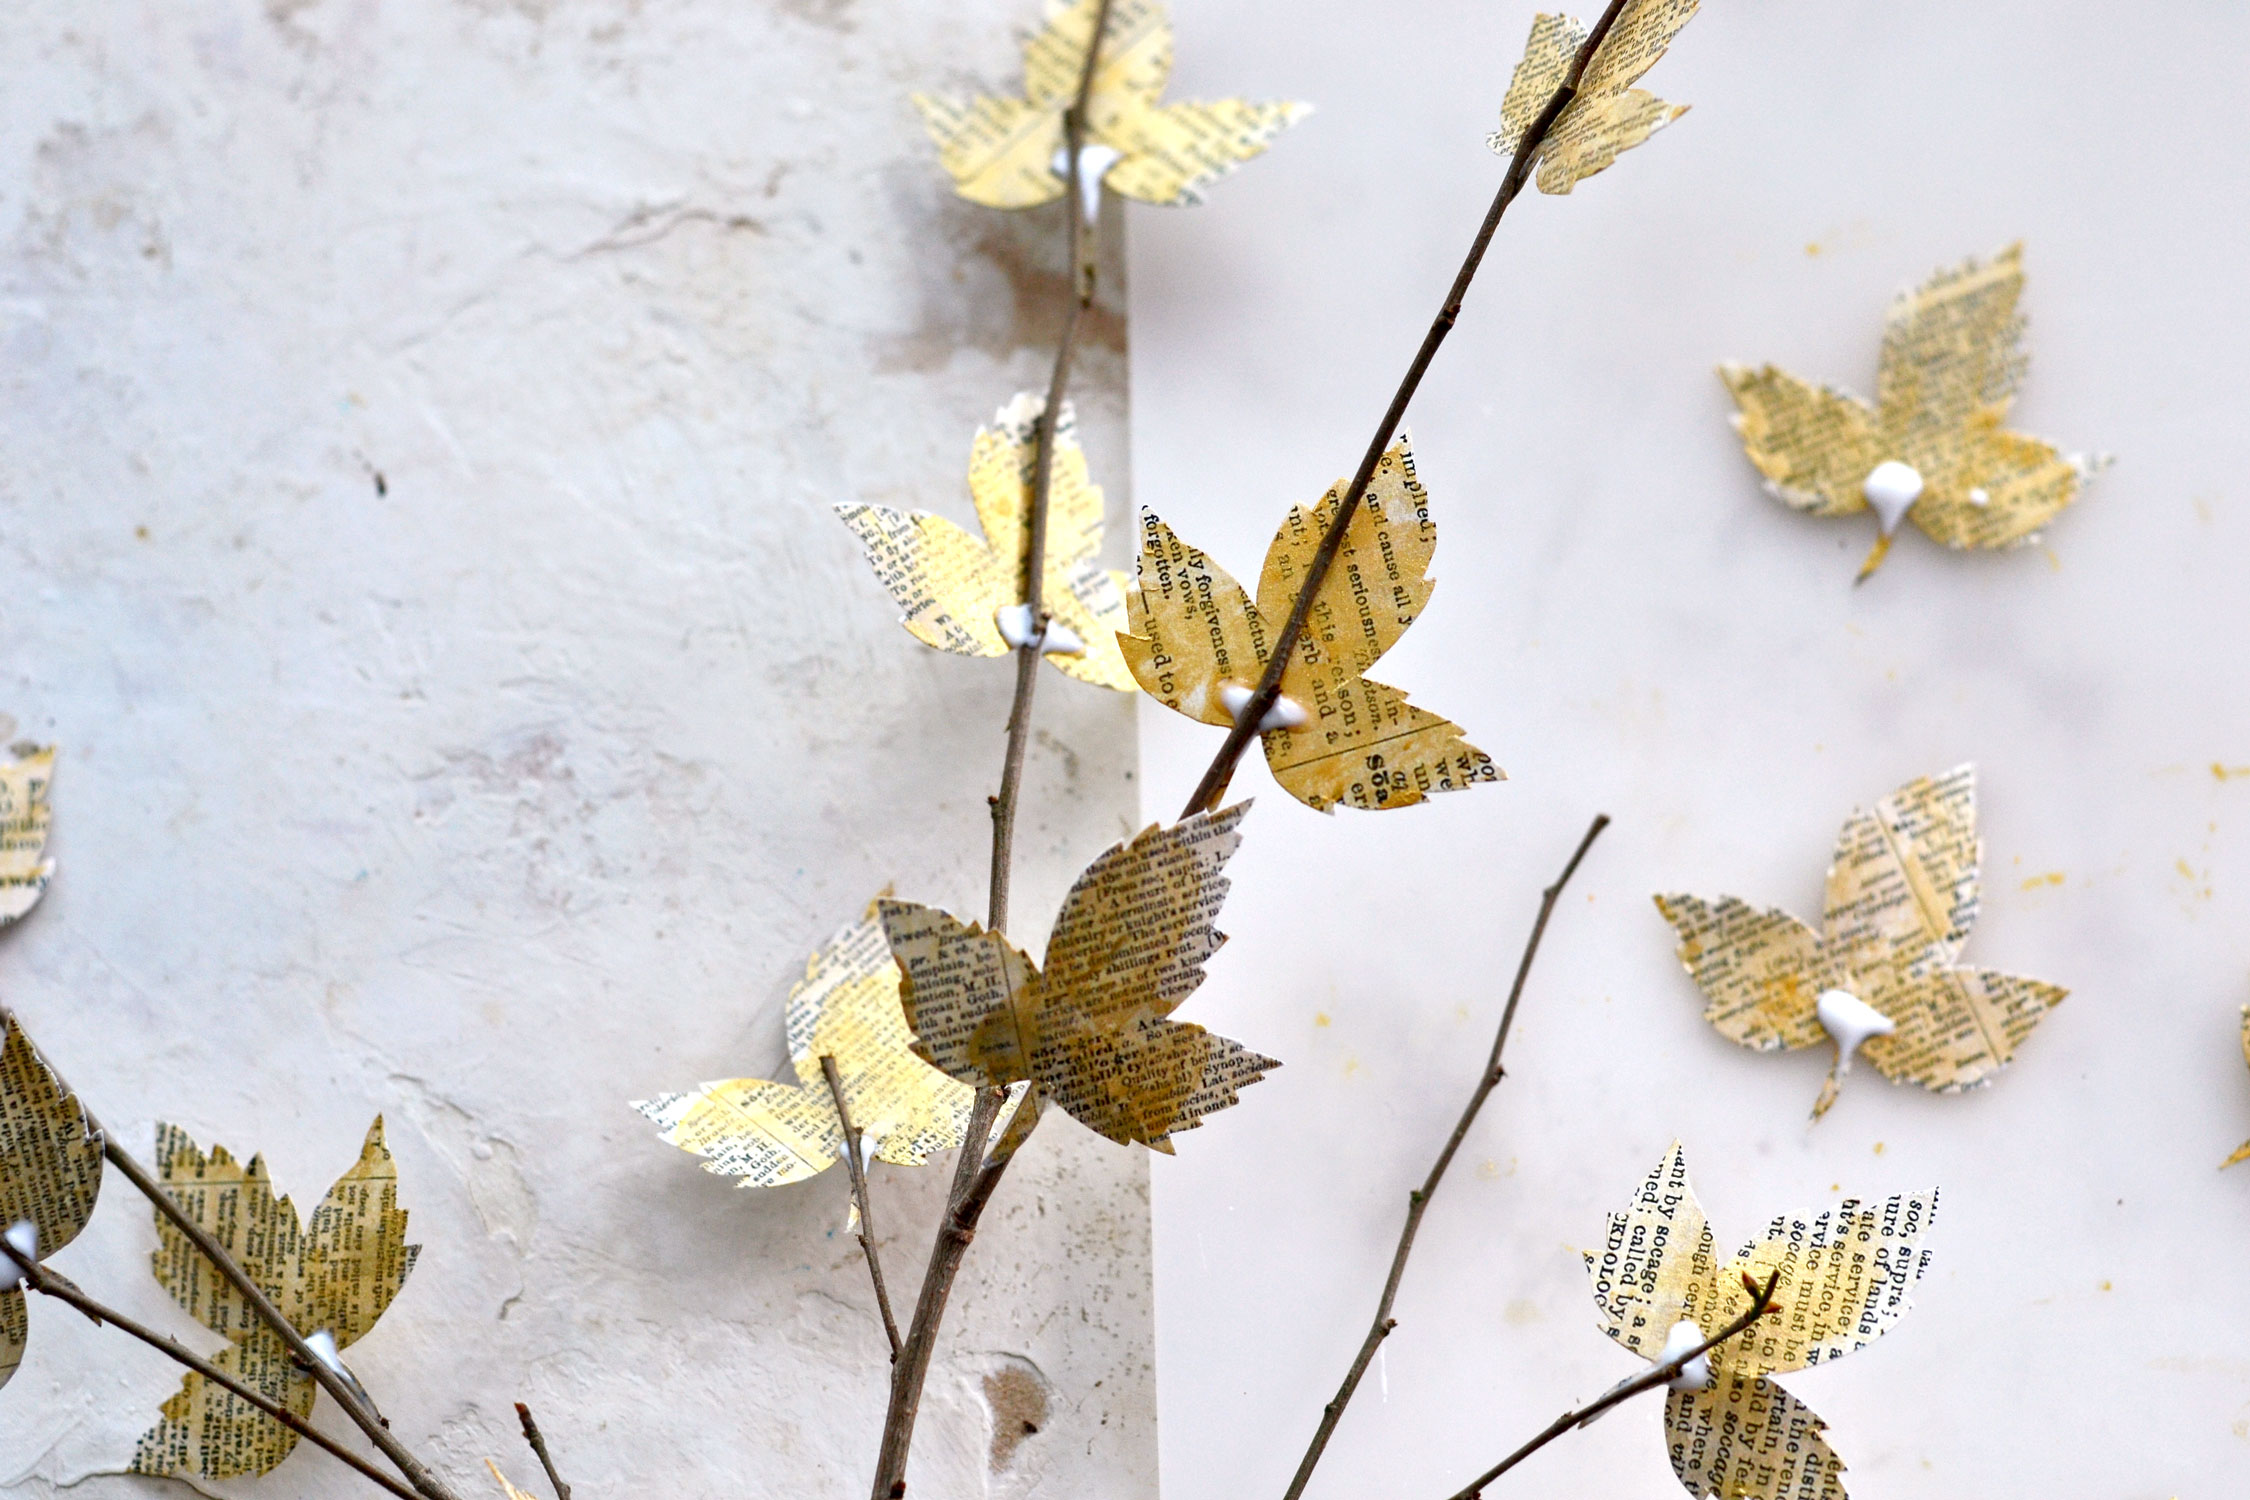
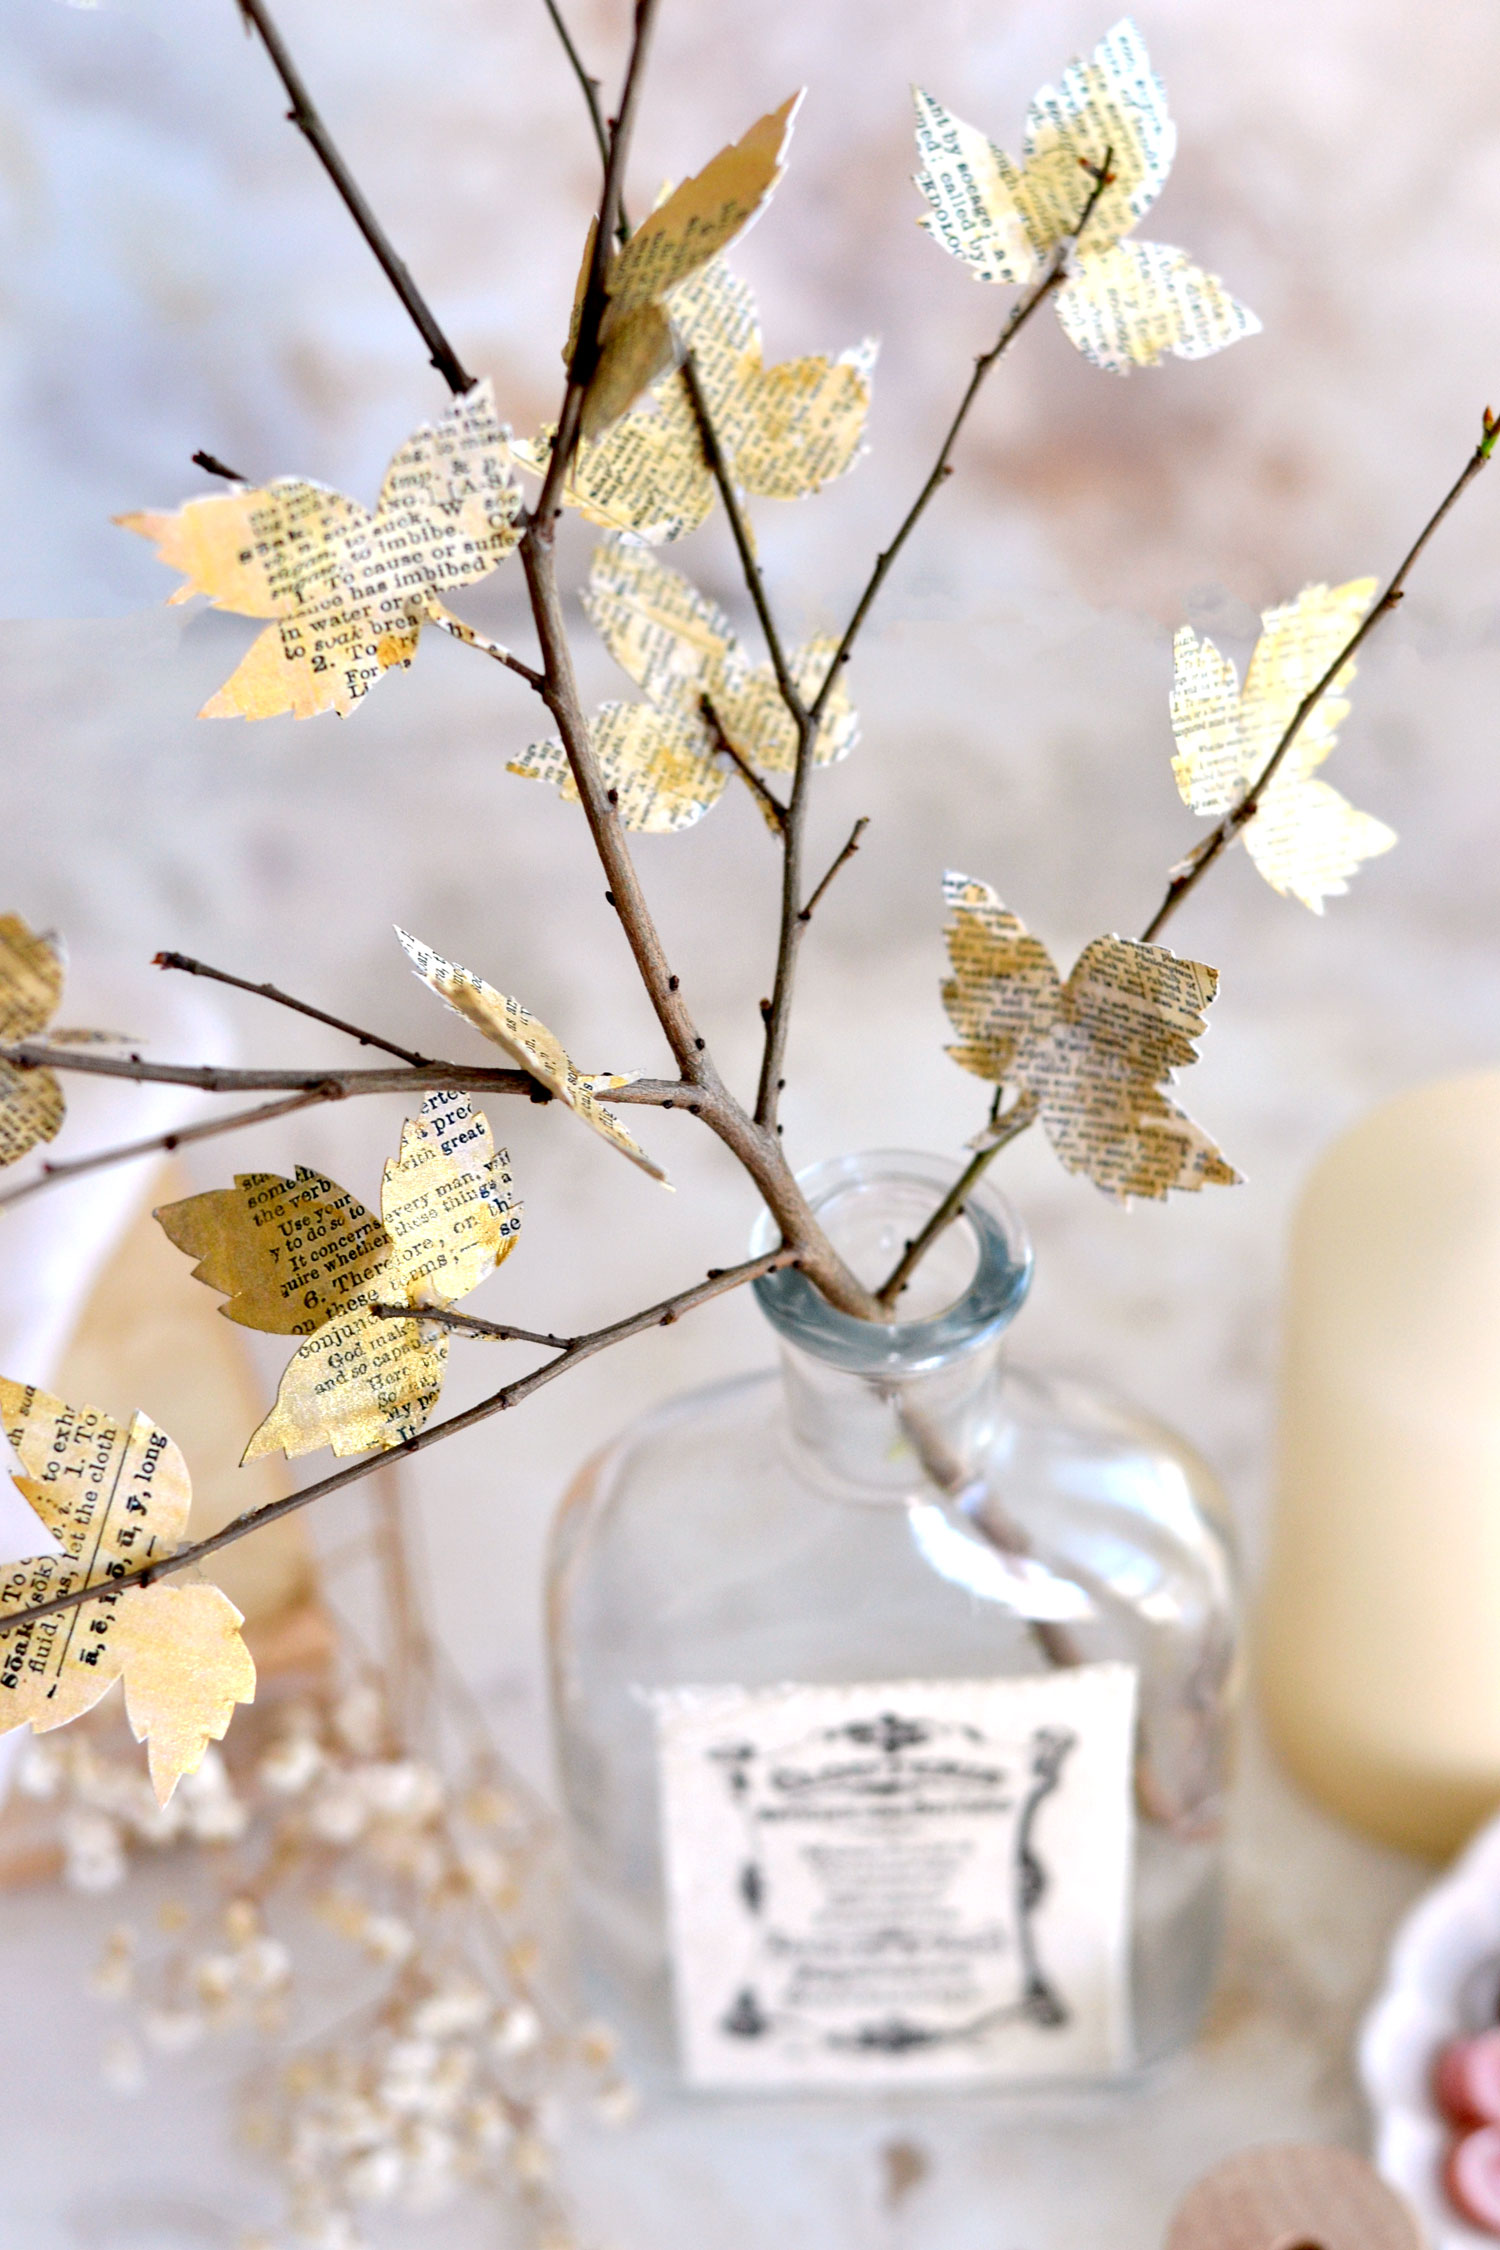
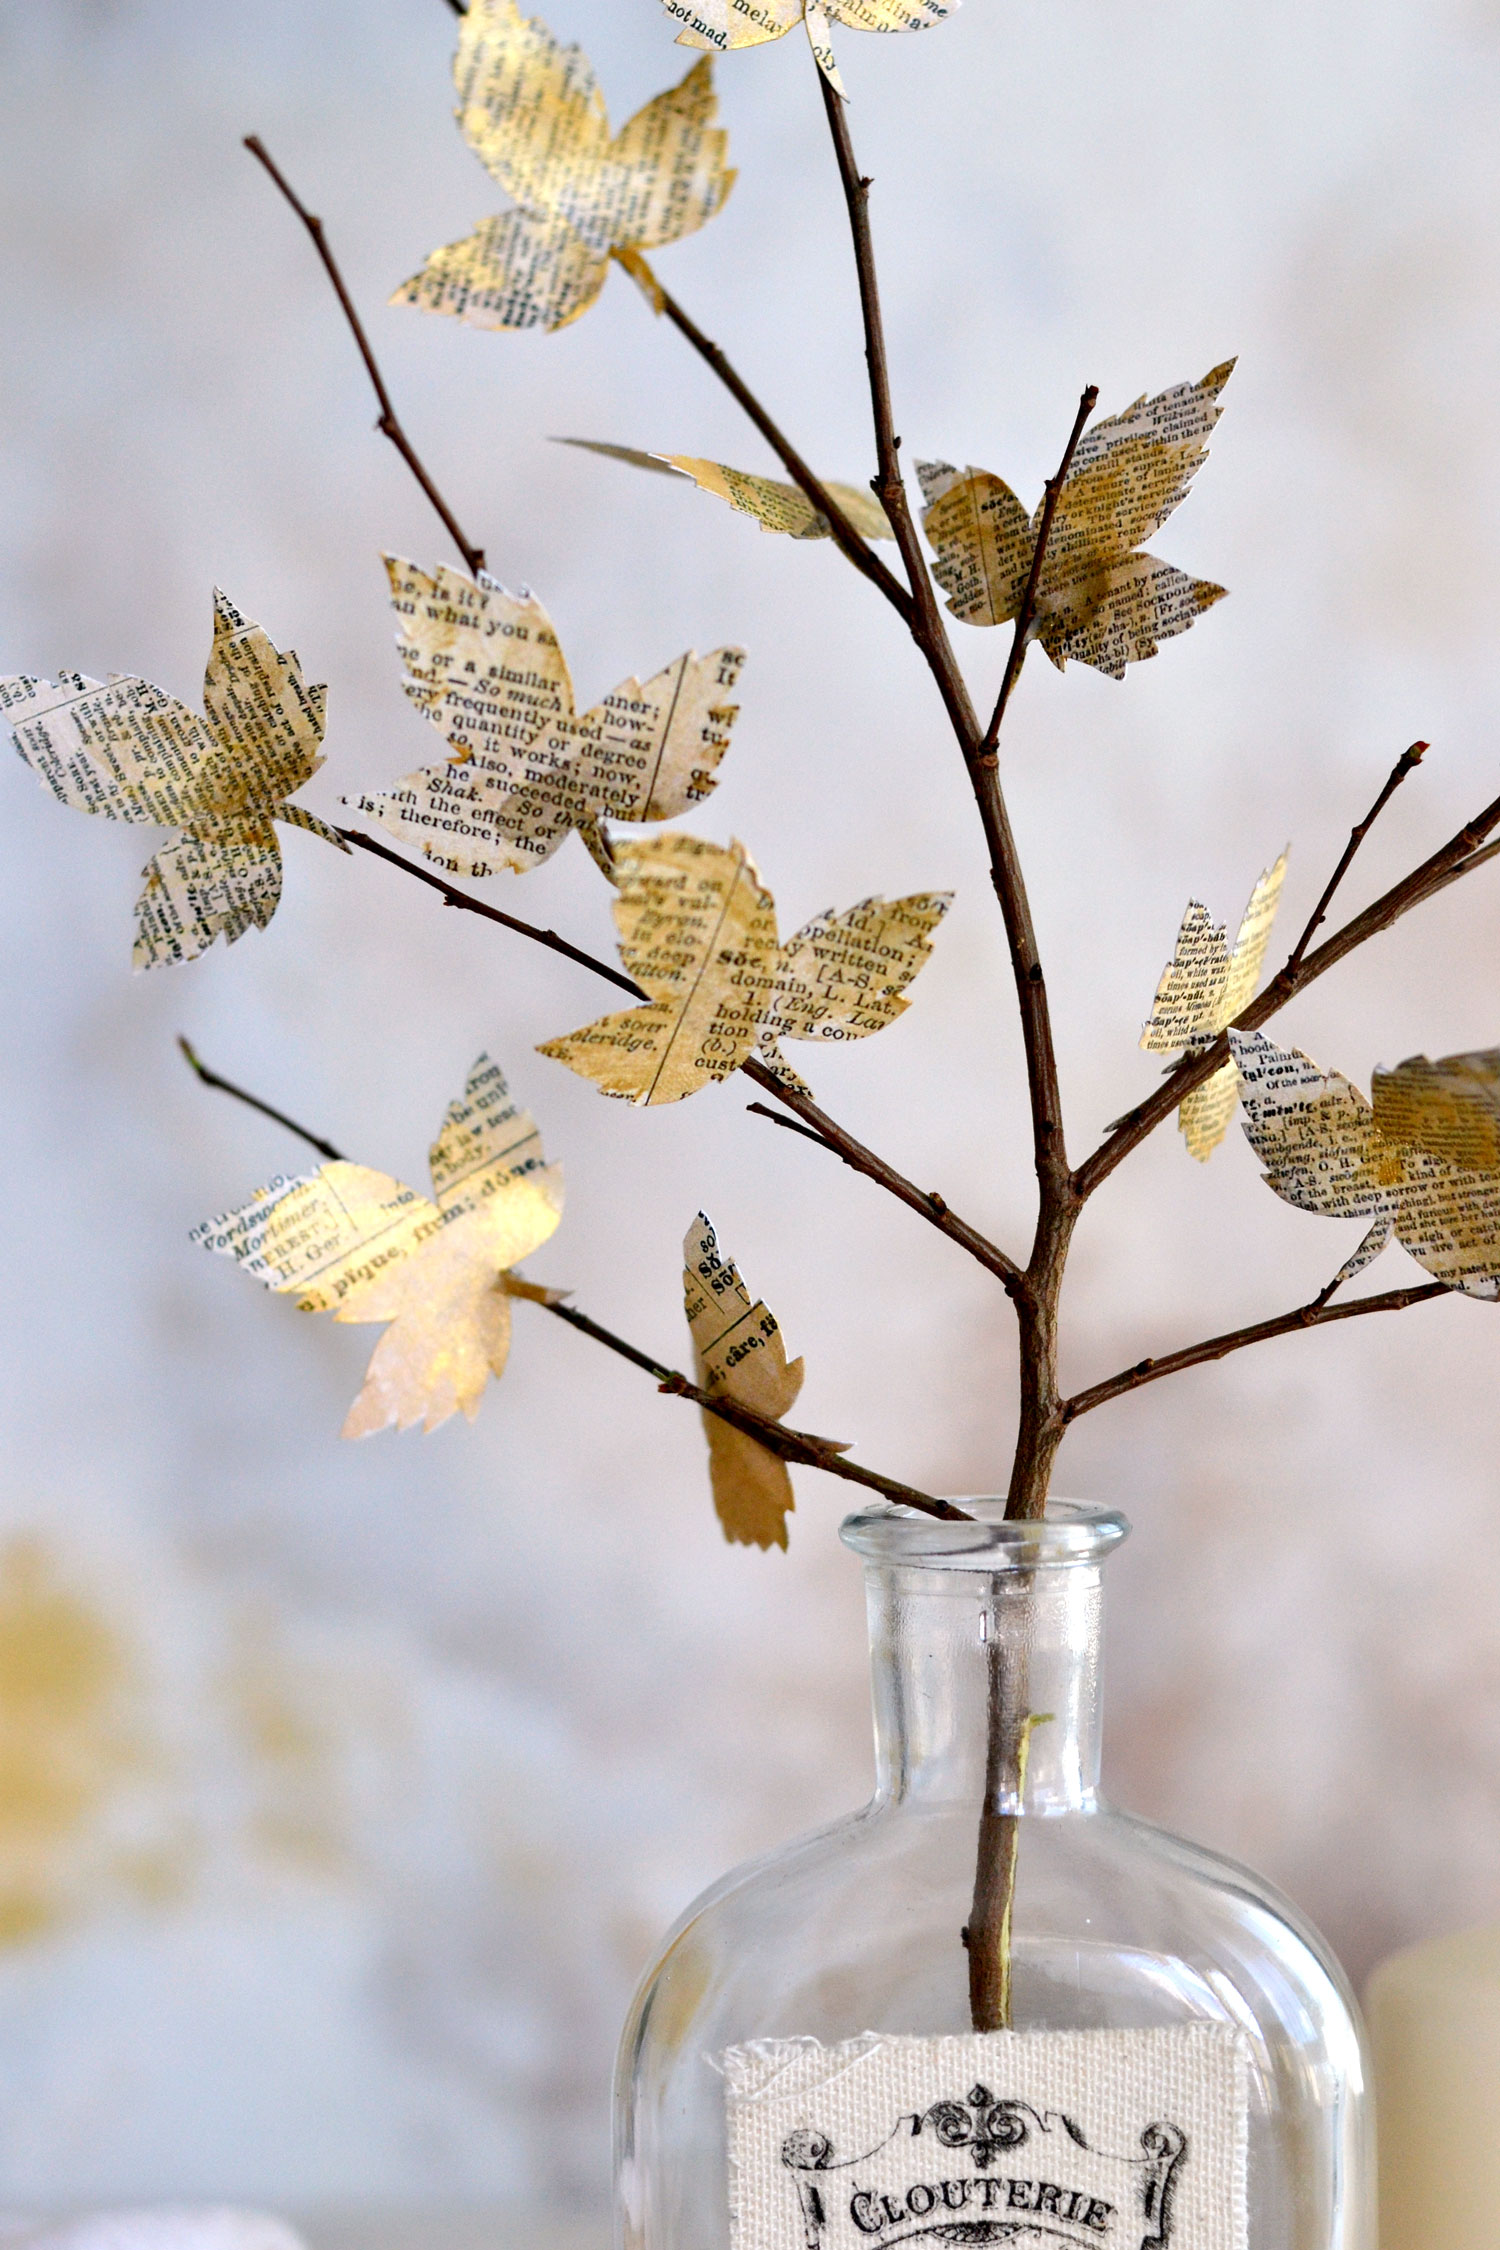
After drying, you can admire your absolutely gorgeous book page leaves with golden touches!
Use small vases or improvise a little bit and use small apothecary bottles to display the branch with paper leaves in your home. I’m using this super chic French ephemera bottle that I decorated a while back while creating the French Ephemera Fabric Labels. I feel the neutral color of the fabric works really well with the natural and organic feel I was envisioning for this project!
The golden highlights are absolutely mesmerizing and create stunning light dances while embracing the sunrays at different moments throughout the day.
If you prefer to make your leaves with actual book pages, you definitely can, just cut different-sized leaves from the printables that I’m sharing and use them as templates!
I love how universal this project is and how it can be easily matched with other decorative items around your home! This is a great thing because you’ll be able to use the leaves all year long, no matter the season!
I hope you will give this project a try, it’s such an easy project that will yield some truly amazing results!
 You might also like our Book Page Pumpkin Project HERE.
Happy crafting,
Diana | Dreams Factory


Ann says
The project is beautiful! Thank you for sharing! I’m going to try to cut the leaves on my Cricut – I bought a used one a few weeks ago. I’m
Still trying to master the basic print and cut feature. LOL
Karen says
Hi Ann. That’s lovely! You’ll get the hang of print and cut in no time. 😊