DIY Holiday Bookmarks
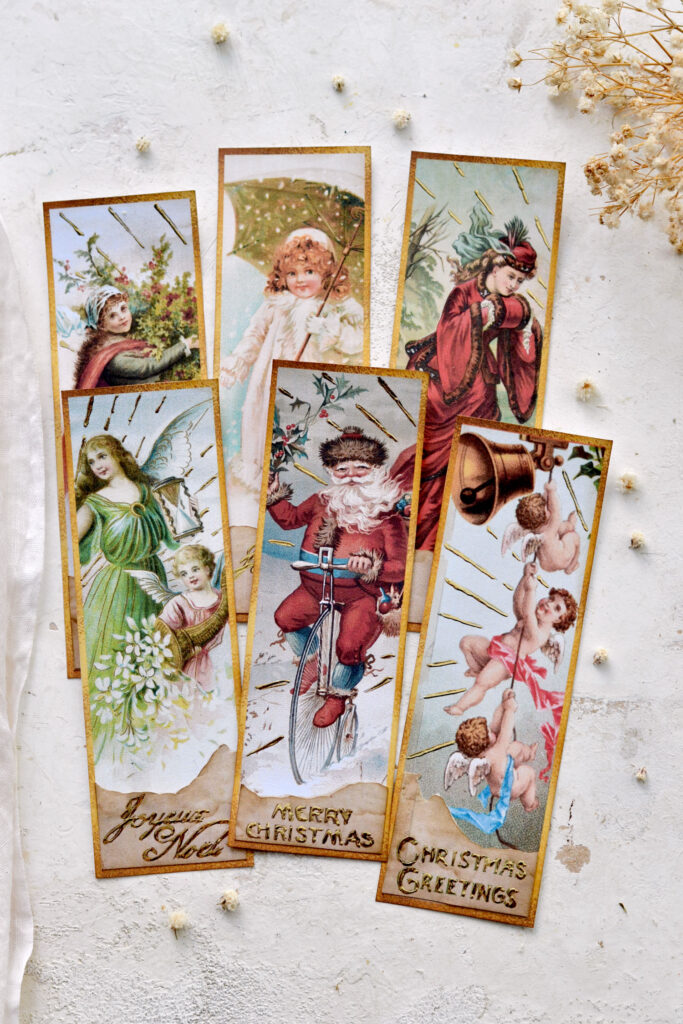
Hello Graphics Fairy friends! I’m Diana from Dreams Factory and I’m happy to be here again to share another creative project with you! Today, we are switching things up a little bit for a Christmas in July get-together as I’m sharing how to make some beautiful DIY Holiday Bookmarks! These Christmas bookmarks have faux golden frames and a lovely vintage vibe. I also included a few torn pieces of stained paper as embellishments that will add some dimension to the finished pieces.
You can decide if you want to add torn pieces of paper with or without Christmas wishes (I’m sharing them both), depending on how you are planning to use these beauties. And to finish things up, I’ll show you how to add gold foil details to the writing, but also create some decorative sunrays to make them even more charming.
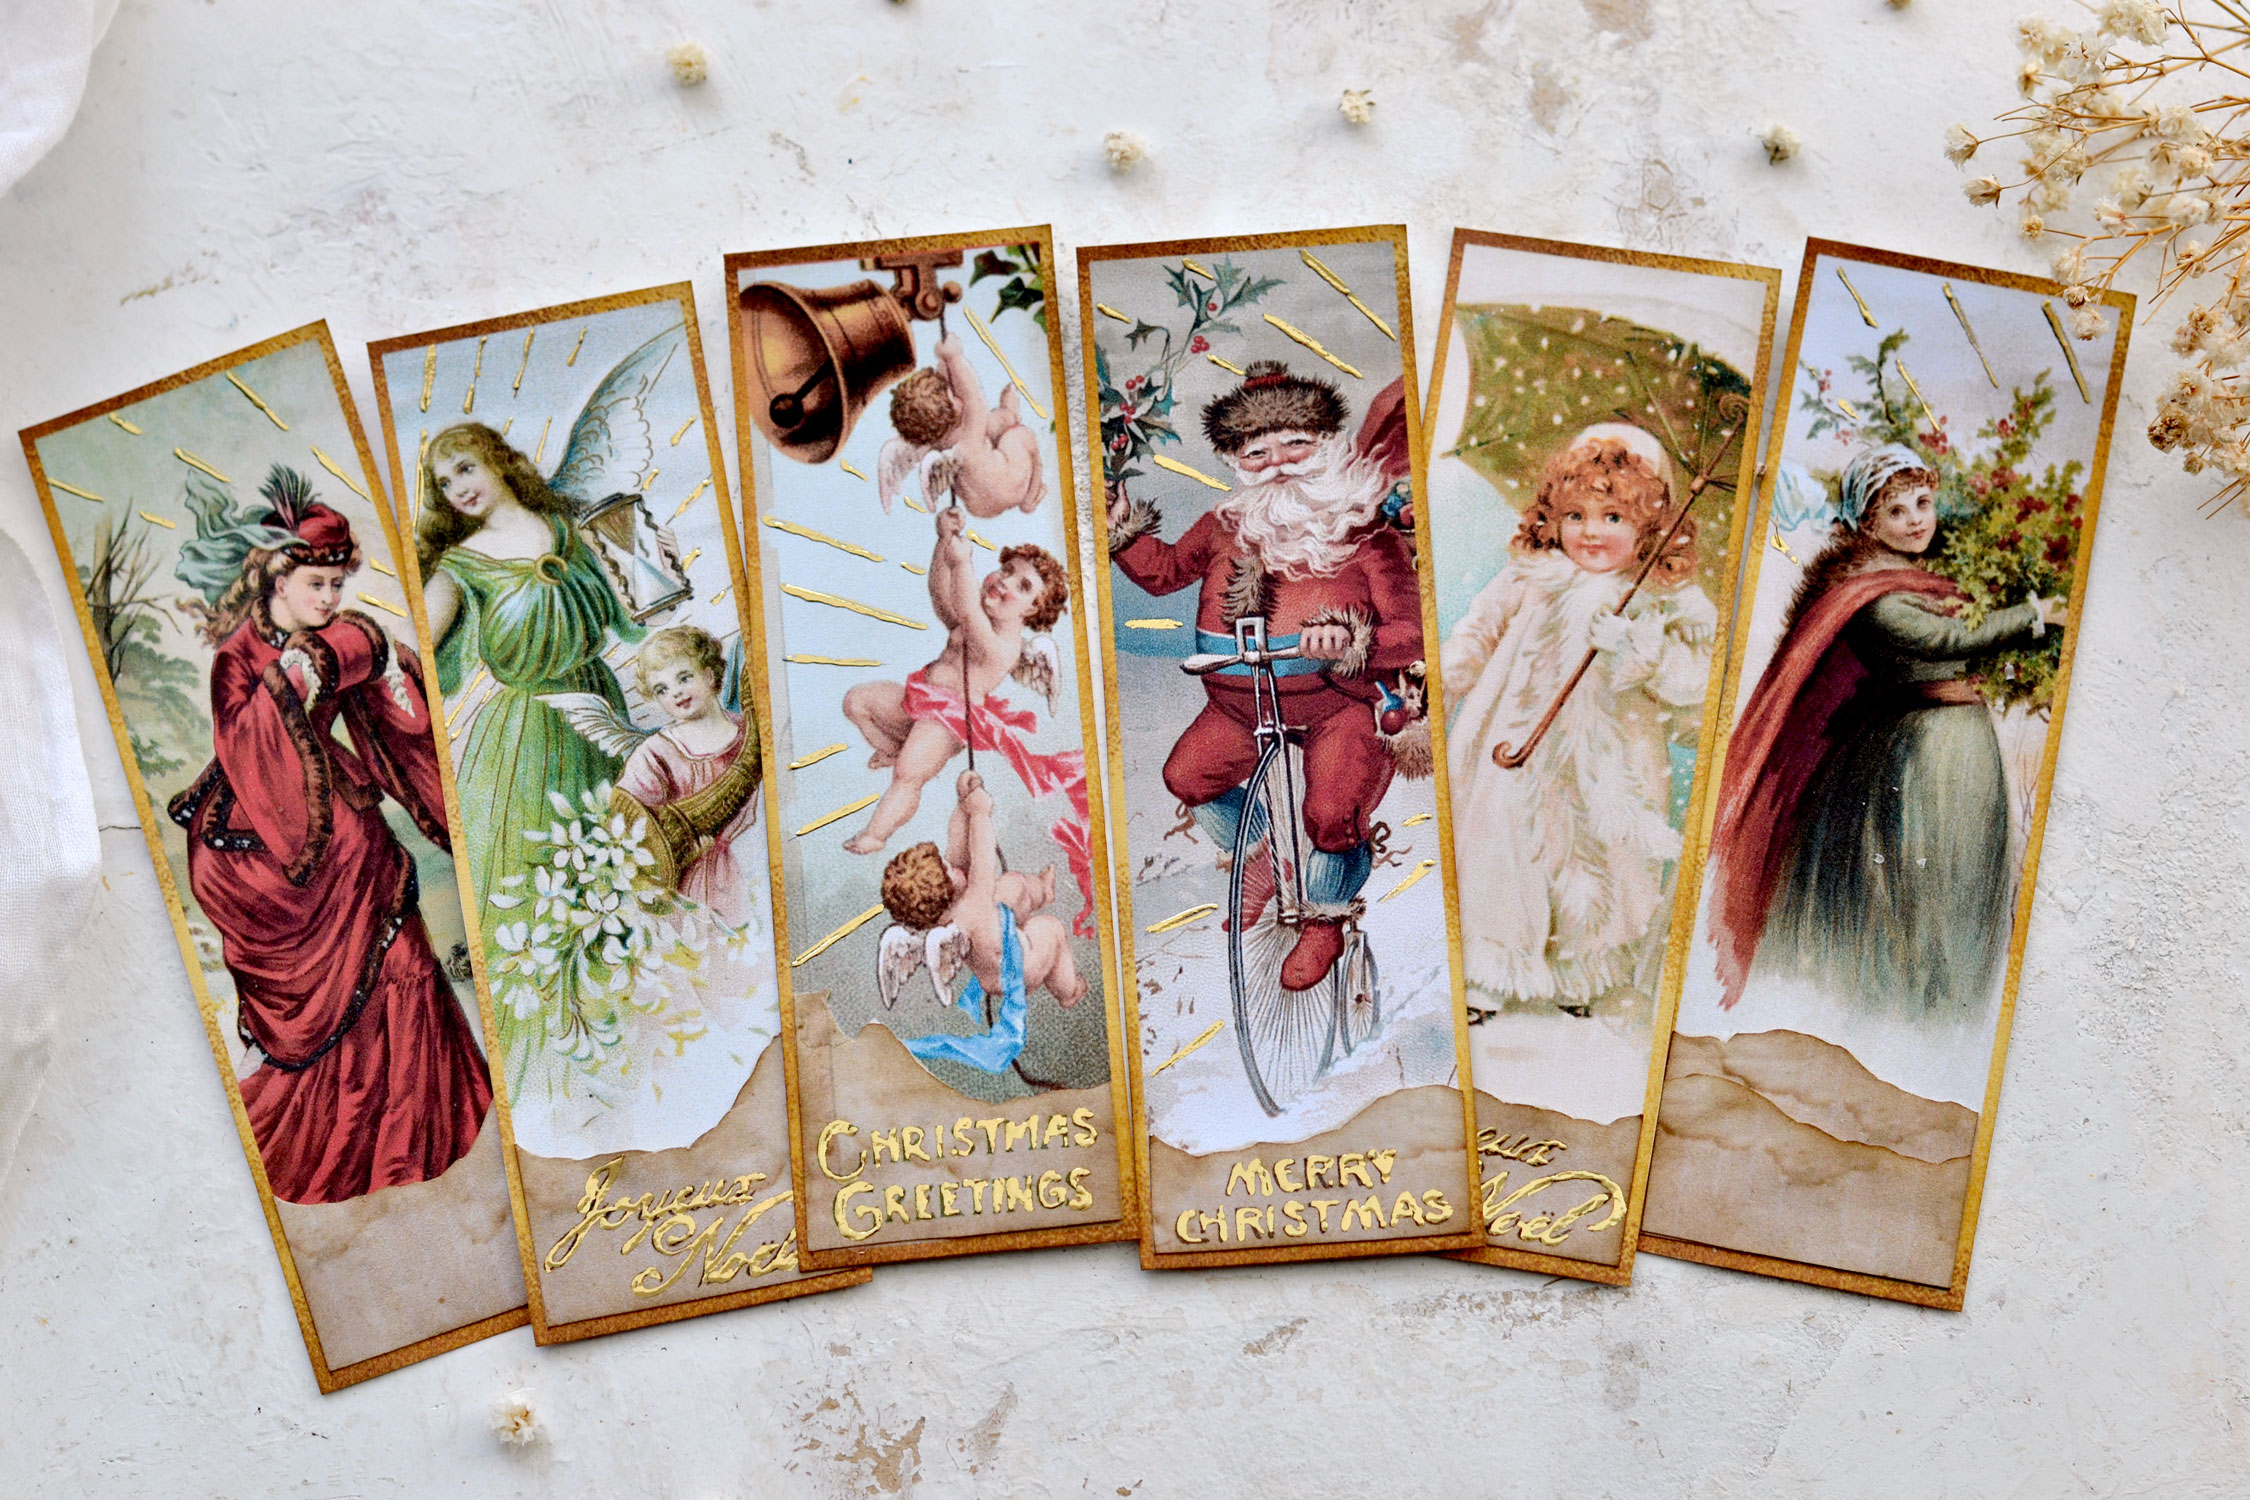
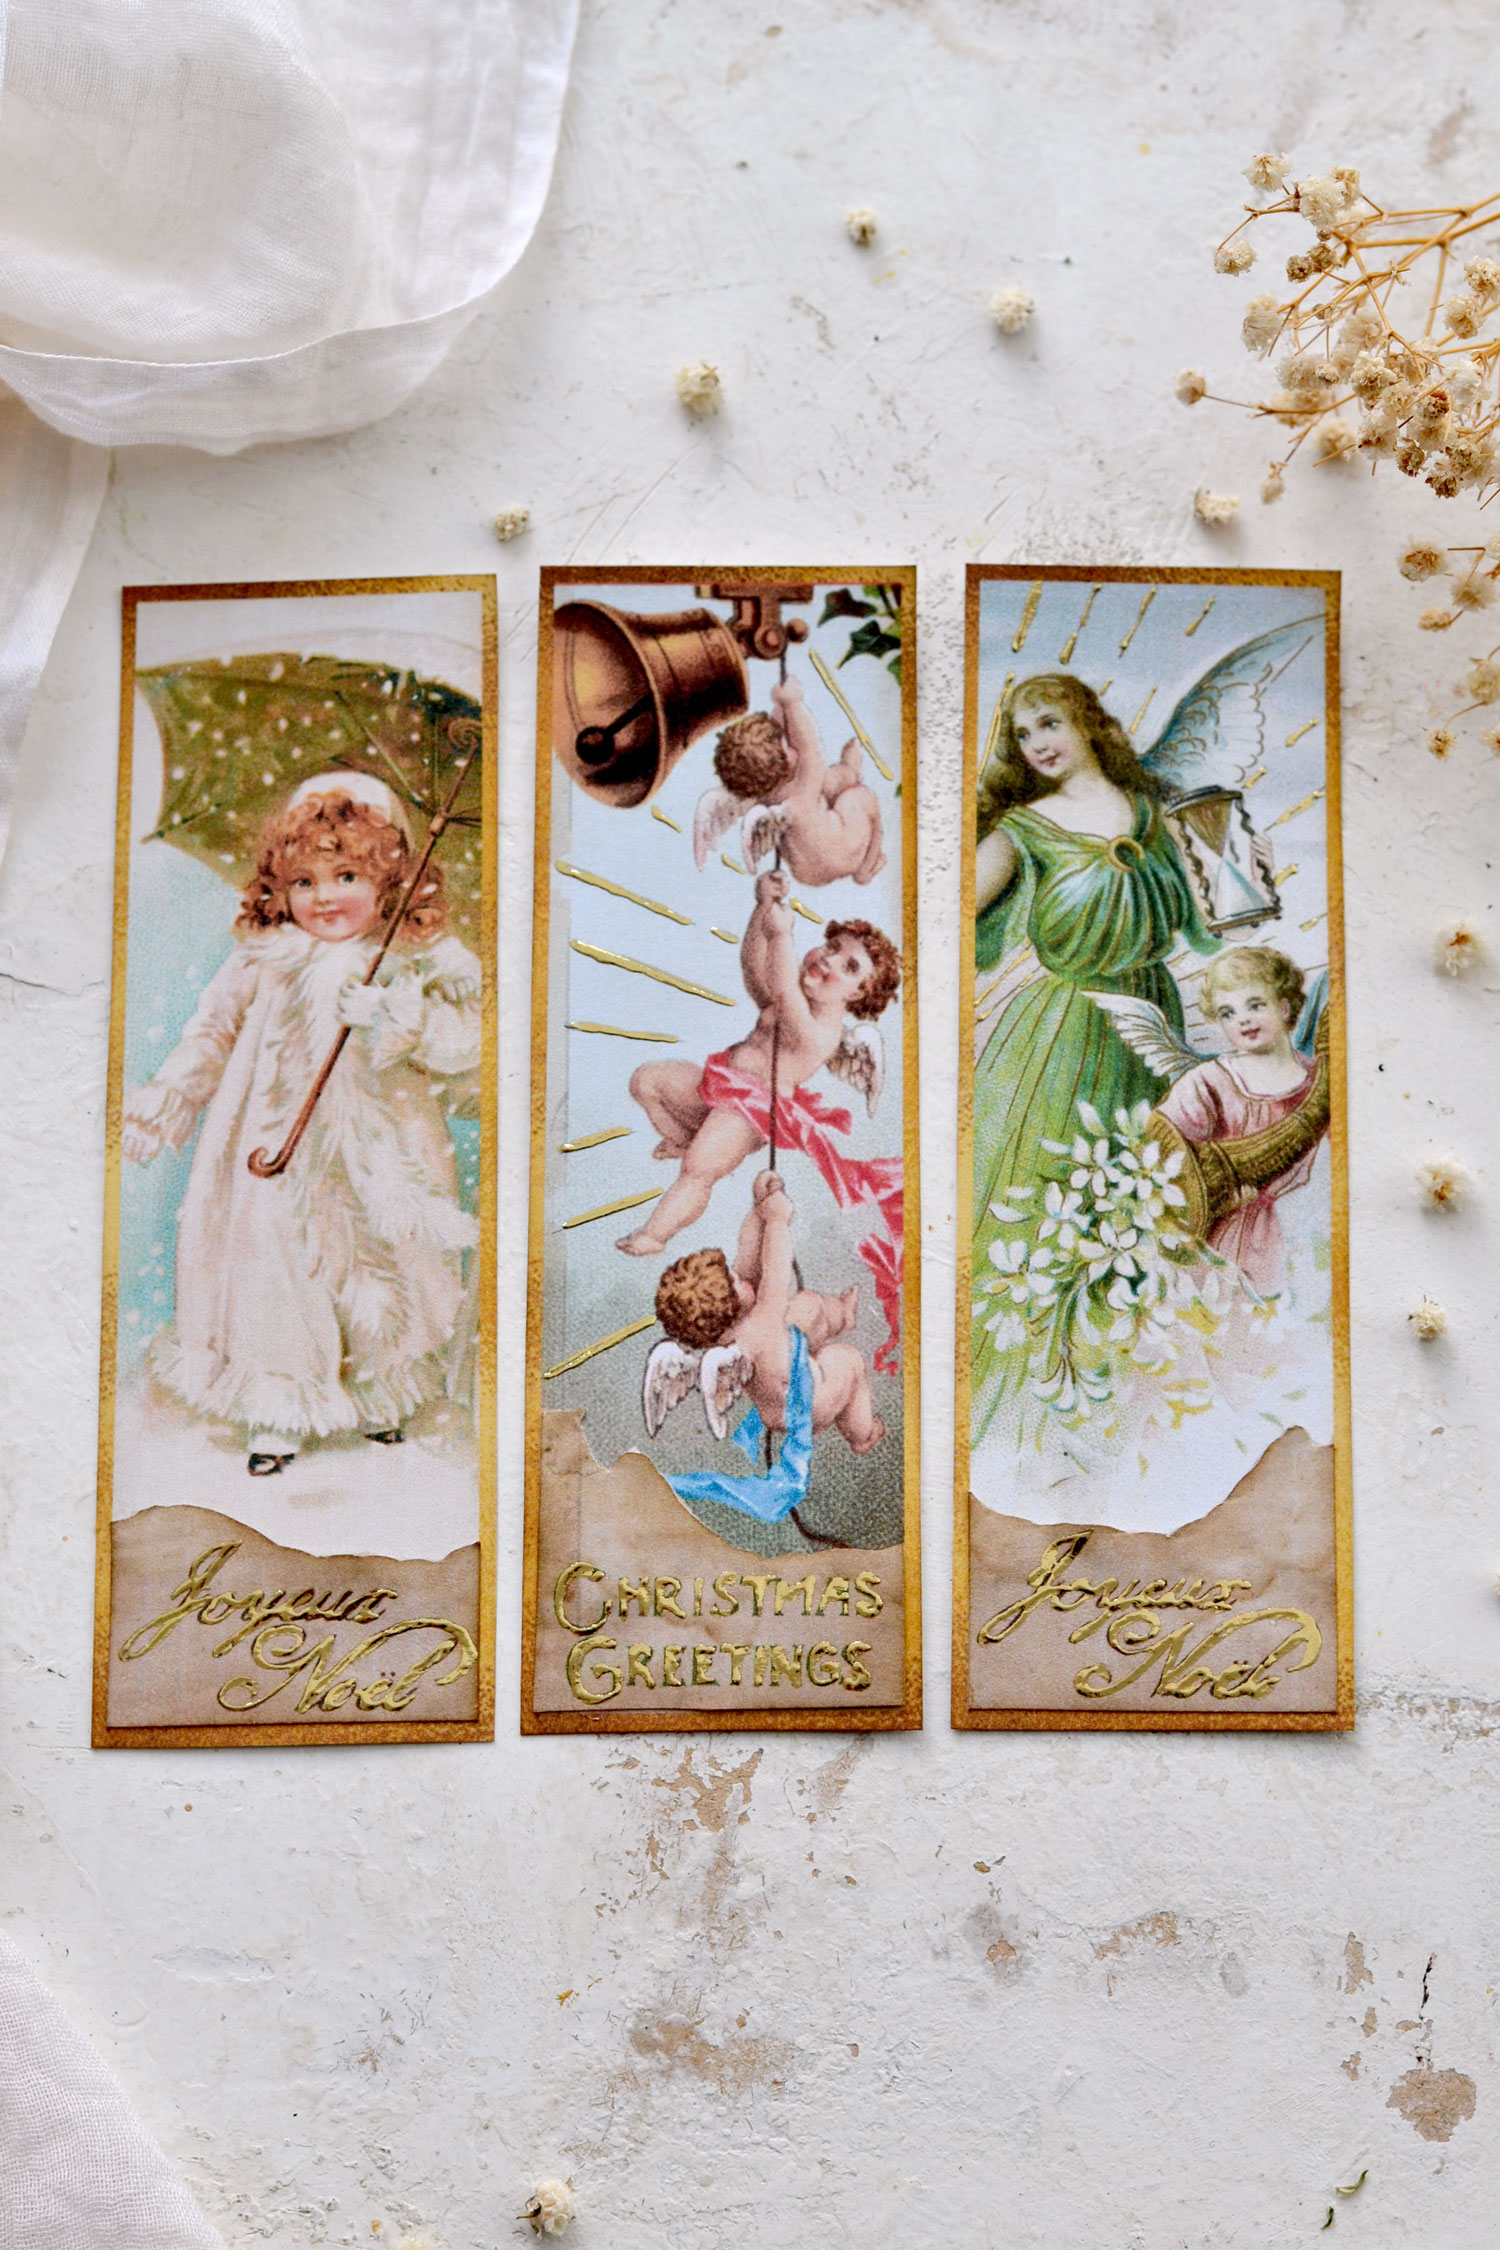
You can find the printable that I created for this project below. I designed six beautiful bookmarks and I challenged myself to use Christmas images that I haven’t used before. OK, I might have used one of them on another project, but it was in a different scenario and I think we could still give it a go here.
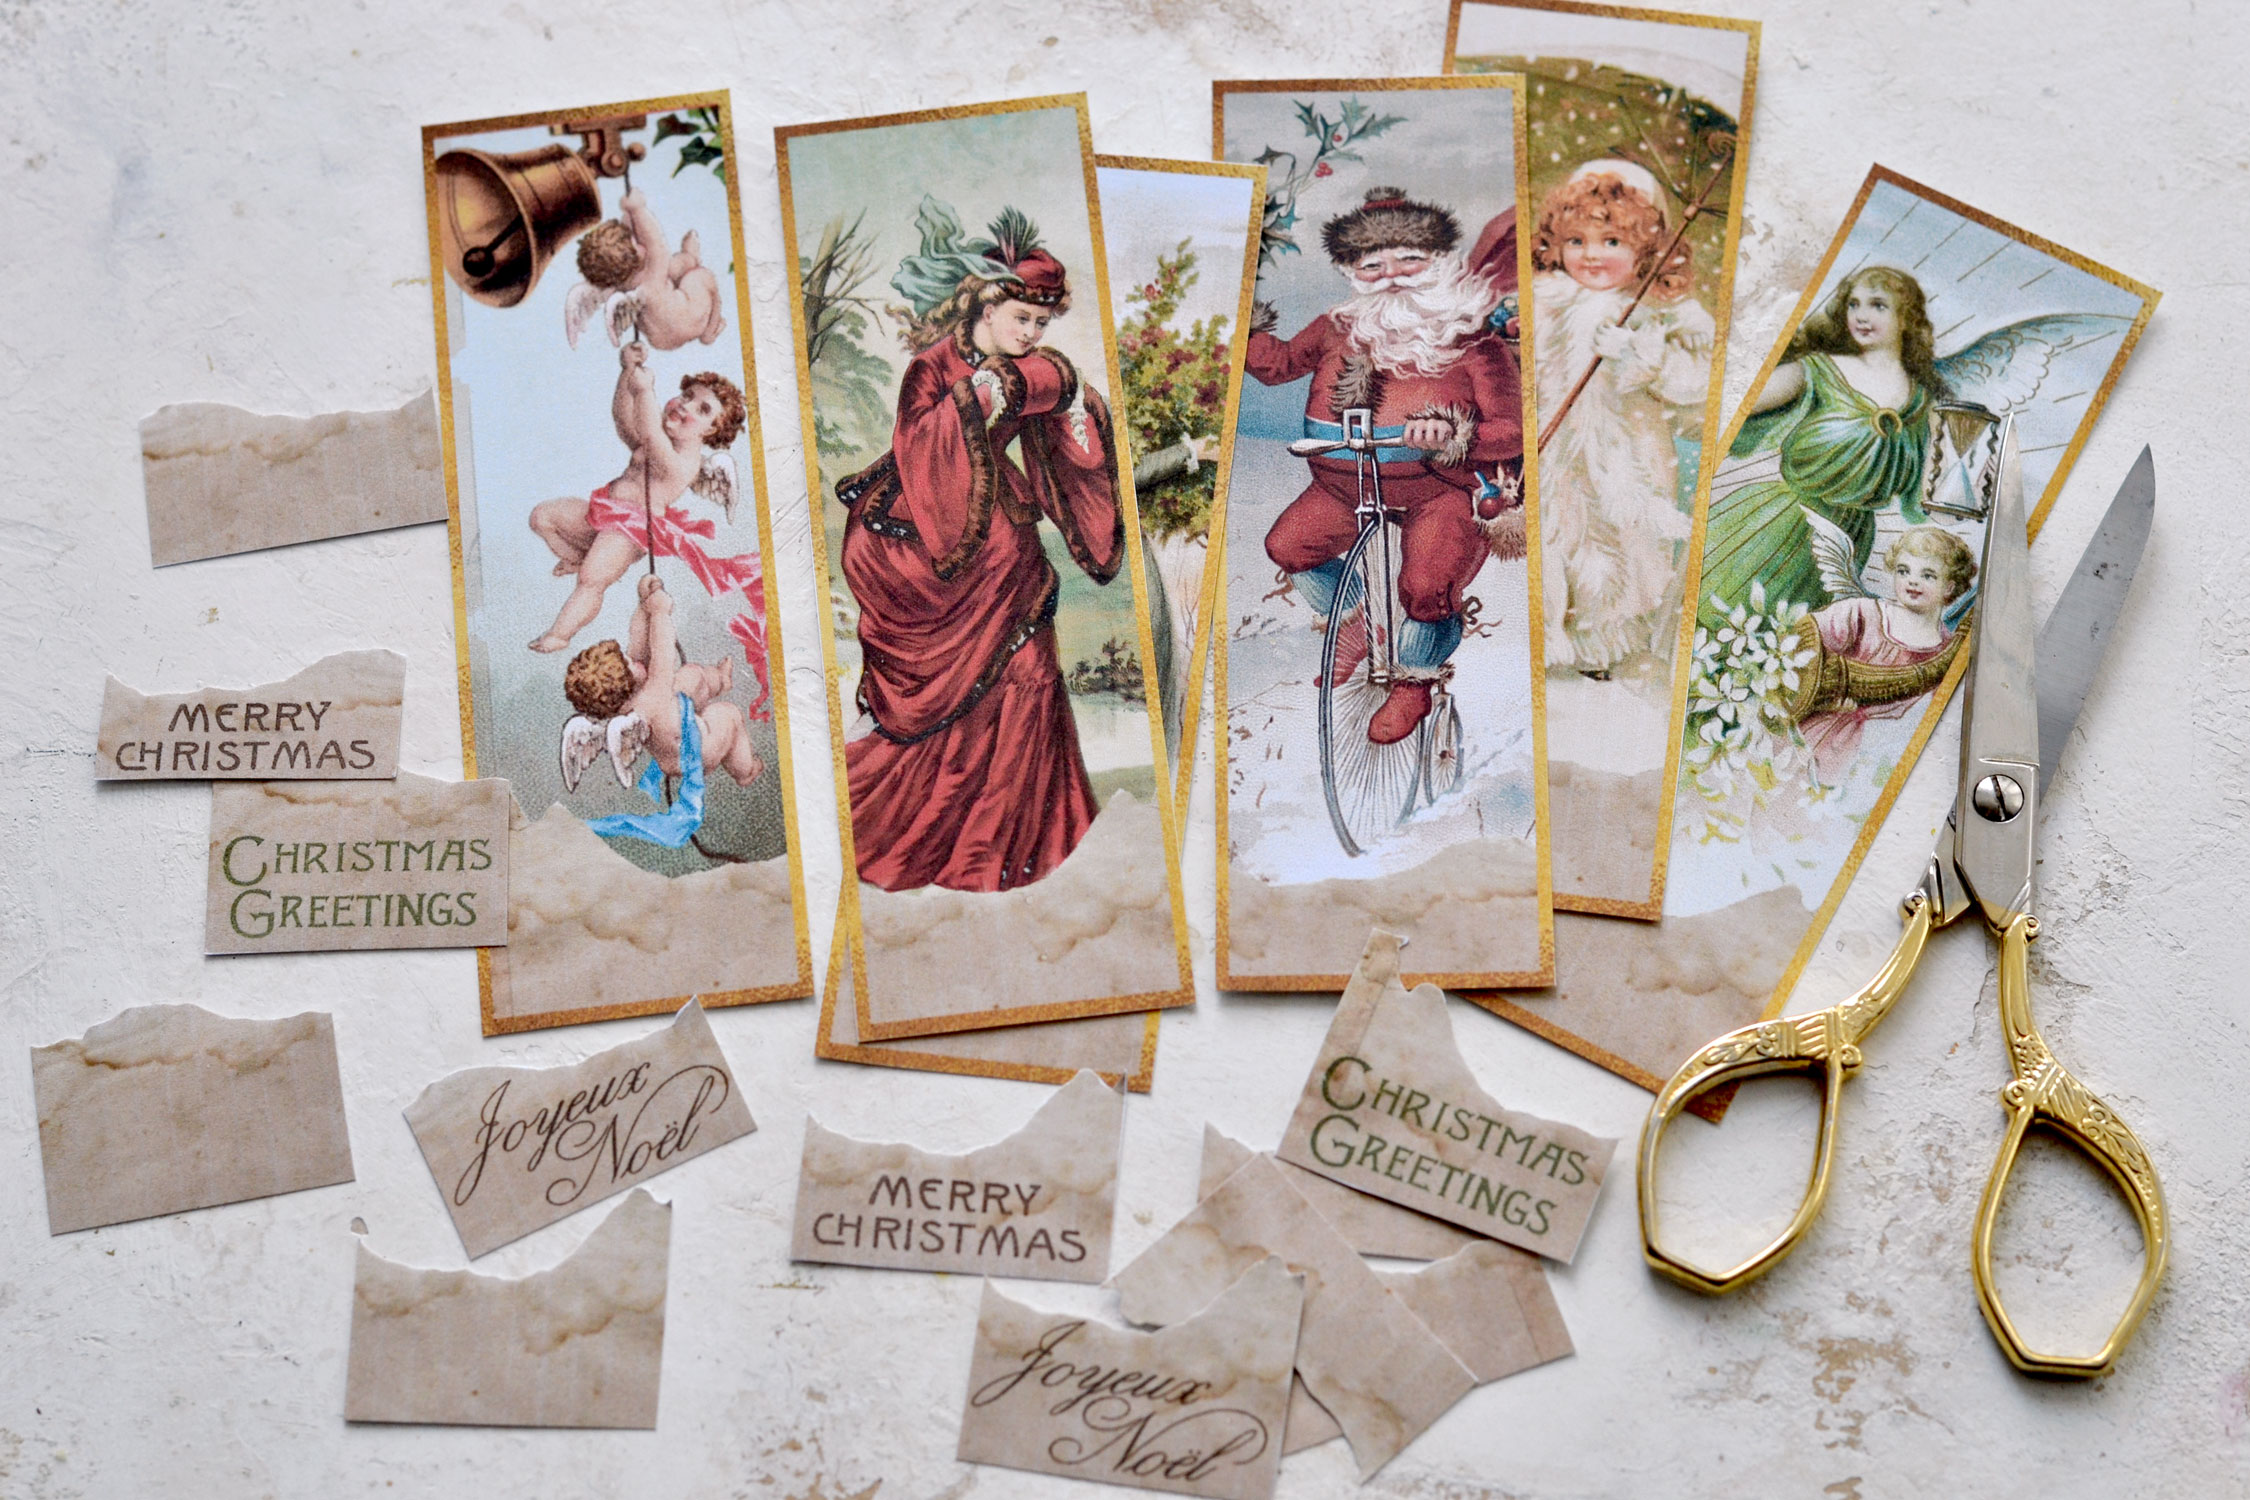
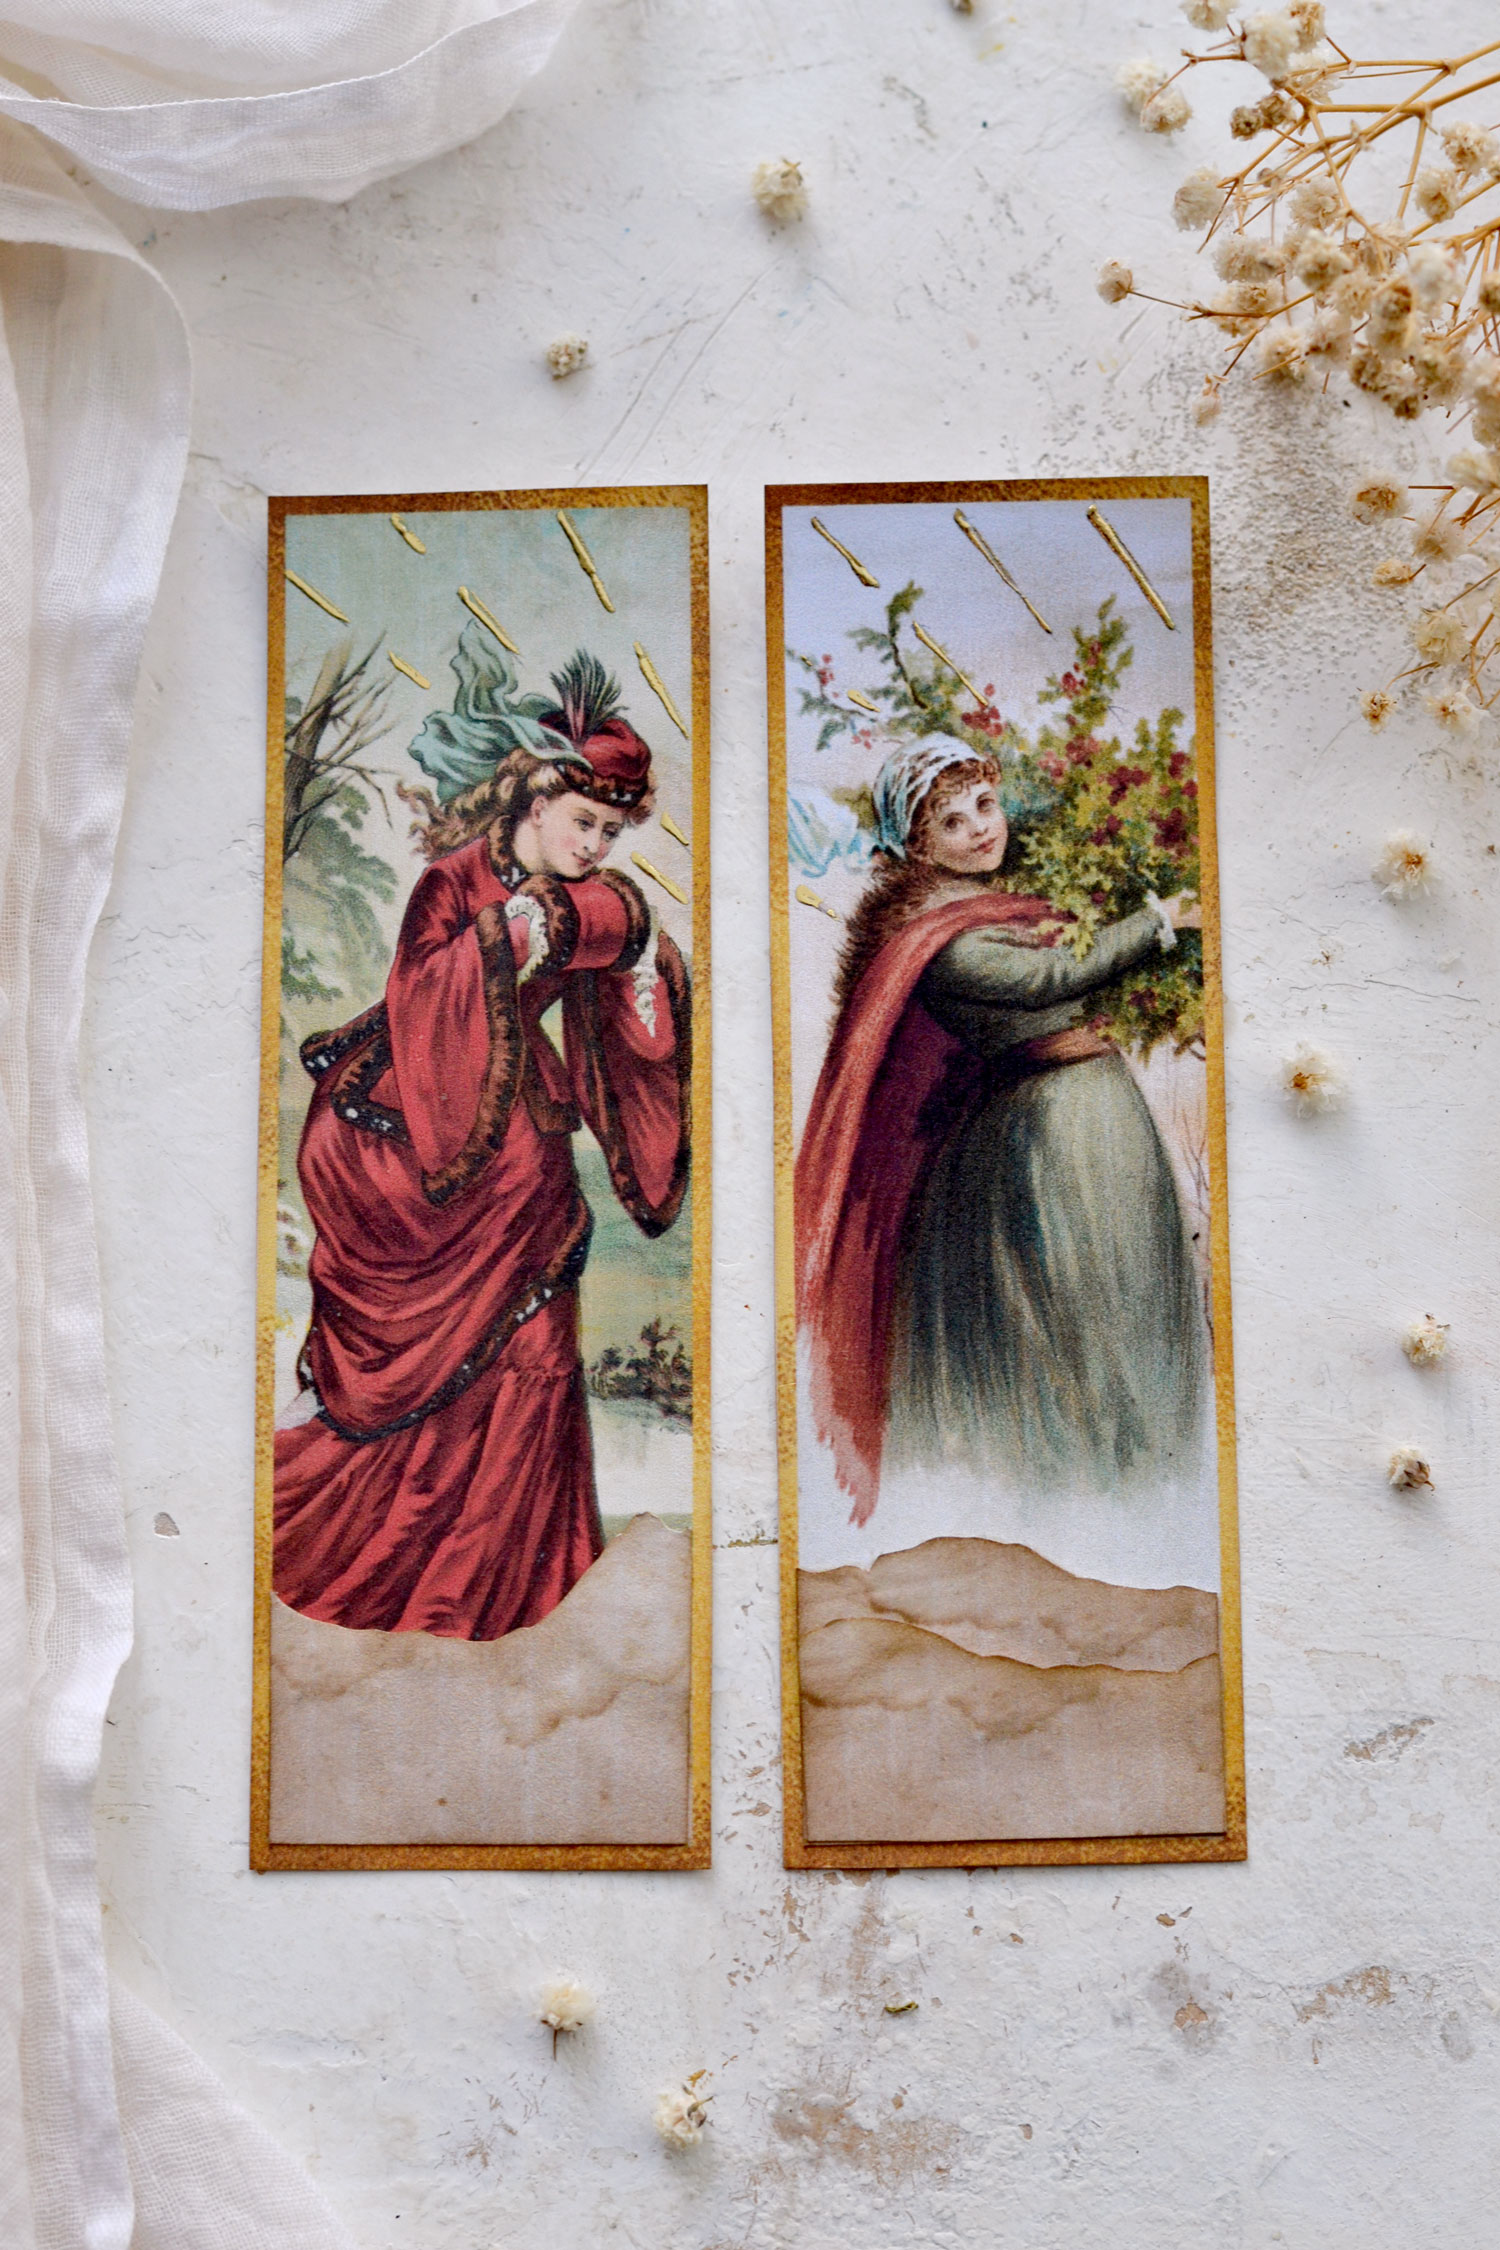
I included torn pieces of paper for each of our tags. The torn pieces come in two versions – one with Christmas wishes and one without – just use the one that you prefer.
Free Printable DIY Holiday Bookmarks:
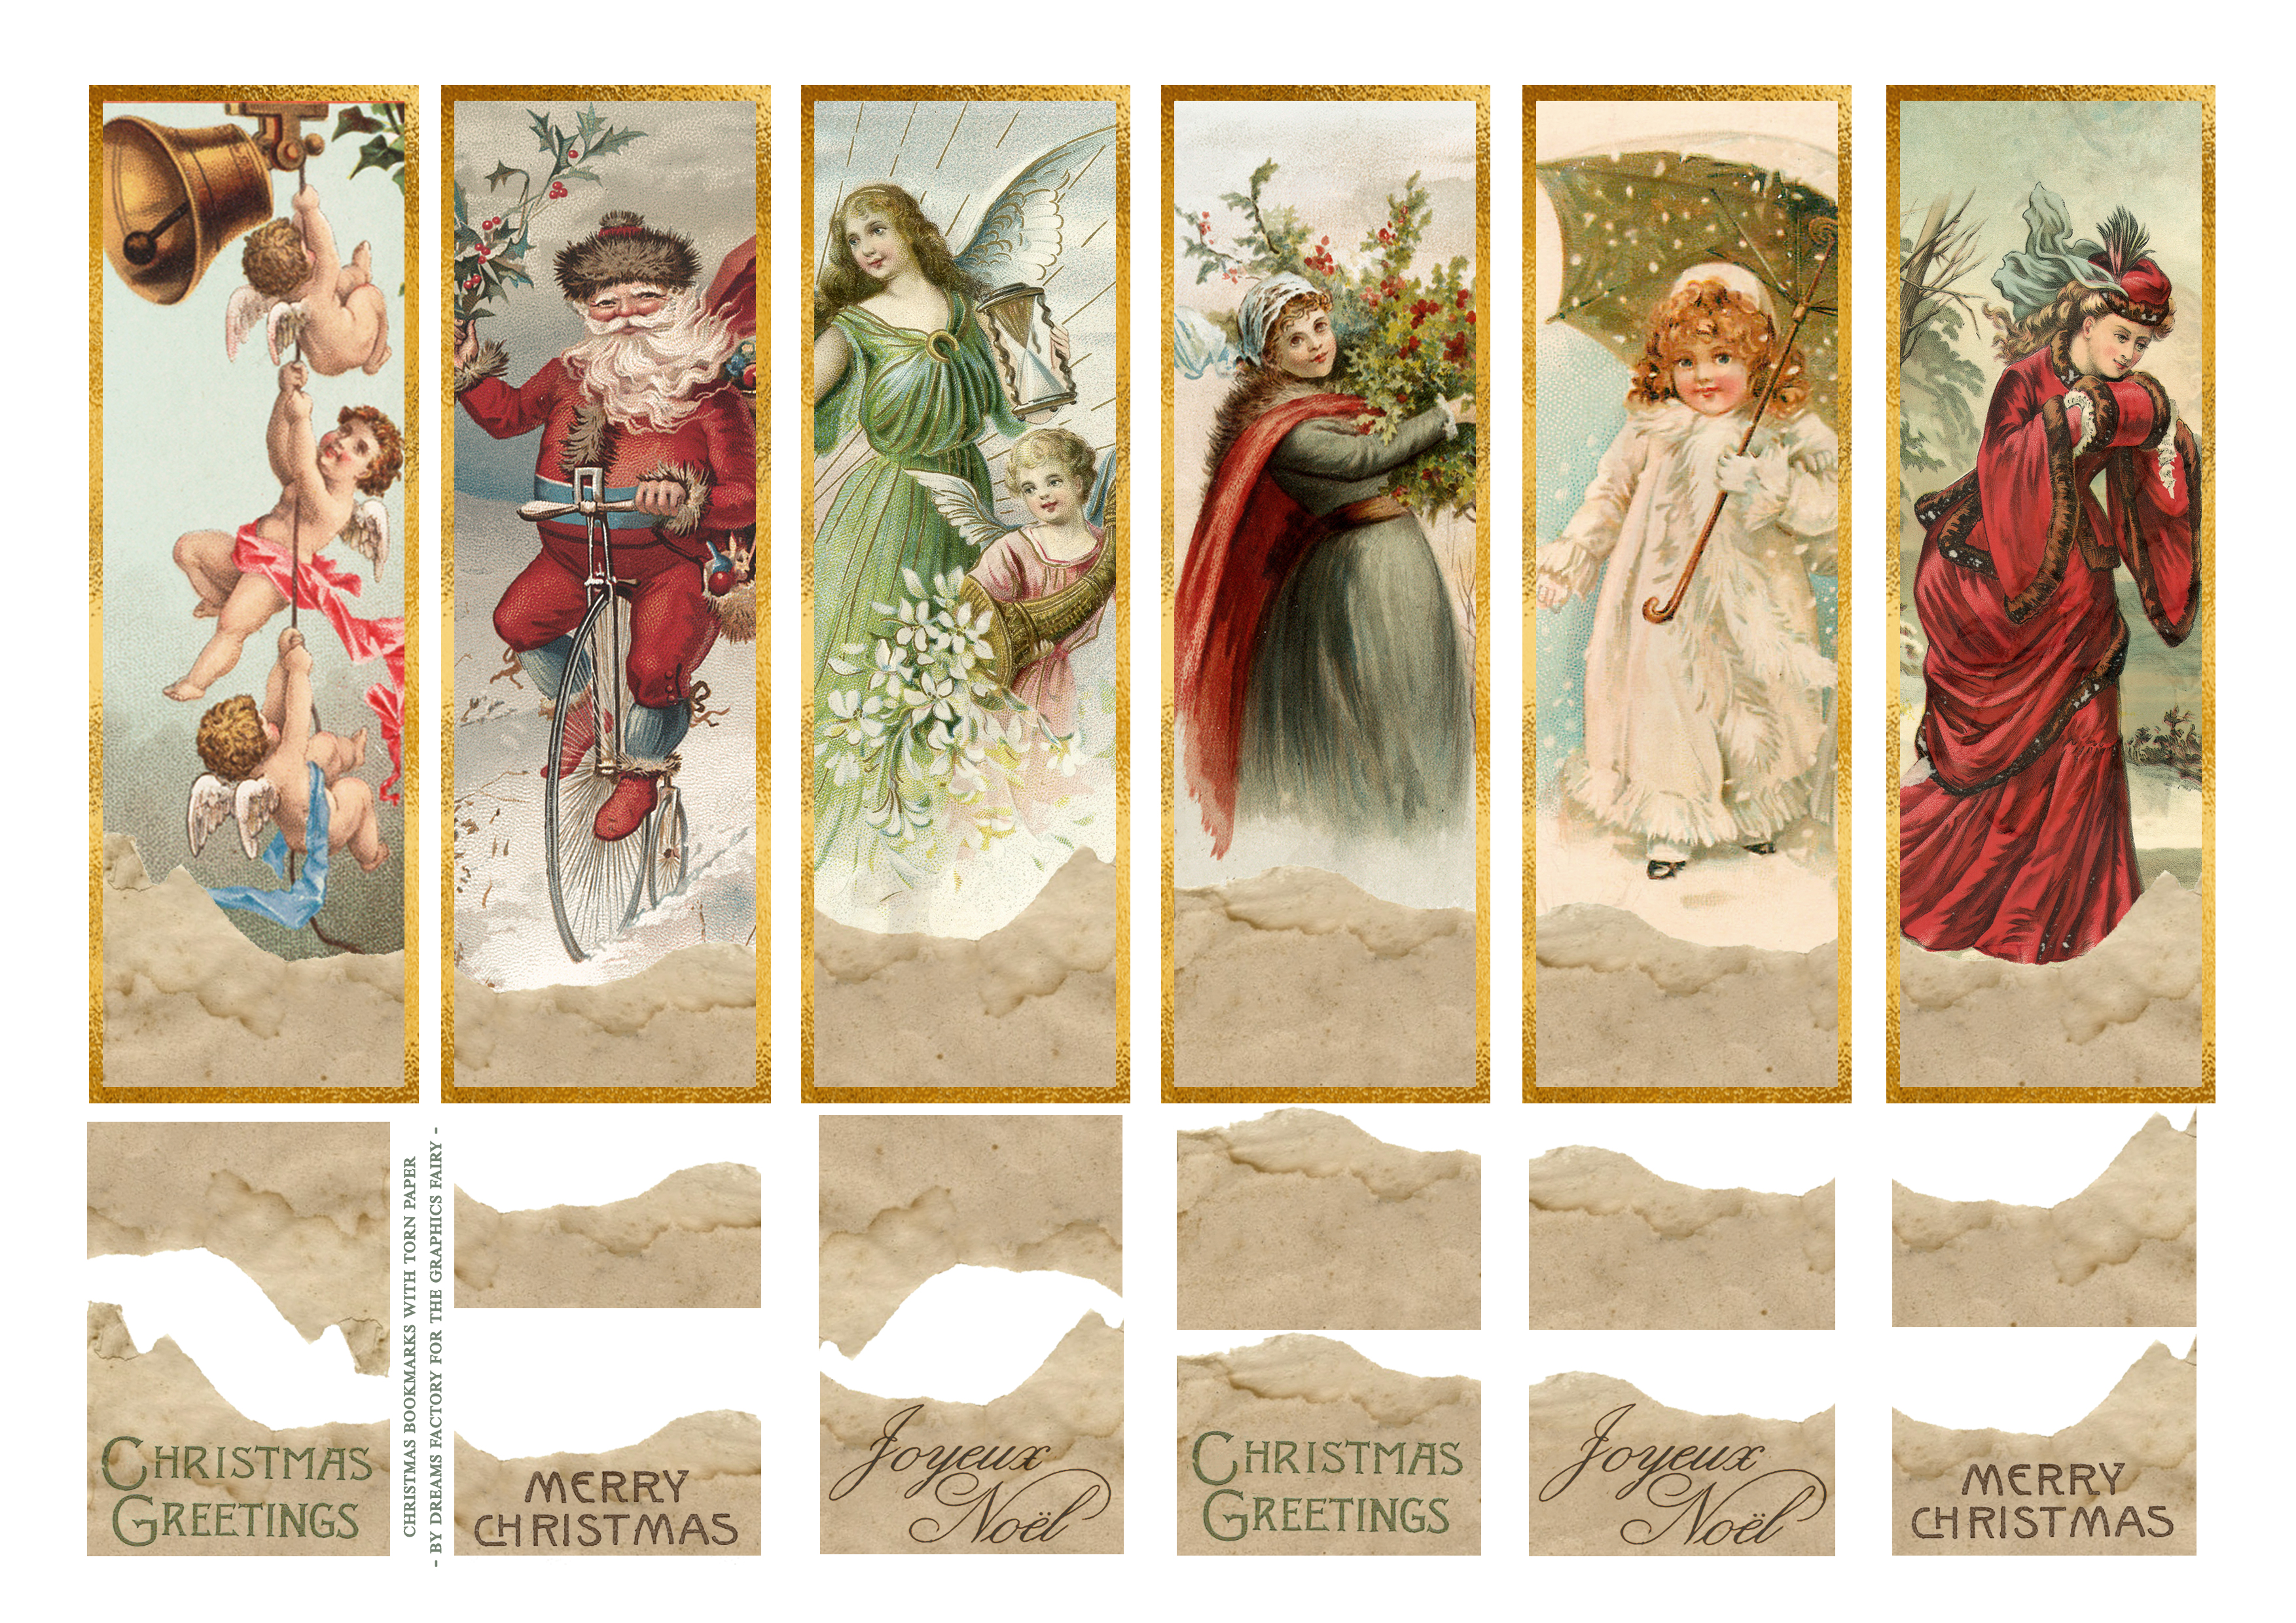
—-> Click HERE to Download the Full Size Printable PDF <—-
Supply List:
- cardstock paper
- home printer
- scissors
- mini distress inks
- blending tool with foams
- gold foil
- scissors
- Pebeo Mixtion OR Deco Foil gold foil glue
- ruler
- pencil
- paper glue

Step by Step Tutorial:
Start by printing your printable on cardstock paper, then use your scissors to cut each of your paper elements.
Use distress ink to give the paper even more of a vintage vibe. I love using the Walnut Stain brown from Ranger, it gives the paper such a beautiful, worn appearance.
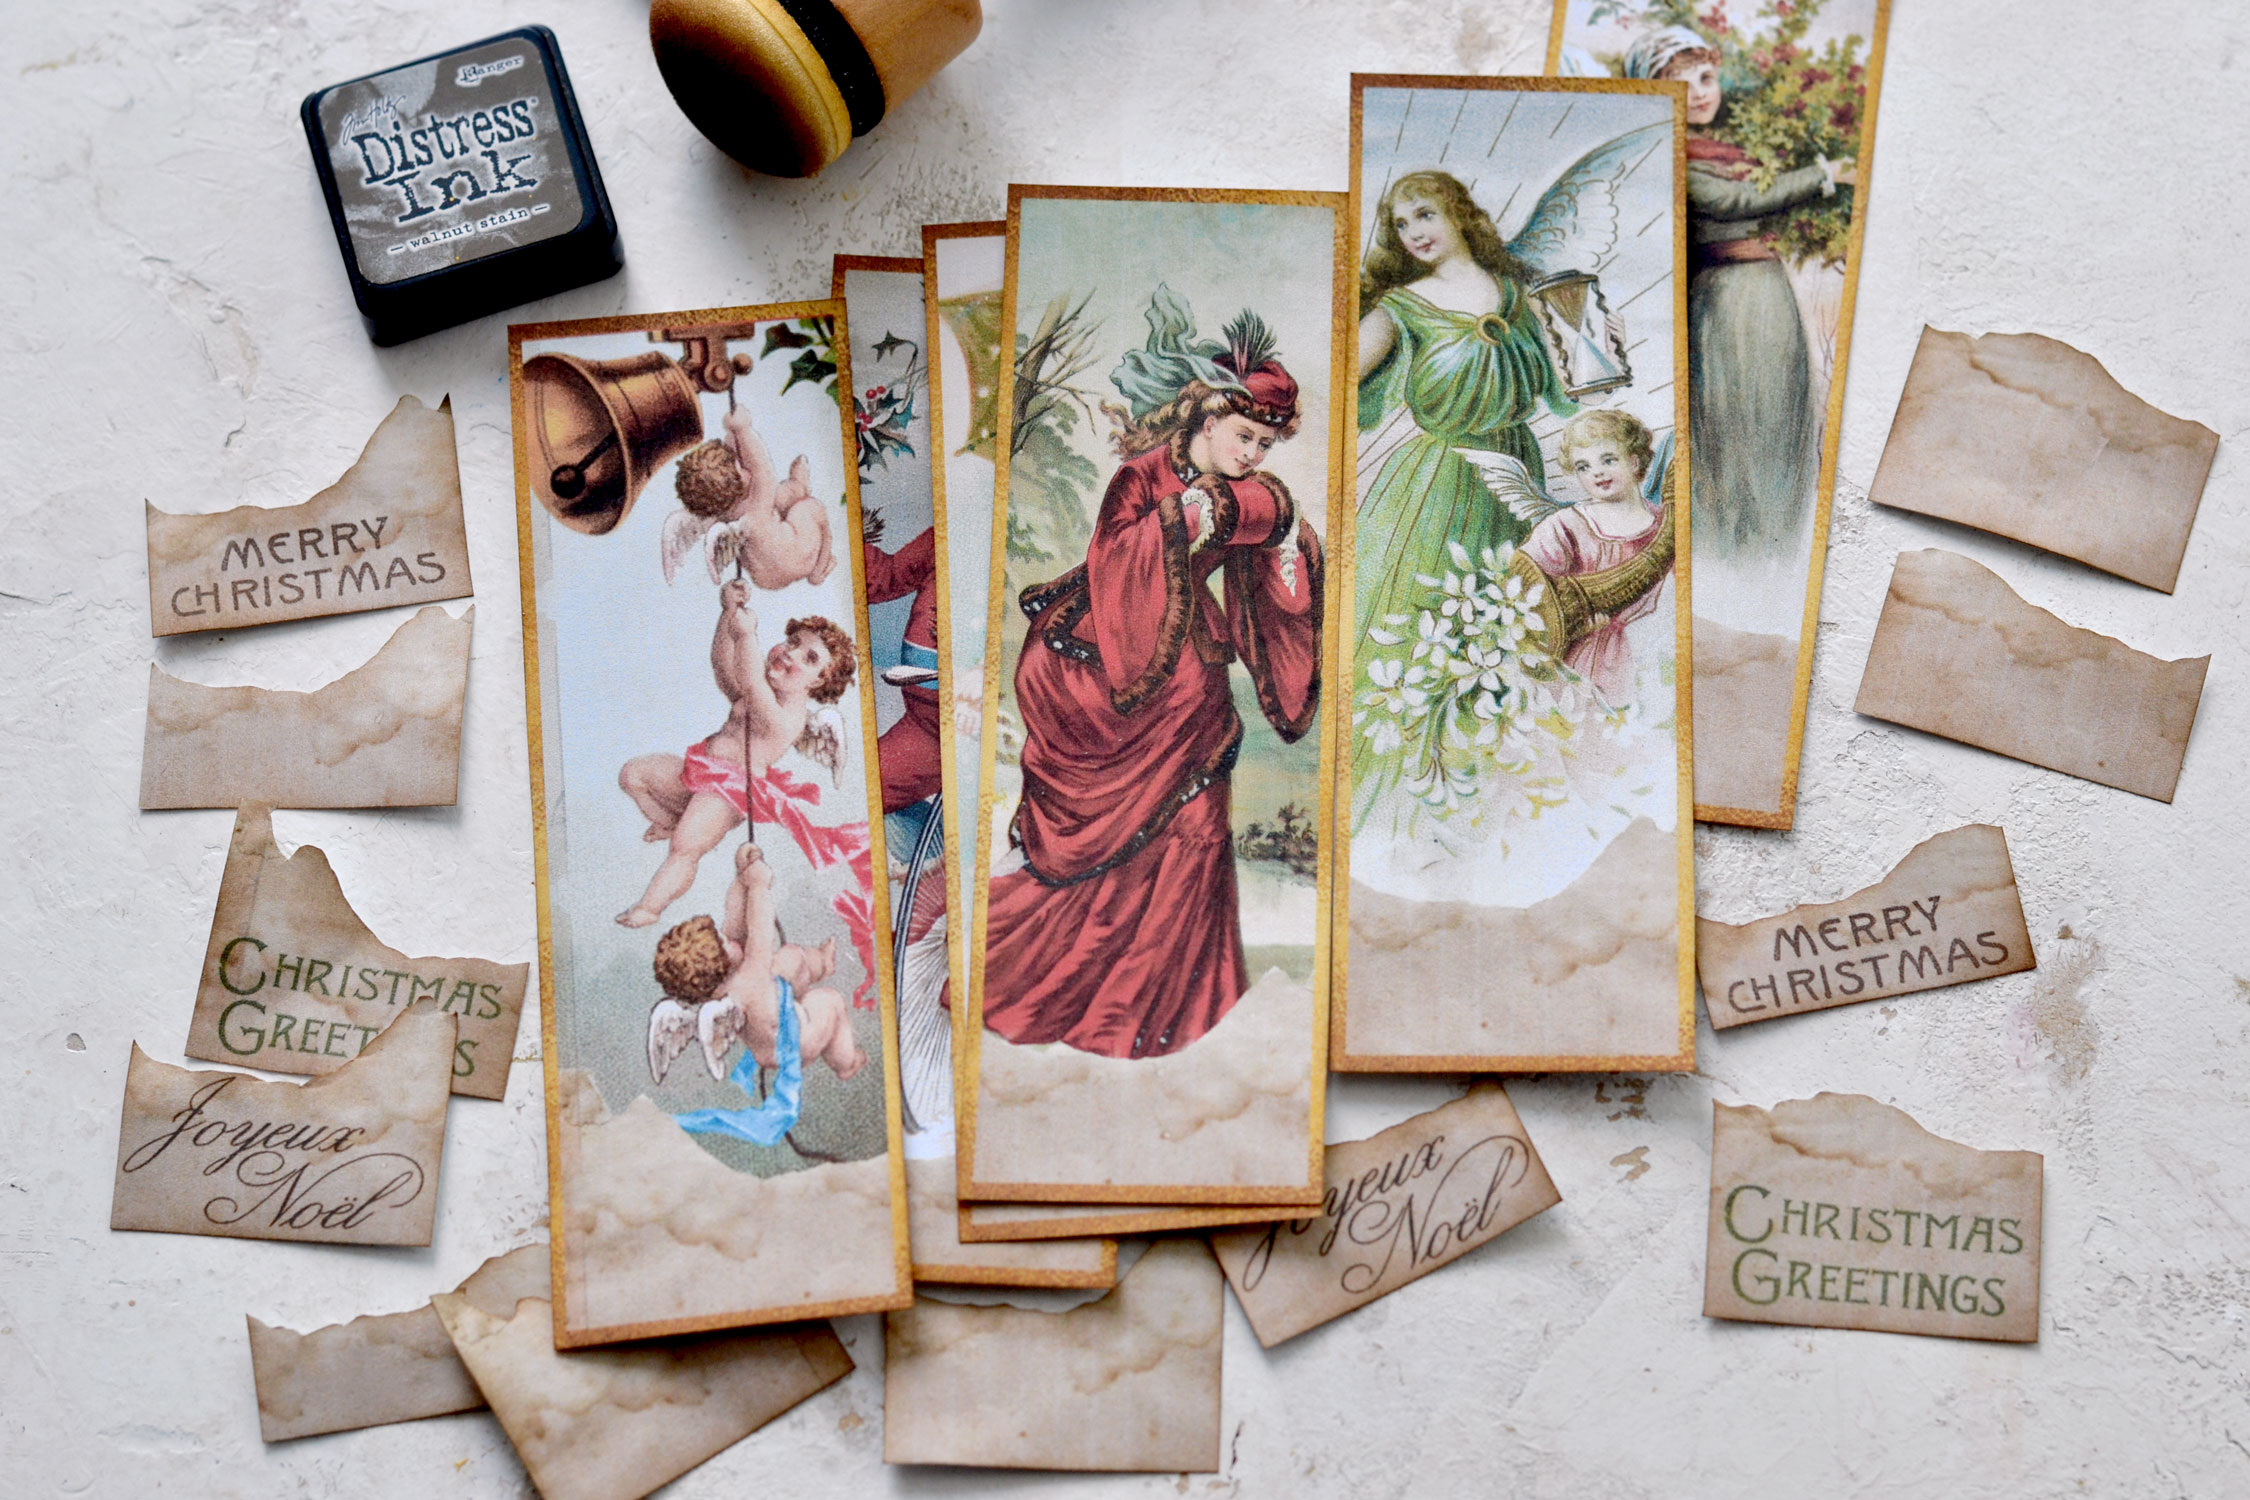
Just like I mentioned before, each tag has two corresponding torn pieces of paper, one with the Christmas wishes and one without. Now it’s time to decide which of these two you would prefer to use. I think the one with the Christmas wishes has a pretty obvious purpose. As for the other blank one, you can decide to use it if you prefer to give your bookmarks more of a universal feel – they can be adapted and used on other non-Christmasy projects as well.
Use paper glue to adhere the torn pieces of paper to the bottom of your bookmarks.
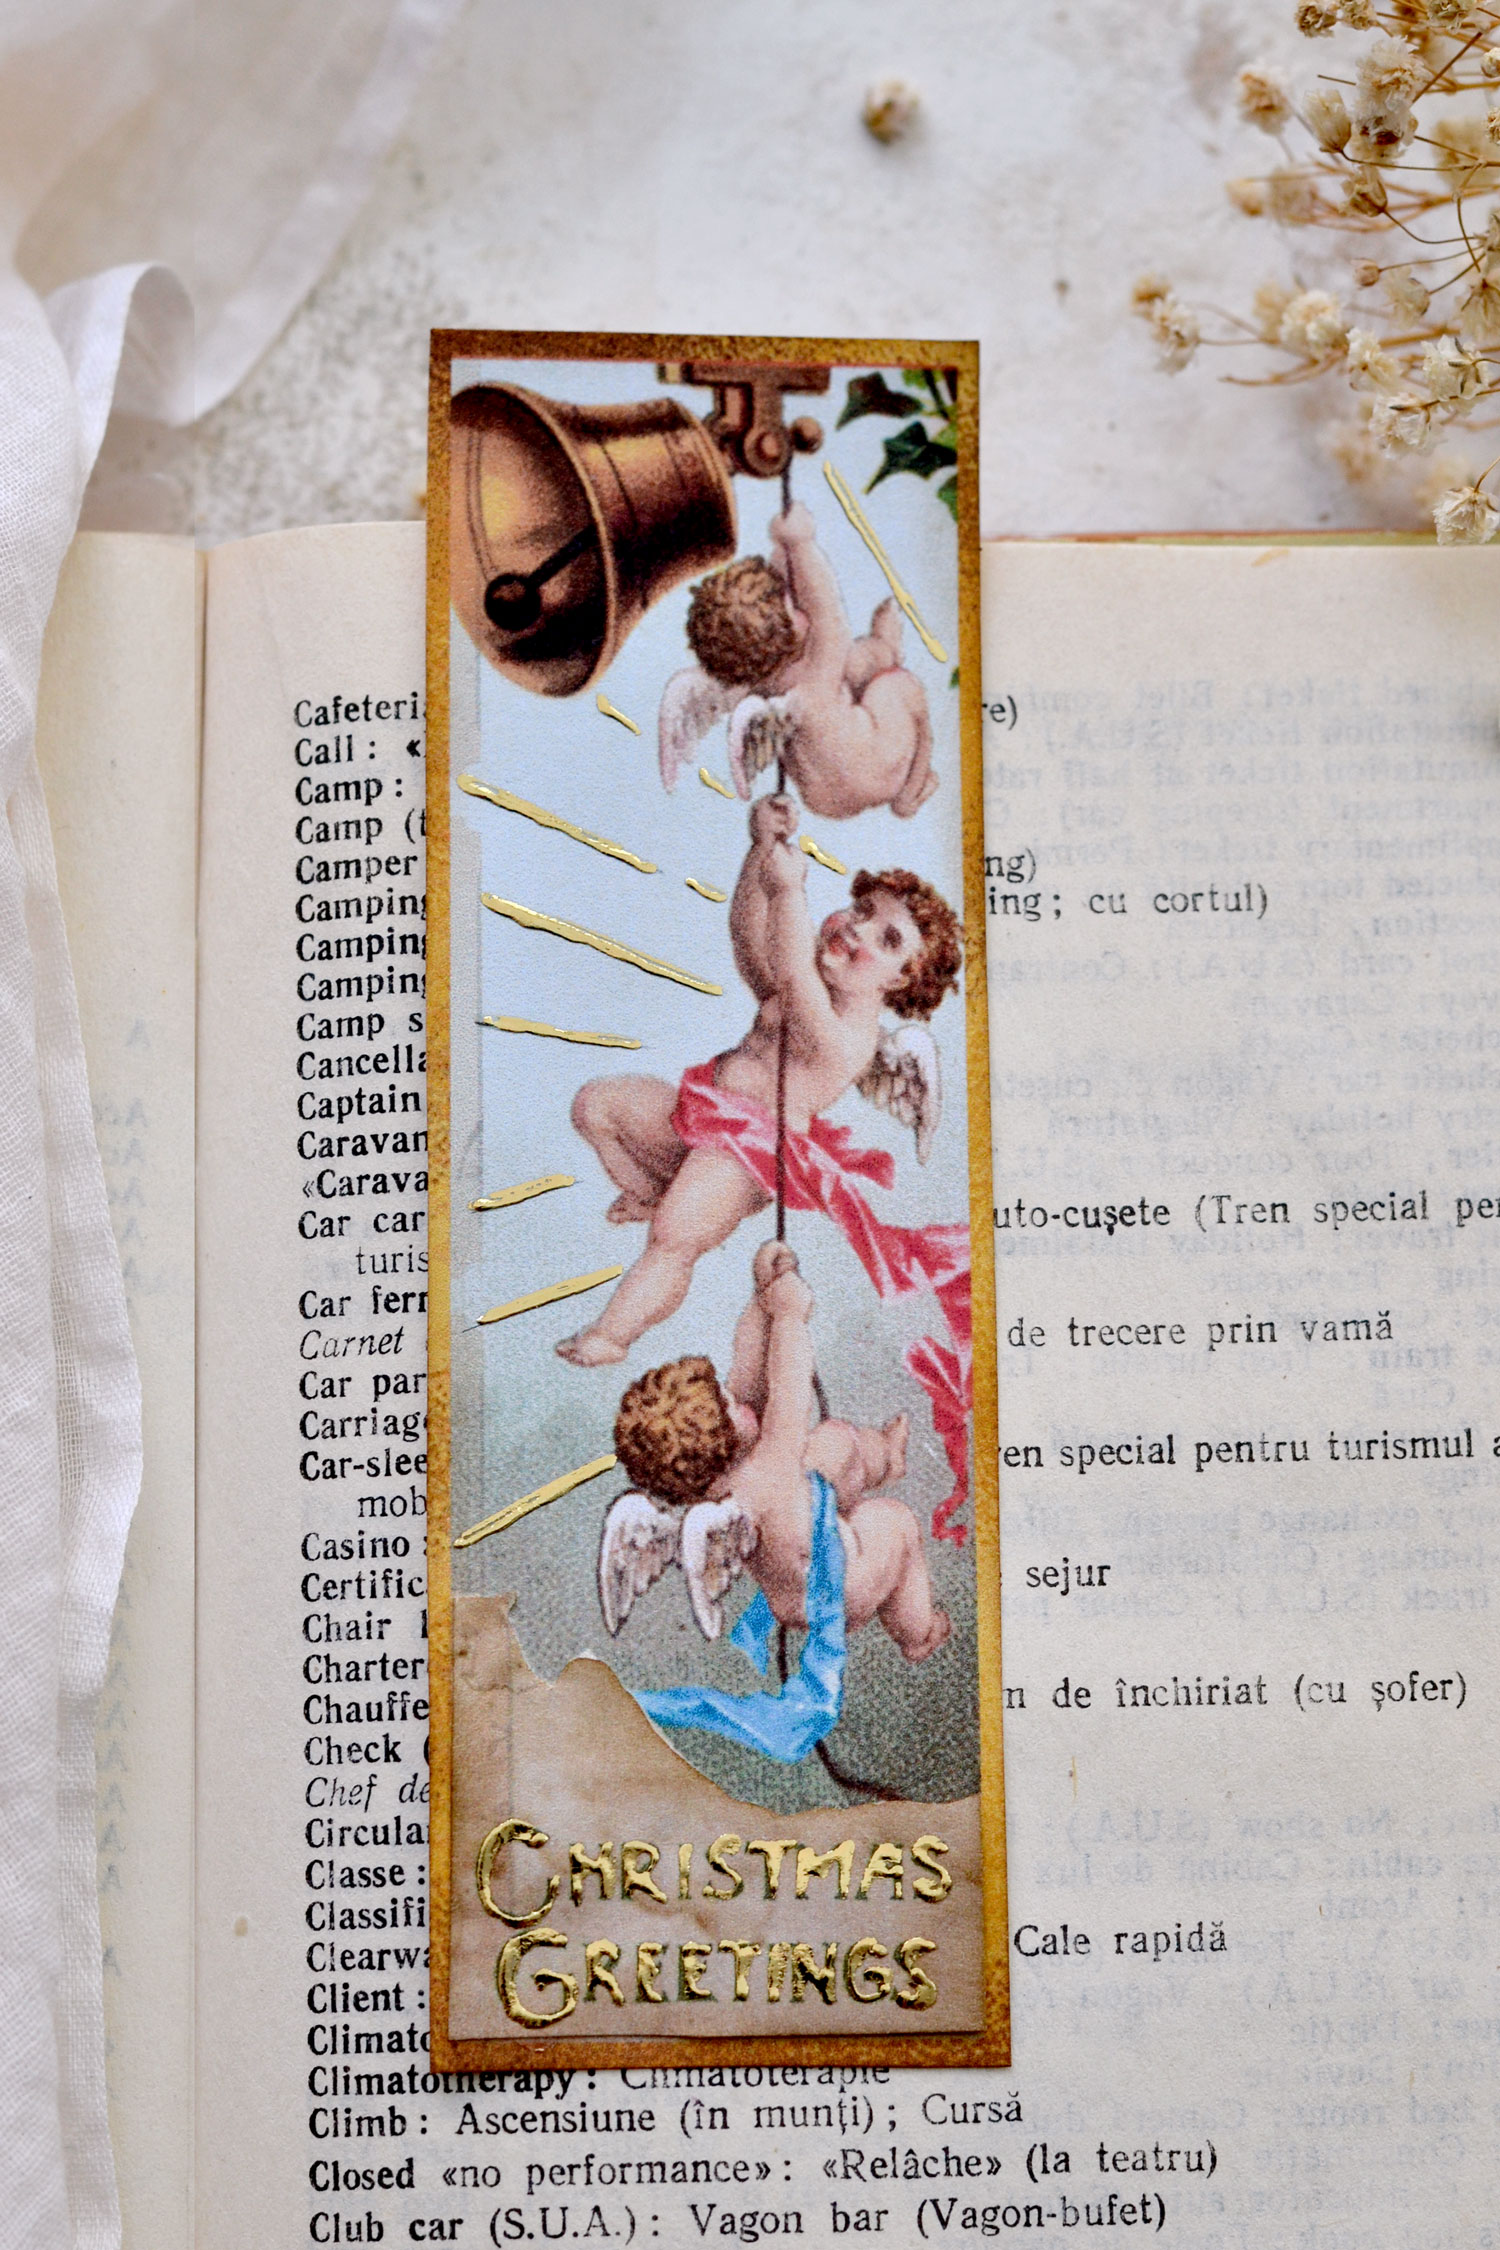
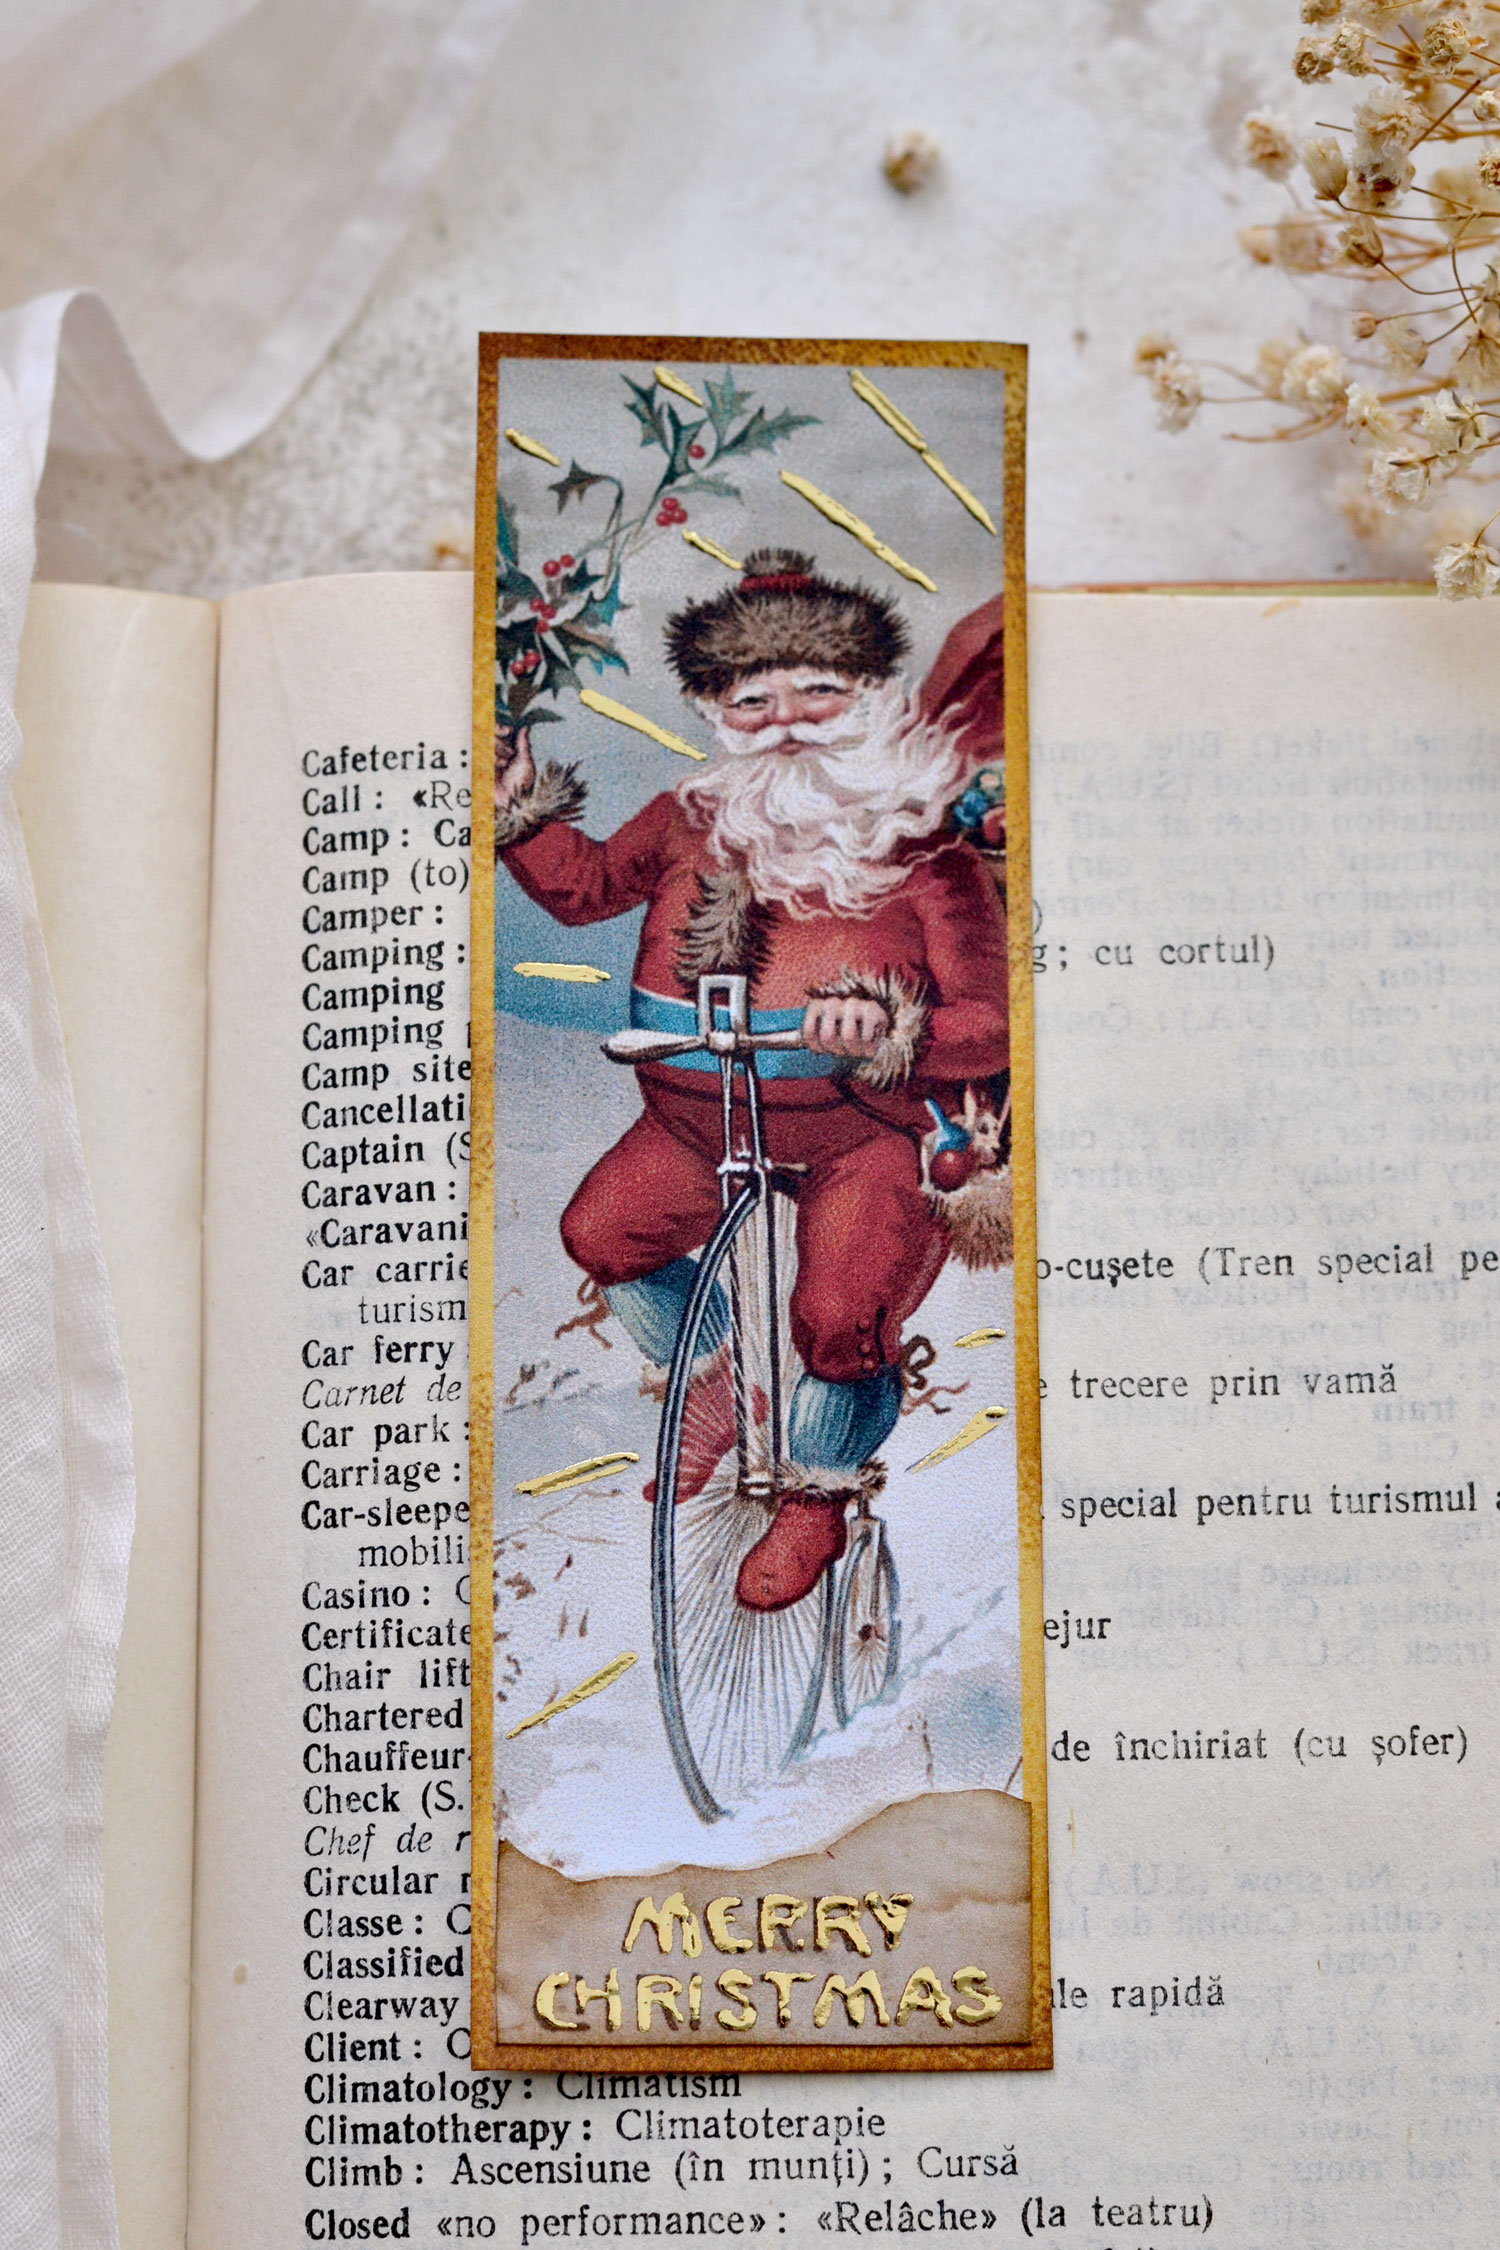
Now it’s time to add some marvelous gold touches!
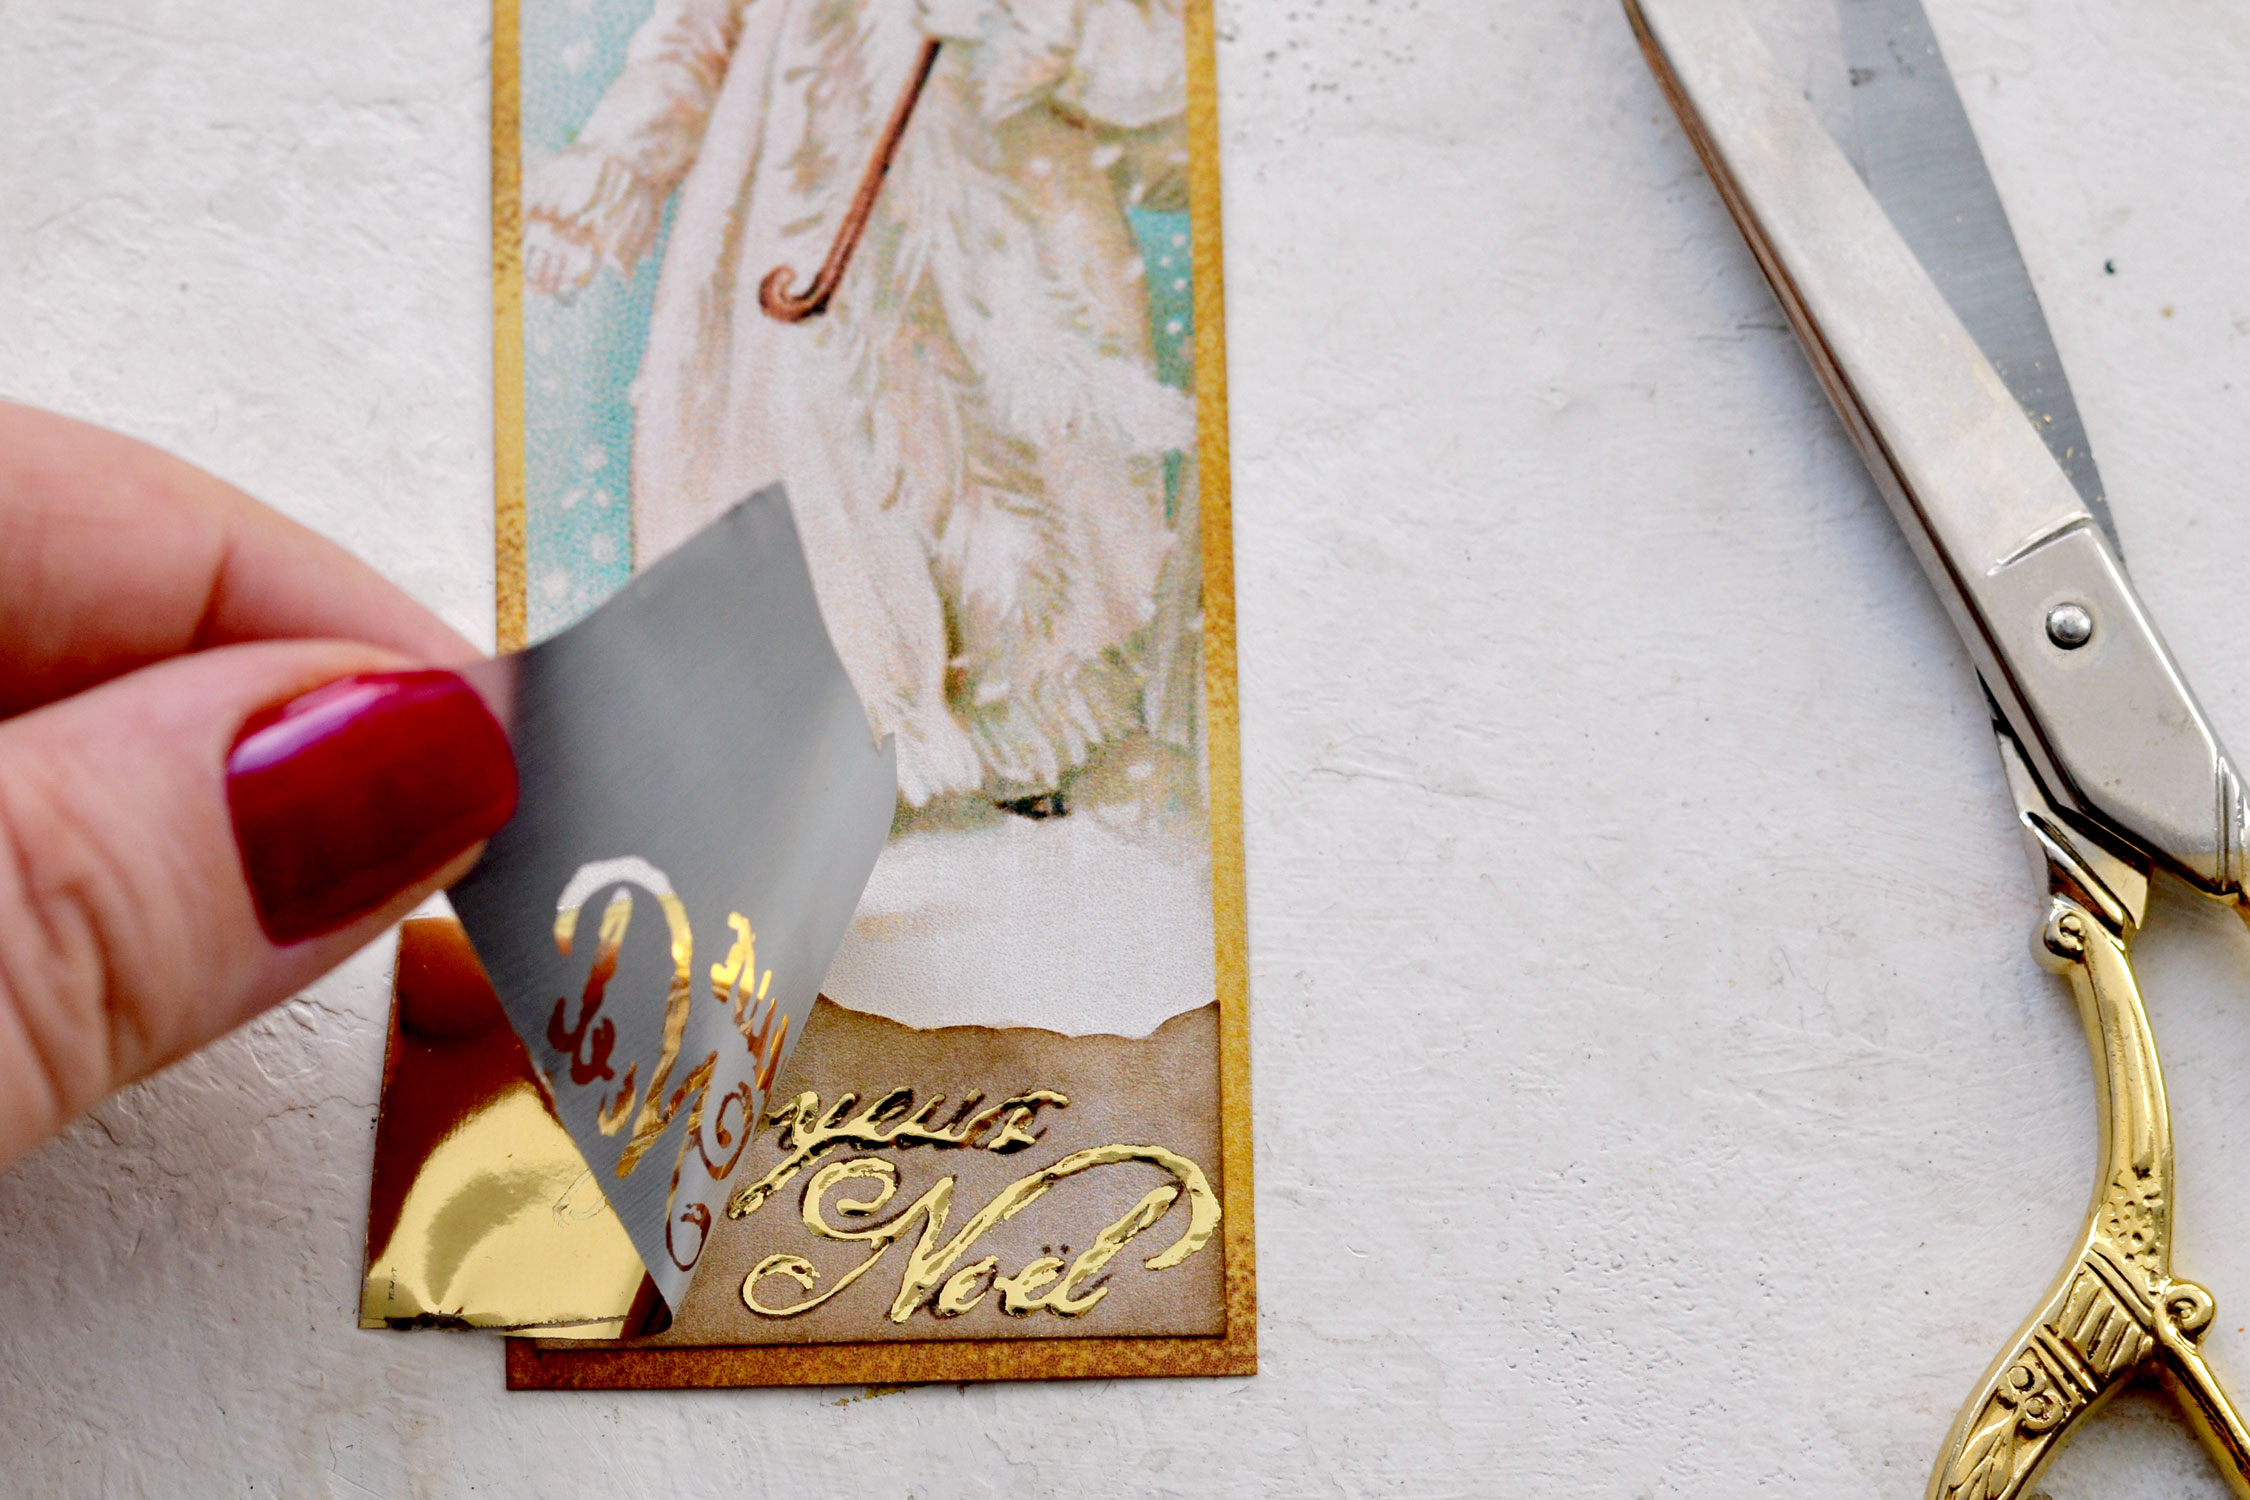
This time, I tried my new gold foil glue from Pebeo, which comes with an applicator and can be used directly on your paper. This one is actually a mixtion relief (it feels more like a paste) and it can be used both with gold foil and gold leaf! Pretty cool, right?
Just use the applicator to paint with glue over the Christmas writing while lightly pressing the tube to gradually release a tiny amount of glue.
The mixtion glue will be white when applying it and will turn transparent and tacky (the main feature) after drying.
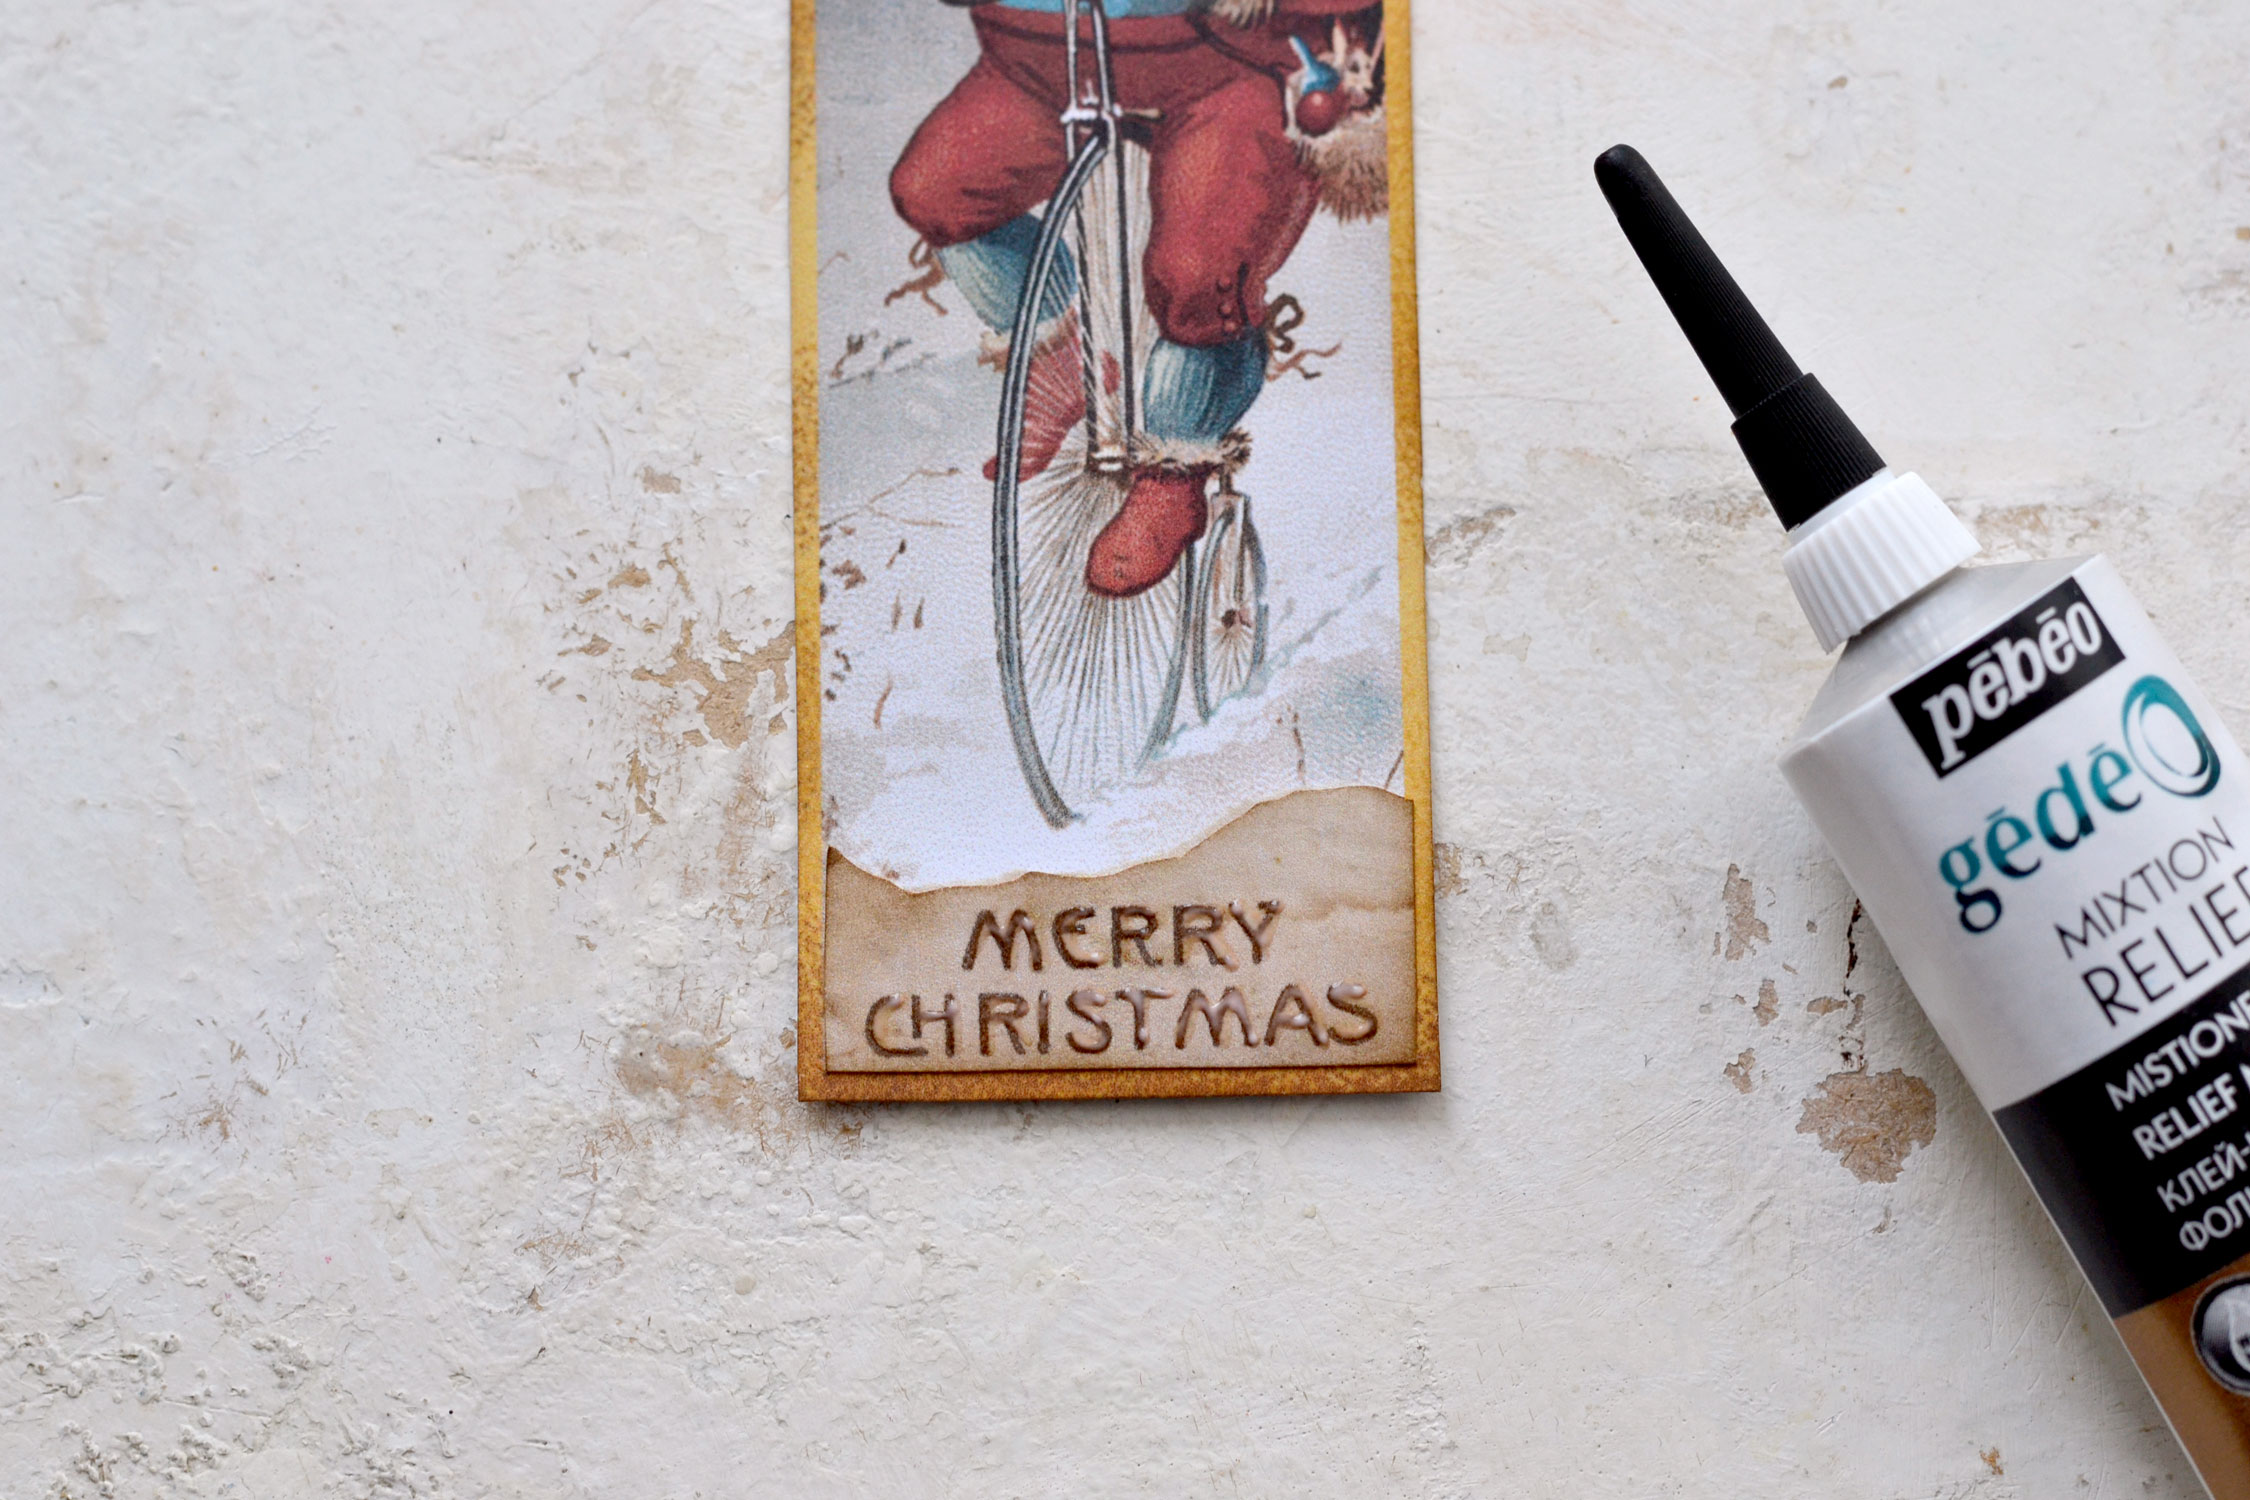
Leave the gold foil glue to dry, then cut a small piece of gold foil and add it on top. Press with the tip of your fingers (not your nails) for a few seconds at a time. The tackiness of this special glue will adhere the gold foil on top of your writing!

Peel off the gold foil and you are done! Your absolutely gorgeous gilded Christmas wishes are ready to be admired!
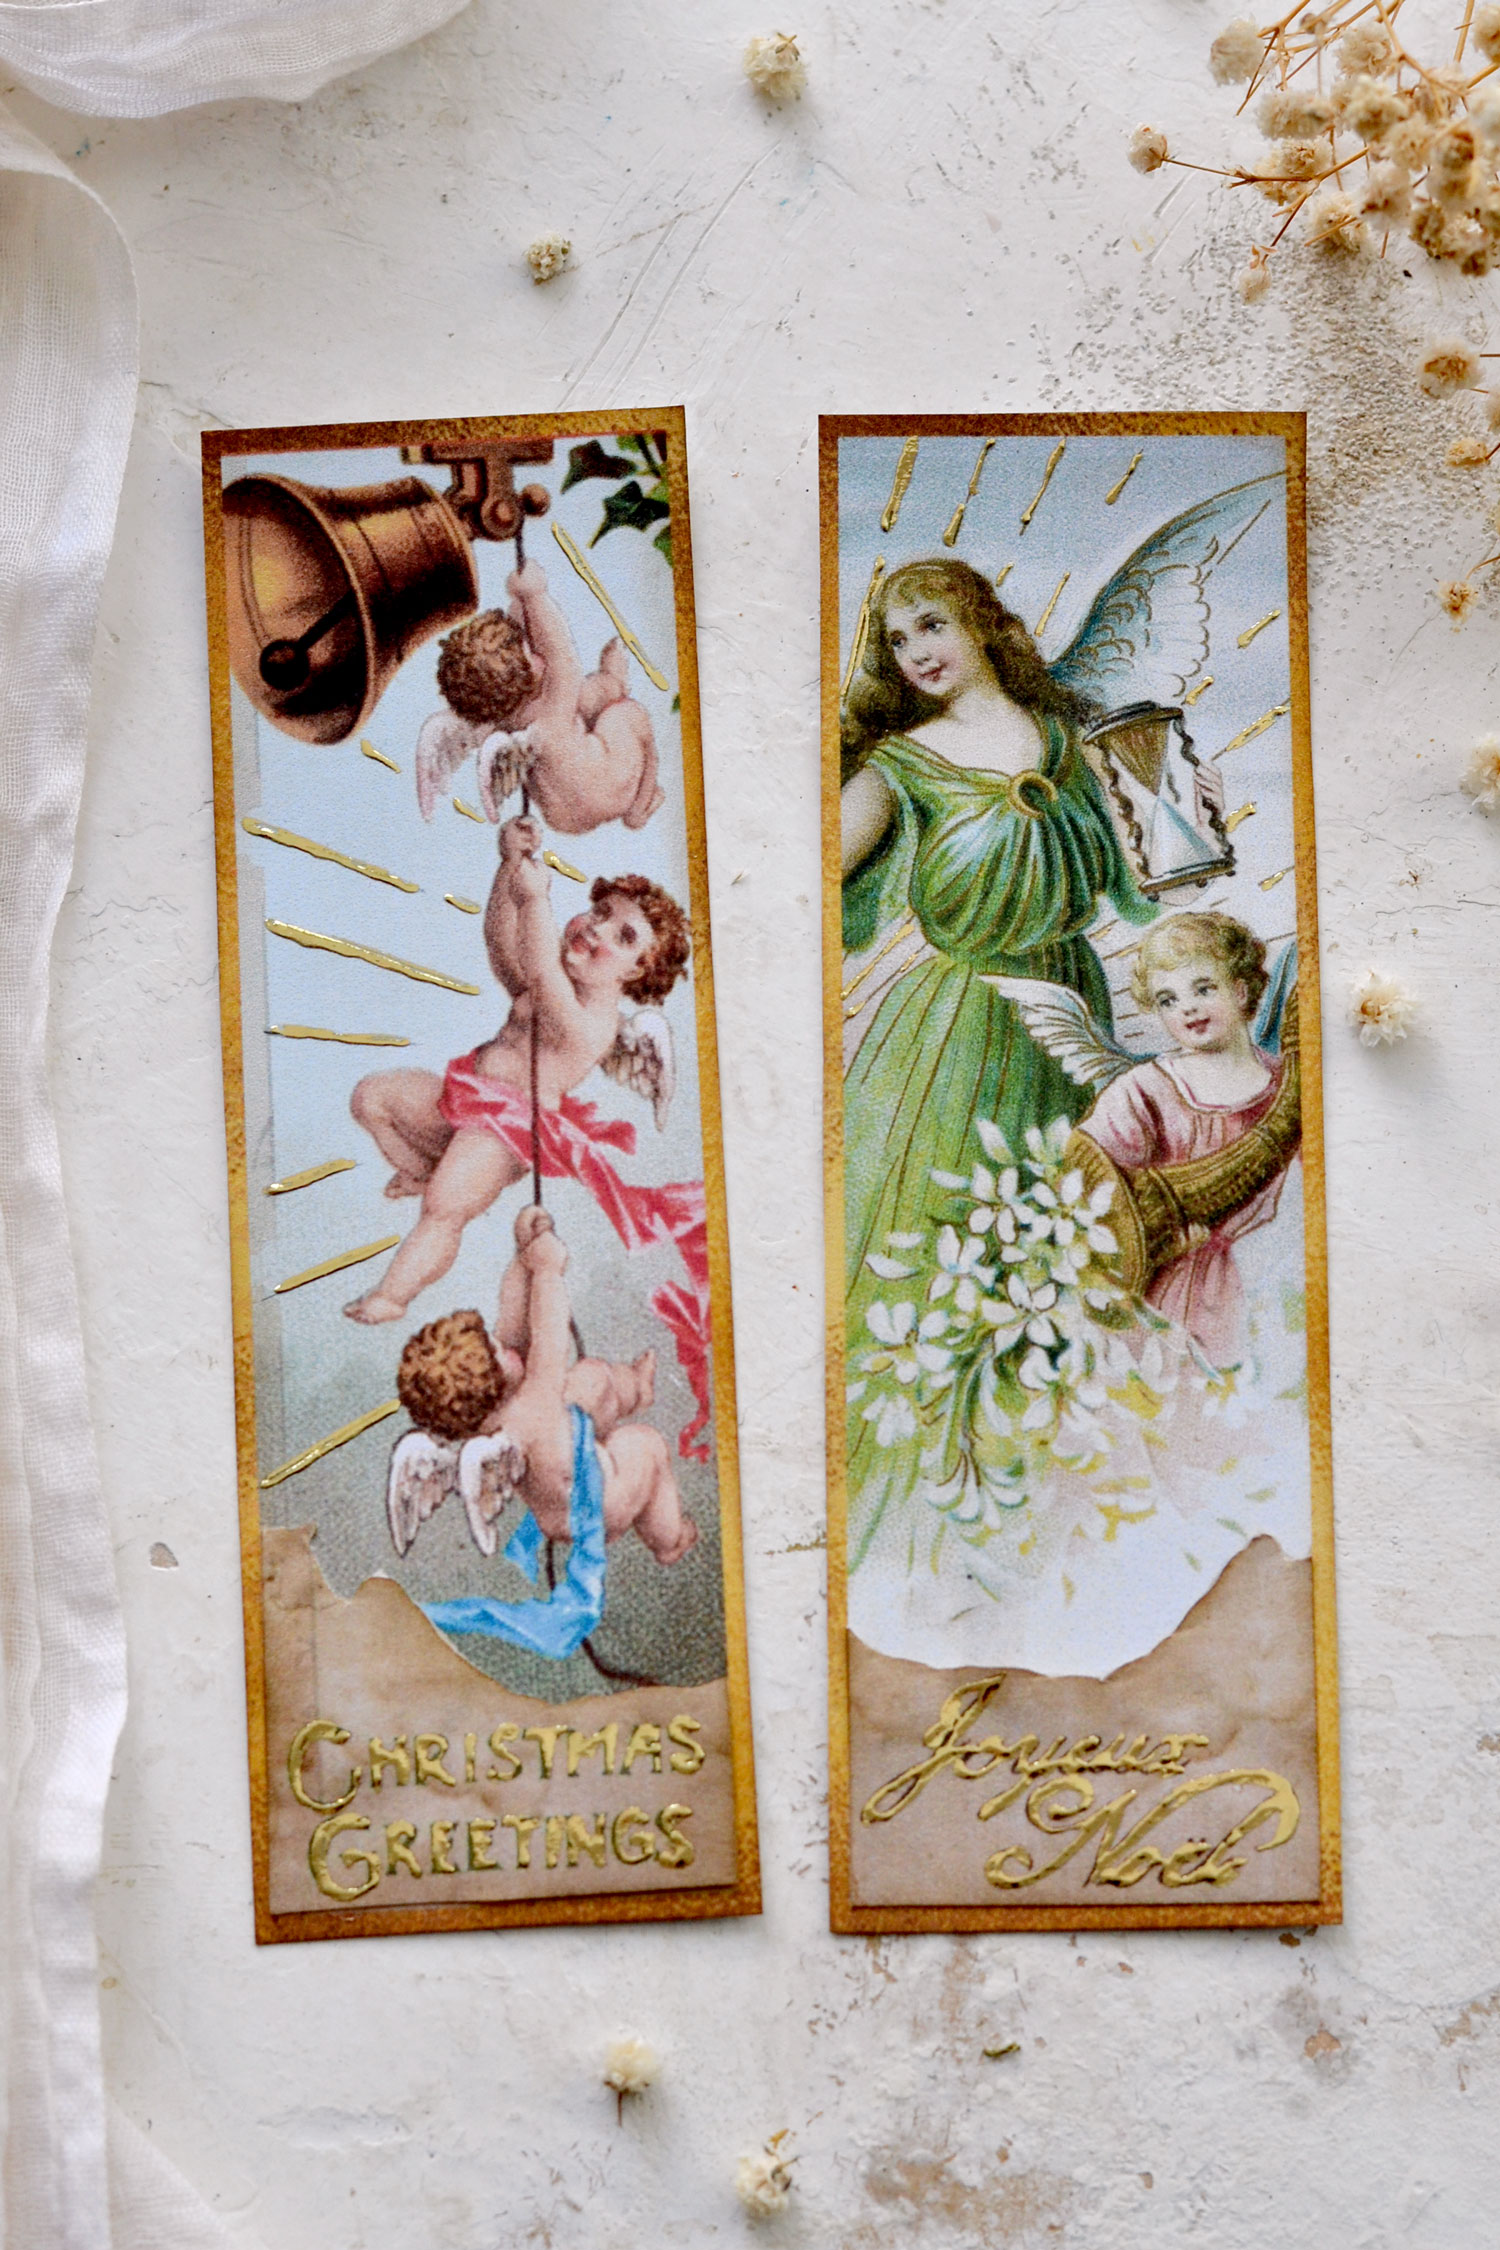
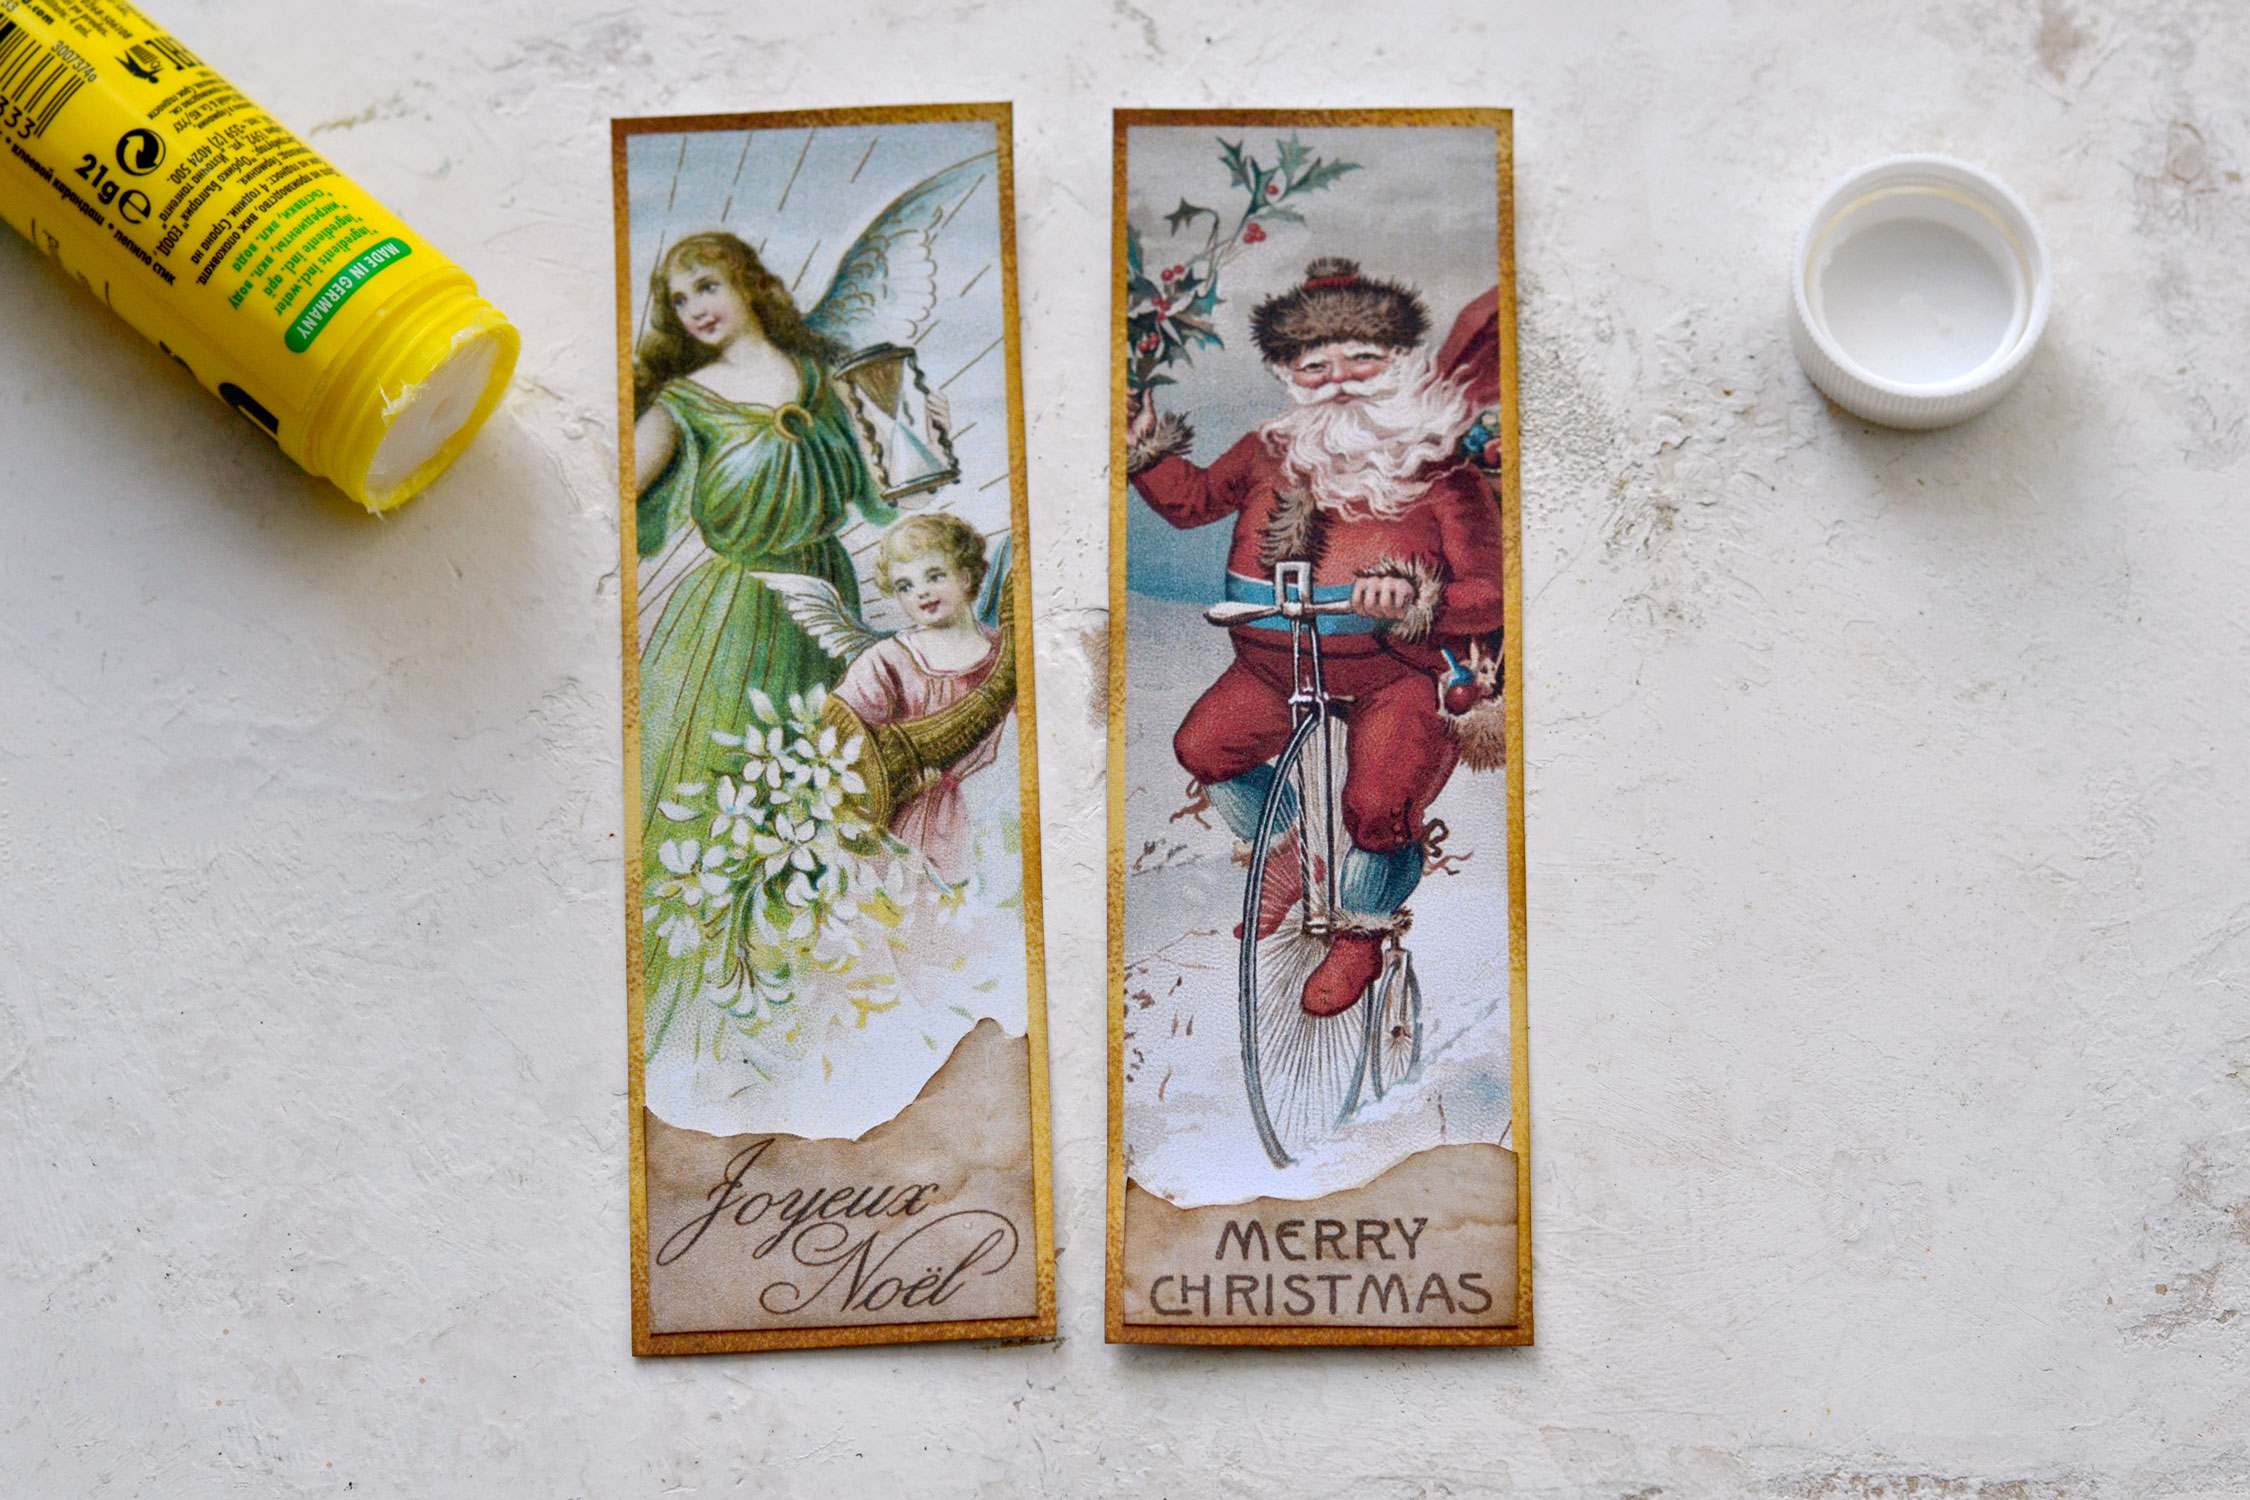
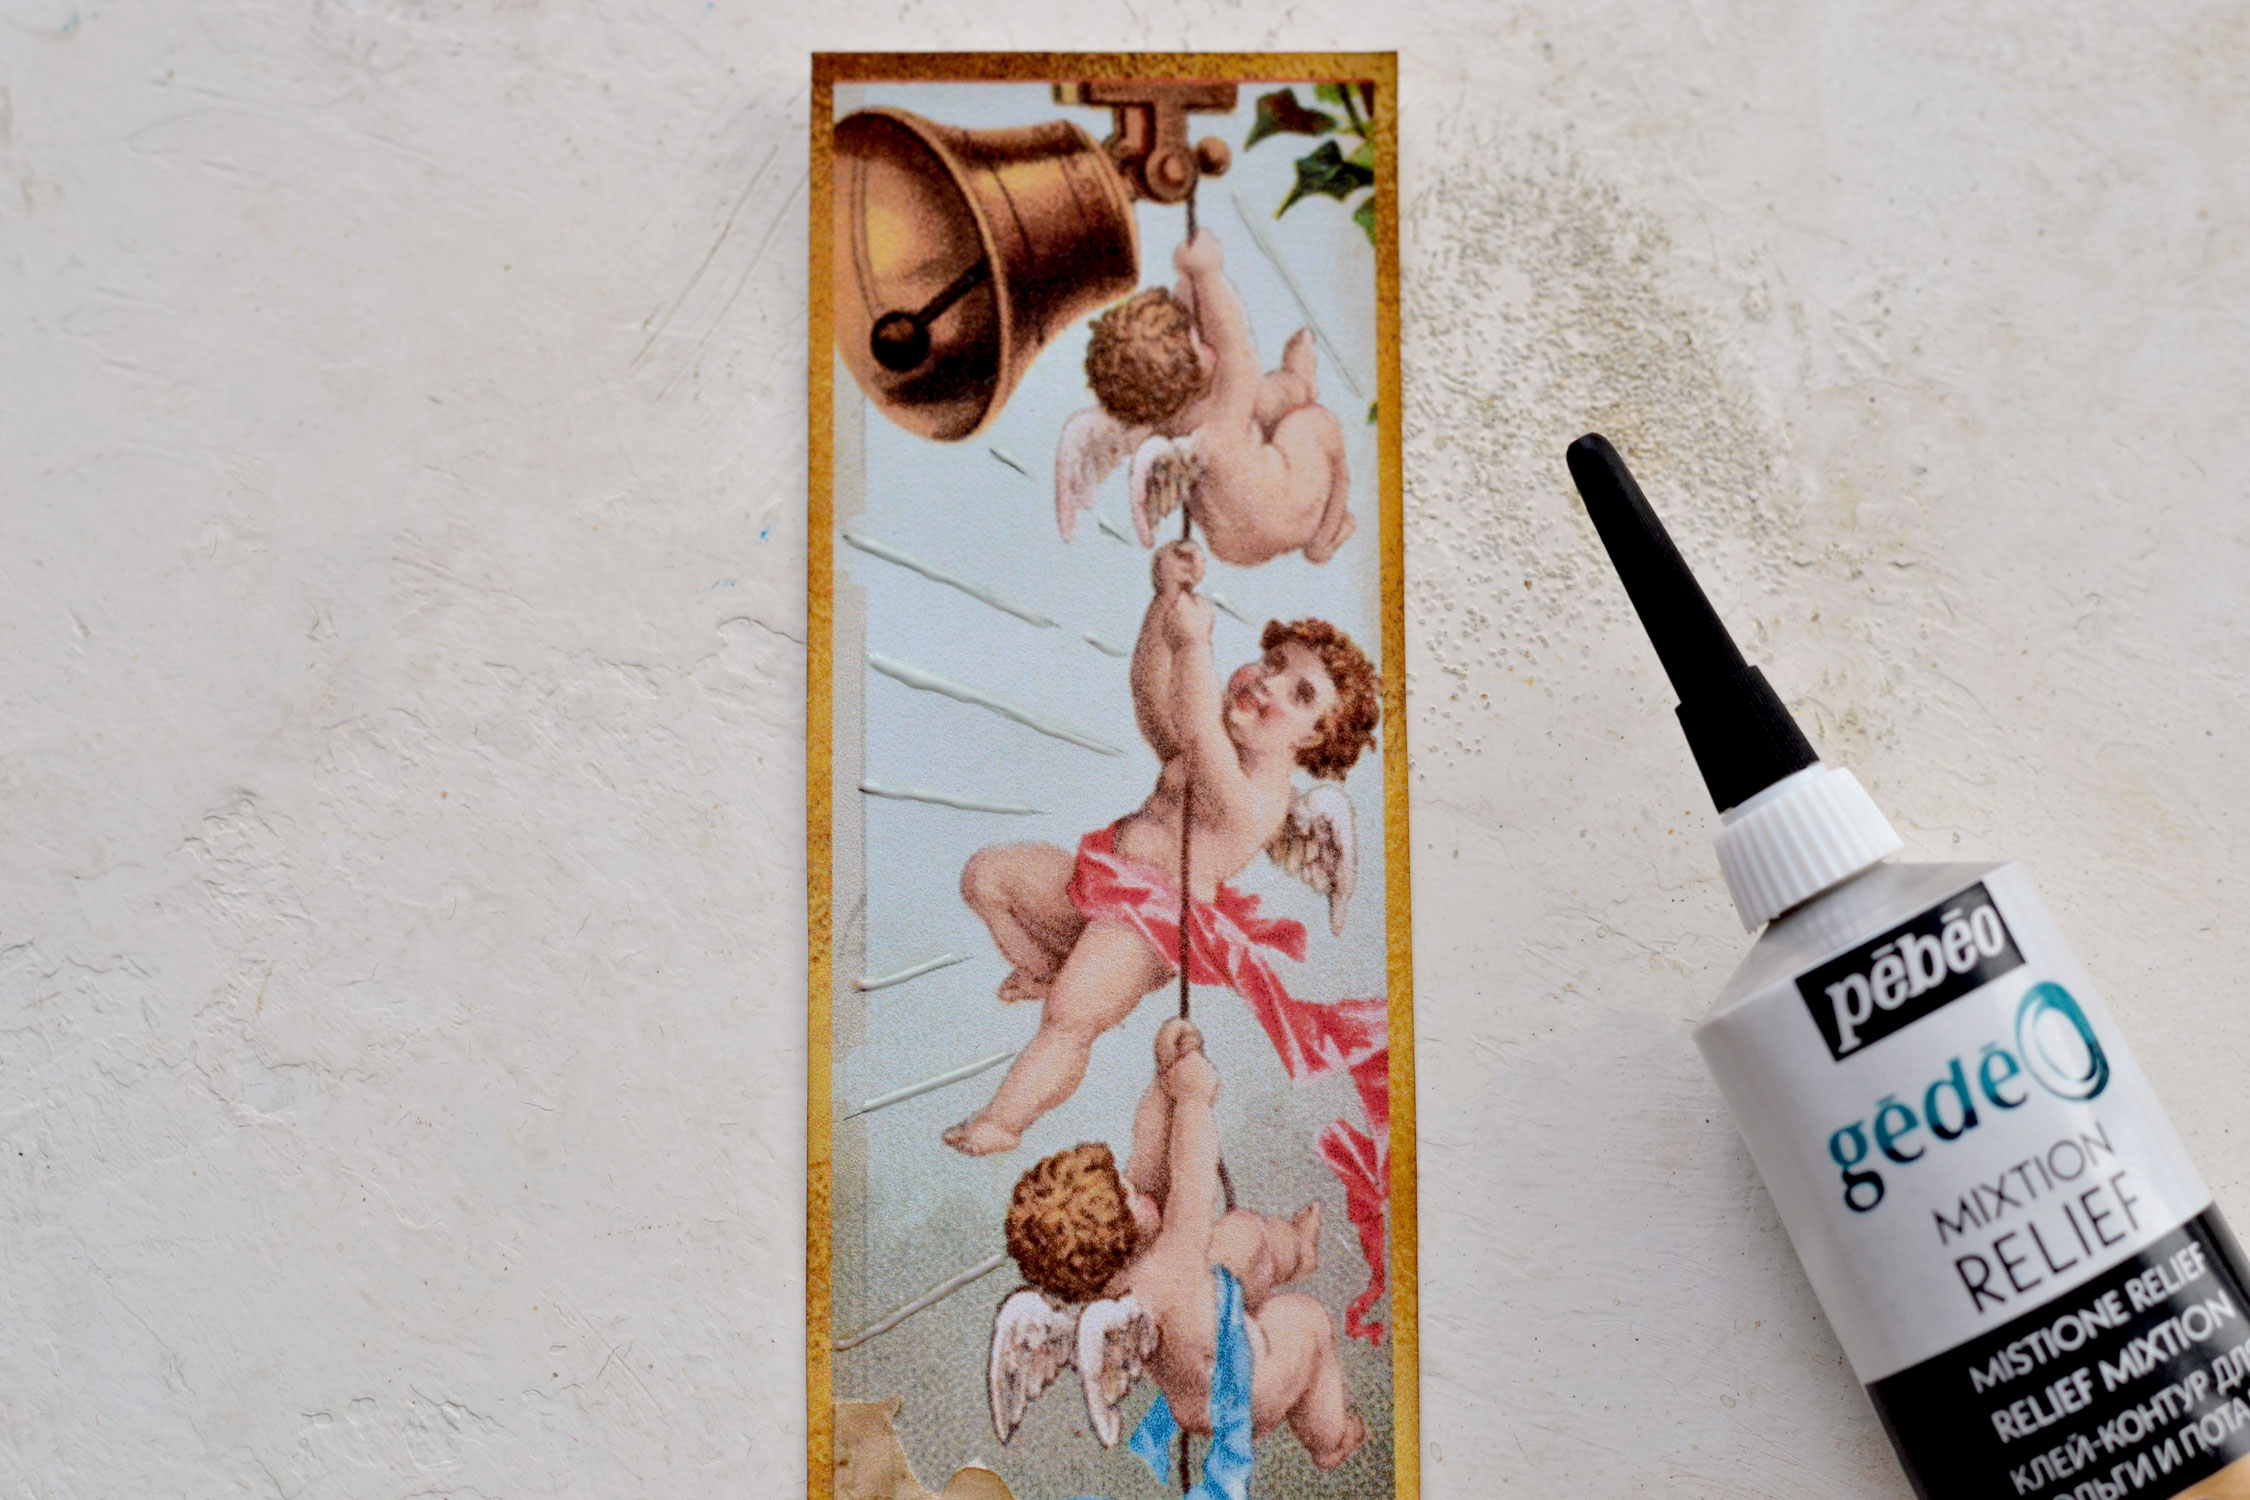
I was inspired by the angels bookmark that had some lovely sunrays embedded in the design to try making some on my own. I used a ruler and a pencil to create the beams following the same idea.

Next, I painted with that magical glue on top of the beams, let it dry and finally I applied some more gold foil on top.
The finished Christmas bookmarks turned out absolutely gorgeous, I was really happy with their final look!

Don’t expect the gilded areas to be perfect, because they won’t be. But even so, they are absolutely amazing and add so much character to the handmade feel I was envisioning for these beauties.
I was initially concerned this won’t work really well because the writing is quite small, but I put on my eyeglasses and just went with the flow.
I know I mentioned this before, but painting with gold foil glue is one of my favorite things to do! I don’t know if it’s the glue painting over the writing that is quite relaxing or the afterward revealing after applying the gold that makes me love this, but I do! I love it!
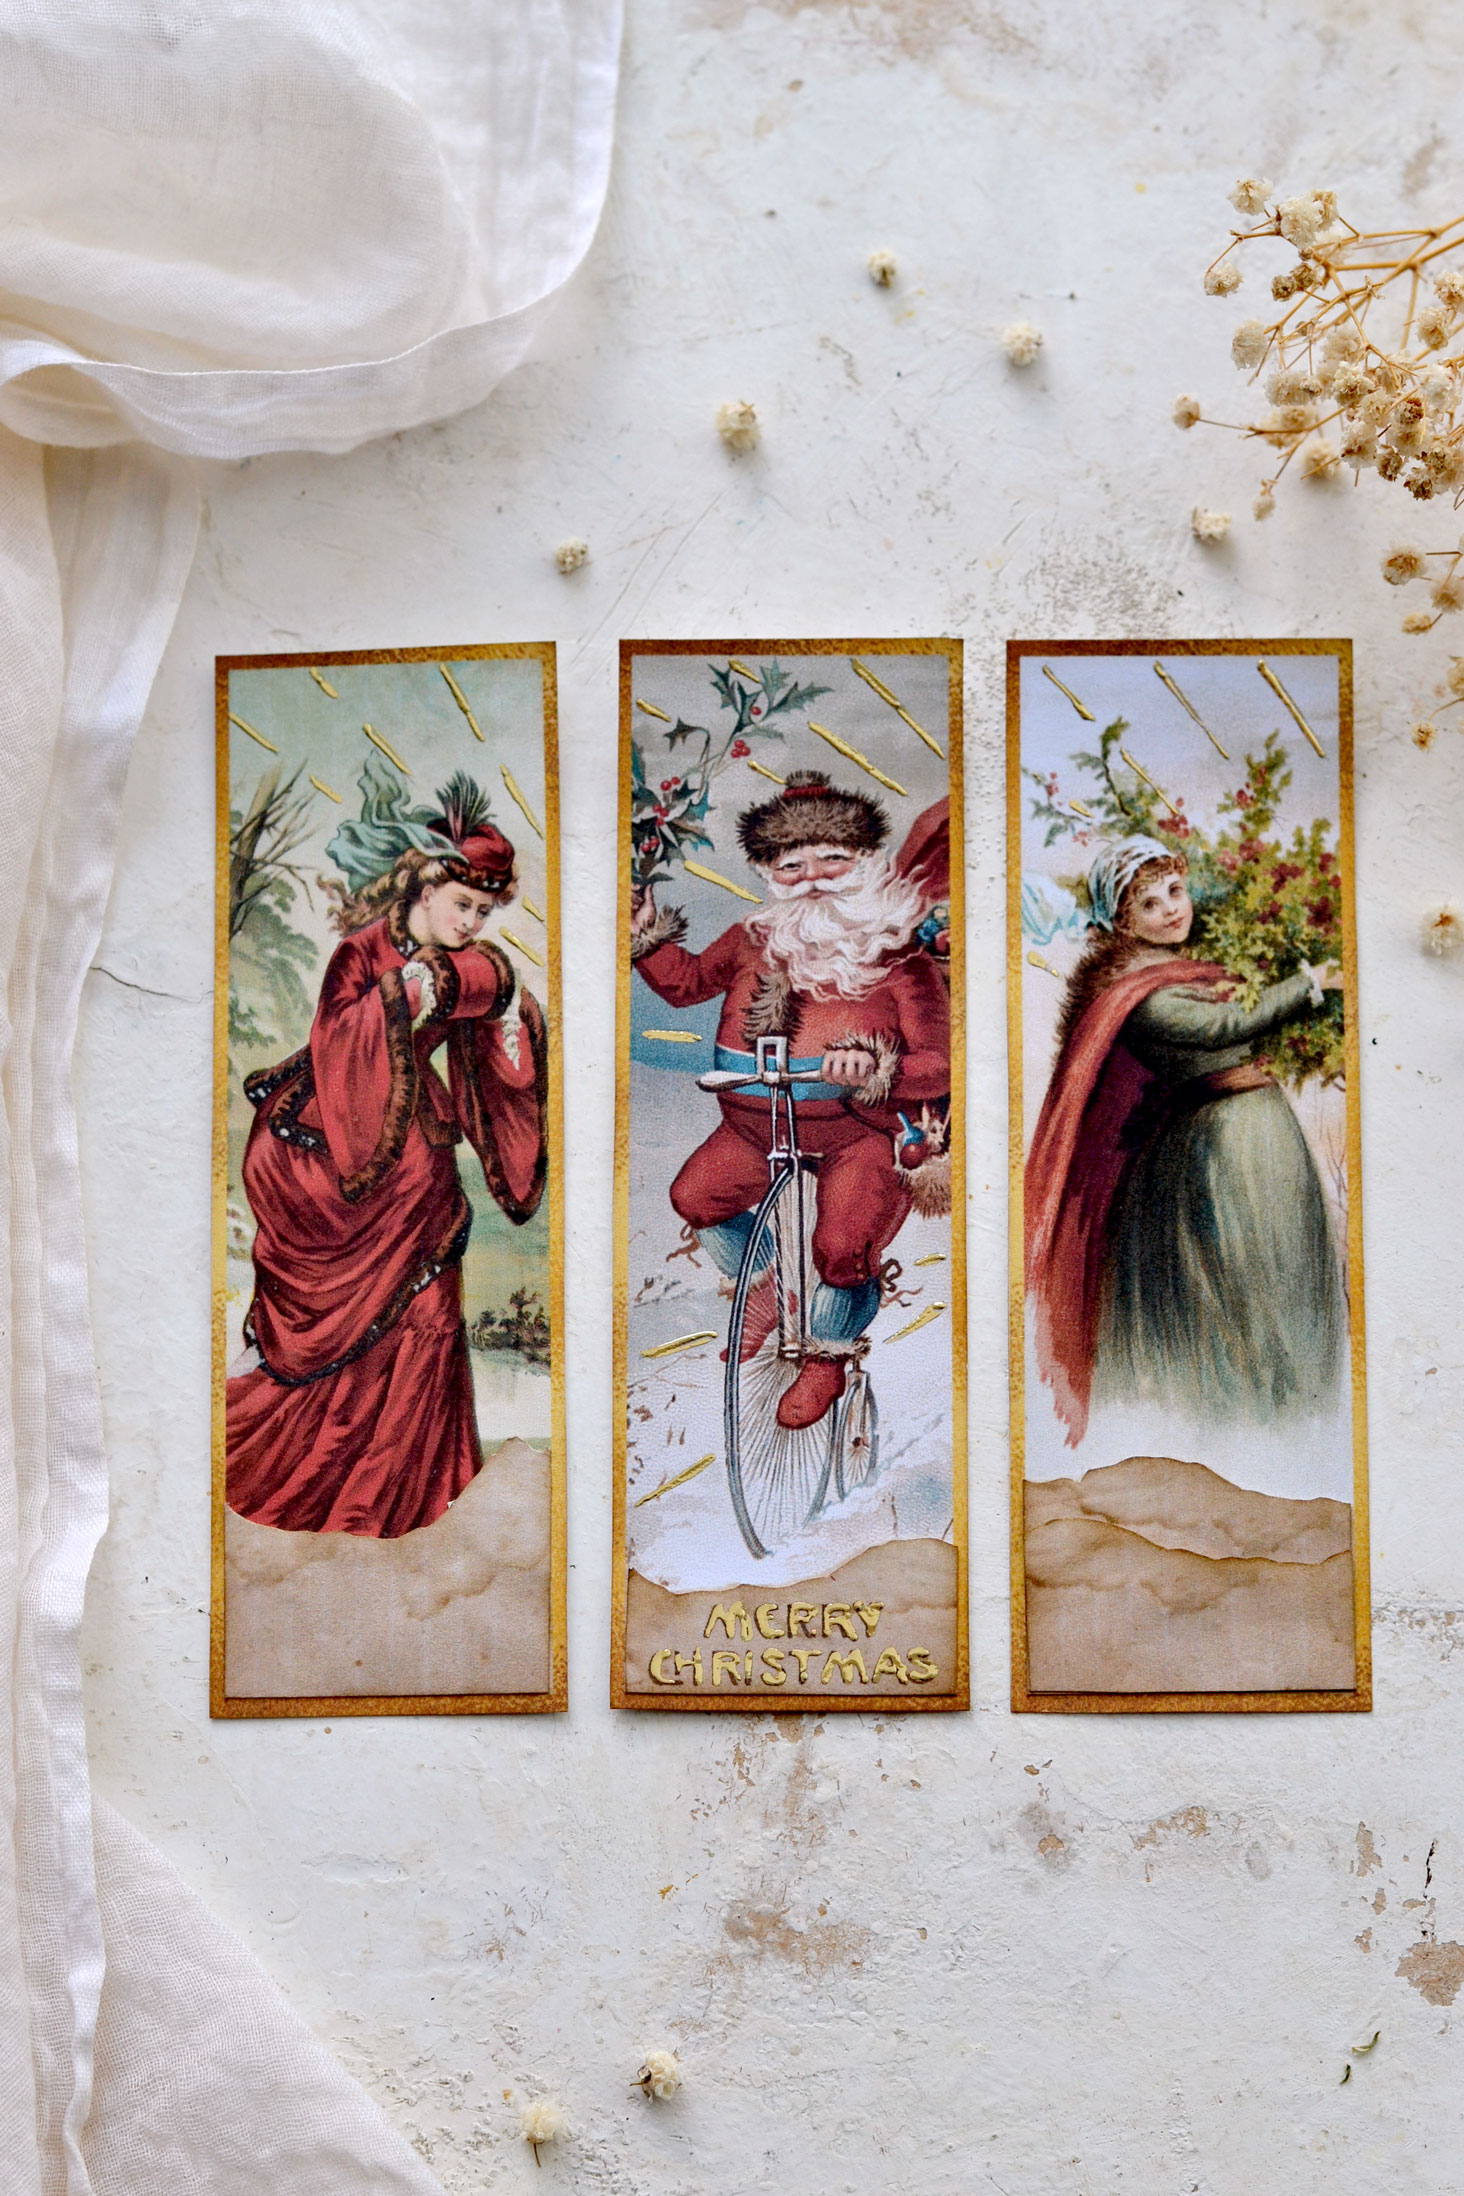
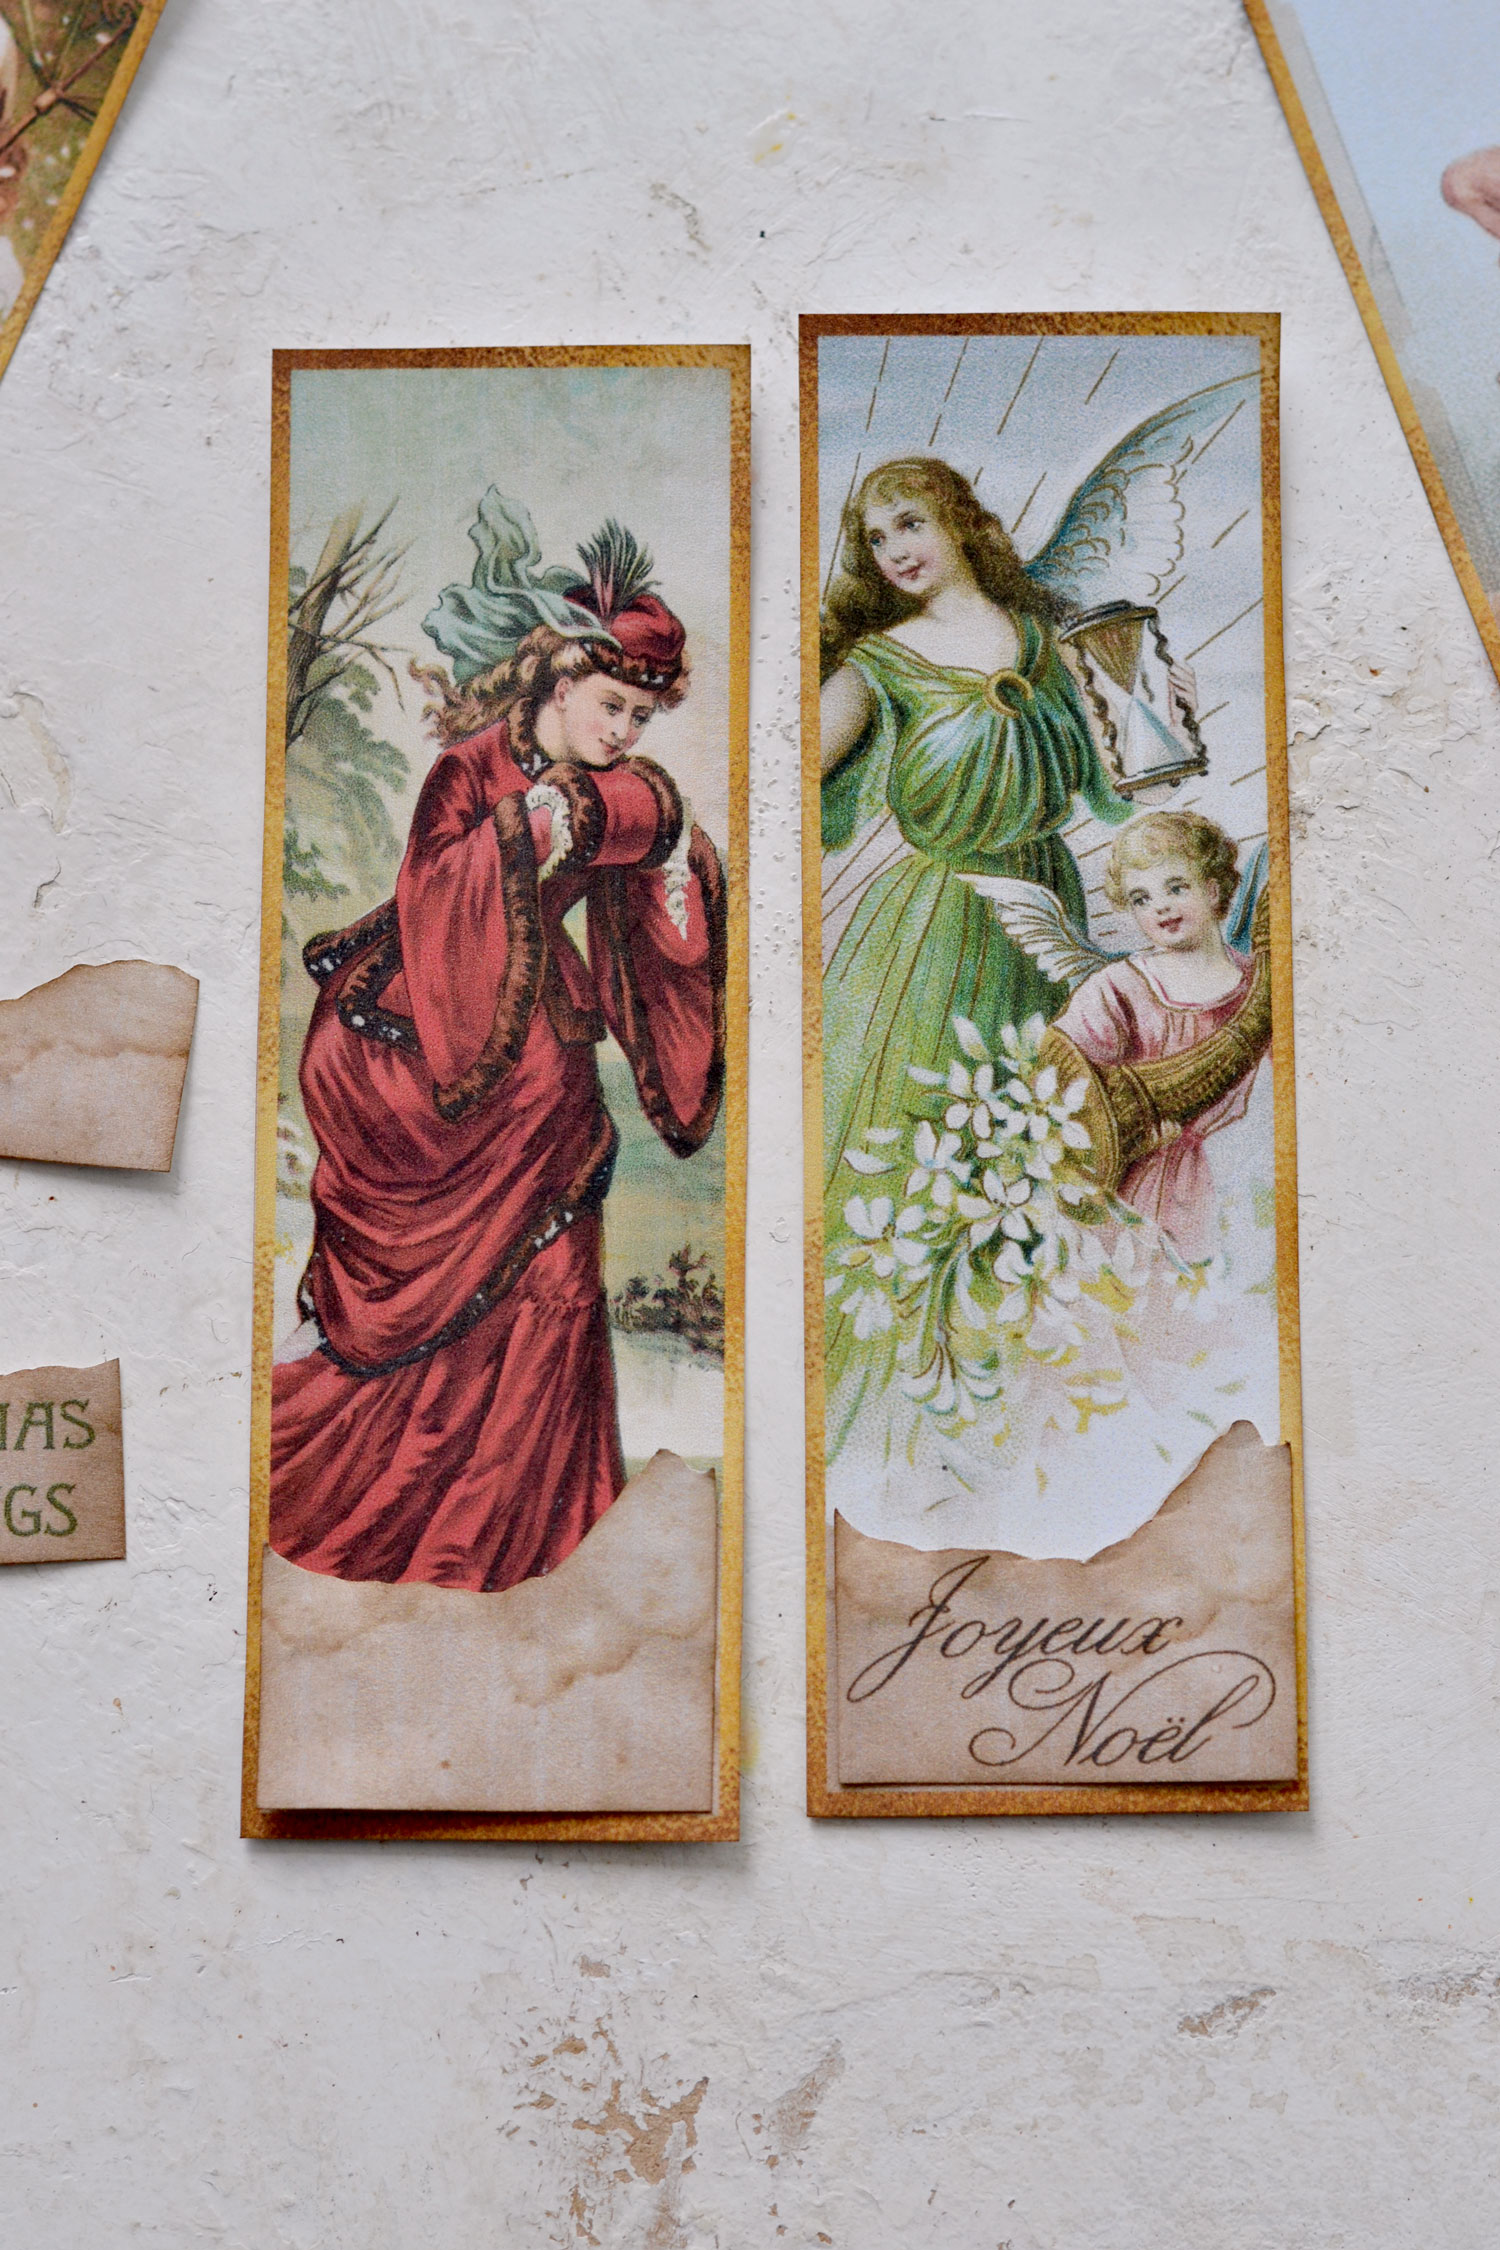
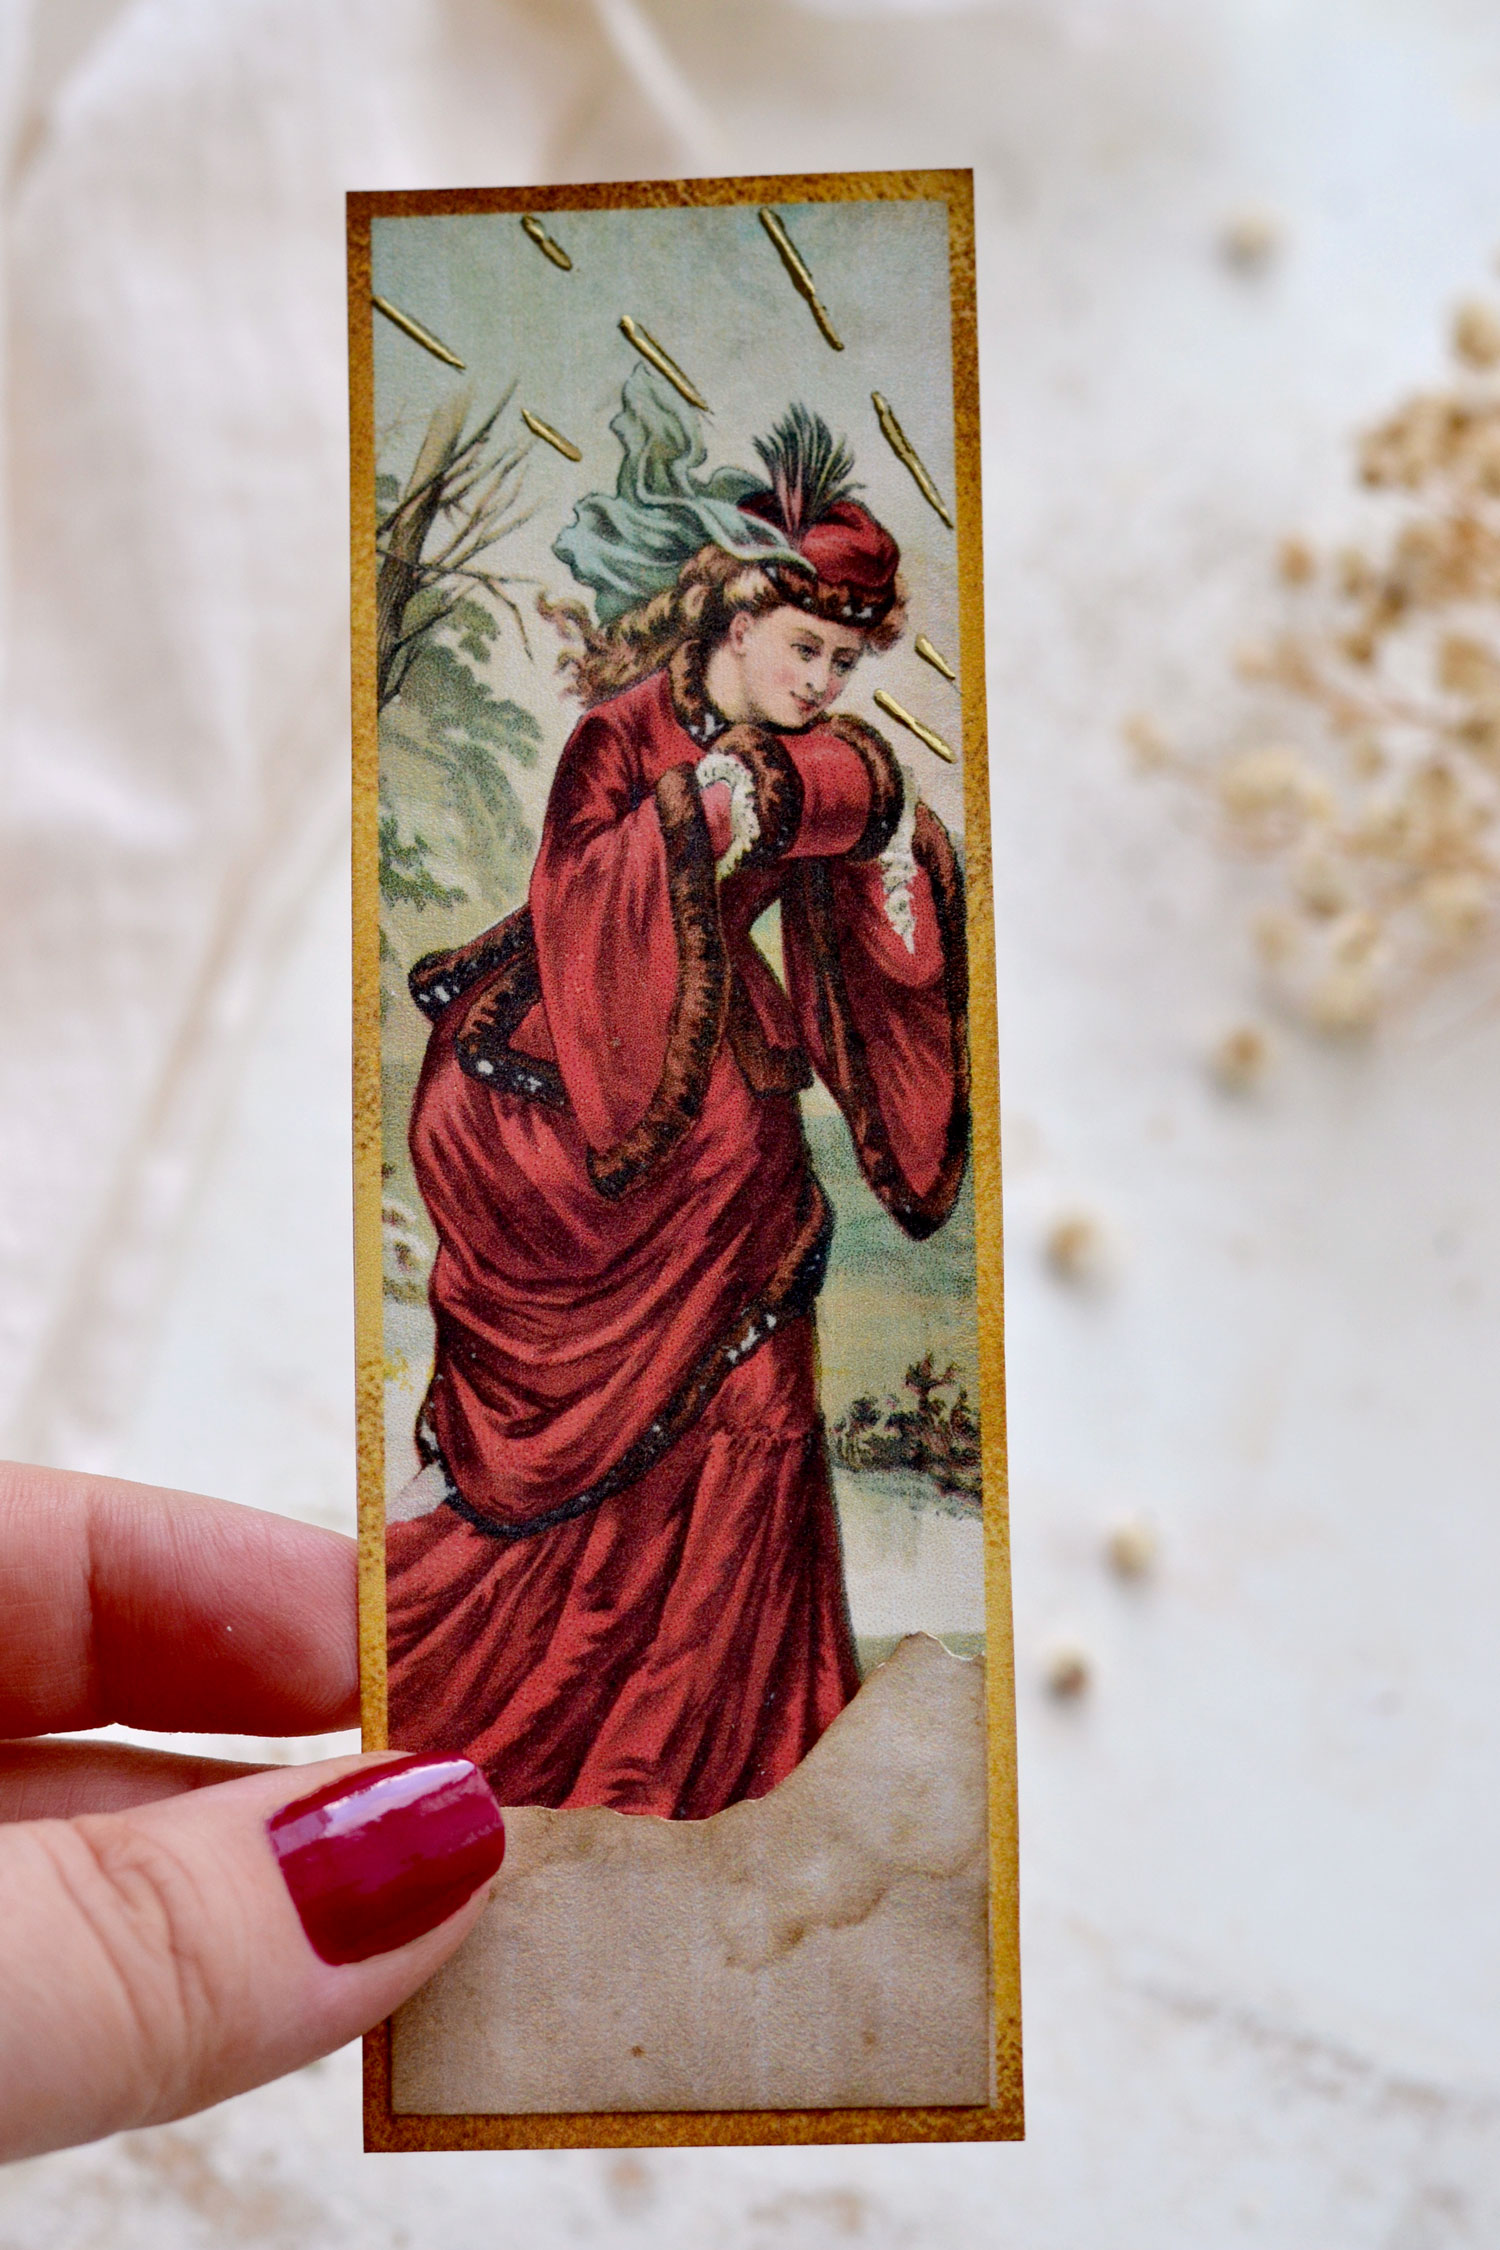
I’ve decided to keep these two ladies in red without any Christmas wishes, I think they would look amazing if included in other seasonal projects too! As you can see, I also added two different scrap pieces of paper on the bookmark on the right, you can do that too if you want to add even more dimension to the finished pieces.
This vintage lady in red Christmas bookmark turned out to be one of my favorites! Maybe it has something to do with the fact that I’m binge watching The Gilded Age series these days… Who knows…
But I’m also loving this one with these gorgeous angels! It’s so beautiful, don’t you think?

As a final idea, you could leave the top of your scrap pieces of paper unglued and create a small pocket for your bookmarks! Now they can be easily turned into lovely Christmas tags or other embellishments for your junk journal! How adorable is this cherub bookmark?!
I hope you will love this sweet little project and decide to give it a try! The bookmarks can be used for yourself or can be gifted as small handmade gifts for Christmas. Everyone would love to receive them, so use this Christmas in July session as a prep time and have these ready for when in season!
You might also like my DIY Paris Christmas Bookmarks HERE.
Happy crafting,
Diana | Dreams Factory


Leave a Reply