DIY Paper Bag Stars
Hello, Graphics Fairy friends! I’m Diana from Dreams Factory and today I’m happy to share another DIY project with you. Today I will show you how to make these simple, but absolutely beautiful DIY Paper Bag Stars. This is one of those projects that will completely take you by surprise, you HAVE to give it a try!
I wanted to keep things easier today because we all know Christmas will be here in a blink of an eye! But I will mention a few things you need to consider while creating this project, so everything goes as smooth as possible and you are actually having fun while creating these beauties.
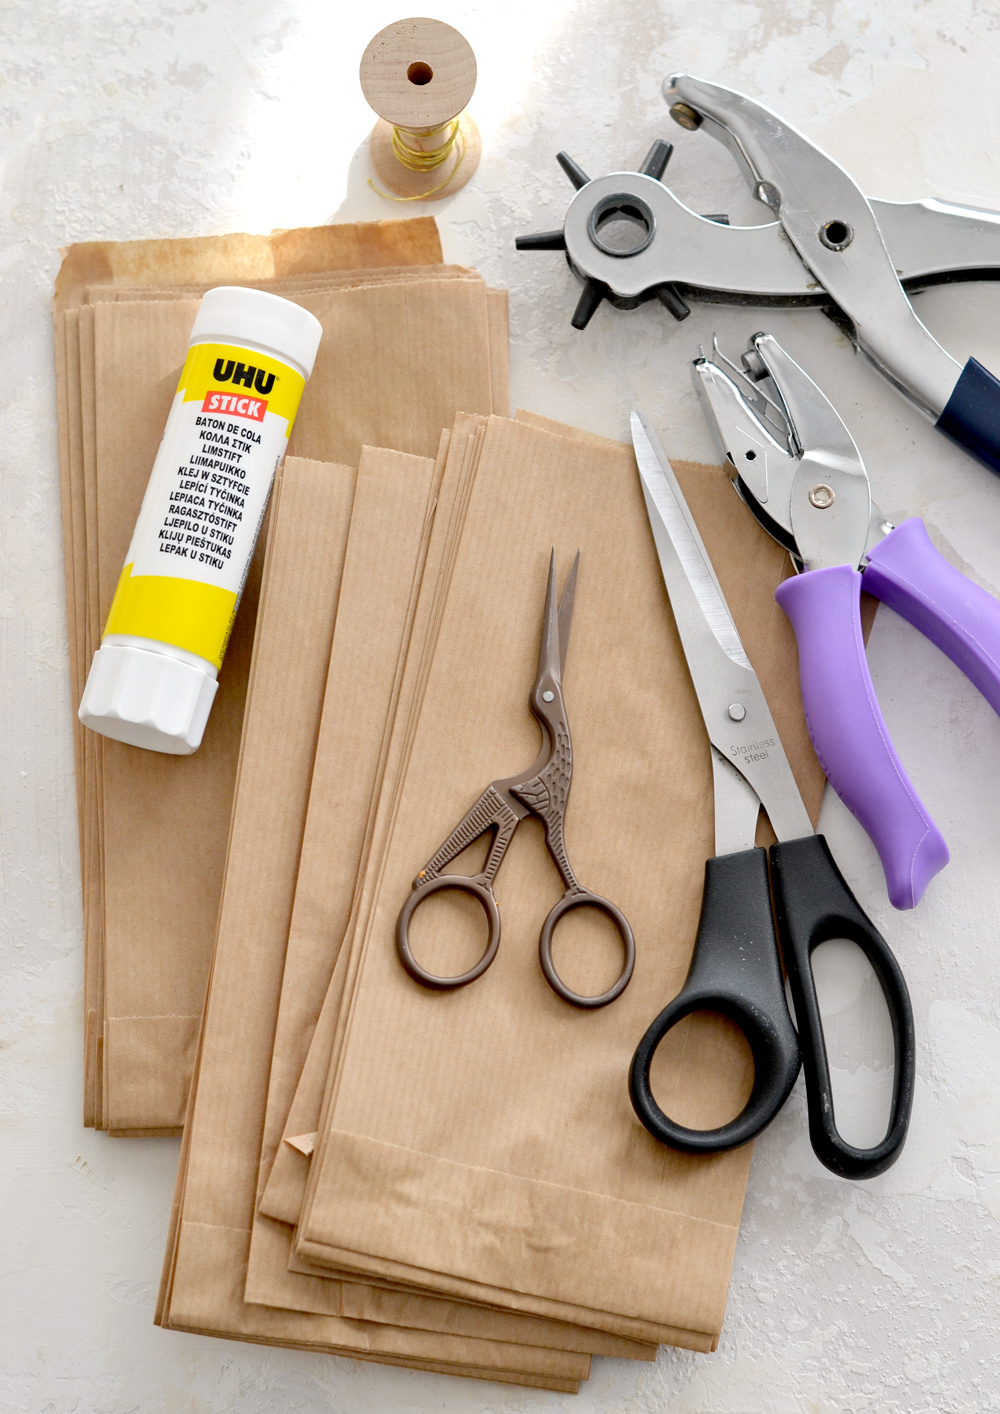
If you take a look at the supply list, you will see it’s quite a short one today. You will basically need 5 things: paper bags, some scissors, paper glue, a hole puncher and some thread to hang the stars. The puncher will have a double purpose here – one for making the holes for hanging the stars and another one for helping us decorate the stars.
DIY Paper Bag Star Supplies:
- paper bags
- scissors (try different sizes ones)
- paper glue
- hole puncher (try different sized ones)
- thread
IMPORTANT!
As for the paper bags, you can use brown paper bags, white paper bags, even colored paper bags if that’s what you have around. Depending on the quality of the paper bags that you will be using, you will get more or less sturdier final stars. Also, the length of your bags will dictate the radius (and then the diameter) of your stars and the opening of each bag will dictate how many bags you will need per star – I used 13 brown paper bags to get one star!
I bought the paper bags online, these are actually pharmacy brown kraft paper bags. These are thinner than regular paper bags and have a chic almost glassine-like look. They were perfect for this project!
DIY Paper Bag Stars – Gluing & Stacking the Paper Bags Together
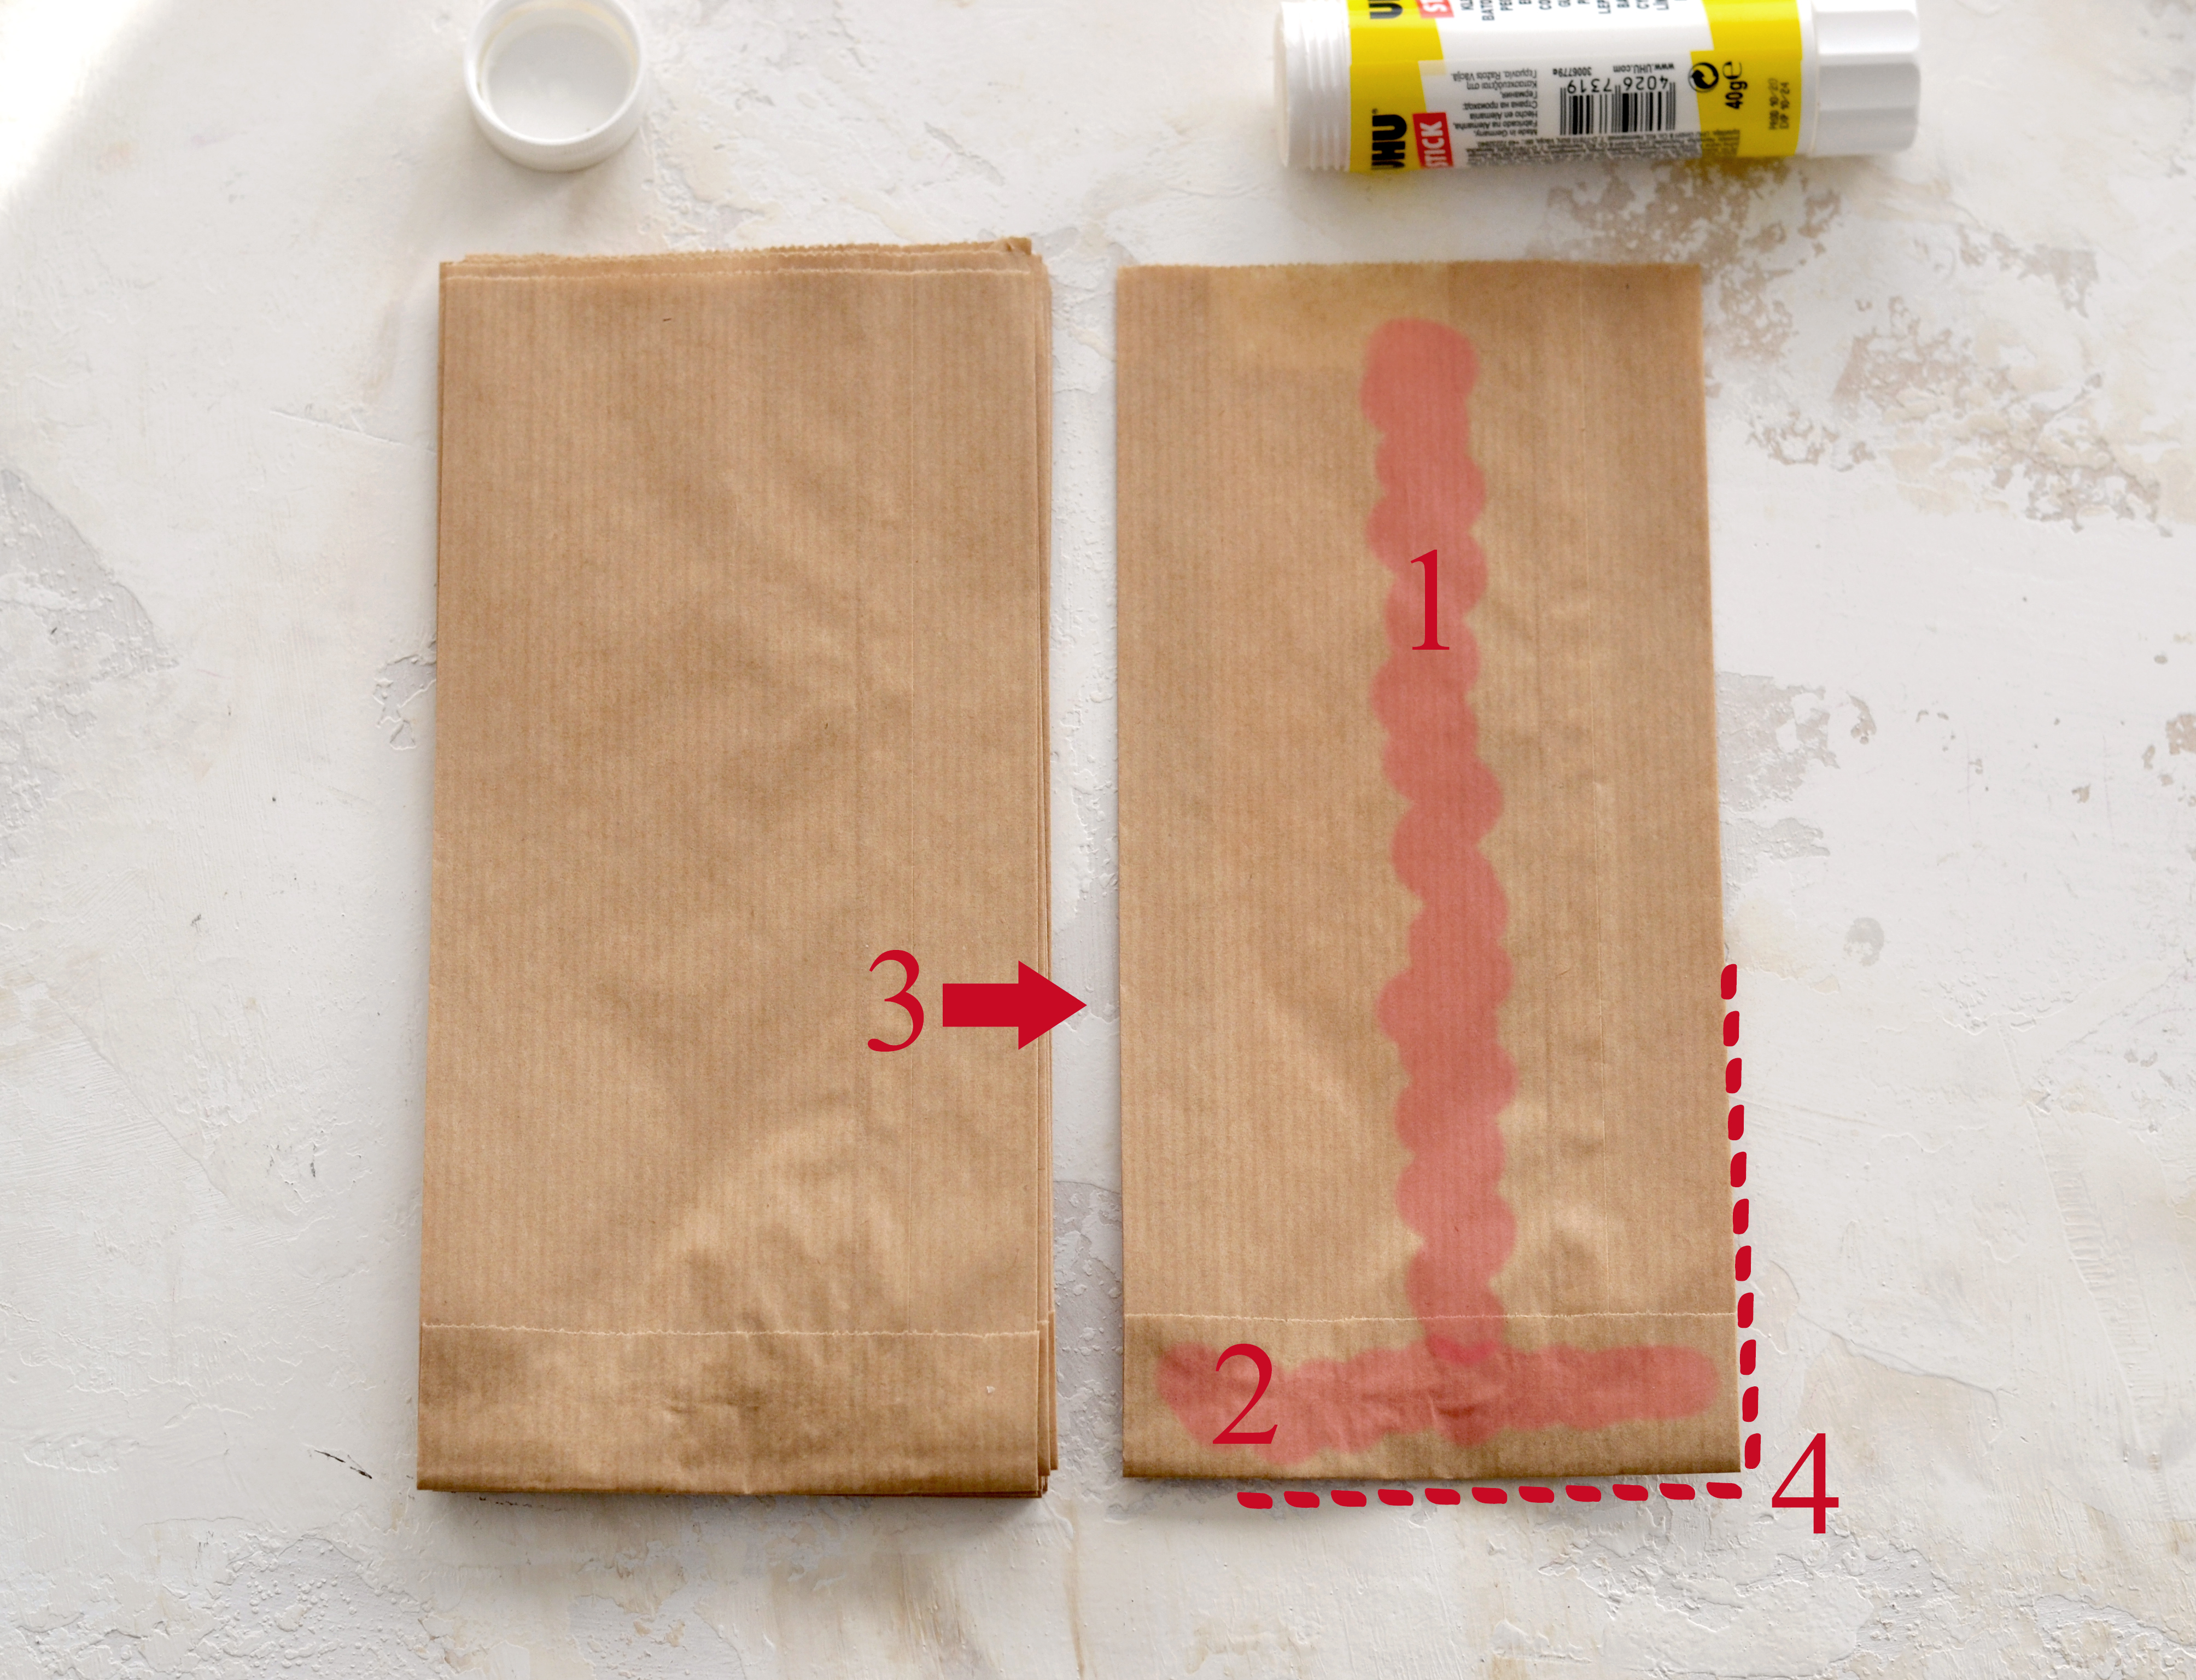
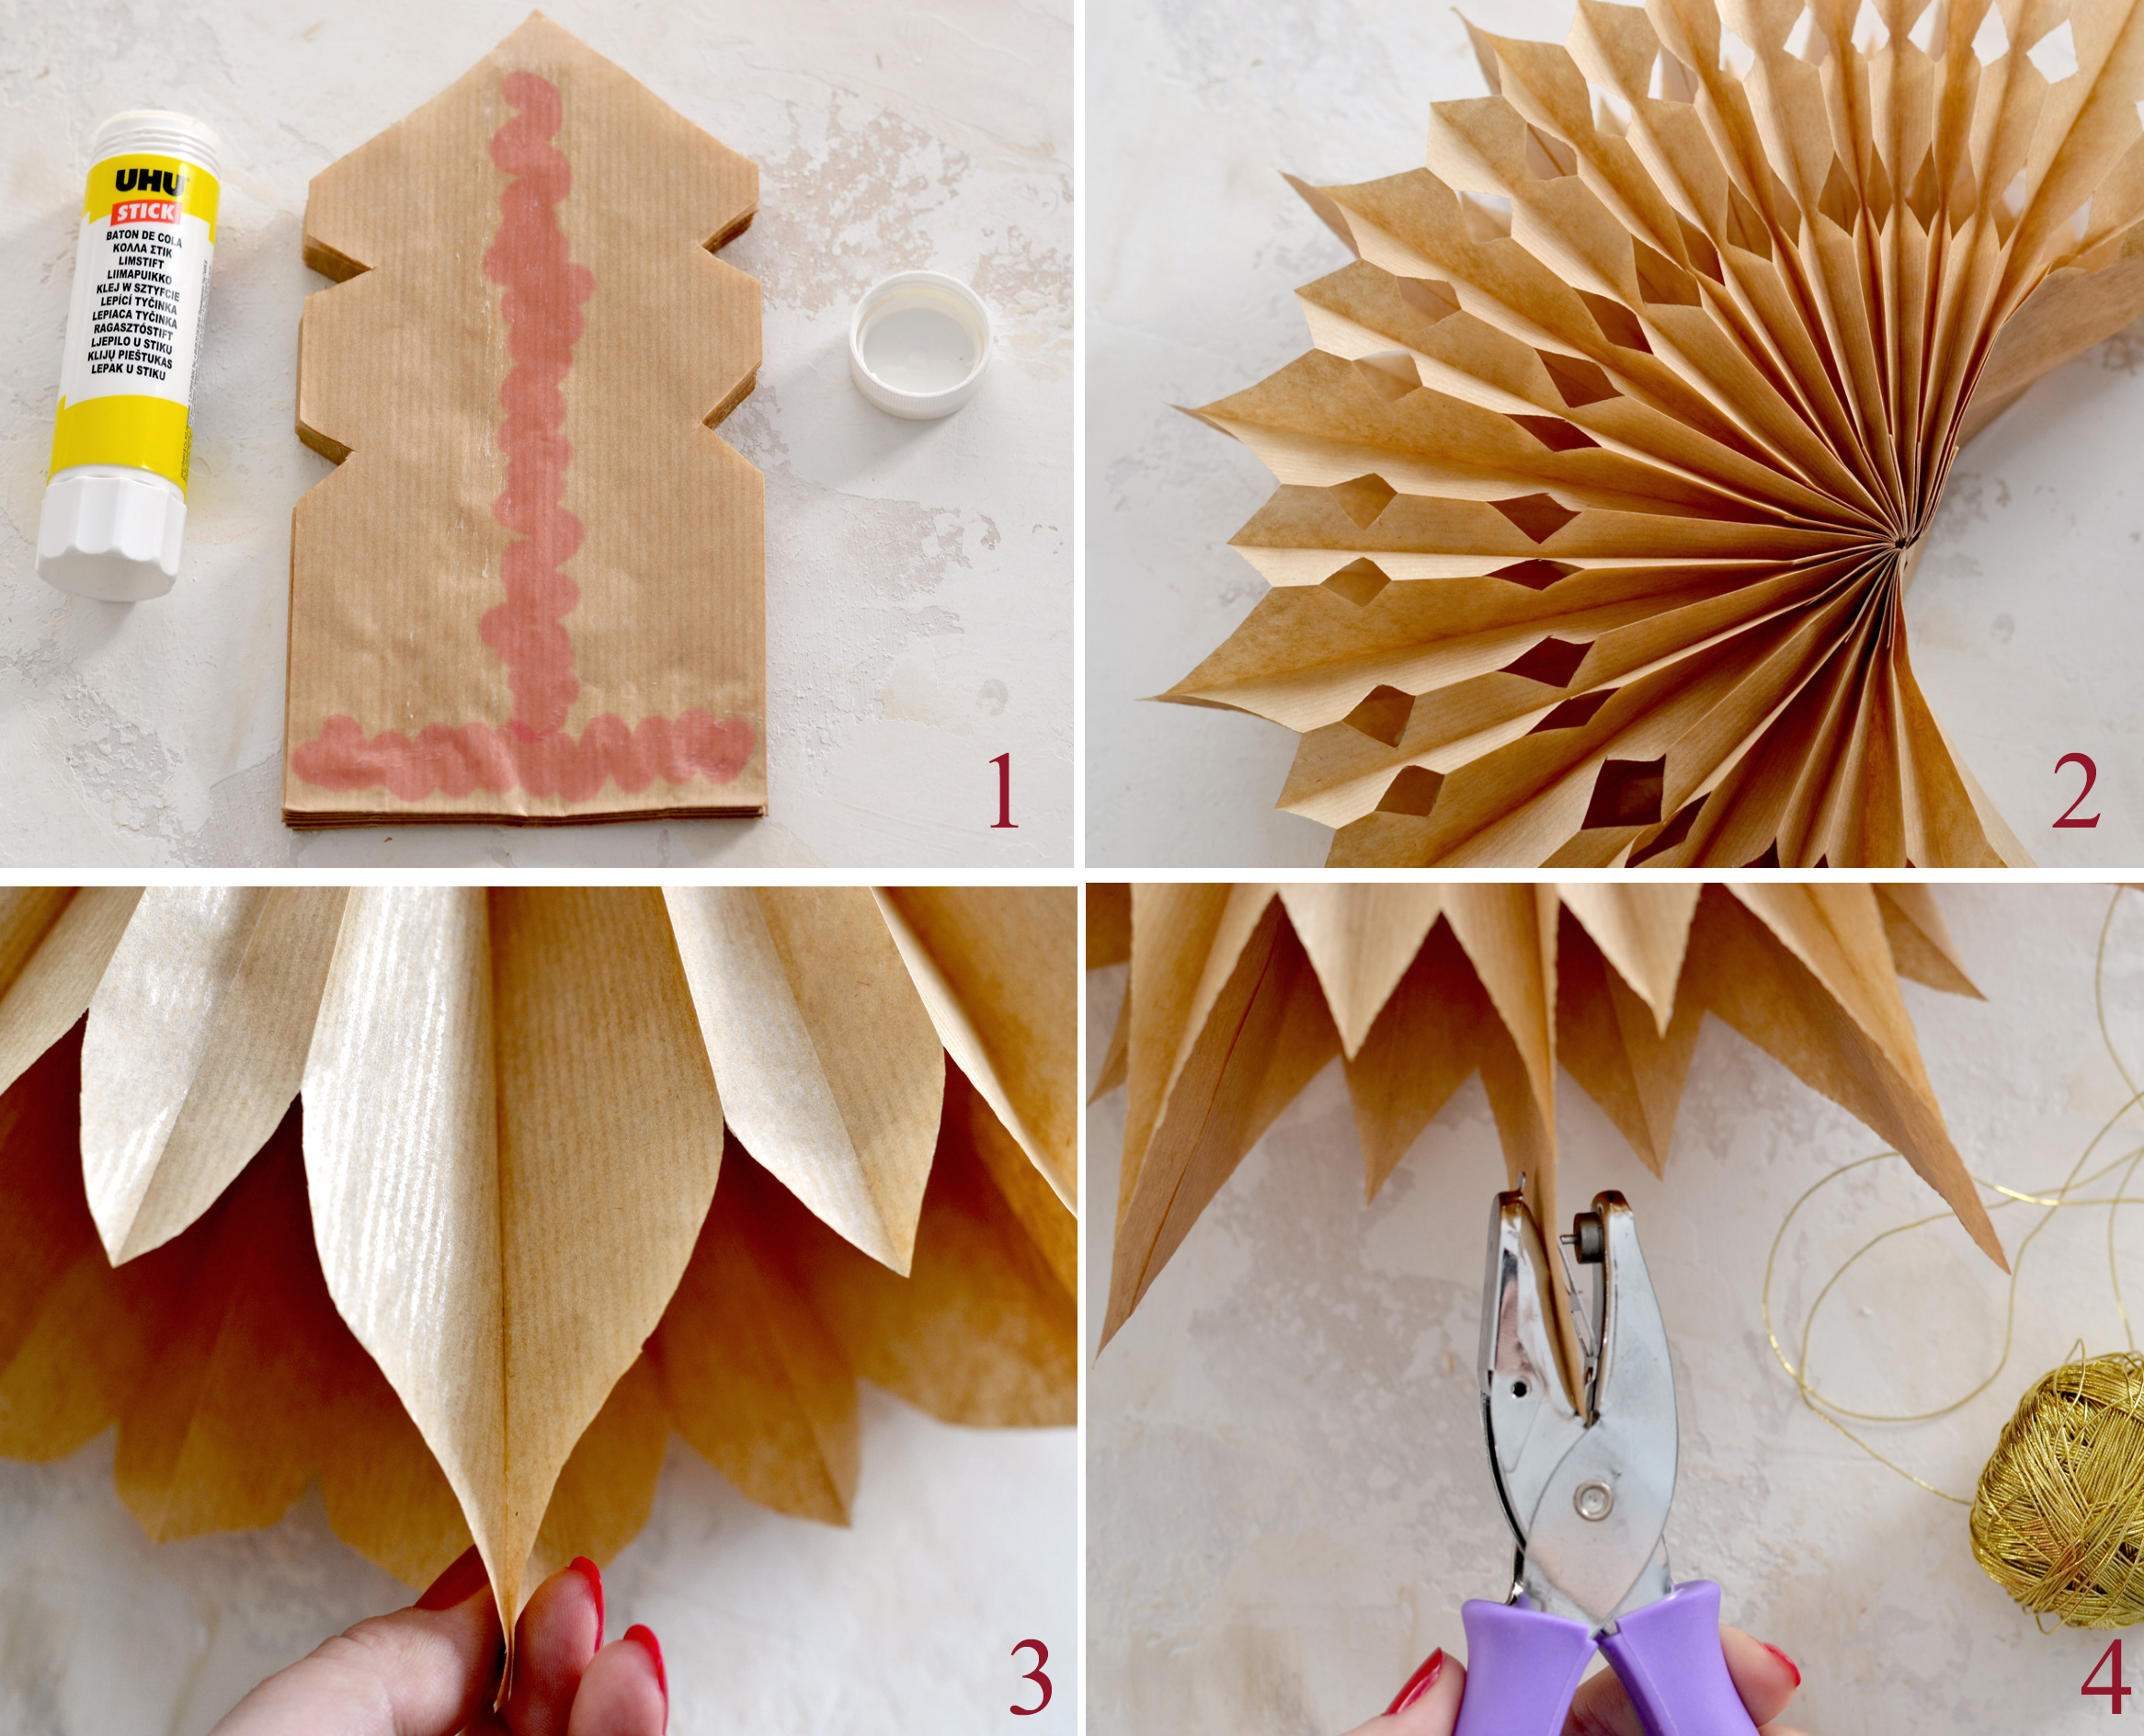
The idea for making the DIY Paper Bag Stars is quite easy, you’ll need to stack and glue 8-13 bags to get one star. Place one paper bag on your table and add paper glue following an upsidedown capital T letter on the bag (1+2). Add another paper bag on top (3), making sure all the margins are perfectly overlapping (4). Add all the paper bags to create a stack, then create as many stacks as you want!
Open up the stacks fanwise as you go (after the glue has dried) to see if you need to add more bags – each stack should open up completely to create a rounded shape without stretching too much.
P.S. The upside down T capital letter red marks (1+2) are only for guidance, my glue is not actually red!
DIY Paper Bag Stars – Cutting & Embellishing the Stars
Now comes the fun part, getting creative with these beauties! This is the part when you allow yourself to be surprised, so try not to overthink things and just go with the flow. I noticed that cutting a triangular shape on the top part of the bags will create a more pointy star and a more rounded shape will create a more flower-like star. So depending on what you want to get, you can keep this in mind as a good starting point rule.
I initially measured the width of the stack, to get an idea of where the middle is, but then I decided I don’t want to stress too much about this and just eyeballed everything and cut. It was a great decision because one of the best things about this project is that it is really forgiving. I mean REALLY forgiving, you will see that you don’t have to perfectly match things up to get a simply gorgeous final star, small imperfections are OK here and there.
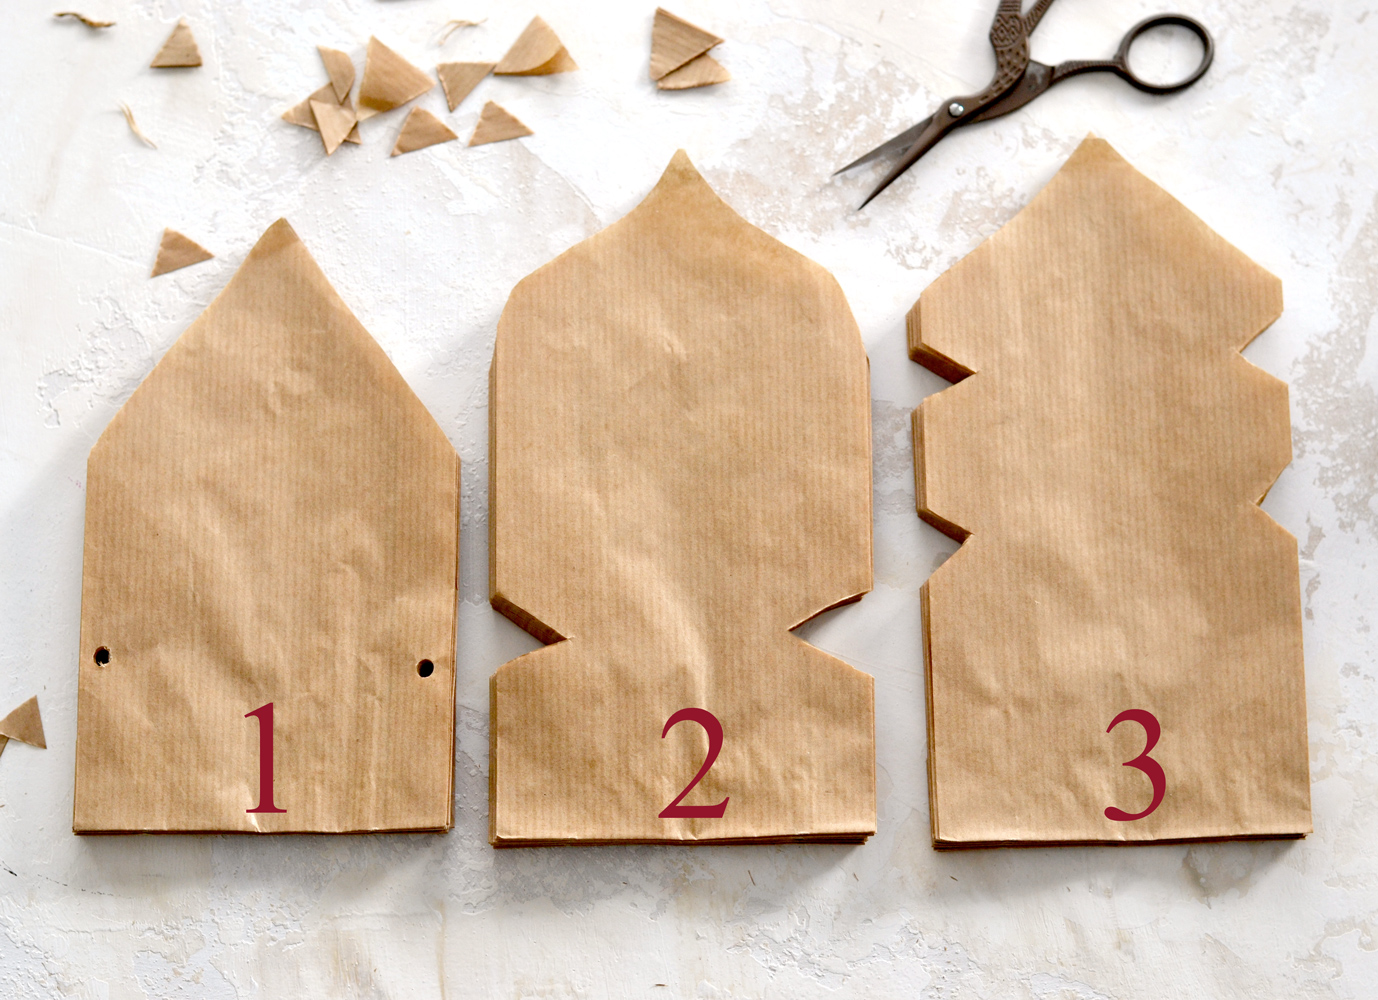
Design 1
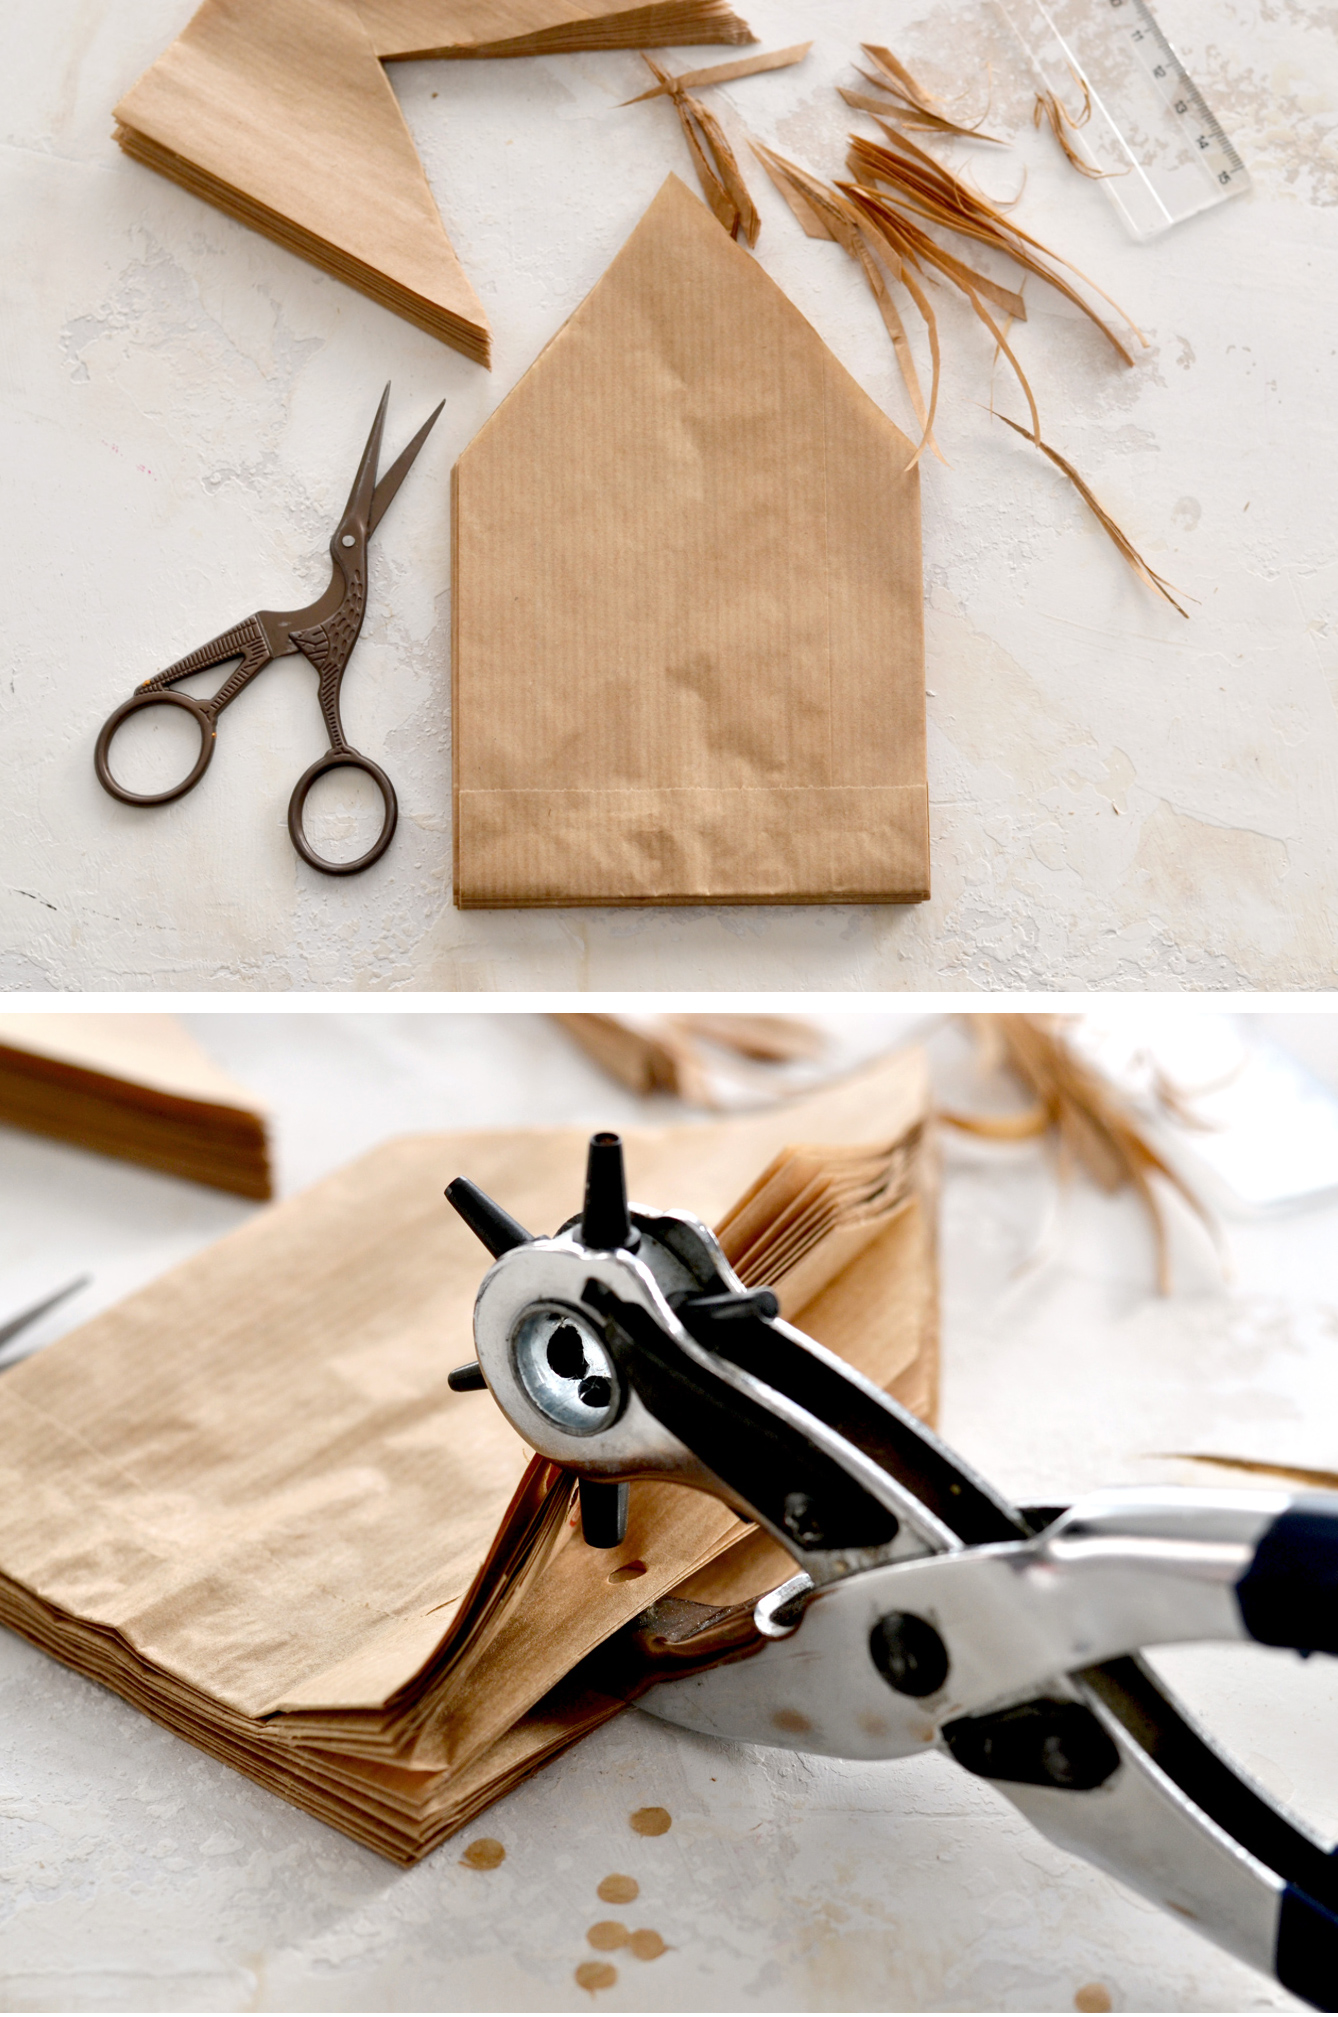
For the first paper bag stack, I cut a simple triangular shape on top to get a more pointy star. Depending on the thickness of your paper, this will turn out to be more or less difficult. If the stack is too thick, you might not be able to cut through all of them at once. If this is the case, you’ll need to hold a few bags together and gradually cut them, then use the cutting on the top as a guide for the next bags and so on, until you are able to cut them all.
Then I punched decorative holes on the left and on the right. I used a leather one-hole punch, you can use what you have around. I had to hold a few of the bags together, just like I mentioned before and gradually punch them, using the previously punched one as guidance.
 Design 2
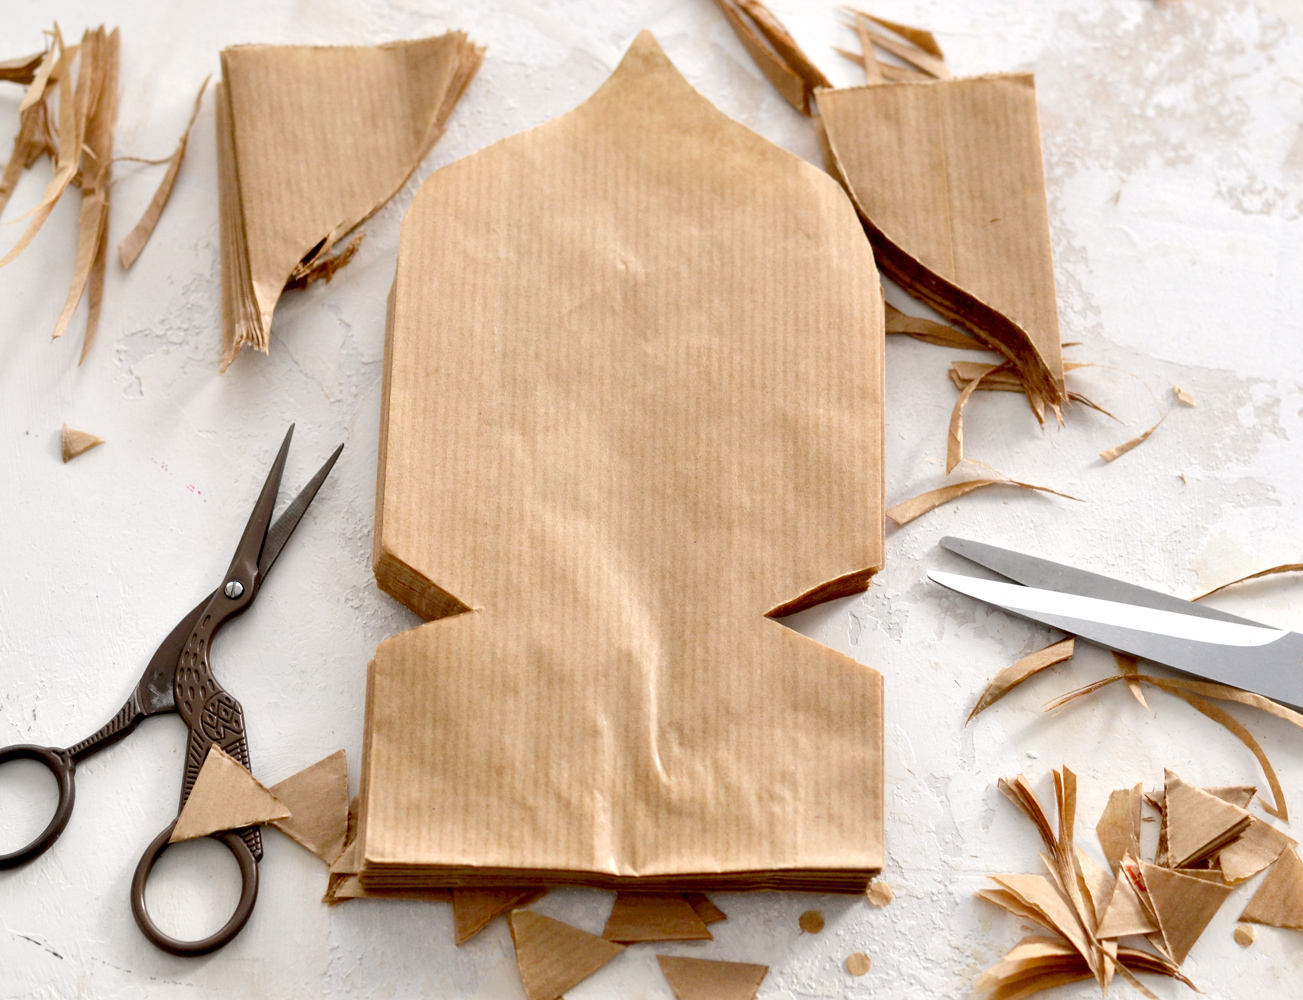
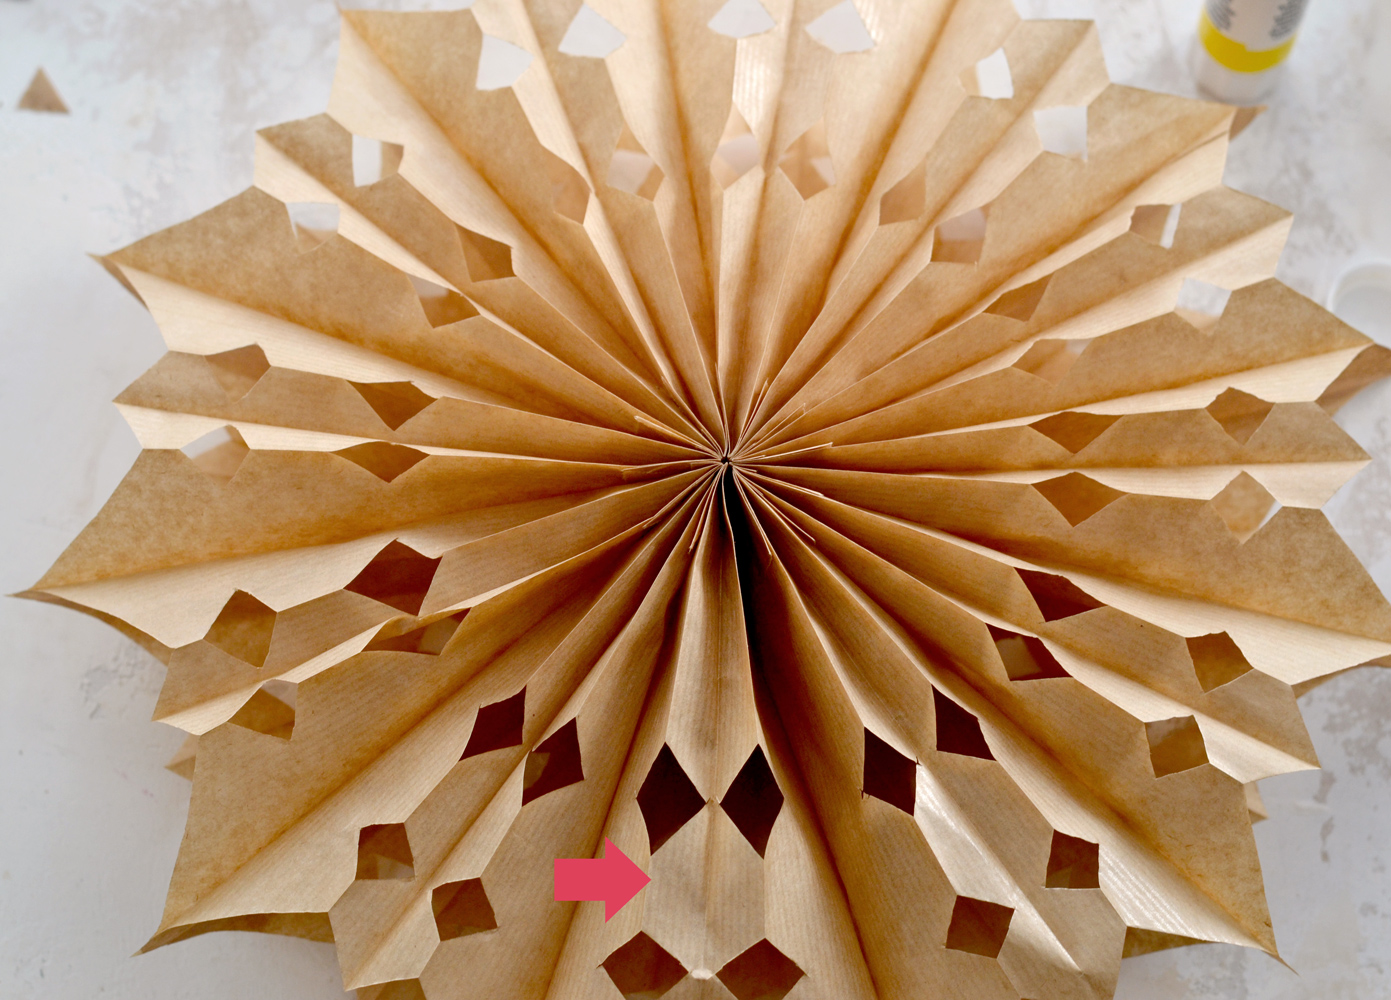
For the second design, I just cut triangle shapes on the lower left-right sides of the paper bag stack. Then I cut a more rounded triangle shape on top – I had a Morrocan ogee shape in mind for this last cut.
Design 3
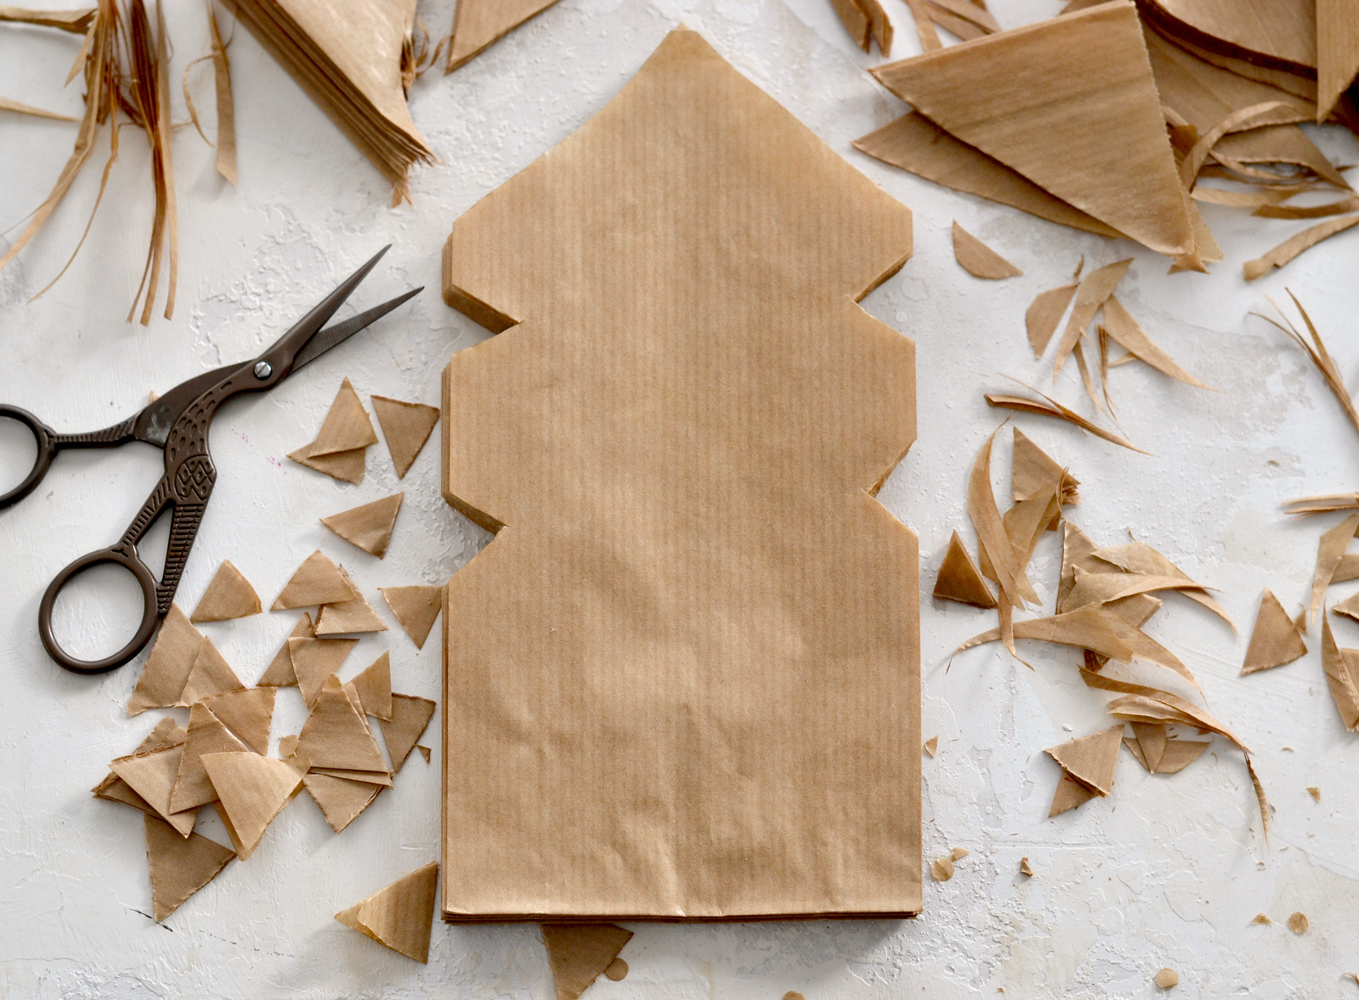
For the third design, I cut 2 sets of triangles on the upper sides of the paper bag stack, then I cut a simple triangle on top.
Paper Bag Stars Design 1+2+3
Here is how all the final designs turned out. You can definitely see they are not perfectly cut or lined, but this will not be an issue, they will still look amazing! You can also see that even though I used the same paper bags for all the stacks, I cut off some of the length on the first stack before cutting the top triangle – this length will determine the final diameter of your stars so cut it smaller if you want to get smaller stars.
Opening the Bags
For our last steps, we’ll need to apply an upsidedown capital T glue trace on one of the bags again (1), then open up the stack as a fan (2) and glue the first and the last bag together, making sure the design is nicely overlapping (3). Punch the last hole on one of the pointy ends and add some thread (I used gold metallic string) so you can hang the stars.
If your paper bags are stretching a little bit too much after opening them up to create the star, you might have needed to add one or two more bags! It would be best to actually check this before cutting the design and definitely before gluing the final stars! Some of these ‘stretches’ might be fixed if using your fingers to fold that section again.
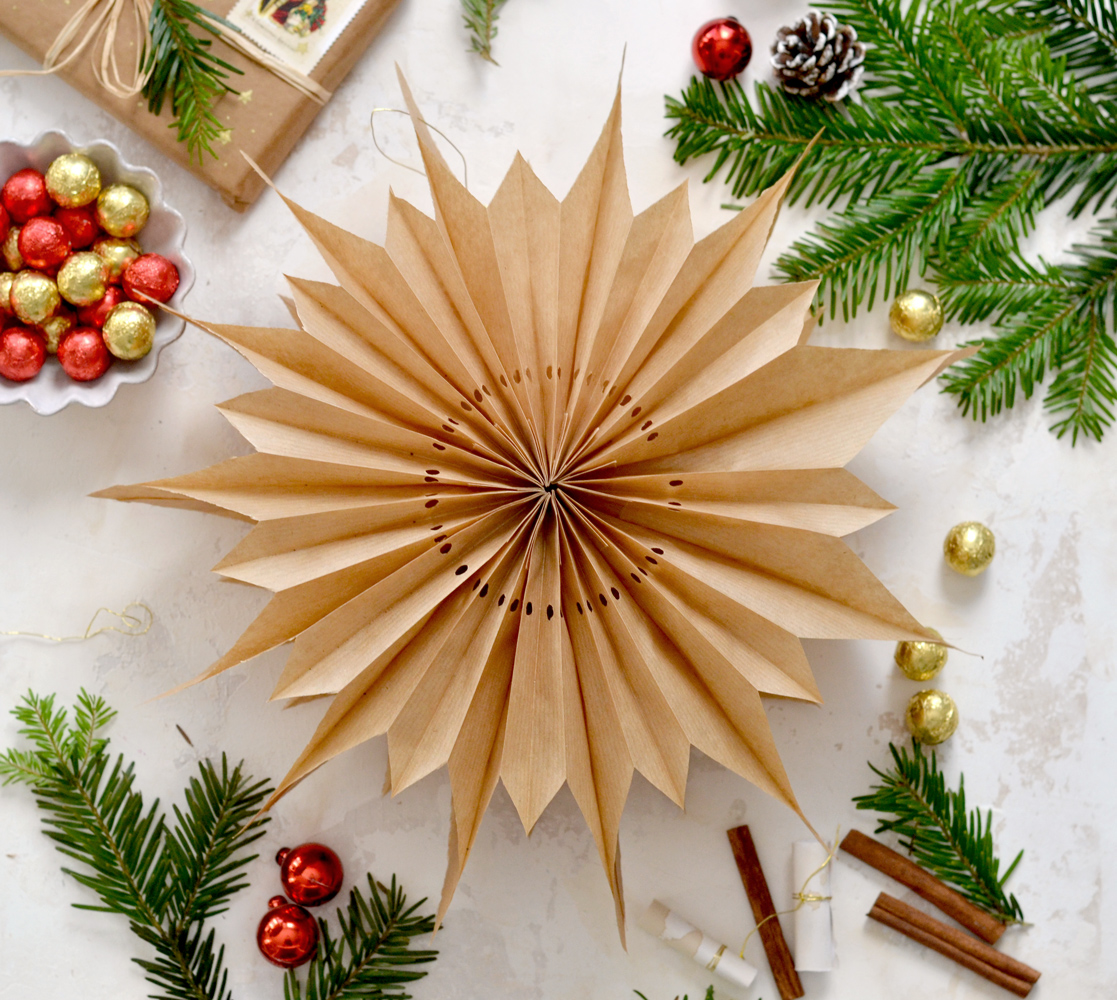
I have to confess that this last step of opening up the stars is quite rewarding. I was mesmerized by the beauty of each star and was pleasantly surprised (OK, I was actually ecstatically jumping up and down) to see how a few simple cuts could create such gorgeous final DIY Paper Bag Stars!
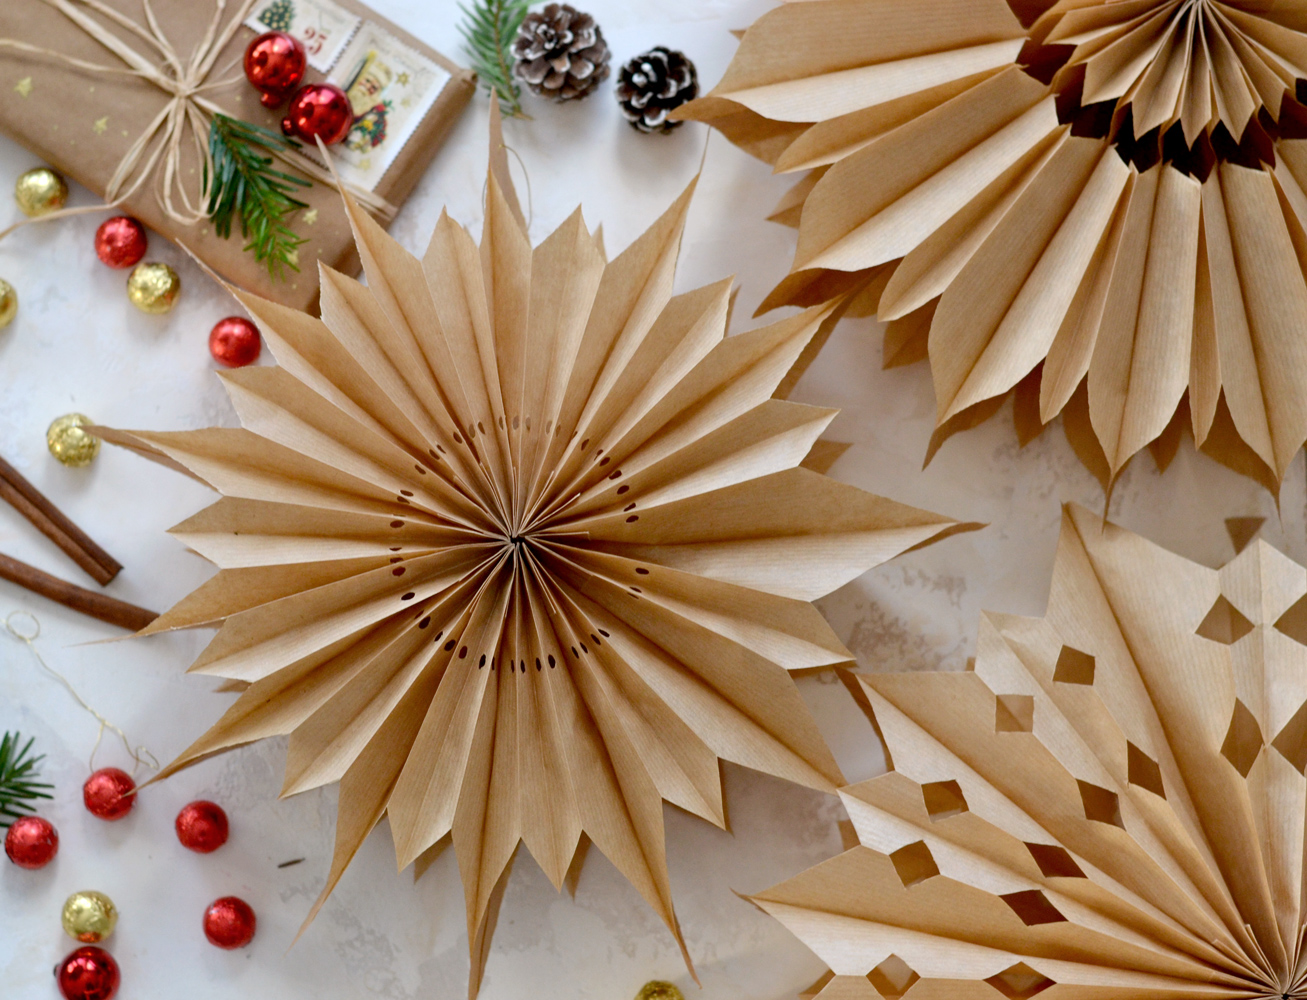
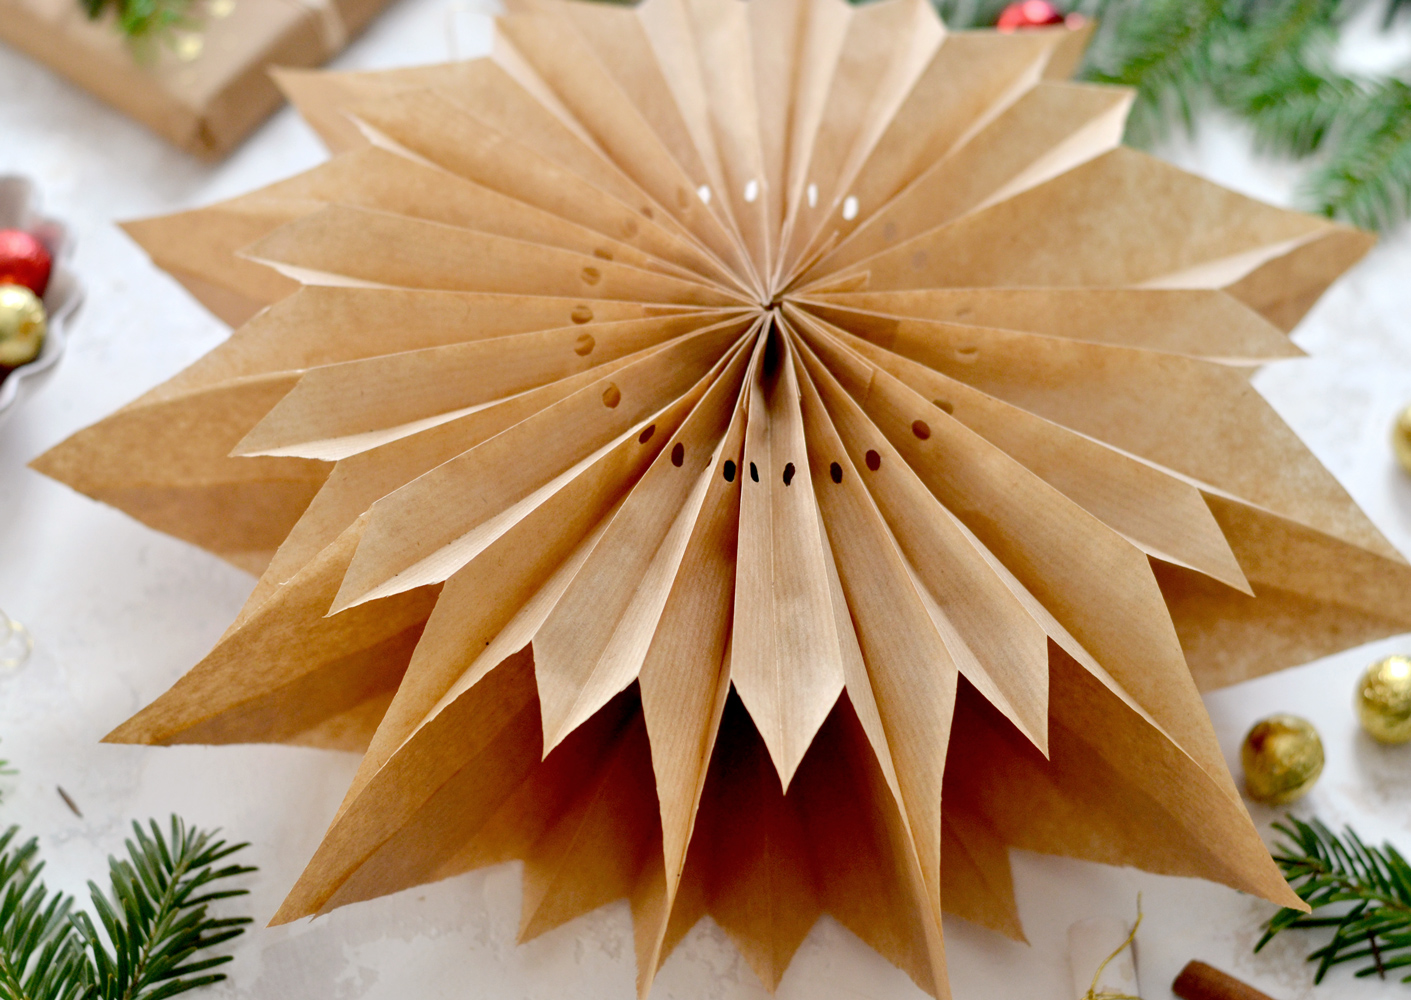
This is how my 1rst design turned out. Can you believe how gorgeous it is? I LOVE the simplicity of this pointy paper bag star, this one actually turned out to be my favorite!
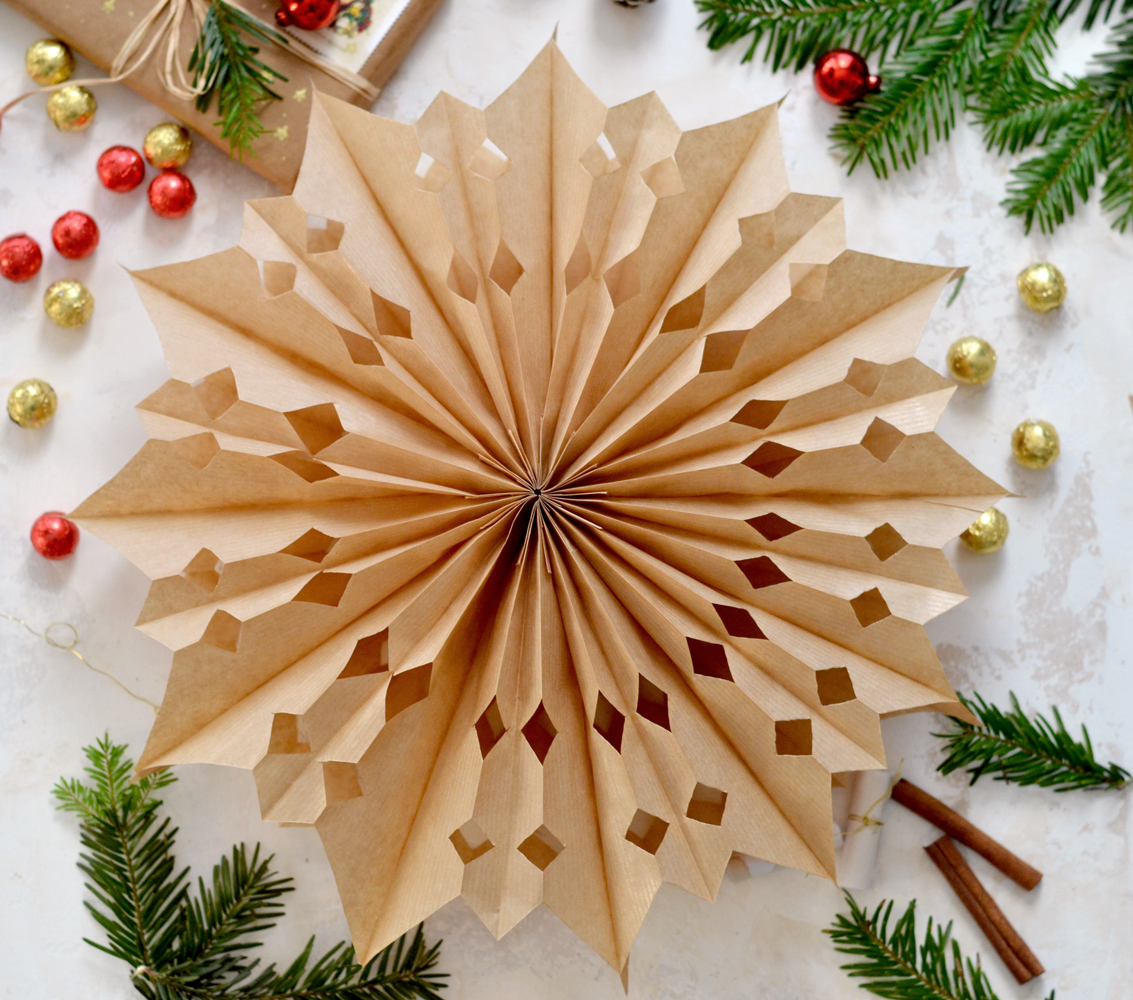
This is how the 2nd design turned out, I LOVE that it looks so delicate and sophisticated at the same time! And when we think about it, we only made two triangle cuts on the sides and the Morrocan-inspired one on top! Maybe I’ll choose this one as my favorite? Hmm, decisions, decisions … it’s really hard to pick just one!
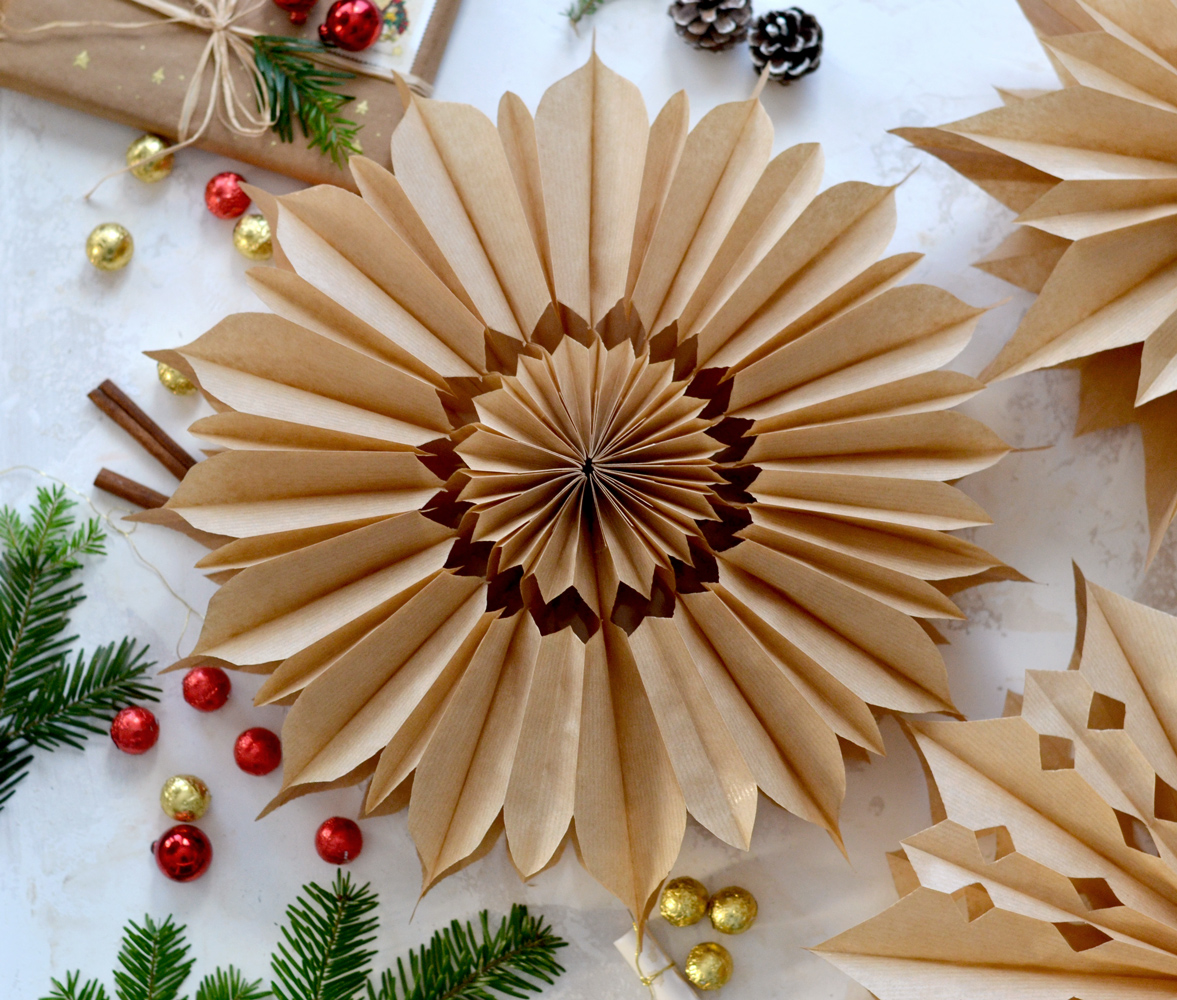
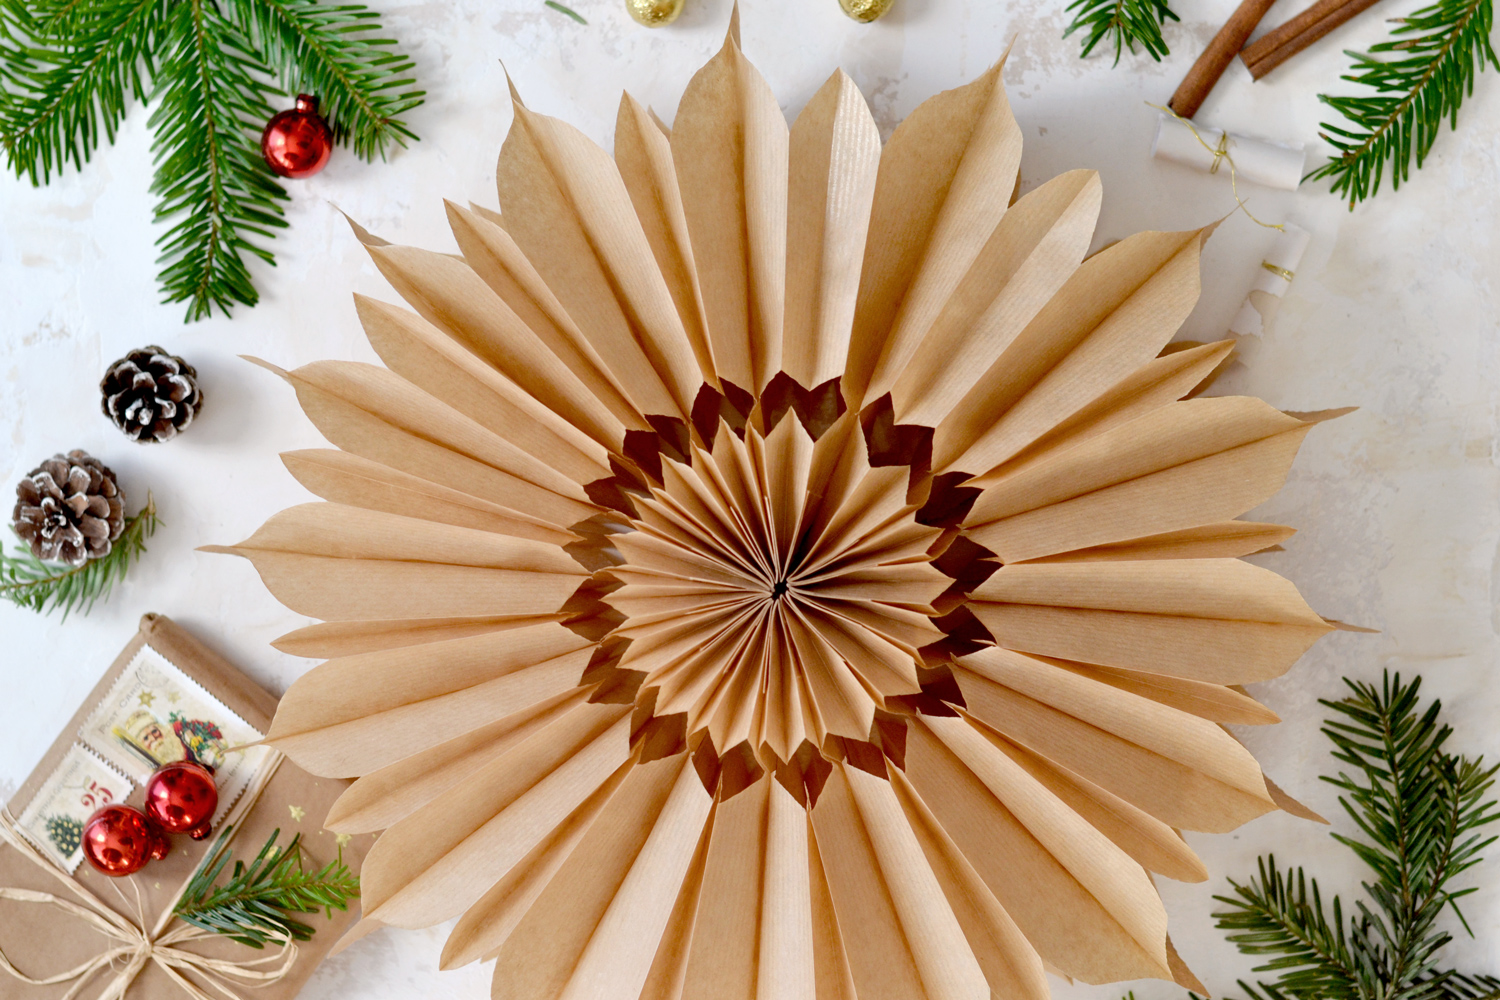 And here is the last one, this one turned out to be amazing too, don’t you think?
I’m really curious which one is your favorite, can you pick just one?
You can hang these beauties all over your home or you can use double-sided tape to directly glue them on your walls. These would also be great to use at parties or any other special occasions where you would want to create an affordable, but super chic and memorable decor – they will definitely be the stars of the whole event! You can use different colored bags or different sized ones to create more interest. You could use tiny paper bags (white glassine bags, I’m looking at you) to create small DIY Paper Bag Stars and use them to embellish gifts or even hang them in your Christmas tree. There are so many possibilities to get creative with these!
Give this project a try, don’t overthink the cuttings and allow yourself to be surprised! These paper bag stars will definitely shine their joy and happy magic into all of our lives!
You may also like how to make a Bow from Wrapping Paper HERE and the Decorative Brown Paper Bags HERE.
How to Make a Paper Bag
And on another note … if you want to learn how to make a Paper Bag then check out our video below for that!
Merry Christmas friends, I wish you blessed and happy holidays!
Diana | by Dreams Factory



Jodi Carstensen says
How do I download directions for your projects offered on The Graphics Fairy.
Karen Watson says
Hi Jodi, I’m afraid we don’t have that function here on the blog, we only have it on our membership site. You could print out the page though if you like.
Joanne says
Save to Pinterest
Karen Watson says
I’m glad you liked it enough to save it Joanne!
Jan Kinman says
Thank you for all the talent you all share! And the Free things you give are so appreciated! The paper bag art is so fun! My favorite is #2. It looks like a sunflower to me. They will be so cute to have for summer.
Blessings to all of you for a new 2022.
Karen Watson says
I’m glad you enjoyed Diana’s project Jan! Now that you say that, I can see the Sunflower! Great idea to use for Summer. 🌻
Queenie says
These are amazingly beautiful. Thank You for sharing these with us mortals.
Karen Watson says
I’m glad you enjoyed Diana’s post Queenie! 🎄
Renae J Brooks says
Awesome post! They are all beautiful! But FYI: the link did not take me to the correct type of paper bag. 🙁
Karen Watson says
Thanks for letting us know Renae, I will change the link.
LeAnne Pugliese says
These are gorgeous! I’d love to try one of these myself! I have a whole stack of white paper bags that might work! I confess that I love the first one the best, but they’re all beautiful! Merry Christmas!
Karen Watson says
I bet the white bags would look really pretty LeAnne! 🎄