DIY Poppy Craft Tags
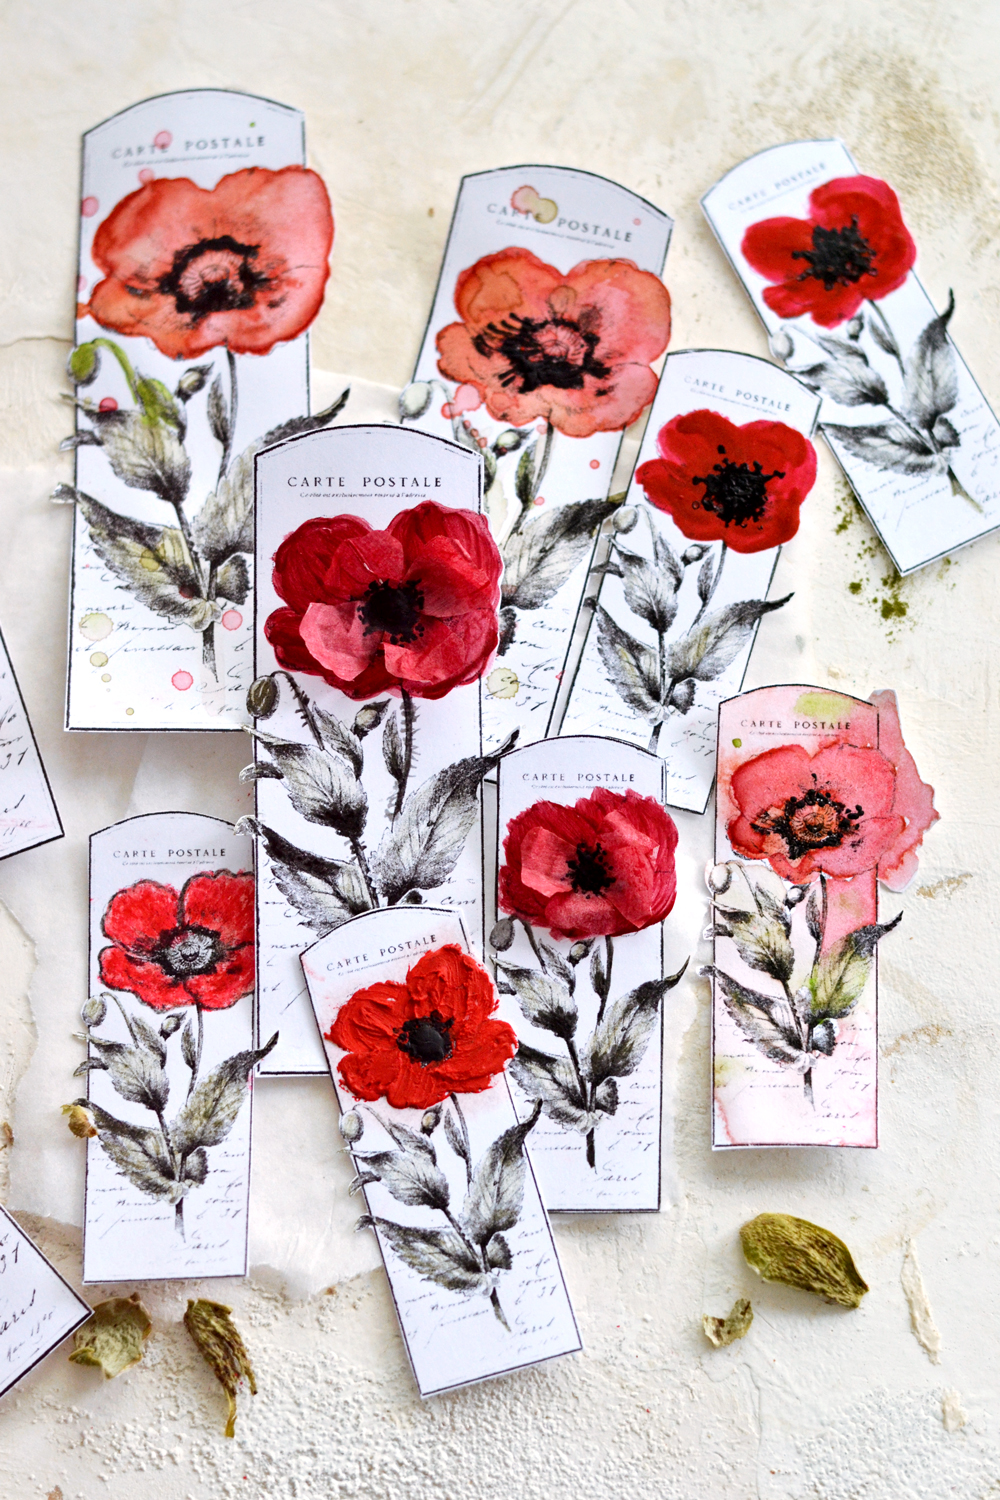
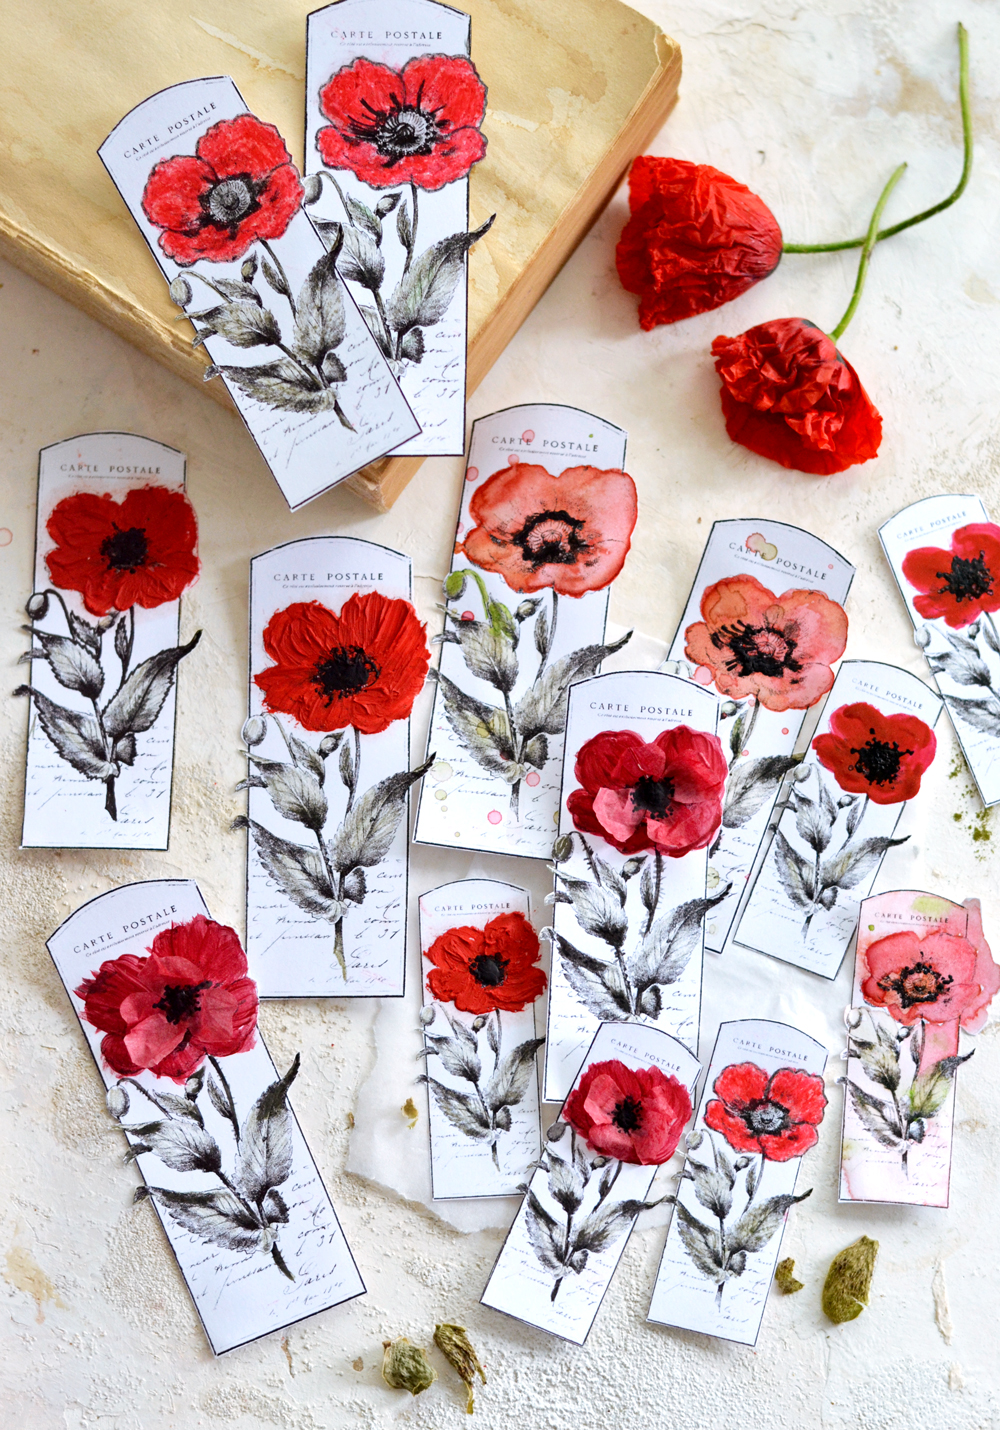
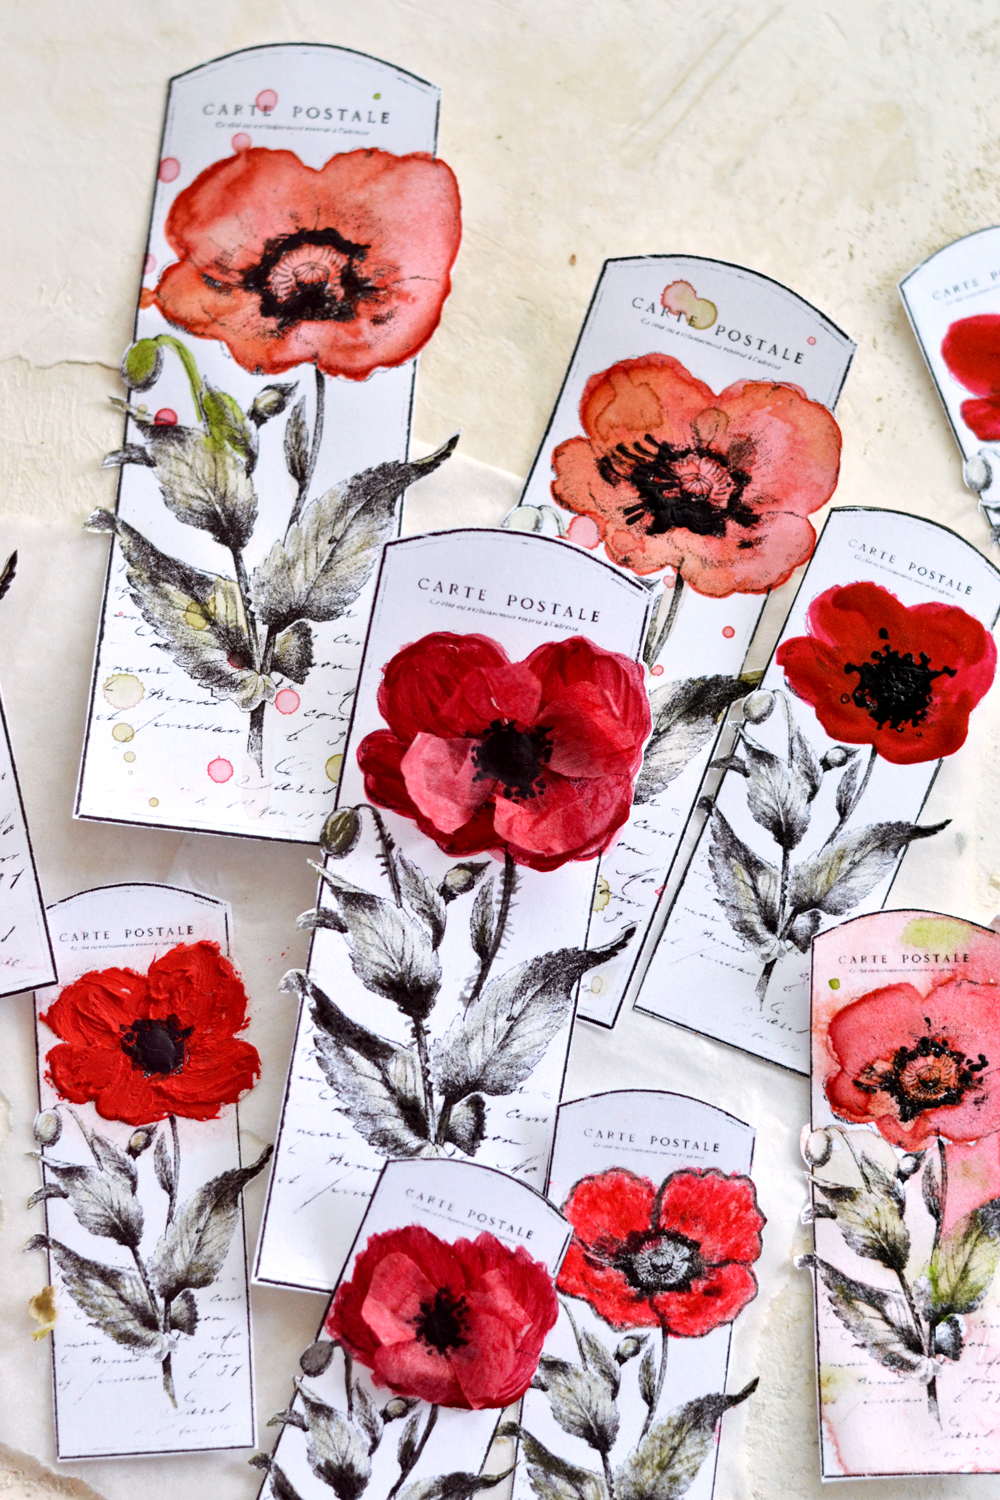
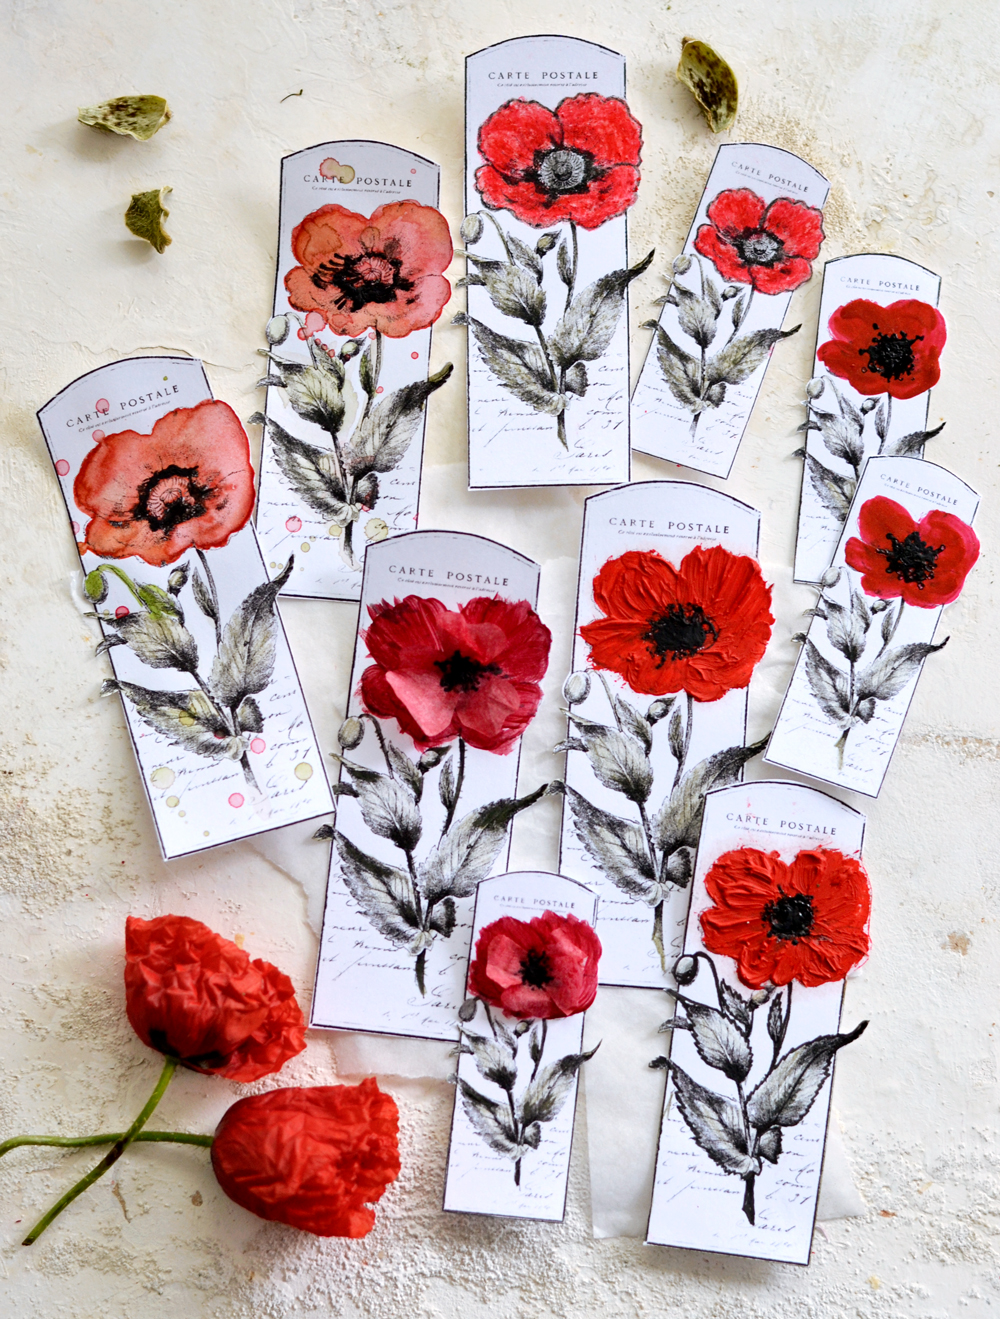
Hello, Graphics Fairy friends! Diana from Dreams Factory here, I’m ‘popping’ in with a beautiful DIY Red Poppy Craft project and a free printable. Today we are making some gorgeous DIY Poppy Tags! These are lovely to make for Memorial Day, Veterans Day or Remembrance Day. You can attach them to a gift, attach one to a wreath, or pin them on to wear. They would make cute bookmarks too. I will show you 5 different techniques for making these. Some of these would be fun to make along with kids especially older kids!
I will be showing you 5 easy ways of decorating these oh-so-amazing Red Poppy Craft Tags, 5 starting points that will allow you to conduct your own experiments.
We’ll have fun with:
1. The joyful colored pencils and pastels method
2. The chic nail polish method
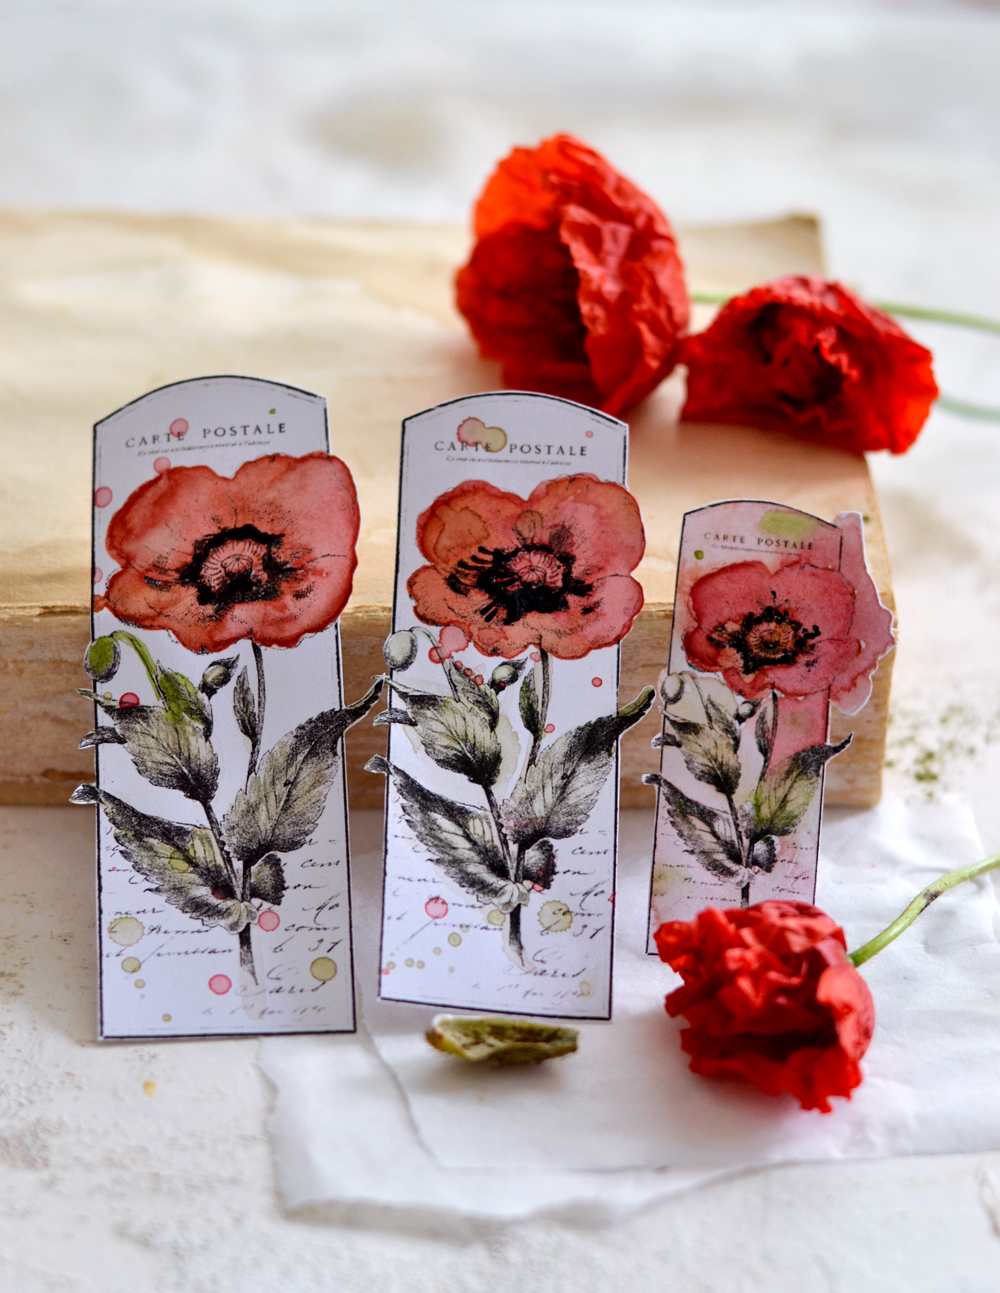
3. The dreamy watercolors method
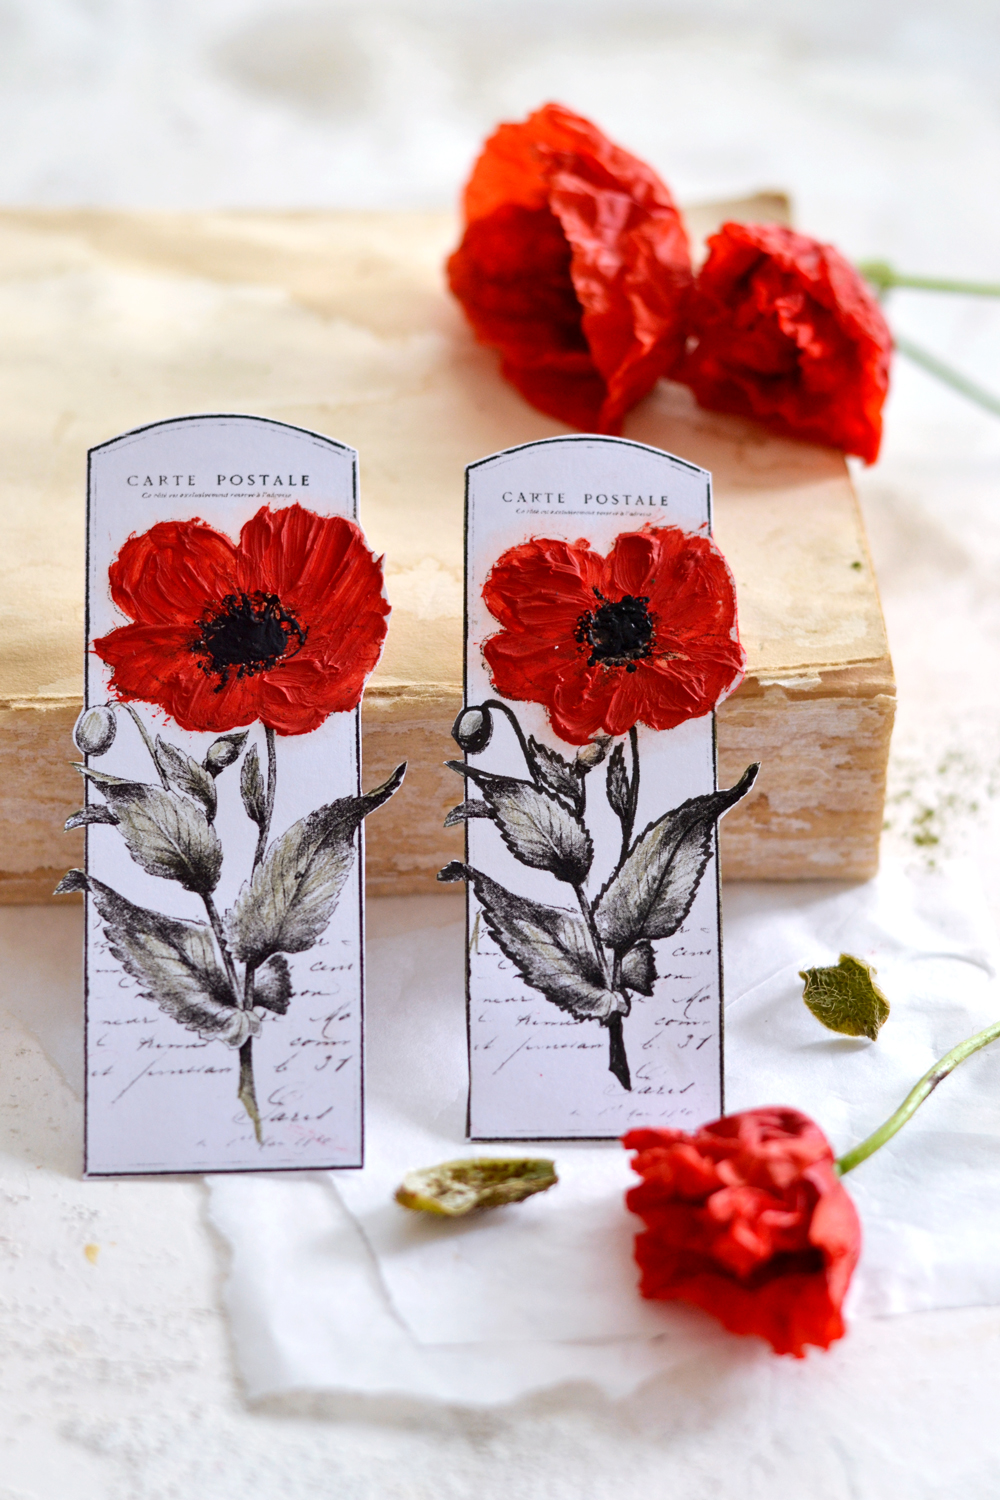
4. The classy oil paints method
5. The delicate tissue paper and acrylics method
The only hard part will be deciding which one do you love best! I’m not even kidding, it was really hard to pick a favorite after finishing all these experiments and being able to admire the final results. I had quite a crafty morning! But if I would have to pick JUST ONE, it would definitely be the delicate tissue paper Poppies & acrylics method, the final results were simply stunning!
The black and white poppy illustration is the resource that I used to create the tags. They were originally from an from an 1880’s Agricultural Magazine, how amazing is that!? I included a few French elements, some handwritten excerpts and a vintage frame to give them more chicness.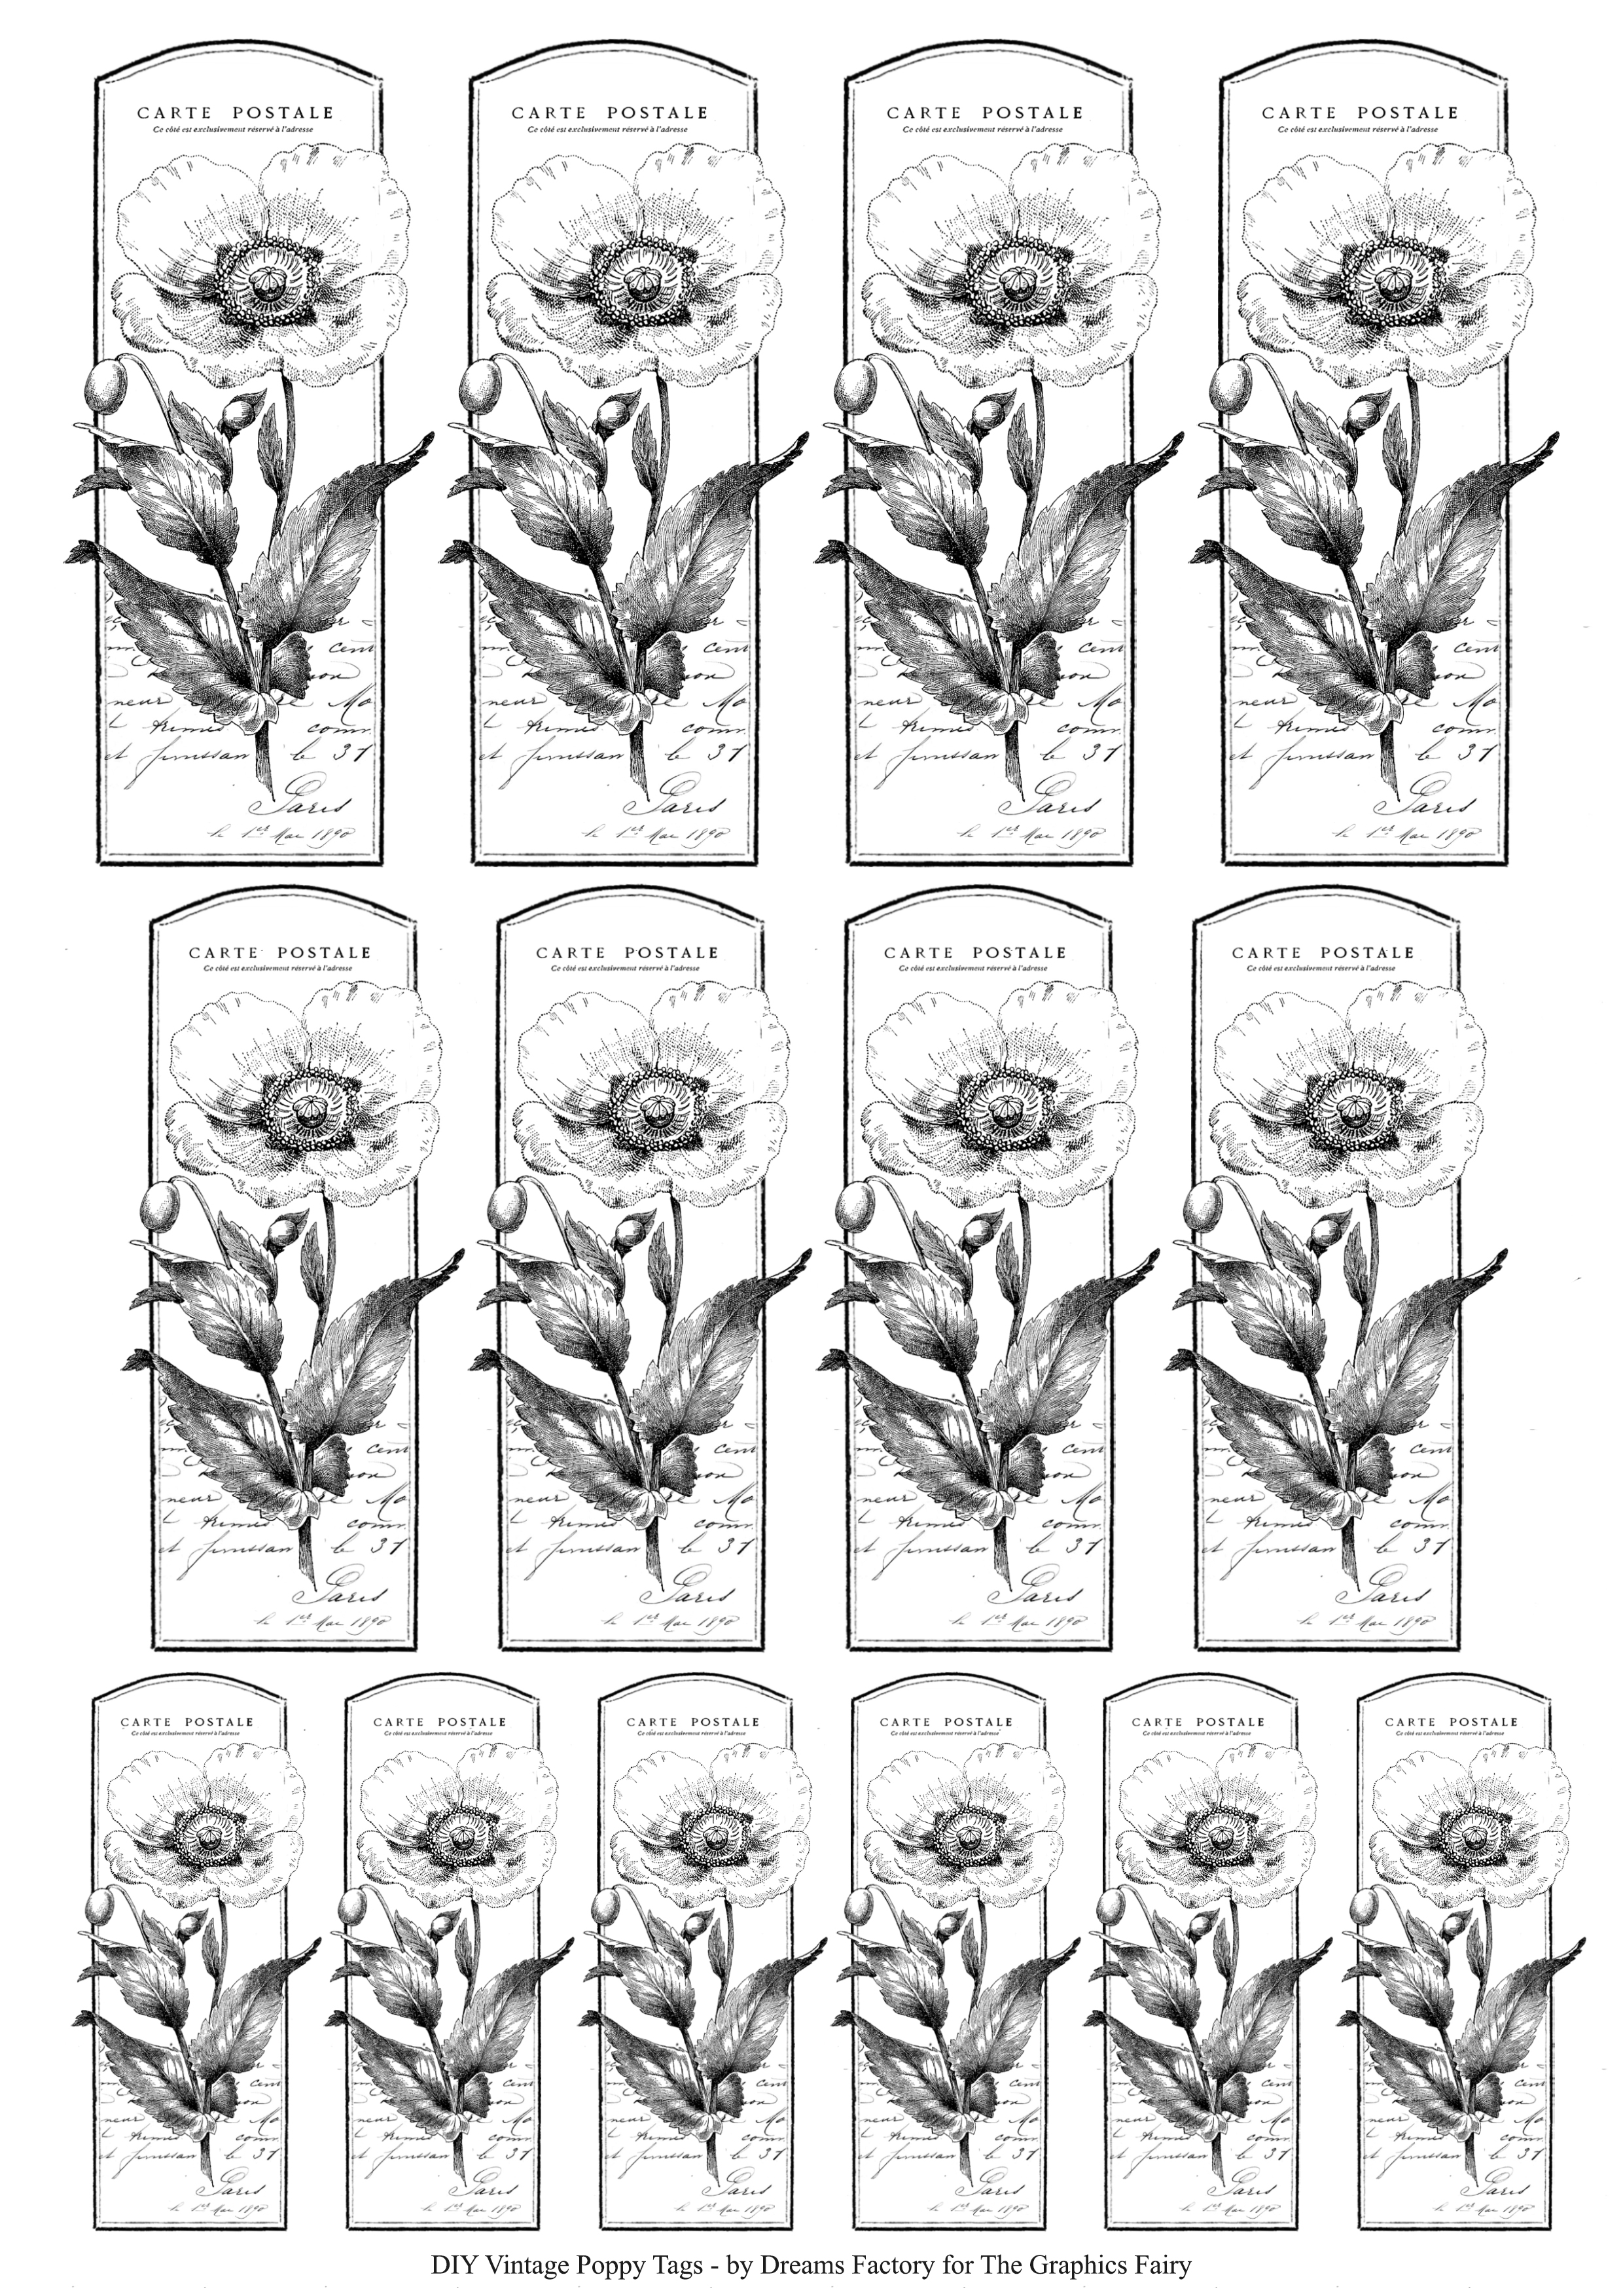
—-> Click HERE to Download the Full Size Printable PDF <—-
Just a quick note before I share my supply list below – I envisioned a classy final look for my DIY Vintage Poppy Tags. I loved their original ‘illustrative’ feel so I tried preserving that as much as I could. So I focused my 5 experiments on decorating the red flowers (my ‘pop’ of color), rather than the leaves and the stems. I used on almost all of the tags a dark green colored pencil to lightly color the leaves and the stems, plus a black and a gray pencil to highlight the existing details of the illustrations and to create more depth.
DIY Red Poppy Craft Tags – 5 methods!
SUPPLIES:
- cardstock paper
- laserjet printer
- manicure scissors or other small detail scissors
- colored pencils
- red nail polish
- watercolors
- acrylic regular paint
- oil paints
- Q-tips or palette knife
- toothpicks
- micro pen liner (for fine details)
- red or white tissue paper
- plates for mixing the paint and for water (I used small heart shaped porcelain bowls)
- pocket binders (or a non absorbent material) to protect your working surface
- paper towels
- Mod Podge and a glue applicator
Gather all your ingredients first.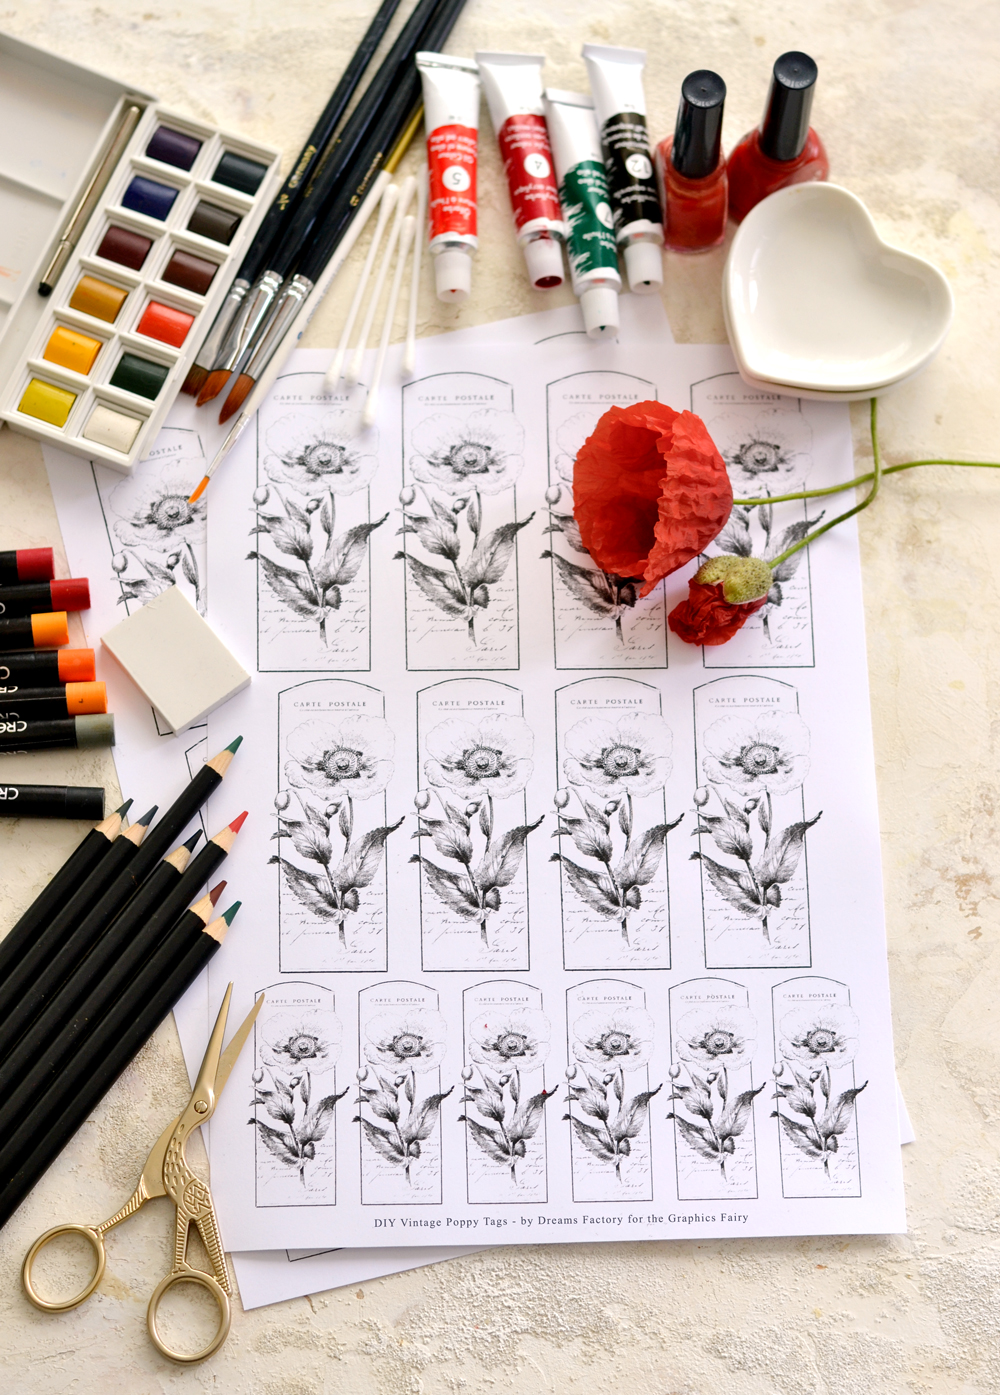
I decided to roughly cut the tags at this point, but you can definitely remove all the white paper outside their borders if you want to. Now let’s get going on our Poppy Activities.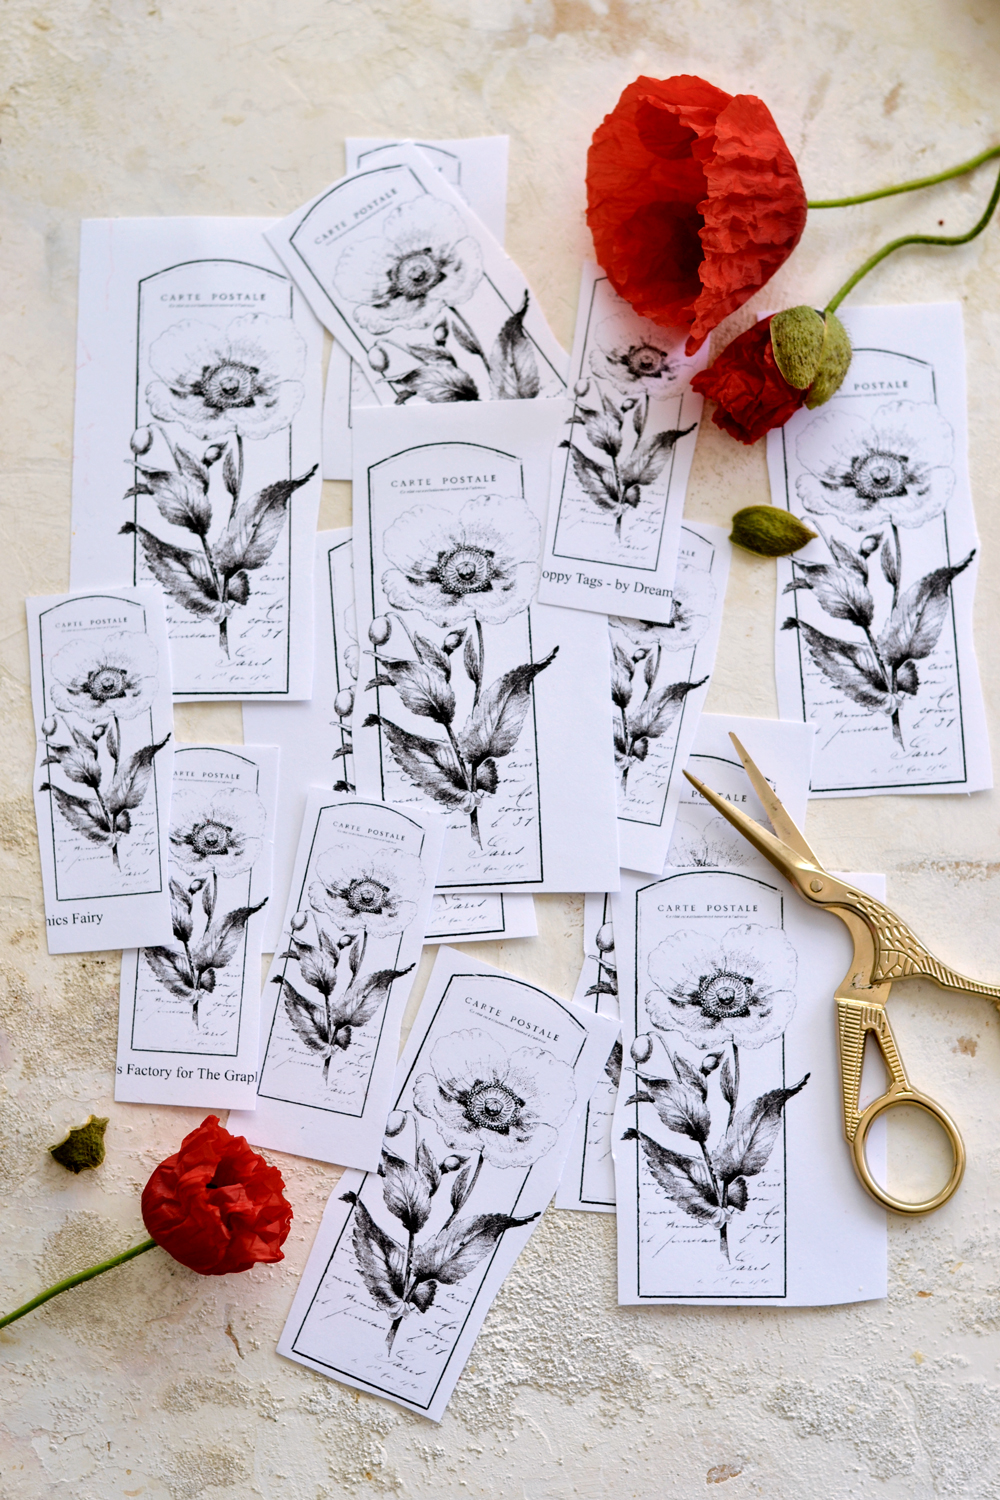
Red Poppy Craft Tags Technique 1: The Colored Pencils and Pastels Method
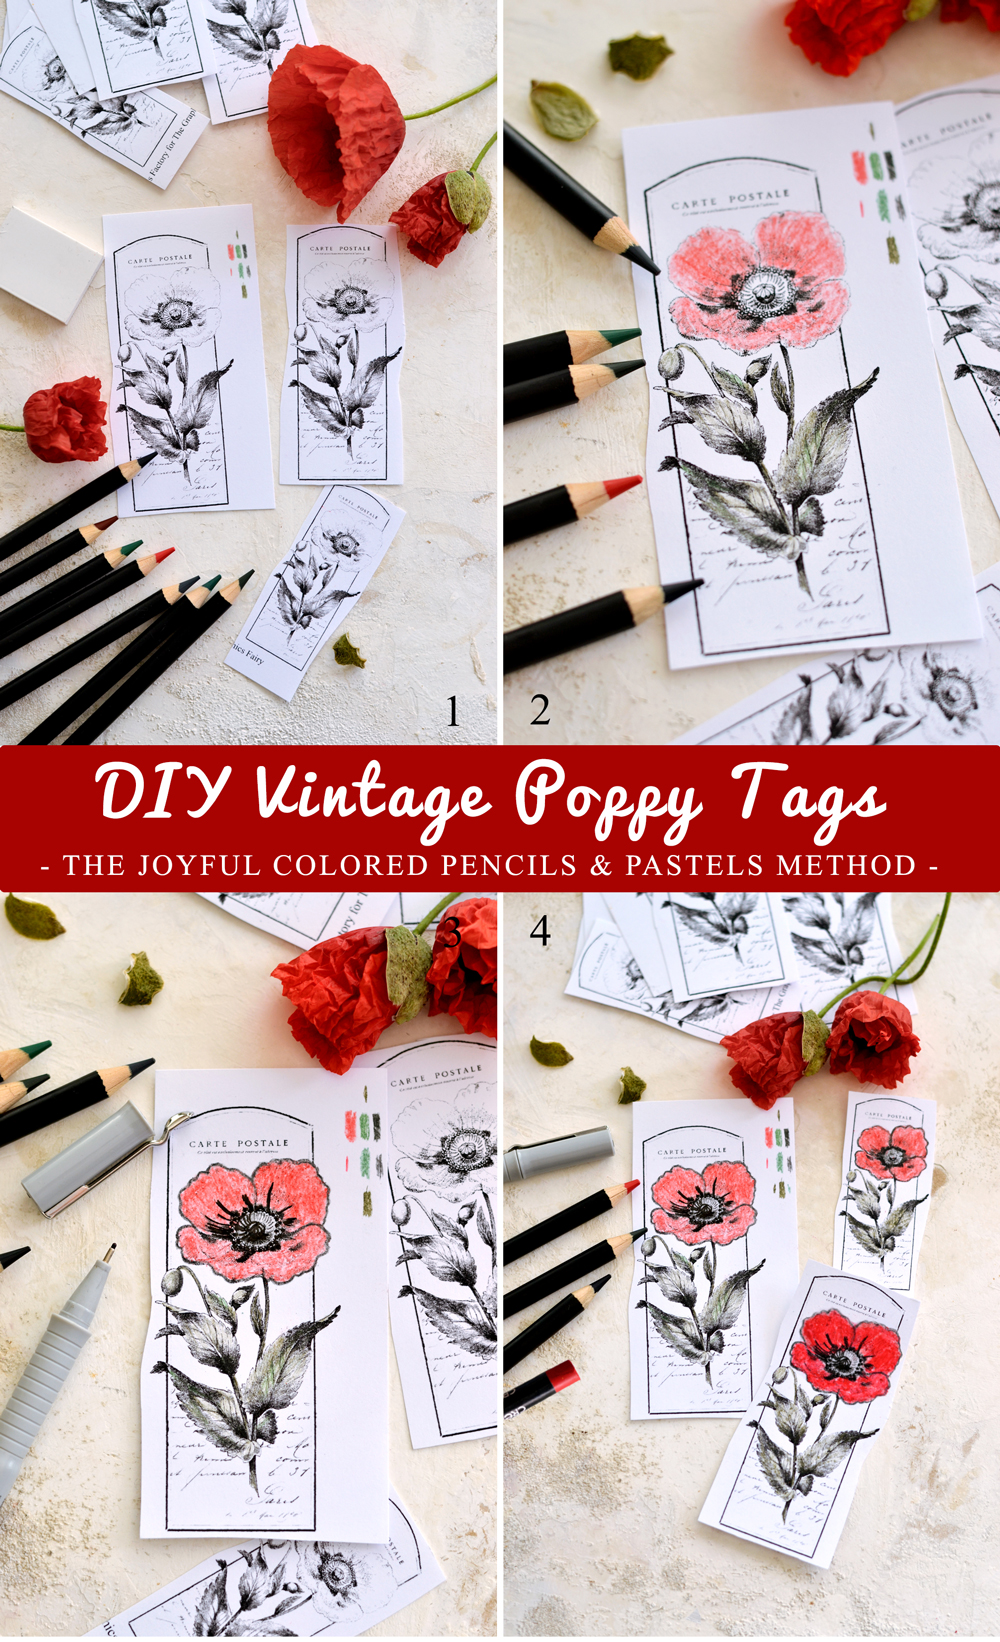
1. Create a color scheme – gather different shades of the colored pencils or pastels you are planning on using and do a few tests on some scrap paper to see how the colors look together.
2. Starting with the colored pencils, I chose a dark green pencil to lightly color over the leaves and the stems. I didn’t want to completely cover the amazing details that were already on the leaves and the stems, but rather to give them a subtle tint. I used a medium gray to color and highlight the places that were already darker on the leaves, giving them more depth.
I used a beautiful red pencil to color the petals and then went back to highlight all the black details on the stamen and the pistil.
3. You can use a micro liner to highlight some of the finer details on the flower or even create a contour.
4. I used just one red pastel and went over the red pencil to create a more dramatic effect, but you can also add some orange pastels for more depth. Experiment, experiment, experiment, all that coloring is really joyful and relaxing! 🙂
Technique 2: The Nail Polish Painting Method
1. Use red nail polish to color the petals of the poppy – you will get a better coverage if you use a fairly good amount of nail polish right from the beginning. I did one petal at a time and I didn’t stressed about making them too perfect.
2. Add a blob of black paint (I used undiluted watercolors, but you can also use acrylics) directly from a small tube, to create a raised effect in the middle of the flower, then dip a toothpick in the black paint and tap it on the paper to create small dots all around it. After drying, the red nail polish will create a chic, almost like an enamel effect on paper. You will love it! 🙂
Poppy Craft Technique 3: Watercolors Method
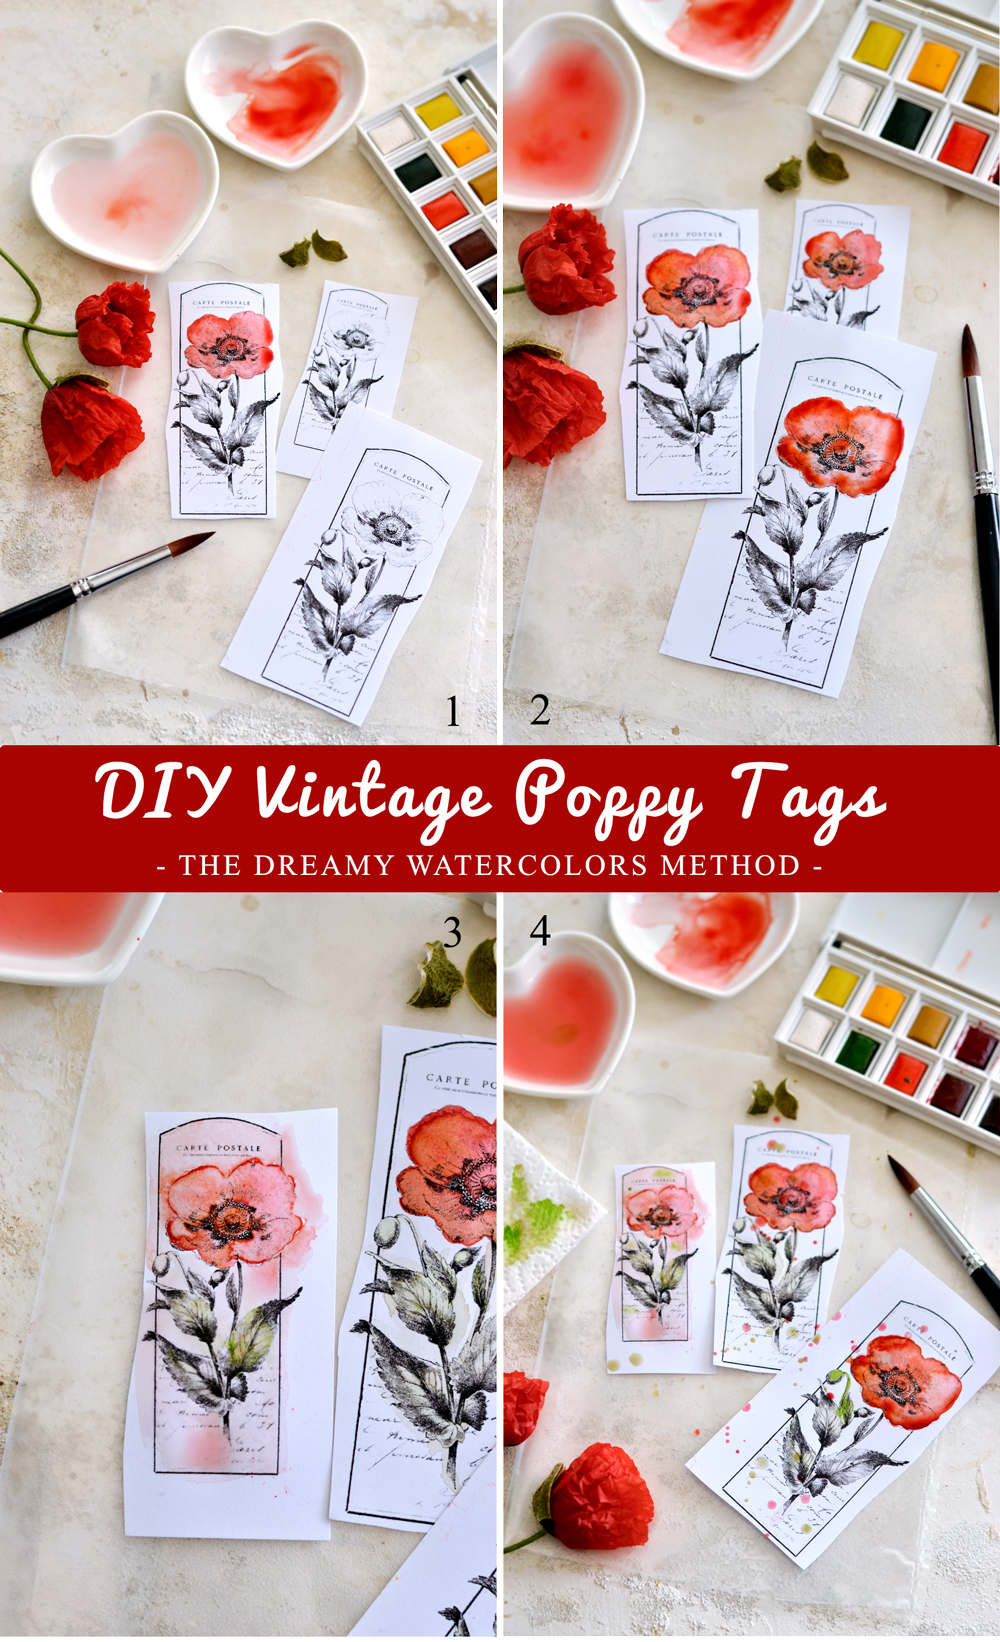
1. I used my new set of watercolors for this method and I experimented with red and a little bit of orange until I created a color I loved. You can use a small plate (or the case of your watercolors) to mix your colors before actually brushing them onto the paper.
2. You can also use your brush to damp your paper with water first, then add the colors and let them all blend on the paper.
3. For demonstrating purposes I decided to even make a watercolor background on one of my tags, simply by brushing water all over the background, then adding small amounts of watercolor paint here and there.
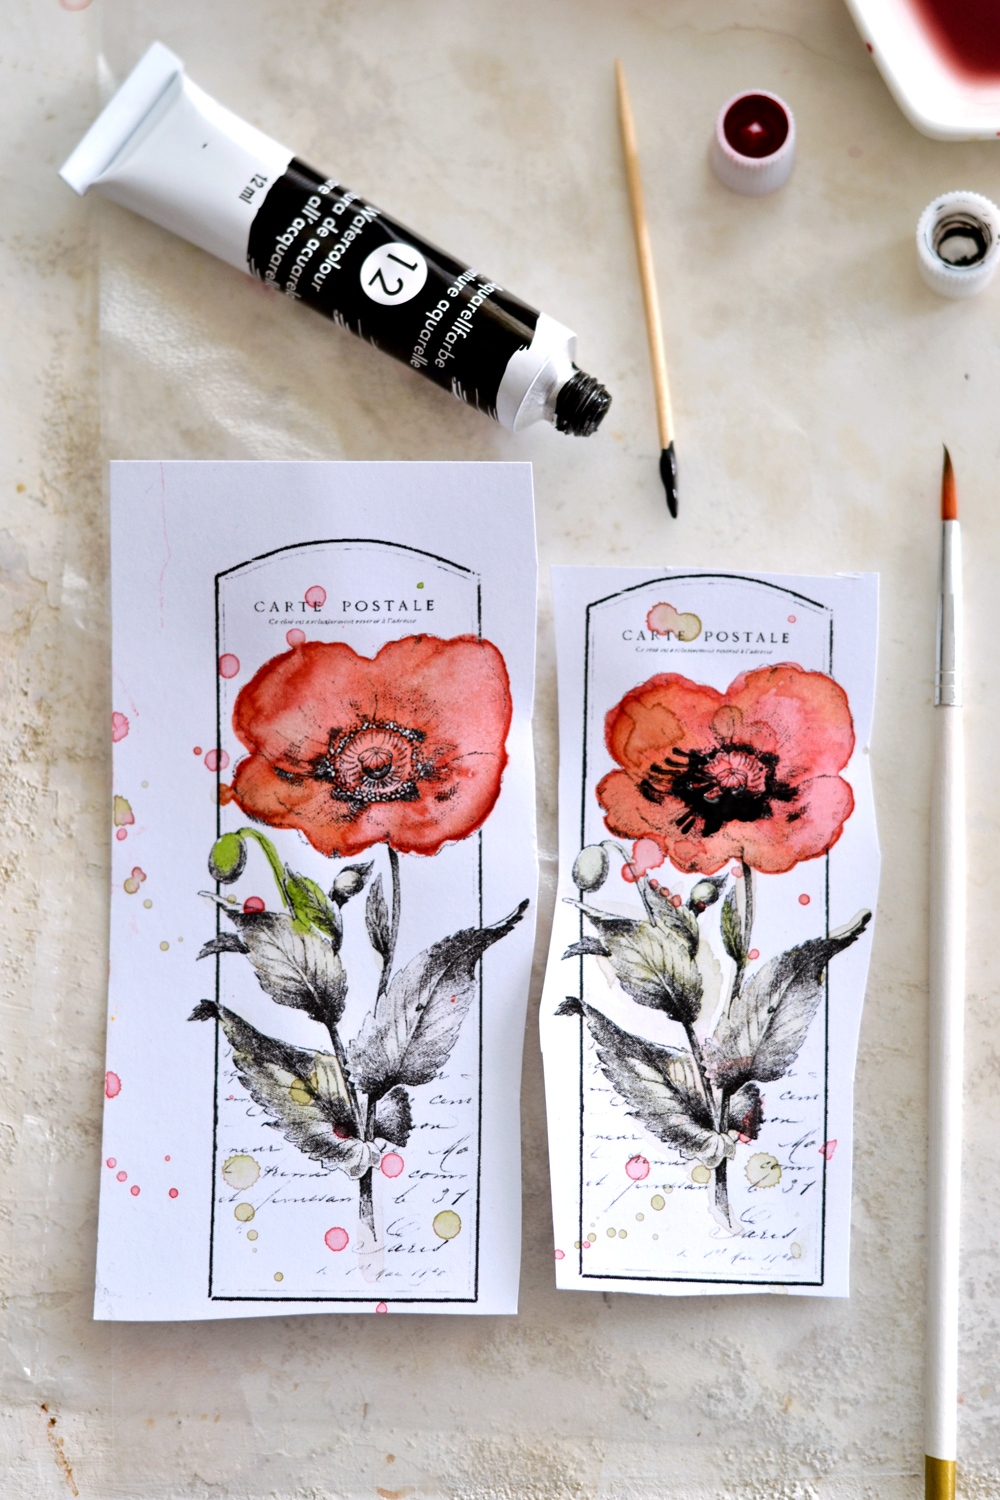
4. Then I added some watercolor splashes on the tags and I really loved the final blending effect! Eventhough I used cardstock paper (and not watercolor paper), I was still able to get that dreamy watercolor -y effect. So beautiful! 🙂
Note: Use undiluted black paint and a toothpick to create a highlight effect in the middle of the flower (the flower on the right), it will create a beautiful almost like a 3D effect after drying.
Technique 4: The Oil Paints Method
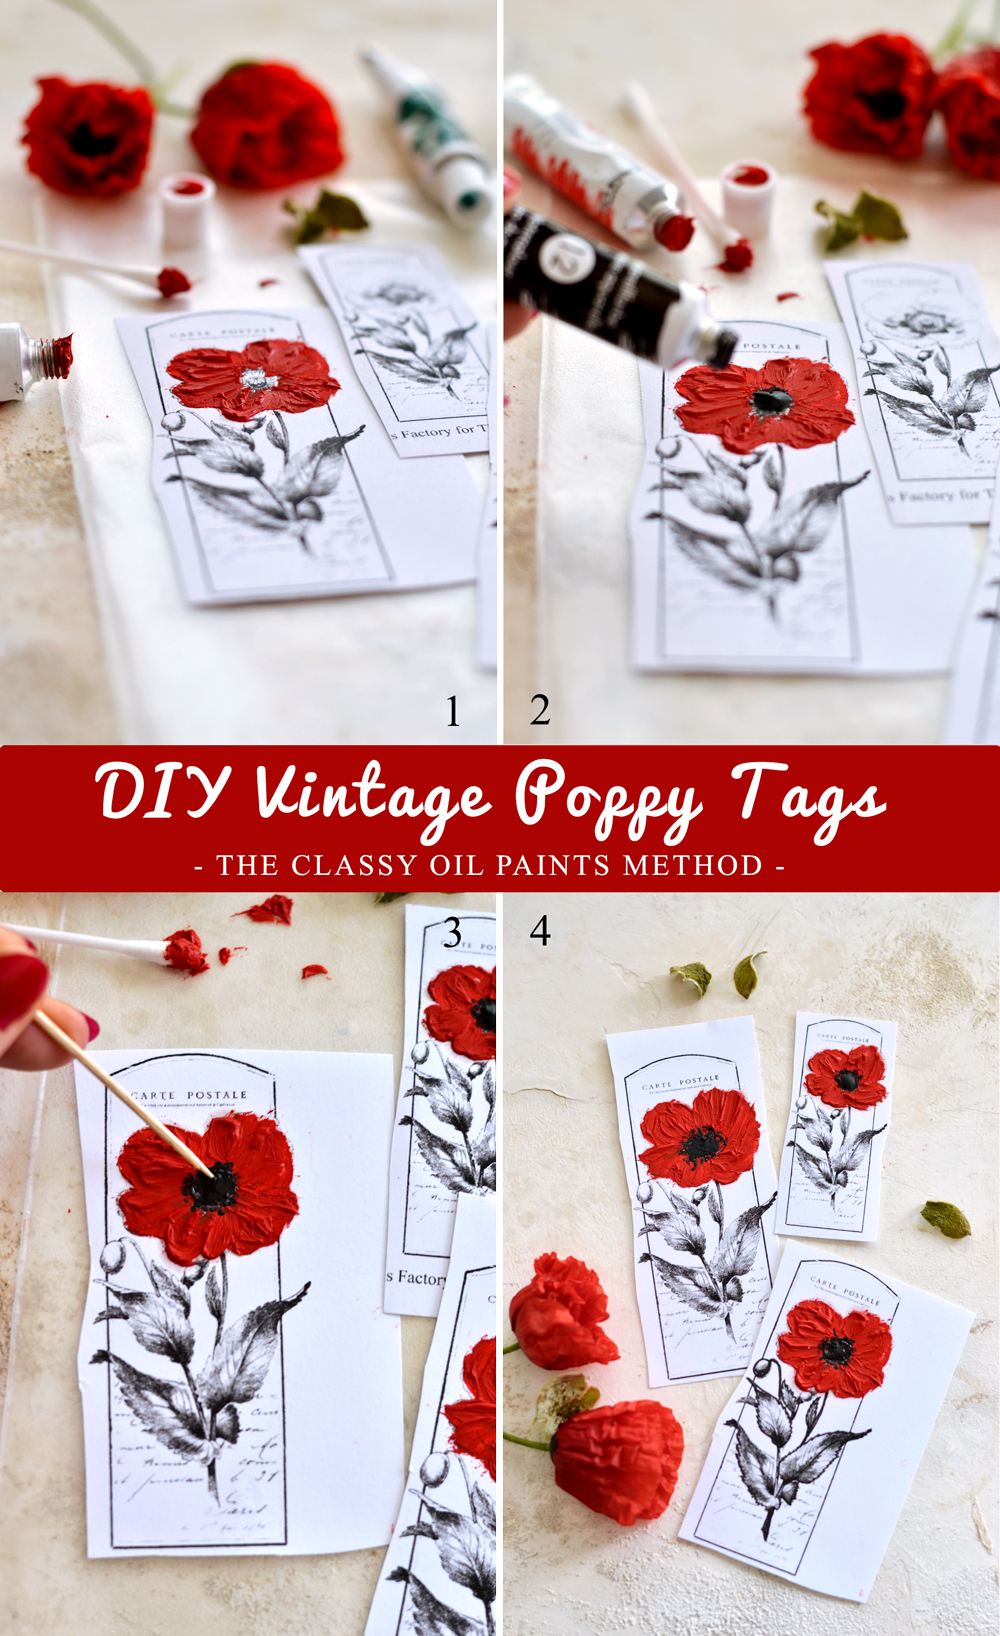
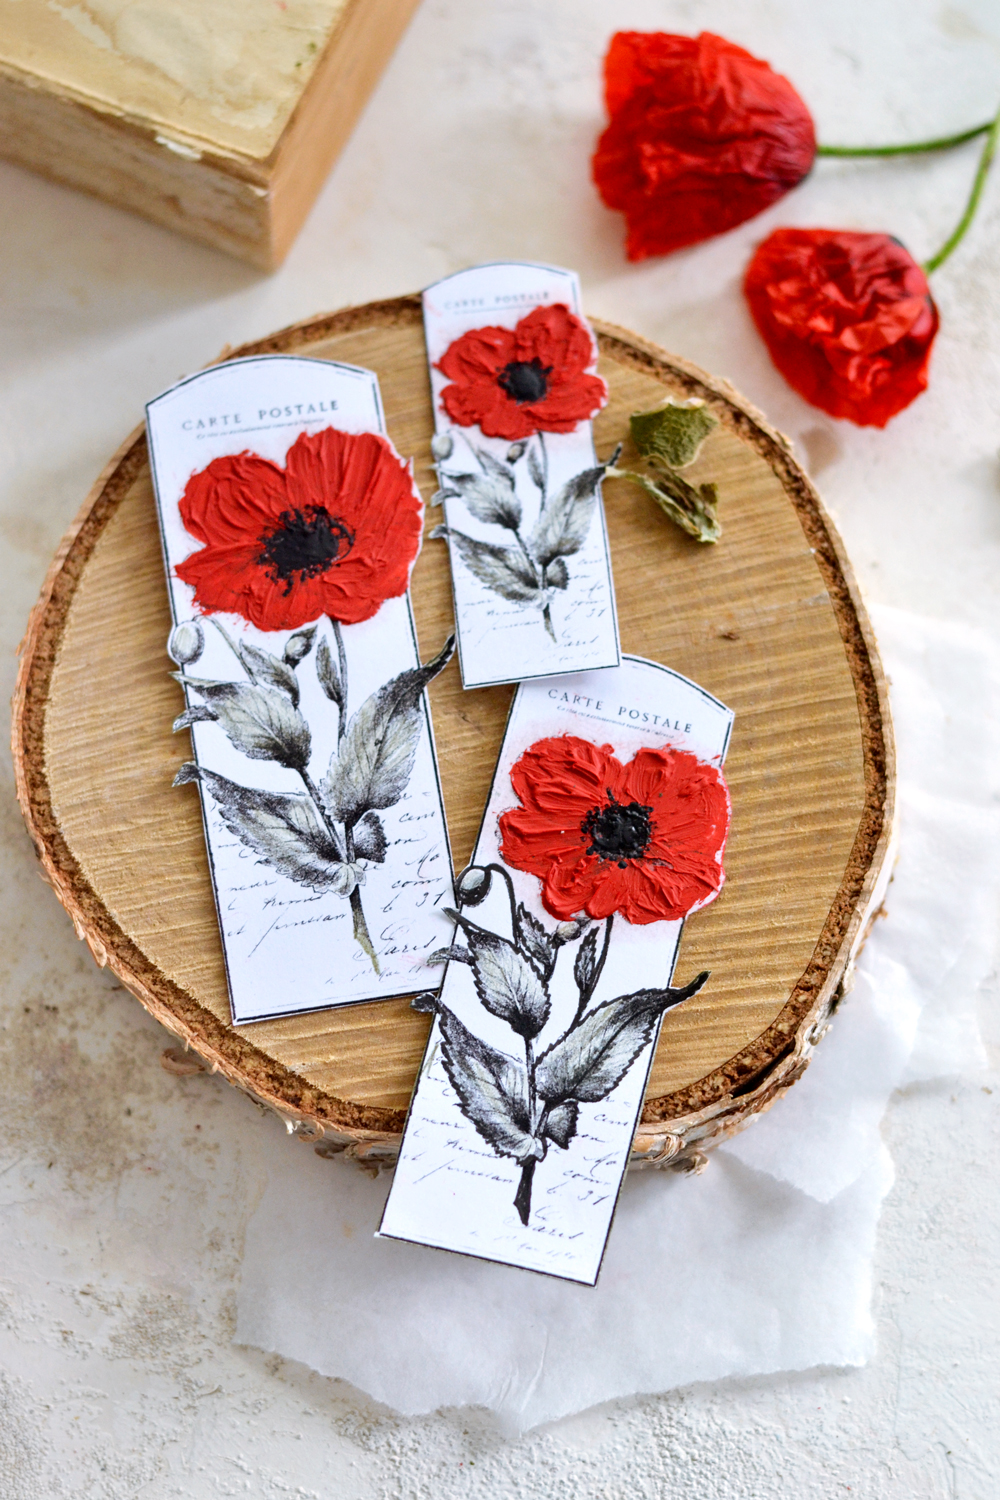
1. I’m not usually using oil paints in my projects (never, really) but I decided to give them a try here for the sake of experimenting. I know oil paint brushes are a mess to clean afterwards (and I couldn’t find my palette knife anywhere) so I used a Q-tip instead to apply a generous amount of red paint. I created paint strokes with the Q-tip starting from the middle of the flower and moving outwards, following the illustration’s design.
2. Then I applied a blob of black paint directly from the tube, creating a raised effect in the middle of the flower, just like a beautiful black pearl!
3-4. I dipped a toothpick in the black paint and tapping it around that pearl of black paint, I created a beautiful, super realistic effect on all the flowers. I simply adored the effect I got with this method, my tags looked like classy mini oil paintings! 🙂
Note 1: Please keep in mind that this type of paint is not usually used on paper! Even though the final effect was truly amazing, depending on the type of oil paint you are using, it might take 24 h to a few days to completely dry and it can create a shadowing effect on paper (it can bleed through). Now I’m thinking that I could have used some gesso first, before applying the paint, maybe I’ll try it next time! Because I have a feeling it will be a next time! 🙂 I would say this method is definitely intriguing and worth exploring if you want to add some structure, so feel free to conduct your own experiments and see what you get!
Note 2: If you don’t want to use oil paints, you can simply try this method with acrylic paints.
Red Poppy Craft Tags Technique 5: The Tissue Paper & Acrylics Method
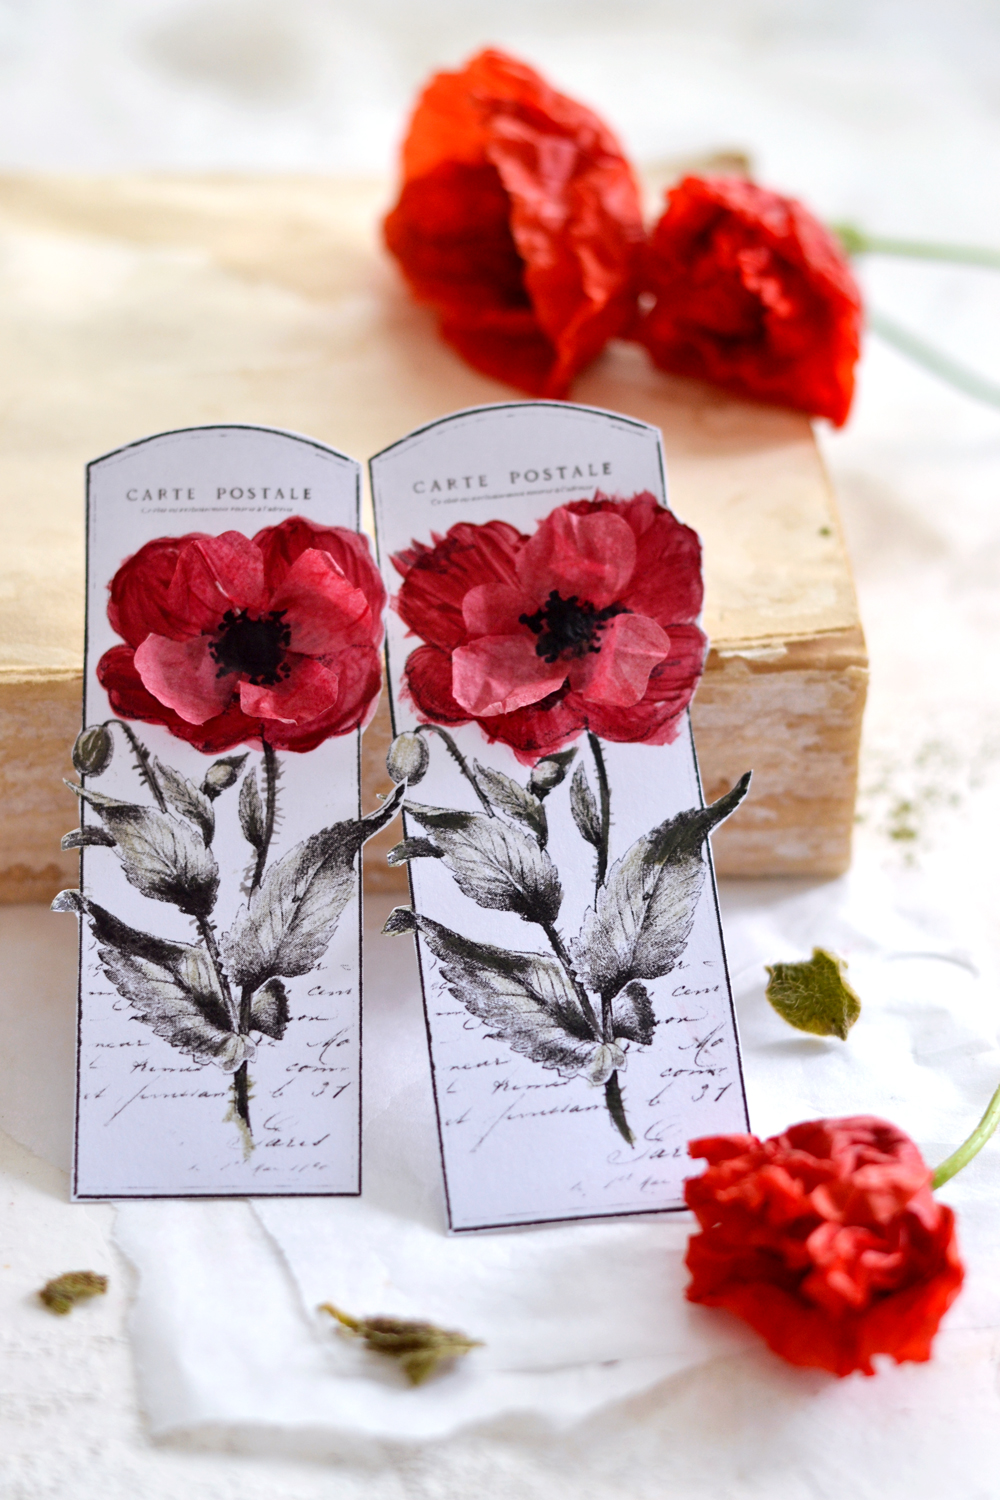
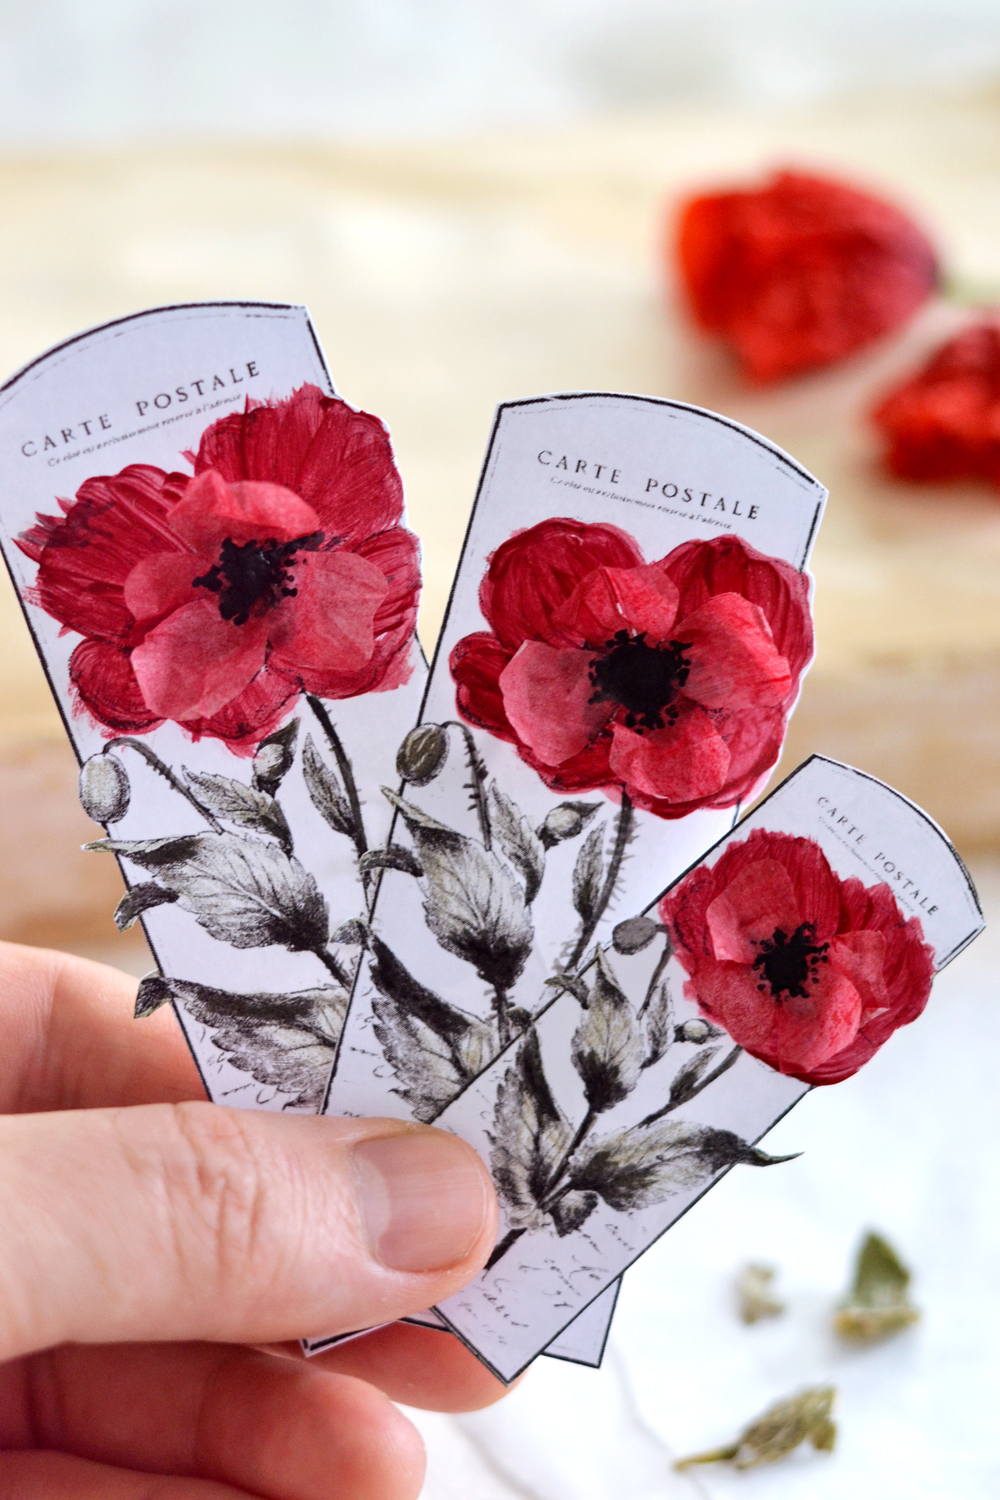
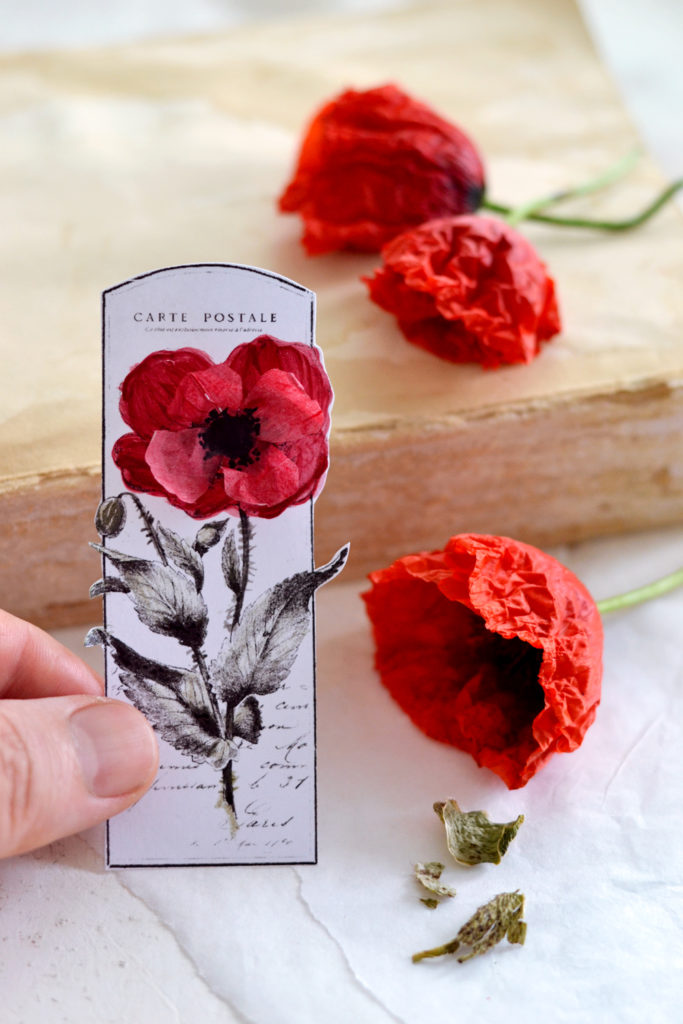
I’m saving the best for last! 🙂 This method was my favorite, the tissue paper created a beautiful 3D effect, sheer and delicate, visually similar to the real poppy flowers! Even the texture was similar to the real flowers when moving your fingers over them!
I cut some heart shaped petals that were still holding together at the bottom. They created a small bow or the infinite sign when unfolded. Don’t stress too much about them being perfect, the more uneven the more realistic they will look. Just like in nature! 🙂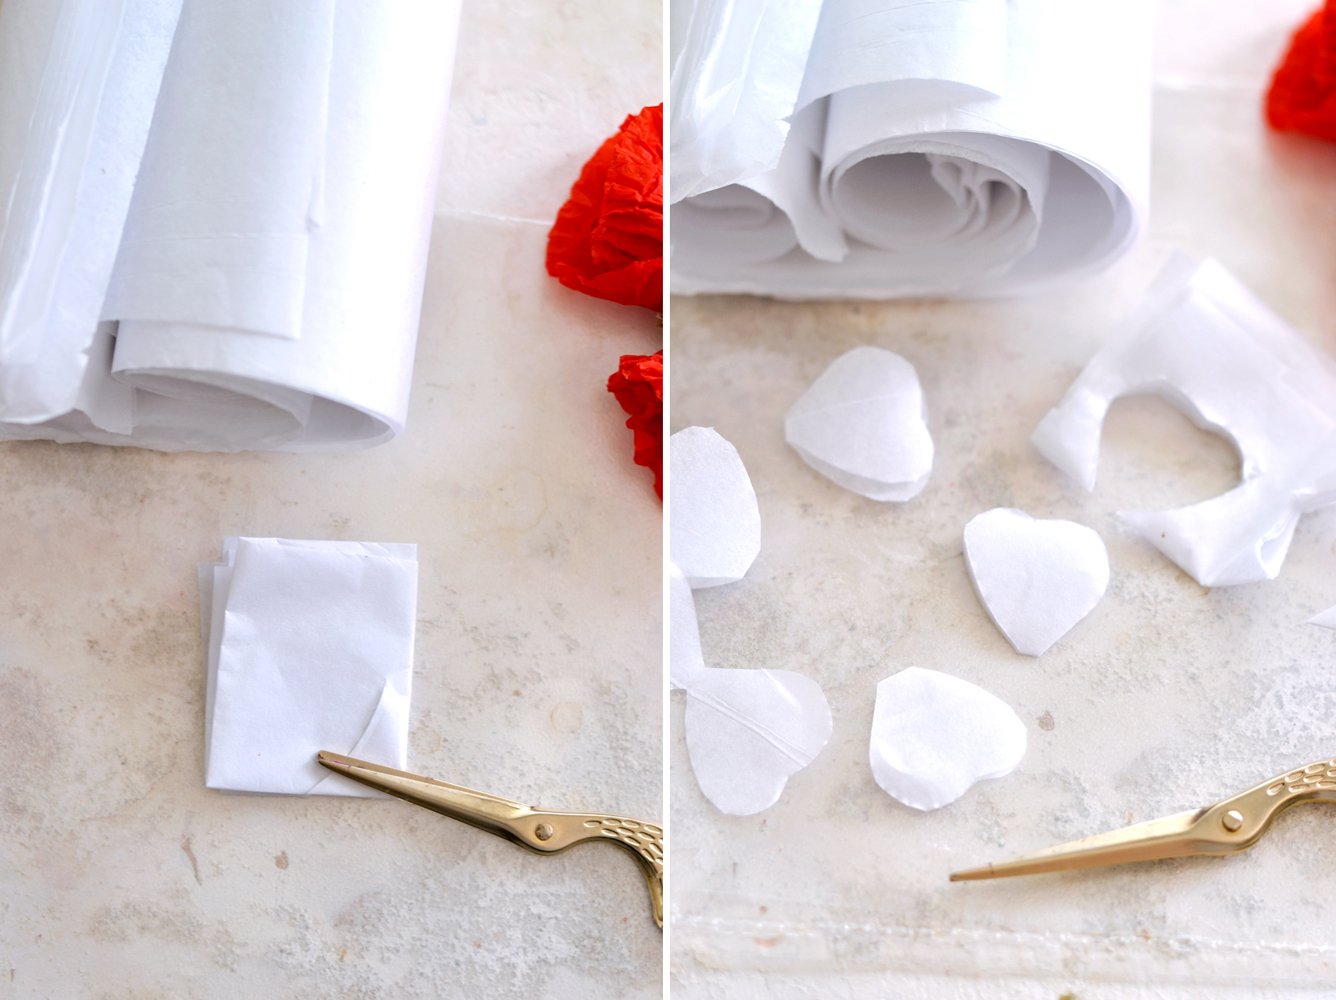
1. I started by painting with red acrylic paint the petals on the tags using a small brush, because I wanted to create a colored base for my tissue paper.
2. If you have red tissue paper, you can use it now to create the petal shapes, if not, use white tissue paper (coffee filters may also work, but I didn’t try that one) and paint it with the same red acrylic paint (or you can use a different shade to create more depth). Use a plastic sheet underneath and be careful, the tissue paper … I mean your new petals can be quite delicate 🙂
3. Measure the tissue petals before applying them to the tags so they are smaller than the petals from the printable. Glue them on top of the printable (I used my glue applicator and some Mod Podge) and let them dry a few minutes.
4. Again, add that small dab of black paint – the black pearl – directly from the tube, right in the middle.
5. You can see in this image the difference between simply applying the dab of black paint from the tube in the middle of the petals (the flower on the left) and the using of a toothpick to create small dots all around it (the flower on the right).
6. Follow the same steps for all the DIY Vintage Poppy Tags you are making and get ready to be amazed, the final results are quite gorgeous!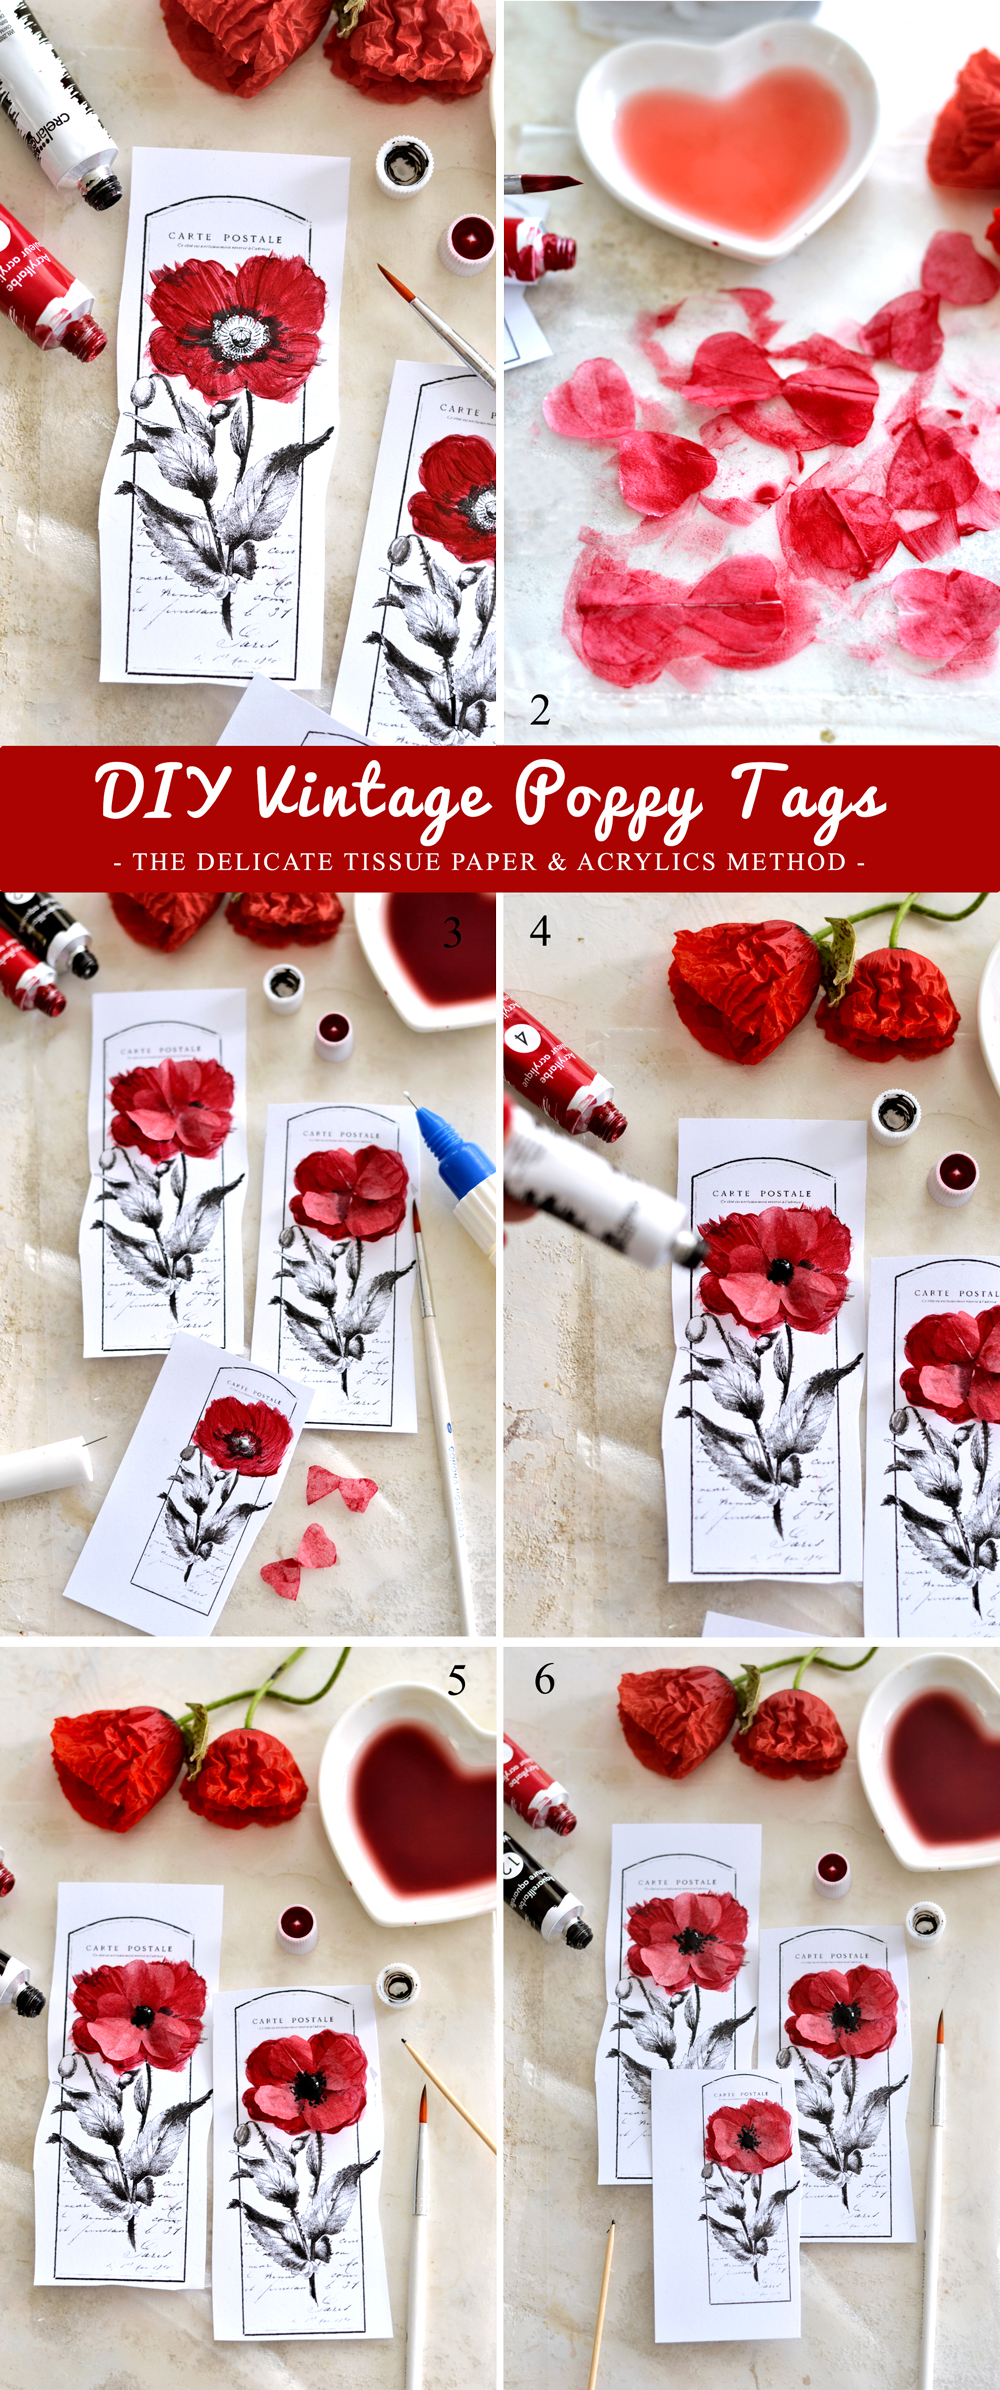
That’s it! No matter which method you use, let them dry completely before using your scissors to remove the white excess paper outside the frames.
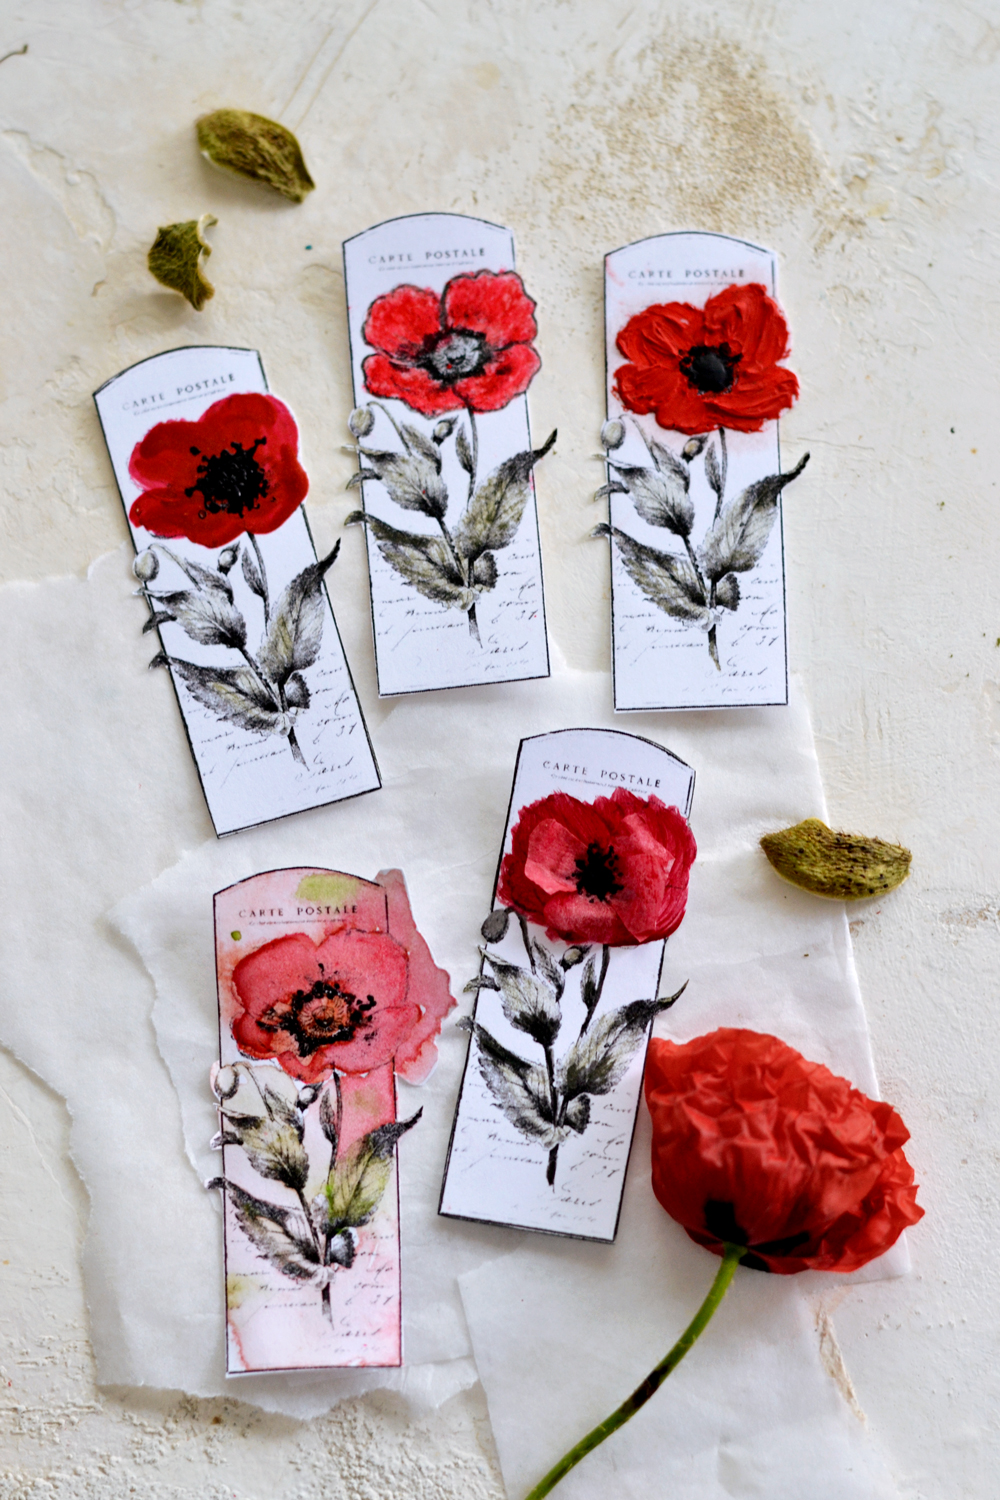
And that’s pretty much it! All our 5 methods of making and decorating beautiful DIY Vintage Poppy Tags!! Our super fun and unique ways! 🙂
Each method is quite unique on its own, creating amazing results. But I really loved the process too, it was so relaxing making these!
You can punch and use them as tags when wrapping thoughtful gifts for family and friends, we could all need a ‘pop’ of color in our lives right now!
But you can also include them in so many of your creative projects, you even even use them as labels to decorate pretty objects around your home.
Have fun creating these beauties, I’m really curious which method do you love best! Can you pick just one? 🙂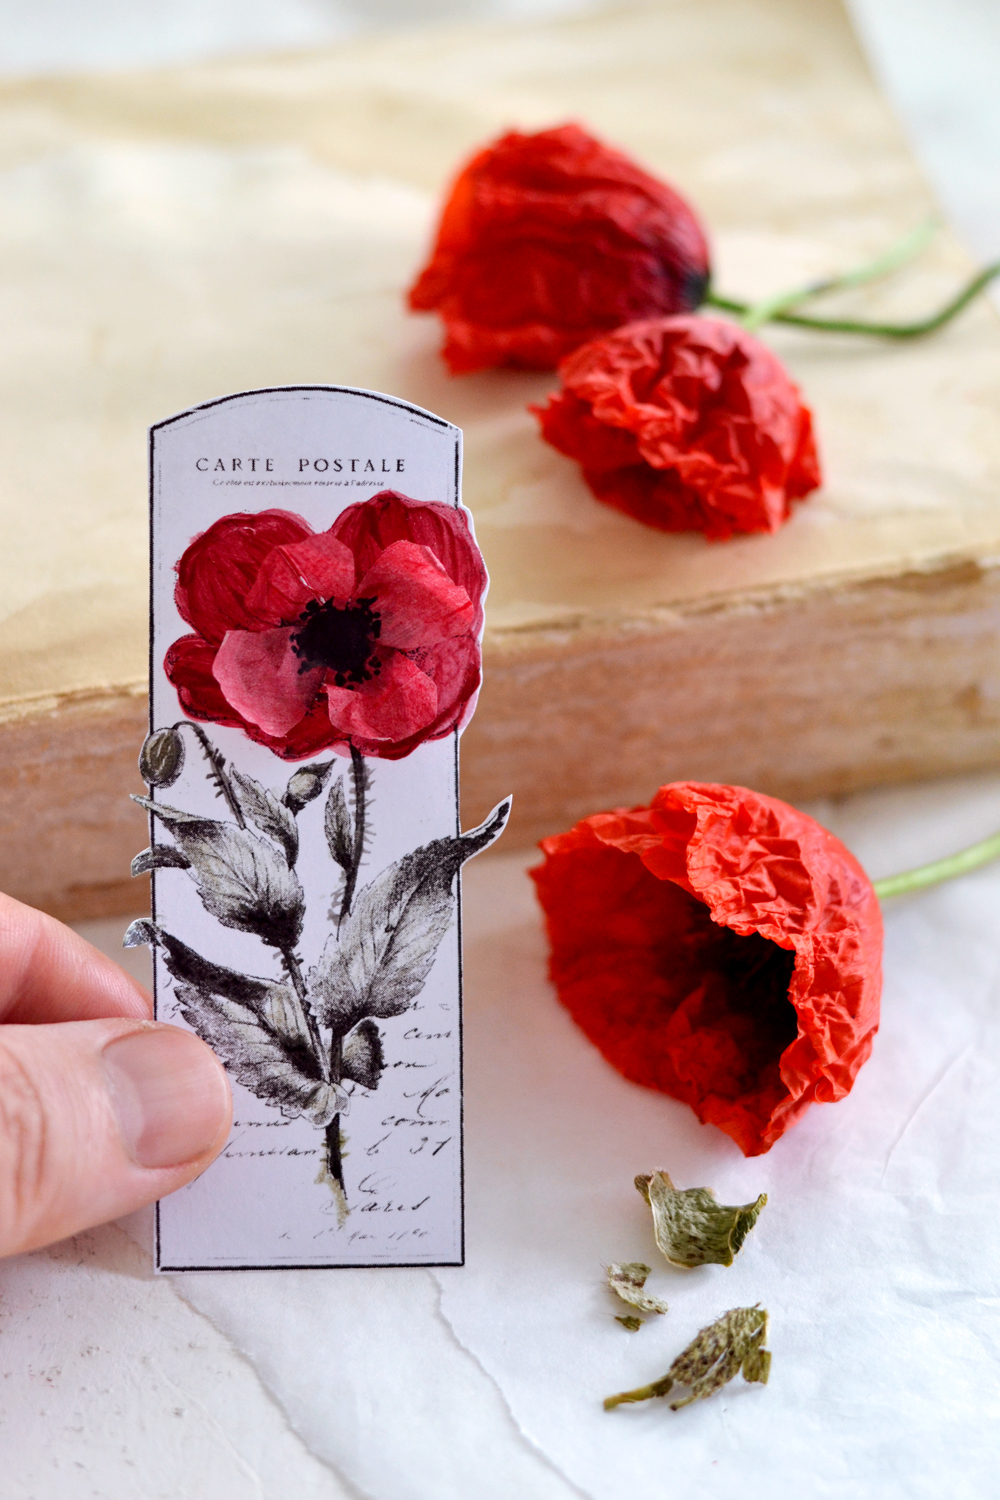
I stepped out of my comfort zone with all this red, because this color it’s not really my first choice when making a project. Any project! 🙂 But sometimes, if we allow ourselves to try new things, we might be surprised … in the most amazing kind of way!
 I really encourage you to see these methods as a starting guide for conducting your own experiments! Try all my 5 methods or come up with your own, don’t be afraid to experiment. You might be surprised too! I hope you have fun making these Red Poppy Craft Tags. I think they are a lovely symbol of remembrance in honor of your favorite Veteran on their special day. If you enjoyed this Craft please share it on Facebook or Pin on Pinterest!
Have fun creating,
Diana / Dreams Factory



Debbie says
Amazing tutorial. Just beautiful.
Karen Watson says
Thanks for your sweet comment Debbie! 😊
Bronwyn Mitchell says
Thank you so much for printables . I plan to try coloured pencil first. Then make some quilled petals and see how they look.
graphicsfairy says
Oh that sounds like fun Bronwyn 🙂
Marcie Lovett says
What a fun experiment, Diana. Nail polish? I’d never think of that! I have that watercolor set and love them, but not the brush 😕 I like the tissue paper best, originally thought you’d cut them from crepe paper.
graphicsfairy says
Thanks so much Marcie, so glad you enjoyed it!
Marcie Lovett says
What a fun experiment, Karen. Nail polish? I’d never think of that! I have that watercolor set and love them, but not the brush 😕 I like the tissue paper best, originally thought you’d cut them from crepe paper.
Angela says
Thank you
graphicsfairy says
You are so welcome Angela 🙂
Teddee Grace says
When I was a child, crepe paper poppies, which were pinned to one’s lapel, were still sold on Memorial Day in my rural Missouri hometown to memorialize the dead lost in both WWI and WWII and to raise money for veterans of same. Poppies grow in profusion in Flanders Fields where so many Americans, including one of my great uncles, are buried who lost their lives in WWI. These poppies make a lovely memorial craft project for May.
graphicsfairy says
Than you so much for sharing Teddee, I completely agree they would make a wonderful Memorial Day project!
Deborah Fusaro Costanza says
I am the President of the local VFW Auxiliary 2540. Several times a year we have Poppy Drives to distribute the familiar red poppies and the story of the Buddy Poppy to the public. Your gorgeous poppy design will, with your permission, become a part of our Poppy Table. I am an artist and I will decorate your designs. We accept donations for our Buddy Poppies. May we accept donations for your design? We do not “sell” Buddy Poppies. I’m going to do this first batch as my holiday gifts for my loyal members. I try to make something every year for our members. Thank you so much for this design.
Karen Watson says
How exciting Deborah! We are so thrilled that you can use Diana’s lovely design, for your Poppy Drive! We hope you get loads of donations!😊
Sue Walsh says
These are truly stunning! Thanks for taking the time to share how you made each of them. I’d really like to try each one of them. Thank you for another pretty freebie too. 🙂
Karen Watson says
We’re so glad you enjoyed this one Sue!