Floral Mail Art
Hello my friends. One of our talented Design Team Members, Tejae Floyde from Tejae’s Art, is sharing with us this week. She has created an elegant Floral Mail Art project. As you know, we feature a new Design Team project each week created by one of our extraordinary artisans. Our goal is for you to be creatively inspired by this series! Be sure to check out her Video Show and Tell at the bottom of the page…you will need to scroll all the way down to see it. Are you ready to be inspired? I will let Tejae tell you all about her Digital Mail Art project in her own words…
Floral Mail Art
I don’t know about you, but one of the first things I do when I see a new stack of incoming mail from the mailbox is to thumb through it quickly to see if I’ve received any mail art from my friends. Pretty stationery, hand stamped imagery on envelopes, and colorful packages makes my heart skip a beat. I just adore receiving and sending mail art. I love it so much that I regularly exchange mail art with a friend in Washington.
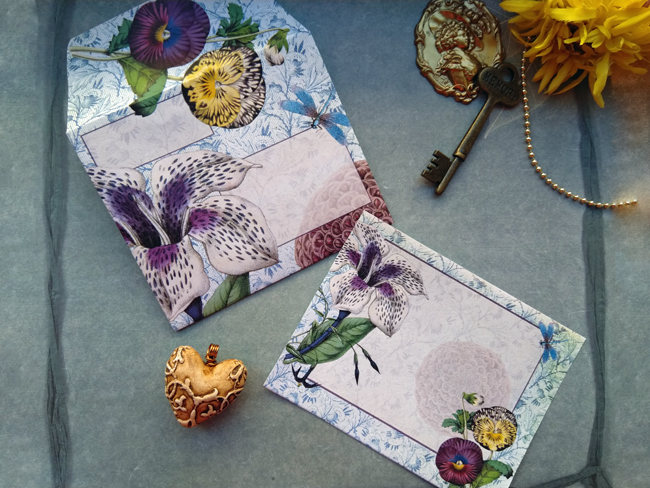
For this month, I want to show you my latest digital project for the Graphics Fairy design team. I created stationery sets combining 3 bundles from the Premium Membership Site. The Bundles I Used: Delicate Endpapers, Yellow and Purple Botanicals, and Envelope and Pocket Templates. Even though I used the same art on all three sets they each have their own unique look.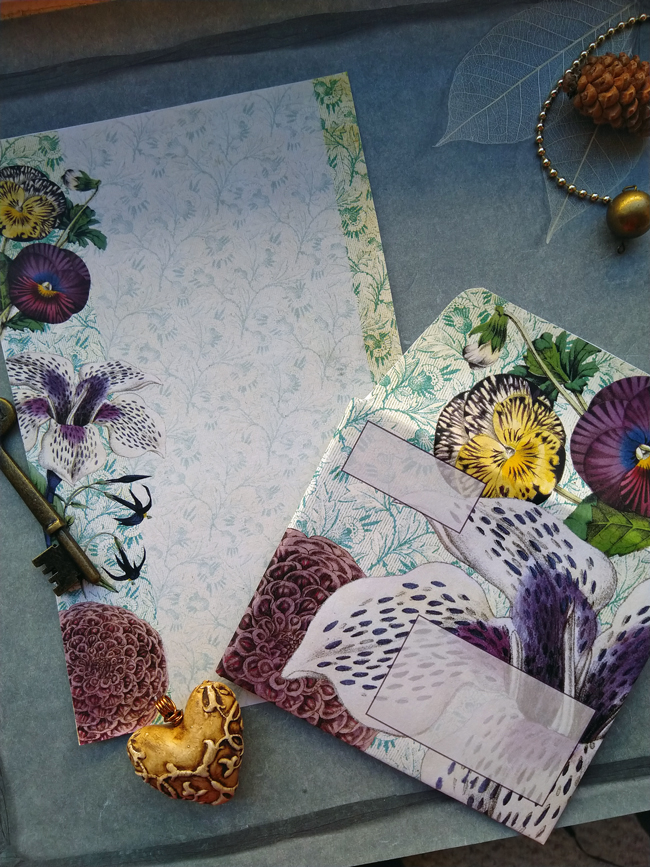
Using Photoshop Elements
The graphics program I’m using is Photoshop Elements. Read along for hints on how I created the set. I show you how I made this exact set (above) and give you tips for making your own. Also on The Graphics Fairy Premium site are Photoshop Elements Tutorials from Basic to Advanced, so you can learn how to create all kinds of beautiful Vintage Digital Projects.
Whether or not I’m working digitally, the way I go about designing mail art is to work from the bottom up, or the background layer to the foreground layer.
I started this project by downloading and opening the envelope template. Adding a layer mask allowed me to easily begin to layer the artwork. Starting with one of the delicate papers bundle images for background, I duplicated the background layer and adjusted the color. I created one envelope at a time while saving them as separate files. This made it easy to go back and make matching stationery based on the colors and elements I used. 
Once the background was placed and colorized, I began adding the florals one at a time. I had a general idea of what I wanted, and experimented with resizing and moving the florals around until I landed on something I liked. The variety of flowers in the Yellow and Purple Botanical bundle makes it easy to coordinate nicely. The art is a lot of fun to design mailart with.
After the images were all placed, I added the boxes for the to/from address boxes. I adjusted the opacity to make the art behind the address box barely visible. A touch of purple around the edge makes the design cohesive throughout.
After all 3 envelopes were complete, saved, and closed, I reopened the first envelope and a new 8.5″ x 11″ file. I turned off the envelope mask layer and copied over the other elements to the new file. Then I closed the envelope file.
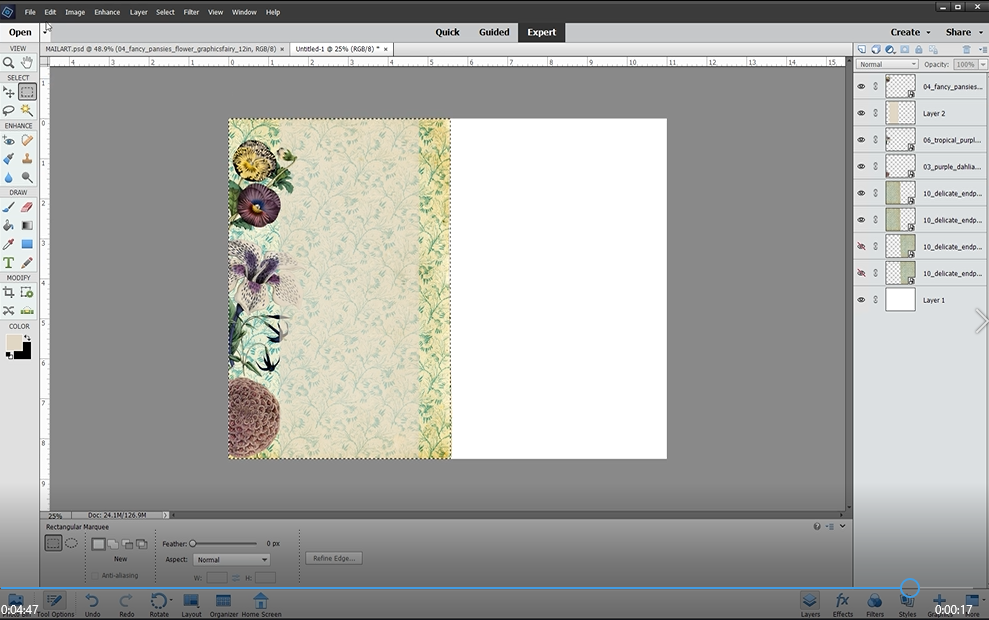
Adding all the art into the new file gave me a head start to create matching stationery because the colors were all the same straight out of the gate. I rotated the sheet to be landscape. I designed the left half of the sheet, then copy/merged the art and pasted it onto the other half. Print, cut, fold, and adhere the envelope pocket and you are ready to write a lovely note and mail to a friend! Easy peasy.
Floral Mail Art Show and Tell
Please watch my quick video on The Graphics Fairy YouTube channel where I share a couple of more secrets with you.
Tejae
Please visit me at Tejae’s Art and on Instagram.
