Using Foils without a Machine? Oh, yes…
Hello my dear Graphics Fairy Friends!
It’s Heather from Thicketworks, here to share a recent experiment!
We’ve all seen the gorgeous foils that are on the market…but some of us can’t justify investing in a Laminator or similar machine.
And frankly, some of us {you know who you are…} can’t be bothered to pull out the Big Shot or similar embossing machine in order to add a bit of foil to a paper project.
Perhaps you can relate?
Well, I’m here to show you just how easy it is to incorporate fancy foils without the fuss or expense of the ‘standard’ methods!
I’ve tested a variety of surfaces, just to see how far we can take this madness!
Are you ready to learn How to Gild with Foils?!
{this post contains affiliate links}
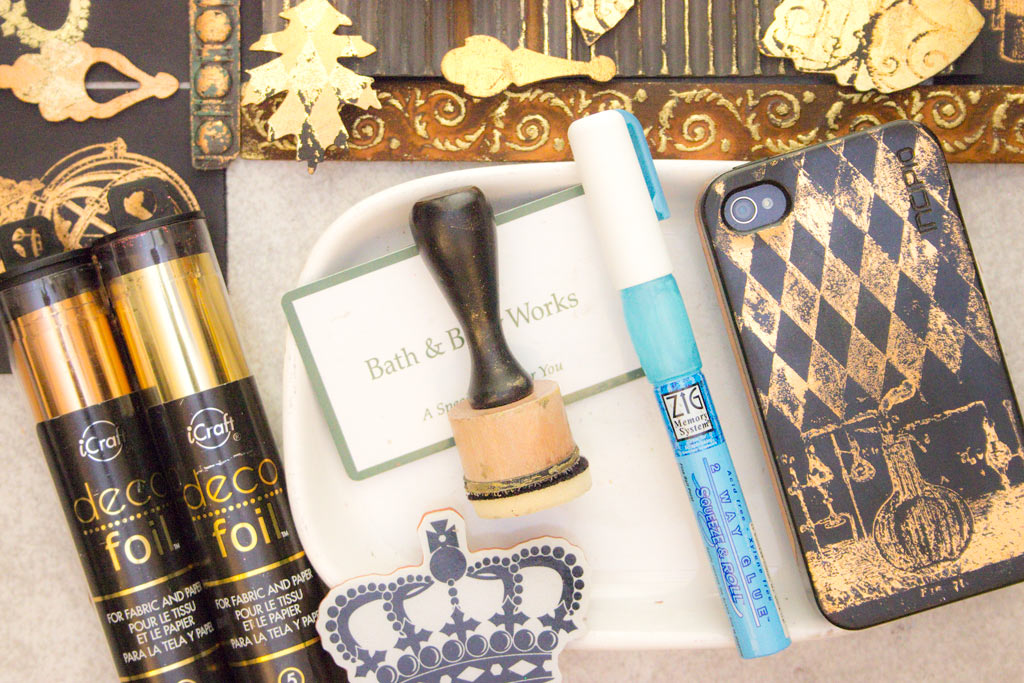
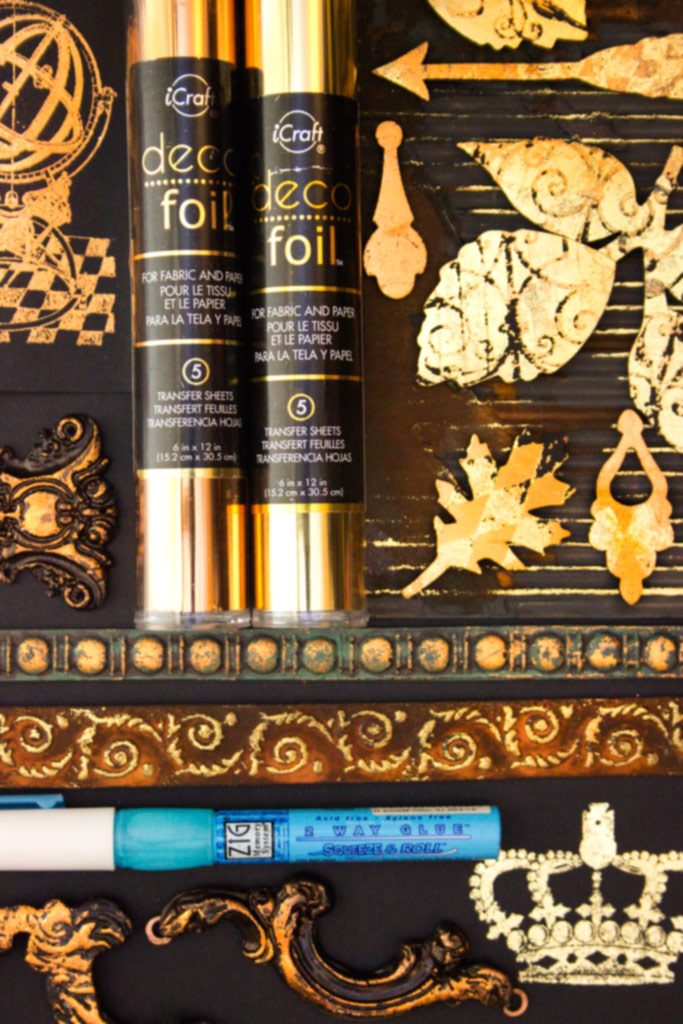
Here’s a list of the items used in this demonstration…
Supplies:
- Foil – I love the brilliance of this brand!
- Zig 2 Way Glue (I had the fine tip glue pen, but I suggest using the large chisel tip pen)
- Ranger Inkssentials Ink Blending Tool
- A palette for dispensing the adhesive (I used an old ceramic dish)
- Your favorite rubber stamps
- Smooth Cardstock
- An old credit card or similar
- A soft cloth
- Mona Lisa Spray Sealer for Metal Leaf (use when foiling decorative items like jewelry)
- Double Sided Crafting Tape (use when adding lines or stripes)
- Sticky Backed Foam Sheets (die cut or punched into fun shapes)
How to apply Foils without a Machine:
#1 Rubber Stamp Method
Remove a sheet of foil from the packaging – the sheets are very thin, and can be separated by sliding them apart.
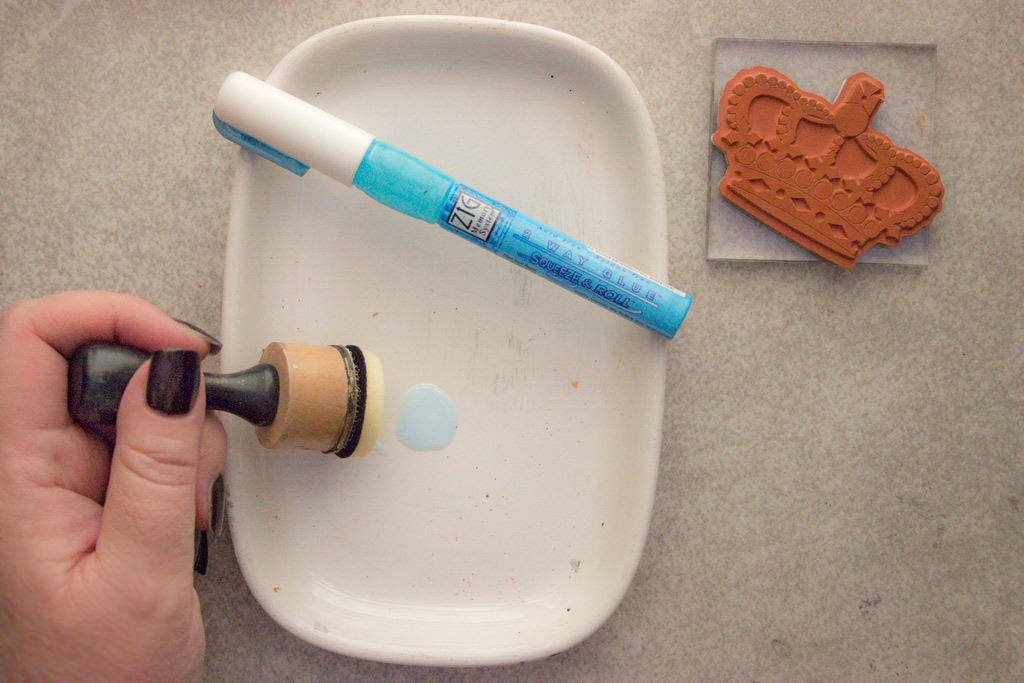
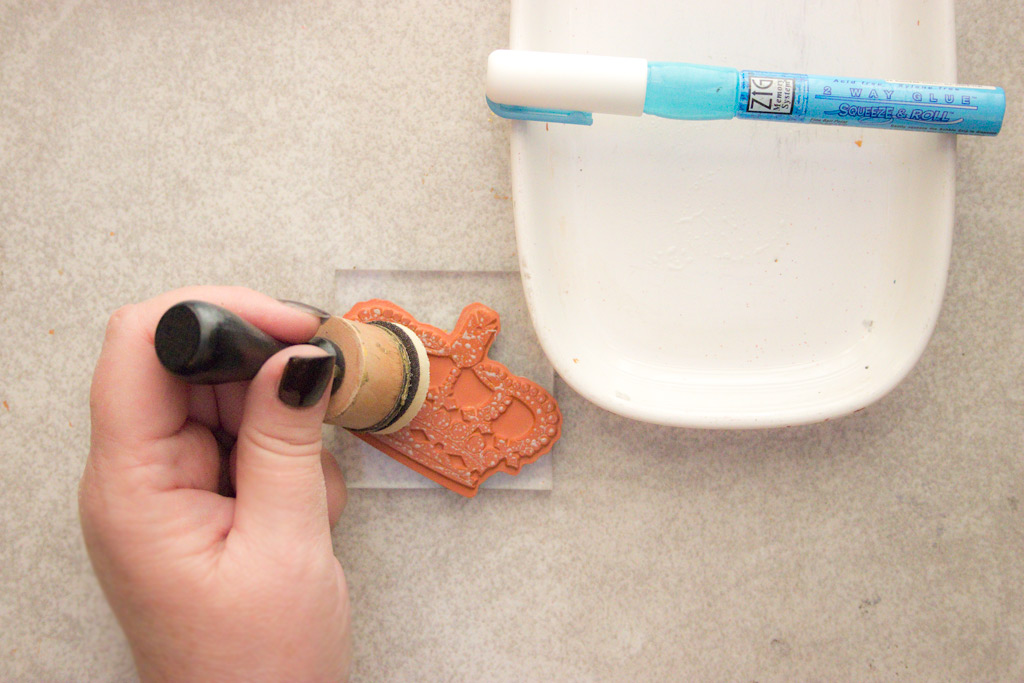
Dispense a generous amount of Zig 2 Way Glue onto a smooth, non-porous surface.
Use a Blending Tool to absorb the adhesive.
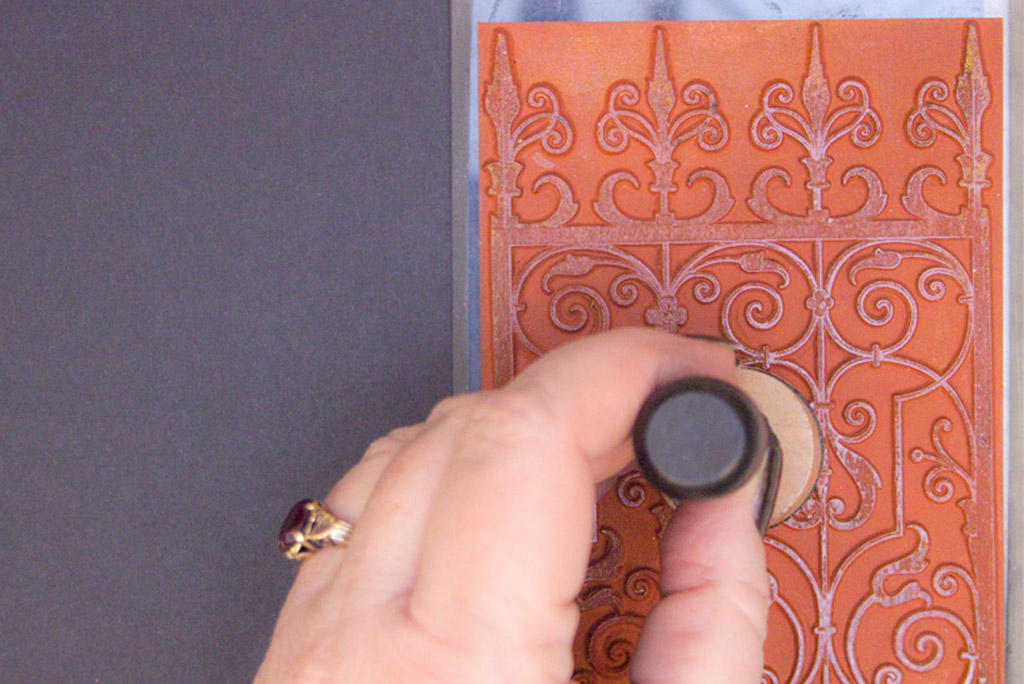
Tap the surface of the rubber stamp with the Blending Tool, making certain to cover the entire surface:
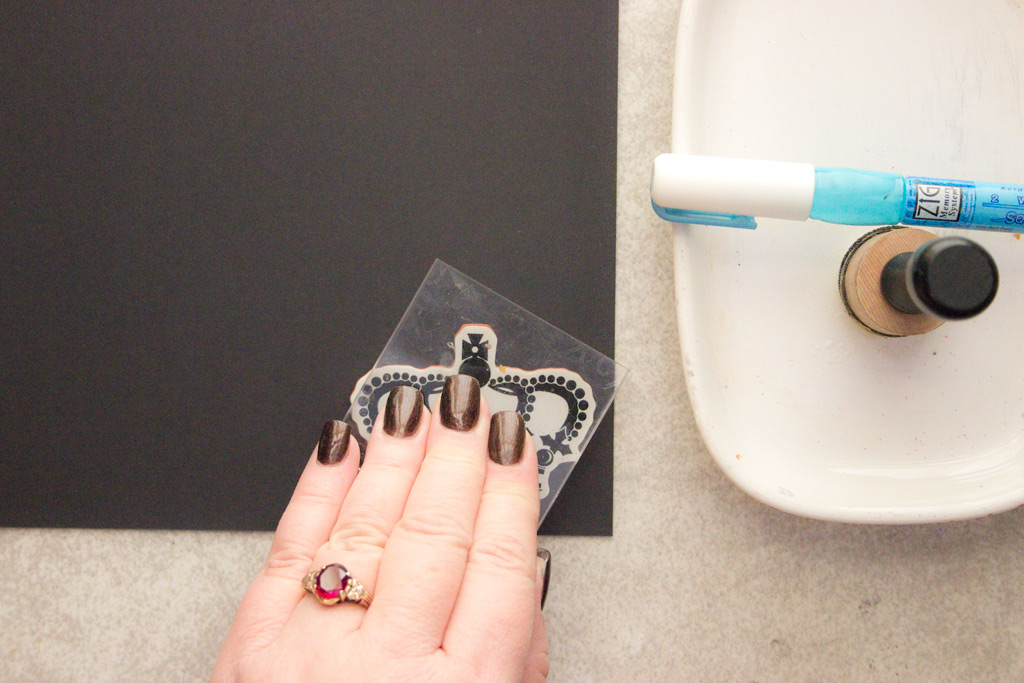
Quickly stamp the image onto smooth cardstock and lift immediately.
Note: If the stamp contacts the paper for too long, it will tear the paper when removed.
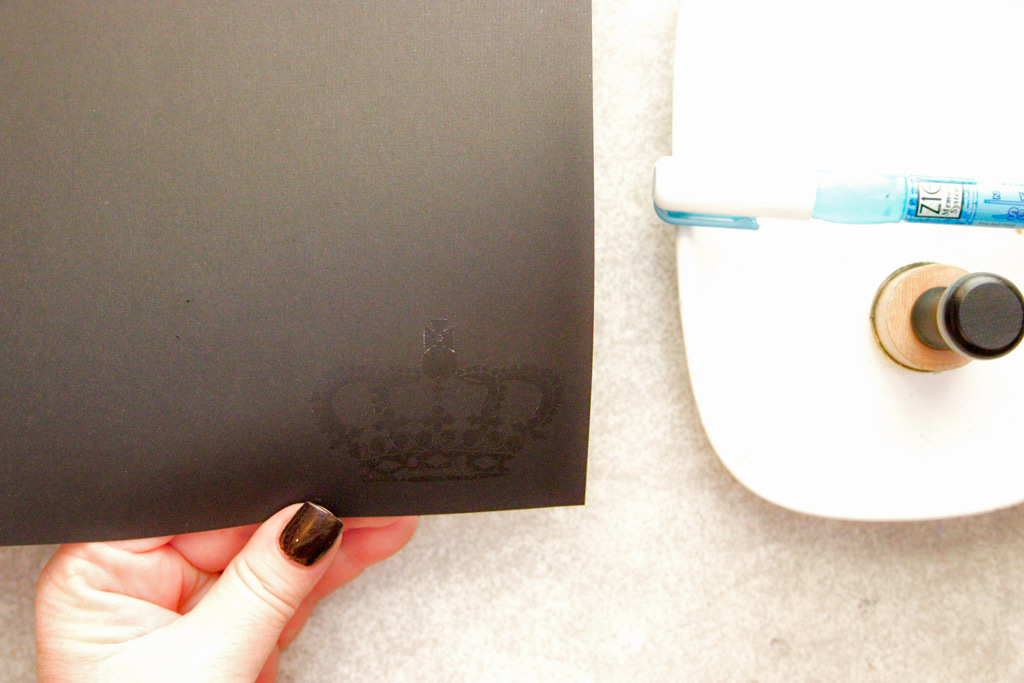
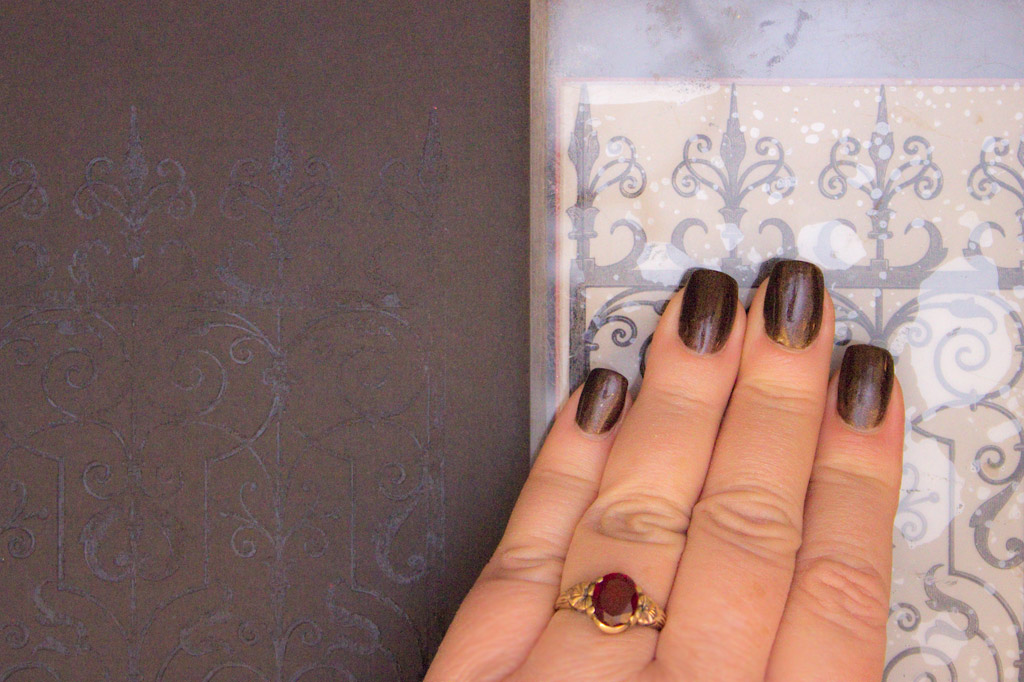
Here, you can barely discern the impression made by the stamped adhesive:
Allow the glue to dry…this can take a few minutes, but it’s very important.
The foil will not adhere properly to the adhesive while it is still in liquid state: it must have a tacky surface to activate the transfer of foil to substrate.
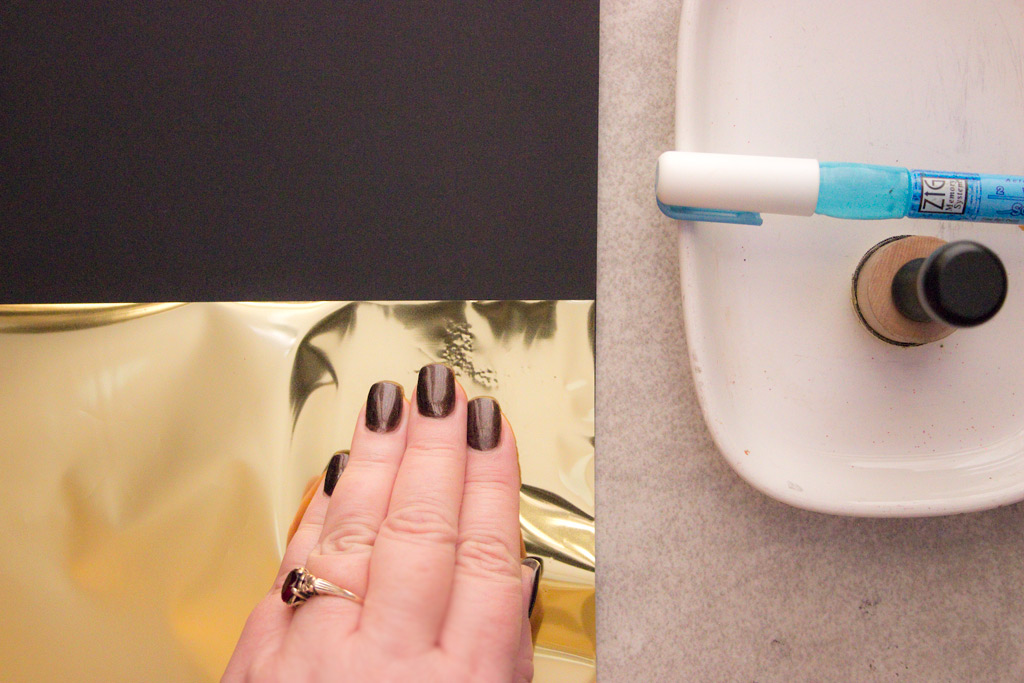
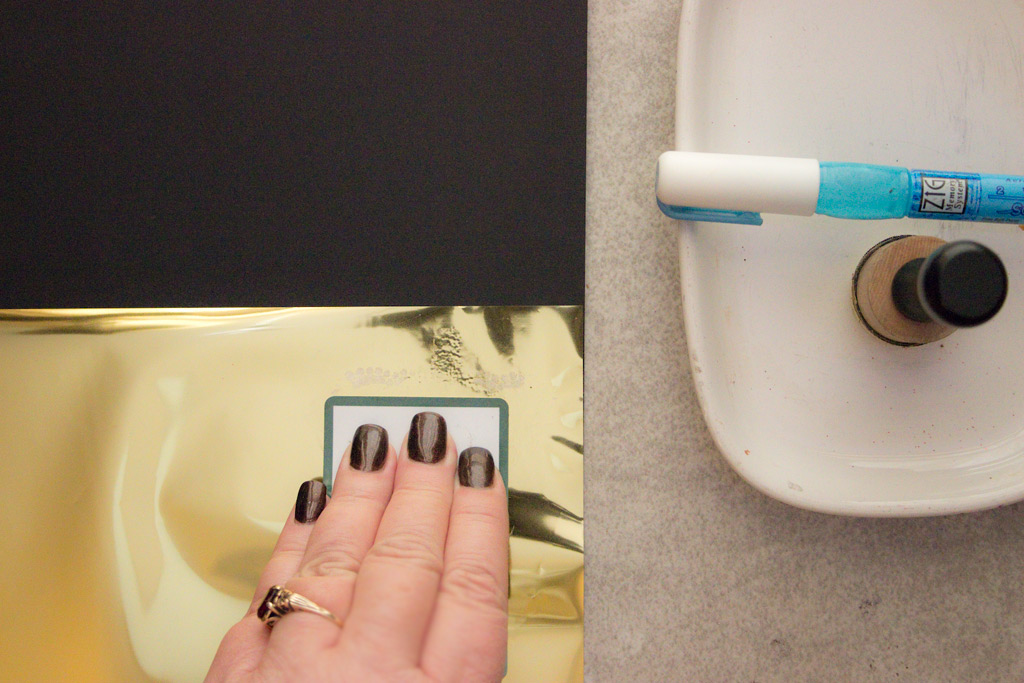
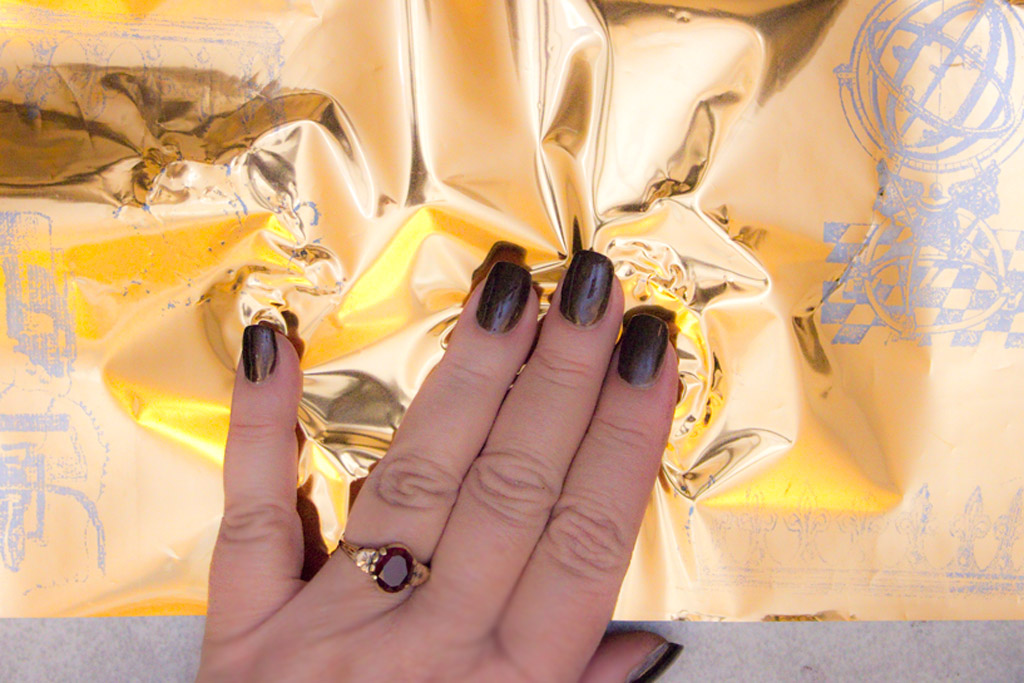
Once the glue has dried, gently place a sheet of foil, metallic side up, onto the glued image.
Use the pads of your fingers to press the foil against the adhesive.
Once the foil has made good contact with the adhesive, use an old credit card to burnish the foil against the surface.
Use quite a bit of pressure.
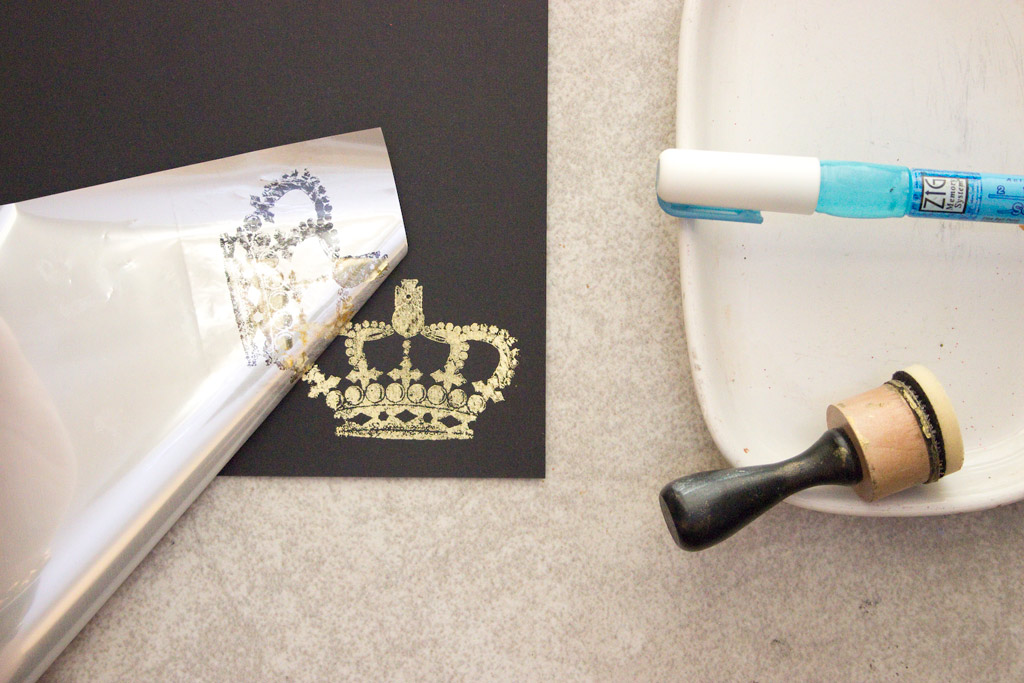
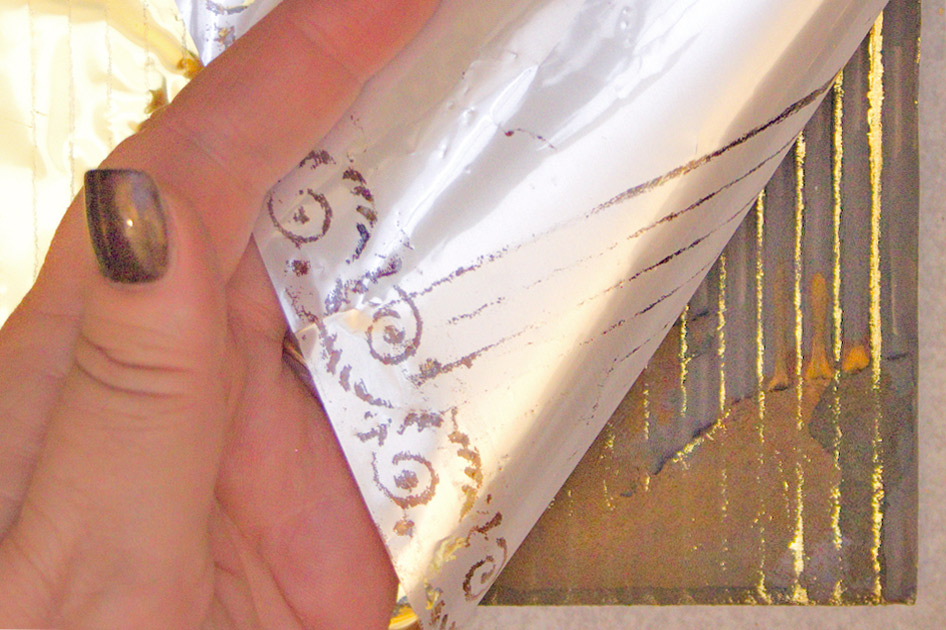
Test the results by peeling one corner of the foil away.
If the foil has not fully transferred, replace the foil and burnish again.
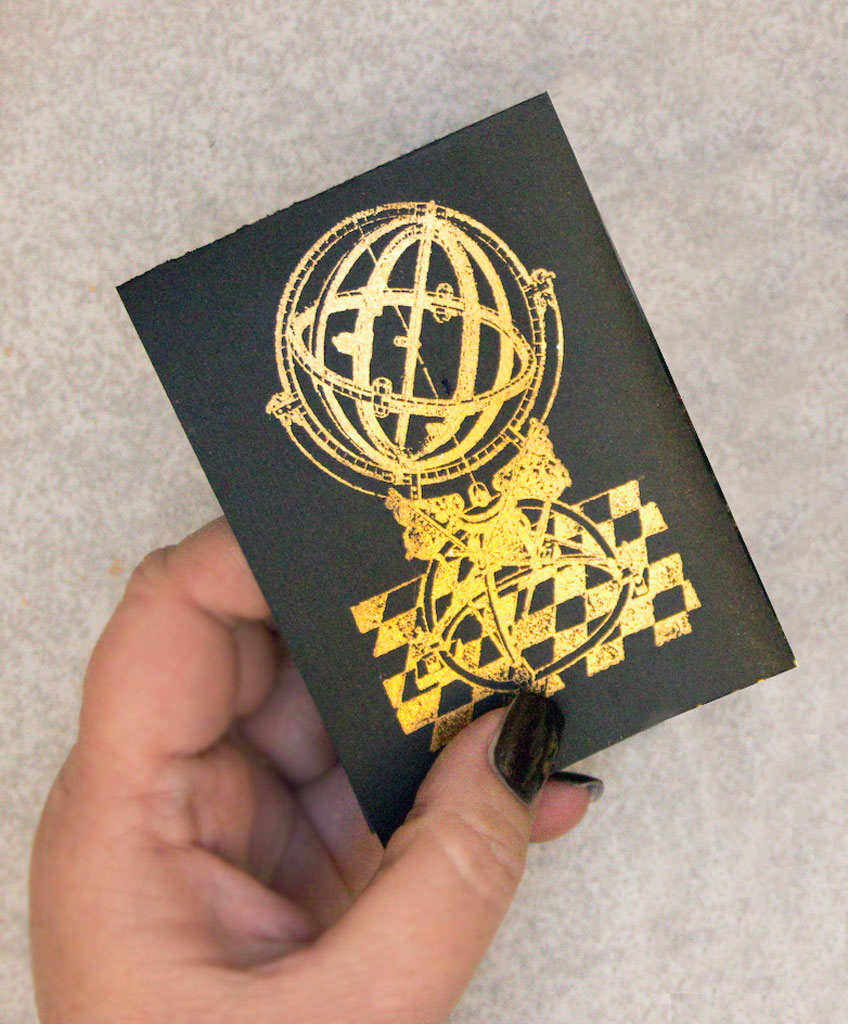
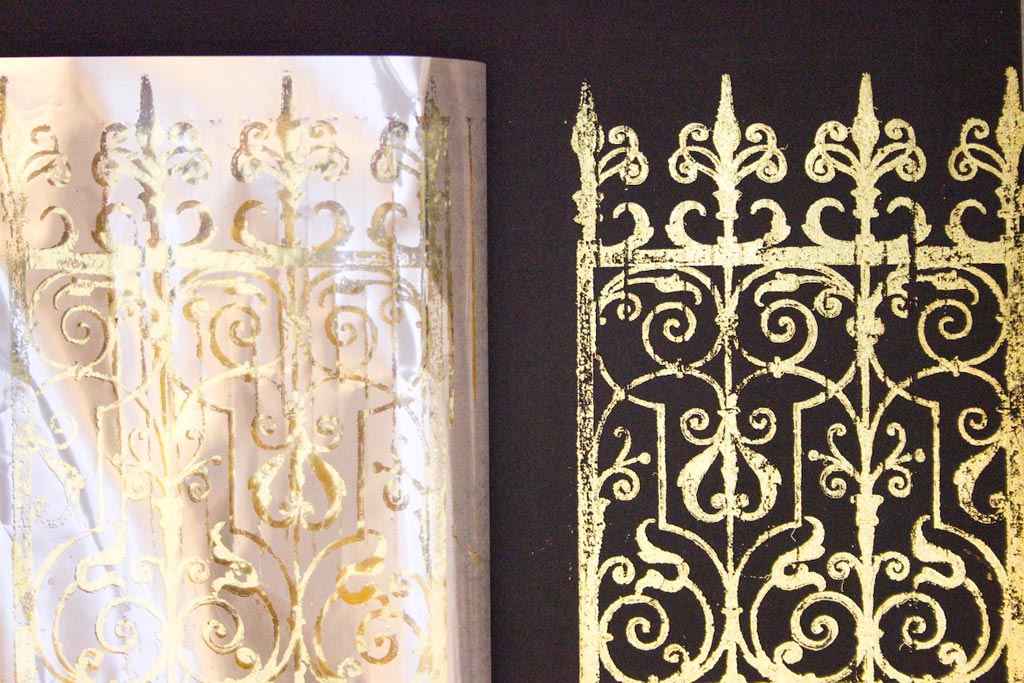
With the correct amount of adhesive + burnishing, the resulting Foil Transfer can be extremely detailed:
This method works for larger scale stamps, as well.
Just work quickly so that the glue does not begin to set up before you stamp the image on the cardstock!
You can continue to stamp images while the previous application dries.
This slightly distressed transfer was created by using a section of the foil that had portions removed by a previous application.
Note: Cleaning your Stamps and Blending Tool – Zig 2 Way Glue is water soluble. Place your stamps and foam blending pad into warm soapy water for a few minutes. Use an old toothbrush to scrub the remaining adhesive from the surface of your stamps…and just squeeze and rinse your blending foam!
#2 Foiling an Uneven Surface
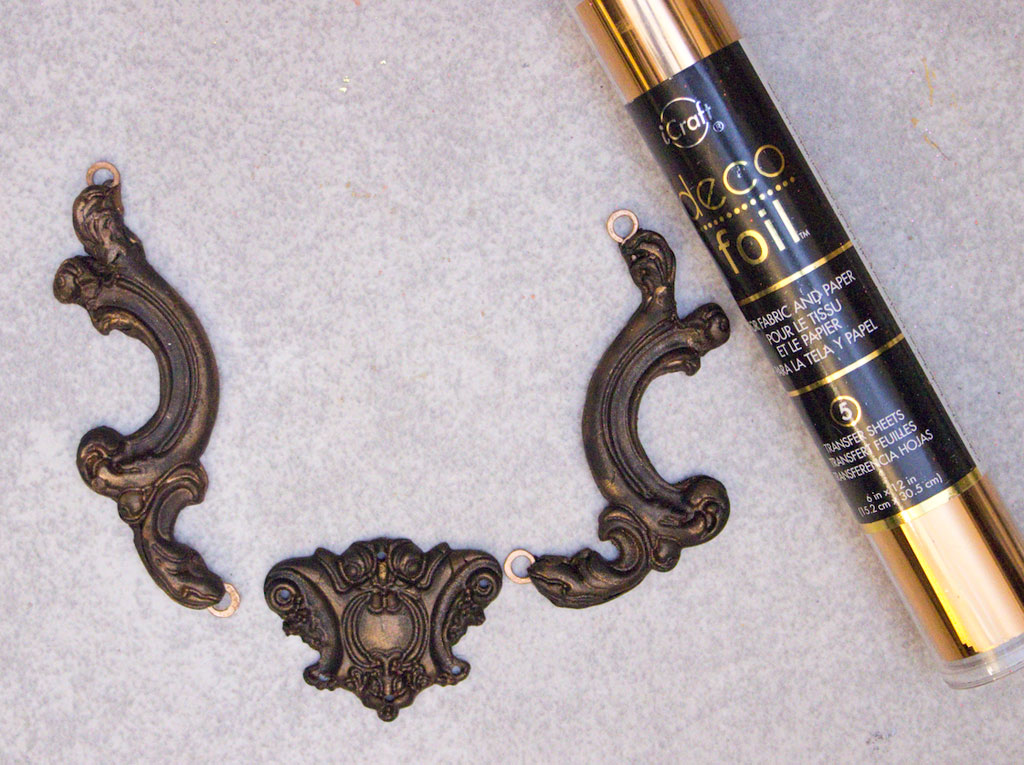
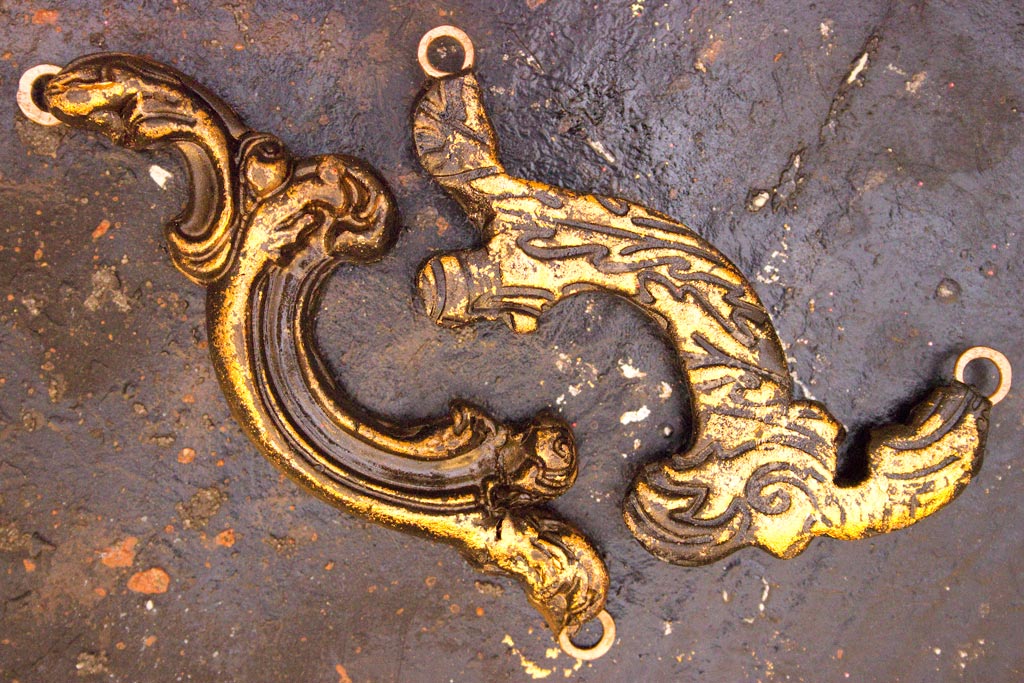
These jewelry components are made of cured black polymer clay. They have been highlighted with mica powders and sealed.
Let’s see if we can highlight the contours with foil!
Tap adhesive on the upper surfaces of the castings.
Allow to dry.
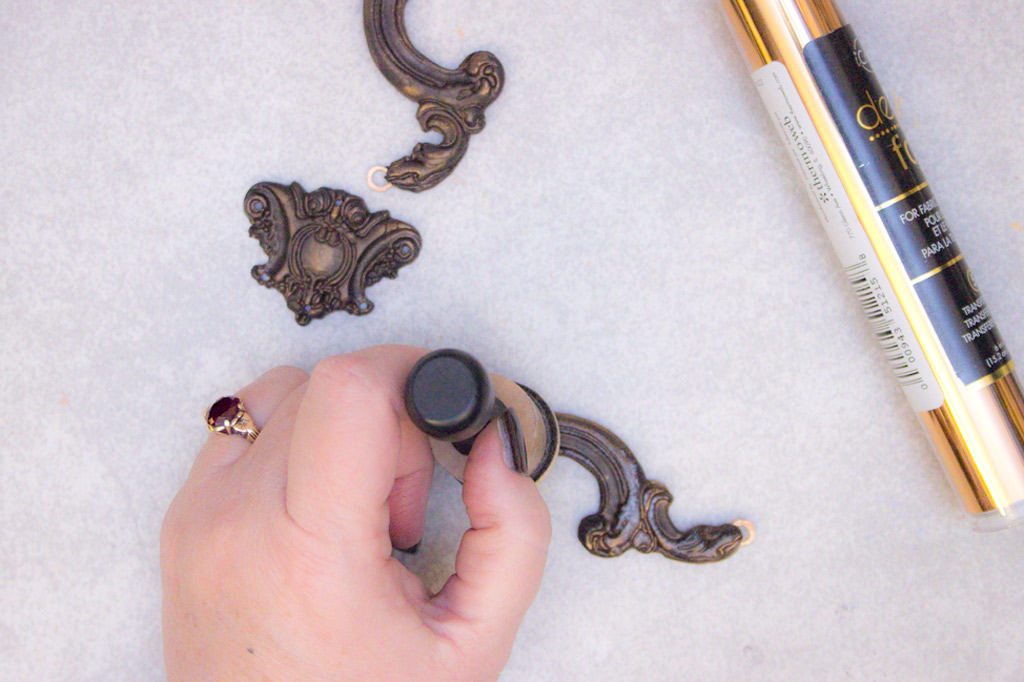
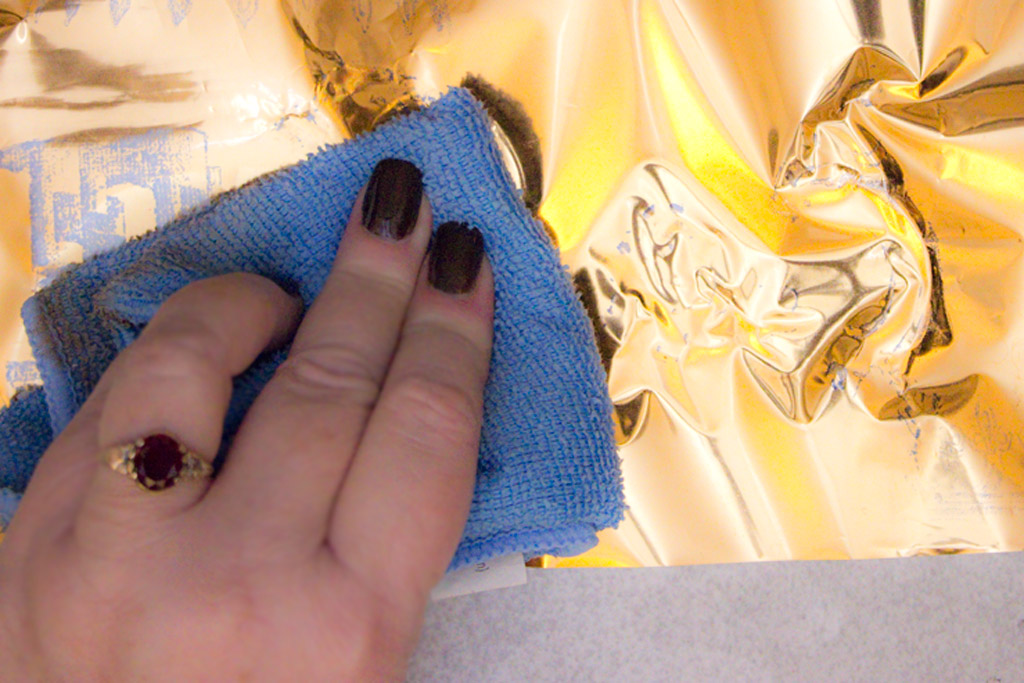
Place the foil, metallic side up over the items and press the foil against the adhesive with your fingertips:
Use a soft cloth to burnish the foil against the surface.
Press firmly!
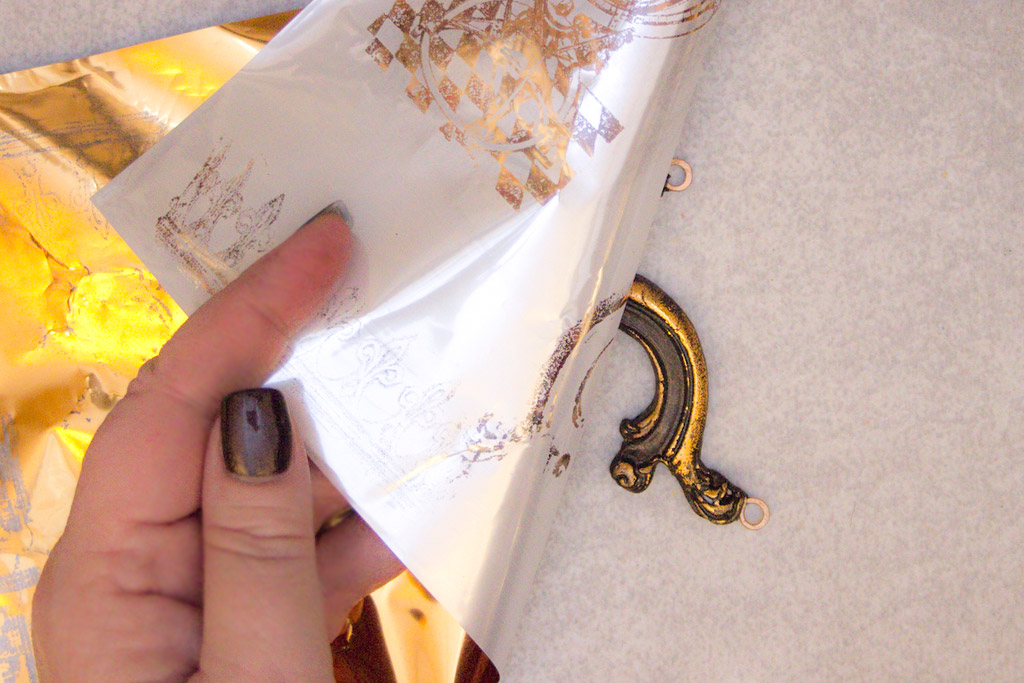
Test to see if the transfer is successful:
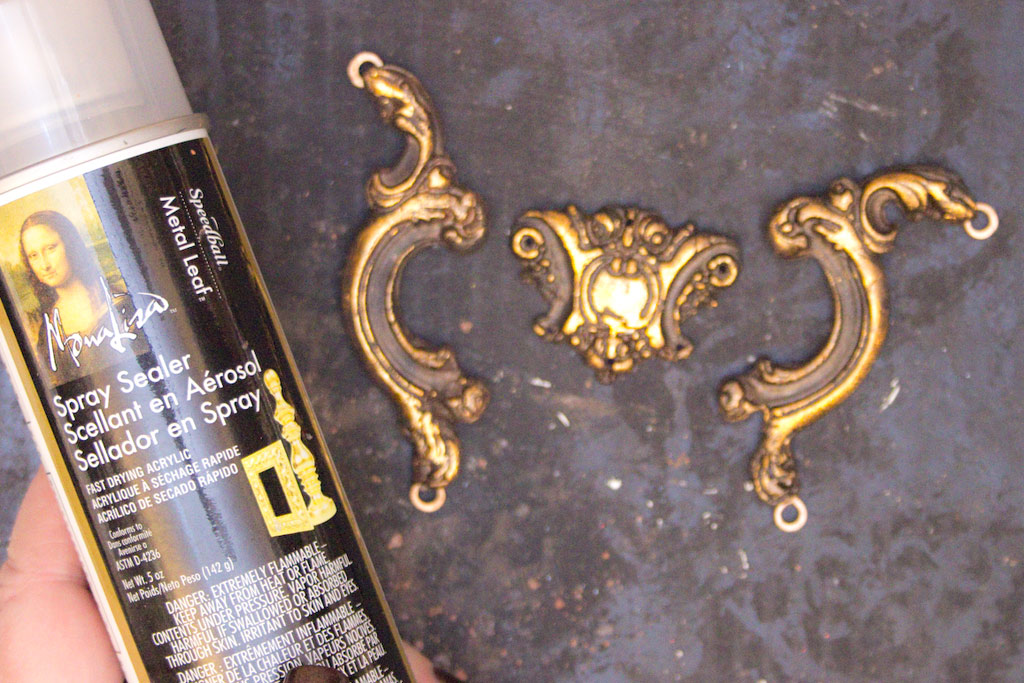
When complete, use a good quality Gloss Sealer to protect the surfaces, and cover any remaining stickiness.
The results remind me of Gilded Ornaments that are just beginning to show signs of wear and tear…
#3 Foiling over Acrylic Craft Paint:
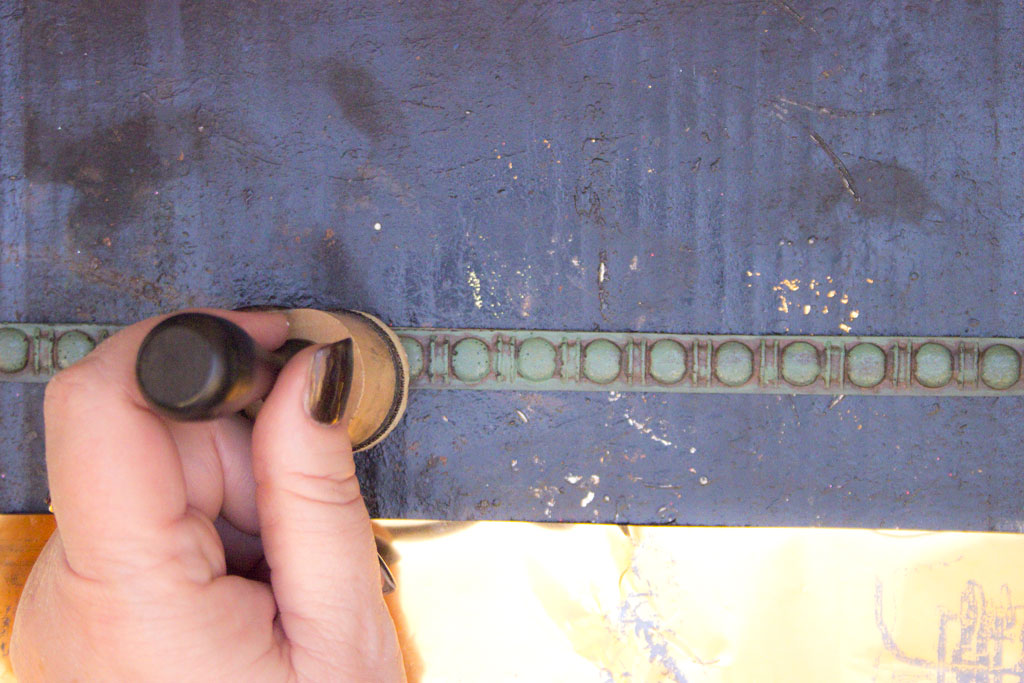
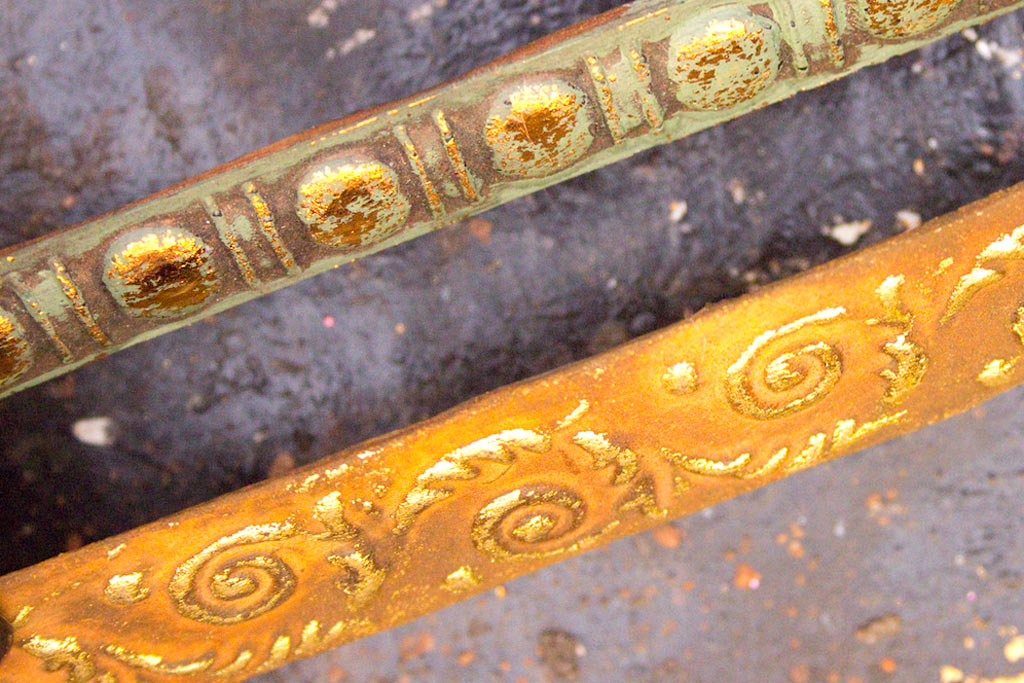
This strip of plastic molding has been given a mild verdigris finish with cheap craft paints.
It has not been sealed.
Apply adhesive to the areas you’d like to highlight:
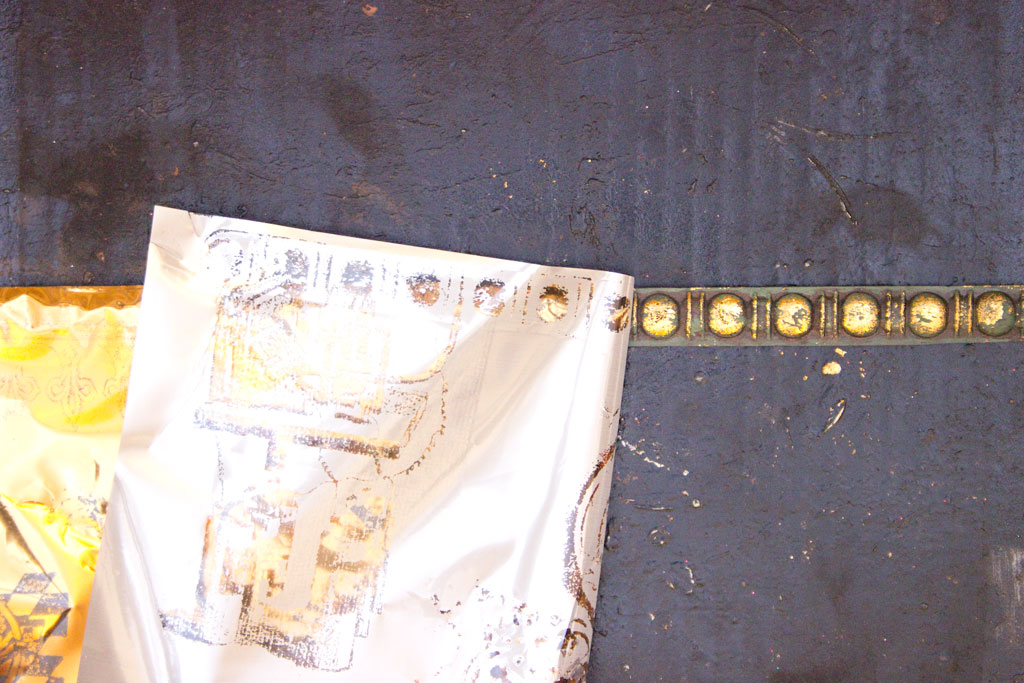
Press the foil down with fingertips, then burnish firmly with a soft rag.
Reveal the Distressed Gilding Results:
#4 Foiling over Metal Paints:
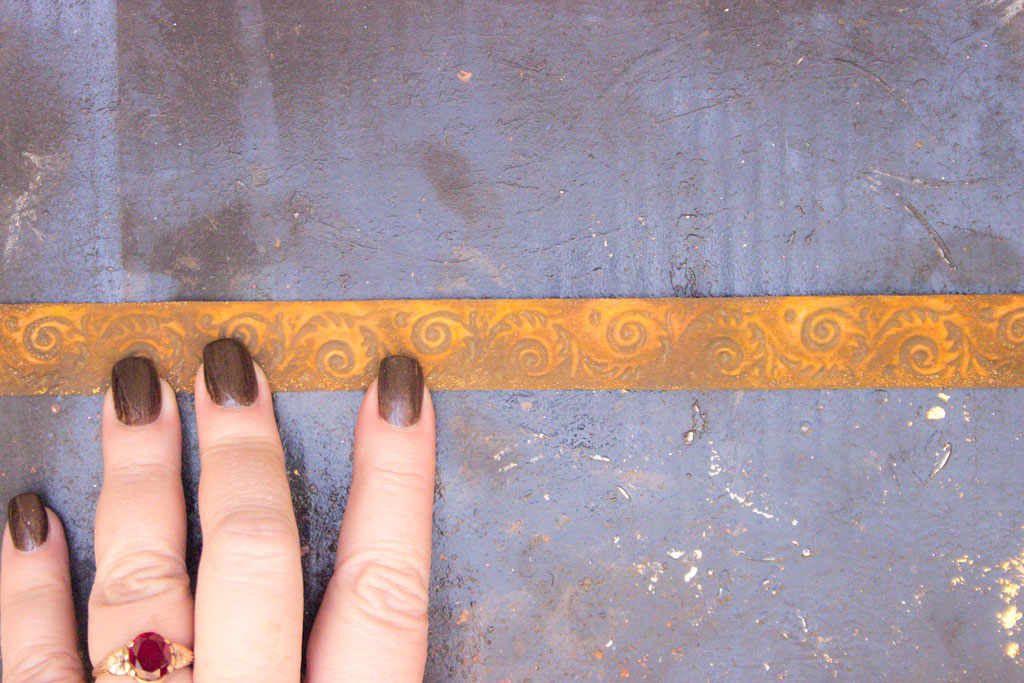
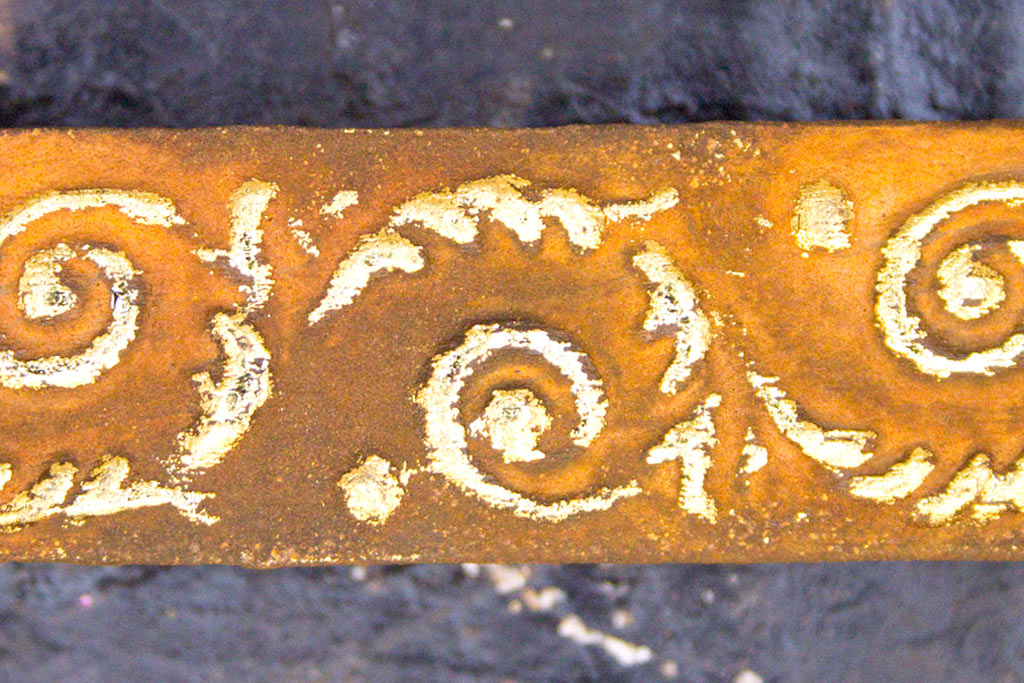
This plastic decorative molding has been painted with Modern Masters Iron Paint, and then rusted with a chemical agent.
It has not been sealed and has a very matte finish.
Apply adhesive, press the foil into place, then burnish firmly with a soft cloth.
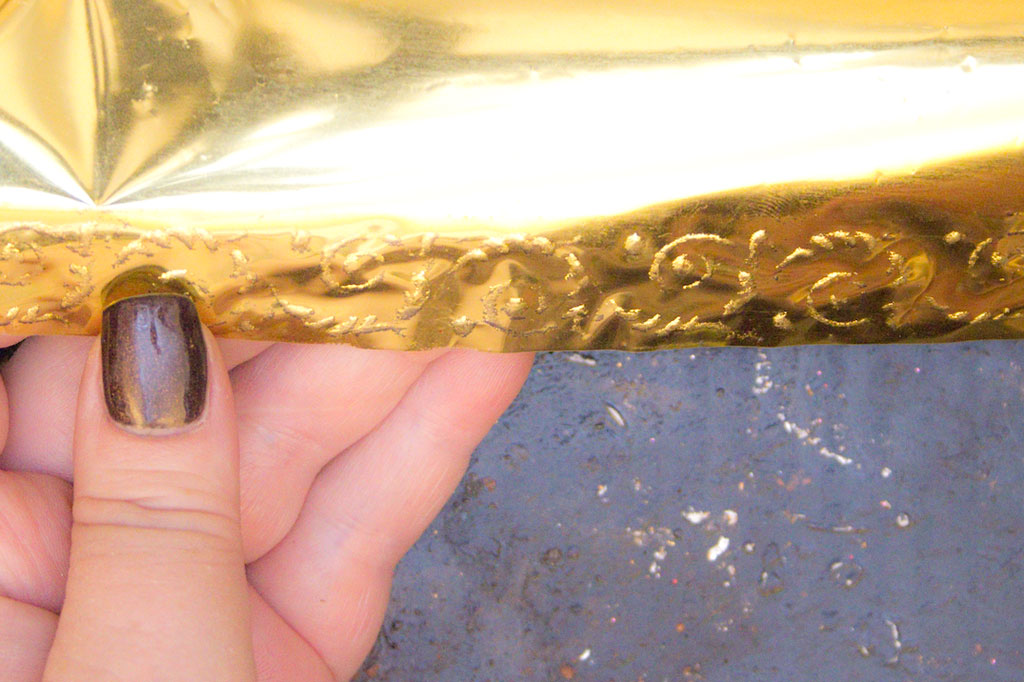
Below, you can see the imprint of the bas relief in the foil sheet – this is a good sign that the foil transfer is successful.
Finish by sealing with a good quality Matte Spray Sealer.
Both of these applications result in a lovely time-worn appearance:
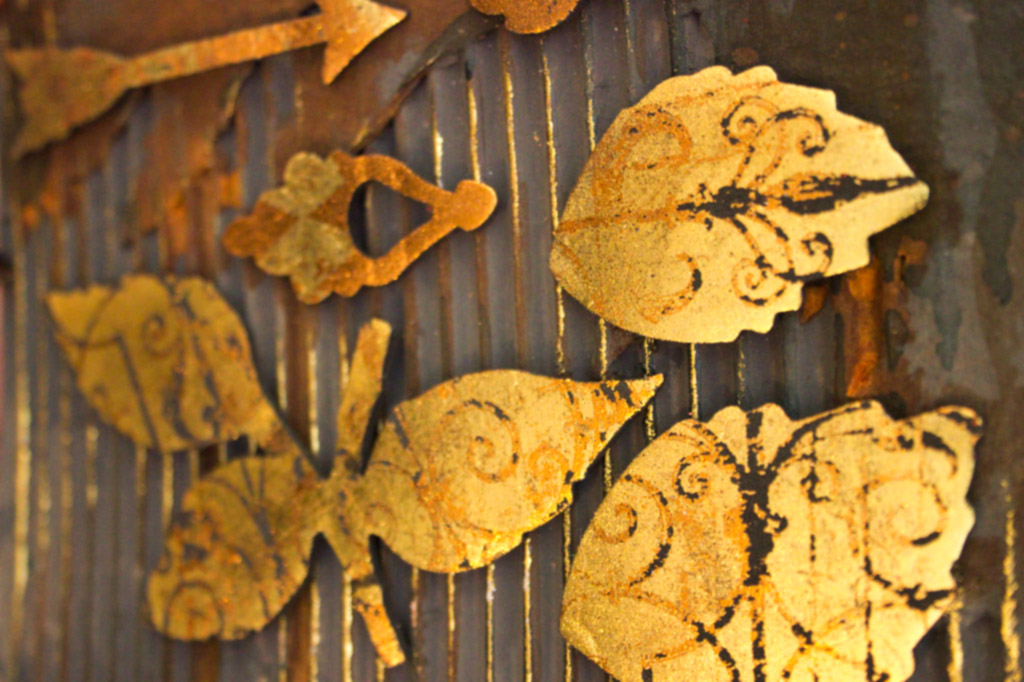
#5 Foiling Corrugated Cardboard:
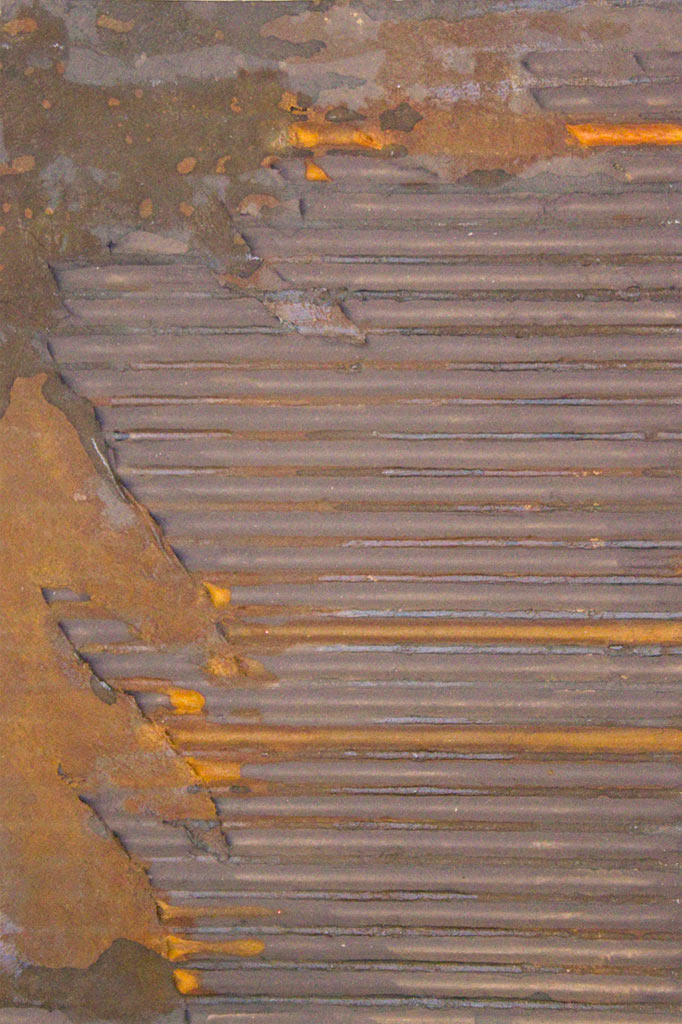
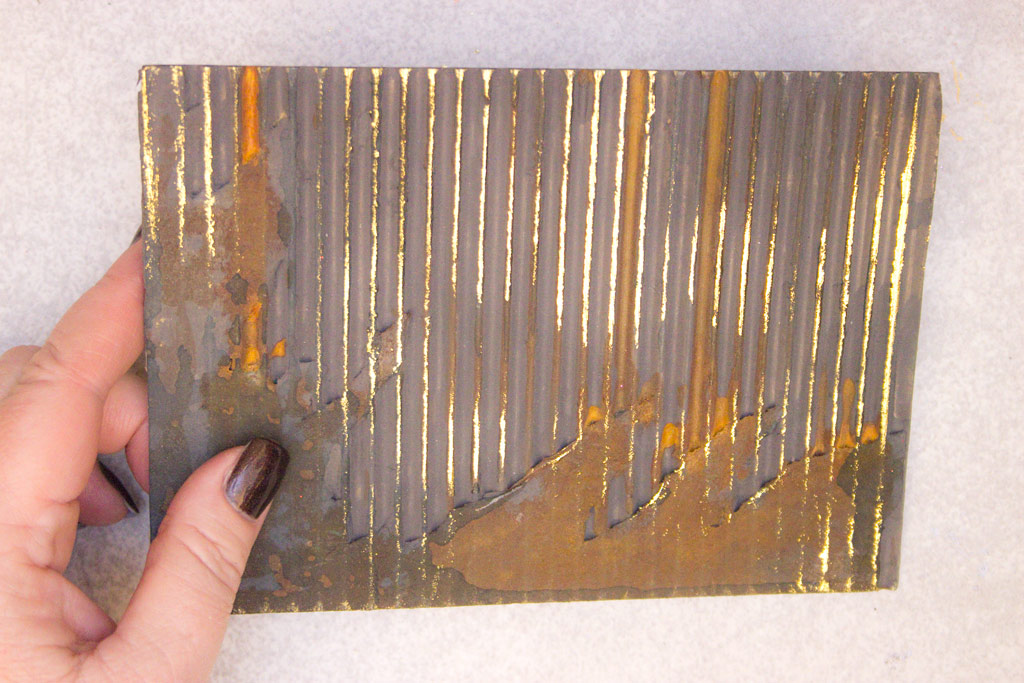
This ordinary corrugated cardboard has been painted to resemble a rusted surface.
It has not been sealed.
By following the same procedure, we can ‘gild’ just the upper surface of the corrugations:
The juxtaposition of the rusty matte underlayer + the intense shine of the foil is unexpected and striking:
#6 Foiling Hard Rubber:
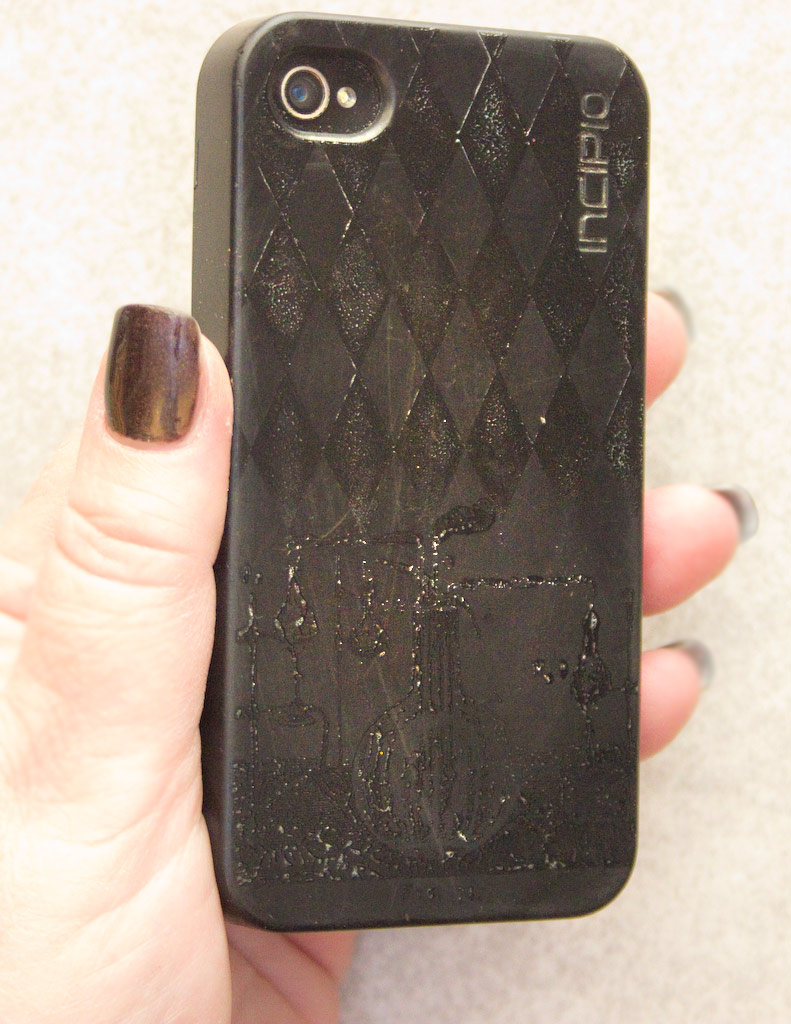
This beat up cell phone cover has little charm…can we give it some personality?
Here, you see the adhesive impression of the Rubber Stamps used to create the design, while the adhesive dries:
And here, a lovely distressed coppery motif has been applied:
#7 Foiling with Double Sided Tape:
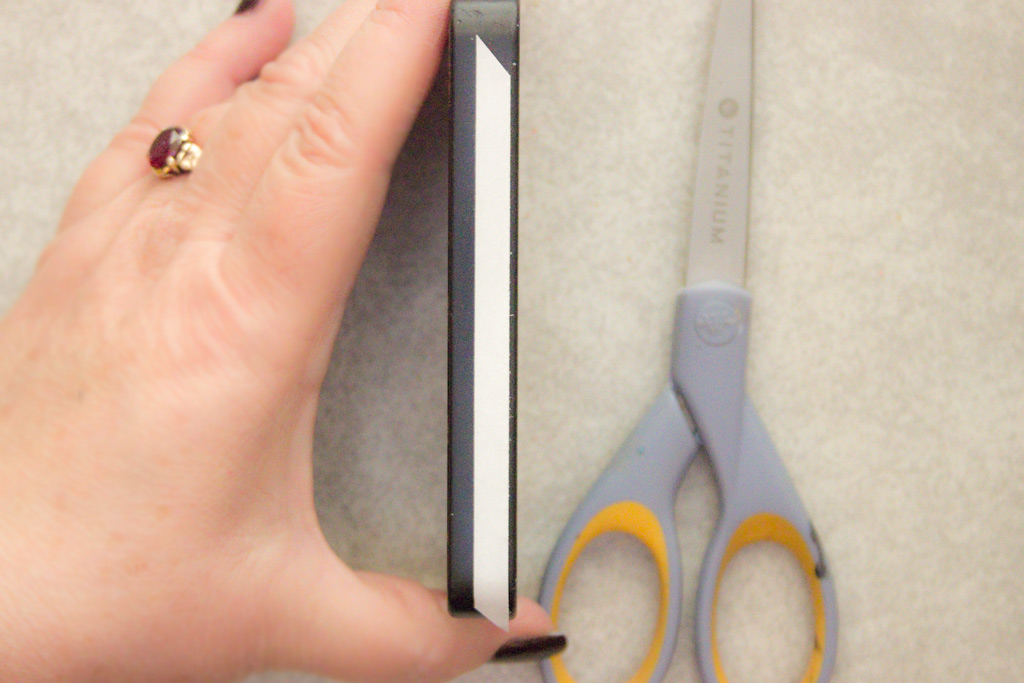
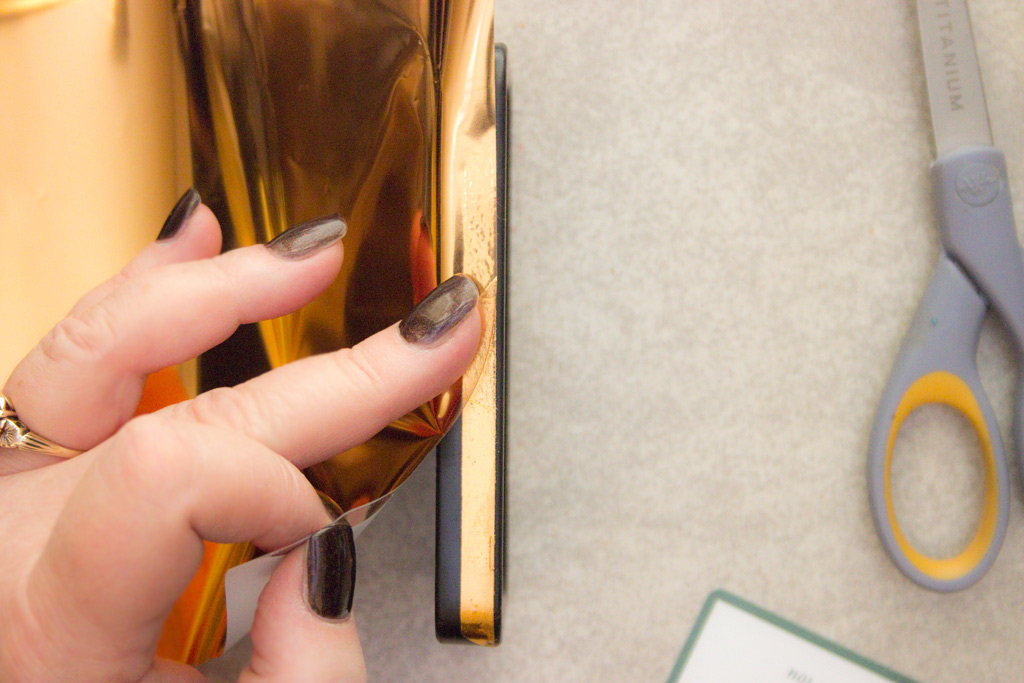
To add super shiny stripes onto your surface, simply apply a good quality double sided tape and burnish it firmly before removing the protective backing:
Apply the foil by burnishing very firmly with a credit card, and reveal the clean and bright results:
#7 Foiling over Fire Patina:
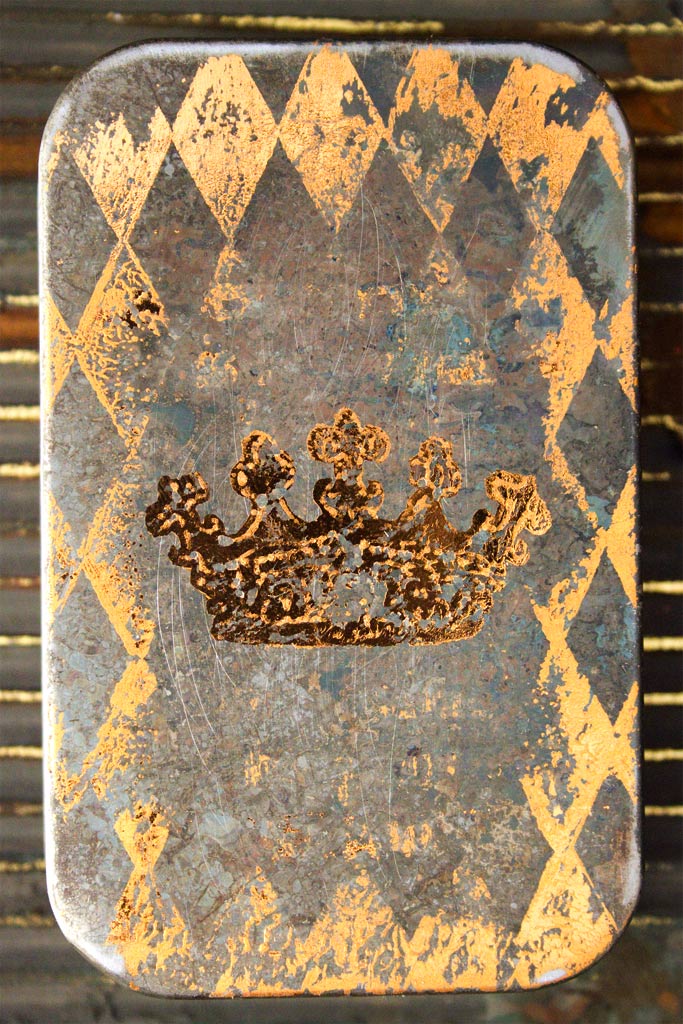
This altoid-type tin has been subjected to a Fire Patina. (click HERE to learn this fun process)
This results in a weathered, slightly rusty surface. The tin has been sealed with spray sealer.
Once the foil has been applied, the resulting Distressed Gilding is delicious!
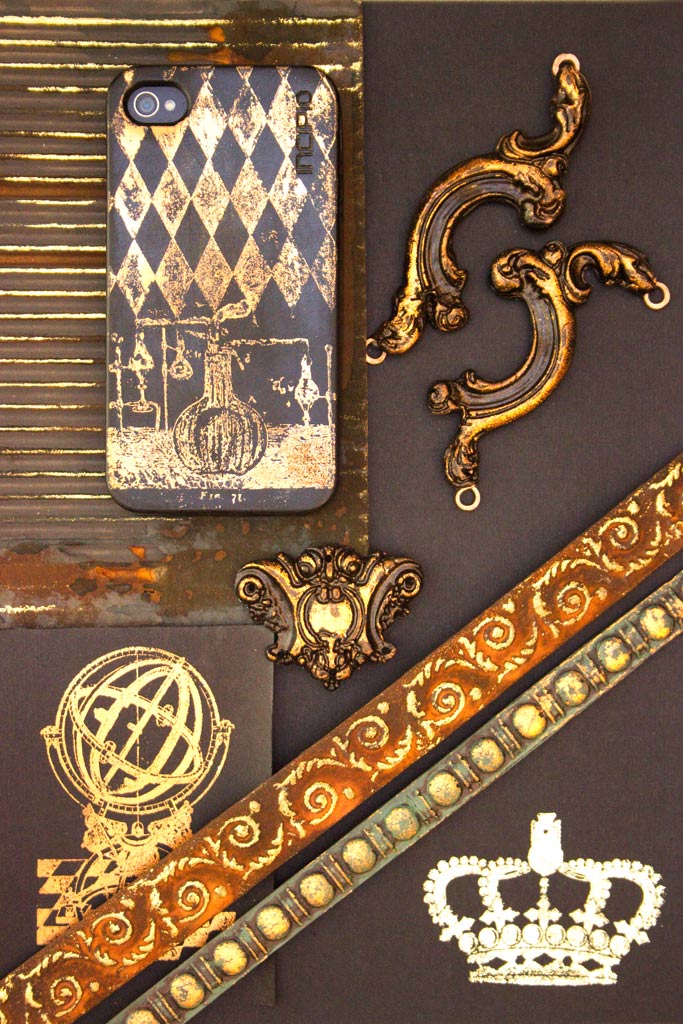
Thus far, we’ve managed to transfer foils to several different surfaces, with minimum effort or expense!
#8 Two Tone Foiling with Adhesive Backed Foam:
There are expensive adhesive foam sheets sold specifically for use with Foils.
I’m stubborn and curious…I wanted to know how ordinary cheap sticky backed foam sheets from the Kids Craft Section of the local Craft Store would work.
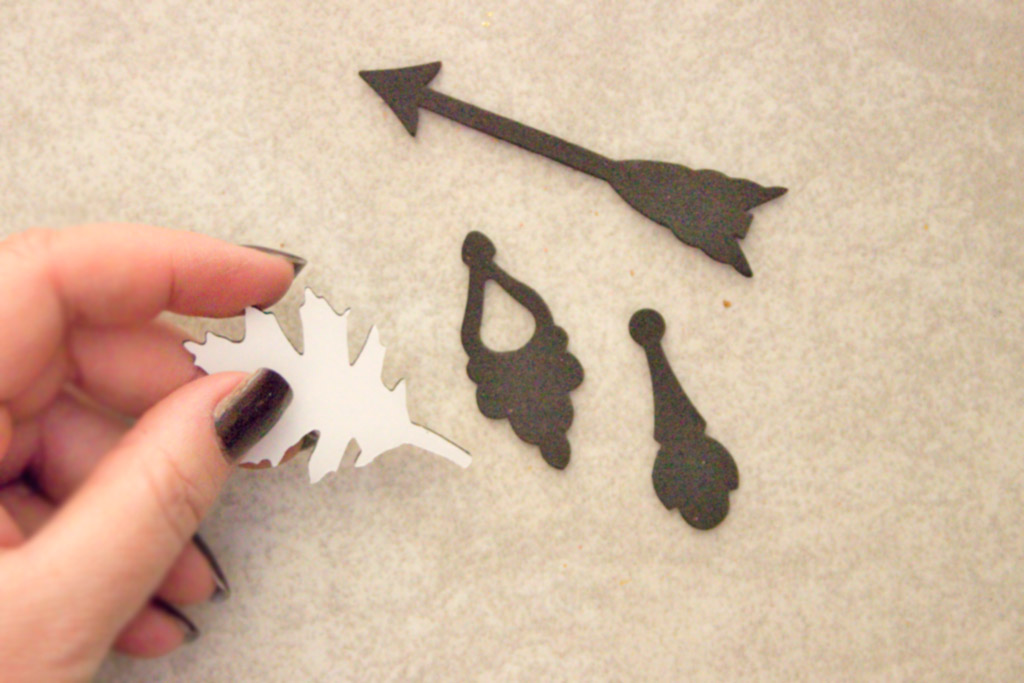
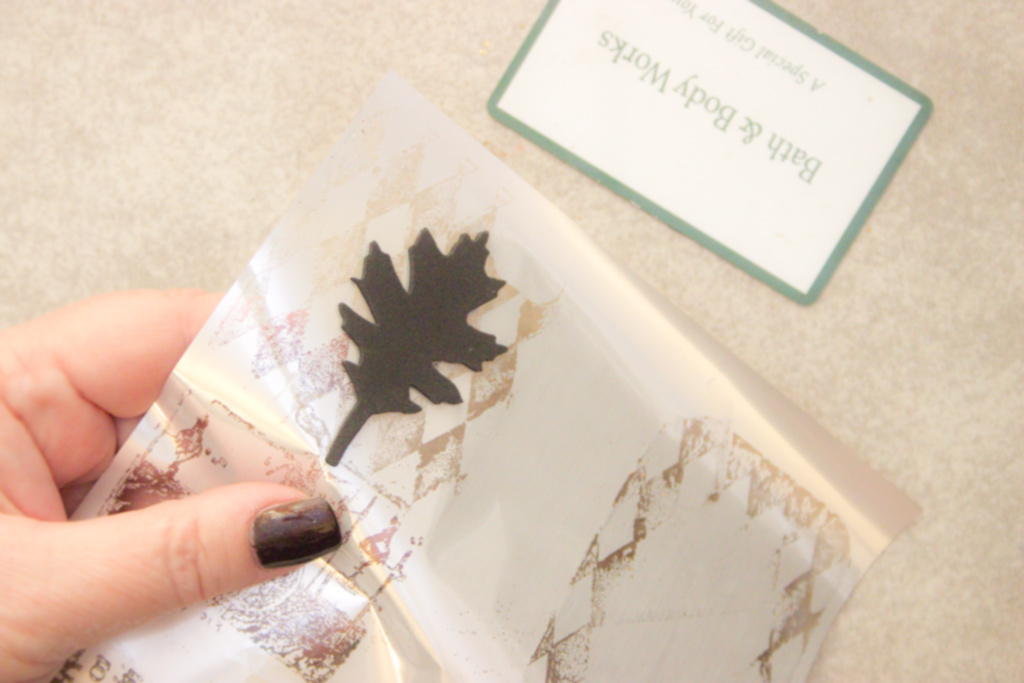
These shapes have been die cut from ordinary craft foam sheets.
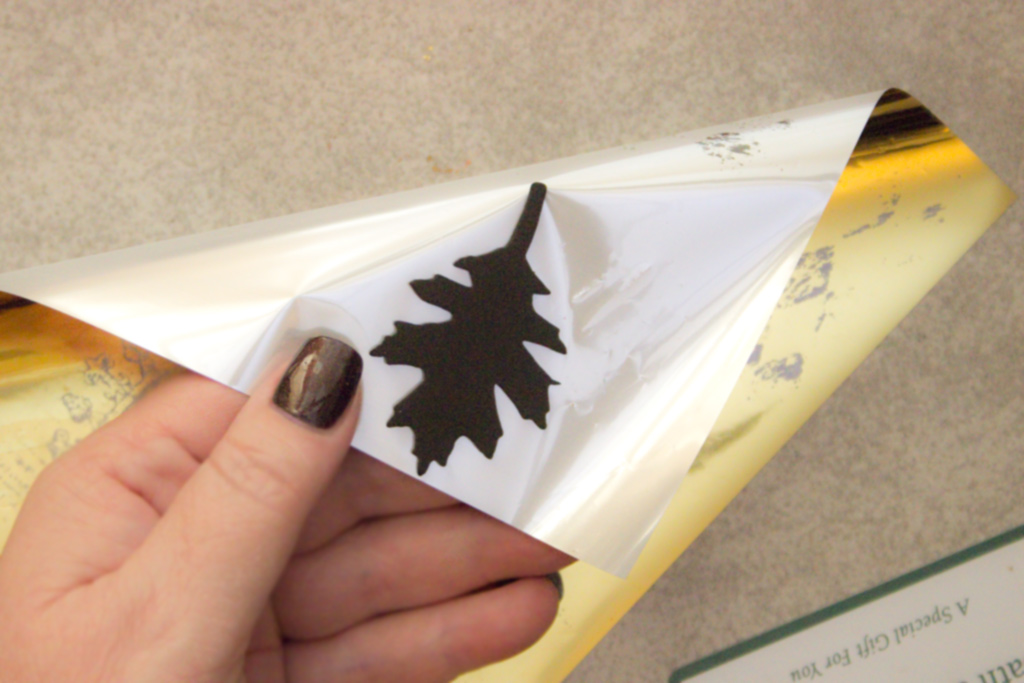
To achieve a Two Tone Effect, place the adhesive side of the foam shape onto the back of the foil in an area that has bears the marks of previous transfers.
Here, I’ve chosen an area with a harlequin pattern:
Press gently with your fingertips.
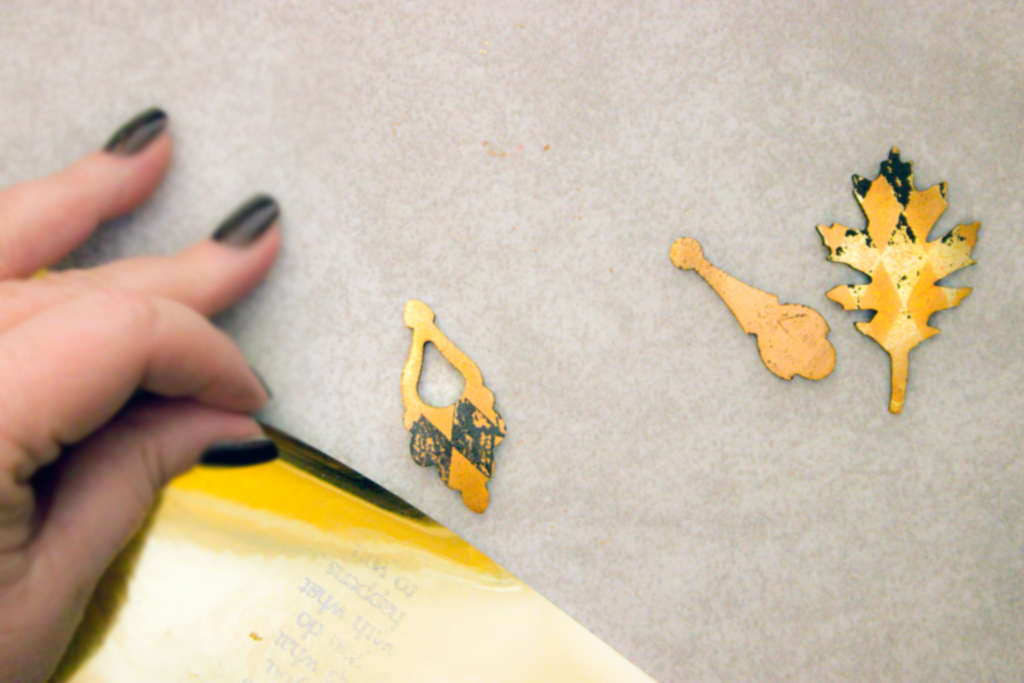
Peel the foam shape away, and then place it onto a contrasting color foil sheet.
The surface will now be covered with a pattern in both colors of foil!
Note: the black areas here are the result of pressing too firmly – the adhesive stuck to the back of the foil sheet, and tore away, revealing the black foam beneath. I like the distressed result, but if you want a completely foiled surface, use a light touch!
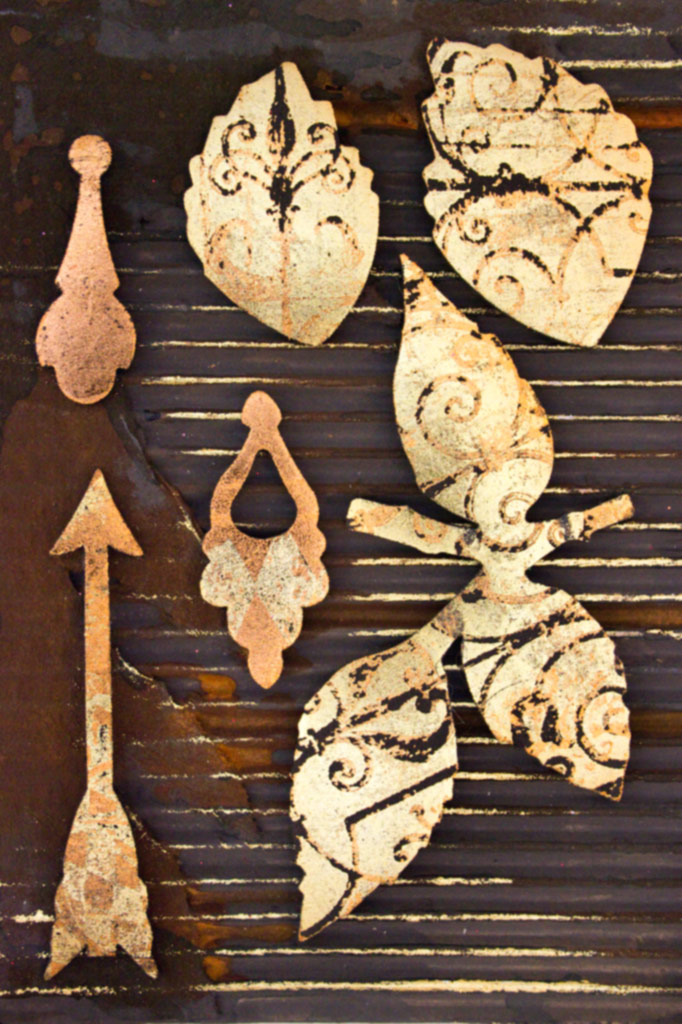
All die cut foam shapes, with surface patterning from previously ‘used’ foil:
The Two Tone Effect is gorgeous!
And there we have it: How to add Foil to almost any surface, without the use of expensive machines!
Thank you so much for visiting The Graphics Fairy today! I hope that you feel inspired to Gild with foils yourself!
Come see me at Thicketworks to explore the Quirky Side of Crafting!
Until next time,
Heather ♥
It’s finally here! Our first online crafting eCourse! If you’ve always wanted to try the art of Mixed Media, be sure and check out this amazing course by Heather Tracy!
Click HERE to learn more about it.





Mia says
Beautiful results! I love the variety of your experiments. Just out of curiosity, why not use the Deco Foil adhesive? They have it in liquid form, a pen, and a transfer gel, as well as a few other options. Just wondering…
Heather Tracy says
Thanks, Mia. I do have (and use) Deco Foil adhesives, too. This was an experiment in using other adhesives, so that if we didn’t want to invest in the whole Deco line, we could still play! xox
Mia says
Ok, great! Thanks for your reply. I was just wondering if Zig adhesives worked better than DecoFoil’s. I have DecoFoil adhesive, so I will just use that. 🙂
Faith says
Fabulous Hrather, thank you for sharing and making everything seem achievable! Both cost and experience wise.
I had saved this tutorial for a ‘ rainy day’ sooo glad I got to it!
graphicsfairy says
Thanks so much Faith, you are so kind 🙂
Diana Ramsey says
Absolutely marvellous! I just bought some of the Deco Foil, and I have all the other stuff. I am tickled pink to see all these wonderful ideas. Thank you being so generous to post all this wonderfulness. Pardon my effusiveness, but I am excited!
Heather Tracy says
Yay! Thank you for taking the time to comment…I’m excited too, Diana…so many fun ways we can use these cool foils! I LOVE effusiveness, and am often guilty of it myself, my friend! xox
Denaha says
Wow! I followed a link from Pinterest and I’ve been on your site all day looking over your amazing tutorials. I have to give you credit…not many things can divert me from Pinterest like that. I love, love, love this post (and the other ones too). I have tons of this type of foil as well as real gold and silver foil and flakes and I just can’t wait to play!!! Thanks for the inspiration!
Heather Tracy says
Hey Denaha – I’m totally with you – Pinterest is all too enticing! Thank you for dragging yourself away long enough to visit The Graphics Fairy today 😉 I know you’ll have as much fun with these techniques as I do! xox
Janice-NH says
All I can say is AWESOME! I’ve taught classes using gilding flakes and I’m going to try your methods with that medium. You gave me just the inspiration I was looking for to give some painted drawers pulls a new and unique look! Hope your curiosity continues to provide the rest of us with frugal crafting techniques!
Heather Tracy says
Hi Janice! Ooohhh…I just know this will work beautifully with Gilding Flakes. What a great idea, my friend! I’ll bet those drawer pulls turn out beautifully…thank you for visiting, and for your kindness!
And yep, I’ll keep sharing the Curious Adventures, because I can’t HELP it! 🙂
Rupa says
Every piece is so gorgeous! Everything you touch turns into gold…literally in this case lol! Surprisingly, I have the Zig glue pen already. I bought it to make my silhouette cutting mat sticky again and it does a pretty good job of that btw. I can’t imagine how many million other brilliant ideas are swirling in your head, just waiting to fall off your brain and enthrall us! Thank you for all you do!! I need foil but seriously woman, you are blowing my craft budget off the roof with so many amazing products/ideas.
Heather Tracy says
Hi Rupa! Oh, I’m glad that you already have the Zig Pen…it’s so interesting how we can combine different tools and techniques to discover uses we never imagined before…that’s the most fun! Thank you for your kind support and it always make me smile to read your enthusiasm…that’s how I feel every time I stumble across something that I want to share with my creative friends: happy and excited! Have fun foiling, my friend – I sure am! xox
sue says
Thank you, thank you. What a full, easy description that I can’t wait to get started on. What I love is that I have all these items already and this is how I am going to spend my Saturday afternoon indoors while it snows outside, enjoying my favourite pastime. Thanks again. x
Heather Tracy says
Yay! I just know you’ll enjoy this process as much as I did, Sue. Happy Creating! xox
Helen Edwards says
Absolutely gorgeous!!!!!You are amazing. Thank-you so much for all these fantastic methods of gilding on a budget. Can’t wait to give them a try.
Hellen
Heather Tracy says
Hi Helen! Oh, it’s my pleasure to share all these little joys…thank YOU for taking the time to visit! Have fun…xox
Sharon Groves says
This is the best tutorial on using foil that I have ever seen! Got me so excited about trying the foils – thanks!
Heather Tracy says
Wow, Sharon! What a fantastically kind thing to say…I’m so glad you found it useful…now, go forth and FOIL! xox
Karla Bostic says
It is always amazing to see how us everyday average folks can use these shortcuts to make fabulous pieces. I am curious, did you seal the rubber phone case? I am concerned it might wear off without some type of sealer, but what kind would I use?
Heather Tracy says
Hey Karla! I DID seal the case, and I just used the Mona Lisa Gloss Spray Sealer…I hope it holds up, but we’ll see! Thanks for visiting and for your kindness. xox
Teddee Grace says
Heather, you are something else! So creative! Thanks so much for sharing your wonderful talent, hard work and making me feel as if I can actually do it!
Heather Tracy says
Hi Teddee! You CAN do it…I was nervous, but then SO excited when it actually worked. You’ll have so much fun, I promise! xox
Janette Deans says
Brilliant tutorial and so wonderful to see the different finishes, thanks so much for the share…x
Heather Tracy says
Hello, Janette! I’m so glad that the tutorial is of use to you, my friend. Thank you! xox
Janus says
You take “foiling” to new levels! And using double sided tape, great tip. Thank you, Heather.
Heather Tracy says
Hey there, Janus! So happy that the info helps others, my friend. Thanks for visiting, and for your kind words. xox
Kristie Taylor says
Ohmygoodness!! I too love the look of foiling, but don’t want an expensive machine, so thank you Heather for showing me this, and opening the door to new exploration!!
Heather Tracy says
Yay! See, I knew I couldn’t be the only one! You’ll have so much fun with this, Kristie! Thanks for visiting, darling. xoxo
Margie says
Wow – thank you so much Heather for a brilliant tutorial with great results. Can’t wait to try it with stamps now.
Heather Tracy says
When I discovered that we could use all our stamps I was SO excited, Margie! I hope you have as much fun as I did, my friend! xox