DIY Tea Stained Paper
A Word About Tea Staining
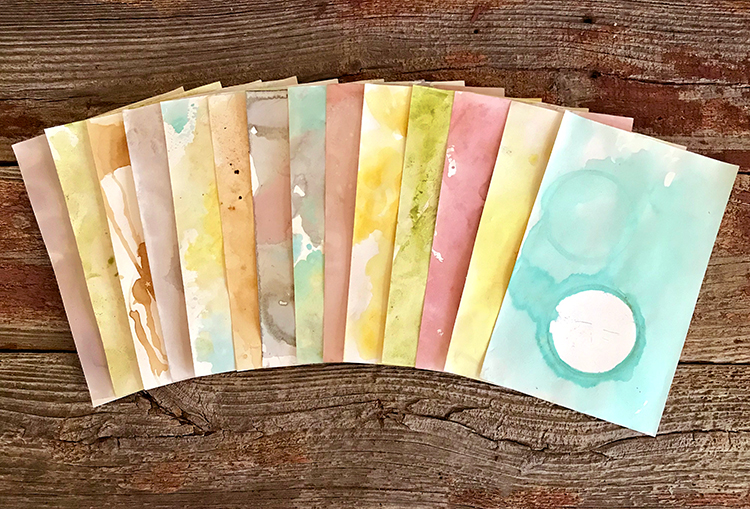
I have been staining papers for my books and art for many years. Tea is one of my favorite tools because I adore the subtle hints of color and age that I can achieve with this simple, natural tool. I have discovered some new teas of late and could not wait to see what happens when I apply them to good, heavyweight paper (watercolor or mixed media). If you know me well, you’re aware that I love to get into my laboratory (studio) and run experiments. Like a mad scientist, I push the limits as far as I can. I do this gladly and lovingly so I can share the results with you!
NOTE: As much as I wanted a nice blue tea paper, I have yet to find one that produces a blue shade. Therefore, I added a drop of gel food coloring to my green tea and it worked splendidly! So don’t be afraid to think outside the box to achieve the results you want.
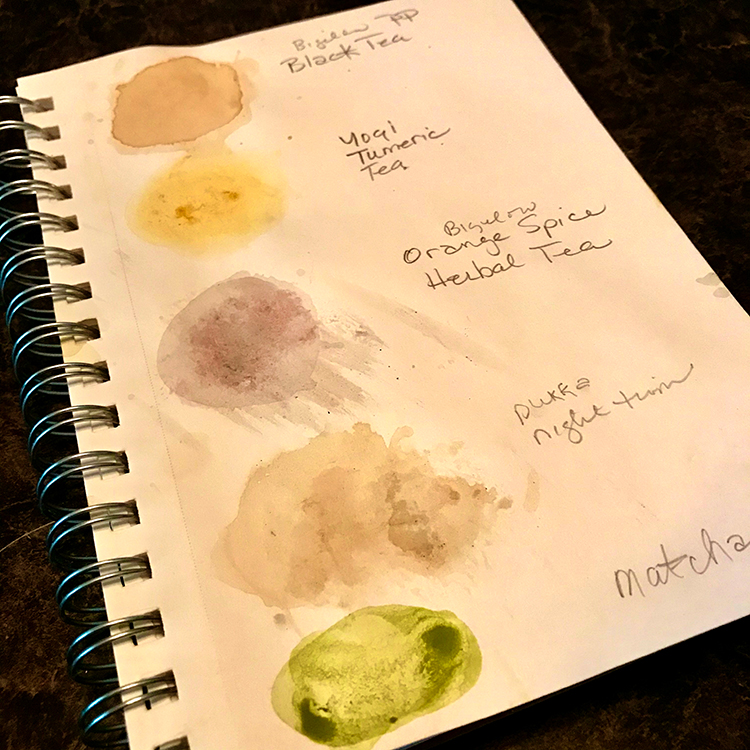
A word about teas: Teas come in a variety of flavors and potions – black, white, green, herbal, matcha, organic, etc. They also come in many forms – bags, loose, powders, liquids, effervescent, etc. How do I choose which ones work the best for staining papers? First, let me say that not all teas are created equally. Just experiment with what you have. It is really just a personal choice what the final look is that you are seeking. I keep a detailed swatch notebook to record the colors I achieve with each tea and tinted tea. It helps me when I want to recreate a tea stained color.
A word about papers: I prefer to use papers that are made for wet media, such as watercolor or mixed media. These papers can take a lot of water without disintegrating. You can tea stain lighter weight papers, even 20 lb. copy paper, with some success. However, they often tear, dissolve, and fall to pieces in the process, leaving you frustrated and without much to show for the work. Another of my favorite papers for staining is an 80+ lb. cotton or rag content paper.
For this tutorial, I will be using a smooth Mixed Media paper that takes the tea beautifully without falling apart. You can find these in pads that are reasonably affordable. I do love how tea stains watercolor papers as well. Hot press WC papers with texture is probably my favorite because the stain gets into nooks and crannies. As always, it is a personal choice about the final look you desire.
Supplies for DIY Tea Stained Paper:
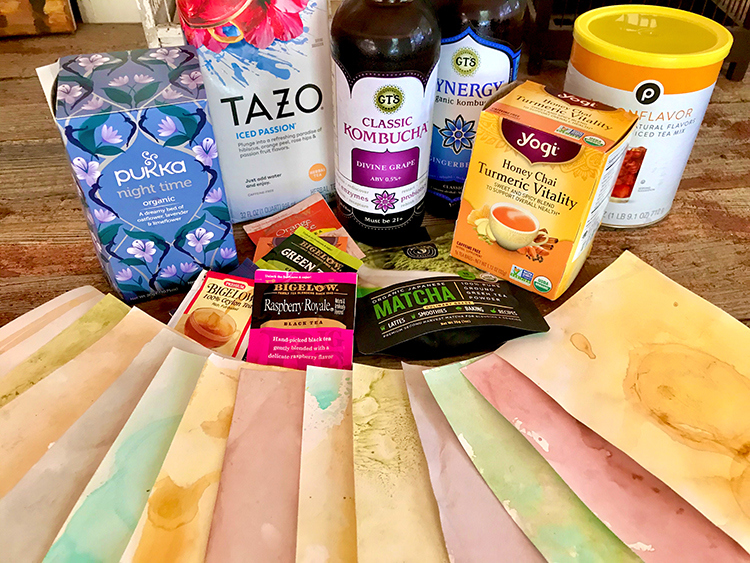
Tea – a variety of tea bags, powdered teas, and liquid teas
Cups for making tea
Gel Food Coloring
Watercolor or Mixed Media Paper
Brushes, Sponges, Eyedroppers
Cookie Sheet with a rim
Paper Towels
Bottle caps or other circular objects
Tea Stained Papers Technique – Step-by-Step Directions
This is a fun technique, but it is messy since a good amount of water is required. Make sure that you protect your surface well. TIP: I use a large trash bag spread over my table. Then I cover it with an old towel or cloth to absorb some of the water.
Step 1 – Mixing Teas: Make tea bags or powdered teas with the following recipes:
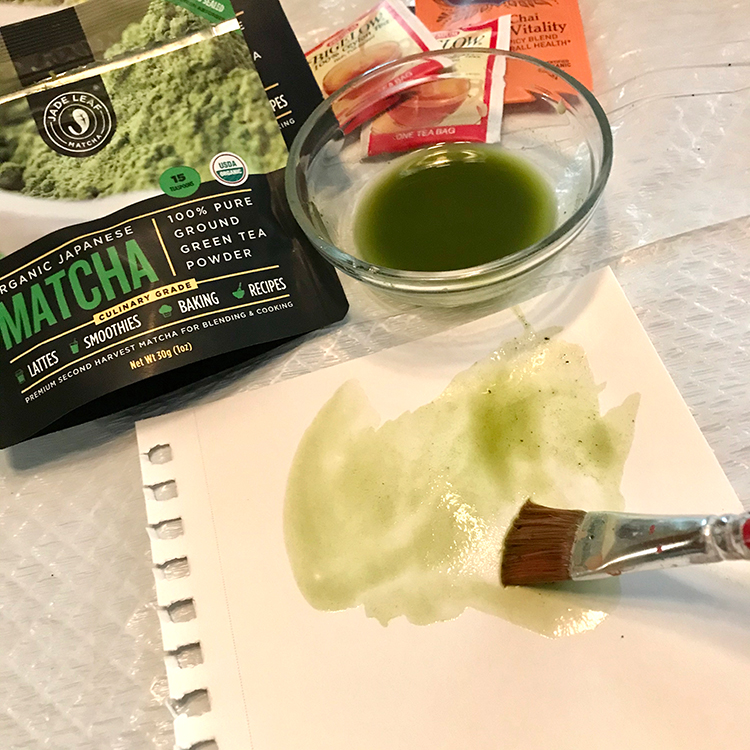
Matcha – mix with 1/2 less water than package directions. Makes a lovely green.
Green – 4-5 bags per 1/2 Cup water. Green tea does not give a lot of color. It is a great mixer for gel food dyes.
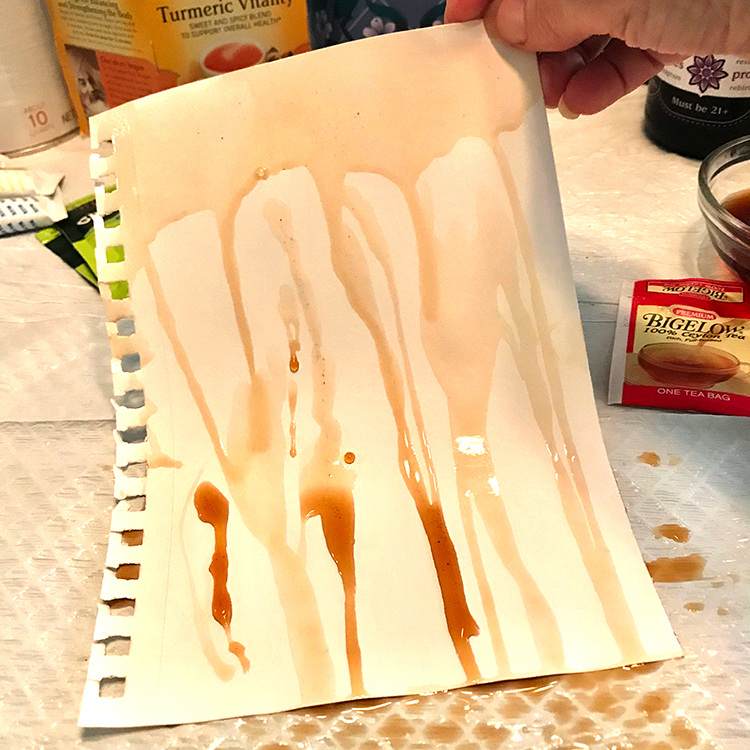
Black – 3 bags per 1/2 Cup water. The hotter the tea is, the more orange it will color the paper.
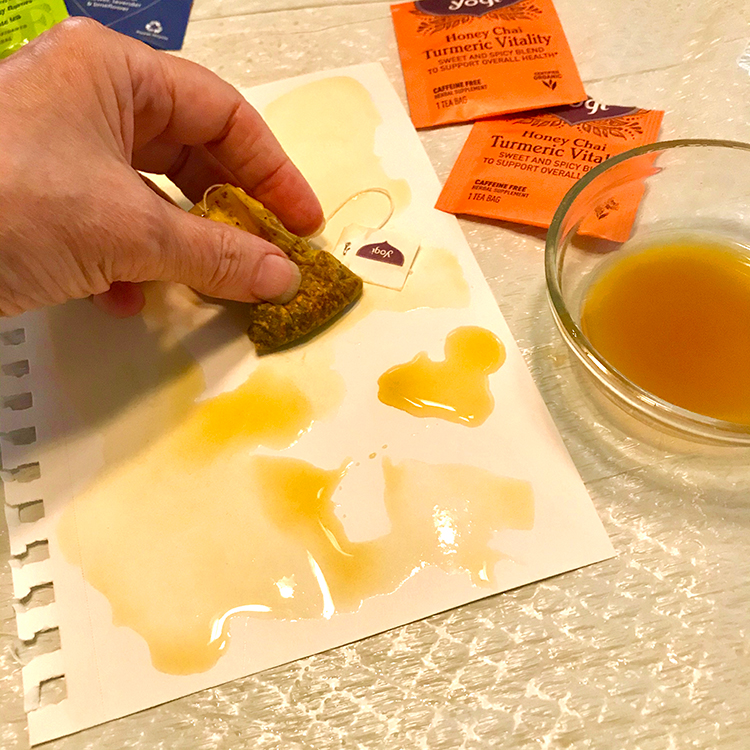
Herbal – 3-5 bags per 1/2 Cup water. Bigelow Orange Spice makes a delightful gray. Turmeric tea makes a beautiful yellow.
Powdered Tea – 2 T per 1/2 Cup water. This creates sweet browns and sepia tones.
Liquid Tea / Kombucha – straight from bottle; do not dilute. Produces some amazing colors. I like the effervescent ones.
TIP: You can add a drop of gel food coloring to make what I call lovely ‘Tinted Teas’. Just a tiny drop is all you need! Make sure you mix it well.
Step 2 – Apply Tea to Paper: Be inventive. Play with the tea and paper. Crumple some of the paper before you stain.
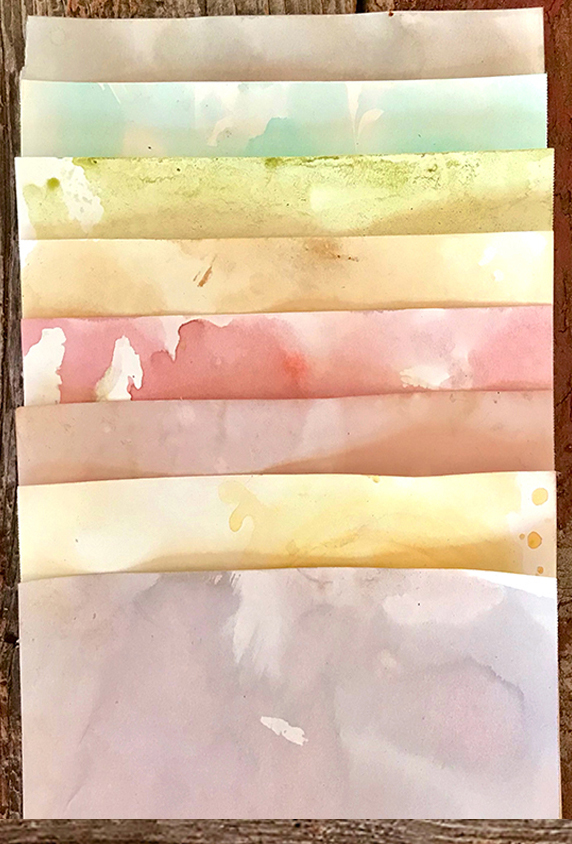
Method 1: Lay paper flat on surface. Apply tea with brush, sponge, or eyedropper. Paint the tea on randomly and unevenly, allowing some areas to puddle. This will make the paper look older. Let the tea soak into the paper. Allow to dry like this. Below you see a beautiful green produced by Matcha ground green tea powder mixed with water. Find my recipe above.
Method 2: Apply a lot of tea along one edge with a sponge or brush. Lift the edge of the paper and let the tea drip down. You can also add some drips with an eyedropper if you want more. This example is a beautiful orange brown color achieved with strong black tea. See my recipe and hints above.
Method 3: Lay paper flat on surface. Apply the tea with the wet tea bags that have been steeped per package directions. Be careful not to burn your fingers with boiling tea water. Rub the bags over paper, allowing some areas to puddle by squeezing the bag. Press it into the paper. If the tea bag starts to come apart, throw it away and use another. The herbal tea used below is Turmeric and produces the most beautiful golden yellow color.
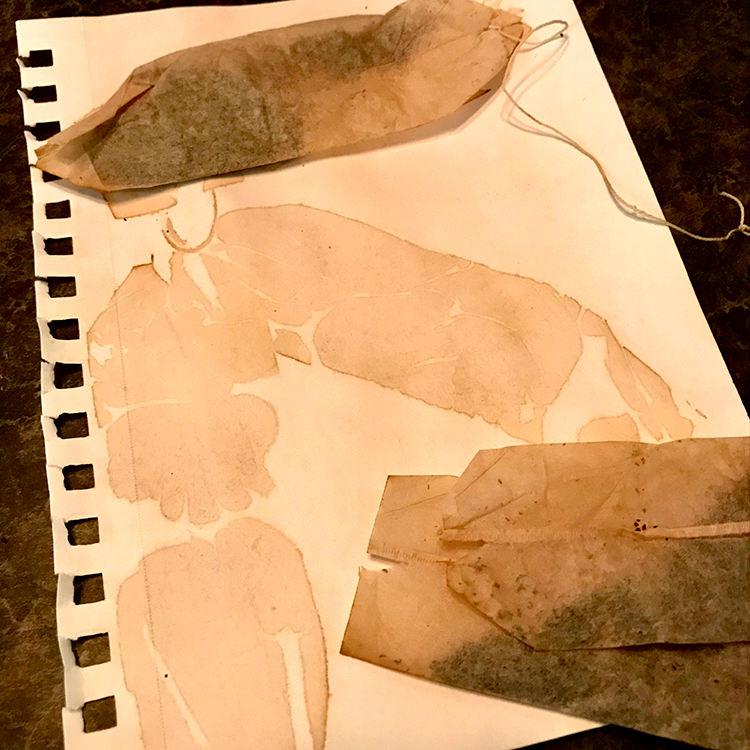
You can also allow the bag to sit on the paper until it is dry for darker stained areas.
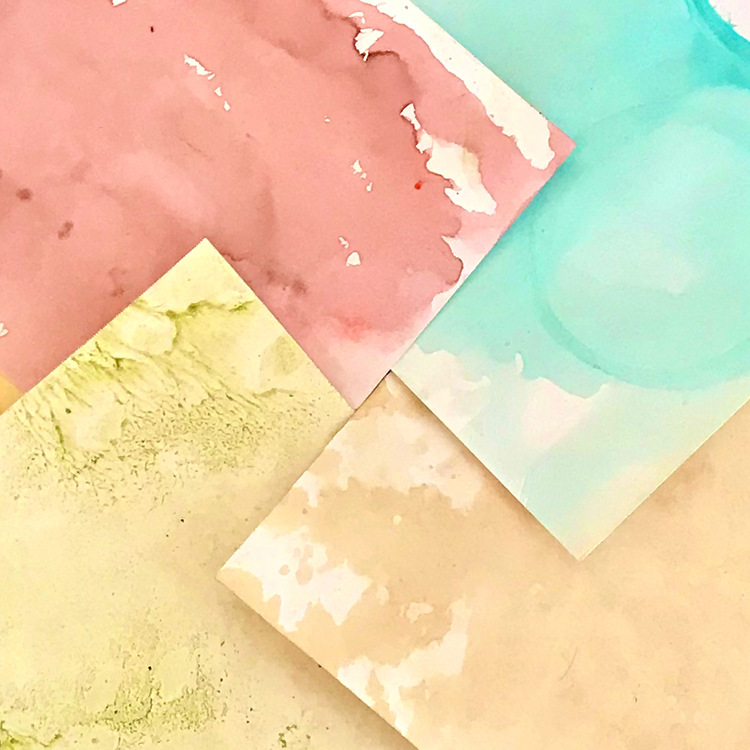
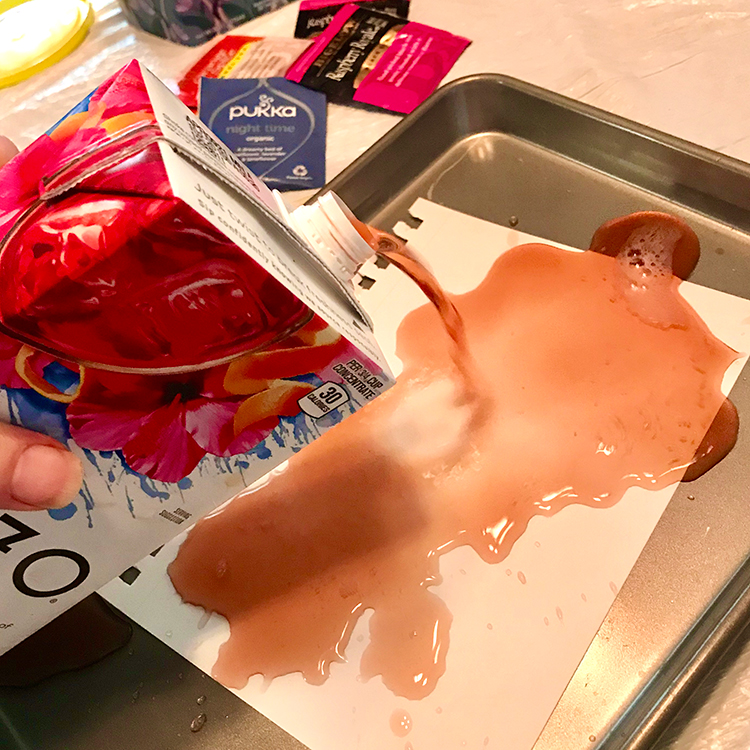
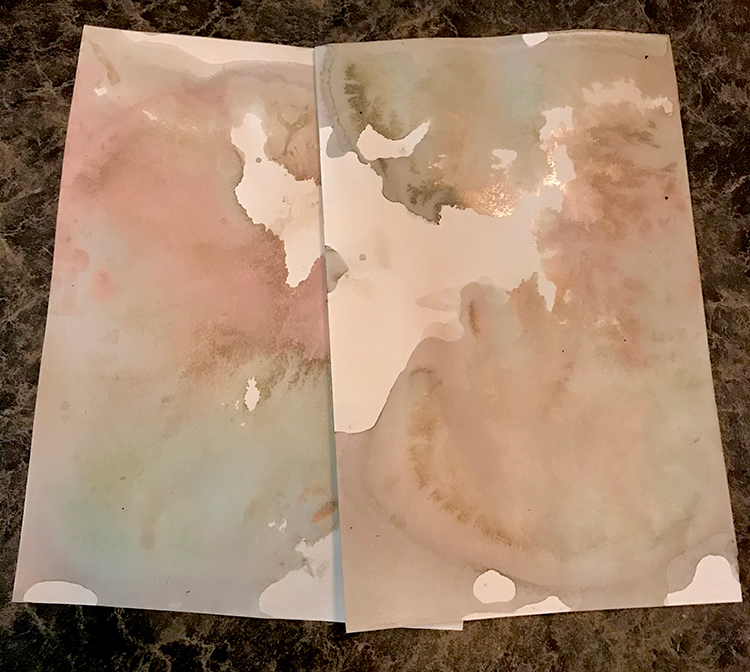
Method 4: Lay paper in a low edge cookie sheet. Pour the liquid tea directly onto the paper. Pour it slowly and stop when it covers the paper. You can do a few sheets at a time with this method. Pour and place another piece of paper on top. Press it down with your hand to allow tea to soak in. Blot some of the liquid with a cloth or paper towel. Allow this to sit for 2 minutes. Separate sheets and place on baking sheet. Bake this in a low 200º oven for 5 minutes. This will dry the paper and darken most the colors a bit. I used Tazo Passion Tea Concentrate here. It provides a lovely pink color. I also love to use Kombucha effervescent teas mixed with a little gel food coloring for this technique. The purple and aqua examples were done this way.
FUN TIP: Be sure to use the leftover tea to create some multi-colored backgrounds! It gets muddy sometimes, but we love those rich brownish grays, don’t we?
Optional Distressing (Aging) Tips:
I prefer old, aged papers with loads of texture and eye appeal. So I have a few other techniques to achieve that rustic look and feel that melts my heart.
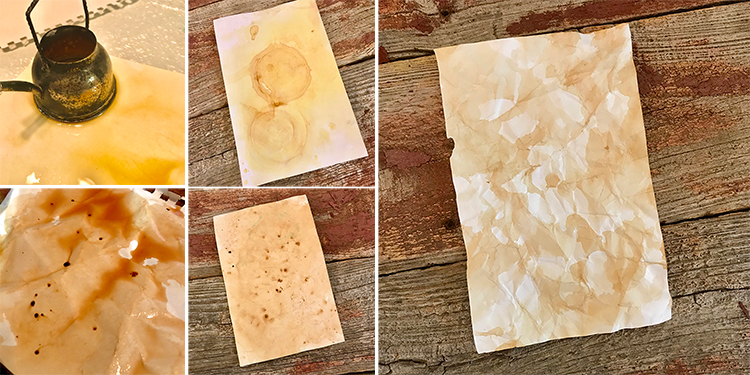
To make a circular stain mark, place a cap or anything round (I use an old child’s teapot) on the paper before you apply the tea. Allow paper to dry with the cap on it. The two top left photos show the method and the result. I used the Turmeric tea bags.
To create the effect of age spots, sprinkle instant tea on the paper after you have applied the tea. It works best on damp versus totally wet paper. The two bottom left photos show the method and the result. I used the black tea bags.
Crumple the paper and smooth it out before you stain. While paper is wet, fiddle and rub along the edges to enable tearing of it. You can also do this in other areas of the paper to produce small holes. You can see a crumpled paper to the right below. I used a green tea in this example.
Step 3 – Deepen Color: After the paper is dry, apply more tea in certain areas to darken the stain.
Optional – Heat Set: Some people like to bake or heat set their papers. I find that the papers, when dry, are permanently stained. You can bake a single layer of the wet papers on a cookie sheet in the oven at 200 degrees for 5 minutes. TIP: I run my paper through my dryer on hot for 3 or 4 minutes.
If you want even more ideas and tips on aging paper, check out my Paper Distressing tutorial HERE!
I hope that you had fun learning How to Tea Stain Paper with Colored Teas with me!! When I am not exploring with new and old Techniques for Mixed Media in my Graphics Fairy sandbox, I also create Photoshop Elements tutorials and craft project videos over on The Graphics Fairy Premium Membership site. You can find even more of my books, junk journals, mixed media art, classes, and whimsical shenanigans on Rebecca E Parsons Dot Com.
Also, be sure and you check out this YouTube Video that Lisa did, showing you how to use Tea Bags in your art!


Cathy V says
This sounds like great fun. It may even motivate me to clean off my craft table so I can make another mess!
Karen Watson says
Haha! Too funny Cathy!
Janine says
Hi Rebecca
Twinings Cranberry and Pomegranate tea bags produce blue paper, even though the tea itself is pink 🙂
Karen Watson says
Good to know. Thank you Janine!
Jayawardena Sharmini says
Hi Rebecca,
You can use dried butterfly pea flowers to make a tea, to get a blue shade. I have tried this on good quality copy paper, both painted over and given a bath. The painted over gave a deeper shade of blue.
It’s a herbal tea.
Karen Watson says
Thank you so much for the tip Jayawardena! I’ve never heard of that tea, that shade sounds lovely!
Delana says
Hi Rebecca,
I love your tea staining technique. You and Graphics Fairy are how I learned what junk journaling even was with the free tutorial on how to make the Paris themed one. I like to dry my tea dyed paper and food color dyed paper on a pizza pan with air holes in the oven for a few minutes to get the air holes on my paper in a darker color.
Also, I have found a blue tea but haven’t personally tried it. Butterfly-pea flower tea is also known as blue tea.
Thank y’all for all that that y’all do. (I love the premium membership site too)
graphicsfairy says
Aww, thank you so much for the kind words and wonderful ideas Delana! It was so kind of you to take the time to share your wonderful thoughts and ideas 🙂 Have a wonderful day!
Nan says
So lovely! I love tea dying but rarely do it for some reason! I do make a mess of things but that is the fun!
graphicsfairy says
Ha ha, yes Nan, that is half the fun. Have a great day!
Yolande Bergeron says
Merci Karen
I like to learn new methods in order to introduce them into my creations and with your blog it is guaranteed. It is always interesting to try new things
Merci
Karen Watson says
Thank you so much Yolande, I’m so glad that you are able to use the techniques that have learned here! 🙂
shhdp says
Hi Rebecca,
Firstly, thanks for all of your experiments and the tutorials that are the result. Secondly, Harney Tea (all orders ship free!) sells a tea that brews bright blue and turns purple when you add lemon; you might want to give that a try! Thirdly, when you dry your papers in the dryer, doesn’t the dryer get a mess inside?
Karen Watson says
That Tea sounds amazing, thanks for the tip! Hopefully Rebecca will pop over and answer your dryer question.
Denise Tiblis says
She probably has one with a dryer rack that is used for sweaters and such. If you used that with something under the paper it would probably work. My vacation home has one, I will have to try it.
Karen Watson says
Aw, yes! Great tip Denise! Thank you. 🙂