Image Transfer Medium Testing
Hey Everyone. it’s Rebecca Parsons here to show you my Image Transfer Medium Testing experiments with some of the newer Image Transfer products. 1Gel disappeared from the market a few months ago. We used it to make our beloved image transfers here on The Graphics Fairy. We mourned its demise for a short while, but needed to find a good substitute. Therefore, I tried several alternatives, and below are three that are working for my art and image transfer needs. I ran the tests for you on a painted surface and on fabric! YAY! Just remember, your results may differ so I always recommend that you complete a small test piece prior to creating your final piece. NOTE: All photos in this post are unretouched and taken in the same lighting conditions.
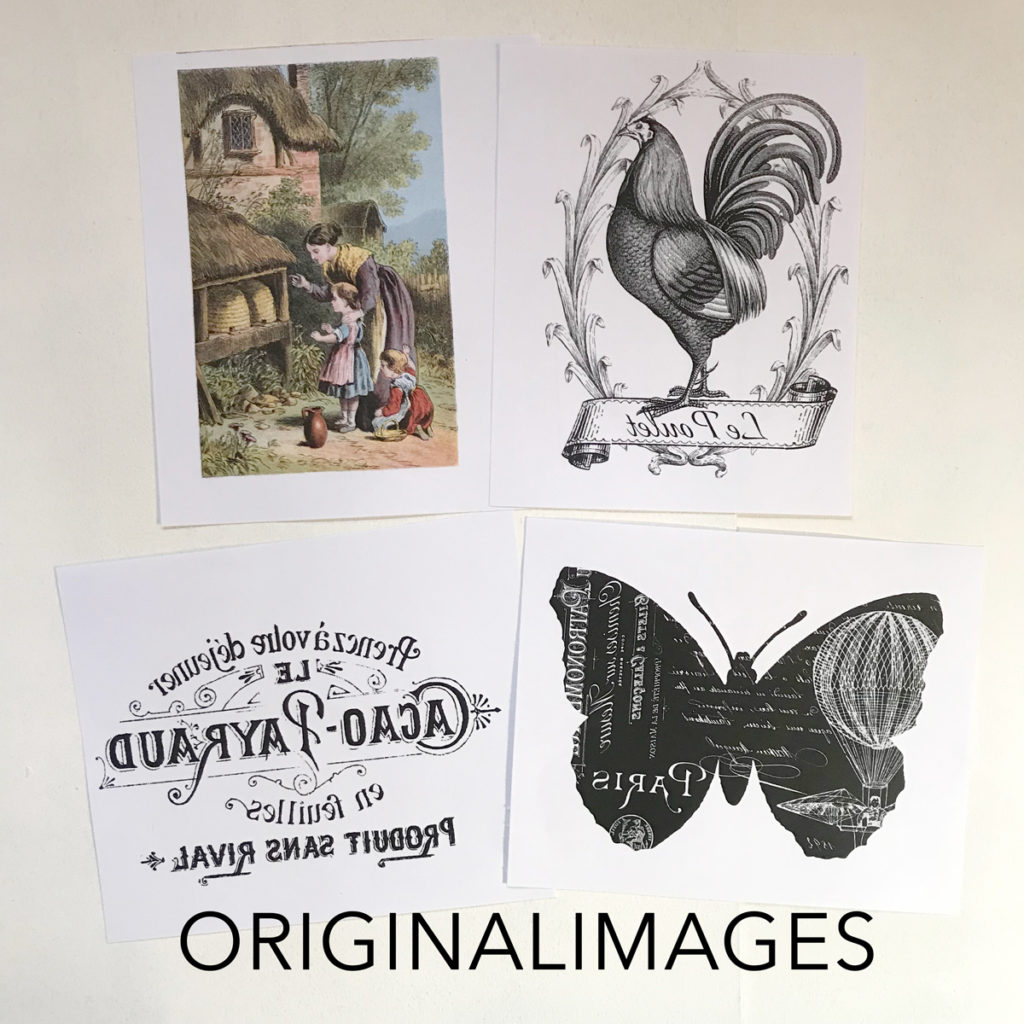
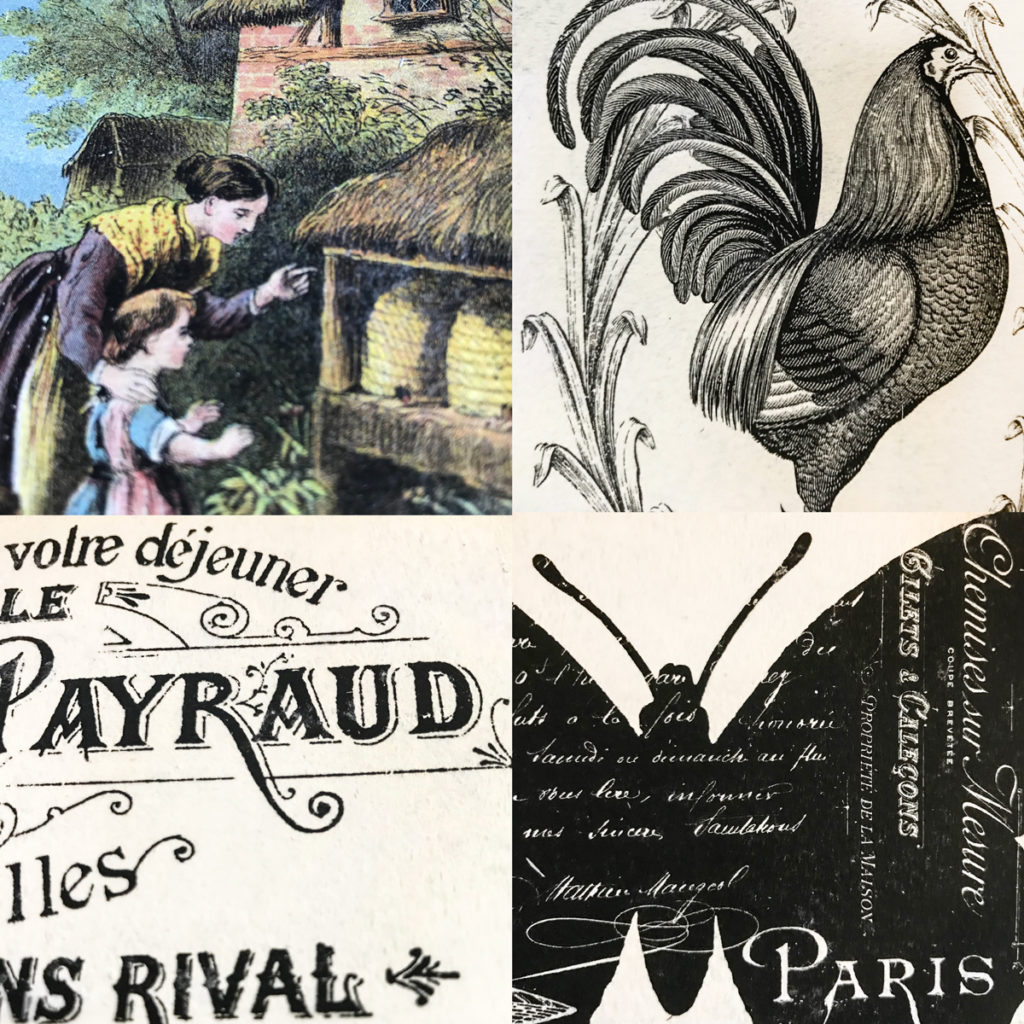
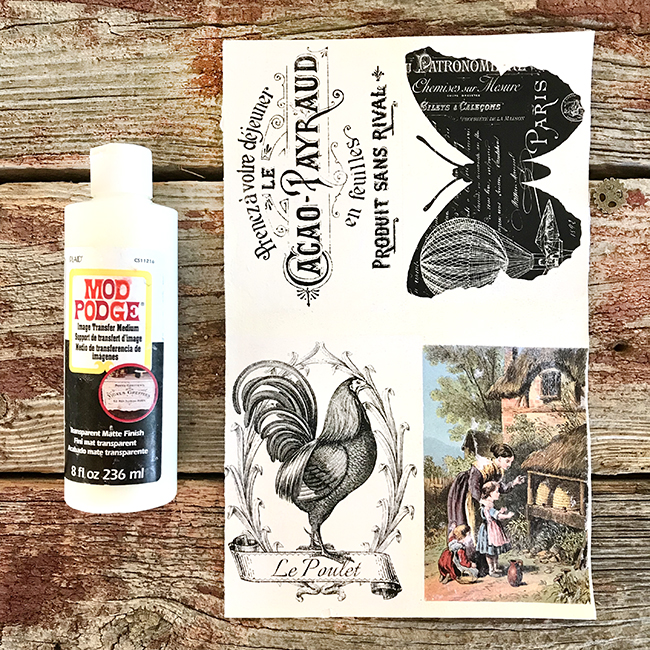
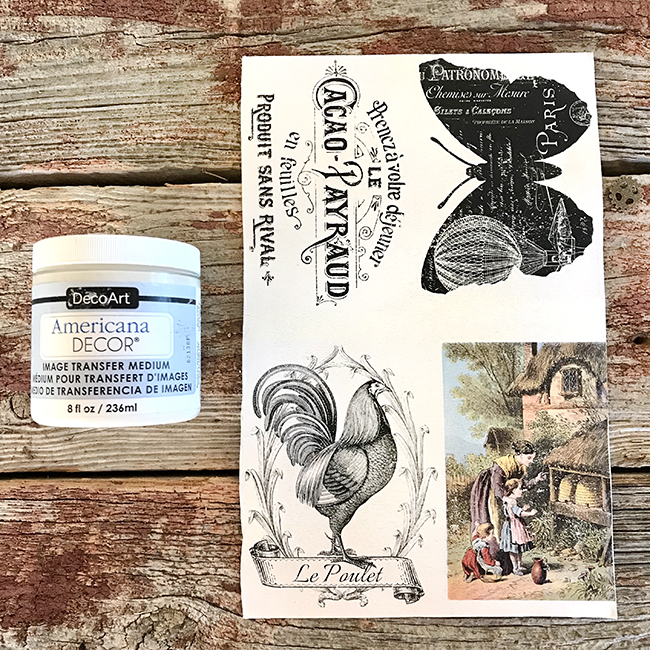
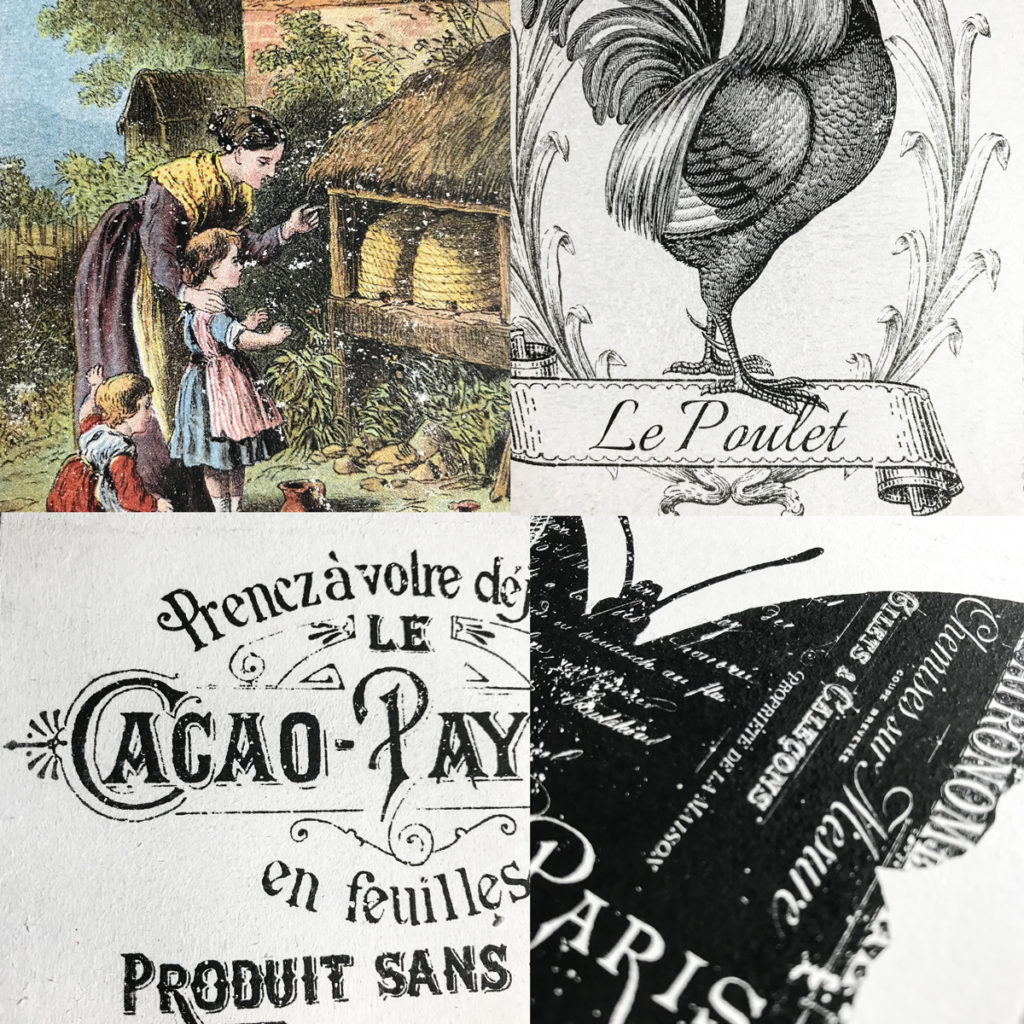
Experiments were conducted with five images that are all different. I selected them for different reasons. There is a full color image to transfer to a painted surface and another for fabric. Then I decided on three black and white images – a French label image with a variety of letter styles and sizes, of course. I chose a Rooster image with fine details that could easily get lost. Finally, I selected a black butterfly image with white text to see how a dark image transfers.
The surface was painted with two coats of Folk Art Chalk Paint (White Adirondack) and then allowed to dry for a few days. I used a rough brown paper bag like sandpaper to smooth out the surface. However, there was some fine texture. The fabric was washed to remove any sizing. The images were trimmed to the desired size. I made a printable version of the reversed images for you if you would like to perform your own tests.
The Transfer Mediums
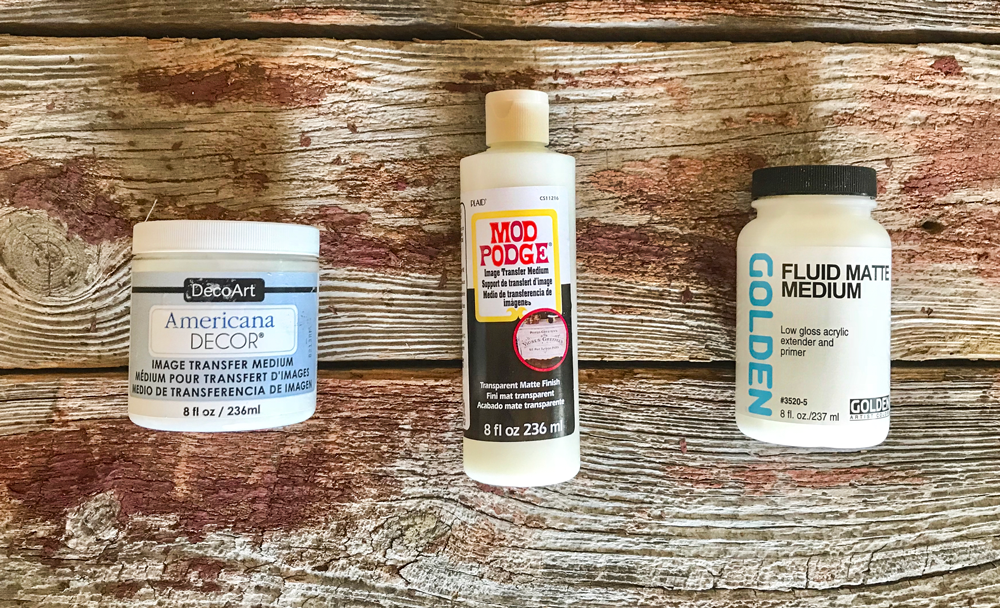
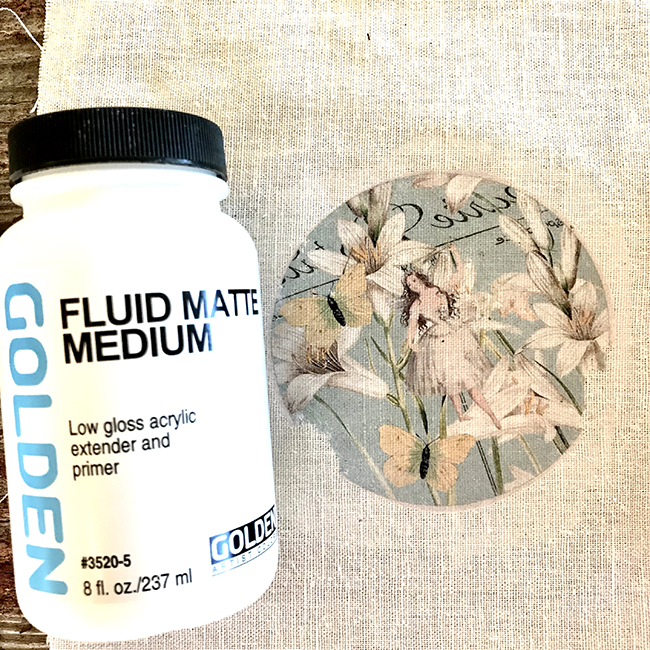
I used three Image Transfer mediums for my testing – Mod Podge Image Transfer Clear, DecoArt Americana Image Transfer Medium, and Golden Fluid Matte Medium. For sharp, saturated transferred images, it is best to use a toner or laser print. All three manufacturers recommend toner prints instead of inkjet prints. Sorry! I followed the manufacturer’s directions for application and paper removal. Here are the results of my Image Transfer Testing by Product. I compared 11 different aspects that are important to successful image transfers. I bolded the most important feature I discovered.
Golden Fluid Matte Medium – Instant Transfer
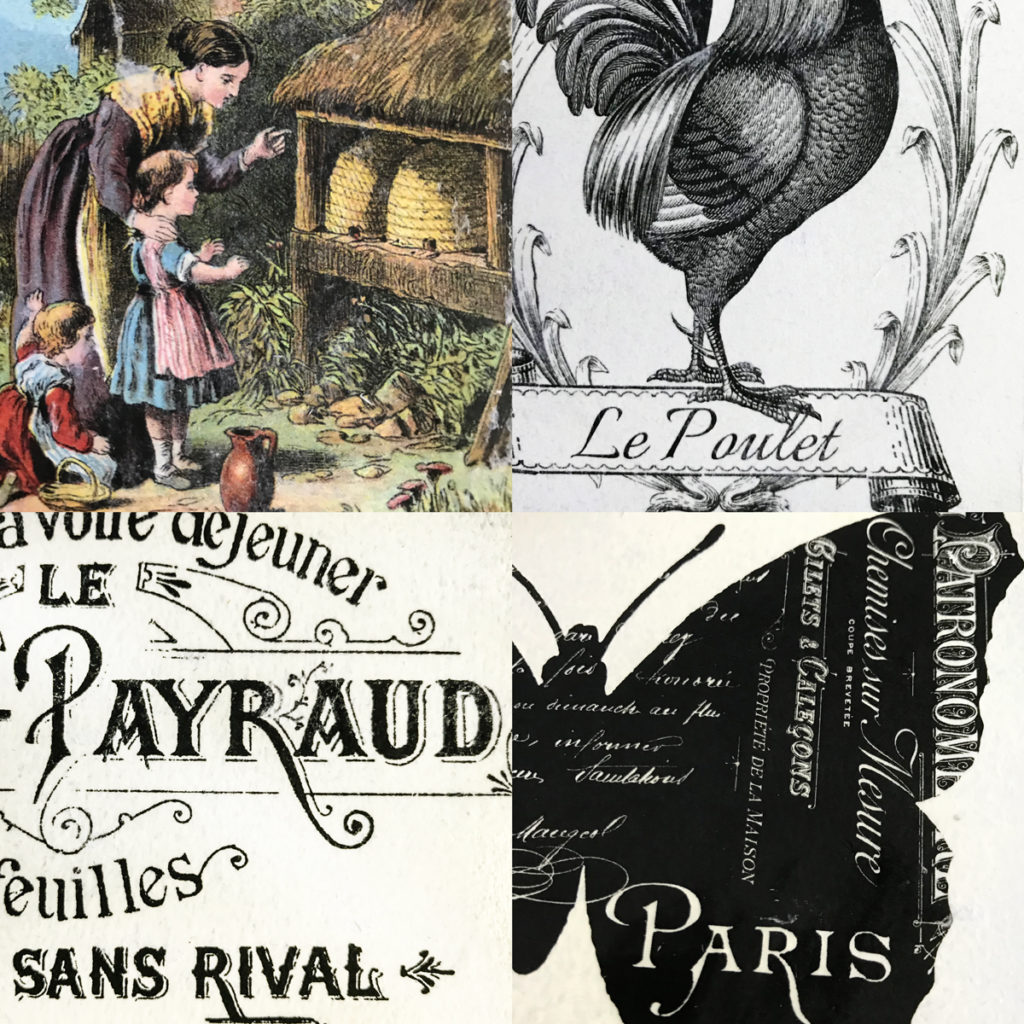
The Golden Fluid Matte Medium allows you to begin removing paper within 3 minutes. YES – Three Minutes! I set a timer for 2-1/2 minutes. Then I gently lifted a corner to see if the image was ‘married’ to the surface and the paper would separate. Once that happened, I gently began to peel (yes peel) away sections of paper diagonally across the print. NOTE: It takes practice and patience. If the image lifts, lay the paper back down and wait another minute. (I will give a full tutorial on this technique soon.) Then I waited another 2-3 minutes as directed. At that time I began the gentle rubbing method to remove the haze paper. I loved, loved, loved that I was able to peel away almost half the paper to begin with and practically immediate results. Two passes removed the haze. As a result, within 15 minutes I had fully completed image transfer. This almost blew my mind!! Here are close up photos of the completed transfers.
Cost $12+ for 8 ounces
Print – Laser or Toner Based
Consistency – Liquid
Sheen – Matte
Easy of Application – Easy
Wait Time – 2-3 Minutes
Background Removal – Slight halo of white areas
Durability – Good
Small Image Details – Excellent
Transparent or Translucent – Transparent
Fabric – Good Transfer (The tear is my bad, I did not burnish well on the edge.)
Mod Podge Image Transfer Clear Medium
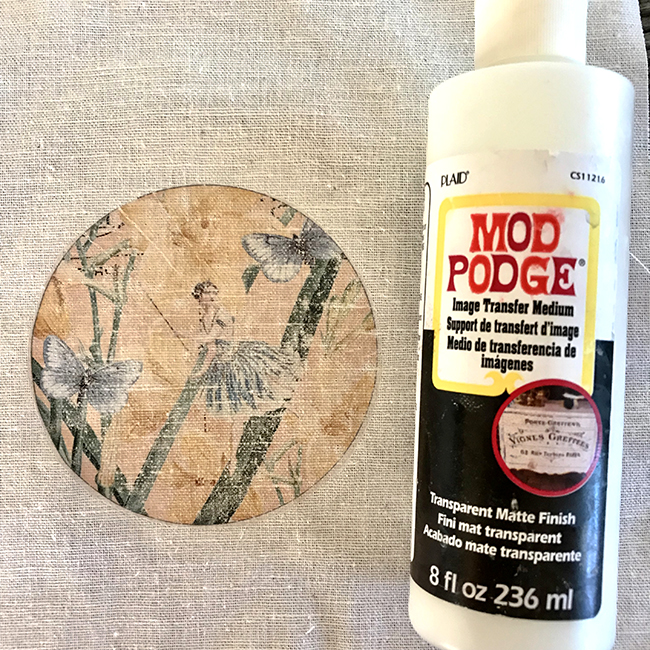
Mod Podge Clear produces excellent transparent transfers – different from the milky MP version. I applied the medium to the surface and front side of the image with a brush. Then I carefully placed image face down onto the surface. The MP allows you to adjust the image slightly, which I really like. I use an old credit card to smooth out creases and air bubbles. The working time for MPC is 24 hours. At 24 hours, I sponged water onto the back of the image and let it sit for 2-3 minutes. Using fingers and a soft sponge, I gently rubbed away paper layers with a gentle circular motion.
Plaid suggests that you remove the paper in layers – five gentle removal processes about 10 minutes apart with a sturdy sponge. You should allow for drying a few minutes between each rub. Then repeat the wetting process until all paper has been removed. Five passes removed the haze. For added durability, they recommend that you apply a topcoat. Here are close up photos of the completed transfers:
Cost $12+ for 8 ounces
Print – Laser or Toner Based
Consistency – Liquid
Sheen – Matte
Easy of Application – Fairly easy
Wait Time – 24 hours
Background Removal – Slight halo
Durability – Good
Small Image Details – Excellent
Transparent or Translucent – Transparent
Fabric – Does not recommend for fabric (I did it anyway with good results for art, but would probably not be permanent for clothing)
Americana Decor Image Transfer Medium
DecoArt Image Transfer Medium is the least expensive for good results. I applied medium, with a brush, to the surface and front side of the image. While wet, place image face down onto the surface. Smooth out creases and air bubbles. Let dry 8 hours. Then brush or sponge water onto back of the image. Let sit for 2-5 minutes. Using a soft sponge or fingers, gently rub away paper layers (a gentle circular motion works best). Let dry. Repeat wetting process until all paper has been removed. Three passes removed the haze. I found that the sponge caused tiny specks of detail to be removed where there was texture. I would use only fingers to remove paper in the future. For added durability, also apply as a topcoat. Here are close up photos of the completed transfers:
Cost $10+ for 8 ounces
Print – Laser or Toner Based
Consistency – Loose Paste
Sheen – Satin
Easy of Application – Easy
Wait Time – 8 hours
Background Removal – Slight halo
Durability – Good
Small Image Details – Slight loss of detail on textured surface
Transparent or Translucent – Transparent
Fabric – Good Transfer
Summary
In conclusion, I was pleased with all three mediums. Above all, they work as advertised, providing me with an excellent surface to work with. I will use them all for future image transfers. I am still on the hunt for a good 1Gel substitute for inkjet images. Again, my best advice is to experiment on a test piece before committing to your final work and naming your favorite.
My Image Transfer Medium Testing was a learning experience and I hope you can use my results to help your creativity. I will be back in two weeks with more mixed media mayhem. I also create Photoshop Elements tutorials over on The Graphics Fairy Premium Membership site. You can find even more of my art, DIYs, and whimsical shenanigans on Cre8tive Compass Magazine!
May joy be with you all,
Rebecca




Tracy Taylor says
Thank you for your generosity w your time and knowledge! I am completely new to this. Also thank you for all the free transfers!
Tracy Taylor
graphicsfairy says
Thank you Tracy, Just enjoy it and have fun 🙂
Kim M says
You don’t have to use reverse images for the transfers? I always thought that was a part of the process. Since they printed right-side up, does that mean they went print side out/up on the fabric or wood? Thanks for the info!
Karen Watson says
Kim, for most transfer methods you will want to reverse the image if it has text. If there isn’t any text, you may not need to reverse it, just know that the image will be mirrored.
Sharon Morcus( HUNN says
Hi there id like you to stop taking payments from my account for awhile please im not useing it and haven’t the past few months. So ill would still like to get emails on what things are new but if you could cancel thee money coming out of the account please thank you
graphicsfairy says
Hi Sharon,
No problem, we will get that taken care of for you in the next 24 hours. Thanks so much for trying out The Premium Membership 🙂
Marilyn Szatmari says
Thank you .I needed to have a few ideas of what to use as a lot of products can only be bought online out in the sticks.if you are not sure about them it can cause a lot of angst tying the wrong product.
graphicsfairy says
Thanks Marilyn, I am so glad you found it useful 🙂
Rebecca E. Parsons says
I know Marilyn. I live on a tiny island and shop online mostly for my art supplies. Enjoy!
Daphne says
Thank you, Rebecca, for this testing. I still have a little 1Gel left and didn’t realize it had been discontinued. Great to know the alternatives!
graphicsfairy says
Thank you Daphne 🙂
Rebecca E. Parsons says
There are alternative Daphne. It was fun testing the mediums.
Jo says
Daphne: Have you used the 1Gel for inkjet copies and transferring onto fabric? If so, how did it work for you??
Joey says
Oh my gosh, thank you Rebecca for the wealth of information. It will definitely be used time and time again. I just got a laser printer for black and white. As you know I am going to have fun with it and your awesome tutorial with so much info.
Have a blessed day! Ms Joey
graphicsfairy says
Thanks so much Ms Joey 🙂
Rebecca E. Parsons says
Joey, I am so glad you found this useful. Happy creating!!
Heather K Tracy says
Fantastic demonstration, Rebecca! Thank you for helping us to find not one, but THREE wonderful mediums that replace 1Gel. I really appreciate the time and effort that went into this research, and the results are AH-Mazing!
graphicsfairy says
Thanks you so much Heather 🙂
Rebecca E. Parsons says
Oh Heather, you know how much of a challenge this project was. I loved the discovery!
peggy gatto says
Thank you so much!!
Rebecca E. Parsons says
You are welcome Peggy!!