
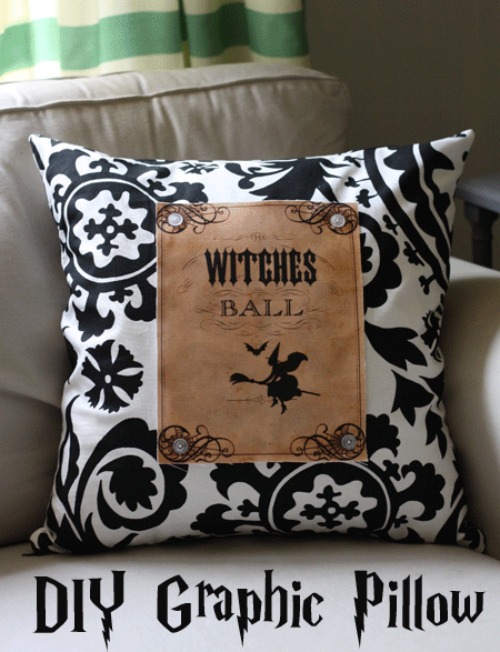
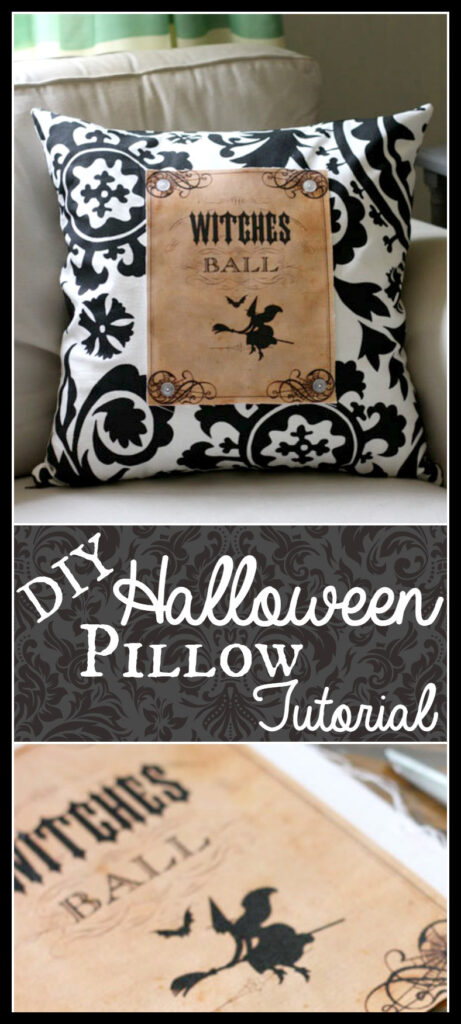
DIY Halloween Pillow
Hi everyone it’s Gina from The Shabby Creek Cottage. Halloween decorating is upon us, but if you’re like me you probably don’t want to revamp everything in sight. Adding a little graphic is a great way to get in on the spirit, but my removable option means you won’t be stuck with the look forever. Want to make my DIY Halloween pillow that you can change with the seasons? Well you’re in luck because I’m going to share my secret!
 Let’s get crafting so we can make this super fun cute pillow for our halloween decor! I think this would look so cute on a porch for your trick or treaters to see, although it would be nice inside on a couch too.
DIY Halloween Pillow Supplies:
- Pillow Insert
- Pillow Cover
- Iron On Transfer Paper
- White Fabric
- Free Witches Ball Printable
- Scissors
- Buttons
- Needle and Thread
- Iron
DIY Pillow Instructions:
First you want to start with a throw pillow cover. You can make one (like I did) by following my zippered pillow cover tutorial, you can revamp one you already have, or you can purchase one that will work with your decor.
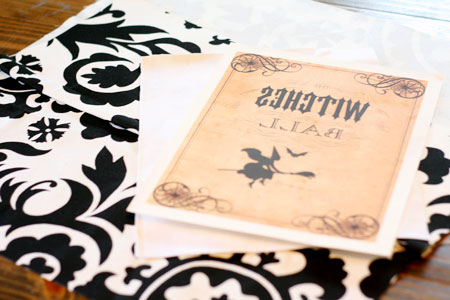
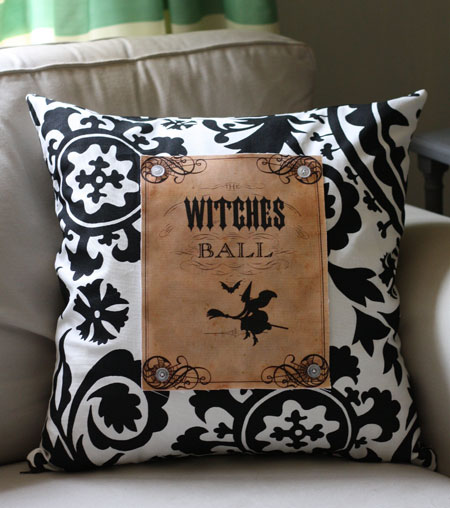
Besides a pillow cover, you will need a print out (make sure you do it in reverse) that’s on iron on transfer, a piece of white (or solid) fabric that will fit the print out, a few buttons and a needle with thread. I used the Witches Ball Printable from HERE.
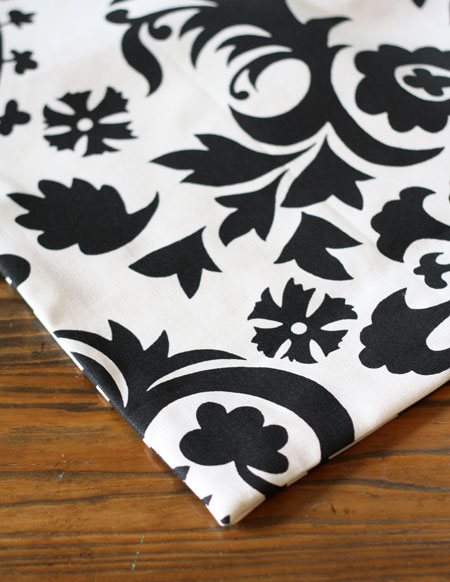
Any pillow cover will work, I made a new one, but you could totally use one you already have. I love this graphic print, and thought it would be beautiful against the vintage graphic. The black and white design seems perfect for Halloween too.
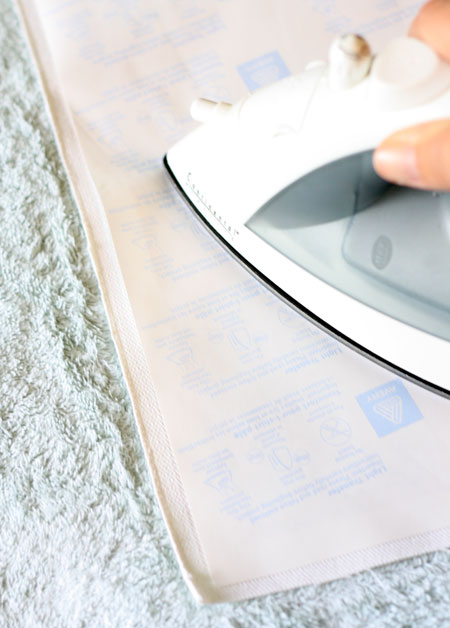
Next take your print and iron it onto the solid fabric, according to the directions on the Iron on Transfer package.
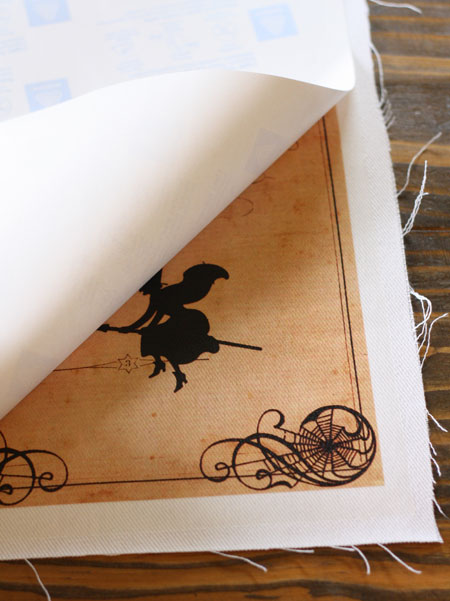
Let it cool for a few minutes, then peel slowly off the paper to reveal your image.
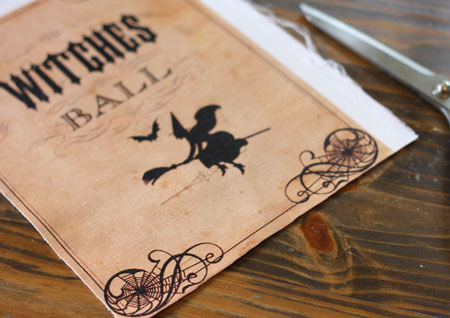
Trim out the graphic, it’s possible that it might unravel just a bit, but the transfer will help it from unraveling too much. I kind of actually really like the frayed edges, I think it looks great with the vintage graphic. It gives the halloween throw pillow a more rustic feel too.
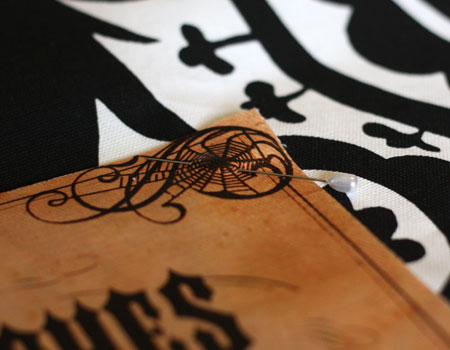
Once your fabric is all trimmed up, center up the graphic on your pillow cover, and then pin it down in each corner.
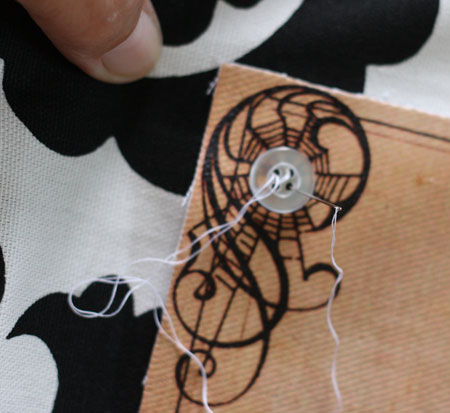
Next you will stitch the buttons on each corner to hold it in place. (This might be best for decorative pillows only. If your kids are rough with pillows, it might not be the best place to use them.)
Once all of your buttons are in place, then you’re finished … such an easy sewing project! Want to take it off? Just use a seam ripper to take the buttons off and the pillow is good as new. Kind of a cool trick right?! Of course you can use this idea over and over and change out the graphic for different holidays, seasons or occasions.
I hope you enjoyed making this DIY Halloween Pillow with me today! For more Halloween Ideas you might also like the Spooky Halloween Candle Wraps Project HERE.
Hope you enjoyed this project! Want more ideas for home accessories? Stop by my blog at The Shabby Creek Cottage to see some of my other ideas.
Gina


Stephanie C says
This is such a great idea! I can’t wait to make a few. Thank you for all the inspiration.
Denise says
Wow, this is great! Hey, wouldn’t it be cool to actually put buttonholes in the corners, so you could unbutton and change out panels, decorated for different holidays or just ‘cuz you get bored with one *whistling softly* not that I get easily bored or anything…ahem. Yeah.
Karen Watson says
Great idea Denise!!
Jasper says
Wow, that looks good… I have to find me some fabric.. Thank You for the idea. Yours look’s great..
Cathy says
Love it! How do you get the graphic to print in reverse?
Thanks.
Karen Watson says
Hi Cathy,
Check out this tutorial for reverse printing https://thegraphicsfairy.com/how-to-reverse-images-for-transfers/ 🙂
Christina van Dessel says
Hallo Gina, thank you for your wonderful DIY! I really would love to try it! What printer do I have to use? Is it a laserprinter?
Greats from Belgium, 🙂
Christina
Karen Watson says
Hi Christina,
Gina just uses a regular inkjet printer. For more info check out her, how to print on fabric, tutorial here https://thegraphicsfairy.com/how-to-print-on-fabric/
I hope that helps!
Abbey says
Would never have thought of doing something like this…Love how the iron-on turned out against the Premier Prints Suzani Black Fabric! You’re right–great contrast and perfect for the season 🙂
Kathy @ Creative Home Expressions says
Love it, Gina! I like that if you can apply it in a temporary fashion to an existing pillow you get more mileage out of your everyday pillows.