
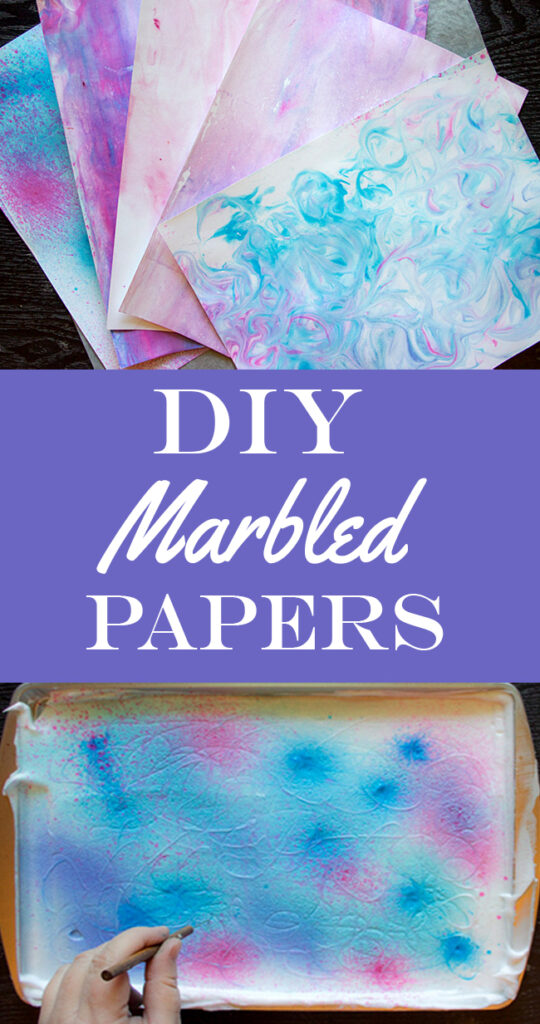
DIY Marbled Papers
Hello my crafty friends it’s Heather from Thicketworks and today we’re going to make DIY Marbled Papers! This is such a fun and easy technique using a surprise ingredient … we’re going to use shaving cream for some good clean fun! I love this technique and thought I’d share a few tricks that I’ve learned while working with this fun, easy and inexpensive paper marbling method!
If you’ve been wondering How do you make Marble Paper at Home then this post is for you! I’ll even give you some ideas for using our Papers to make some beautiful art.
 Make your own gorgeous Marbled Papers with this fun technique tutorial and inexpensive ingredients!
{Note: Most crafters use acrylic paints for these prints, but I prefer spray inks}
Feel free to use either!
You may already have most of the supplies – if not, a quick trip to the Dollar Store will help!
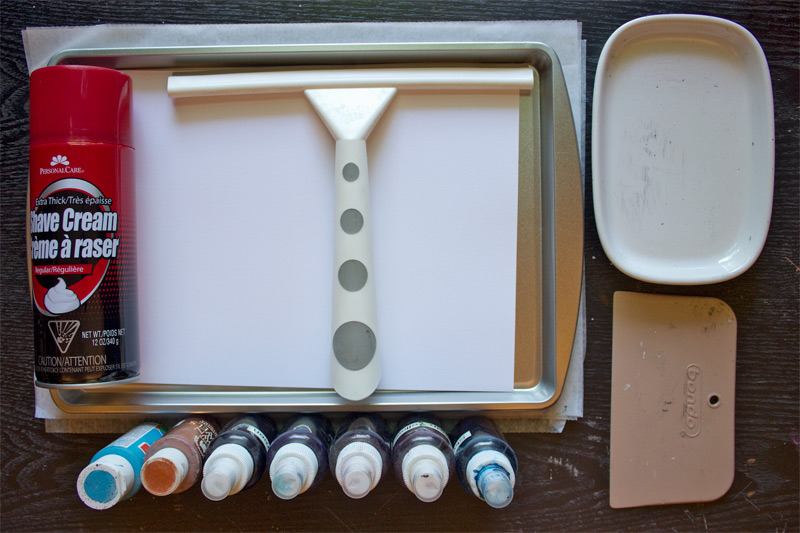
Supplies:
- Foam Shaving Cream – nothing fancy…basic is BEST!
- A shallow pan, large enough to contain an 8.5″ x 11″ sheet of cardstock
- White card-stock
- A Squeegee or similar tool
- A smoothing tool or Spreader
- Waxed paper or similar
- Spray Inks + Metallic Spray Inks or Craft Paints
- A handy, lined refuse container
- Any pointed tool, for making patterns
- A damp cloth
- An old credit card
- A Crafting Iron
Optional (for turning marbled papers into art prints):
- A Die Cutting Machine
- Rubber Stamps – I used the fantastic “Fabulous Flourishes” from Tim Holtz
- A VersaMark Ink Pad
- Metallic Embossing Powders
- A Scanner or Printer
- Water Soluble Oil Pastels
- A paint brush
- Aleene’s Tacky Glue
- Stickles
How to create DIY Marbled Papers with Shaving Cream:
Set up your work space with handy sheets of waxed paper to receive the prints as you create them.
Keep a damp cloth nearby to wipe your tools and hands clean.
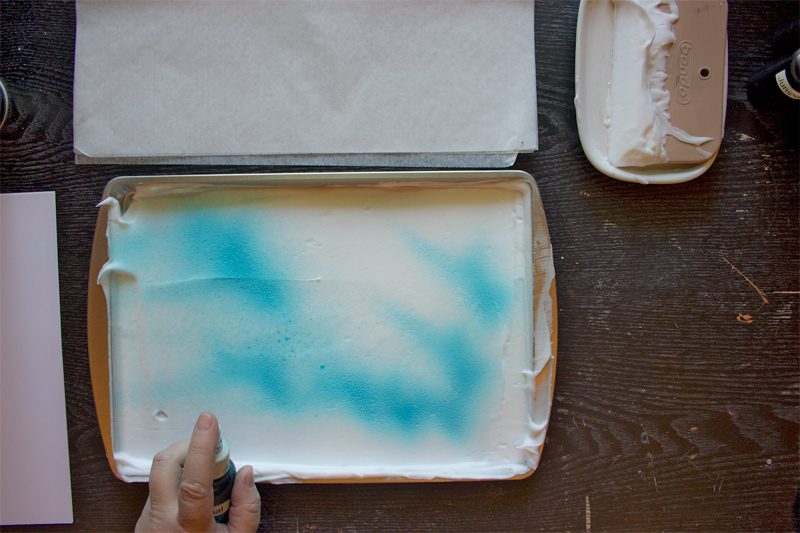
Spray a moderate amount of shaving cream onto the surface of a shallow pan or tray:
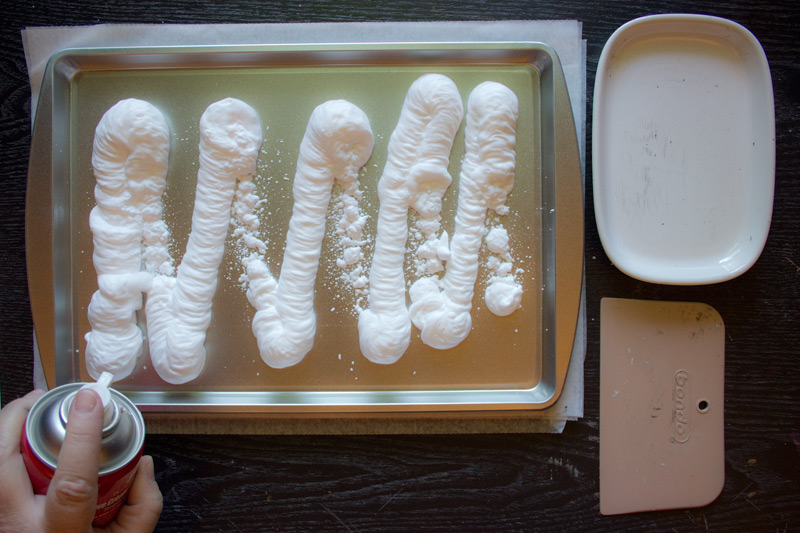
Use a spreading tool to smooth the surface of the shaving cream.
You may want to use gloves for this next part and keep some paper towels near by … Spritz the surface with your favorite spray inks:
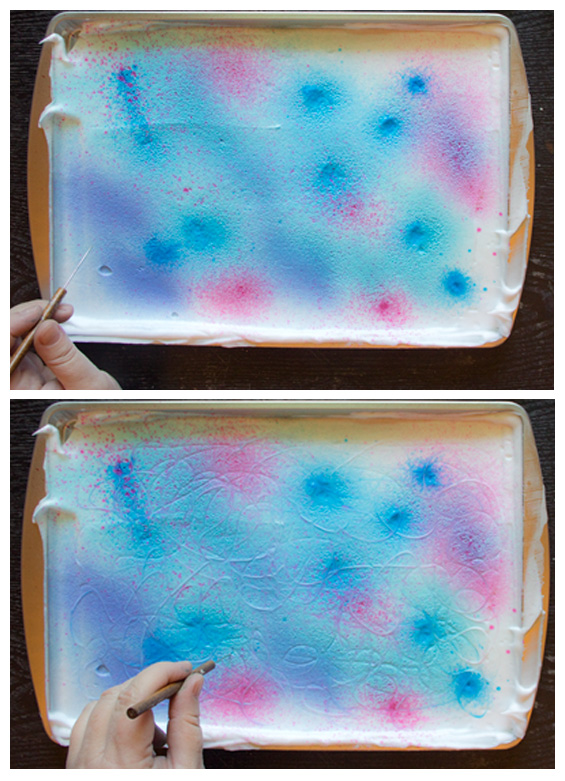
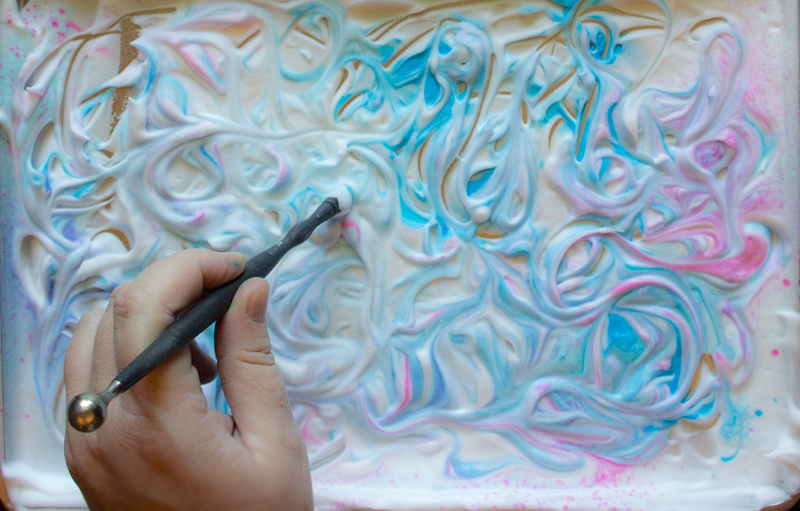
Using a pointed tool, trace patterns into the prepared shaving cream.
In this example, a fine needle tool was used (you could use a toothpick or skewer instead, or even combs). It creates very subtle patterning:
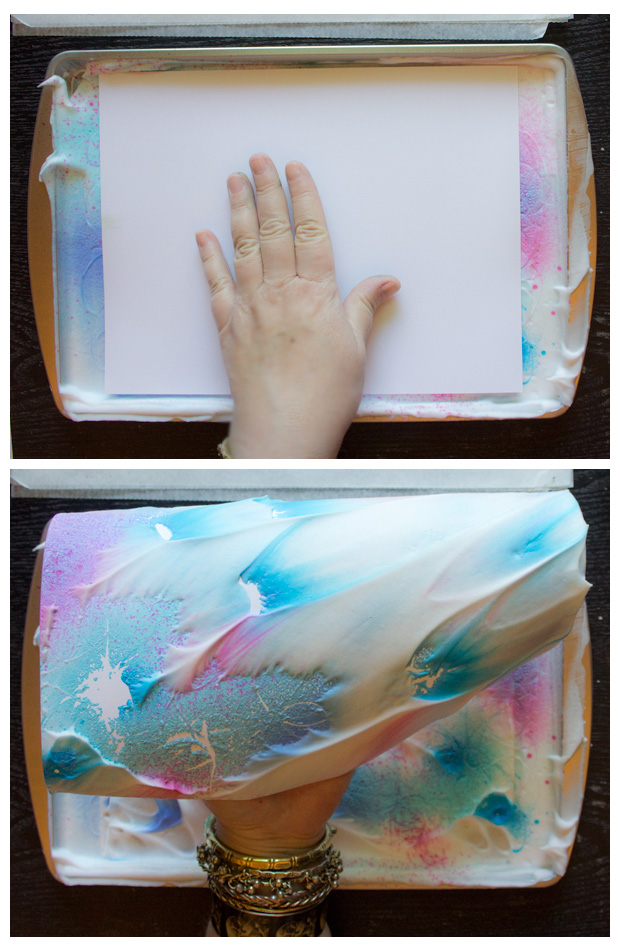
 Lay a sheet of white card stock gently onto the surface of your mixture, and press until the entire sheet has made contact with the foam for your shaving cream marbling.
Lift the paper away, carefully, and set aside, foamy side up, on a sheet of waxed paper.
Allow a few moments for the pigments to bond with the surface of the card stock, (30 seconds is quite long enough) then scrape the surface clean with a squeegee or similar tool.
Deposit the ‘used’ shaving cream into a waste container.
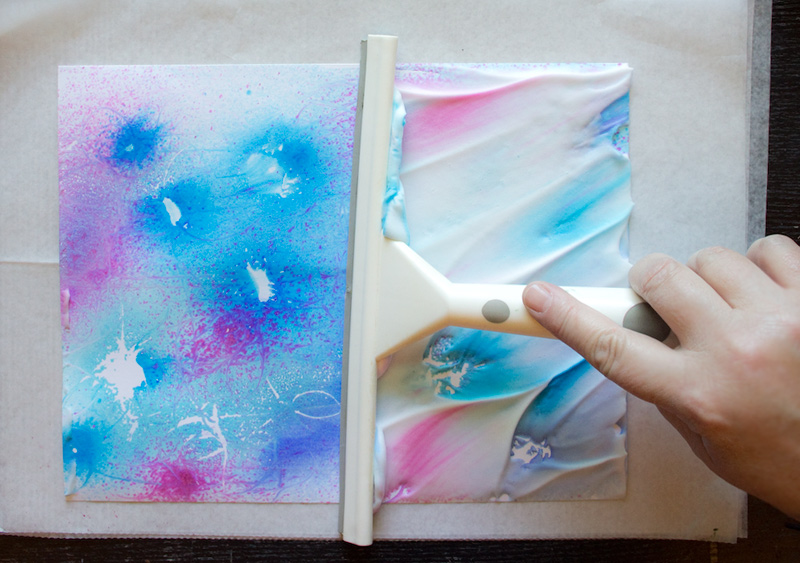
Set your first print aside to dry, and prepare for the next one!
Blend and smooth the surface of the tinted shaving cream that remains in the pan, using a spreading tool.
Spritz additional splashes of ink if you like.
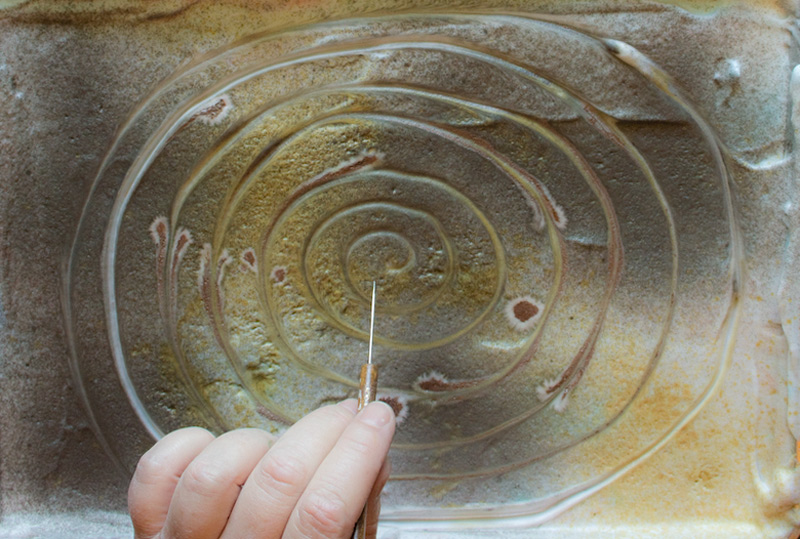
Experiment with different sizes of pointed tools.
Drag the colors into one another, creating a marbled effect:
Lift each print, pause for a few seconds, then wipe clean.
Set aside to dry, and carry on!
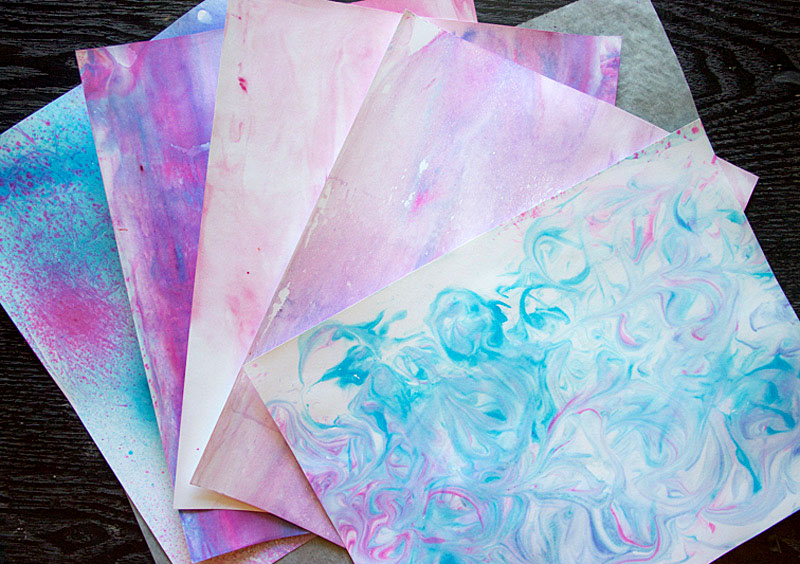
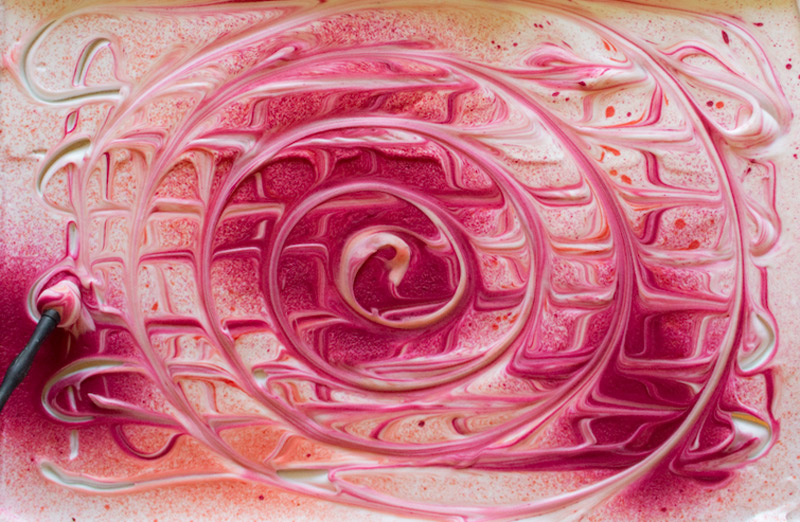
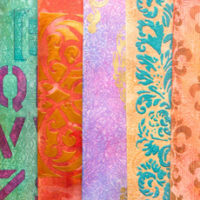
Experiment with different color and pattern combinations:
Play with spray inks of all varieties: bright, grungy, metallic:
How to create a “Skyscape” Effect:
This is one of my favorite uses for marbleizing Shaving Cream Prints!
Begin with an already tinted and smoothed layer of color.
Add concentrated Dawn and Dusk tones at one edge.
Use a pointed tool to swirl the colors together, just along the edge.
Smooth the swirled colors by stroking just that area with a credit card.

Once you’ve created several prints, place them onto waxed paper and iron them until they are dry and flat:
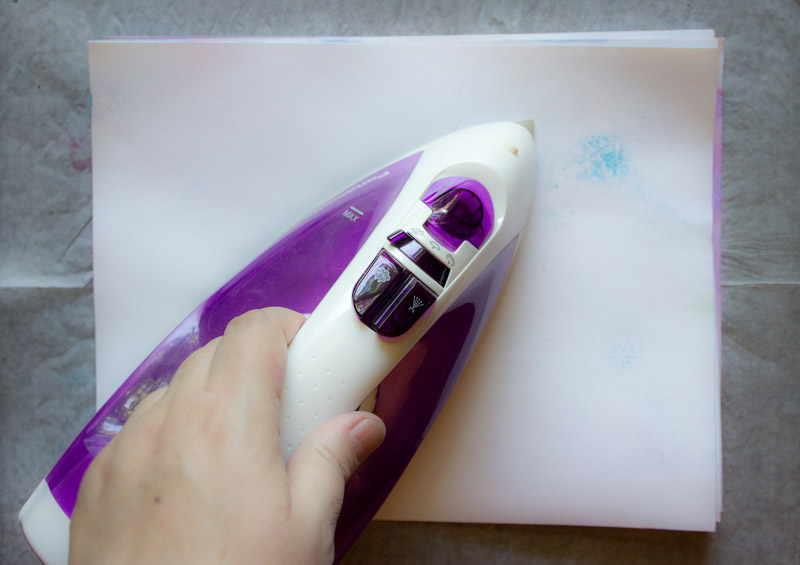
You now have a variety of colorful paper marbling papers, that can be used in many different ways:
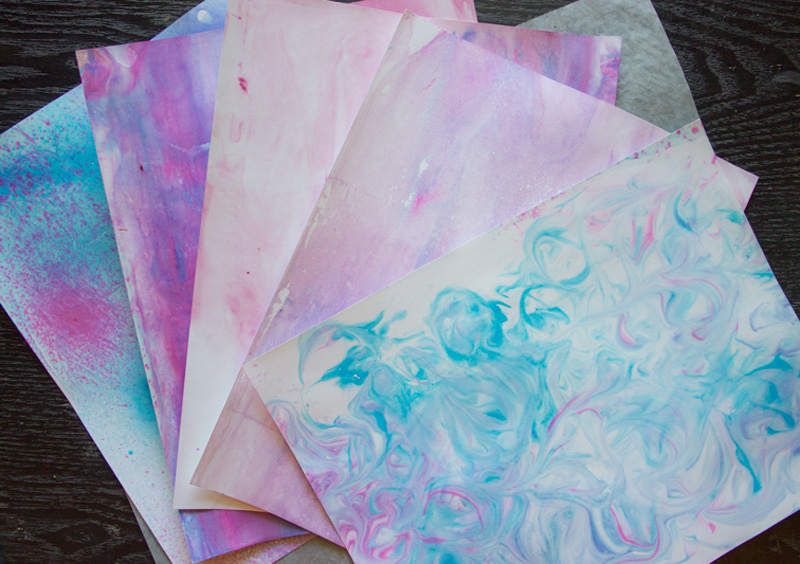
Ideas for using Your Marbled Papers:
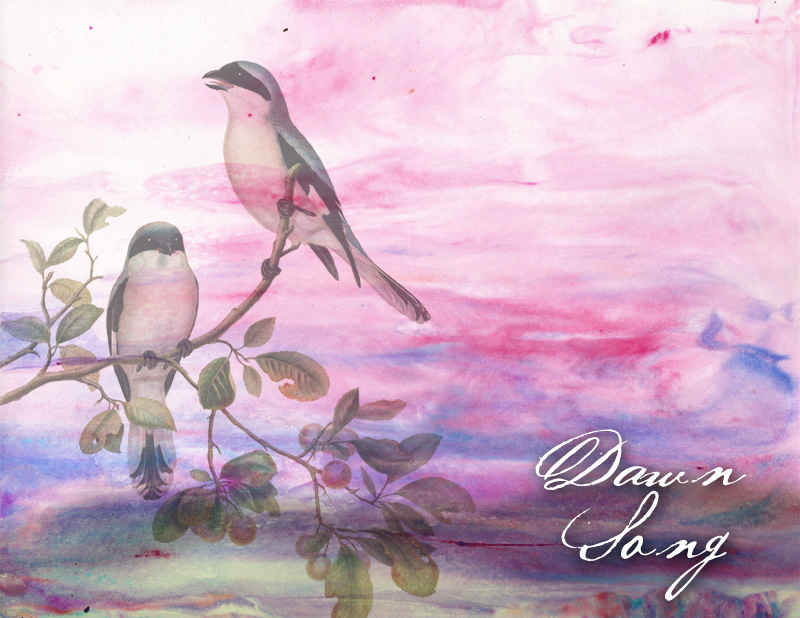
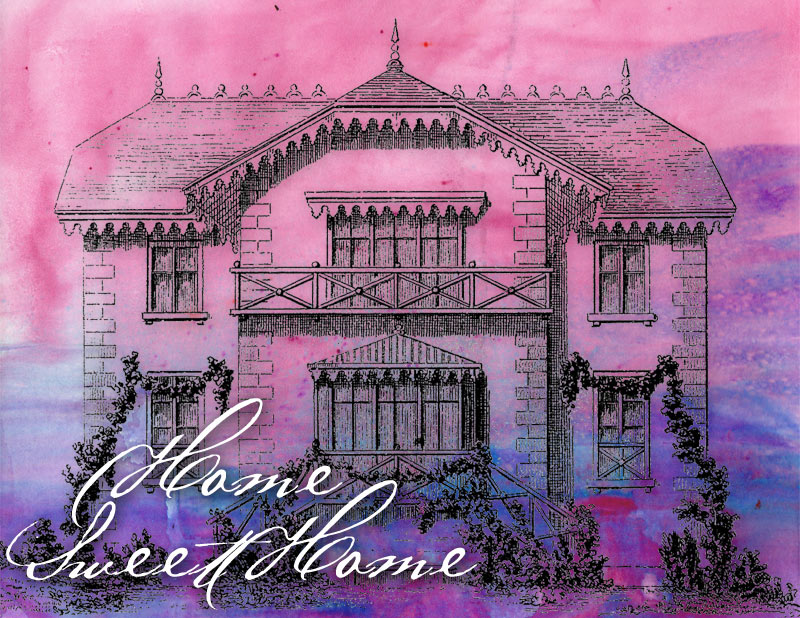
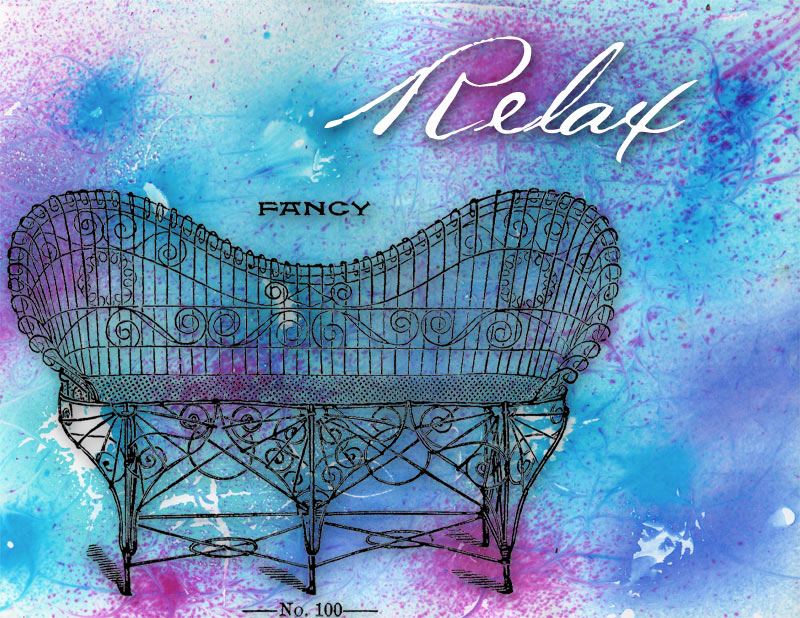
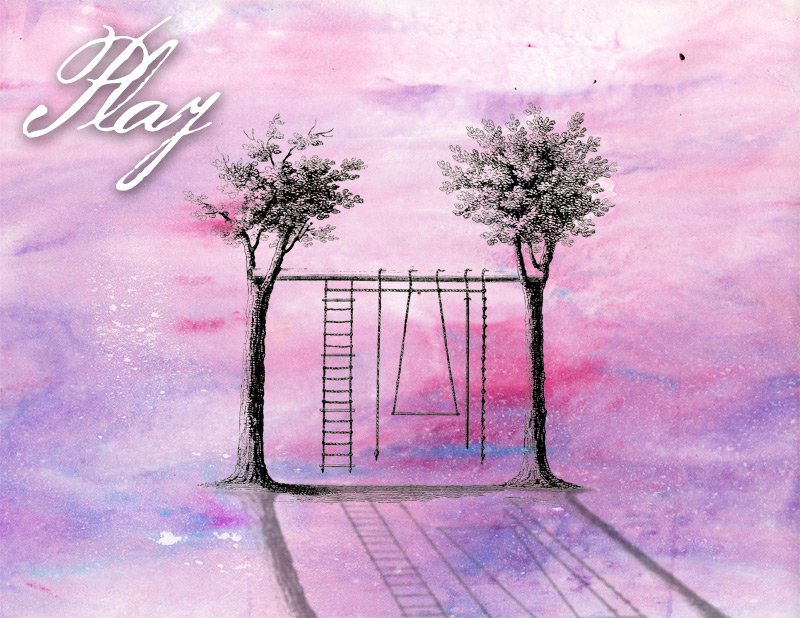
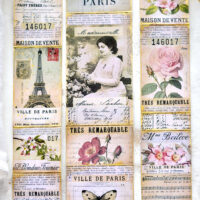
Create Digital Collages!
I like to scan the prints that I’ve made, then add text and Graphics Fairy Images via the computer. This results in ready-to-print artwork!
I hope you’ll create your own, but in the mean time, here are a few examples to inspire you.
Note: if you would like to use these collages, feel free to download copies by clicking on each image.
Source images are listed as linked text above each collage.
Love these gorgeous Antique Birds:
This Charming House is delicious!
…And this adorable Fancy Wire Settee!
Finally, how sweet is this Garden Swings Image?!?
Create Stunning Backgrounds:
Perfect for Card Making, Scrapbook Layouts, and Mixed Media Pieces wherever you want a pop of beautiful color.
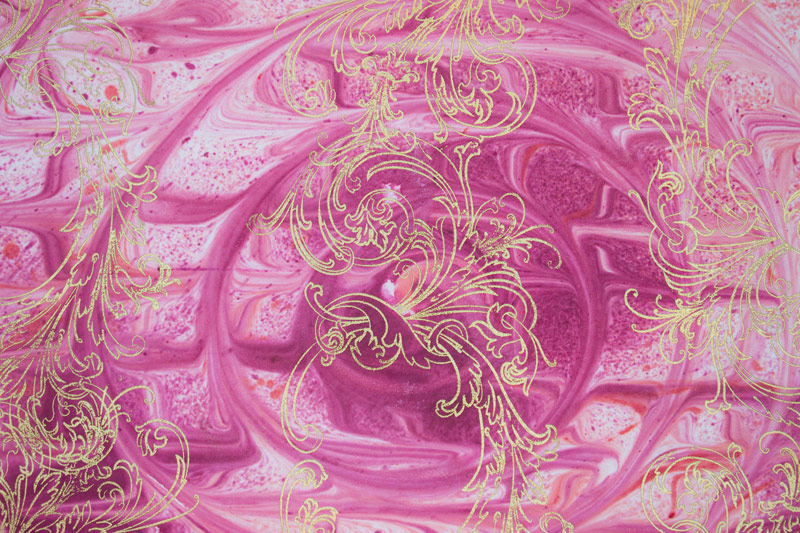
Heat Emboss your favorite Rubber Stamp images (like this luscious Tim Holtz “Fabulous Flourishes“ motif) onto the surface of your Shaving Cream Prints:
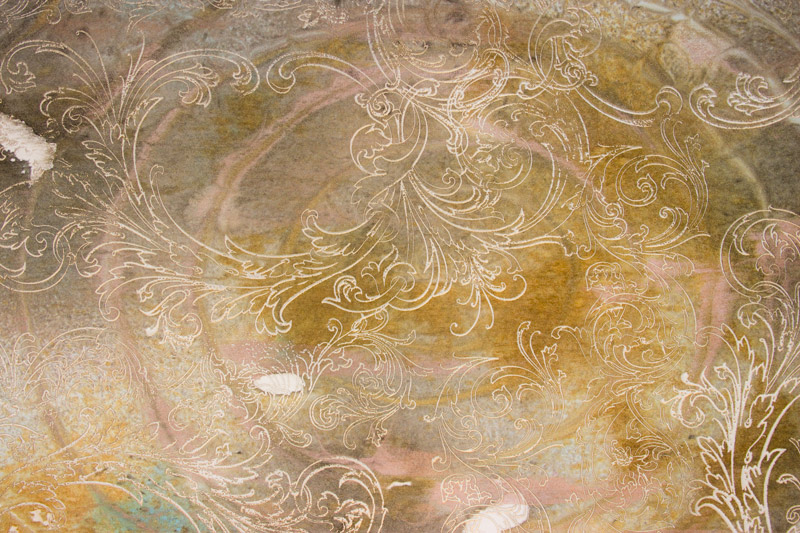
Adding another layer of pattern creates a sense of depth and richness:
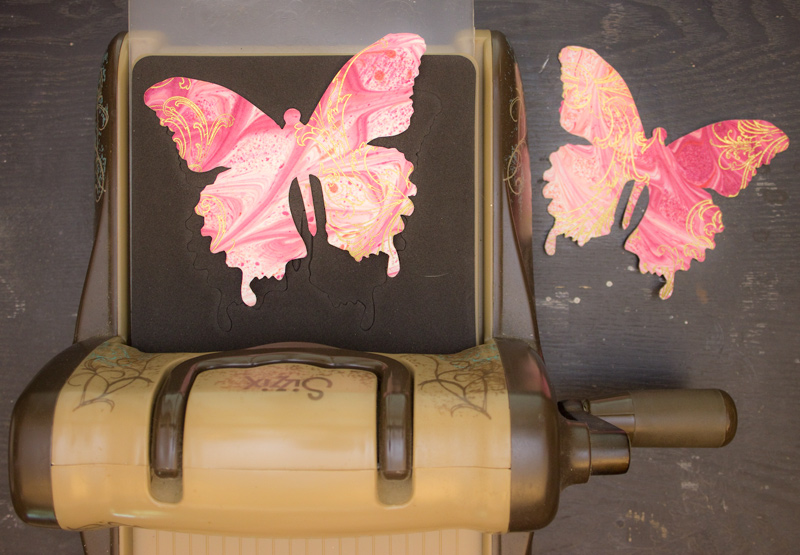
Use your patterned Shaving Cream Prints to die cut spectacular embellishments!
Here, I’m using my beloved Sizzix Bigz Die by Tim Holtz, “Layered Butterfly“:
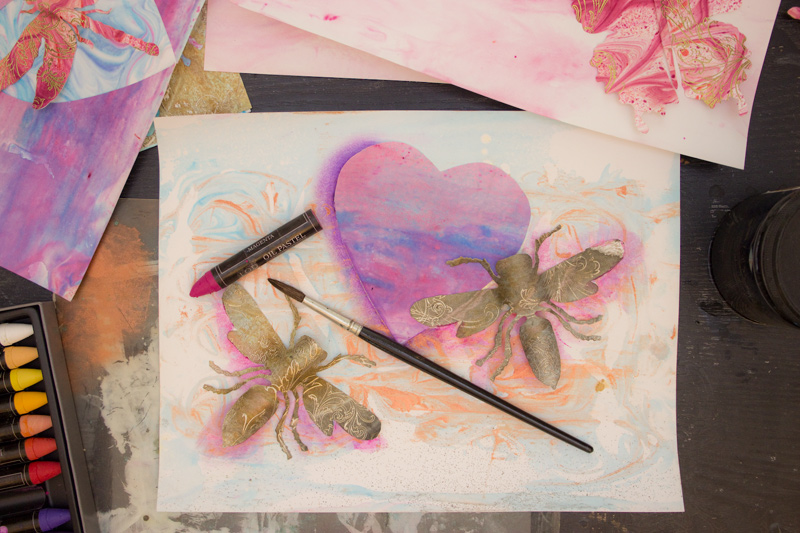
“Bee” inventive…cut multiples of the Sizzix Bigz Die by Tim Holtz, “Layered Bee“!
Then adhere the ‘negative’ over another Shaving Cream Print, using Aleene’s Tacky Glue:
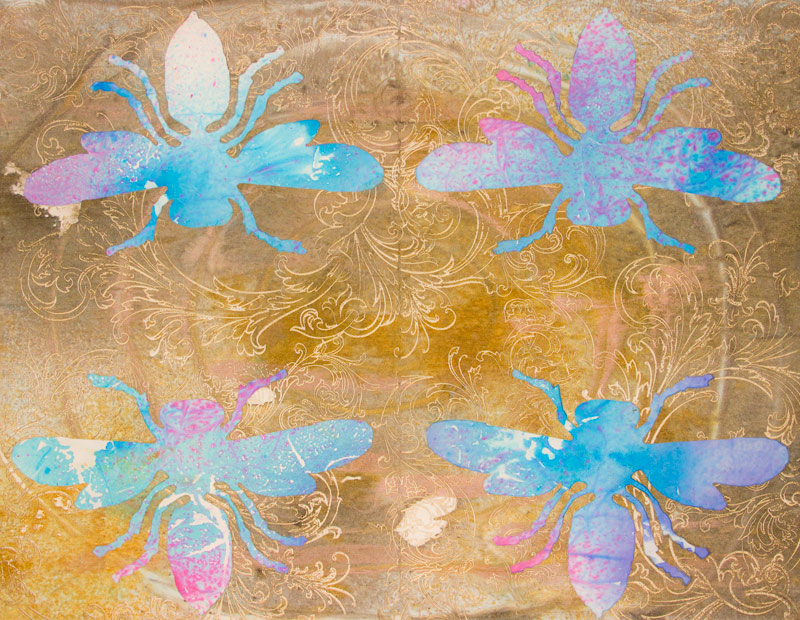
Adhere your die cuts on top of other prints, and add shading / deeper colors using Water Soluble Oil Pastels and a damp paintbrush:
Embellish further, using Stickles or any other shiny media!

Thank you for visiting The Graphics Fairy today! I hope you’ve enjoyed this exploration of this DIY Marbled Papers Technique and ideas.
Visit me at Thicketworks, any time you want to walk on the weirder side of crafting!
Until next time,
Heather ♥


Just Me says
You bring a whole new aspect to this technique! I had never thought of swirling the colors with something, I’ve always just put the ink (or even food coloring) down by splattering it and letting it blend as it wants to and loved that effect. Now I must go play with more shaving cream and paper!
Heather Tracy says
Yay! I’m so glad that you found a twist on an old technique, “Just Me”! Thank you for stopping by, and have fun!
Gigi Harlan says
How fun is that! Absolutely wonderful! Also thank you Karen for the ephemera I just downloaded. They will be perfect for a project I am working on!
graphicsfairy says
That is awesome Gigi, enjoy!!
mrs haynes says
dear heather I am a newbie, but being elderly does not stop me from my play time so I am going to have a go at the shaving cream technique, thanks for sharing it may be useful for card making what do you think?
Heather Tracy says
Dear Mrs. Haynes – I believe this technique would be a wonderful way to create backgrounds for card making! I use it for that, as well as many other things. Thank you for stopping by, and have fun during ‘play time’!
Tracey says
Oh my word This has Zadies name all over it!!!!! I need one of those Di-cut thingiemajigs!!
Thank you for your sharing heart! It’s precious!
Heather Tracy says
Hey Tracey, Zadie would have a blast with this…and YES, you DO need a Die-Cutting Machine! How on earth did you last this long without one? {hee hee}. Thanks, my friend!
Kathleen Miller says
I’d never heard of this technique before. Thank you for introducing the art to me. Your work is GORGEOUS!
Heather Tracy says
Hi Kathleen! Yay! I’m so glad you stopped by – you’ll have fun with this one 🙂
Deanne Young says
Always in “the fun” when receiving your posts to my inbox!
Rupa says
As always, you make the most mundane of things look gorgeous!! It’s one thing to make the prints but it’s another to cut butterflies and embellish them etc. The final projects with butterflies are so beautiful. You are always so creatively pushing the boundaries 🙂
Heather Tracy says
As usual, Rupa, you pin-point the aspect of the process that holds the most excitement for me – turning ho-hum materials into something special. Thank you!
Noreen says
I love this colors and the way they play together! Thanks for sharing this fun technique.
Paula says
Well I’m certainly going to try this project! It’s fun with beautiful results. Thanks for sharing your amazing talents…we appreciate you!!!
Heather Tracy says
Hi Paula! You’ll have fun…thank you for your kindness, my friend.