Mixed Media Creation
Hello, Graphics Fairy friends! I’m Diana from Dreams Factory and I’m really happy to be here once again, sharing a fun project with you. I’ll show you how to make the most amazing Mixed Media Creation. We’ll be making some beautiful Antique Wax Paper Labels using a DIY Wax Paper Technique!
This is a super exciting experiment because we will not use the regular wax paper that we all know, but instead we will actually create our very own! Yes, you’ve heard it right, we will be making our own antique wax paper for our Mixed Media Creation! That means using regular paper and melting our own wax.
You will see how easy but also complex this technique is and how it will give you again, like many of my projects, the chance to experiment. But also to have fun! Here is a fair warning though – you will become completely obsessed with this technique and will probably just want to turn everything into antique wax paper with a passion! You’ve been warned get ready for inspiration!
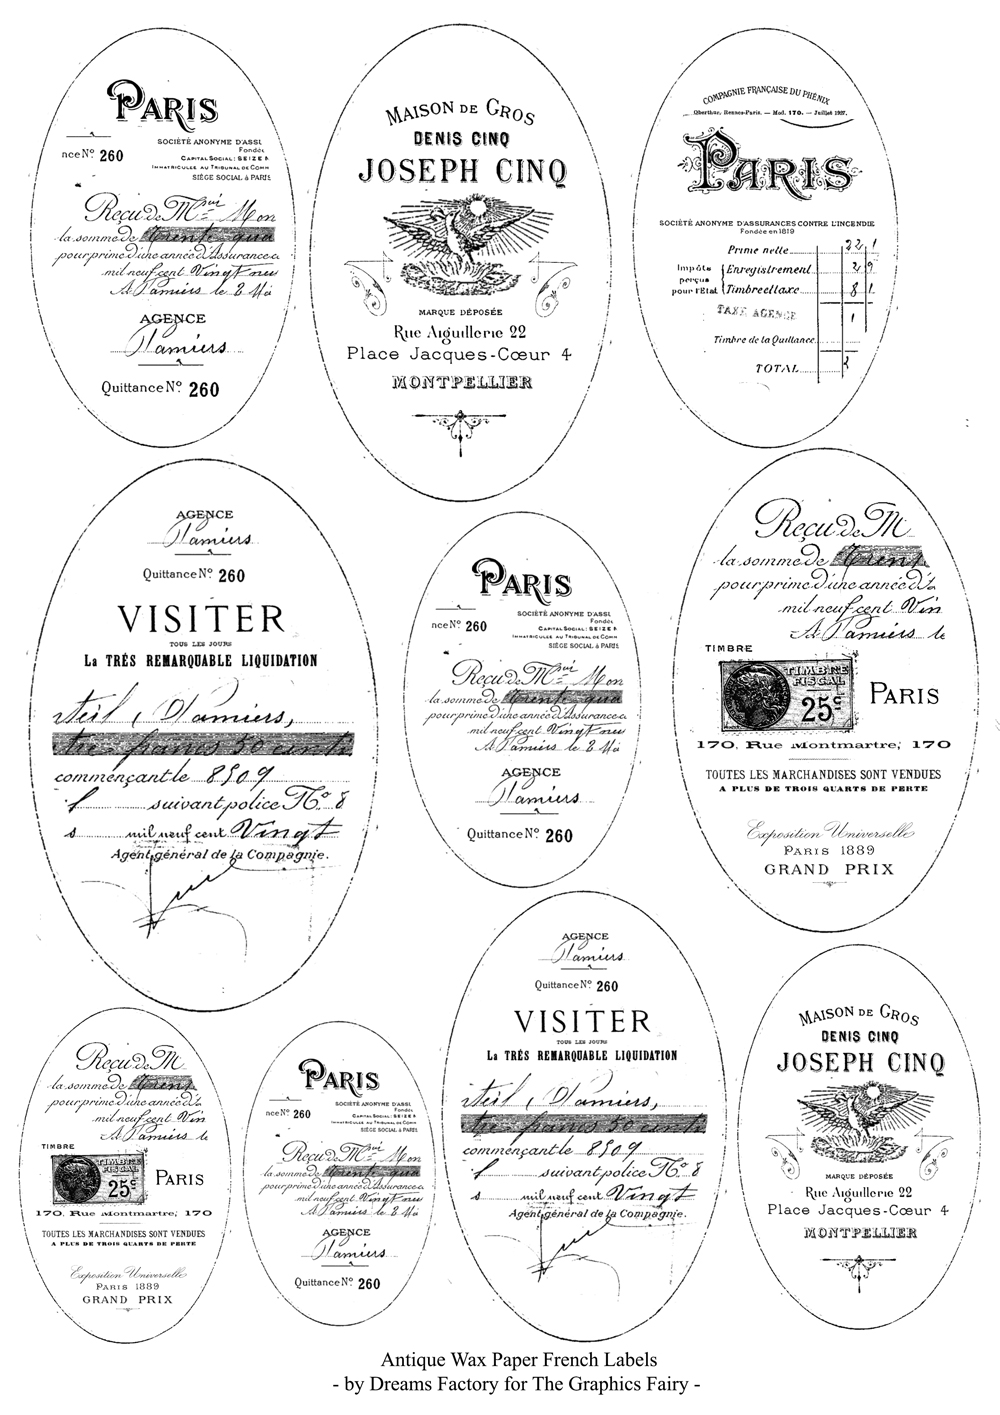
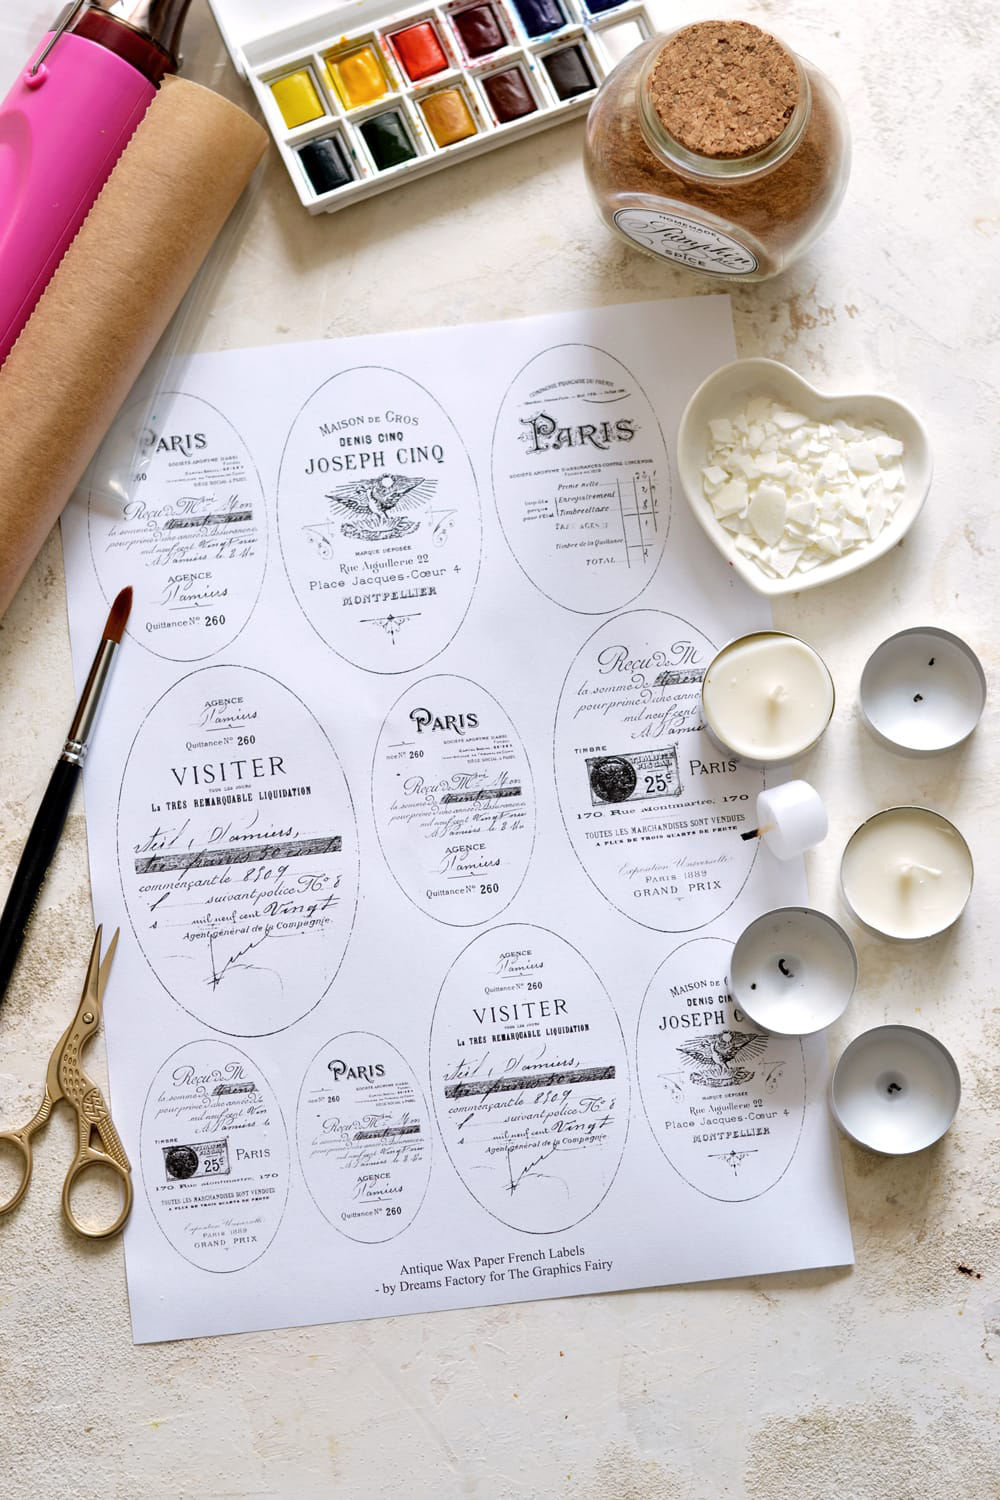
I had this project in mind for a while and I thought some ‘tres chic’ oval French ephemera labels would be perfect for this occasion. They come in different sizes – you’ll be able to download and use them as you wish. Highly adaptable as always!
Printable For Mixed Media Creation
—-> Click HERE to Download the Full Size Printable PDF <—-
Once you’ll learn all the steps, you’ll be able to apply all these techniques to any of the free printables that I shared so far and basically to ALL the images from The Graphics Fairy! No matter how small or large that image is!
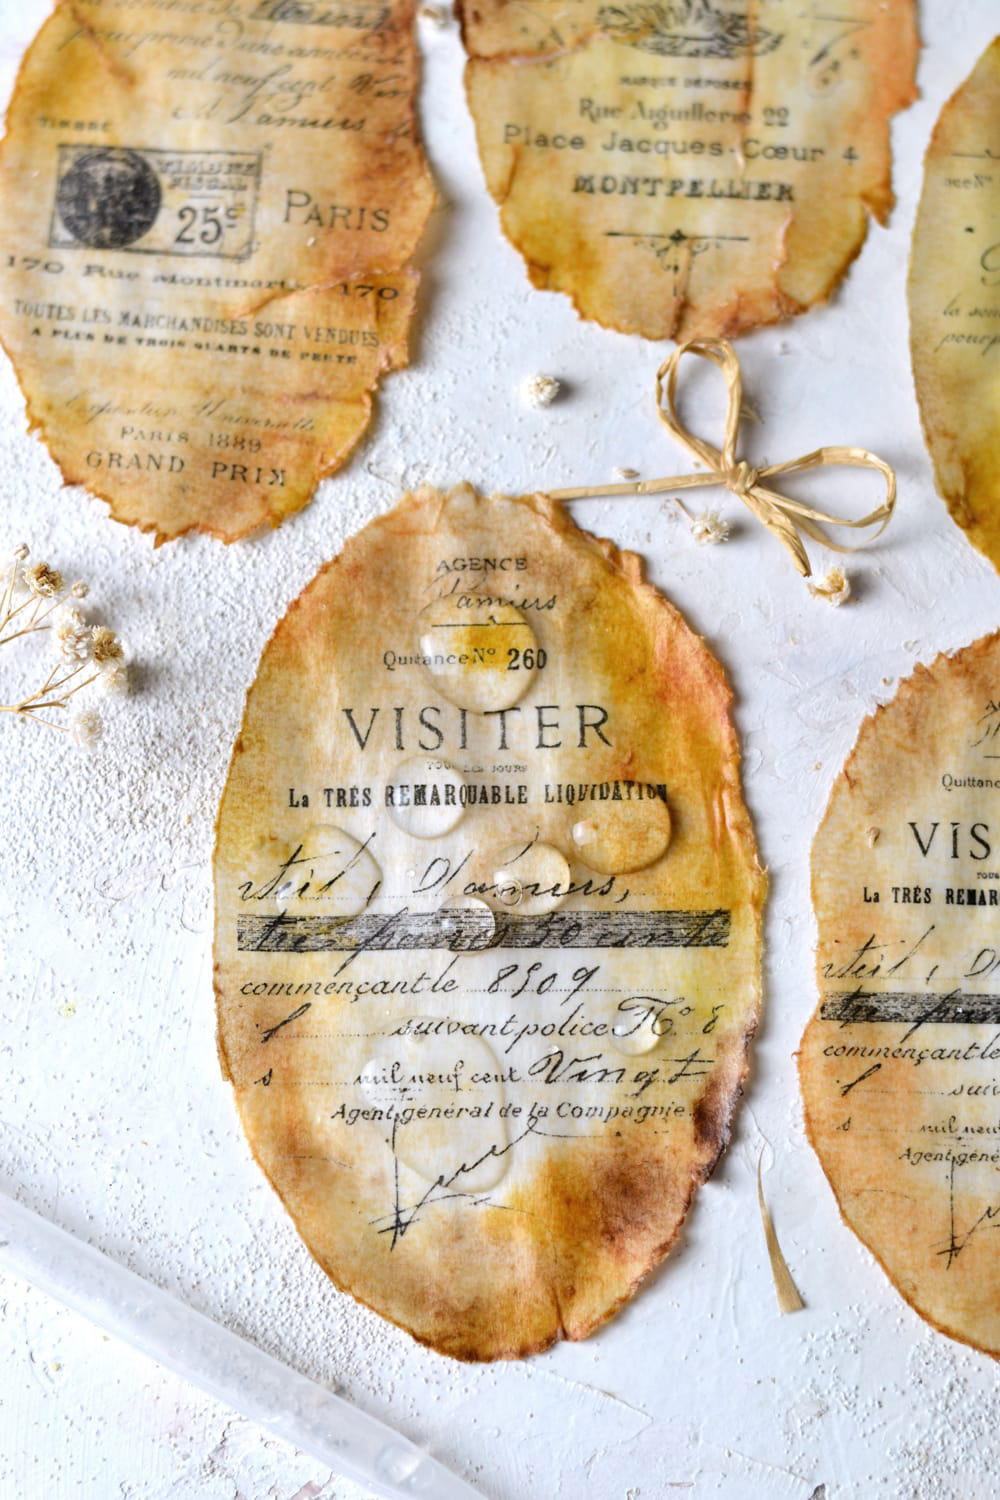
Want to hear the best part of this whole antique wax paper labels experiment? Besides the obvious fact that you’ll be creating something truly amazing and unique? 🙂 You will be able to completely WATERPROOF your paper! The melted wax will soak into the paper and will create a perfectly sealed surface after drying!
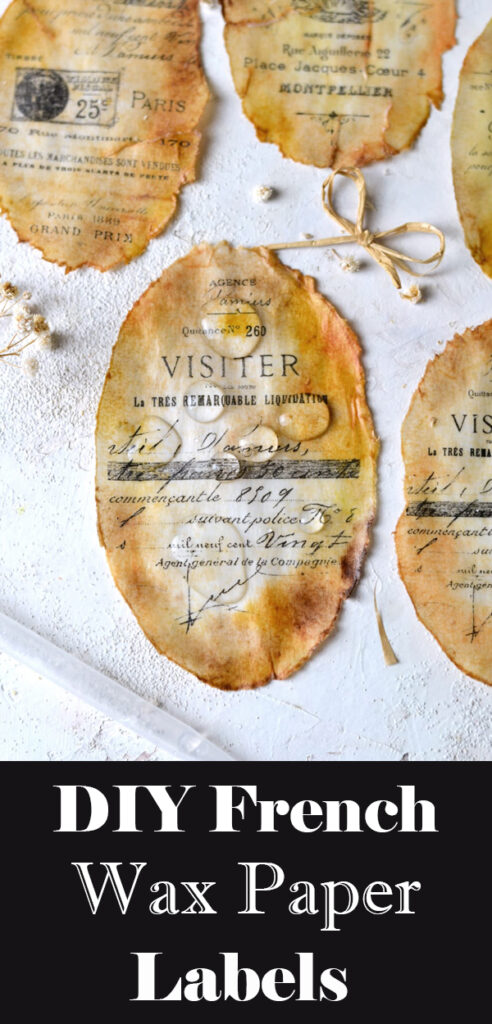
See how the small drops of water just sit on top of this label, just minding their own business and not soaking into the paper? 🙂 I actually let them sit there for a couple of hours just to see what happens and guess what – they were there even after all that time! How amazing is that!?
What kind of Wax for Mixed Media Art?
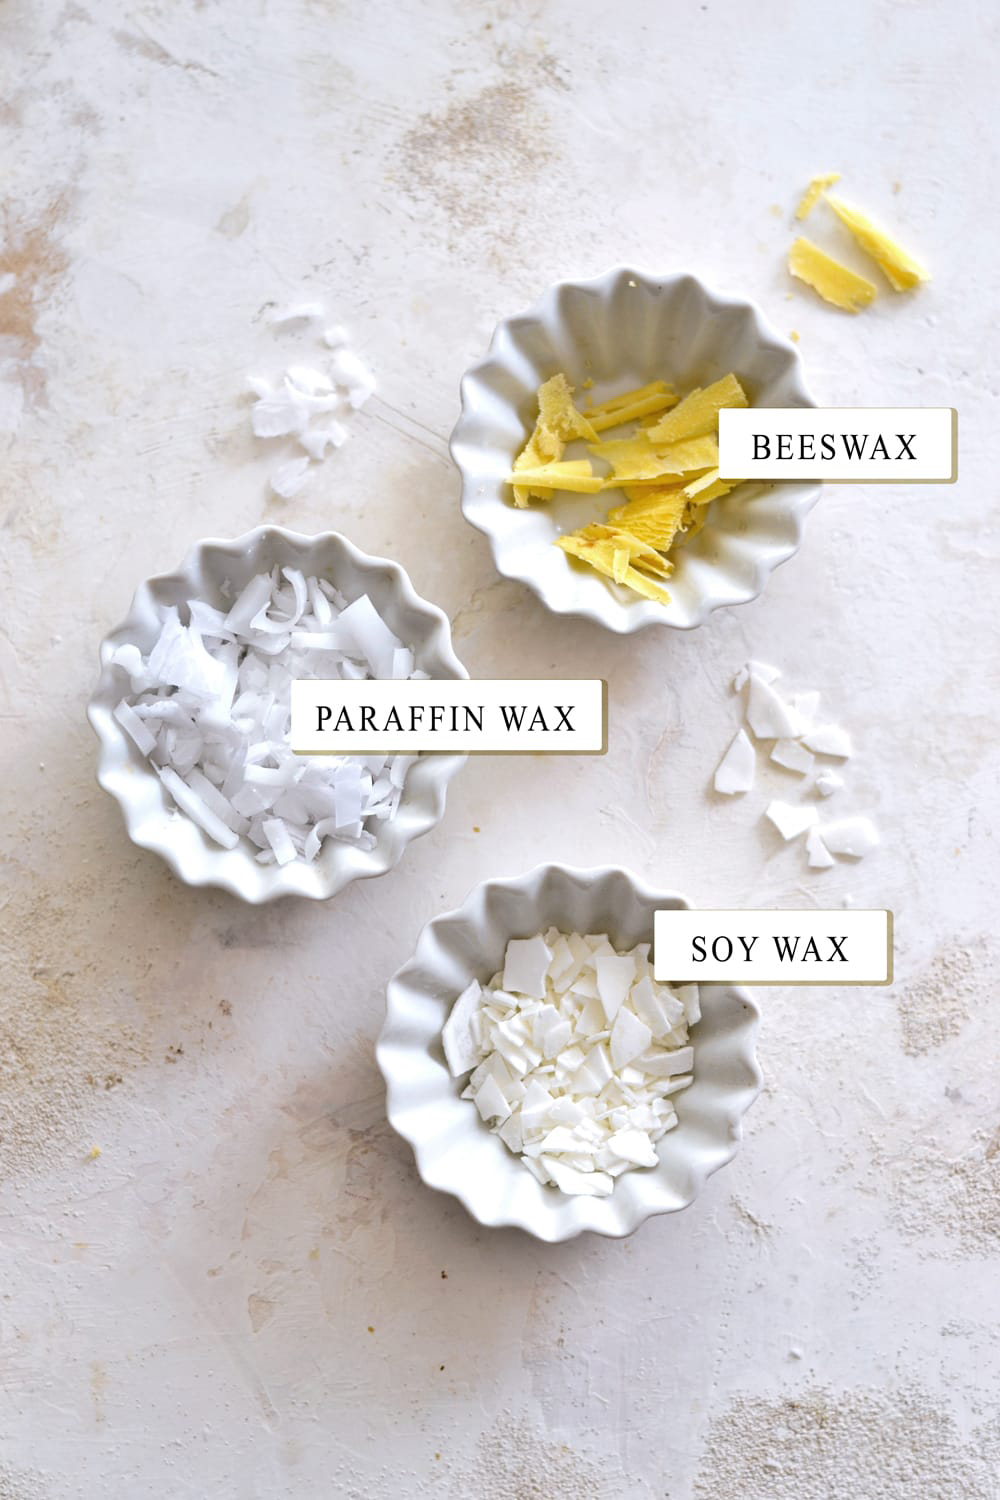
Before we jump right in, let’s talk wax for a second. I had 3 types of wax around and I thought it would be fun to include them all in today’s project, just to give you some ideas on what you can use. Chances are you already have at least one type of wax from my list in your home right now so you’ll be able to make this project in no time!
- Paraffin wax is actually regular candle wax – this might be the most used and probably the one many of us already have at home. It can be white, but can also be found in many other different colors. The white one will not affect the color of your paper when melted and applied, but the colored one might, so make a few tests before using any of them. You will need to grate it or cut it into really small chunks before using, any leftover candle pieces will work just fine. Some people have concerns about the chemicals that might be added while producing the wax, just use the two other healthier alternatives if that is a concern to you.
- Soy wax is an all natural free of chemical wax and can be usually found in the form of flakes. It will not alter in any way the color of your paper after being melted and applied and can also be combined with your favorite essential oils to give your paper a beautiful scent. Win-win!
- Beeswax is another all natural free of chemical wax and can be found in the form of pellets or bars. It can be white or yellow. The white one won’t alter the final color of your paper, but the yellow one will add a yellow hue after melting and applying. This last part can be used as an advantage when creating something antique or vintage, the subtle yellow wax can add more interest to your work.
Supplies for DIY Wax Paper Technique
- regular white paper
- laserjet printer
- scissors
- watercolors (or highly diluted acrylic paint) & a brush
- a jar / other recipient for water
- a plastic sheet or a non absorbent surface (to protect your working area while using the water and the paint)
- wax – regular candle scraps (paraffin) OR soy flakes wax OR beeswax (choose your preferred type)
- parchment paper
- a heat gun (or a hairdryer)
- the surprise element – pumpkin pie spice (or cinnamon)
Tutorial for Mixed Media Creation
To make things easier, I’m organizing this whole make your own antique wax paper experiment into several steps:
I. Tearing and preparing the paper
II. Painting the paper and creating the distressed antique look
III. Preparing the wax
IV. Melting and applying the wax
V. The surprise (almost forgotten) element
Let’s get started!
How to make antique wax paper labels – Tearing and preparing the paper
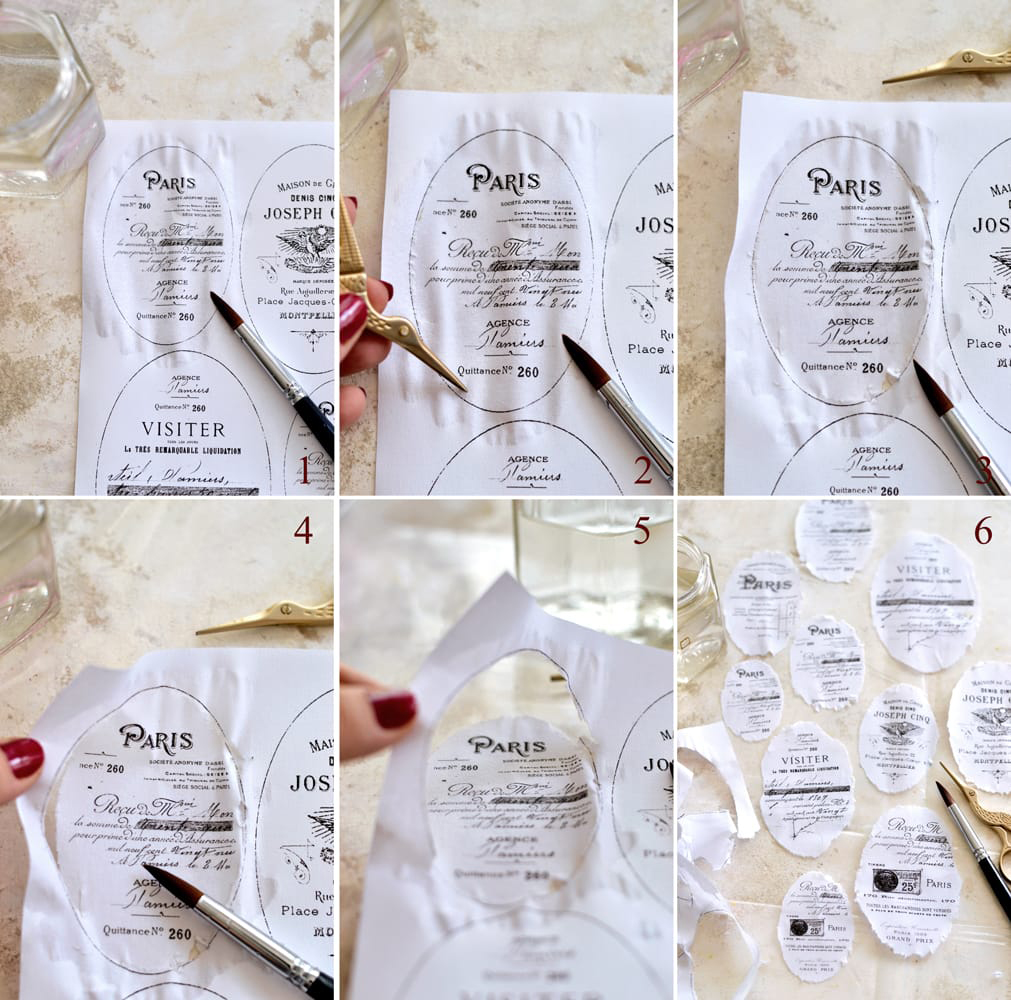
Because I wanted to give my labels a more worn, organic look, I decided to tear each label instead of using scissors to cut them! We will be using water to damp the paper and some scissors to trace the oval shape of the labels, it’s one of my favorite tricks. Now it’s the time to protect your working surface, things will get soaking wet! 🙂
1. Start with the first label and brush plenty of water all over its surface – inside and outside its oval frame.
2. Use the tip of your scissors and following the oval shape of the label, trace a parallel oval shape inside the black border. The trace will be more or less visible, but it is important to go all around.
3. The tip of your scissors might tear the paper in some places, depending on how wet your paper is, but that’s OK!
4. Start to gently and gradually pull the outside excess paper with one hand, while pushing the inside of the label on the table with your brush with the other hand. Add more water with your brush to the edges to help the paper tear more easily.
5. You will basically lift the outside paper while leaving the label on the table. You will get a beautiful torn effect edge on your label and you will completely remove the black border. If you have some black border traces left, just scratch them off with your nail, they will come off easily. Then you will have to gently pull your new label from the table and put it somewhere to dry. The paper will be fragile at this point, so handle it with care.
6. Move on to the next label, then to the next one (and so on) and follow the same steps.
II. How to make antique wax paper labels – Painting the paper and creating the distressed antique look
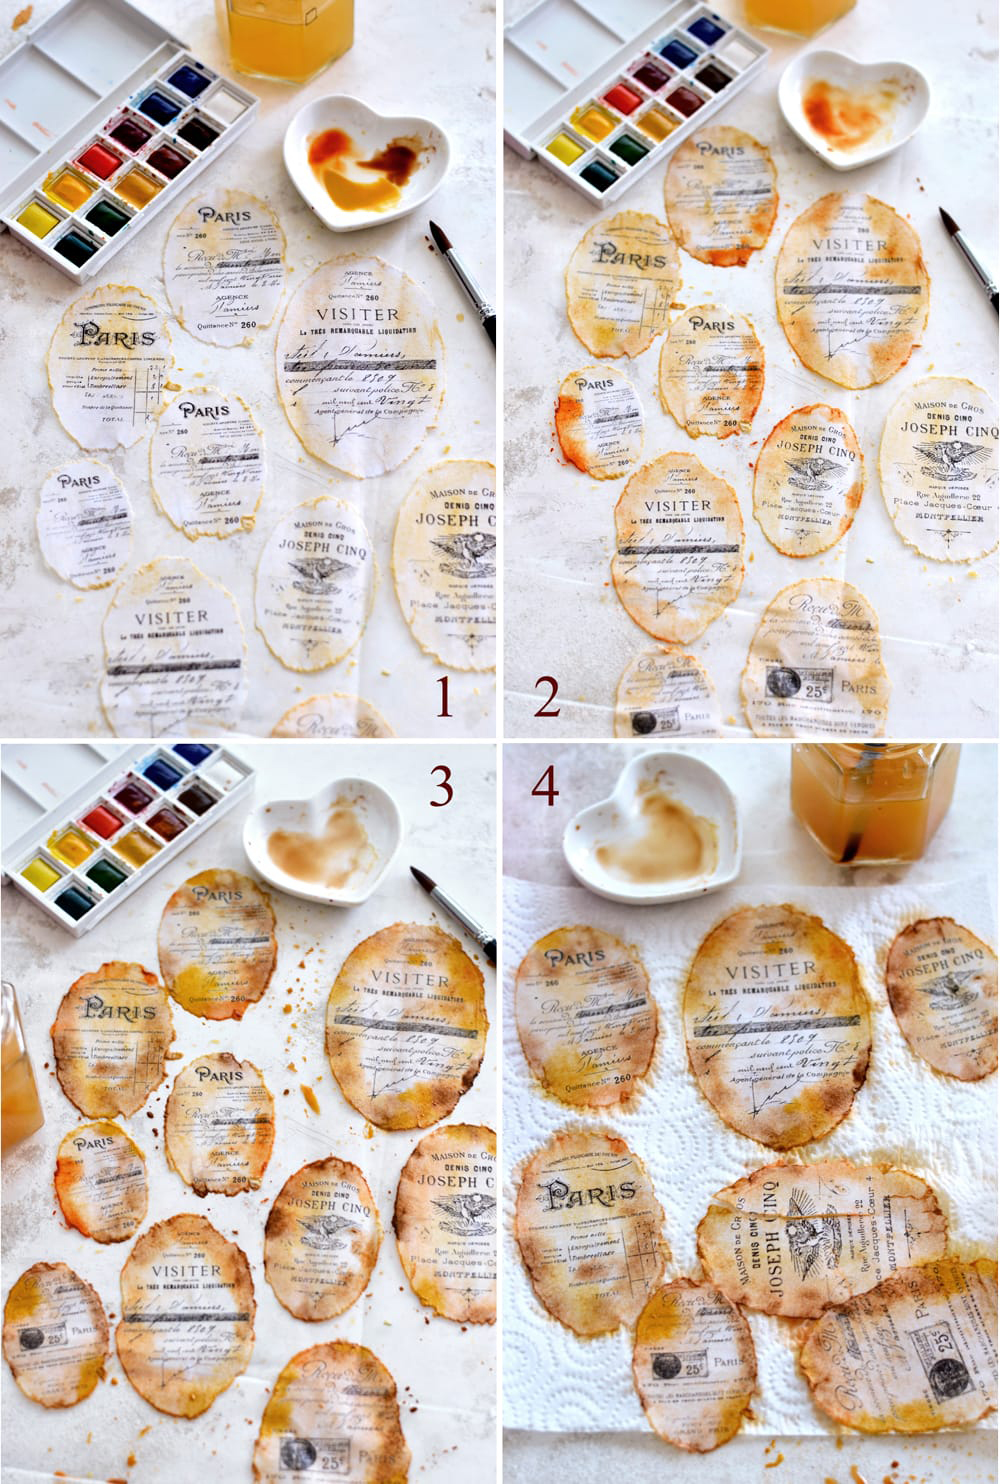
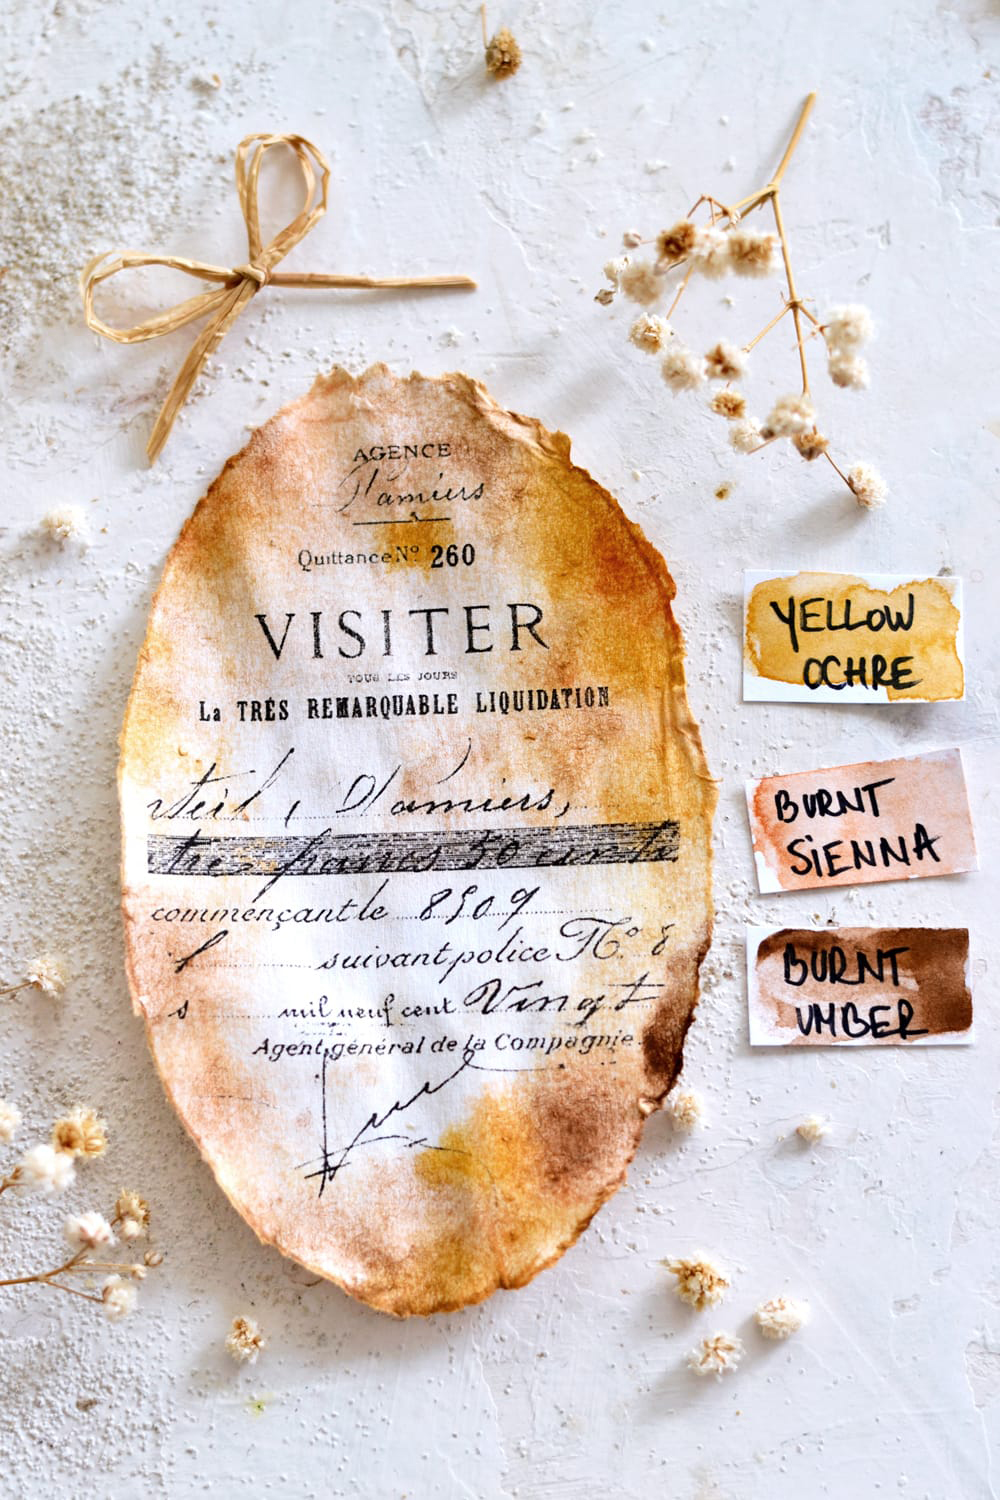
I used watercolor paint for this part, but you can also use highly diluted acrylic paint to “dye” your labels. To get a beautiful antique look, I used Yellow Ochre, Burnt Sienna and Burnt Umber. The paper needs to be soaking wet to allow the watercolors to do their magic. Make sure you are still using something to protect your working area!
1. I started by brushing a little bit of Yellow Ochre and a lot of water all over the surface of the labels to completely cover it with the diluted paint and to remove the white of the paper. Then I added small brush strokes to the edges of the labels, using more of the same color.
2. I continued with the Burnt Sienna and focused again on the edges, adding some color here and there.
3. The Burnt Umber completed the whole look, I added it sparingly mostly on the edges again, the paper started to look beautifully aged, almost burnt on the edges. You can come back and play with any of these colors by adding more layers to create lovely antique and ‘rusty’ watercolor effects. I focused mostly on the edges while leaving the center of the labels more visible, creating a chic vignette effect.
4. You can gently peel the labels and put them on some paper towels for a quicker drying.
To add more character and creativity, you can even tear the labels in several places, while still wet, the torn paper will start to look more and more antiquefied- totally just invented this word right now!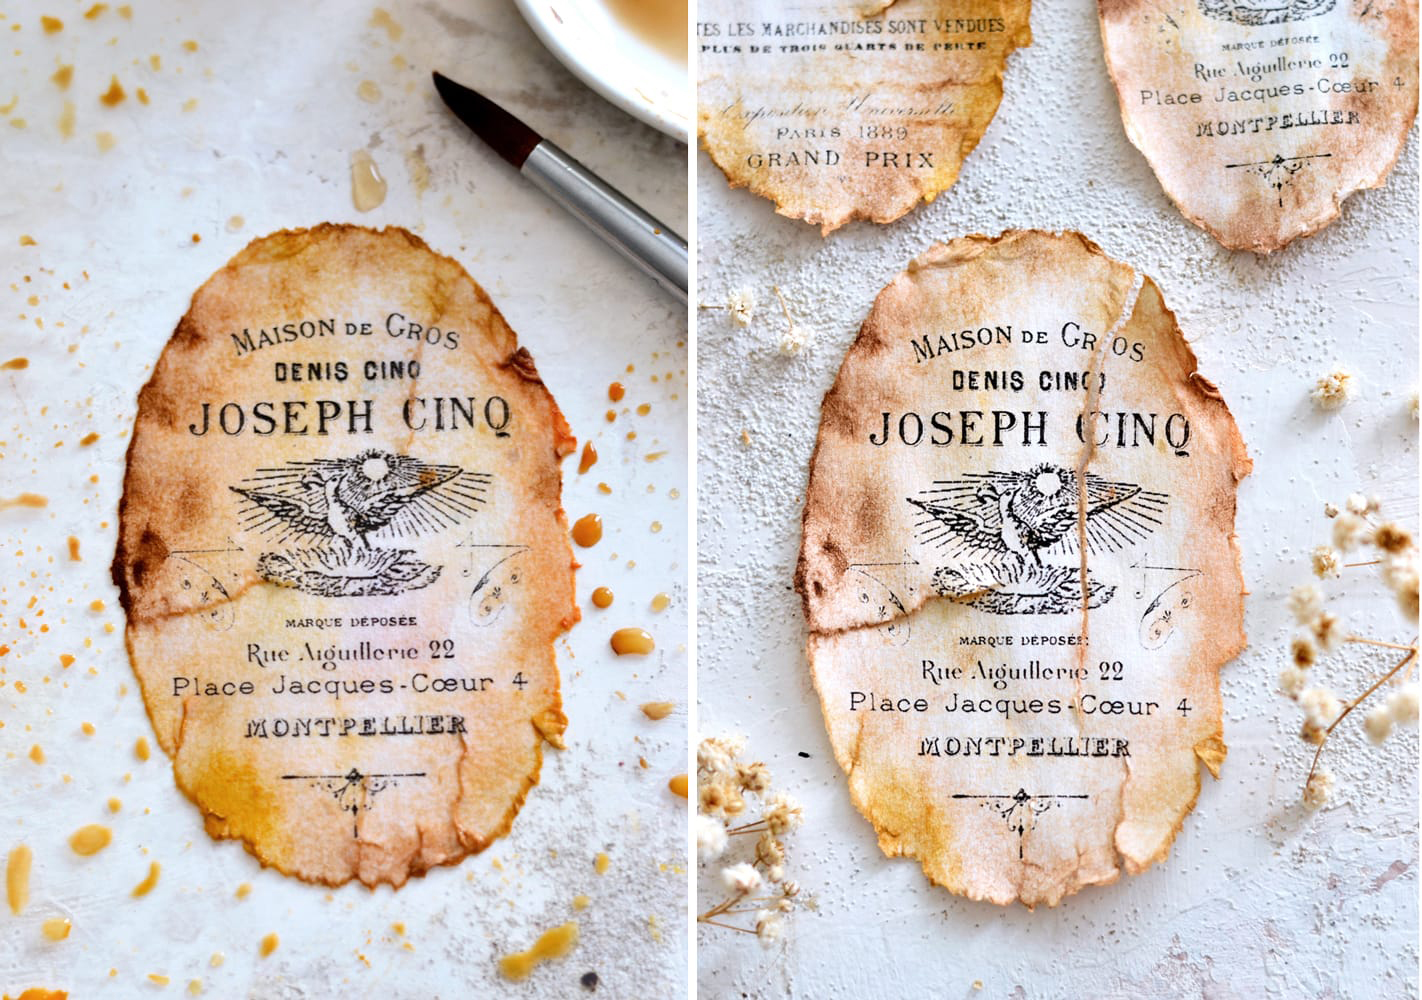
This is how my labels looked after drying – you can air dry them or use your heat gun to speed things up.
Can you believe how perfect the colors blended together?! Each label is truly unique and has its own personality, don’t you think? I really loved them all!
Here are my 3 stunning colors again – Yellow Ochre, Burnt Sienna and Burnt Umber in the form of watercolor swatches, just like the ones I used on my last project – DIY Vintage French Clock faces. I simply adore this color combo, a perfect match for vintage charming projects like this one!
III. How to make antique DIY wax paper labels – Preparing the wax
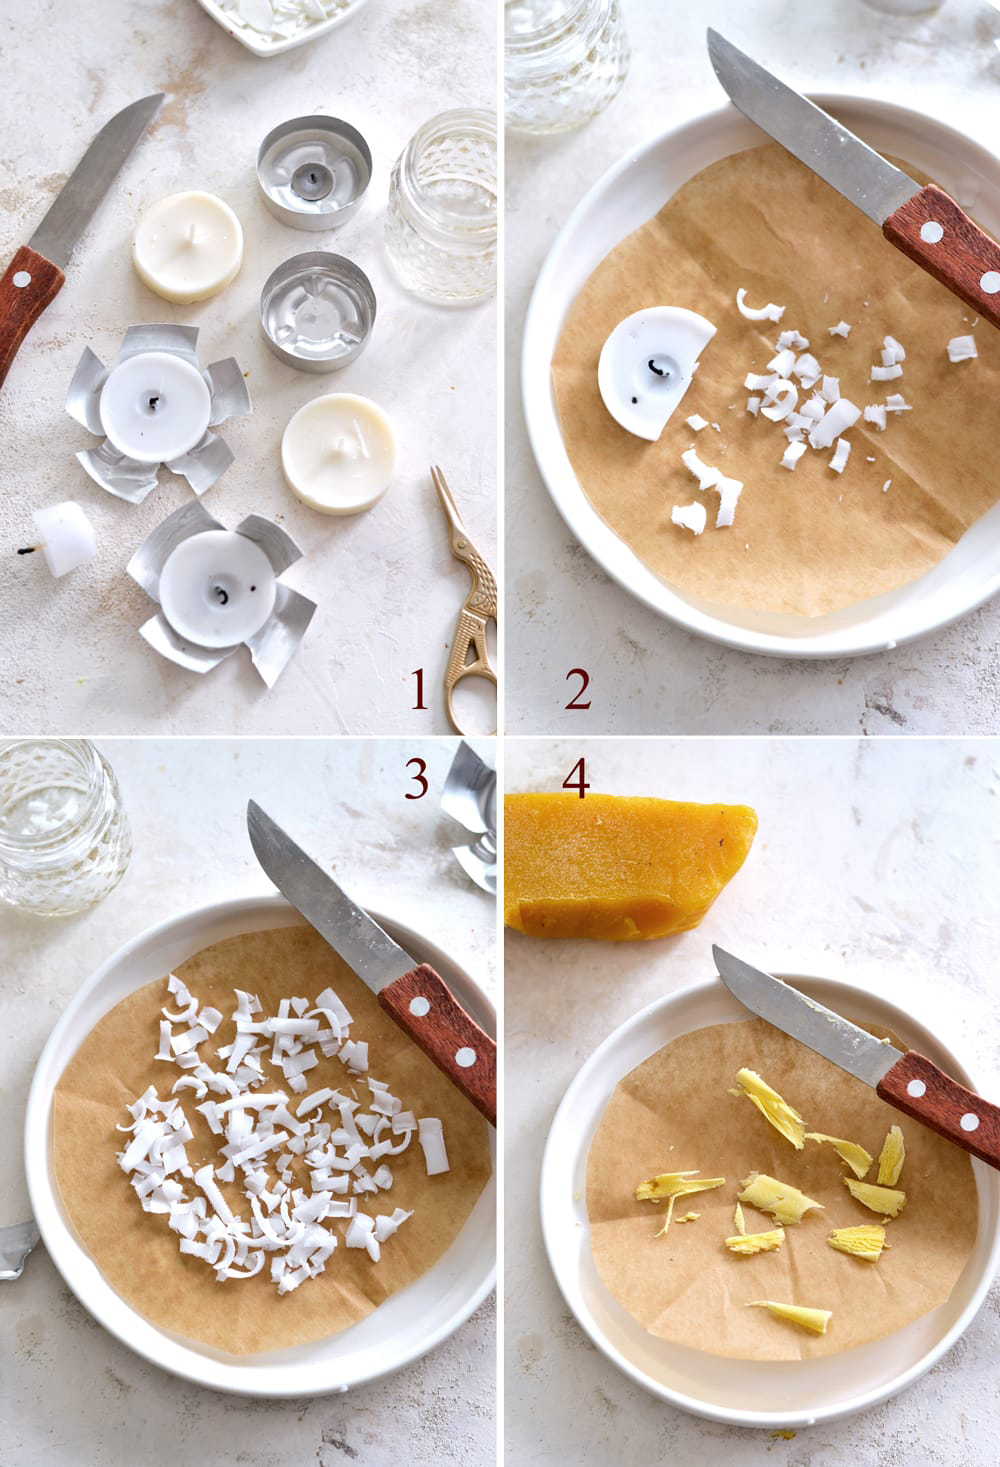
At this stage you will need to decide which wax you want to use for your antique wax paper French labels. If you use paraffin wax, gather new candles or all the scrap candle pieces you can find around.
1. Tealight candles (new and old) would work great, but really anything that you have around.
2-3. I shaved my candle scraps and cut them in small chunks using an old knife, make sure you cut them really thin and small, this will make your life so much easier when actually melting the wax. You could also use an old grater, if you have one available.
4. I also shaved a few pieces from my beeswax bar, this one was much more denser and harder to cut, just be careful when using your knife!
IV. Mixed Media Creation – melting the wax
At this stage I will show you the steps for the paraffin wax, but I basically followed the same procedure with the other 2 waxes as well. The beeswax was the hardest to melt and the most hot one, just be careful when handling it. The point for this step is to completely cover the paper in melted wax so that the wax can soak into the paper . The paper will look oily at first when the wax will be in a liquid form but it will harden and will create a perfectly sealed surface after drying.
1. Start by cutting a piece of parchment paper to create a foldable protective cover. You can use a plate or a heat resistant surface underneath, if you want (I didn’t and it was fine).
2. Place the first label inside the folded parchment and sprinkle some wax all over the label’s surface. Don’t be tempted to add too much wax at first, you will only need a small amount for a label.
3. Close the folded parchment paper and start to heat the wax through it. Move your heat gun around (you can also use a hairdryer) so you will gradually melt all the wax.
4. Open the folded parchment after 20-30 seconds to check the melting point of your wax, the idea is to have a thin layer of melted wax all over your label. Close your folded parchment from time to time and move your finger on top, to evenly disperse the melted wax inside. Please be careful not to burn yourself! The melted wax will be quite hot, but you will still be able to handle it if really careful! You can add more sprinkles of wax if you see that your paper is not completely soaked. The whole surface of the paper needs to be completely saturated with wax. Because you will have a thin layer of wax, the wax will start to harden quite quickly. Don’t worry if that happens before you are completely finished, just can use your heating tool to heat the surface and melt the wax again. And again, until fully soaked and satisfied.
5. Flip your label to also check it’s back, you will see that even though we haven’t added any wax on the back, that surface will be completely soaked in wax too.
6. While the wax is still melted, use a paper towel to remove any excess. We only need the wax that has already soaked into the label, so remove any other chunky bits that you might have on top. Directly heat the surface of the label again – this time without folding the parchment paper over it – and you will be left with a perfectly smooth surface. Put the label on some clean parchment paper to dry and move to the next label, until finishing them all.
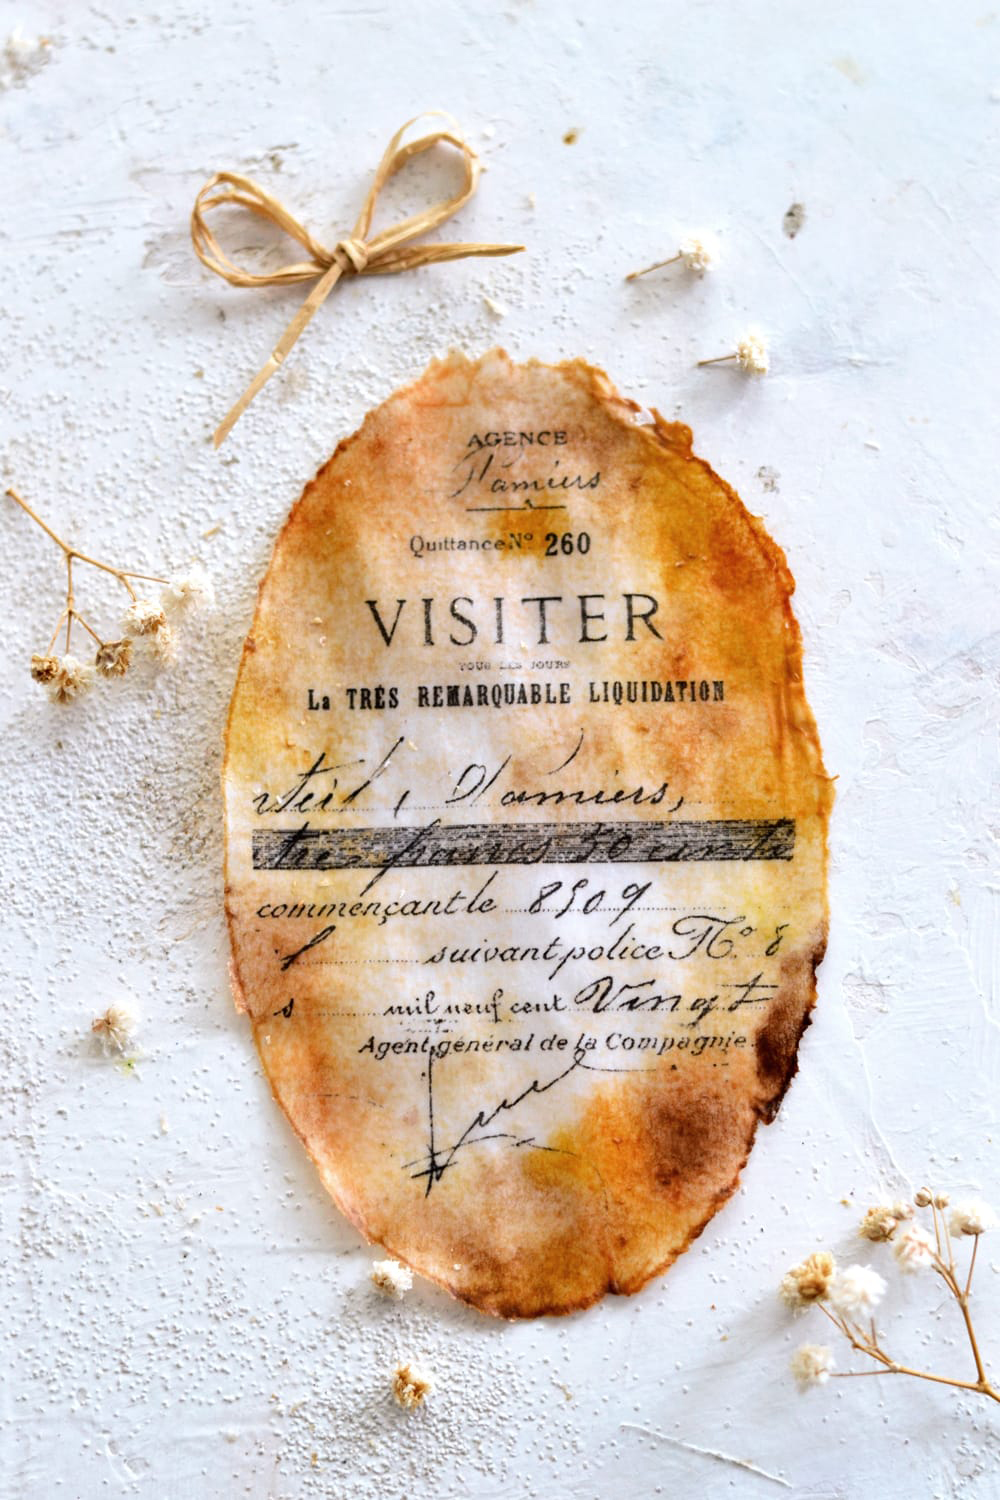
Your first gorgeous antique wax paper French label will make your heart … melt!
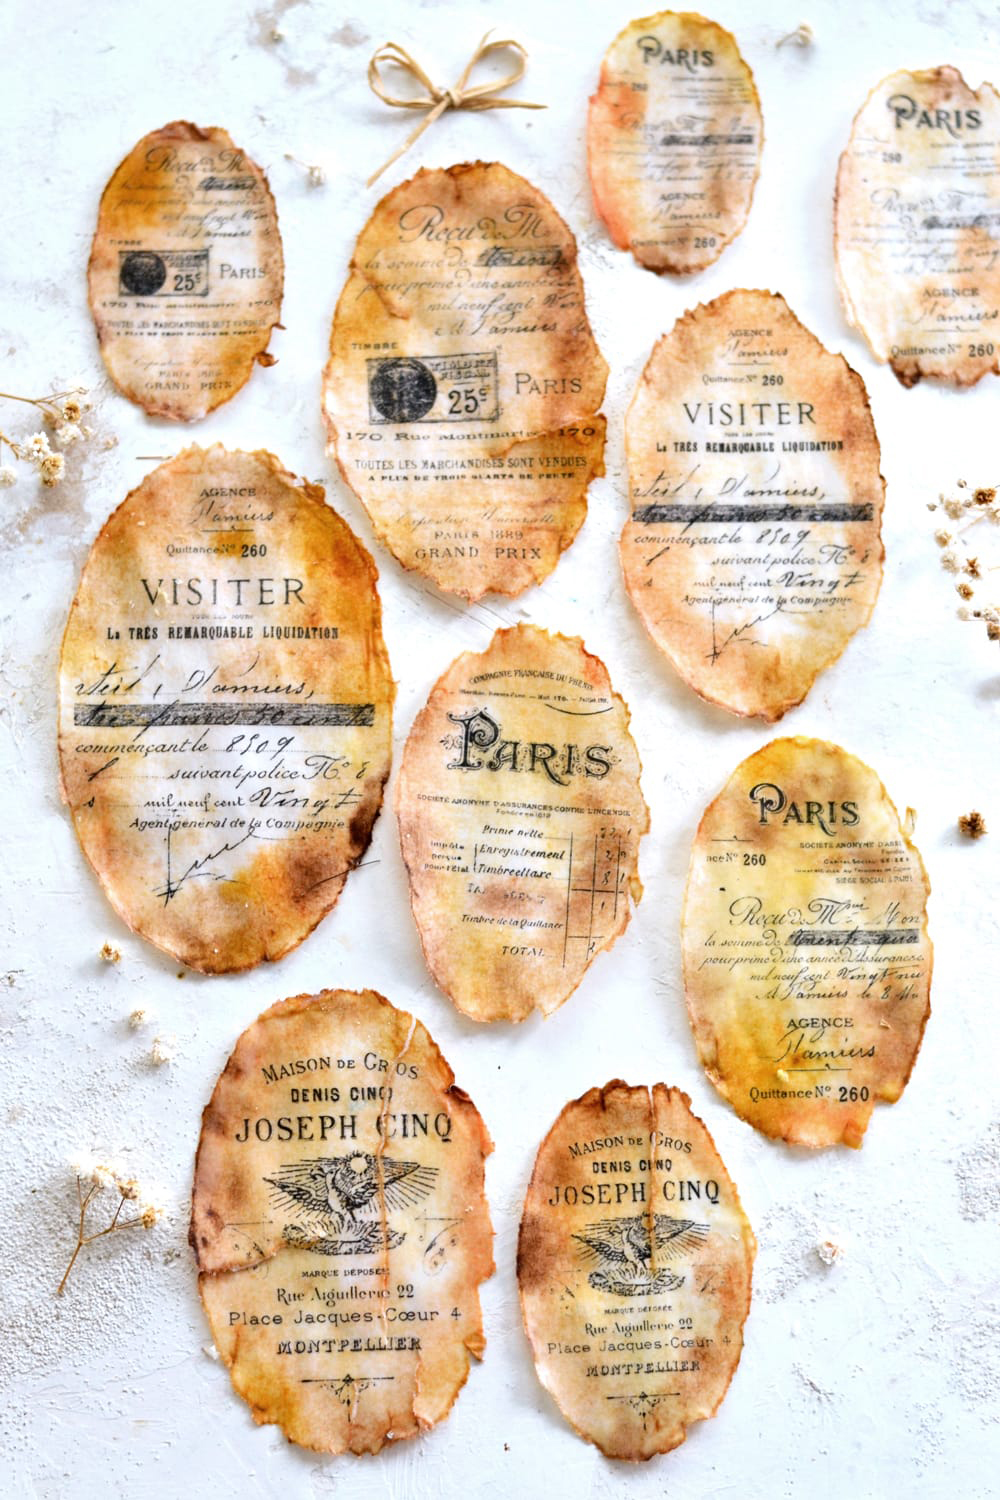
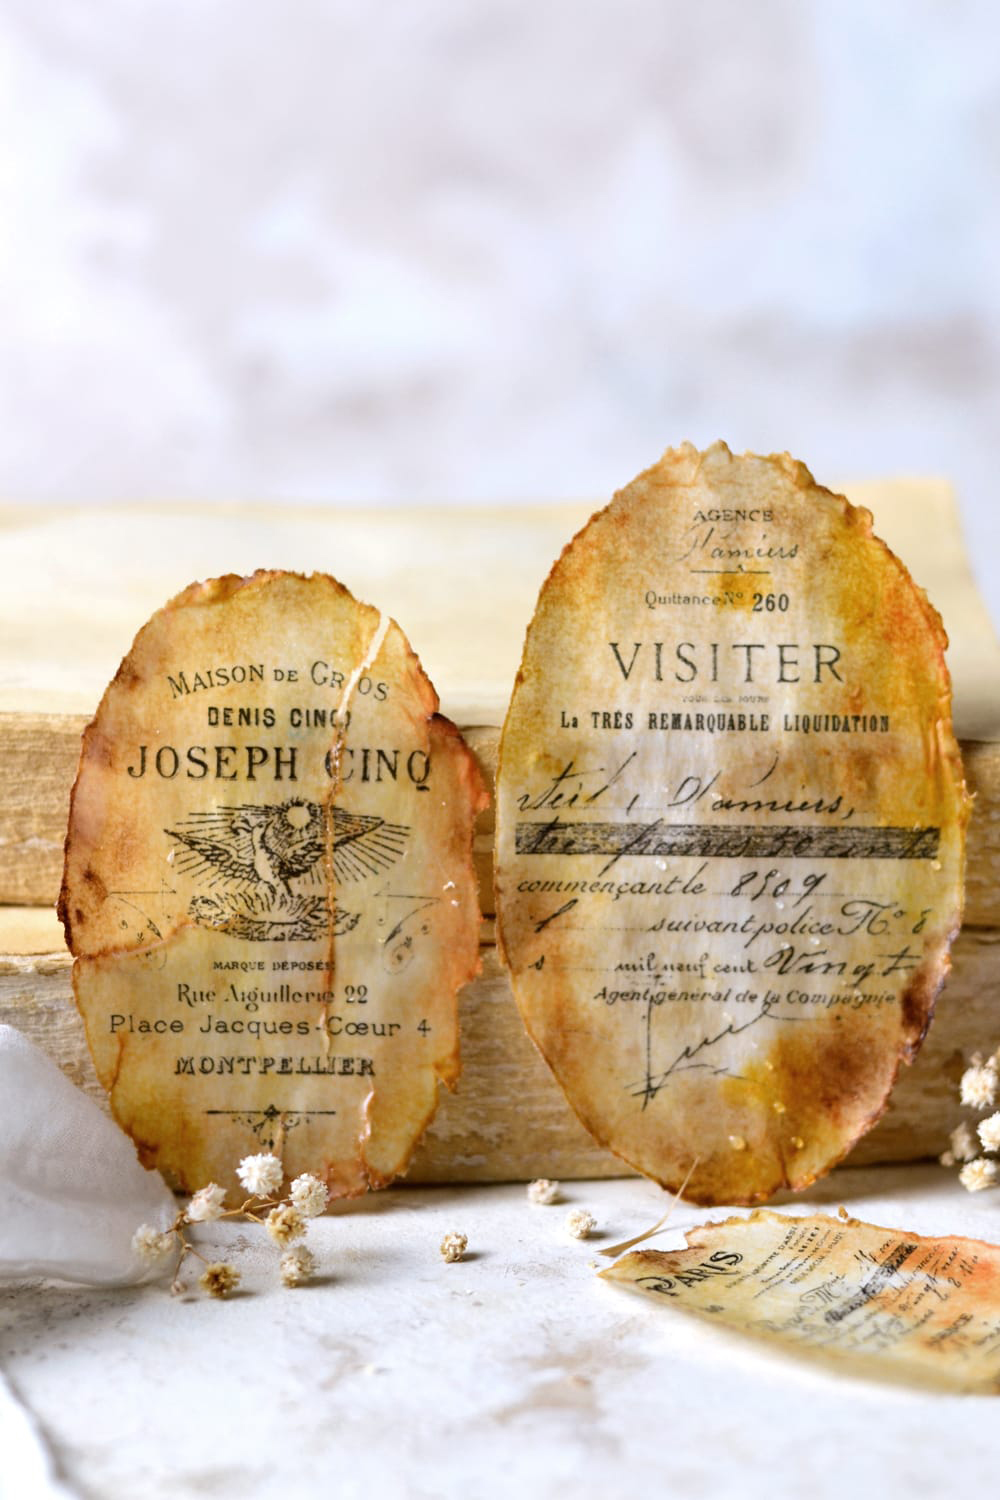
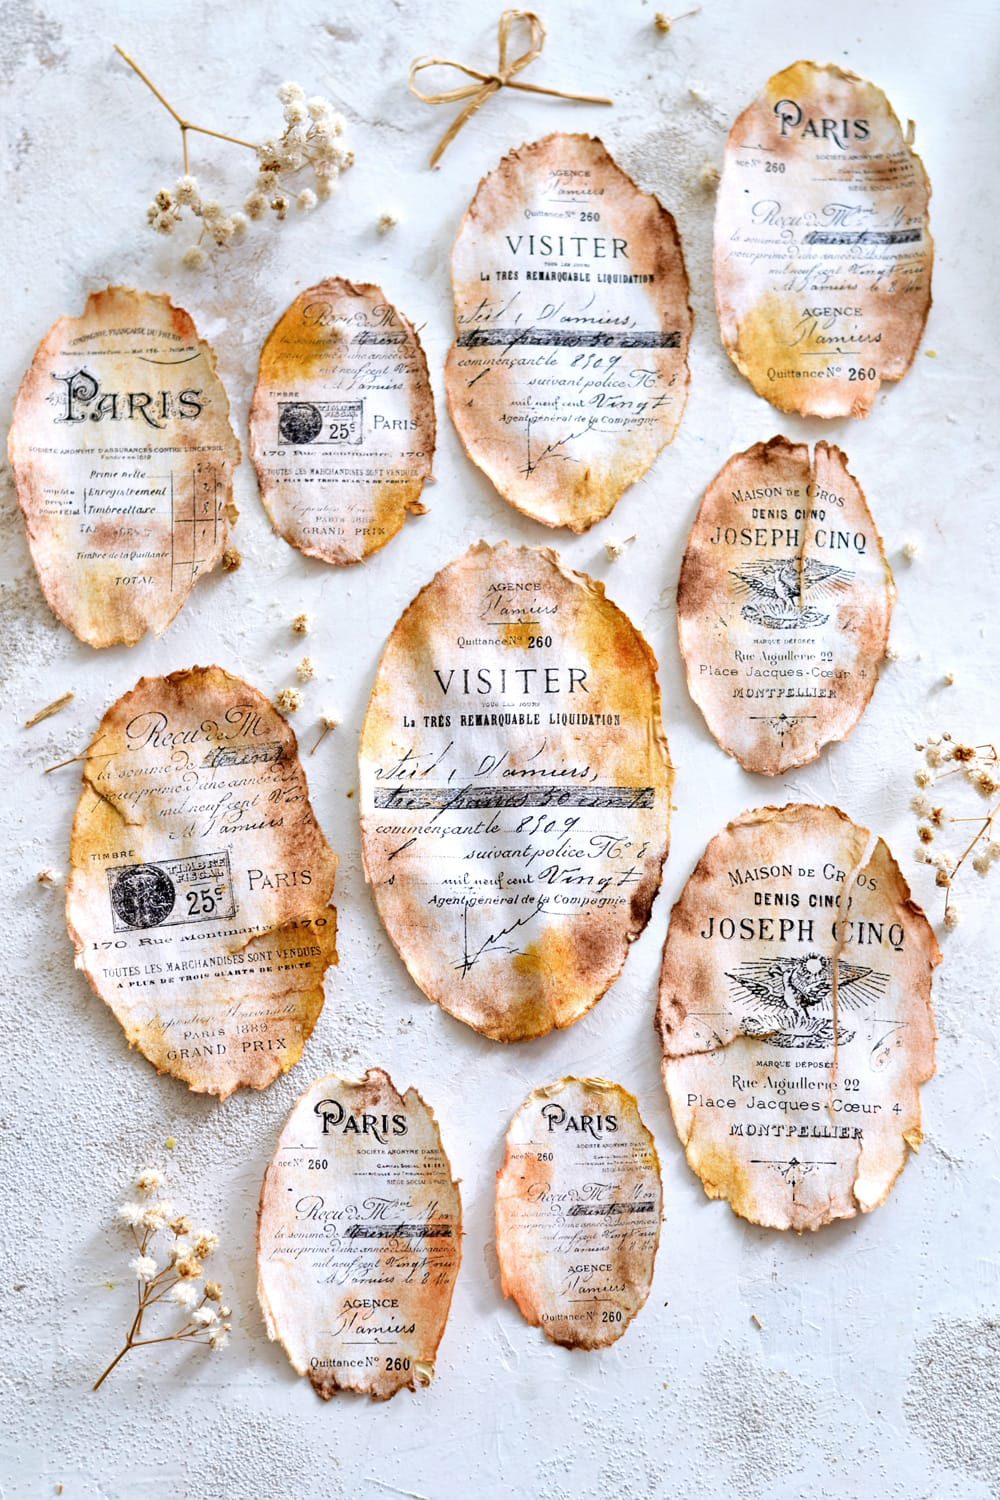
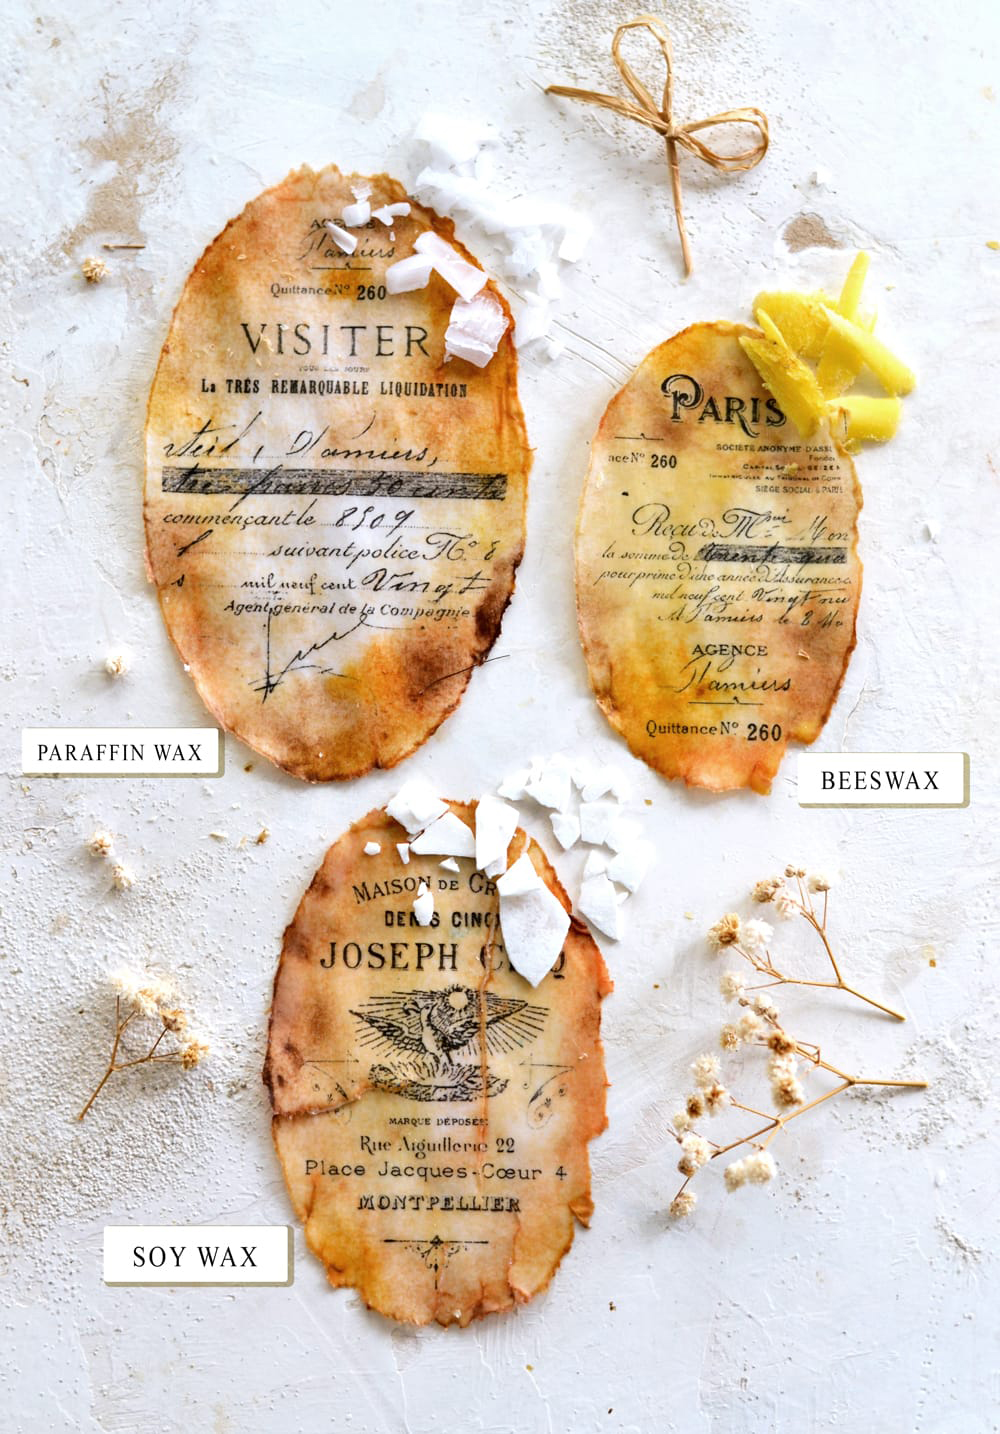
You can see here the final antique wax paper French labels with all the 3 types of waxes that I used, the yellow beeswax was the only one that imparted a subtle yellow tint to the surface. I loved them all, like I’ve said earlier, each type of wax can be used with similar results, just experiment and see what you love most, each one is like a mini piece of art!
The melted wax will completely change the texture of the paper and it will give it a smooth surface to touch and an ethereal dreamy look. Can you believe how realistically antique these beauties look?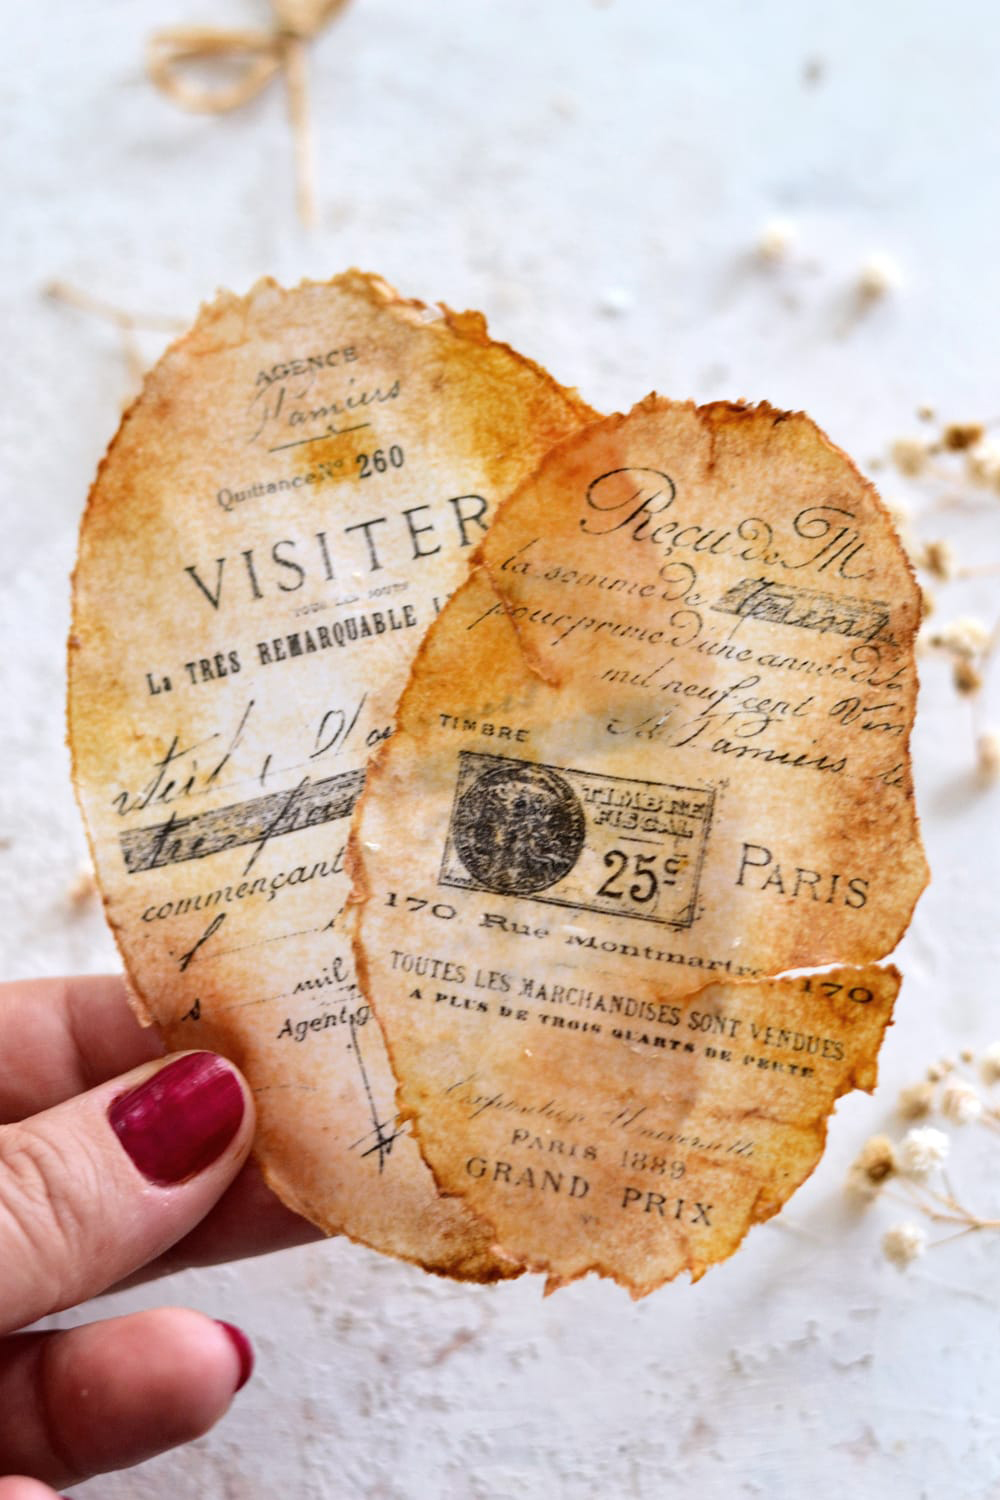
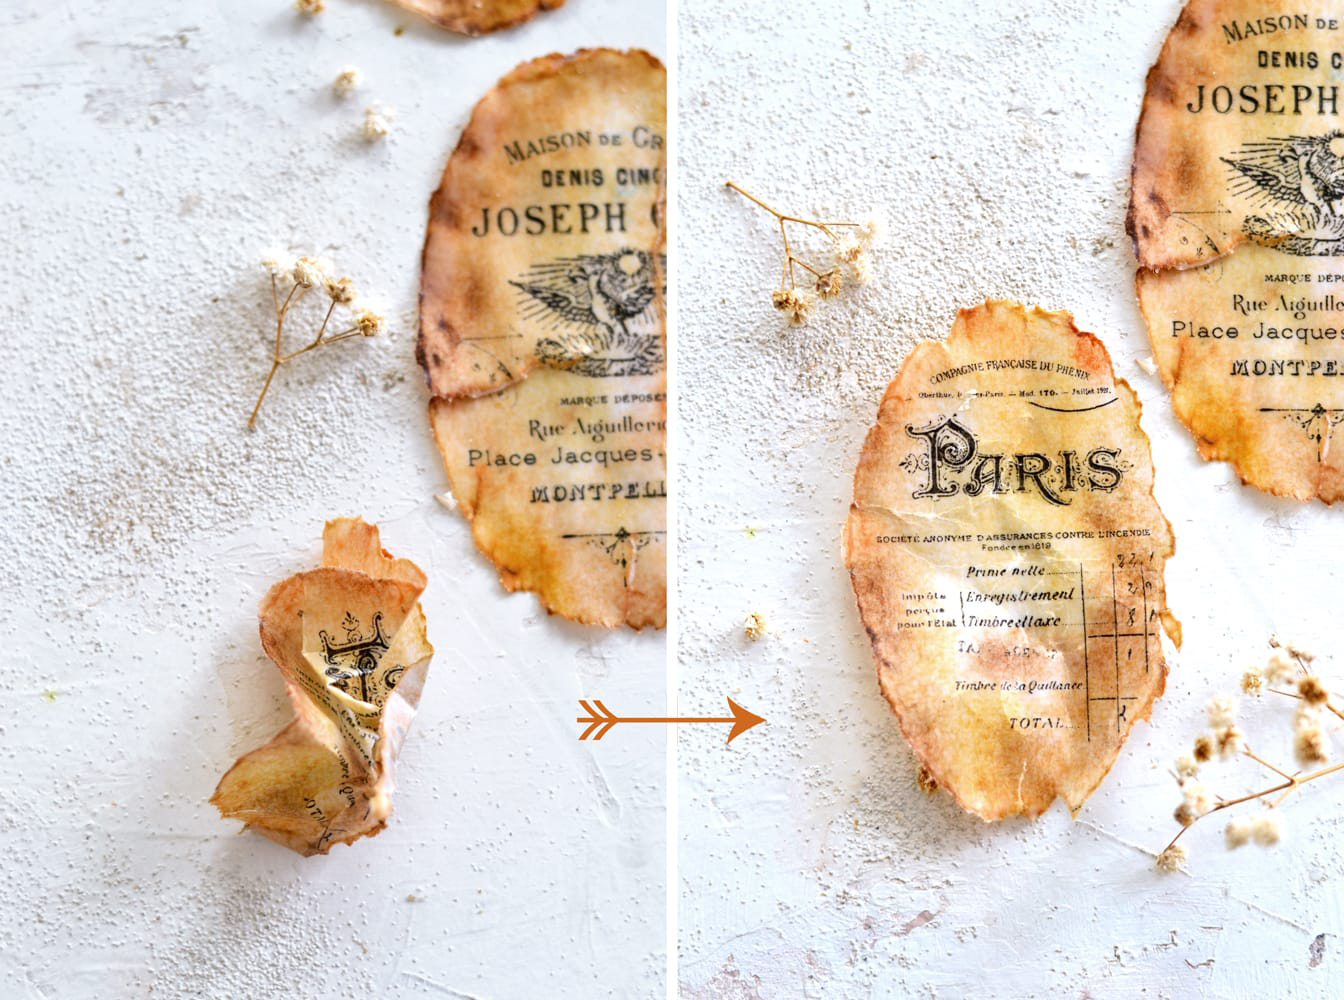
The layer of wax managed to perfectly complete the blended rusted colors on the paper, which were already beautiful on their own, but it really took them to a whole new level of awesomeness! If you want to add some more of that beautiful antiqued charm, you can even crumple the labels into your hand, then easily unfold them to restore their shape. The wrinkled wax will create a truly unique and gorgeous effect!
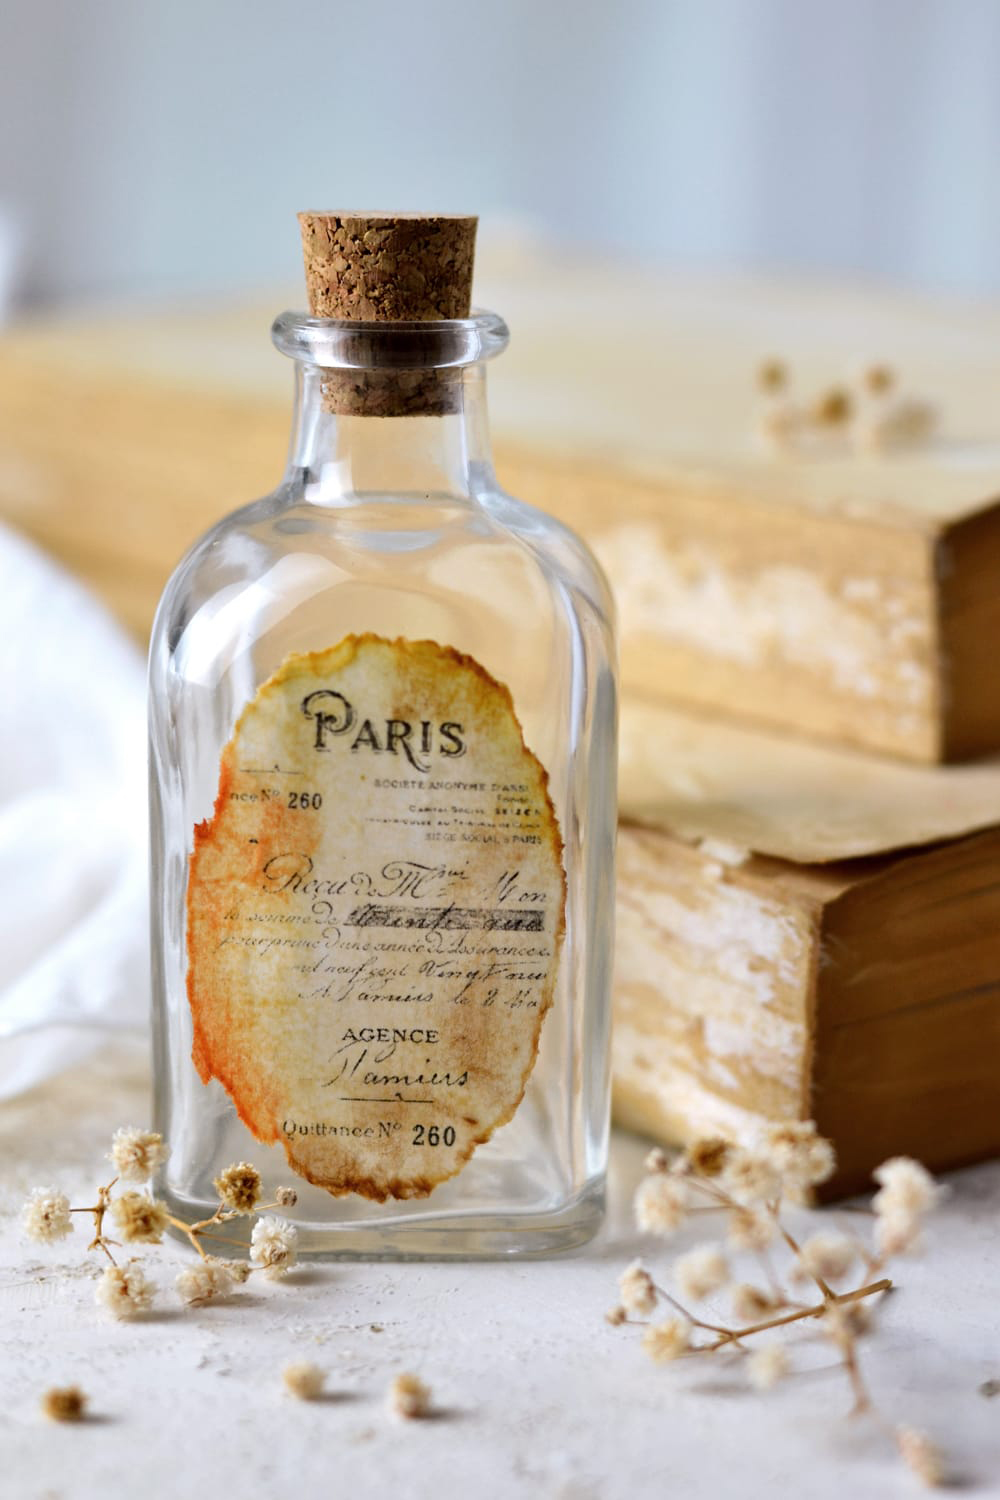
As for using the antique wax paper French labels – I’m sure you are already contemplating million of DIY projects and ideas like assemblages, Mixed Media Art projects, paper collage, other different materials, art forms and more. I just added one to a small found object apothecary bottle and it looked really beautiful!
V. How to make antique wax paper labels – the surprise (almost forgotten) element
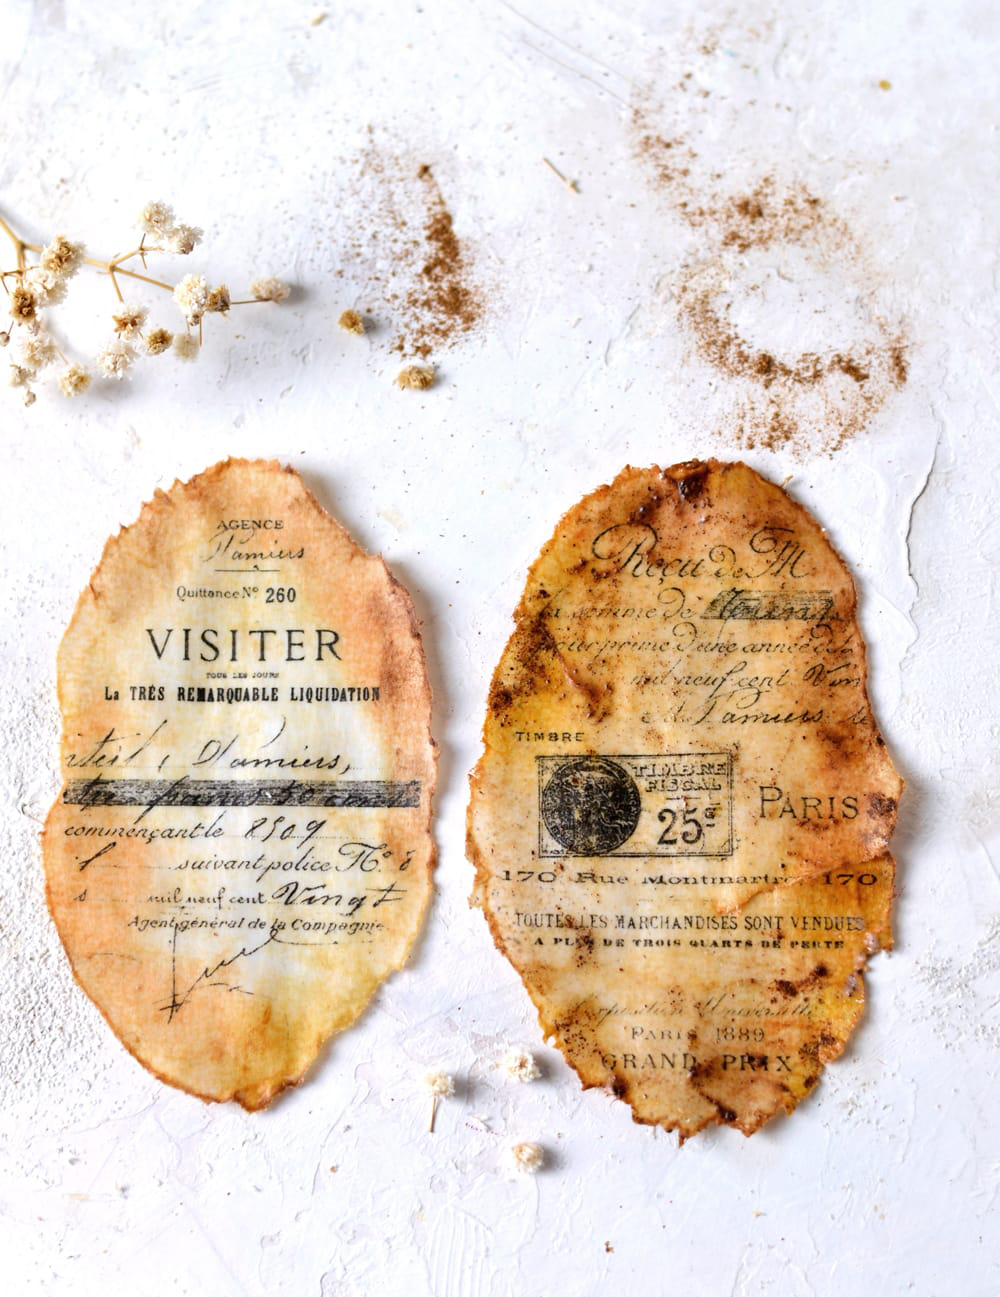
This last element – pumpkin pie spice, yum! – can also be a great addition to your antique wax paper experiments! I completely forgot using it during the making of the labels, so I only did one label at the end, just to show you how it can look. It’s really really really amazing!
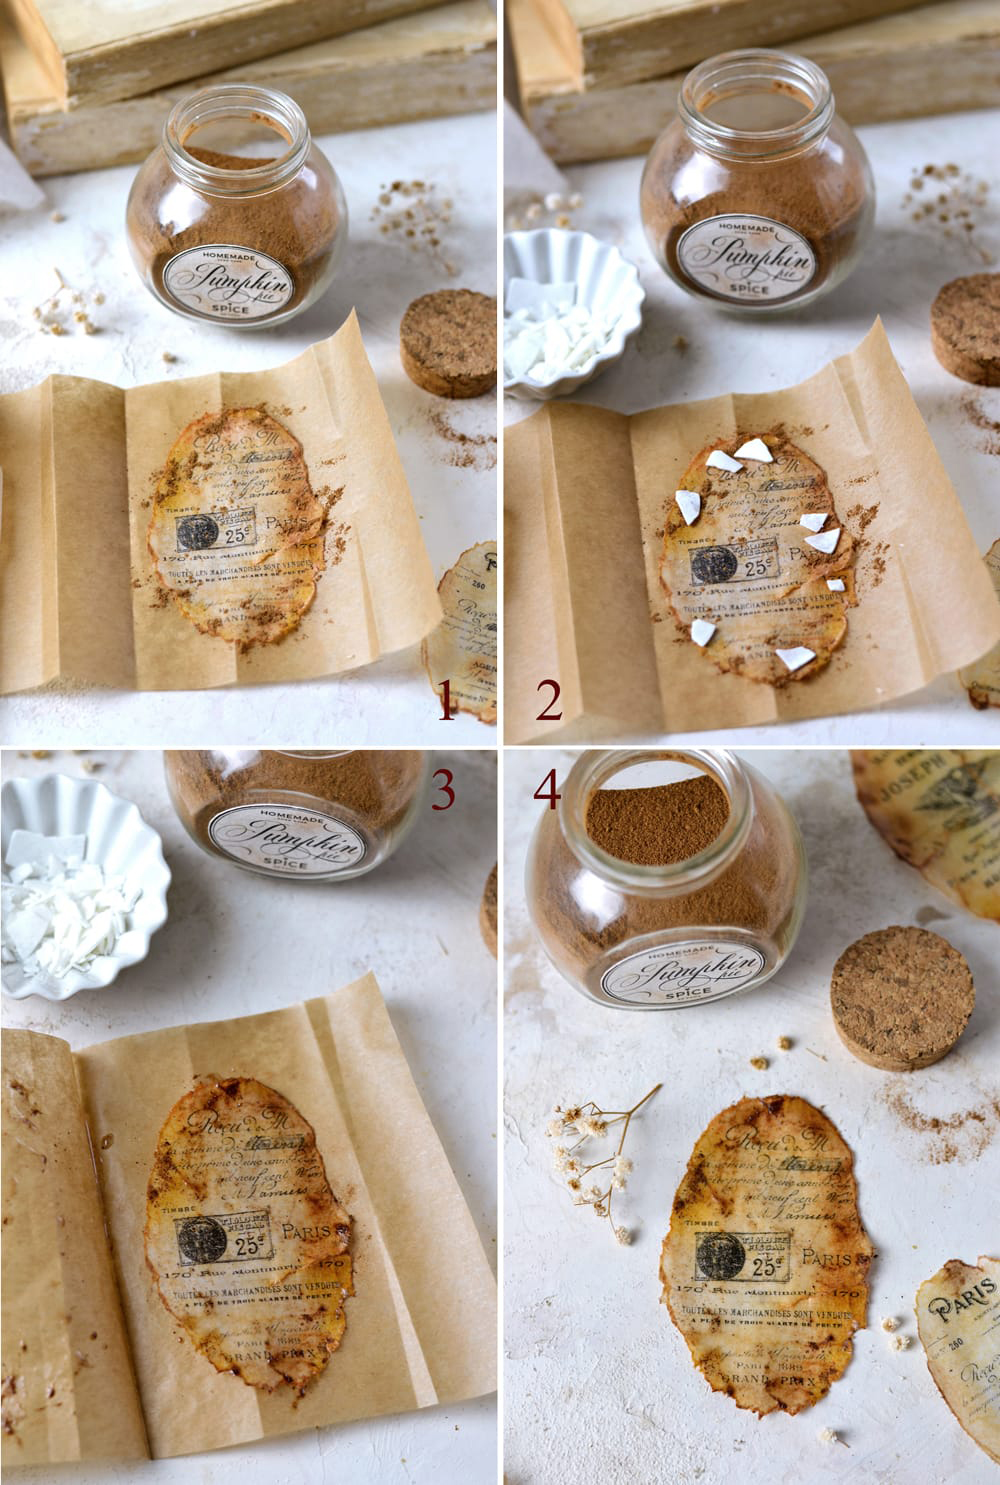
I actually used an already waxed label and following the same steps, I added the pumpkin pie spice and some soy flake wax, I folded the parchment paper and then I heated it.
The pumpkin pie spice will be embodied into the wax and is a fun way to create this perfectly rusted and charming effect.
That’s pretty much it for today, now you’ll be able to master the art of making your own antique DIY wax paper with this mixed media creation! As an alternative to the printable you could also try using Rubber Stamps on your paper, or photographs etc. Creating something so beautiful and unique is truly satisfying, with results that are simply stunning and deeply rewarding on their own! I hope you can use these in your Mixed media Artwork. Perhaps you will share them on your Pinterest or Instagram! You might also like another one of my tutorials for Paper Script Feathers Project HERE.
Make these labels or adapt and use this technique on any TGF images. The sky is the limit!
Have fun creating,
Diana / Dreams Factory



Sandy L says
I have tried this and it is amazing…I got too much wax on first pages so I went to Youtube to see if any had done this and they had and what the solution was to put it between two pages of printer copy paper and iron it and it took off the extra wax….love this….I am making my own whole pages of faux vellum paper now…love it. thanks for the free printables also. My printer is an inkjet printer and as long as I do not use water it is fine. So am using inks for coloring instead. You people are amazing.. thanks so much you have made my jurnal making os much more interesting and fun.
Karen Watson says
Yay! Thank you Sandy! I’m glad you enjoyed this project and thanks for adding those tips!
Maggie Robinson says
Wow! I just read the article and am so excited to try this, I just bought a pound of beeswax and didn’t know what I was going to do with it, now I know!🥰
Thank you so much for this tutorial.
Graphic Fairy is a wonderful site, I’ve belonged for years and love all you do fo us,
Hugs. Maggie ❤️🤗🇨🇦❤️
Karen Watson says
Hi Maggie, that’s great that you already have the beeswax on hand. Have fun trying out this technique! And thanks so much for your very kind words about my site. I’m so happy that you are still sticking around!
Kathy says
Just discovering these while surfing the website to see what I may have missed. So beautiful and creative….I can’t wait to try your technique! Thanks so much for sharing your talent and vision.
Karen Watson says
Have fun playing with this technique Kathy!
Claudia Schmitz says
I just abosolutely loved this project!!! Will try it right away… I was wondering if the label could be totally dipped into the melted wax… could it work? Thaks so much for sahring!😍
graphicsfairy says
Oh yea! So glad you enjoyed it Claudia! I am not sure but you could give it a try and please let us know if you do, we’d love to hear the results 🙂
Lynn says
I love this idea and will be trying it this week! But I too am curious about the glue that she used to adhere the label to the bottle. I will try the mod podge but it would be nice to to know which glue was actually used.
graphicsfairy says
Hi Lynn, I asked Diane your question and here is her response, “I used Mod Podge to adhere the label to the bottle, just like I always do! I wasn’t sure it would work, because Mod Podge is waterbased, but it did! I had to keep the label with my fingers on the bottle for a bit longer then usual to help them to properly adhere, but it worked perfectly and it’s still there 🙂 ” Have a wonderful day 🙂
Harjith says
Just read it and I’m on it already !!!! I have a project in mind. Thanks for sharing
graphicsfairy says
Oh yea Harjith, so happy to hear that, have fun!!!
Leslie says
What glue did you use to attach these labels? I am concerned the wax might make it not adhere well.
graphicsfairy says
Hi Leslie, Diana always comes up with such amazing projects!! She does not mention in her post how she applied the label to her bottle but I am asssuming it was a craft glue like Mod Podge 🙂 Have fun!
Bev says
I’d like to know how to apply the labels too. Do you use glue or a hot iron?
graphicsfairy says
Hi Bev, I believe she used craft glue but am checking with her and will let you know 🙂
graphicsfairy says
Hi Bev, it was Mod Podge, here is her response, “I used Mod Podge to adhere the label to the bottle, just like I always do! I wasn’t sure it would work, because Mod Podge is water based, but it did! I had to keep the label with my fingers on the bottle for a bit longer then usual to help them to properly adhere, but it worked perfectly and it’s still there :smirk:” I hope that helps 🙂
Tammy says
This will be fun to try! Thanks for sharing!
graphicsfairy says
Thanks Tammy, have fun 🙂