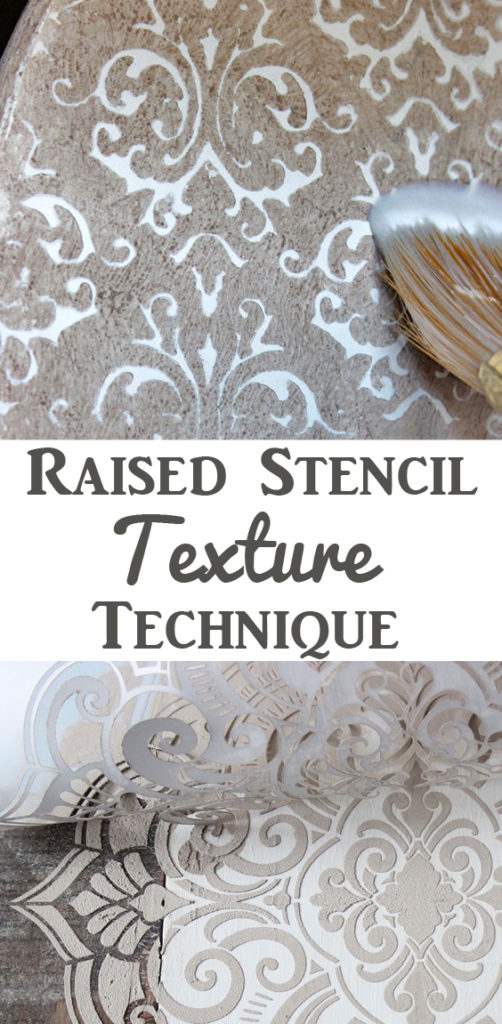
This Raised Stencil Texture Technique will add a whole new dimension to your next furniture project!
Hello, DIY furniture enthusiasts! It’s Heather from Thicketworks. I’m so excited to share this simple but devastatingly effective method to enhance flea-market finds!
It’s easy to achieve, and the possibilities are unlimited!
This post was sponsored by the awesome creative team at Heirloom Traditions, because they are, well, awesome!
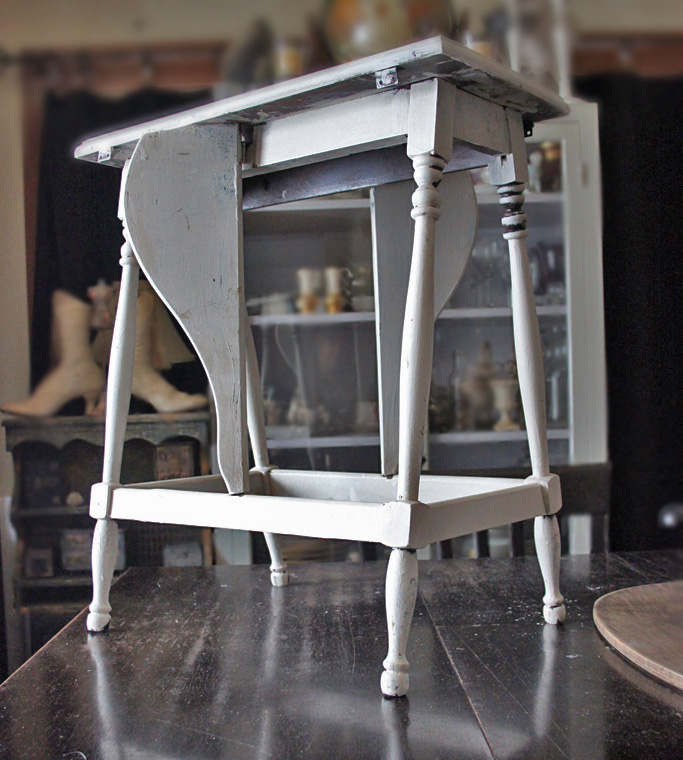
If you find a forgotten and abandoned little Butterfly Table like this one, don’t despair!
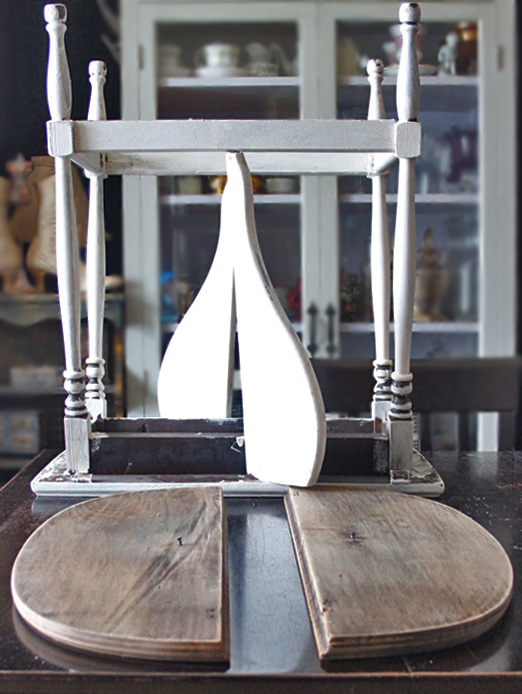
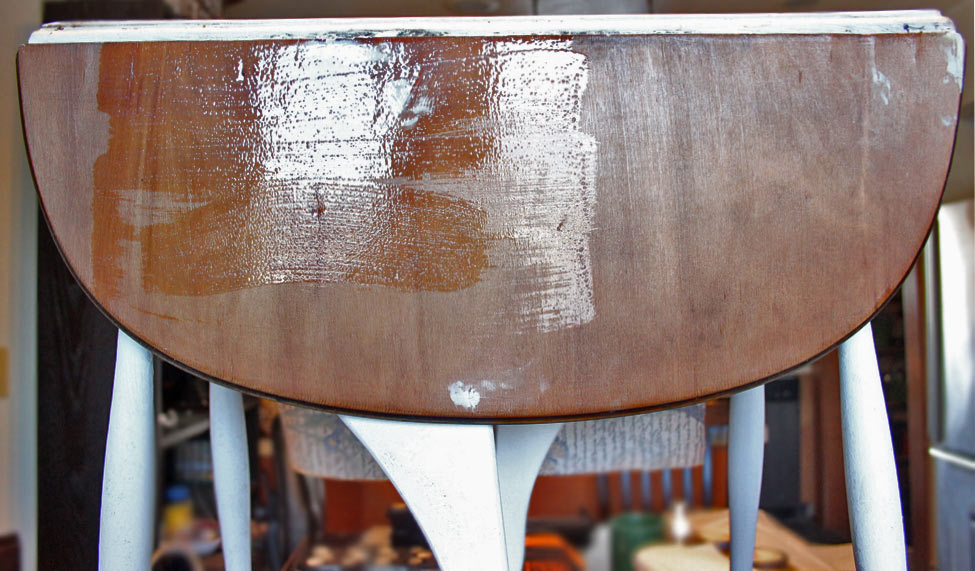
Our little Butterfly Table had lost her wings:
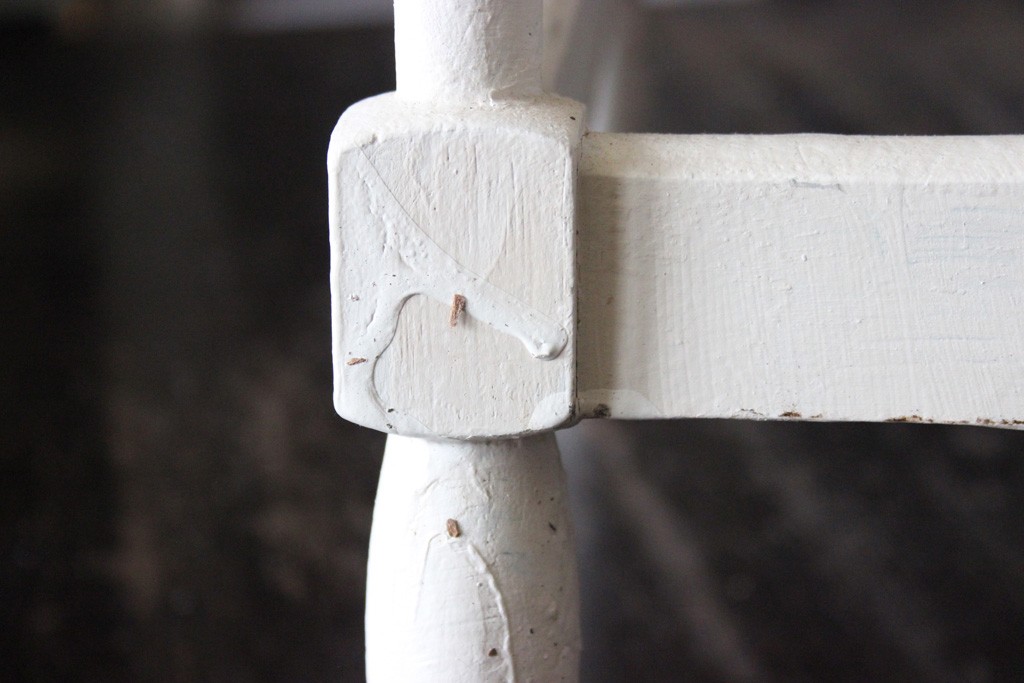
She was clearly suffering under a lumpy layer of latex!
She needs our help! Join me in my quest to restore this delicate creature to the glory she deserves…
If you’d like to resuscitate an abandoned beauty follow along; we’ll make some magic!
Supplies:
*This post contains affiliate links for your convenience.
- Heirloom Traditions Primer
- Heirloom Traditions Chalk Type Paint: I used A la Mode, Row House, and Mocha.
- Heirloom Traditions Gilding Patina: Golden Glimmer
- Heirloom Traditions Venetian Texture Medium
- Heirloom Traditions Wax: Dark Umber
- A Best Chalk Brush
- Heirloom Traditions 1Gel Transfer & Decoupage Medium
- A small synthetic bristled paint brush
- Decorative napkins
- A smoothing tool
- An artists paint brush or two
- Furniture Appliques of your choosing
- Heavy Duty Adhesive to adhere the appliques (I use FabriTac, and it has never let me down)
- 60 and 220 grit sandpaper, and an electric sander if you have access to one
- An emery board
- Rags
- Ornate Damask Stencil and low-tack tape
- A spreading tool, for applying the Venetian Texture
- A small, precise tool to clean up any texture that creeps under the stencil
Optional:
Oil Rubbed Bronze Spray Paint
Heirloom Traditions Metallic Masters Gilding Patina: Copper Penny
How-To:
- Clean the surface of your poor darling – just a damp rag was needed for this job.
2. Make any necessary repairs, and sand any rough areas.
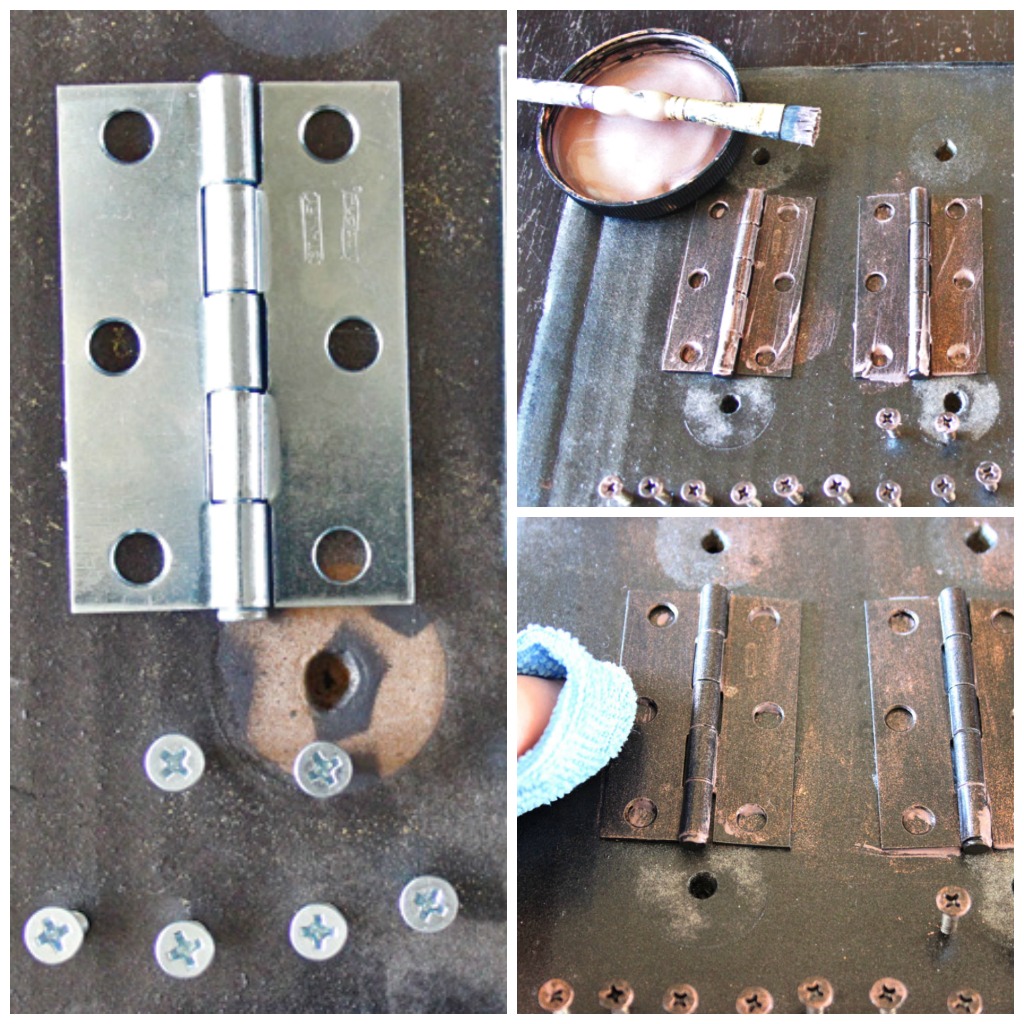
3. If you need to replace hinges, you can get away with using the bright silvery finish ones, by following this quick routine:
4. Spray paint the surface of the hinges and the screw-heads with Oil Rubbed Bronze.
5. When dry, dab a messy coat of Copper Penny over the surface.
6. Wipe back with a damp rag.
Presto! Now you have ancient(ish) hardware.
(As a bonus, the Copper Penny acts as a protective finish and will resist scratches)
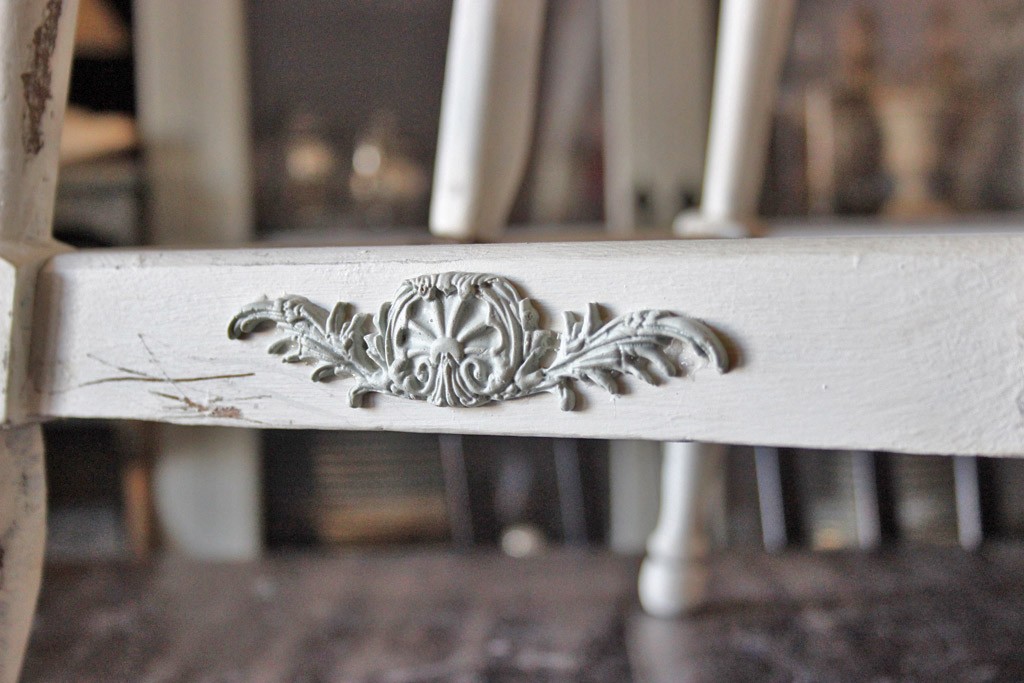
7. Attach furniture appliques, if you desire:
8. Apply a coat of Primer to the areas that you will be painting, if you’re concerned about bleed through. I did.
9. Apply a quick coat of A la Mode Chalk Type Paint, once the Primer has dried (usually about an hour).
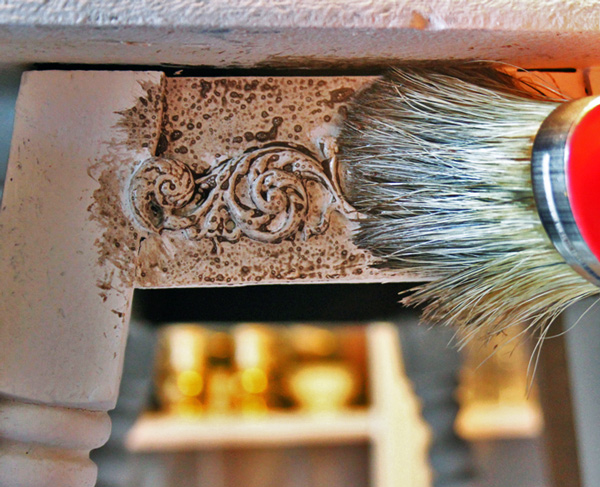
10. Once the paint has dried, use a brush to apply Dark Umber Wax wherever you want to see a bit of ‘antiquing’. I concentrate on the nooks, crannies & corners.
11. Use a damp rag to wipe the excess spray wax over the larger areas of the piece. It collects in the tiny imperfections in the surface, leaving a very appealing and convincing patina.
Note: Spray Wax dries very quickly, and creates a permanent protective coat that needs no buffing or re-application.
Woo hoo! Easy on the hands, and no hard work.
12. Prepare to decoupage! This part is always exciting…I love the feeling of anticipation.
13. Separate the two layers of your decorative napkins, discard the plain layers, and set the printed sheets somewhere close at hand, so you can easily pick them up quickly. Prepare enough sheets of paper so that you can complete the process without having to stop. 1Gel dries quickly!
Note: you can use decorative tissue paper for the decoupage if you’d rather.
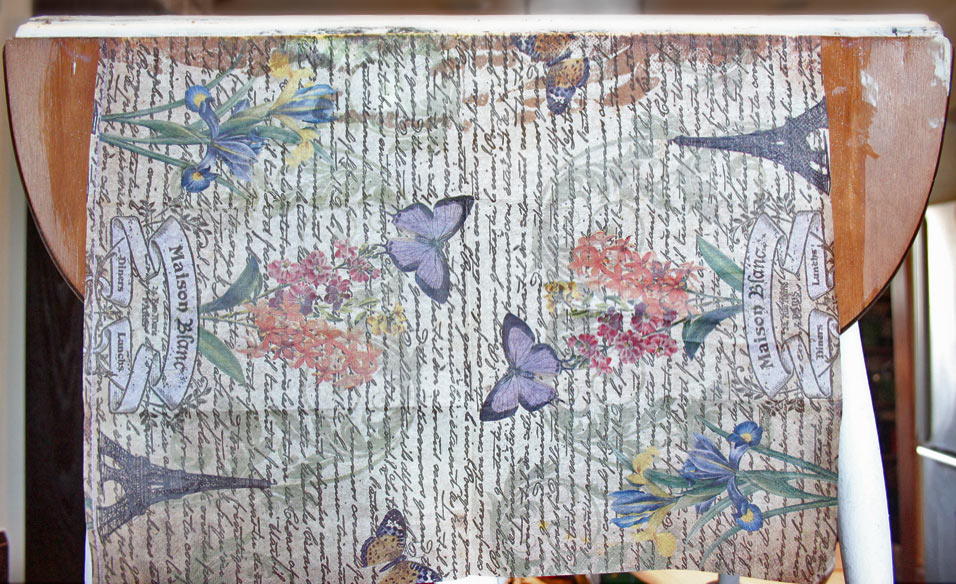
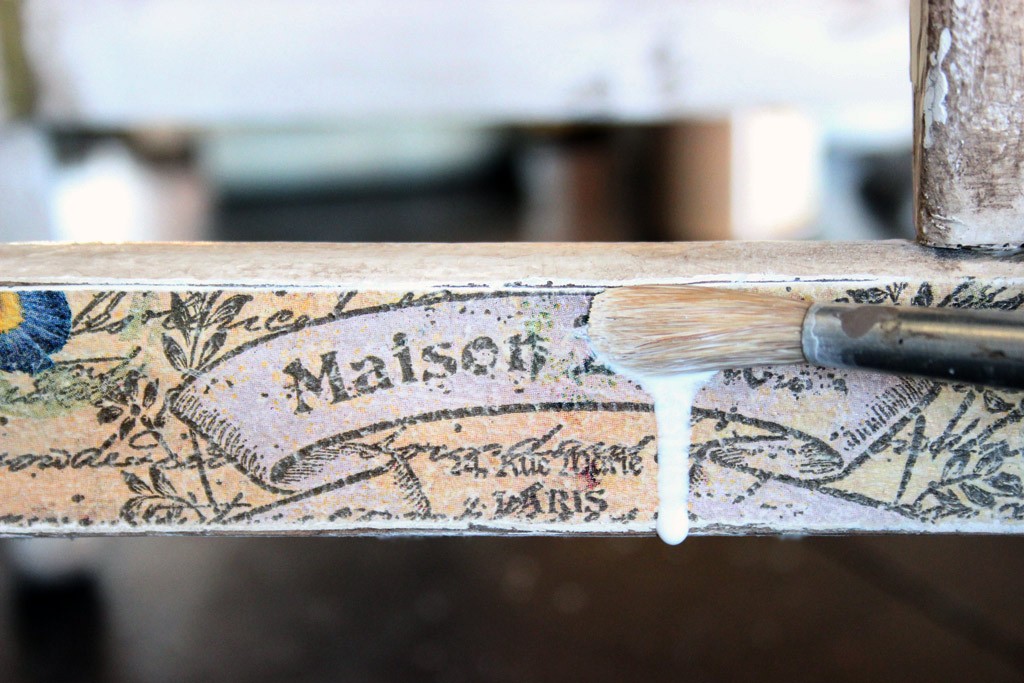
14. Paint a generous layer of 1Gel over the area you wish to decoupage. For this project, I chose to decoupage the folding leaves of the tabletop and the long stretchers between the legs:
15. Quickly and carefully position the printed napkin onto the 1Gel.
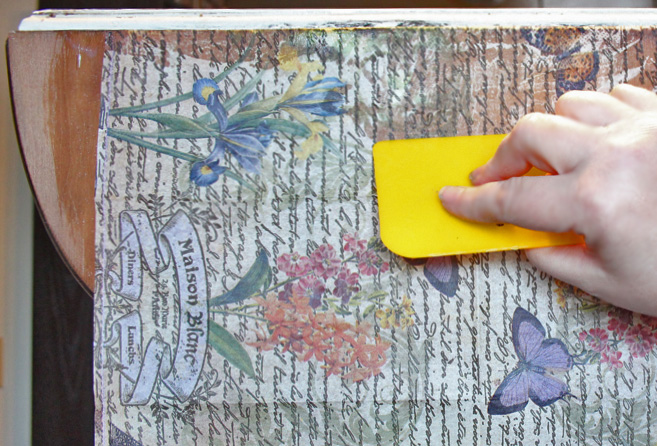
16. Gently smooth the napkin onto the surface with your spreader:
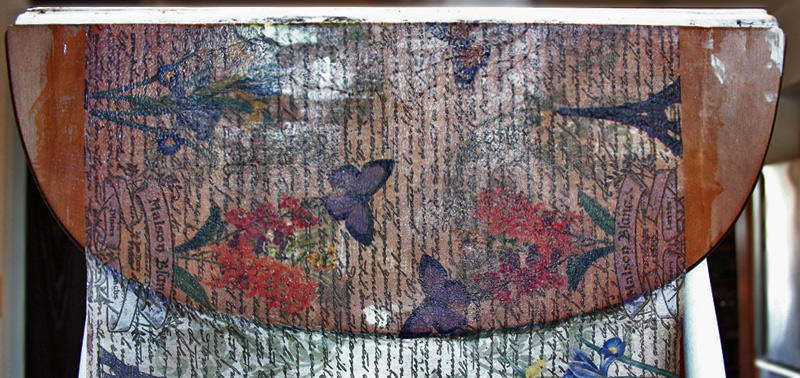
Here’s what I love about this: the natural variations in the tones of the wood, and any stains, will show right through the decoupage. To me, this is a lovely effect.
17. Coat the surface of the paper with 1Gel, and allow it to dry – we’ll take care of the excess paper hanging over the edge later.
18. Patch any bare areas of wood with 1Gel and additional paper. Allow to dry.
19. When the paper is dry, use an emery board or sandpaper to gently ‘file’ away the excess paper. This trims it to the exact dimensions of the wooden surface.
20. If you want a distressed appearance, sand the surface of the decoupaged paper. This will fade the graphics and feather the edges of the paper into the wood. I sanded with 220 grit until I reached bare wood in places, because that’s the effect I wanted. You can sand as much, or as little as you like.
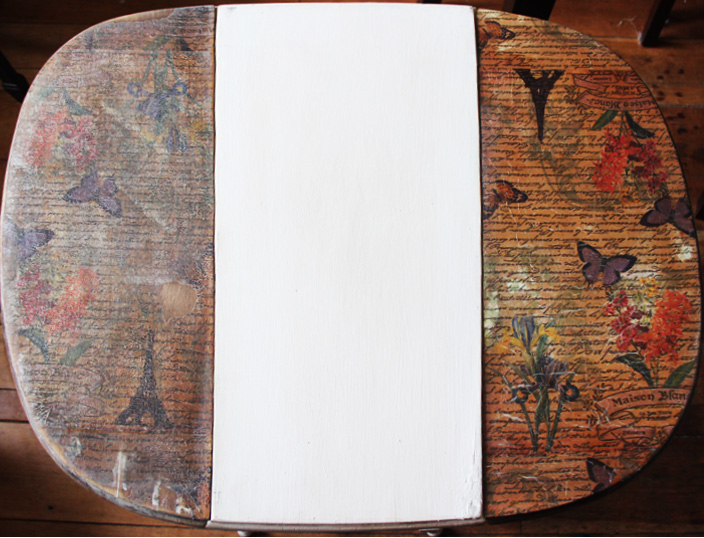
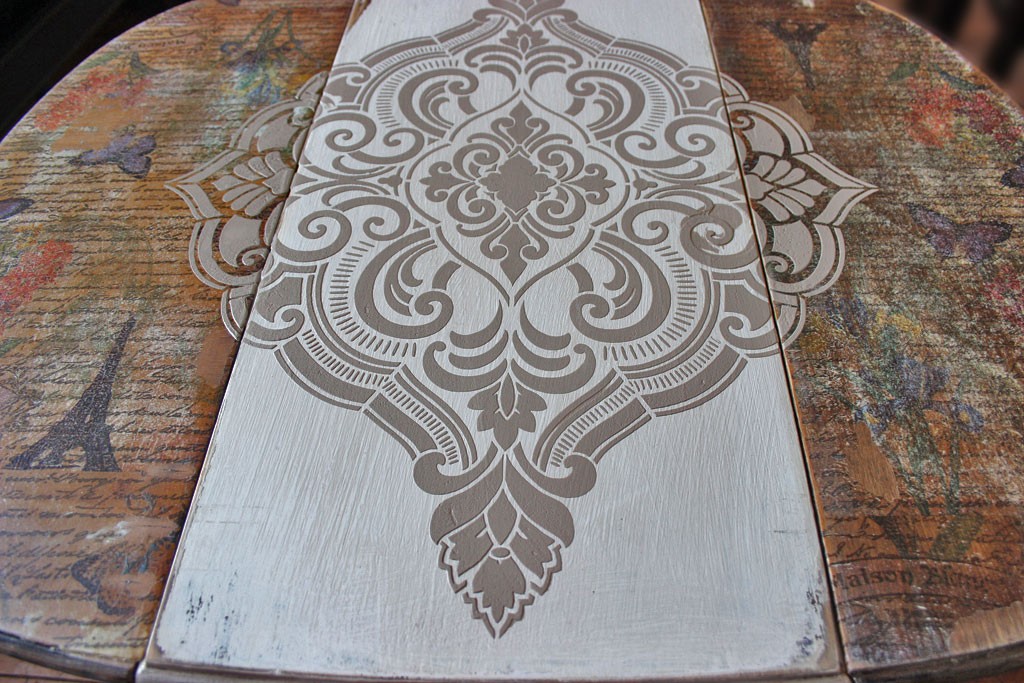
Here, we’re looking down onto the table top. The leaf on the left has been sanded to a satin smoothness, and appears quite aged and distressed. The leaf on the right has not been sanded at all, and the colors are vibrant.
21. Repeat the same process for all decoupaged areas.
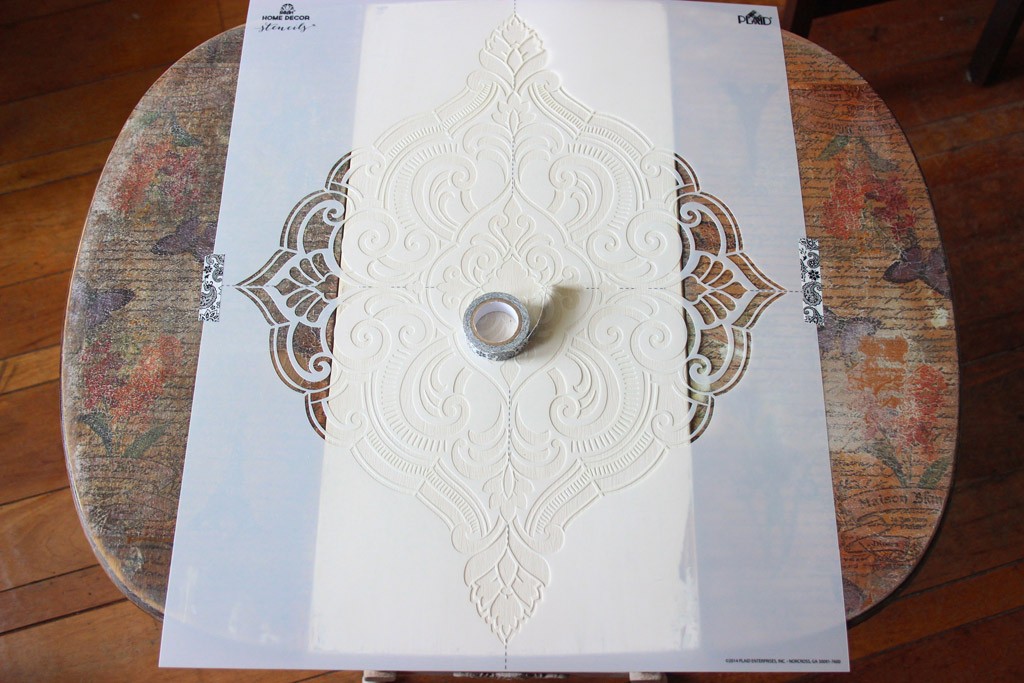
This Plaid Home Decor Stencil was just what was needed in order to unify the ‘patchwork’ appearance of these three sections.
22. Place the stencil where you intend to create Raised Stencil Texture. Lightly tape it to the surface to prevent shifting.
Now it’s time for some FUN!
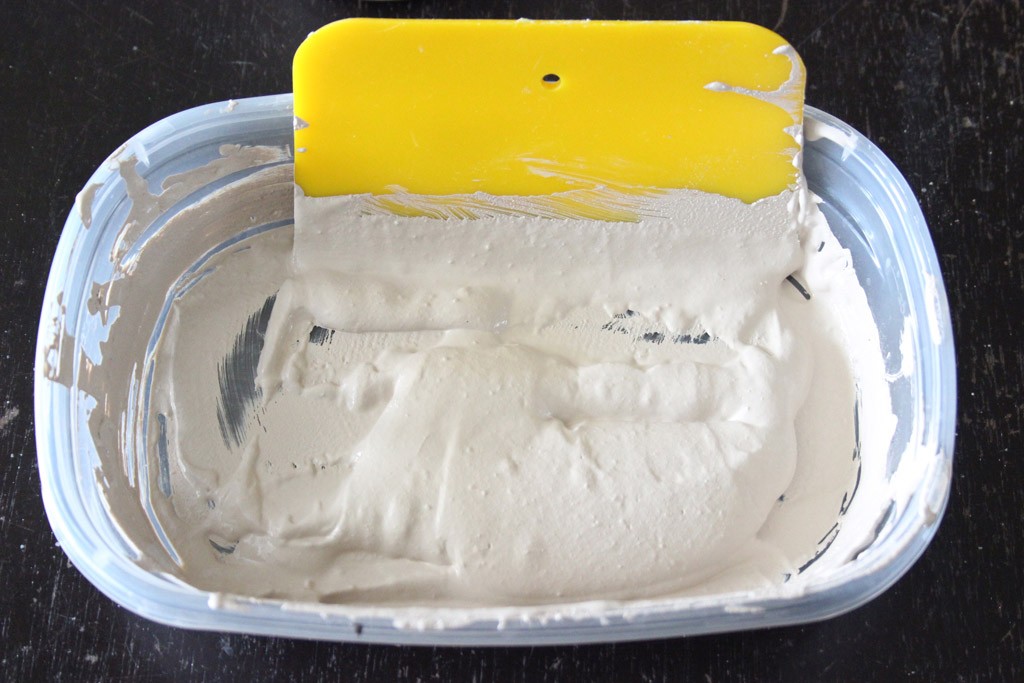
23. Mix up a batch of Venetian Texture Medium. This magic powder will turn any water based paint into texture paste!
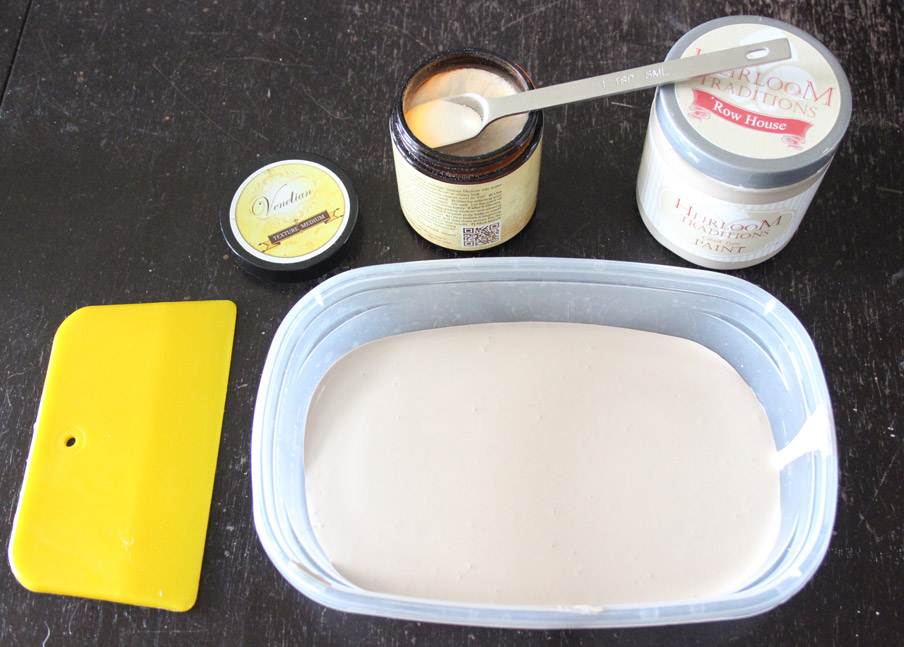
Here, I’ve poured about 1/2 a cup of Heirloom Traditions Chalk Type Paint: Row House into a flat bottomed container.
24. Add the Venetian Medium powder a bit at a time, and mix thoroughly. I used about 1 1/2 Tsp for this mixture. Allow the medium to set up for about 5 minutes.
I like to begin using it once it has reached this degree of thickness – not hard enough to form peaks, but firm enough to hold its’ shape when mounded:
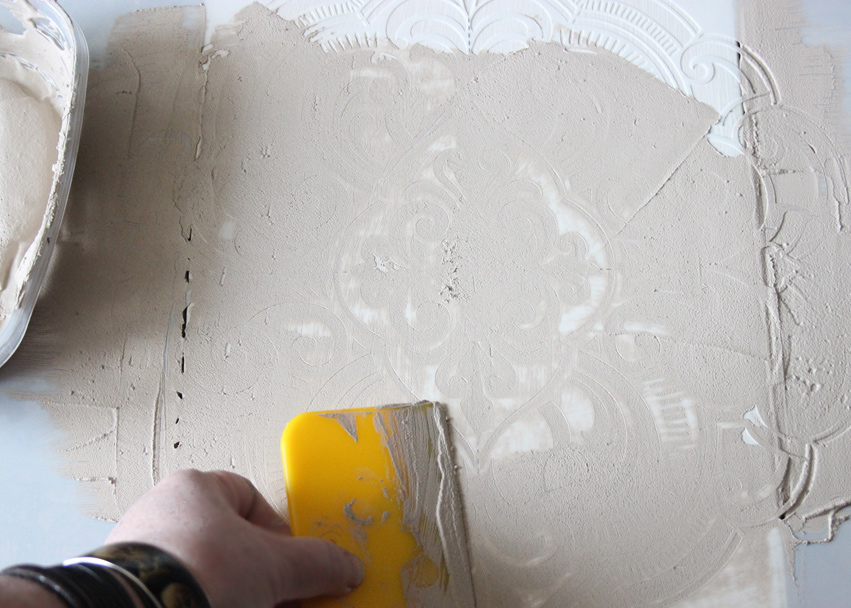
25. Smooth a layer of texture over your stencil, using your spreader:
The key is firm but even pressure.
We don’t want to force the medium under the stencil edge if we can help it.
(Don’t be like me – you can see the splodgy mess I created on the left side)
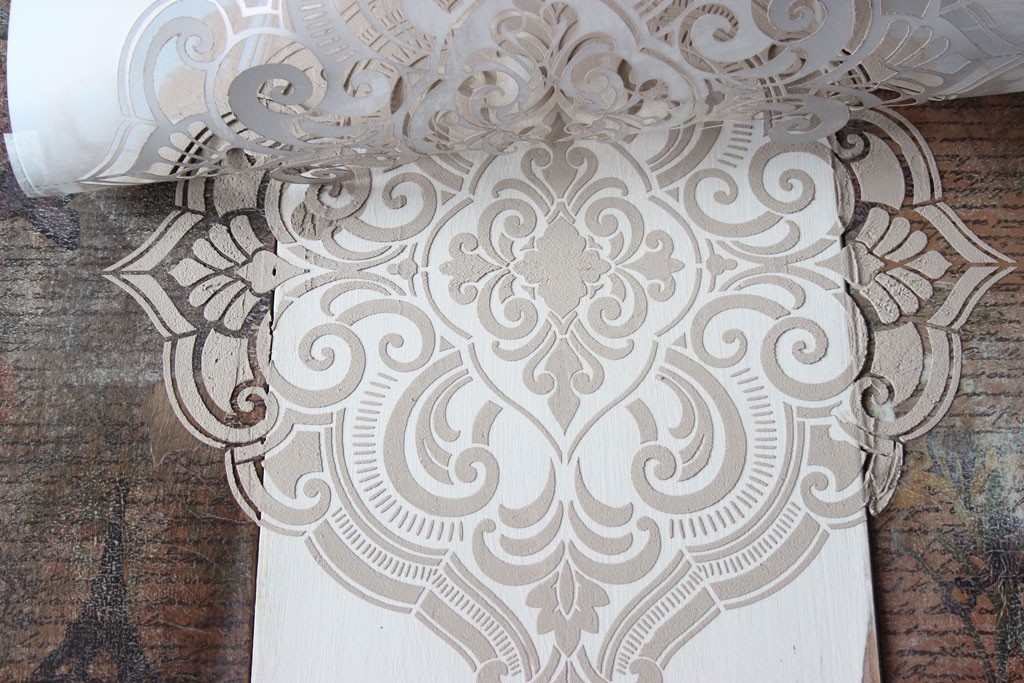
26. Remove the stencil immediately, and go wash it off under plenty of running water.
You don’t want this stuff to dry on the stencil. No. You don’t.
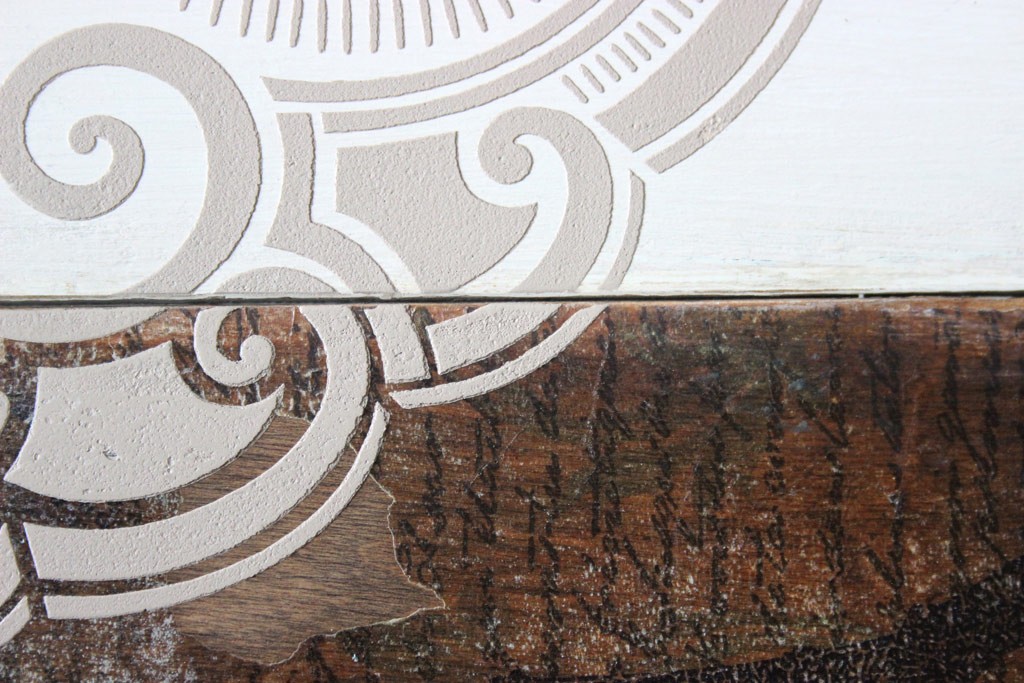
Note: I allowed the texture to dry right over the seams in the tabletop, and sanded the edges of each section smooth after it had thoroughly dried.
You can use this same technique to create a continuous design over drawer fronts, across cupboard doors, etc.
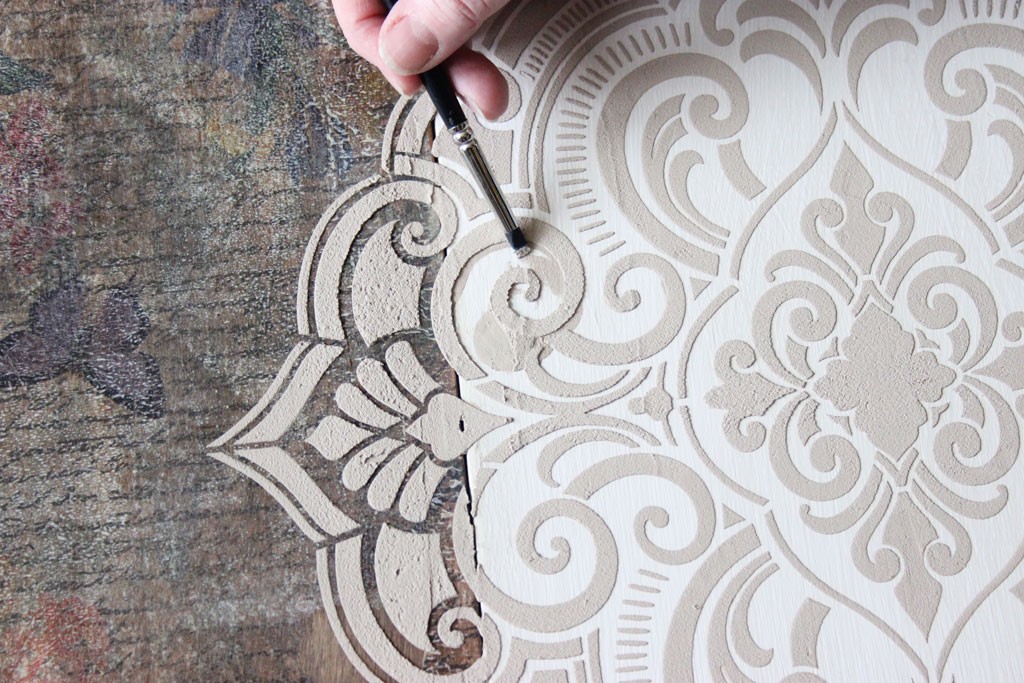
27. If you have a splodge, (like I did) scrape it away while the medium is still damp, using a tool with a flat edge:
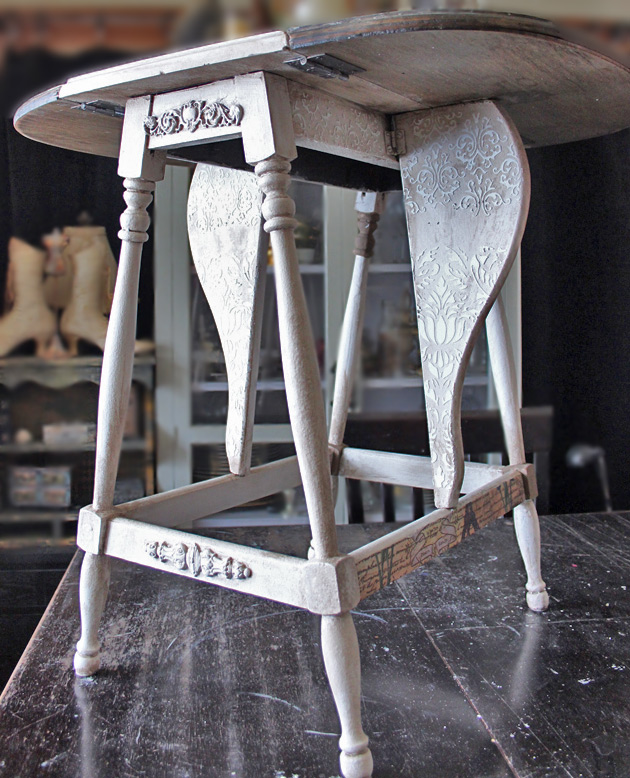
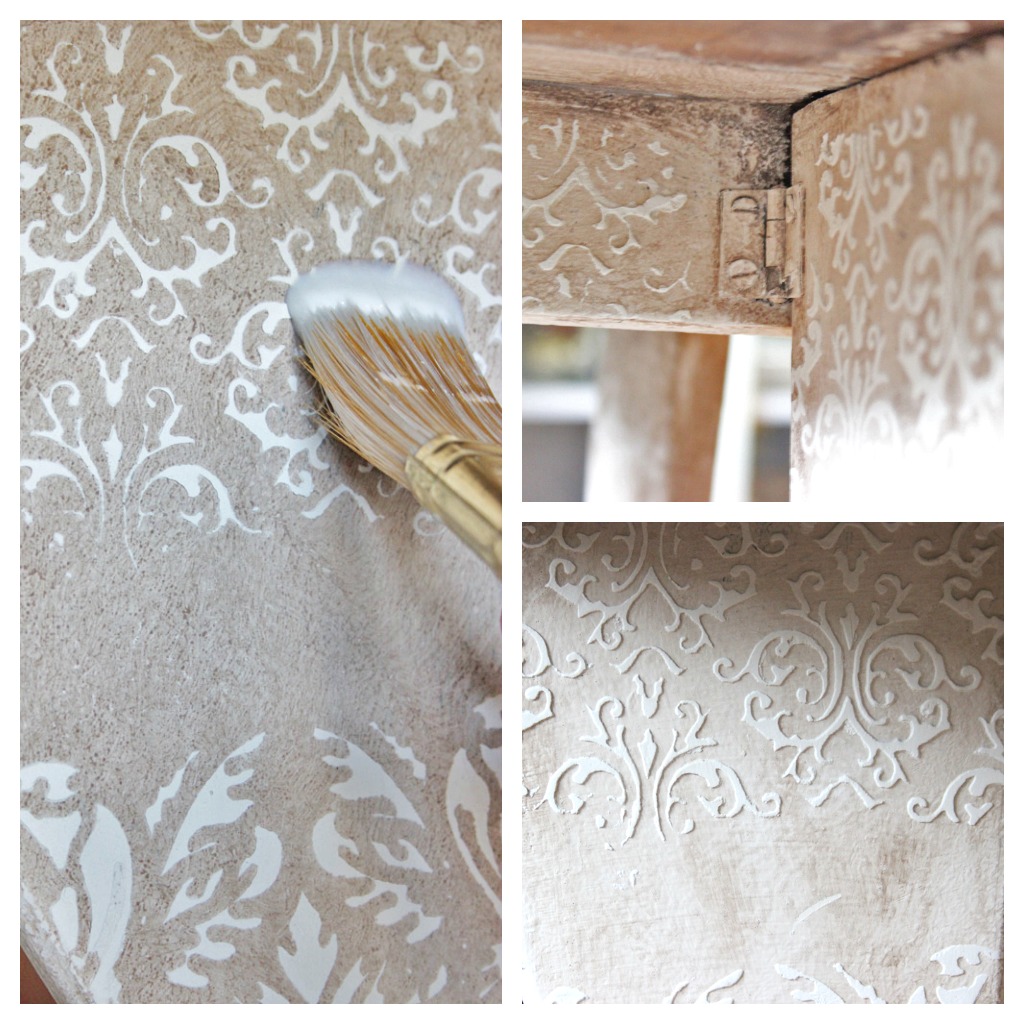
Use several stencil designs if you like. I couldn’t resist adding texture and pattern to the Butterfly Wings of this piece, this time using Nickel Chalk Type Paint + Venetian Texture Medium:
Be adventurous! Add texture in unexpected places.
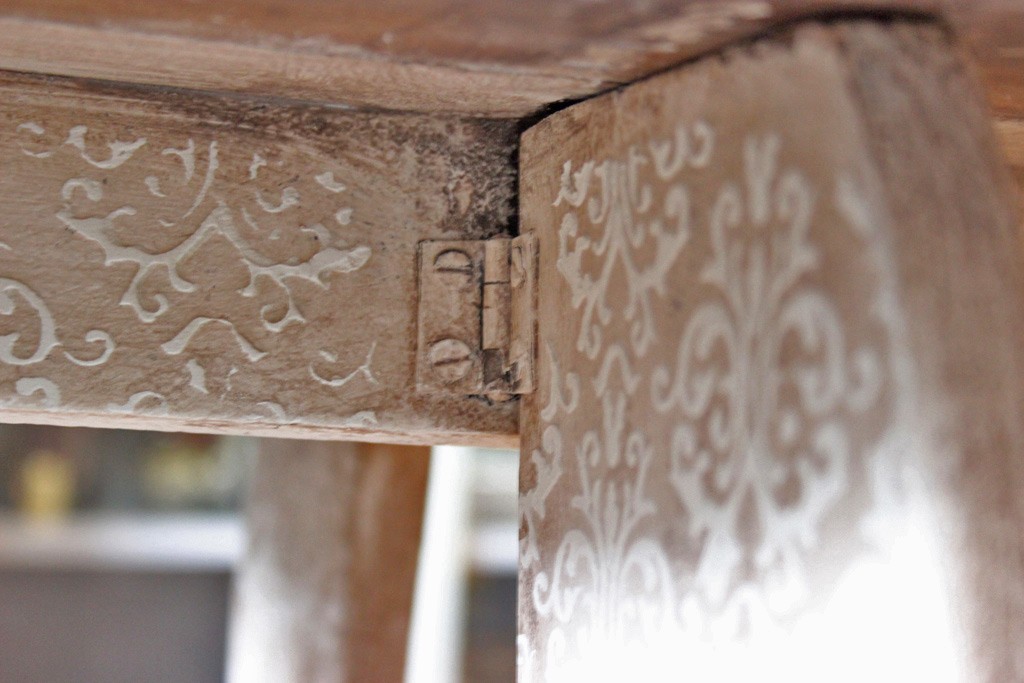
I even tucked texture up under the leaves.
It’s so easy – seriously, this took all of 15 minutes for ALL of the texturing.
Creating little surprises like this make me happy!
28. It’s best to allow the Venetian Texture to dry overnight, so get busy with other areas of your piece!
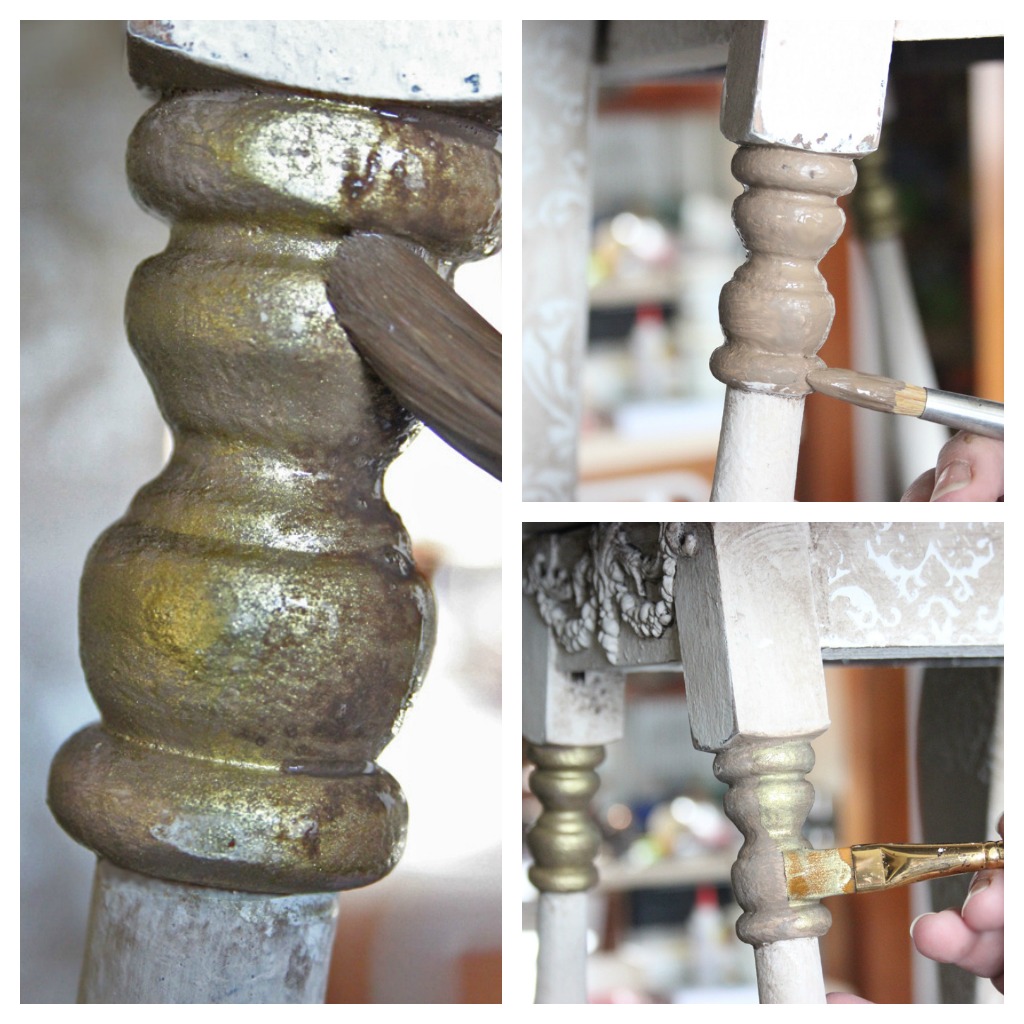
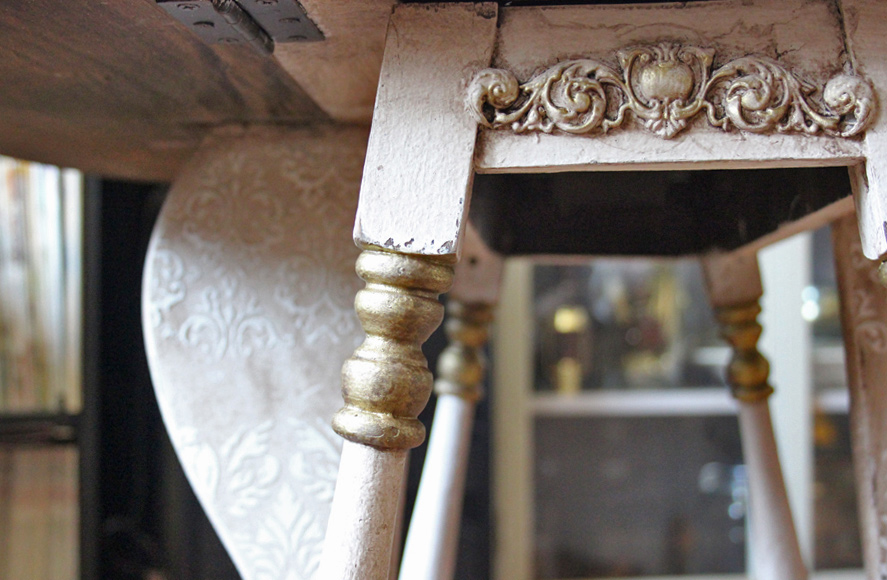
29. To add rich gold tones to the turned spindles, first paint a layer of Mocha Chalk Type Paint, using a soft artists brush.
30. Once the Mocha has dried, add a coat of Golden Glimmer Gilding Patina to the brown painted details.
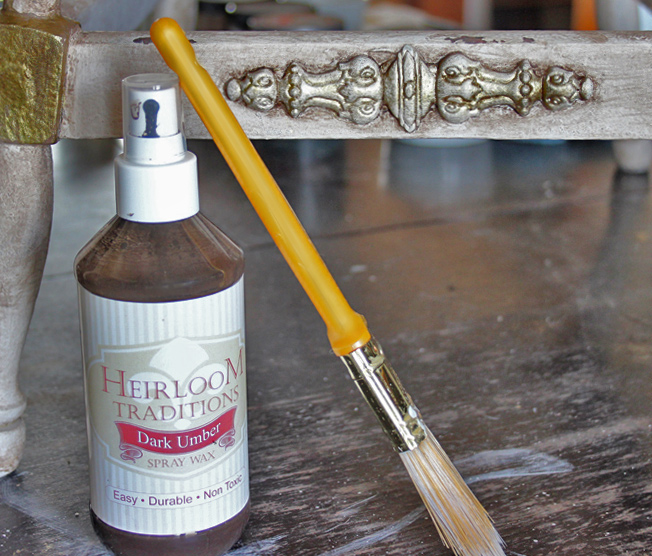
31. When the Gilding Patina has dried, add a splotchy coat of Dark Umber Spray Wax.
Allow the Spray Wax to remain full strength on these details for the richest effect.
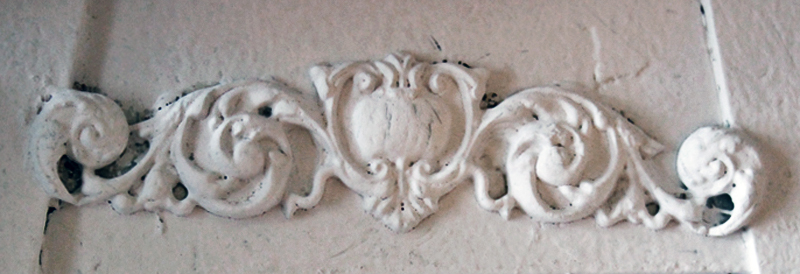
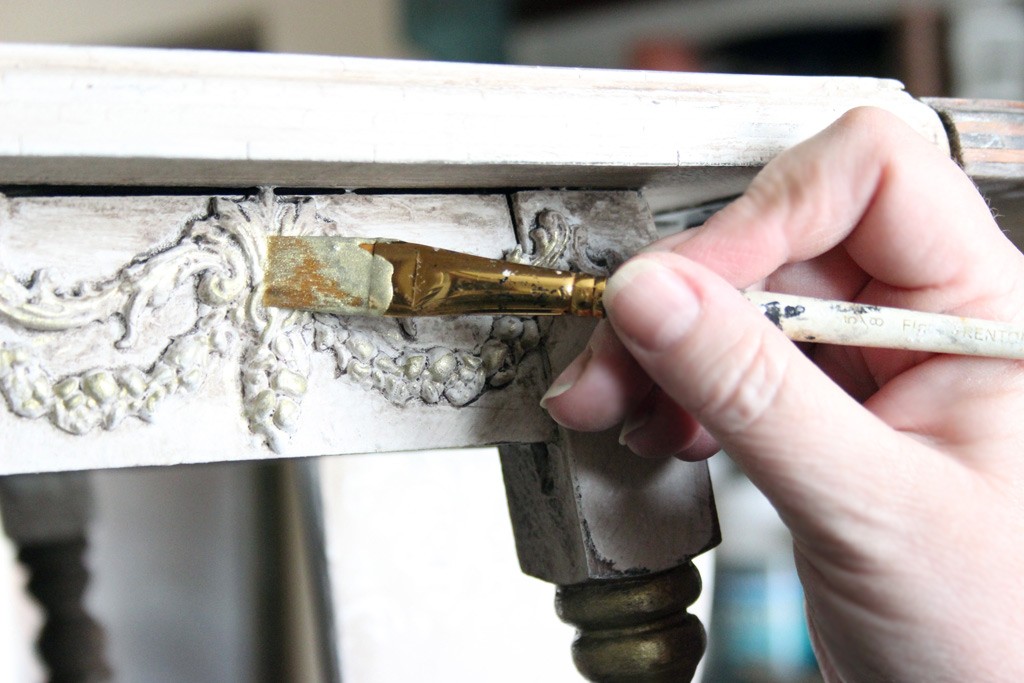
32. Dry brush a bit of Gilding Patina over the high points of the appliques:
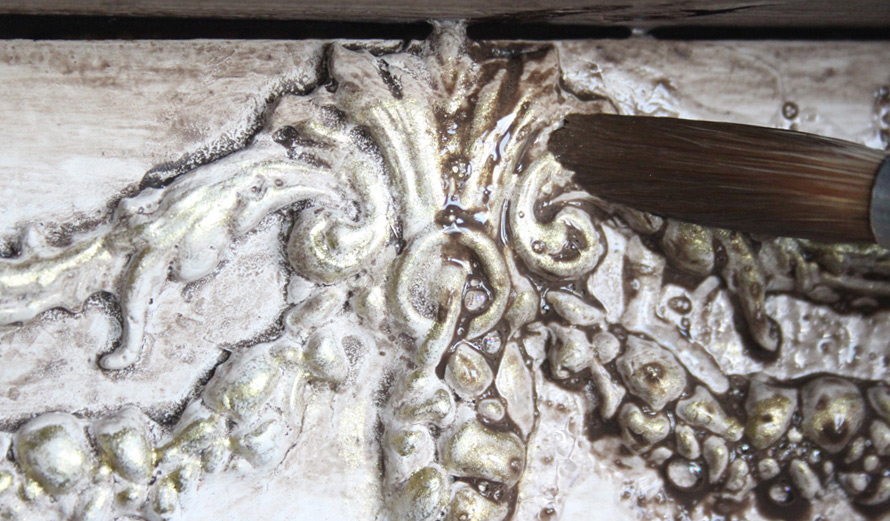
33. Follow with a generous amount of Spray Wax, then wipe back with a damp rag.
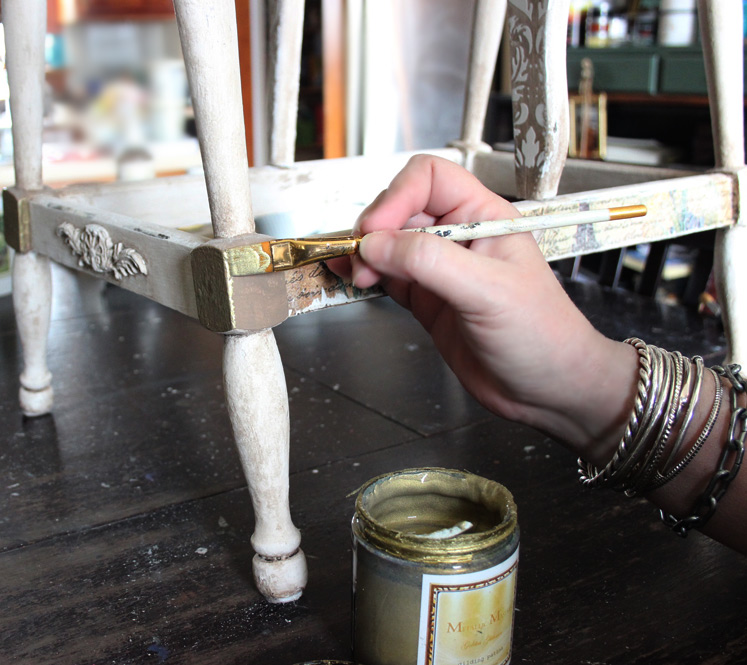
34. Add Mocha accents, followed by Gilding, topped with Spray Wax, wherever you want a bit of mellow metallic gleam:
The result is rich and delicious:
35. If you have decoupaged over painted portions of the piece, you may want to ‘tone it down’ a bit.
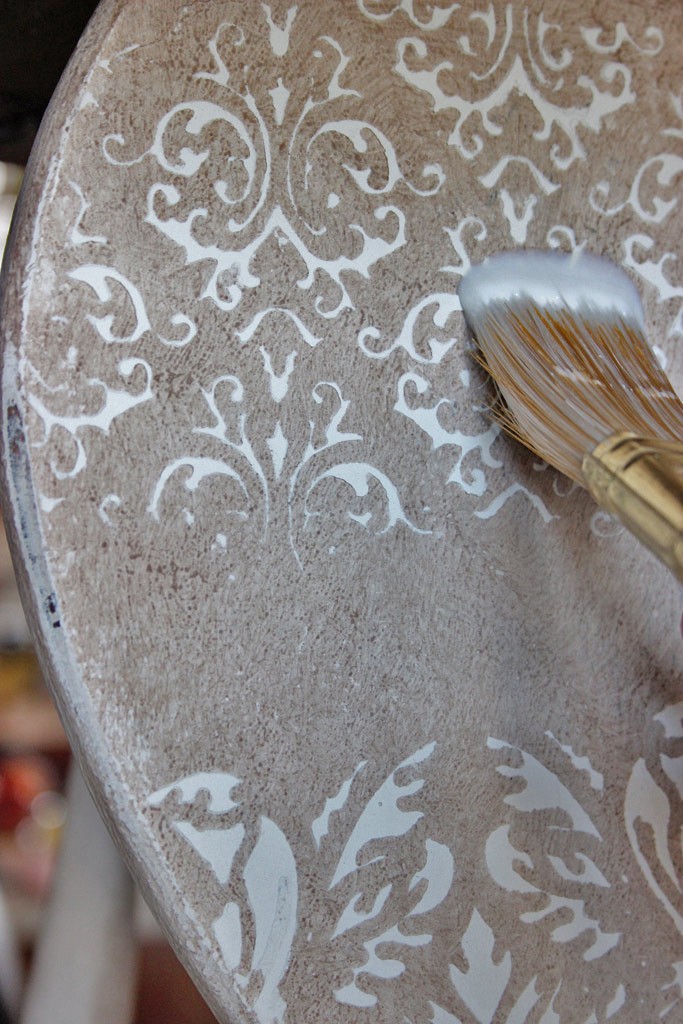
A watery mix of Nickel Chalk Type Paint loosely painted over the graphics will soften the look.
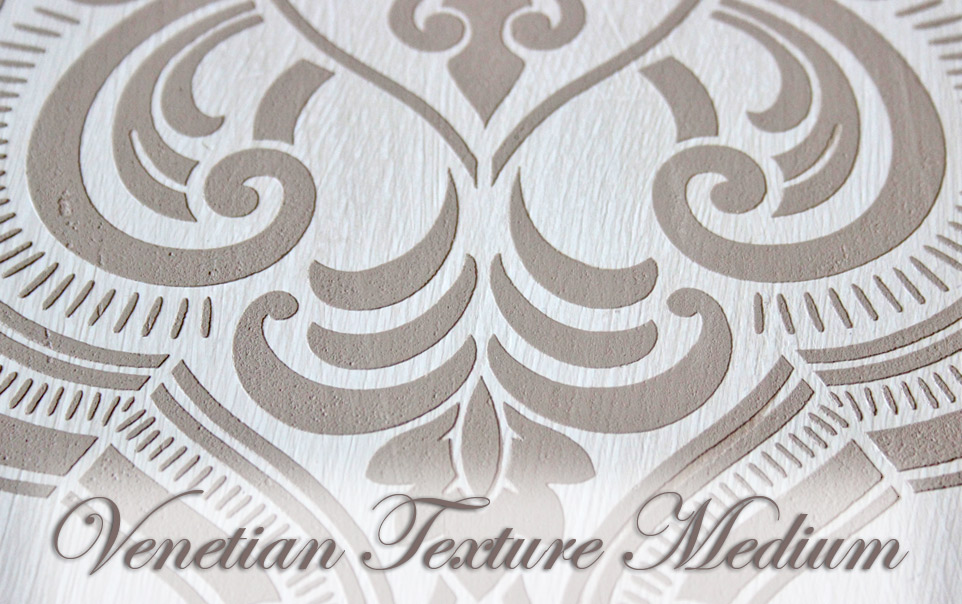
36. Once the Venetian Texture has cured, sand the surface until it becomes smooth to the touch. Now is the time to sand any rough edges, as well.
Using a stencil that is large enough to add pattern to all three sections of this tabletop creates cohesion in the design, even though we have starkly contrasting areas.
37. Complete the process by sealing the textured surfaces – I’m using 1Gel.
It dries quickly and leaves a permanent protective coating.
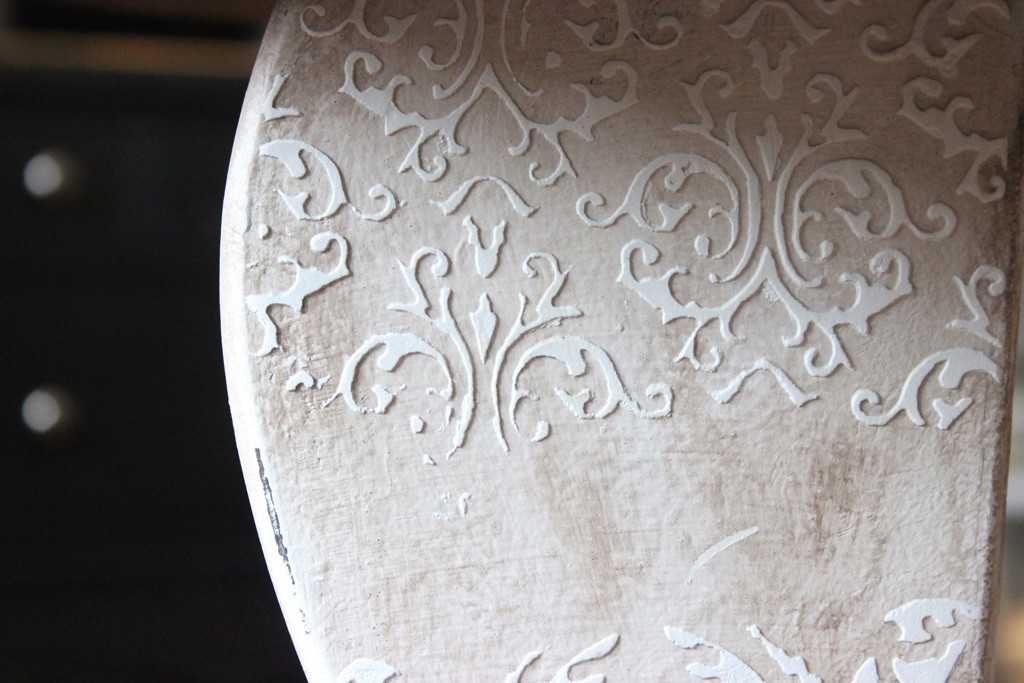
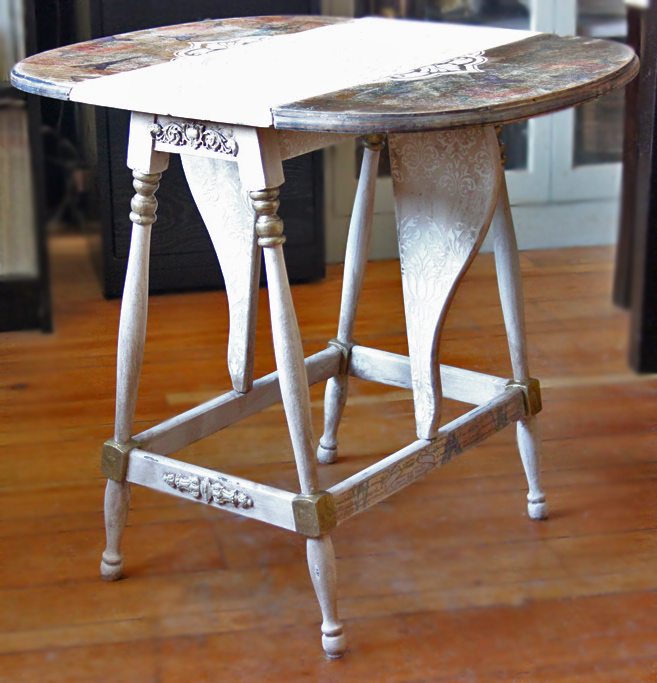
The completed piece is not only a treat for the eyes, the texture demands to be touched!
Our Butterfly has emerged from her latex cocoon!
I love how this little orphan has come back to life!
So many pretty details, none of them difficult to achieve.
One last glimpse of our Raised Stencil Texture Technique results:
For more information on Heirloom Traditions Products, please visit www.heirloomtraditionspaint.com
* Full Disclosure: Heirloom Traditions supplied their products to be used in this project, and they sponsored this post – however, I supplied the elbow grease, rescued furniture, design concept, and opinions! All of which reflect my own point of view, regardless of affiliation…
Thank you for visiting The Graphics Fairy! I hope you’re inspired to create a bit of Raised Stencil Texture on your next furniture project!
If you enjoy a bit of quirky creativity, stop by Thicketworks and poke around.
You’ll find a bevy of oddly charming projects and techniques, I assure you!
Heather


Hannah says
Hi Heather. Great project. I would like to try something similar, but want to have a thicker stencil. Well, I want to make it look more like an applique on a panel of a pice of furniture.
(1) I was wondering if the texture medium could be put into a pastry tube and piped on top of the stencil to look more like a custom applique? Basically, the stencil would be the perfect template.
(2) Then once dried, it would be painted and gilded. Would it stay adhered to the [verticle] surface for years?
Any advice?
Thank you.
Pat Rose says
Heather, I’m new to raised stenciling…Your tutorial says to sand the stenciled wood? Wouldn’t that remove the texture?
Heather Tracy says
Hi Pat! It sounds a bit confusing, I know. Here’s why: once the texture medium has dried, the surface will be a bit rough. Sanding will help to smooth it out, without obliterating the raised stenciled design…the Venetian Texture Medium is as hard as a rock once cured. It would take a LOT of sanding to damage it!
Charity Loechel says
THAT’S A BIT MUCH FOR THAT LITTLE TABLE.. NOT SURE THAT I LIKE IT…
Lenore says
Wow! So much going on in one piece! Thanks so much for the exciting technique of raised stenciling! I must try it.
Heather Tracy says
I did go a bit overboard, didn’t I, Lenore? Raised stenciling is one of the fastest ways you can add interest to a boring piece. It’s also addictive, and can lead to excessive use of texture – I encourage you to try it, but beware! 🙂
Christine E. says
I’m so excited to try these techniques. Love your ideas, Heather!!
Heather Tracy says
Hi Christine! I didn’t see your lovely comment until just now…Thank you so much for your kind words. I hope you have as much fun with this technique as I do!
phyllis says
is this special stencil or would the kind you get from hobby lobby work? and the table is beautiful
Heather Tracy says
Hi Phyllis! Well, I think the stencil is pretty special, but it’s not hard to find. On Amazon, it’s listed as “FolkArt Home Decor Stencil: Ornate Damask”. Of course, you can use any stencil you like. Thank you so much for taking the time to comment, and for being so sweet!
Rupa says
Heather, You say funkified and I say Frenchified and glamorized! You are one busy woman spitting out one fantastic project after the other! Your little beauty is about to take off on her wings! The way you have used the stencil is unique. I just LOVE the texture and that taupe color. That texture medium sounds magical. And now I need that stencil too. Sheesh, you are making me want to get everything you show on every project 🙂 PS: You are not going to believe this but this morning, I was thinking of asking you if you do napkin decoupage and if you could share some tips! This is so spooky that you have done exactly that. I have decorative napkin obsession (among many others). I should use them instead of hoarding them and stroking them lovingly every so often. Oh, if any one is interested, that Tuesday Morning store has the BEST, MOST GORGEOUS napkins!! Just don’t go to the same store I go to and empty the shelves please 🙂
Heather Tracy says
Hi Rupa! I love your napkin hoarding confession! Thank goodness there isn’t a Tuesday Morning in my area, so I don’t have to worry about confrontations in the napkin aisle!
1Gel is so perfect for decoupage. I’ve tried many a brand, and most of them are good, but this is my FAVORITE. I wish I had gallons of it.
And yes, Venetian Texture Medium IS Magical. I have so many ideas for upcoming projects…can’t wait to share!
Thanks for stopping by, and for your kind (and funny) comment!
Bonnie says
Love the texturing and can’t wait to try. Is he Gel the same as Mod Podge?
Heather Tracy says
Hi Bonnie – great question. NO. 1Gel is a very different type of product. For one thing, it dries to a very hard and protective finish. It will never feel ‘sticky’, even in humid conditions. It doesn’t have a glue-like consistency, like Mod Podge – it’s a thinner liquid. Don’t get me wrong, I love MP, and have used it for decades. It’s just that I won’t use it for furniture projects – 1Gel is more to my taste.
Have fun with the texturing – it is super satisfying to get such great results from so little effort.
Ellie Knol says
So beautiful, what a good idea!
Heather Tracy says
Thanks Ellie…the great thing is that you don’t have to have ‘artistic’ skill to pull this off – the pretty paper and the stencils do all the work for you!
Julia says
Where did you get the large stencil or where can I purchase this stencil?
Heather Tracy says
Hi Julia – The largest stencil is made by Plaid, under the FolkArt brand. It’s called Ornate Damask, and you can find it on Amazon! Isn’t it pretty?
HELENA SHANTEAU says
Really neat, do that on flat doors i wonder?
Heather Tracy says
Hi Helena – Absolutely! There’s virtually no limit to how you can decorate with this amazing stuff: Walls, cabinets, frames, doors – any wooden surface. It only strengthens anything you coat it with! If doing doors, I would recommend either removing them so that you can lay them flat, or making your texture medium mixture very thick, so it won’t ‘droop’ while curing. Have fun!
Rebkot says
Wow – Heather – I LOVE your posts! What a very unique project. I wish you were my next door neighbor and would take me to flea markets with you so I could see the hidden treasures.
Heather Tracy says
Awww – Thanks Rebkot! Thrifting is so exciting…I’m sure we would have a blast!
Gaynor says
What a lovely result Heather, you make it look real easy. Like you I love texture, I think this is fab
Heather Tracy says
Thanks, Gaynor! It IS easy. Stencils make it possible to create elaborate patterns and texture without any real effort at ALL. Gotta love that! Thanks so much for your kind words…
Christina says
I really *really* love the stencil you used on the less obvious places of this table. Are you able to provide a link for where I can purchase one the same? Thanks!
Heather Tracy says
Hi Christina – this wonderful stencil is the “Prima Marketing Prima Designer Stencil, 6 by 6-Inch, Flourish”, available via Amazon. I use it on so many projects. It gives that touch of damask that I just adore!
Christina says
Thanks for taking the time to get back to me! Sadly when I look for the stencil you suggested it brings up something totally different … I tried amazon and the distributor directly. (https://www.primamarketinginc.com/shop/store/products/stamping-stencils/stencils-masks/6×6-stencil-flourish) It maybe wonder if maybe I wasn’t clear and asked for the wrong one. The stencil I’m hoping to find is the one that you have featured at the bottom of this post … you’ve got 3 pics all grouped together. Is this the one you thought I meant? Thank you!
Heather Tracy says
Hi Christina – Oops…that’s what happens when you have too many stencils. You were perfectly clear – I’m the one who was confused. Here’s the one you want: Kaisercraft T602 Scrapbooking Template, 12 by 12-Inch, Damask (Amazon). Sorry for my error, and happy stenciling!
Debbie Tibbs says
Wow that forgotten table has turned into a work of art. Great job!
Heather Tracy says
Hi Debbie – coming from YOU, that is praise indeed. Thank you so much for taking time out of your busy day to stop by The Graphics Fairy! It’s a thrill to bring little treasures back from ‘the brink’, and it’s that much sweeter when kind folks leave nice comments!