Recolor Images Using Picmonkey
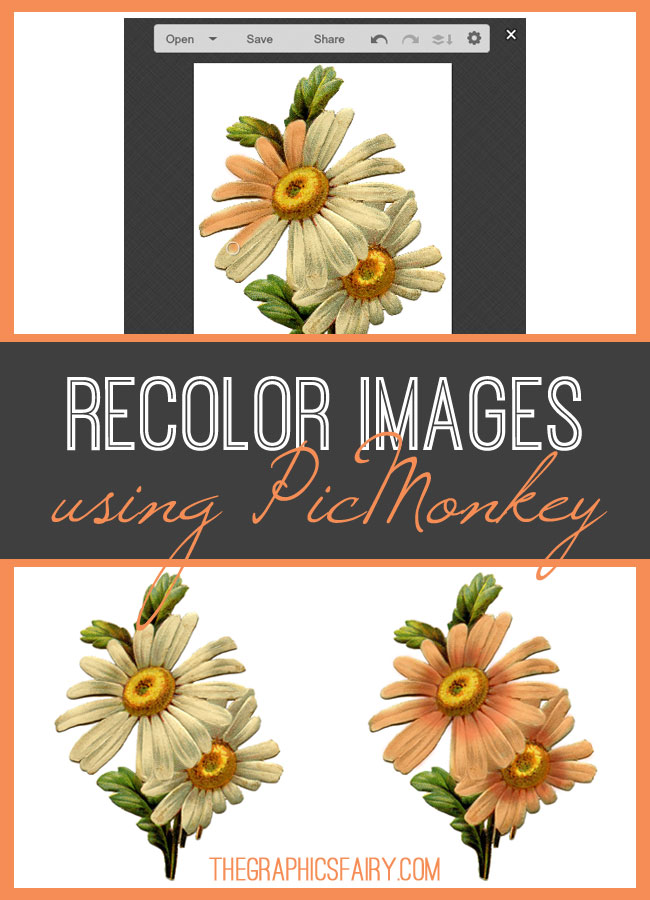
Have you had an image where the color was just not quite right? Ever wanted to make another version of an image with a slightly different color? There is a simple way to “paint” your image in PicMonkey.
{This post contains affiliate links}
Today, we’re going to show you a quick trick you can use to recolor images using PicMonkey.
Open Your Image. Open your image in PicMonkey, by going to PicMonkey. Choose Edit on the main page, and select your image to work with. I used this vintage daisy image from the blog. Tip: images with white areas, and black & white photos work really well, but you can get results with any image.
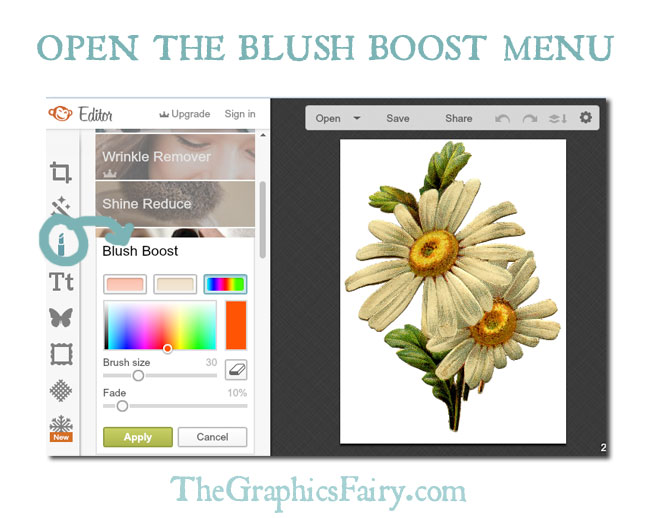
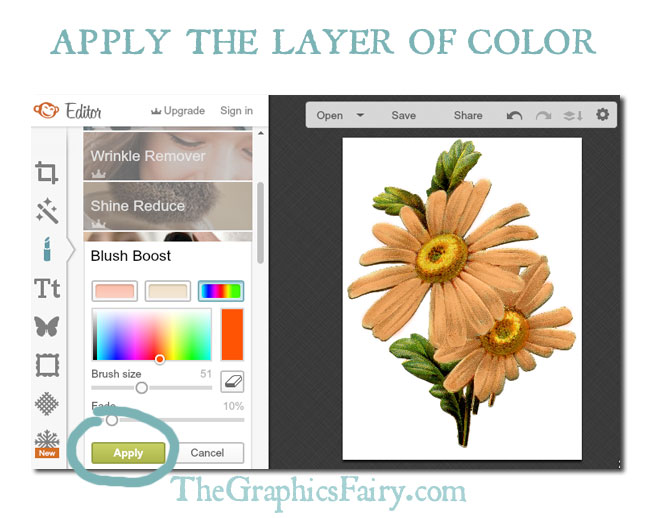
Open the Blush Boost Menu. Hit the Touch Up icon on the left (it looks like lipstick), and then select Blush Boost. Don’t worry, we are not adding makeup to our flower, but we can add a transparent layer of color to our image to change the hue of the image.
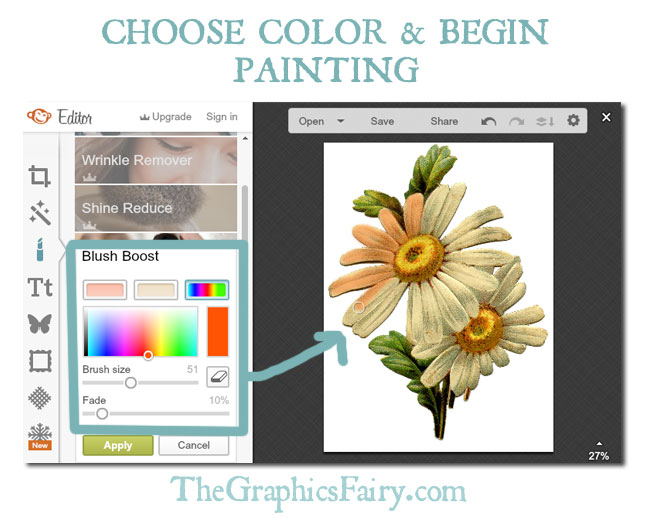
Choose a Color & Begin Painting. In the Blush Boost menu, select the rainbow icon. Click on a color to begin painting. I usually choose a more saturated color at the bottom of the spectrum, then use the Fade slider to control how the color looks (a fade between 10% and 50% worked well for me).
Tip: Work in small sections. Hold down your mouse and color in the image. Every few petals, I would unclick the mouse. This way, if I made a mistake (like coloring outside the image), and hit undo, I would go back to my last action / click, instead of having to recolor the entire image.
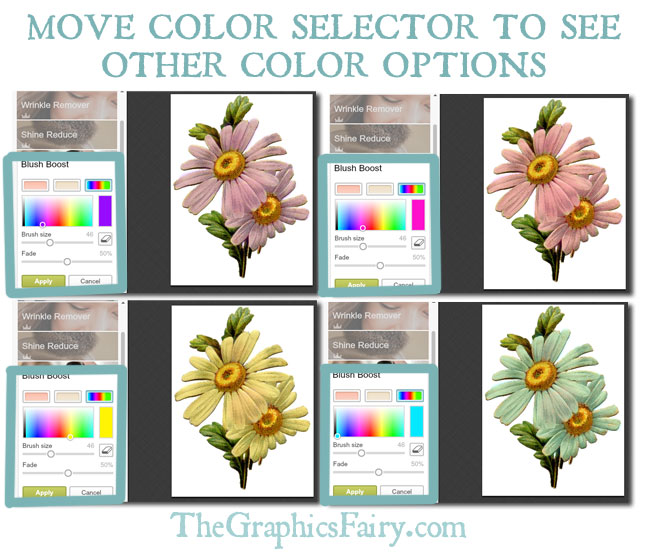
Apply the Color. When you have colored in the image, you can move the color selection to easily see how the image looks as another color. You can also play with the fade to see how intense the color is. Note below how I moved the color slide from orange to purple to pink etc. to see how the flower would look as another color. I did this BEFORE I hit Apply.
When you’re happy with your first layer of color, hit the Apply button.
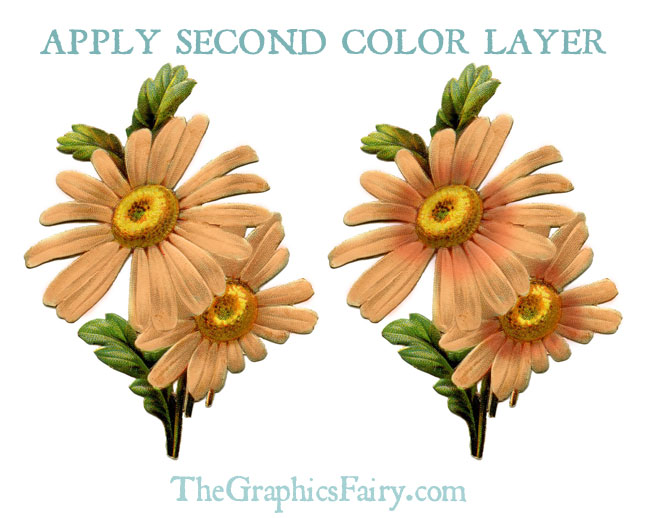
Apply a Second Color Layer (Optional). At this point, you can save your image by hitting Save at the top of the screen, or you can apply more / different colors. To create the flower on the right side below, all I did was go back in to the blush boost layer, select a slightly pinker shade and add color to the center of the flower only.
Save Your Image. Hit Save at the top of the screen to save your image. This is a great technique to color in black and white photographs as well, and it gives you more control than if you were to apply an overlay of color or texture over the entire image.
I hope you enjoy playing with this technique and creating something fun!
Emily
********************
Hello! Are you new to The Graphics Fairy?
Welcome, I’m so glad you’re here! Browse around to find thousands of Stock Images that you can use in your projects or designs! I post new Vintage images every day. Need more info about my site? Try my FAQ page.





Jennifer says
hi- Is this feature still available on Pic-Monkey? I do not see it. Thanks
graphicsfairy says
Hi Jennifer, Picmonkey has changed some things so it is probably best to contact them directly as I am not sure 🙂
Snartle says
So is thete an option so you can select a certain area to recolour?
graphicsfairy says
Yes, you can recolor whatever you choose. The best thing to do is just get in there and give it a try, practice, practice, practice is what I always tell everyone 🙂 Good luck!
Inez says
Thank you SO much for this tutorial! I use Picmonkey all the time, yet I never know about this feature. This is very helpful.
Karen Watson says
You’re welcome Inez, I’m glad you found it useful!
Patty says
I cannot wait to try this out! Thank you Karen!
Juli Levine says
I had no idea that this website existed. I had been wondering how I could color my own images…well, now I know! Thanks a bunch!
Cindy Harris says
A wonderful tutorial! Thank you for teaching others how to use picmonkey.
Linda says
Clever, thank-you for the tip!
Wende says
Thank you SSSSSSo much for this..I’ve been trying to figure out how to do this using picmonkey..my program I use crashed with a runtime error an I haven’t been able to use it..so frustrating..now I can get back to work on new designs..Thanks again.!!
Emily says
You’re welcome Wende. Glad this was helpful 🙂
Chelsea says
Thanks for this informative post. I find it very helpful and look forward to giving it a try. I never knew PicMonkey existed, so this is a wonderful option to try out on the black and white images. Many thanks!
Emily says
Chelsea – definitely try it out. It’s a good alternative to some of the more expensive software and there are a ton of things you can do with it. Here are some other tutorials I’ve done if you’re looking to do something specific with a graphic, try here: https://thegraphicsfairy.com/best-picmonkey-image-editing-tutorials/
Linda L says
Great idea! Thanks for sharing the steps!
Emily says
You’re welcome Linda. Hope you have fun trying this one out 🙂
Tamara says
What a great tip! Thank you so much, Karen. You’re always so helpful and sweet to share! Wishing you a day filled with good things.
Tamara 🙂
Karen Watson says
I’m glad you liked it Tamara! 🙂