Vintage Paper Christmas Ornaments
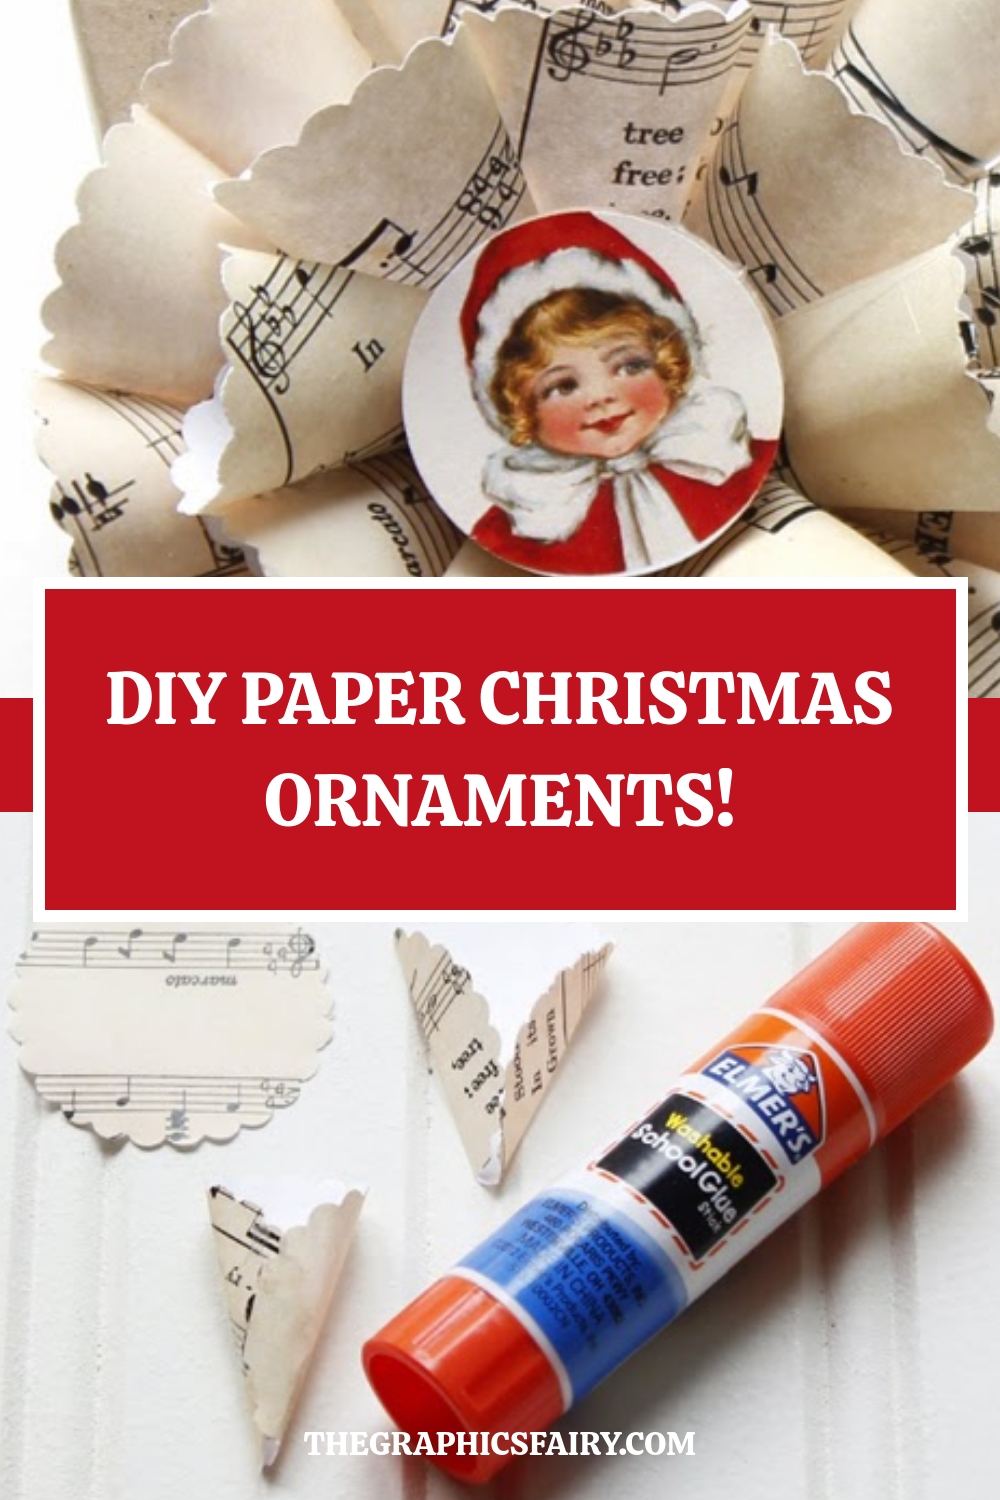
Hi everyone, Andrea from The Cottage Market here! How are you. Guess what…the holidays are upon us and I thought it might be fun to get a head start on the decorating festivities with some vintage paper Christmas ornaments!
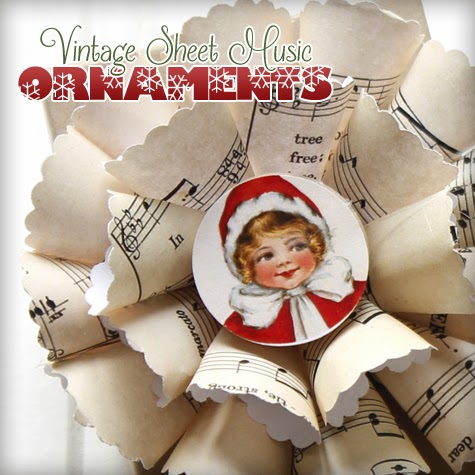
So I have a cute sheet music Christmas ornament diy for you today. You can also use these little cuties for decorations on packages and if your really looking for a big project…you can make this into a full size wreath and it will look amazing! By the way you are going to want to make tons to share and just imagine a full tree of them…maybe with the family pictures in the center and of course the family pets! So many possibilities.
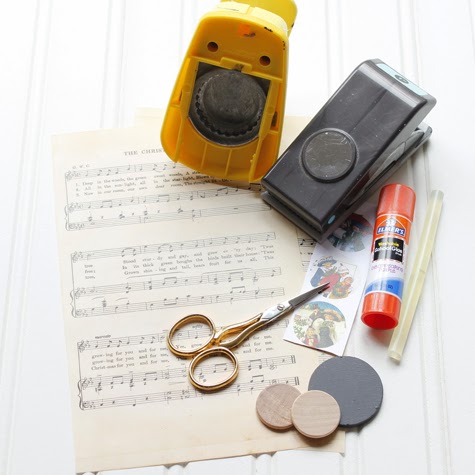
Vintage Paper Christmas Ornament Supply List
- Scalloped Circle punch
- Round Circle Punch
- Wooden Discs
- Scissors
- Glue Stick
- Hot Glue
- vintage sheet music (which you can find here right here at The Graphics Fairy)
- Center Graphics (Also found on this site)
I used a 1 1/2″ scalloped punch for my ornament but you can use smaller and if you are looking for a larger embellishment…go for it!
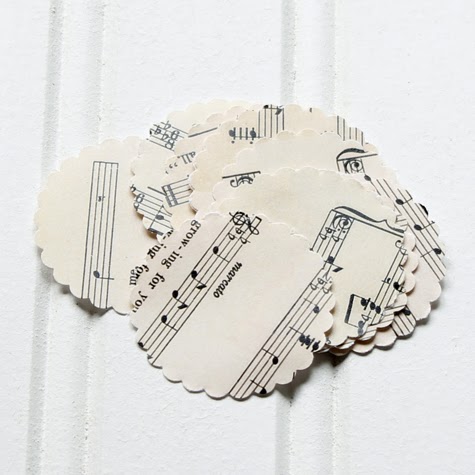
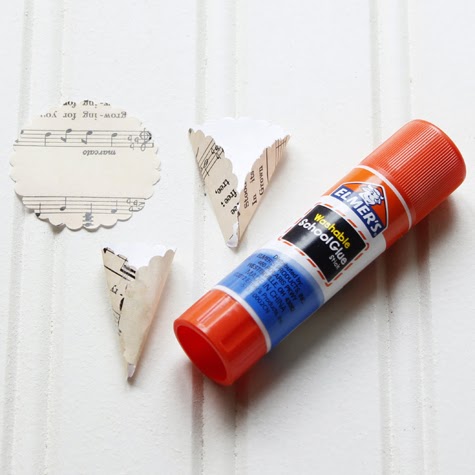
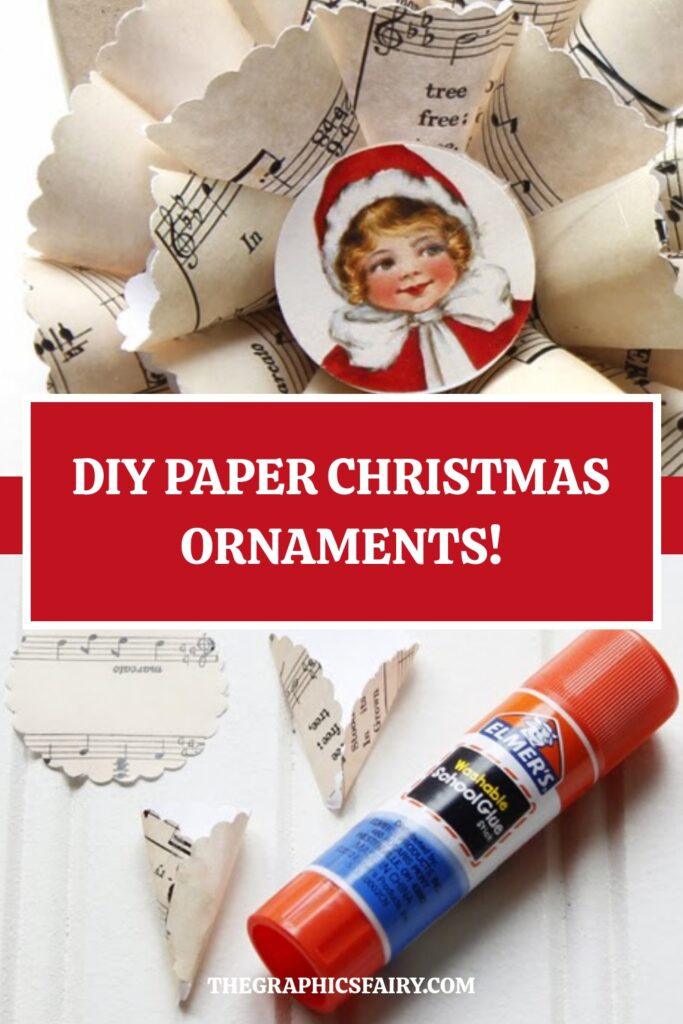
First you need to punch out a stack of circles…easy easy easy!!!
Then it is time to make the cones…make lots of them! It is something that you can do while you are watching TV or chatting at the kitchen table…just take your circle and gently fold as shown and then add a bit of glue to the left side and then fold the right side over and press…repeat…repeat…repeat!!!
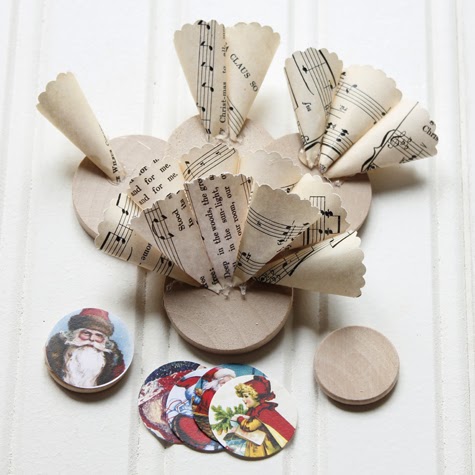
Now take your 1 1/2 inch wood circle or whatever size you are using and start the building process. I use hot glue for this part. A little dab…press the cone on…repeat and repeat and repeat till the circle is full. They you will probably want to add another row…so just move the cone tips to the center and make another go around.
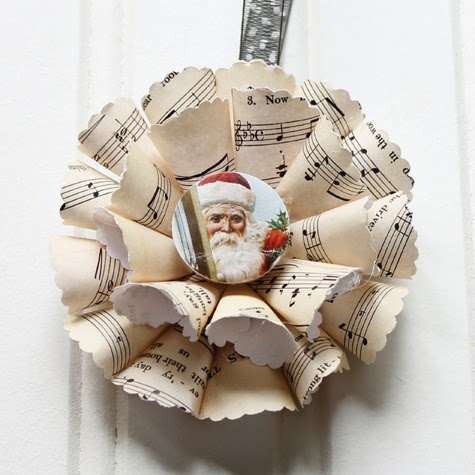
You then apply a vintage Christmas circle graphic to a wooden medallion (I used the Christmas Elf Girl Image) and hot glue to the center…then all you have to do is attach a ribbon loop and you are ready to hang!
You no longer have to search for the perfect sheet music …just run out some whenever you need it from The Graphics Fairy. To let you know…from one 8 1/2 X 11 inch page I got 40 circles to work with so you can get 2 vintage paper ornaments this size from one printed sheet…pretty cool right! I stacked to sheets on a page to fill the page at a good dpi quality 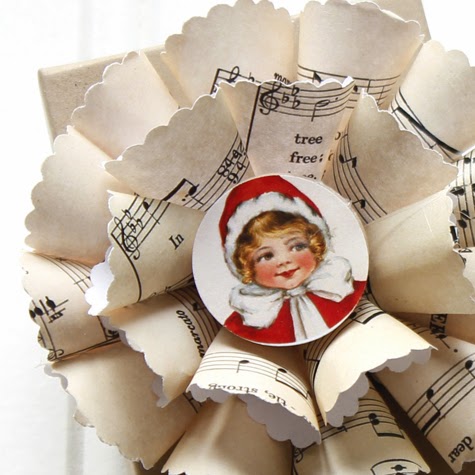
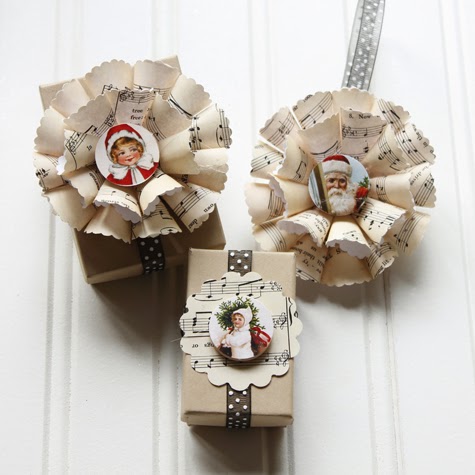
You don’t have to use them as ornaments…you can also use them to decorate your packages instead of a bow…I know everyone will love these as part of their present! If you need just a quick wrapping embellishment…just punch a larger scalloped circle and then glue a wooden medallion with an image on it onto and viola…in seconds you have a gorgeous package! So many possibilities…so many choice Explore the Christmas images and find the perfect centers for your creations or like I said above…family photos…beloved pets…an endless selection to make these with your personal spin!.
Hope you have tons of fun making these Vintage Paper Christmas Ornaments! They would look fabulous with other images here at the graphics fairy…have a look around at some of her scrapbooking sheets…I just love the vintage music sheets though…they are such a festive touch!.
If you ever want to visit me…I am always hanging out at The Cottage Market and would love to see you there some time! ENJOY searching for your favorite images here at the one and only Graphics Fairy…a wonderland of vintage images! You might also like these other Sheet Music Christmas Ornaments HERE or these DIY Holiday Snowflake Blocks HERE too. Hugs…
Andrea



Heather says
I love these! They could be really cool with a vintage button or brooch too 🙂
Carolyn says
I LOVE THIS IDEA I have some antique Christmas cards and I thought I would try this idea with them Thank your for sharing
Peabea says
Love them. Here is link to mine I made and I put link to this site. Thanks so much. They’re adorable. http://peabea.com/2013/11/23/i-made-mine/
Lady_D says
Lovely, and I have all I need to make these – except the wooden discs… Where can I find those?
andrea says
Hi there …How are you! So glad you are good to go : ) You can get the wooden discs at Michael’s…Joannes…Hobby Lobby and most craft shops…but if you can’t find them…then cut or punch a circle from a heavy card stock or card board…it will work very nicely…you can punch sheet music and apply it on the back so it looks finished 🙂 hope that helps and have fun creating! hugs…have a great evening
Laura Strack says
These are darling, Andrea. I could see a little table top tree adorned with these. Maybe even a large Christmas Tree! What we do without Karen and the Graphics Fairy?
andrea cammarata says
Laura…you are soooooooo right…one of these would be perfect for the tree top and also full size…I would love to see it with the beautiful sheet music and then alternating layers of a pretty silver metallic paper and topped off with one of Karen’s gorgeous angel graphics…a little bit of heaven! Thanks for sharing with us and I hope you have tons of fun creating : ) hugs…
Ronda L says
I am so going to make some of these. These would make nice inexpensive gifts for people at work. I also think they would look really cute strung on a banner by themselves or interspersed with pennants. Or hang them on evergreen boughs on your mantel. So much you can do. I can see this also changing up for Valentine’s Day or Easter or 4th of July!! Love it.
andrea cammarata says
I LOVE ALLLLLLLL Of your ideas Ronda! They are actually endless! Thanks for sharing them with everyone…they are great! They so can be changed up for any holiday…that is for sure…I am actually going to try making teenie weenie ones for egg decorations come Easter! hugs and enjoy!
Cynthia says
Simply gorgeous creations!
andrea cammarata says
So glad you enjoyed this little craft Cynthia! I hope you have hours and hours of fun creating! hugs…
Cat Slater says
Instead of Black Friday shopping, 7 of us get together to make Christmas ornaments. Each one of us brings instructions and supplies. This is what I’m bringing. They are fantastic!! Thanks so much for sharing.
Traci says
Love these they would be great on the cover of a mini album as well. I will have to make one (or more). They definitely look vintage and right up my alley. Thanks so much!
andrea cammarata says
Traci…that is a fabulous idea! They would be perfect on a mini album! Hope you submit it into Brag Monday so I can see it!!! : ) Enjoy and have fun! : )
Sharon says
Love them…Thanks
andrea cammarata says
So glad you enjoyed the little tutorial Sharon! Hope you have tons of fun making them:)
Karen says
Hi, do you just use one circle per ornament or do you glue 3 together lilke in the picture? So cute, can’t wait to make them!!!!
andrea cammarata says
Oh Karen! I am so so sorry! I see where that was confusing…only 1…I was just showing the progressions of adding the little cones on and used a few to show the additions : ) It is all done with one circle : ) The cool thing is…you can use different size circles and make bigger ones and if you don’t have a wooden circle…you can cut a circle from illustration board…foam core or you can even use a cake round : ) it all works : ) Thanks for bringing that up…: ) Enjoy and hope you get to make tons of them!
Pat C. says
What an adorable ornament! The scalloped edge adds a sweet touch, but smooth circle punches would be lovely, too. I also love its use as a package topper!
I can’t get to craft stores very often, so I might be tempted to use cardstock or cereal box punch-outs in lieu of the wooden circles. If I used a cereal box, I would cover the exposed side of the larger back circle with a sheet music punch-out.
Thank you so much, Andrea, for this clever idea! xoxo
andrea cammarata says
Hey there Pat…that is an awesome idea! covered cereal box circles would work perfectly!!! : ) LOVE IT and you can make any size at all! Improvising is the story of crafting right : ) lol! Hope you have fun creating…I love this one because you don’t need much to actually make them…just the basics : ) Have fun and thank you! : )
LeAnne says
OH MY GOSH, these are so cute. I made a big wreath once with pages from an old hymnal; plus I made an advent calendar last year from the center images. HOW COOL to combine the crafts….can’t wait to do some of these! TFS!
andrea cammarata says
So happy you like them LeAnne and I am sure yours are going to look amazing! Enjoy and here’s wishing you tons of fun : ) hugs…
Kathleen says
Love your collection of sheet music ornaments. Can’t wait to do them. I will some glitter to the edges for bling. Thank you
andrea cammarata says
So glad that you enjoyed them and yes…add some glitter for bling…to be honest with you…I so wanted to do that but glitter has become the enemy of my little photo space…I can’t seem to get rid of it and then it multiplies…even the dogs GLIMMER!!!! lol!!!: ) so you have fun with the BLING I am sure they will look fabulous! hugs…
Pat C. says
Andrea, I read on Pinterest (where else? hehe) that the sticky kind of lint roller is good for picking up stray glitter. I’ve never tried it personally, so I can’t vouch for its effectiveness–but you might want to give it a shot… in a controlled environment, such as at the bottom of a deep cardboard box, with the dogs locked out of the room! Good luck! xoxo