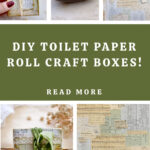
Toilet Paper Roll Craft Boxes
Hello Graphics Fairy friends, I’m Diana from Dreams Factory and I’m happy to be here again to share another DIY craft project with you! Today, I will show you how to make these super chic Vintage Mini Paper Boxes using toilet paper rolls. The process itself is fairly uncomplicated and once you get the hang of it, you can create as many of these super charming mini boxes as you want! I love it when we can create a melange between aesthetics and functionality. These can then be used to hold all sorts of small things around your home or craft room, all in a stylish way. It’s the perfect upcycled craft!
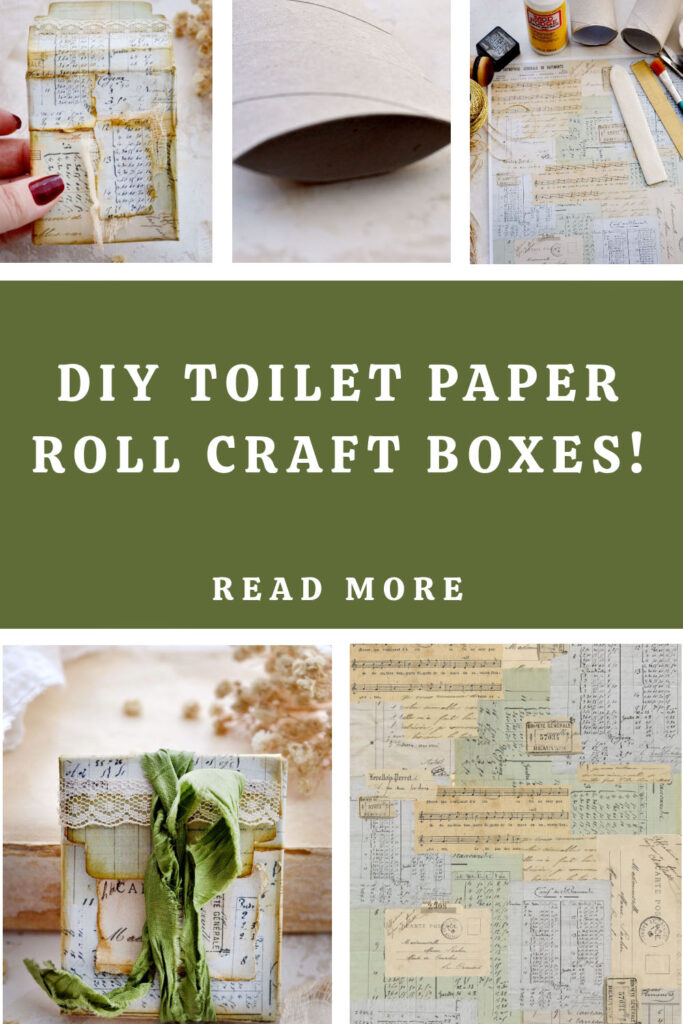
I created this gorgeous French ephemera collage specifically for this project. I wanted the boxes to have more of a universal feel, so you can use this collage to create the boxes and then further decorate them as you prefer.
I actually created two printables for this project and I’m sharing them both below. The first one is our gorgeous French ephemera collage that can be printed and used, no matter the size of your boxes.

The second one with the lovely tabs was actually a later addition to this project, as I created it after finishing the boxes. But I would say it is a great addition that will add even more charm to the final pieces.
Free Printables:
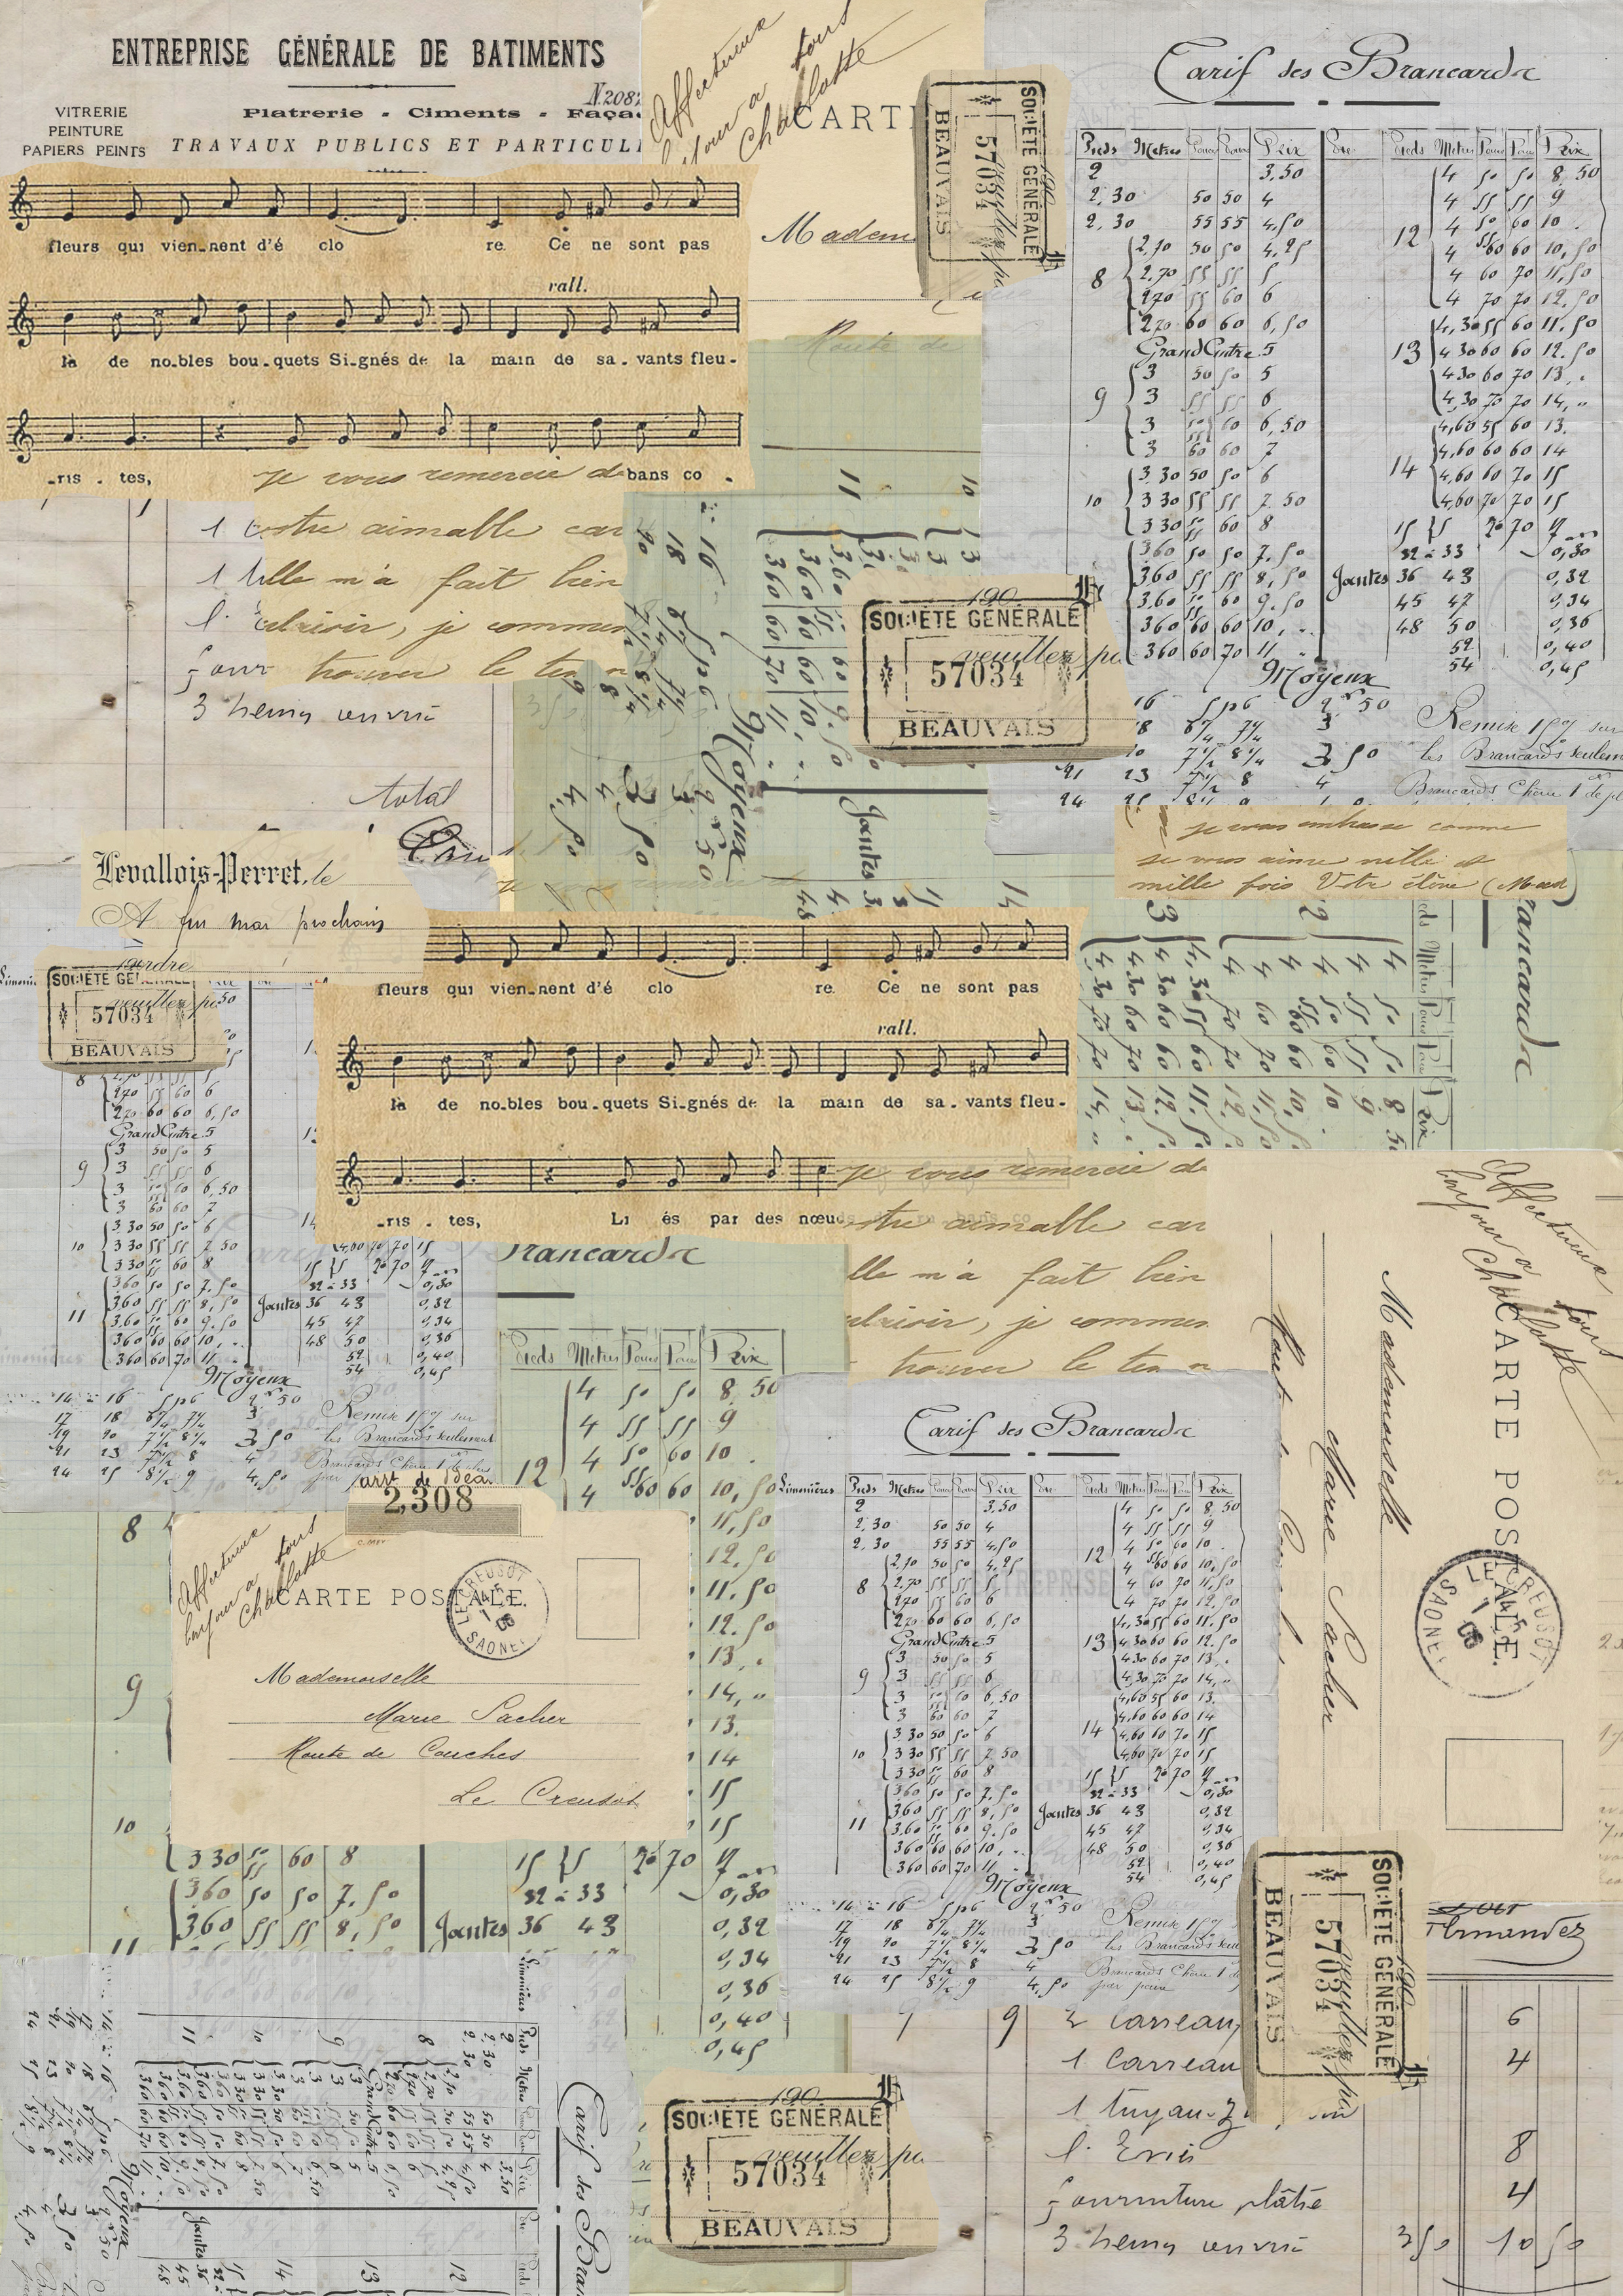
—-> Click HERE to Download the Full Size Printable PDF <—-

—-> Click HERE to Download the Full Size Printable PDF <—-
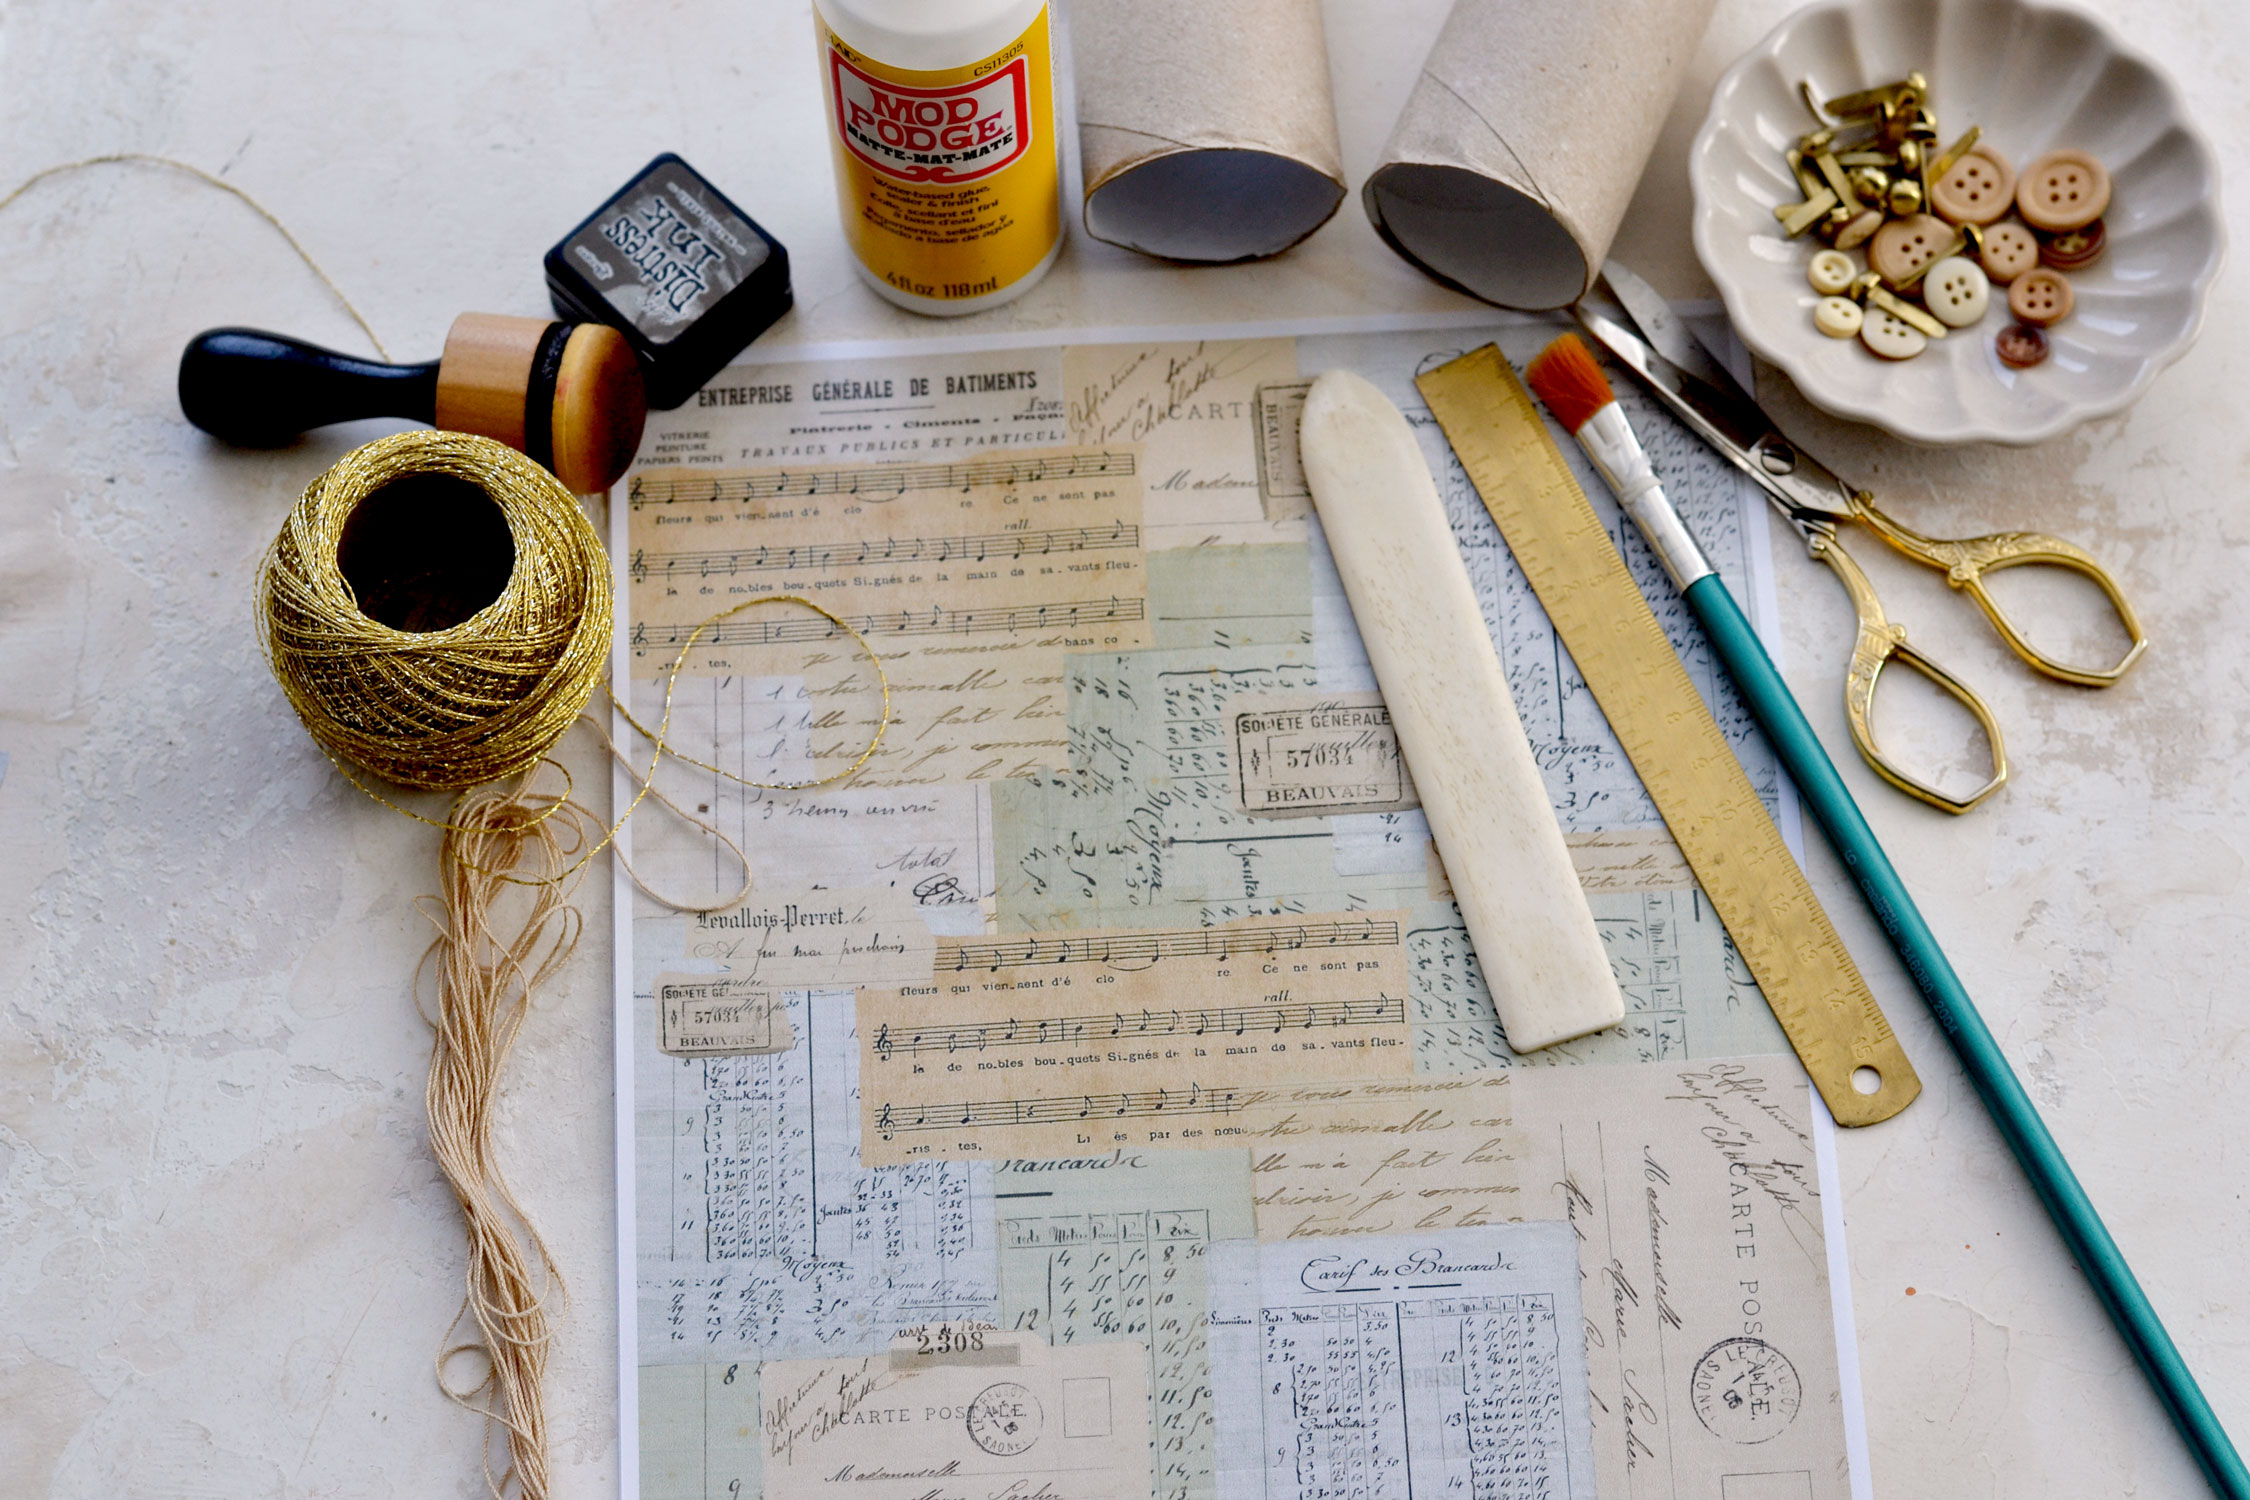
Toilet Paper Roll Craft Boxes Supply List:
- regular printing paper
- home printer
- scissors
- mini distress inks
- blending tool with foams
- paper rolls – toilet paper or kitchen paper rolls (I used kitchen paper rolls, cut in half)
- ruler
- bone folder
- Mod Podge or paper glue
- brush
- coffee dyed gauze or cheesecloth
- crinkle ribbons, gold thread
- buttons or other small embellishments
- metal brads
Step by Step Tutorial:
Flattening the paper rolls
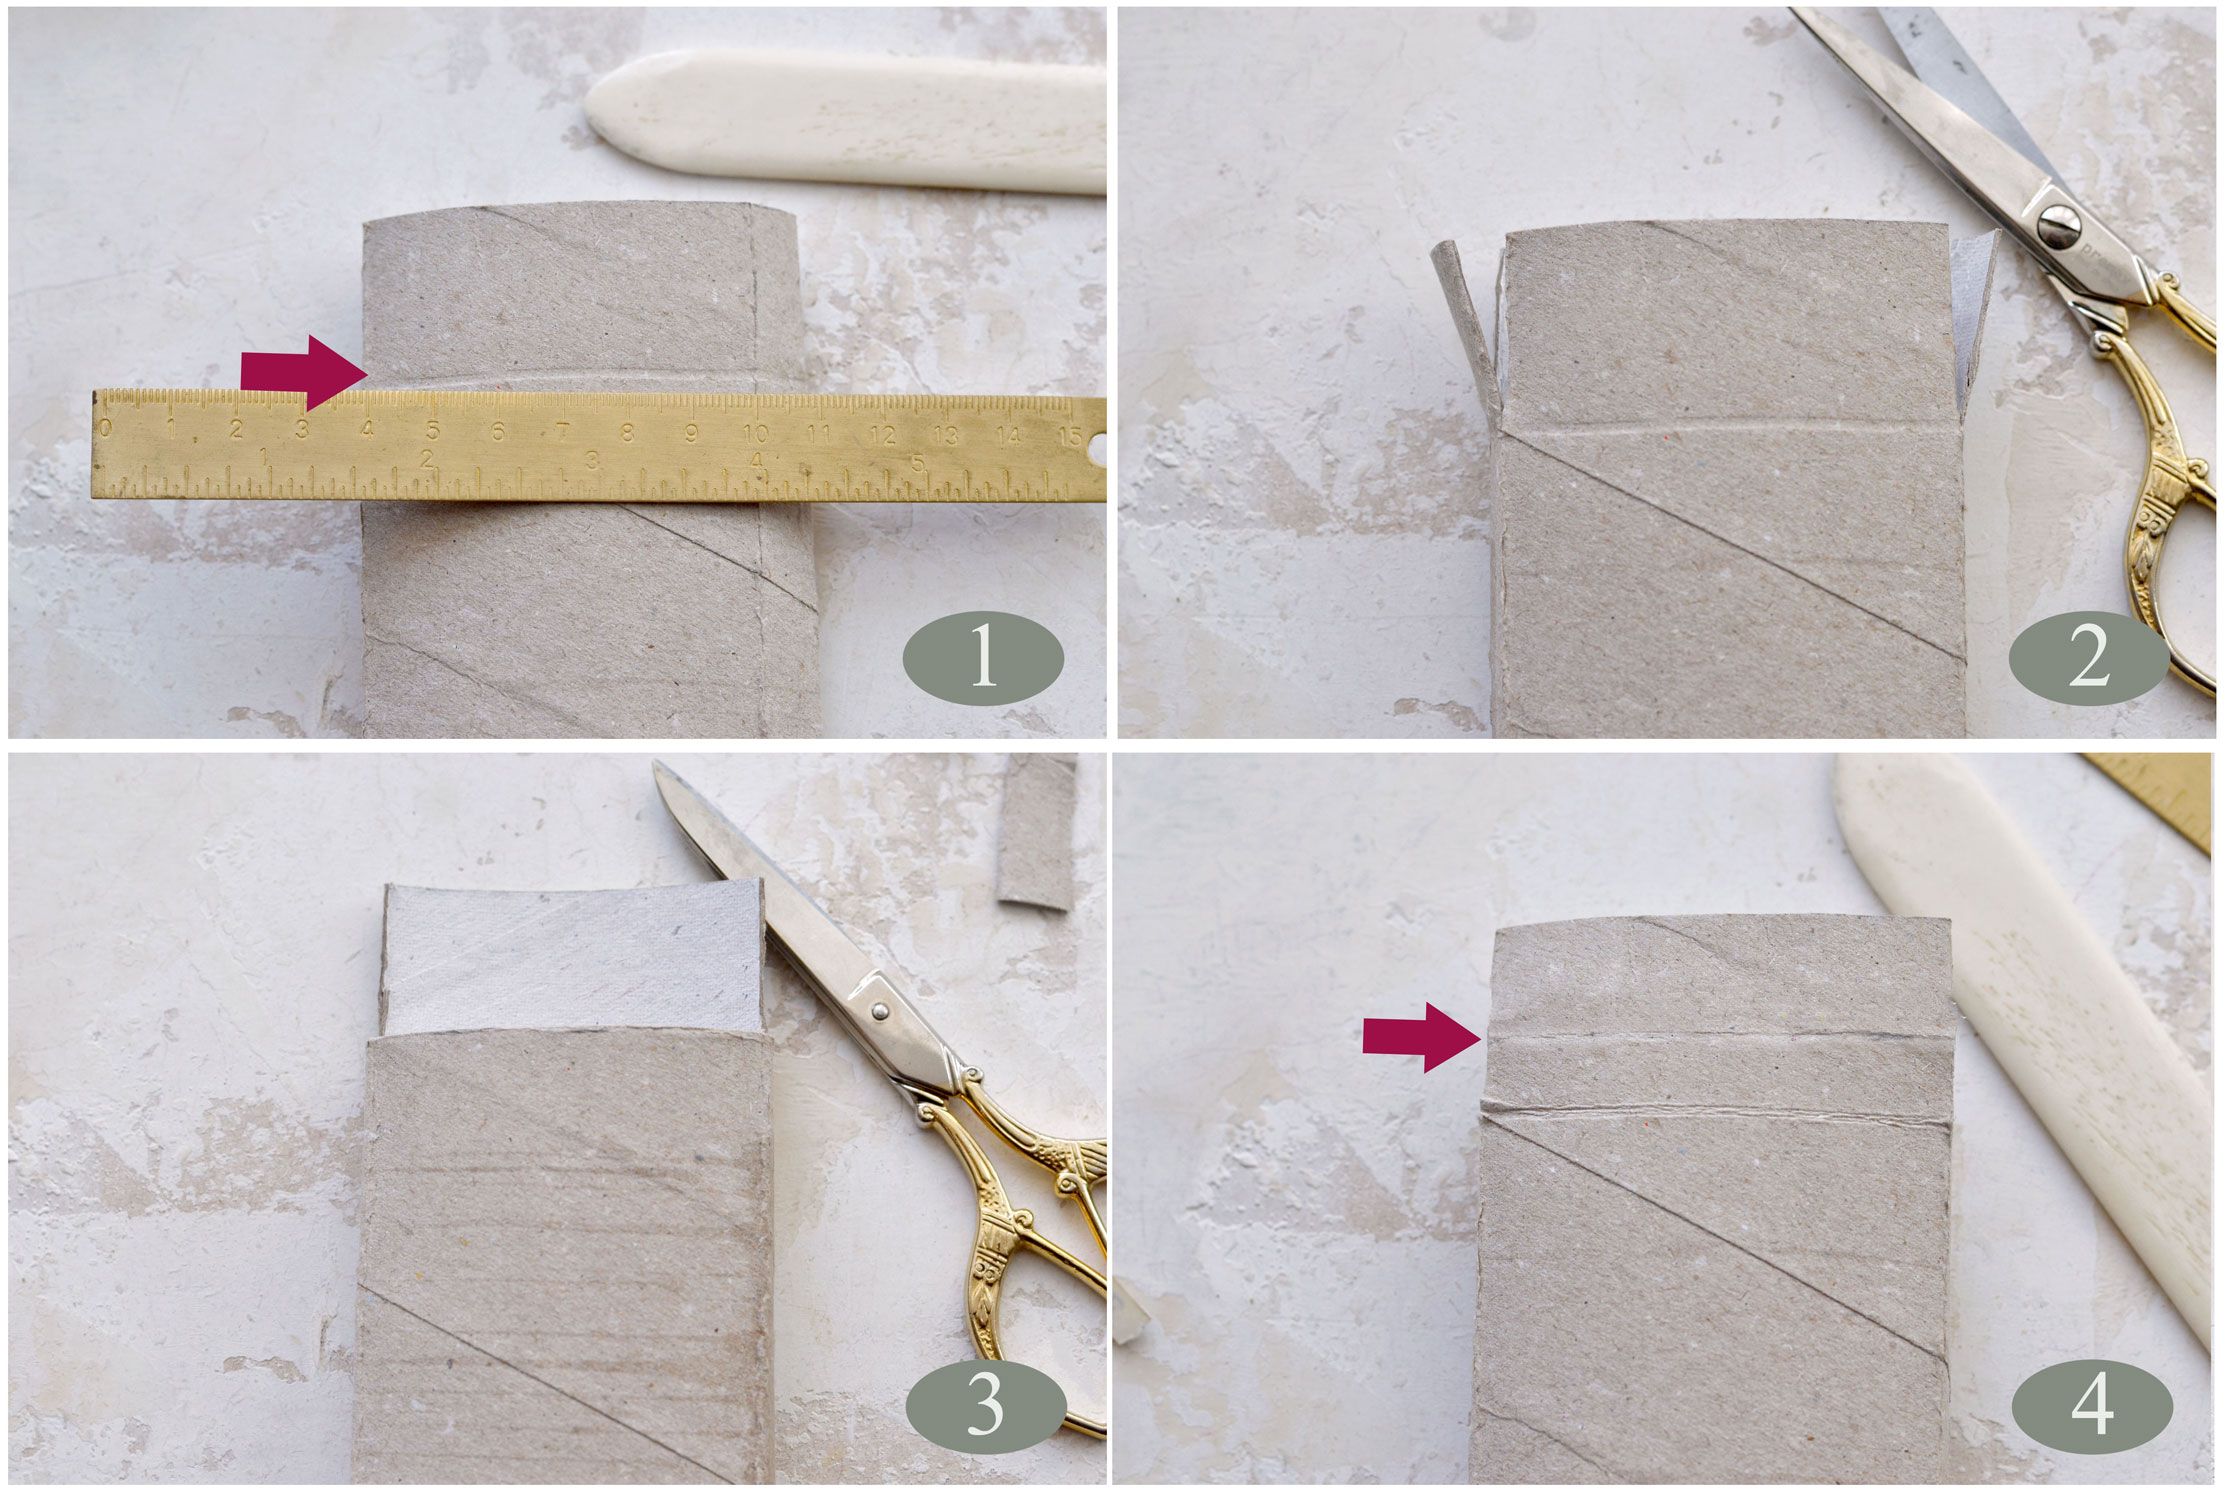
Decide which type of paper rolls you want to use – you can use either toilet paper rolls or kitchen paper towel tubes (1). No matter the type of rolls you use, you’ll need to start by flattening them first.
Place a paper tube on your table and use one of your hands to slightly flatten its left side. Don’t flatten it all the way through, just ever so lightly so you can hold it on your table. Now use your other hand and a bone folder to gradually flatten the right side (2). Flatten this side all the way through. The bone folder will help you to get a nice scoring line, but it really depends on the quality of the paper rolls, too.
If you decide to use kitchen paper rolls, as I did, you can easily cut them in half after flattening them (3).
Rotate your paper rolls and then flatten the other side. Follow this method to flatten as many paper rolls as you want (4).
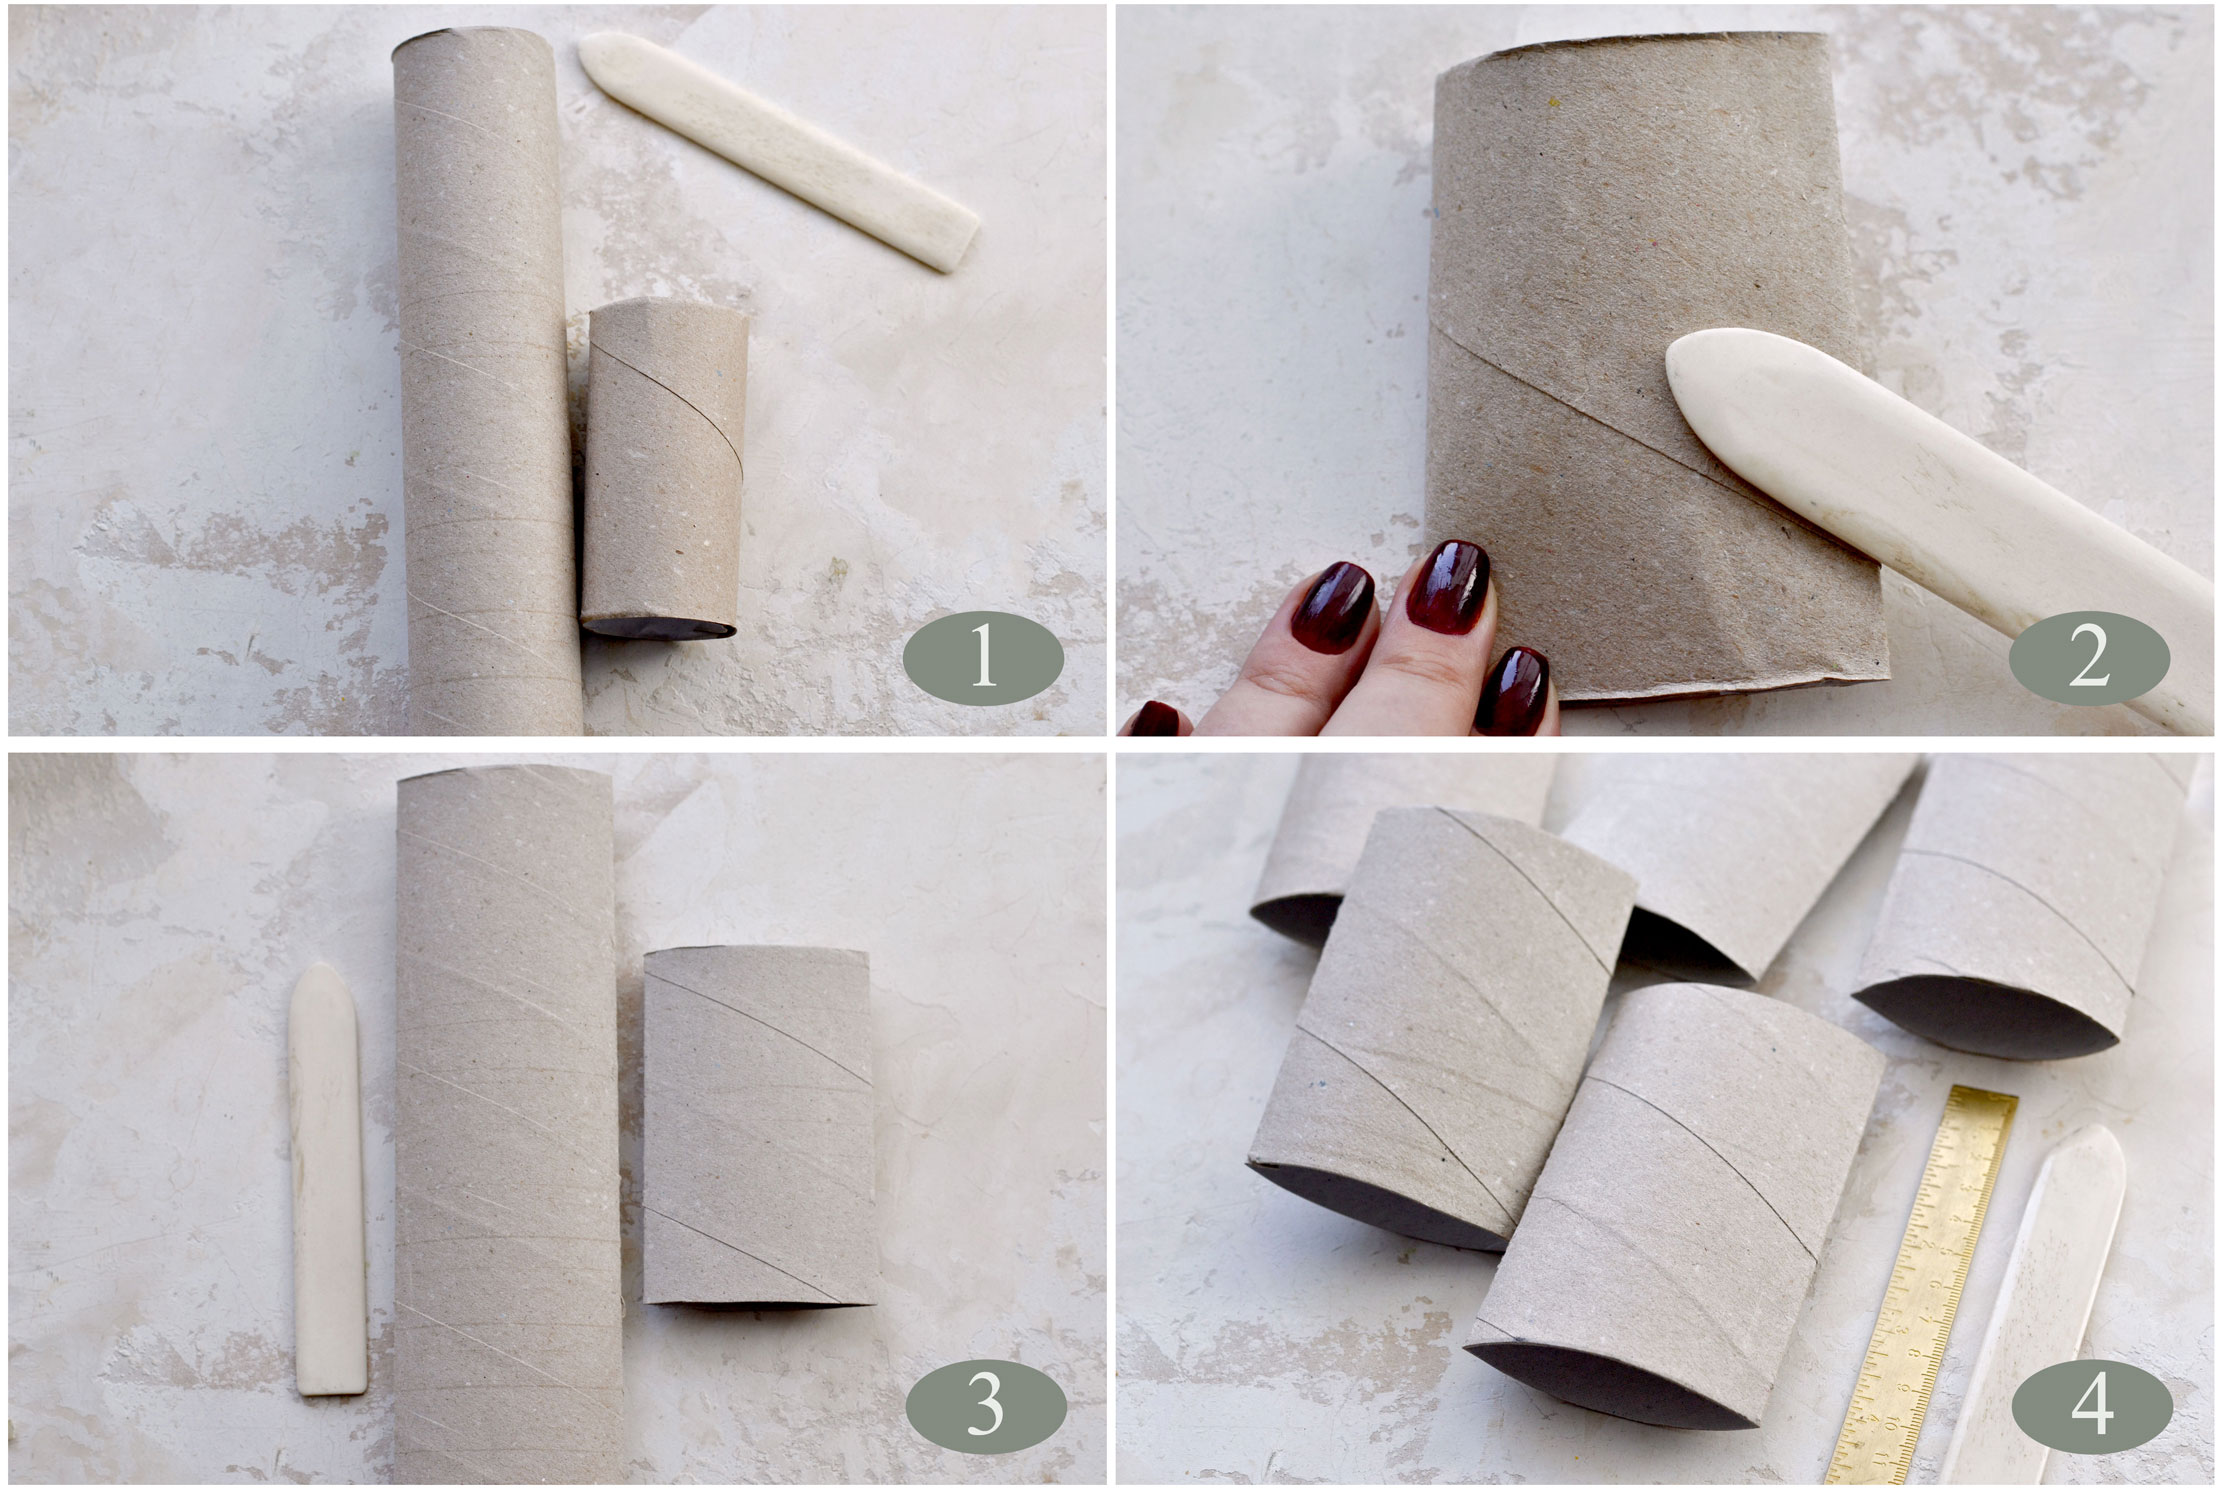
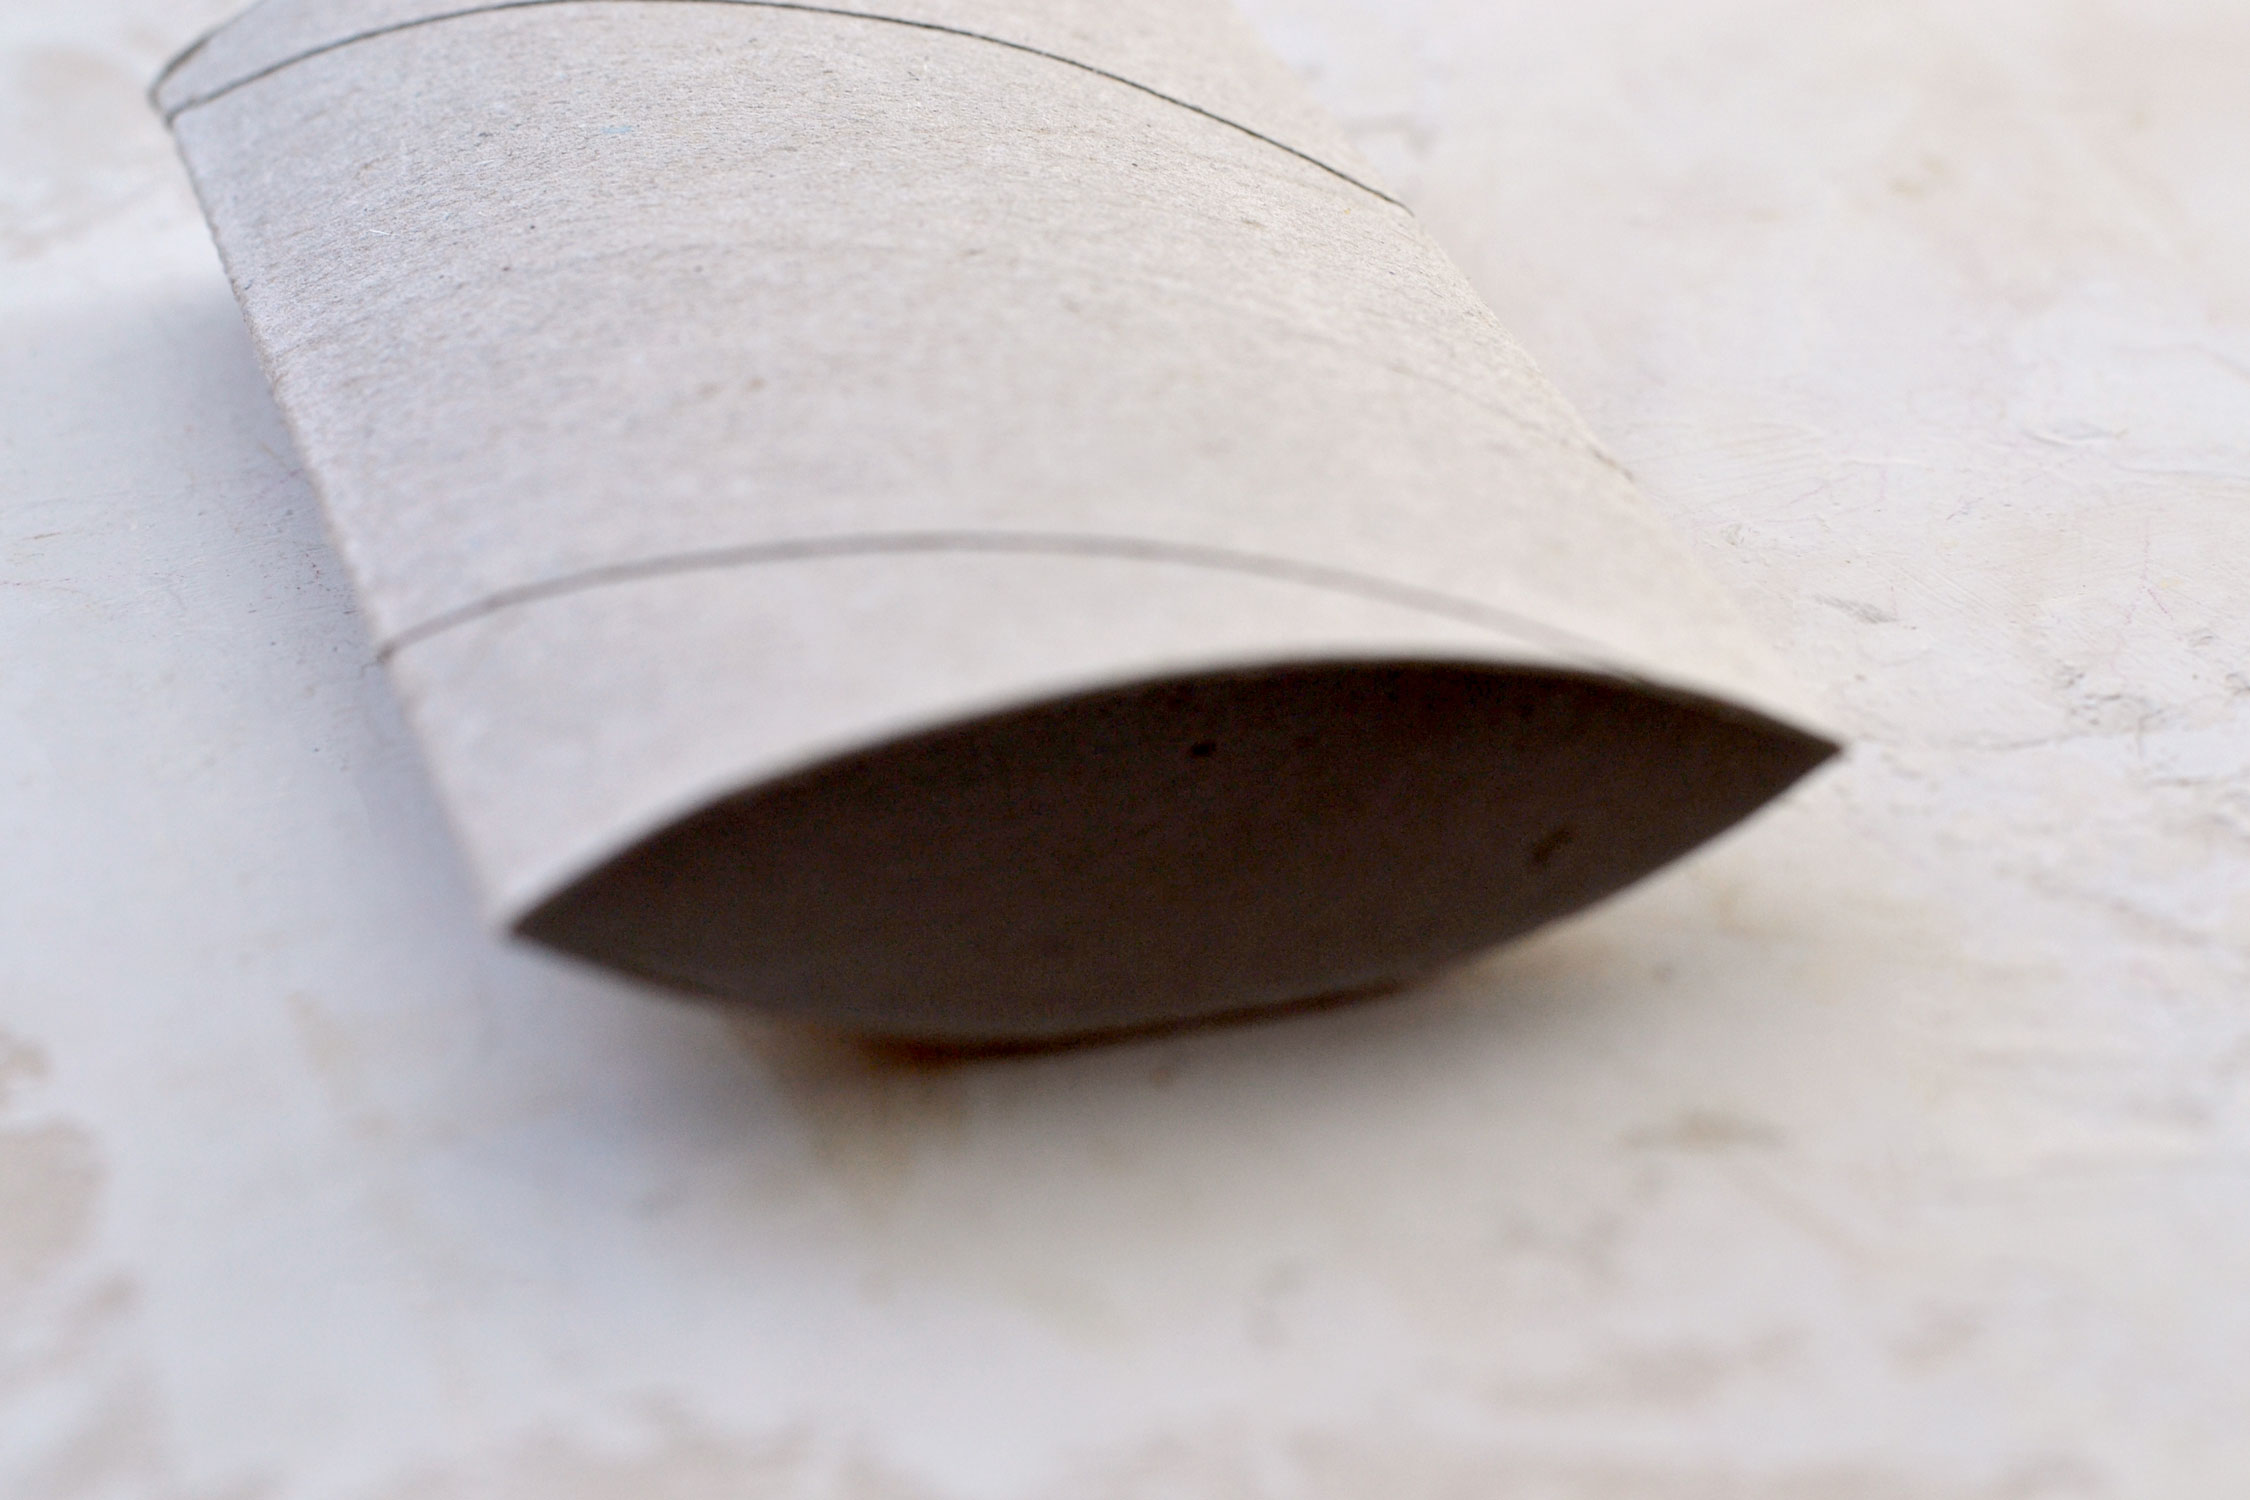
This is how your paper roll should look at this point if looked at from the bottom.
Scoring the bottom and the sides
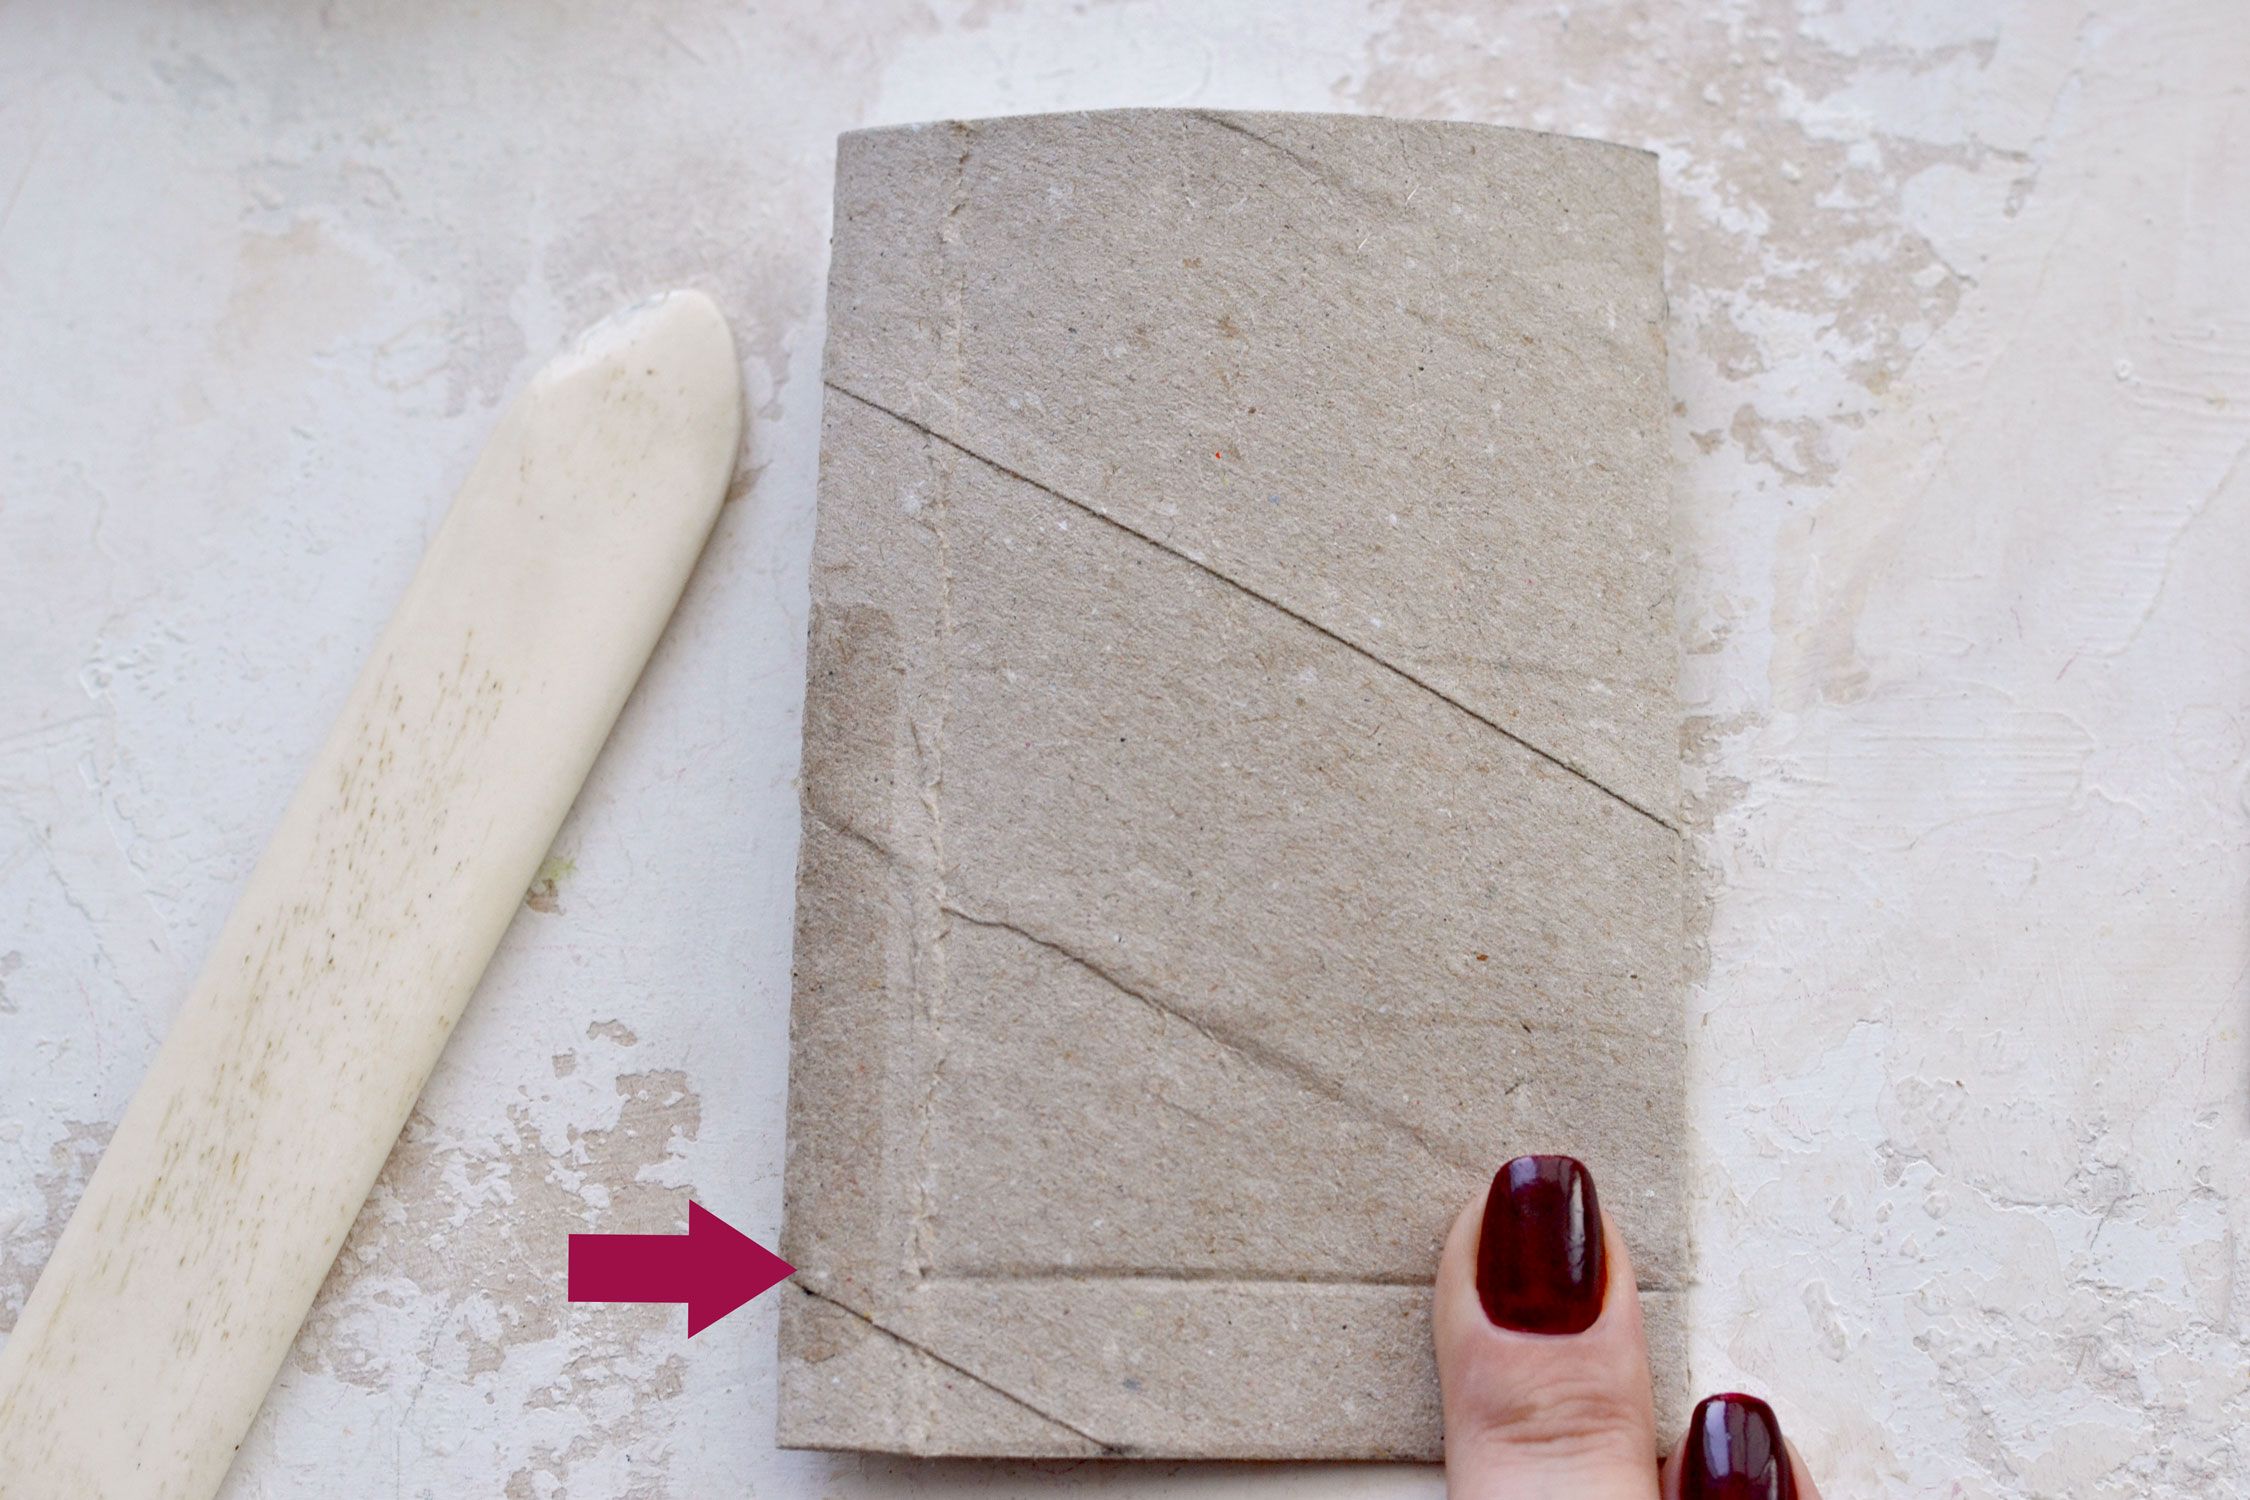
When placed on your table, you should now have a flattened, rectangular-shaped paper, so you can move on to scoring. Use a ruler and a bone folder to score a vertical line on the right side, leaving 1/2.5′′ (1 cm) from the edge. Then use your bone folder to score a horizontal line on the bottom using the same measurements.
Apply enough pressure when scoring these two lines so you get a visible impression on the paper.
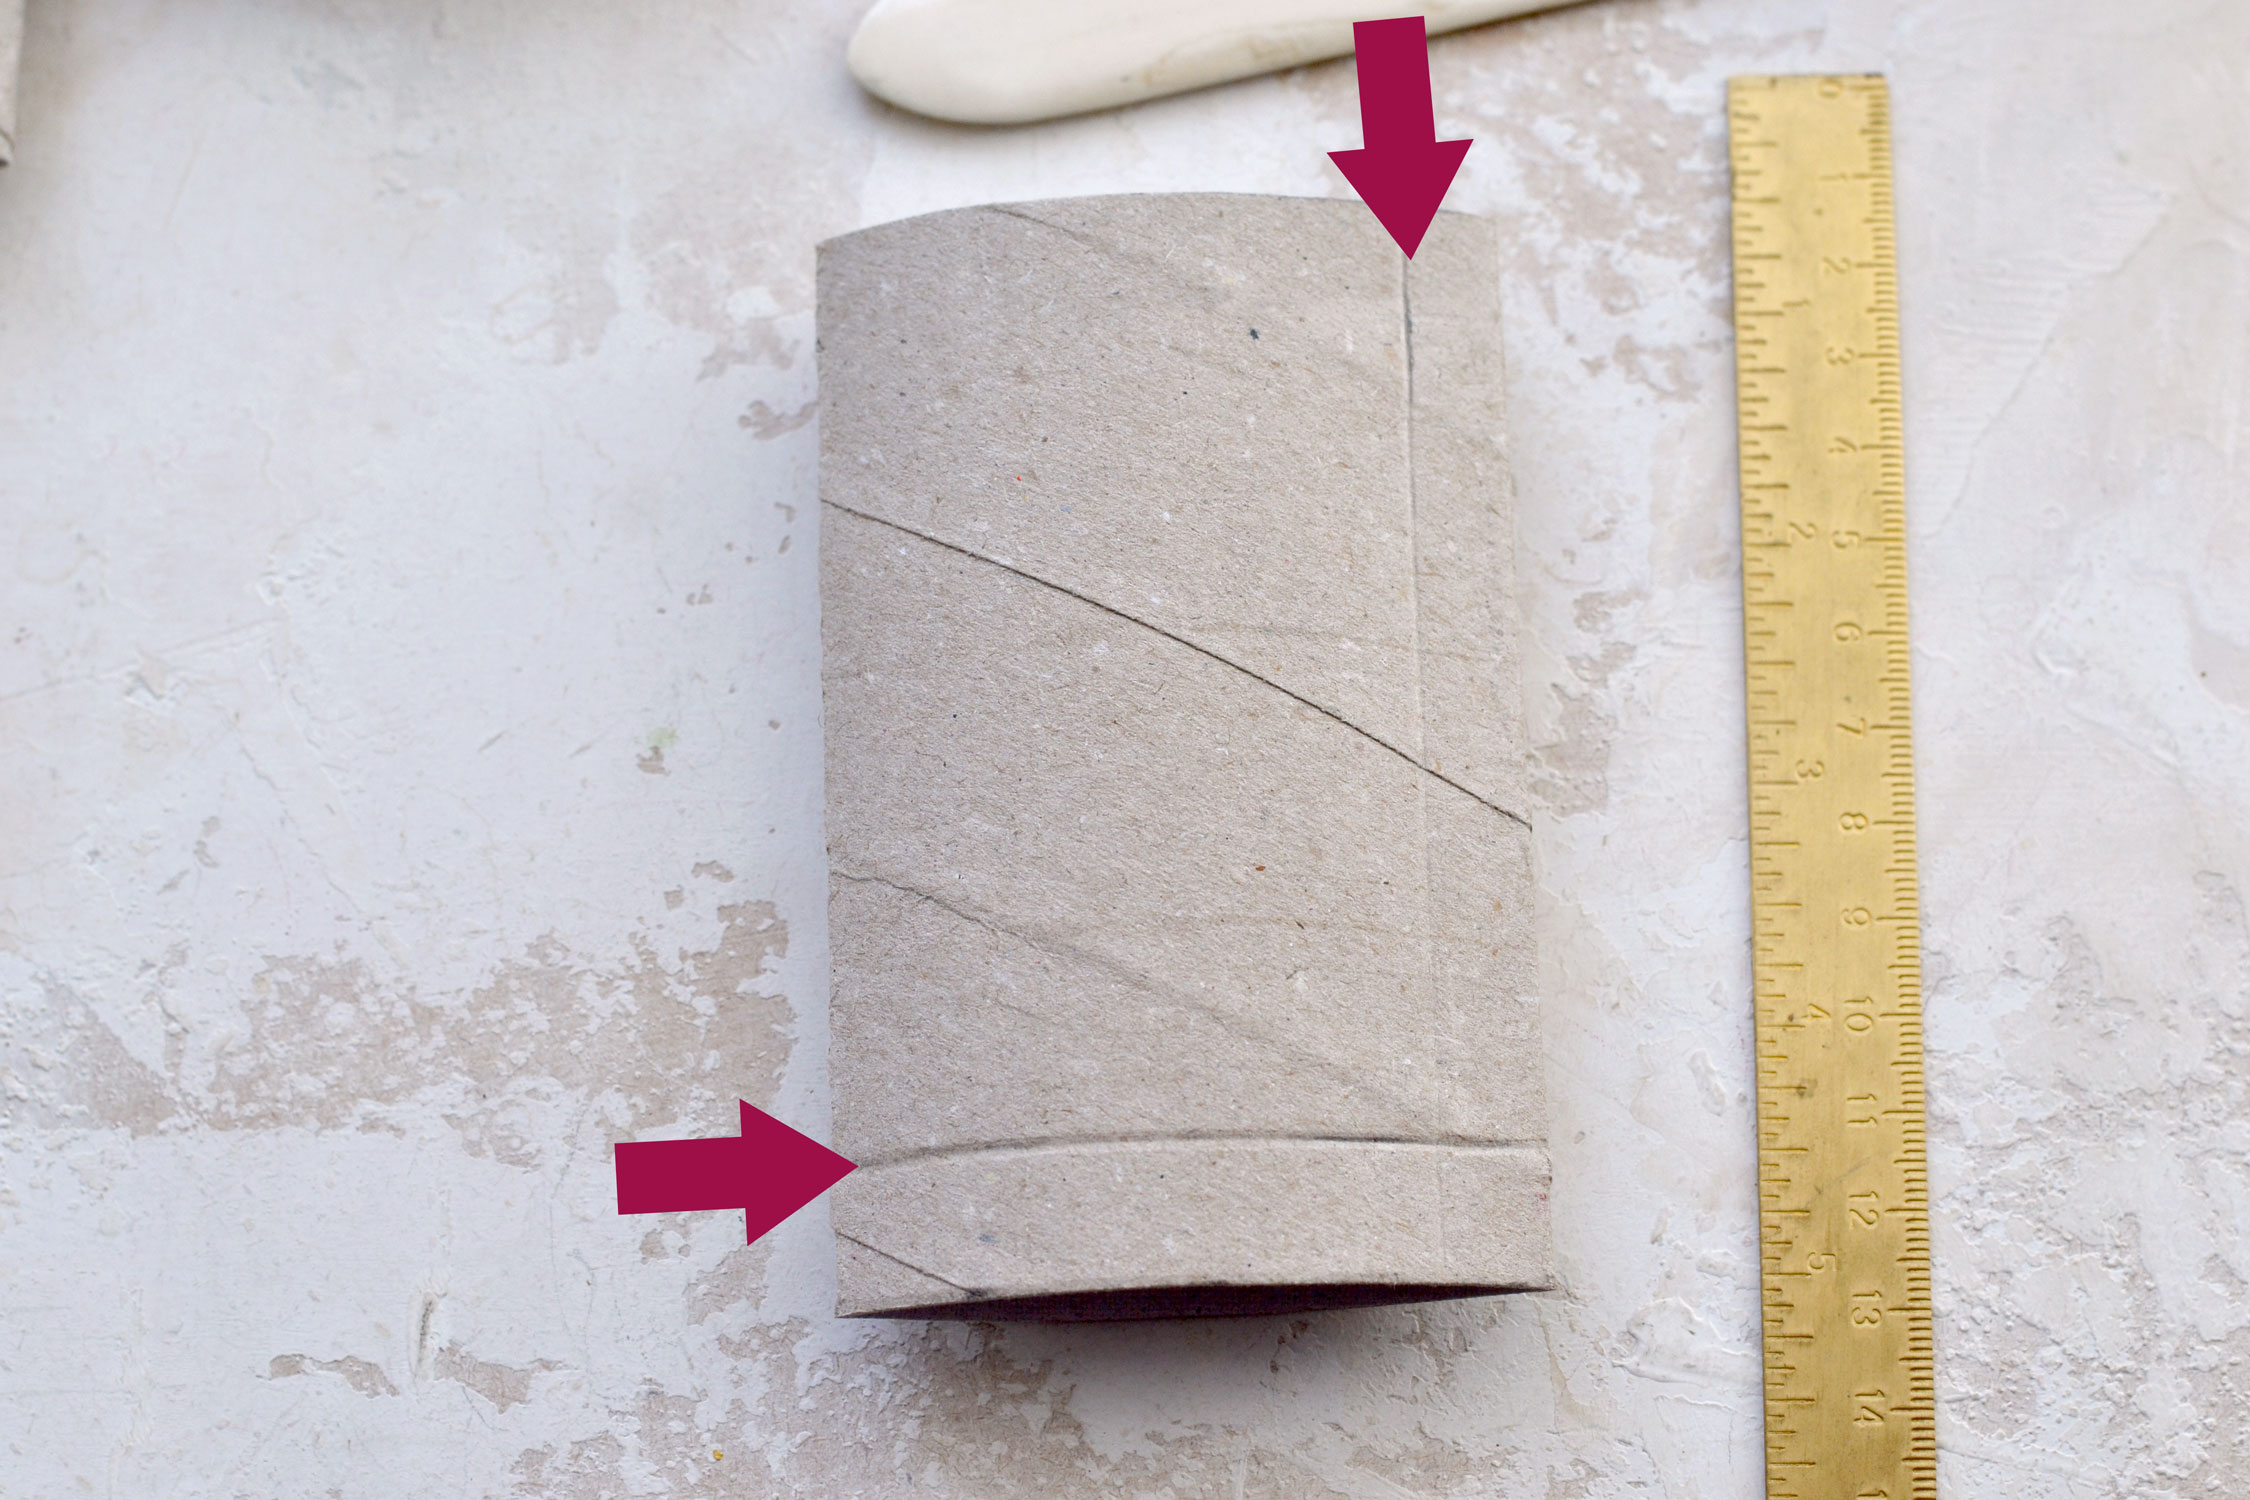
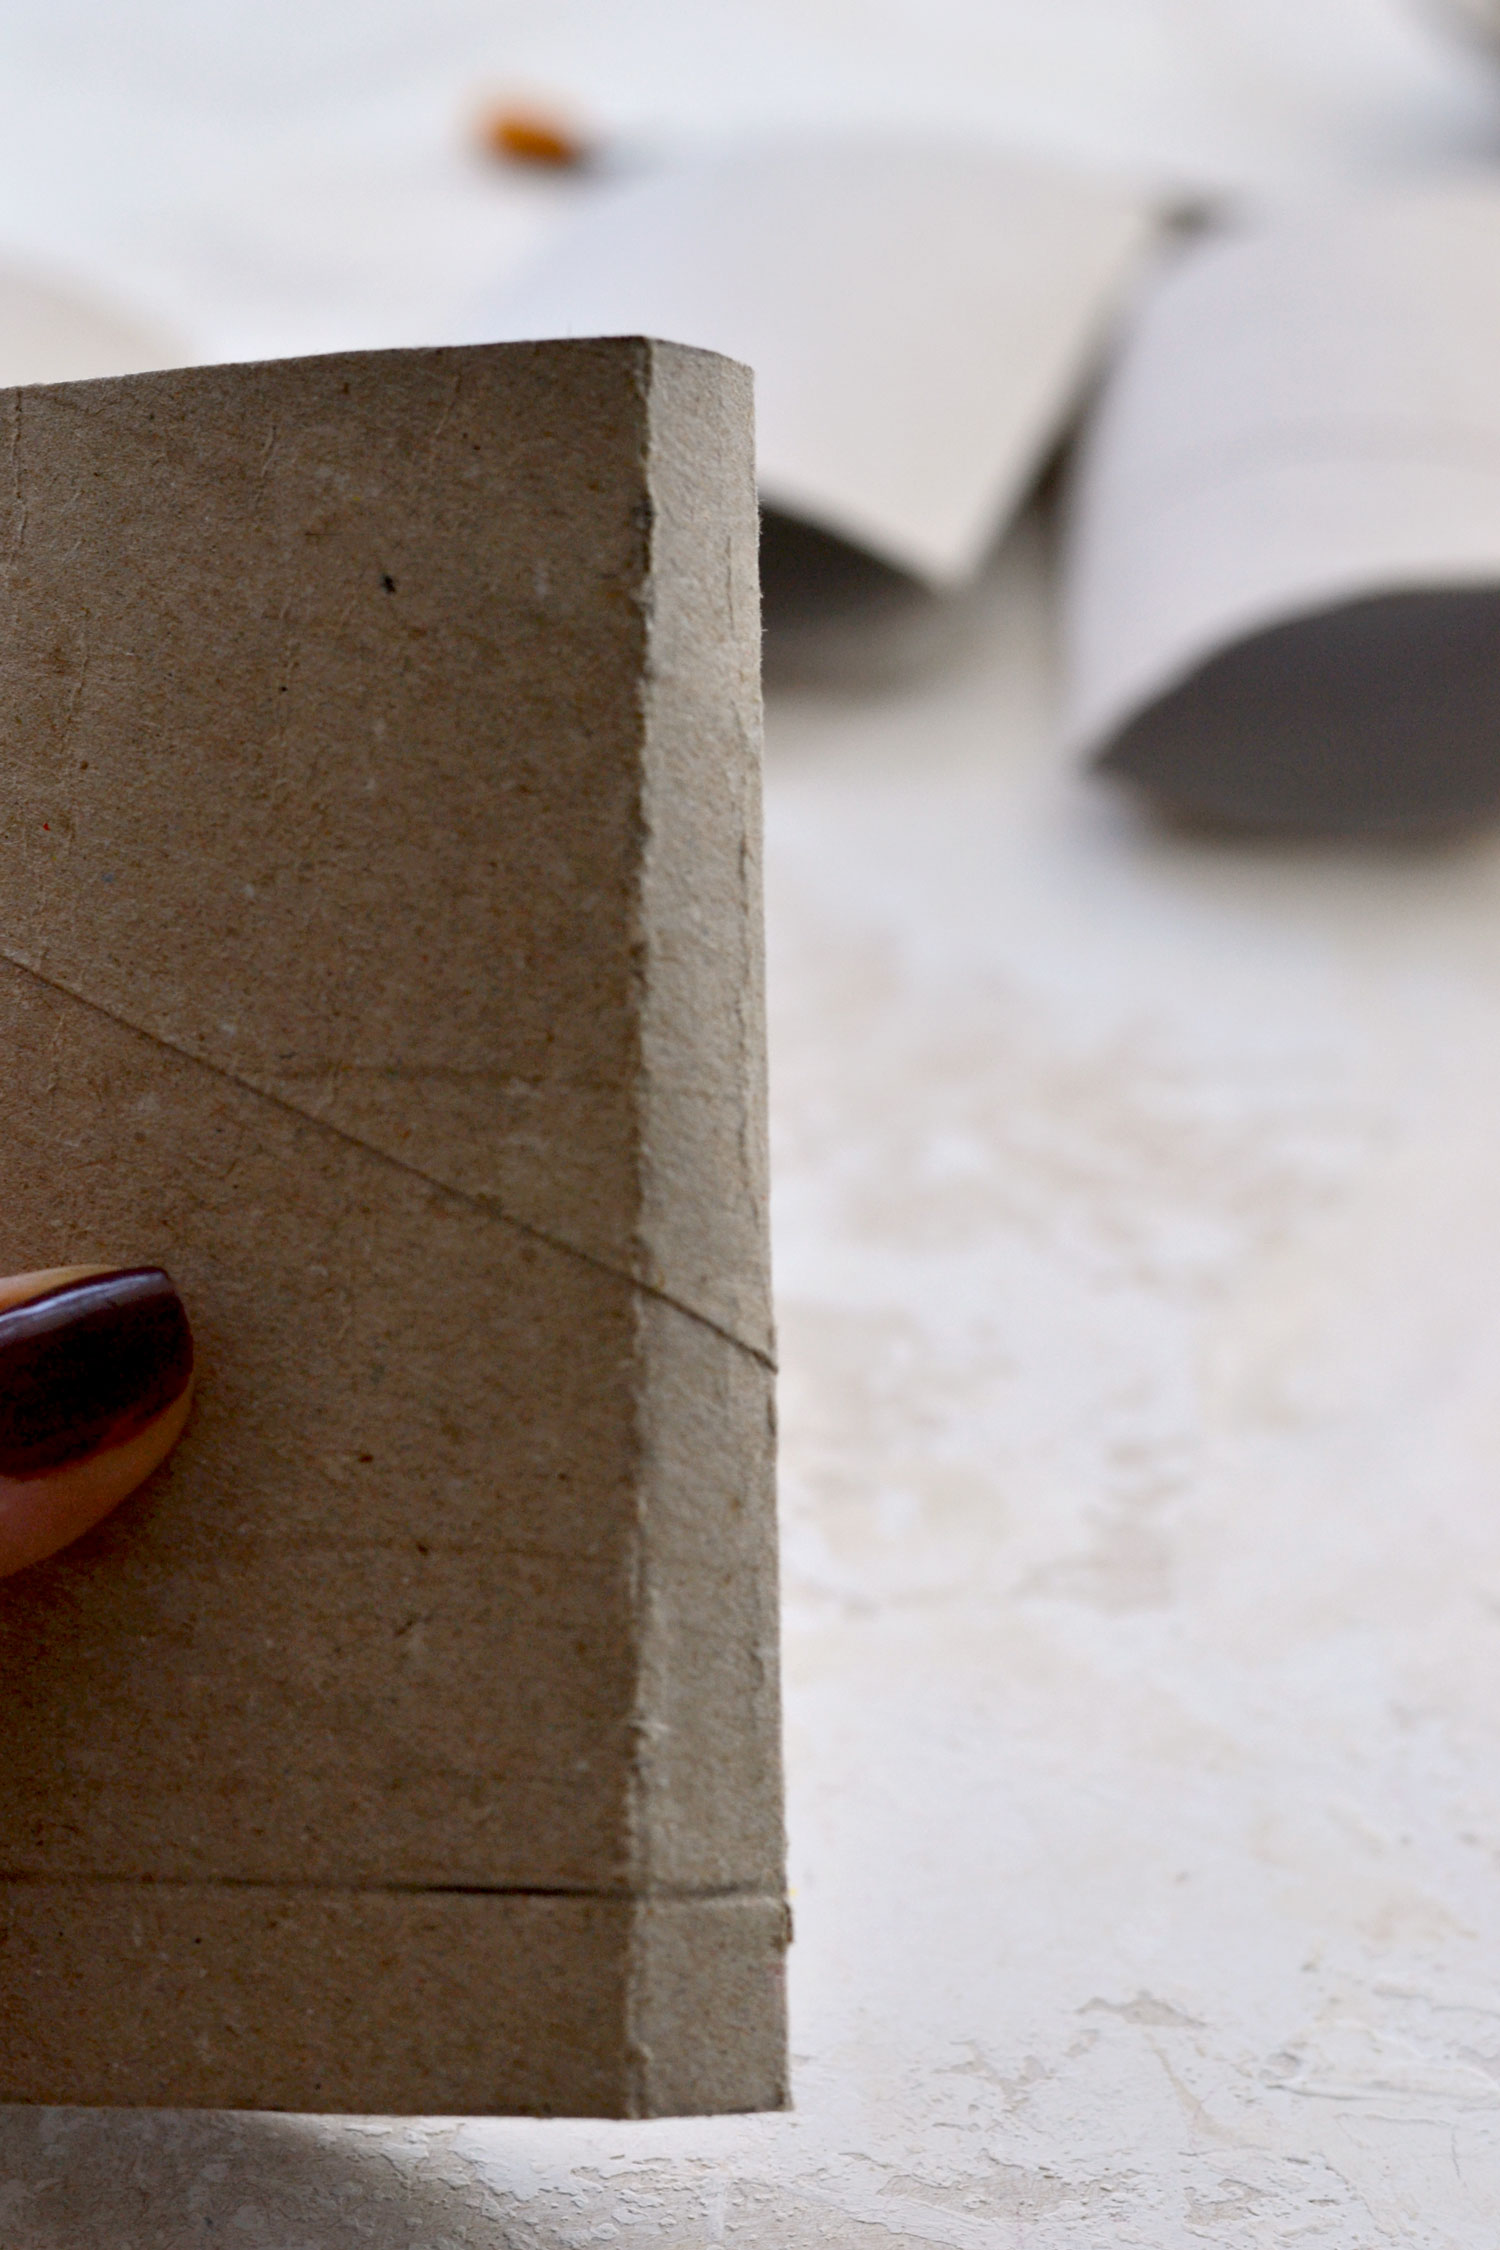
Pick the flattened roll in your hand and use the vertical scoring line that we’ve just created as guidance to fold the paper there. Then, place the paper on your table and use your bone folder to press and flatten the opposite side, following this new shape. Use the horizontal scored line on the bottom as guidance to score the small area on the side that is not scored after the new folding. Then flip the paper and score the back too.
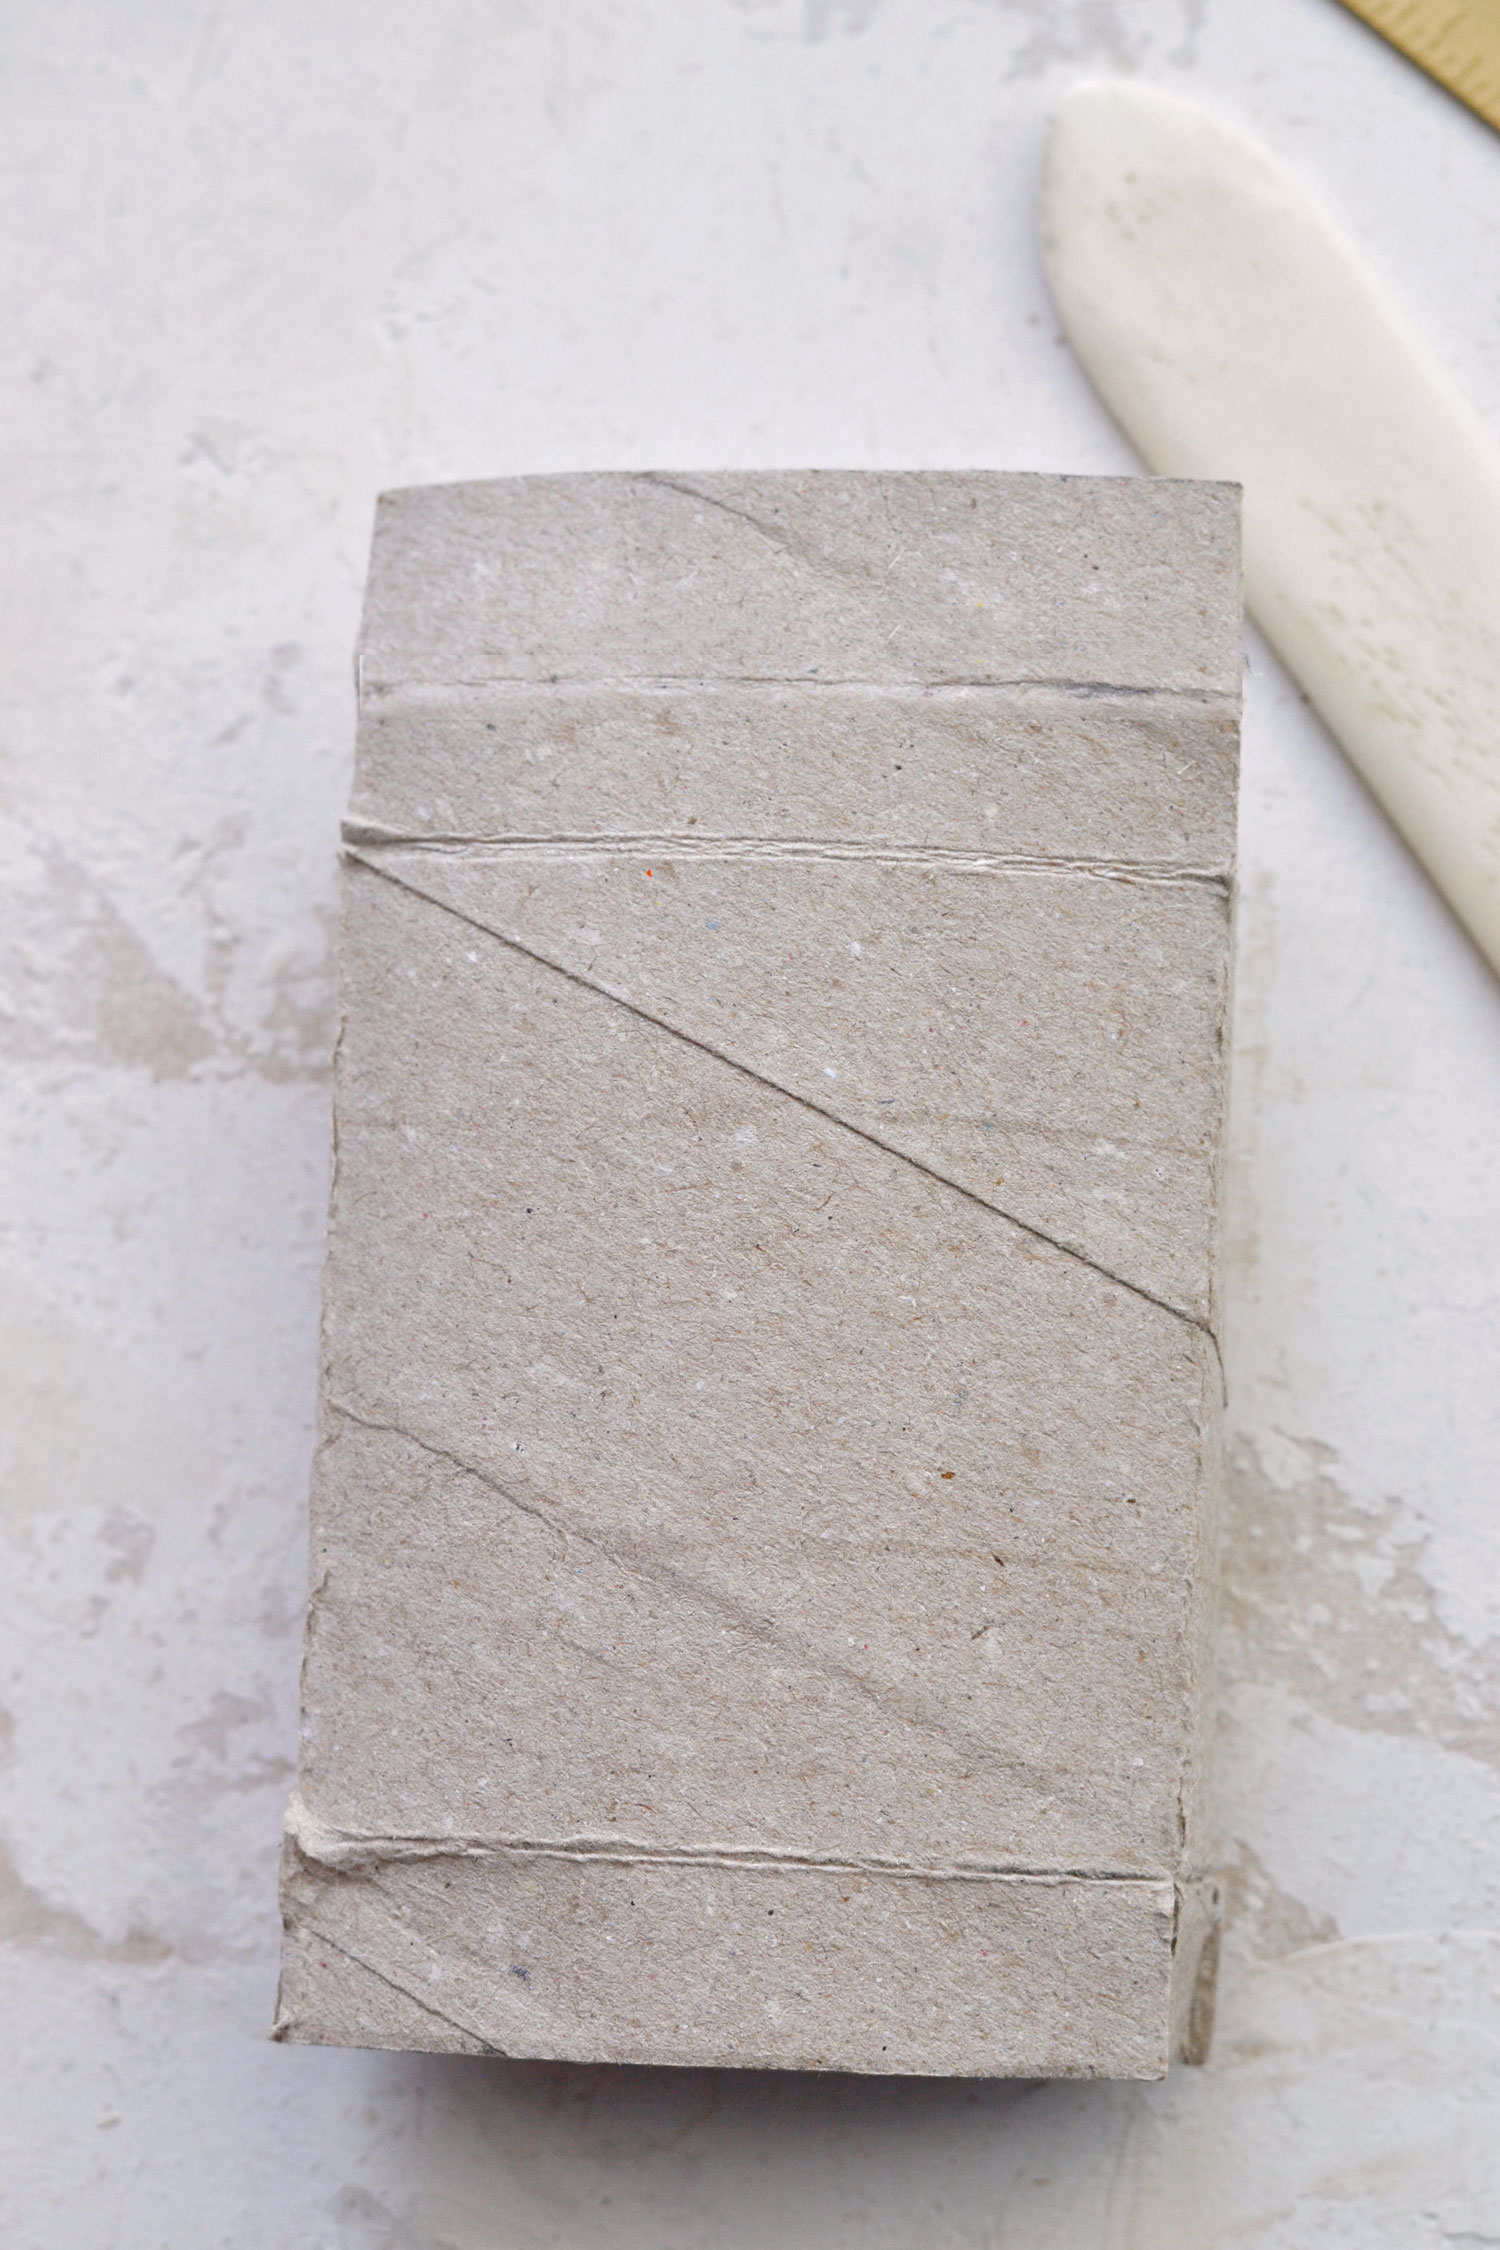
Unflatten the shape following the scored and folded lines on the side to make sure everything goes as smoothly as possible. This is how your shape should look at this point on the long side.
And this is how it should look on the bottom.
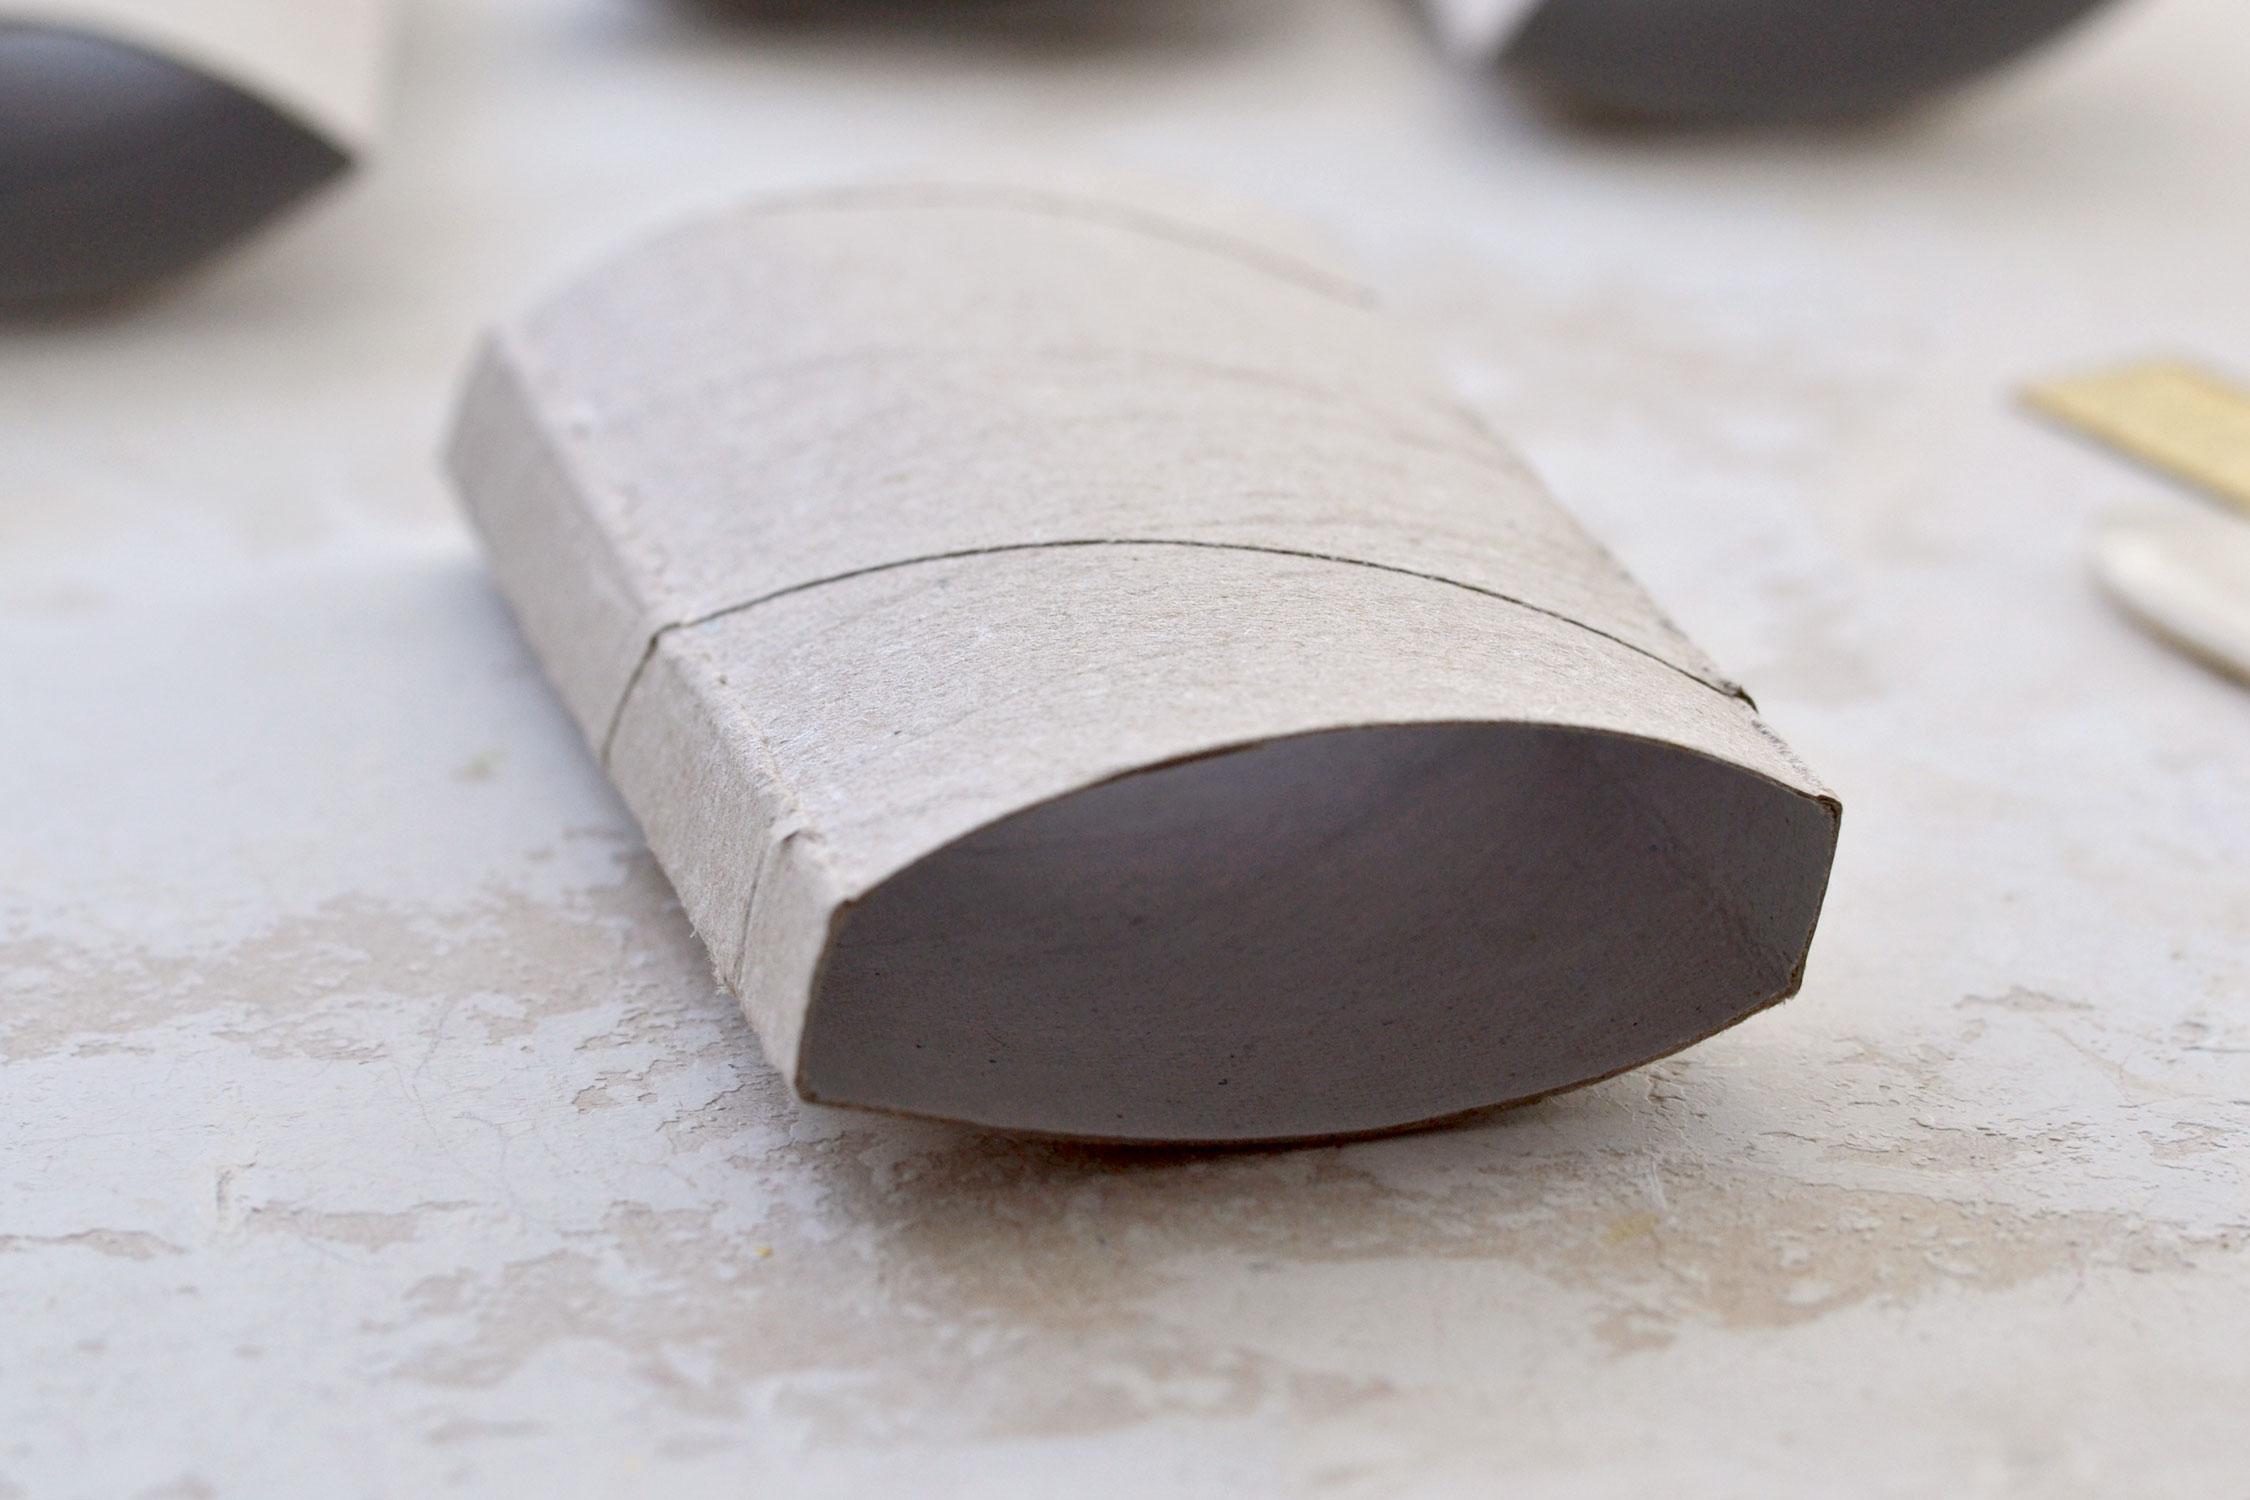
When you are done, you can use your scissors to make four cuts along the bottom until reaching the 1/2.5′′ (1 cm) scored line to get four flaps.
Lift and unflatten your box, then gradually fold each of the bottom flaps inside following the scored lines. Press them really well with your fingers to get a clean line and then unfold them again.
Scoring and cutting the top
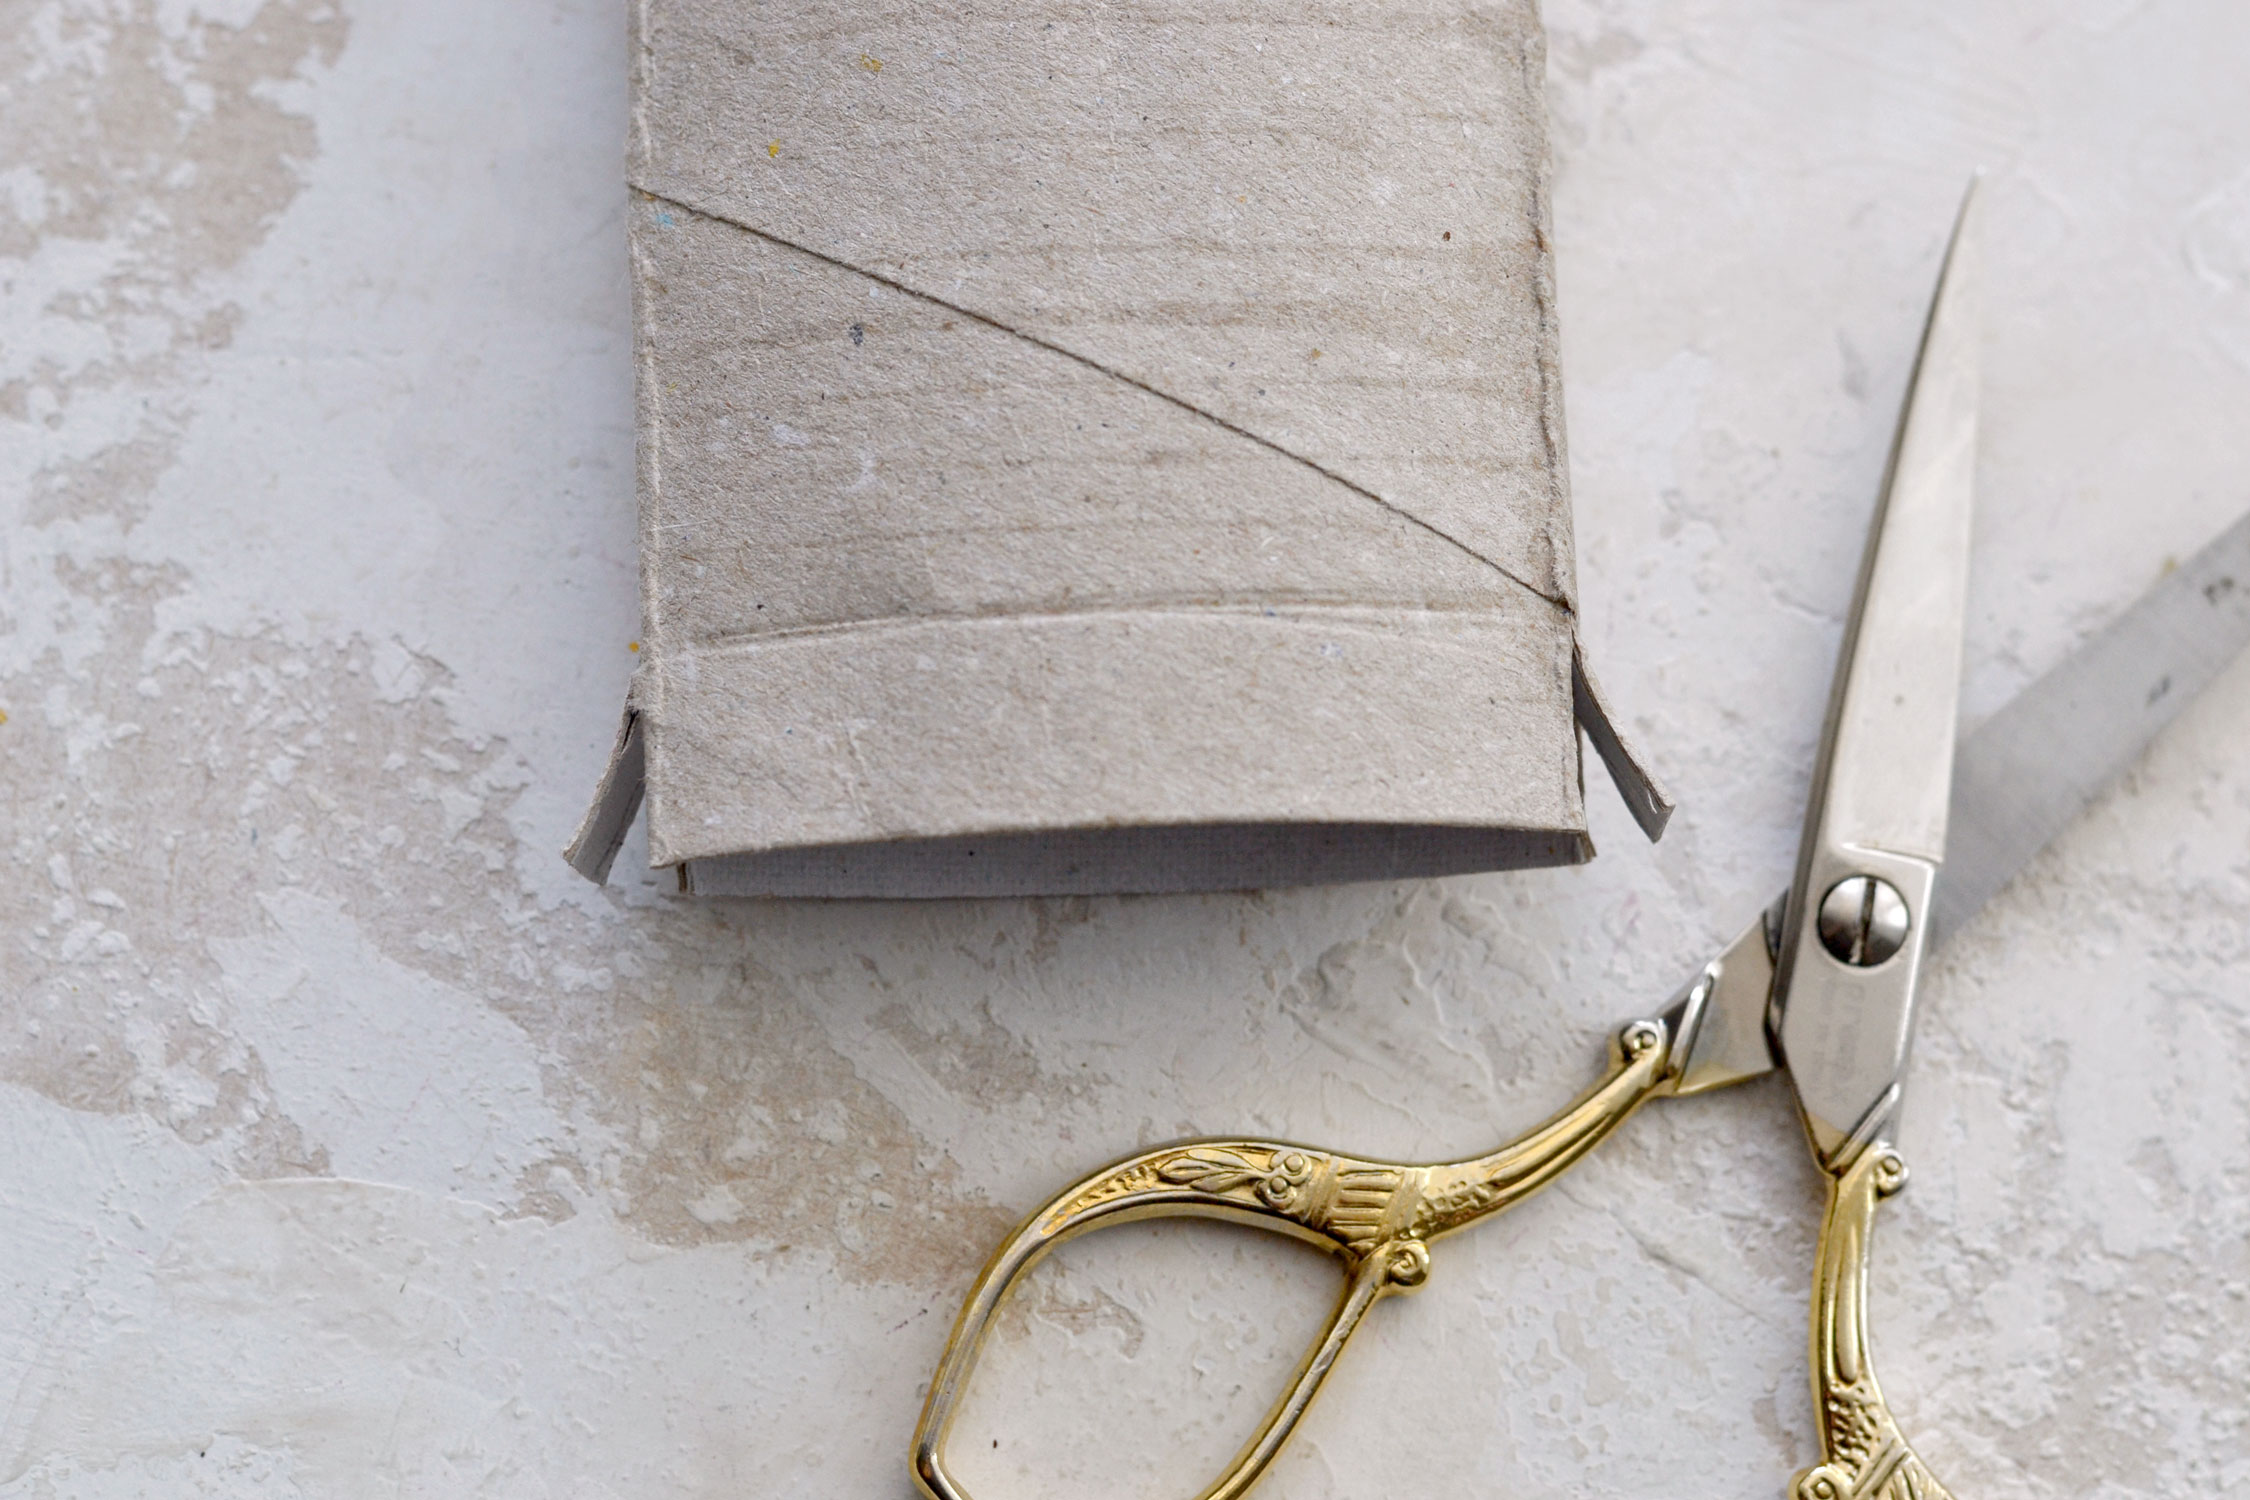
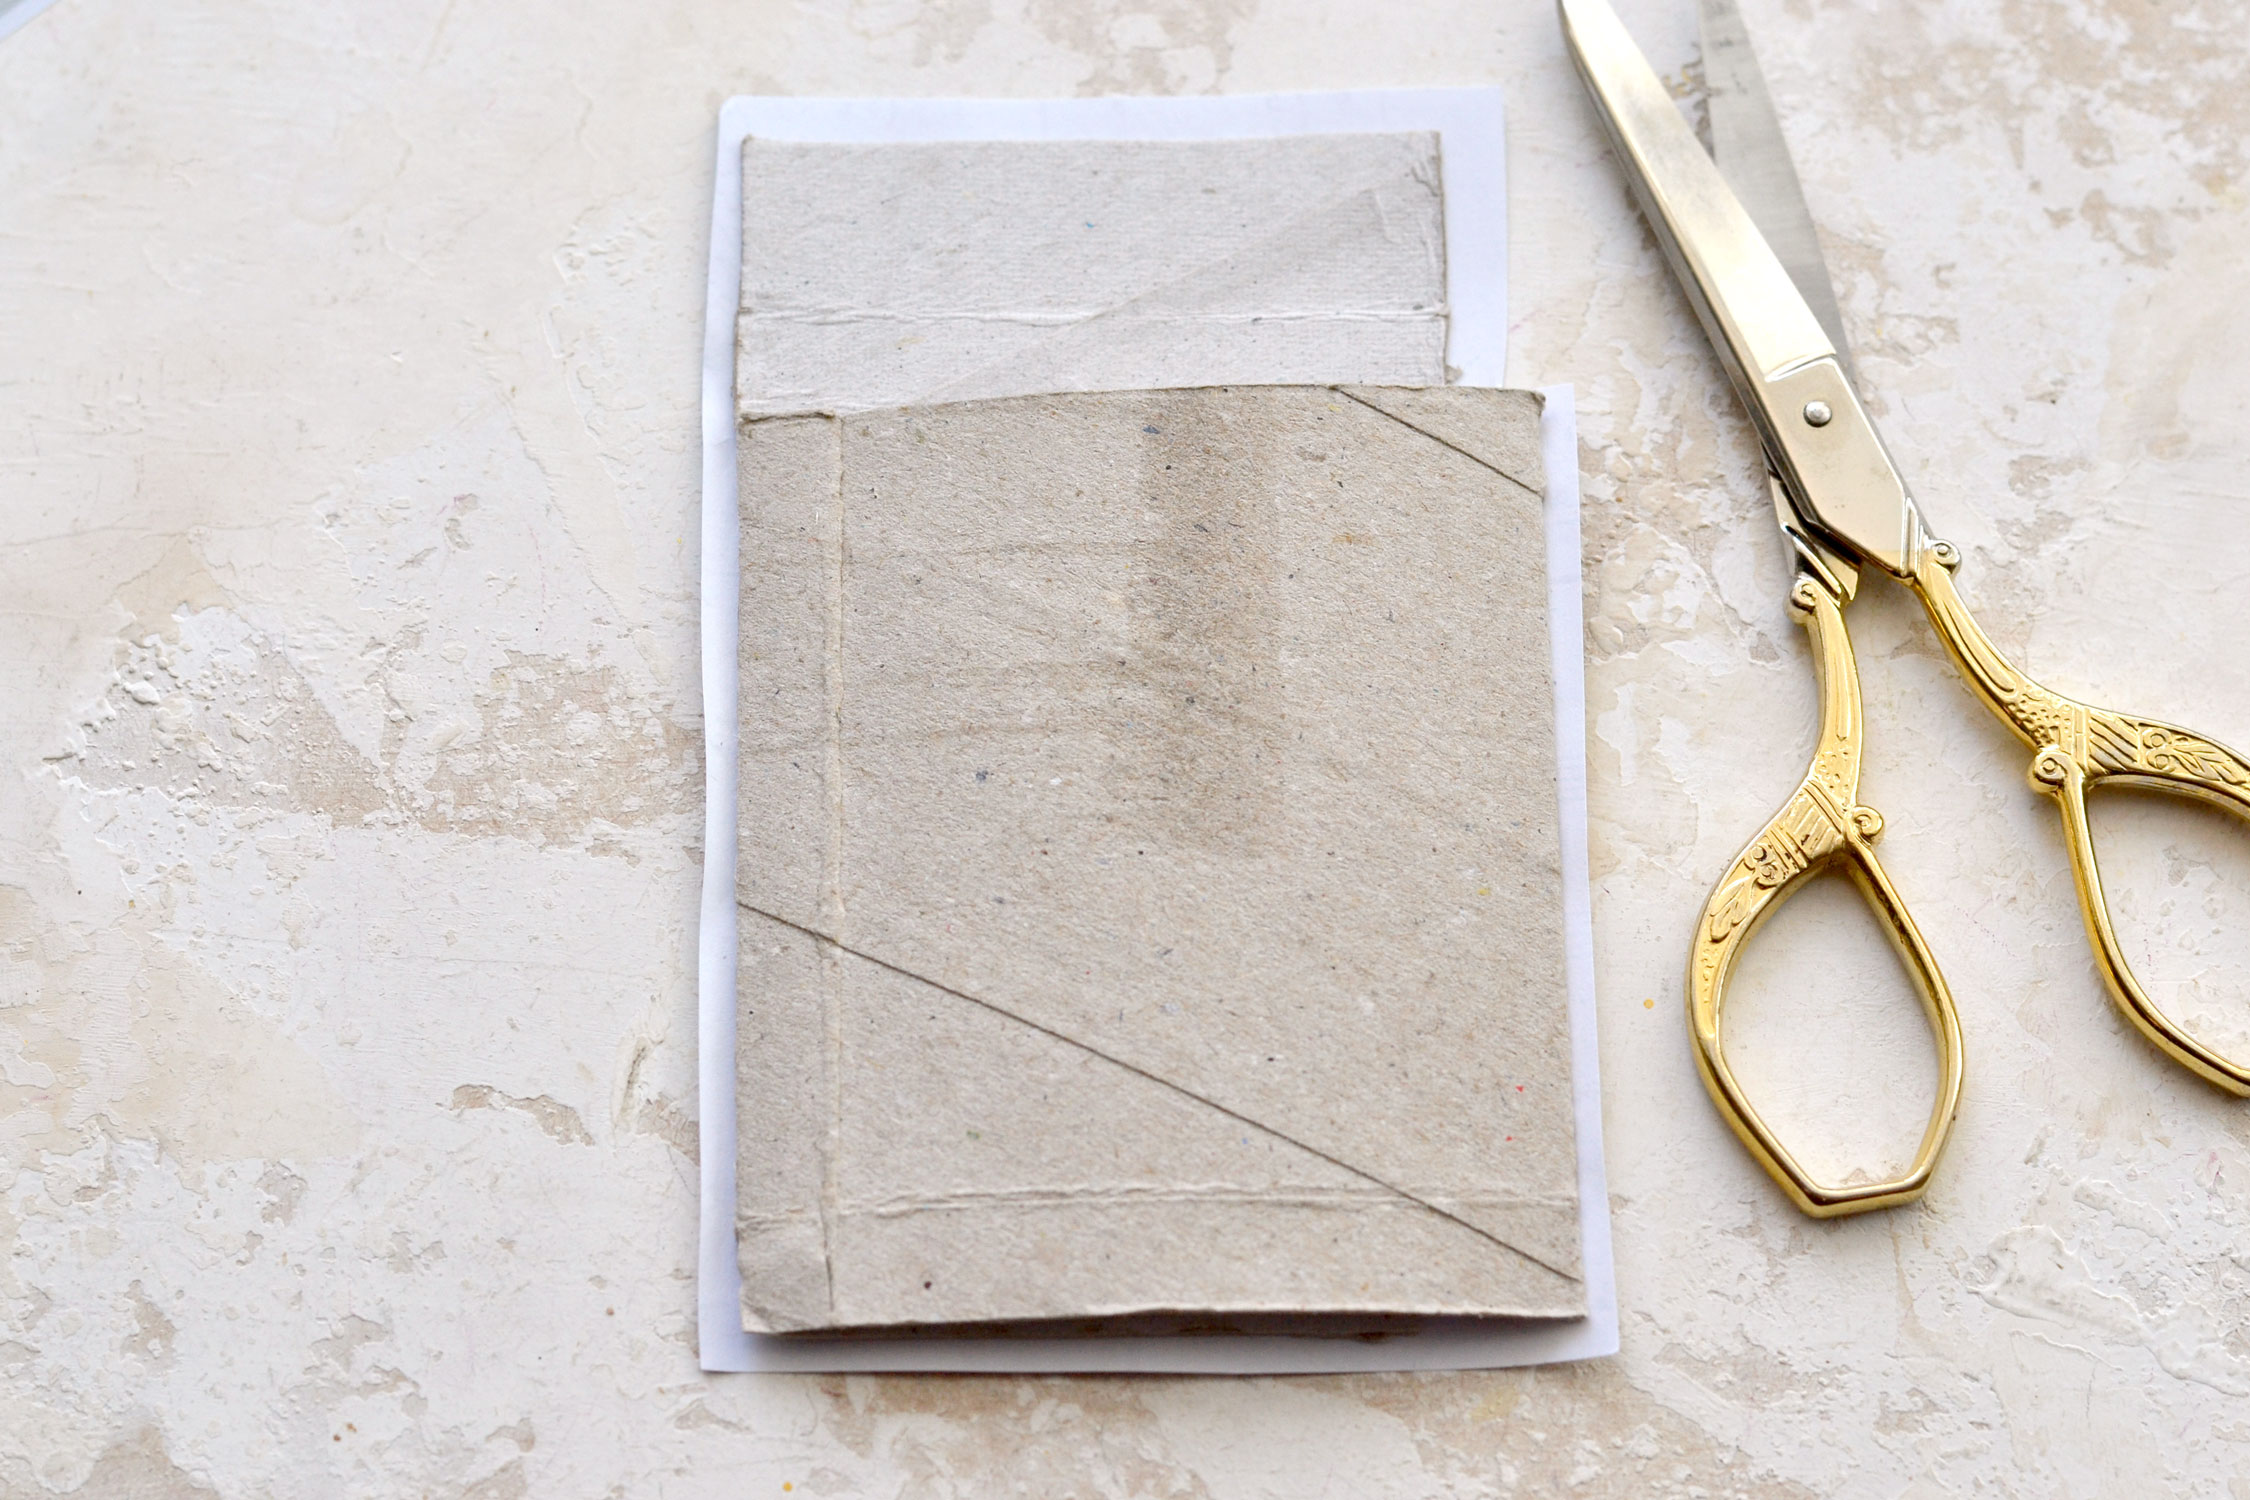
Flatten your box on your table and this time use your ruler and your bone folder to score a horizontal line on top, on all sides, leaving a little bit more than 1 inch (around 3 cm) from the top edge (1). Use your scissors to cut the four flaps (2), but this time, carefully remove one of the larger ones and the two smaller ones on the sides (3), we only need to keep one of the larger flaps. Place the box on your table with the remaining flap on top. Then use your ruler and your bone folder to score a line using the 1/2.5′′ (1 cm) measurements from the scored line before (4) – this will create the top flap that will cover our box.
Pick the box in your hands and use the two scoring lines that we created on top to fold the paper.
Constantly switch between the flattened and unflattened version of your box to check the progress and see if everything fits.
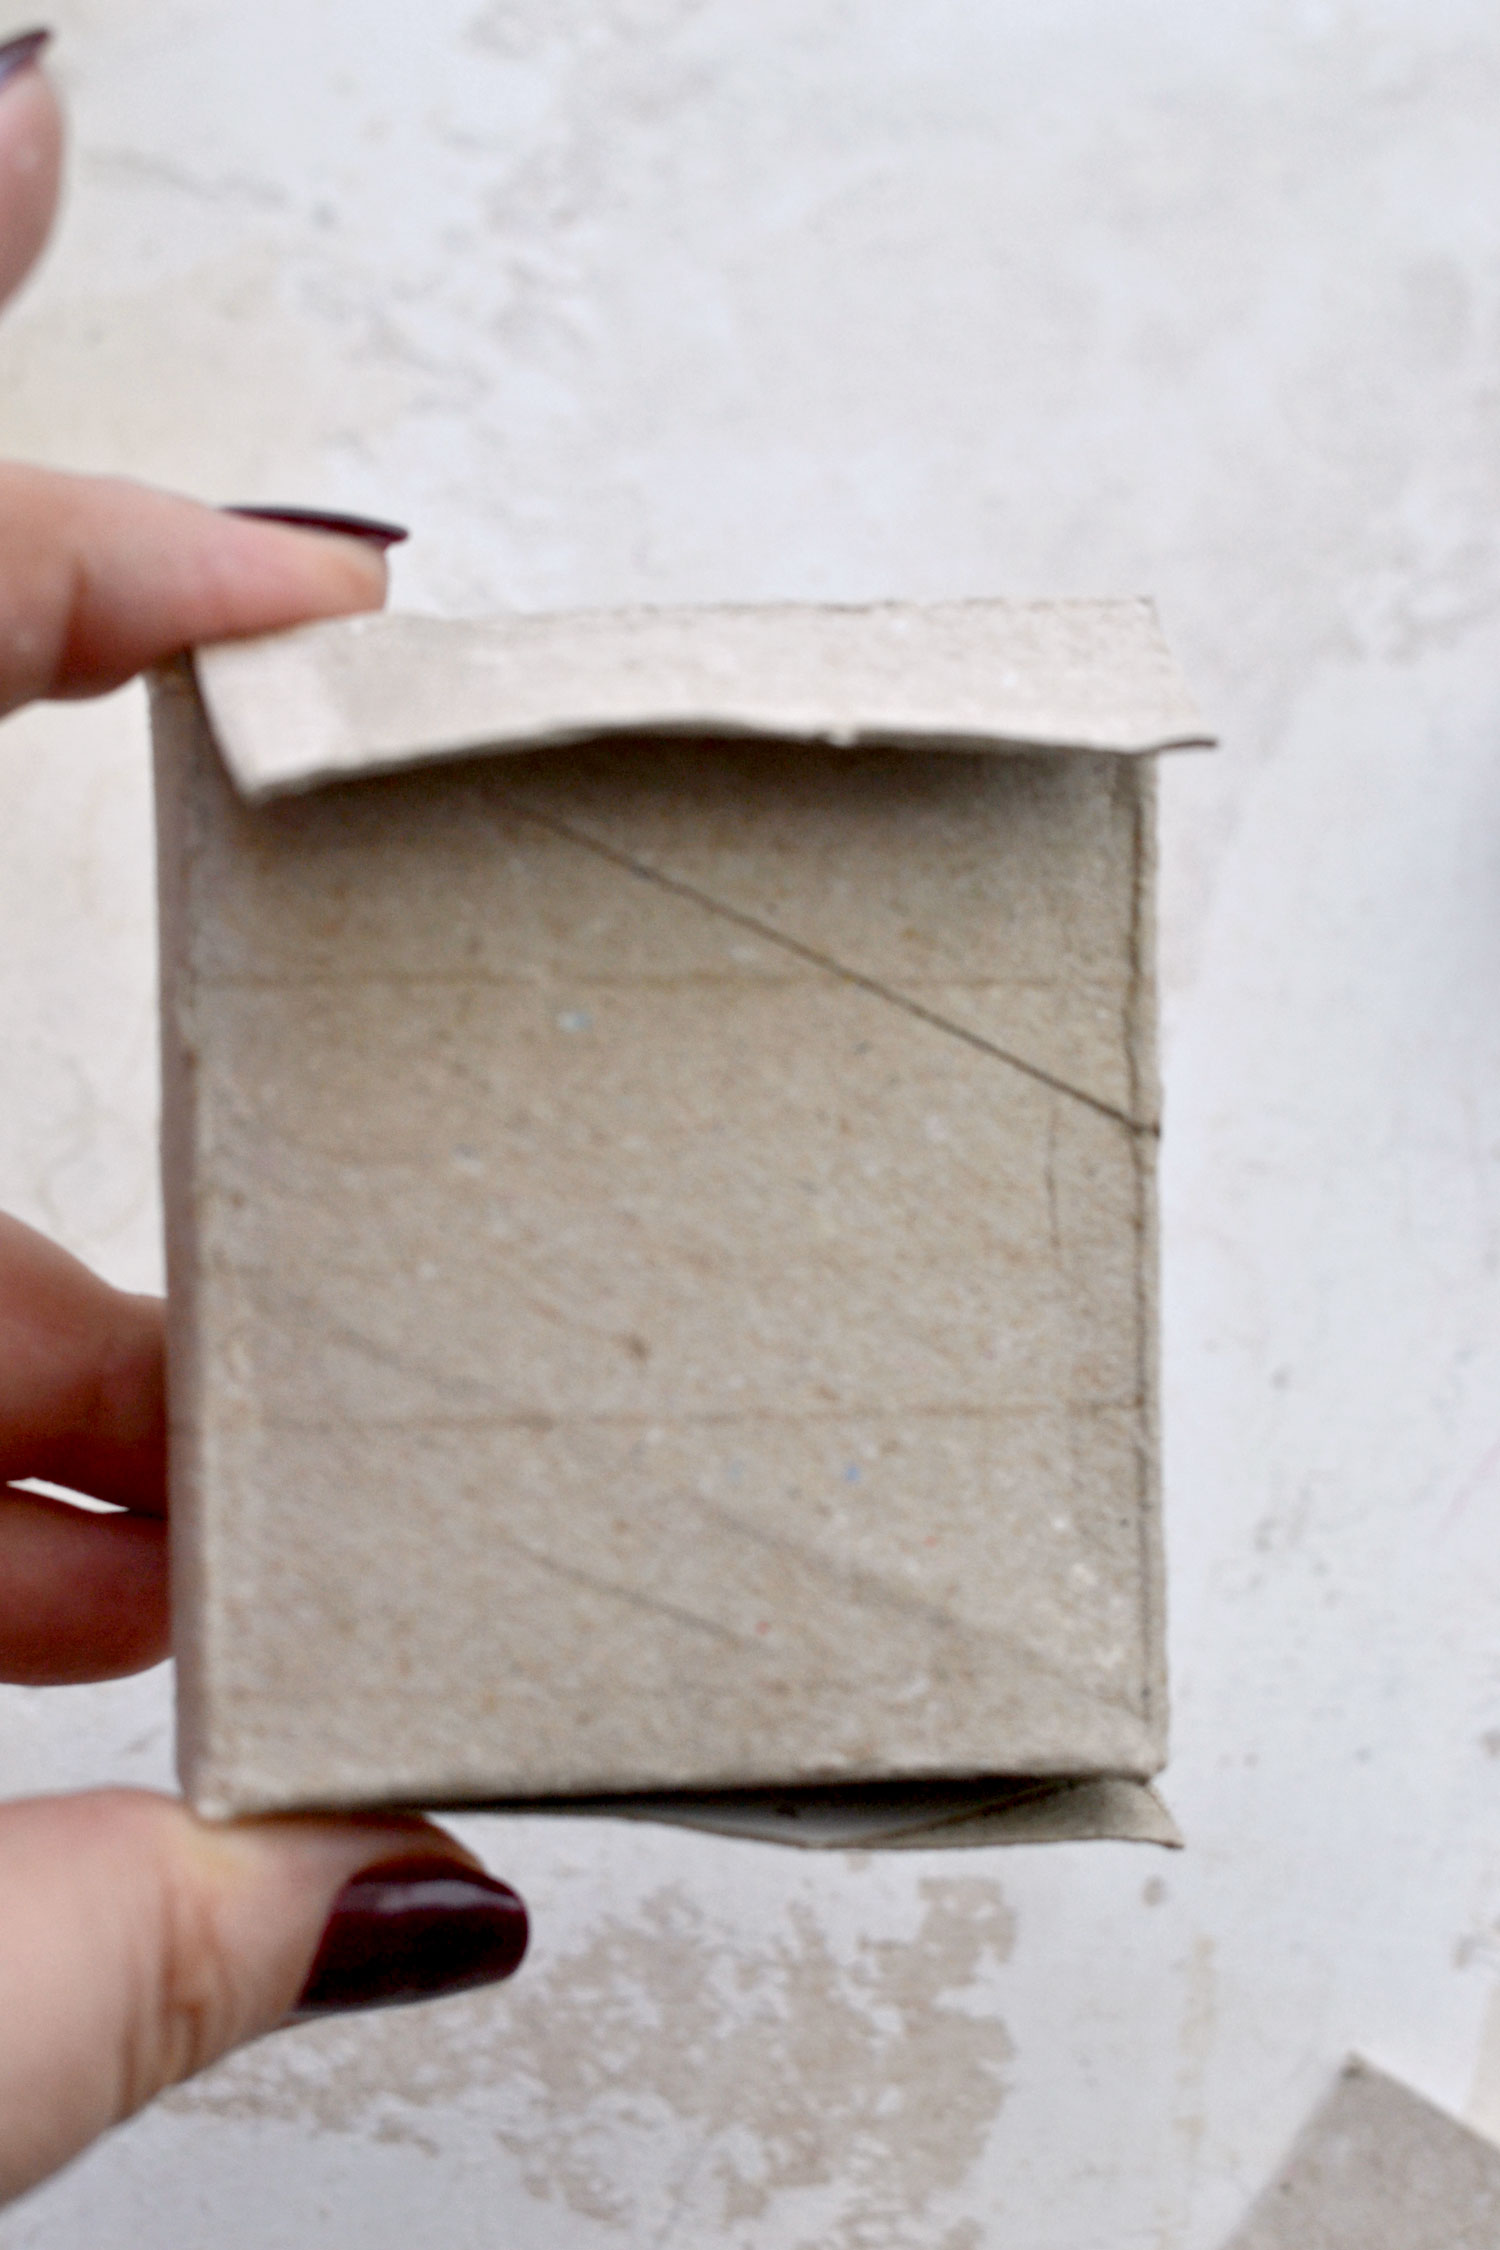
Keep in mind that all the lines that we scored need to be folded before gluing the collage on top to create the shape of your box. You can even assemble it to make sure everything is as it should be, but don’t glue it just yet.
Gluing the collage paper
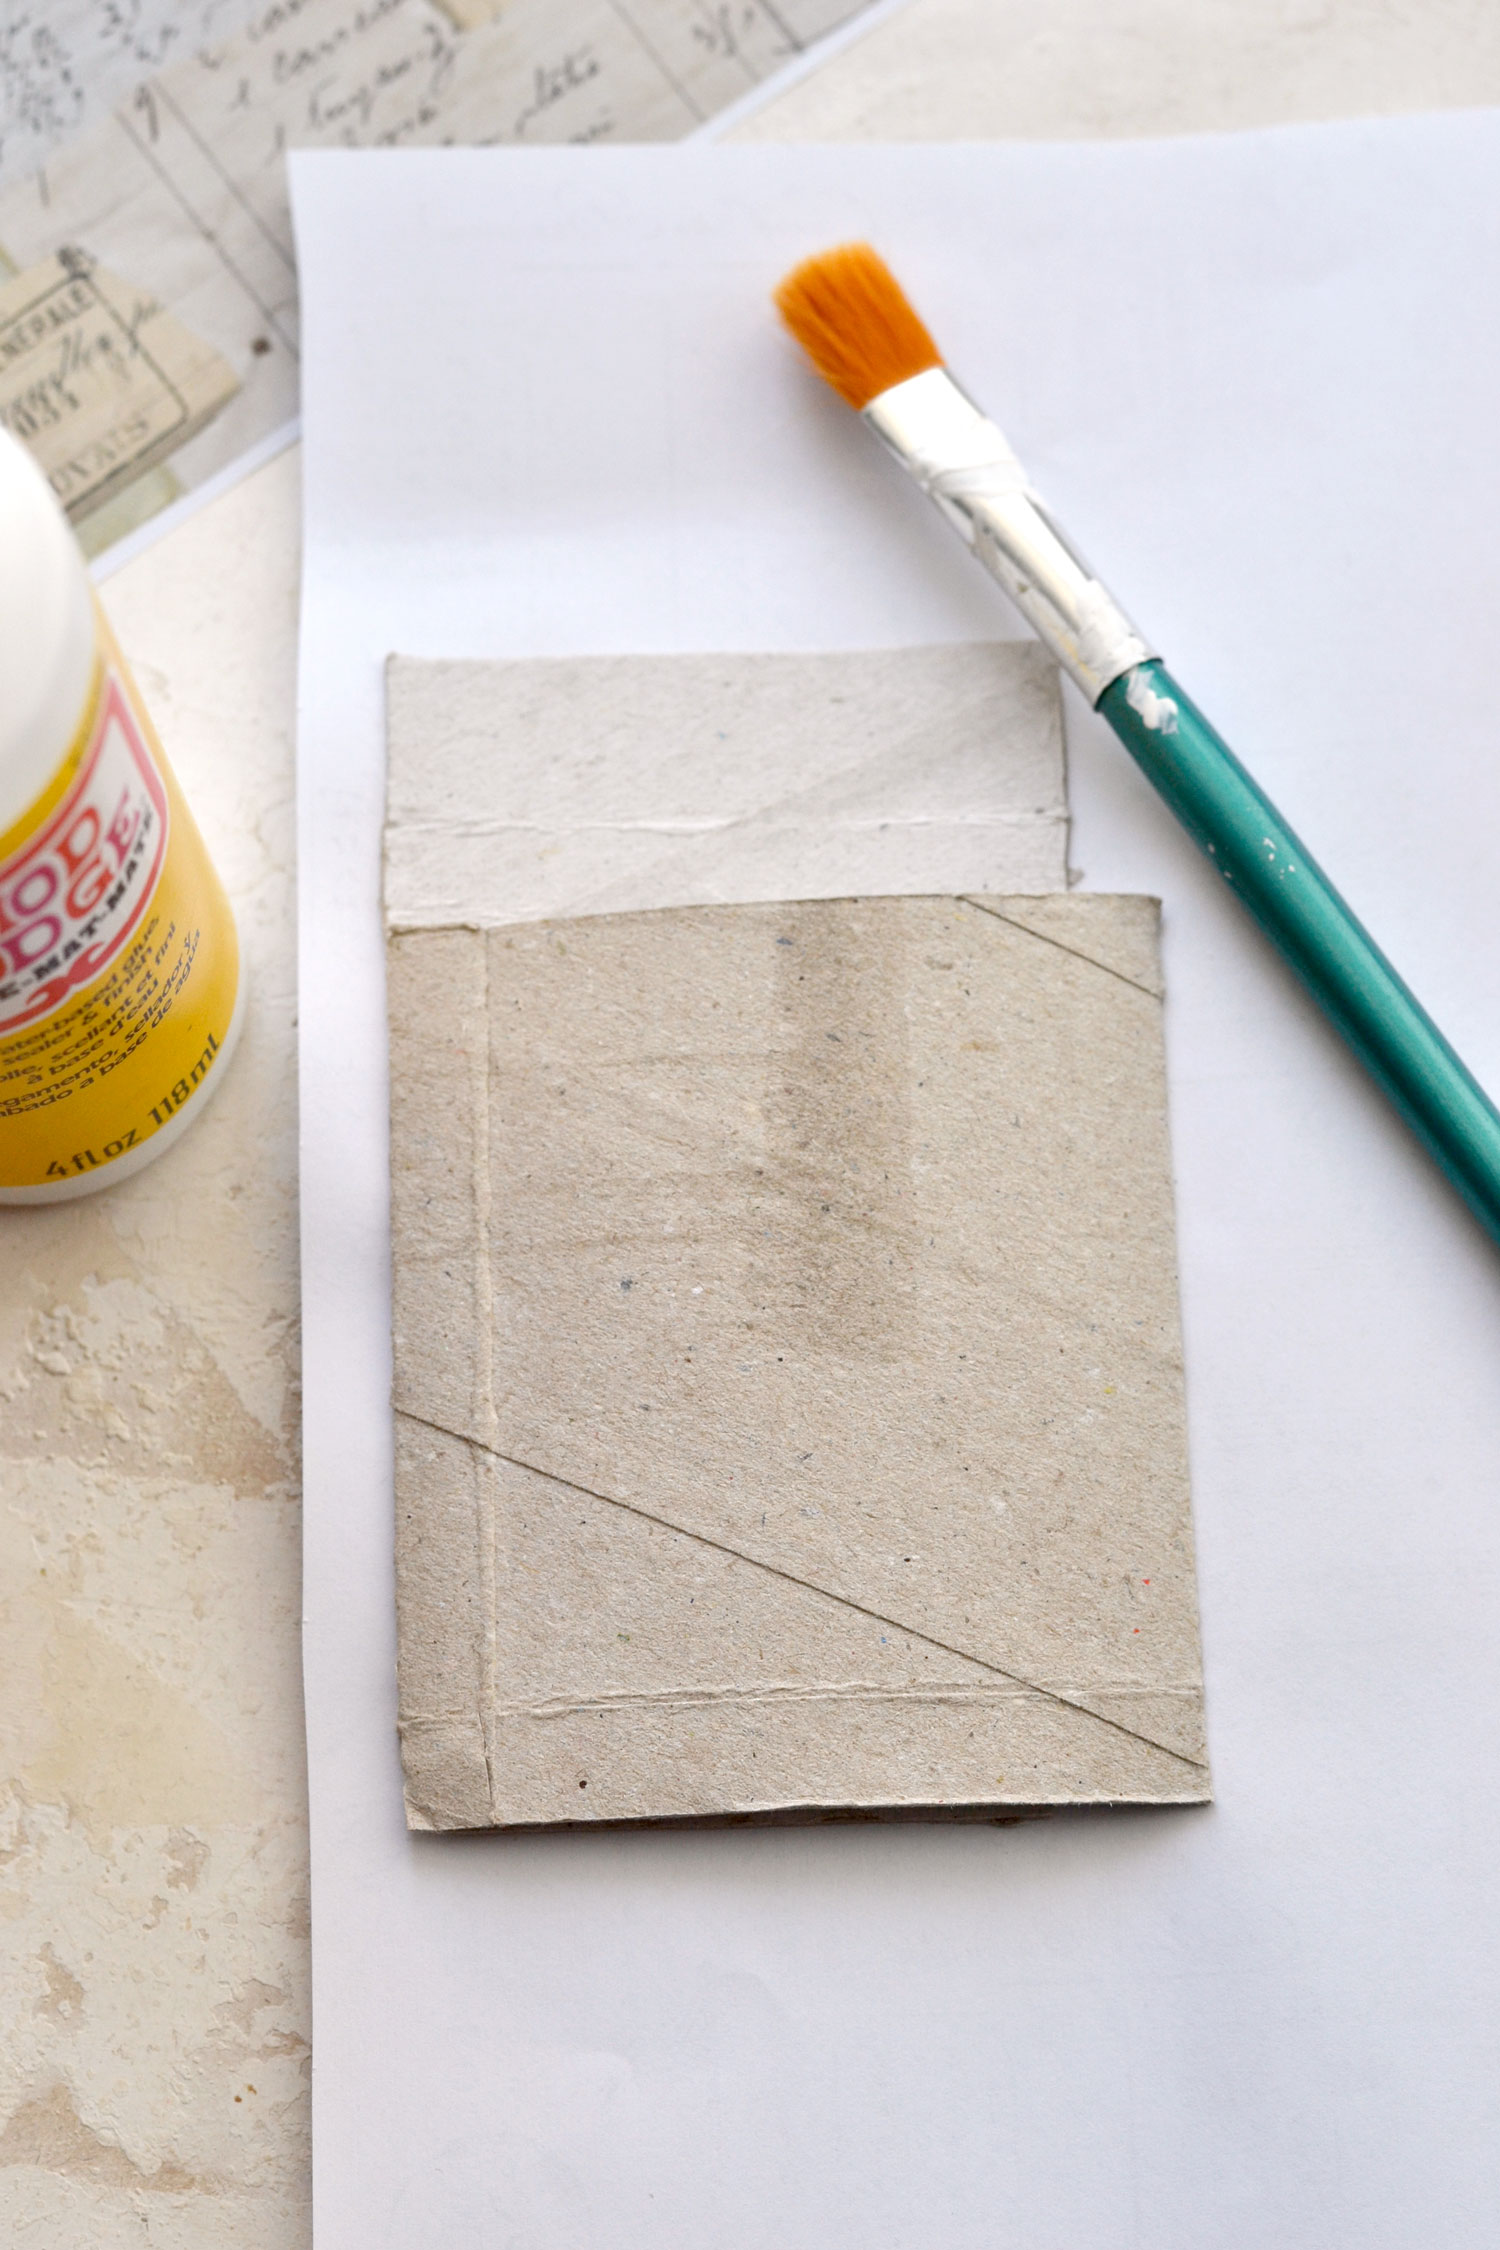
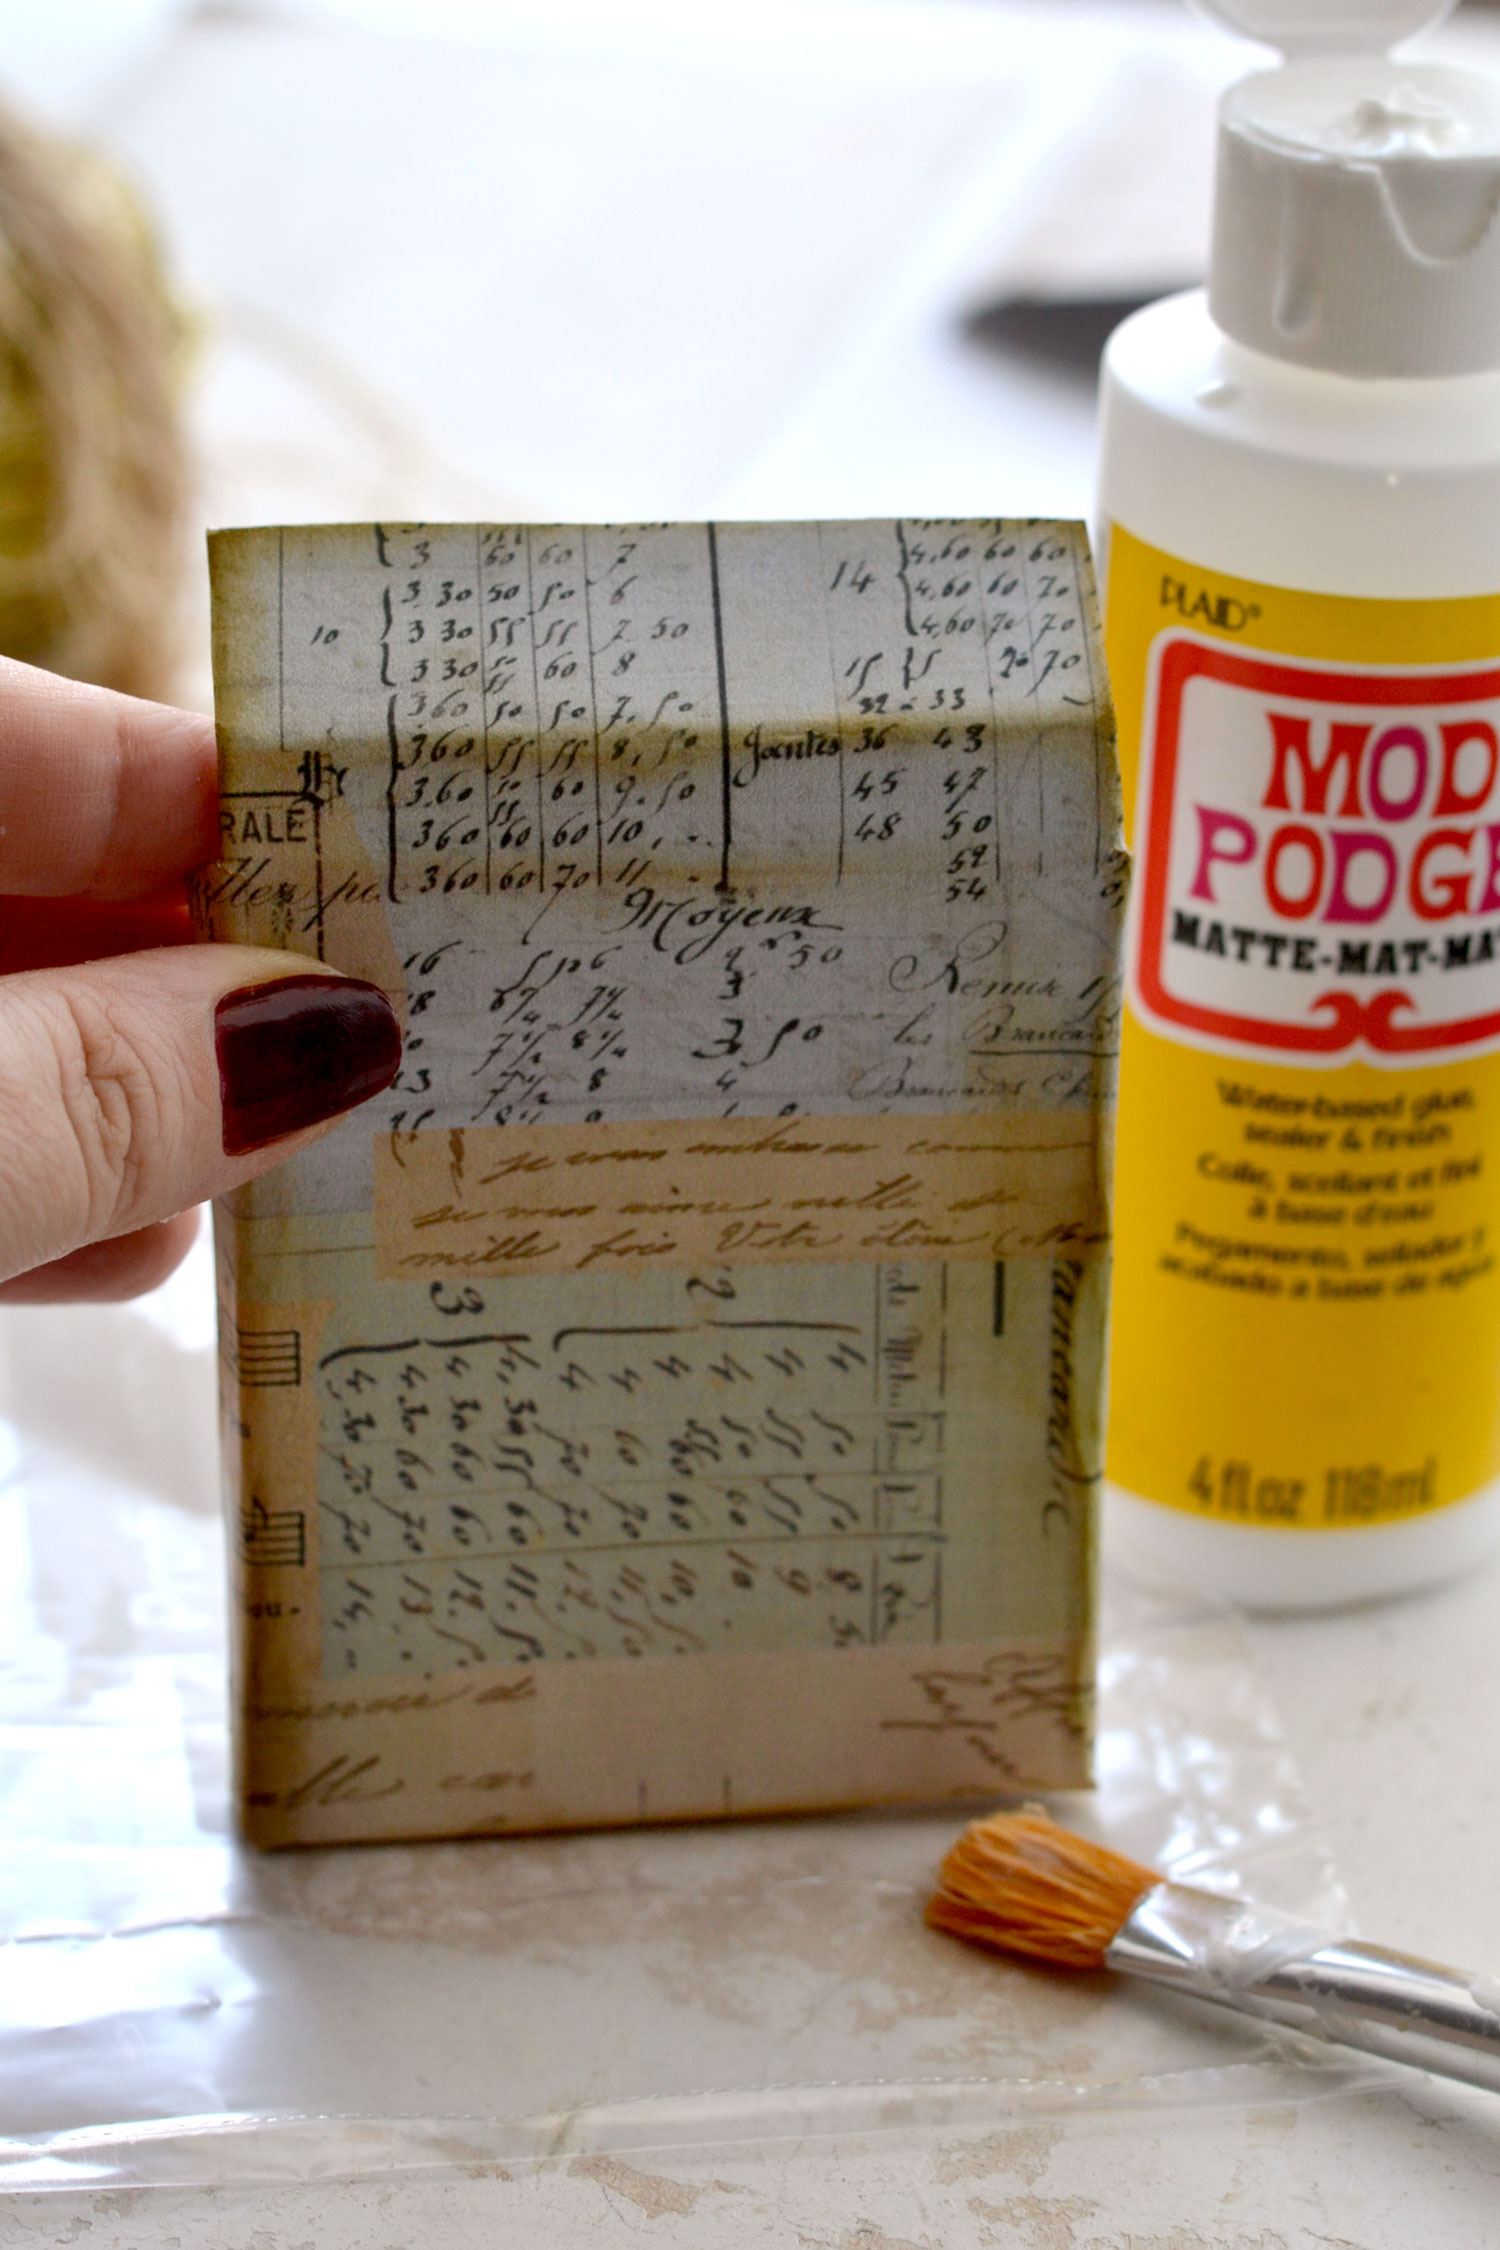
For our next step, you need to flatten your box again, it will be so much easier to decorate it with our French collage.
Start by adding some glue on the whole surface of your flattened side of the box that has the large flap on top. Then, carefully place the box on the back of your printed collage sheet. Press it really well with your fingers to make sure you get a great adherence. You can leave the box on your paper for a few minutes just to be on the safe side.
Cut the collage paper around the box, leaving a small extra border all around the edges. Fold the extra paper inwards and use more glue to glue it in place.
It would be best to use a plastic bag (or something similar) to protect your table. Then you can measure and cut a scrap piece from your collage to glue on the inside of the top flap. Flatten the box again and glue a piece of paper over the middle section and the bottom flaps.

Distressing and assembling the boxes
I found it easier to distress the finished boxes while they were still flattened, but if you want, you can assemble them first and then distress them.
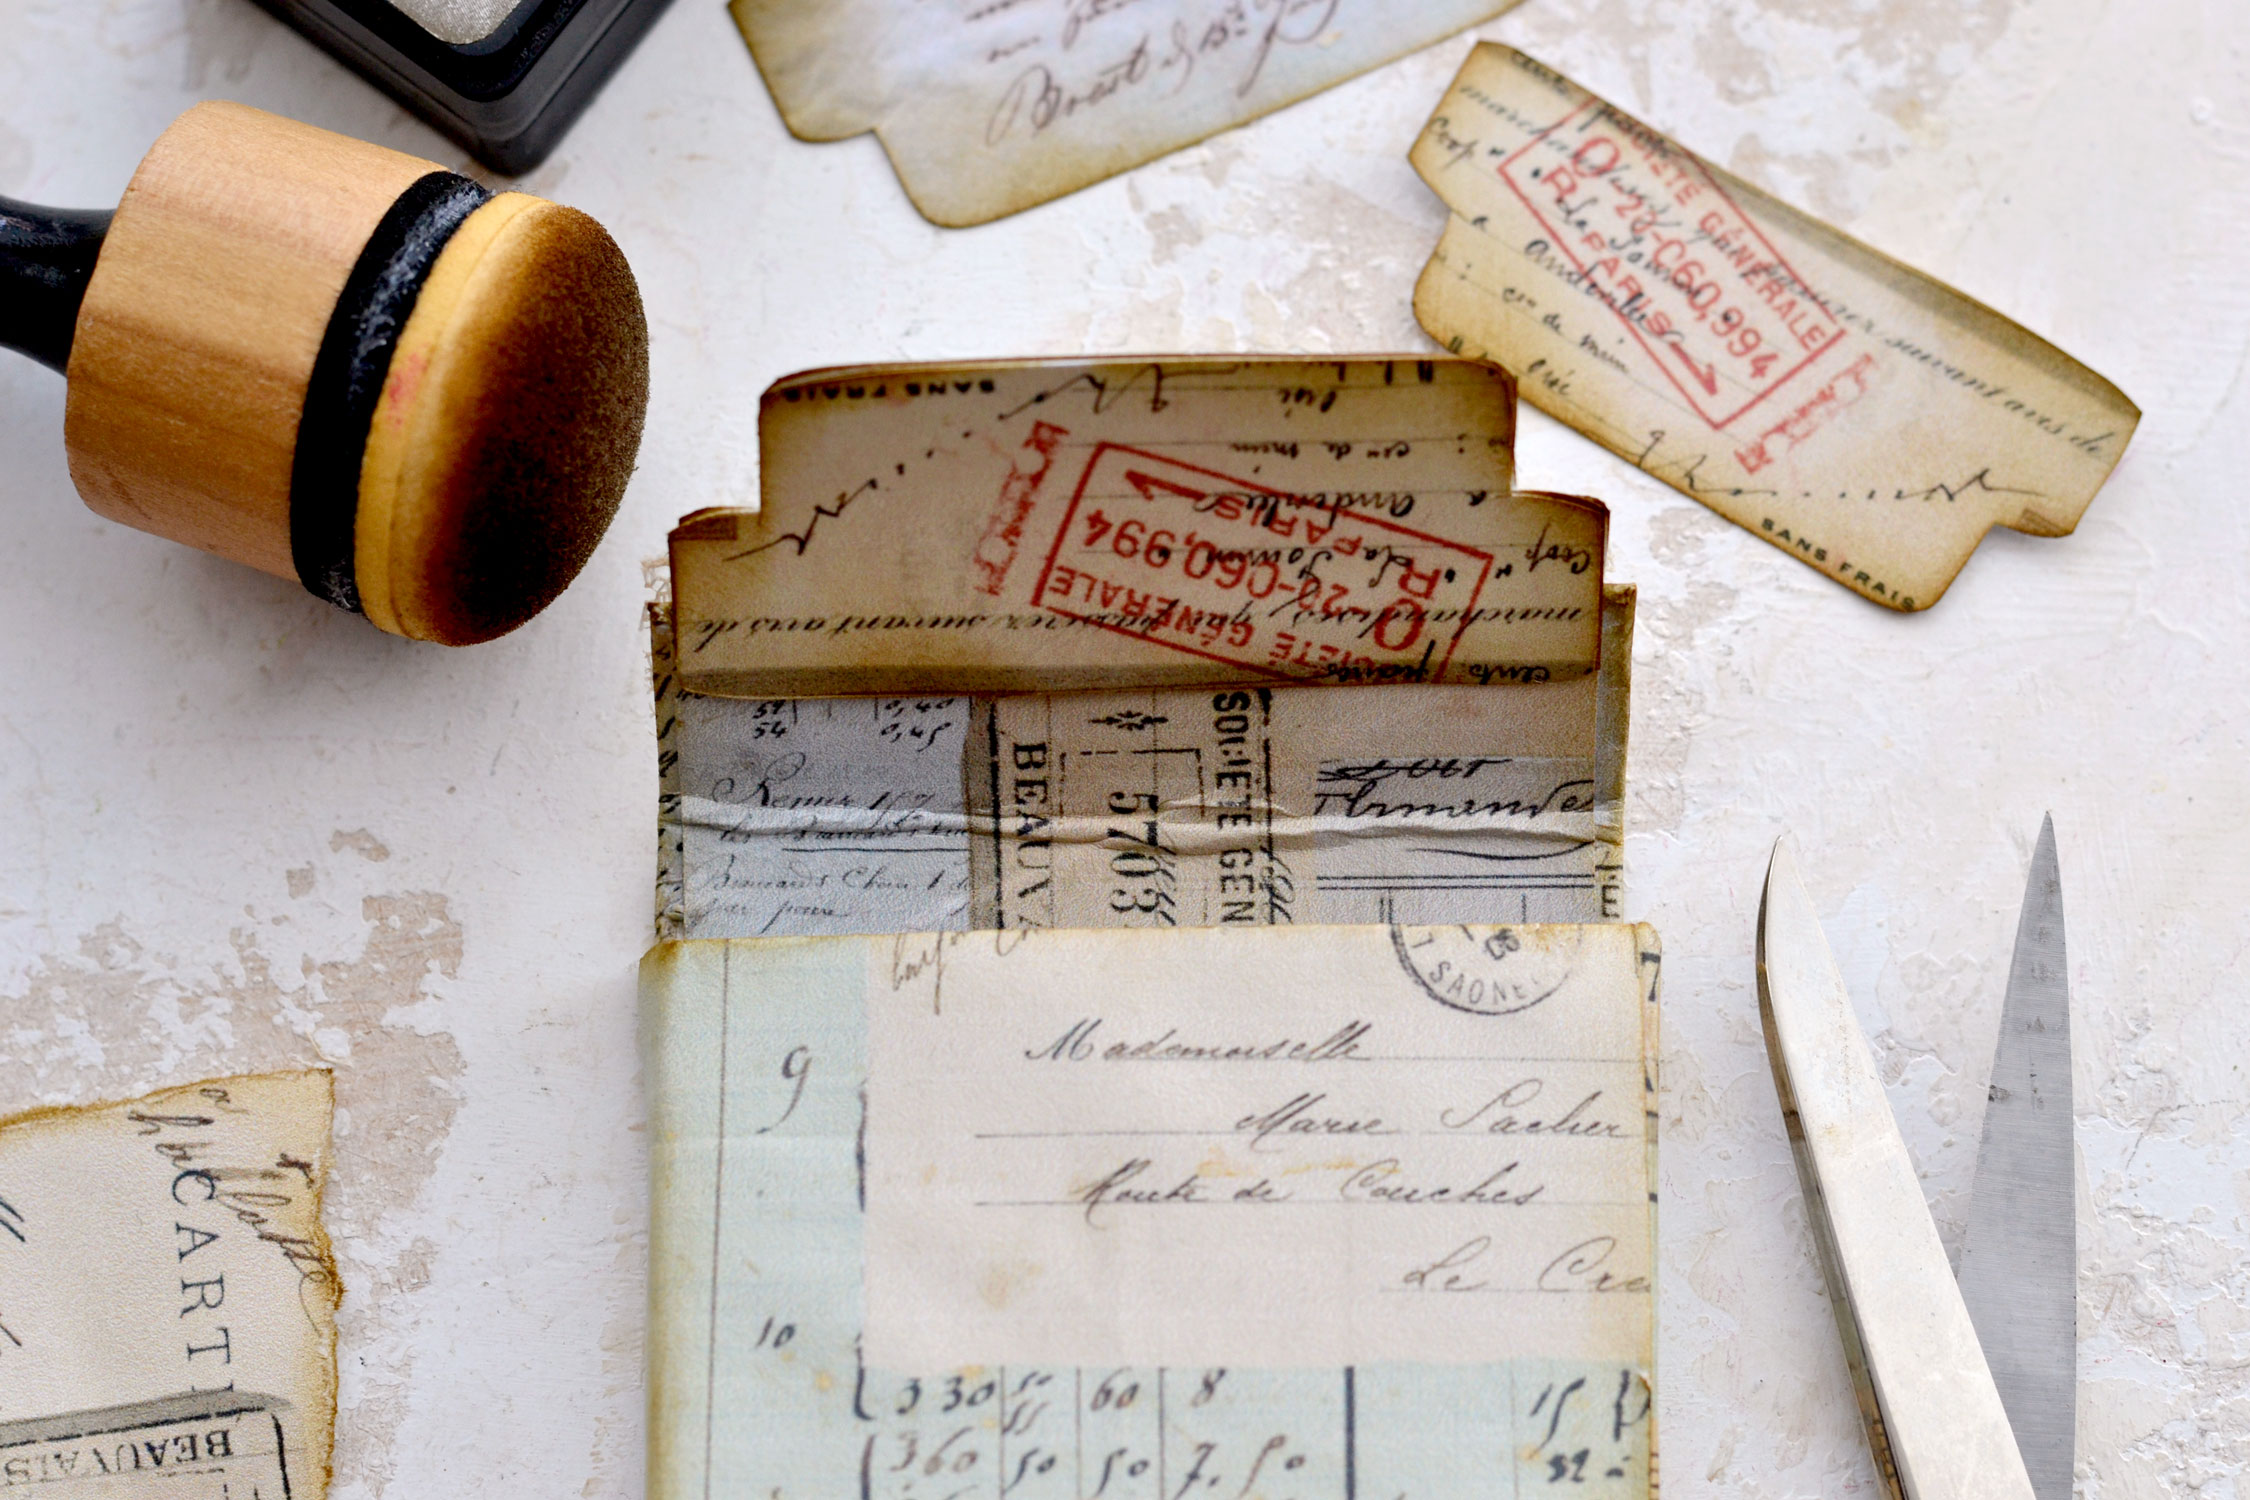
Cut the collage paper where we previously cut the bottom flaps, then use your fingers to fold and tuck the side flaps inside. Then simply add some glue between the long flaps and fold them inside, but do not completely tuck them in. You can press the bottom of the box on your table for a few seconds to make sure the two flaps get the chance to properly adhere.
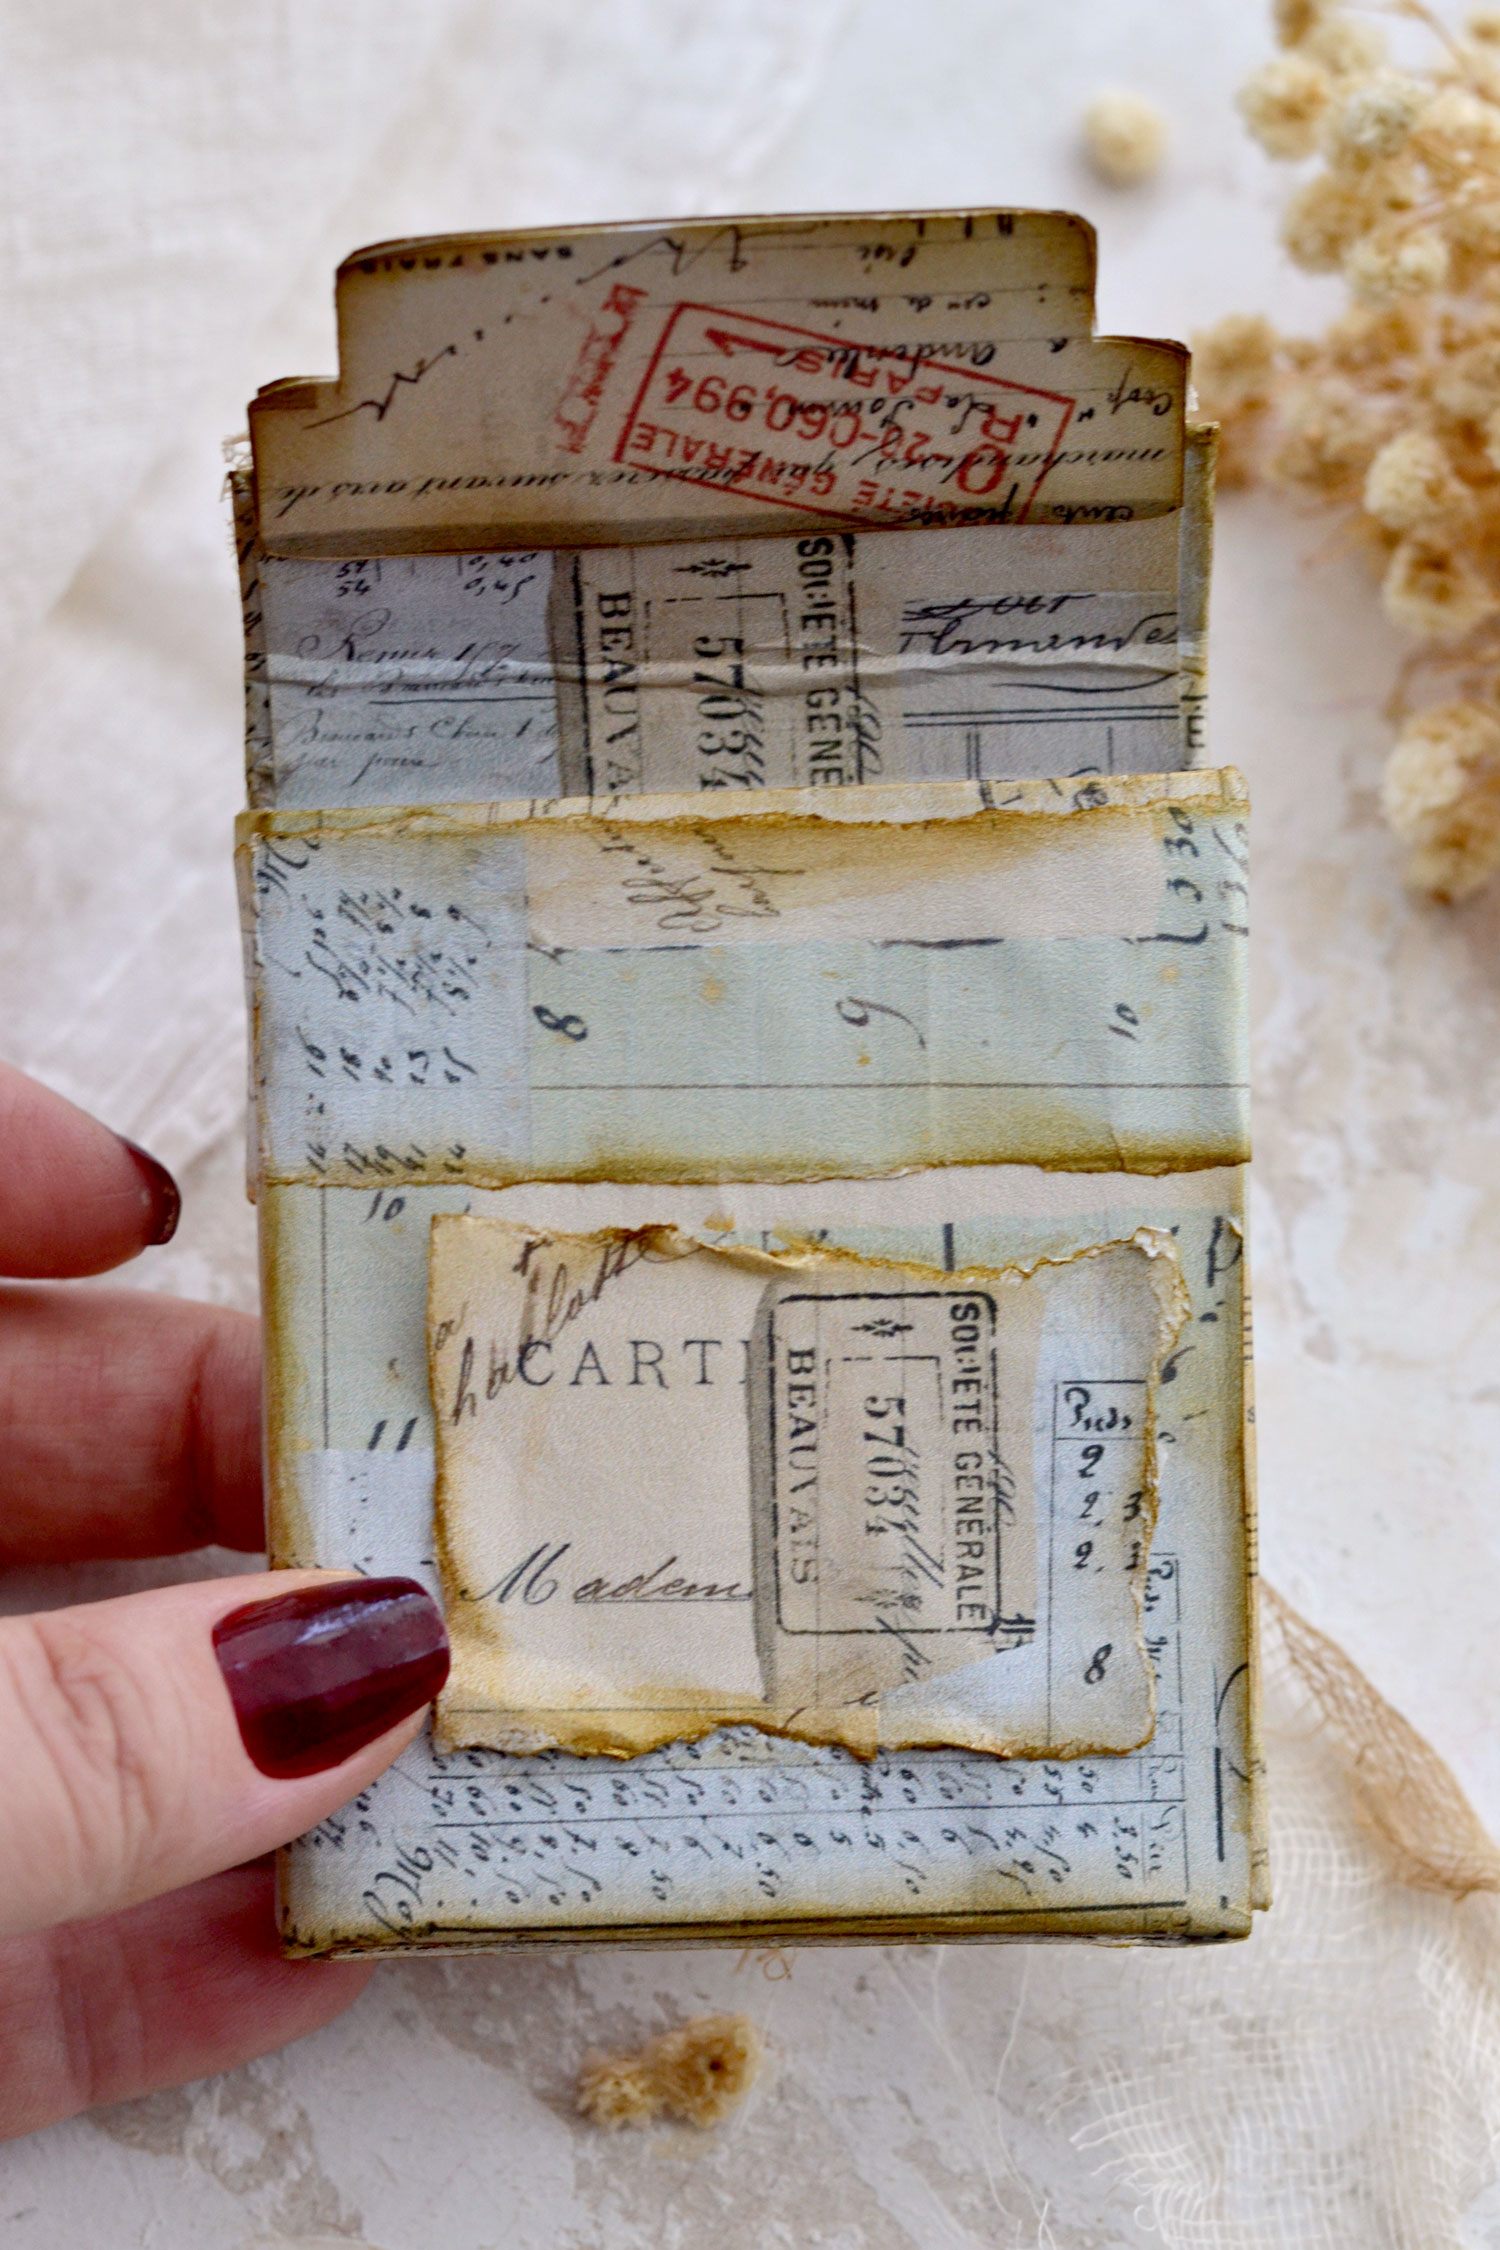
This is the part when I realized I needed the tabs that I mentioned earlier. I used two tabs for each box and I glued them together while also sandwiching a small part of the top flap of the box in.
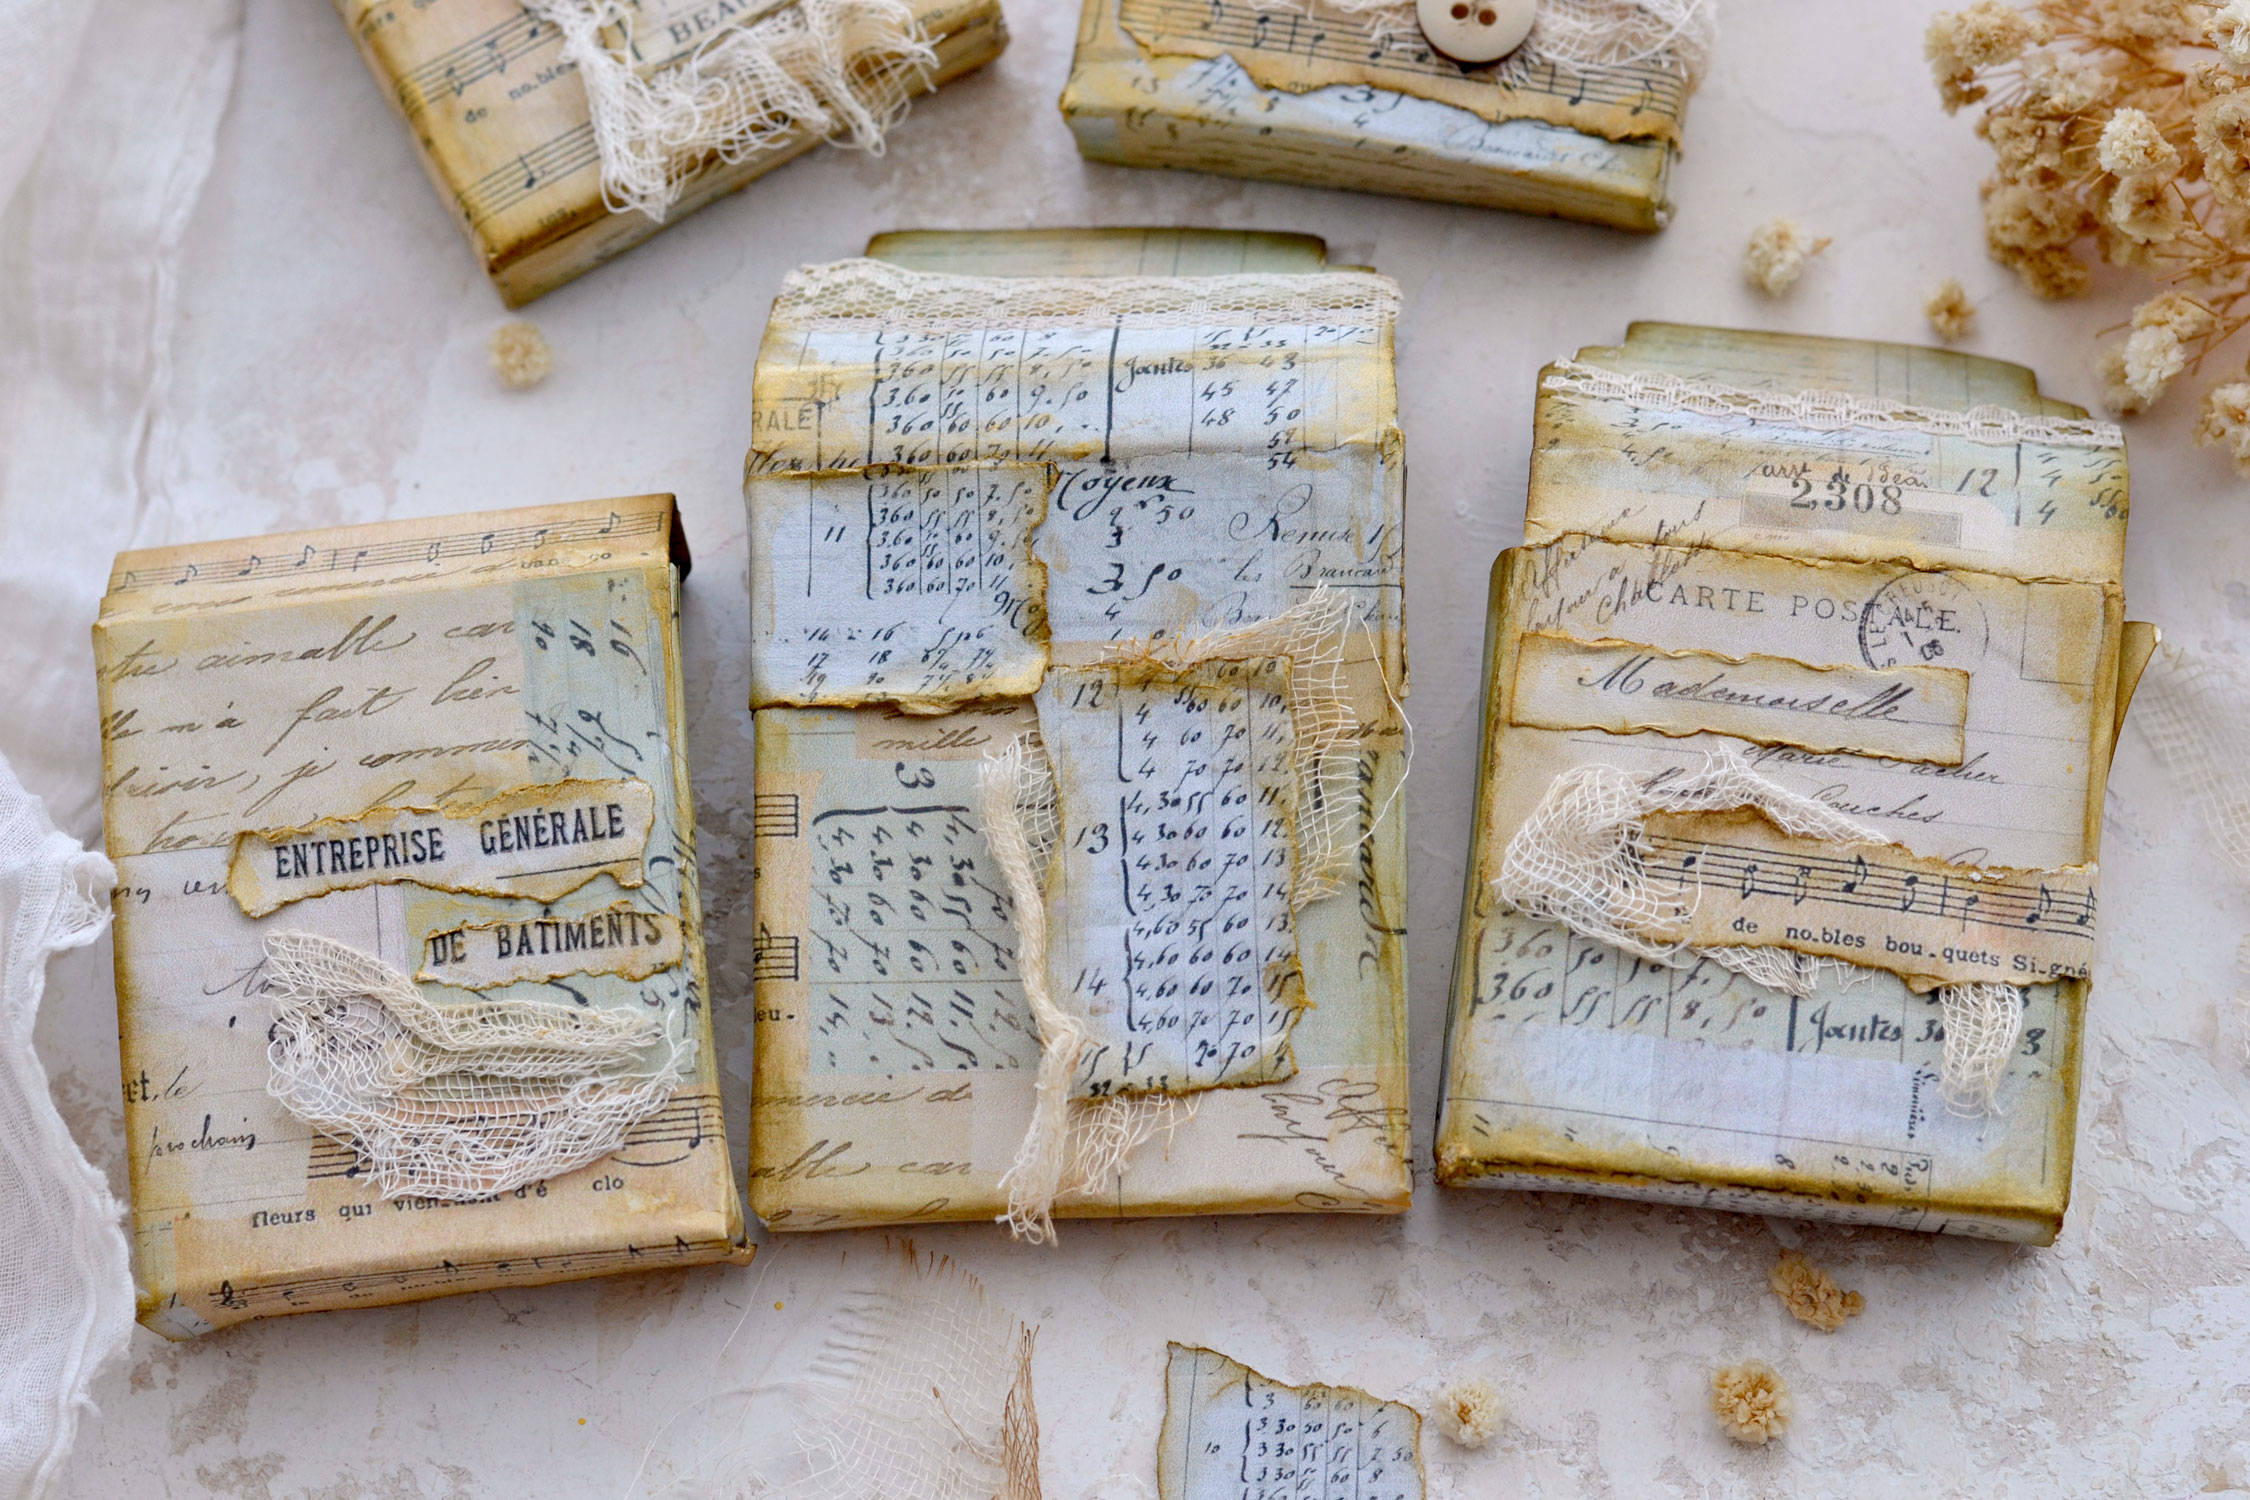
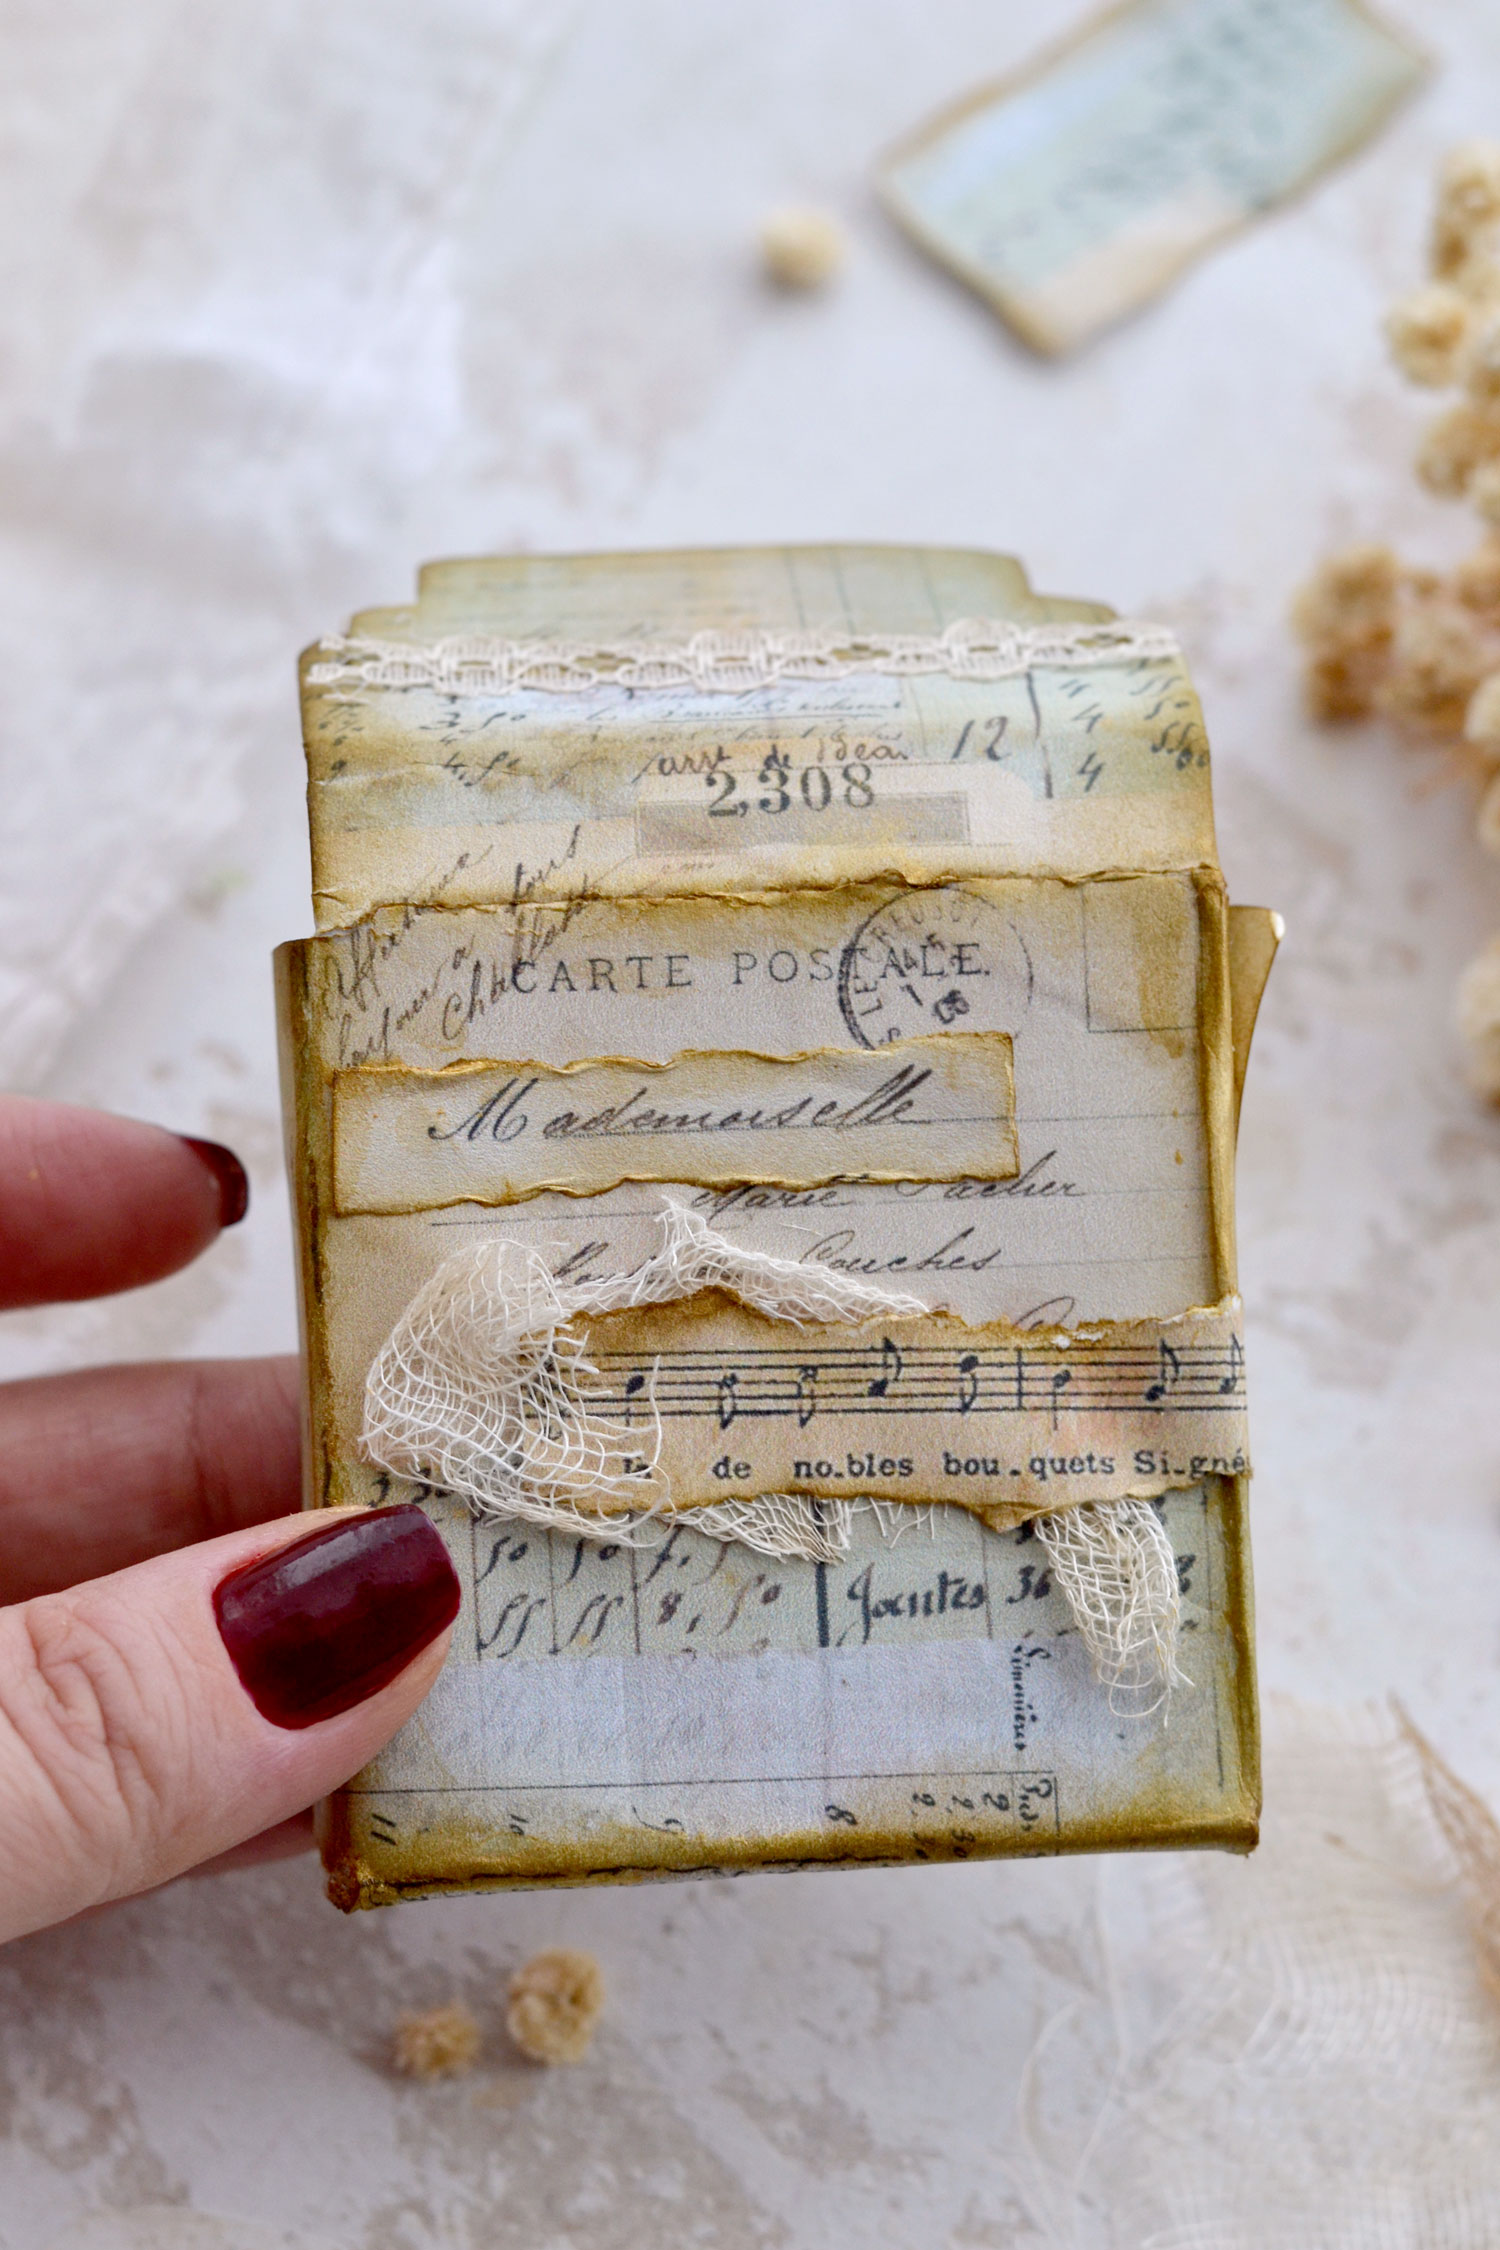
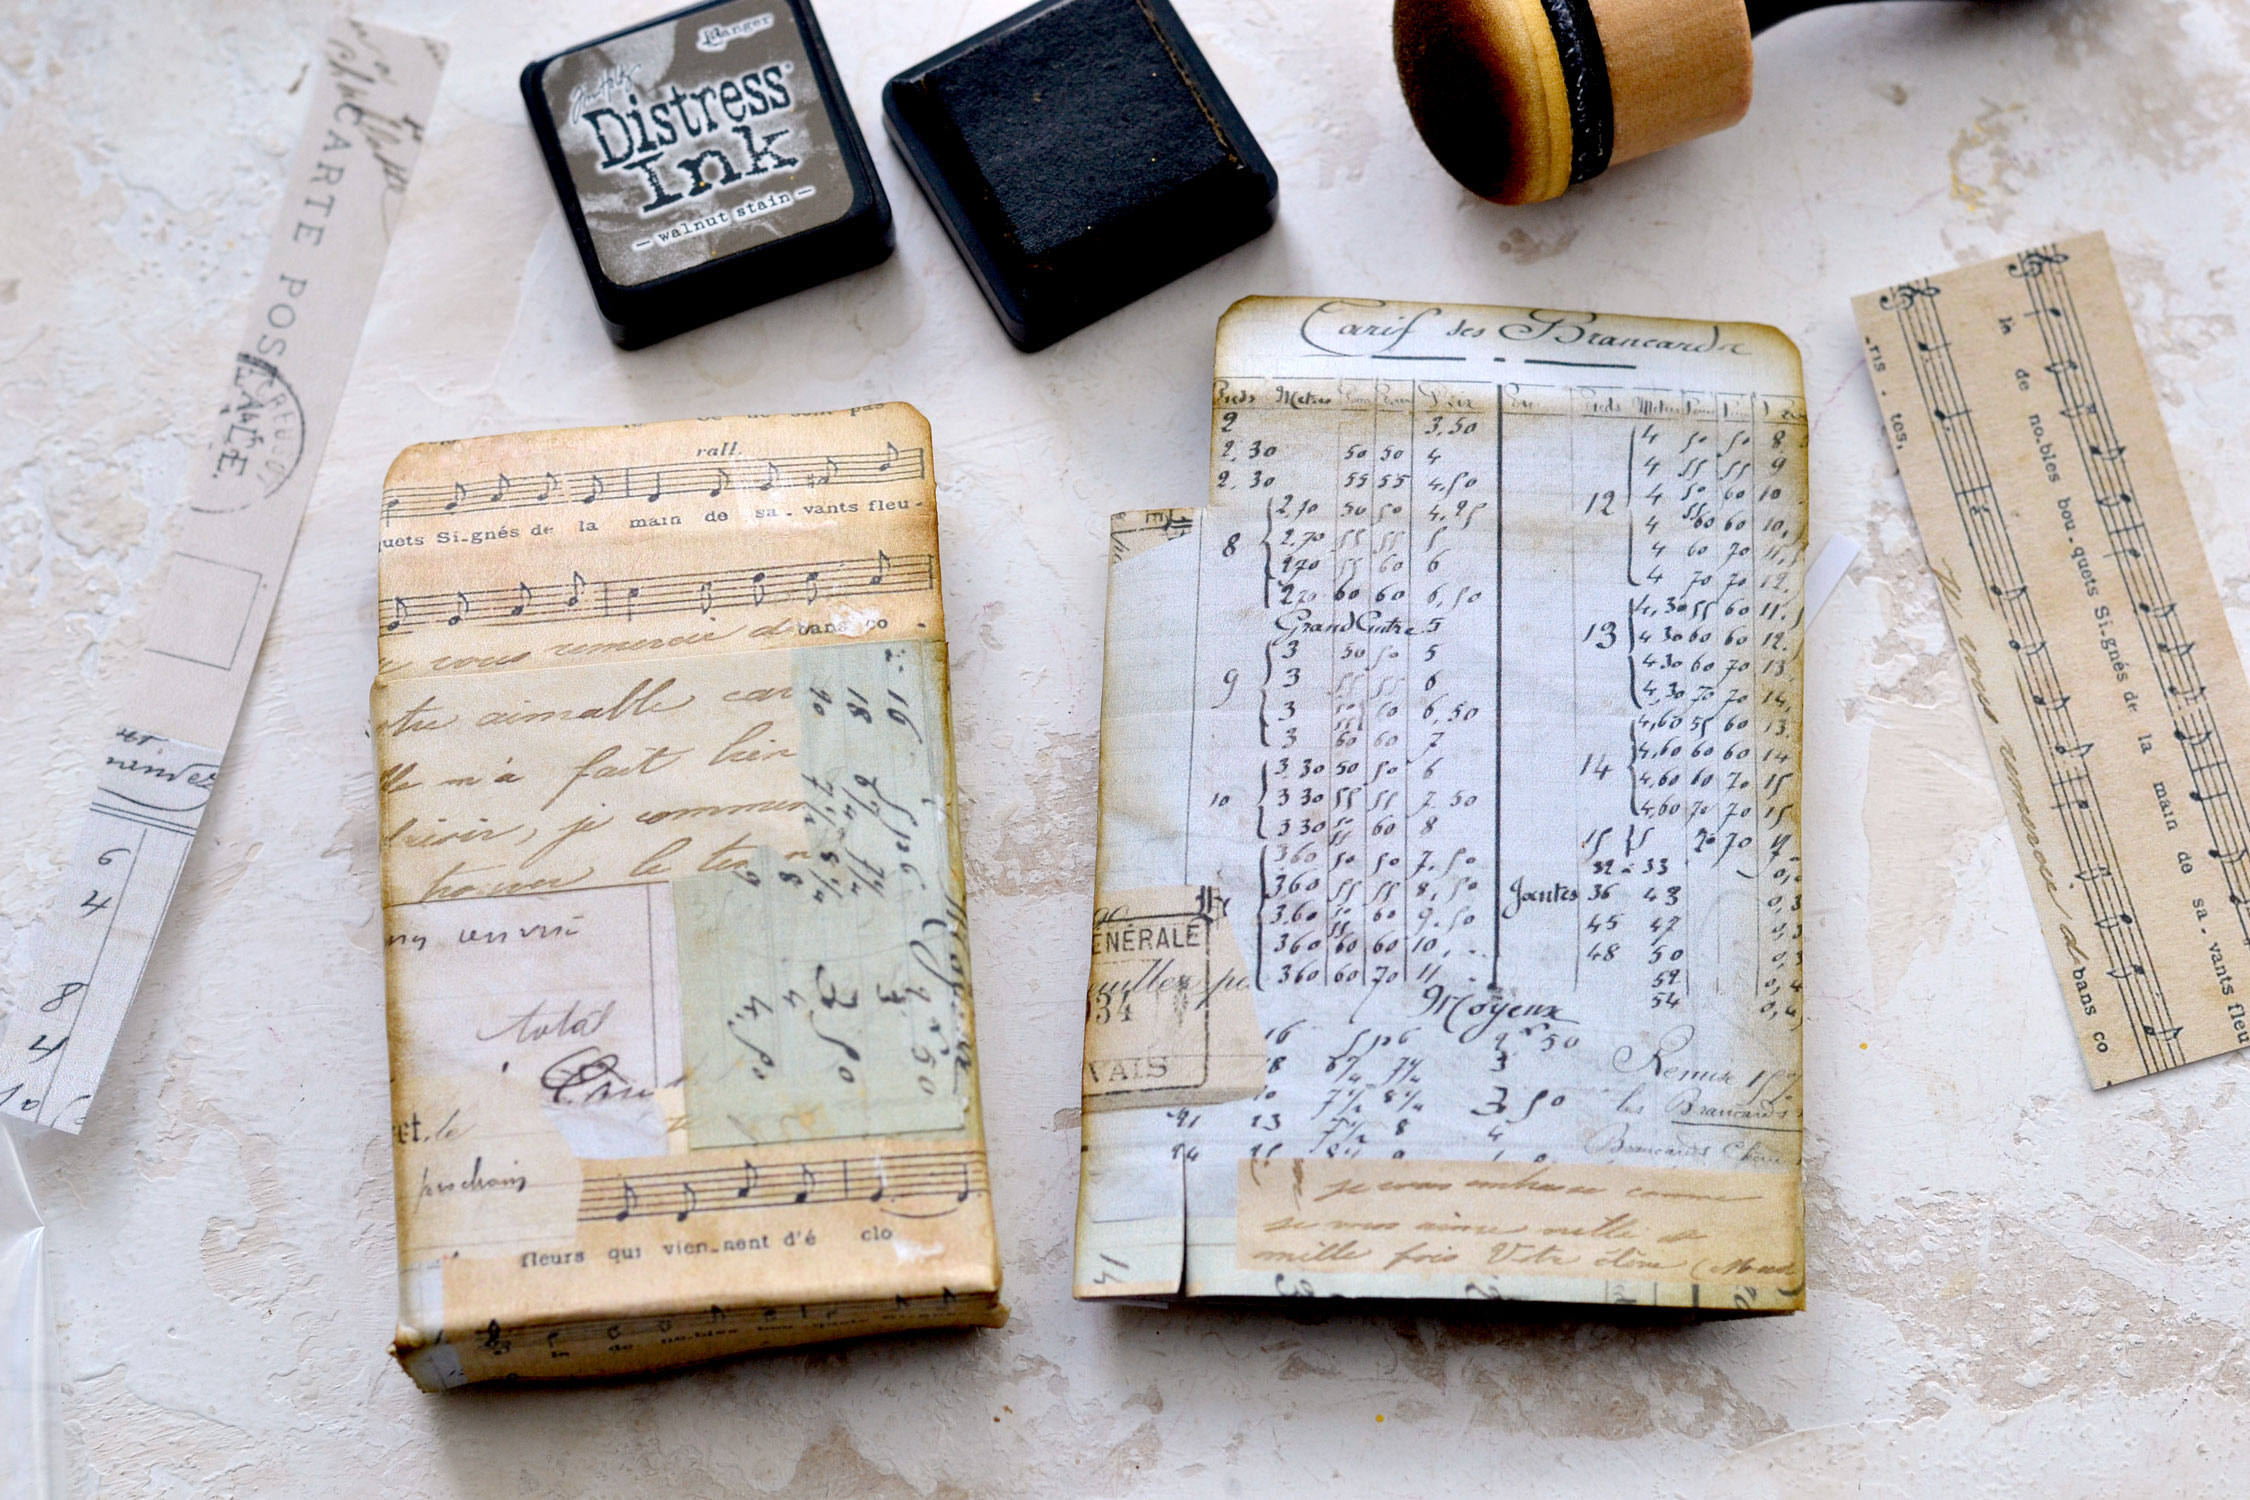
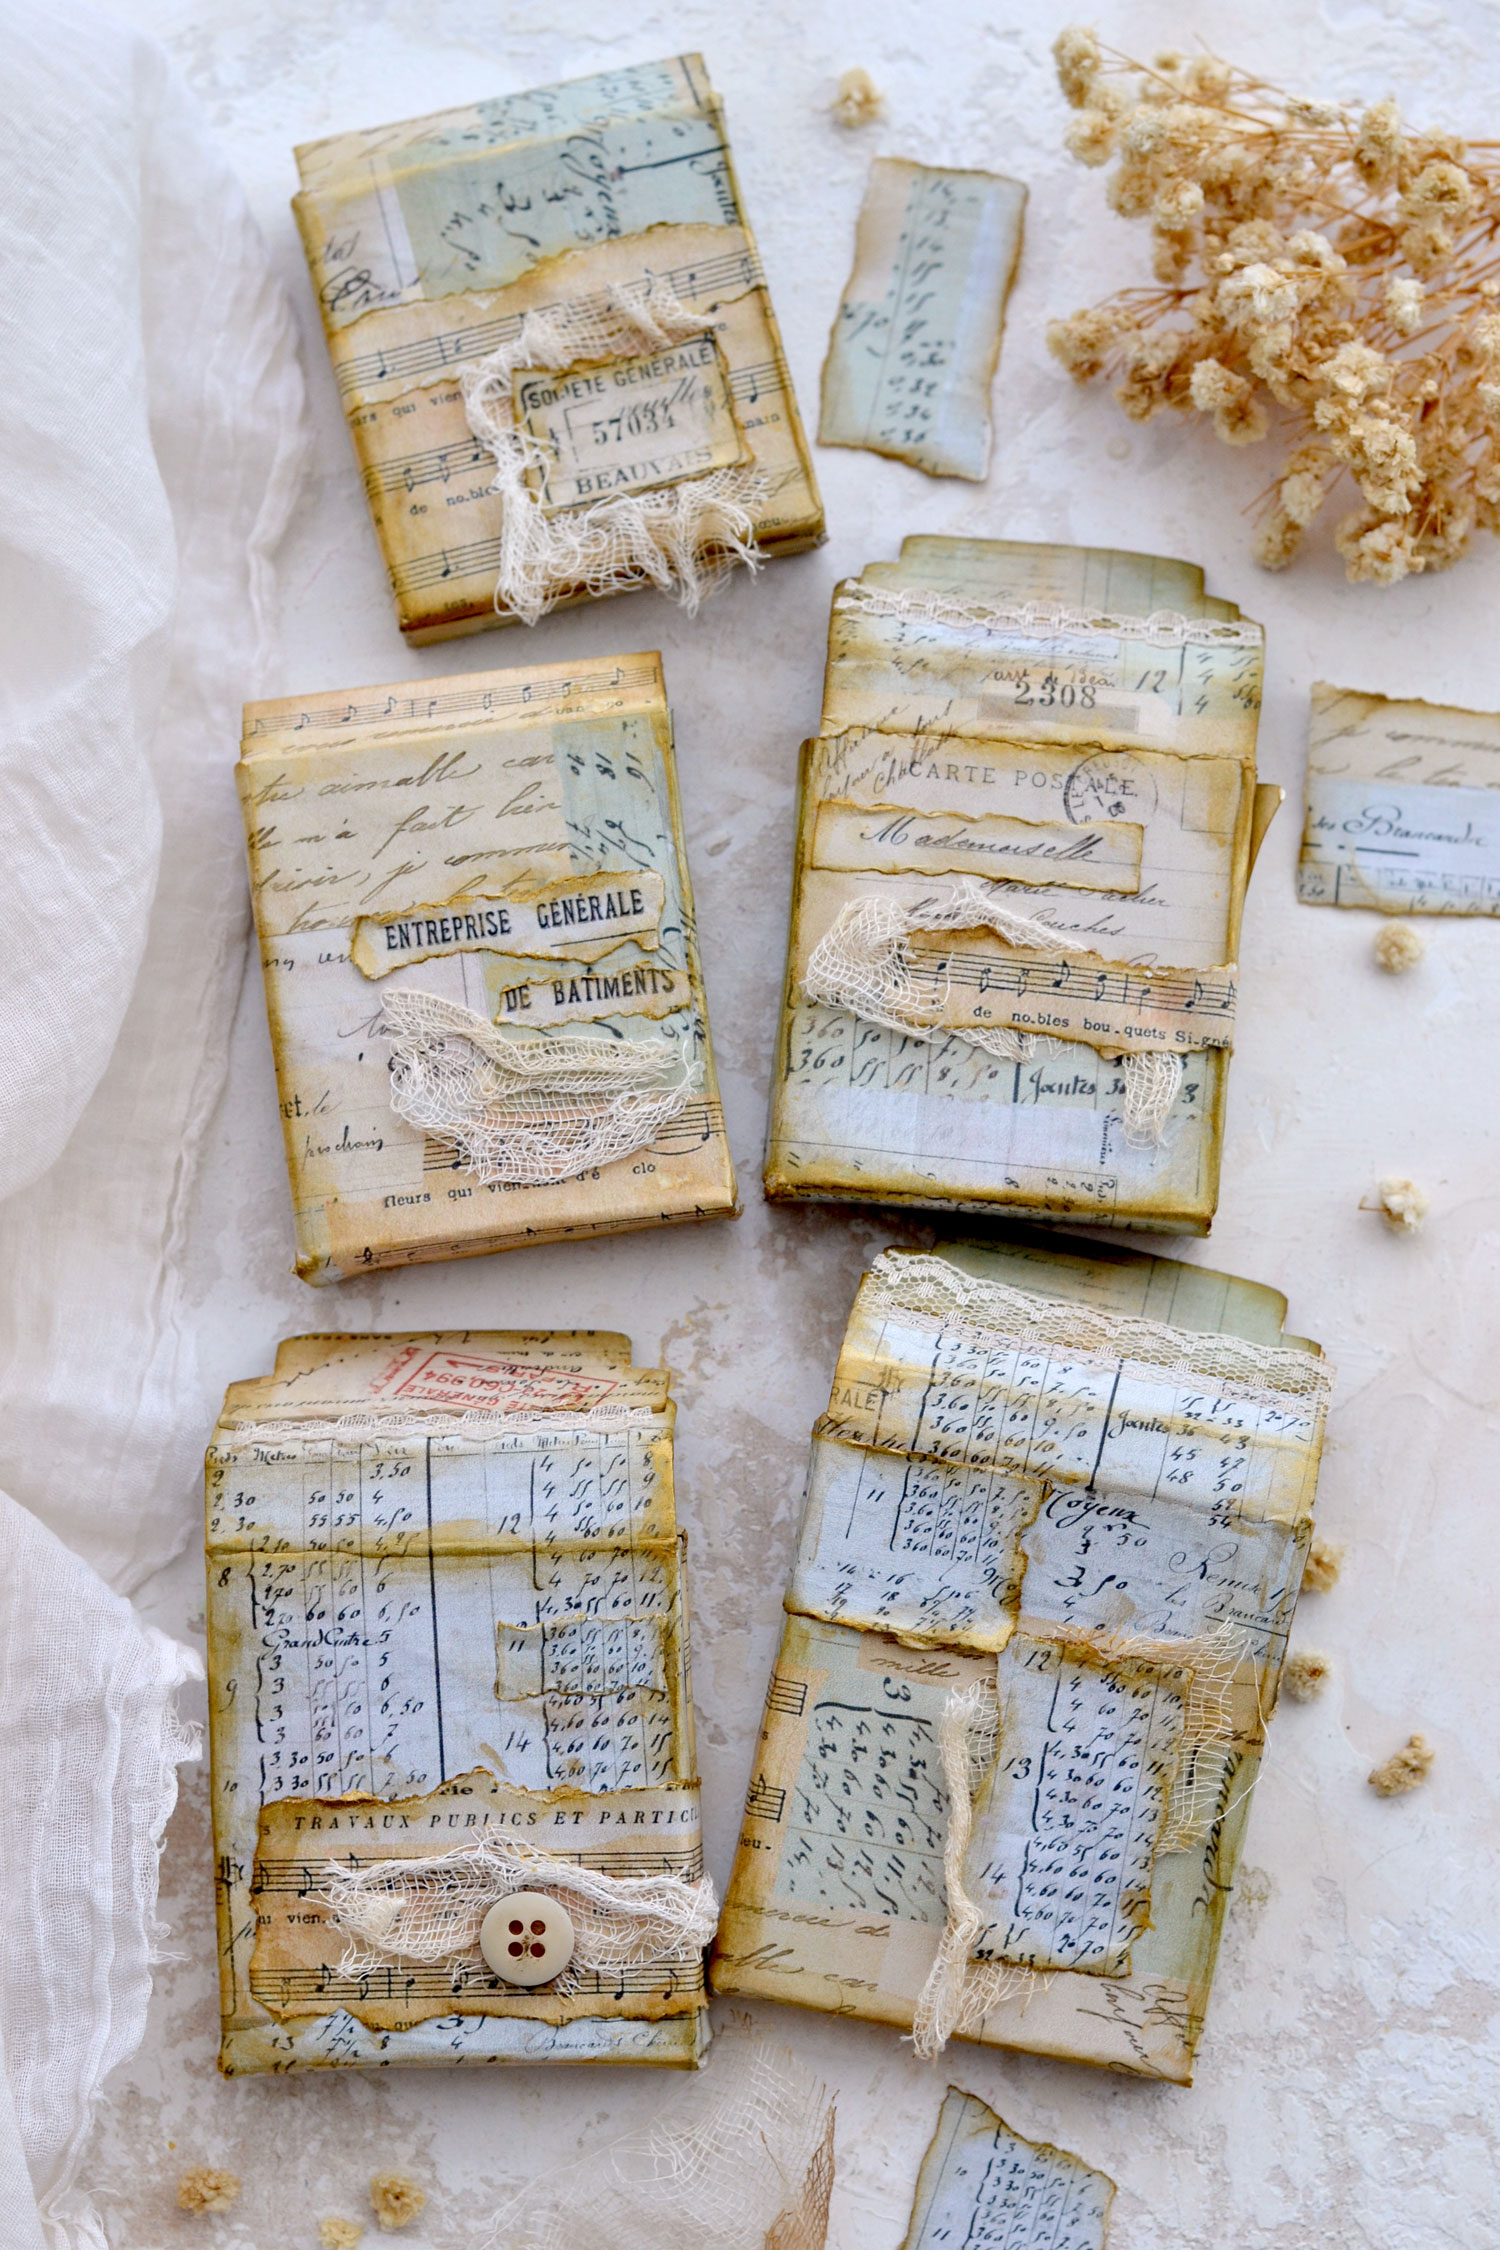
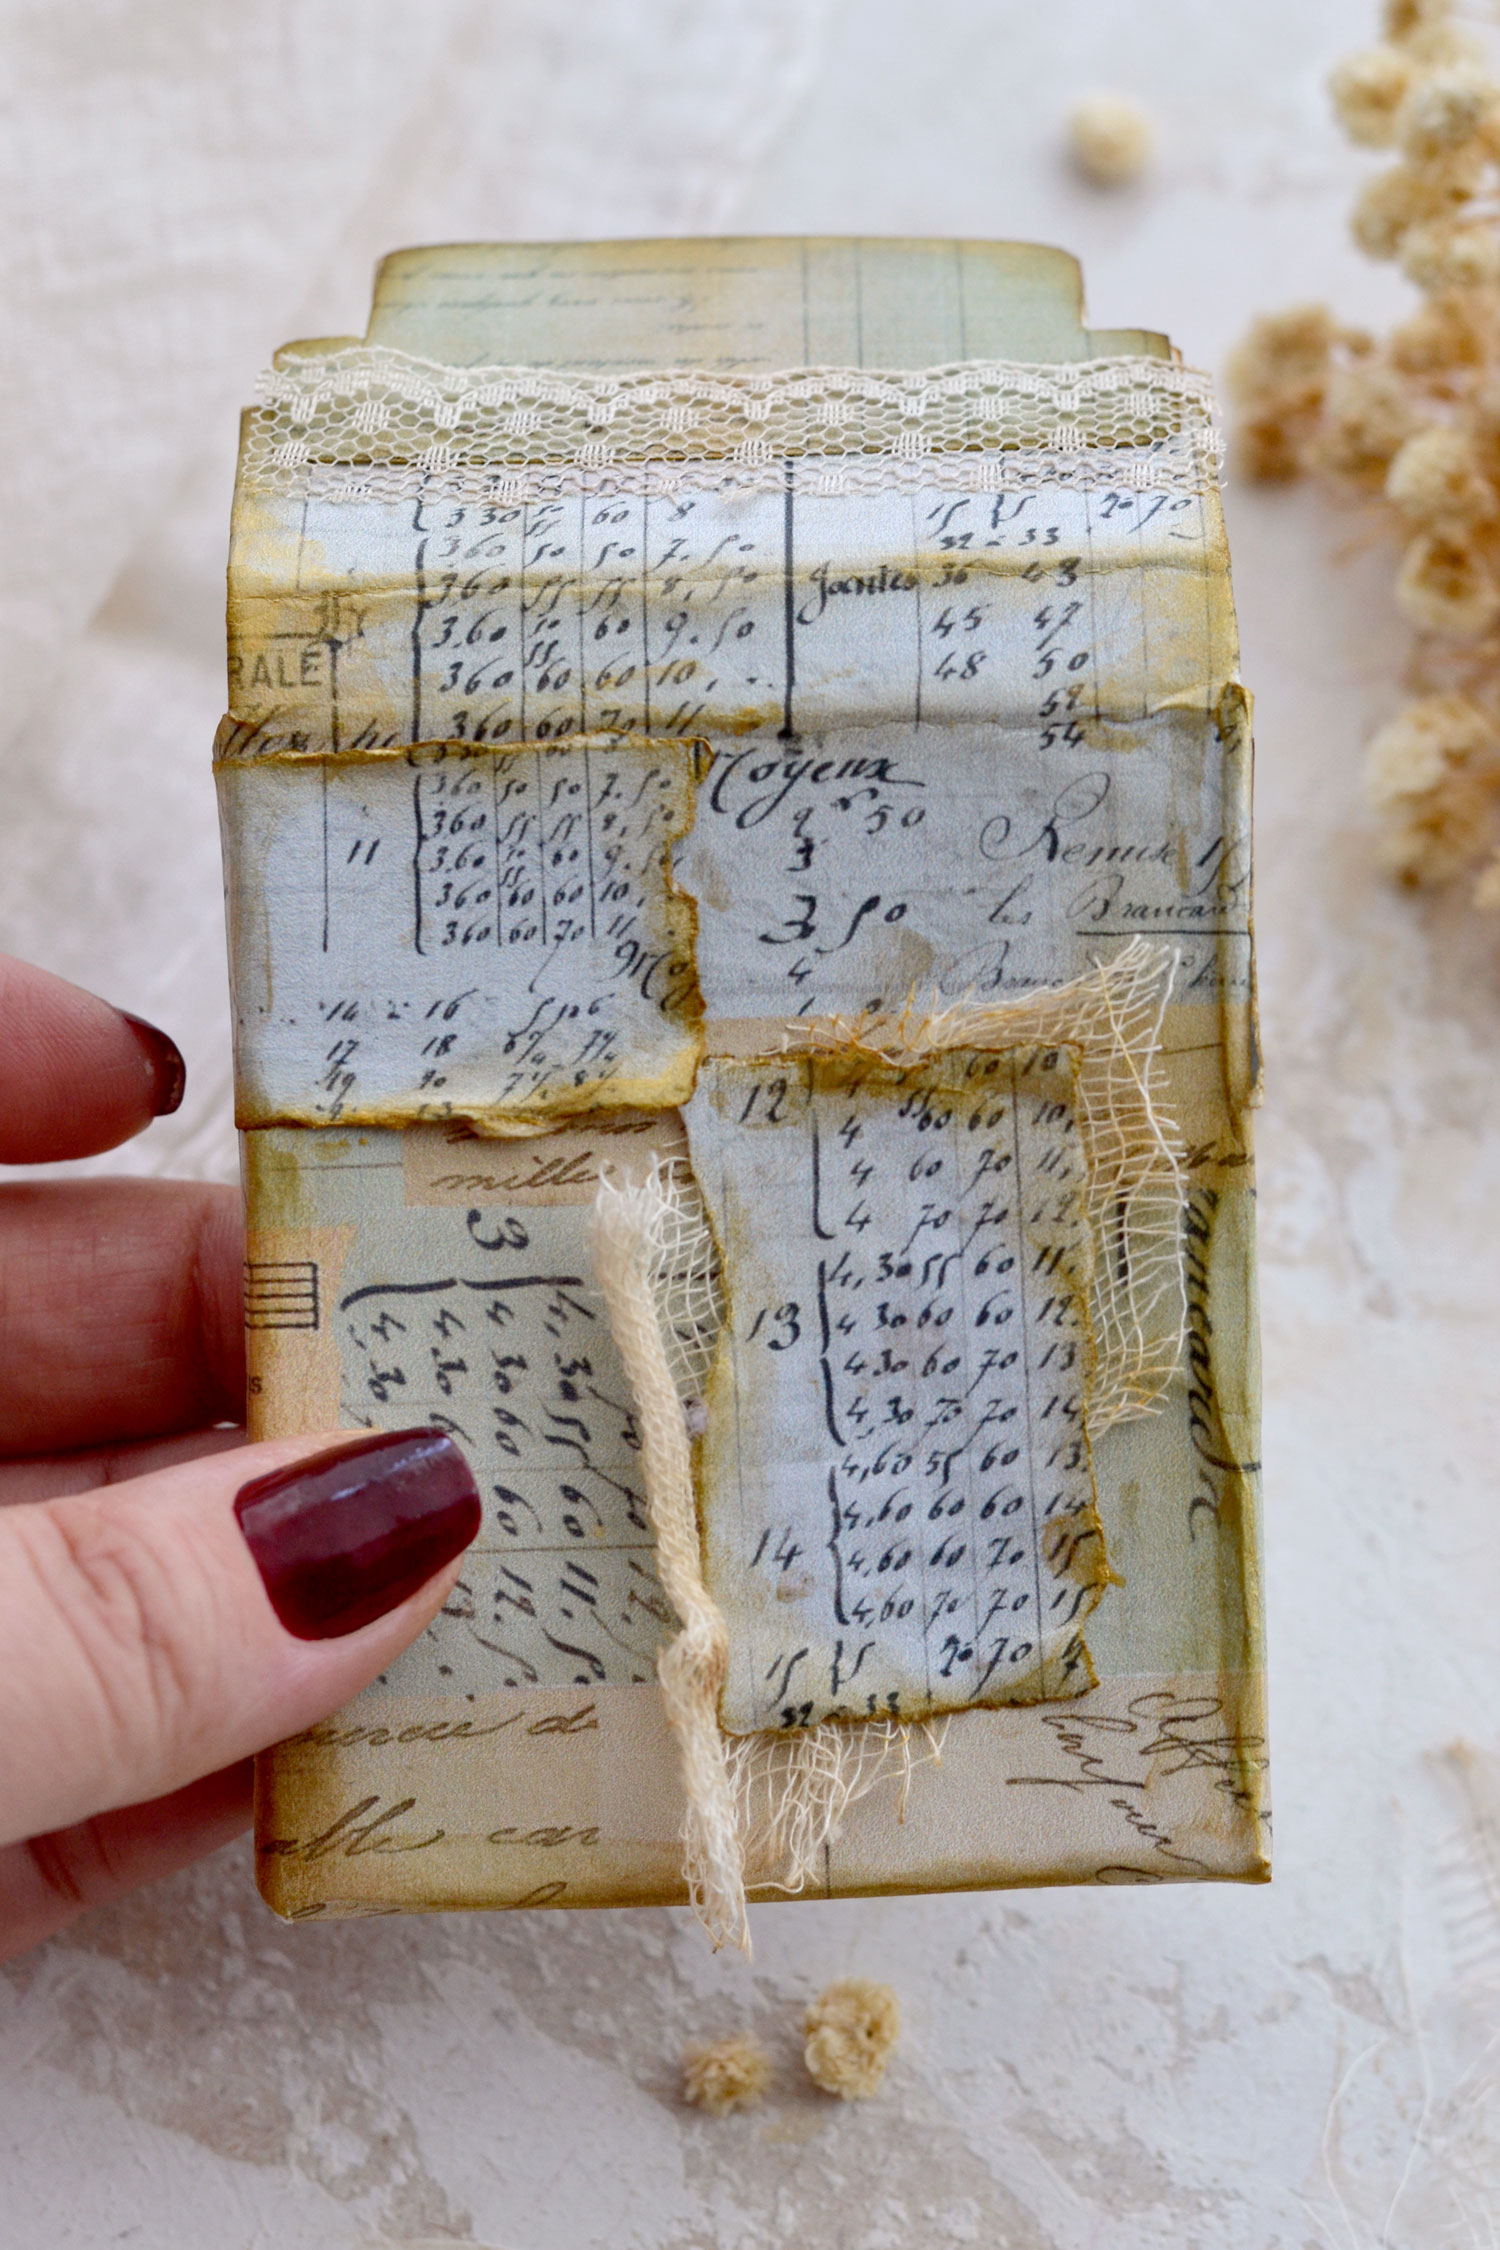
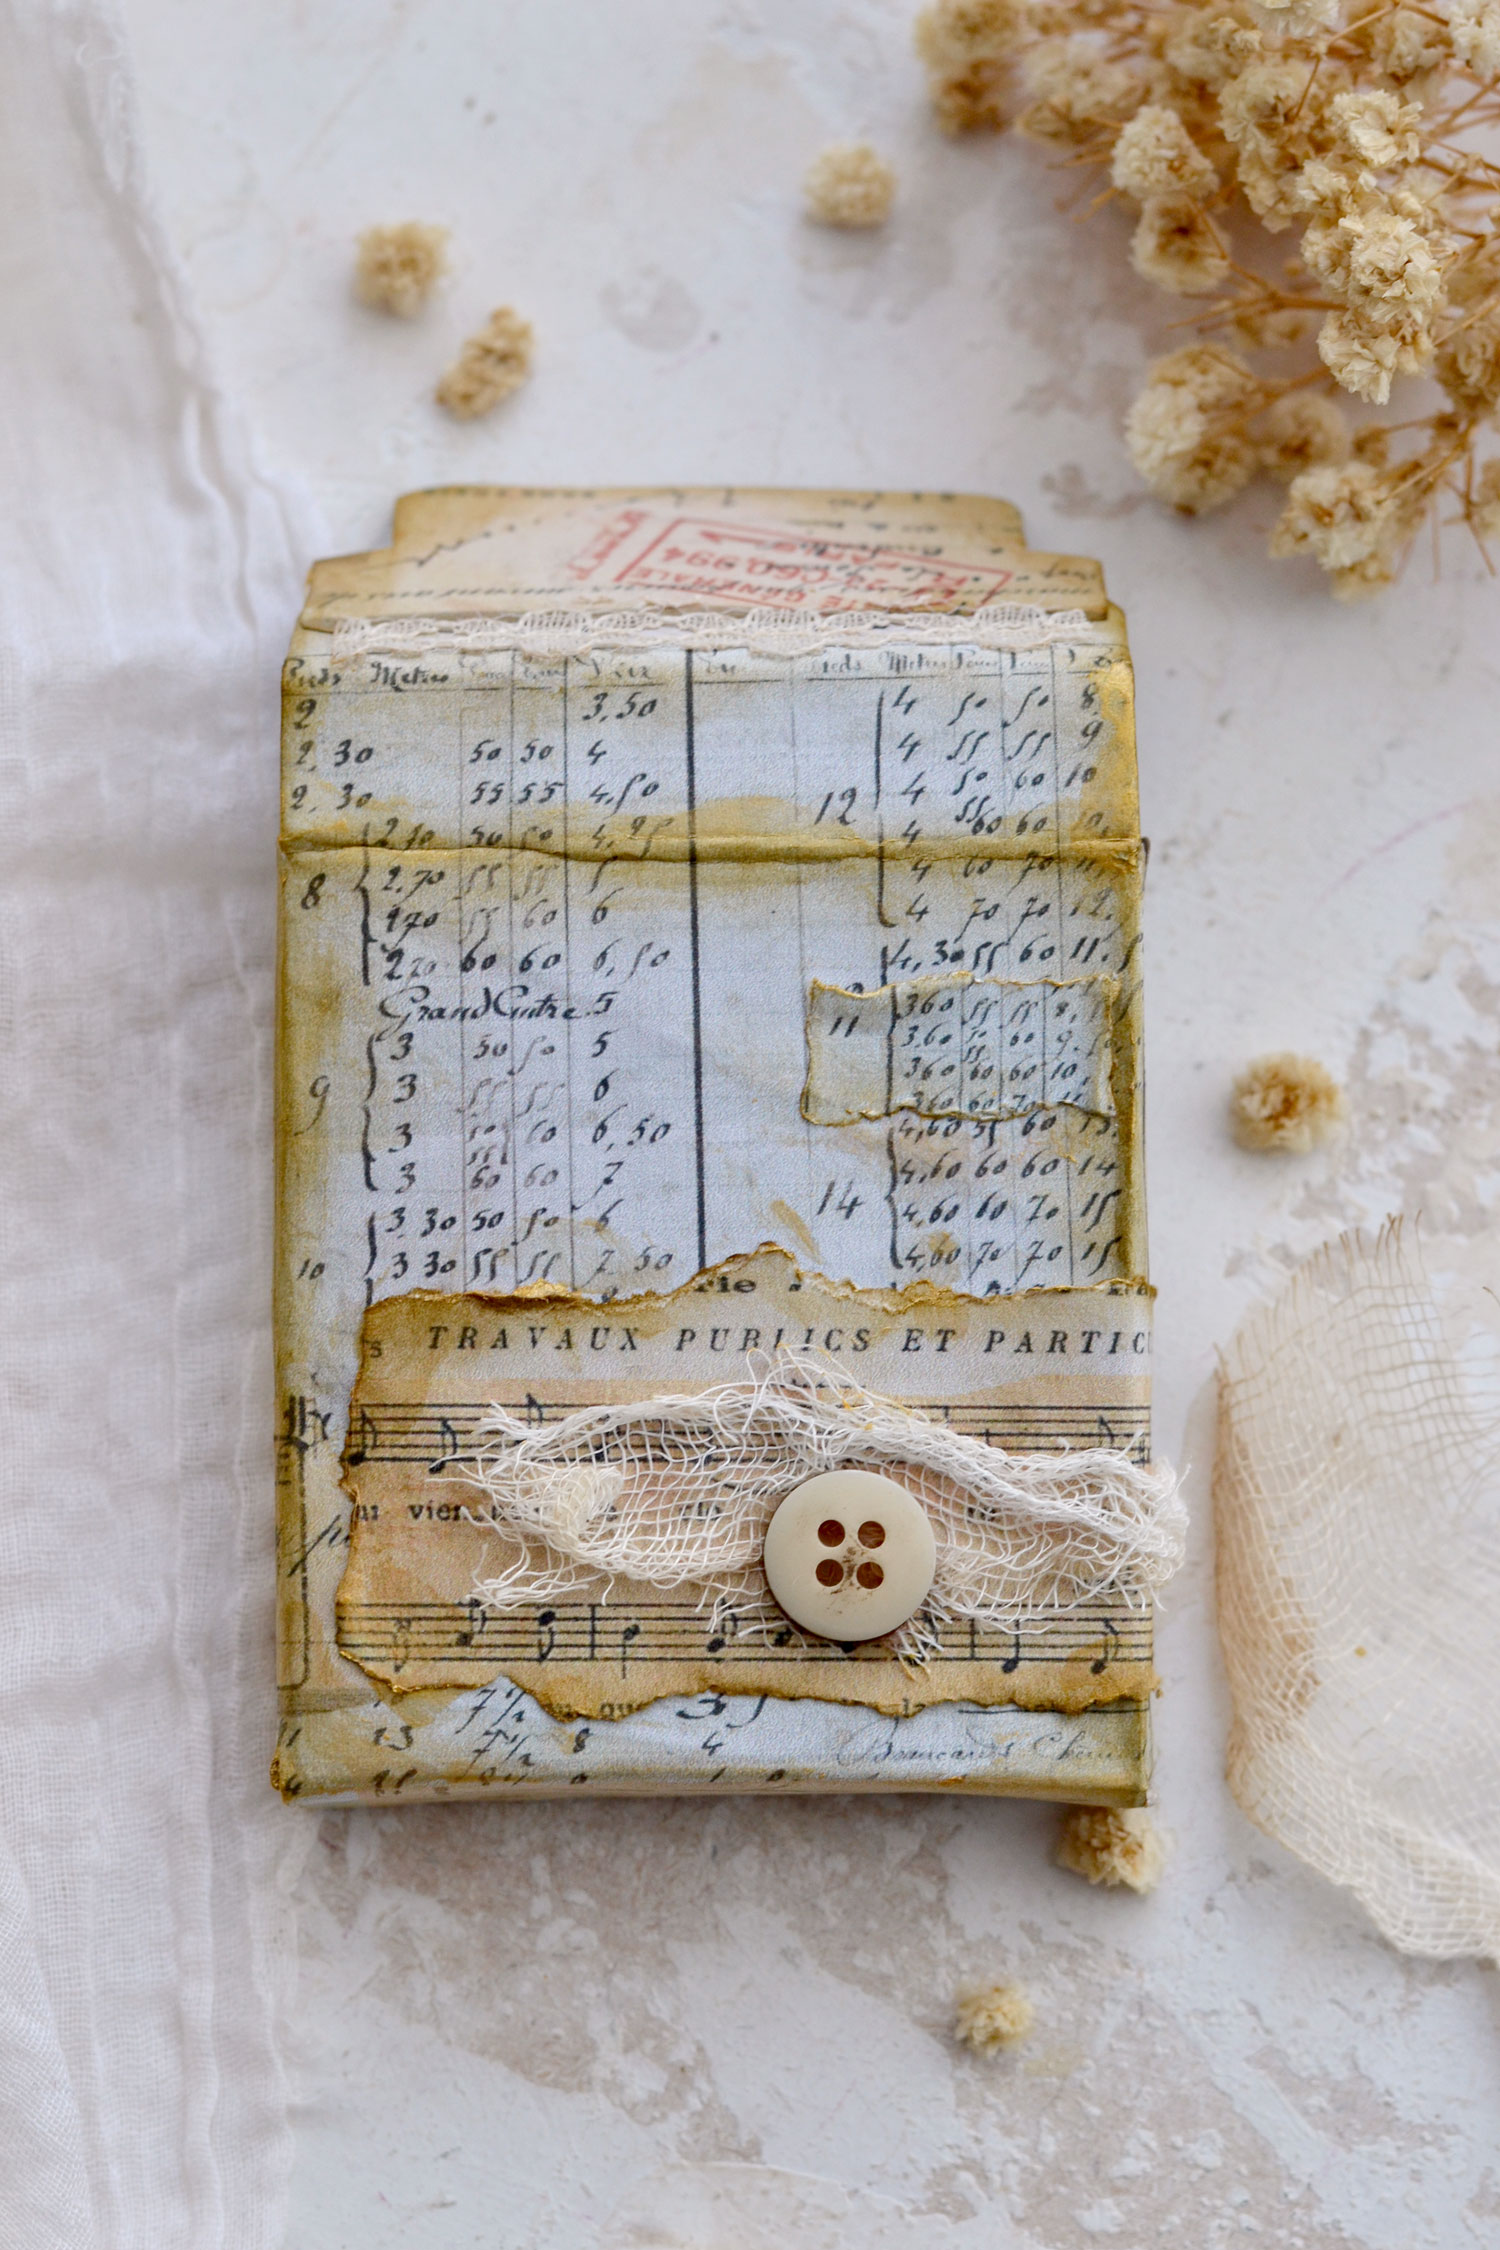
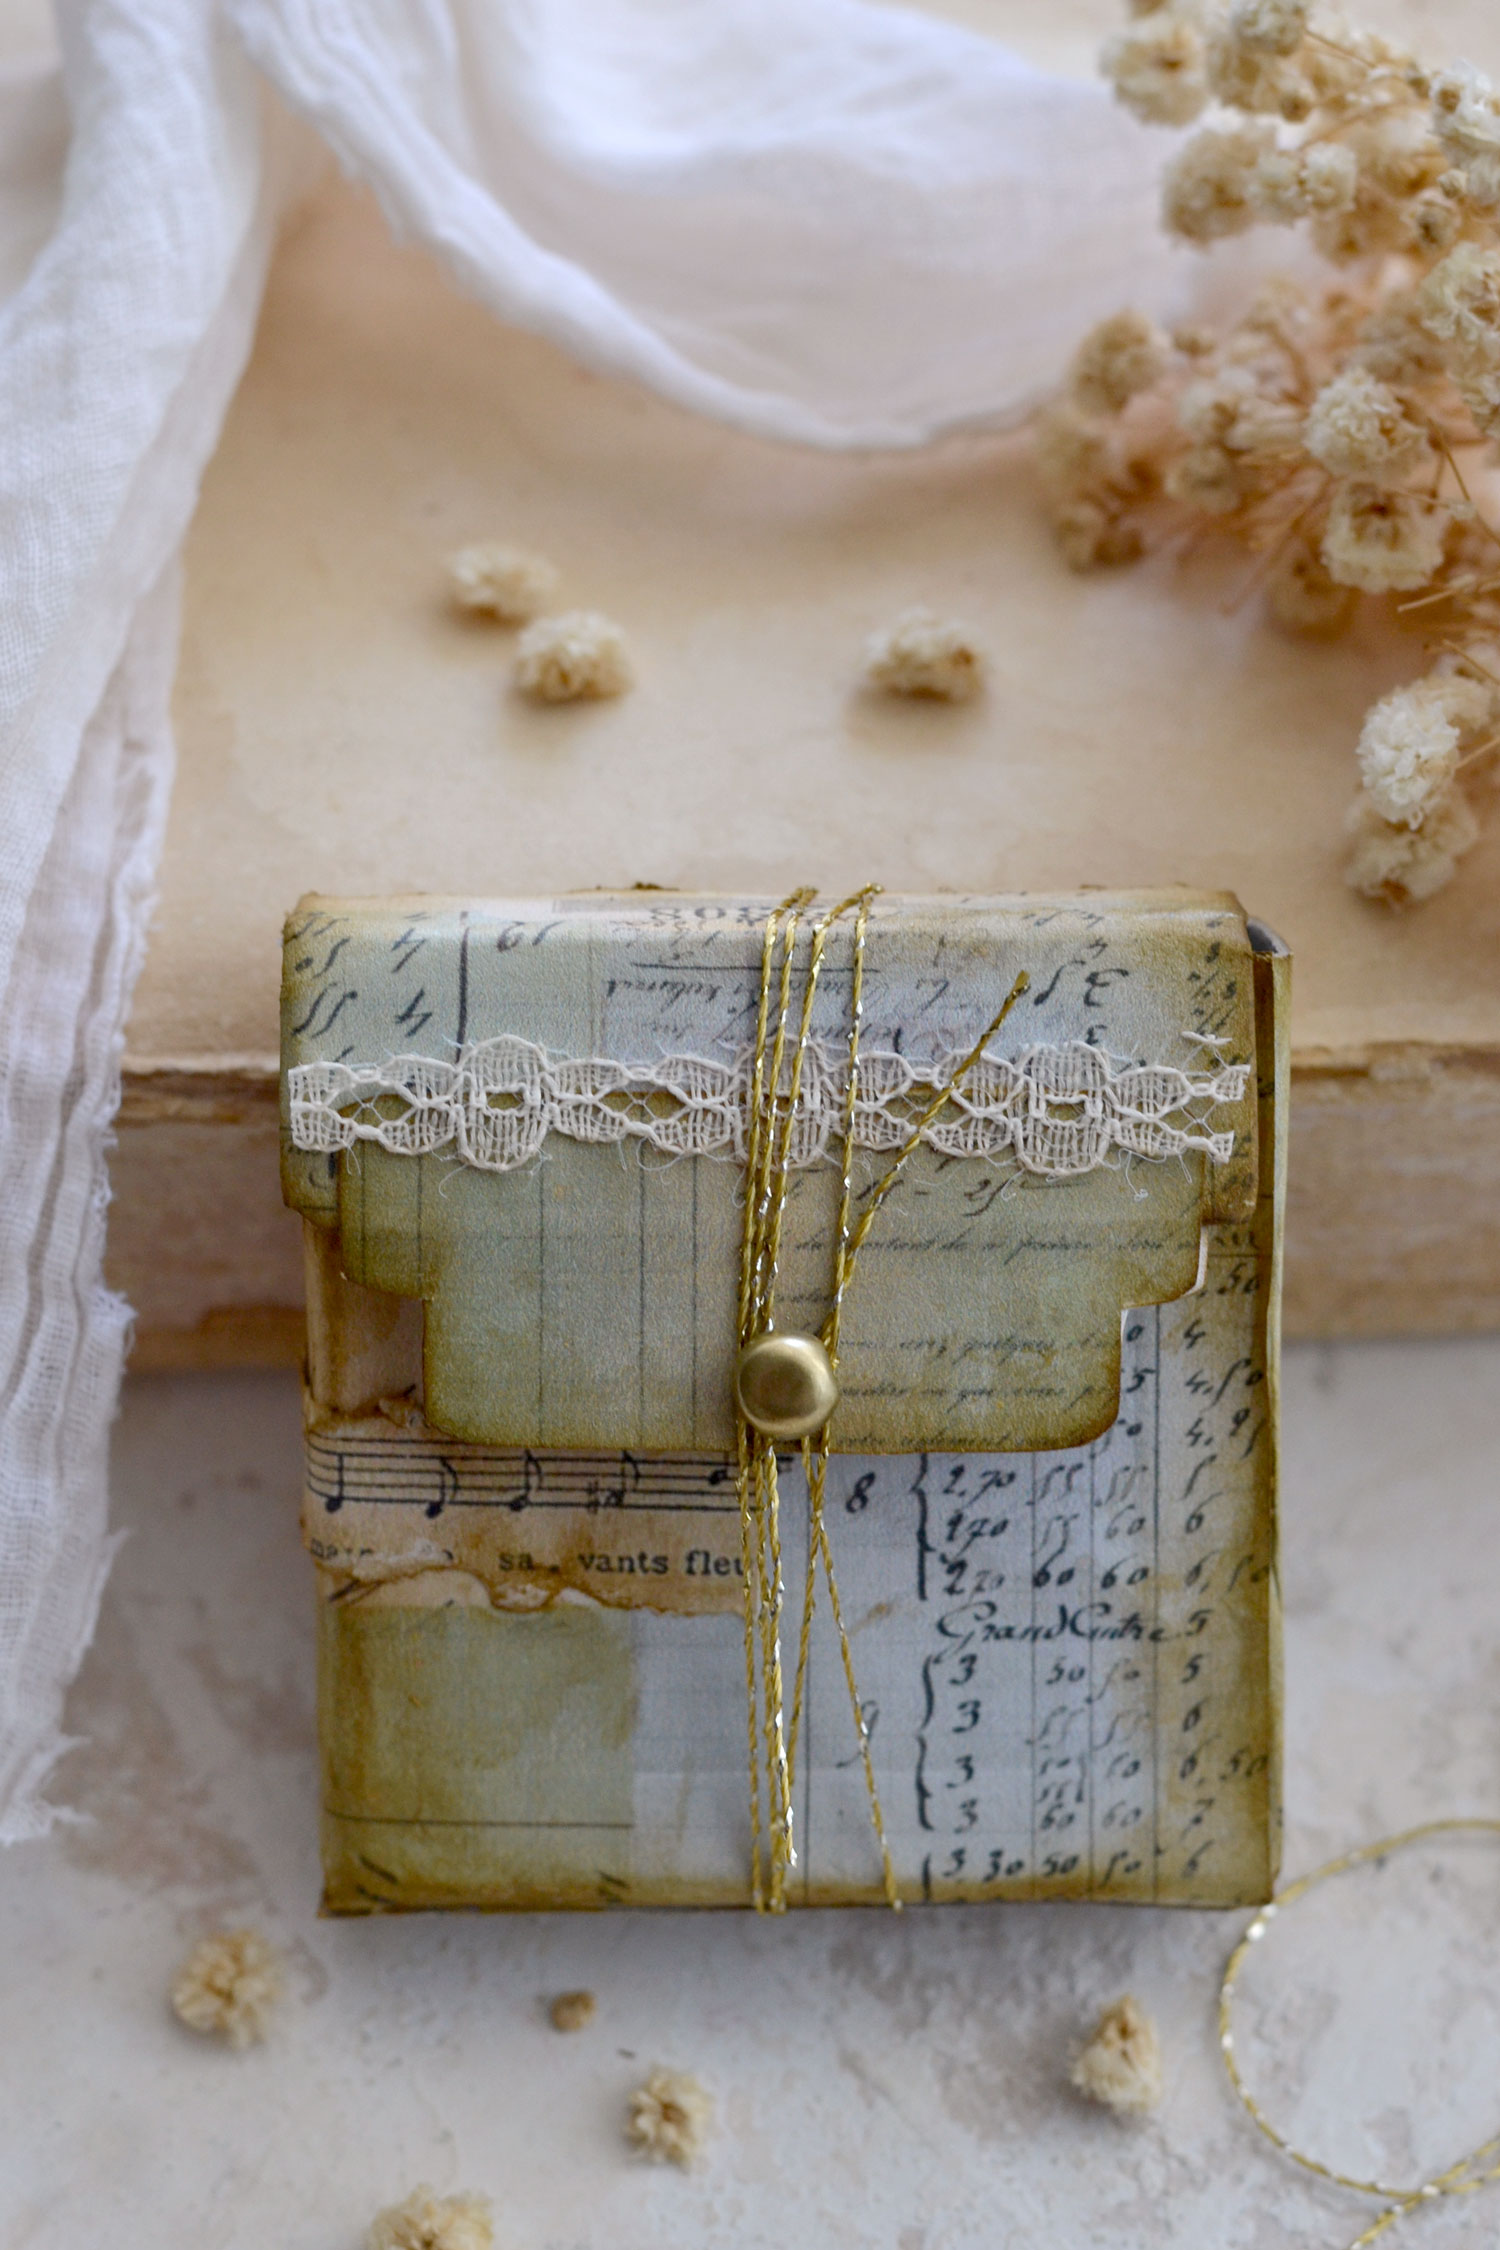
You can leave the boxes as they are or you can use more scrap pieces from your collage to create a little bit of dimension. Add coffee-dyed gauze or lace to further embellish them if you want.

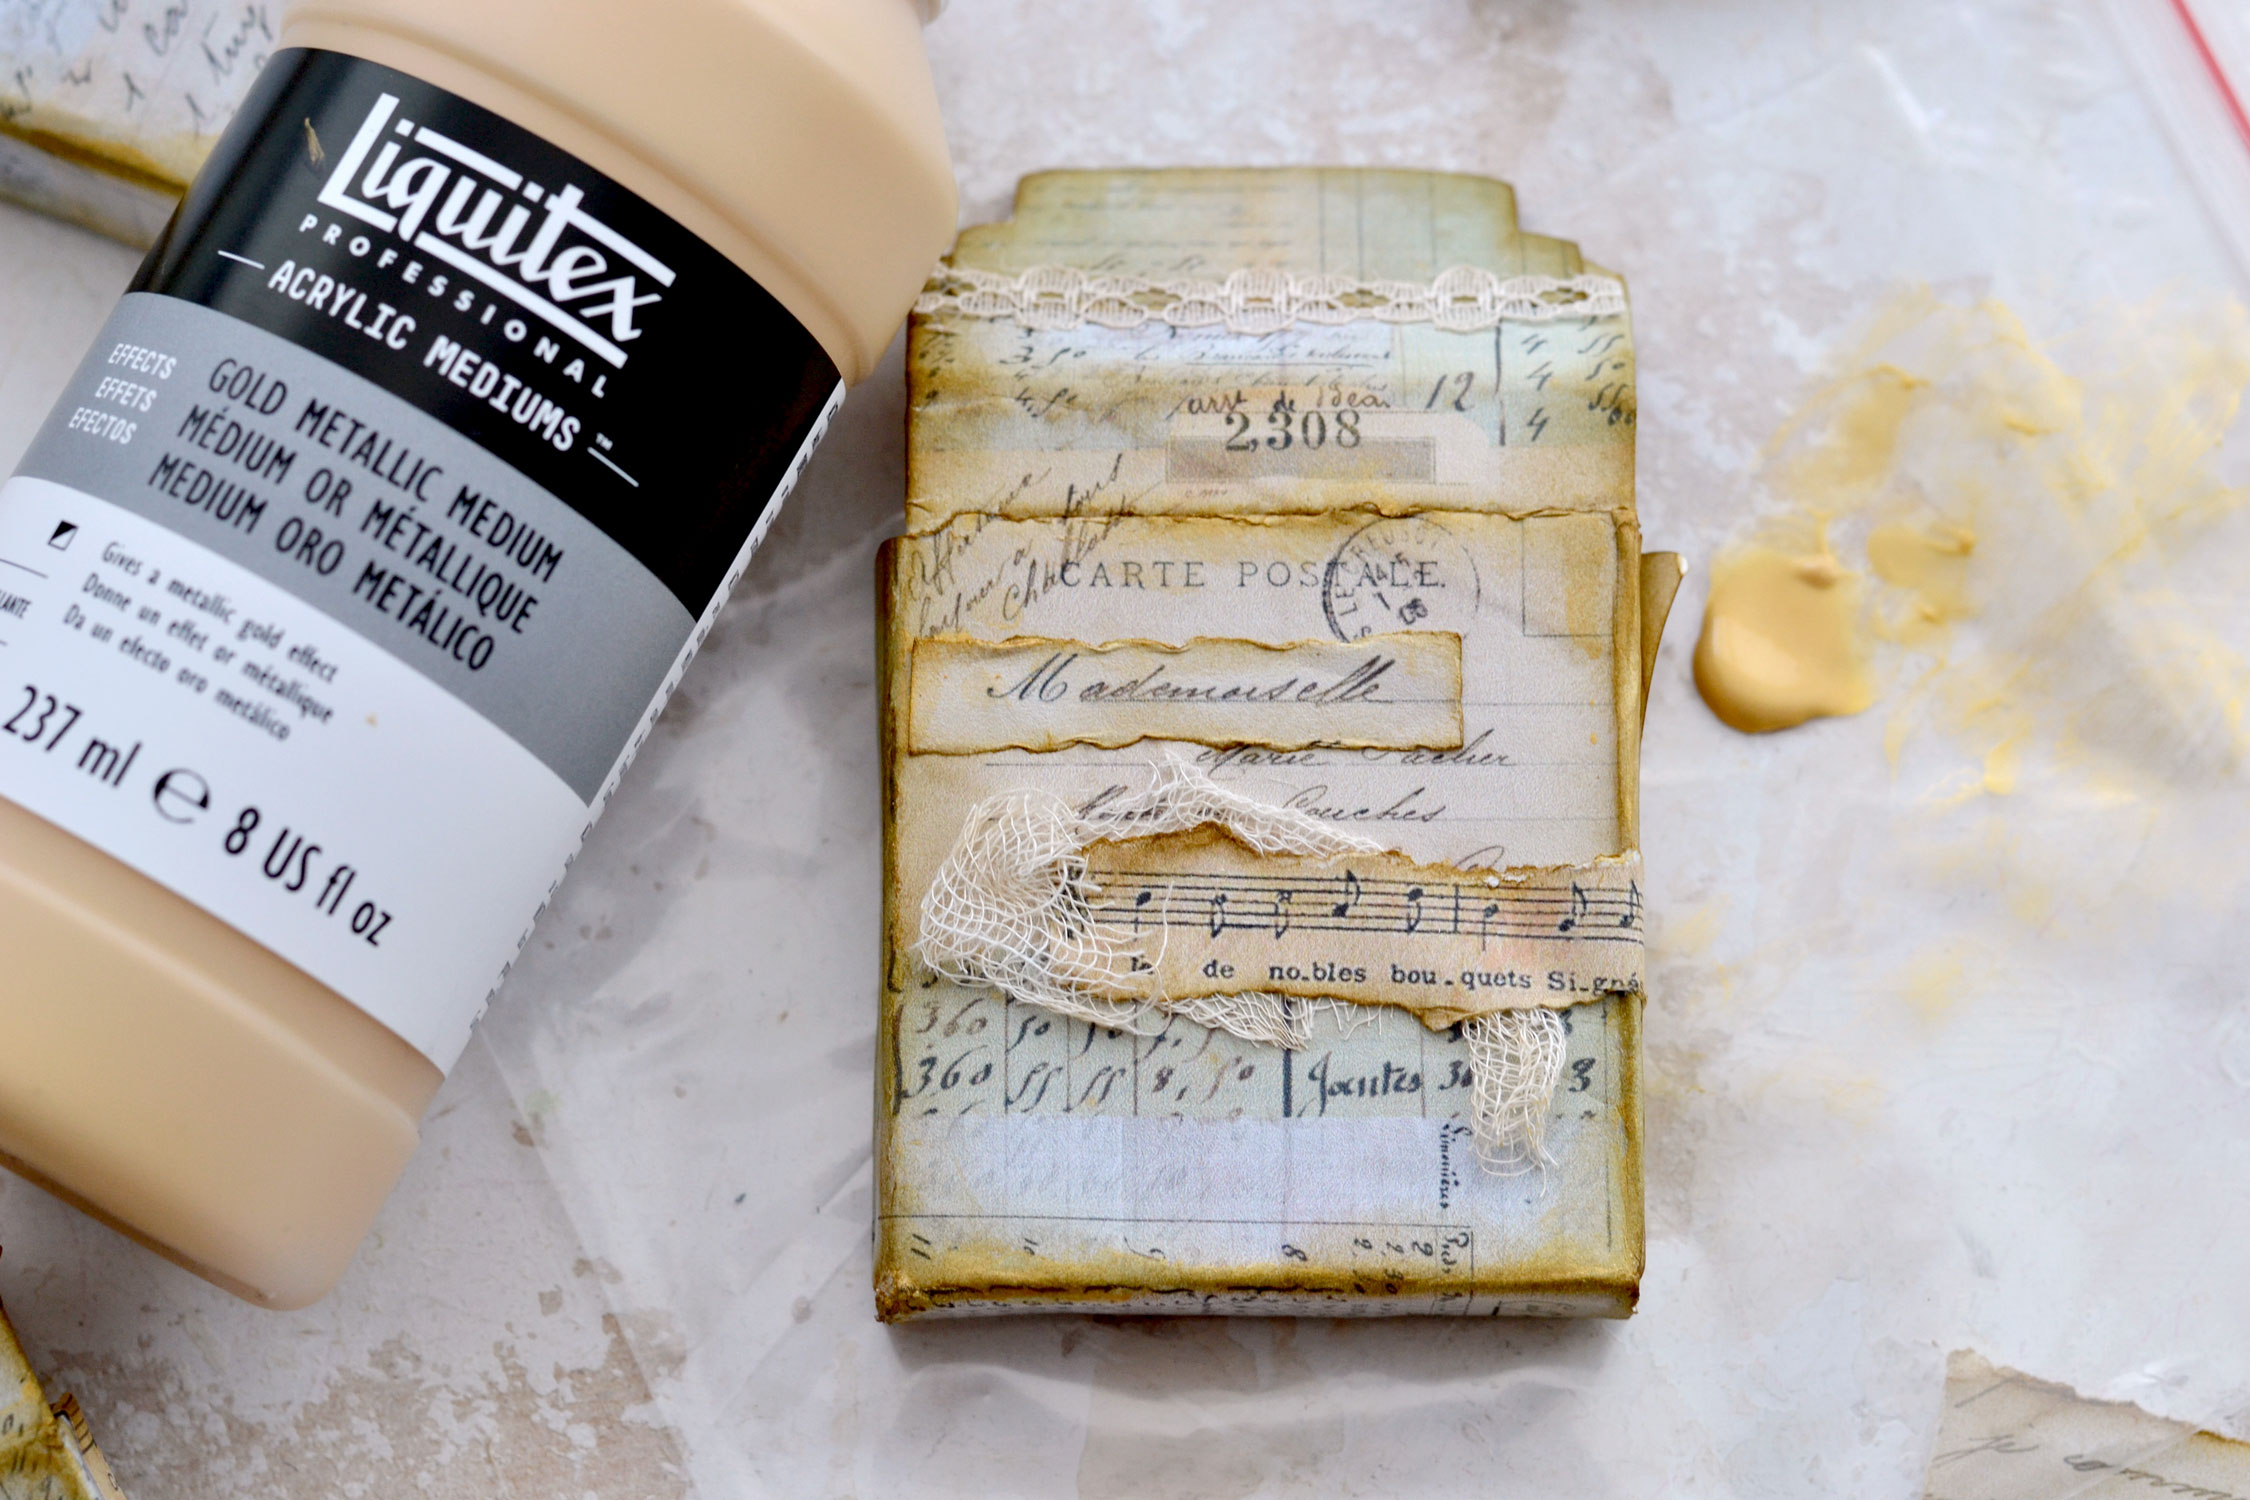
I quickly debated with myself whether to add some gold or not and I’ve decided to do it. I’m not even sure why I’m still debating, since the answer is almost always YES…
I used a tiny bit of gold medium this time and I just smeared it on the edges here and there using my fingers. I also added some on the edges of the scrap pieces of paper that I added on top.
You can use other embellishments if you want to further decorate your boxes, just have fun creating these truly unique, absolutely gorgeous pieces!
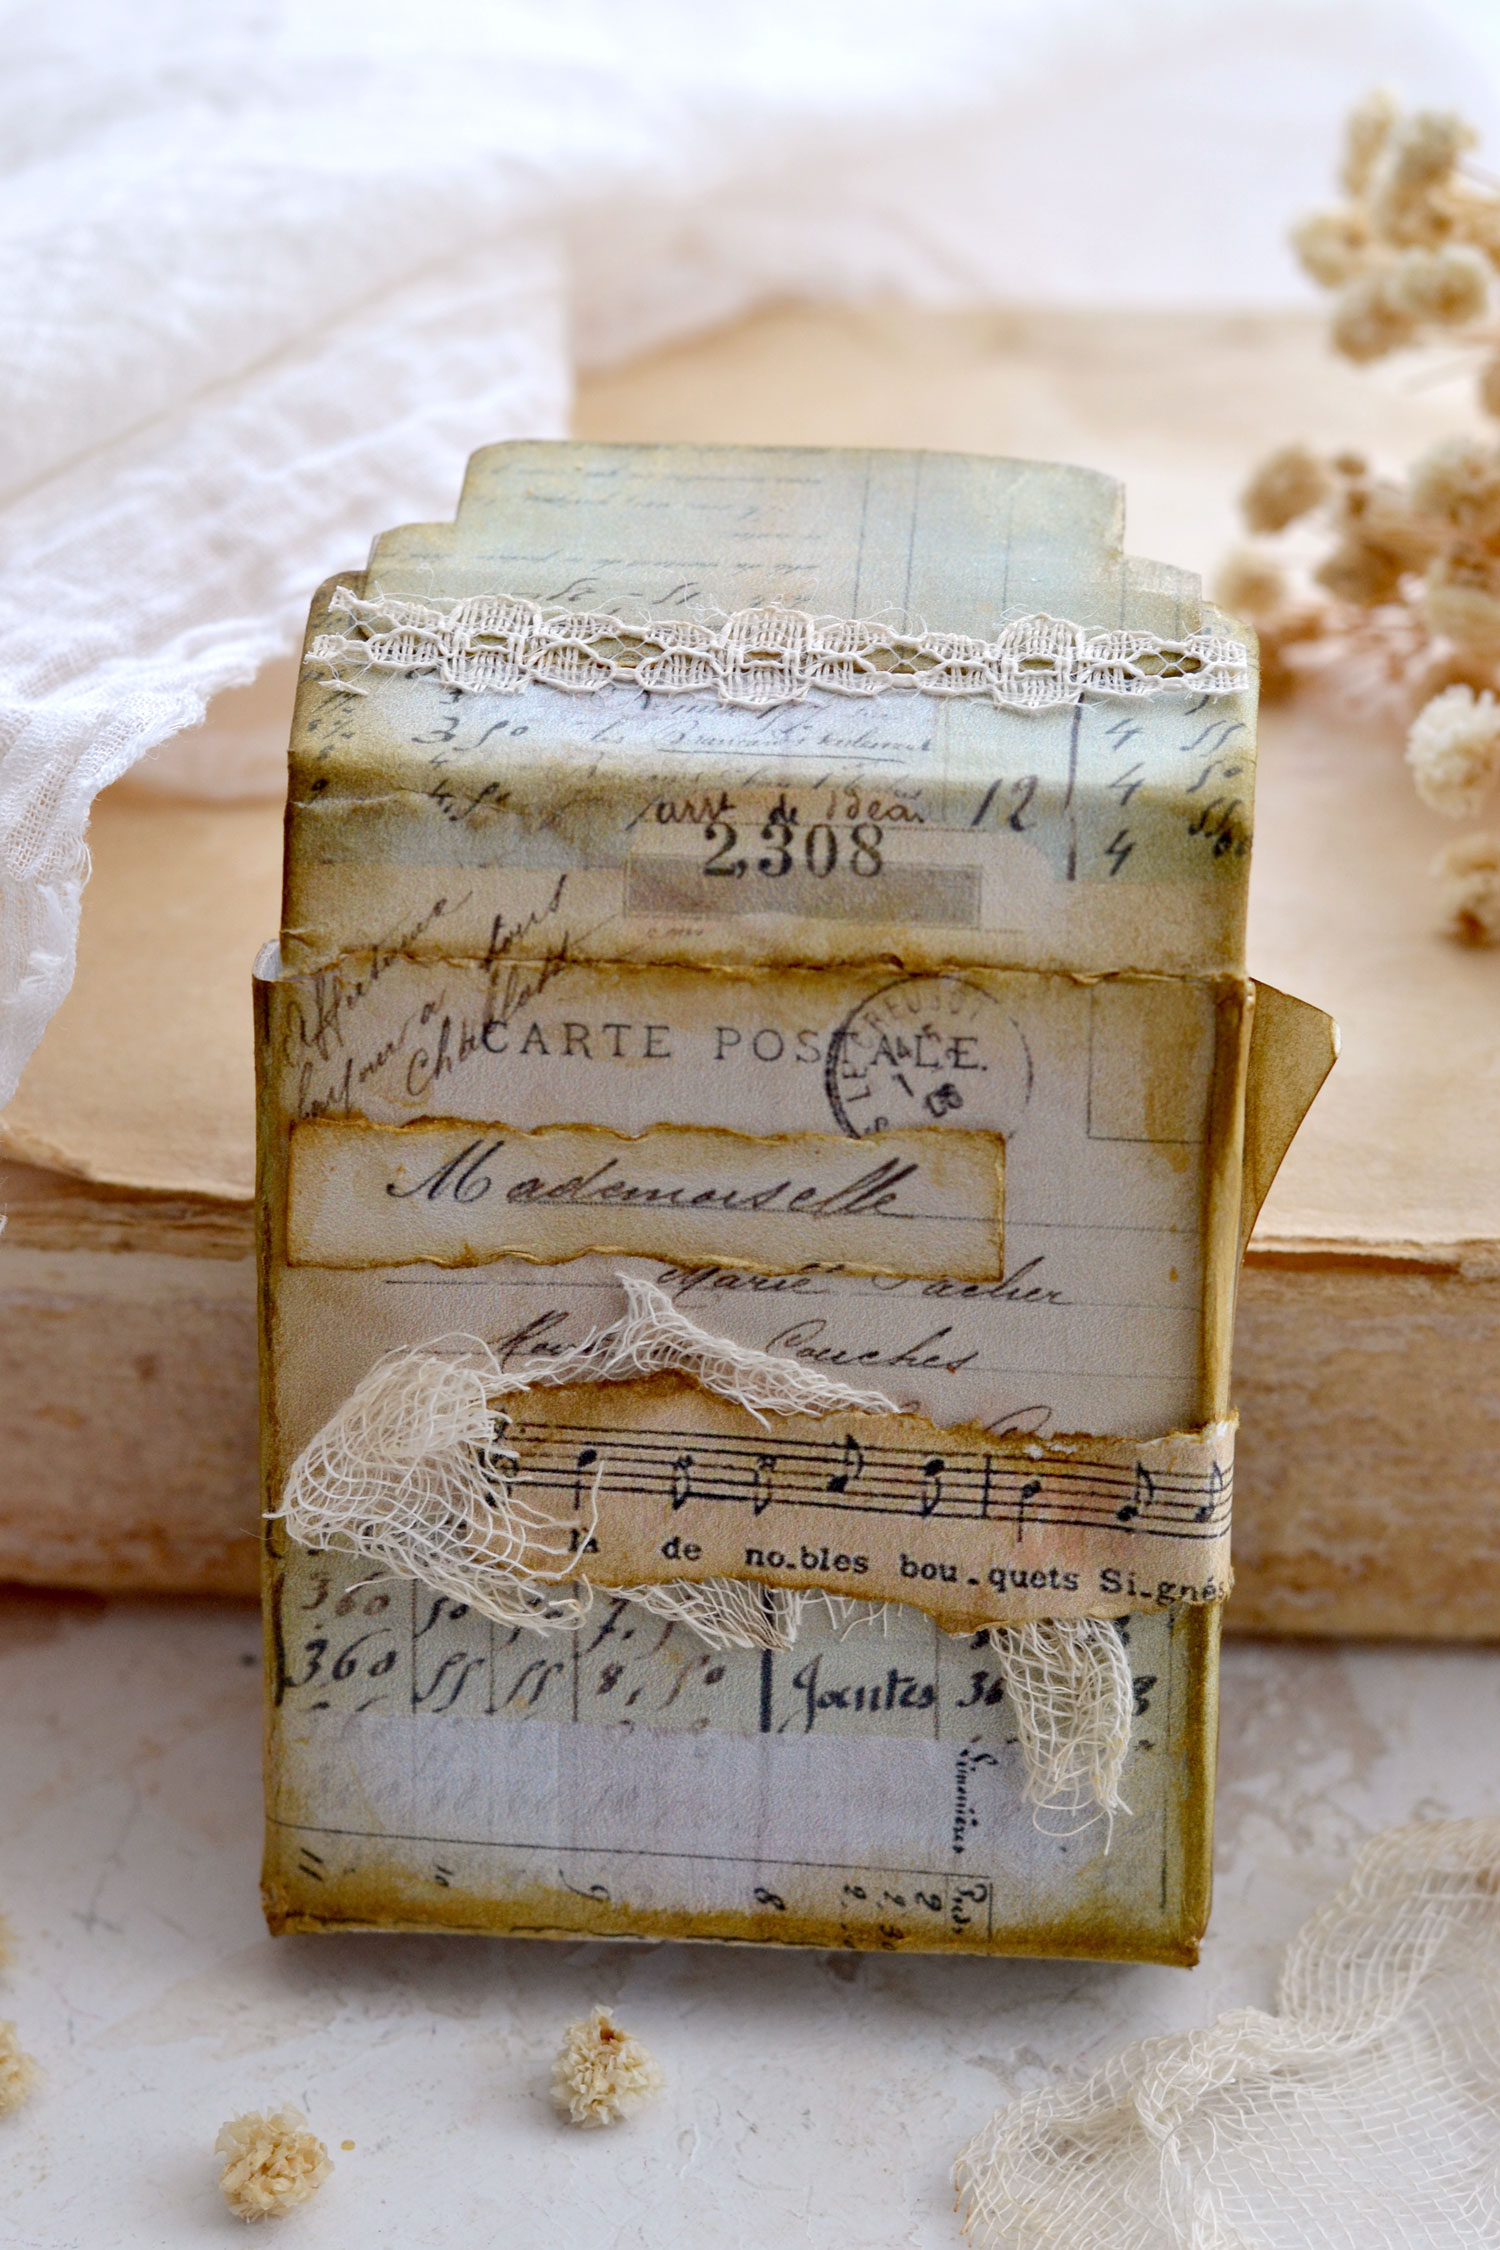
You can use some scrap pieces of paper to also bring to life the back of your boxes.
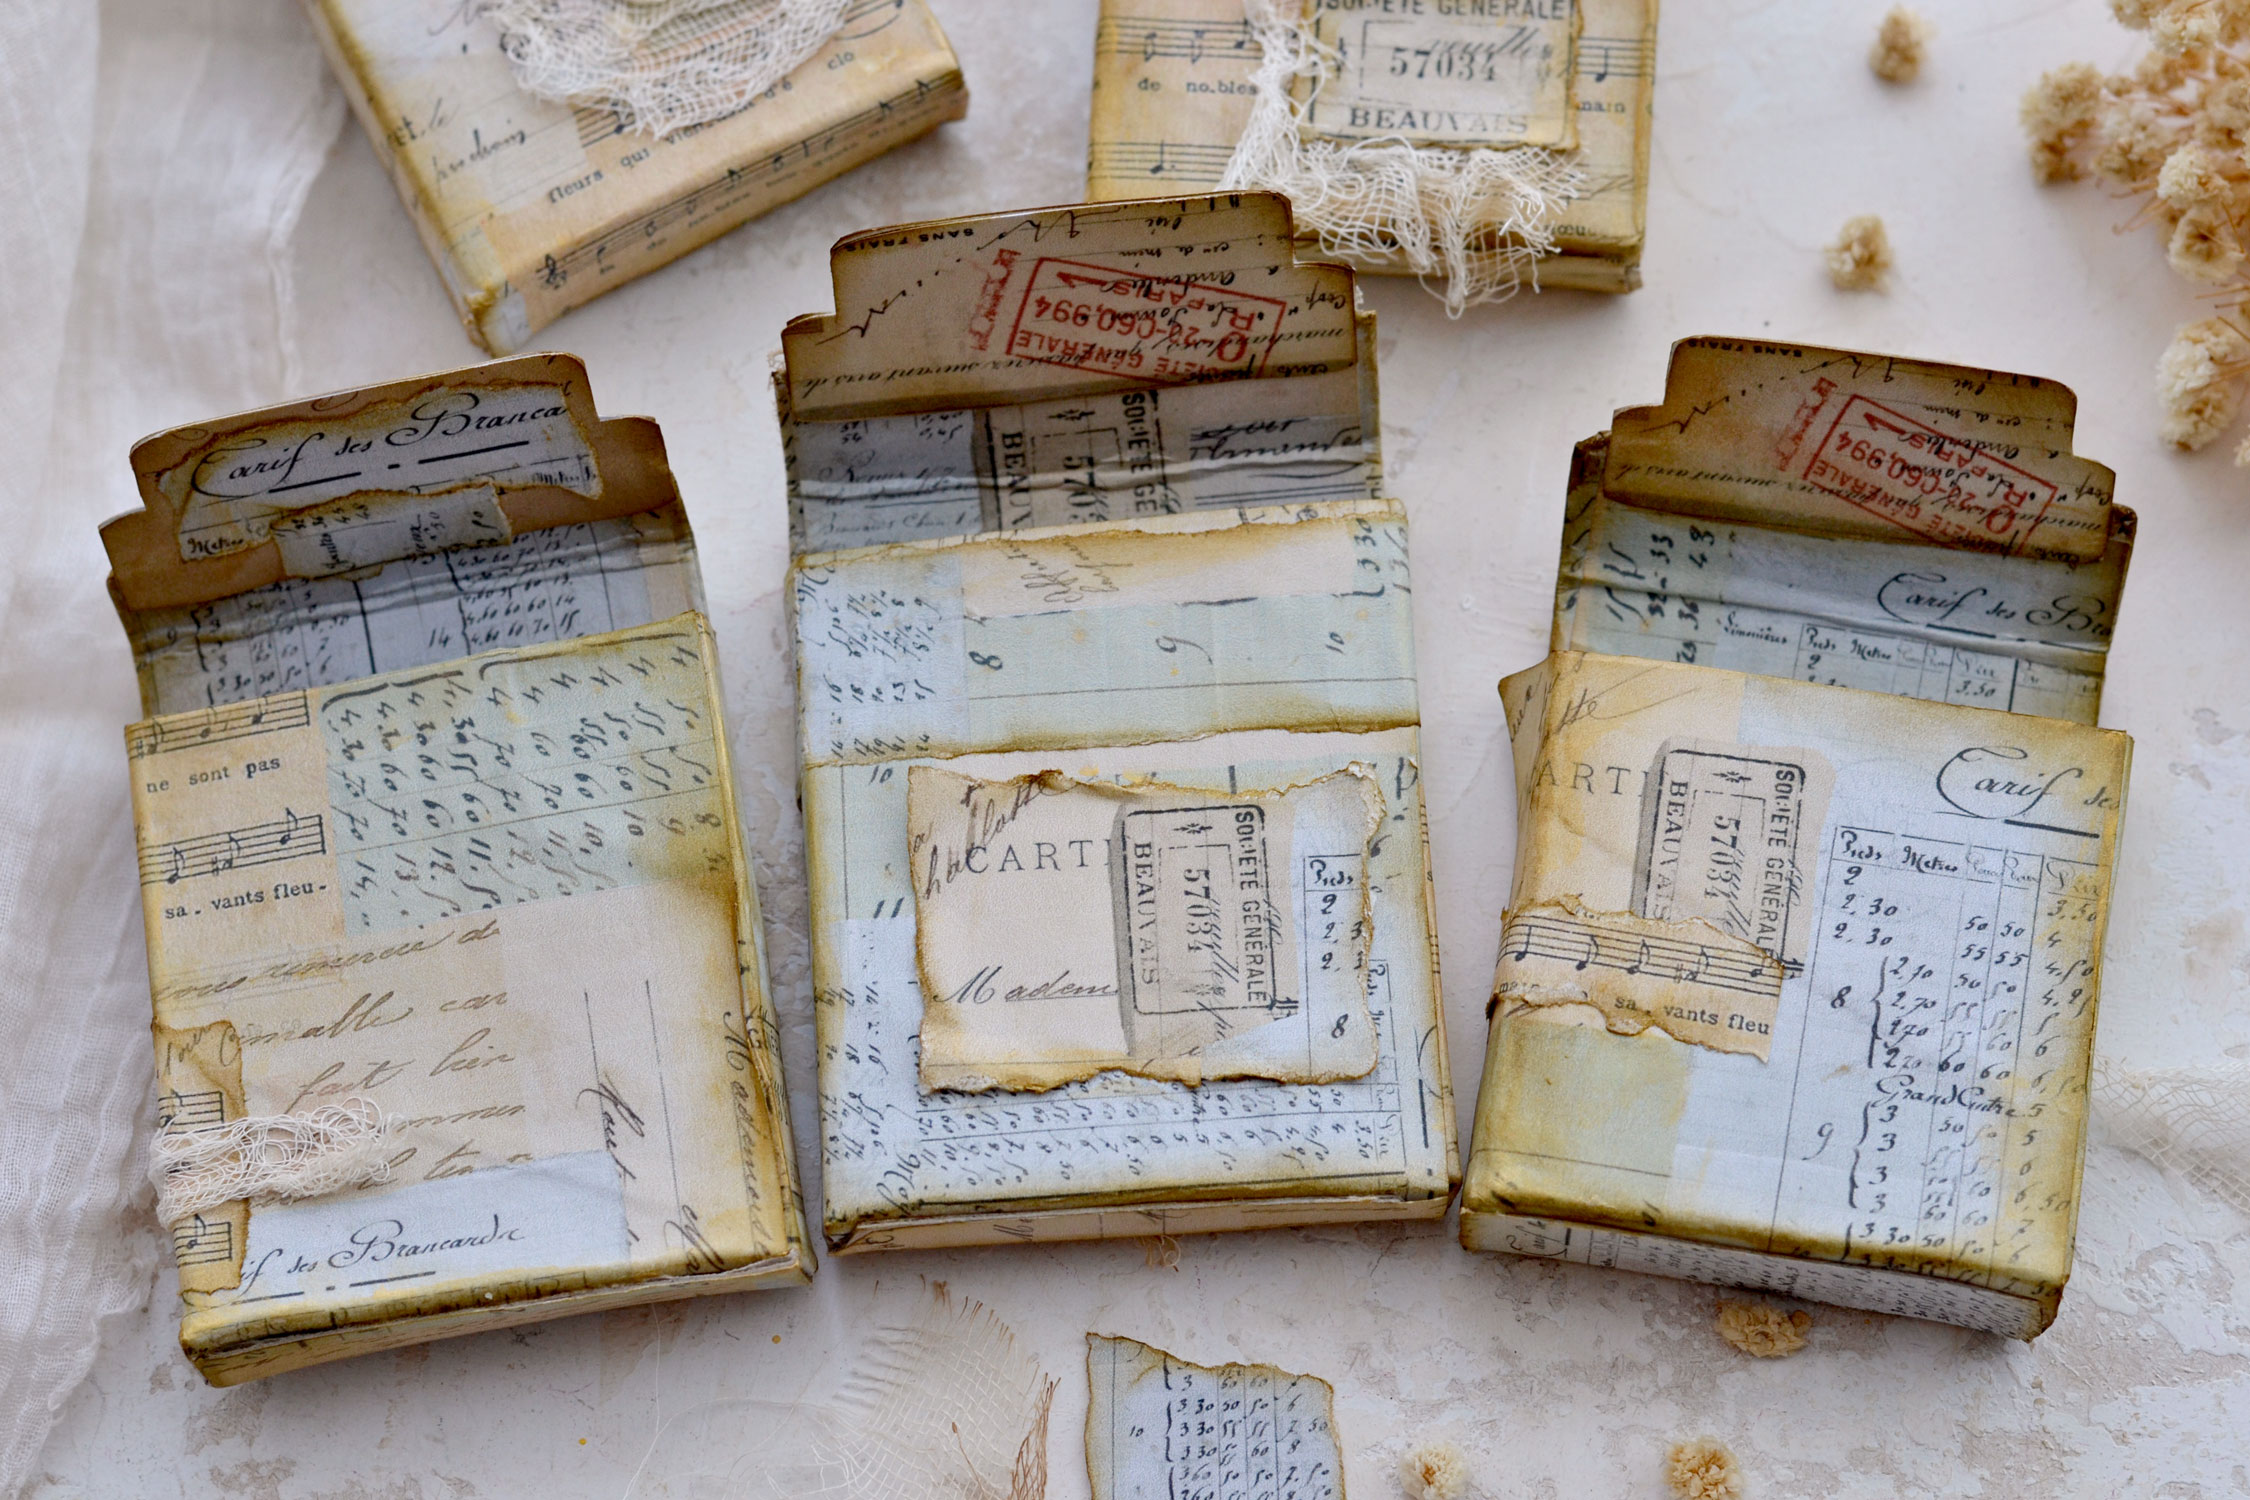
While gluing the torn scrap pieces on top, you can match them (or not) with the design underneath. If you look closely at the image below, you will notice the scrap piece on the left with the blue background matches the design of the box. You can even add some scrap pieces that would wrap around your box, just go with the flow and see where your creativity takes you.
Don’t expect your boxes to turn out perfect, because they won’t! The final results would definitely depend on the quality of the paper rolls you are using and how accurate the scorings and foldings are. You could put a little bit of extra care into the folding and scoring part, but please don’t be too strict with yourself. This is supposed to be a fun project! And if you ask me, all these small imperfections only add to the vintage character of their final appearance!
Don’t forget to distress the torn scrap pieces of paper before gluing them to your boxes, otherwise you might have some unwanted white edges showing through. I had to unglue some of them because I totally forgot to do that, but I caught the mistake in time and I was able to fix it.
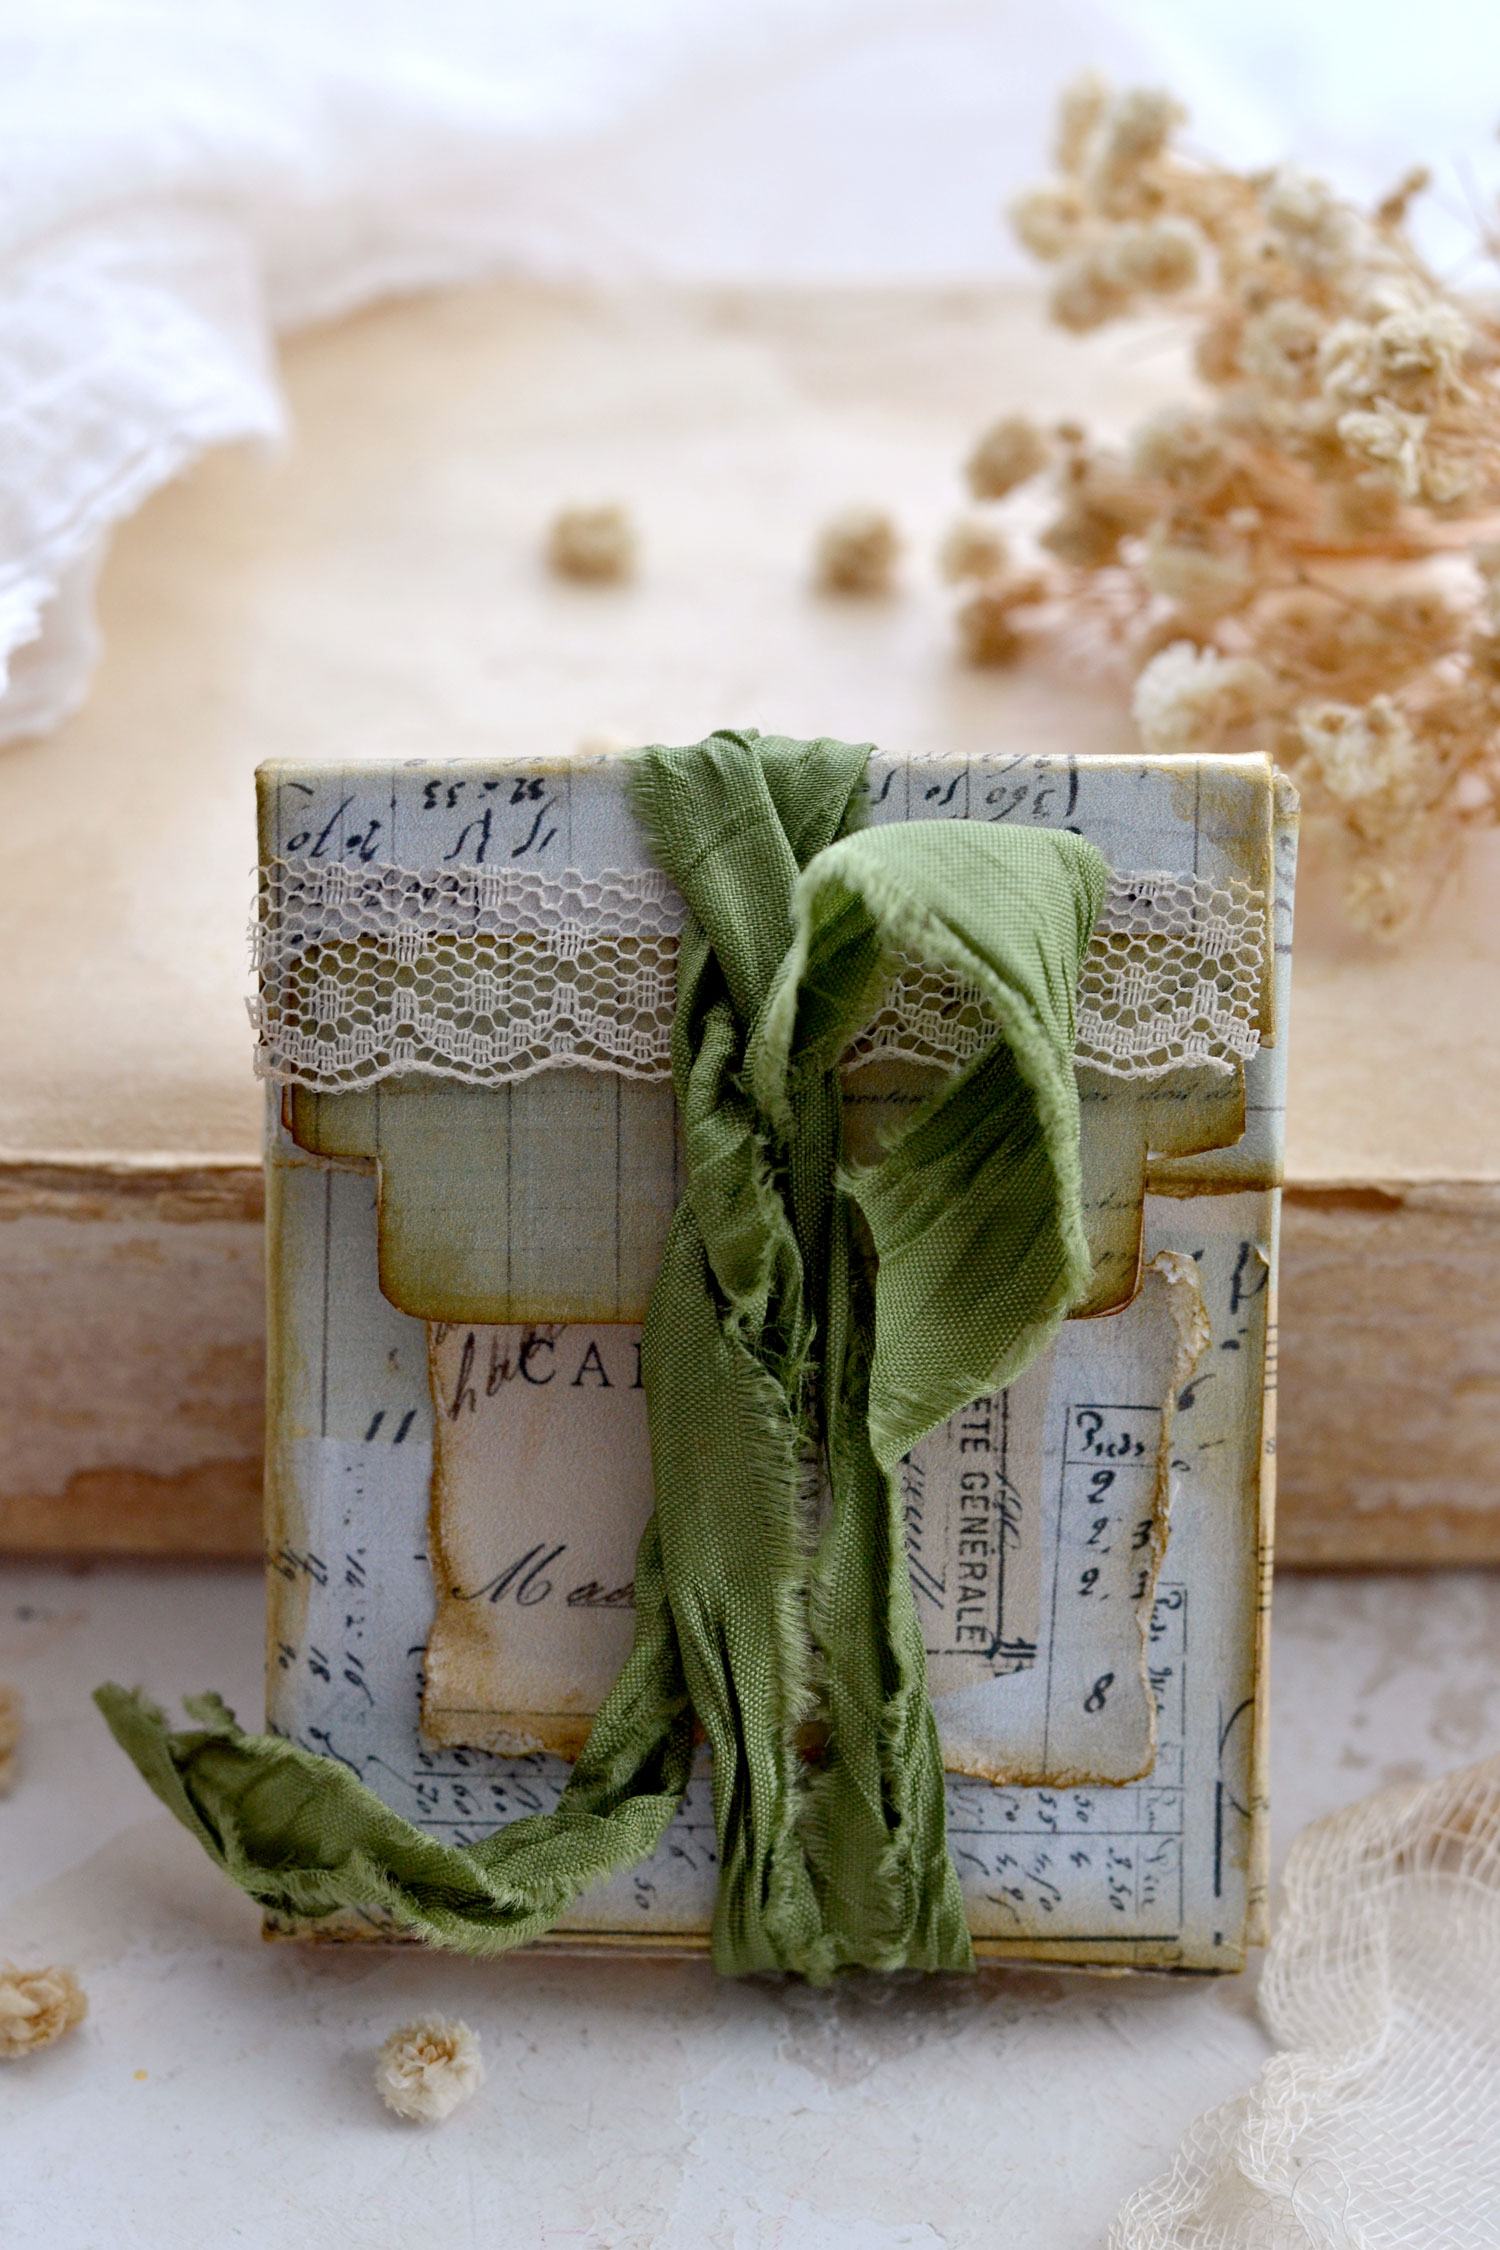
If you want, you can think of creating a closing system for your super chic mini boxes. You don’t necessarily have to, but it can help if you plan to store small bits and pieces inside and not just admire them all day long.
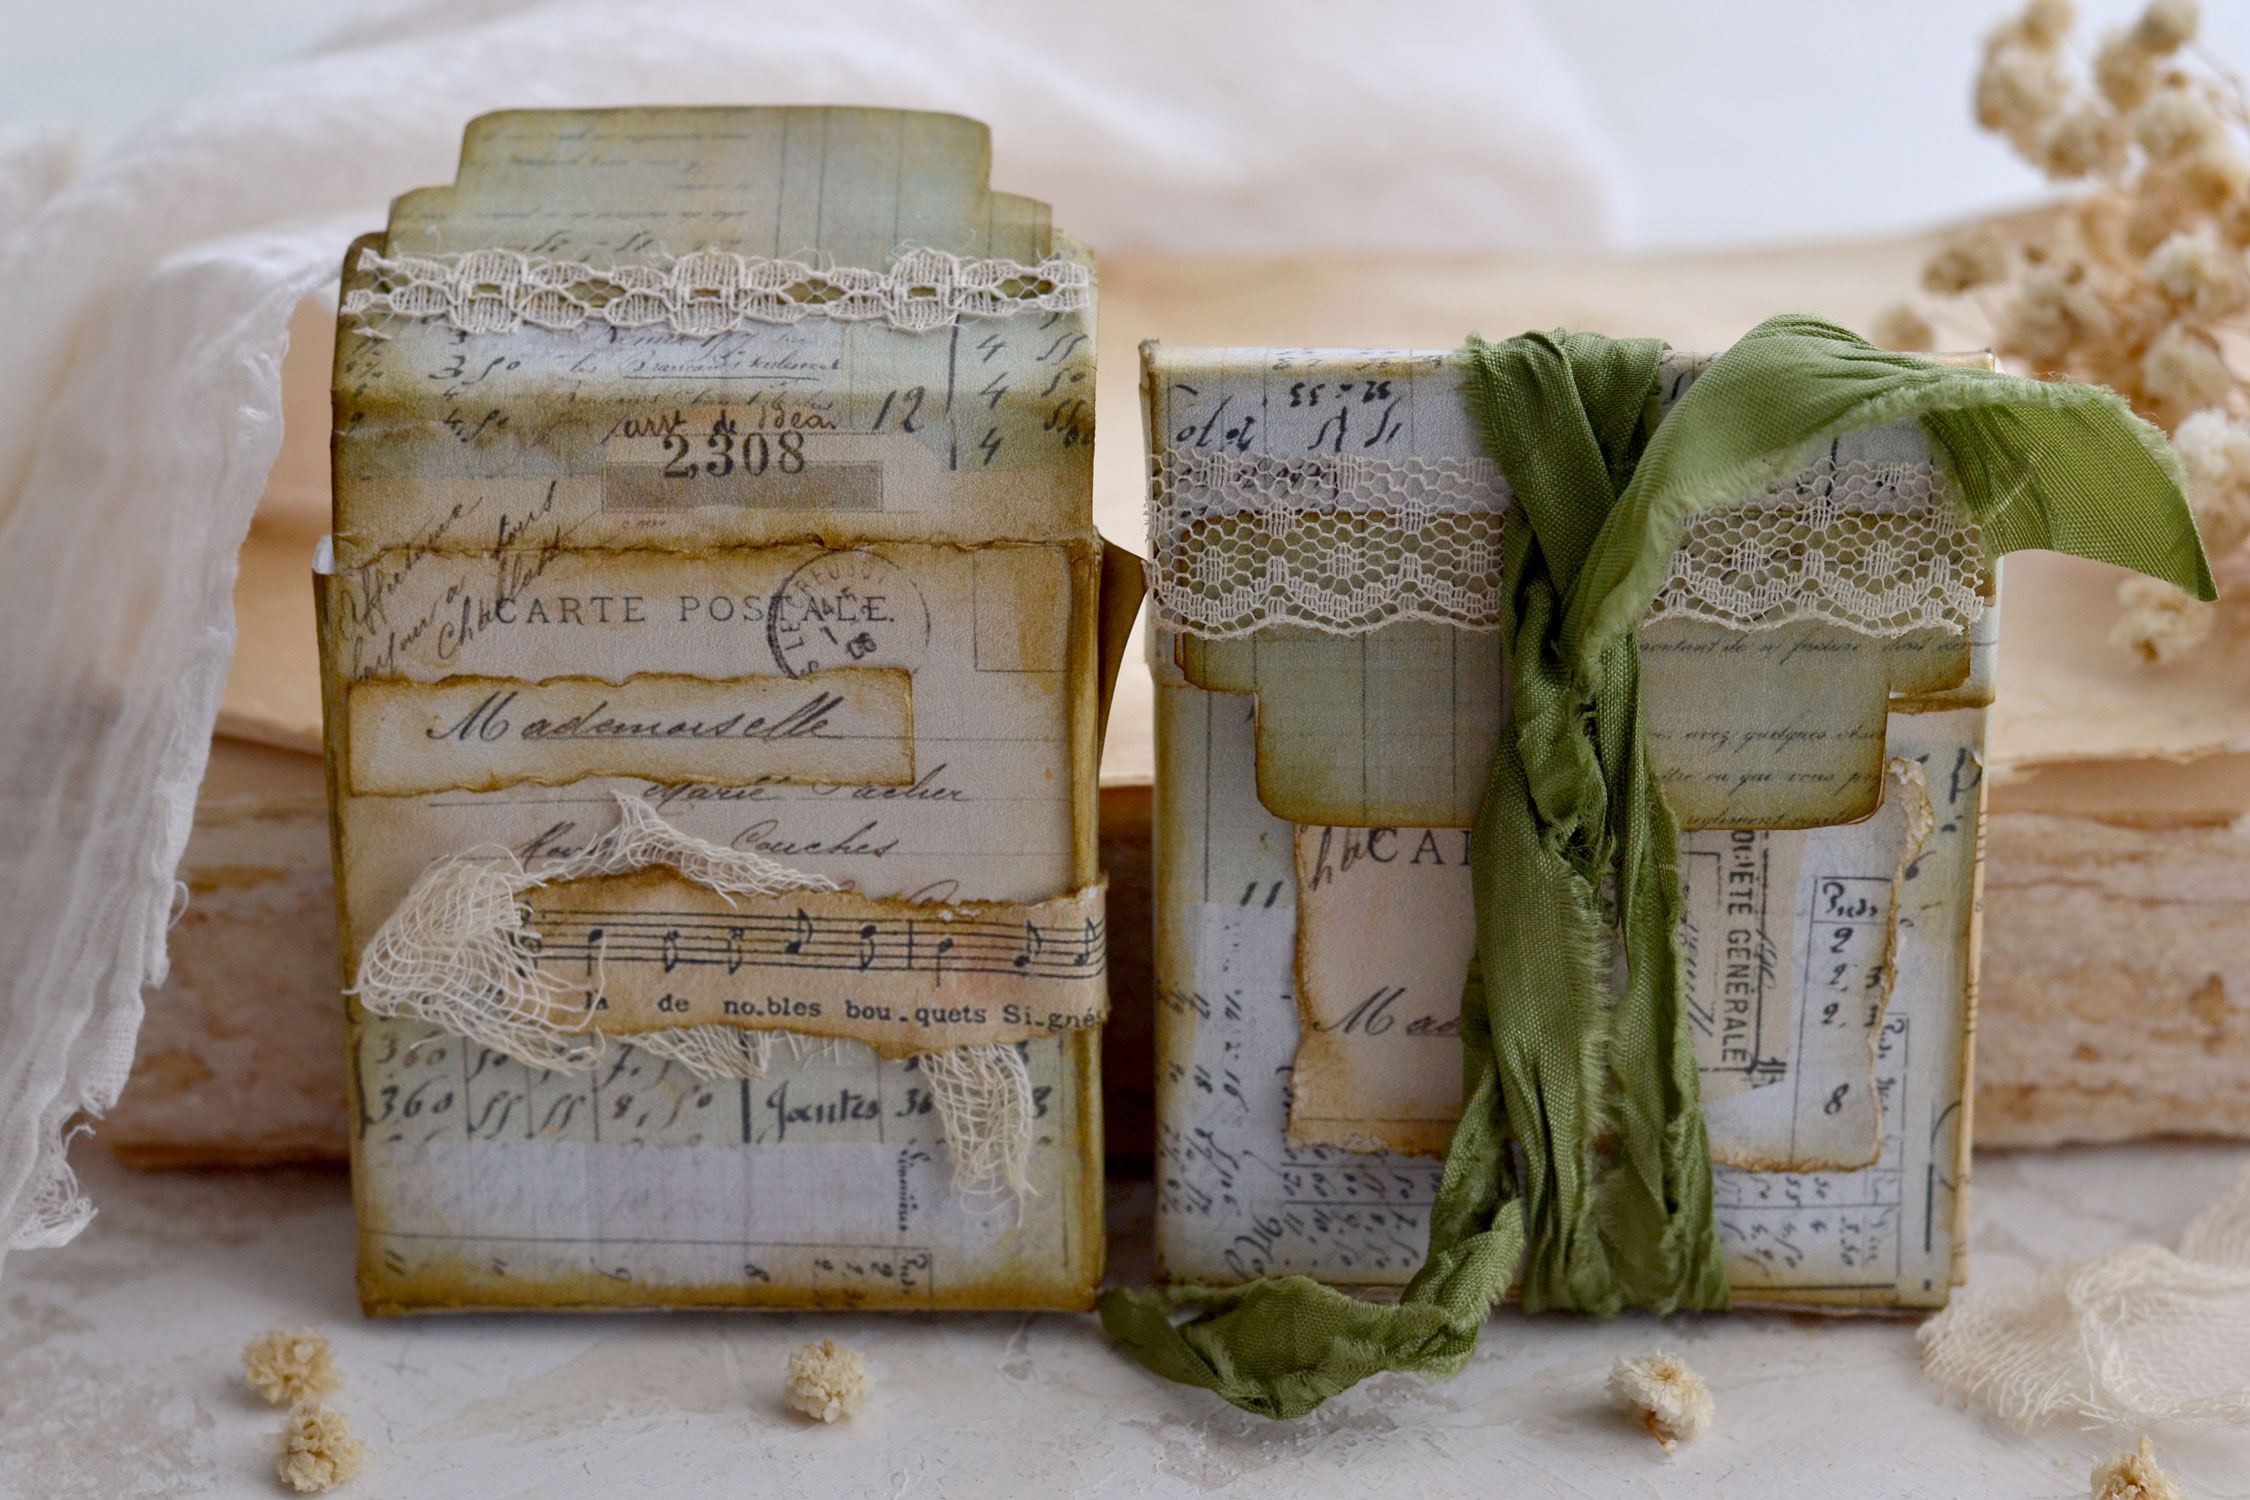
The simplest thing to do would be to use some crinkle ribbon, some lace or even some elastic cord to wrap around the boxes.
Or you could punch the top flap and use a gold brad with some metallic thread to also create a beautiful accessory for your boxes. Some tiny magnets might work too, just glue one on the inside of your box and one inside the flap and you are good to go.
You can leave some of your collage paper unglued on the sides to create that feeling of dimension and bring even more vintageness to the final pieces. I have to confess I’m quite amazed by these little gems, who would have thought toilet paper or kitchen paper rolls could be recycled and turned into something so beautiful?
I hope you will love this project and decide to give it a try, these super chic boxes could be a great addition to your home or craft room. They will help you get organized but also be stylish at the same time!
 You might also like Embossing with Toilet Paper HERE.
Happy crafting,
Diana | Dreams Factory


Ann Simmons says
The boxes look so beautiful! I’m ready to dig some out of my recycle bin and have a fun and pretty place to put paper clips and brads. Your work is awesome Diana! Thank you for the freebies Karen!
Karen says
Thank you so much! I’m so glad you’re loving the boxes and finding fun ways to use them. Your support means a lot!
Sonia says
Absolutely love this! And thanks so much for the Printables! I can’t wait to make tons of them!
Karen says
You’re welcome, Sonia! Happy crafting.
Connie Griffin says
so creative and pretty!
Karen says
Thank you, Connie!
Lana McGhee says
I am so glad I found your site. I am making a Gratitude journal and plan to share it with our church ladies’ group. I love all the printables, especially the vintage ones–they are timeless! I am looking forward to making these vintage boxes; using toilet paper rolls–that is pure genius! Thank you, thank you!
Karen says
Hi Lana! Hope you have a great time putting everything together!