Wire Crafts: Easy Embellishments
Hey y’all – It’s Rebecca E Parsons. Today we are going to do some easy DIY Wire Crafts to use as paper craft embellishments. I use wire embellishments in my Mixed Media art, Junk Journals, and Collage projects. You can review the previous Paper Craft Techniques in this series: Distressing Paper HERE and Paper Tearing Techniques HERE!
Adding Dimension – Wired for Paper
Wire is a great tool for paper crafters. It is easy to find, inexpensive, easy to work with, and takes my paper crafting up a notch. Those are all wins in my book!! TEE HEE. Wire is just so much fun to play with. I use all kinds of wire – copper, aluminum, steel, and sometimes silver. You will usually find it in the jewelry section of a craft store with names like: Jewelry Wire, Craft Wire, Tarnish Resistant Beading Wire, etc. Wire is measured in gauge, which refers to the diameter of a piece of wire. The higher the gauge number, the smaller the diameter and the thinner the wire. I use wire from 18 gauge to 26 gauge for most of my crafting. It also comes in a variety of pretty colors, making it loads of fun!
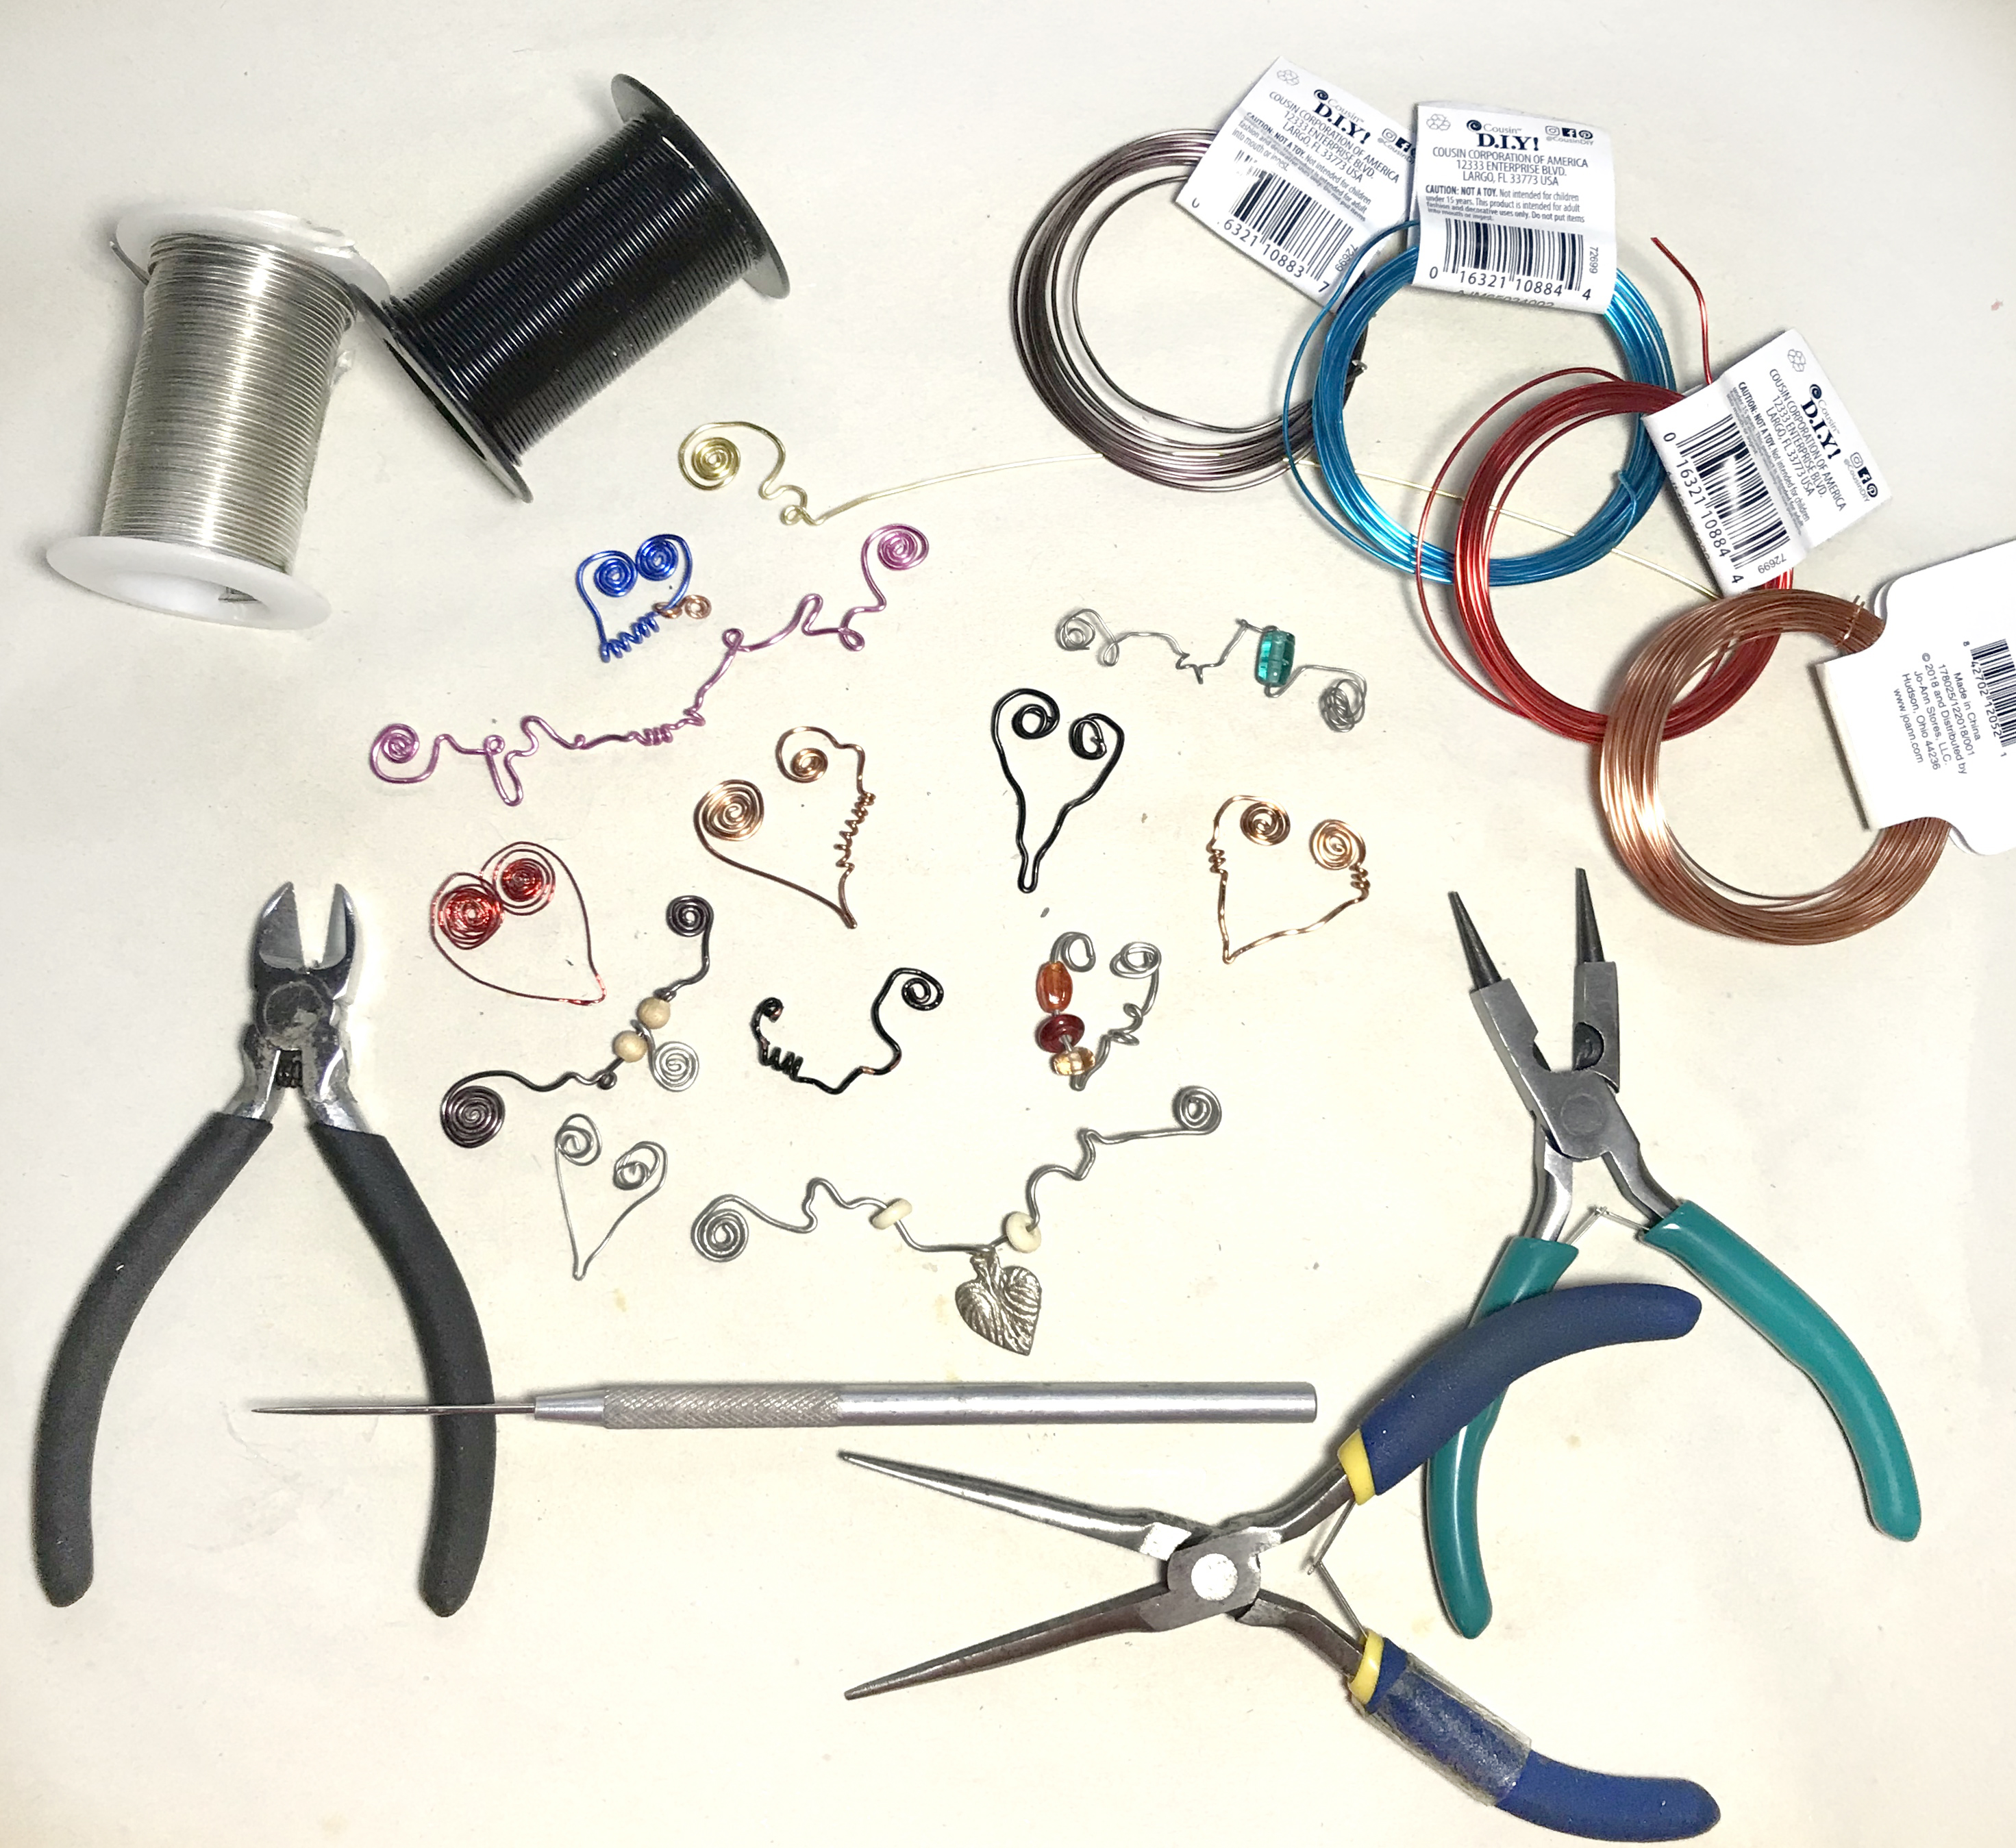
Wire Crafts Supplies:
Wire – 18 – 24 gauge in any color you like
Needle Nose Pliers
Round Nose Pliers
Flush Wire Cutting Pliers
Awl
Optional – Assorted Beads
Making Easy Wire Embellishments for Paper
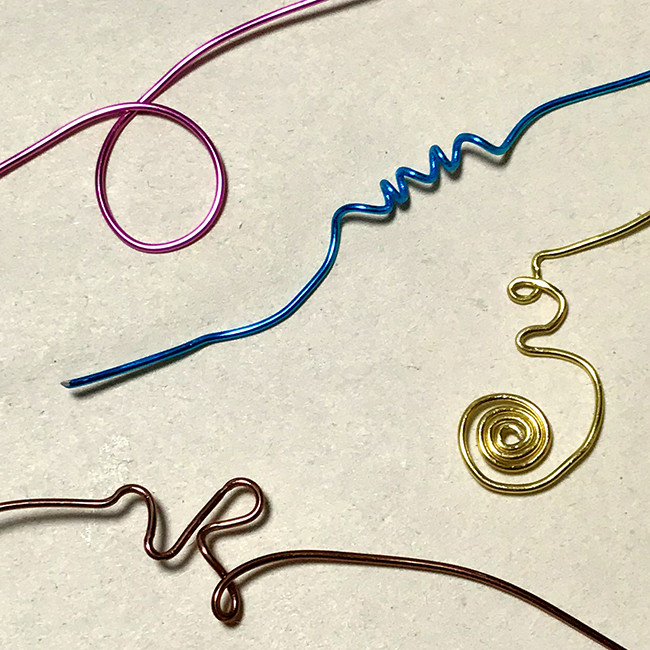
Basic wire design is just flat out fun and even a beginner can do them! Featured below are the four Basic and Easy Wire Embellishments techniques along with some of my favorite things to do with wire for my paper crafting work. You can of course find wire in almost every Junk Journal that I create. I also use wire in my Mixed Media art, Handmade Cardmaking, Party Decor, and so much more. I encourage you to buy a package of wire in several colors and gauges and then just play with it. There is one caveat; it can become addicting and you can get lost in creative flow with these techniques! Have fun!
Wire Loop Clasps
Making basic wire loops is one of the first skills you need to learn when working with wire. They are such a great project as they are easy and fun! This provides the foundation for creating clasps, shapes, and even creating letters and words with wire.
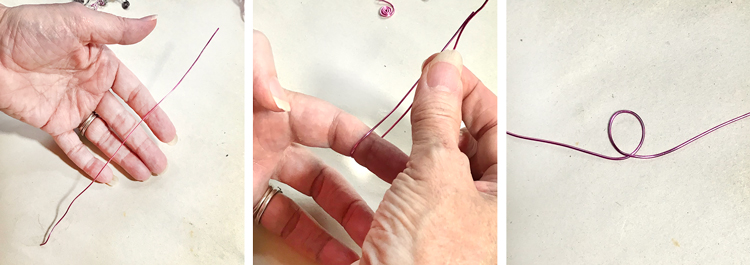
Cut a length of 18 gauge wire to about 8 inches in length. You need a sturdy gauge to make sure it holds onto paper when attached. Hold the middle of the wire against your index finger. (left image) Wrap it around your finger 1 turn. (middle image) You now have a nice loop, which can become a clasp. (right image) At this point you can thread beads onto the wire, coil the wire, or spiral the ends and shape. I attach ribbon sometimes to create a tag for a Junk Journal.
How to Coil Wire
Making basic wire coils is another of the basic skills you need to learn when creating a wire project. And it only takes a few seconds. There are several ways to make a coil – by hand, with a jig or mandrel, or with a gadget made for coiling wire. Here is my easy peasy method!
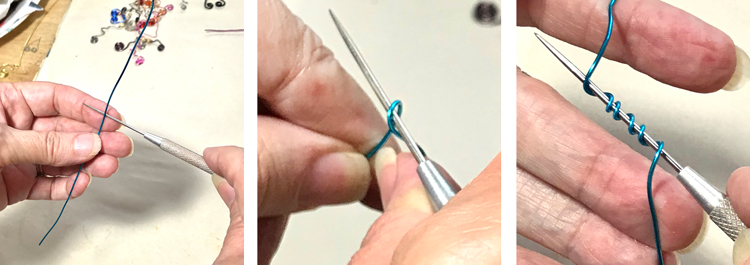
Cut a length of 10-26 gauge wire to about 8 inches in length. Hold the middle of the wire perpendicular to a small nail or awl. (left image) Wrap the wire over and around the nail, keeping the wraps fairly close to each other until the coil meets the desired length. (middle image) A beautiful wire coil is seen in the image at right below. NOTE: There will be gaps between your coils. We are not making jewelry coils, which are butted up against each other. A coiled piece of wire looks interesting and adds so much to your artwork.
How to Spiral Wire
Making basic wire spirals became such a joy for me once I learned the process. I used to think you made a coil and spread it out. That indeed made some interesting shapes, but not a true spiral. There are several ways to make a spiral – by hand, with a jig or mandrel, or with a gadget made for coiling wire. Here is my easy peasy method.
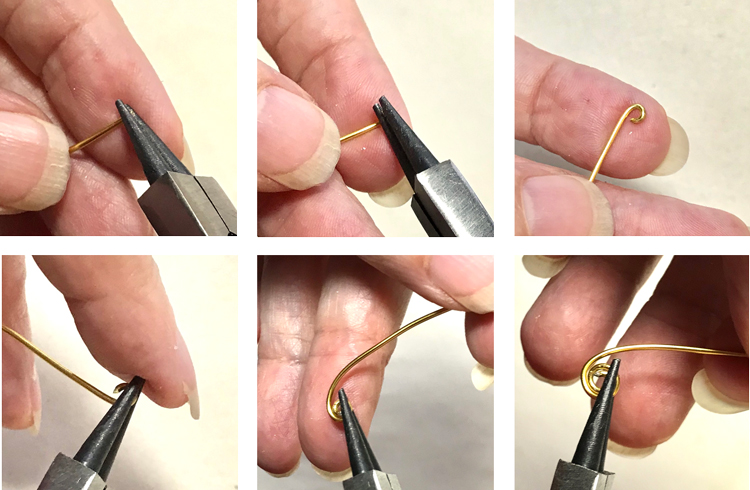
Cut a length of 20 gauge wire to about 12 inches in length. Clamp the end of the wire with round nose pliers. There should be no part of the wire sticking out of the top of the pliers. The end of the wire should be inside the clamp. TIP: Run your finger over the top edge of the pliers to ensure that you feel nothing sticking out. It is important that you start in this manner for the overall shape. (top left image) Turn the pliers toward you 1 full turn. (top middle image) This creates an open loop. You can fuss with it to get it as roundish as possible. (top right image) Hold the pliers in your right hand. Place the loop in the pliers with the long tail of the wire sticking out to the left. The tail is below the loop as in the bottom left image. (Left handed people will have the tail to the right.) You should see about half the loop sticking out the left side of the pliers. Grab the wire with your left hand close to the loop. Wrap the wire around and under the pliers. (bottom middle image) Reposition the loop in the pliers and wrap again. (bottom right image) Repeat until the spiral is the desired size.
Wire Squiggles and Wiggles
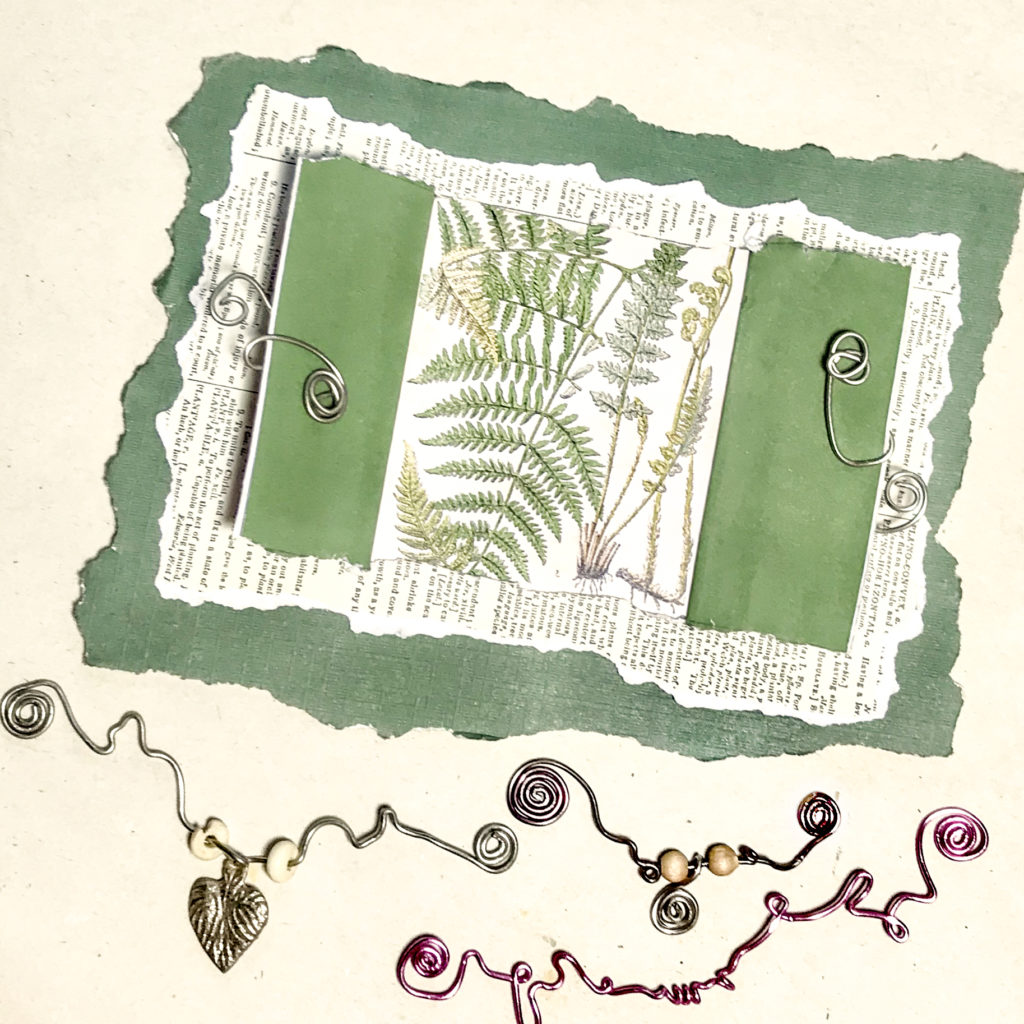
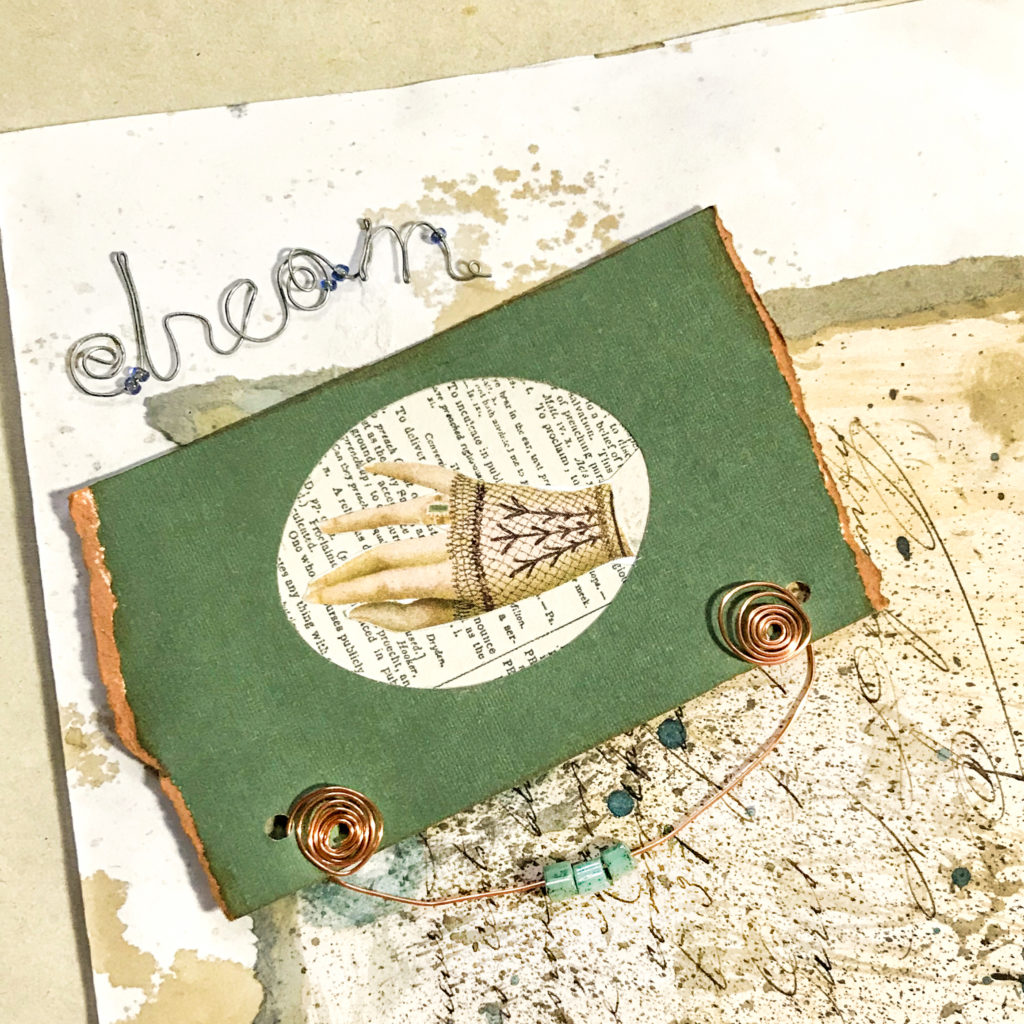
I love using this ‘anything goes’ wire technique. There is no right or wrong…or perfect. This is a nice way to let your creative energy flow. I often use the wire pieces I create to hold a paper window shutter open, attach something to the edge of a journal, hold a tag in place, etc. You will find so many things to do with them. CONFESSION: Sometimes my OOPS wire attempts become squiggles and wiggles by accident. I just go with the flow and name them with this technique. WINK: I am using two squiggles to hold my shutter open and embellish it further as you see below. There are a few random designs I created under the window.
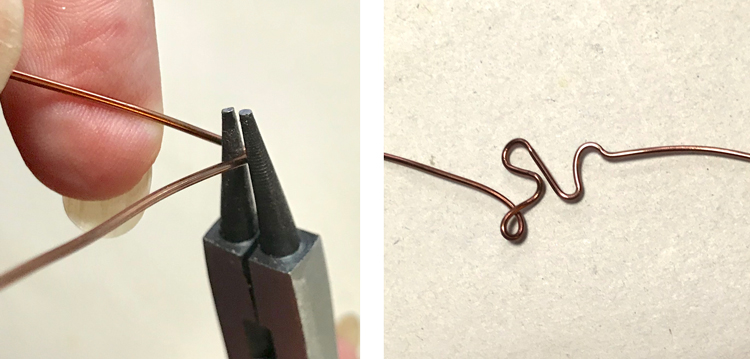
Cut a wire 12 inches or longer. The longer it is, the more wiggles and squiggles you can make. Twist and turn as you like using needle nose pliers and round nose pliers to help you bend. (left image) Make loops and pull them tight. (right image) This combined with any of the other techniques and beads or charms make a beautiful accent.
More Ideas for Easy Wire Embellishments
I am wishing you hours of fun creating Wire Crafts Embellishments for Paper and playing with all the Paper Crafting Techniques in this Series. You can create hearts with wire and embellish them with beads, charms, etc., or a dangle or banner to hang off an image with letters or words. Wire photo corners can be made. You can attach buttons to your work with wire. As you can see there are endless possibilities!
I also create Photoshop Elements tutorials and craft videos over on The Graphics Fairy Premium Membership site. You can find even more of my art, DIYs, and whimsical shenanigans on The Bookery!
