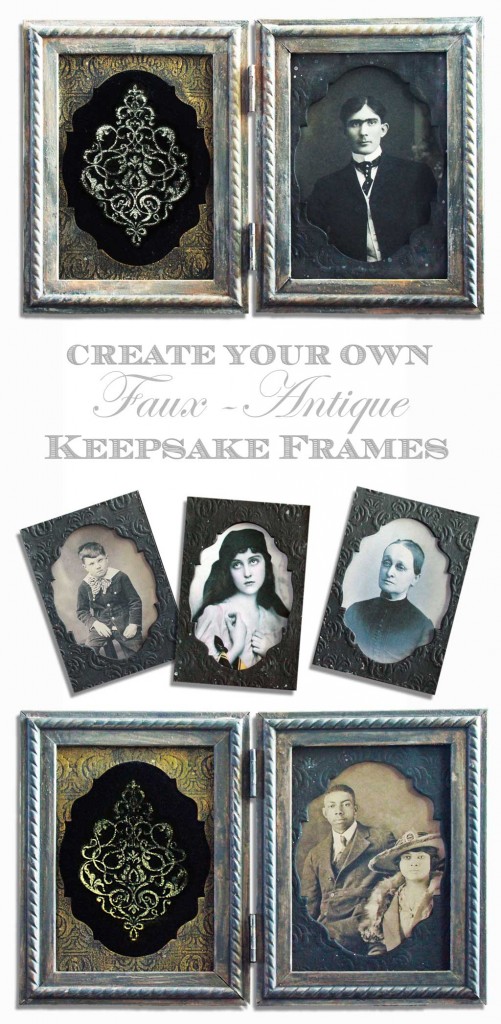
Hello, everyone…it’s Heather, from Thicketworks. Today we’ll be making some inexpensive, but luxurious, Faux DIY Antique Keepsake Frames.
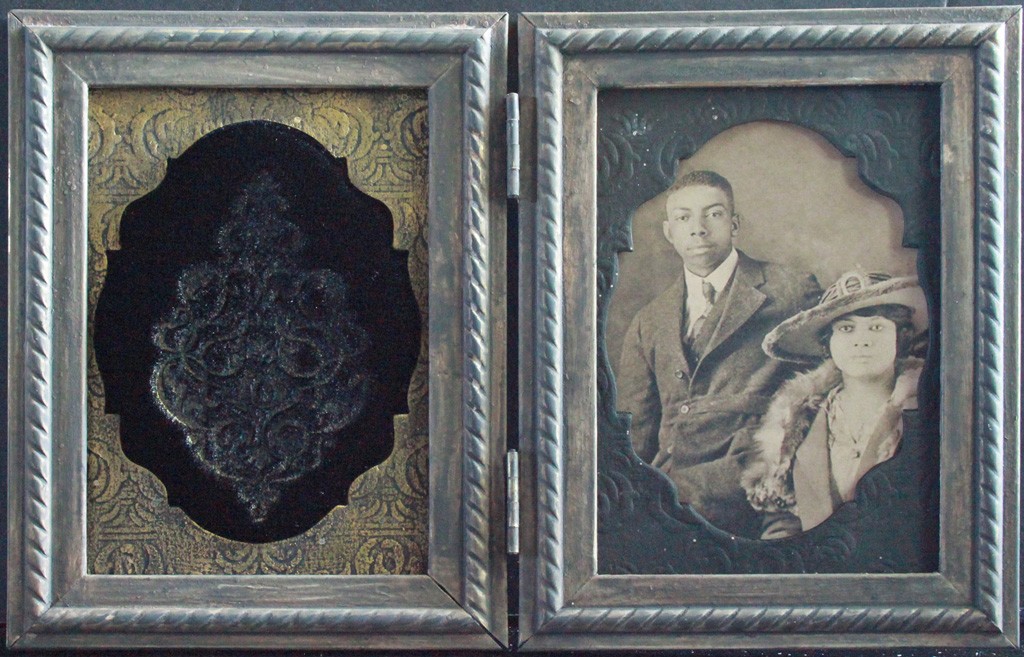
This elegant keepsake can be used to showcase antique photos, like the ones we find here at The Graphics Fairy, or any of your favorite imagery.
In the late 1800’s, it was typical to keep mementos of dear ones in special cases, complete with embossed velvet insets. We’re going to recreate the process of embossing a metallic motif into our velvet!
If you’d just like to learn how to emboss velvet with metallic ink, those instructions are at the beginning of the post.
Here’s a list of the tools and materials that I use for this process:
Embossed Velvet:
- Velvet – not velveteen, but specifically polyester, nylon, viscose or acetate based velvet. (I suppose silk velvet might work, but I wouldn’t want to risk it). I get a half-a-yard of acetate/poly velvet @ Joanne’s for about $10.00, and that’s enough to make at least 8 of these treasures.
- Strong sticky tape – I get the kind that is 1/2″ wide, black, stretchy and very sticky, like electrician’s tape
- An iron, and a protected surface on which to wield it
- A rubber stamp, which will become the focal image on your velvet. Not a clear stamp. The motif should be bold, rather than detailed. I’m sure you can achieve this with wood mounted stamps, but I’ll be focusing on how to use cling-mounted rubber stamps.
- If you are using cling-mounted rubber stamps, a piece of sturdy glass pane, large enough to mount your stamp onto is very helpful.
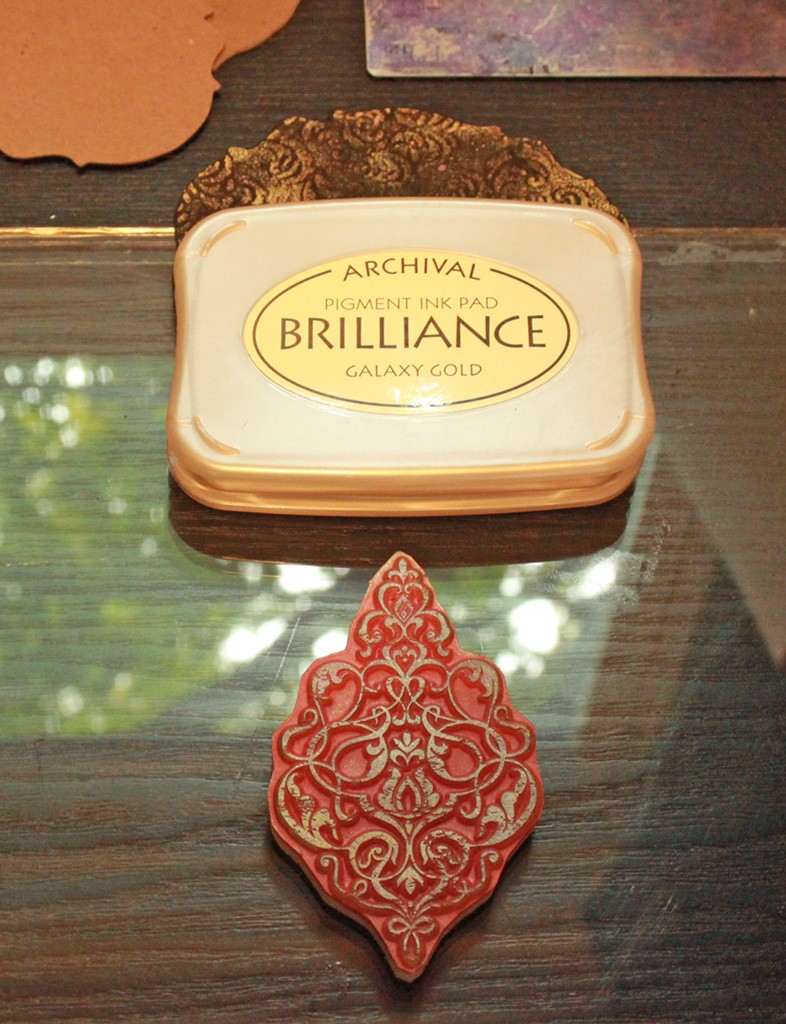
- A Tsukineko Brilliance ink pad in “Galaxy Gold” or Hero Arts Shadow Ink pad in “Silver” (other metallic inks may work, but I’ve only tested these two)
- Scissors
Faux-Antique Keepsake Frame:
- Images printed in scale with your frames. Inkjet prints are fine.
- For this project, I used Unibrow Man, African American Couple, Young African American Man, Amazingly Beautiful Gypsy, Spooky Old Woman and the adorable Cranky Little Boy photos from The Graphics Fairy free archives.
- A set of hinged picture frames from the dollar store. I get the ones that have a 3.5″ x 5″ opening.
- A few of sheets of craft felt
- Several 8.5″ x 11″ Sheets of Medium Weight Chipboard – slightly heavier than cereal box weight.
- A pencil
- Spray Adhesive to mount the felt onto the chipboard, and the velvet onto the felt/chipboard backing
- Black Gesso or craft paint as a ‘primer’
- Craft paint in your choice of colors for aging the frames
- Inka Gold or Rub-n-Buff in your favorite color
- A glue stick
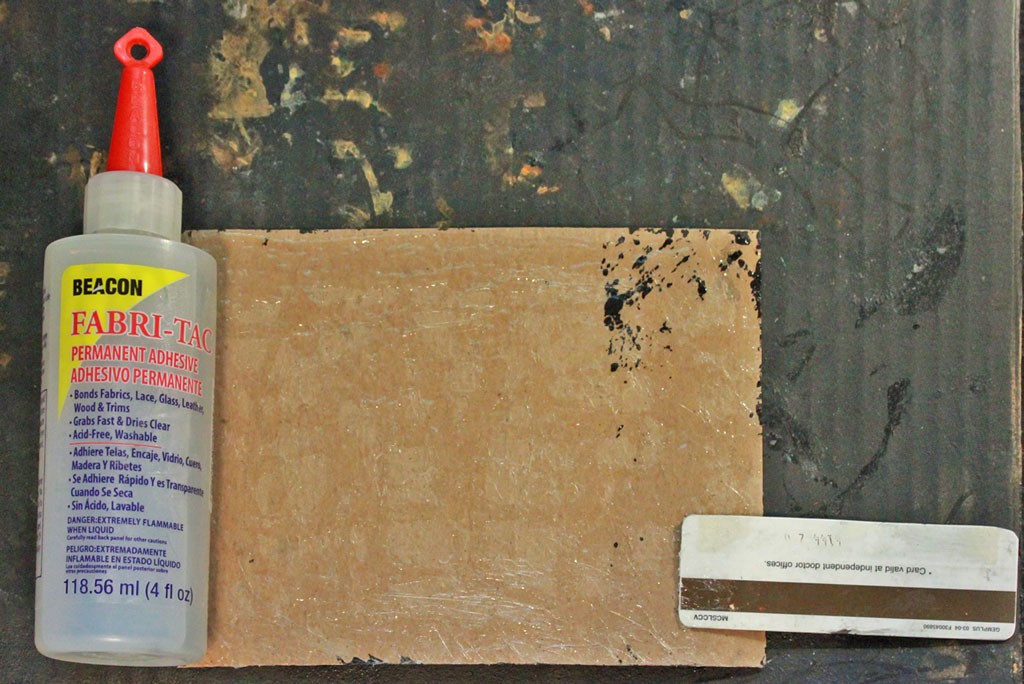
- Your favorite heavy-duty adhesive. (I use Fabri-Tac).
- A sturdy and sharp craft knife
- A cutting mat
- A metal ruler
- Washi or low-tack tape
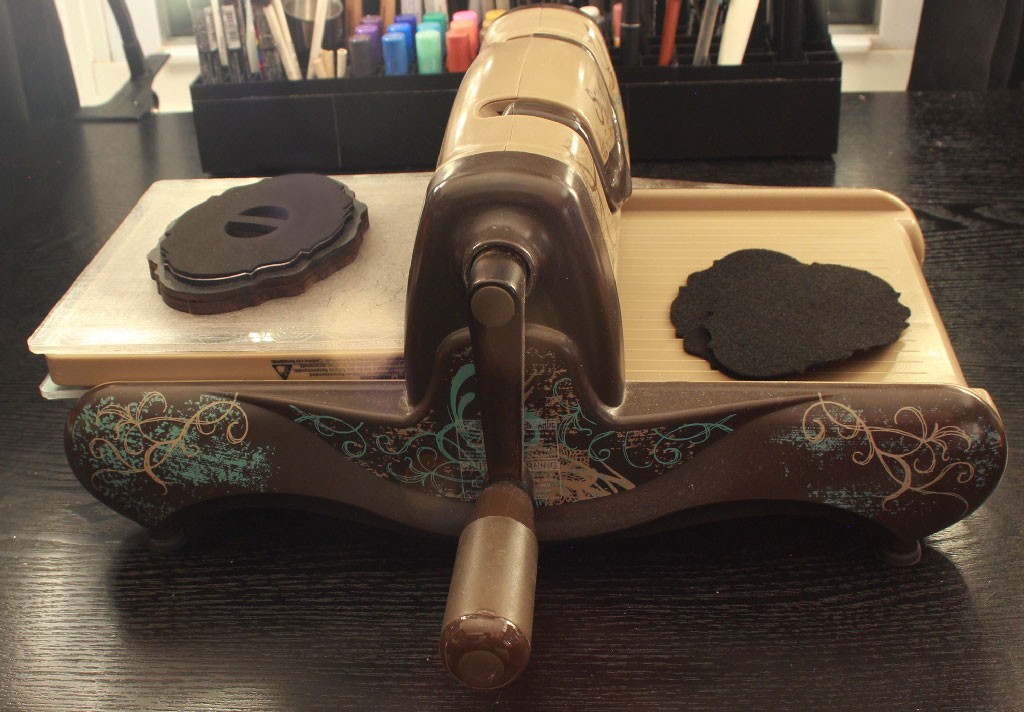
- A die cutting machine ( I use a Sizzix / Vintaj Big Kick)
- An ornamentally shaped die to cut out the ‘frame’ shapes ( I’ve used the Tim Holtz Movers and Shapers Magnetic Die – “Mini Baroque”)
- An embossing folder with a suitable motif
- A spray bottle of water
- A stapler & staples (I used a mini-stapler)
- Coarse grit sandpaper or a metal file
- Emery board or pumice bar (I get mine @ the dollar store)
Whew! It didn’t seem like that much stuff at the time…
Embossed Velvet Process:
- Disassemble the picture frame: bend back the prongs, remove the backer boards, the cardboard inserts, and the glass. The glass in these cheap frames is usually very brittle, and can have sharp edges – be careful. Set the inner cardboard pieces aside; we’ll be using them later. Discard or store the glass and the backer boards, as we will not need them for this project. Leave the prongs in place.
- Select the die you will be using to cut an ornamental “insert frame” shape. The die should be a bit smaller than the opening of your picture frame:
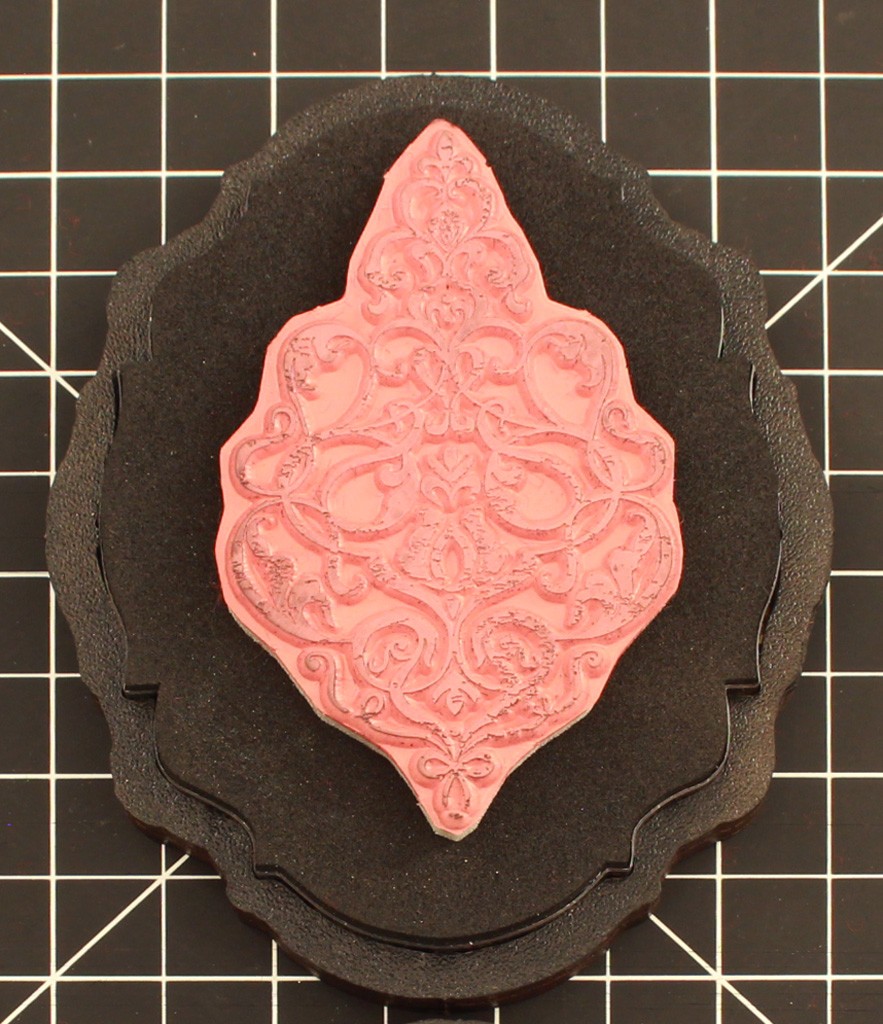
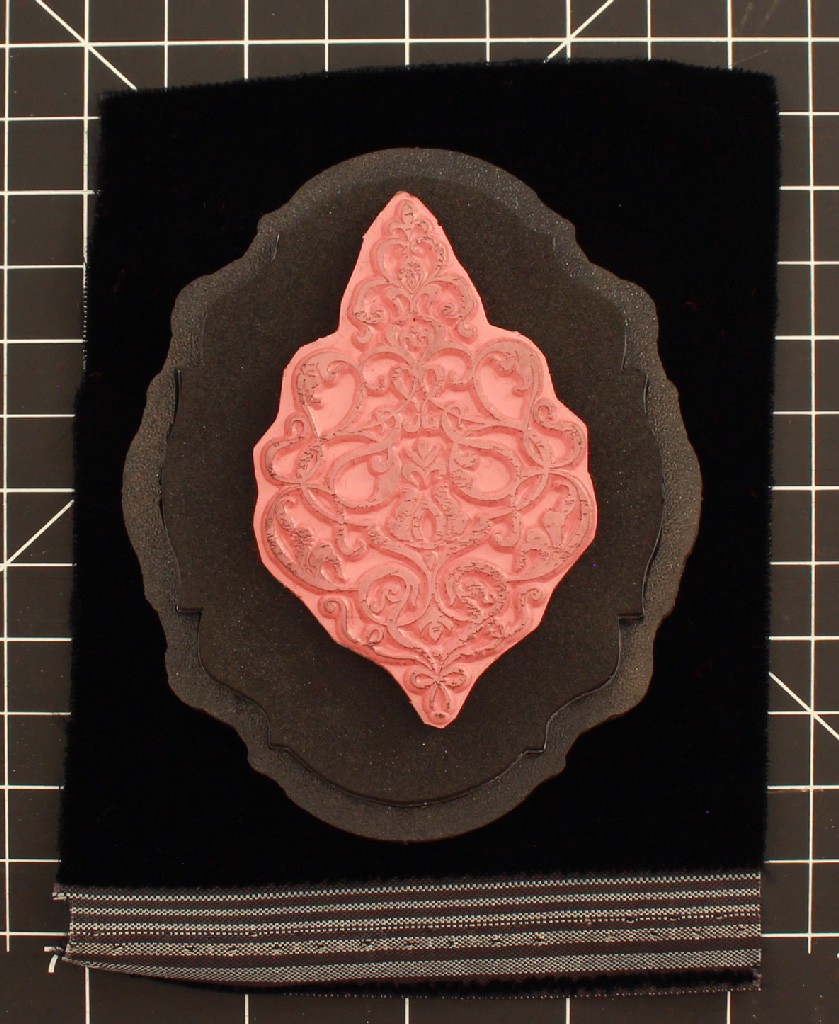
3) Select your rubber stamp motif – choose a design that will fit comfortably within the shape of your chosen die(s) (I’m using one of the Tim Holtz / Stampers Anonymous “Distress Damask” cling stamps)
4) Cut a piece of velvet about half an inch larger than your die on all sides.
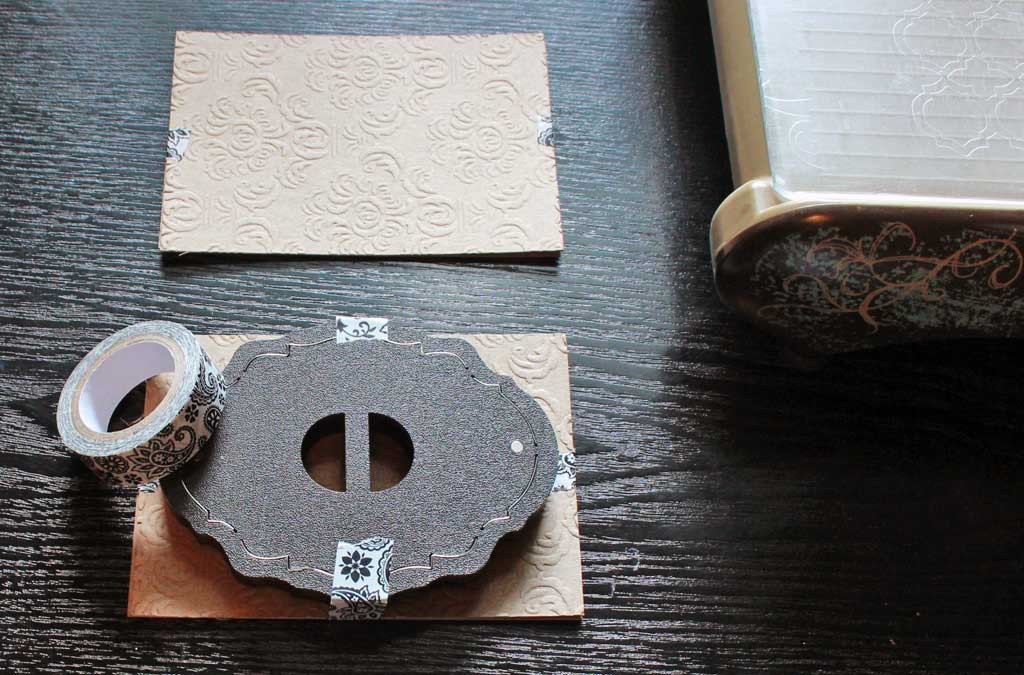
5) Mount the stamp face up on your plate glass and ink the surface of the stamp:
6) Center the fabric face down over the stamp, (without shifting!) I know, it’s challenging…and securely tape all 4 sides of the velvet to the glass:
7) Make certain that your iron is set to ‘no steam’. I use the ‘wool’ setting (yours may be different, experiment carefully), and press straight down on the back of the velvet / stamp sandwich, ensuring firm and even contact with the surface of the design. Be careful not to touch the utility tape with the hot iron, or you’ll be cursing in no time…
I generally press straight down and hold for about 3 seconds at a time, lifting and repeating until I’m sure the entire design has been ‘impressed’ into the pile of the velvet. The key here is not to allow the velvet to shift at all while the heat is being applied.
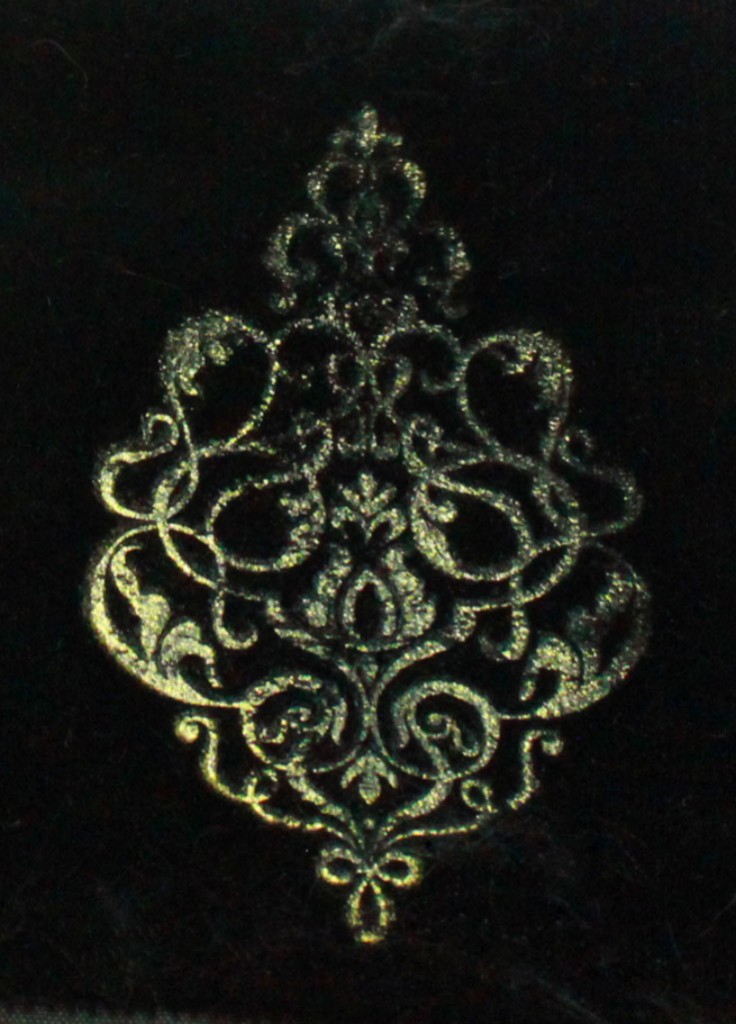
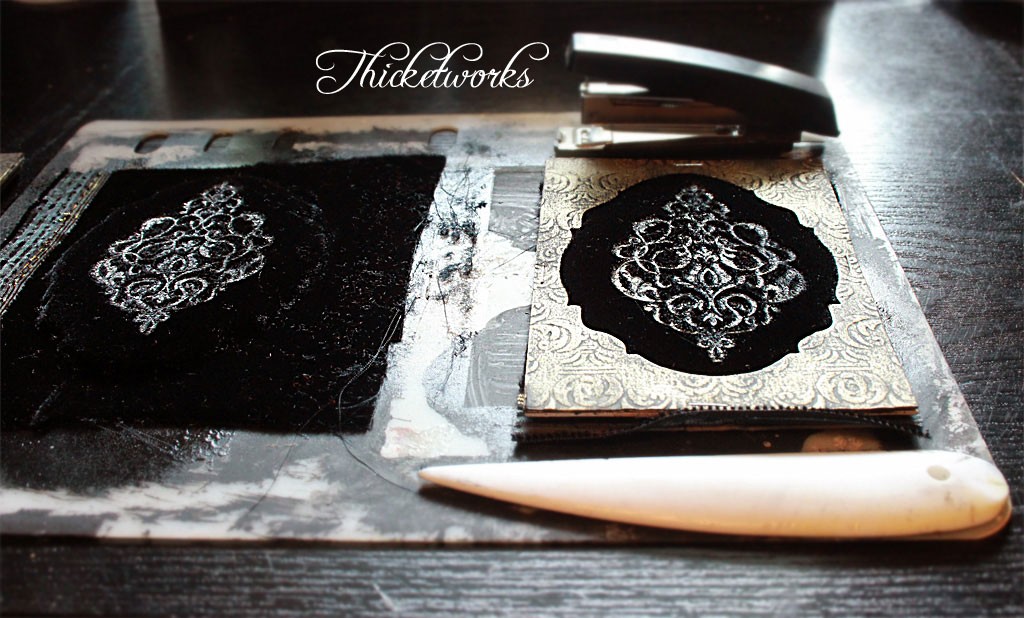
If all goes well, you should have a result that looks something like this:
Set your embossed velvet aside, for now. If you can bear to stop admiring it…
Inset Frame with Embossed Velvet Process:
8) Retrieve one of the cardboard inserts that you removed from the frames. Use this, and the frame itself as patterns to follow as you cut chipboard cards to fit.
For each folding frame you will need to cut:
- 6 chipboard pieces sized to fit as snug inserts into the back of each frame opening –
- 2 of these will become backing boards for the photo and the velvet insert
- 2 of these will become embossed “inset frames”
- 2 of these are backing for the “inset frames”, without embossing
2 chipboard pieces sized to fit the entire back of the folding frame, all the way to the edges on all sides (these will become the backing / outer shell of the folding frame).
This is our goal:
Note: You may find that you need to cut additional chipboard in order to create enough layers for everything to fit snuggly. I ended up using three 8.5″ x 11″ chipboard sheets per folding frame. Your mileage may vary…
When you have cut all of your chipboard:
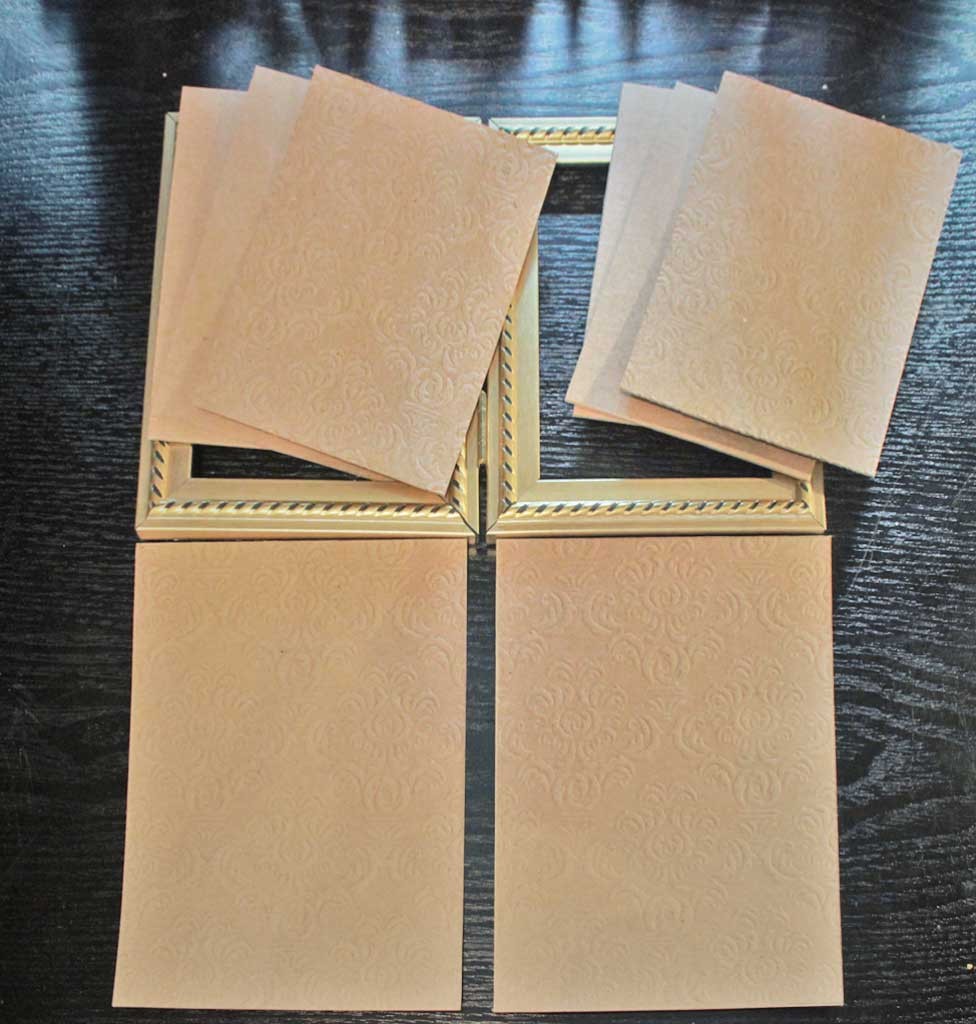
9) Emboss both of the “outer shell” sized chipboard pieces, set aside.
10) Emboss 2 of the “insert” sized chipboard pieces, and leave 4 plain.
11) Set aside 2 of these plain “insert” sized chipboard pieces, as backing for our velvet panel and our photo panel.
Note: embossed impressions will be more pronounced if you lightly spritz the chipboard with water before enclosing it in the embossing folder.
12) Layer the 2 embossed chipboard inserts atop the 2 plain chipboard inserts; embossed surface uppermost . Using a small amount of low-tack or Washi tape, adhere each set together in preparation for die cutting the center aperture.
13) Center the die, and lightly tape it to the embossed surface of the layered cards. Send it through the machine.
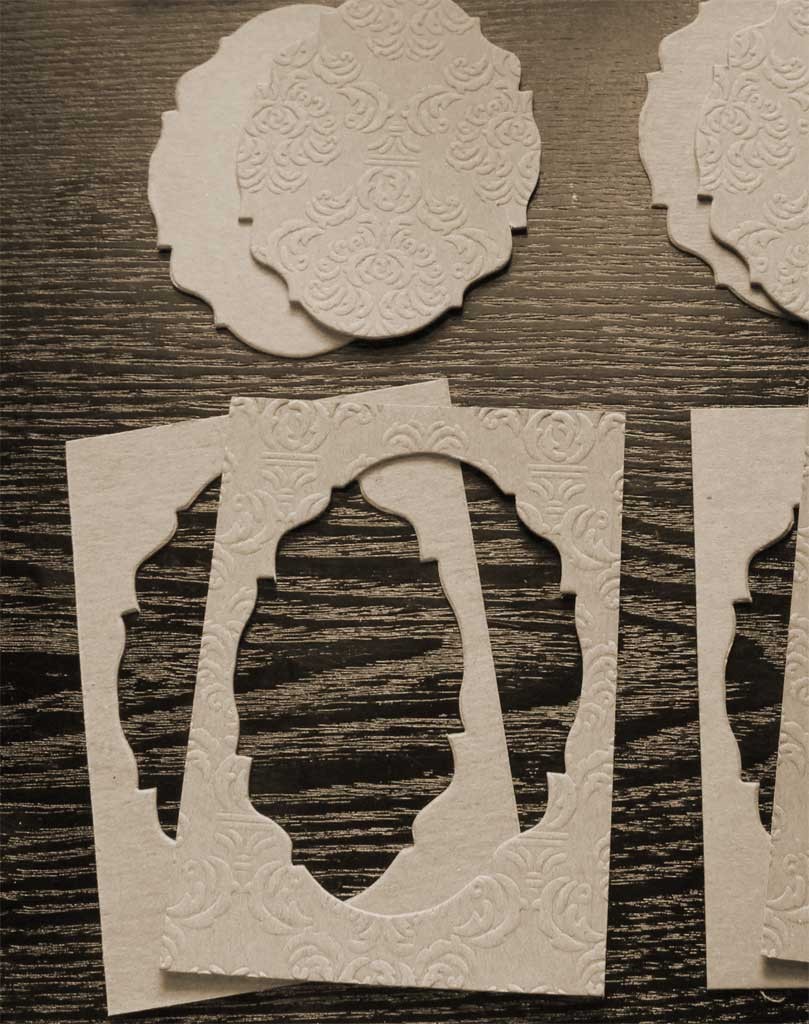
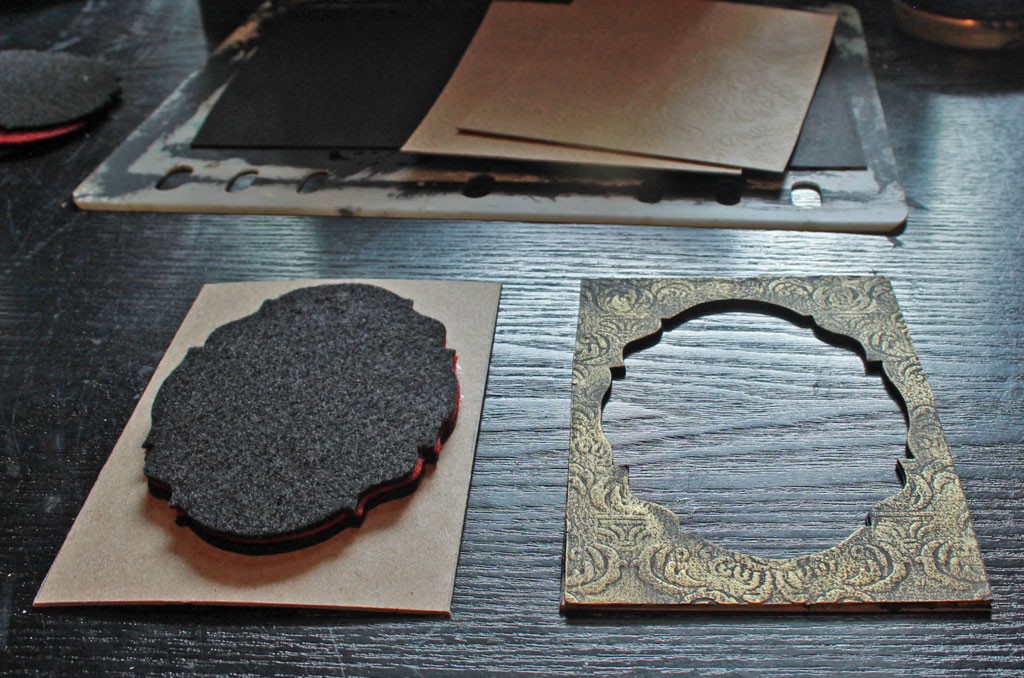
The goal is to produce matched pairs of “insert” frames, one embossed, and one plain. We’re creating one ‘frame’ that will perfectly match the felt padding we are creating for the velvet, and one frame for the photo panel. What we are after are the ‘negatives’ of the die cut shape, or the ‘frame’, rather than the medallion shape.
As a bonus, these embossed / plain die cut medallions make great gift tags…
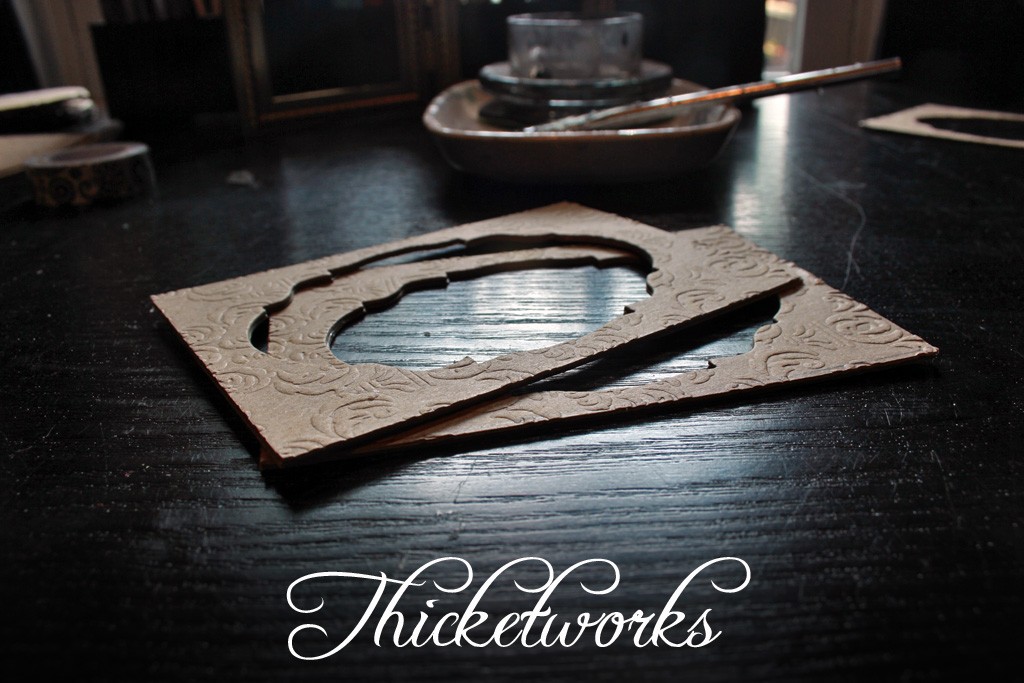
14) Glue the embossed layer of each “frame” onto it’s un-embossed mate, creating a double thickness of chipboard. Take care to align the inner edges of the cut-out shapes. Once glued, they should look something like this:
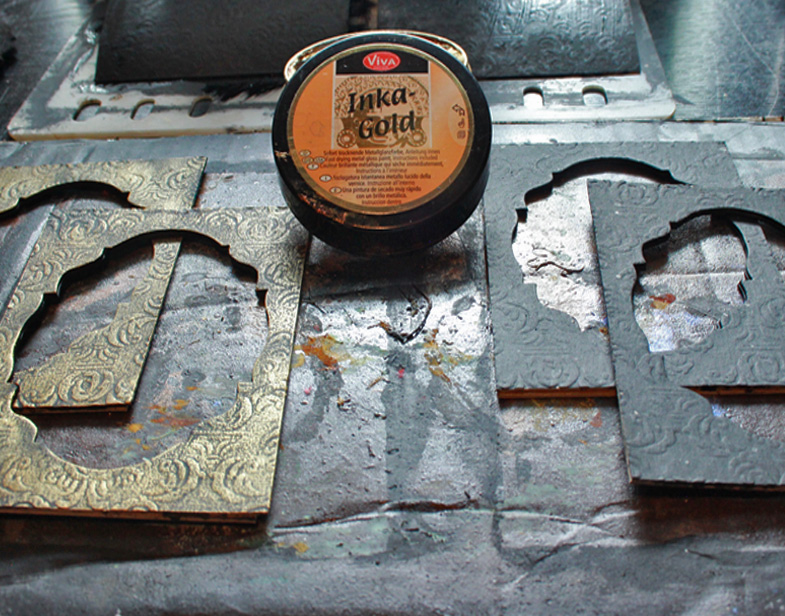
15) Once the glue has cured, coat the embossed surface with black Gesso or craft paint. Take care to cover the inner edge thoroughly. When the Gesso or craft paint has dried, use Inka Gold or Rub-n-Buff to highlight the embossed design of one frame, and leave the other black. I like to spatter a bit of contrasting paint on the black surface.
Since I’m making multiples, this pictures shows double the amount of frames required for a single project. (You’ll only need one black and one metallic frame).
Embossed Velvet Padding/Backing Process:
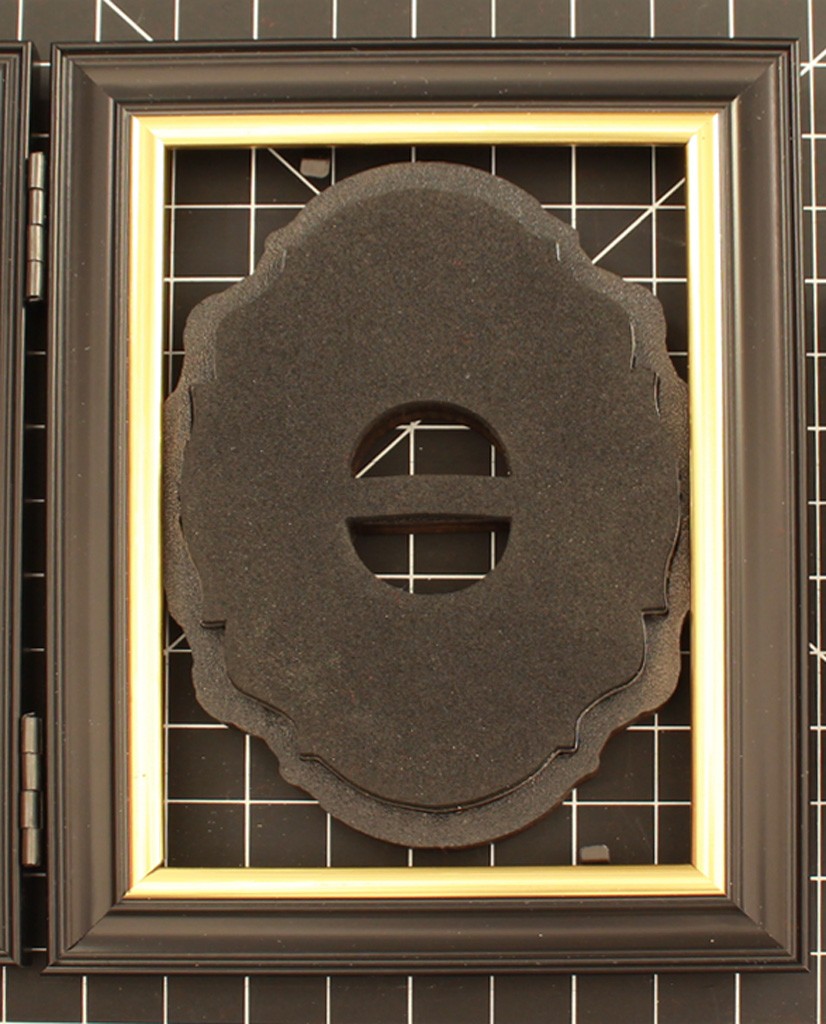
16) Die cut 2 or 3 layers of craft felt in the same ornamental shape. This time we want the medallions, and you can discard the felt ‘frames’:
This is the padding for our embossed velvet panels. Those 2 plain “insert” sized pieces of chipboard that you cut earlier? Now’s the time to remember where you put ’em!
17) Trace the aperture from your fancy “insert frame” onto the plain chipboard insert. Place one layer of die cut felt onto the chipboard, matching it carefully to the traced shape. (The other plain “insert” piece will back our photo). Our aim is to place the padding so that it matches the center of the frame opening exactly:
18) When you’re satisfied with the placement, adhere the felt to the chipboard insert, then adhere the second layer of die cut felt directly atop the first, resulting in a stack of one layer of chipboard, with two or three layers of felt glued to the surface. I use a strong spray adhesive for each layer, going outside and heeding all safety warnings.
19) Once the felt padding is in place, cover the felt layers and chipboard surface with spray adhesive, taking care to spray the adhesive along the edge where the felt meets the cardboard.
20) With this sticky mess on your work surface, gently place the embossed velvet over the top of the felt padding, lining up the embossed motif over the padding carefully. Firmly press the velvet to the felt and the chipboard around the edge of the padding. A bone folder helps with this step.
21) Place your metallic “insert frame” over the velvet and padding, easing it to fit. Once it’s firmly in place, staple along the very outer edges of the frame to capture the velvet inside the frame, and to force the padding to protrude slightly through the aperture. It’s essential to keep your staples along the very outer edge of the “insert frame”, so as not to be visible when placed inside the actual picture frame.
If any of the velvet overhangs the edges of the assembled layers, just trim it away.
22) Slide the padded velvet panel into the left side of the picture frame, and clamp it down with the little prong thingies on the back of the frame.
23) Center your chosen photo beneath the black “insert frame”, and trace around the outer edge. Trim the image to fit. Glue the image to the remaining plain “insert” sized chipboard card with a glue stick, then glue the black “insert frame” over the image, creating a sandwich. Once the glue has dried, place this photo panel in the right side of the picture frame. If it does not sit flush with the back of the frame, add additional chipboard layers until it is snug. Clamp down with the prongs.
We are about to permanently enclose the back of the frame, so any last minute adjustments should take place now.
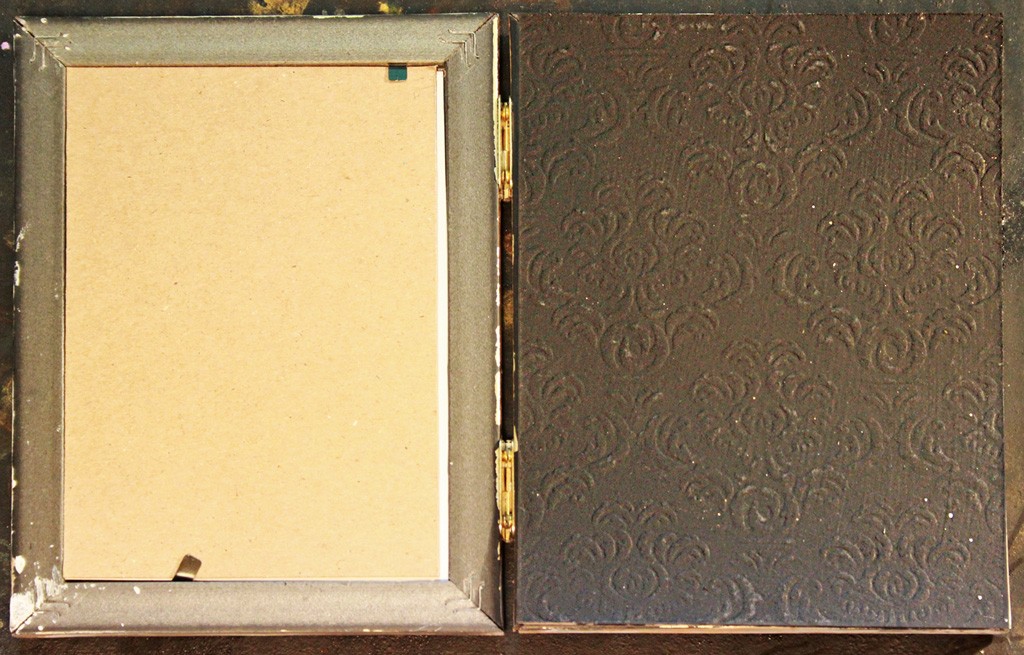
24) Grab the two embossed rectangles of chipboard that match the external dimension of the frame. Verify that they fit the back of each side of the frame:
25) Cover the back of each embossed chipboard panel with heavy-duty adhesive, making sure to spread the adhesive over the entire surface. (I use an old credit card for this).
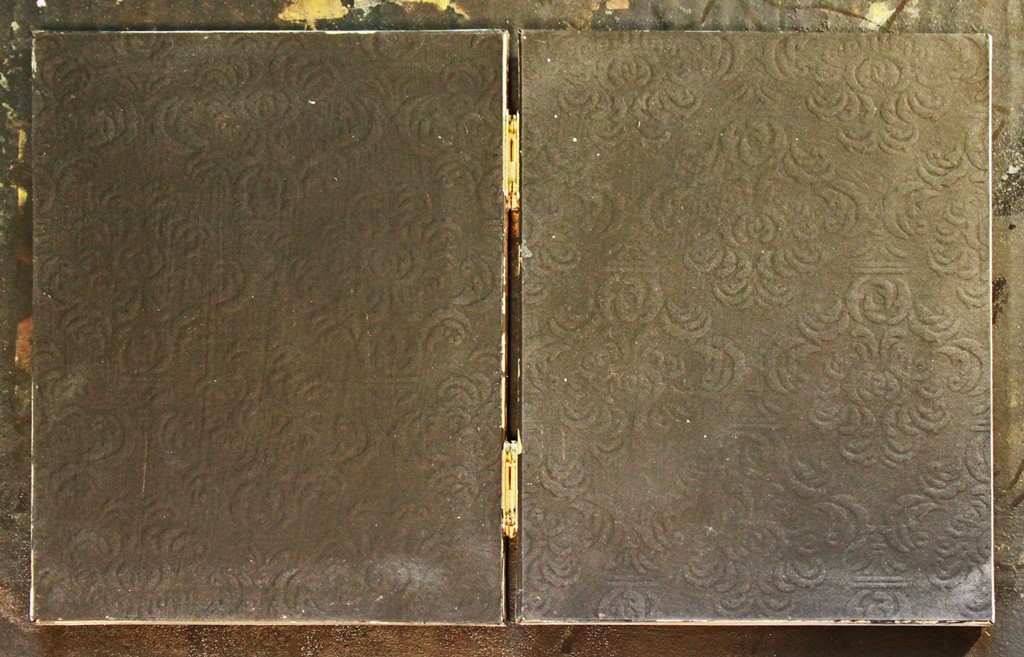
26) Glue each of the two panels to the back of each side of the frame:
Allow the adhesive to cure, making certain that the bond is secure. Weight it if necessary.
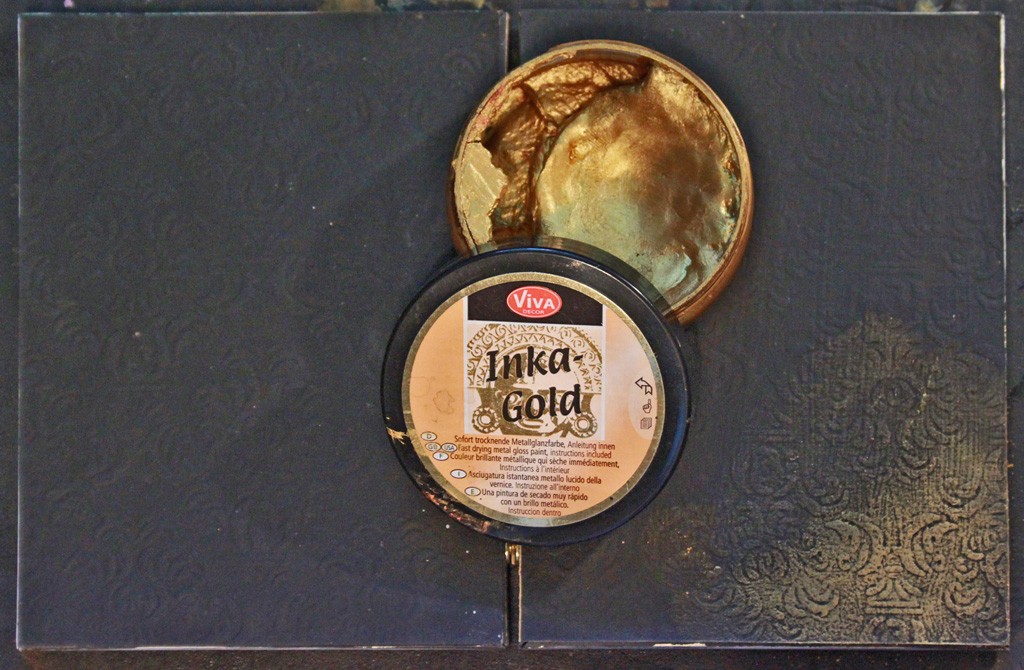
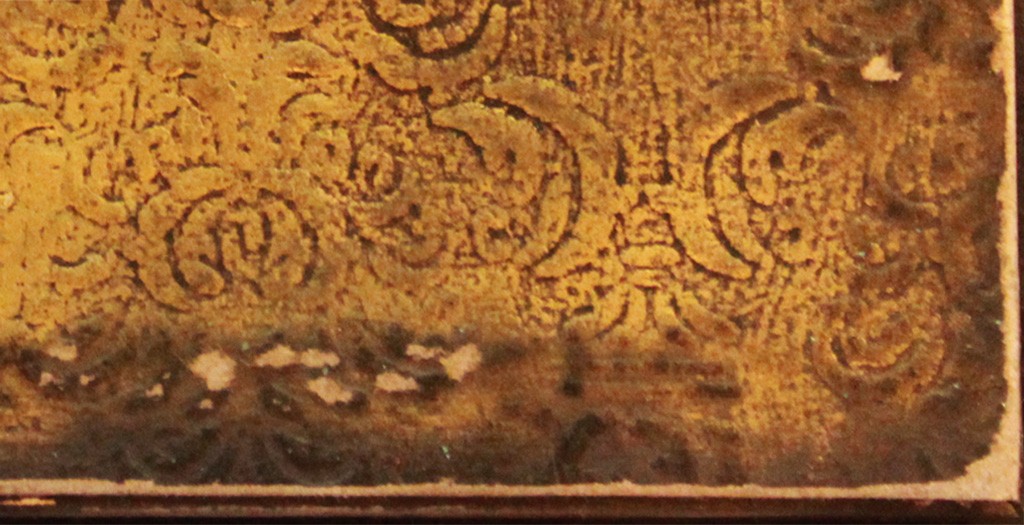
27) Add a layer of metallic finish, if you choose:
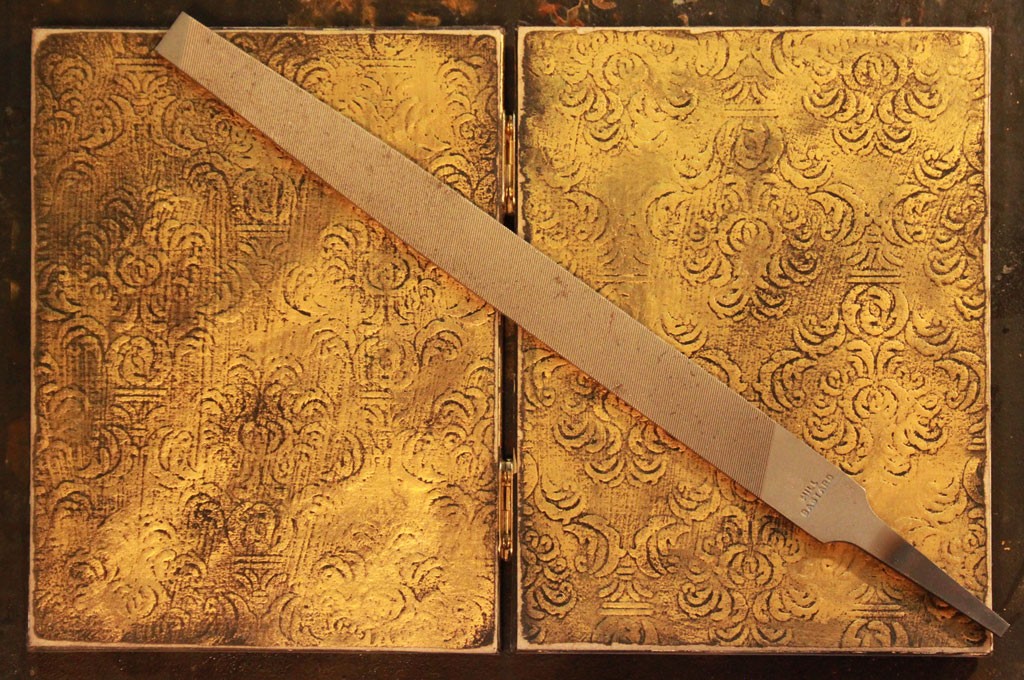
28) Distress the edges of the embossed panels, to simulate a century and a half of wear:
29) Using your emery board or pumice bar, sand away at the surface layers, revealing the chipboard in spots:
30) Use craft paints to create a layered and distressed finish on the frame, disguising its dollar store provenance, and there you have it!
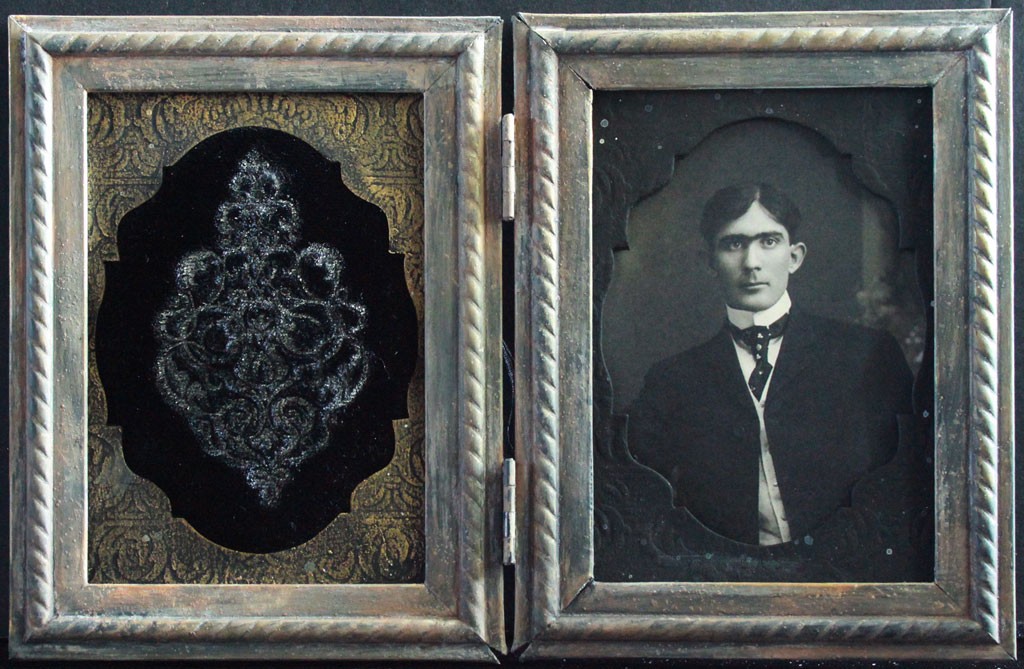
Instant (ok, not quite instant) history….A beautifully aged and distressed ‘heirloom’ suitable for your favorite vignette spot.
I loved making these keepsake frames, and I can’t wait to use more embossed velvet in future projects. Thanks for joining me, and I hope you enjoy using these techniques in your own creations!
If you’d like to explore more faux-finish techniques, stop by Thicketworks and poke around. I’d love to hear from you!
Take Care,
Heather




Milagros C Rivera says
Heather what a magnificent post!! The results are unparalleled the vintage like k achieved is so unique. I had embossed velvet before with a wood mounted stamp and no ink no I need to go try some metalic embossing the result is phenomenal! You’re so awesome thank you for sharing your wonderful ideas!
Heather Tracy says
Hi Milagros! Don’t you just love embossing velvet? I was so excited to discover that the metallic inks work beautifully with the process. I know you’ll have fun with this. Thank you SO much for stopping by, my friend!
Julie Lee says
Wow! This is a fabulous tutorial. What beauty you achieved and how well you described your process. Heather, you are so clever! Thank you so much for sharing.
Heather Tracy says
Hi Julie! How lovely to see you here…It makes me very happy that you like this little project – thank you so much for taking the time to stop by and leave such a sweet comment! xox
Caroline says
Phew!! I need to let my breath out now, had been holding it throughout without realising!?
I will also need to return & read beginning as think I missed part where you alter actual frame (I know. Useless memory)? Saying that, I know how I’d probably be able to do this bit. You have of course created an amazing keepsake, written excellent step-by-step & inspired many! Your mission is unqualified success! A lot to remember so would be useful to save (I will anyway). Tfs & being so enthusiastic & always encouraging! You are one of a kind special, glad I have “met” the crafty you, especially as we seem to have very similar sense of humour (or is that quirky ways? Lol)
As phone keeps turning off, stopping response now. “Thank goodness!” The crowd cry ?
Heather Tracy says
Hello Caroline! So thrilled to see you here, dear heart…And, oh, it just makes me SUPER happy that you found this useful in any way at all. I have to agree that we share a special ‘something’…quirky, yes, humorous – Yep! Thank you for stopping by and leaving such an encouraging comment, my friend!