DIY Art Journal Cover
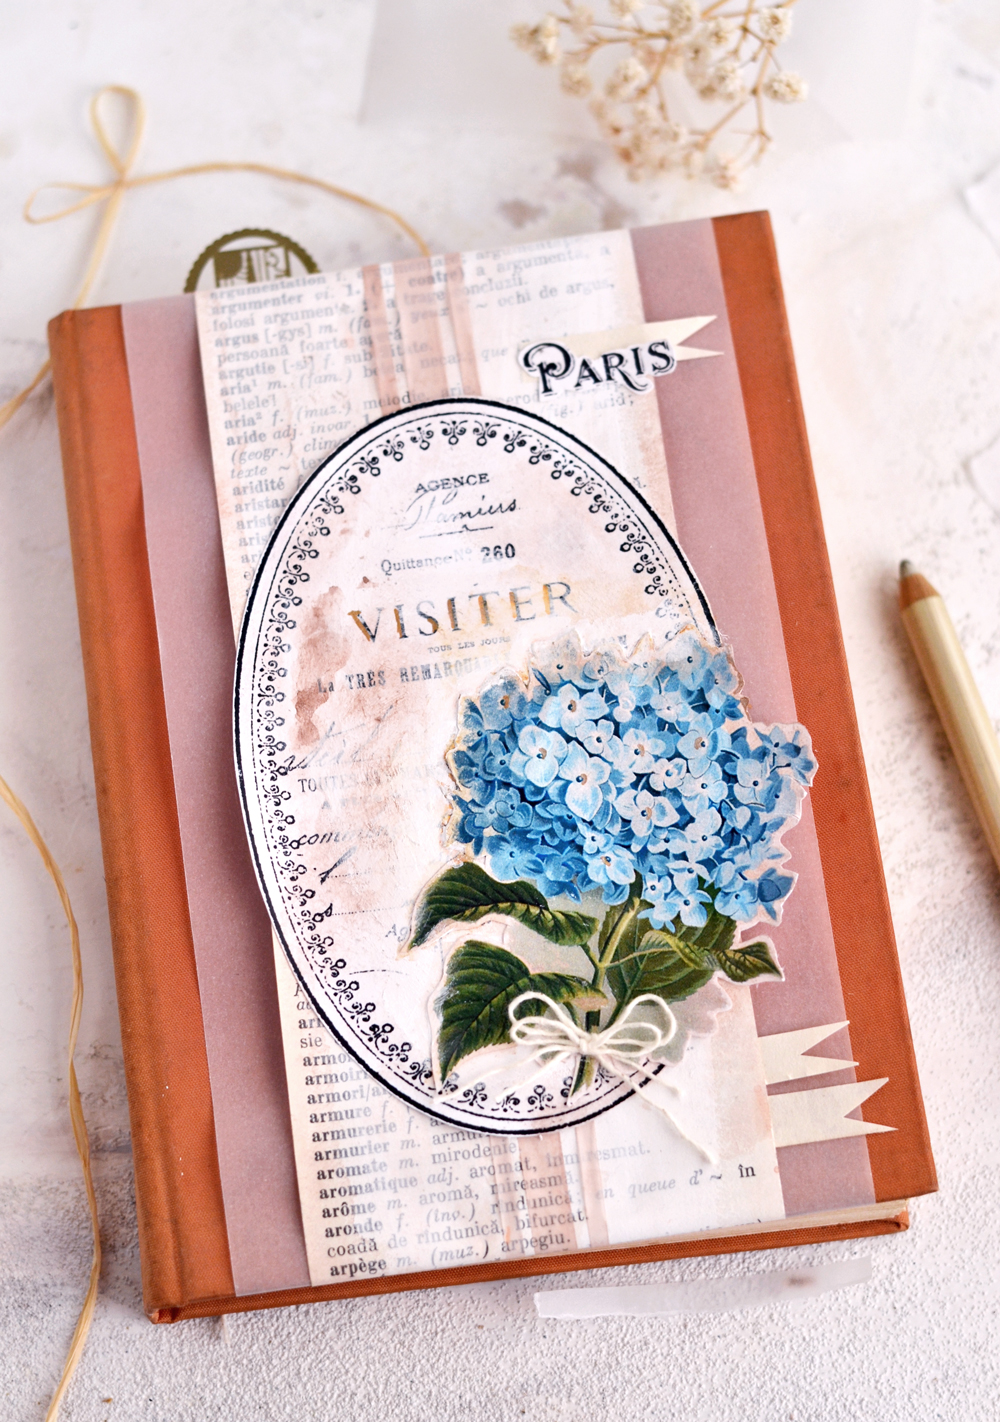
Hello, Graphics Fairy friends! I’m Diana from Dreams Factory and I’m happy to be here once again for our monthly project – this time we are making a French style DIY Art Journal Cover! We will be using a few simple supplies, and a Free Printable, to create a beautiful mixed media cover for our art journals, a few different mediums and papers to create a layering effect that will add some chic dimensions to our work.
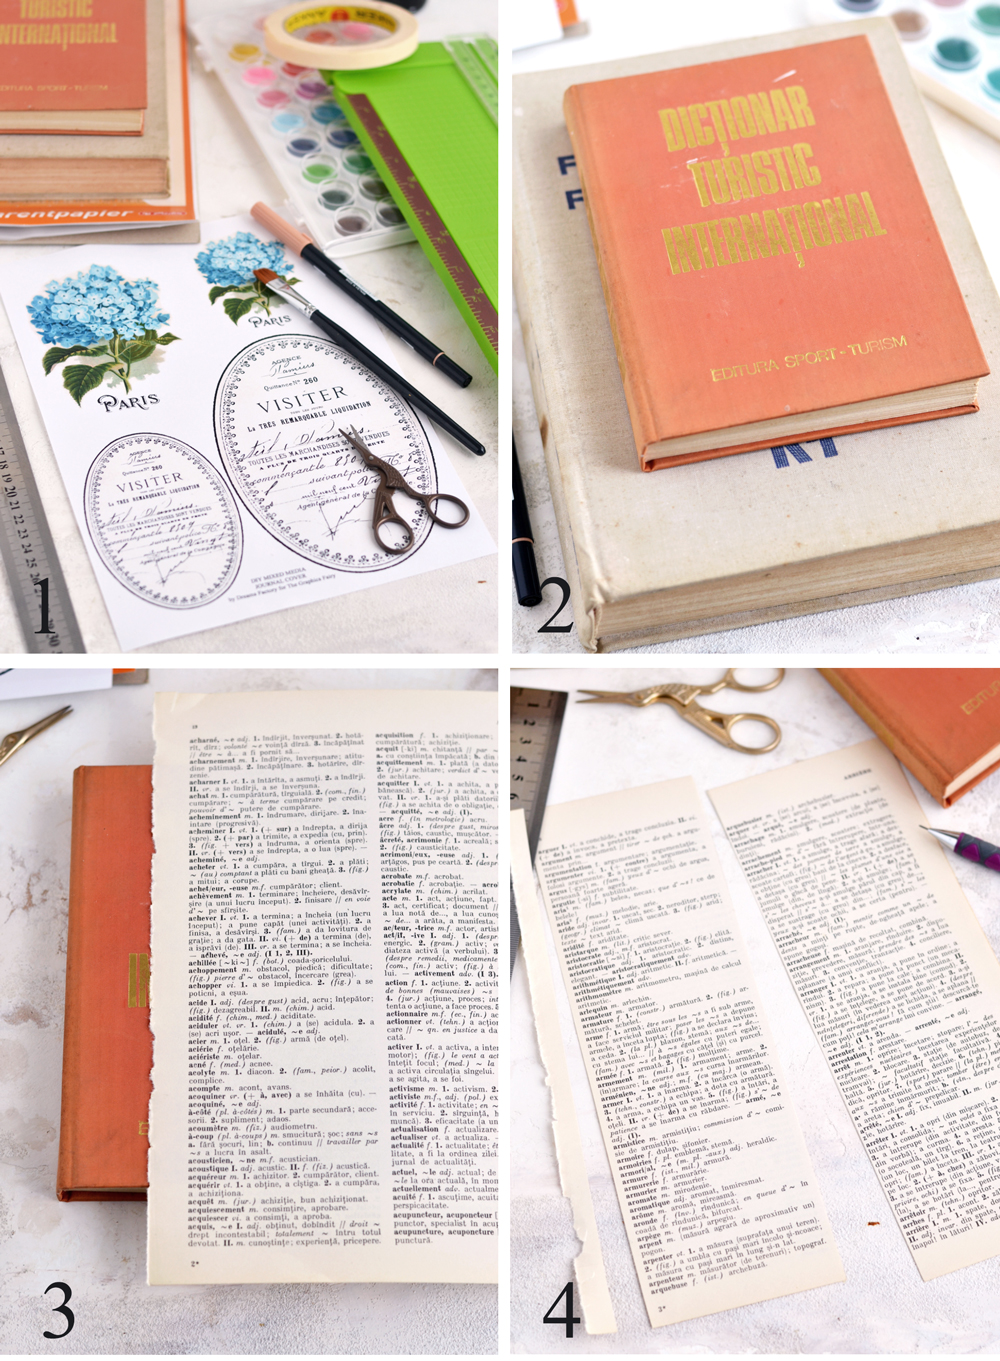
My new art journal is actually an old dictionary I had around. I knew I would turn it into something beautiful at the right time and now it looks like that time has come! The dictionary is not very big, which makes it perfect for easy handling (even travelling), has hard covers and an interesting vintage almost rusty brownish color. It’s not really the typical color I would choose, but I decided to step out of my comfort zone for this project (we should all do that from time to time!) and keep the color as it is! I would say it was a pretty good decision!
TIPS & TRICKS
If you don’t have a dictionary, you can use any other book – old or new. My first choice would be an old book, because it could give much more character to the whole project, but a new one would be fine too.
If you don’t love the color of the book you are planning on turning into an art journal, you can use acrylic paint (or chalk paint), or coats of gesso, to paint the cover as you wish! You can choose a more neutral color, a pastel, a whimsical or a quirky color … the sky is the limit!
The French oval printable with its amazing vintage frame that I’m sharing for this project might be familiar to you, because I used something similar to decorate my DIY French Seltzer Bottles and my DIY Painted and Distressed French Bottles. I really love this oval frame from The Graphics Fairy so I thought why stop at one project when you can just simply reinvent things and create something beautiful over and over again, right?
For the central focus of my project I decided to go with this stunning blue hydrangea, which doesn’t really need any introduction! But if you like any other flower or botanical image from The Graphics Fairy more, feel free to use that instead, this will be your art journal cover after all, it will have to be something that YOU REALLY LOVE!
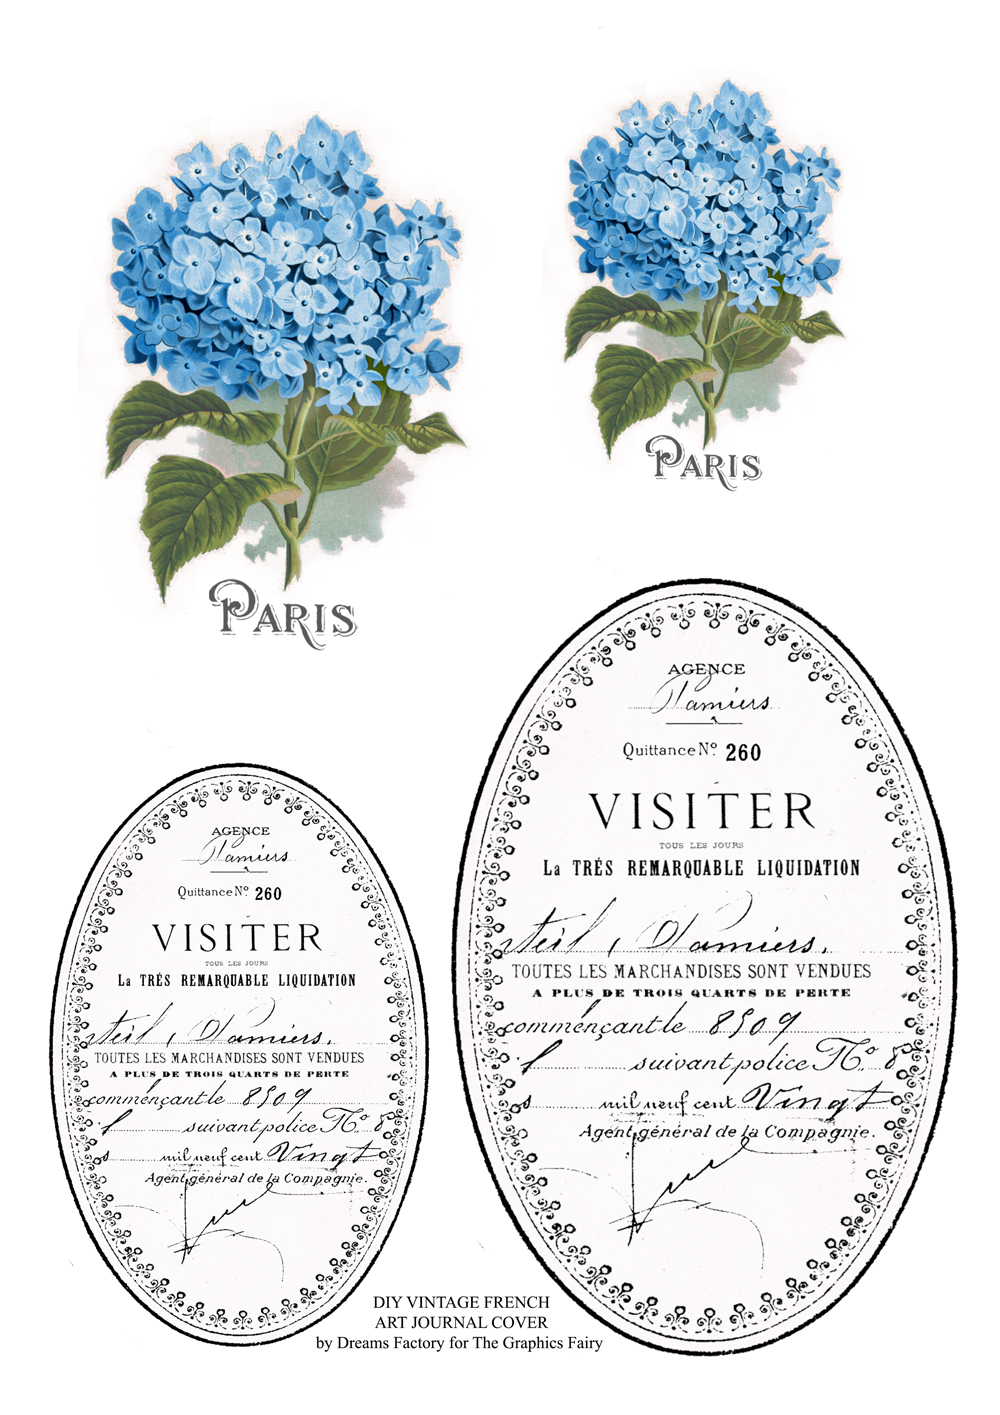
—-> Click HERE to Download the Full Size Printable PDF <—-
DIY Art Journal Cover Supplies:
- Hydrangea & French oval printable
- cardstock paper (to print the printable)
- laserjet printer
- old or new dictionary / book with hard covers for your art journal
- a page from an old or new larger dictionary / book that would wrap around your art journal cover
- gesso
- paper glue
- watercolors OR highly diluted acrylic paint
- brushes
- scissors
- trimmer OR a ruler and a pencil
- tracing paper or baking paper (a size that would also wrap around your art journal cover)
- masking tape (optional)
- a metallic gel pen (optional)
INSTRUCTIONS:
1. Gather all the materials and print the free printable that I created for this project.
2. Make sure your other book is larger than your art journal, you need to be able to vertically wrap one of its pages around your art journal cover. I used a page from another old French dictionary from my stash but you can use a page from any other book you have around. When choosing your page, it would be great to look for one that has rather positive words or sentences, so you won’t end up with ‘bad vibe’ words or messages on your cover
P.S. If you don’t have anything around that you can use at this stage, you could just print and use one of the lovely 5 Printable Vintage Dictionary Pages.
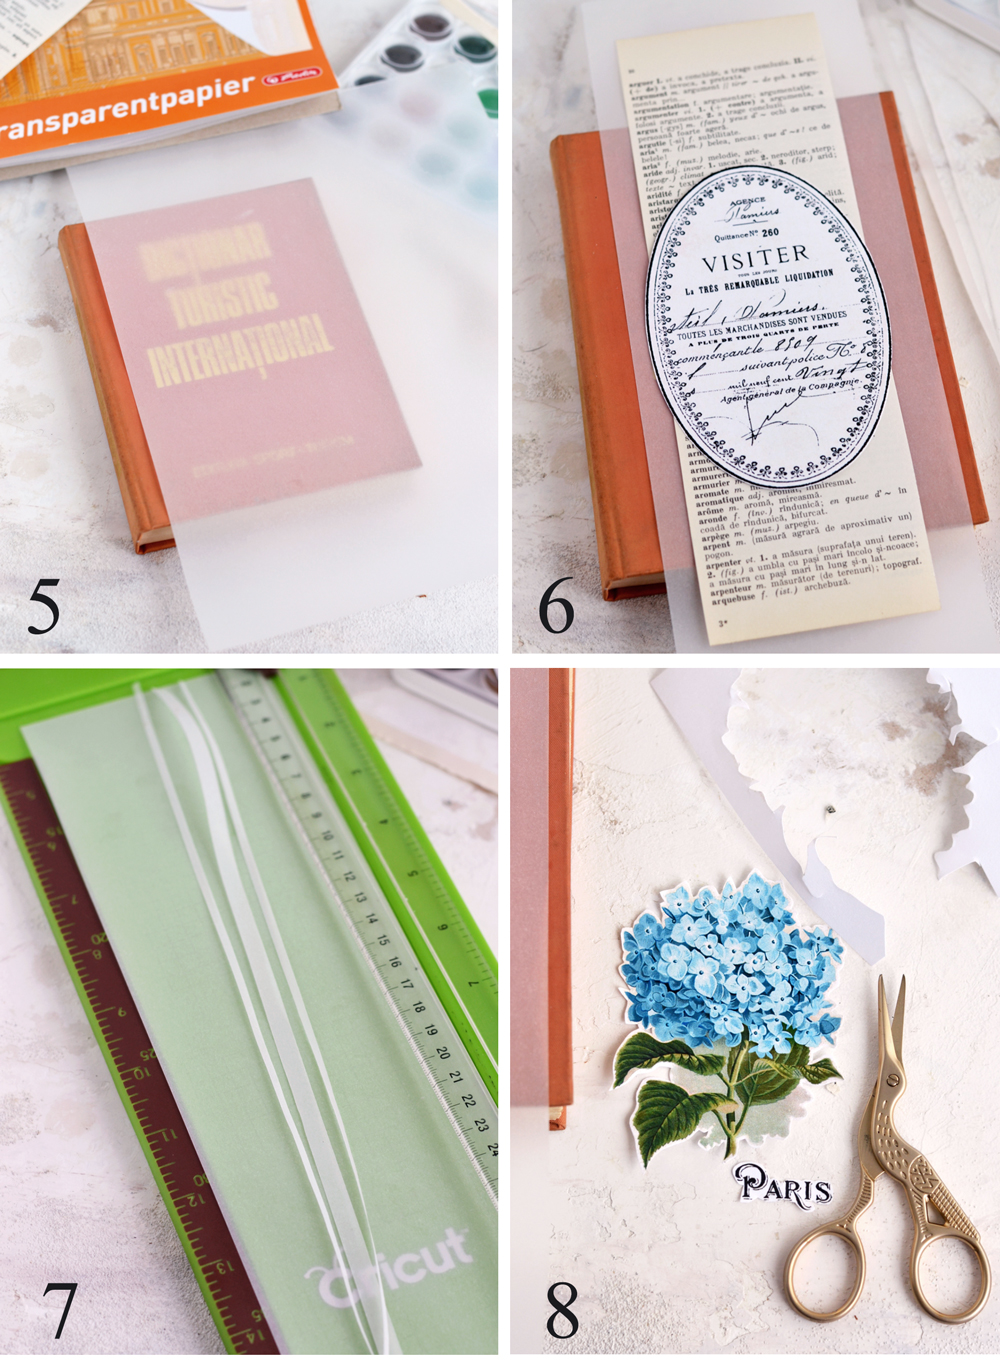
3-4. Tear the page that you decided to use from the larger dictionary, measure how much you want to cut and cut a long vertical strip. I initially tried using my trimmer to cut the old dictionary page to size, but the paper wrinkled so bad I just couldn’t use it for this project anymore. I had to choose another page, I measured and traced the size using a ruler and a pencil, then I used my scissors to cut it.
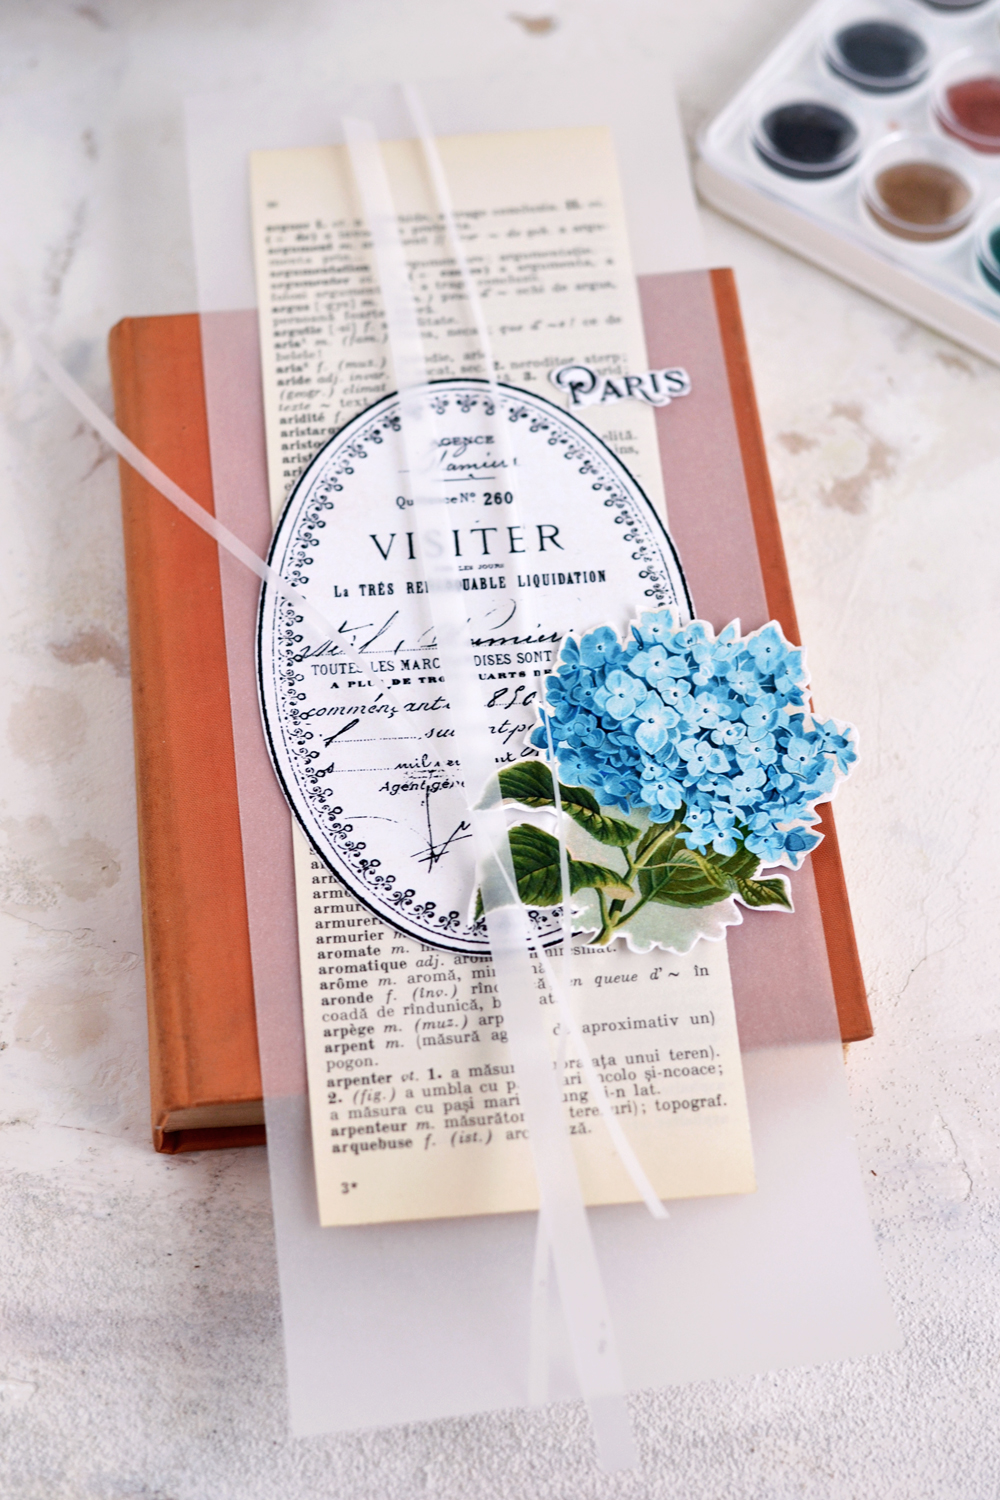
5. Place the tracing paper on top of your art journal and move it around to see how much space you want to cover. I only left about 1 cm uncovered on the left and right side. It was enough to cover the most part of the art journal but also managed to create a nice contrast with its color. Remember, you only need to vertically cut the tracing paper, because you’ll need to wrap this one too around your art journal cover.
6. As our final dimensions you should have:
- a larger strip cut from tracing paper that would partially cover our art journal but would also expose some of its beautiful color on the sides
- a strip cut from the page of the larger dictionary / book page that should be narrower than our tracing paper
- our French oval frame image that should be smaller than our tracing paper, but a little bit bigger than our dictionary page strip
7. I decided to also create a sheer grain sack looking effect that would somehow complement the look I had in mind for my Journal Cover. So I cut 3 strips of long vertical tracing paper (1 wider and 2 narrower in size). You can skip this step if you want, but I think it was quite a nice addition to the whole look.
8. Use your scissors to cut your hydrangea and make sure you leave a small white border all around it, it would help us add some depth when coloring afterwards. The white border should follow the organic shape of the image and should have a rounded cut edge (rather than a blunt cut one).
All the elements should match the size of your art journal and should completely hide the writing that might be on the original cover!
Now that we have all our elements ready, let’s bring them all together to create our unique and chic (unichic, hehe) collage cover. This is the part when you can get really creative and turn everything into your own piece of art. There is no right or wrong, just free your mind and let your creativity guide you!
9-10. I started by brushing a thin layer of gesso on my dictionary page strip (just here and there, not everywhere) to somehow tone down the writing. Then I added rusty brown watercolor speckles and I used a paper towel to dab them on the page after a few seconds. I used more watercolor paint on the edges to give them a vintage and worn feel.
TIPS & TRICKS
What I really love about watercolors is the fact that you can always repair your ‘mistakes’. ALWAYS! So if you think you added too much paint and everything is ruined – that might just happened to me once or twice – add more water and all is good again in the world. You will need a little bit more time for everything to dry afterwards, but I prefer having this option, so I don’t mind the waiting.
11-12. I followed the same steps for the vintage oval French frame using watercolors and gesso to tone down the writing and give it a similar overall look.
I also completely painted the grain sack stripes with the same rusty brown watercolor. They wrinkled quite a lot during the process, but I was able to use them after drying.
13. I used the same brown watercolor (quite diluted this time) and painted the white border of the hydrangea to create that overall vintage effect. I let everything dry completely before moving to the next step.
P.S.: You can also check my other mixed media altered book journal for more inspiration!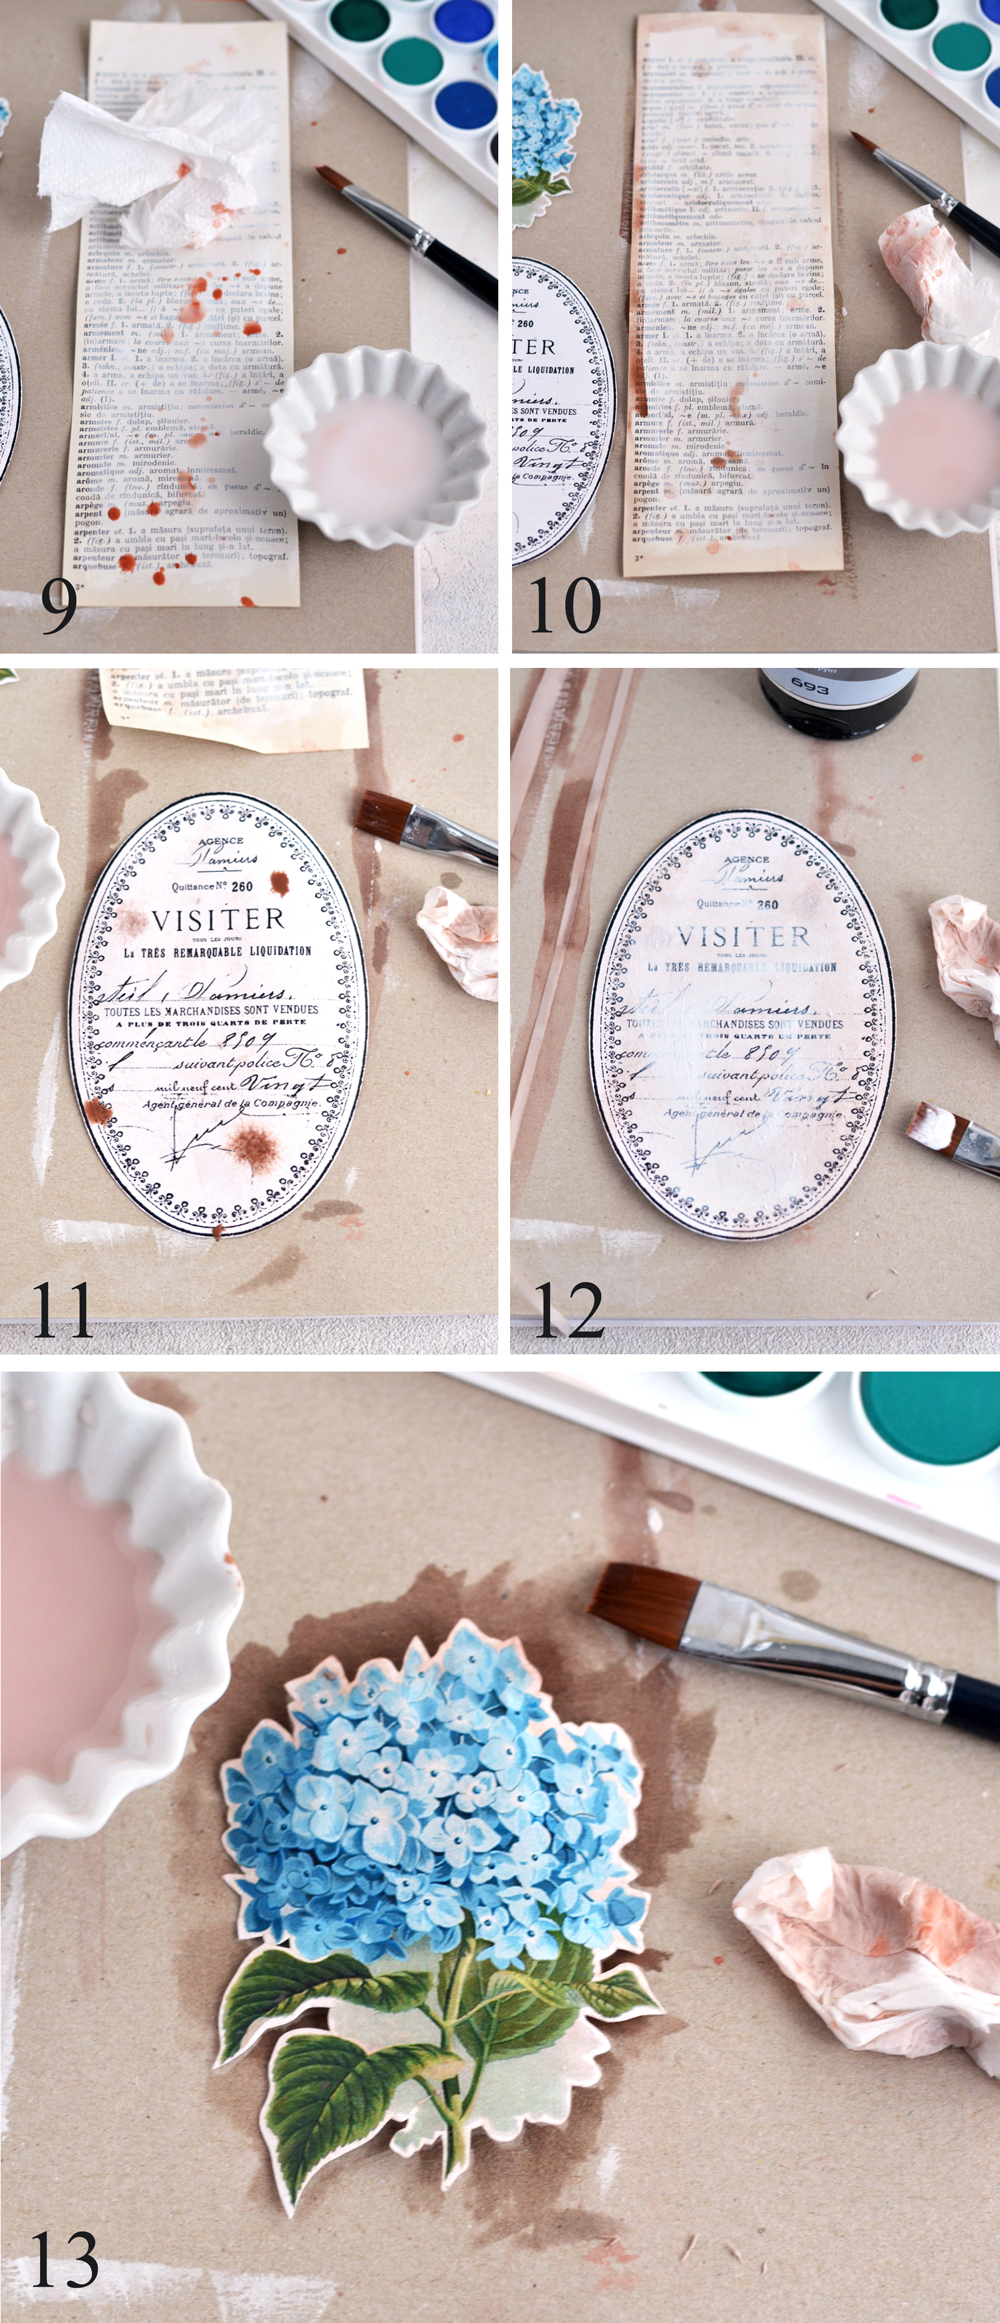
14-15. I thought it would be easier if I would assemble the first elements together instead of individually gluing them to the cover. I was right … again! It was so much easier! I glued the dictionary page on my tracing paper and then glued the grain sack stripes on top using paper glue for all the elements.
16. I placed the whole assemble on top of my cover and using a small amount of paper glue in the middle I carefully centered it (both horizontally and vertically) on the cover.
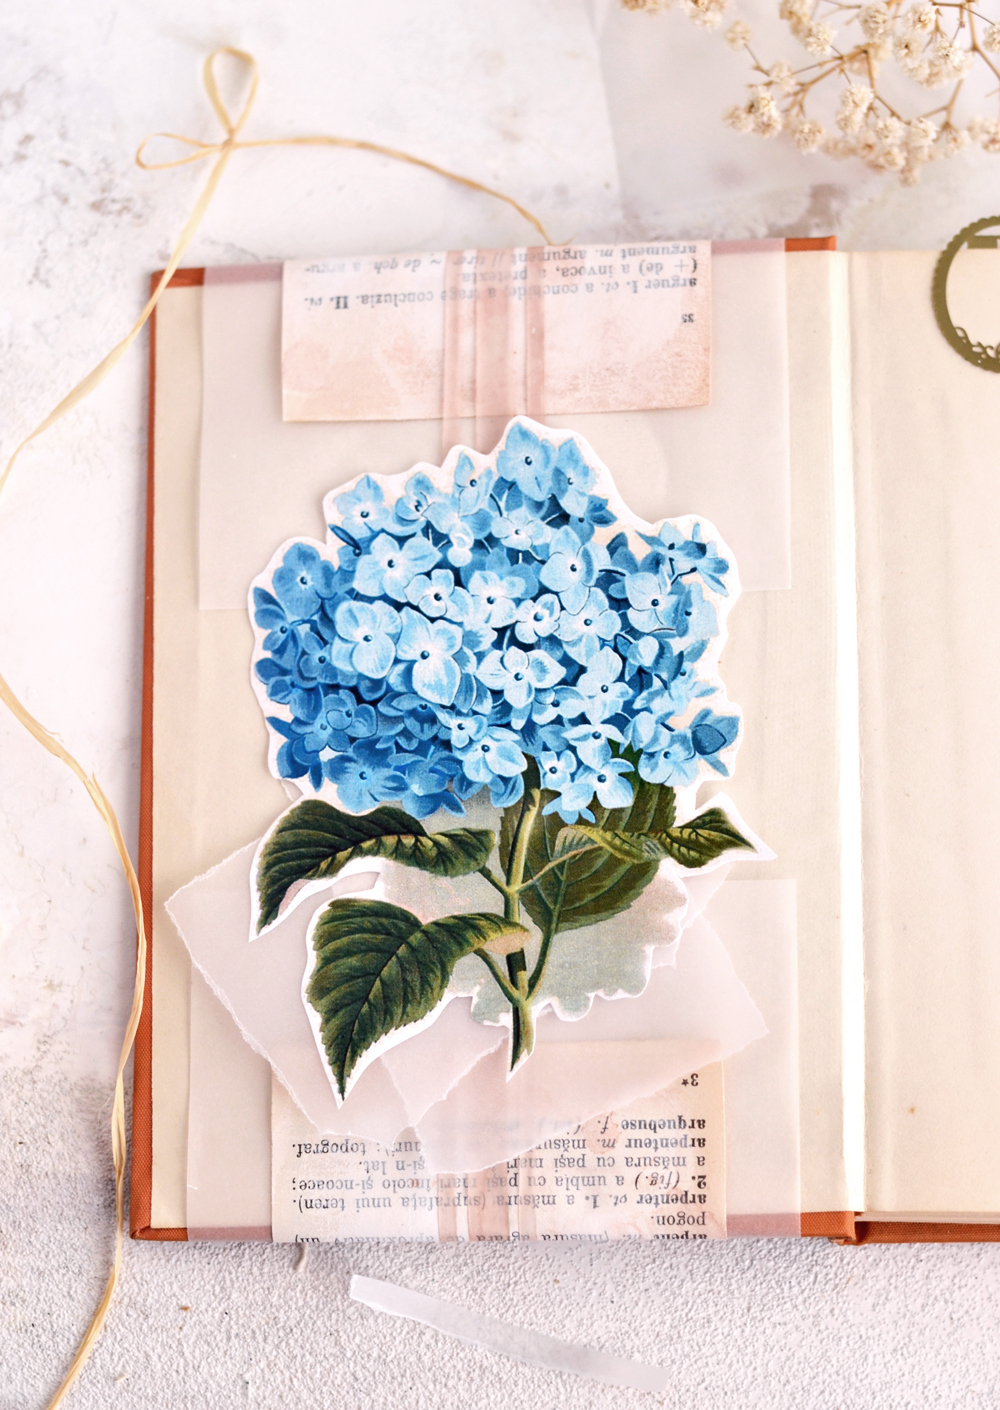
17-18. I opened my art journal and I first folded in the upper part of the whole assemble and used some more glue to adhere it to the inside of the cover. I also used some masking tape to strengthen everything even more and then followed the same steps to fold and glue the lower part of the assemble.
19. Everything looked … pretty much amazing! 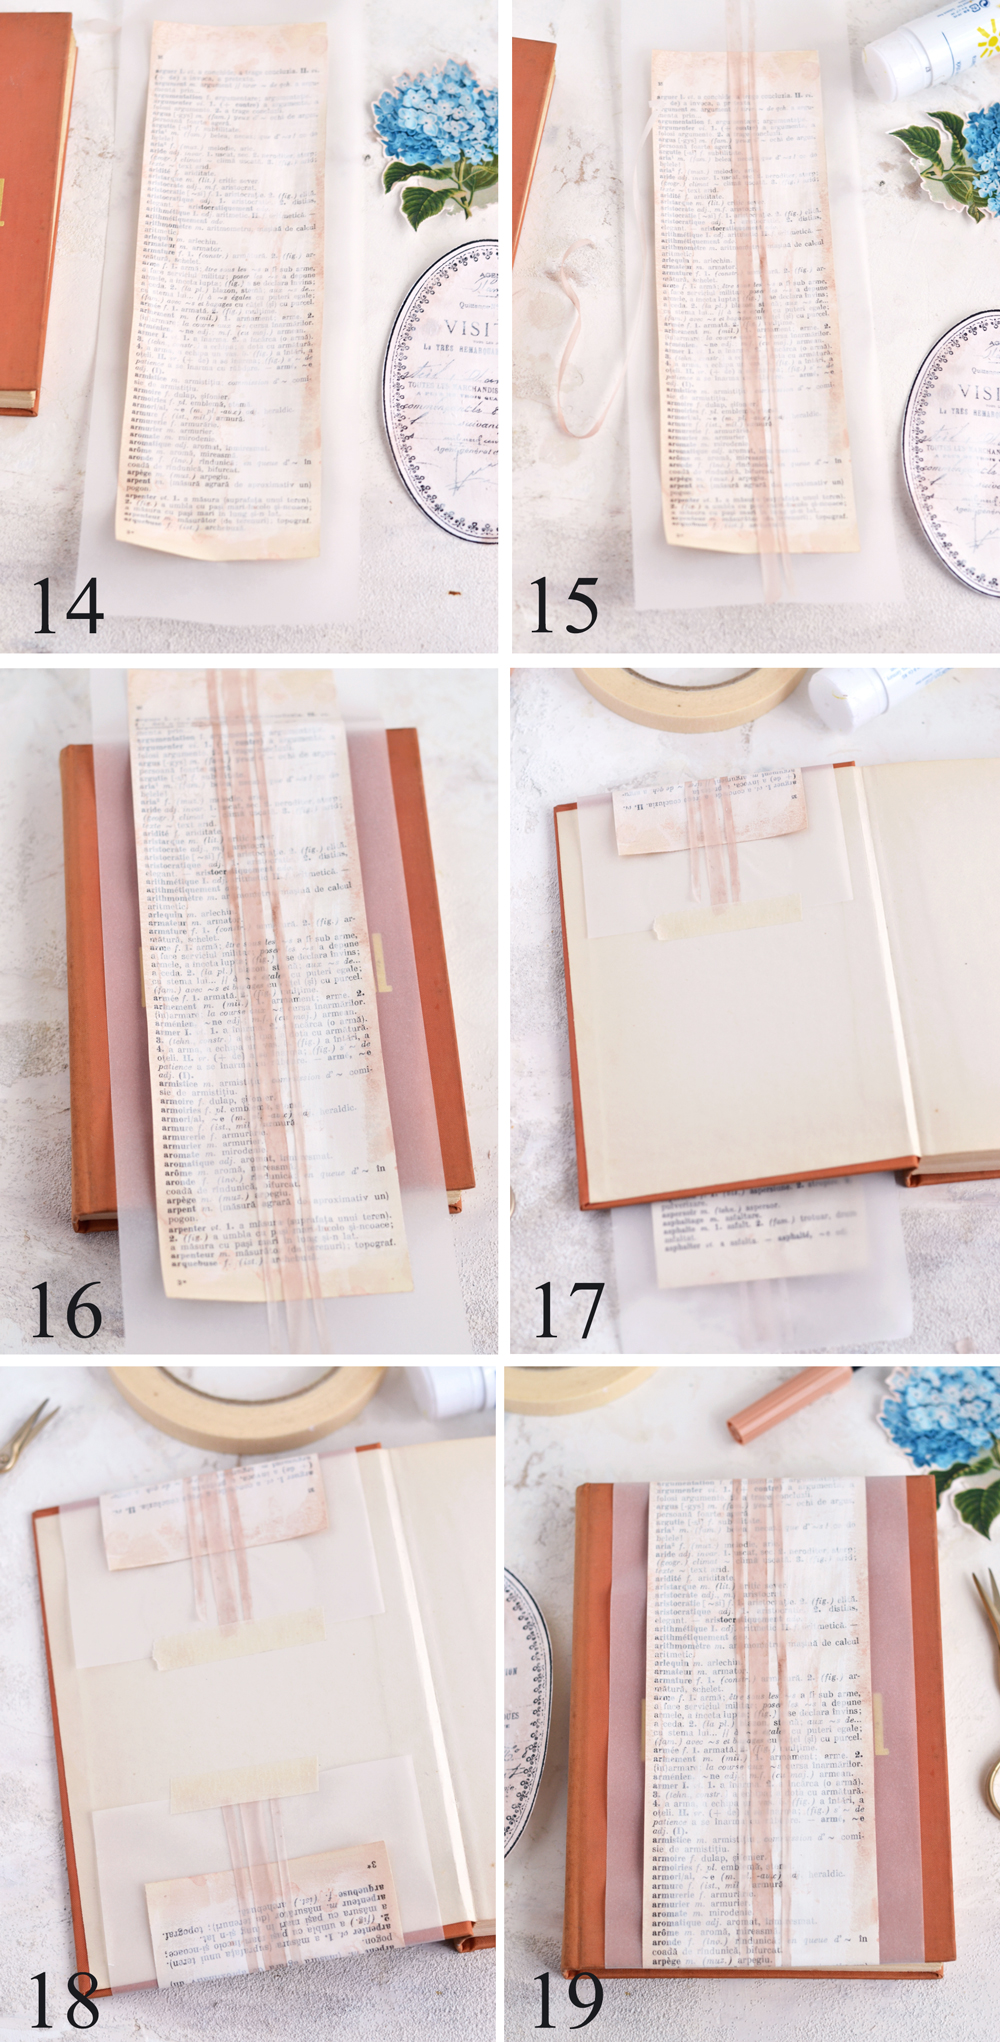
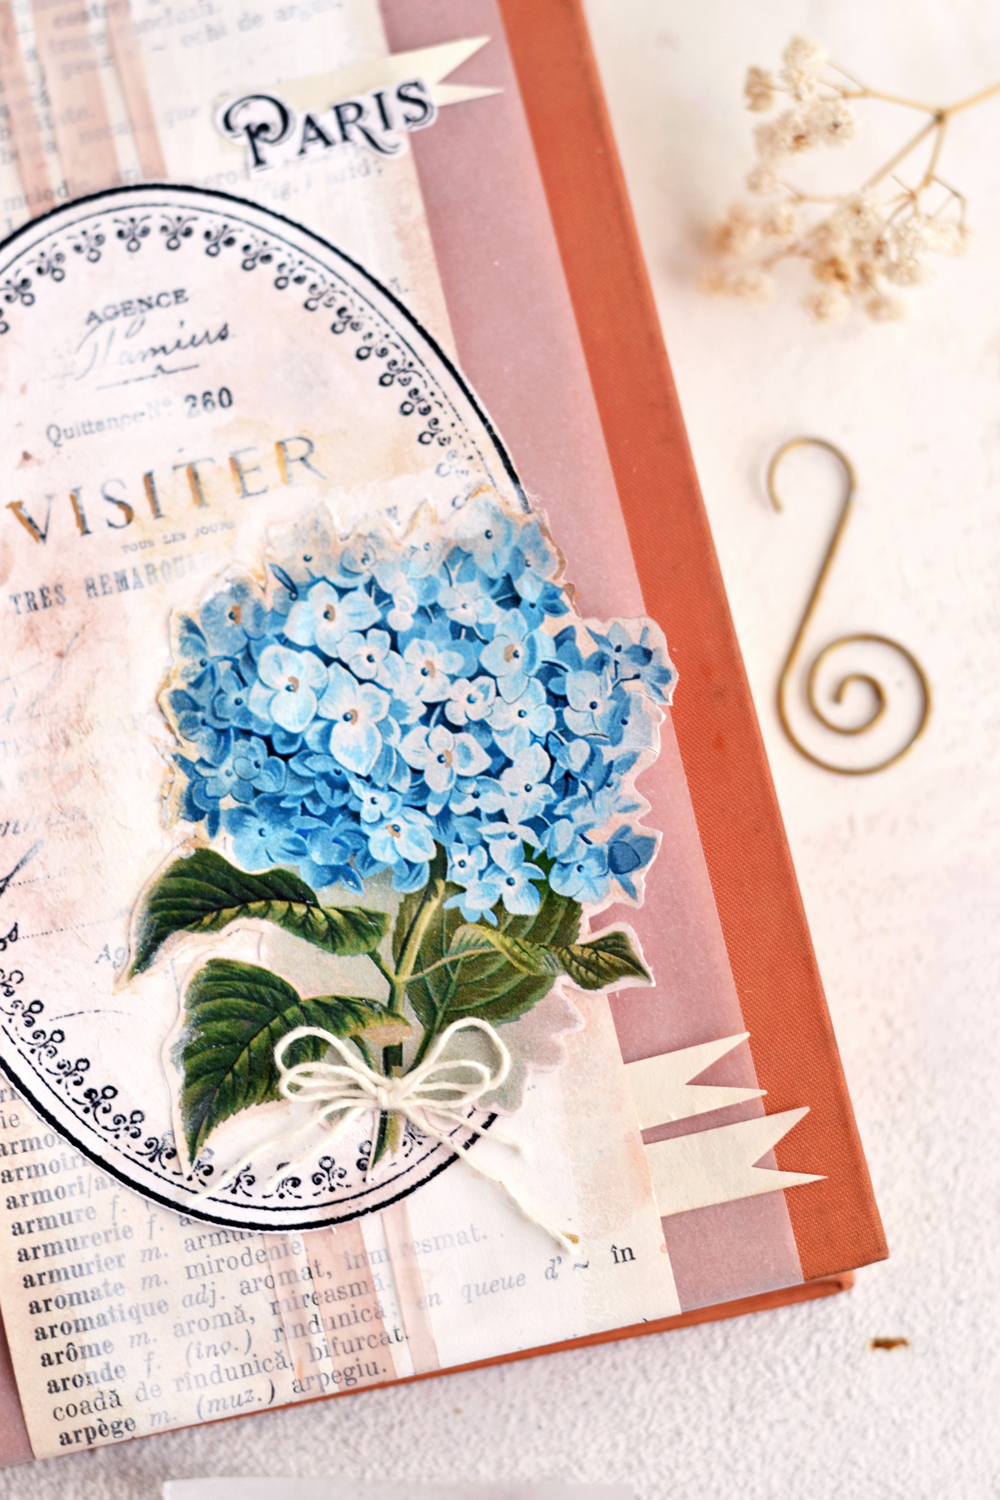
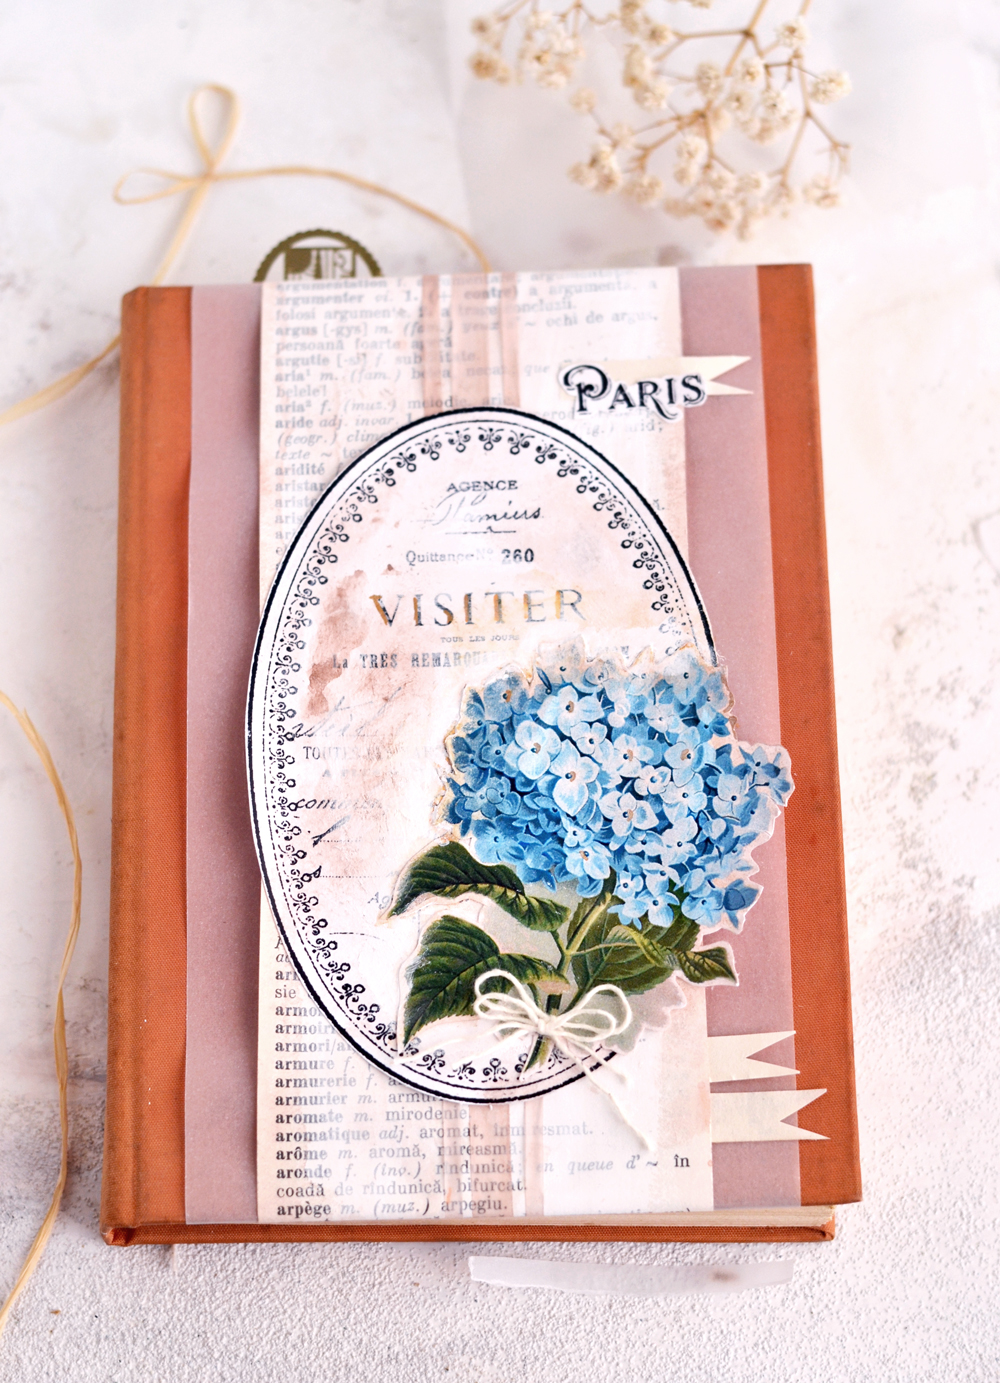
20-21. Now it’s the perfect time to glue the French oval frame on top. And to find the perfect spot for your hydrangea! 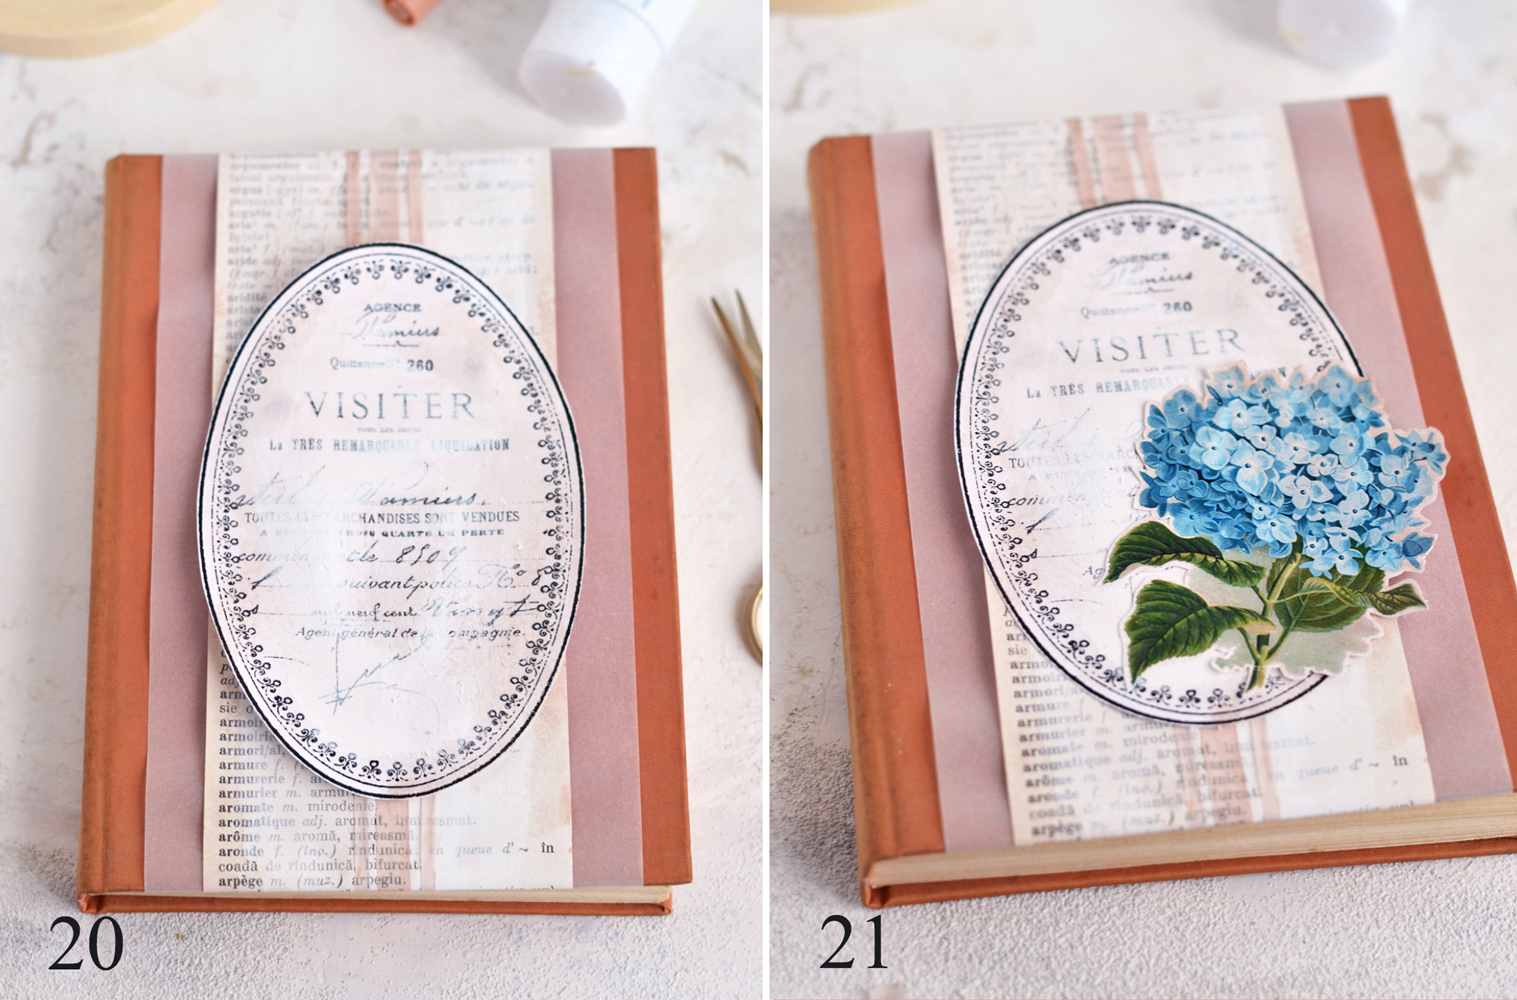
You could stop right now and use your already amazing DIY Vintage French Art Journal Cover … or go deeper for all those small details that will add more character to your project.
Like these pretty little bows made from baker twine! 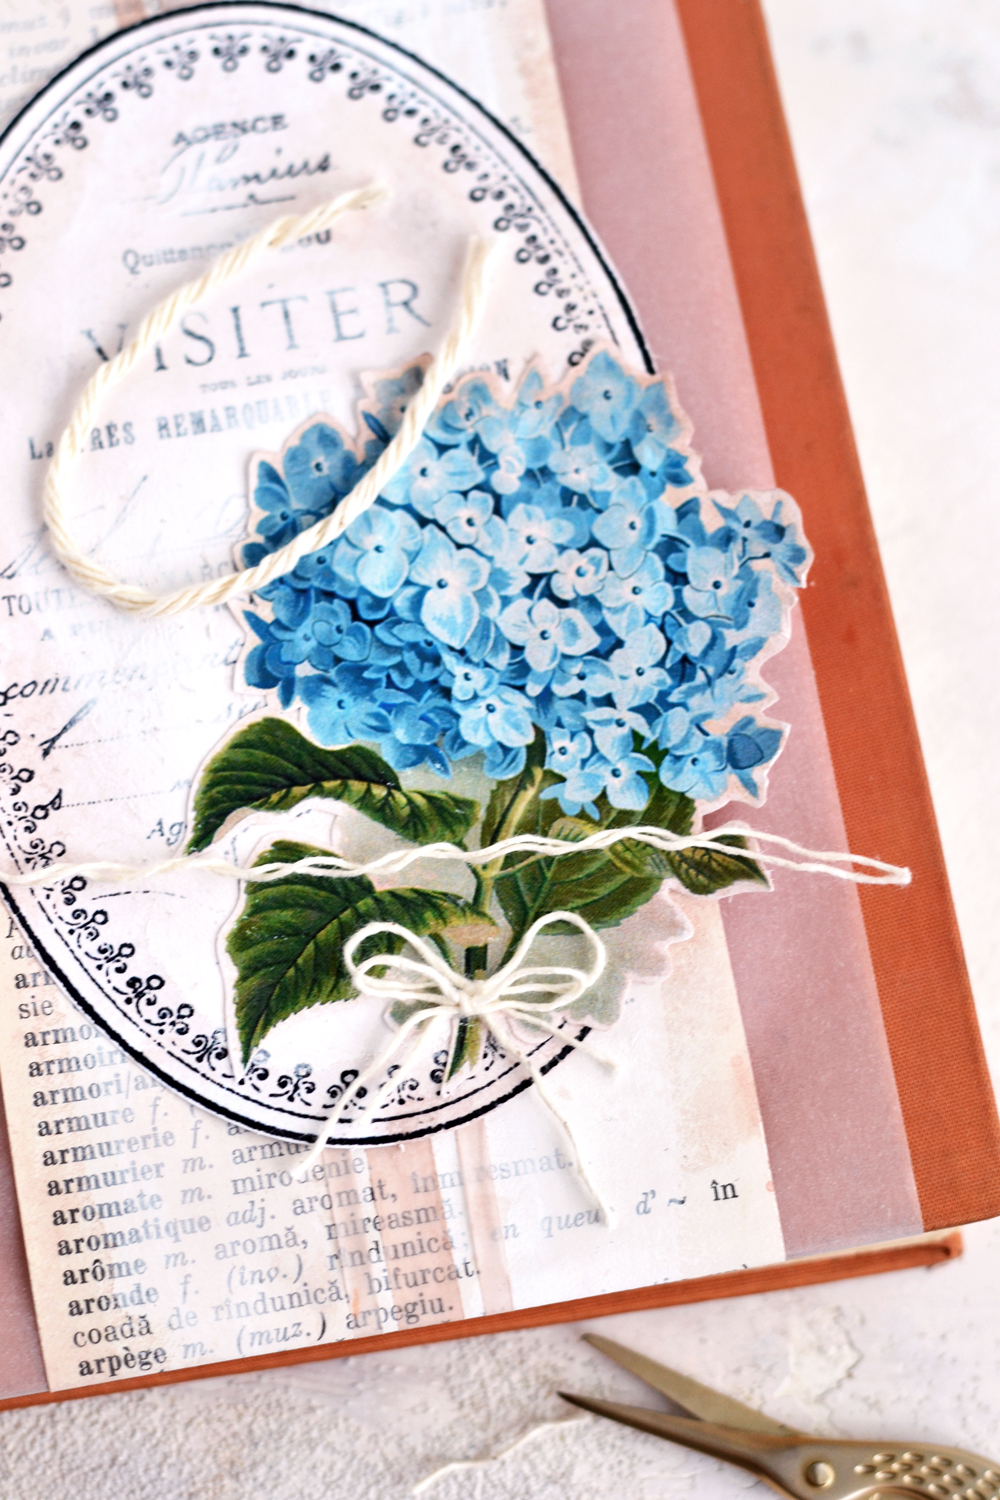
Or these lovely scrap pieces of paper that I turned into small banners and tucked them in between the dictionary layer and the tracing paper using a small amount of glue. 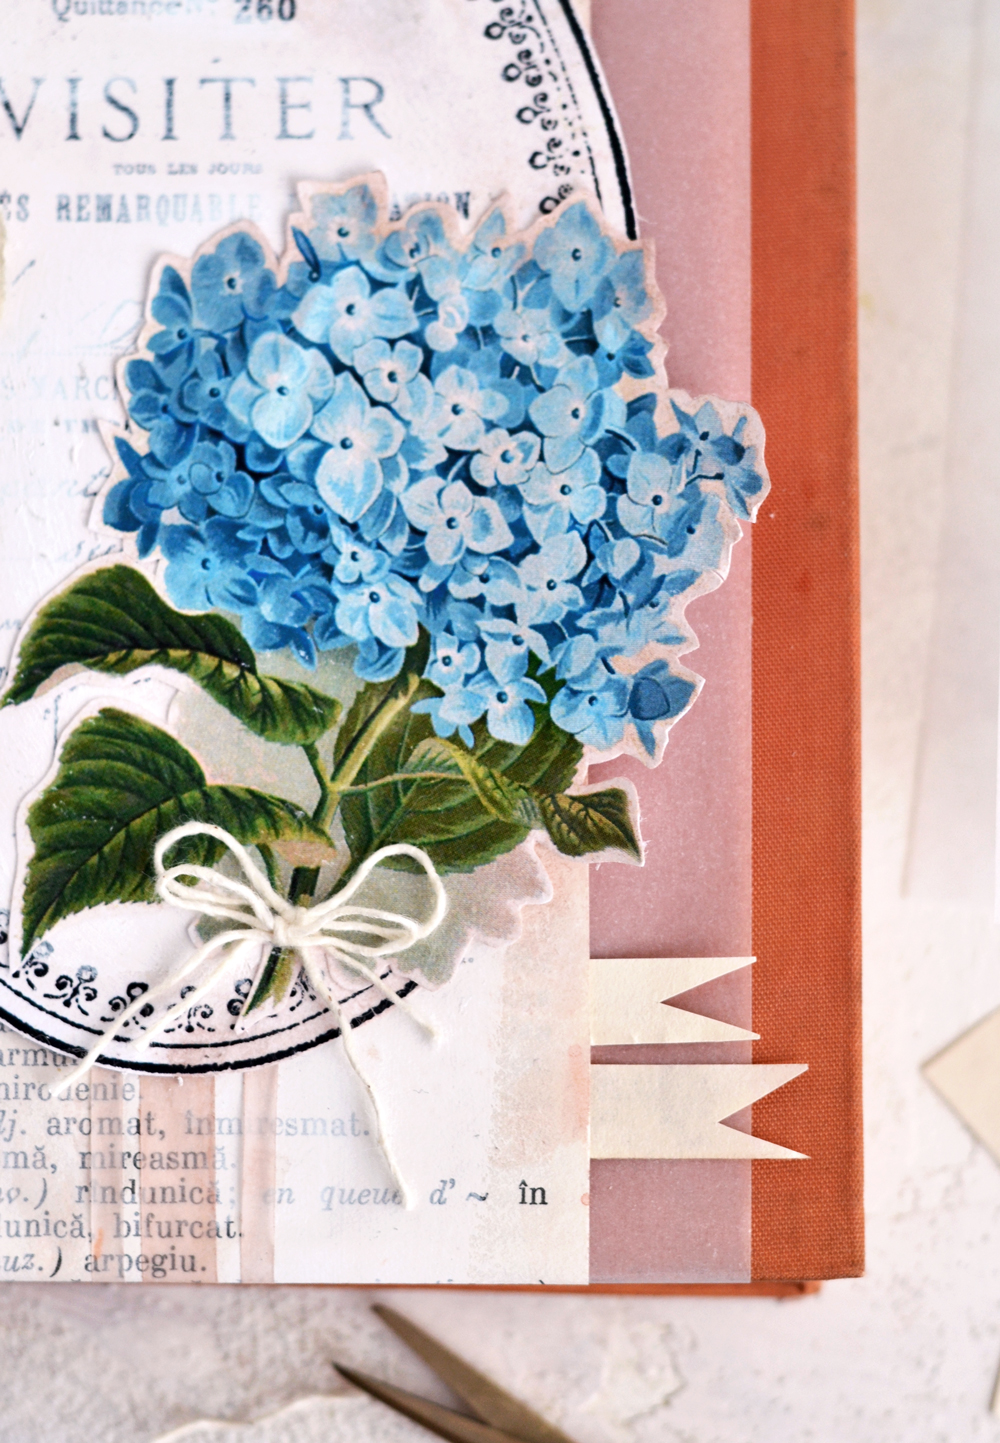
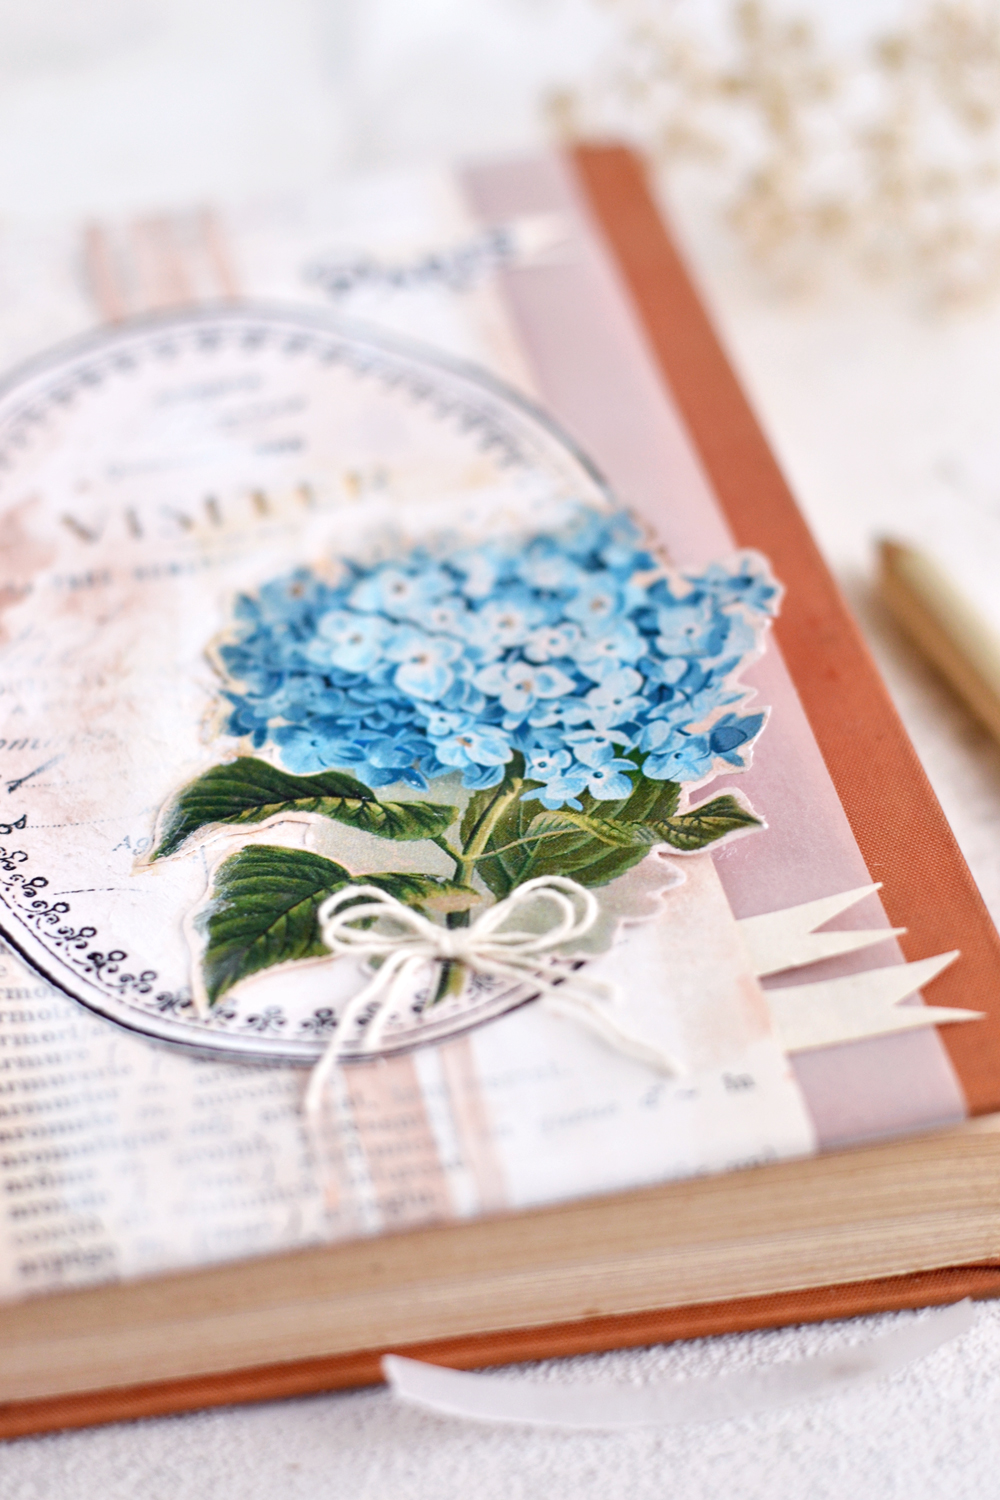
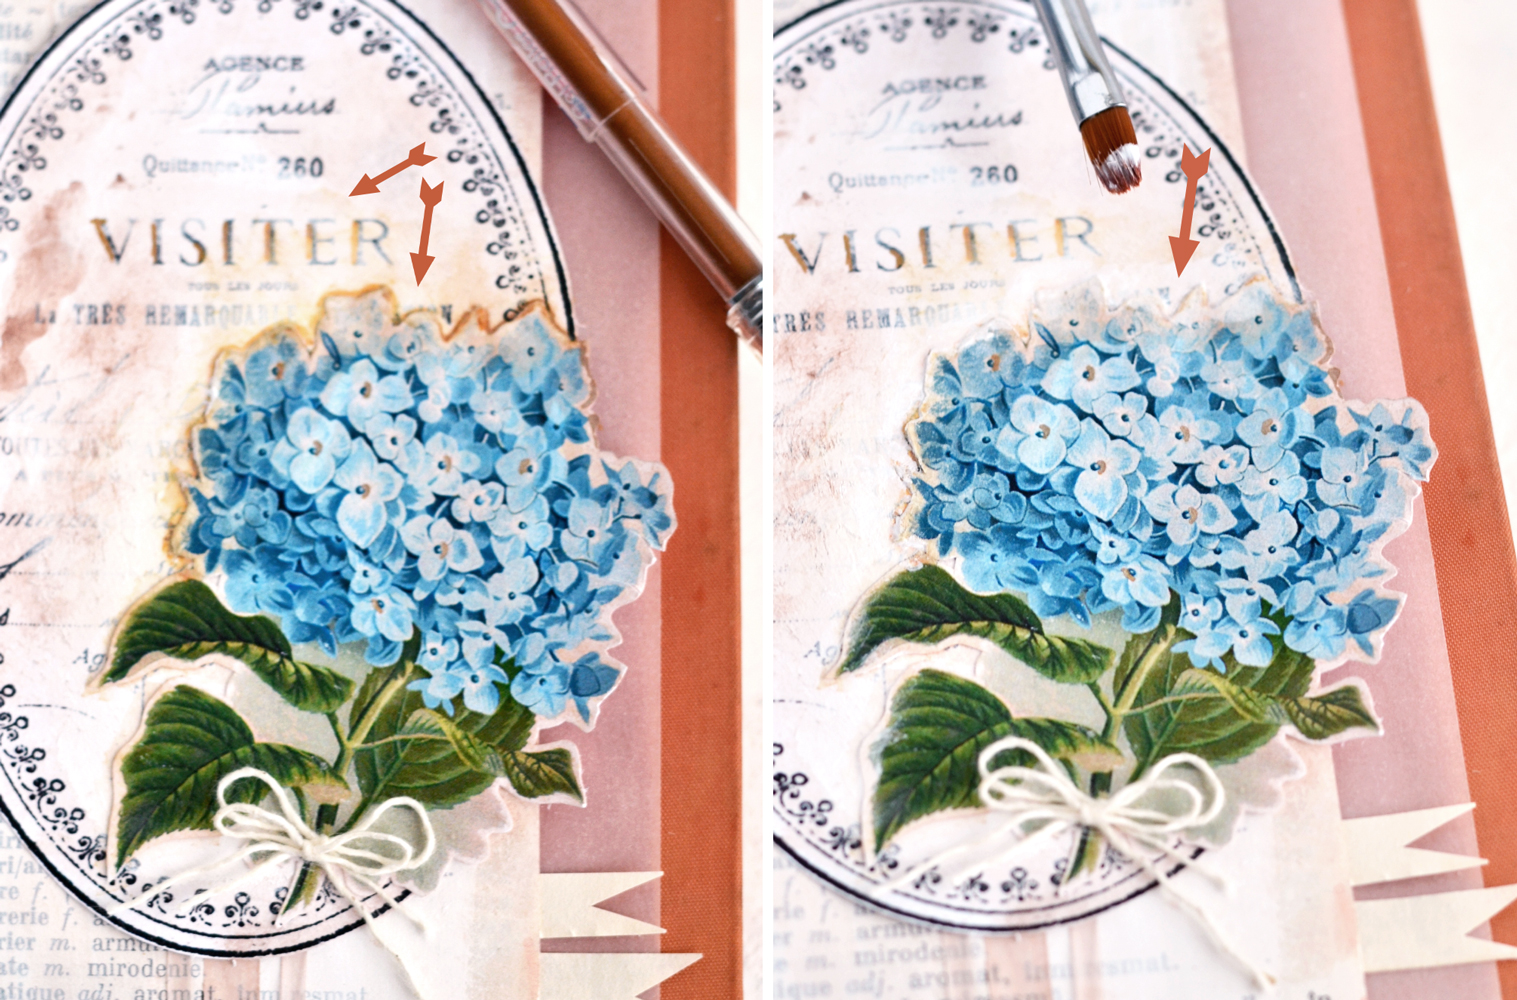
Or the other small traces of metallic gel pen, colored pencils or watercolors that you could use to highlight some of the writing or the contour of the flower. (left image)
Or the white gesso you might need to cover some of that-maybe-too-dark contouring you did on the flower earlier! As you can see, mistakes are allowed! (right image)
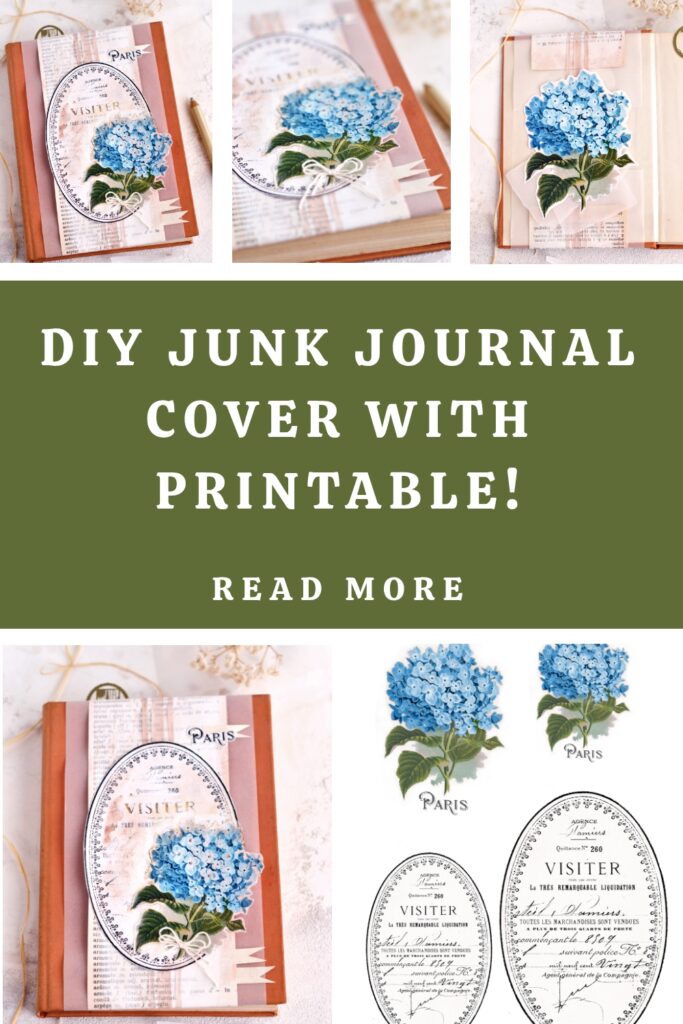
All the elements from the free printable are available in 2 different sizes, you will need to group and use all the smaller sizes together OR all the larger sizes together, depending on how small or large your art journal is. My art journal was quite small (12*17 cm / 5*7 inch) so I used all the smaller elements to create this beautiful Book Cover.
You can use the other elements to similarly decorate other larger art journal covers, or the inside of your art journal but you could also let your imagination run free again and find other unique ways of incorporating them into your creative life. Other somehow obvious choices would be junk journal covers, bullet journal covers or even planner covers. But I could also see today’s tutorial turned into amazing mixed media gift wraps for presents, birthday cards for friends or even smaller or larger vintage French signs for your home decor.
You can mix things up and combine different supplies that you already have in your craft room, like Washi tape, ink, acrylic mediums, brads, and a variety of media that you have on hand.
I actually used the larger hydrangea and some scrap pieces of tracing paper to decorate the inside of my new creation and I simply loved it!
Now it’s your turn! Go find that special old dictionary or book that would make a beautiful art journal and give this DIY Art Journal Cover project a try!
If you liked this project, you might also like my Printable Garden Stickers HERE.
Have fun creating!
Diana | Dreams Factory





Phyl says
Hi Karen,
Loved the Journal addition. Just made a copy of your version with the roses and Paris graphics for a dear friends birthday. Thanks for your inspiration, it was fun putting it all together.
graphicsfairy says
I am sure your friend loved it, very sweet of you Phyl 🙂