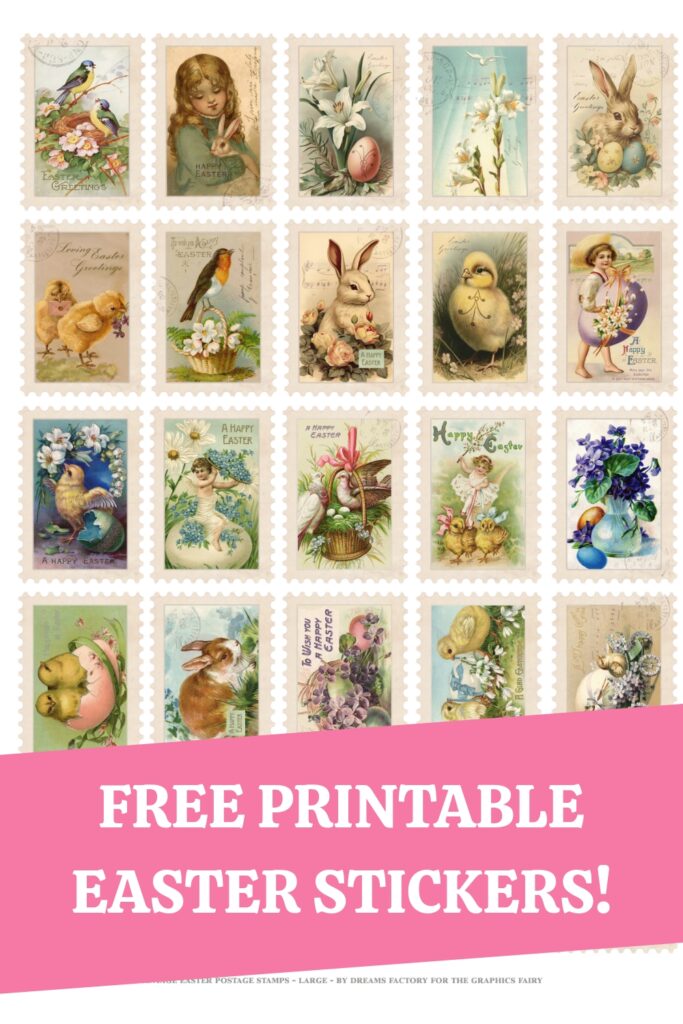
DIY Easter Stickers: Faux Postage Stamps
Hello Graphics Fairy friends! I’m Diana from Dreams Factory and I’m happy to be here again to share another DIY project with you! Today I will show you how to make these gorgeous Easter Faux Postage Stamps in several different sizes. These Easter Stickers will be perfect for adding a touch of chicness to your projects, they will instantly beautify and make them even more charming.
I always have so much fun creating these lovely faux postage stamps! I hope you already jumped on the stamp-making wagon and are enjoying making these yourself! To create that perforated edge stamps usually have we’ll use thinning sheers, that special tool from our beauty stash that completely transforms and makes them quite authentic looking.
If you have other decorative edge scissors that you would like to try, now would be the perfect time to use them. You can go in any direction with these beauties, the choice is all yours.
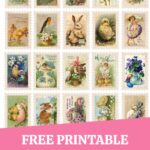
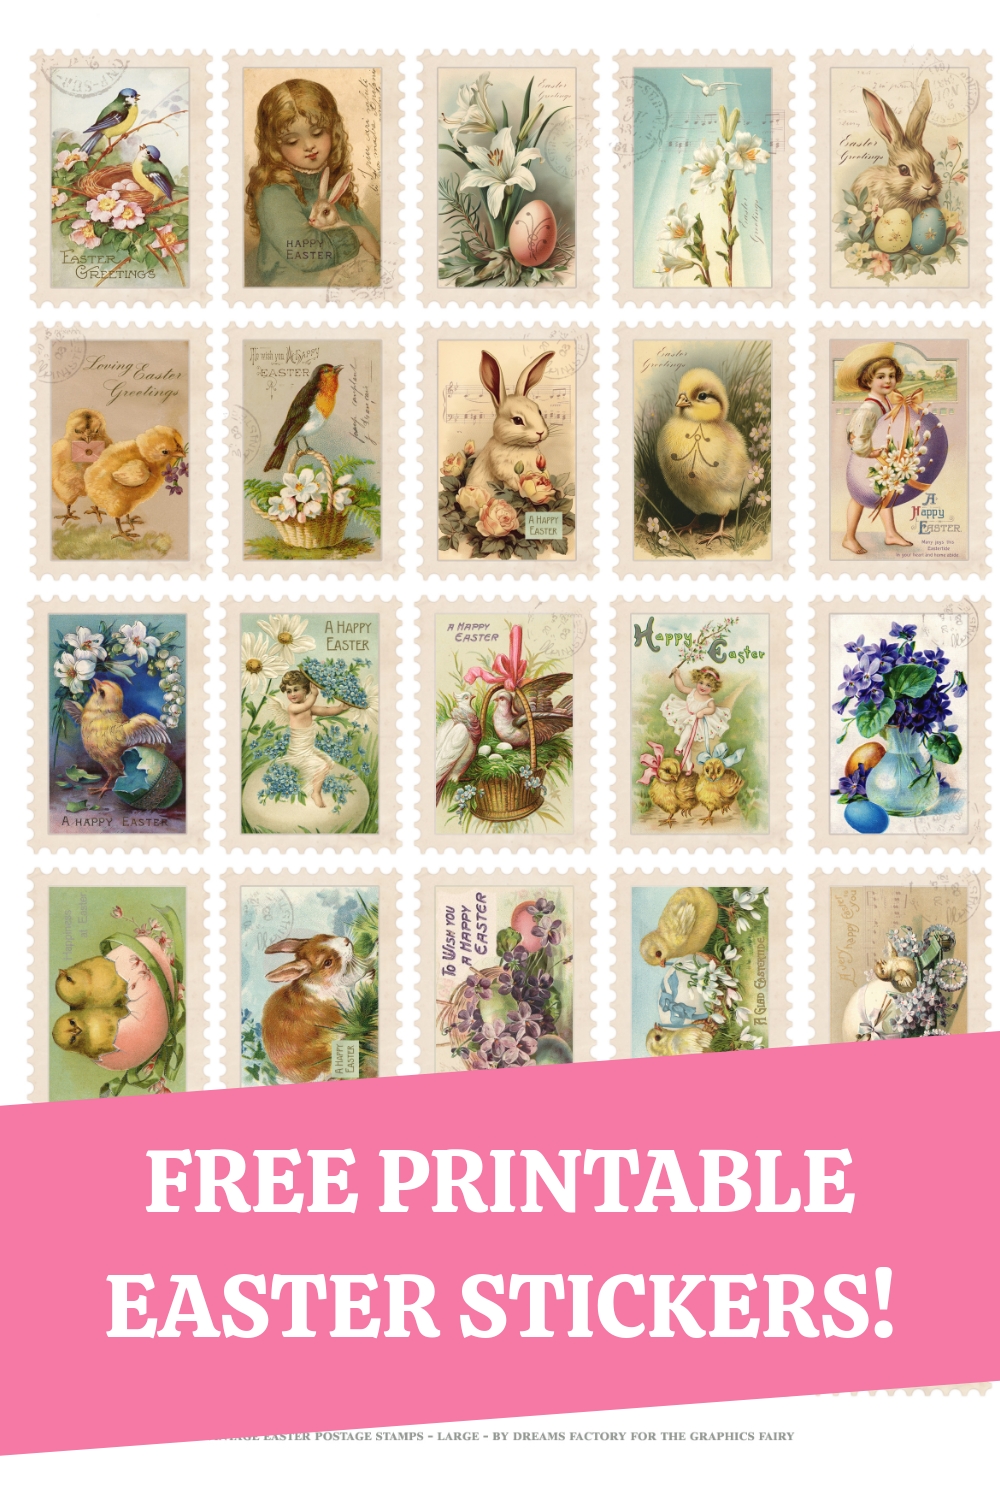
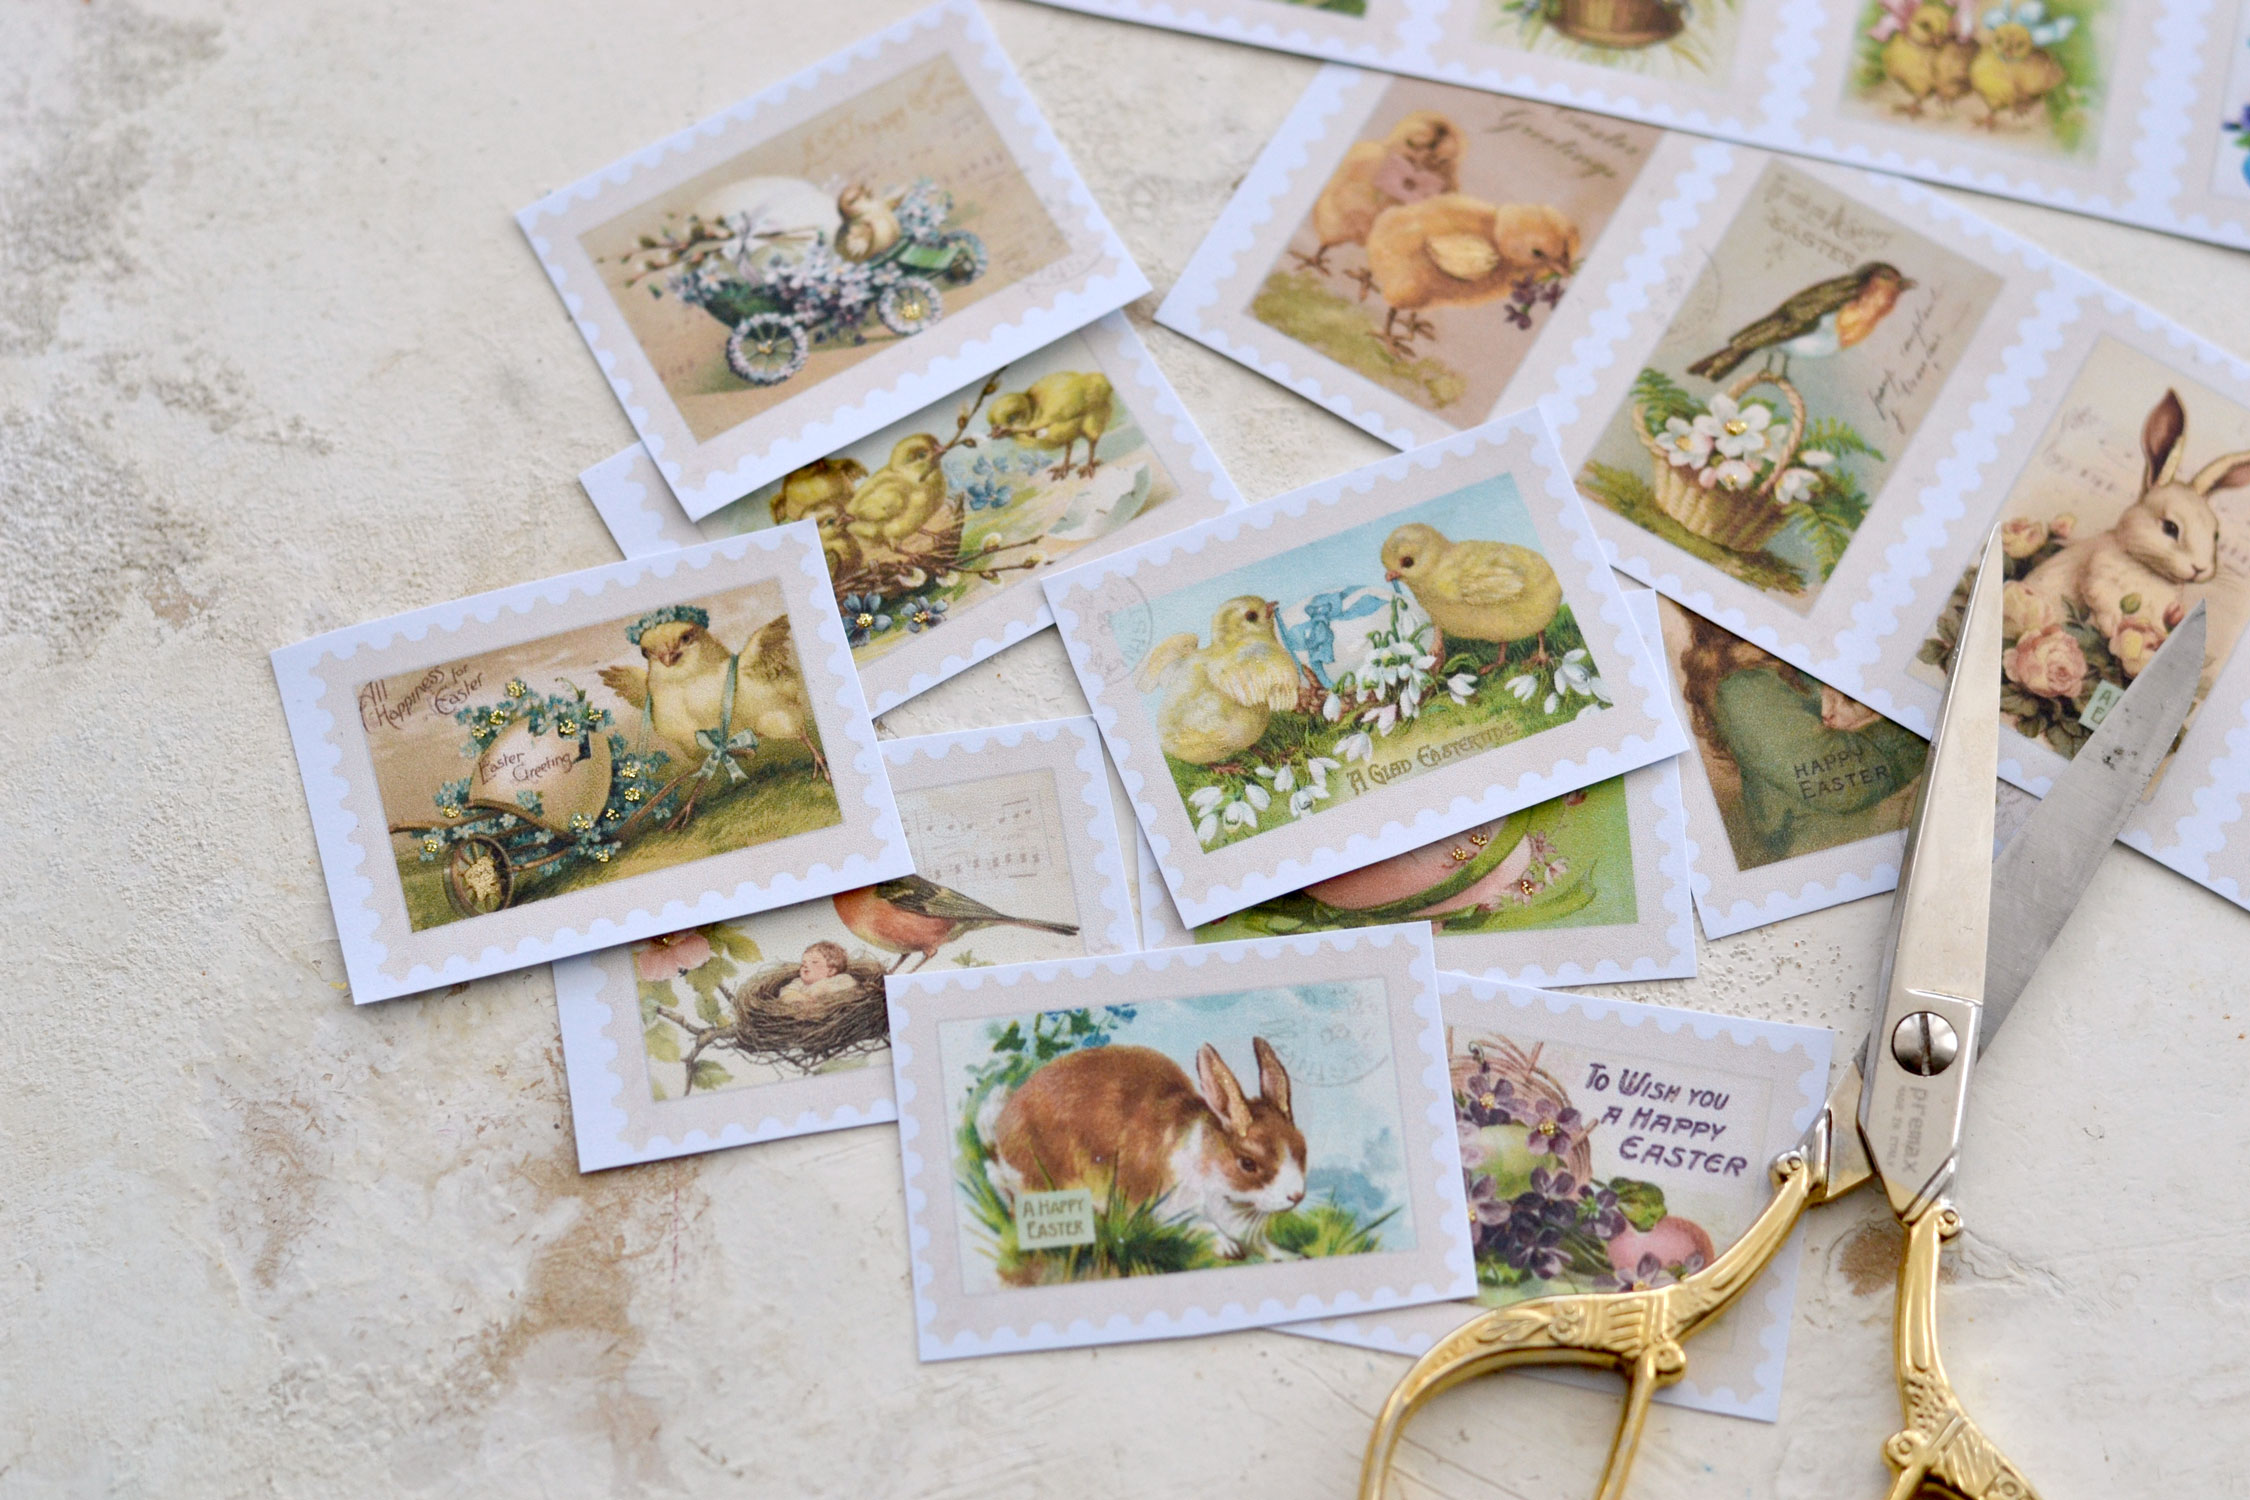
The free printables that I created for this project come with postage stamps in several different sizes, so you’ll have plenty to choose from, depending on your preferences. On the first printable you’ll find 25 large stamps and on the second one you will find 25 medium and 30 small stamps. So you’ll have a whopping total of 80 pieces that will cover all your Easter stamp needs!
Free Printable Easter Stickers:
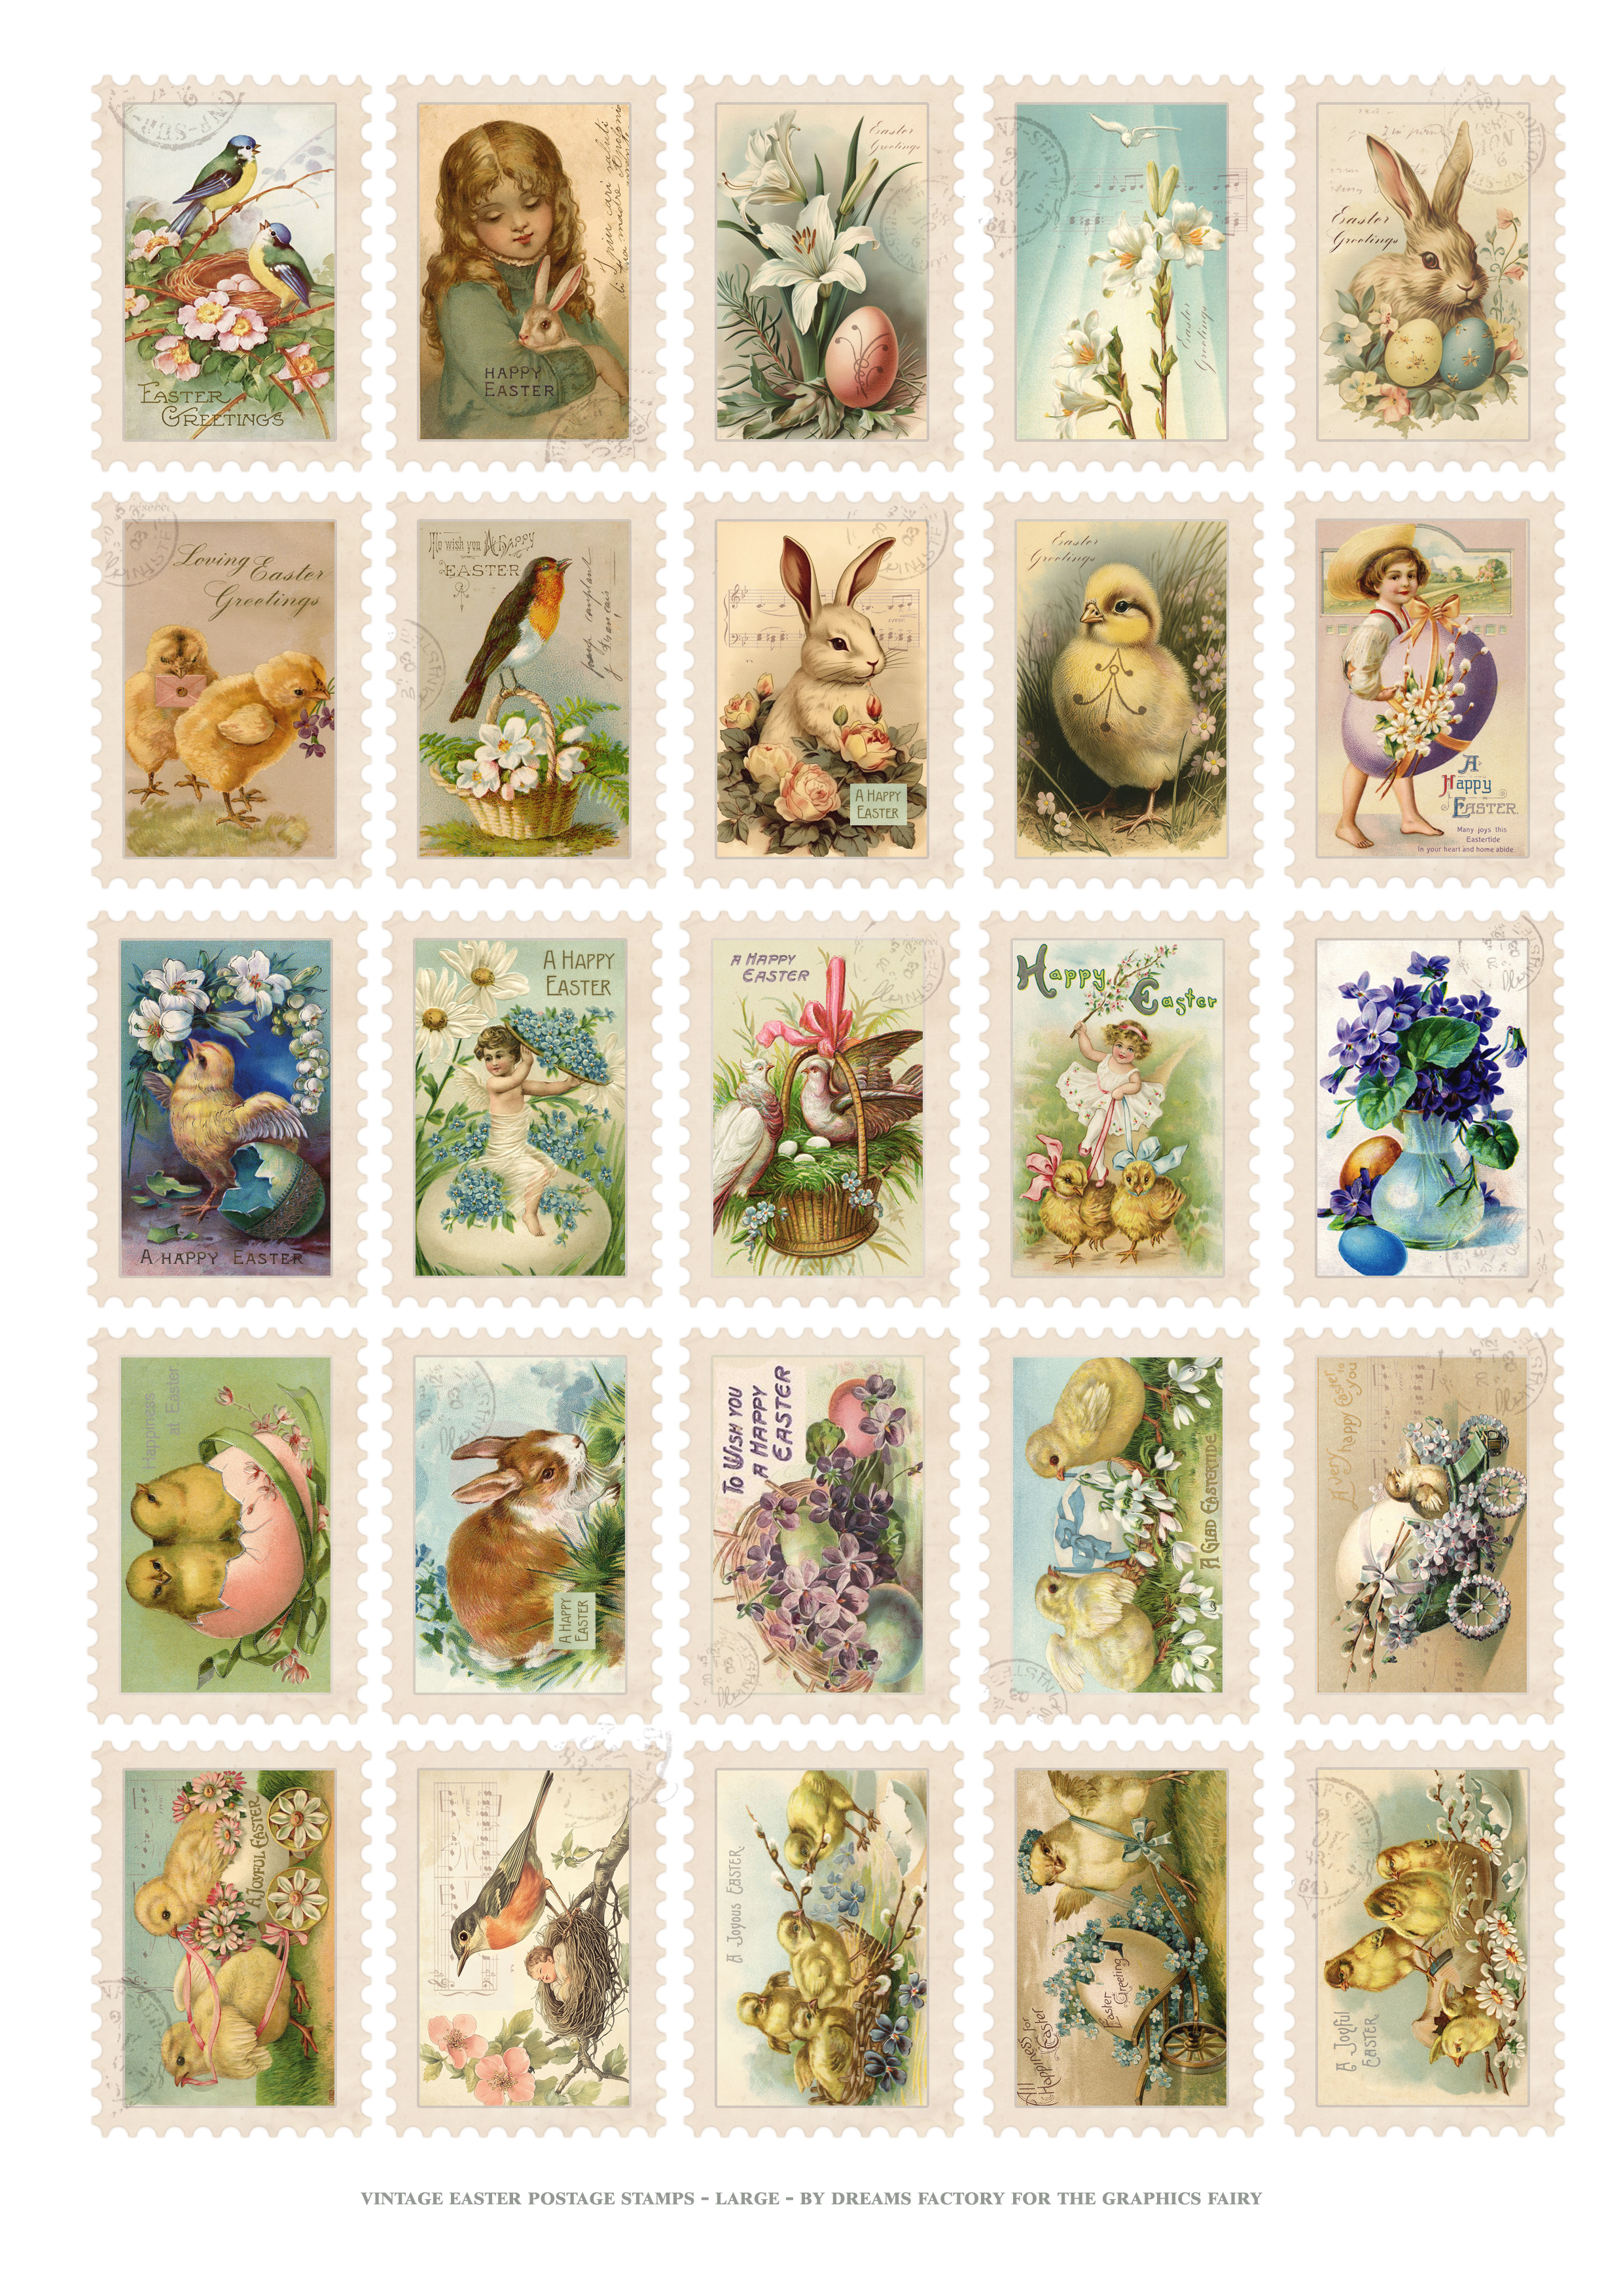
—> Click here to download the full size PDF – the large size <—
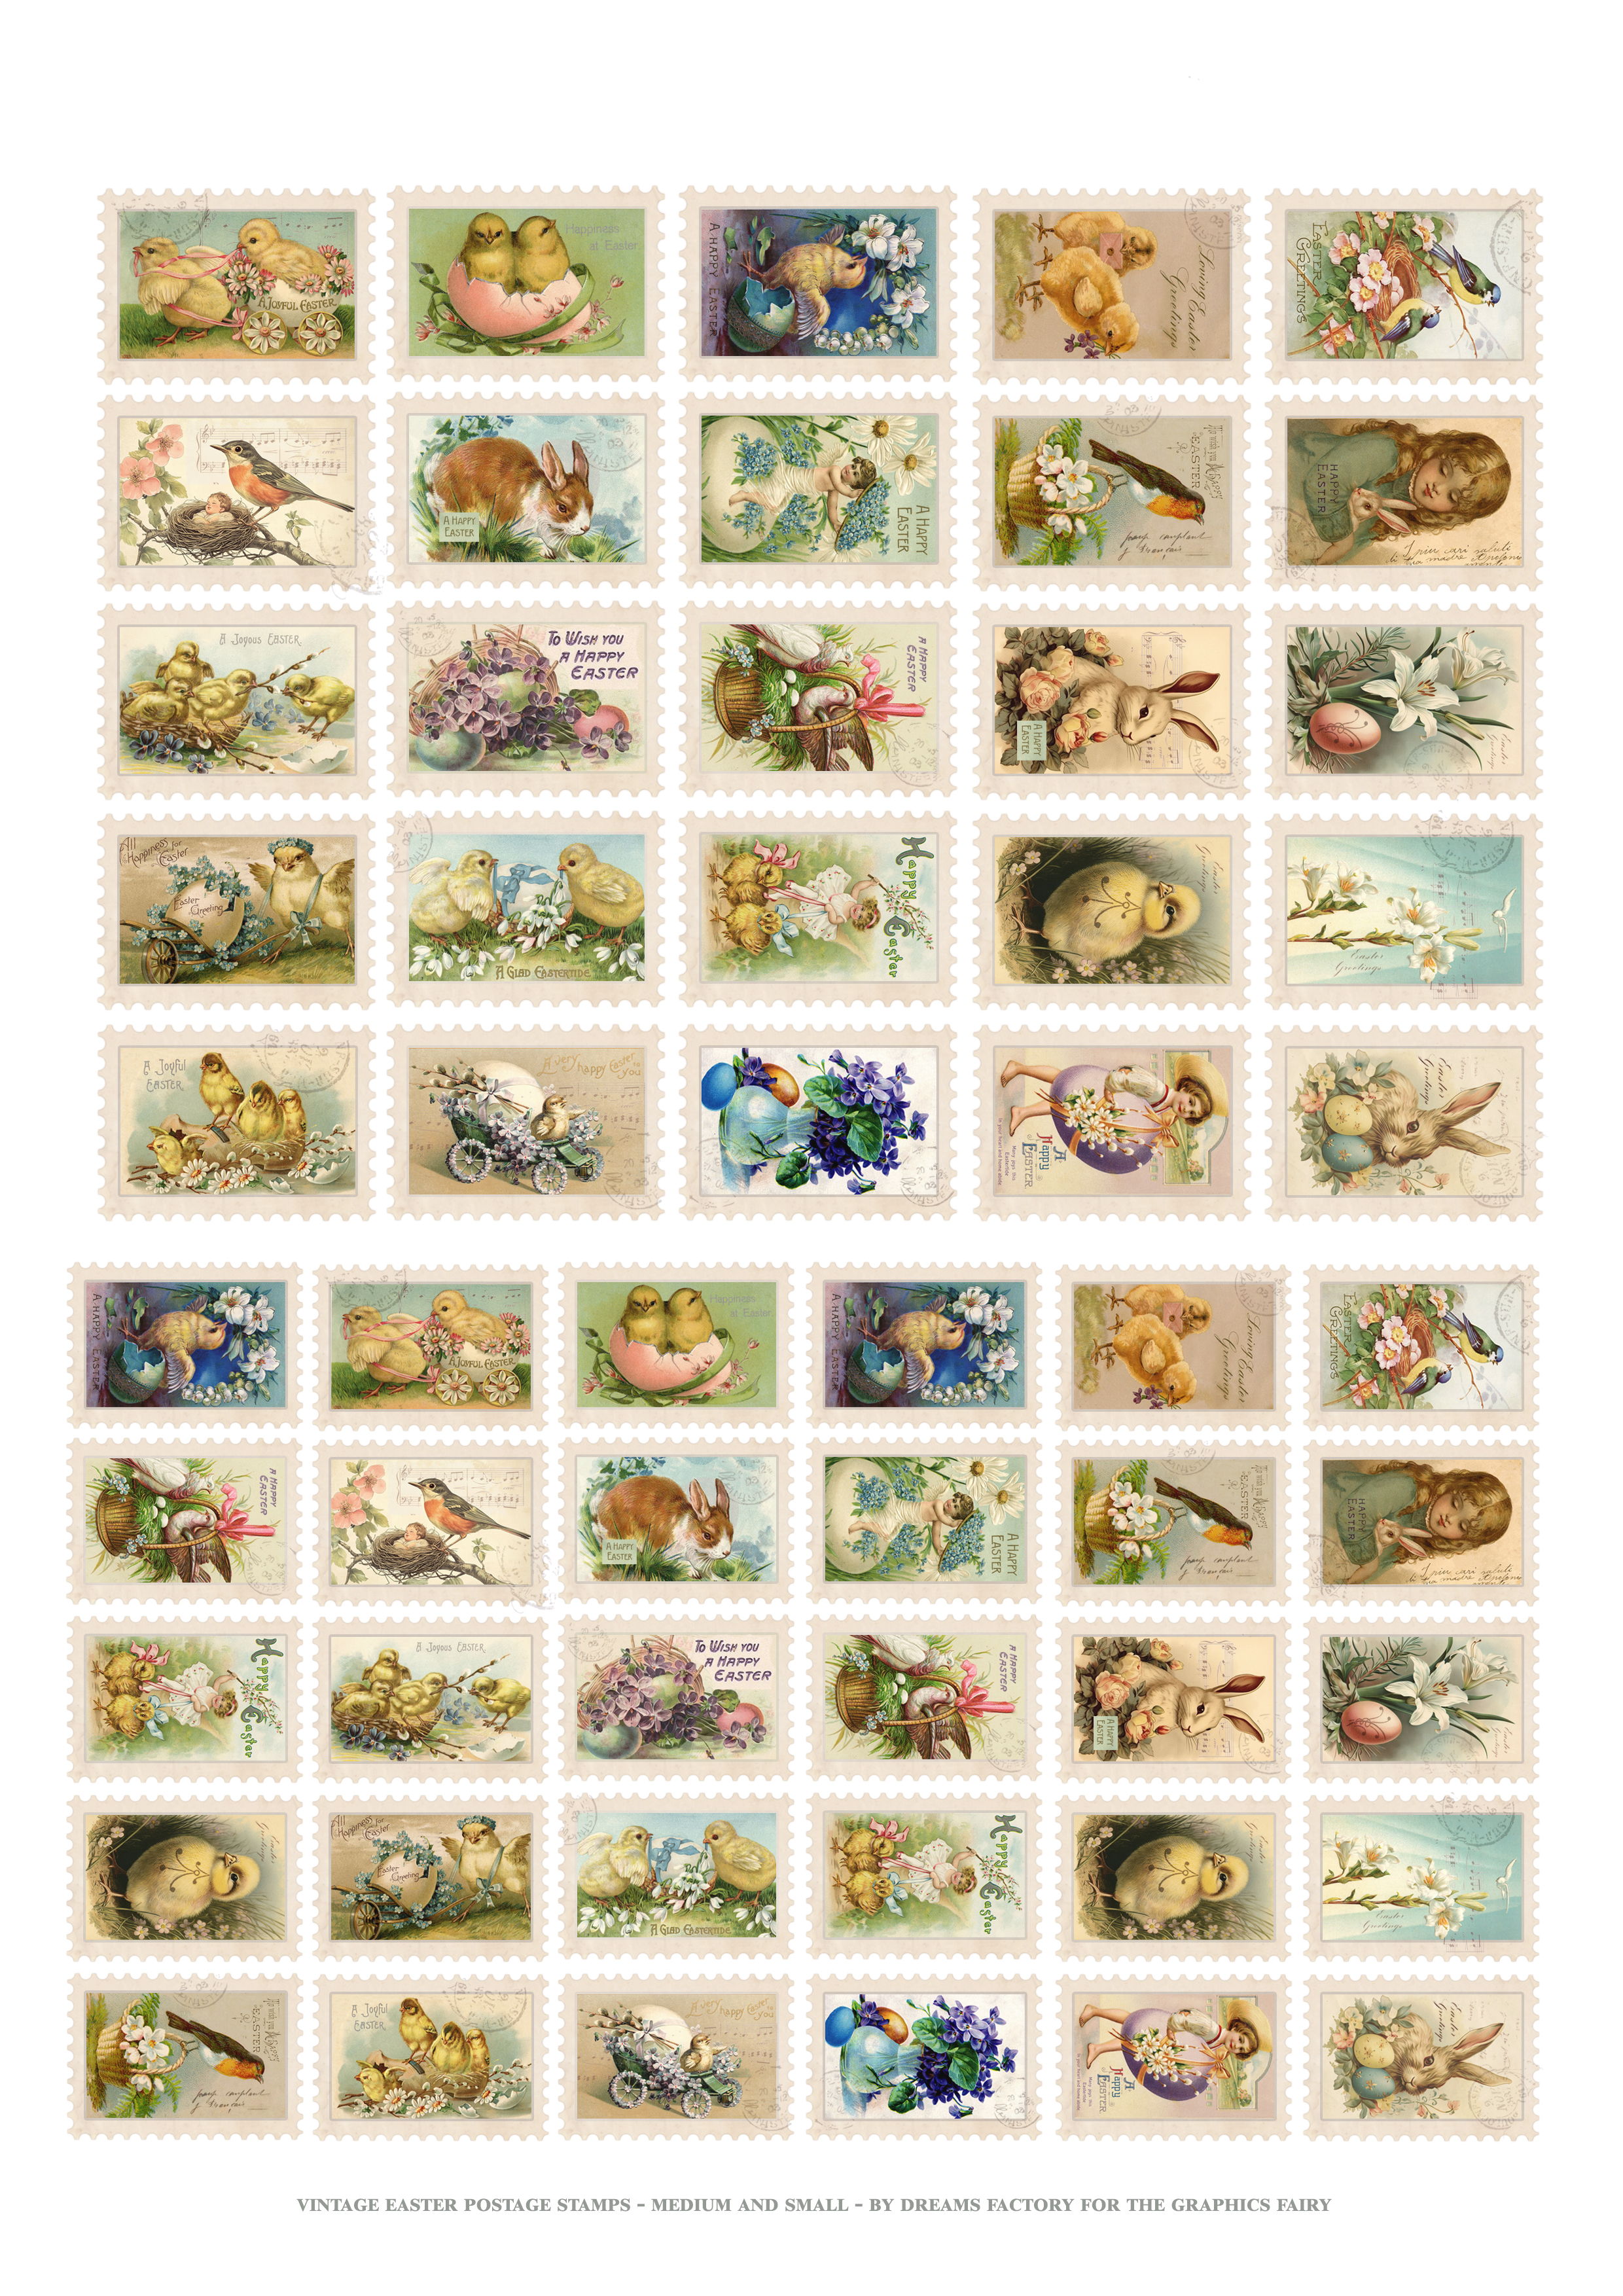
—> Click here to download the full size PDF – the medium& small sizes <—
Supplies:
- regular white paper OR cardstock paper
- ink or laserjet printer
- thinning shears (you can also use regular scissors, manicure scissors, pinking shears, decorative edge scissors)
- glitter glue
- small round brush
- gold watercolors – I used the Kuretake Gansai Tambi Starry Colors
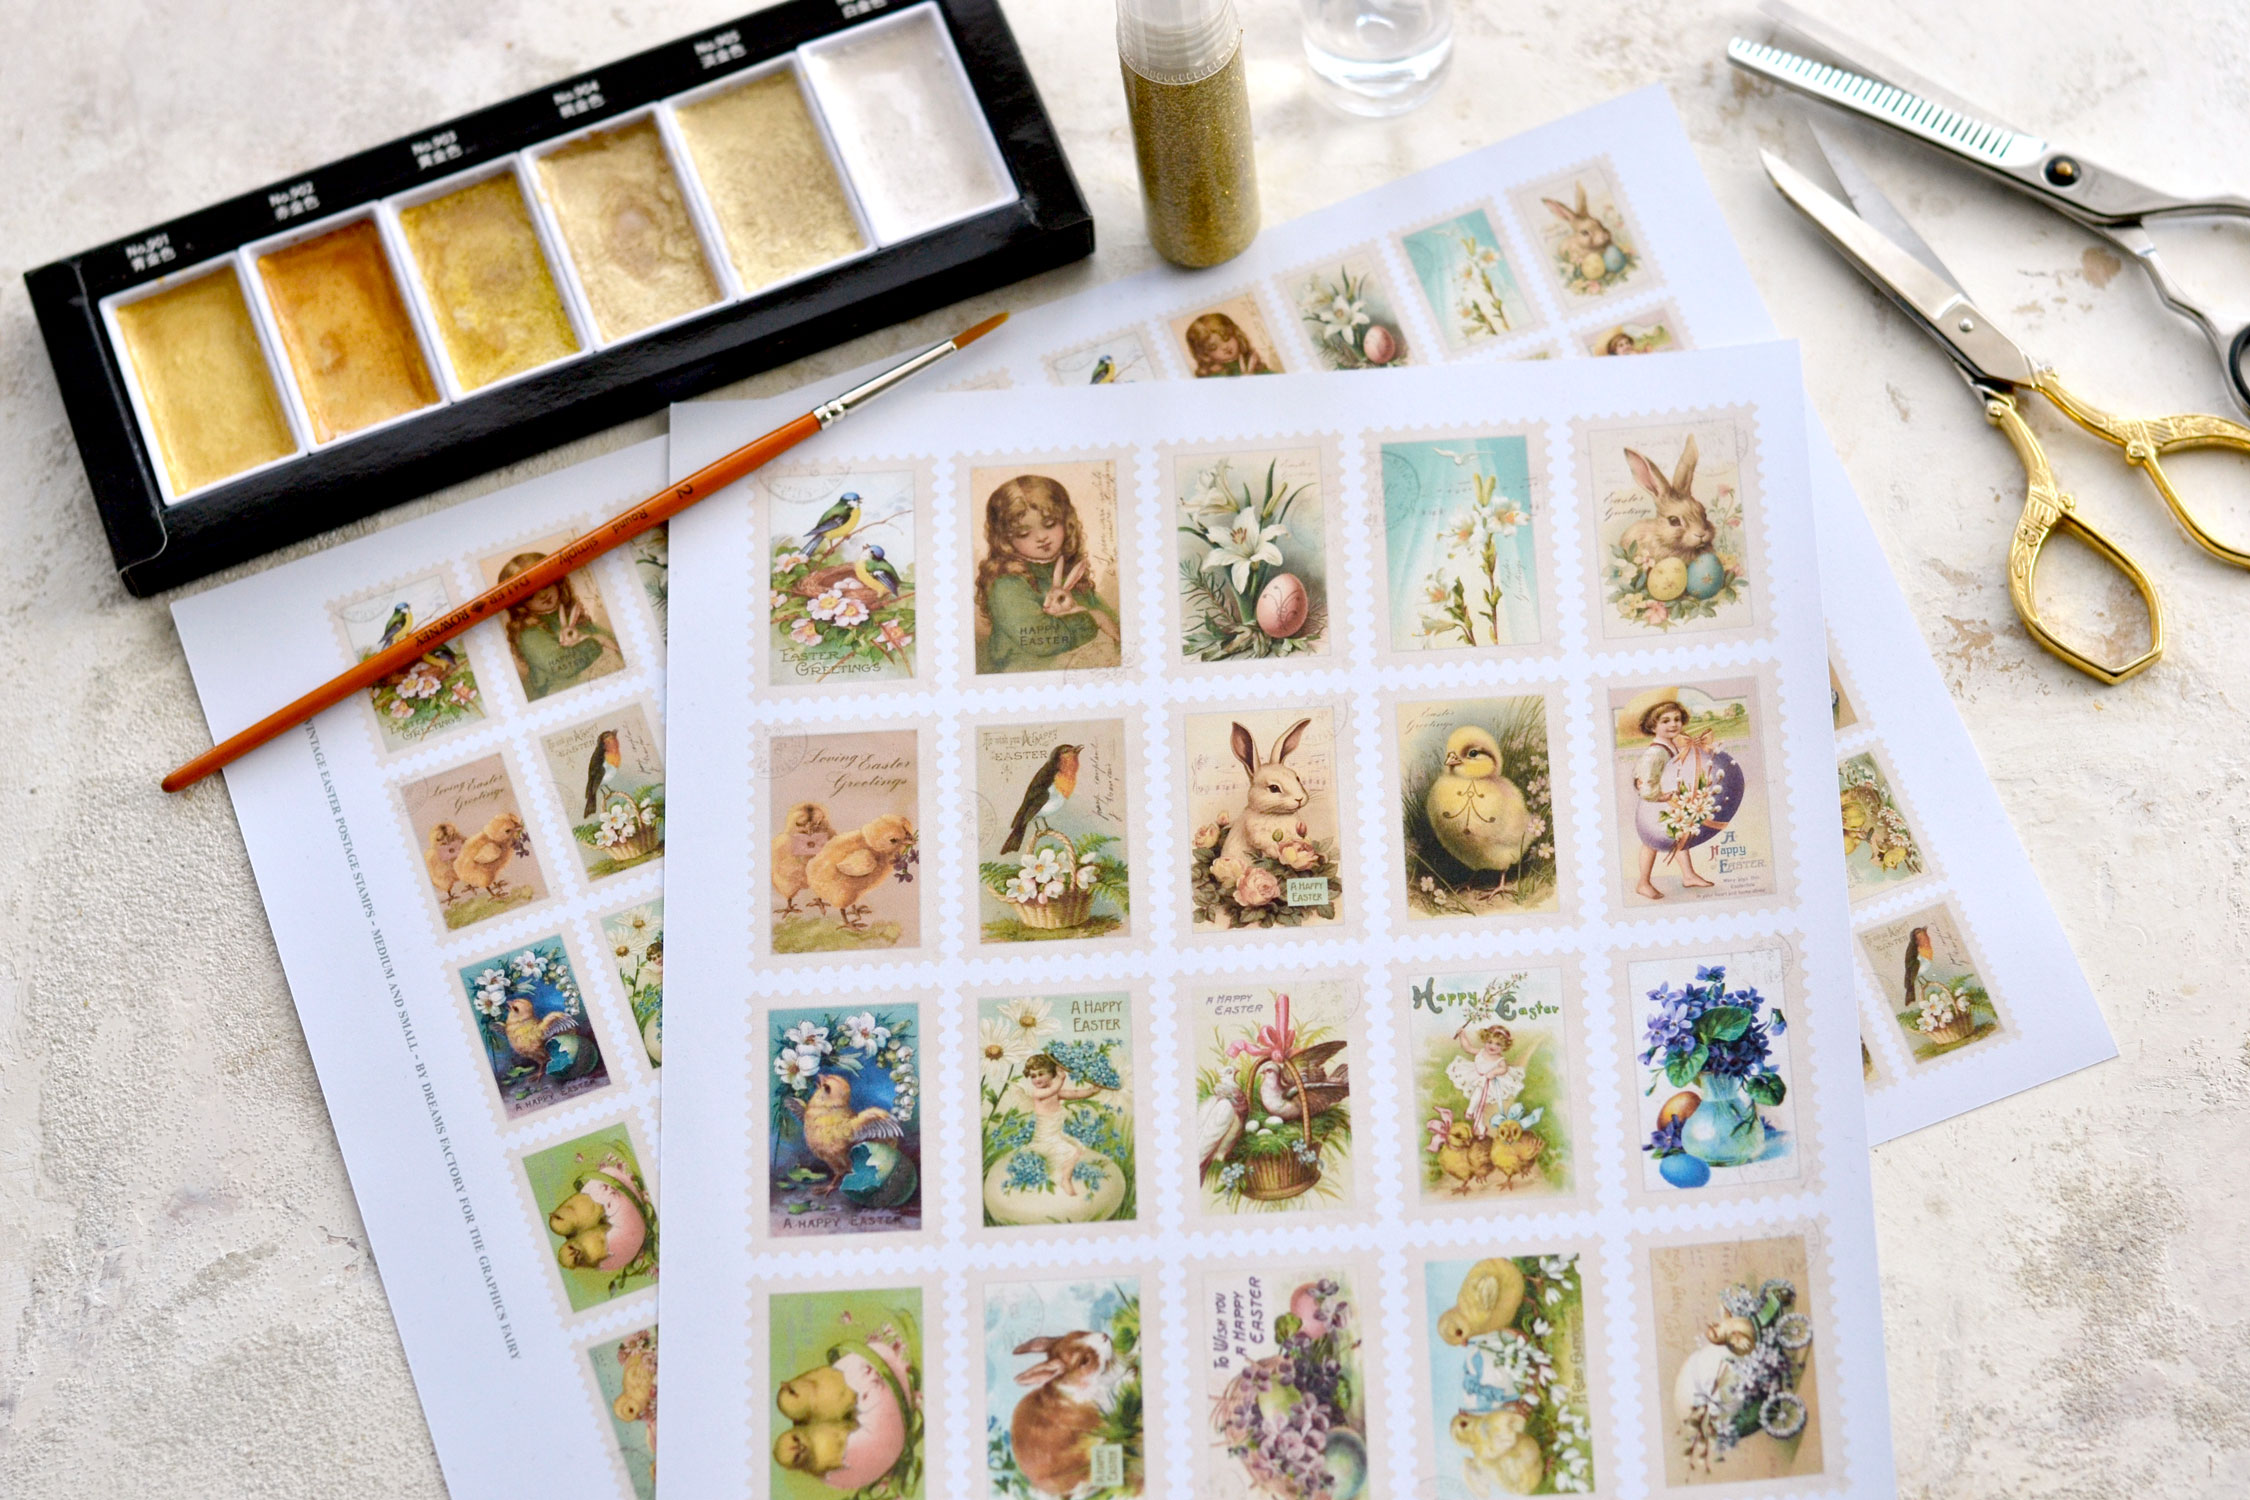
Start by printing the stamps on regular paper or cardstock – I used cardstock.
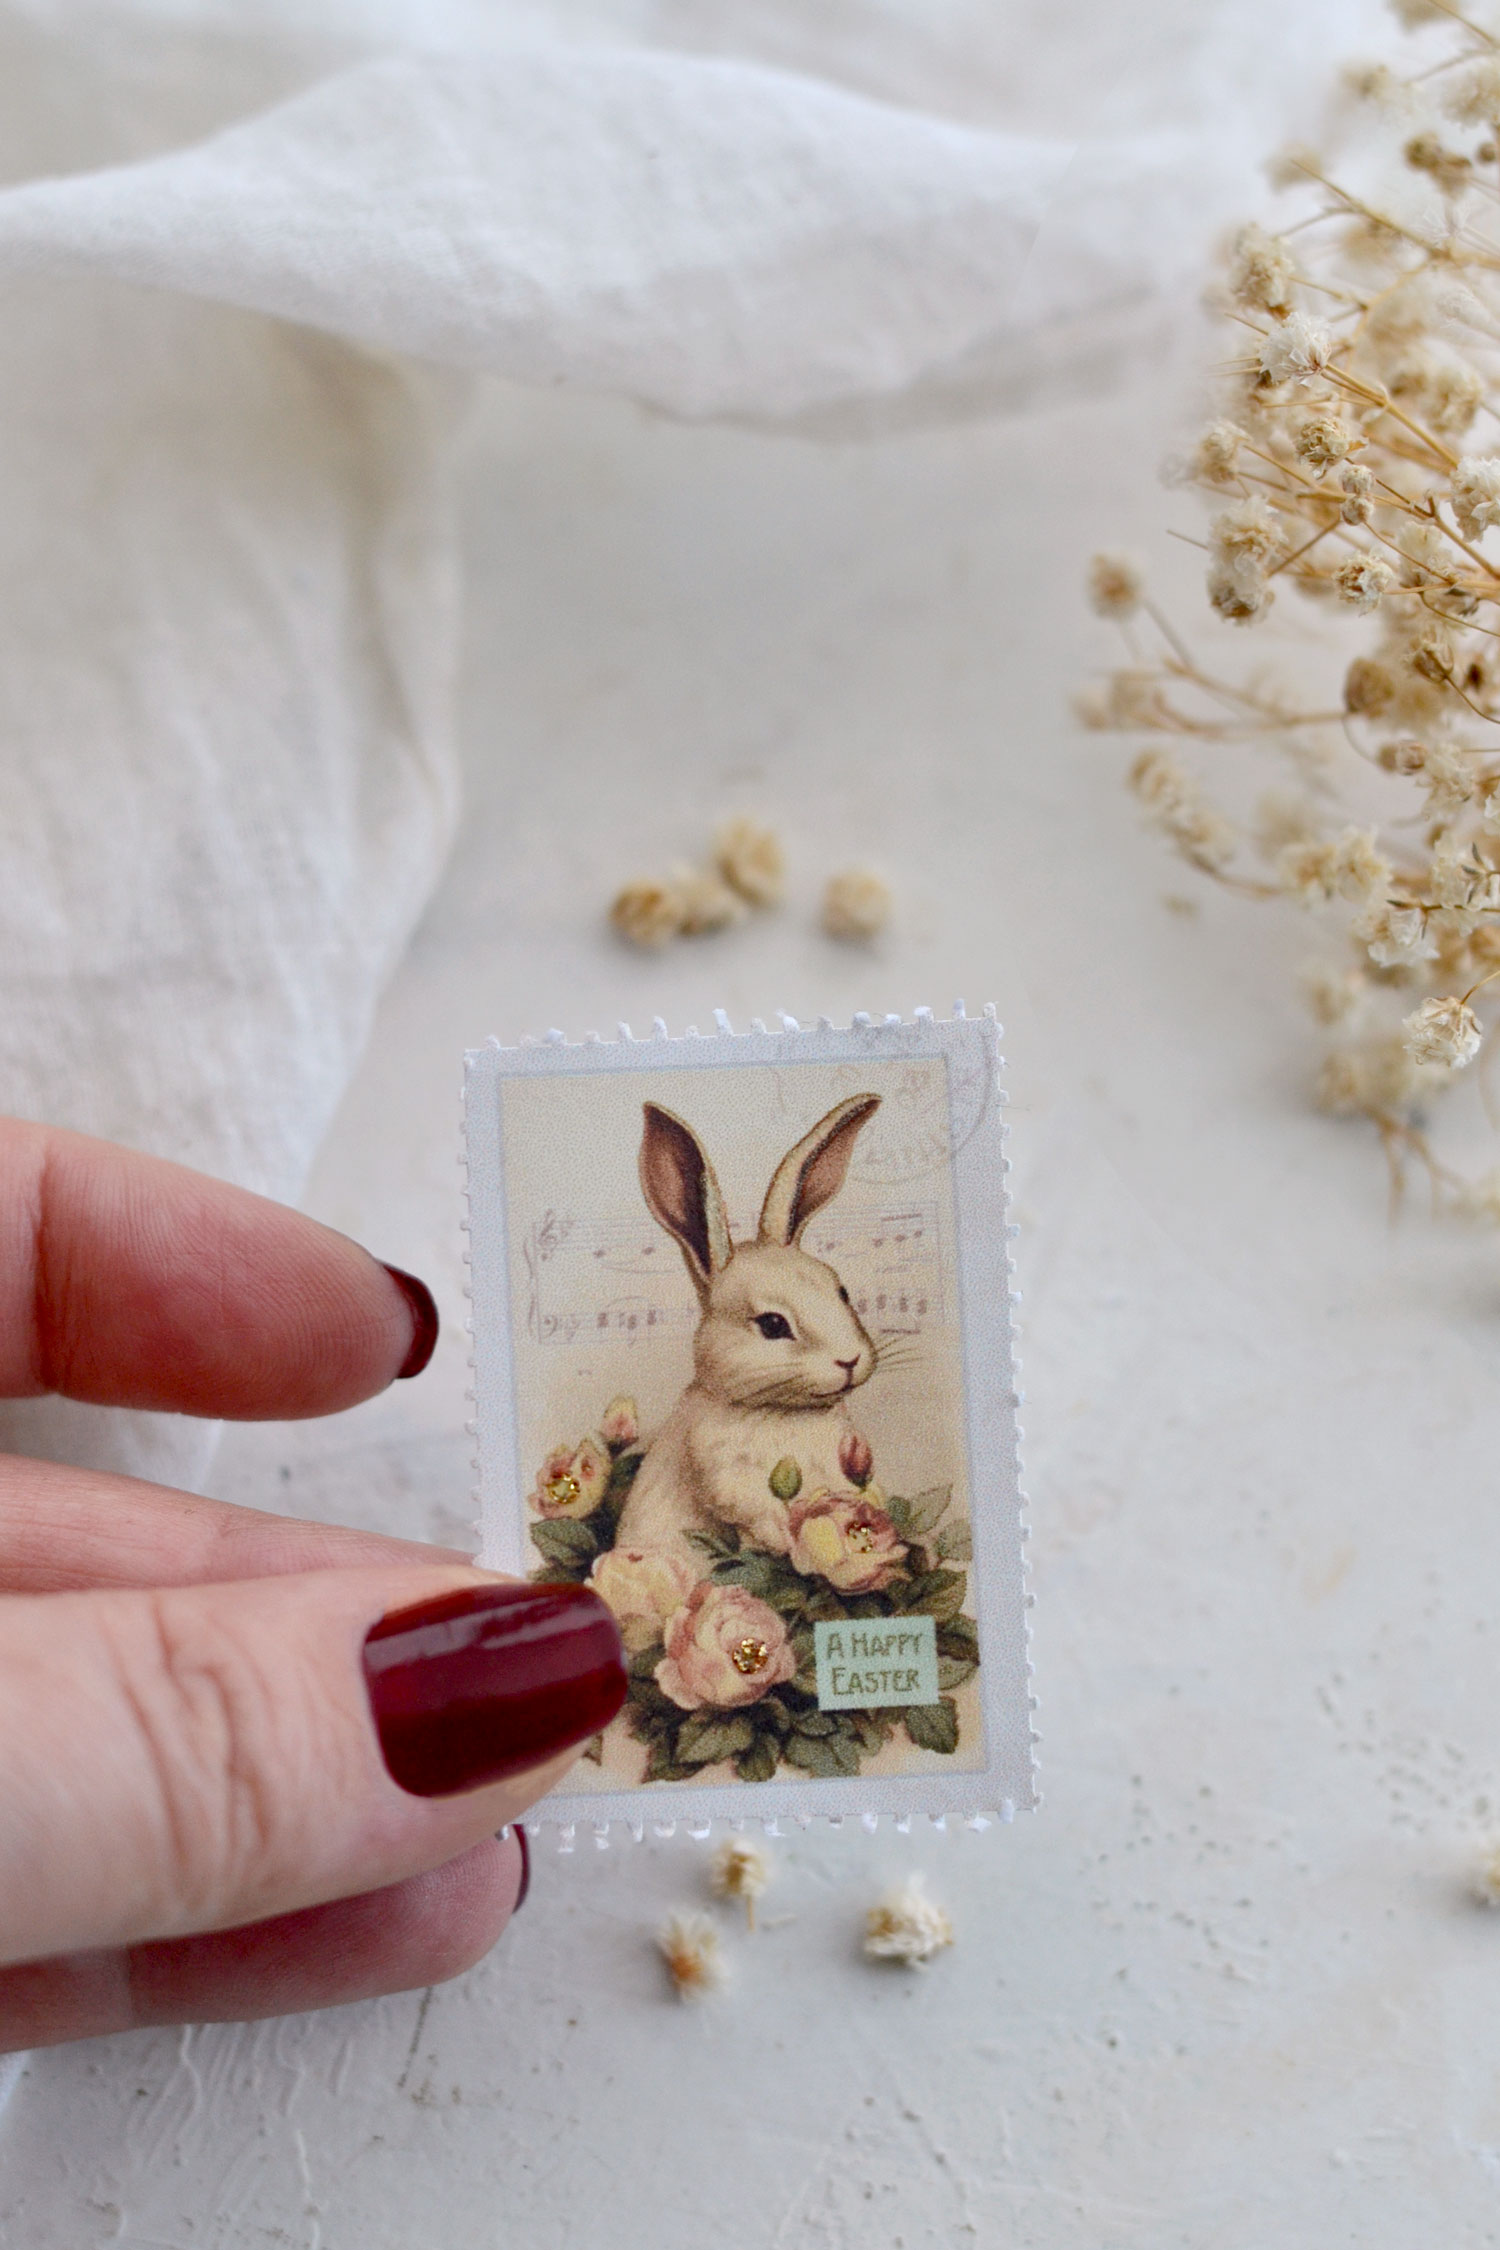
I initially thought about cutting the stamps and then painting some gold touches, but then I realized it would be easier to do the painting first. So I started with that. I used gold watercolors and a small round brush to add some gold accents here and there. I added gold to the wings of the birds, to the ears of the bunny, in the middle of the flowers, and so on. When adding the gold watercolor you need to keep in mind to only add a small amount that will beautify your design. The idea is to emphasize but not completely cover your design.
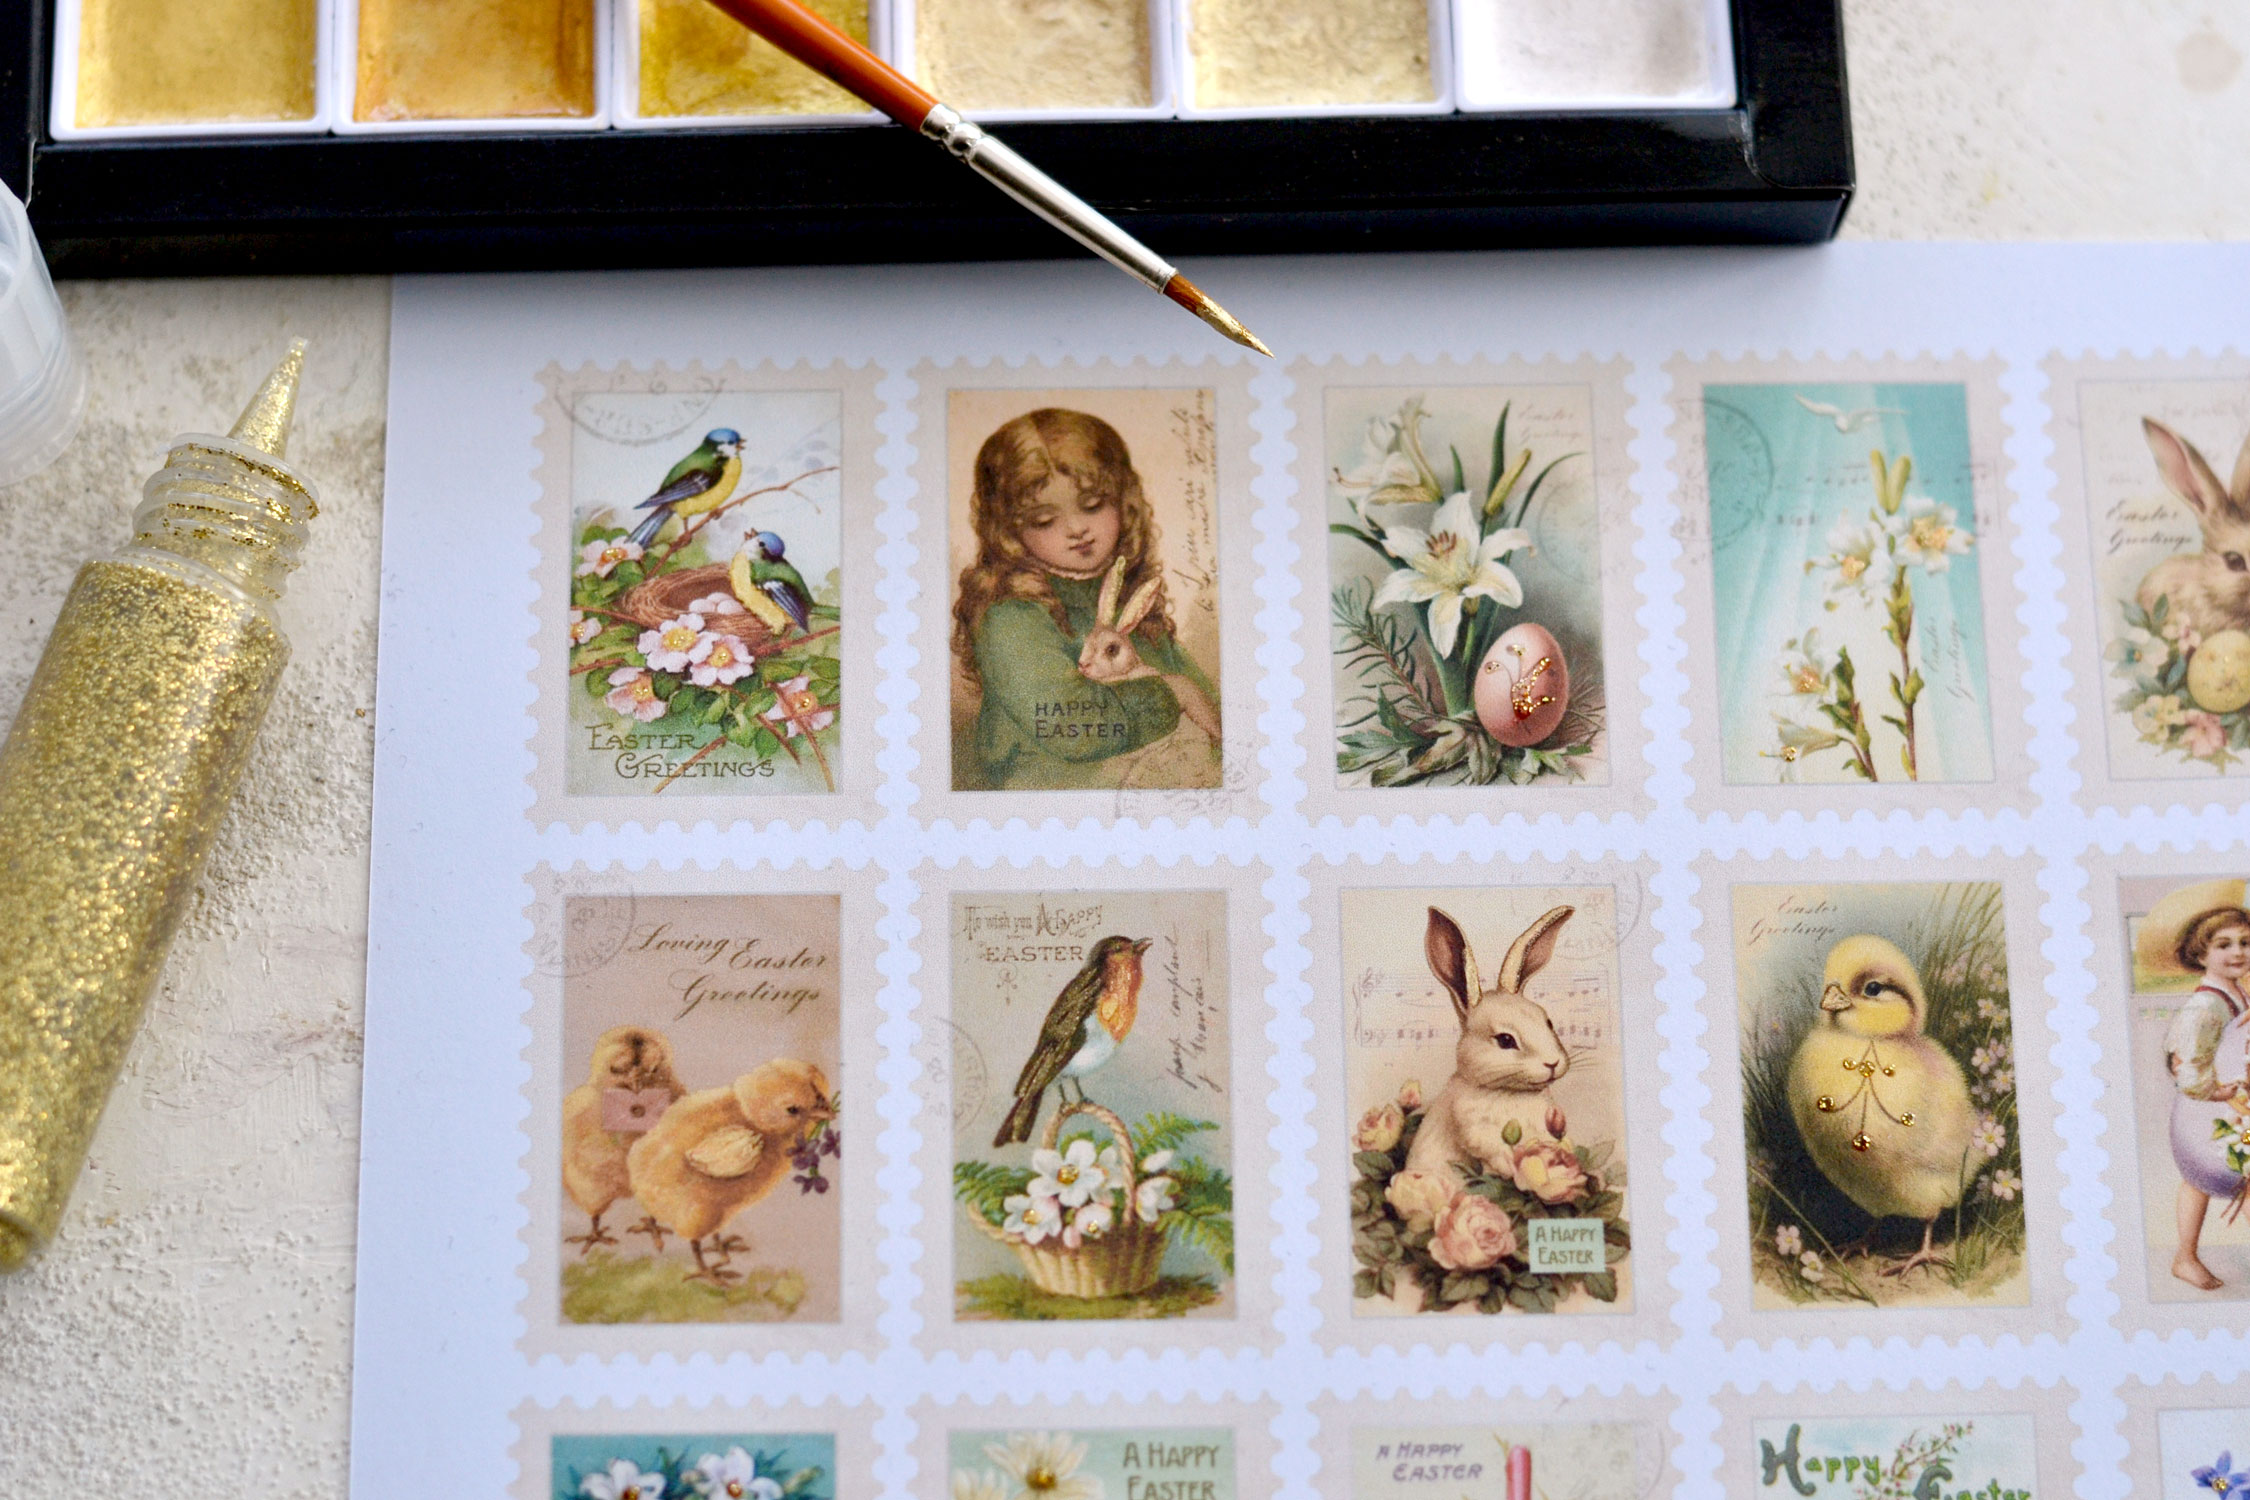
You can then proceed to add the glitter glue in some places following the same principle of emphasizing and not covering your design. Because the stamps are relatively small, I noticed that one or several glitter glue dots strategically placed here and there did the trick. I mostly added the glitter glue dots in the middle of the flowers, they were super quick and easy to apply, no matter the size of the stamp. So we could say that glitter glue dots will be the highlights of the day, that’s really all you need to make these beauties shine!

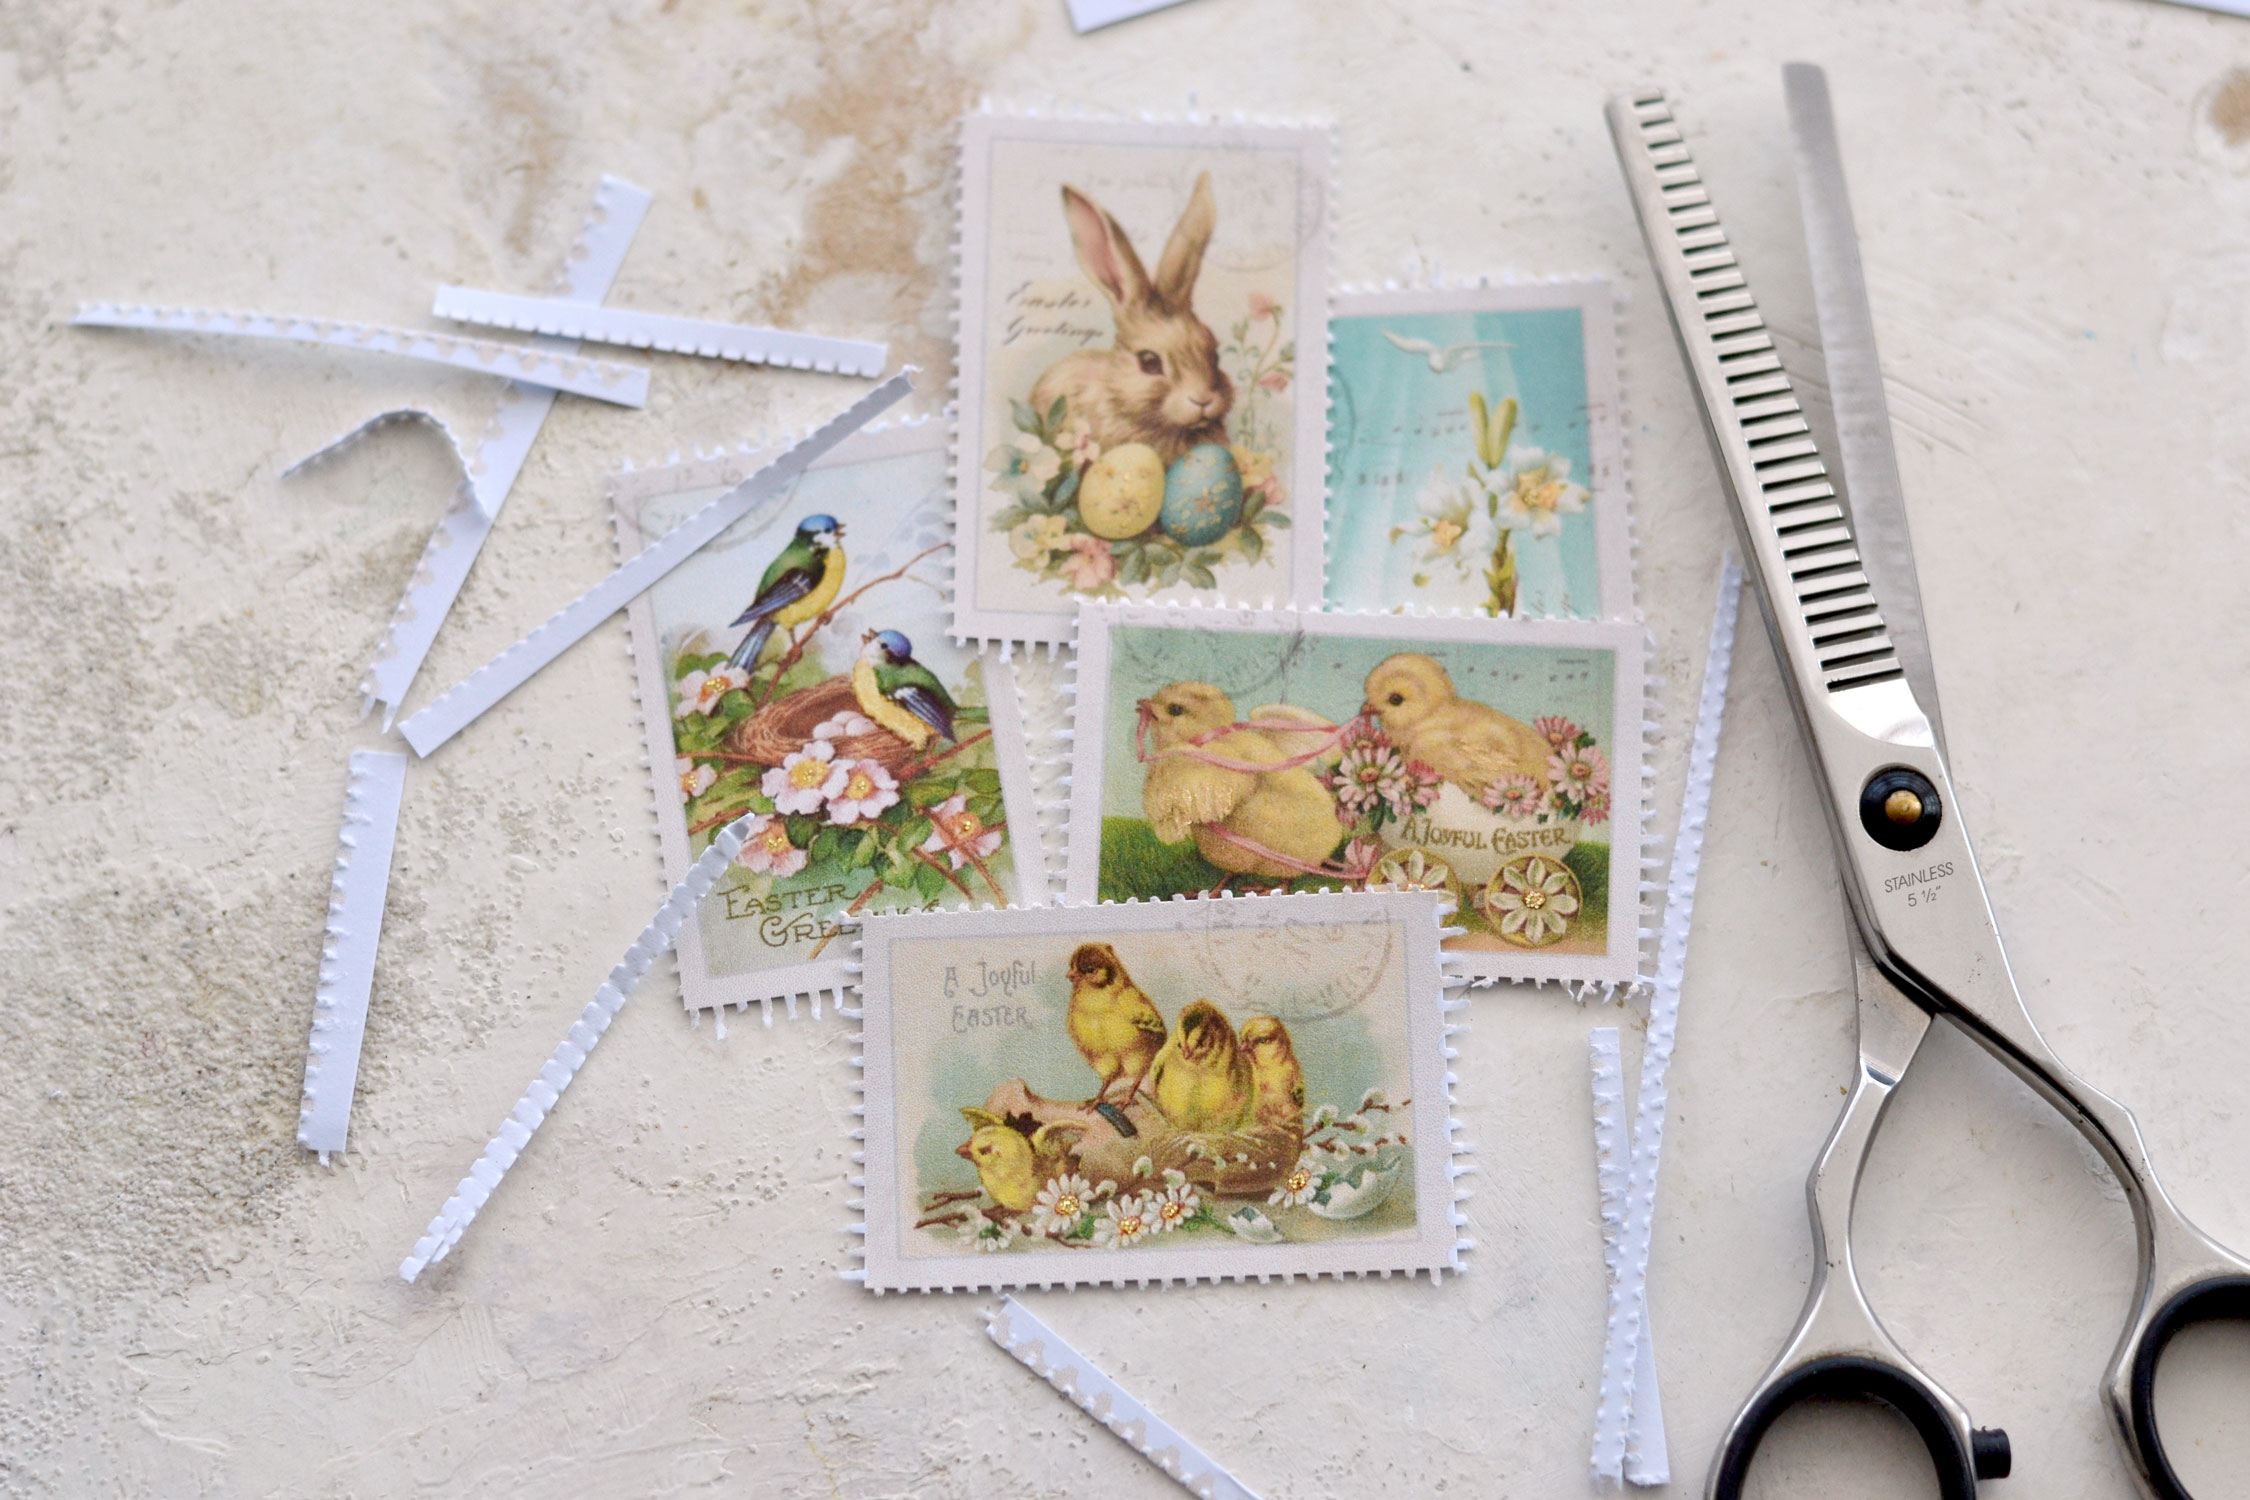
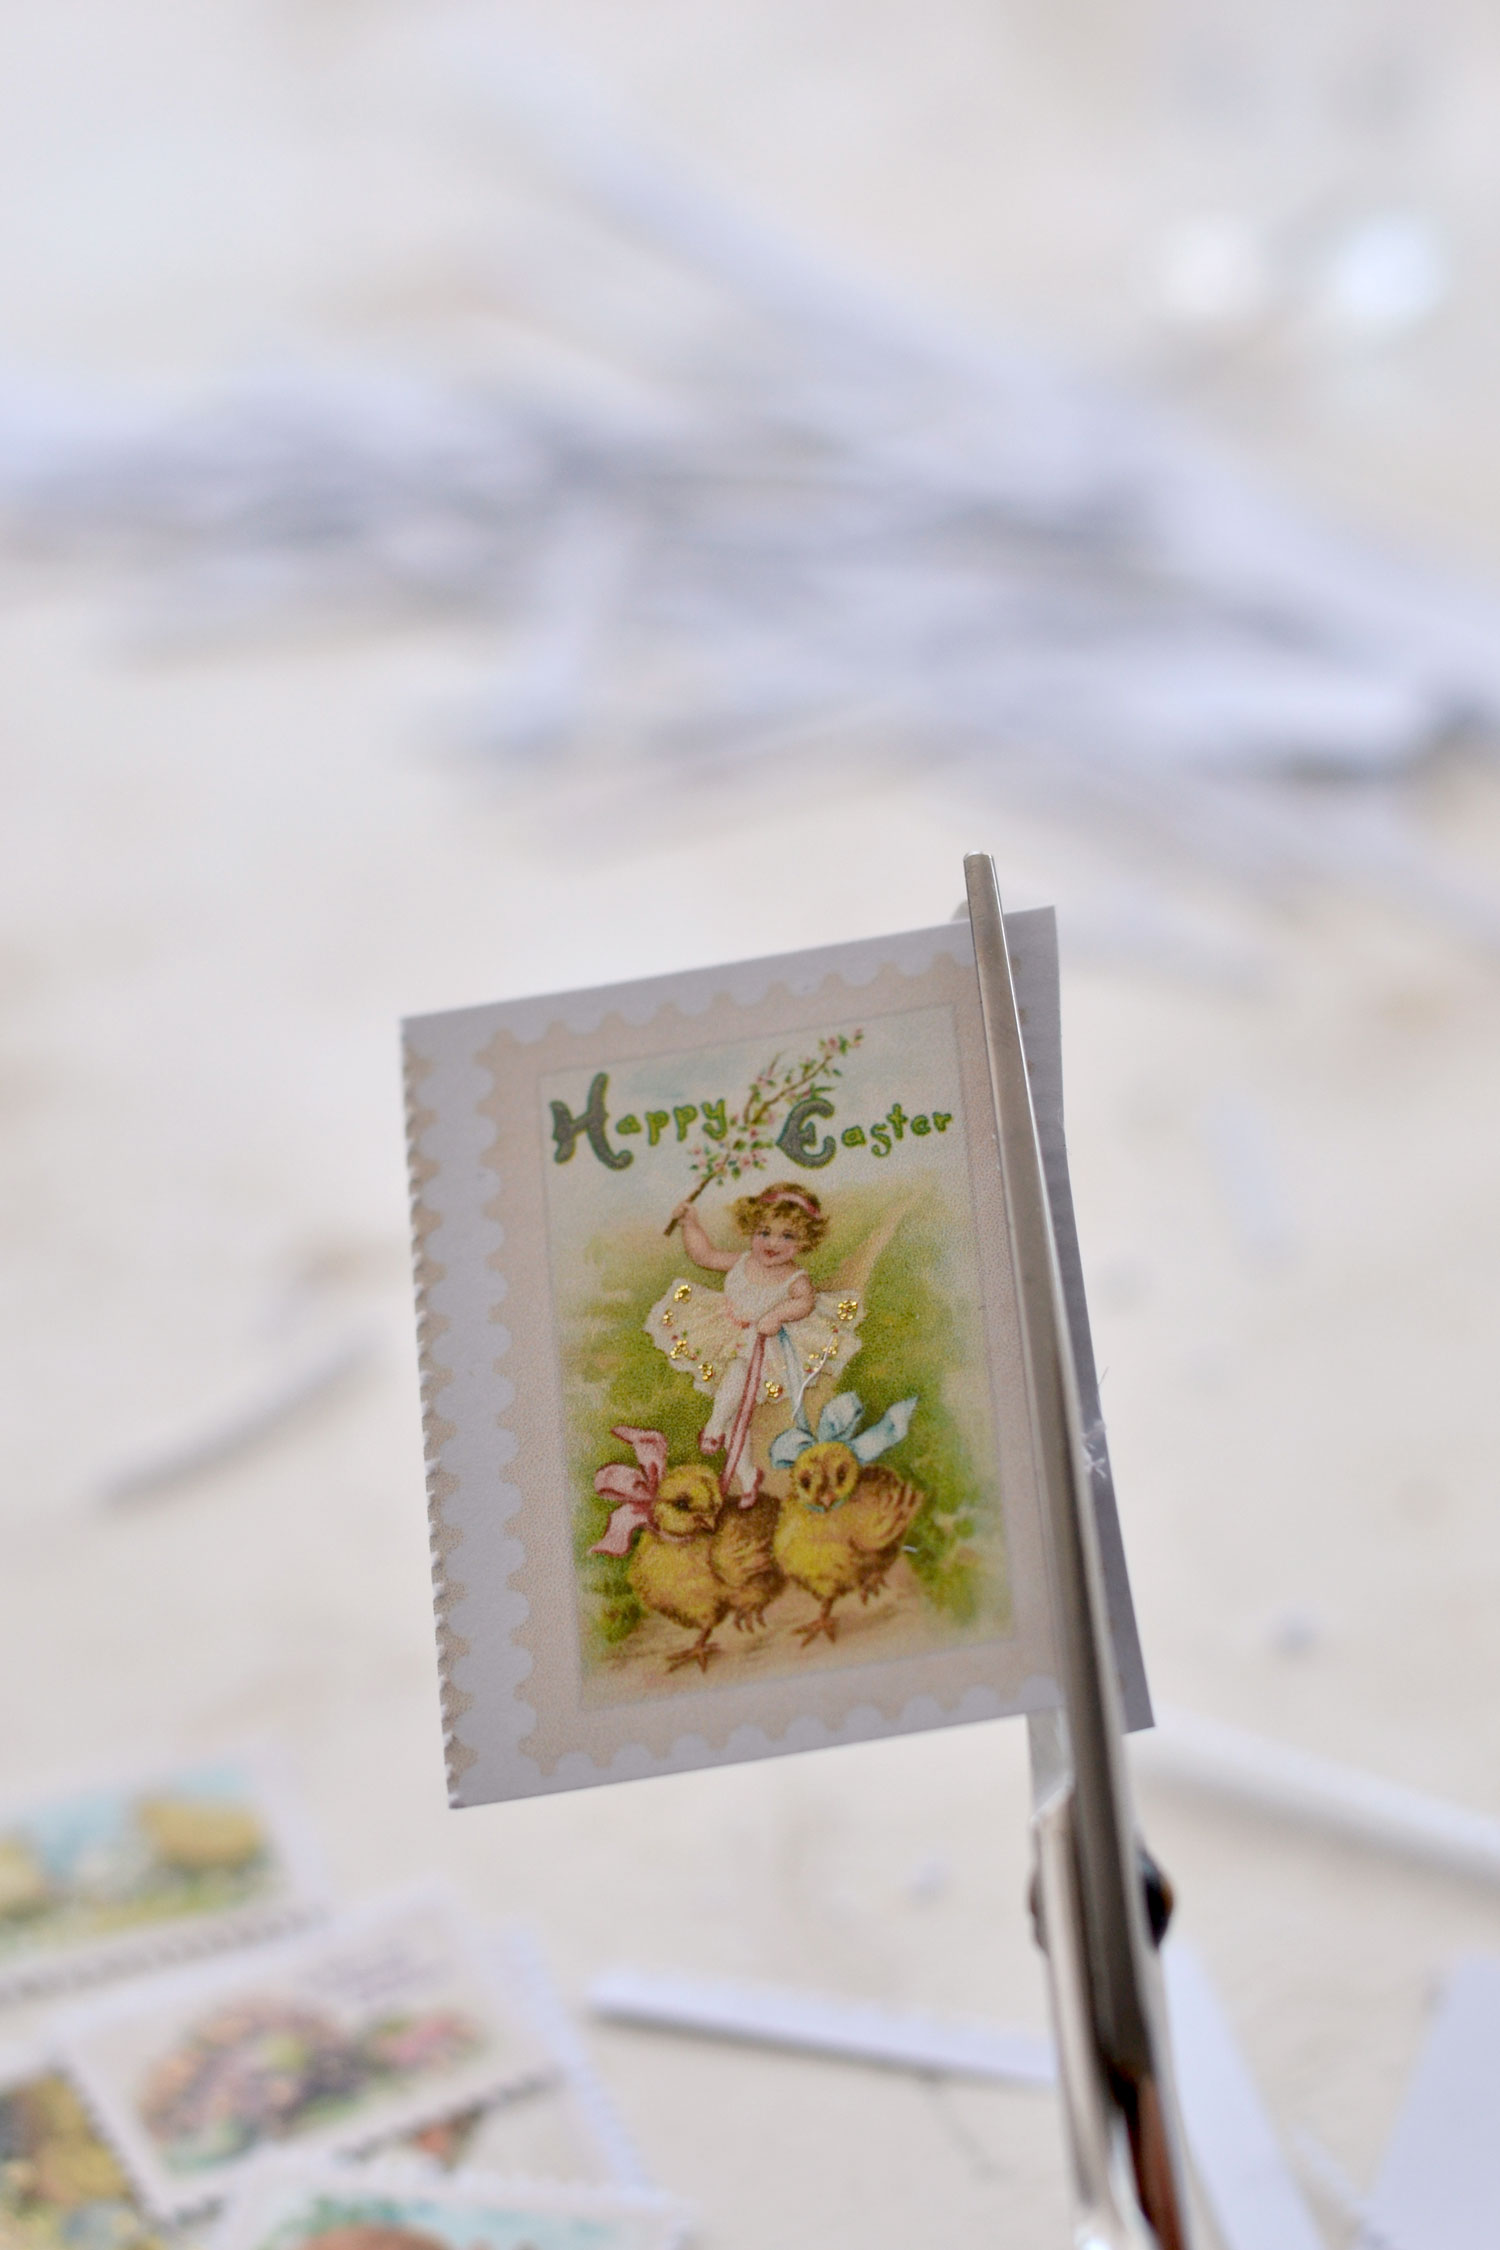
The glitter glue dried quickly, so I was able to start cutting them right after gilding them. I used regular scissors to roughly cut each of the large stamps first.
And then I used thinning sheers to create that lovely serrated edge postage stamps usually have.
It worked like a charm!
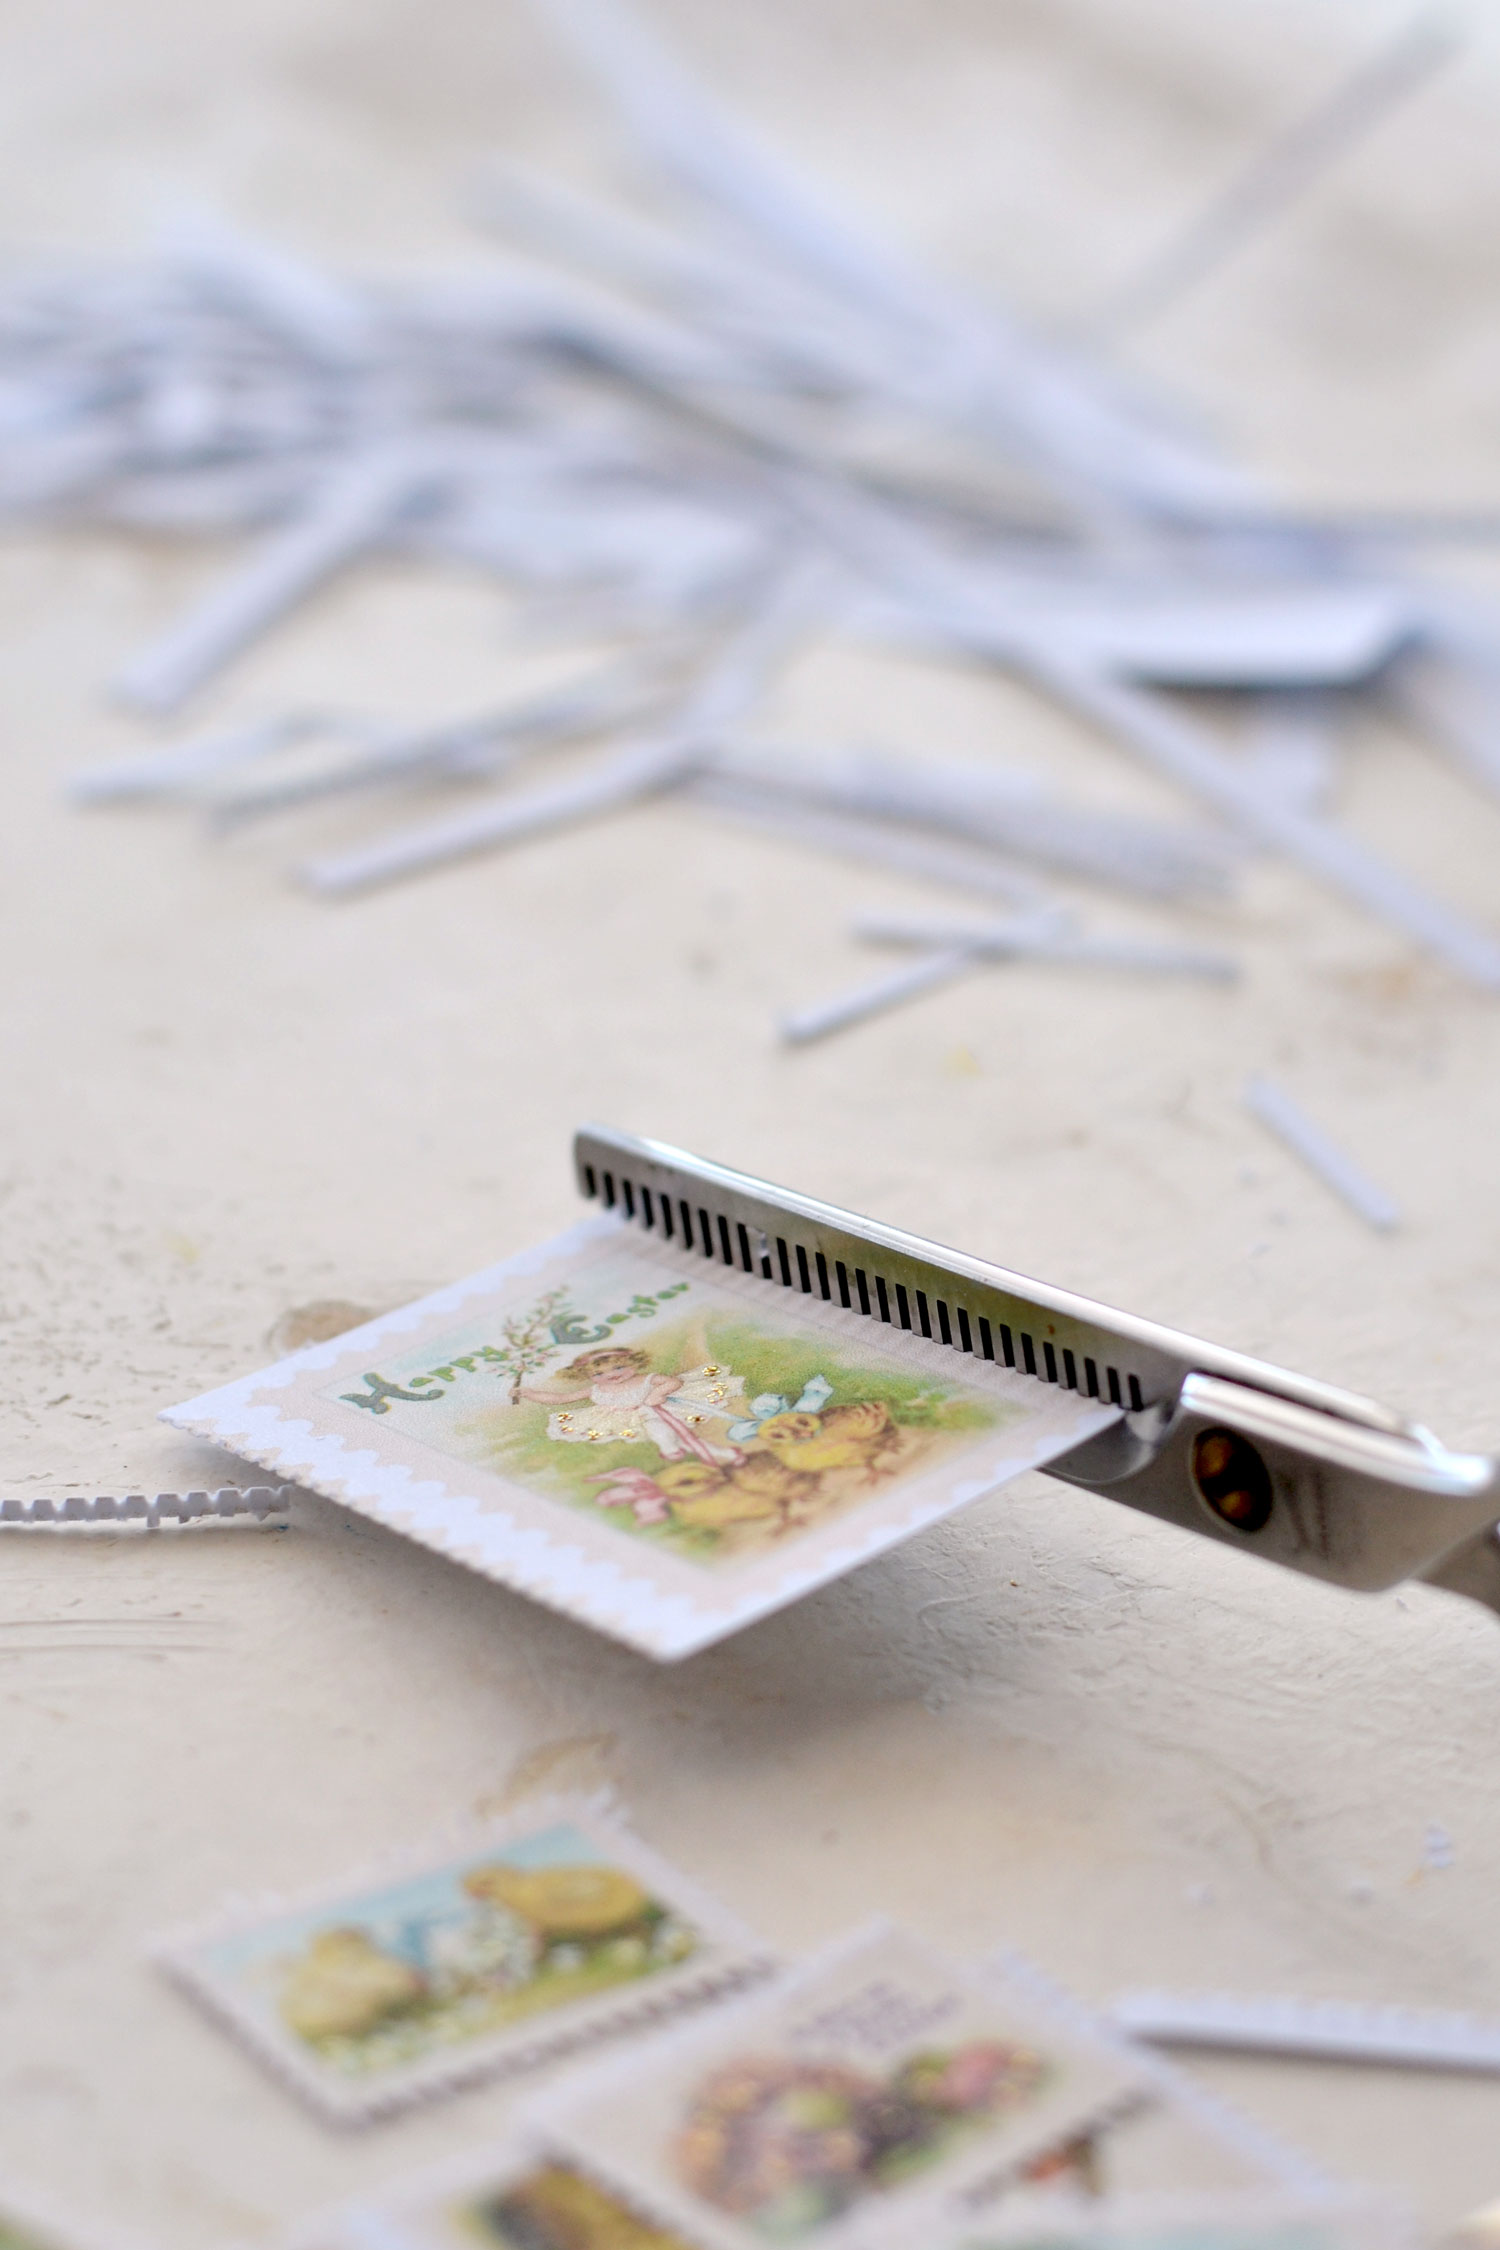
For the smaller stamps, I was able to directly cut them using the thinning sheers.
Just remember that you ALWAYS need to do two things while cutting your stamps using thinning sheers!
The first one is to keep your stamp on the left side of your blade while cutting it – you’ll have to constantly rotate it to keep it to the left.
And the second one is that the serrated blade should always be on top!
These two things will guarantee your success, you will be able to always create some gorgeous-looking faux postage stamps!
It would be best to use a bowl or a small plate to hold all the excess paper while cutting the edges. Cleaning will be so much easier this way! Or you can just create a small pile on your table, then drag everything to the trash when you are done. It will be a small pile at first, but it will get bigger and bigger after you finish cutting all your 80 stamps! Hehe!
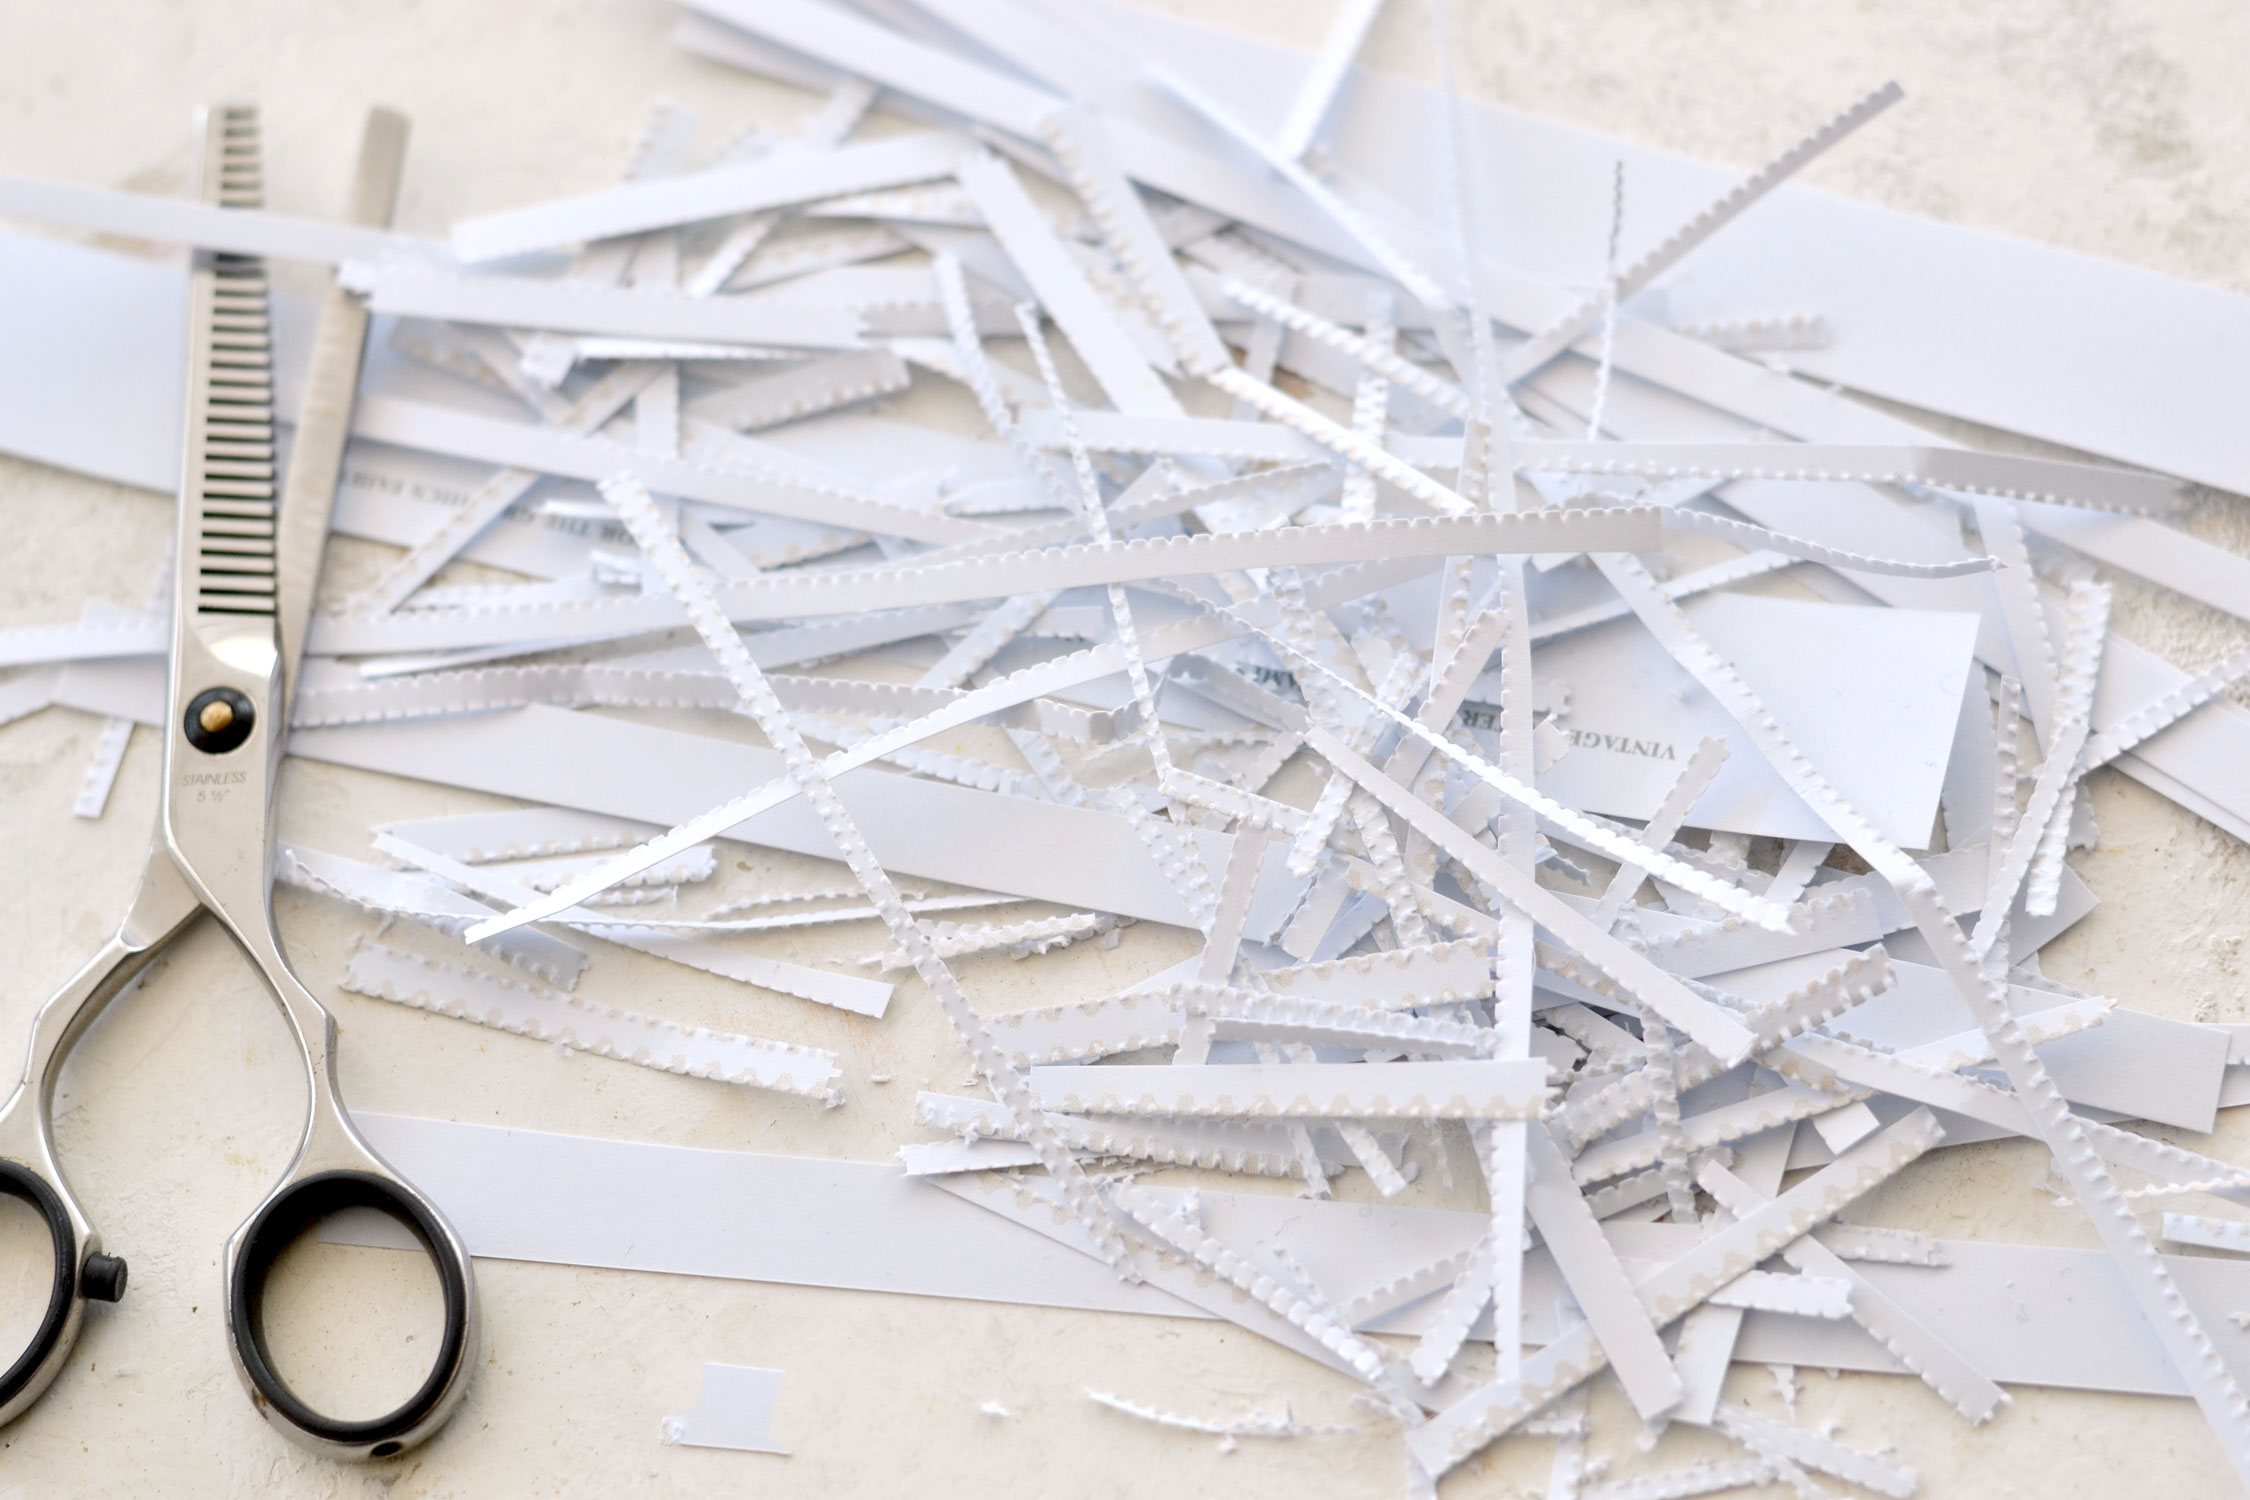
The truth is the whole process is quite relaxing, especially since you can gradually admire all your beautiful creations as you cut them!
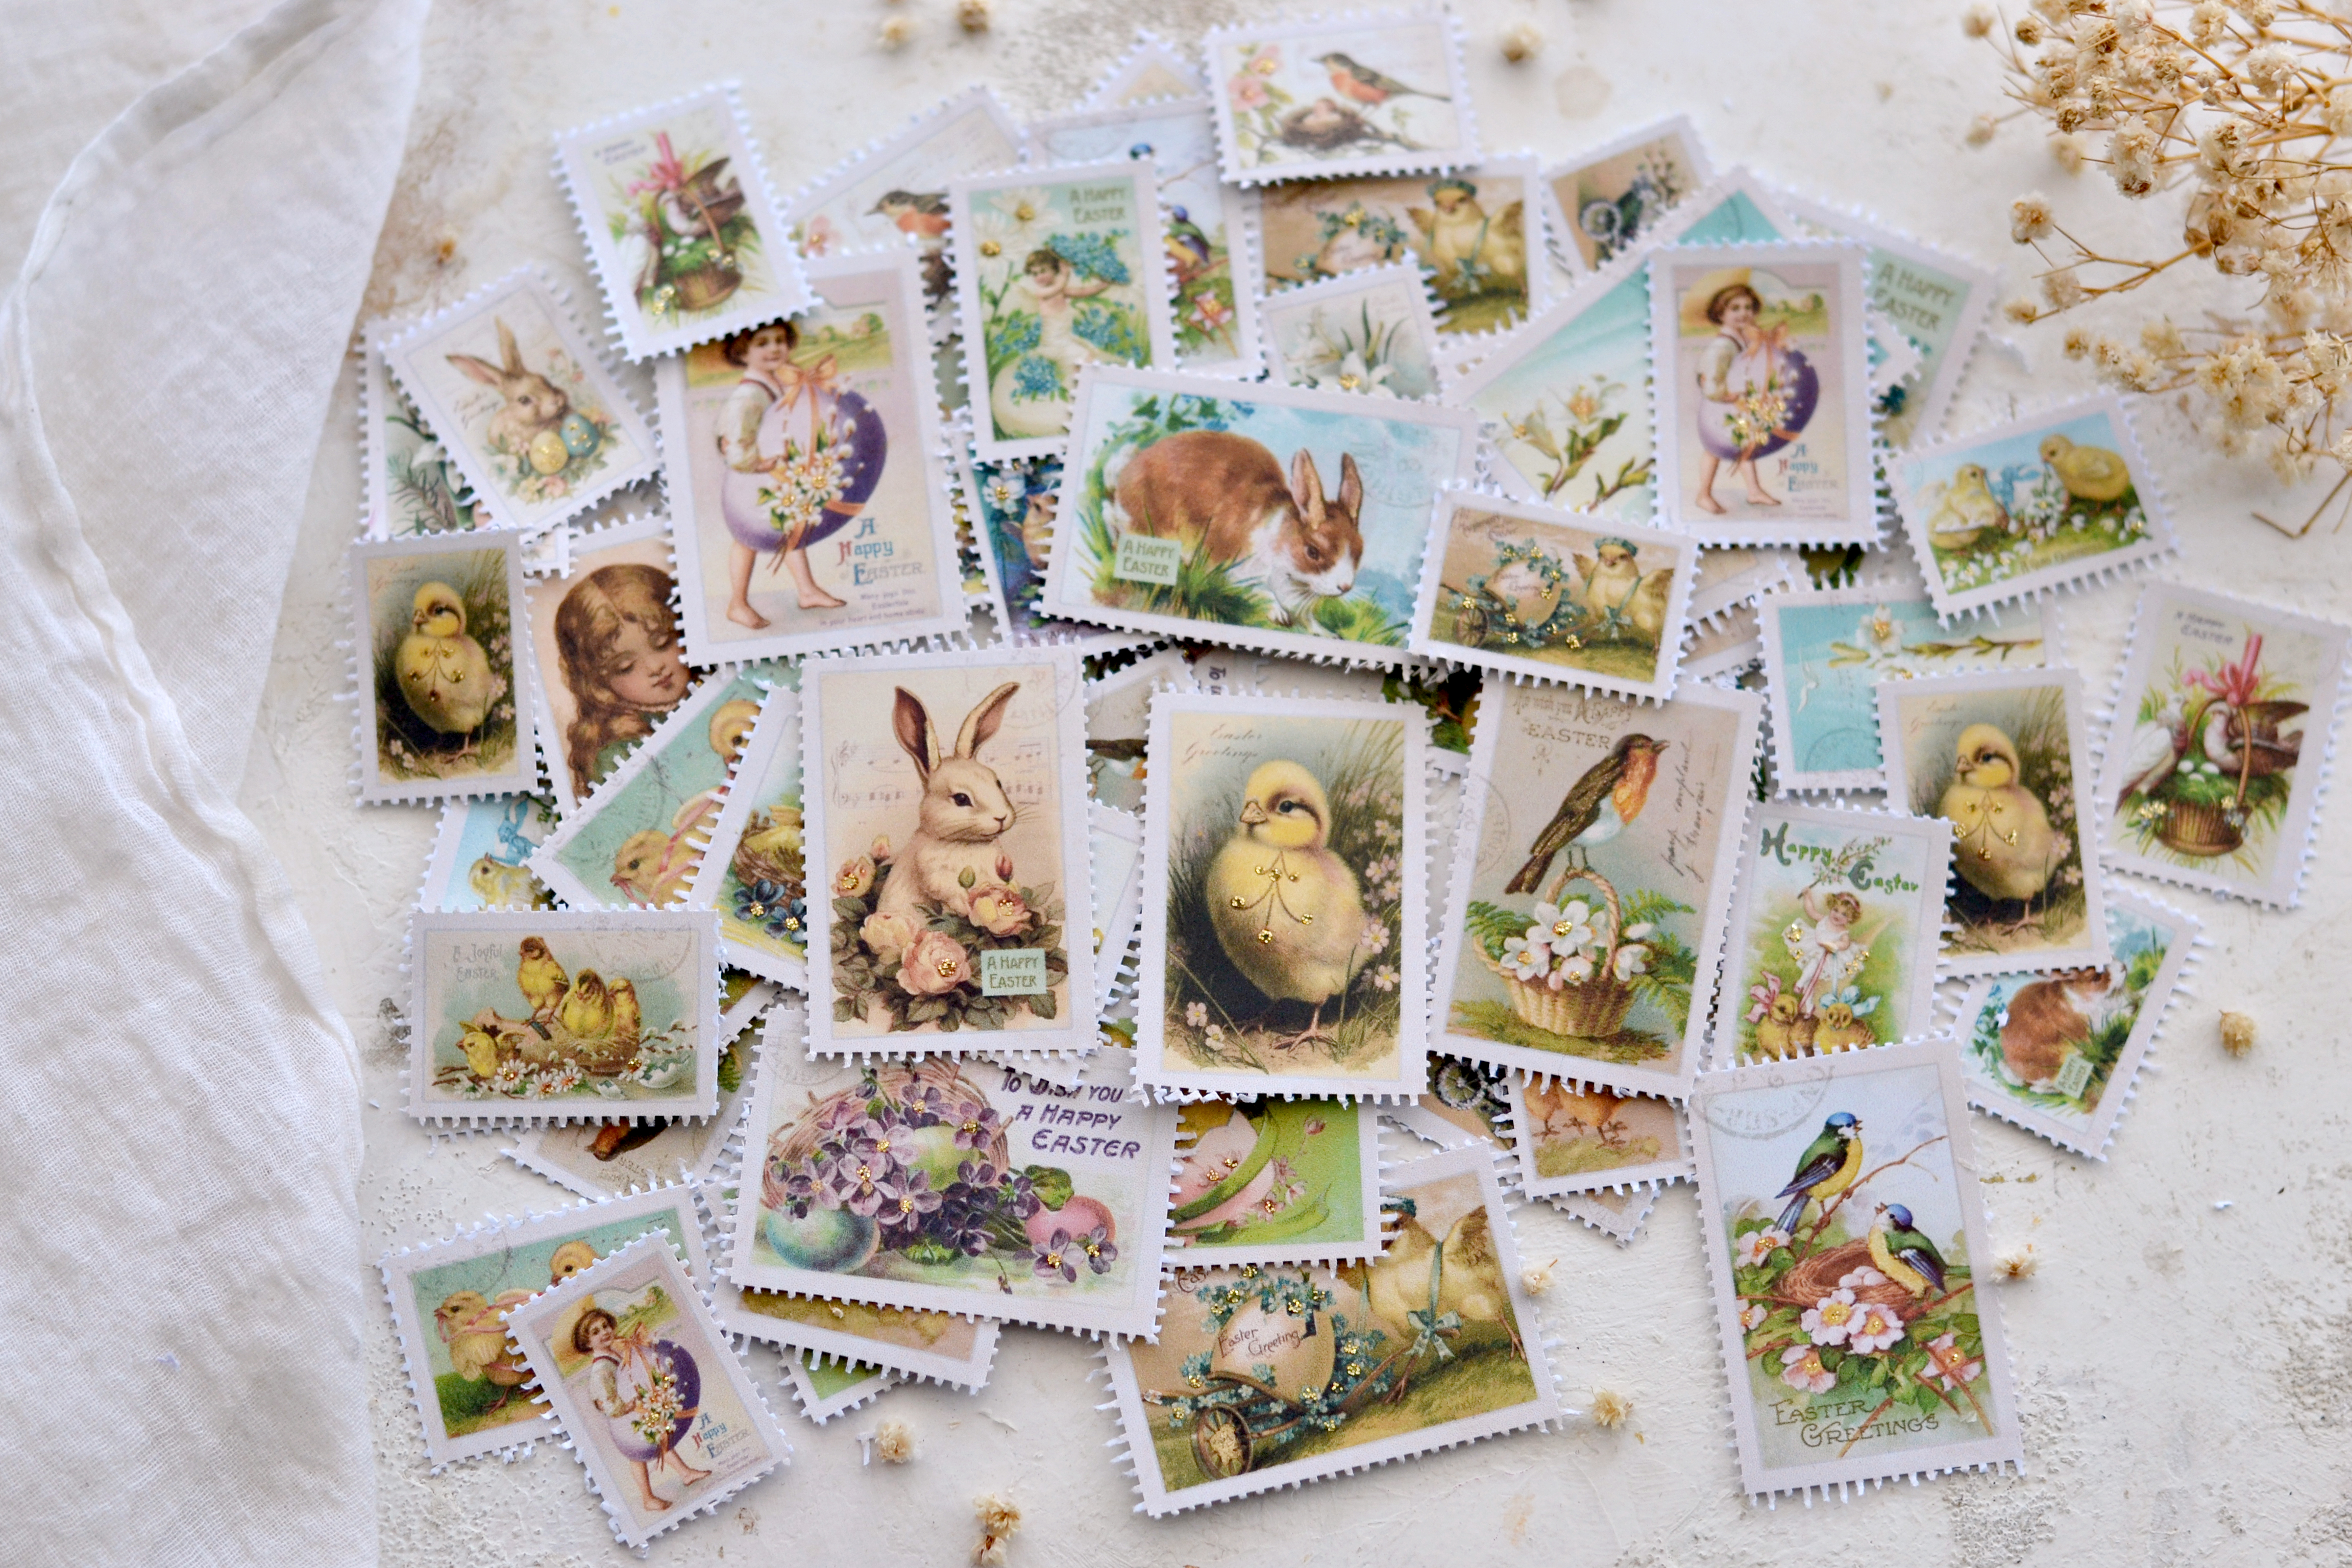
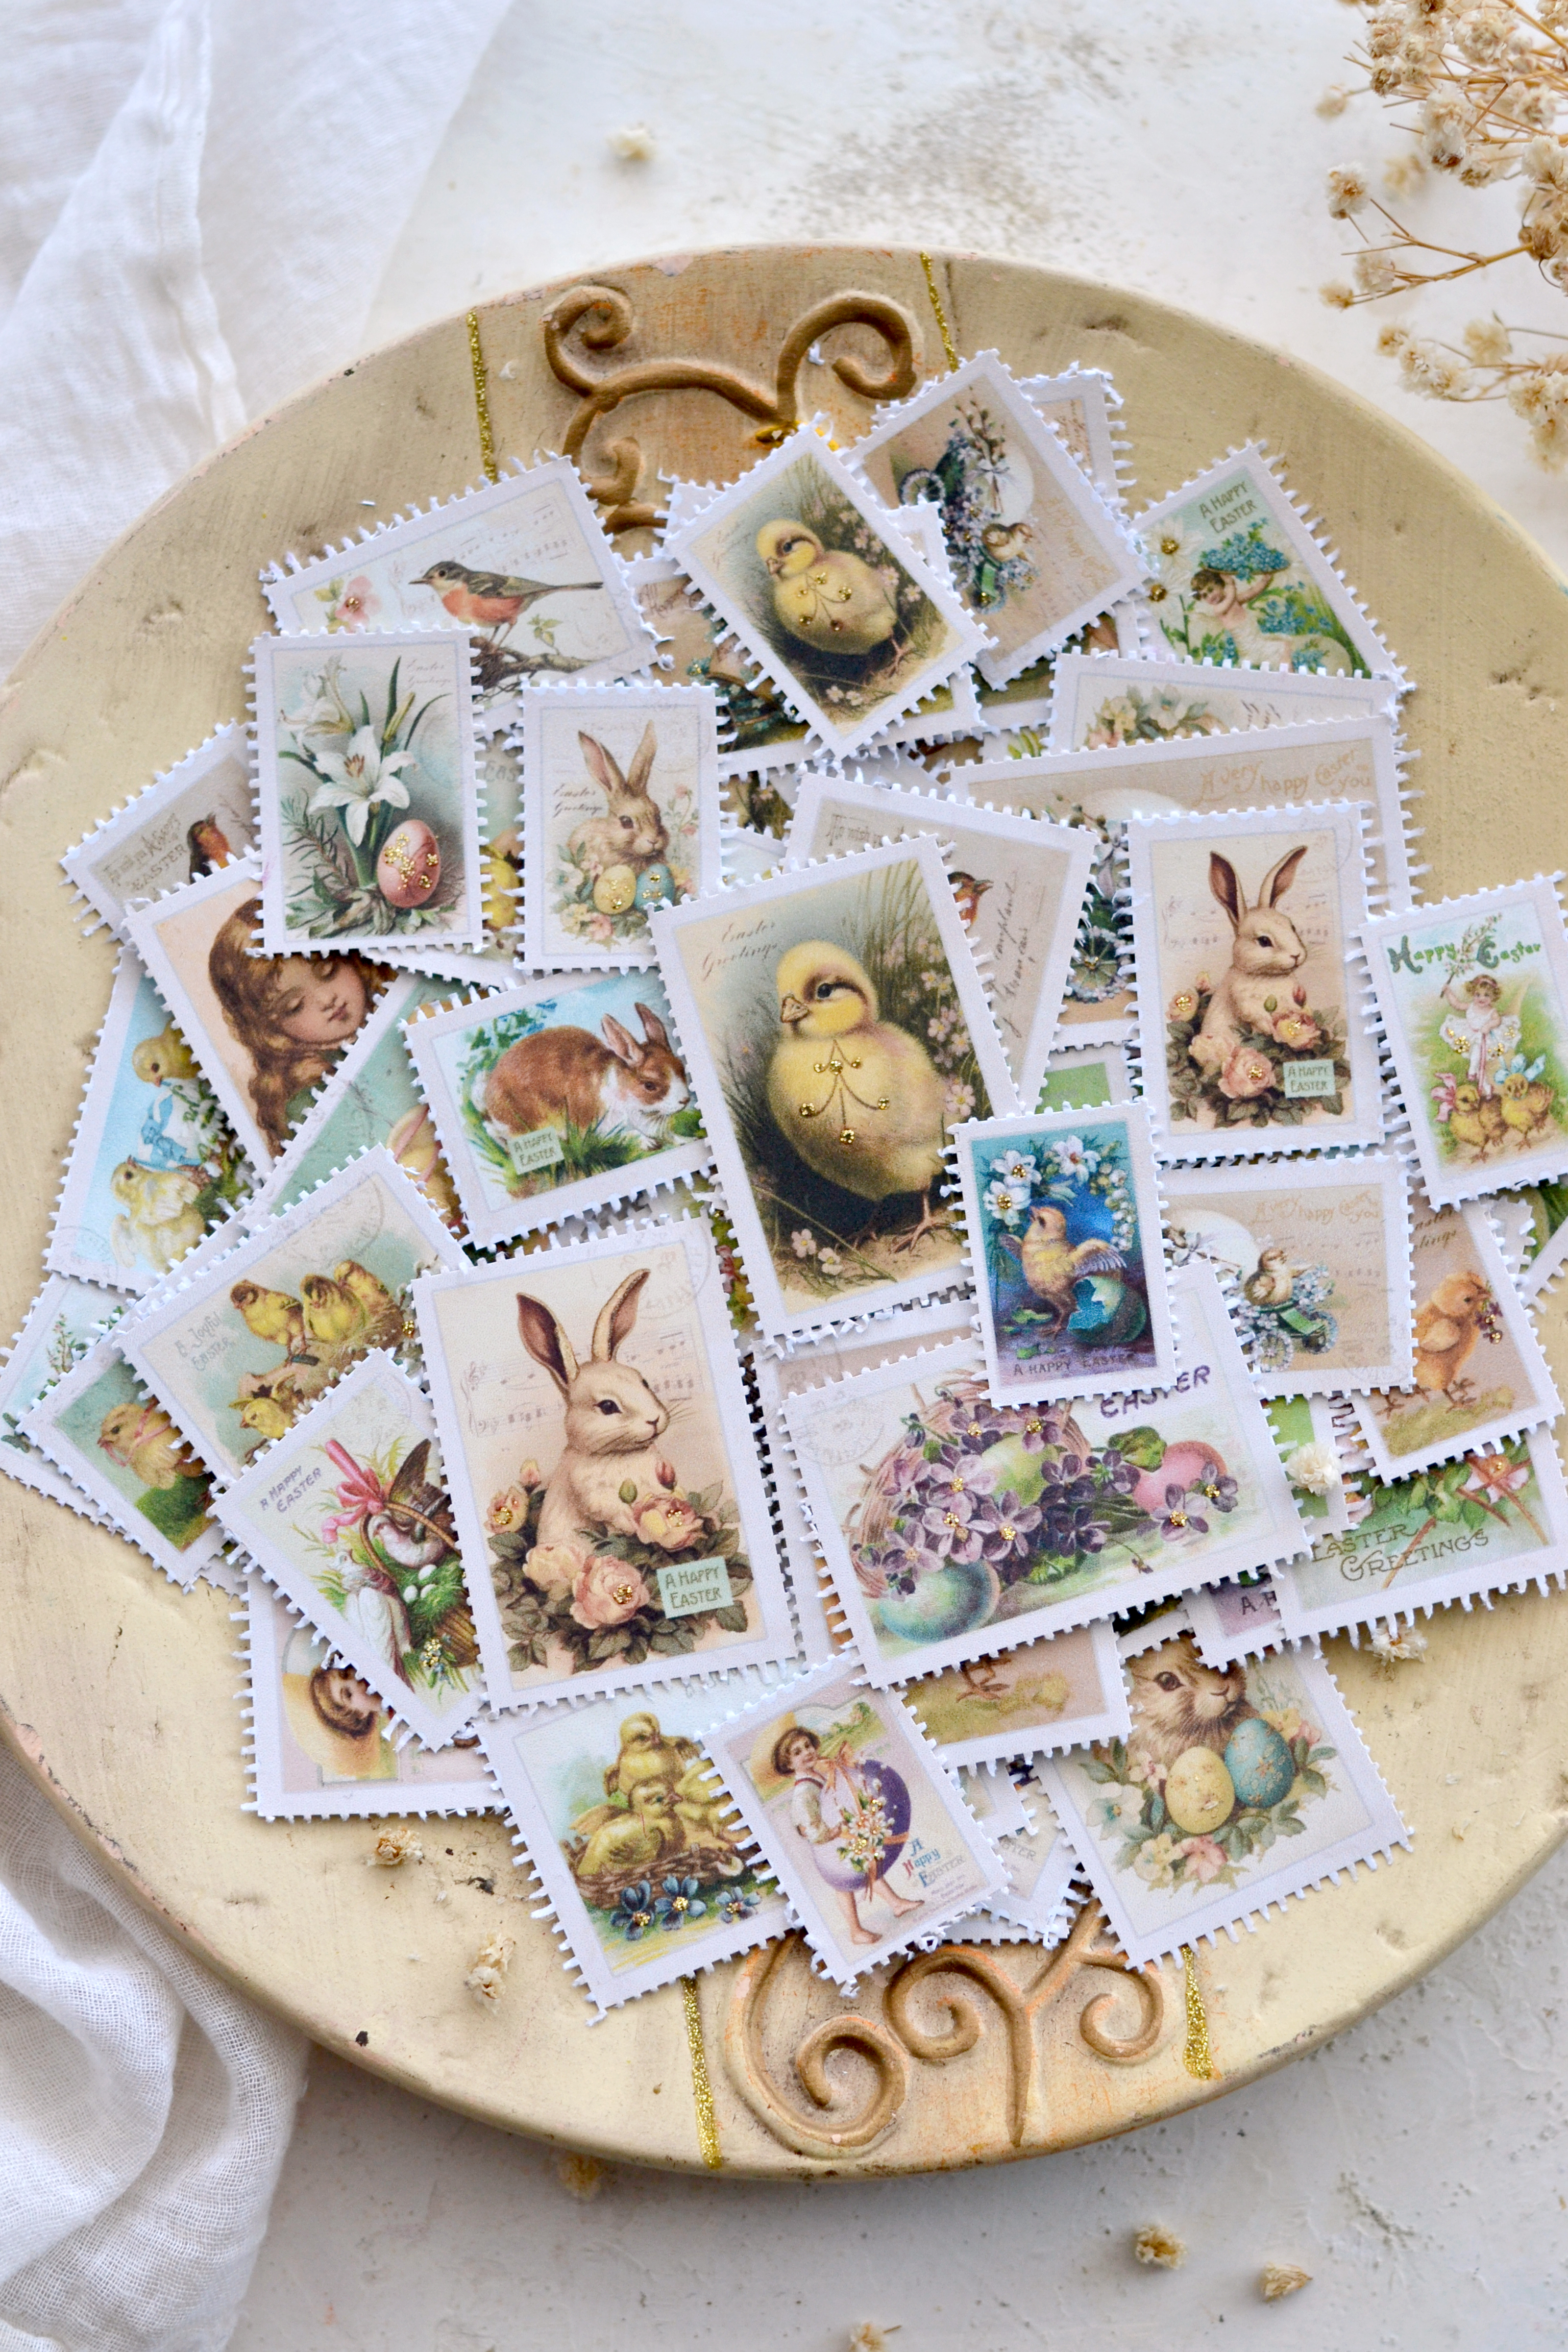
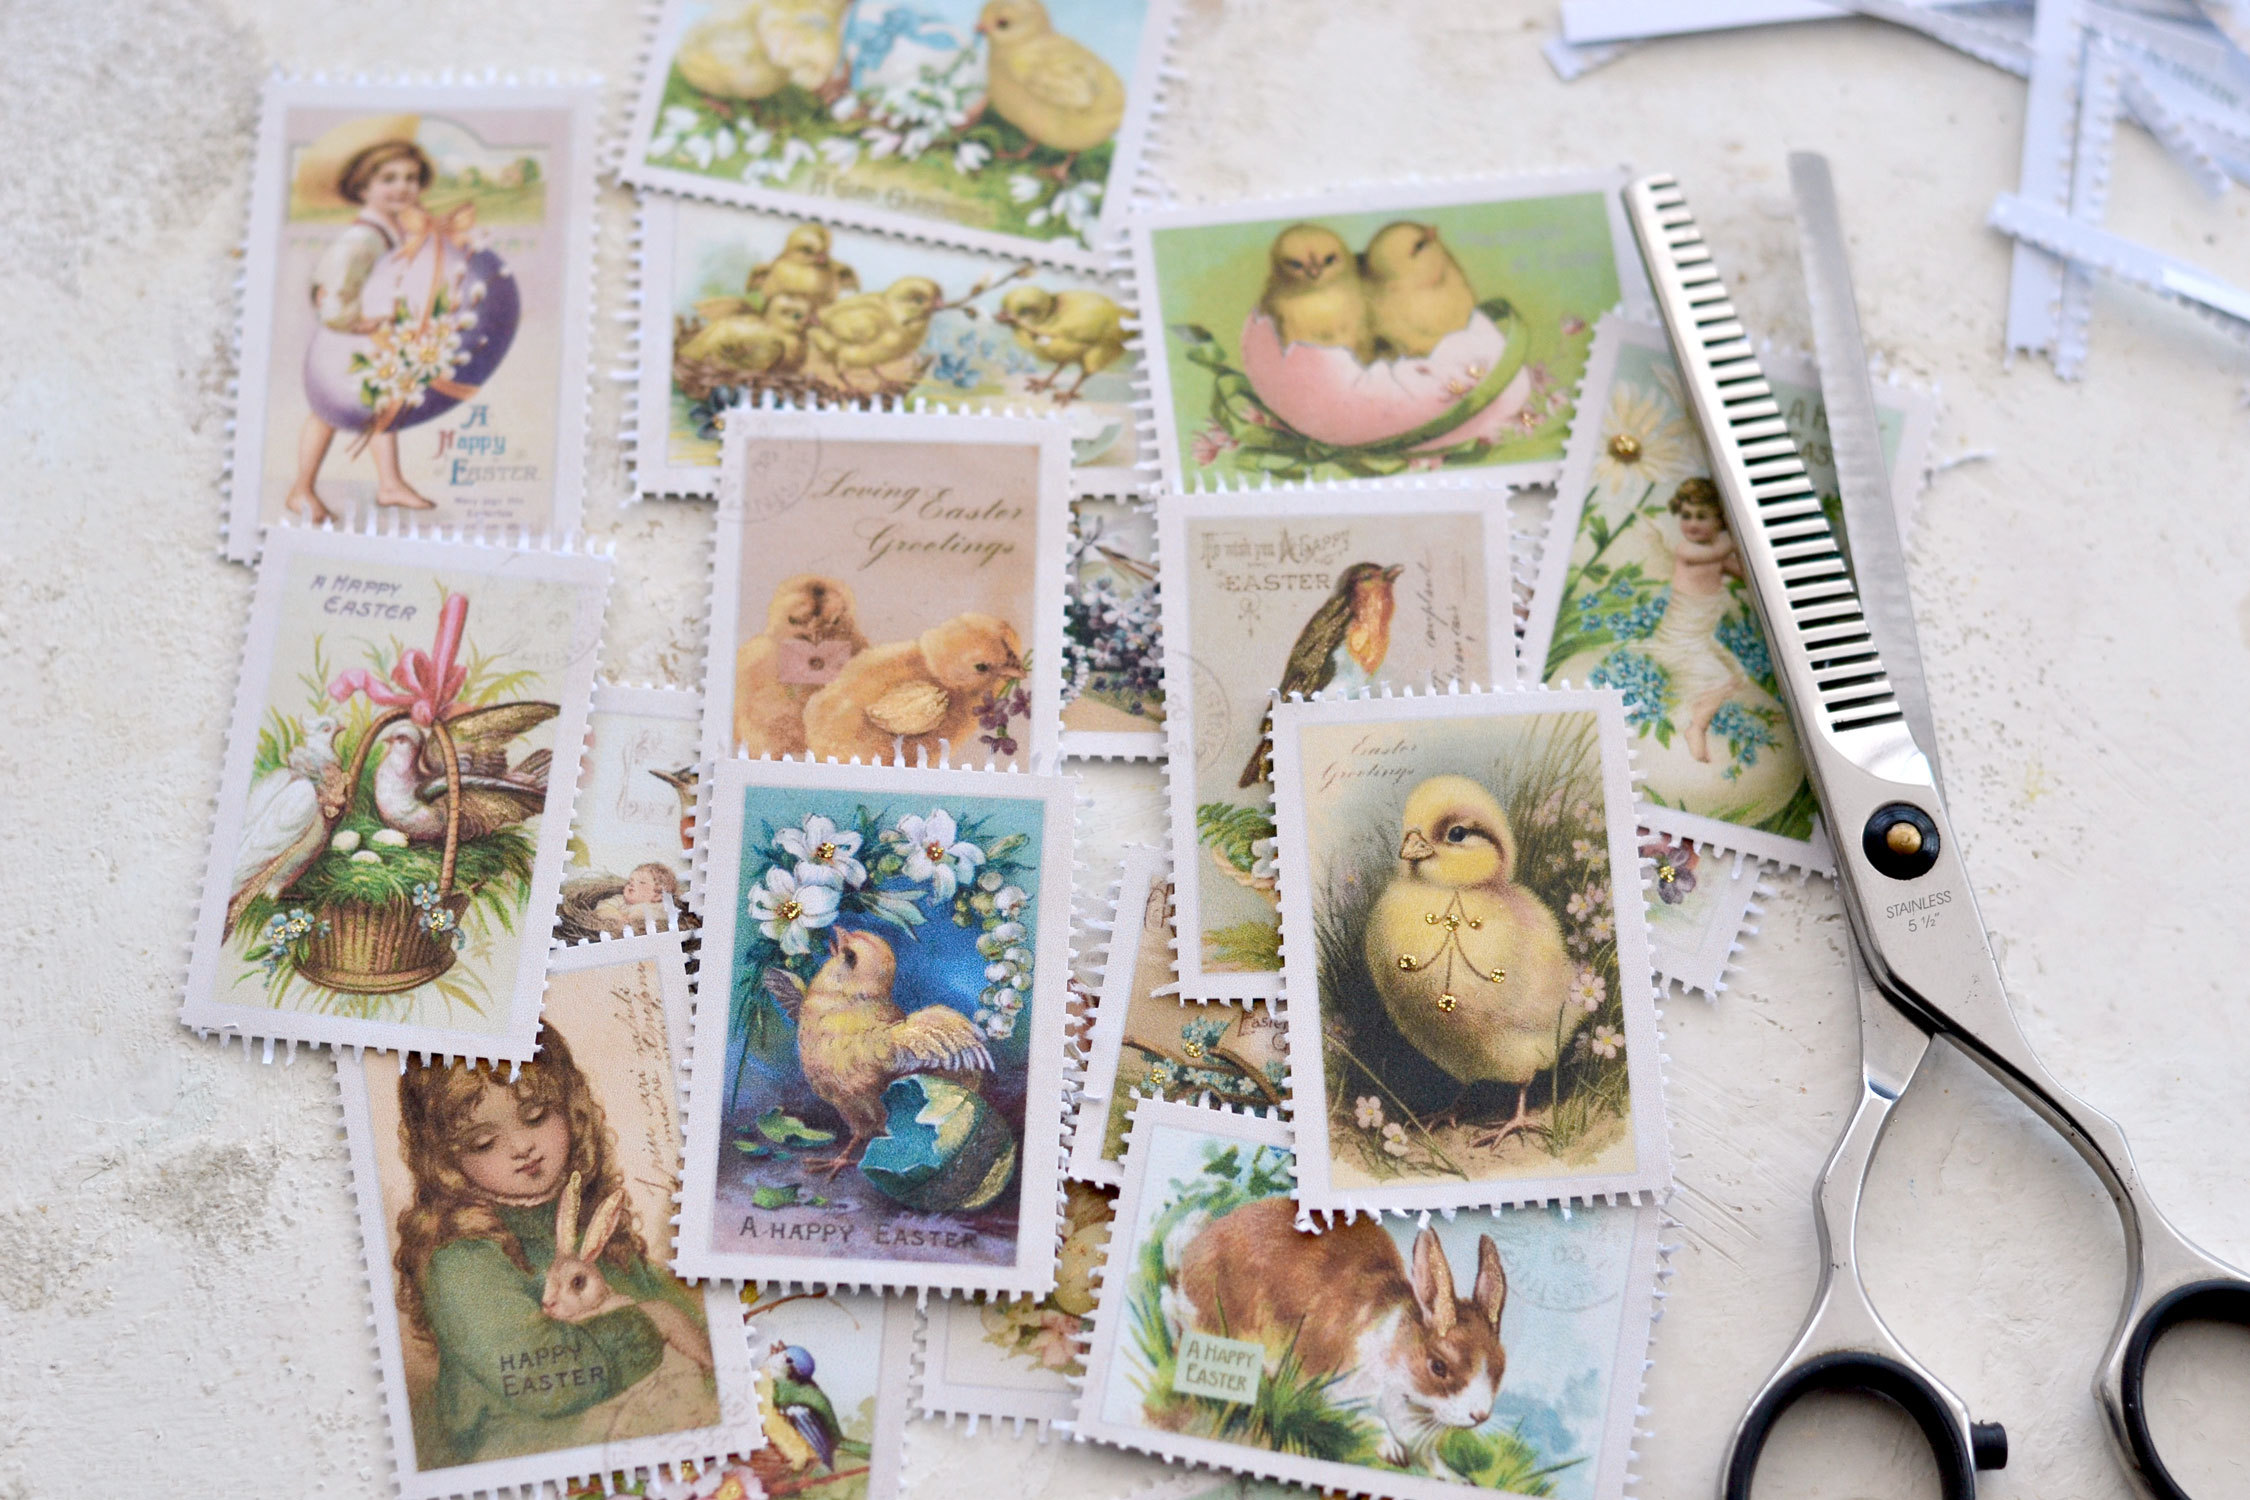
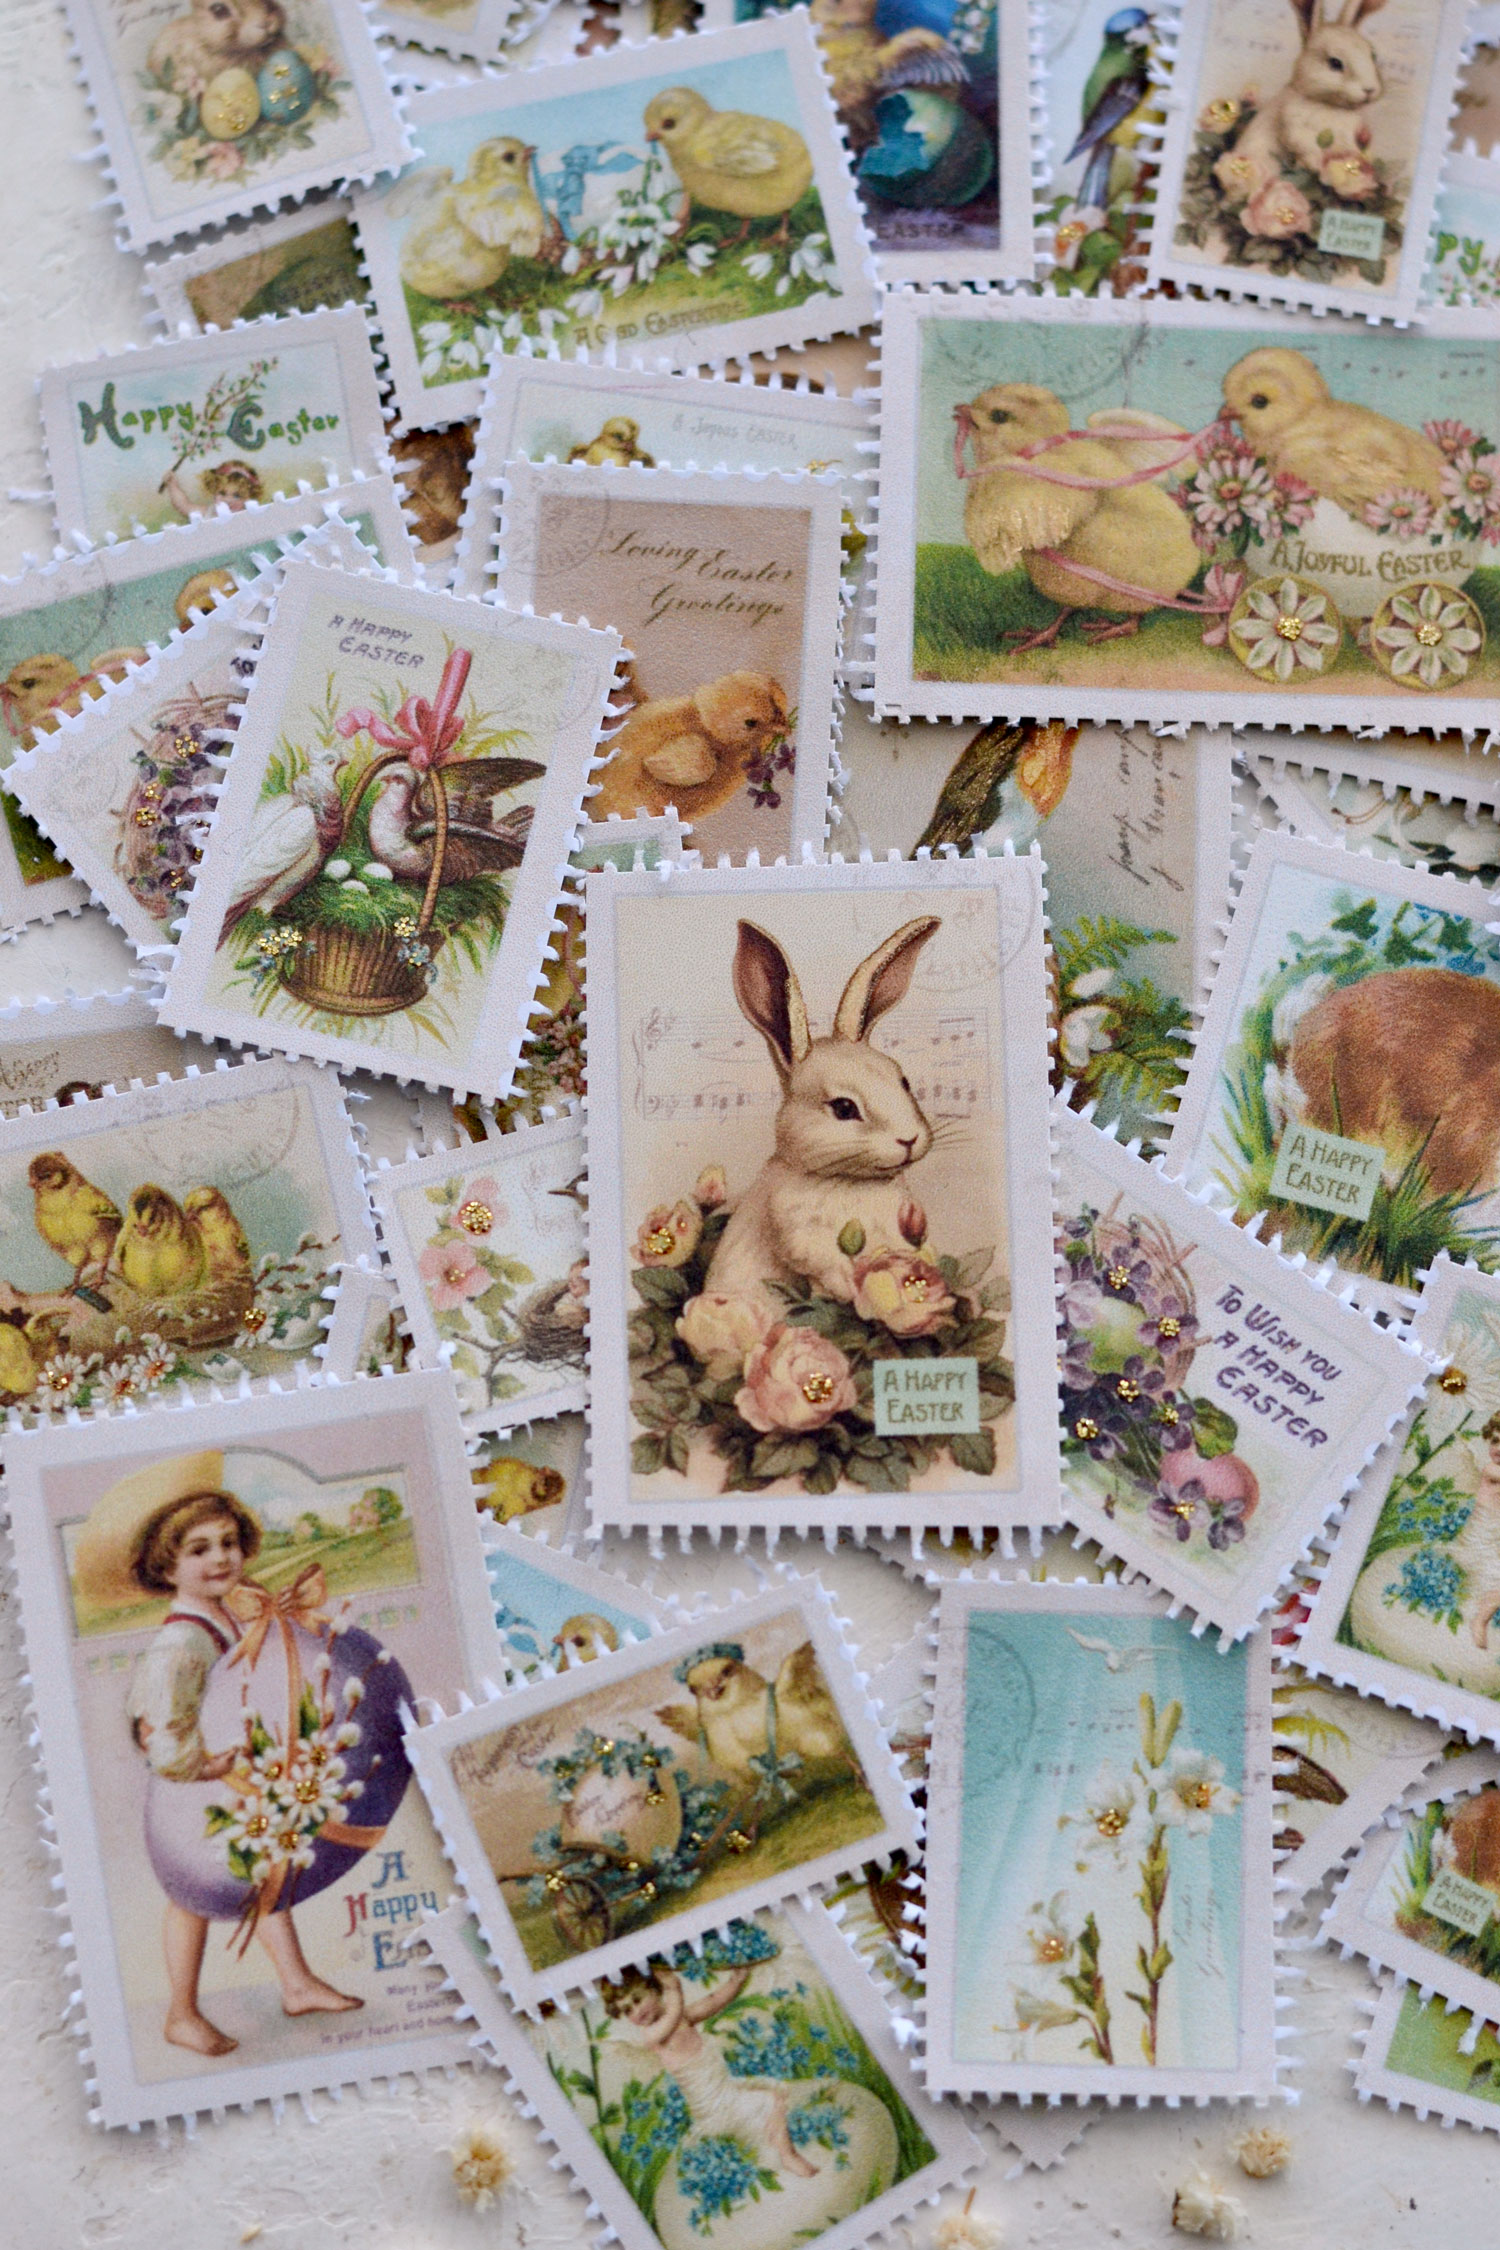
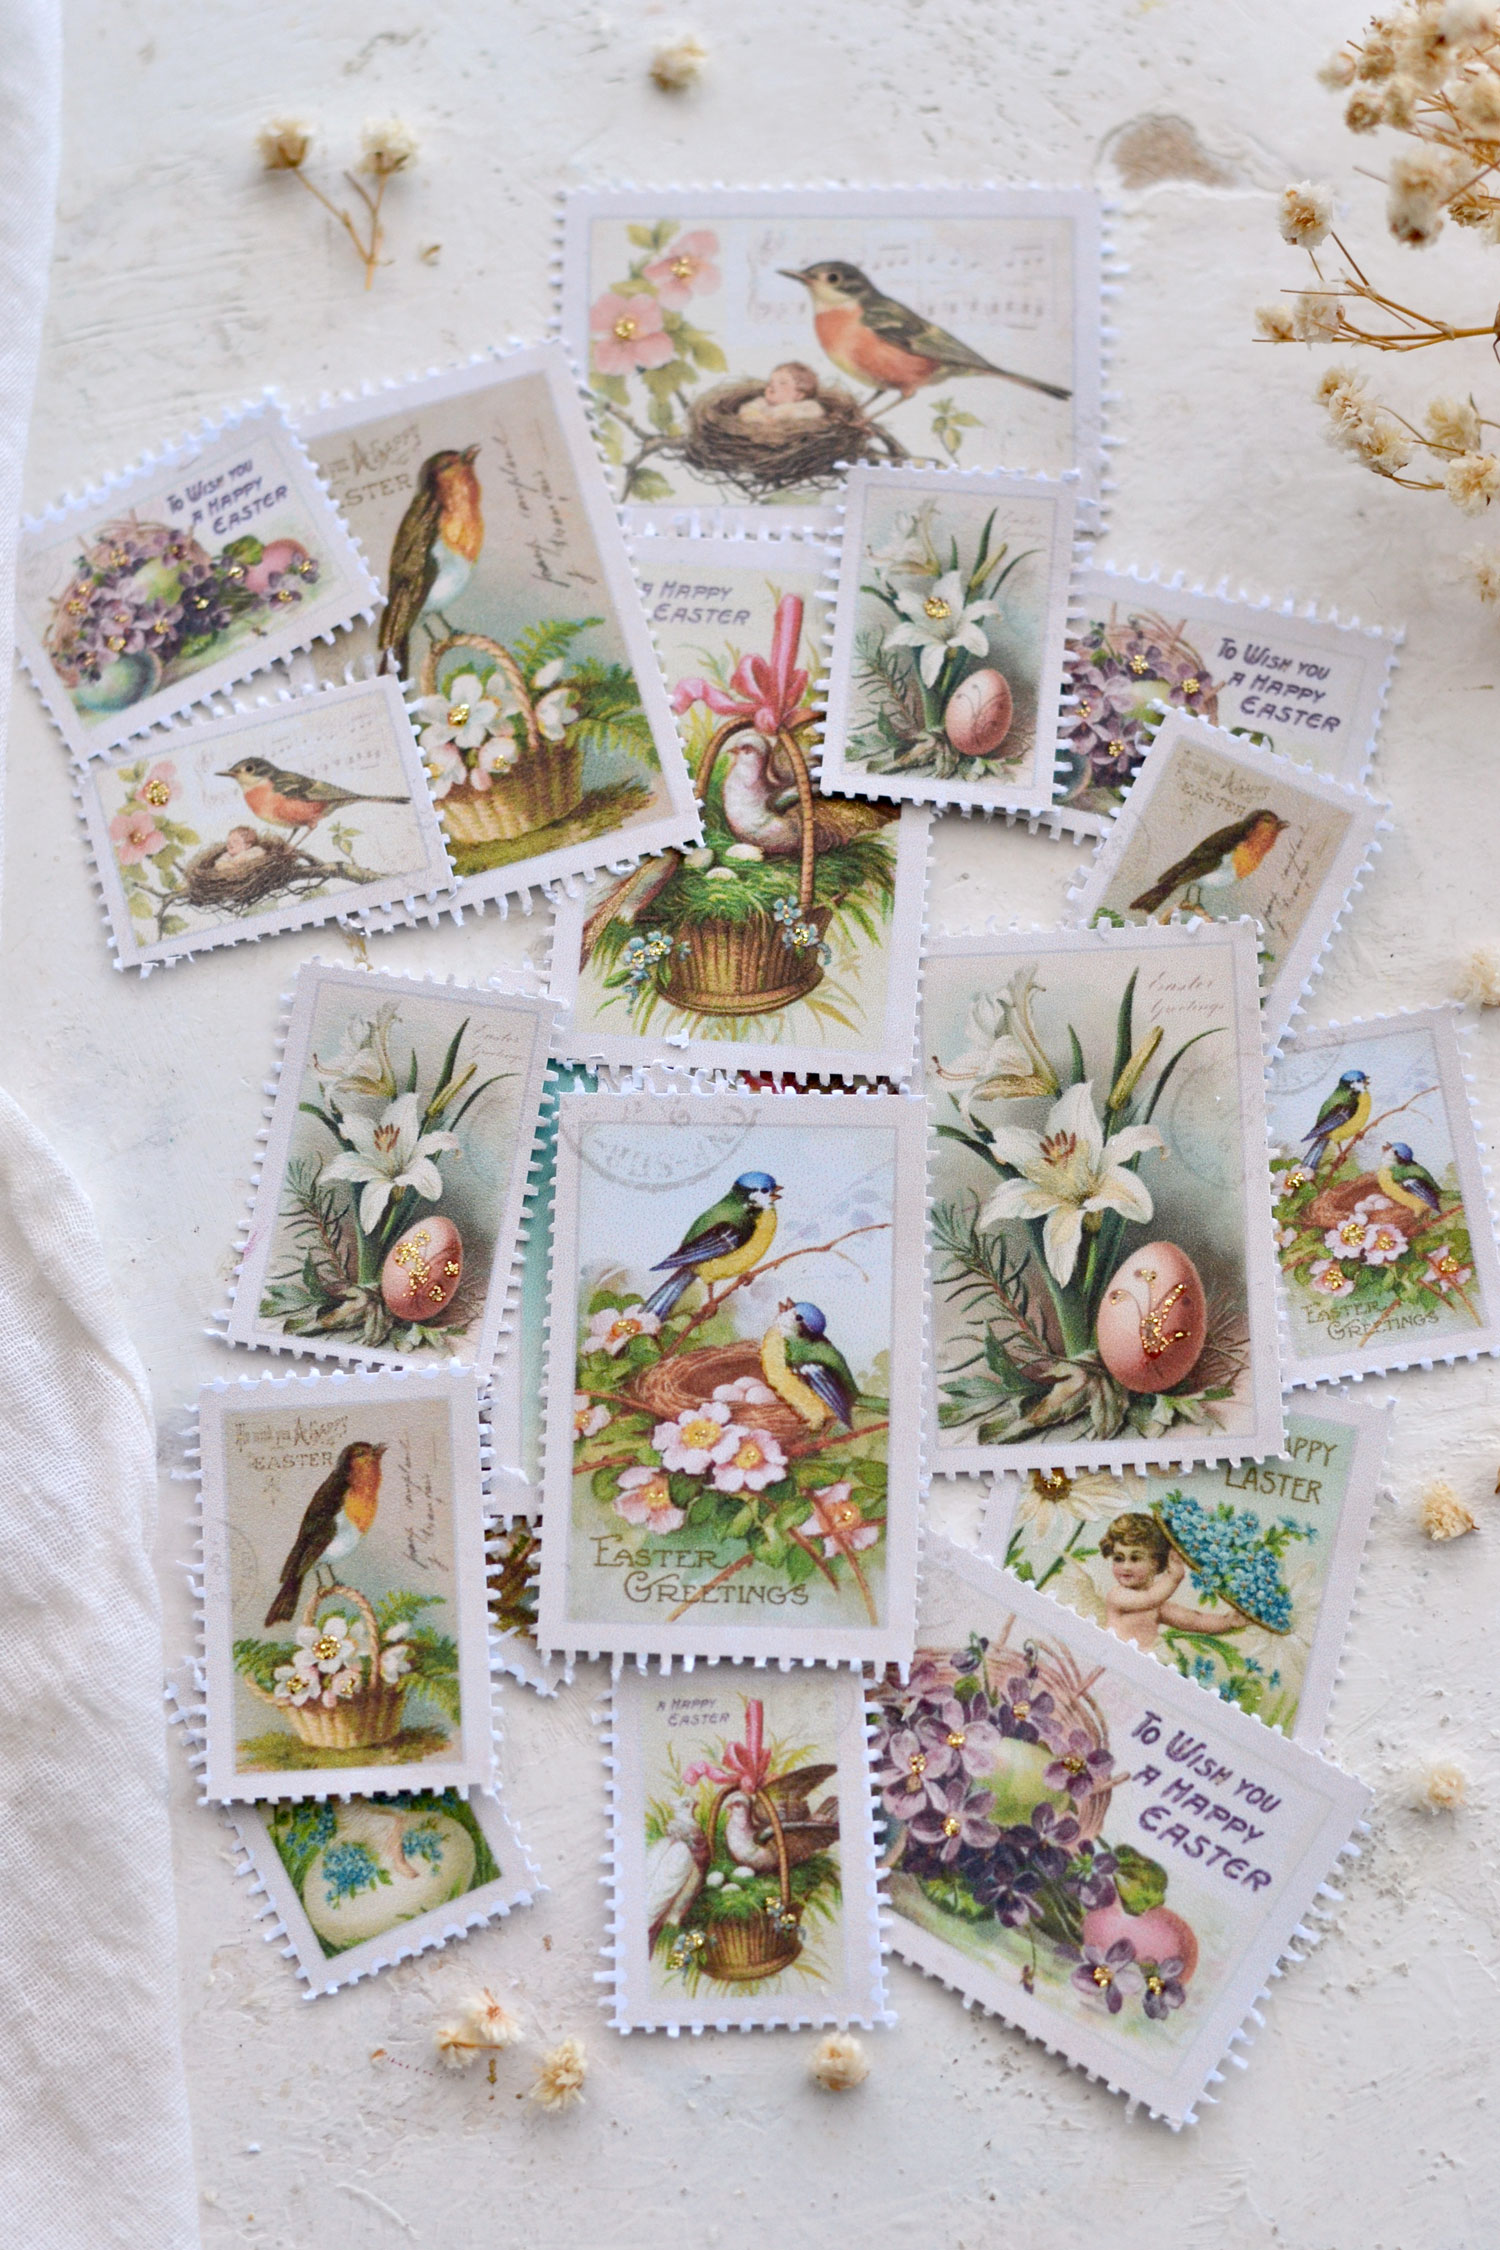
What a gorgeous display of Easter images turned into truly unique postage stamps!
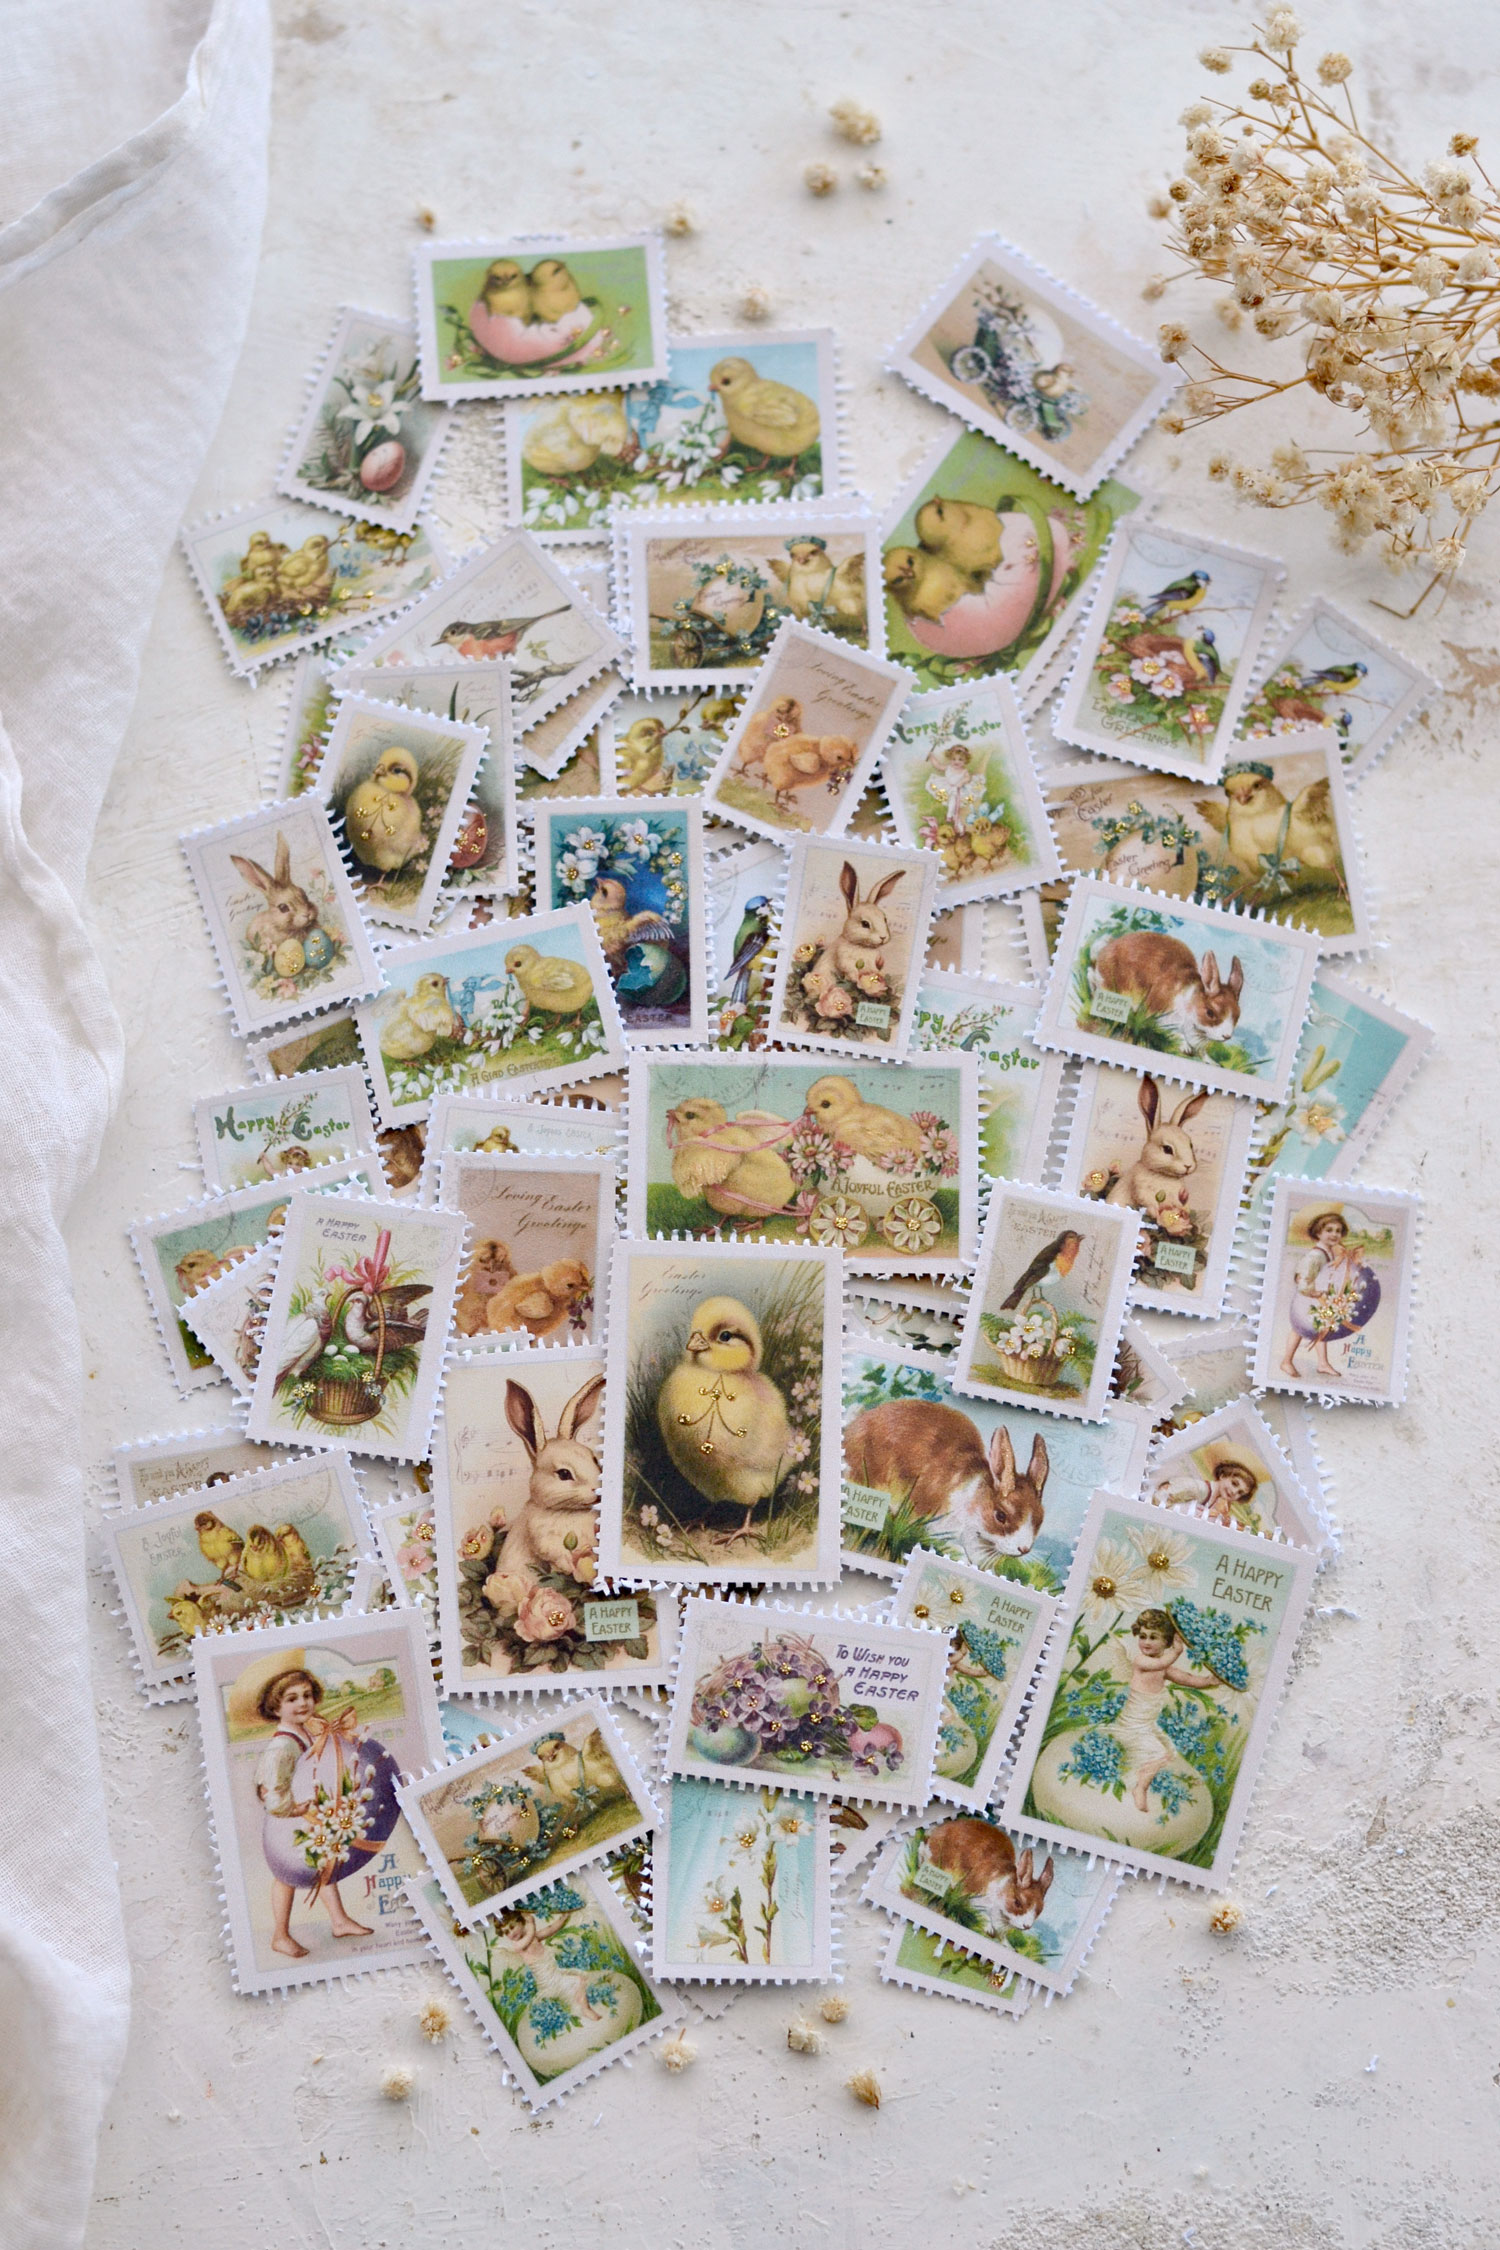
If you look really close you will be able to see all the glittery dots that I added to these beauties, making the designs even more charming!
The glitter glue dots that I added to the fluffy chick in the middle turned it into one of my favorites! I actually added that lovely flourish embellishment while creating the design thinking the chick was a little too plain. But I never thought it would look so beautiful with a few dots of glitter glue on top!
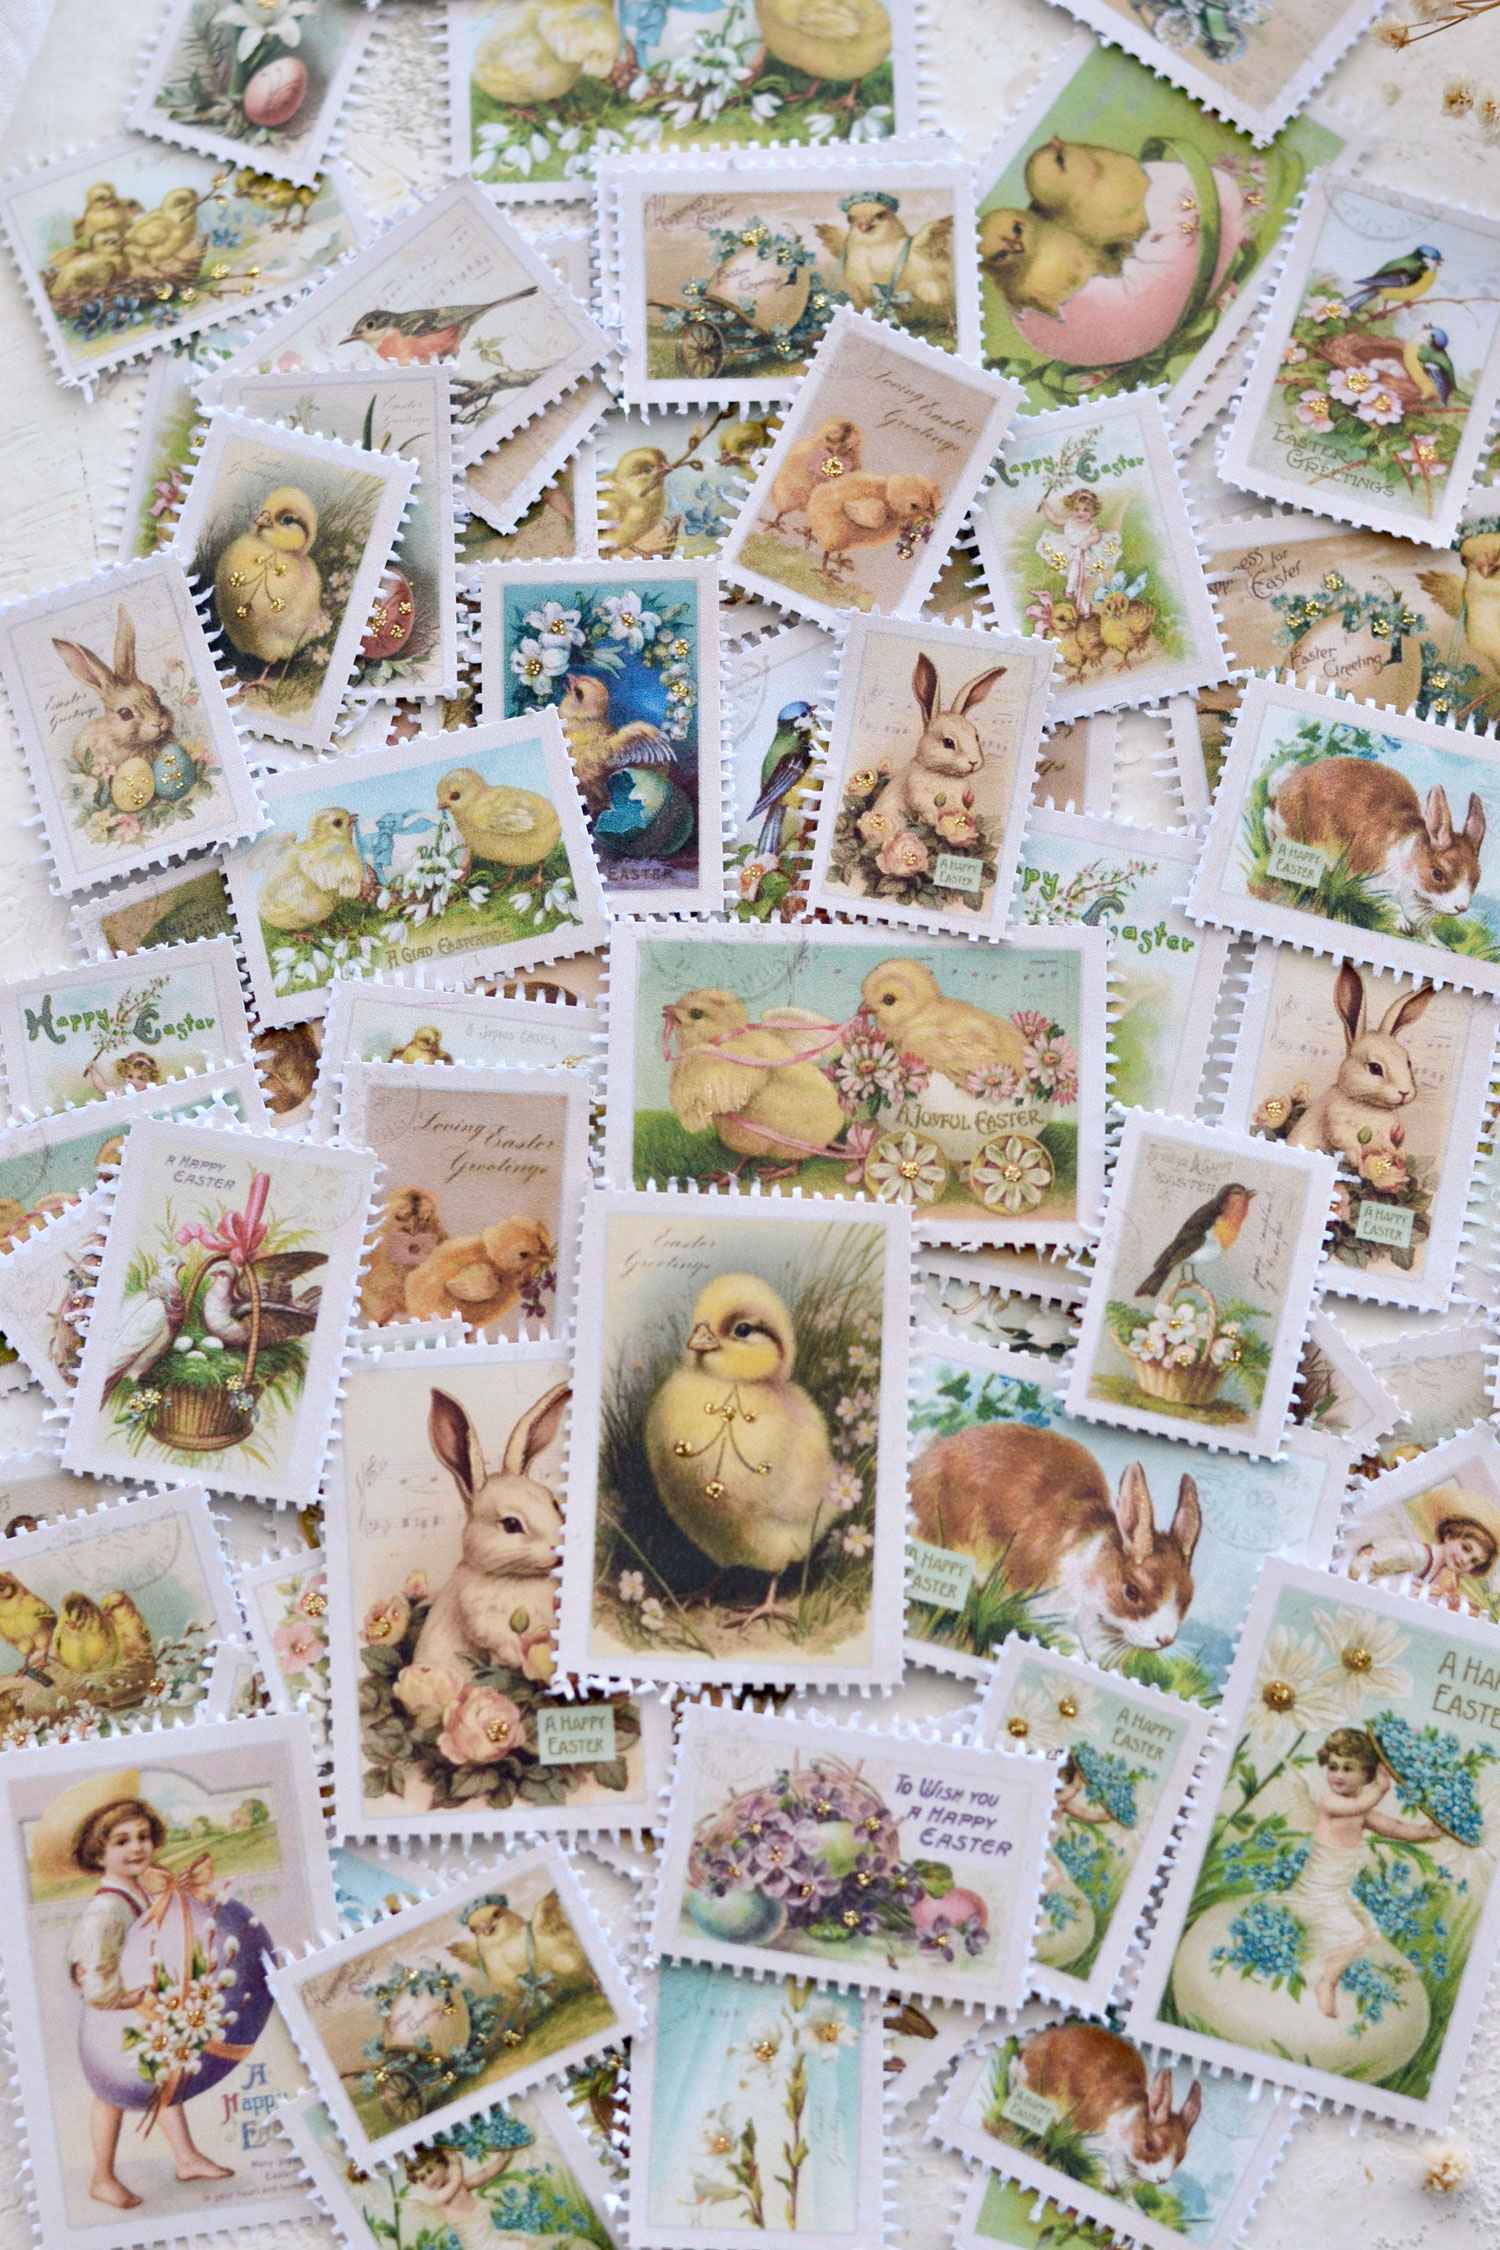
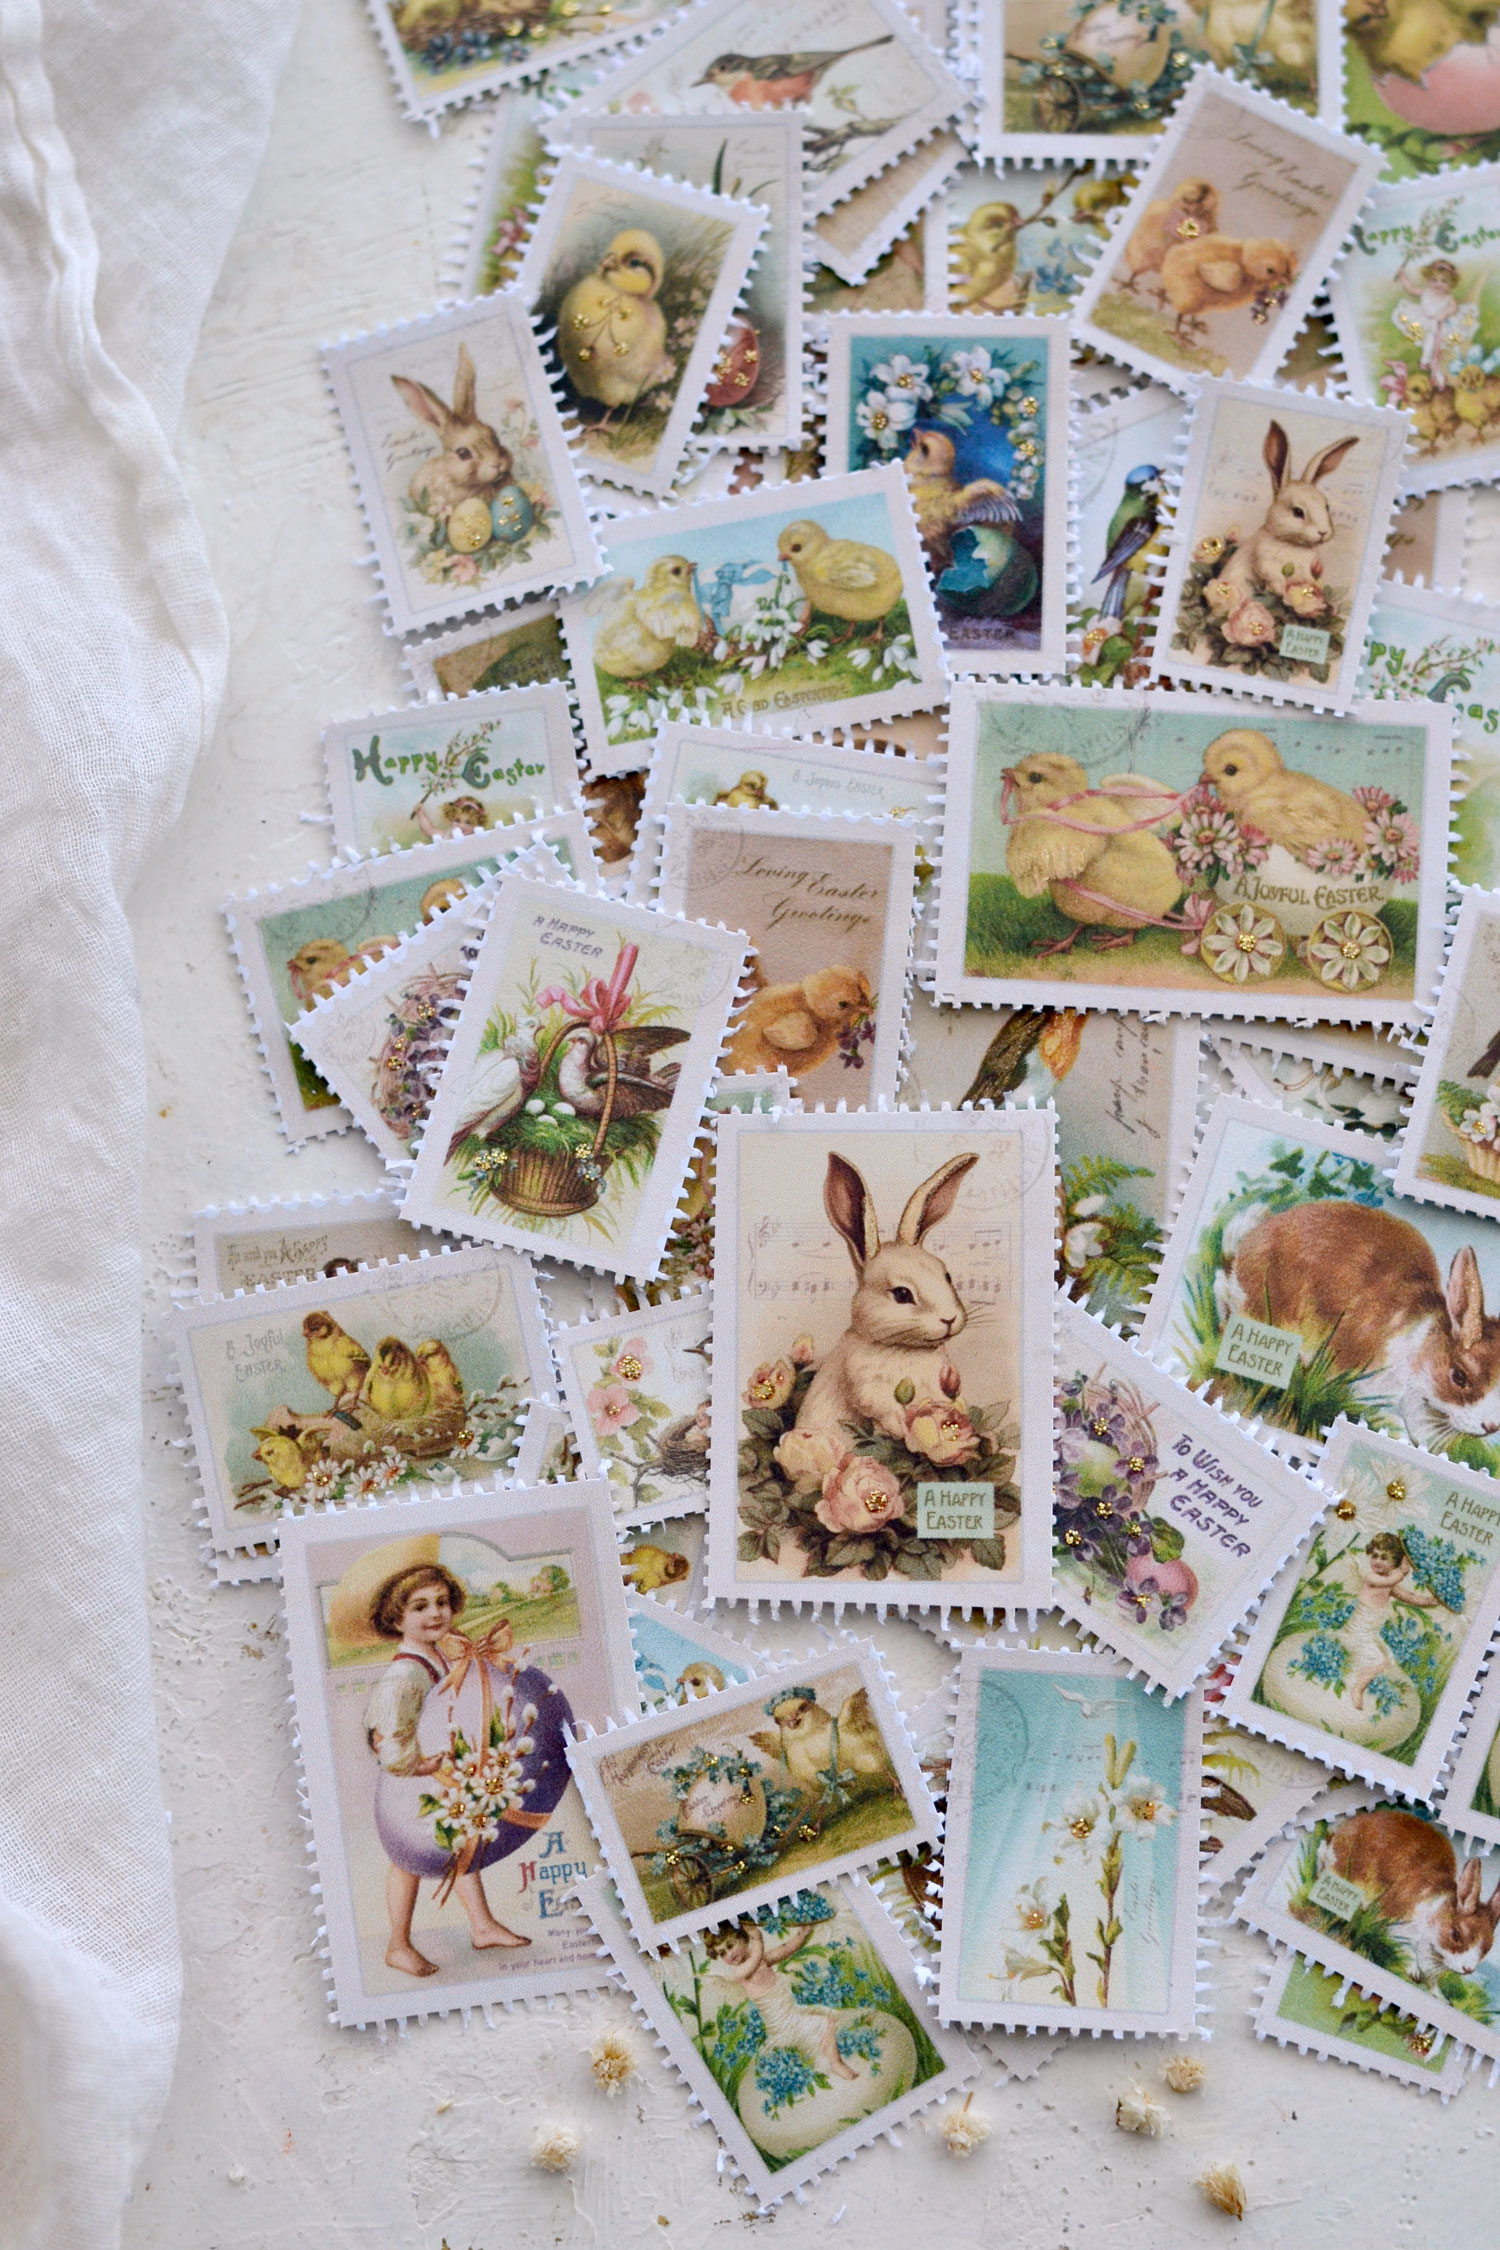
And speaking of Easter chicks, have you noticed that we actually have a bunch of stamps with all sorts of fuzzy chicks? I only noticed there were so many after cutting the stamps, I love how beautiful they all look together! This will give you the option to use them in a special Easter chick-themed project or a color-coordinated one where you need to keep the yellow theme going. 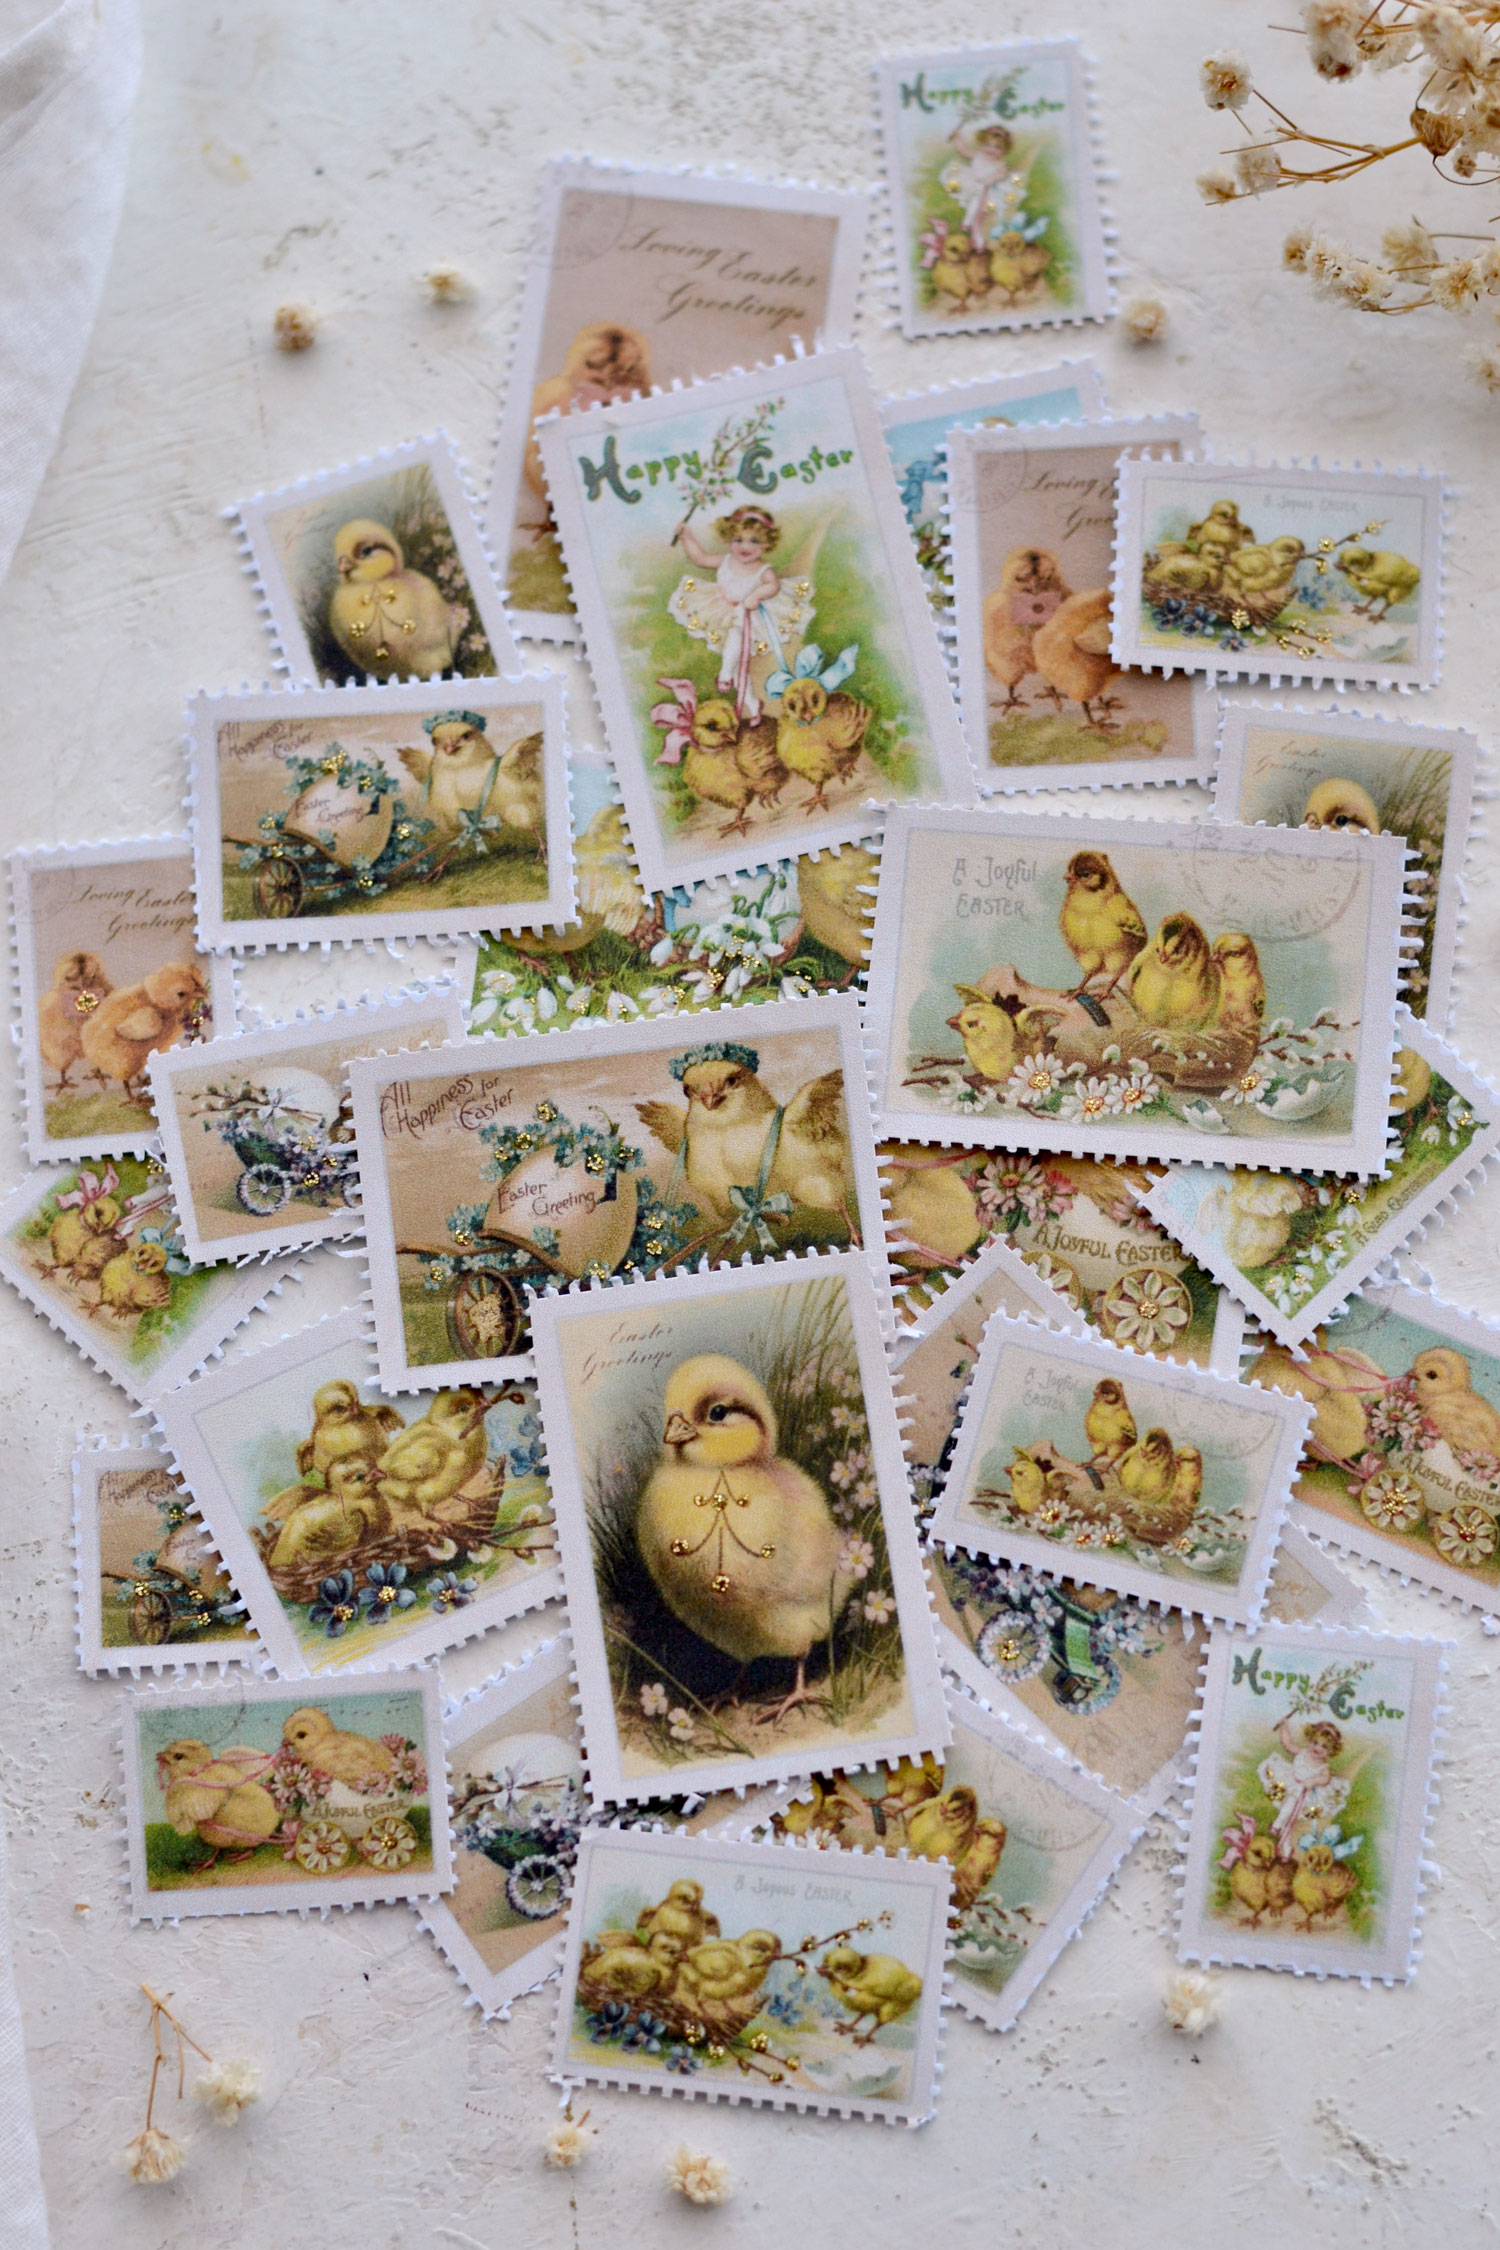
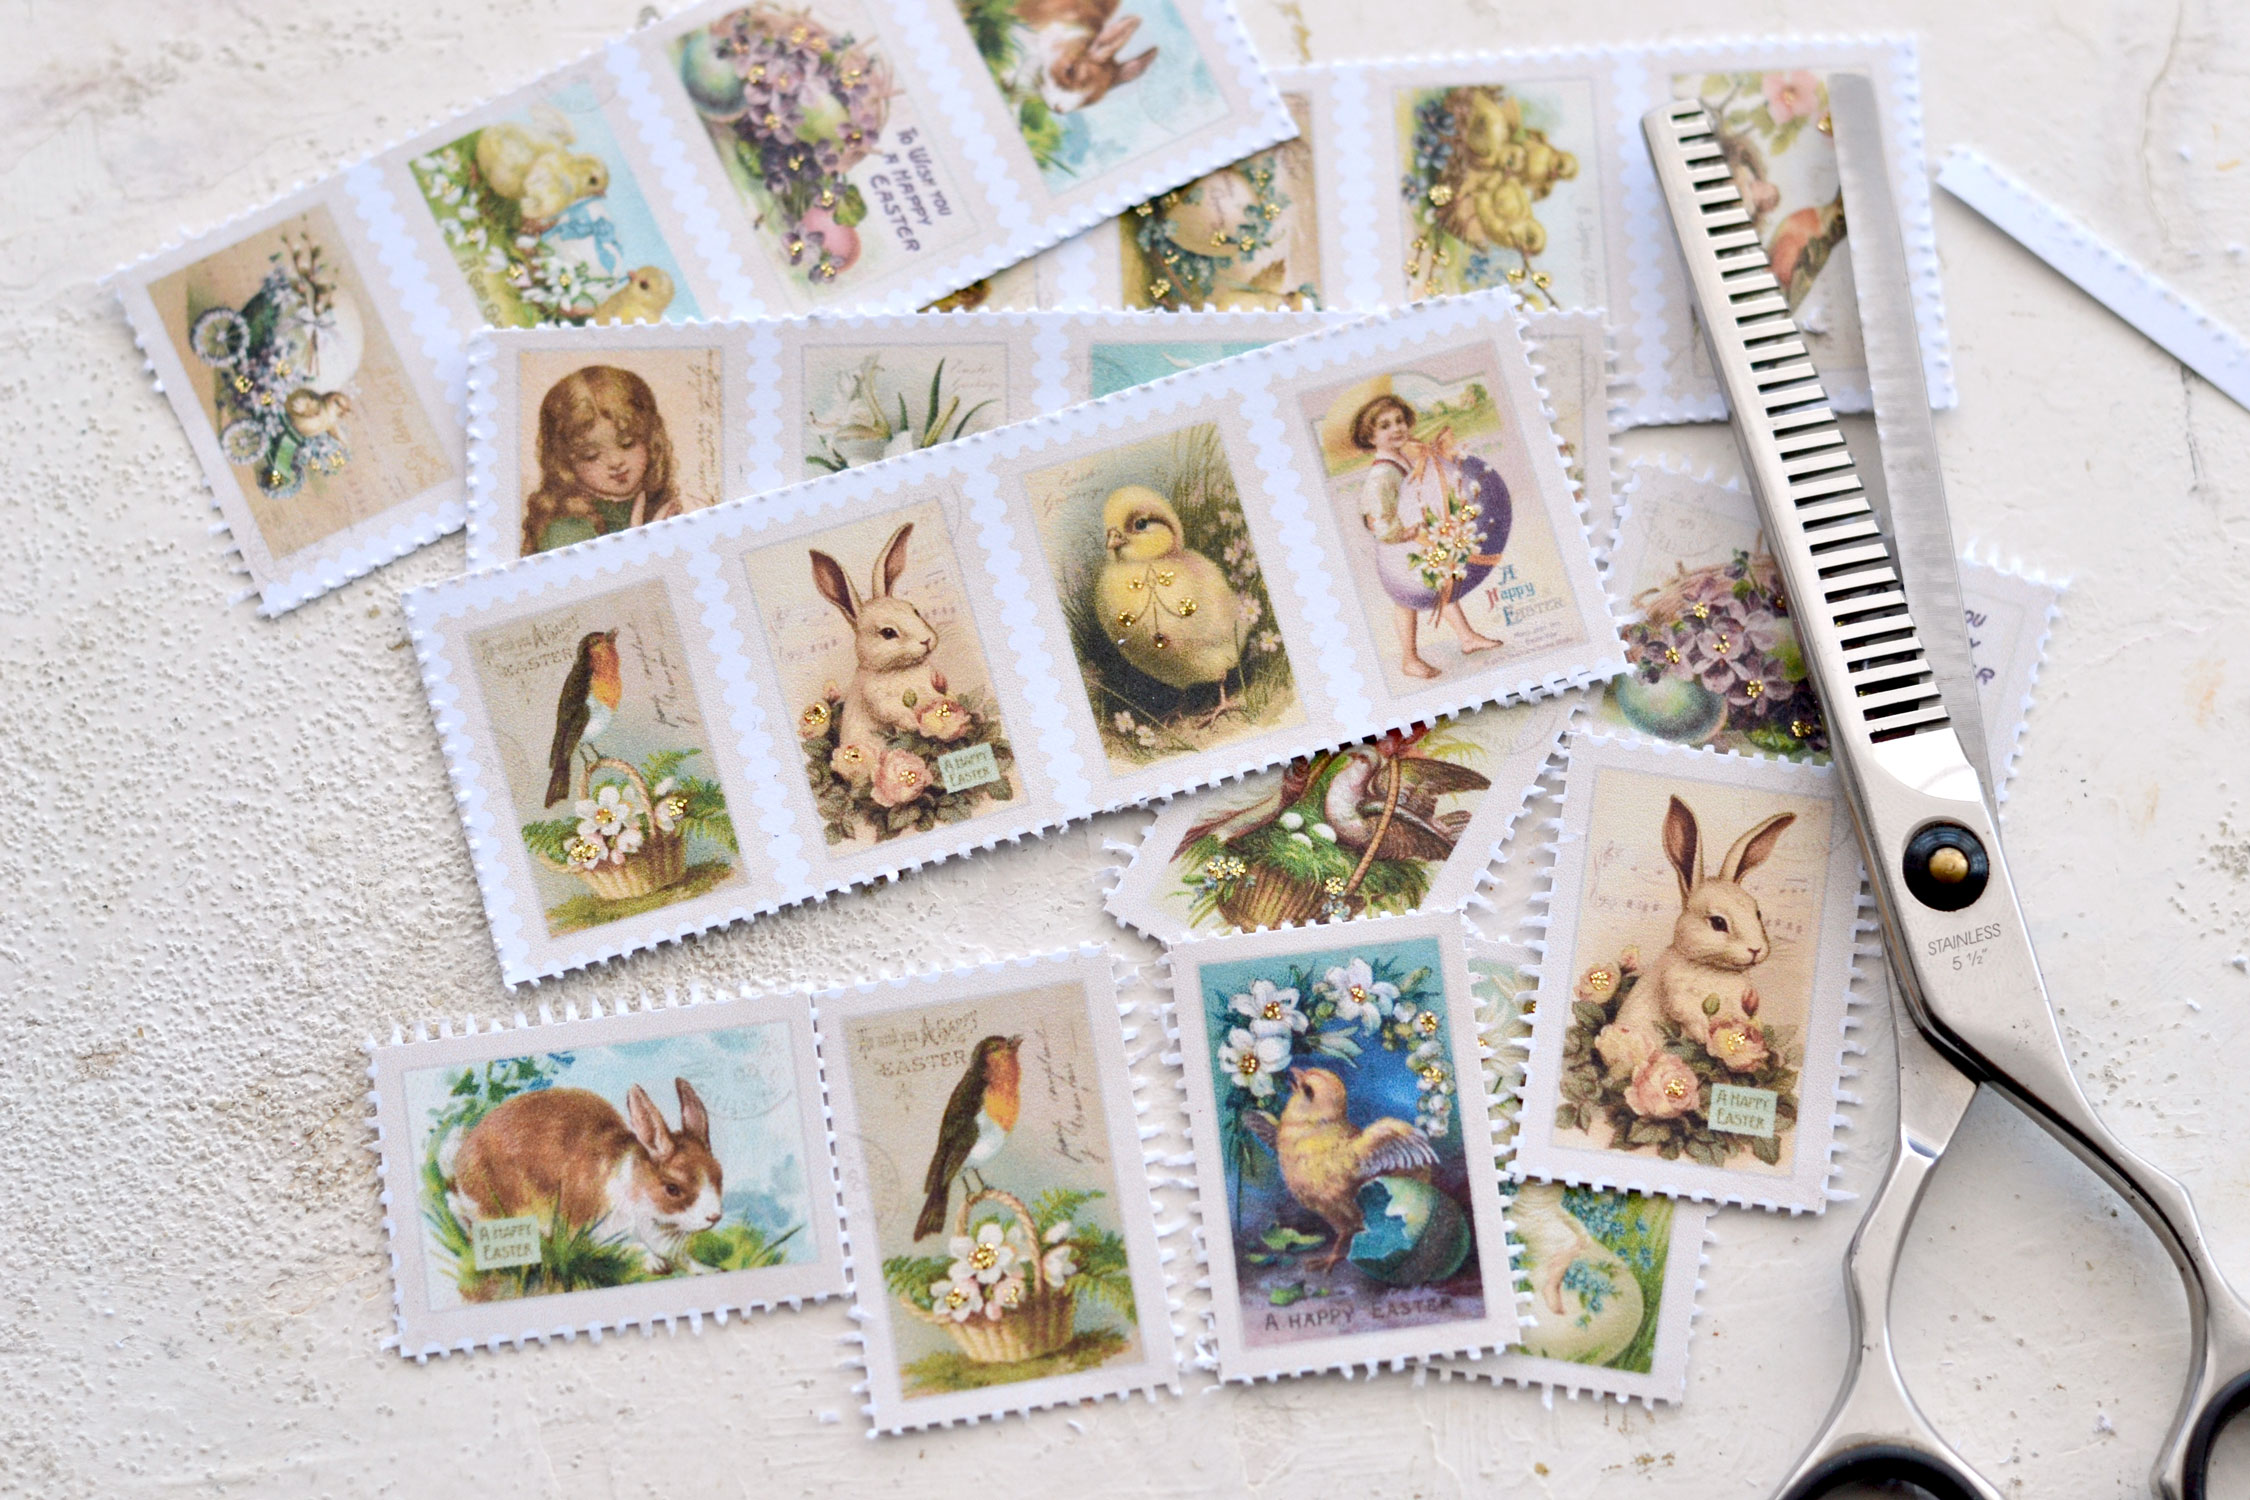
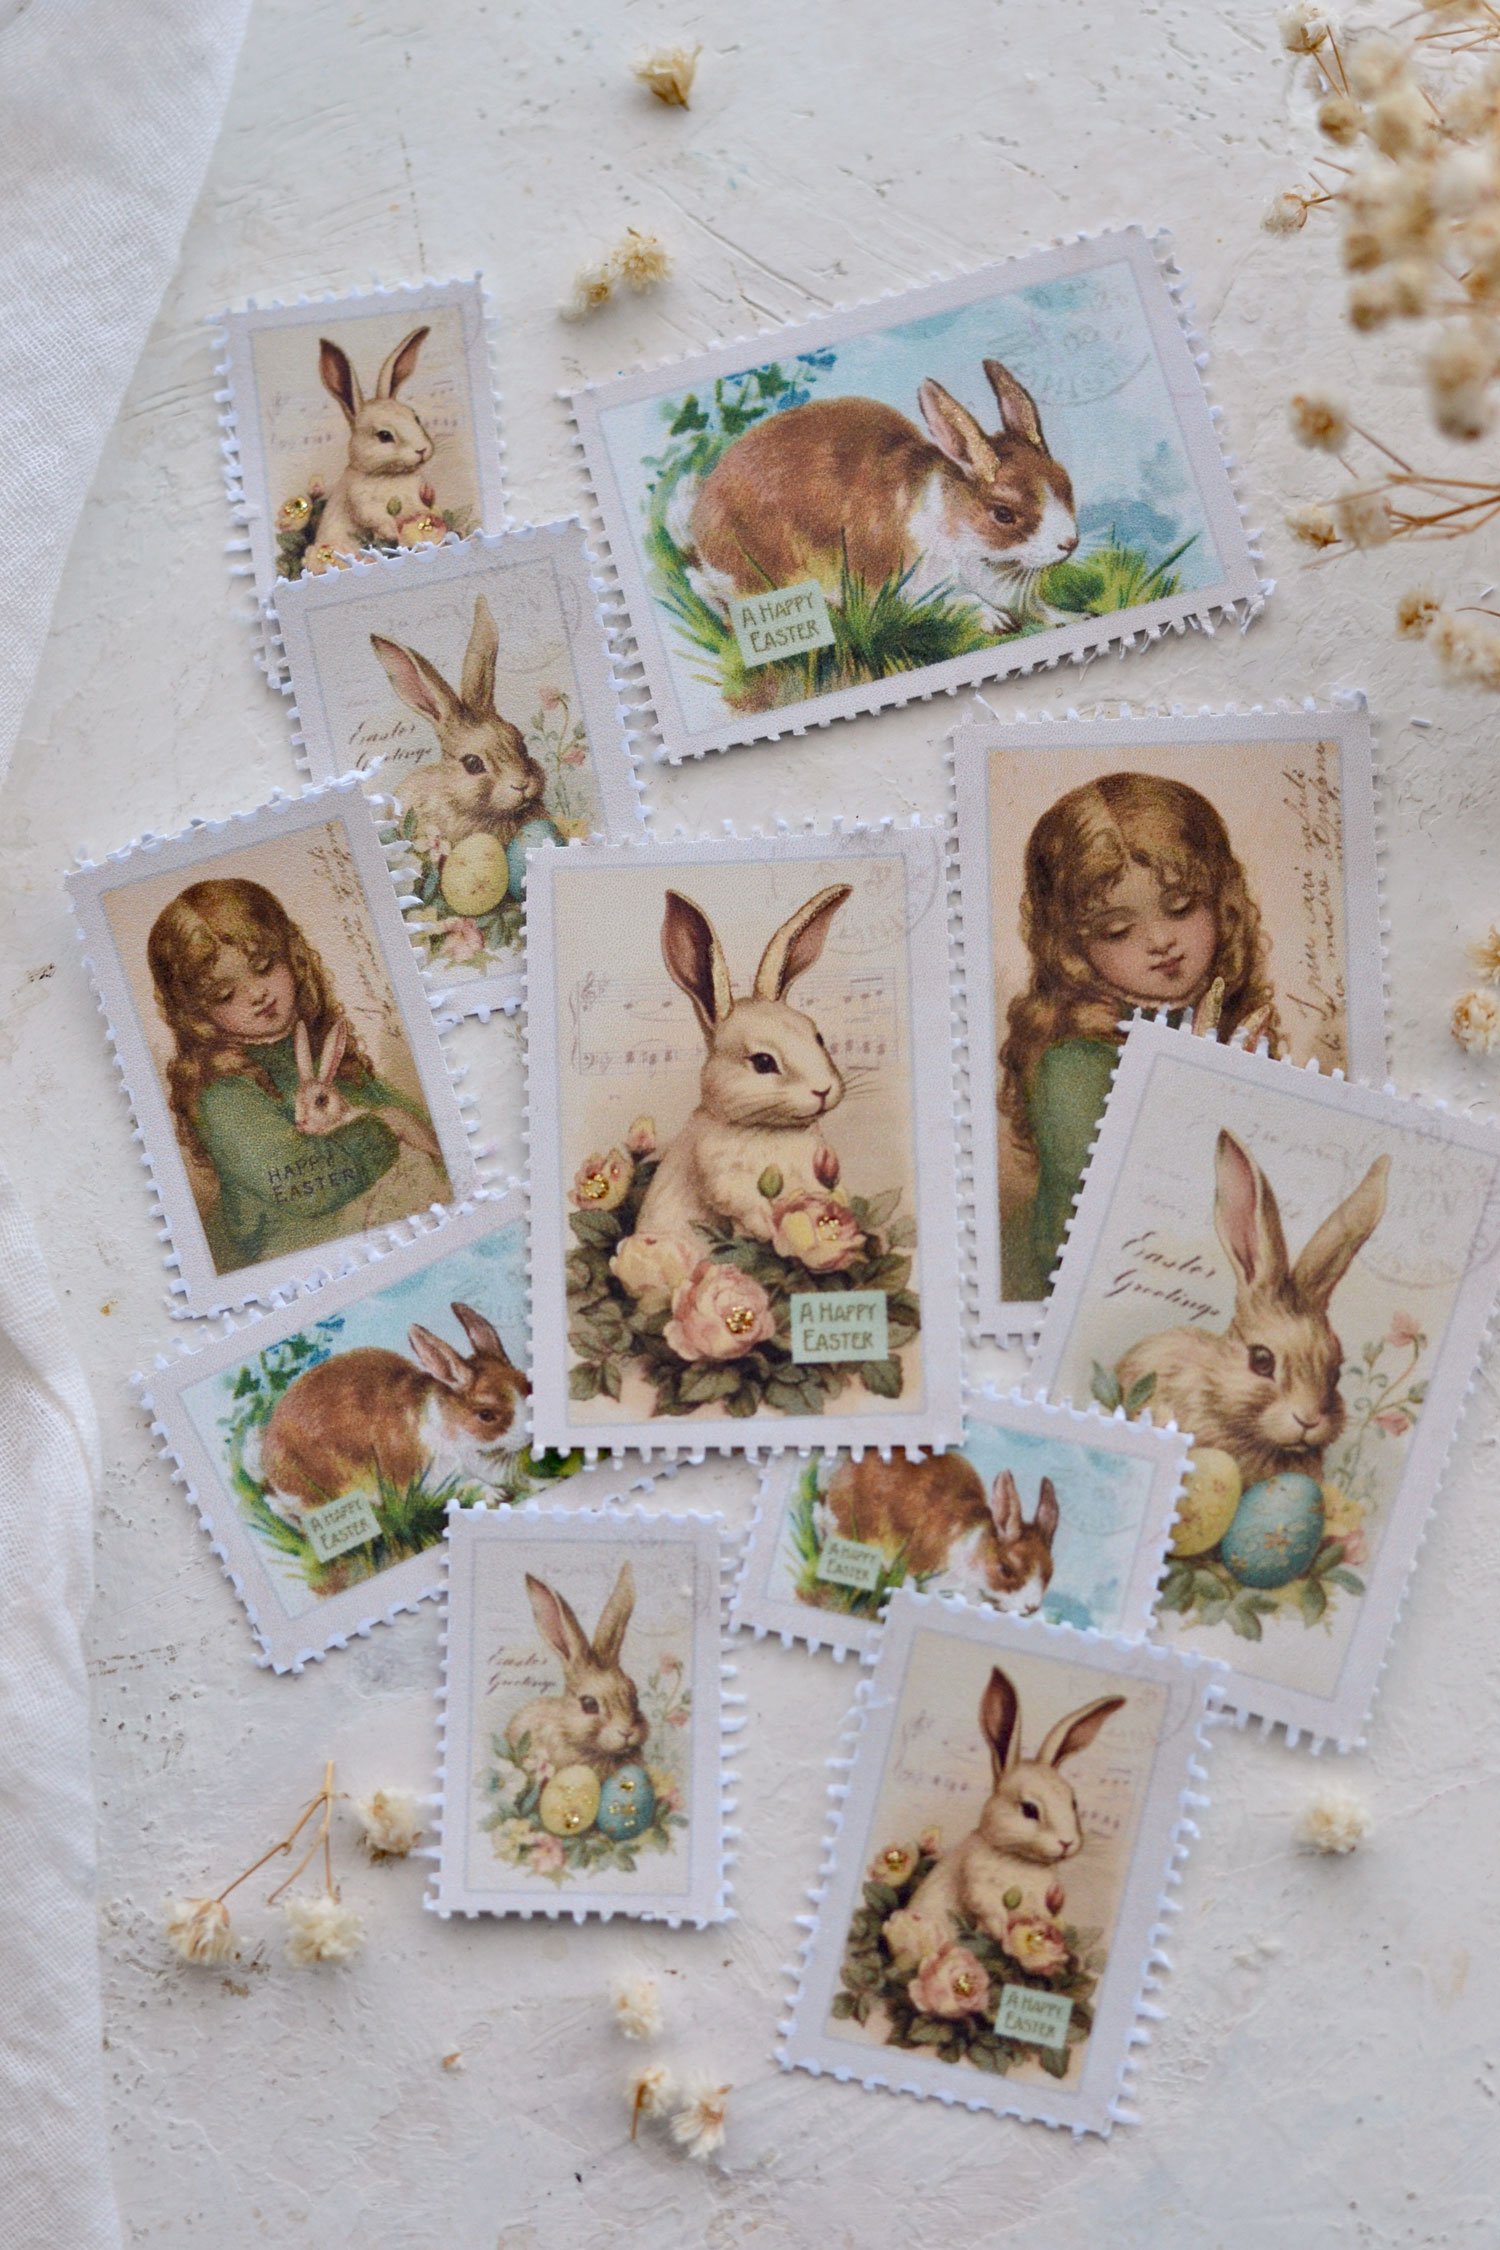
We also have a gorgeous assembly of vintage Easter bunnies just waiting to be admired! You’ll find some to be more simple and others more decorative, so pick them according to your preferences or your inspiration for the moment.
We could create another group with birds and Easter eggs, these can be quite neutral and can be easily integrated into any color scheme!
And lastly, we have some blue postage stamps that are equally stunning! Maybe blue would not be the first color to consider while creating an Easter-themed project, but hey, we can get as creative as we want, the (blue) sky is the limit!
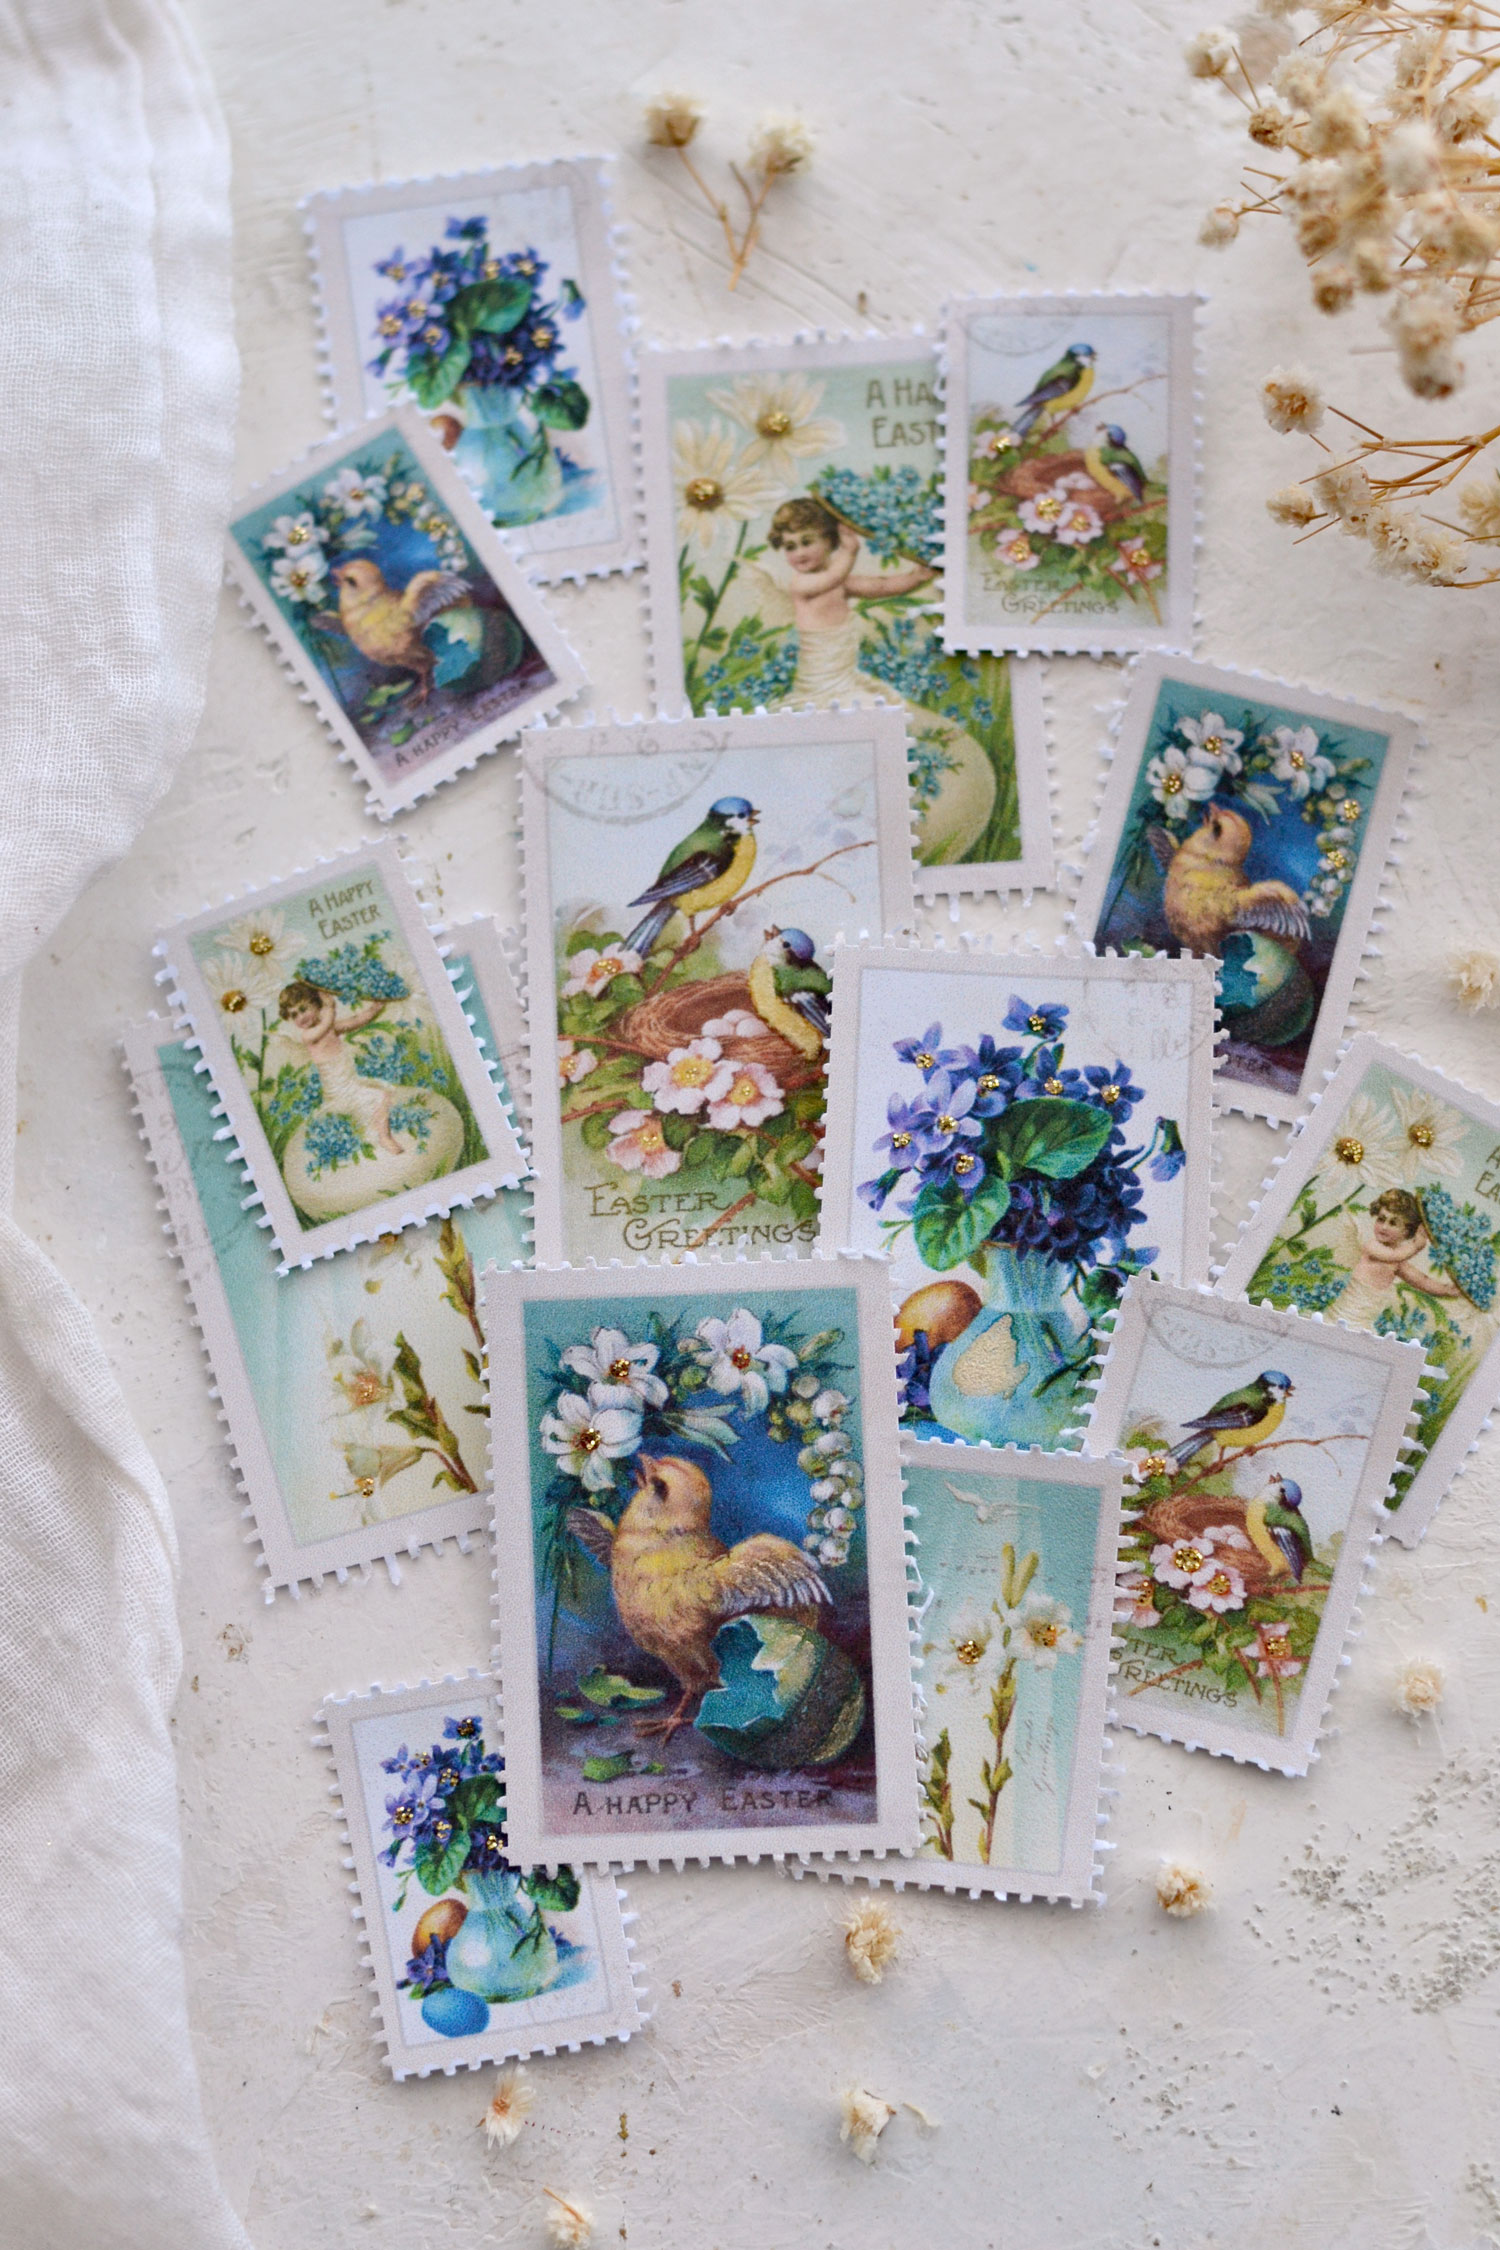
I added all sorts of small ephemera pieces to the stamps while creating the design to make them even more adorable. You’ll find Easter wishes, music sheet cutouts, and round stamps that beautifully complement our vintage Easter images.
I would say that all these small details, along with that perfectly imperfect perforated edge turn these faux stamps into real gems! So I hope you will love this project and decide to give it a try! Have these sticker stamps ready for Easter, they will instantly beautify any of your creative projects like card making, junk journals or gift tags without too much effort on your part.
These Easter Stickers would look lovely paired up with my Free Printable Easter Card Kit HERE.
Happy crafting,
Diana / Dreams Factory


Christine says
Love these, and what a brilliant idea with the thinning shears. Wonderful stuff, thank you.
Karen Watson says
I hope you get a chance to make some of these Christine!
Nora McMillan says
Hello Diane, I have some questions for you. 1. The Easter Stamps are adorable! Would it be okay if I were to put some together in little packets to sell at my Church’s annual Fund-raising Spring Tea? All the proceeds go to the charities they support.
2. I bought your favorite gold paint marker: DecoColor Premium. I also watched some of the video reviews posted. I cannot get mine to flow to make lines. I have to tap it and get a blob of paint that I then dip the tip of the pen into and essentially use it as a brush. I have tried pressing lightly and then pressing more firmly. I love the color and the sheen, but I would love any suggestions you have to make it work like a regular marker.
3. I am making the Easter cards with the deco foil. I bought the fine liner applicator bottles and the Deco Foil liquid adhesive that you have on the list. They work great, but the deco foil glue leaks out of the bottom of the bottle cap (not at the needle applicator cap) while I am dispensing the glue. I have it screwed on tightly. Any suggestions here?
Thank you so much. I love your projects and have made quite a few of them.
Karen Watson says
Hi Nora, For the first one, yes you can sell them in packets at your church fund raiser. Here are Diana’s responses to your other questions: I’m sorry you are having a hard time using your supplies, I know how frustrating that can be!
I haven’t had any problems with my Deco color markers so far so I’m guessing that maybe yours was faulty to begin with or the paint somehow dried on the tip making it too stiff to use. I actually had around a new marker so I was able to do a quick test to see how it would perform when firstly opened. You need to shake your marker really well before using it (no matter if it’s new or old) so I started with that. I then tapped to press the tip on a scrap piece of paper about 10-15 times to slowly introduce the paint into it and I was able to make a few test lines that looked great. After that it worked without any problems, yours should work like that too!
3. As for the glue applicator, the only thing that I can think of is that the bottle is faulty or maybe the glue dried inside the tip and created a blockage there. If that is the case, you need to use a small needle that fits inside the tip to clear that area or even put the cap under hot running water to melt the hardened glue.
These are just a few ideas, but you could also try contacting the shops you bought the products from and describe the issues you are having, maybe they’ll have a better understanding and offer other solutions.
I hope that helps!