DIY Paper Christmas Tree Ornaments
Hello, Graphics Fairy friends! I’m Diana from Dreams Factory and I’m happy to be here again to share another creative project with you. Today, I will show you how to make these lovely DIY Paper Christmas Tree Ornaments, using a cool paper casting technique (with Toilet Paper!) that is really easy and quite affordable to make.
We need to use a beautiful mold for this technique; it will be the star of the show today. I’m using one from IOD, which is simply gorgeous and has some intriguing detailing, but of course, you can use whatever you have on hand. I would say that once you have the mold, chances are you already have all the other supplies around, because we’ll only need coffee, glue and toilet paper to make the base for our ornaments! This paper casting technique usually works with water, but for the sake of experimenting, I thought it would be fun to use coffee instead. And I’m so happy that I did, it will imprint the final pieces with that lovely vintage vibe that we all love! And a subtle coffee fragrance, which is always a good thing in any given situation, if you ask me.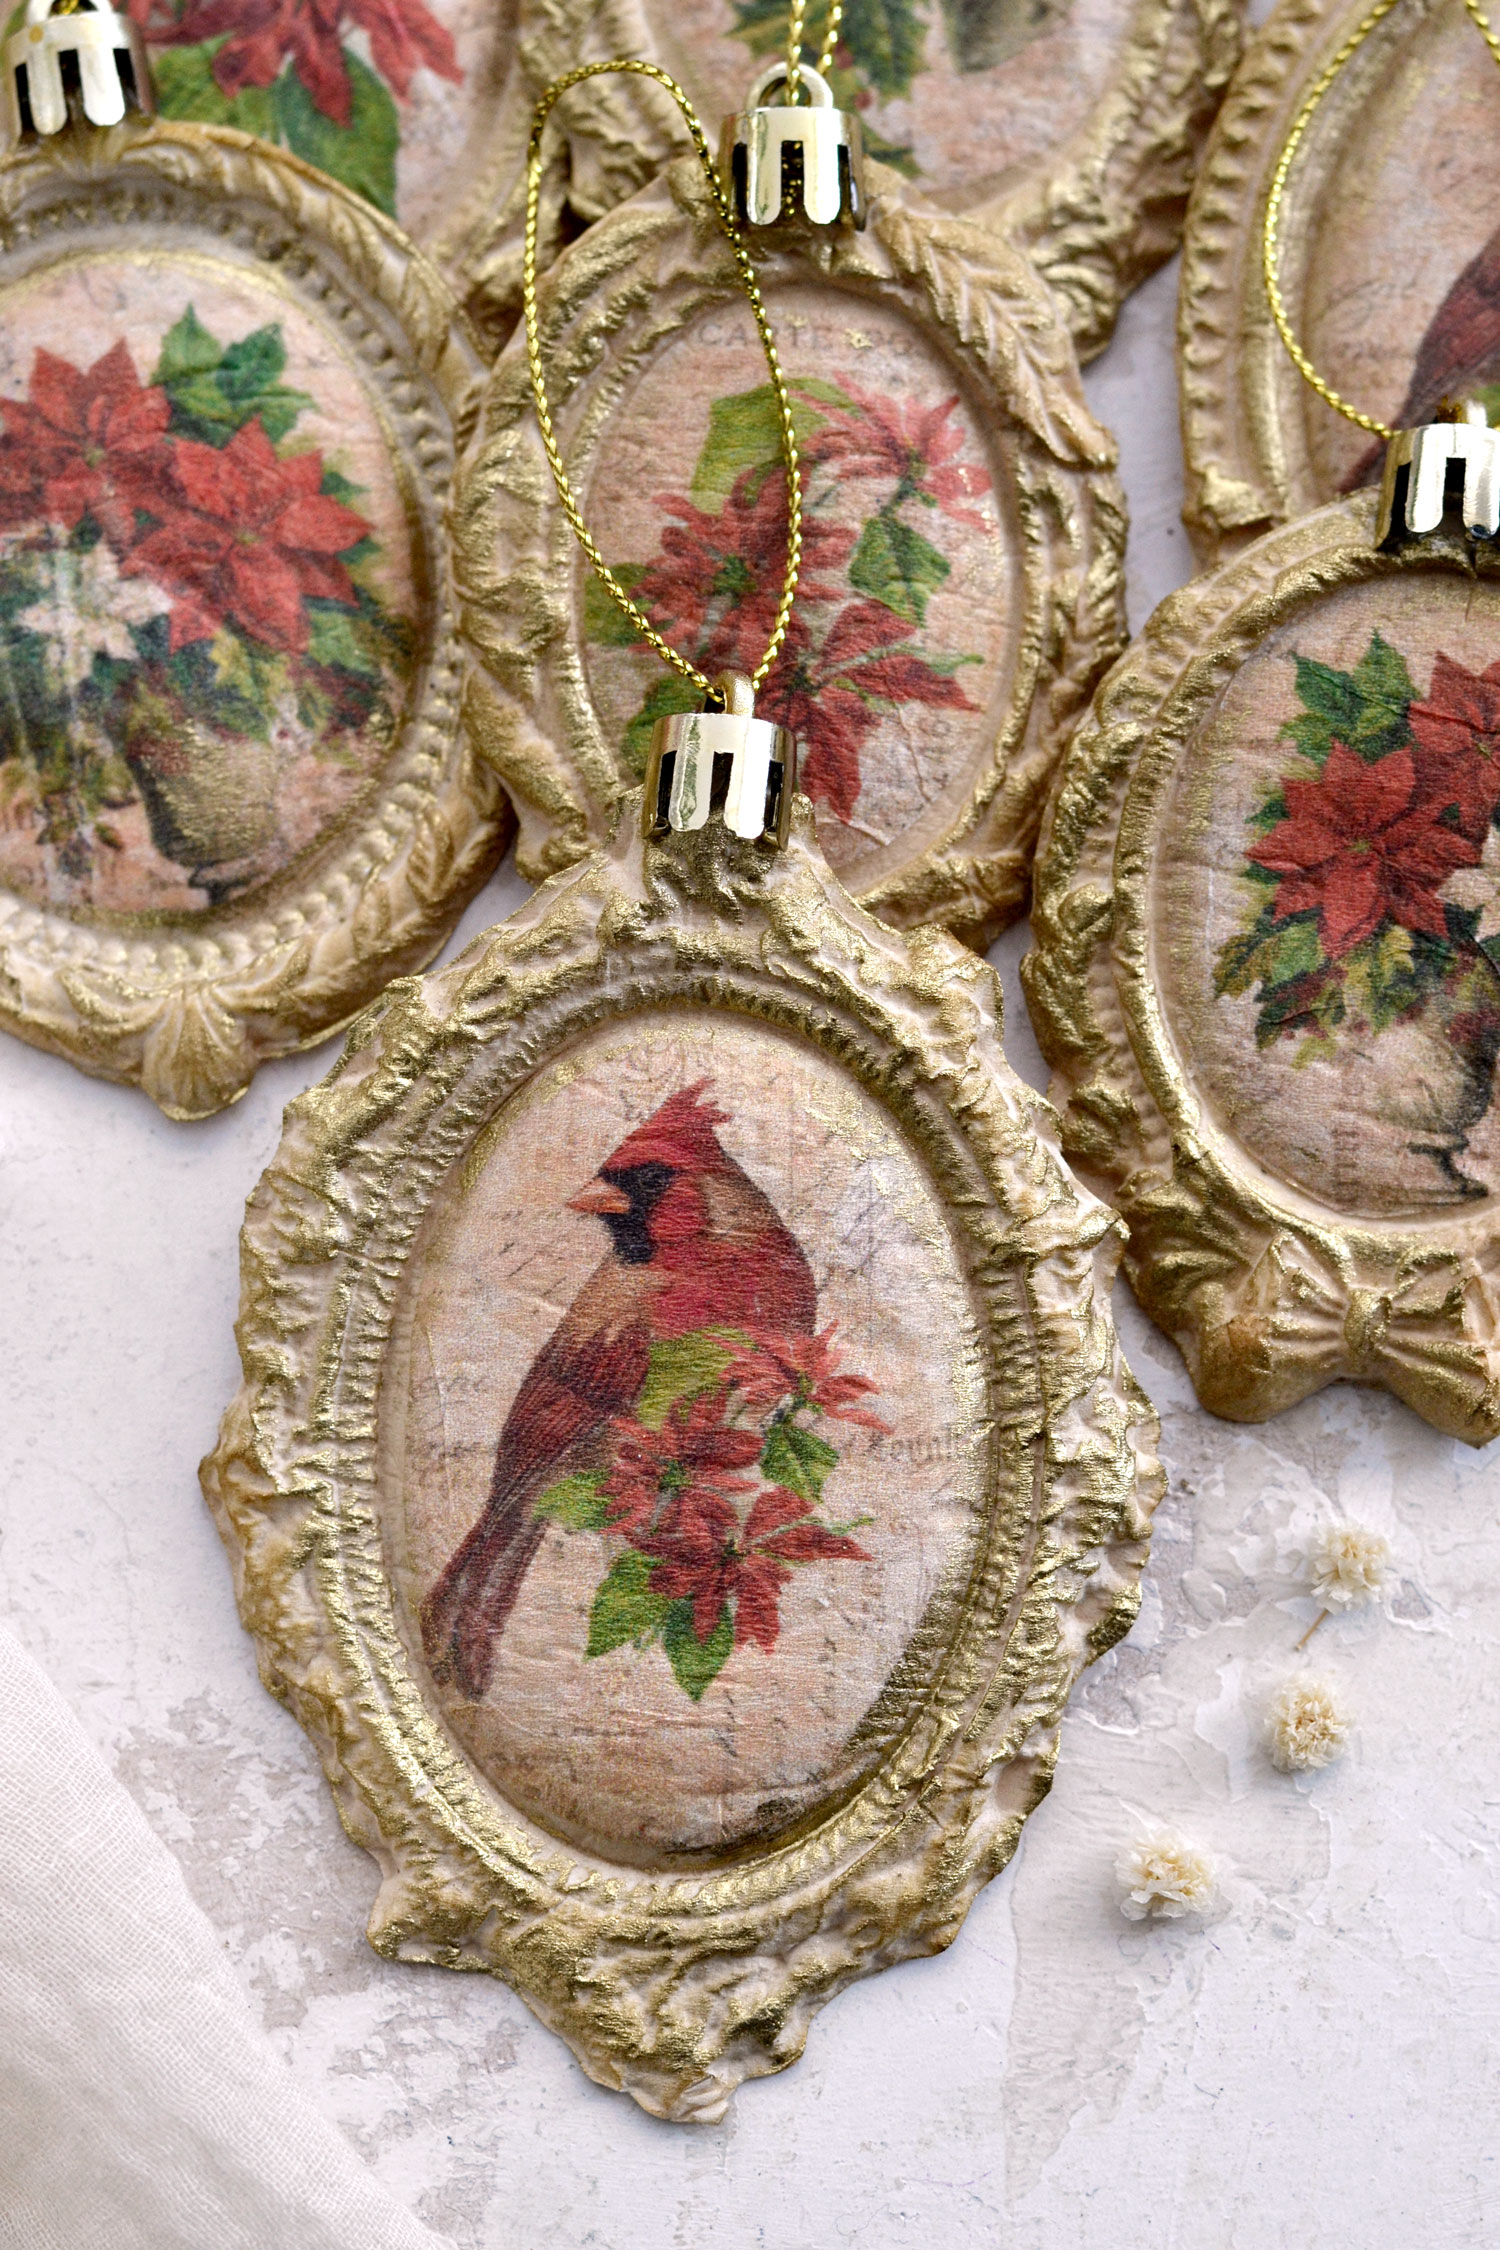
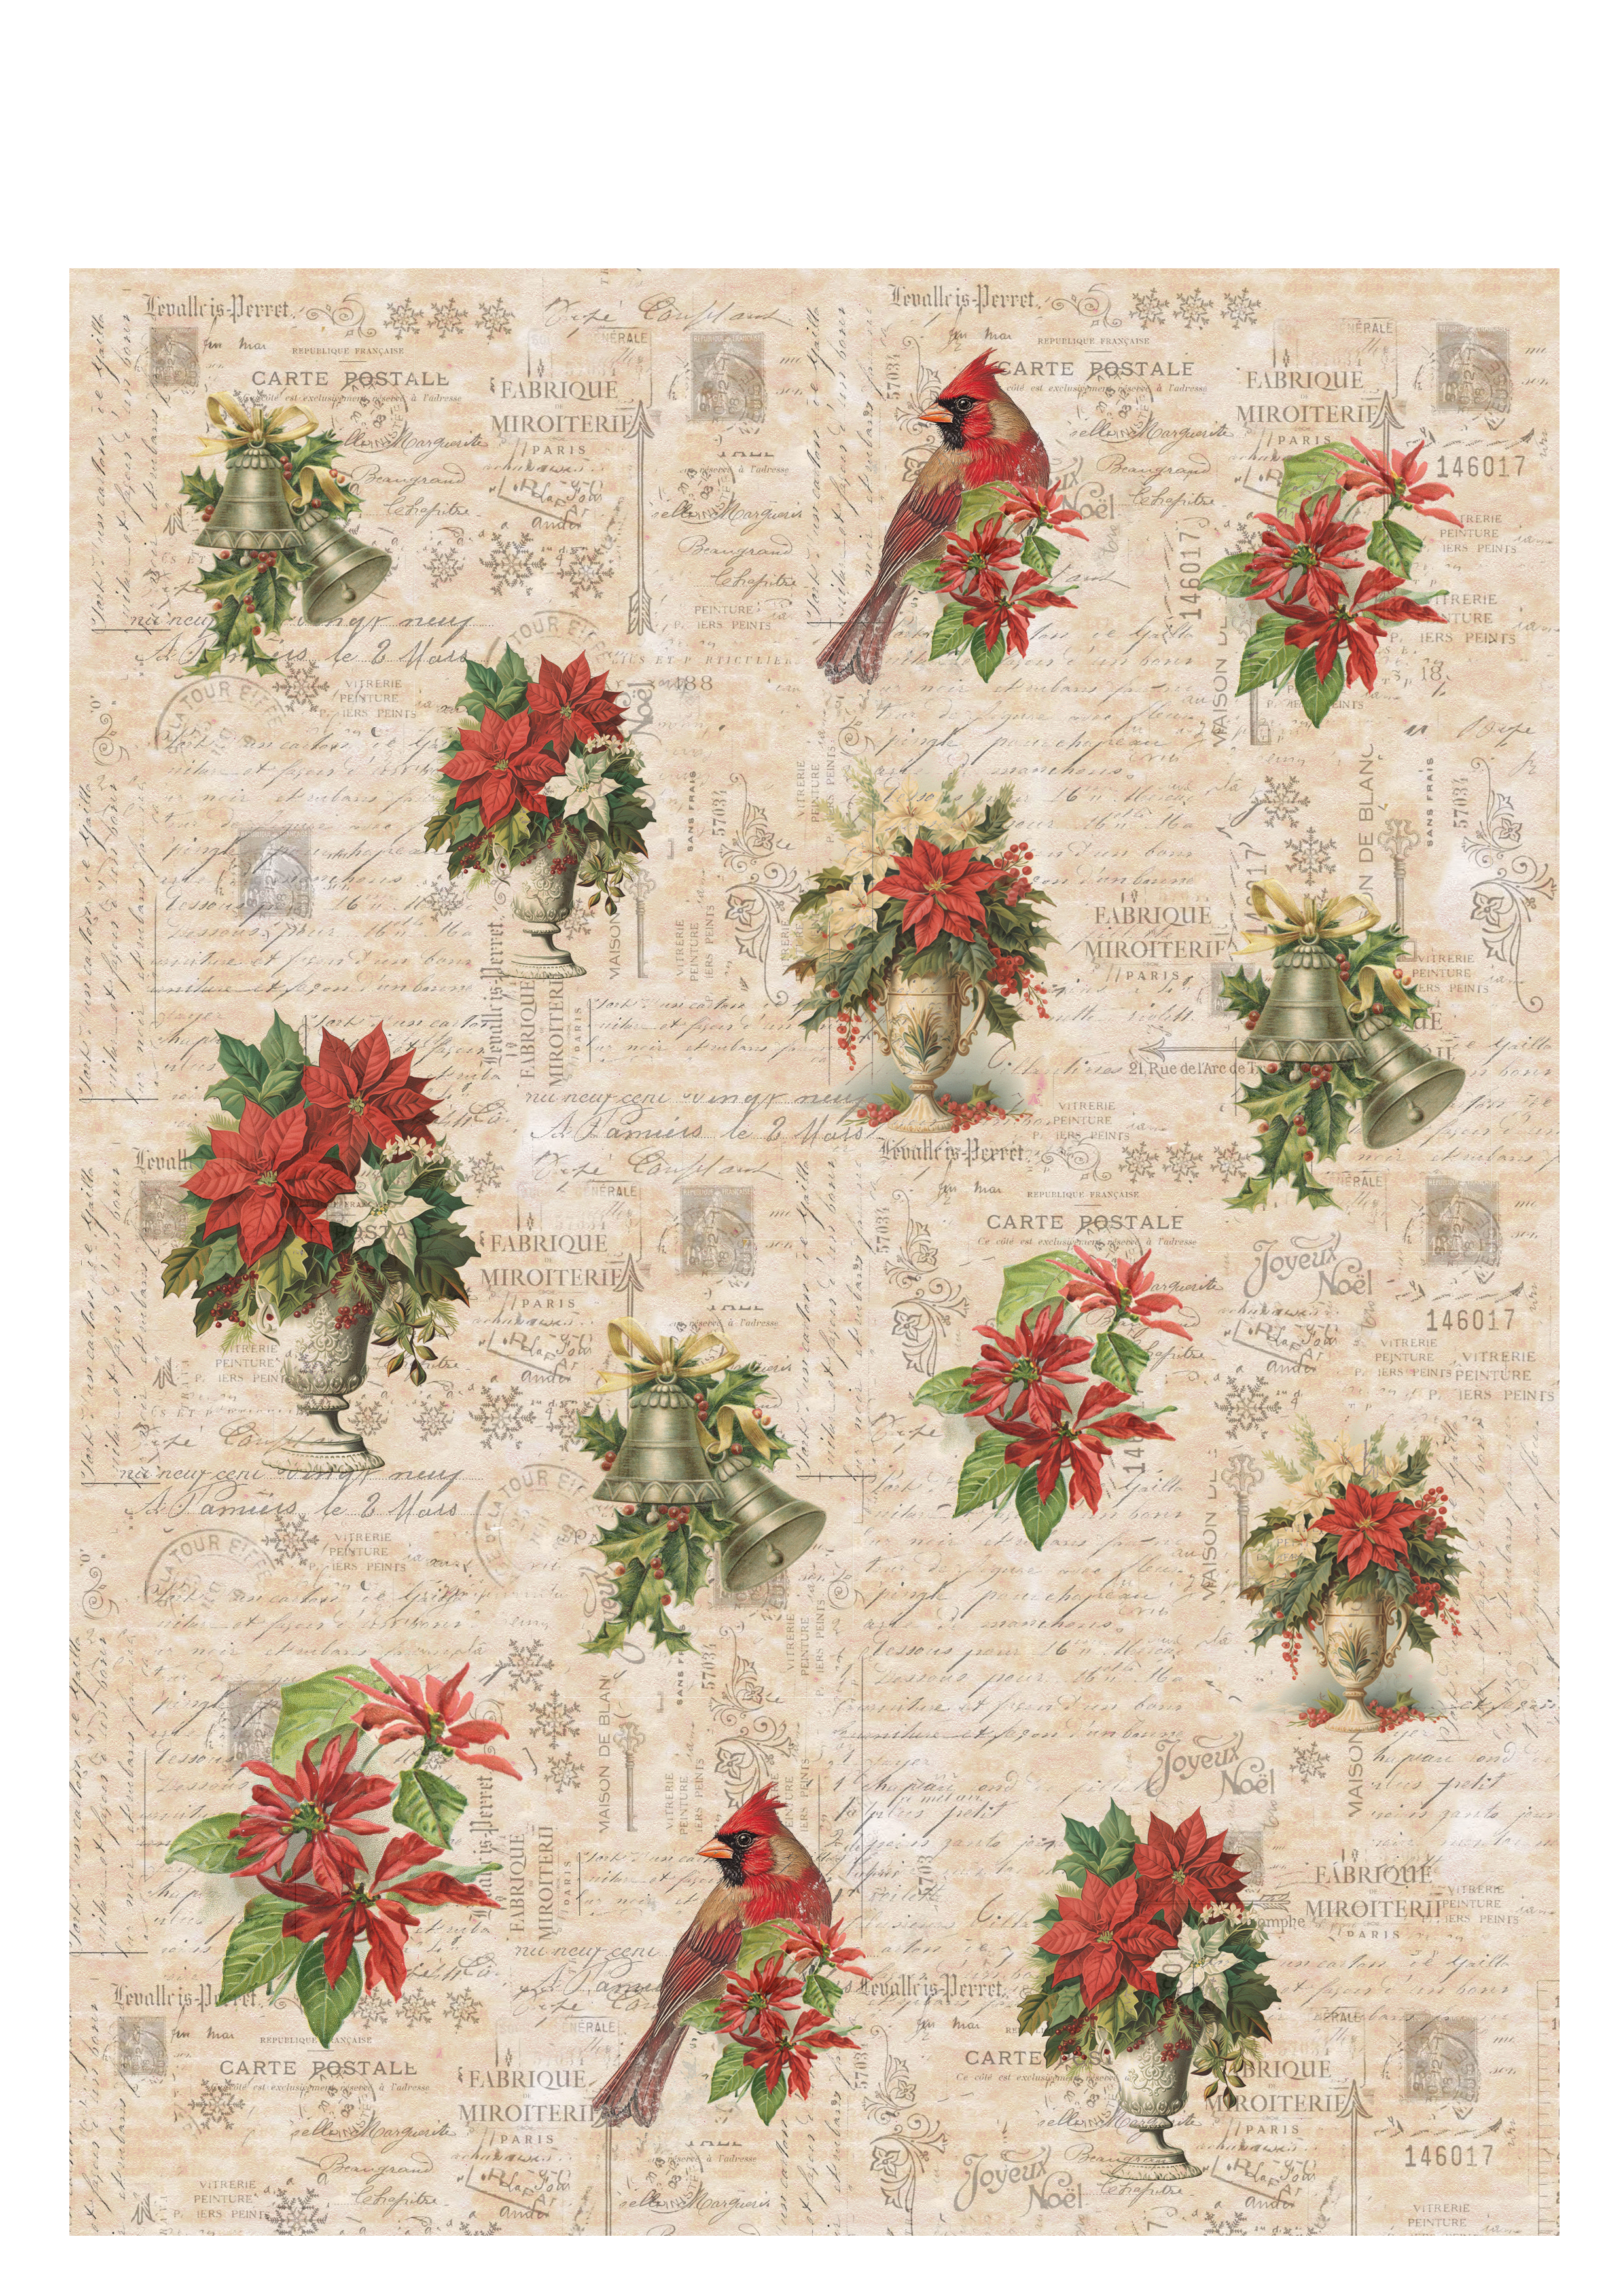
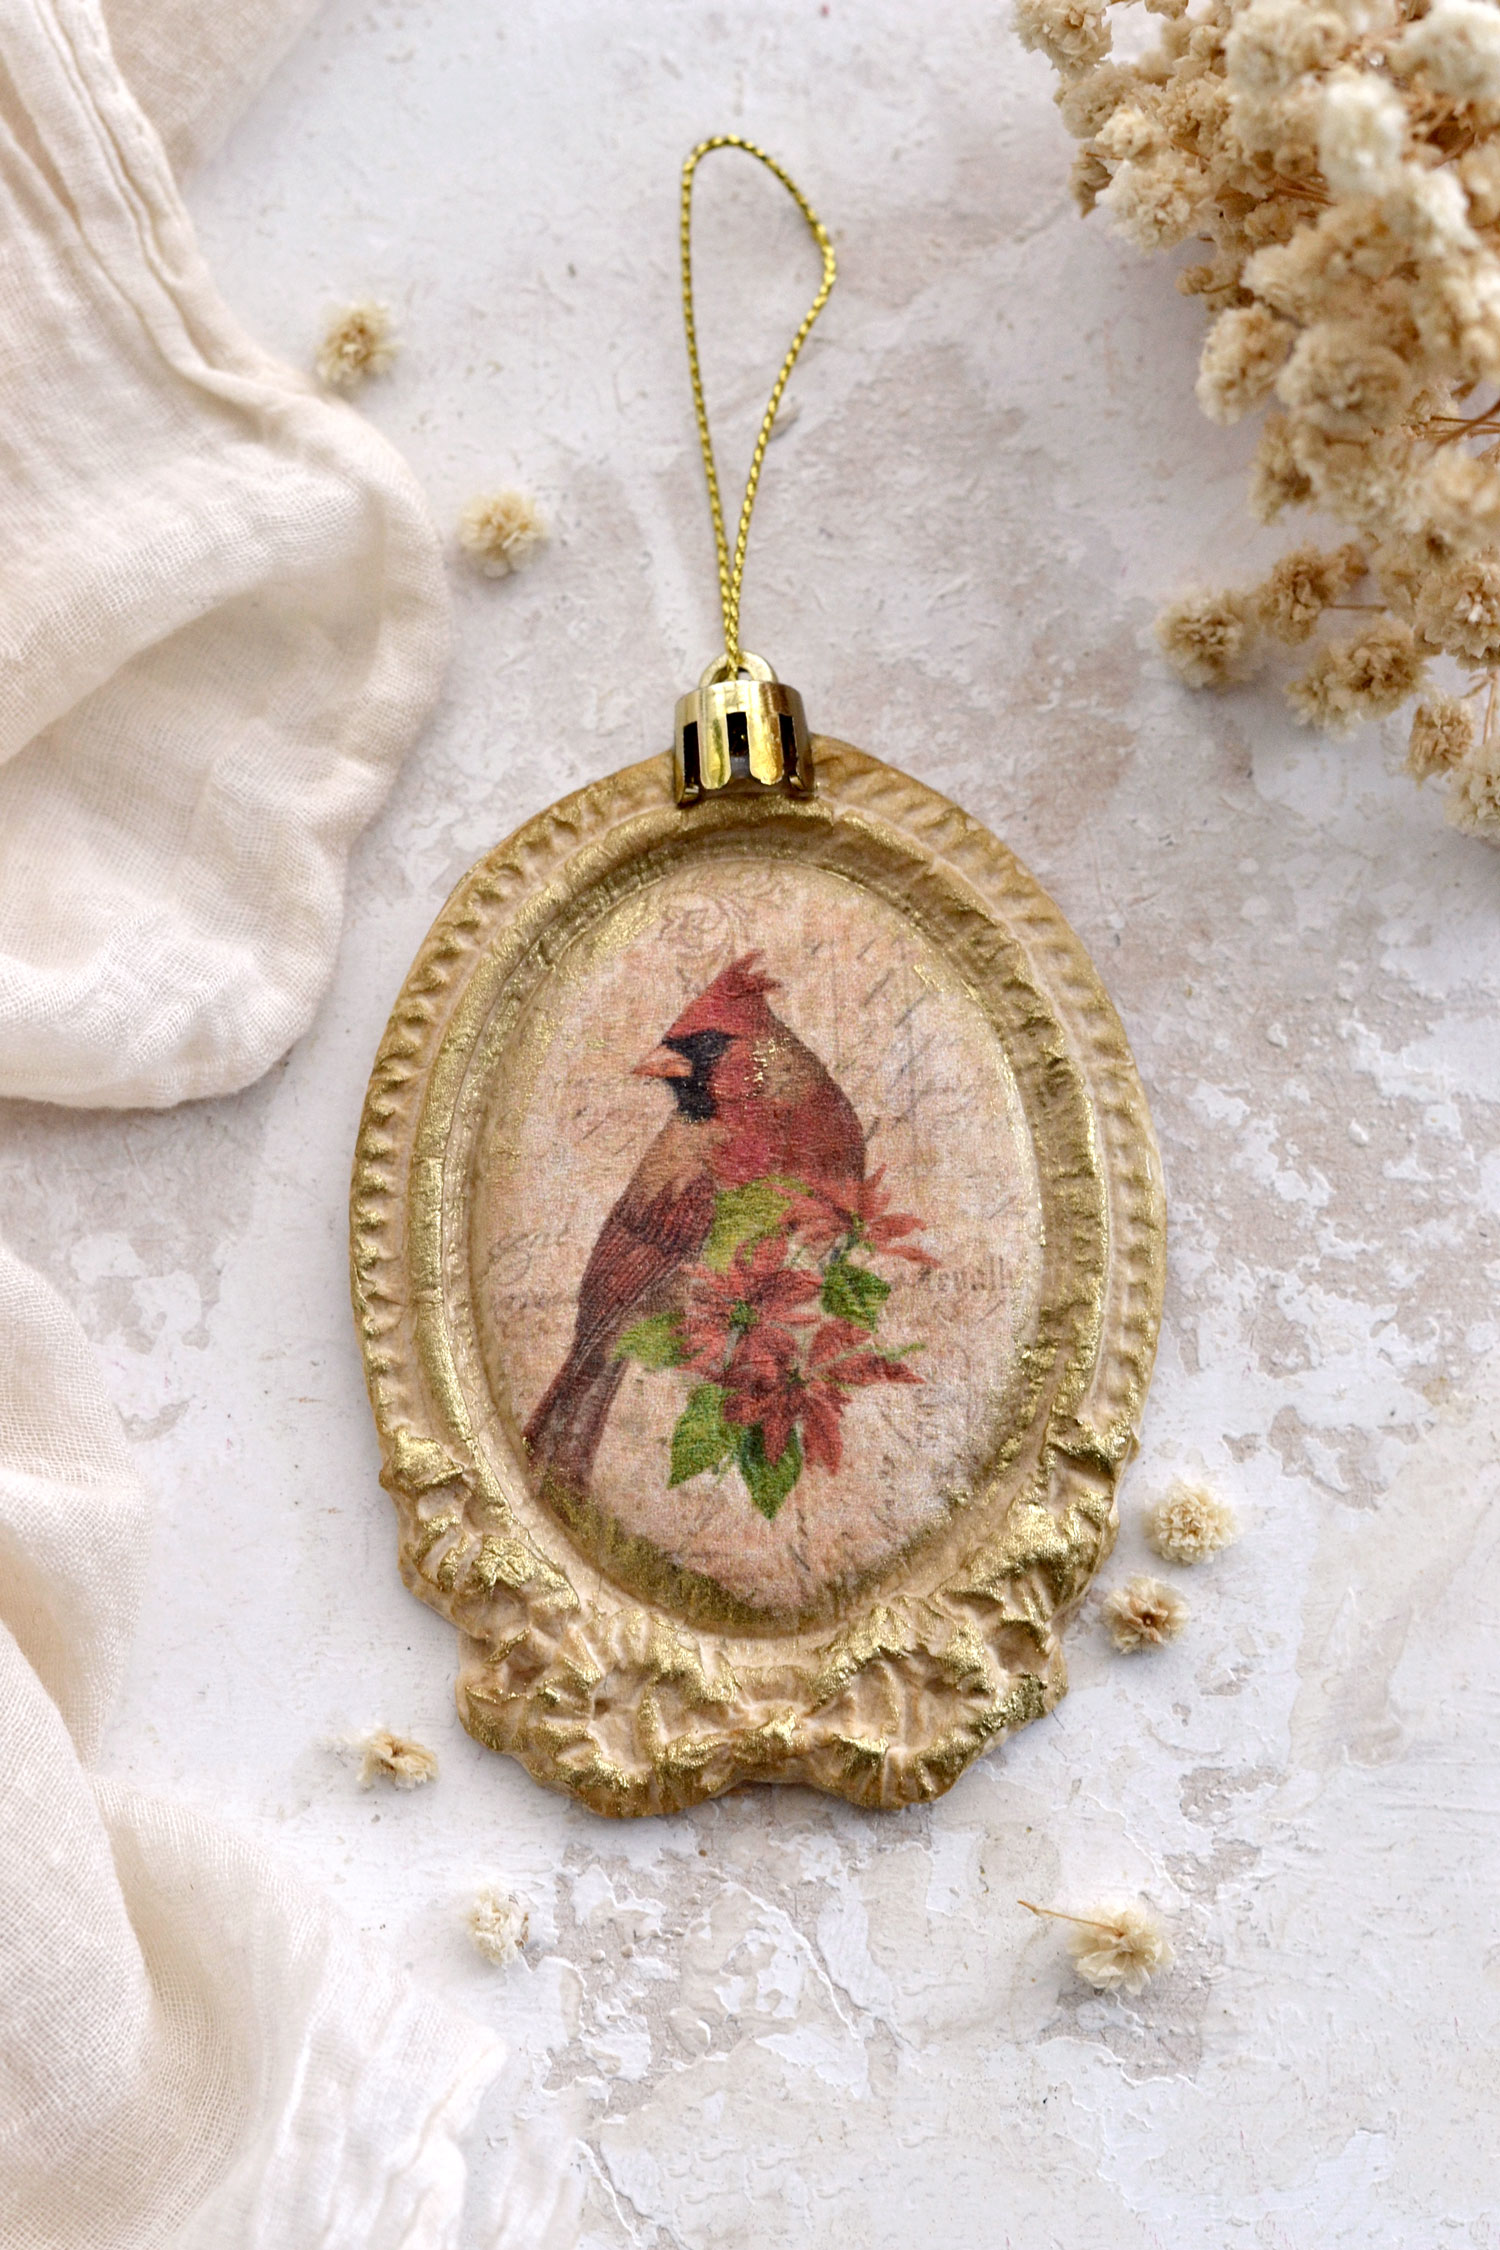
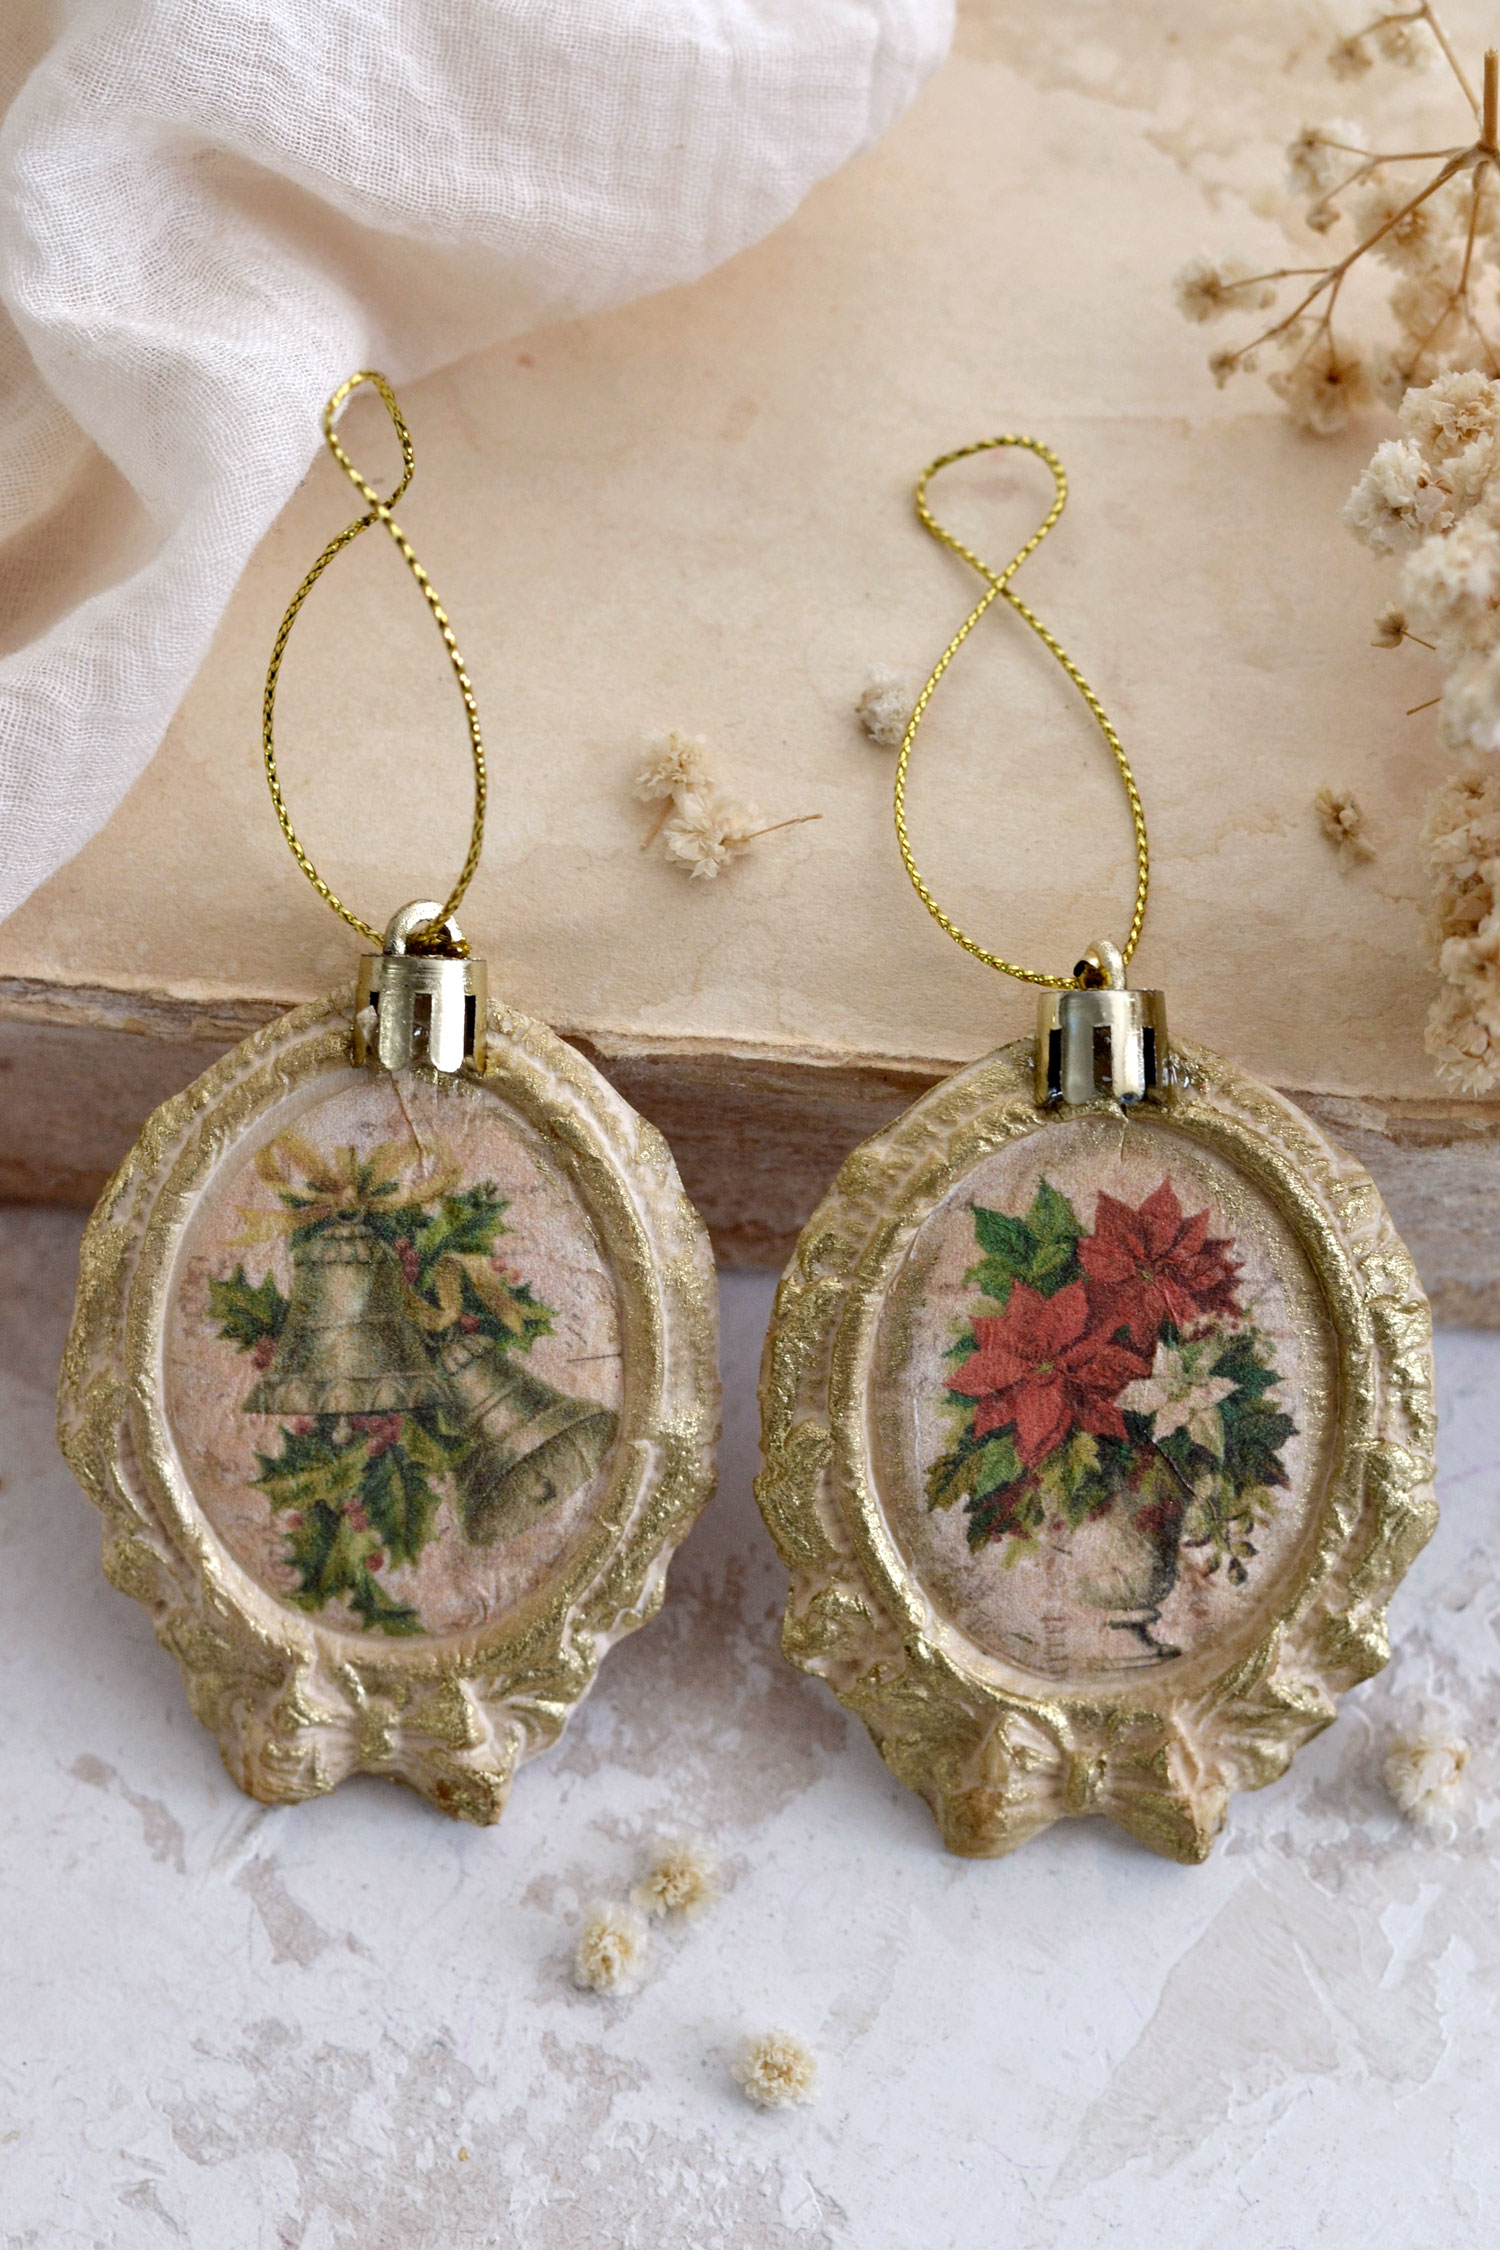
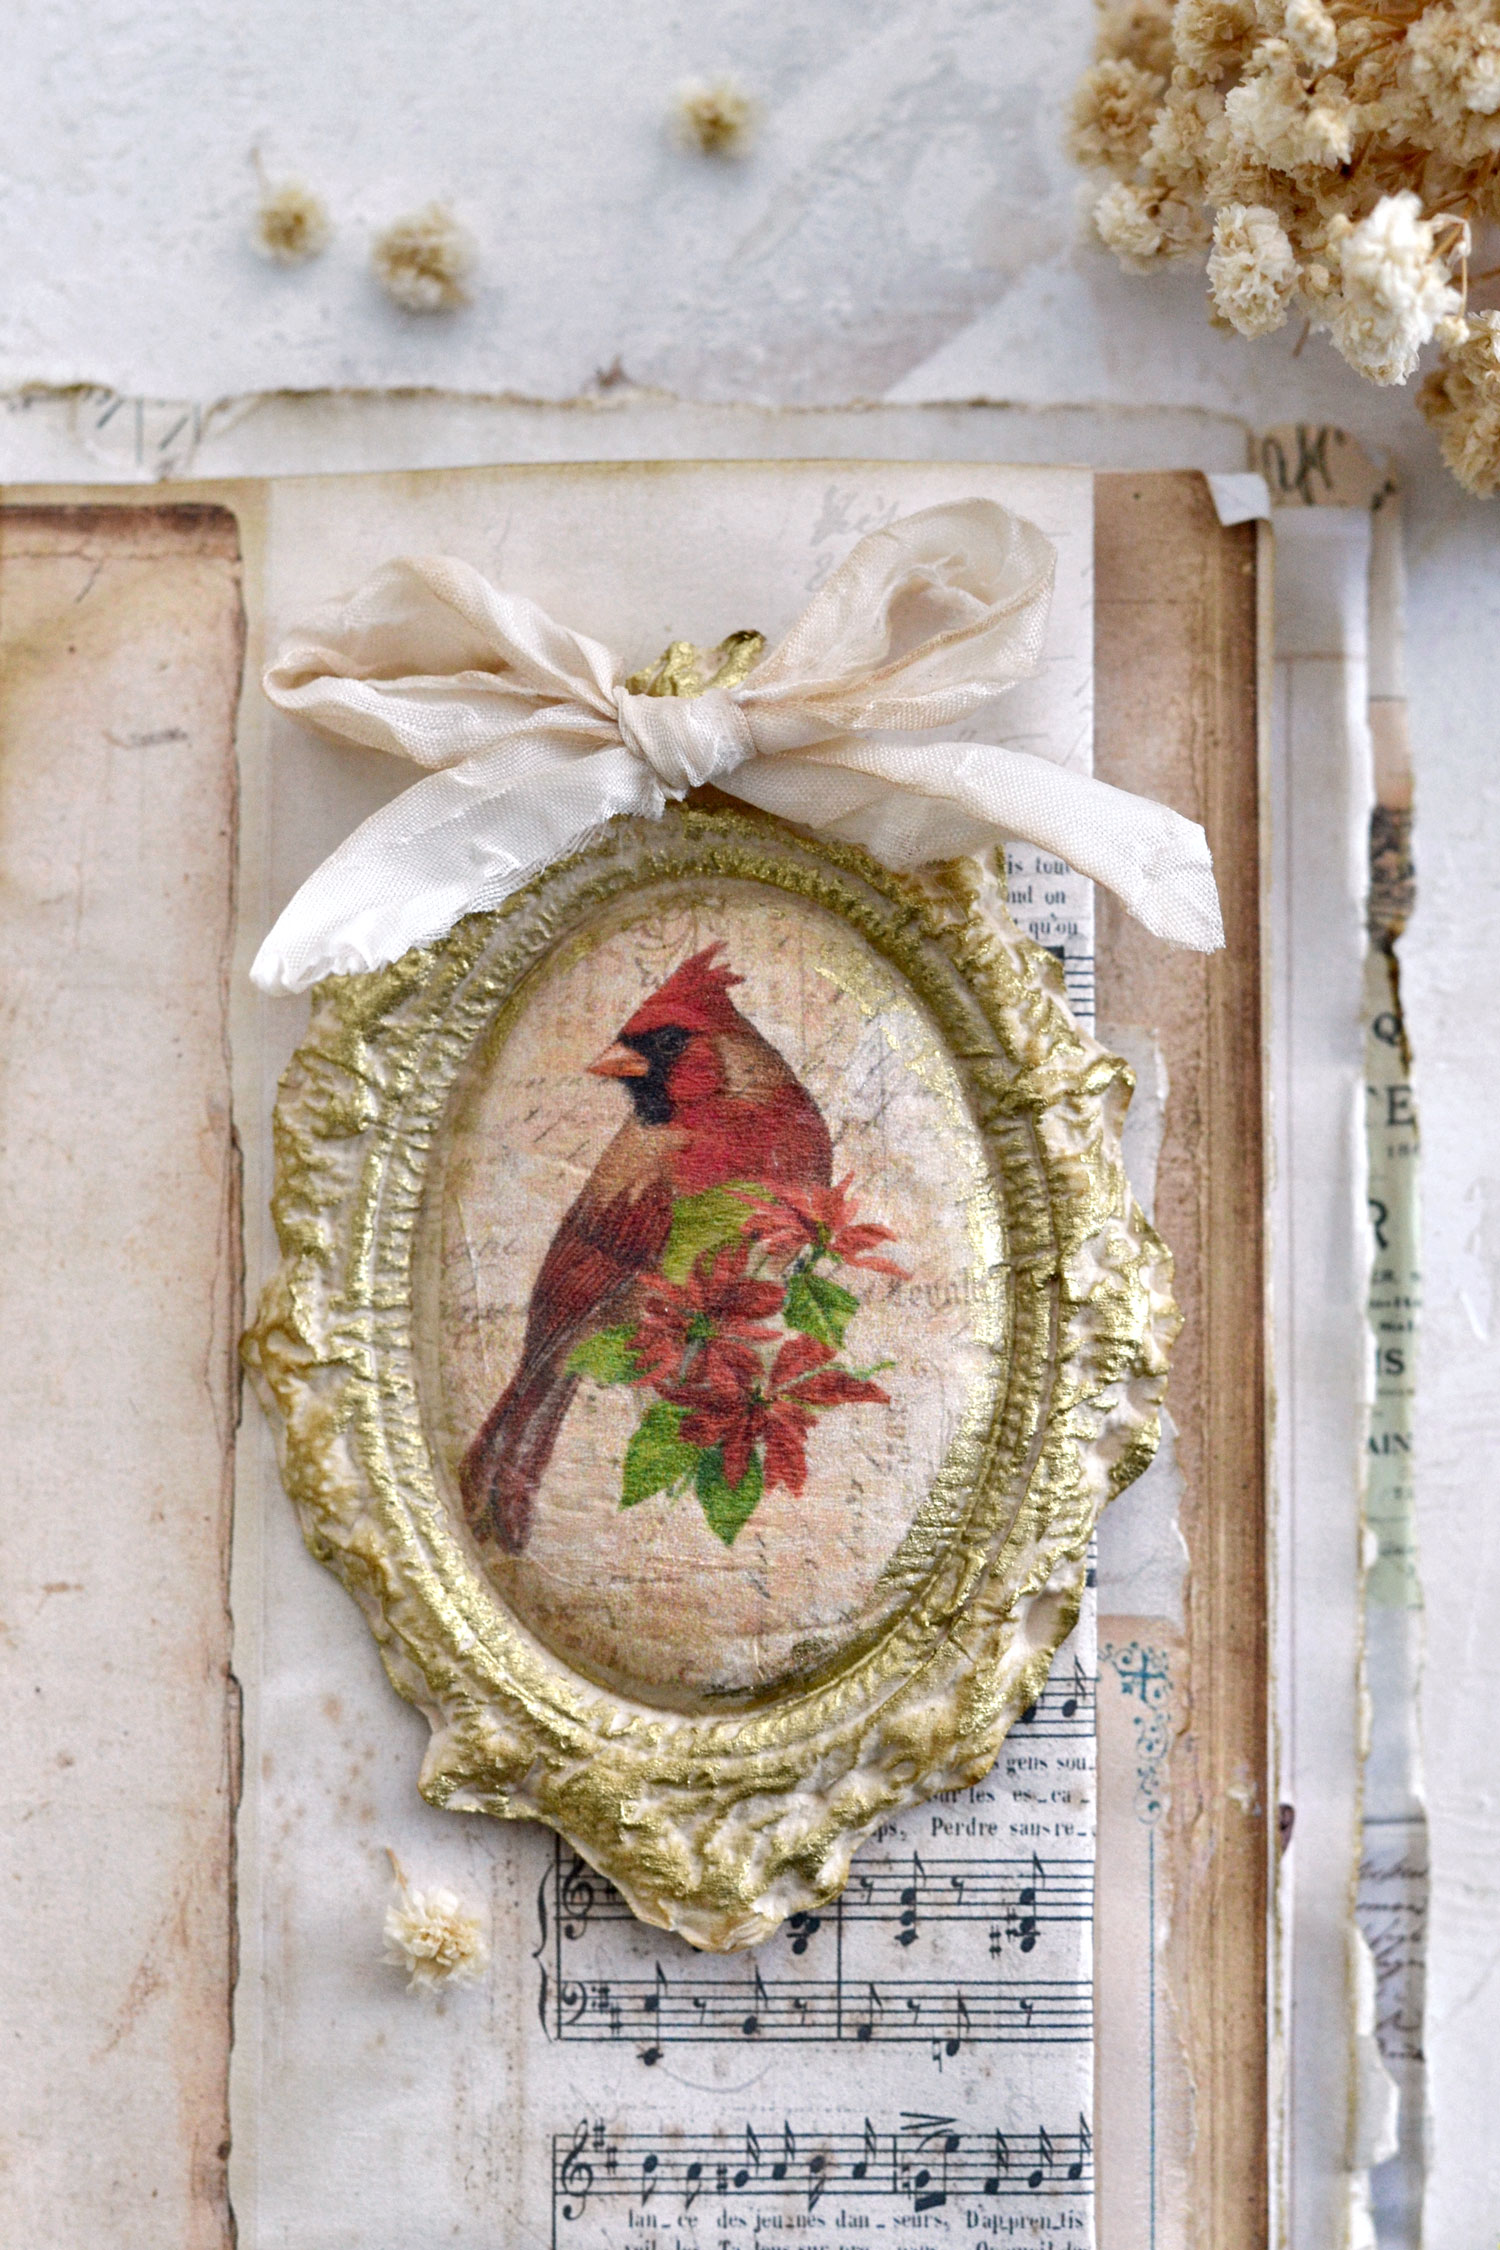
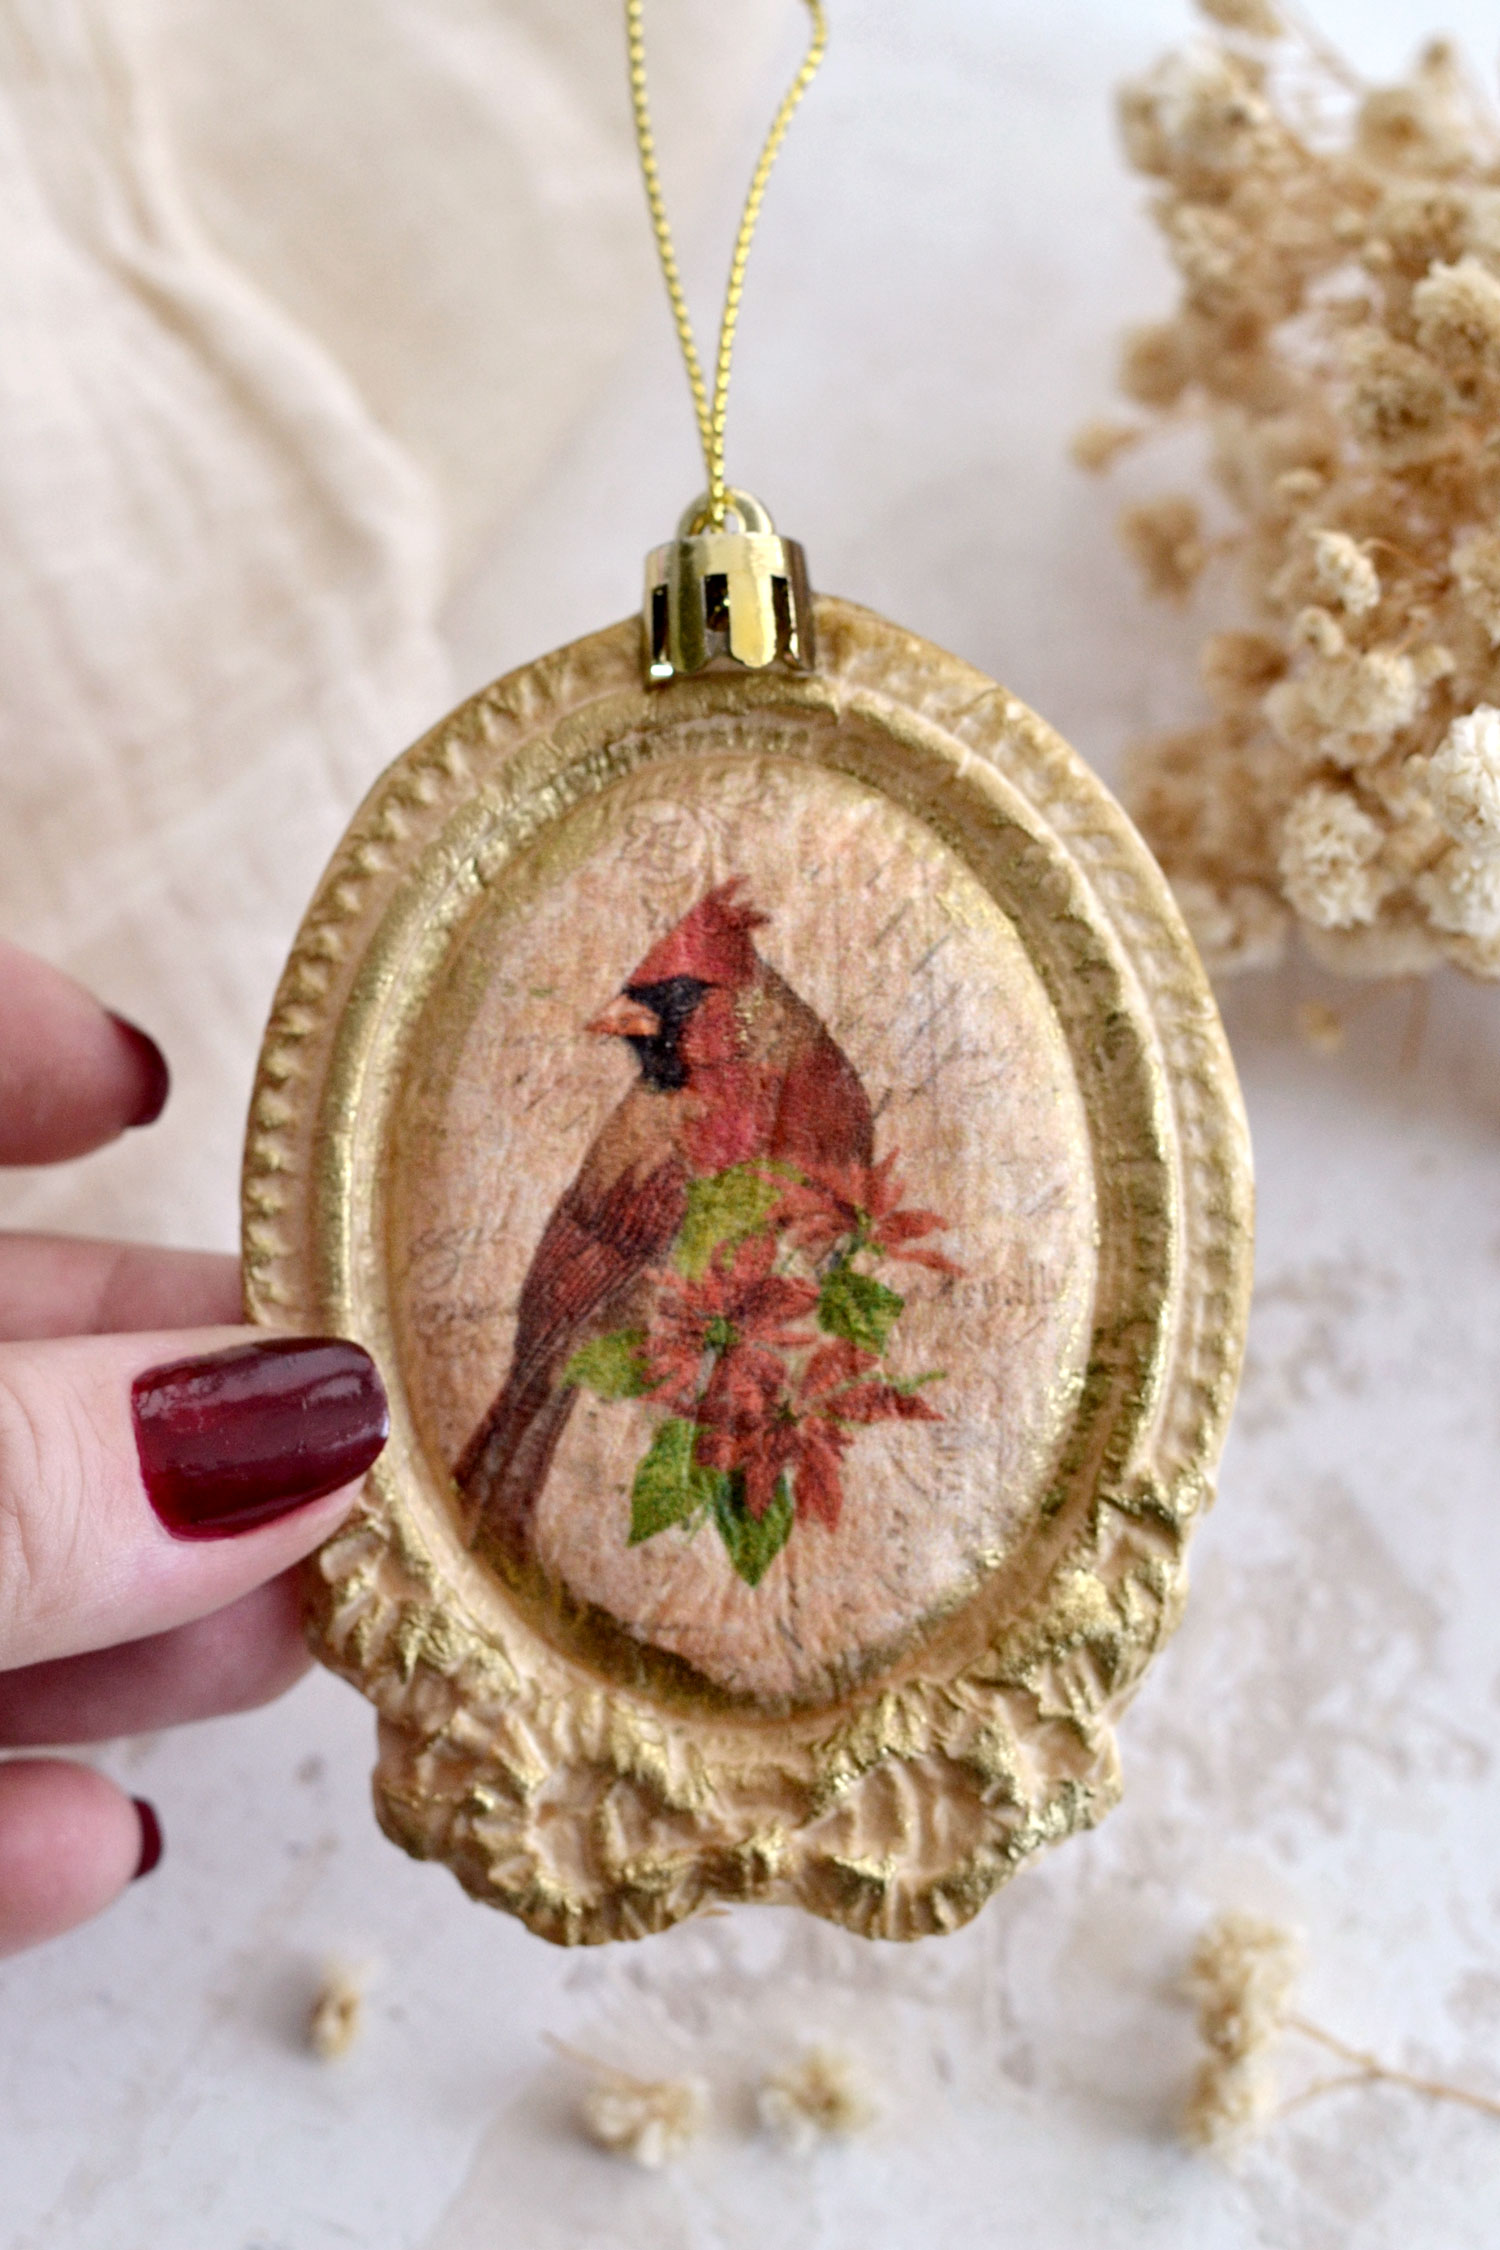
We’ll also need a white paper napkin to create a paper assembly that will allow us to print our beautiful printable. This one is specially designed for this project and will work with any of the molds you decide to use. I will show you how easy it is to print it and then adapt it to your needs. I used poinsettias, red birds and Christmas bells to design the printable, to which I added a lovely vintage background with all sorts of ephemera cutouts to bring in even more charm.
Free Printable:
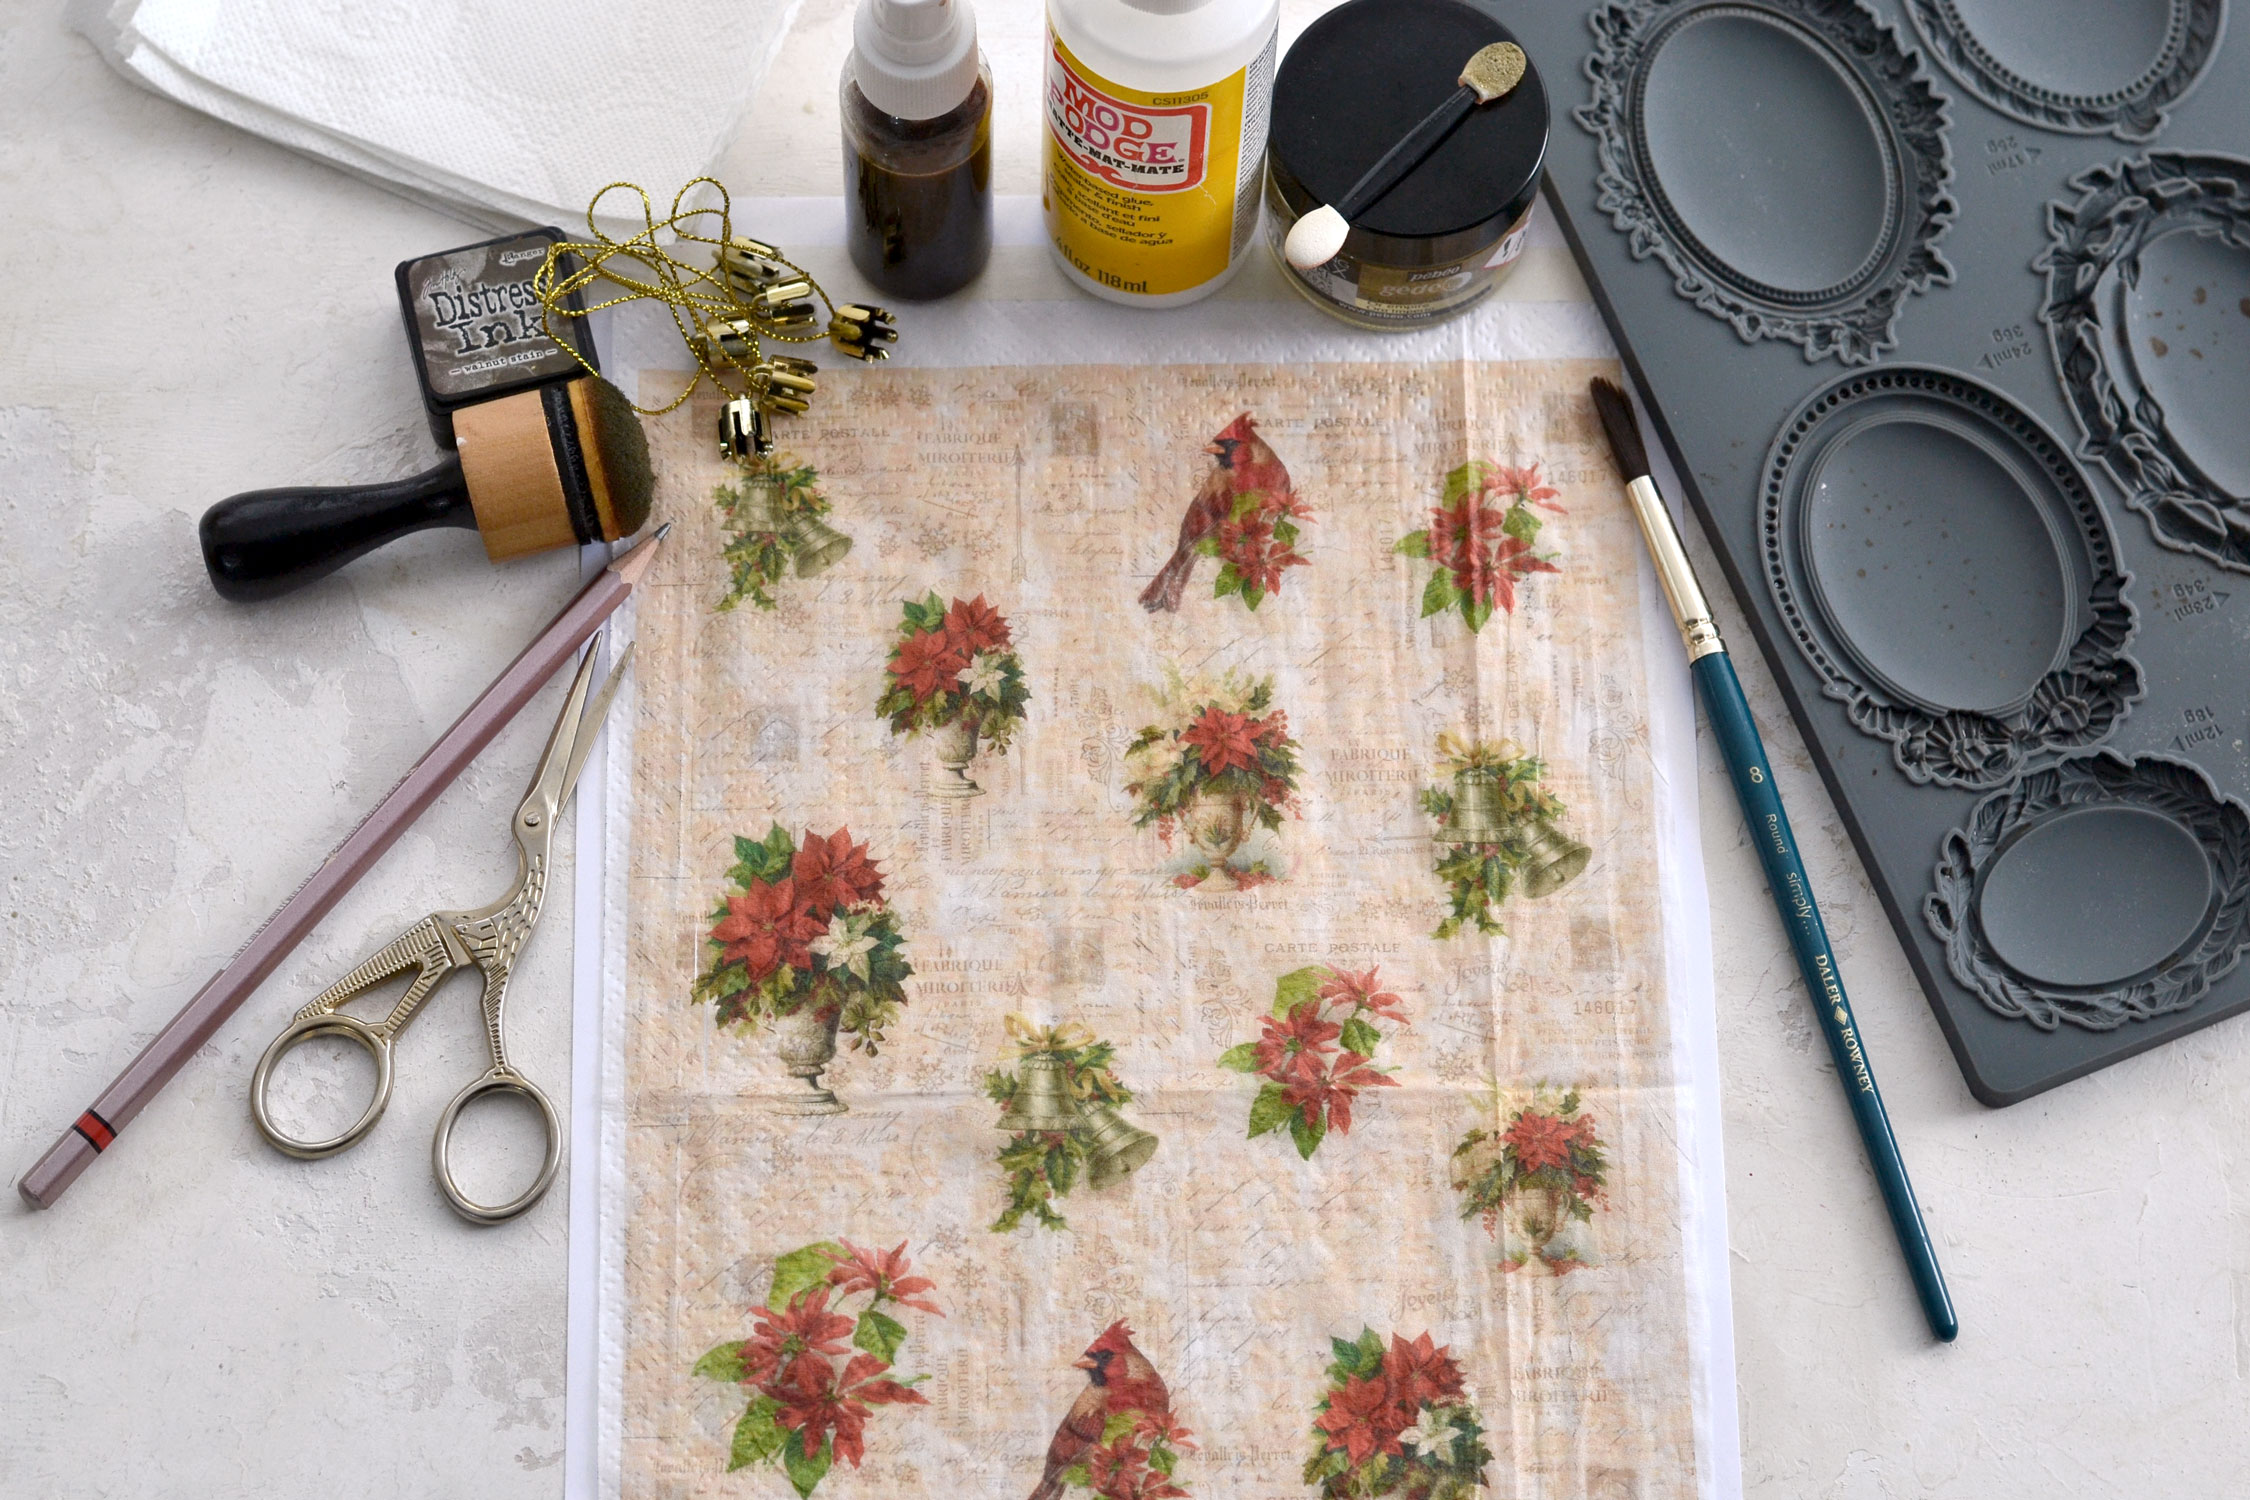
DIY Paper Christmas Tree Ornaments Supply list:
- toilet paper
- napkin paper
- home printer
- scissors
- ornament mold (I used the one called Vintage Brooch from IOD)
- coffee and a small spray bottle
- Mod Podge
- pencil
- brush
- Glossy Accents
- mini distress inks
- blending tool with foams
- gold wax
- tree ornament cap hangers
STEP BY STEP TUTORIAL:
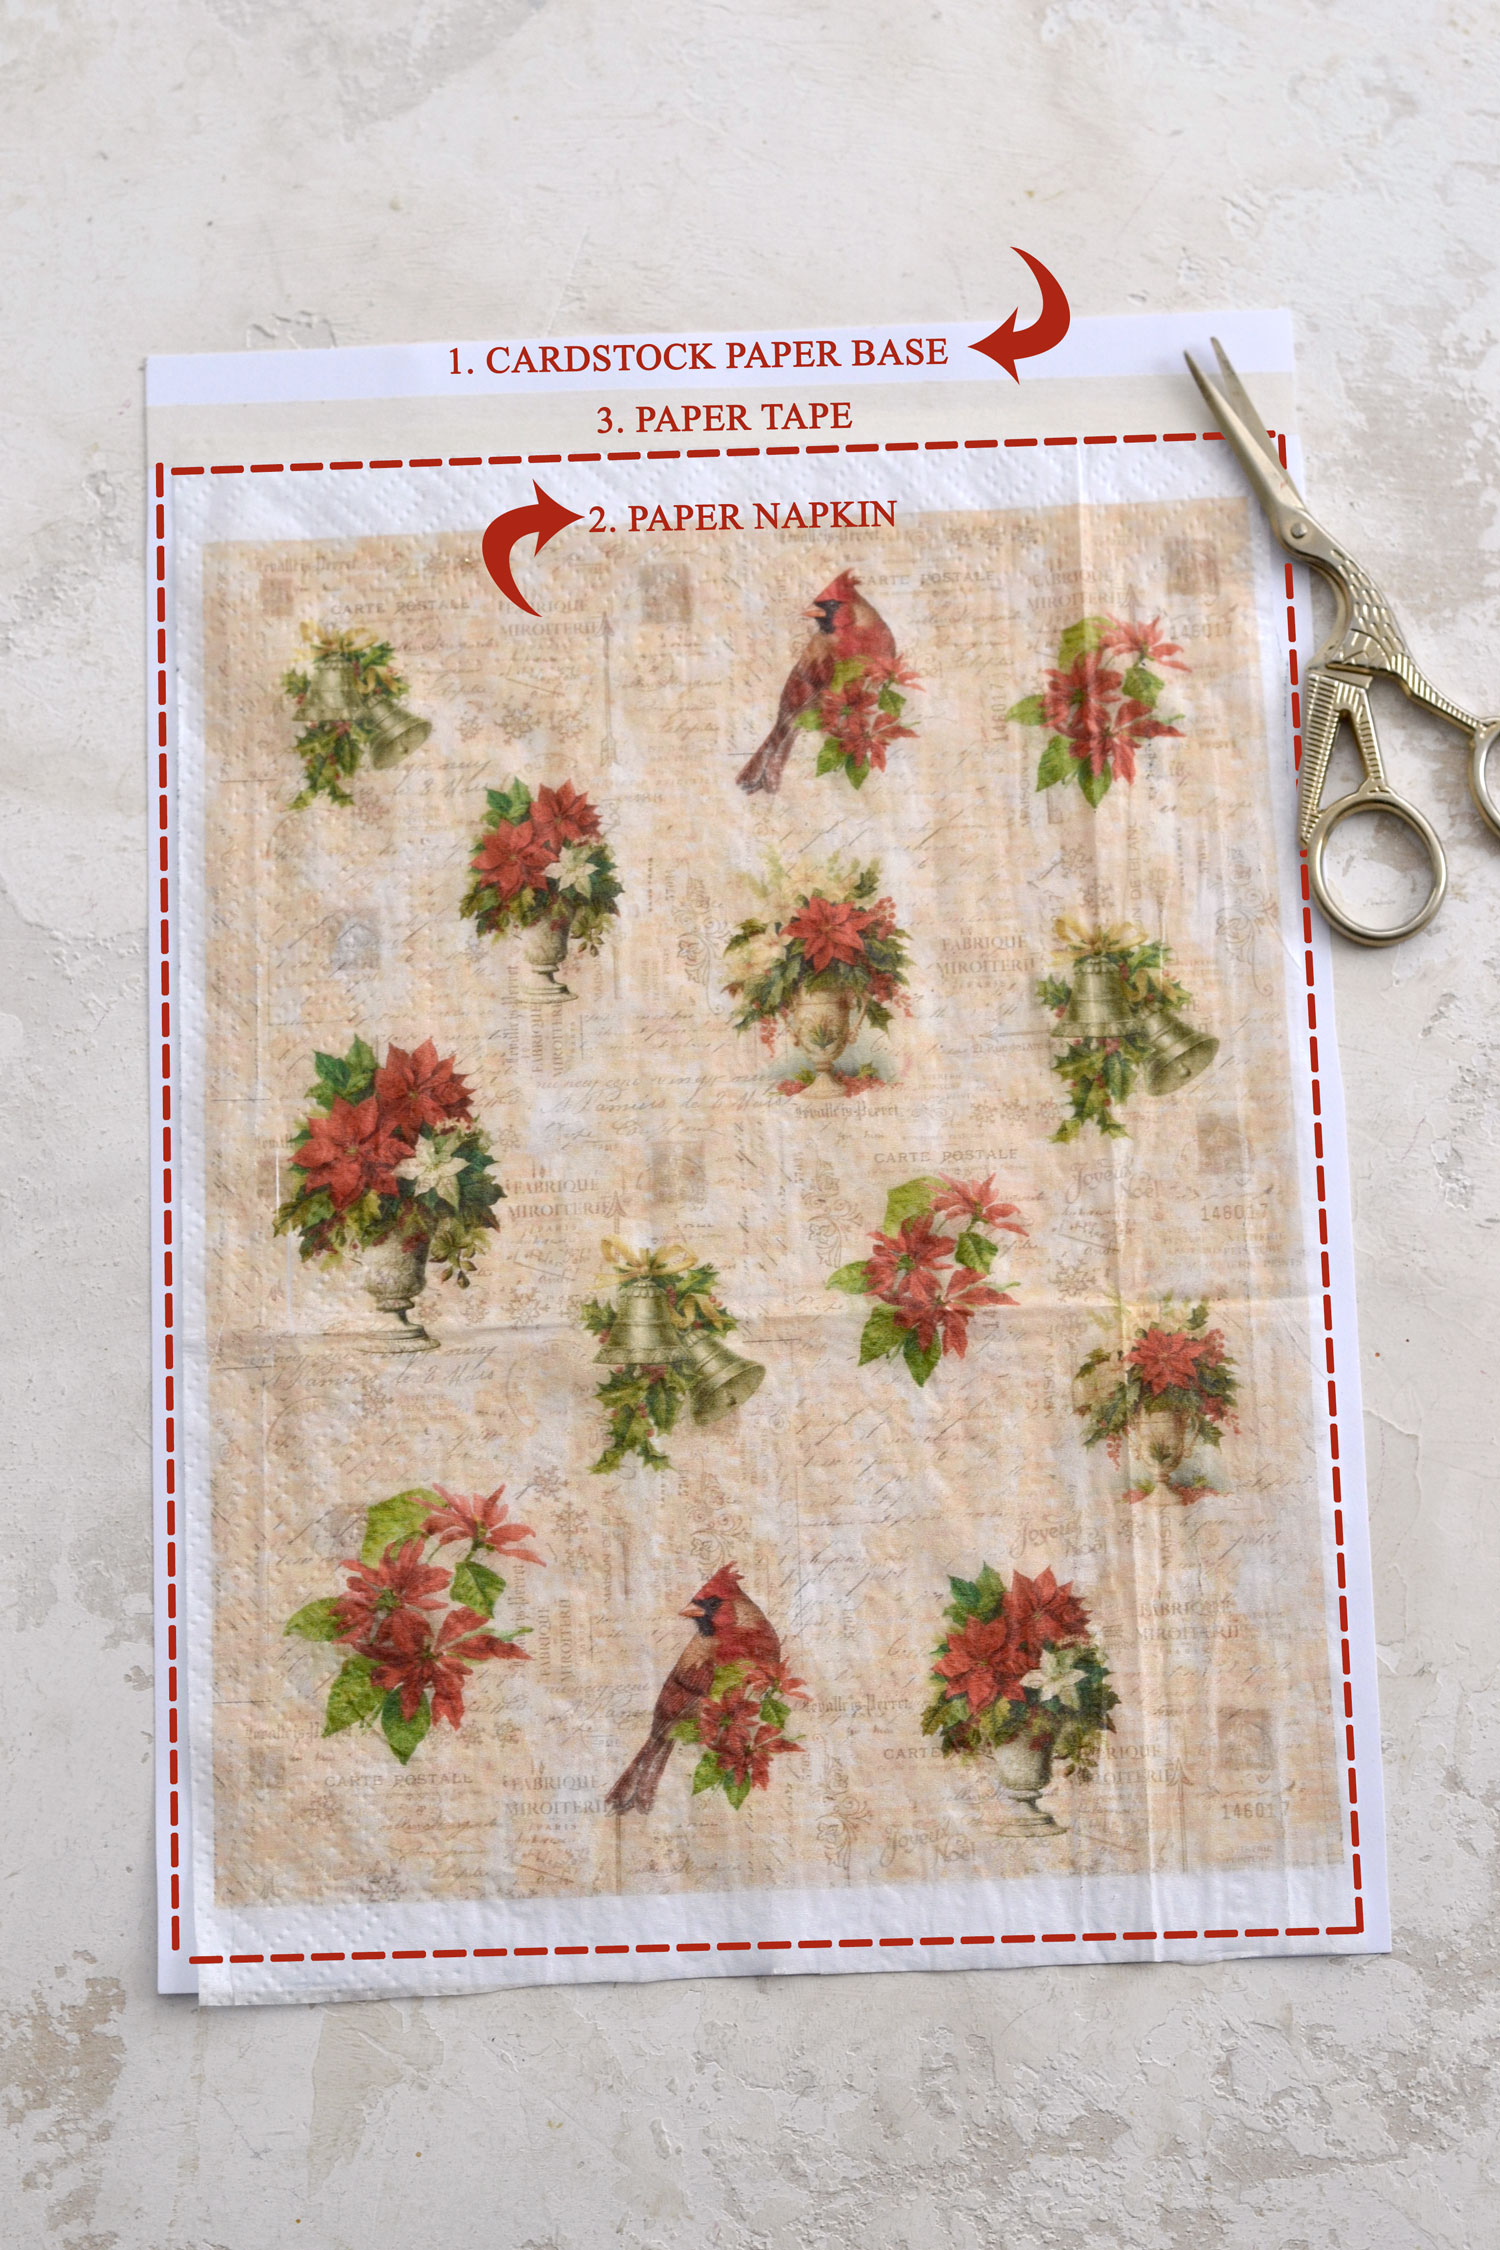
Before we jump right in, I want to quickly show you the paper assembly I typically use when I want to print my own paper napkins.
I start by placing a cardstock on my table and then I add a white paper napkin on top. The paper napkin needs to be slightly smaller on all edges, but especially on top, since we need to adhere that area with paper tape to the cardstock underneath. This works like a charm every single time and you will be able to print any of your favorite designs.
For the paper casting technique, we’ll need our beautiful mold, some coffee, toilet paper pieces, Mod Podge and a brush.
Start by brewing your coffee, let it cool down and then pour it into a small spray bottle.
Use a plastic bag or a plastic sheet to protect your working area. Coffee stains anything it comes in touch with, so keep this in mind before starting.
Place your mold on your table and apply 2-3 sprays of coffee on the surface of the specific mold you are using.
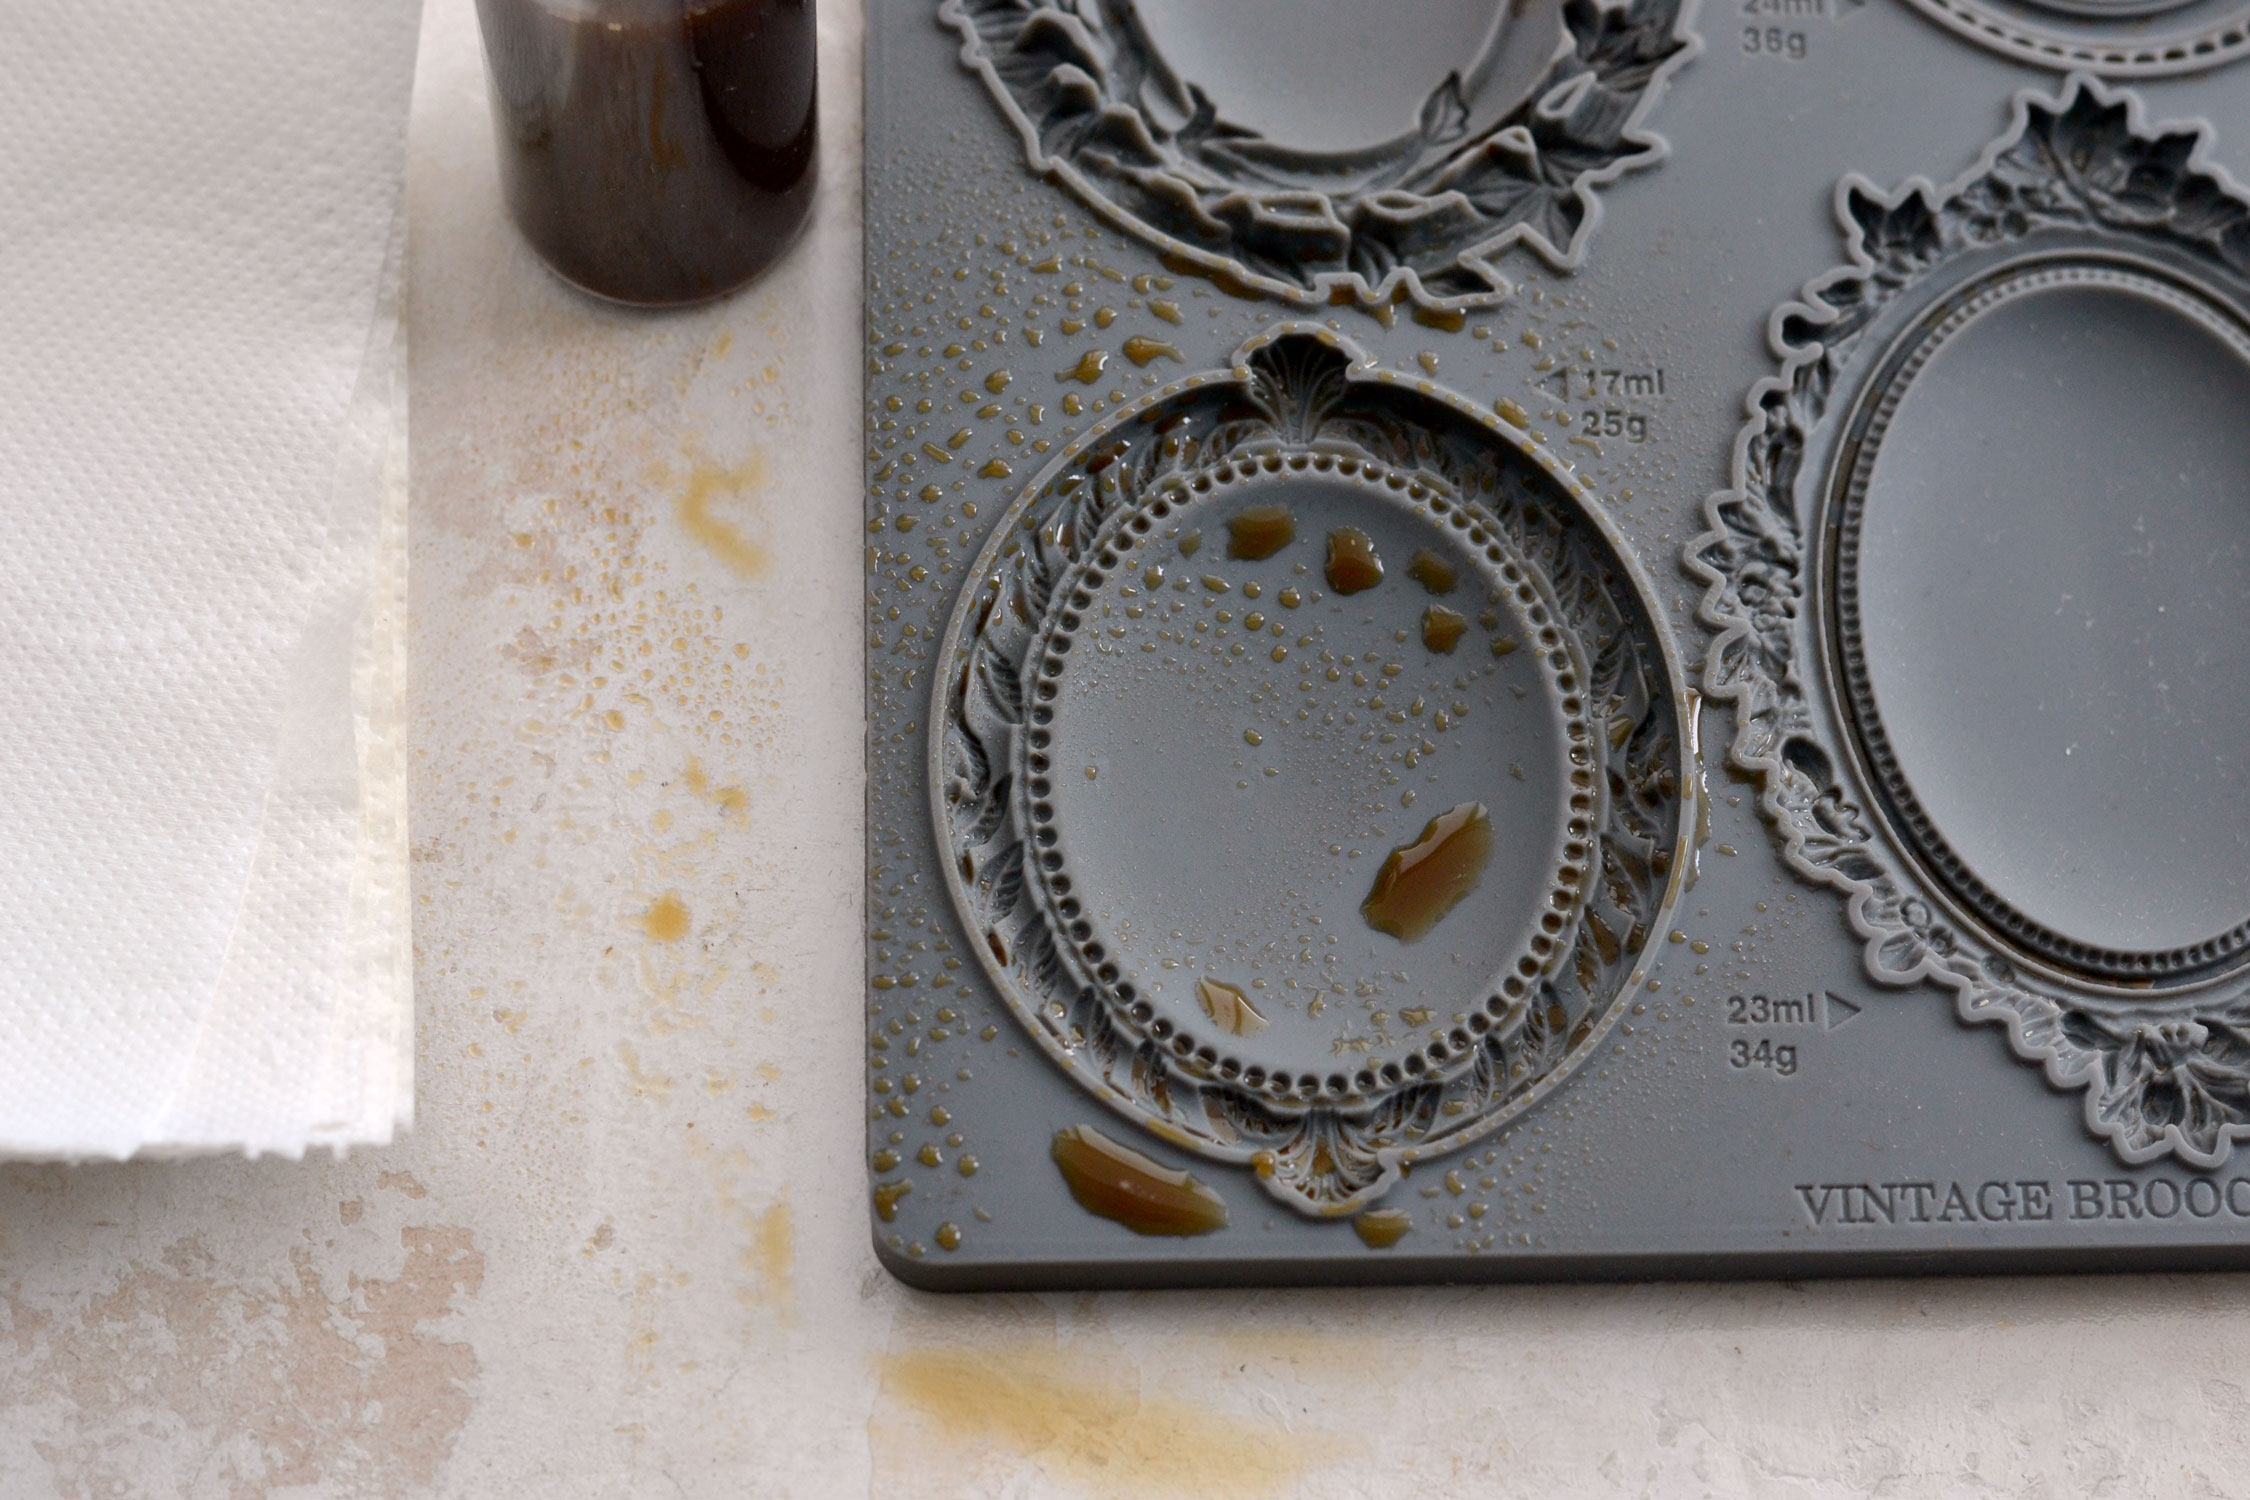
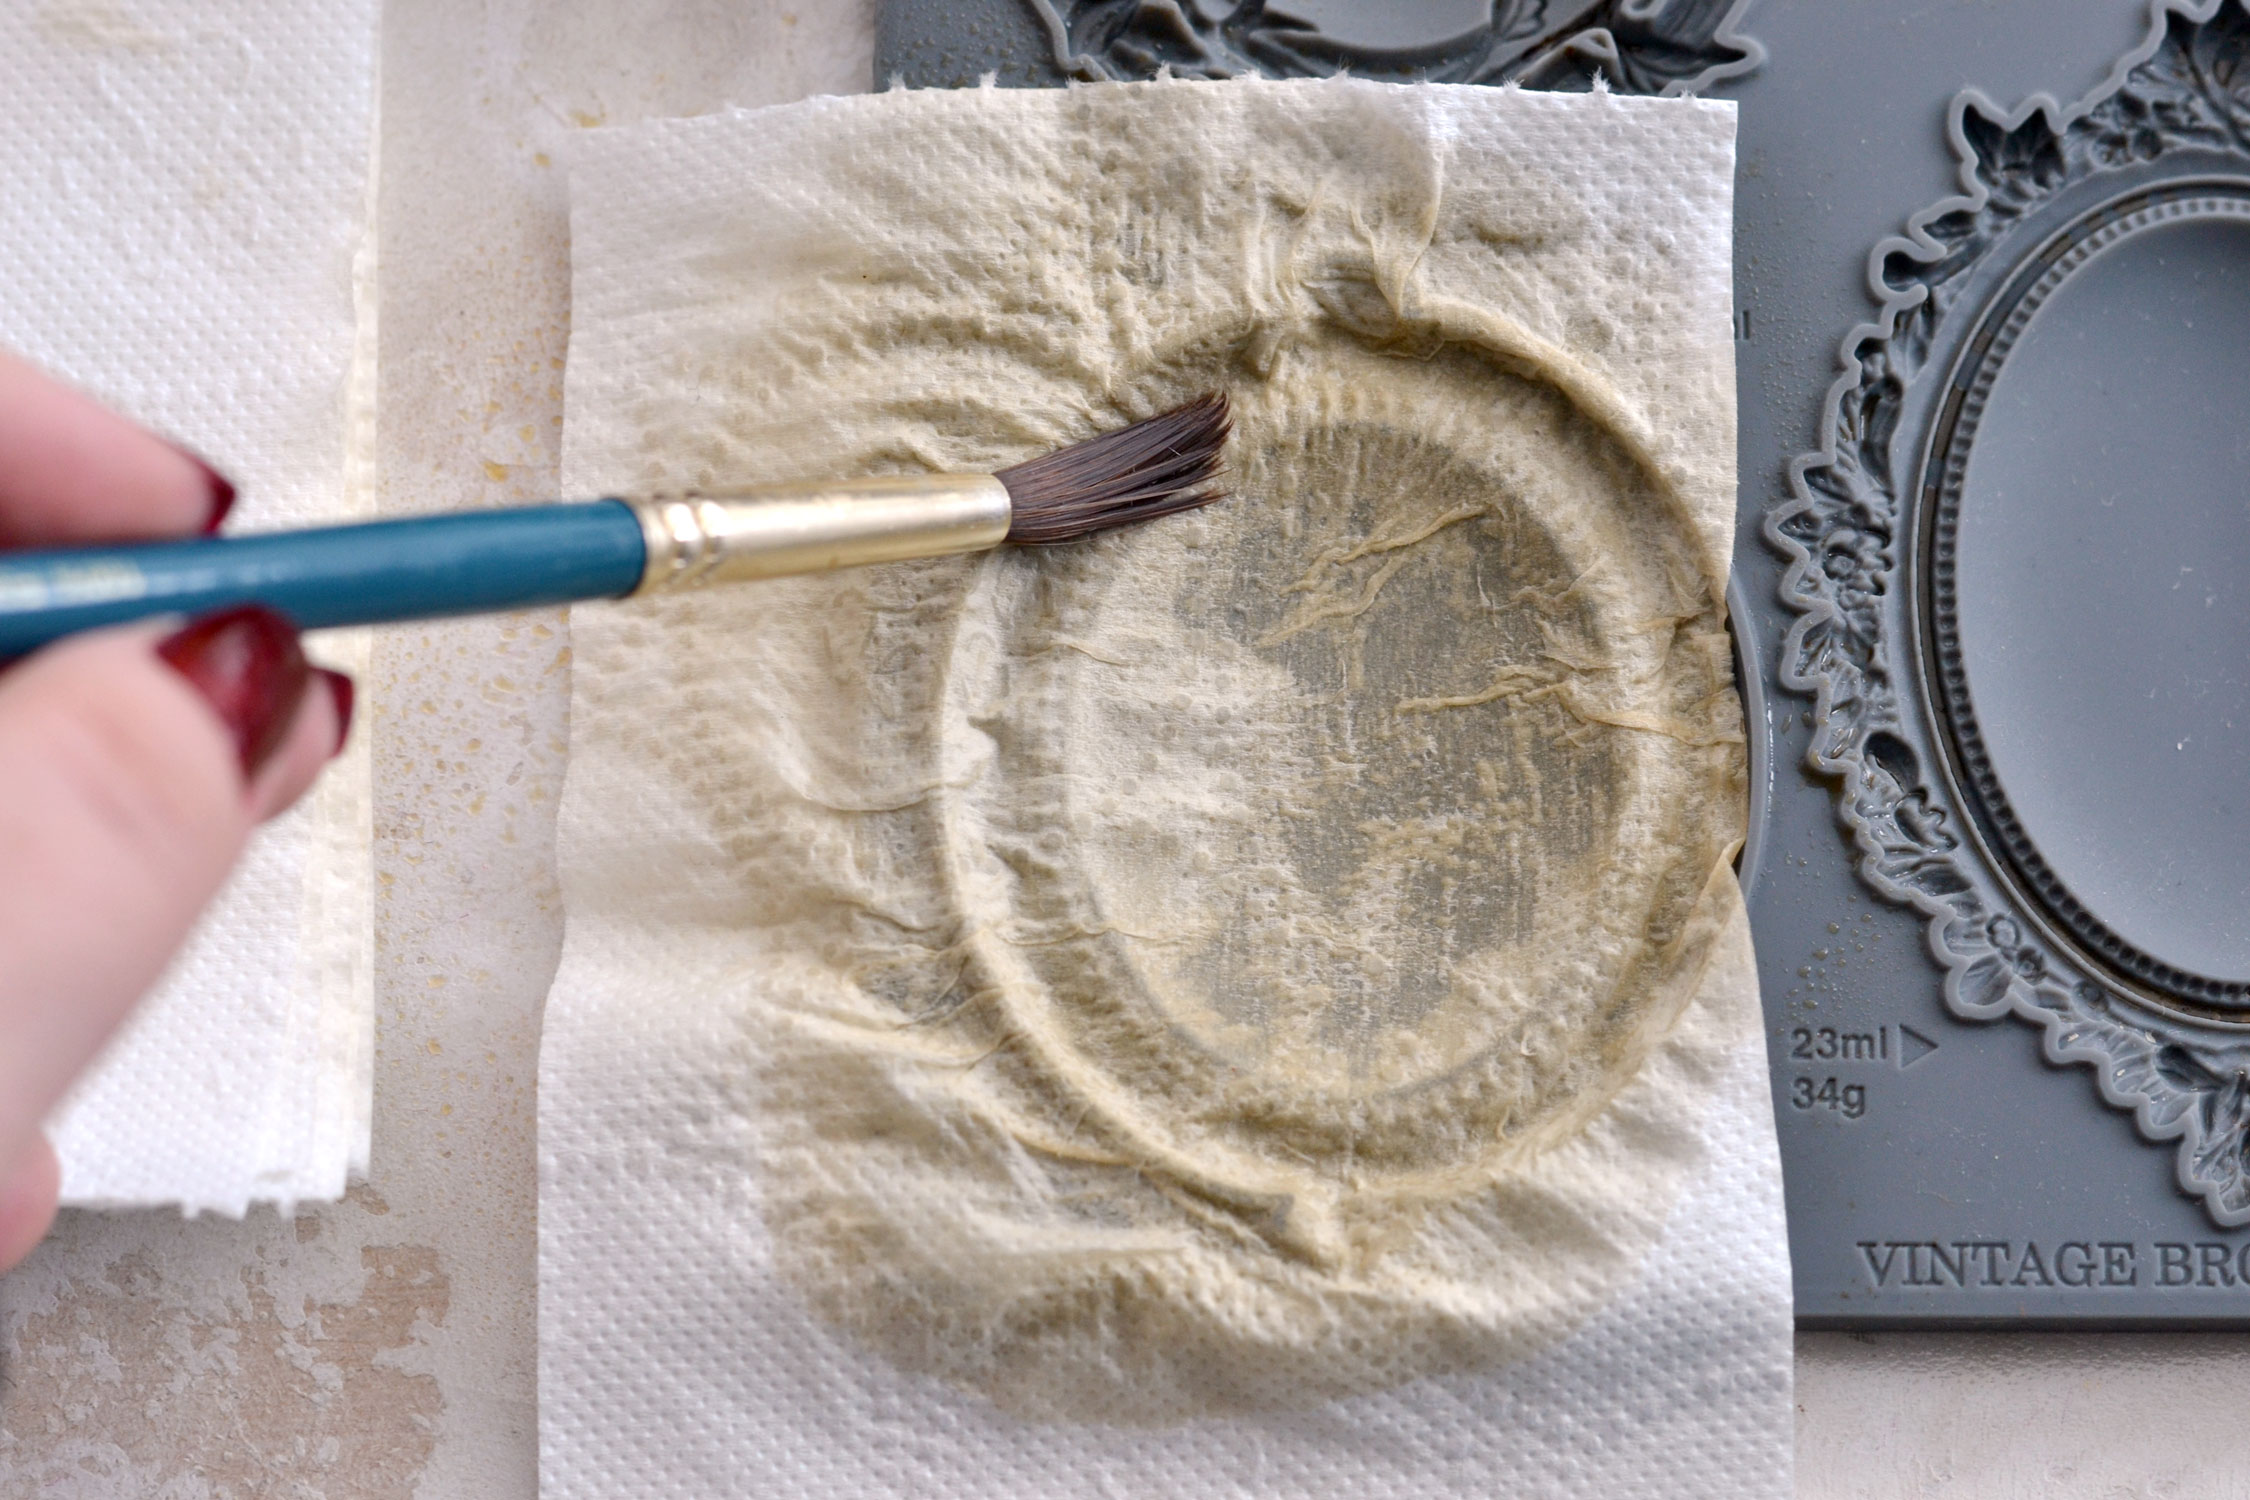
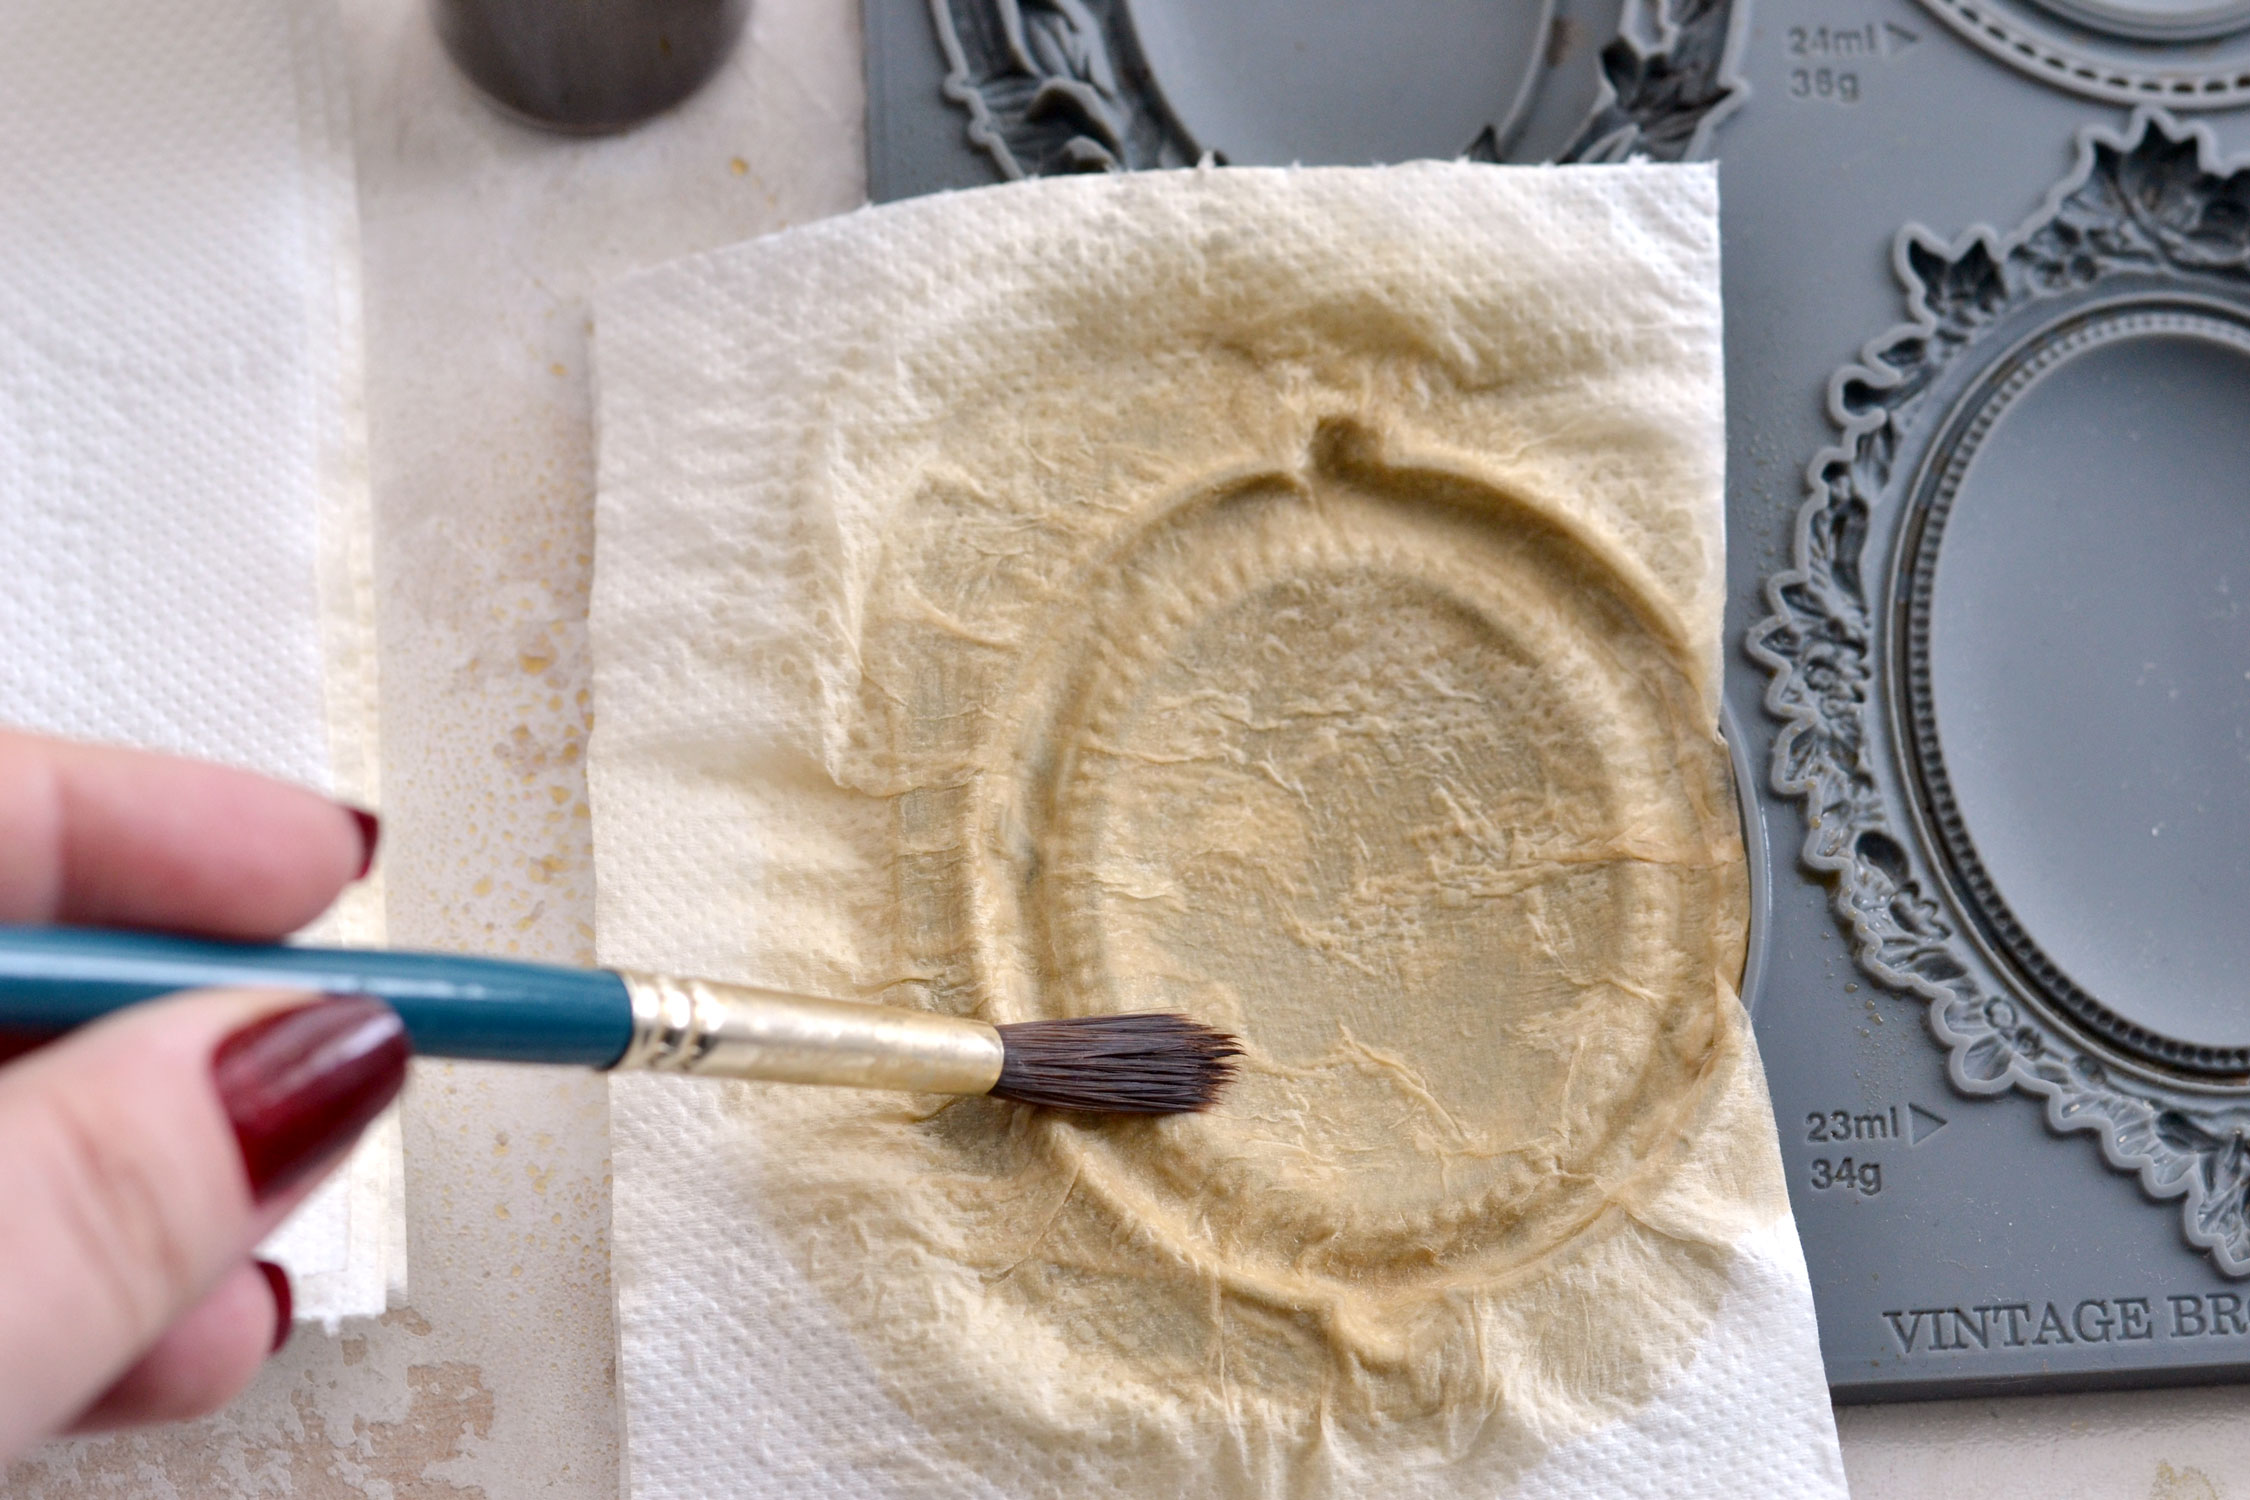
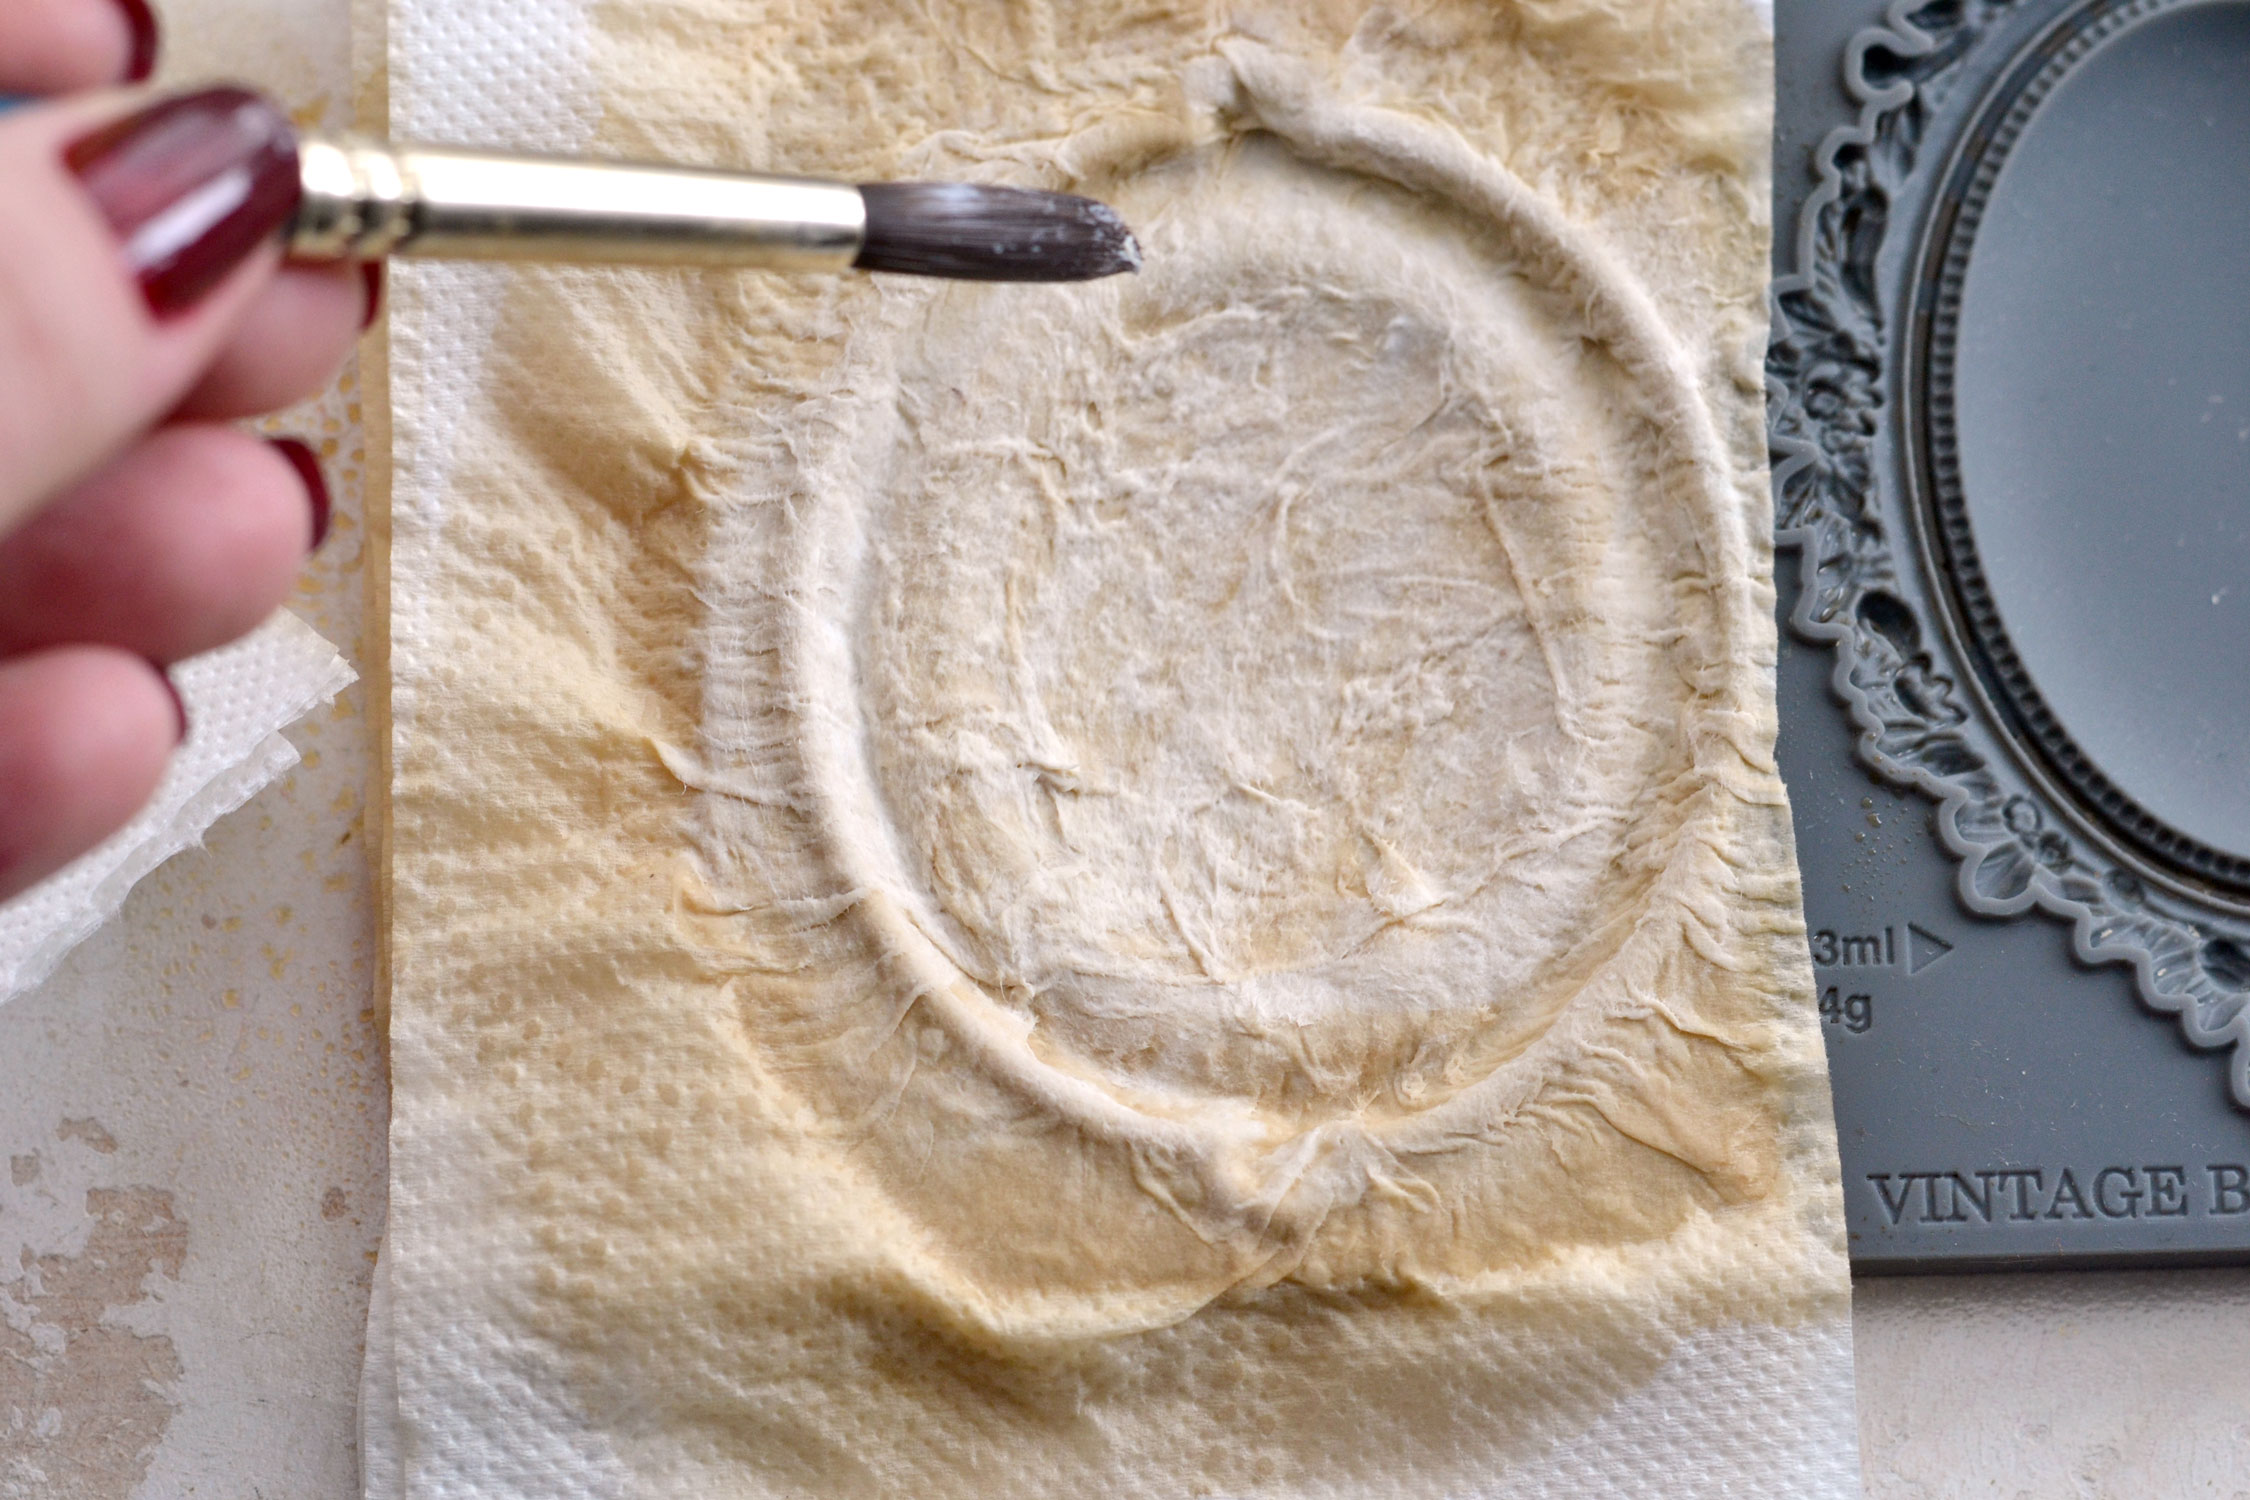
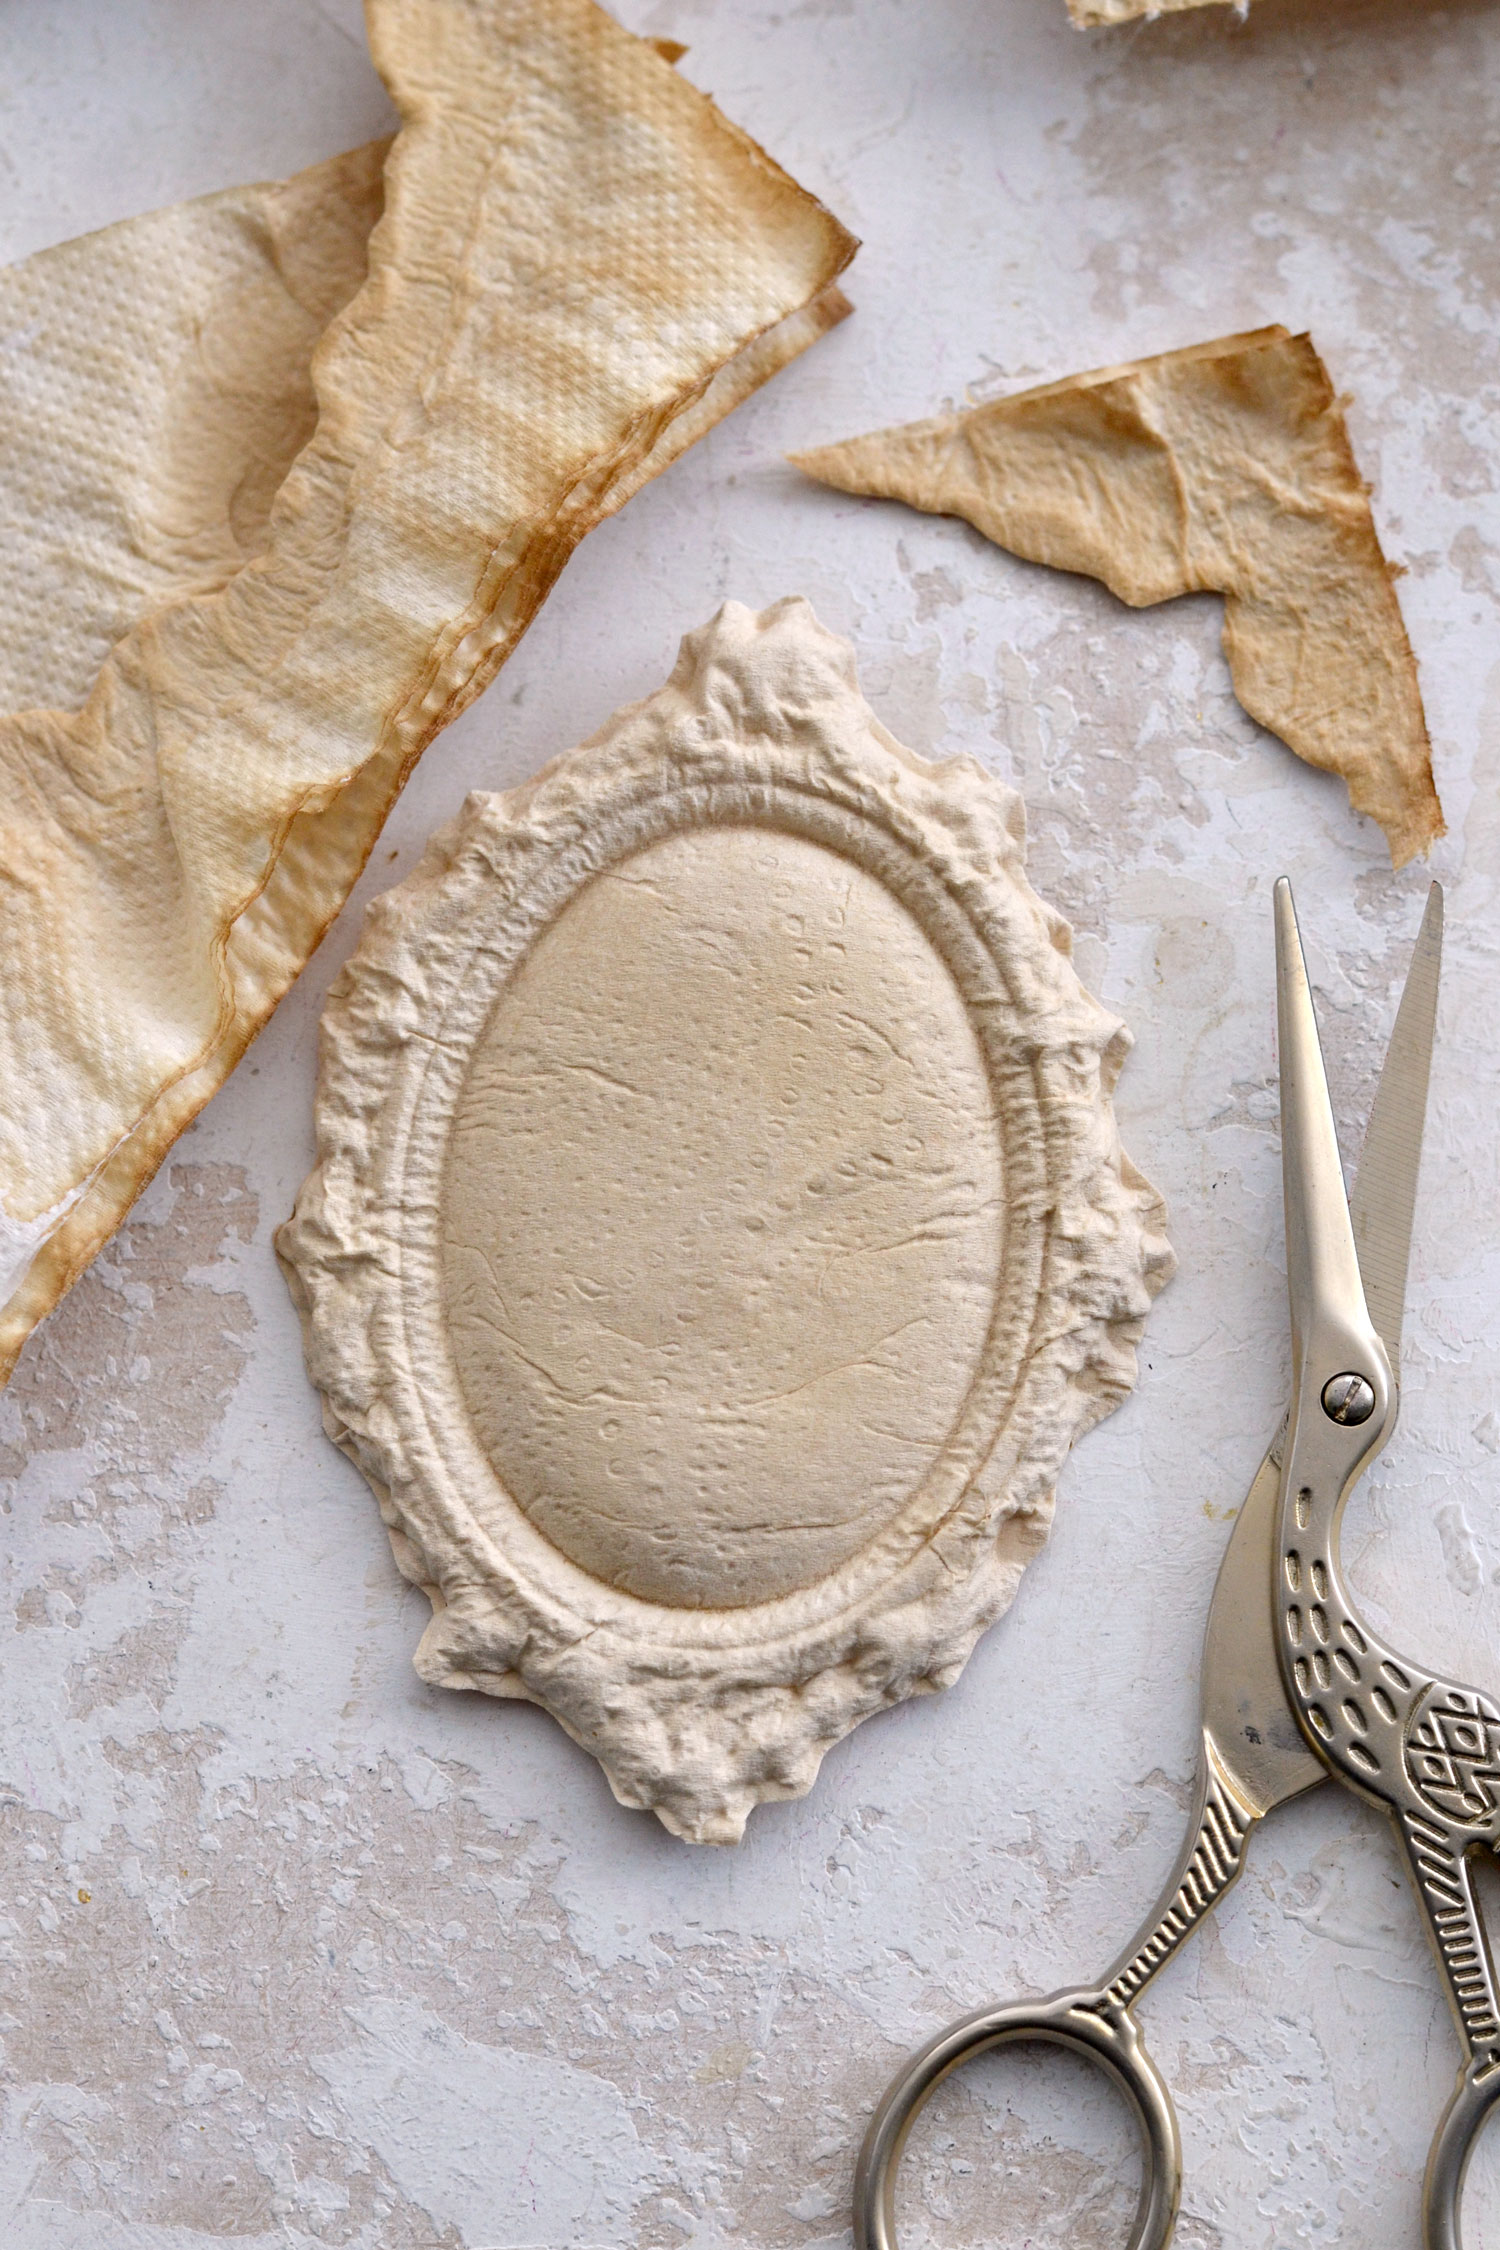
Place a piece of toilet paper on top and apply 2 more spritzes of coffee. Use your brush to press the paper into the mold. I used the side of the brush for the center and then the side again, but also the tip for the details on the edges. I found it easier to start from the middle and work my way towards the edges. Try not to warp the paper too much. The first layer is important because it will dictate the overall shape of our cast. Be gentle as the paper can easily tear but also apply enough pressure so that the paper can take the shape of your mold.
This will be our first coffee + paper layer.
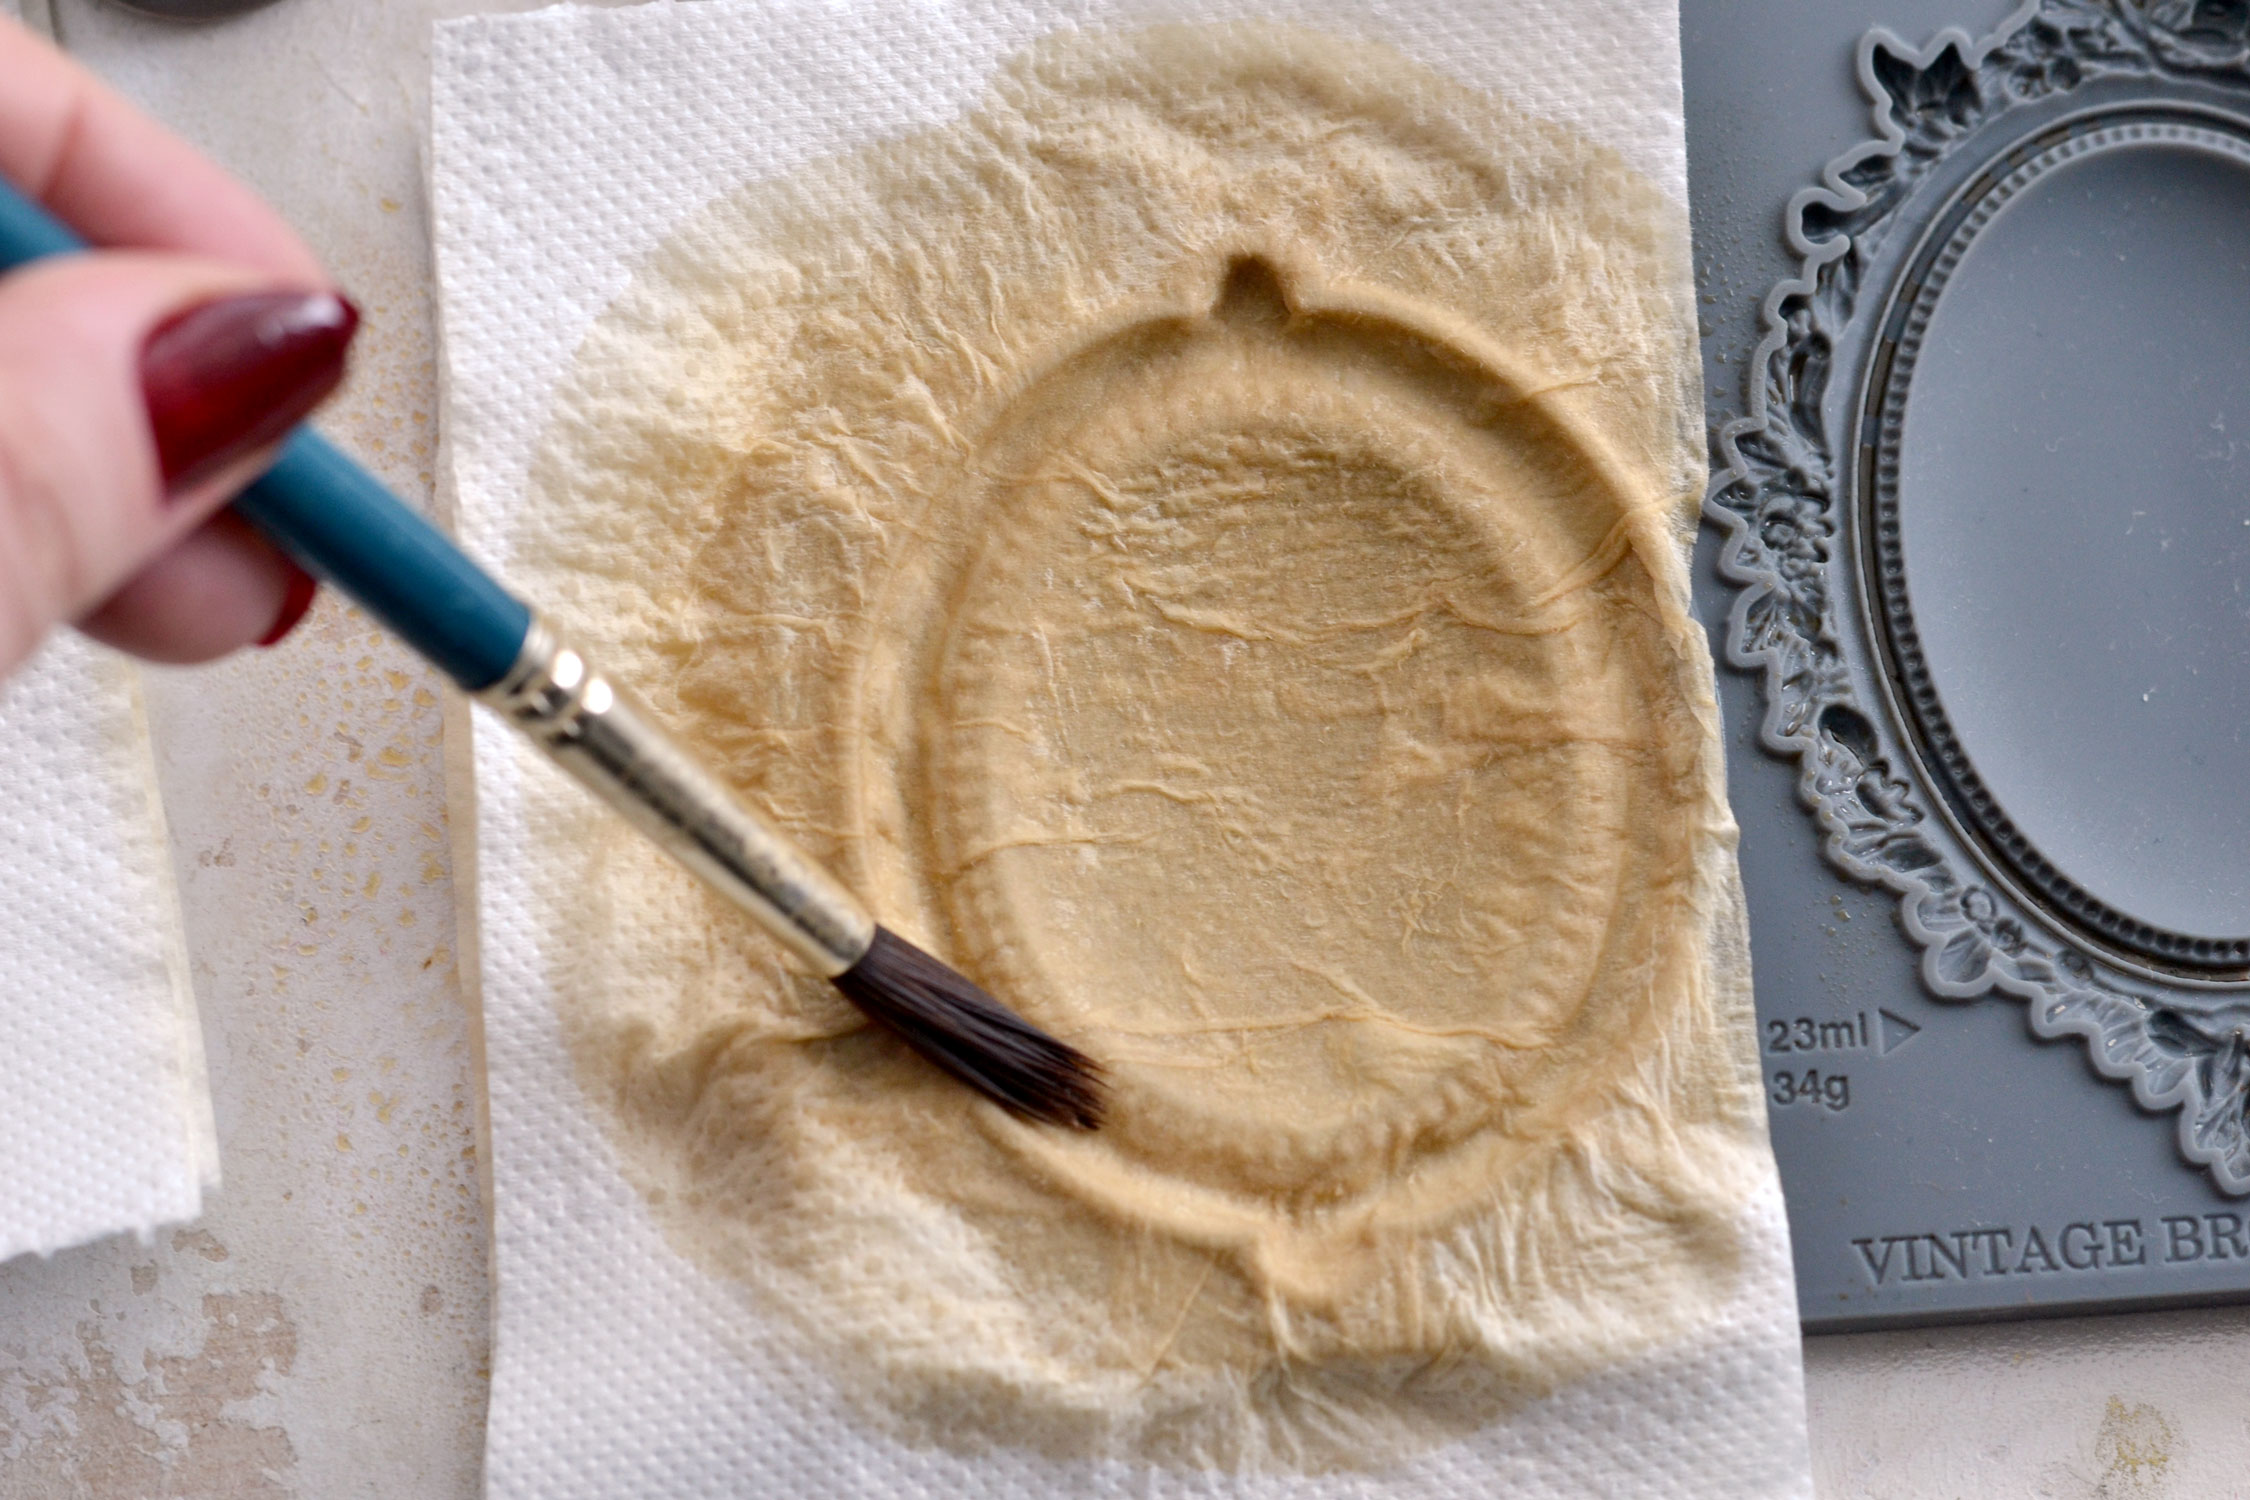
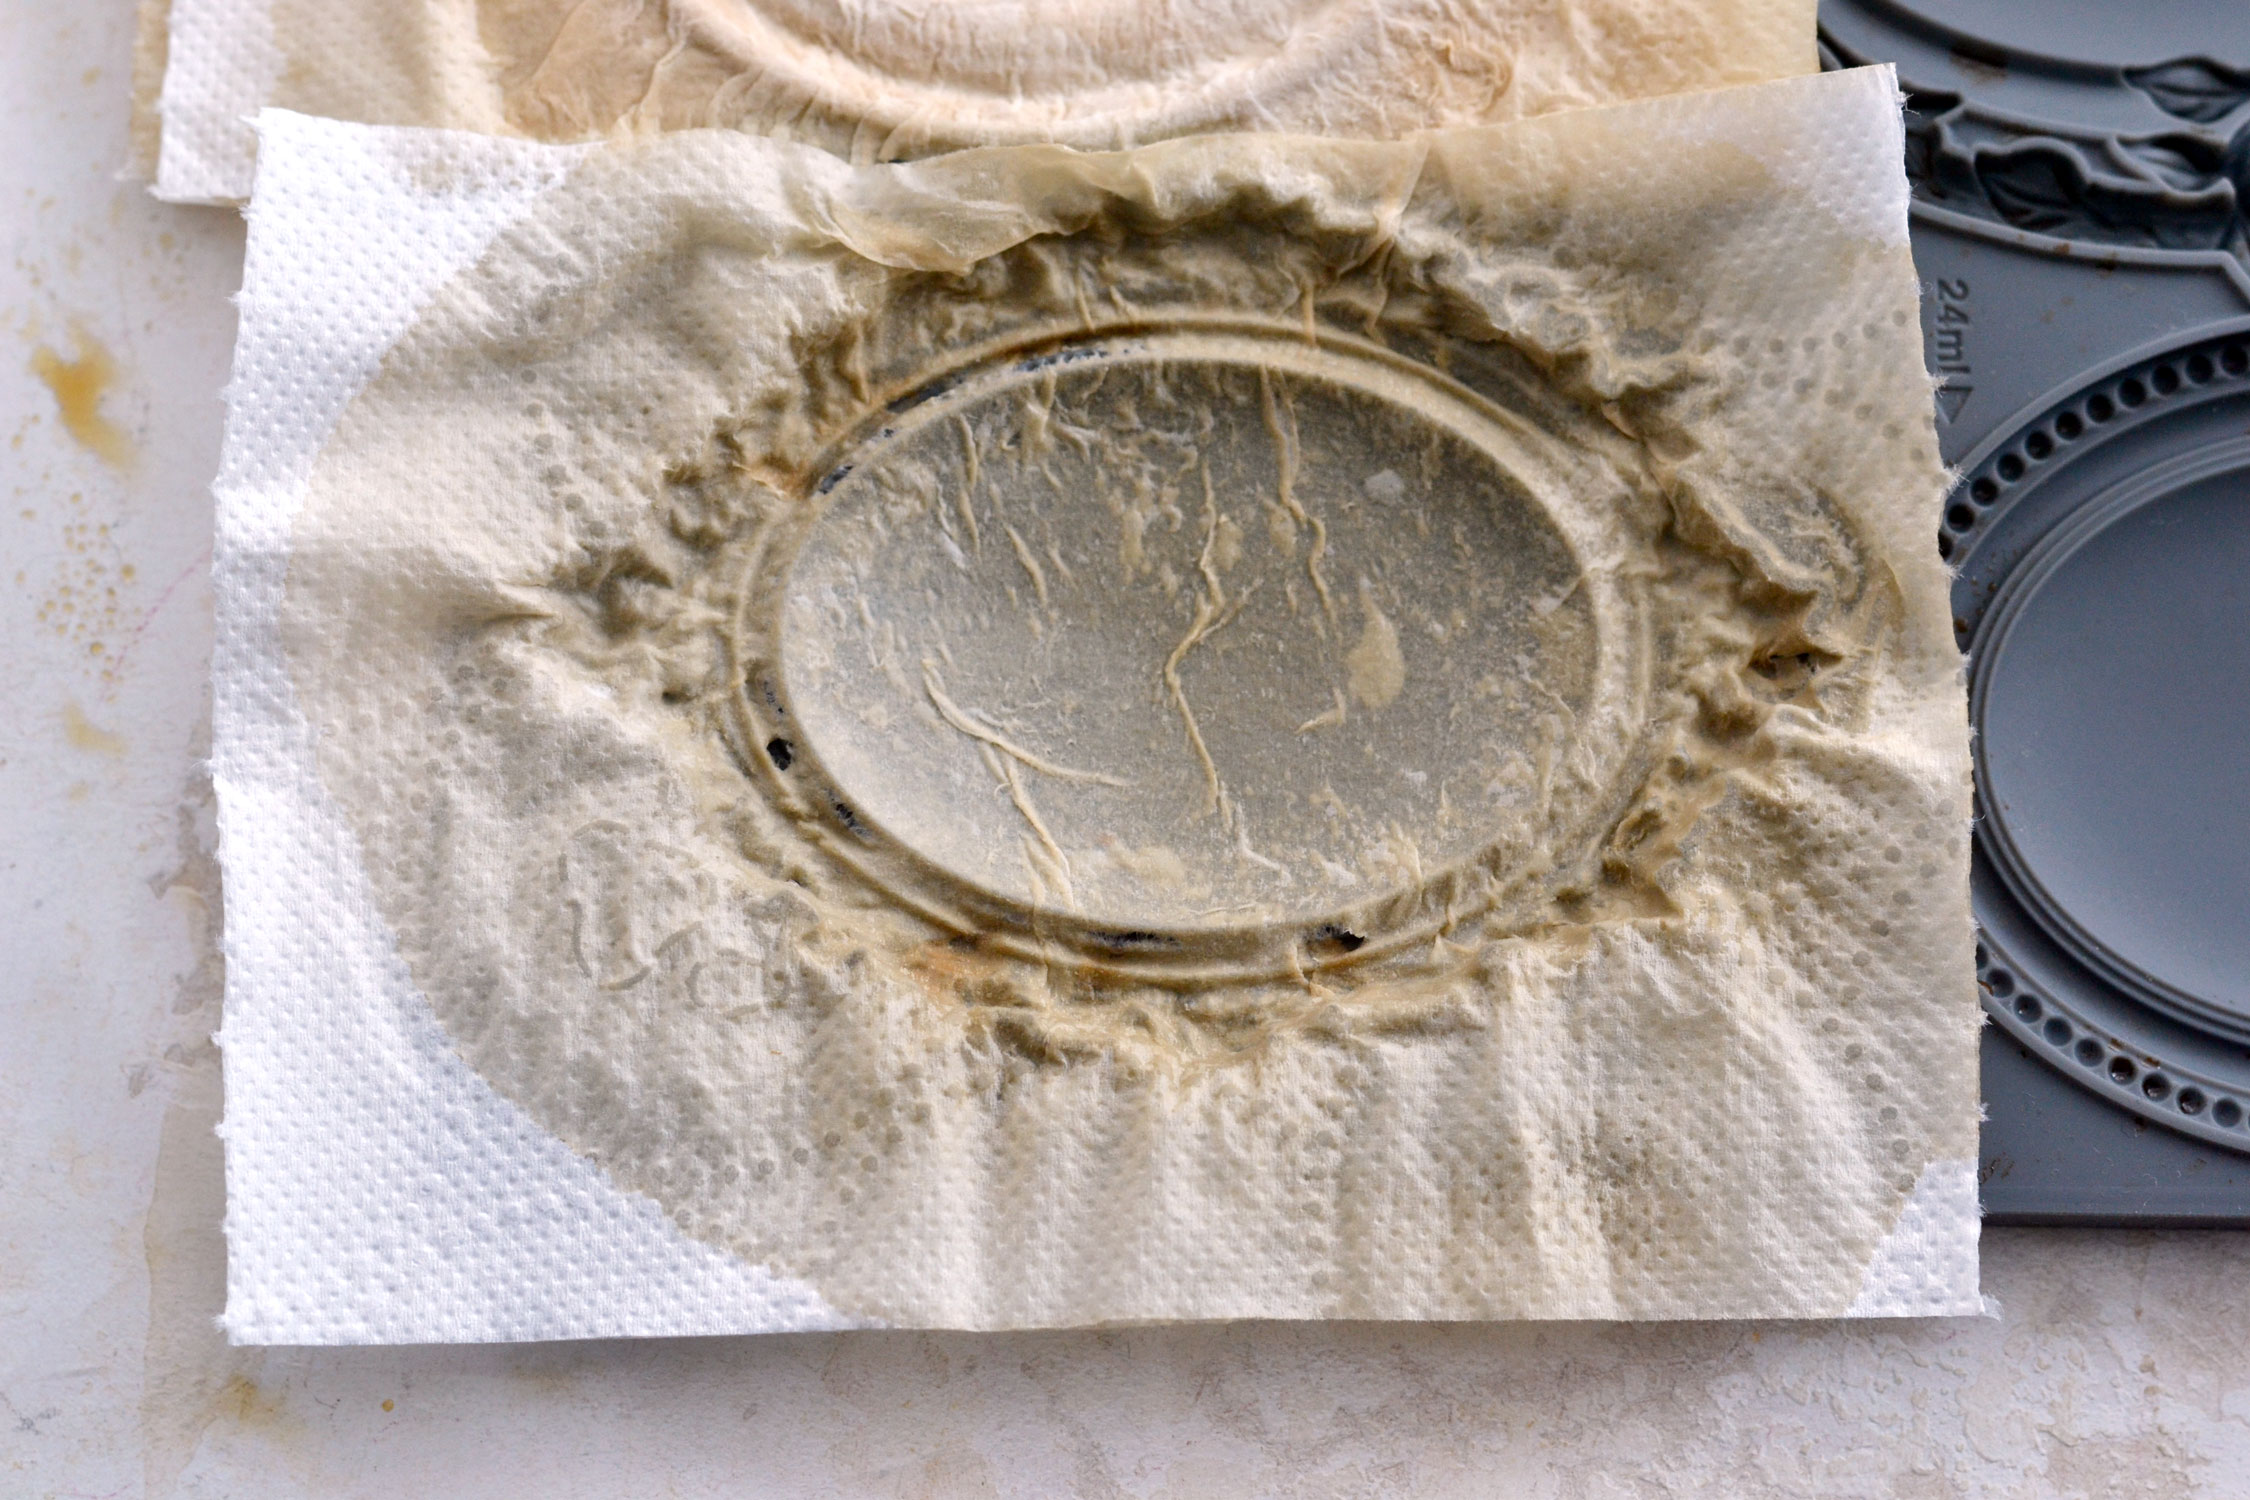
Apply 2 more spritzes on the molded surface, then add another piece of paper on top. Spritz it again, then use your brush to press it into the mold, just like before.
As you can see below, after covering the inside of the molded shape, I also used my brush to press the paper outside the edges. It will be easier to cut the finished pieces afterwards, as you will be able to see the details around the edges more clearly.
This will be our second coffee+ paper layer.
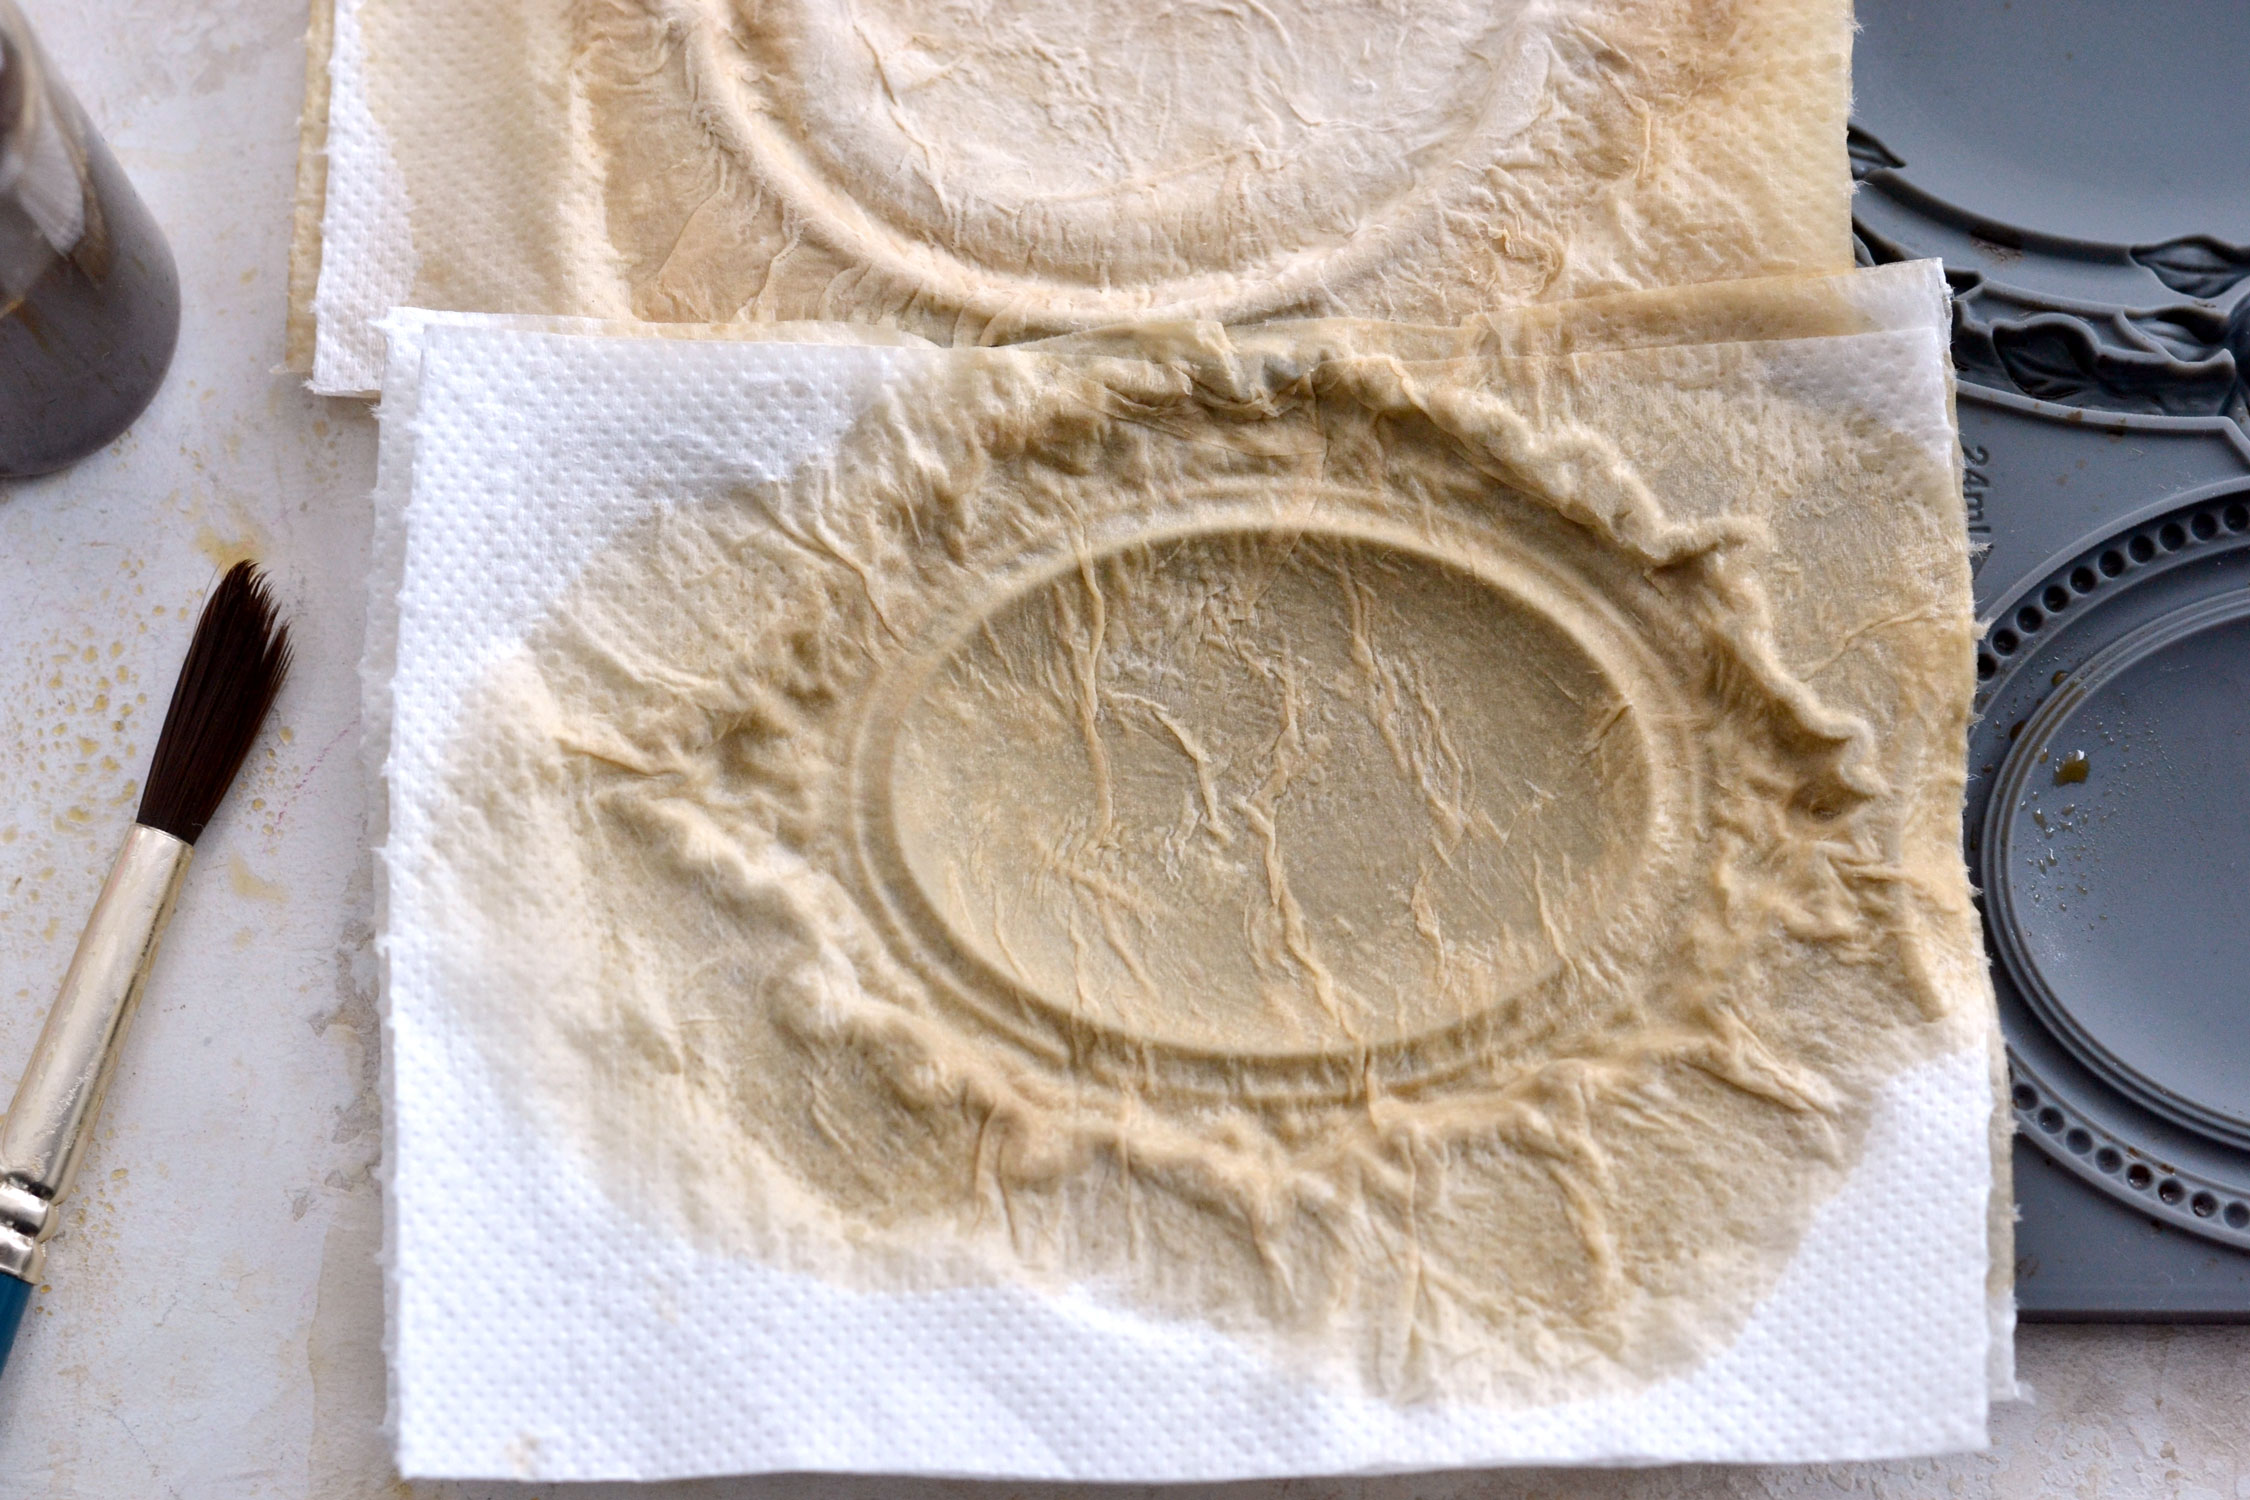
Follow the same technique to add 2-3 more spritzes of coffee, then add another piece of paper on top. Spritz it again and press it into your mold, just like before.
This third step turns a little bit different, as we also need to start adding some glue at this stage. So add the glue and use your brush to cover the whole surface of your shape. Depending on how thick your glue is, you might also need to add another spritz or two of coffee.
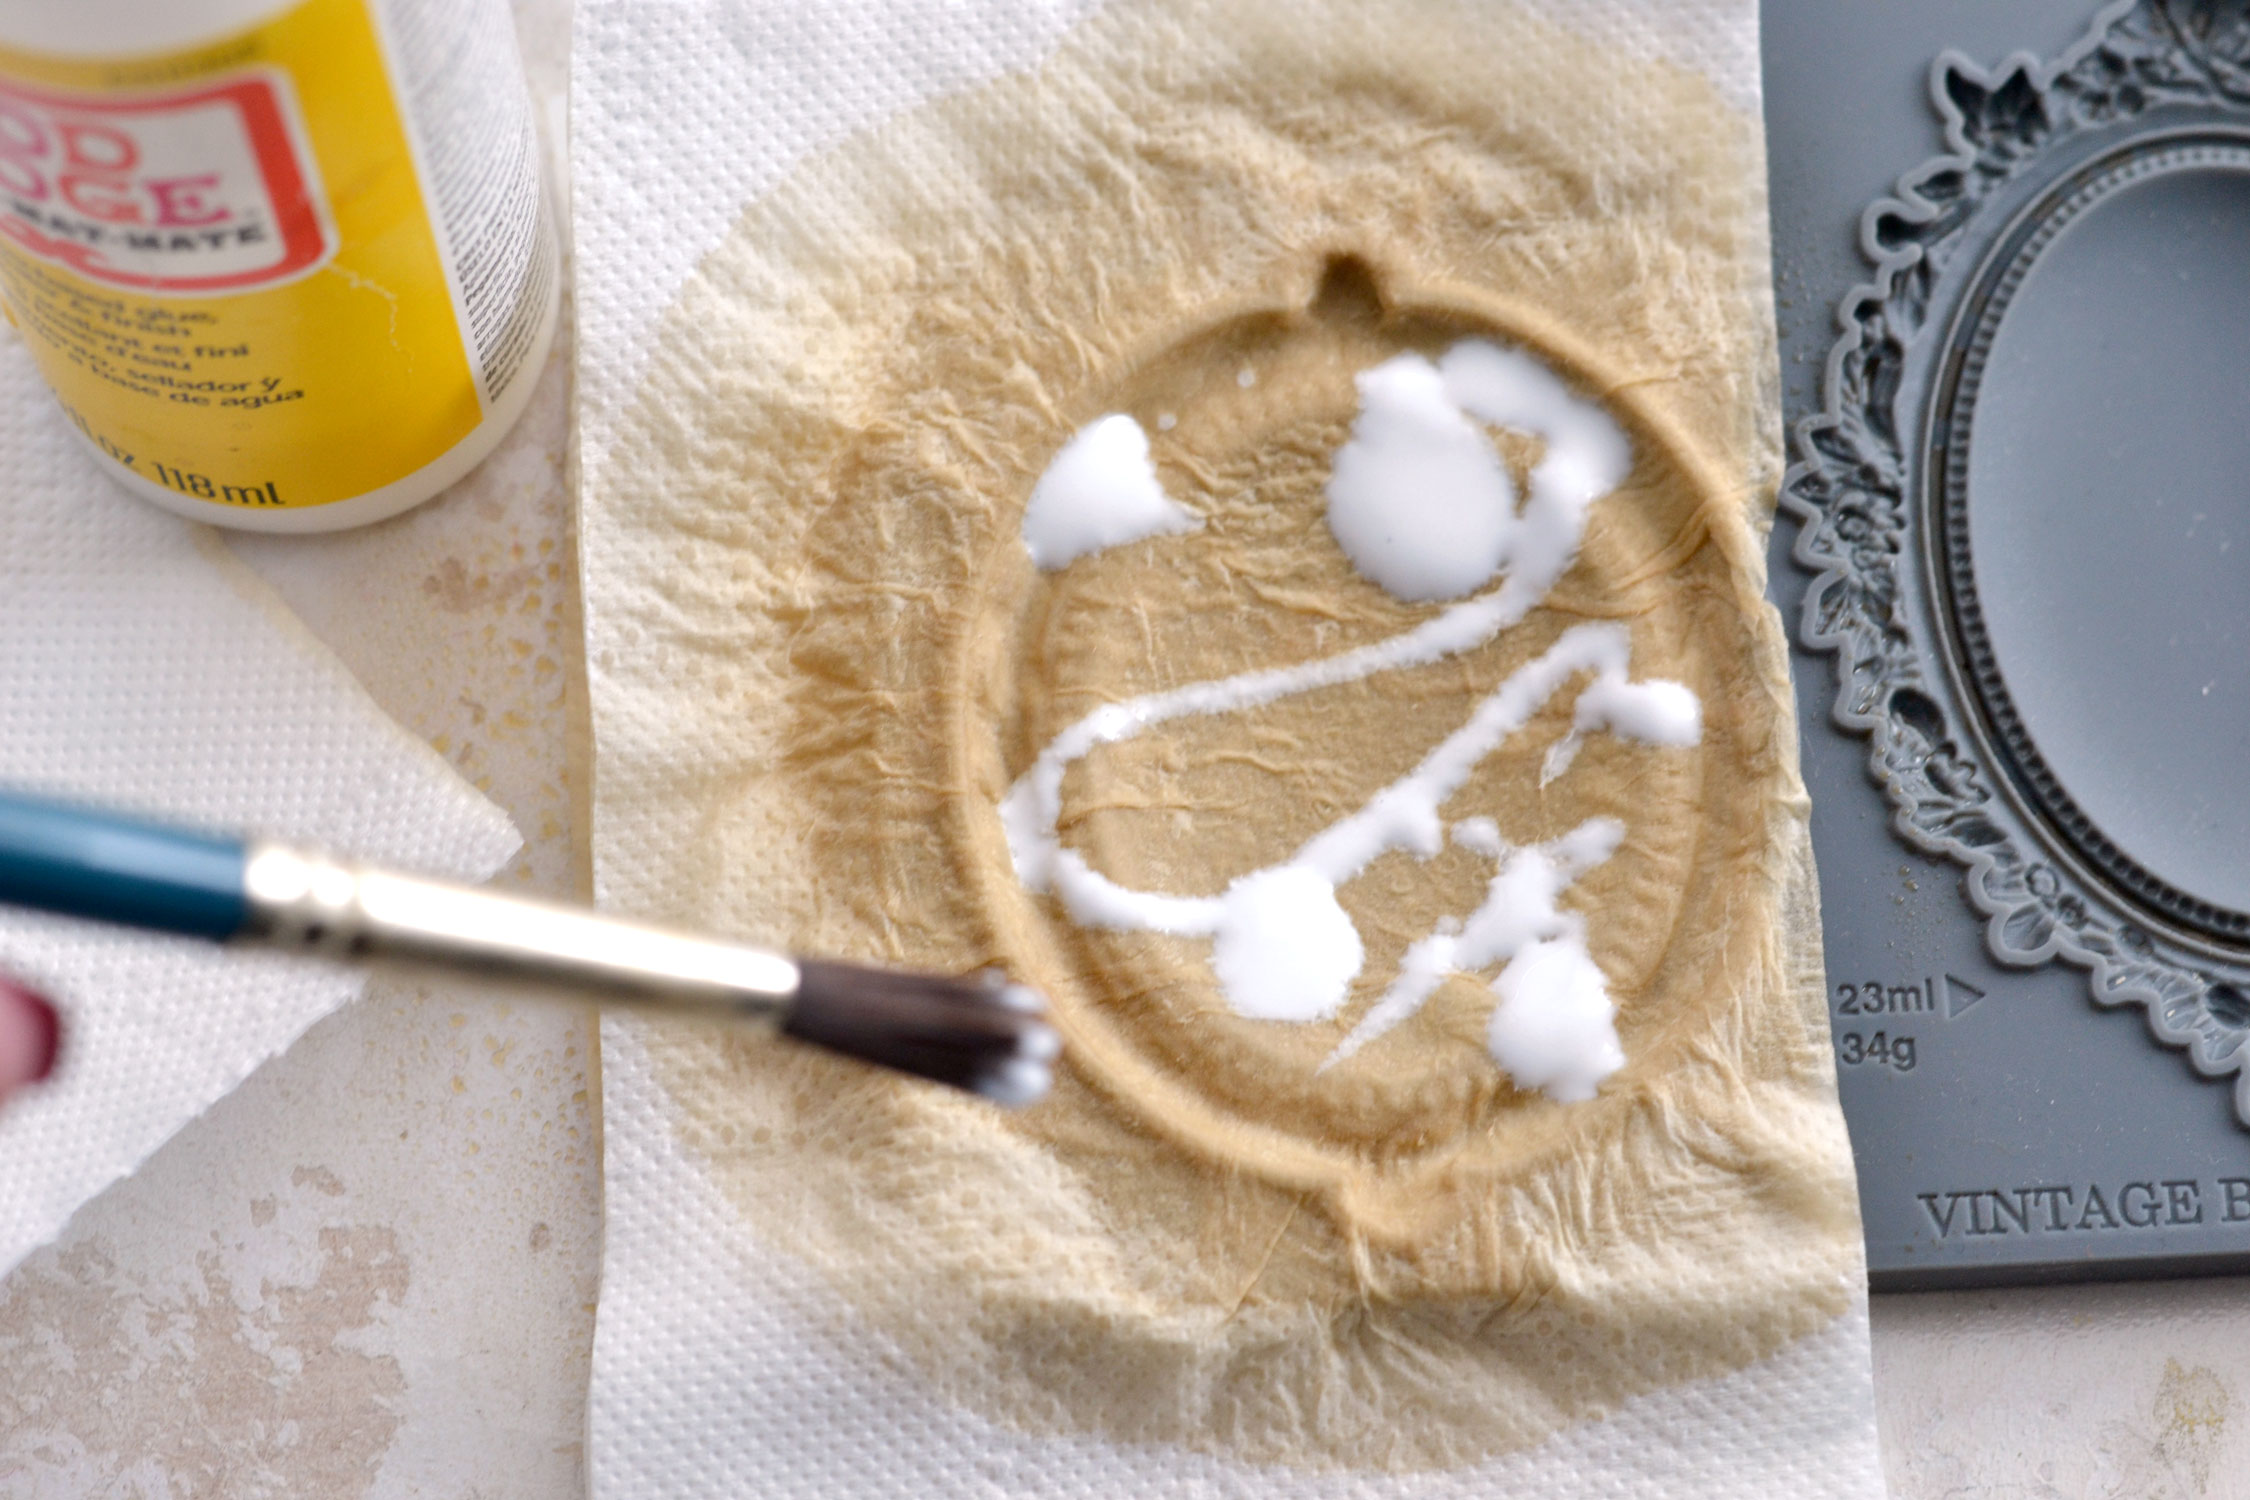
This will be our third coffee+paper+glue layer.
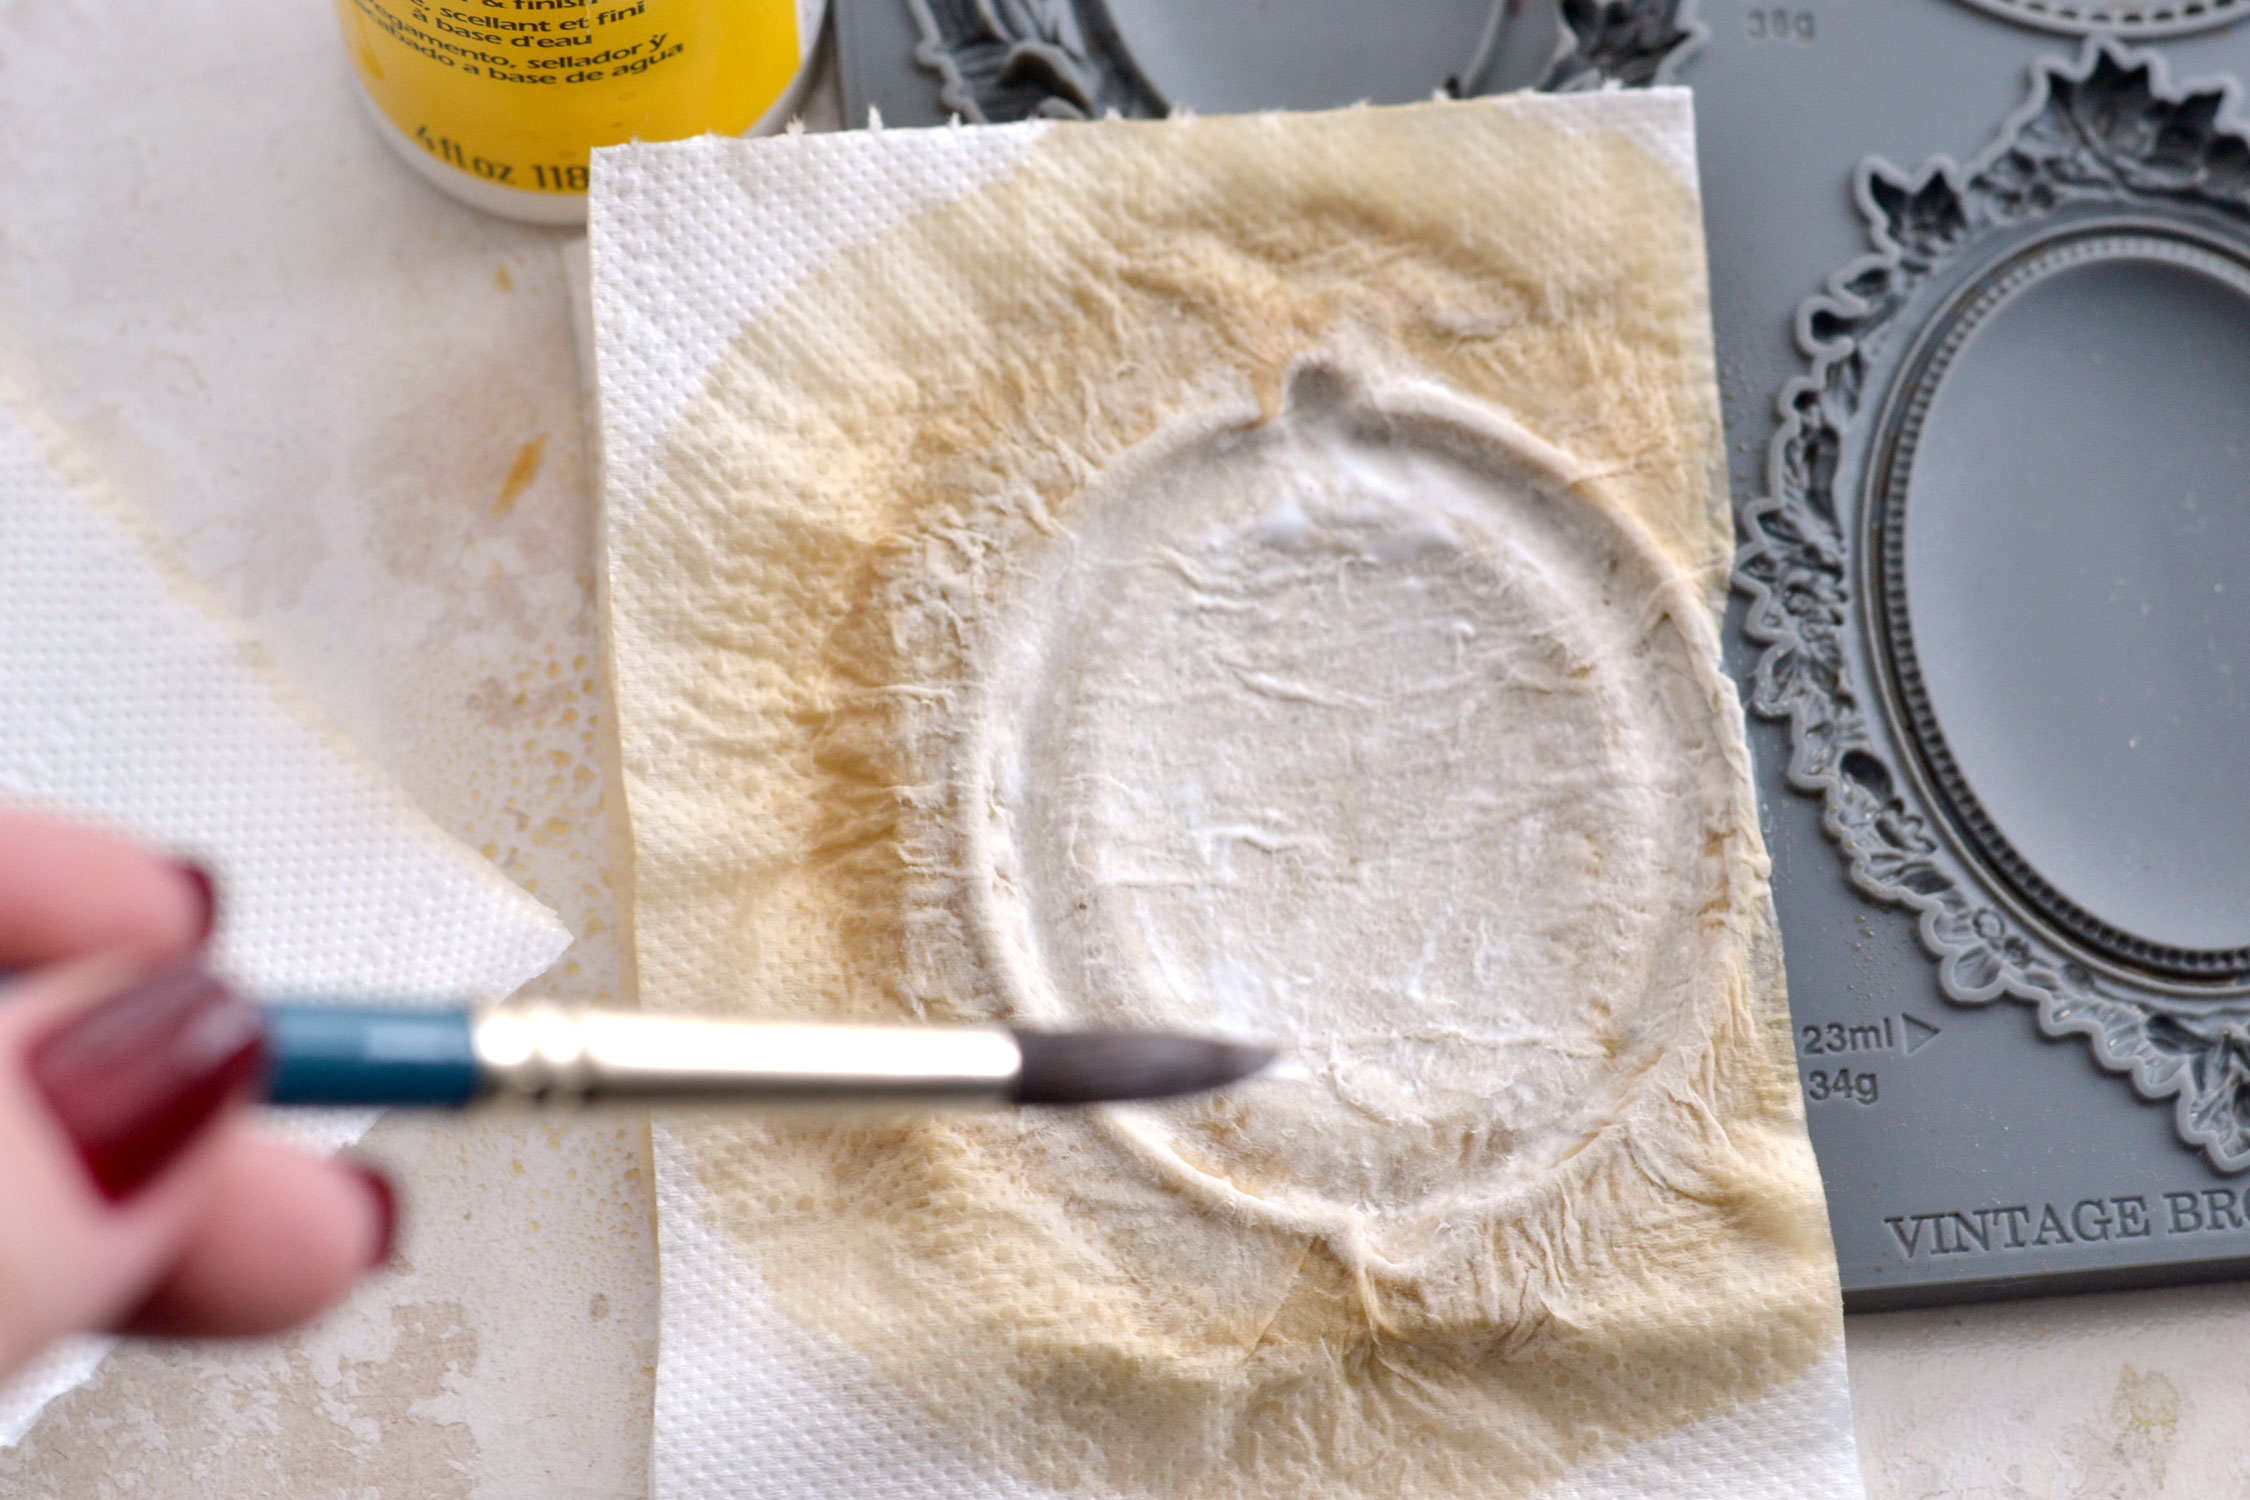
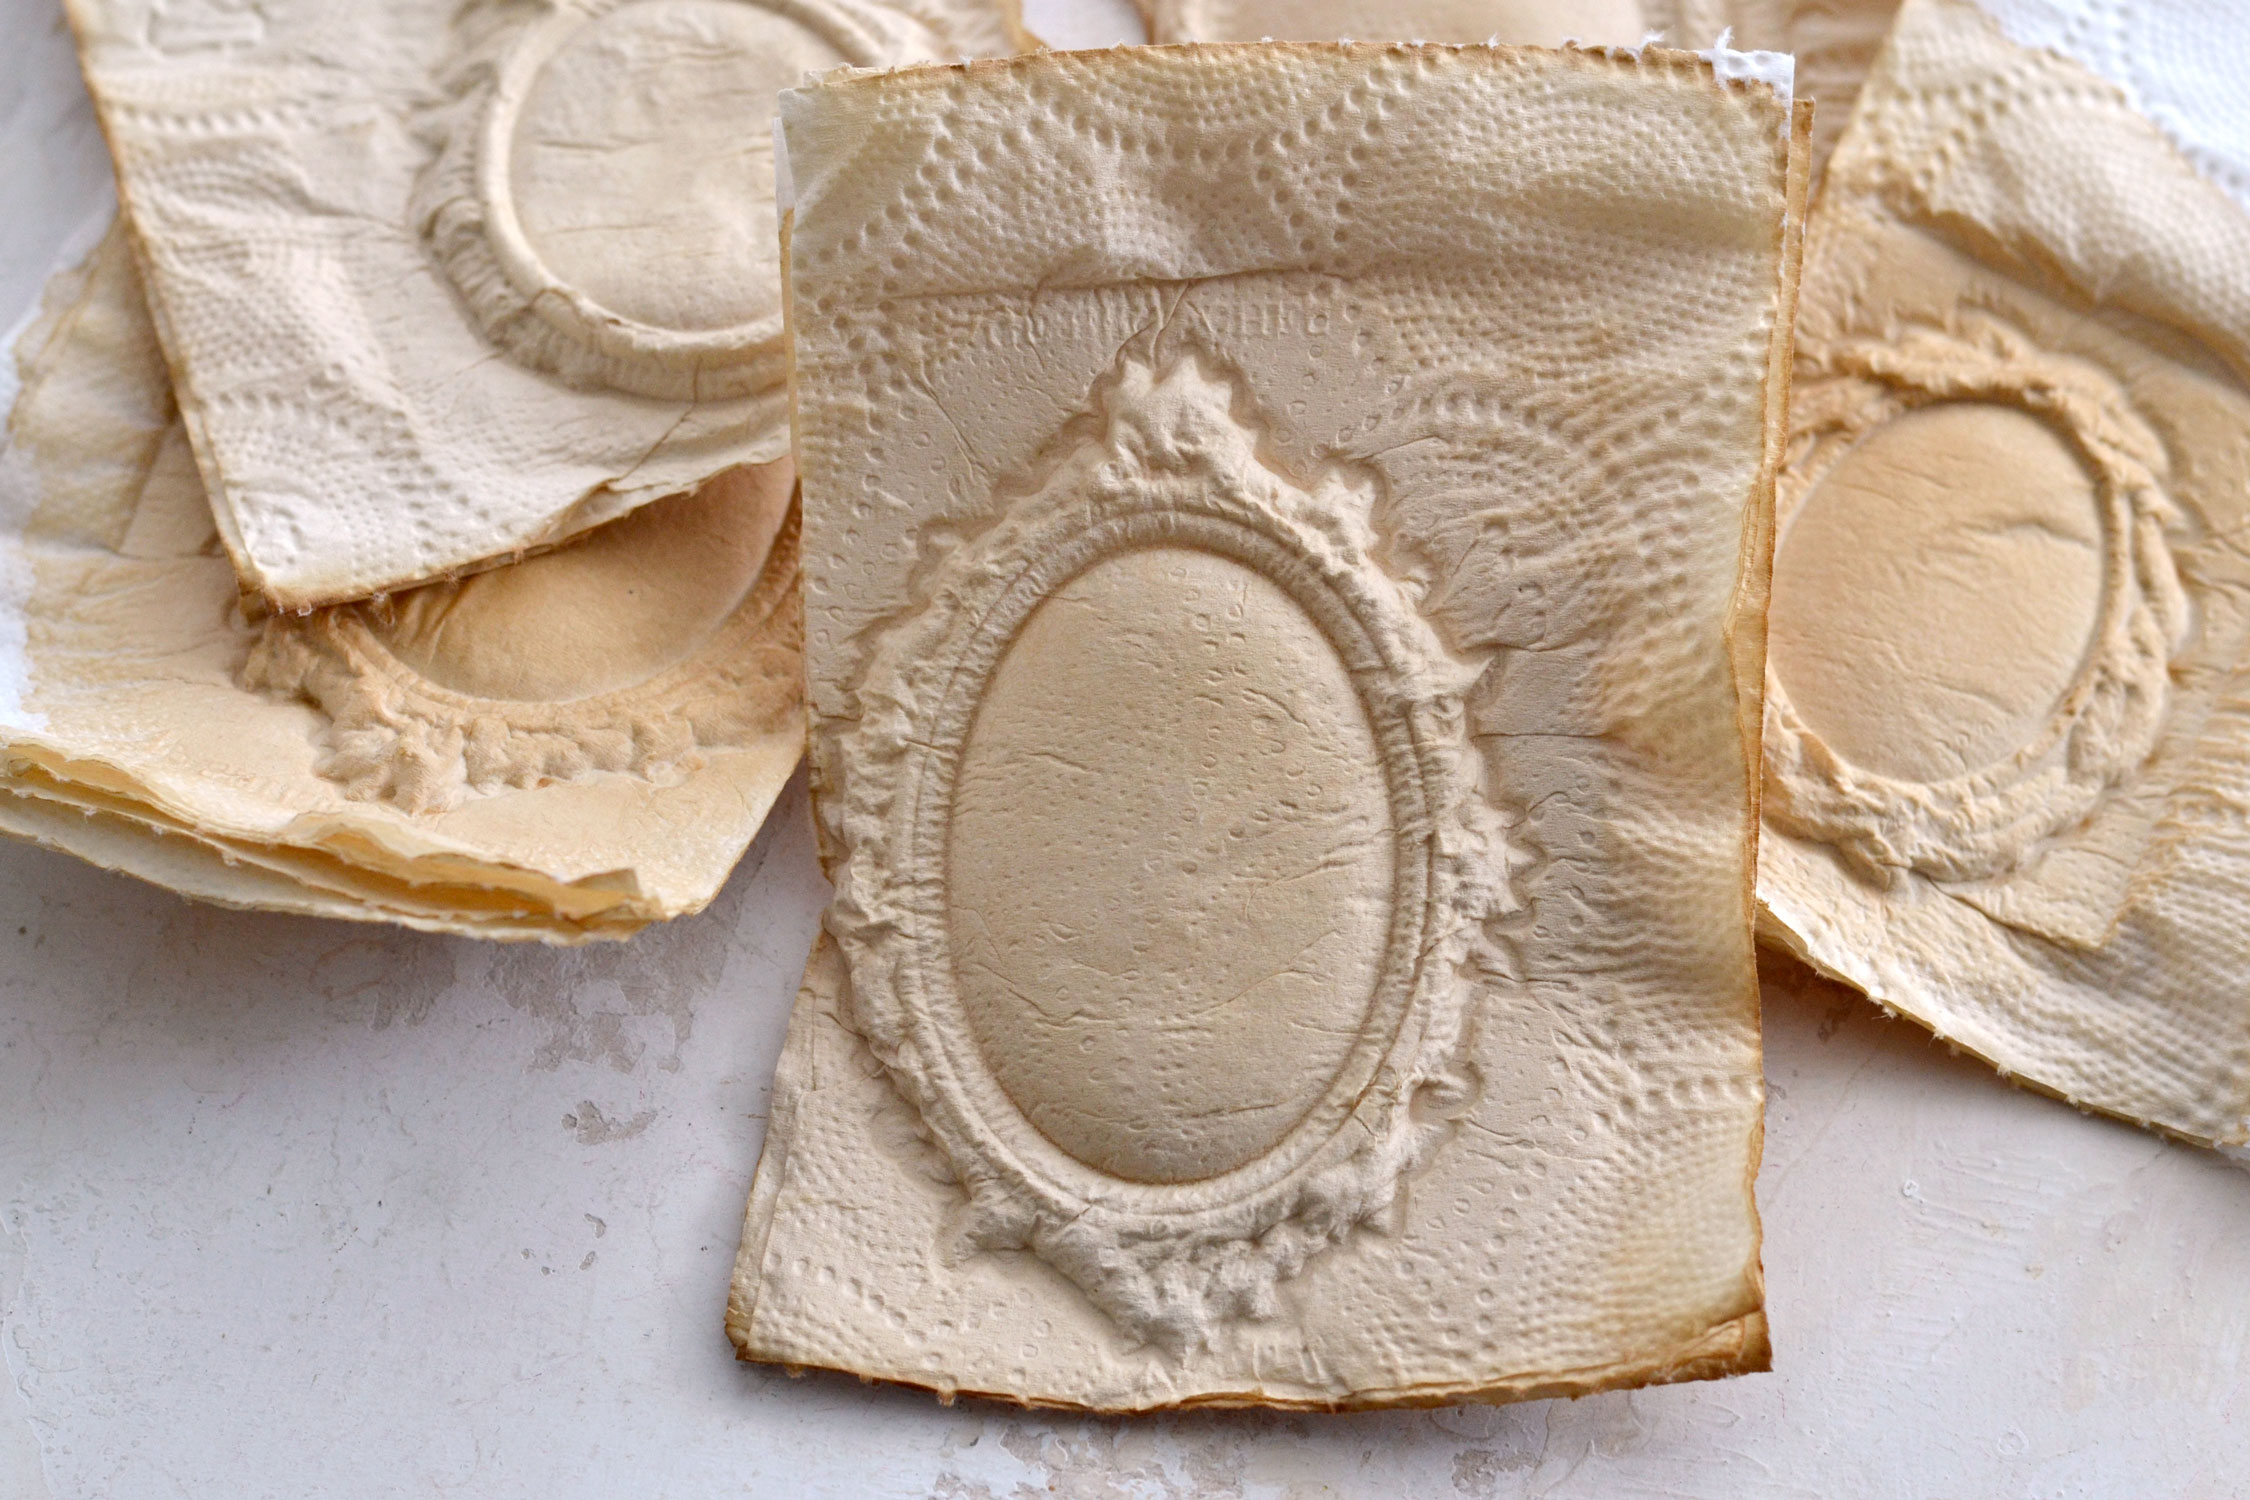
And finally, we need to add another layer following the same previous step (the one with the glue).
This will be our fourth coffee+paper+glue layer.
Here you can better see all four layers.
I found four layers to be sufficient for this project, but if you want to give your casted shapes even more sturdiness, you can add one or two additional layers with coffee+paper+glue.

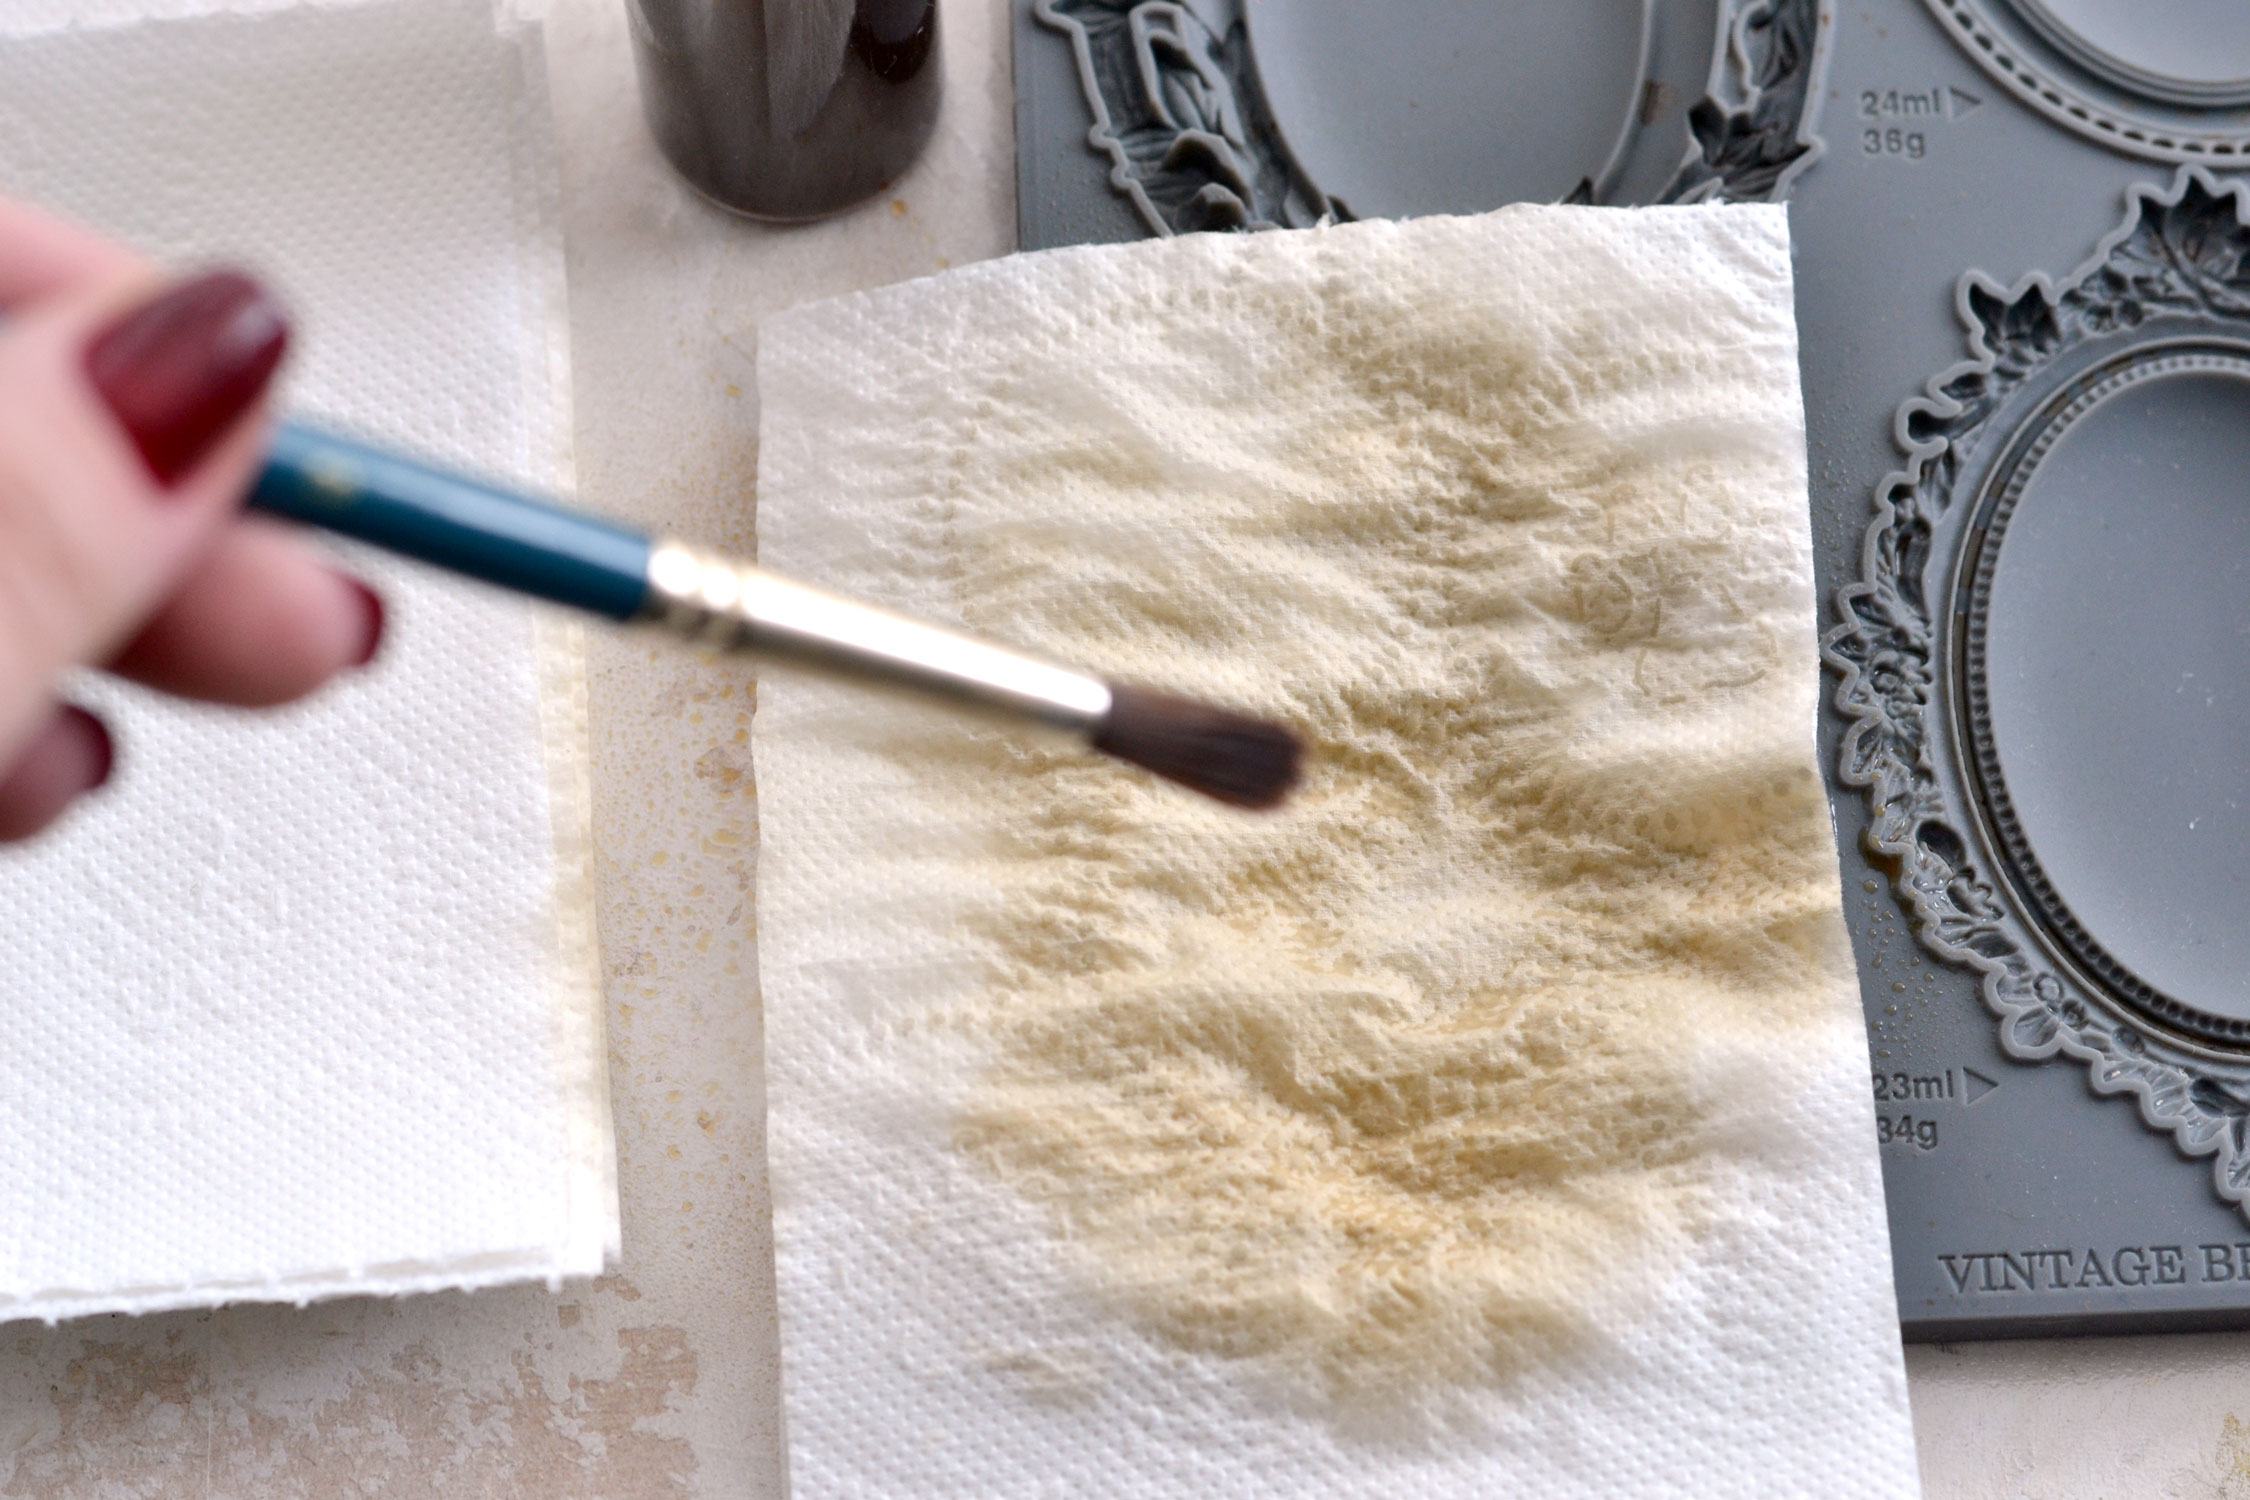
You will need to experiment a little bit to see how the toilet paper performs with the coffee. I noticed that if you don’t add enough coffee spritzes, it is quite difficult to press the paper into the moulds. But if you add too much, the paper will quickly tear. So I guess you need to experiment to find the right balance that works best for you.
Either way, I want to show you how forgiving this technique actually is, even if you add too much coffee, as I intentionally did below.

This is the first layer and you can clearly see that the paper has already started to tear here and there, around the edges.
But everything changes completely as you start adding the second layer! The tears are completely covered. And by the third and fourth layers, you won’t even know they were there!
This is great because you don’t have to worry too much about making everything perfect. Small mistakes can be easily covered as you build your layers on top.
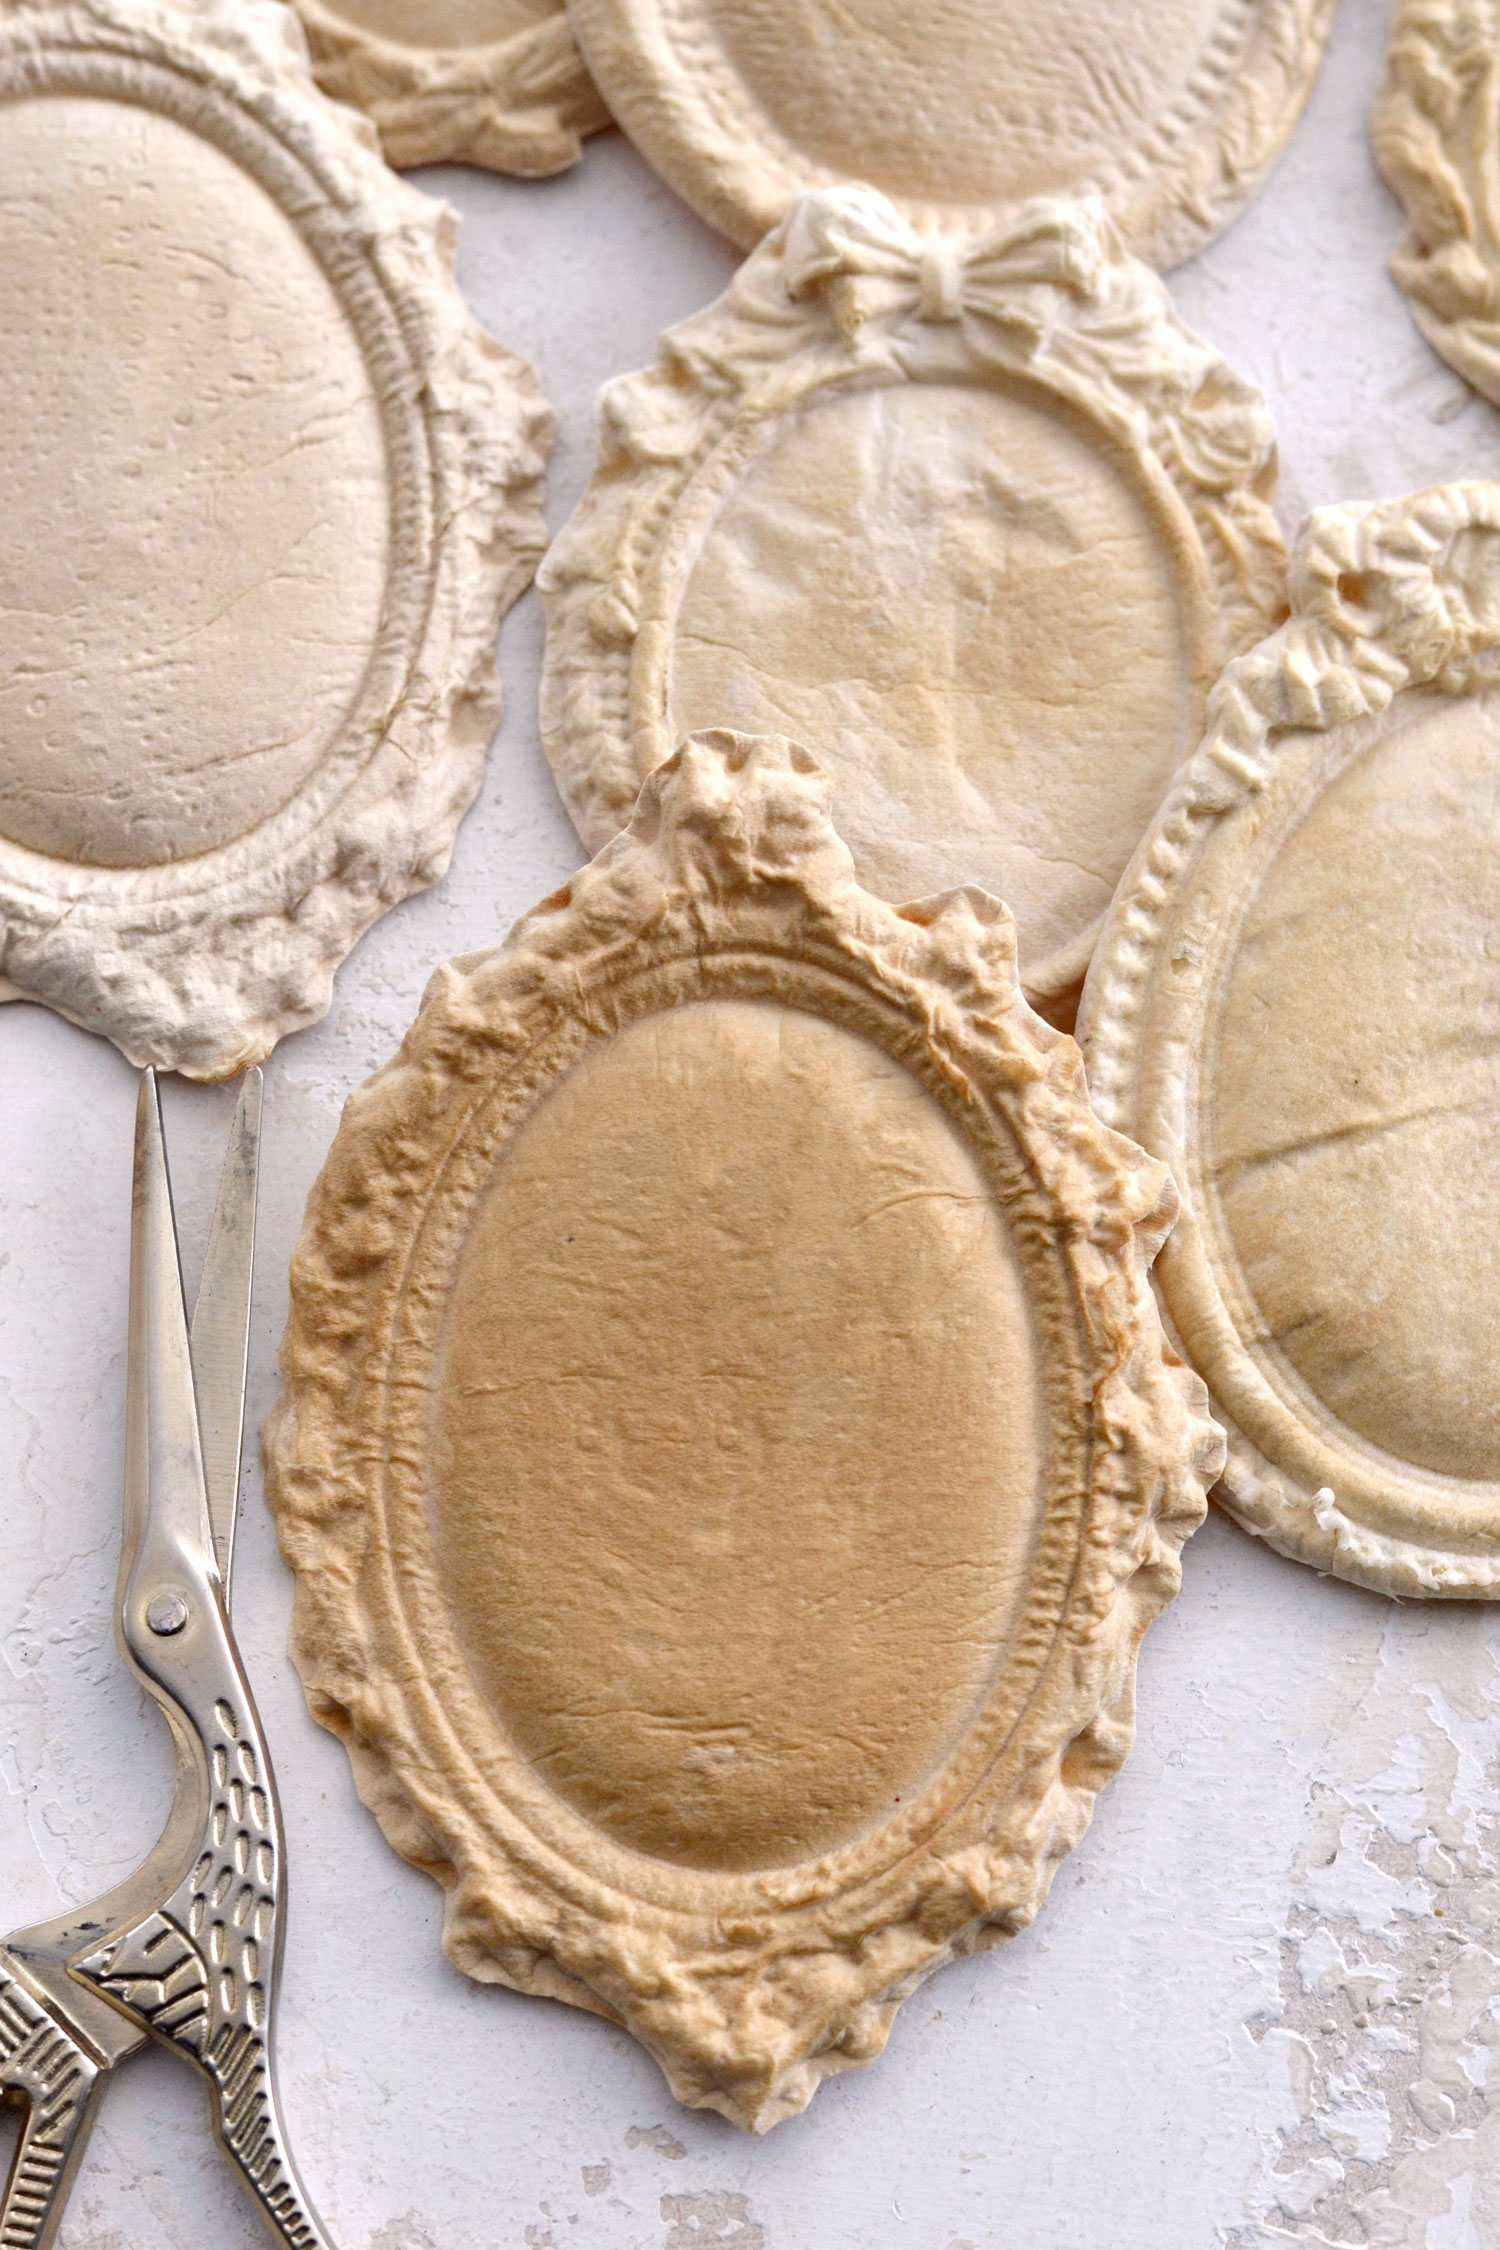
You can do multiple castings at a time, and then you have a few options. You can leave them to dry in the mold, you can use a hair dryer or a heat gun to speed up the process, or you can remove them from the molds and let them air dry on their own.
If you remove them while they are still wet, you need to be careful while lifting them, as they are quite fragile, especially in the center. You can already see all their intricate details, they look absolutely amazing, don’t you think?
 The paper will become crisp after drying, but it will still be lightweight and quite pliable.
So you will be able to cut off the excess paper around the edges to reveal the shape of your beautiful cast. As a small tip, I found it easier to tilt my scissors at an angle while cutting them. It’s easier to cut, but I feel it also preserves the details of your shape better, as you can slightly round the edges as you cut them.
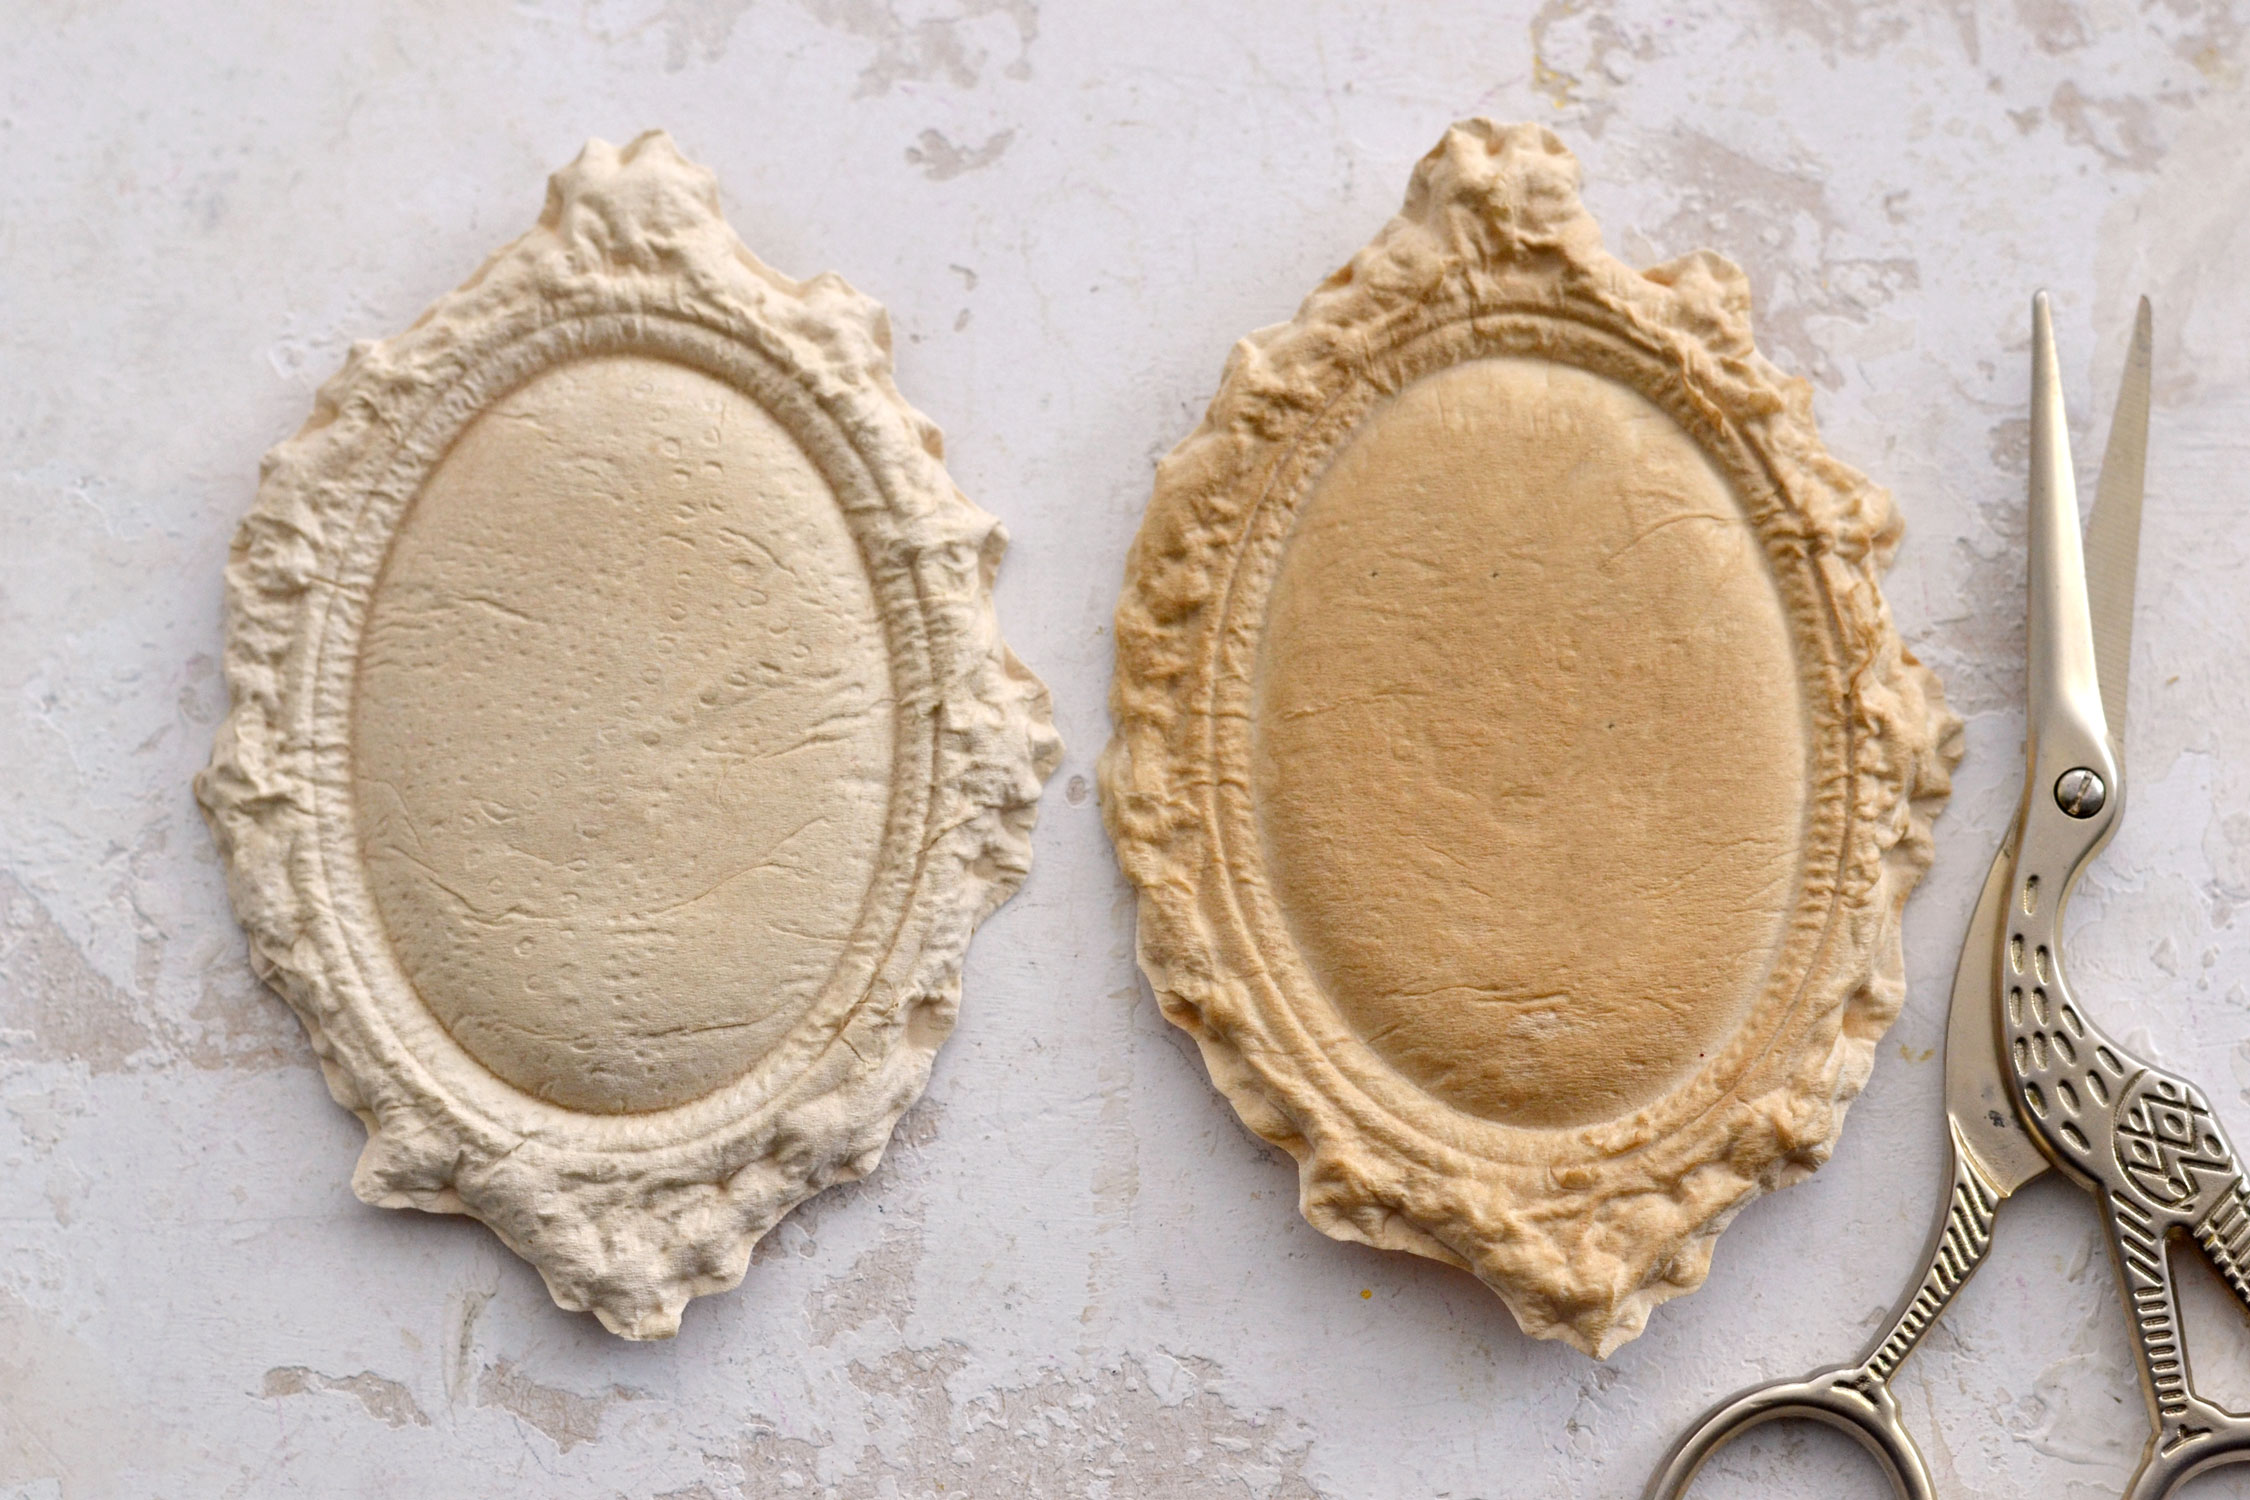
You might have noticed that I have a few different shades here. That’s because I experimented with different intensities of coffee to see if I could create other shades. For the one on the left, I used coffee mixed with water and for the one on the right, I only used coffee.
So yes, you can definitely dictate the final shade of your casts, you just need to experiment and see which works best for you.
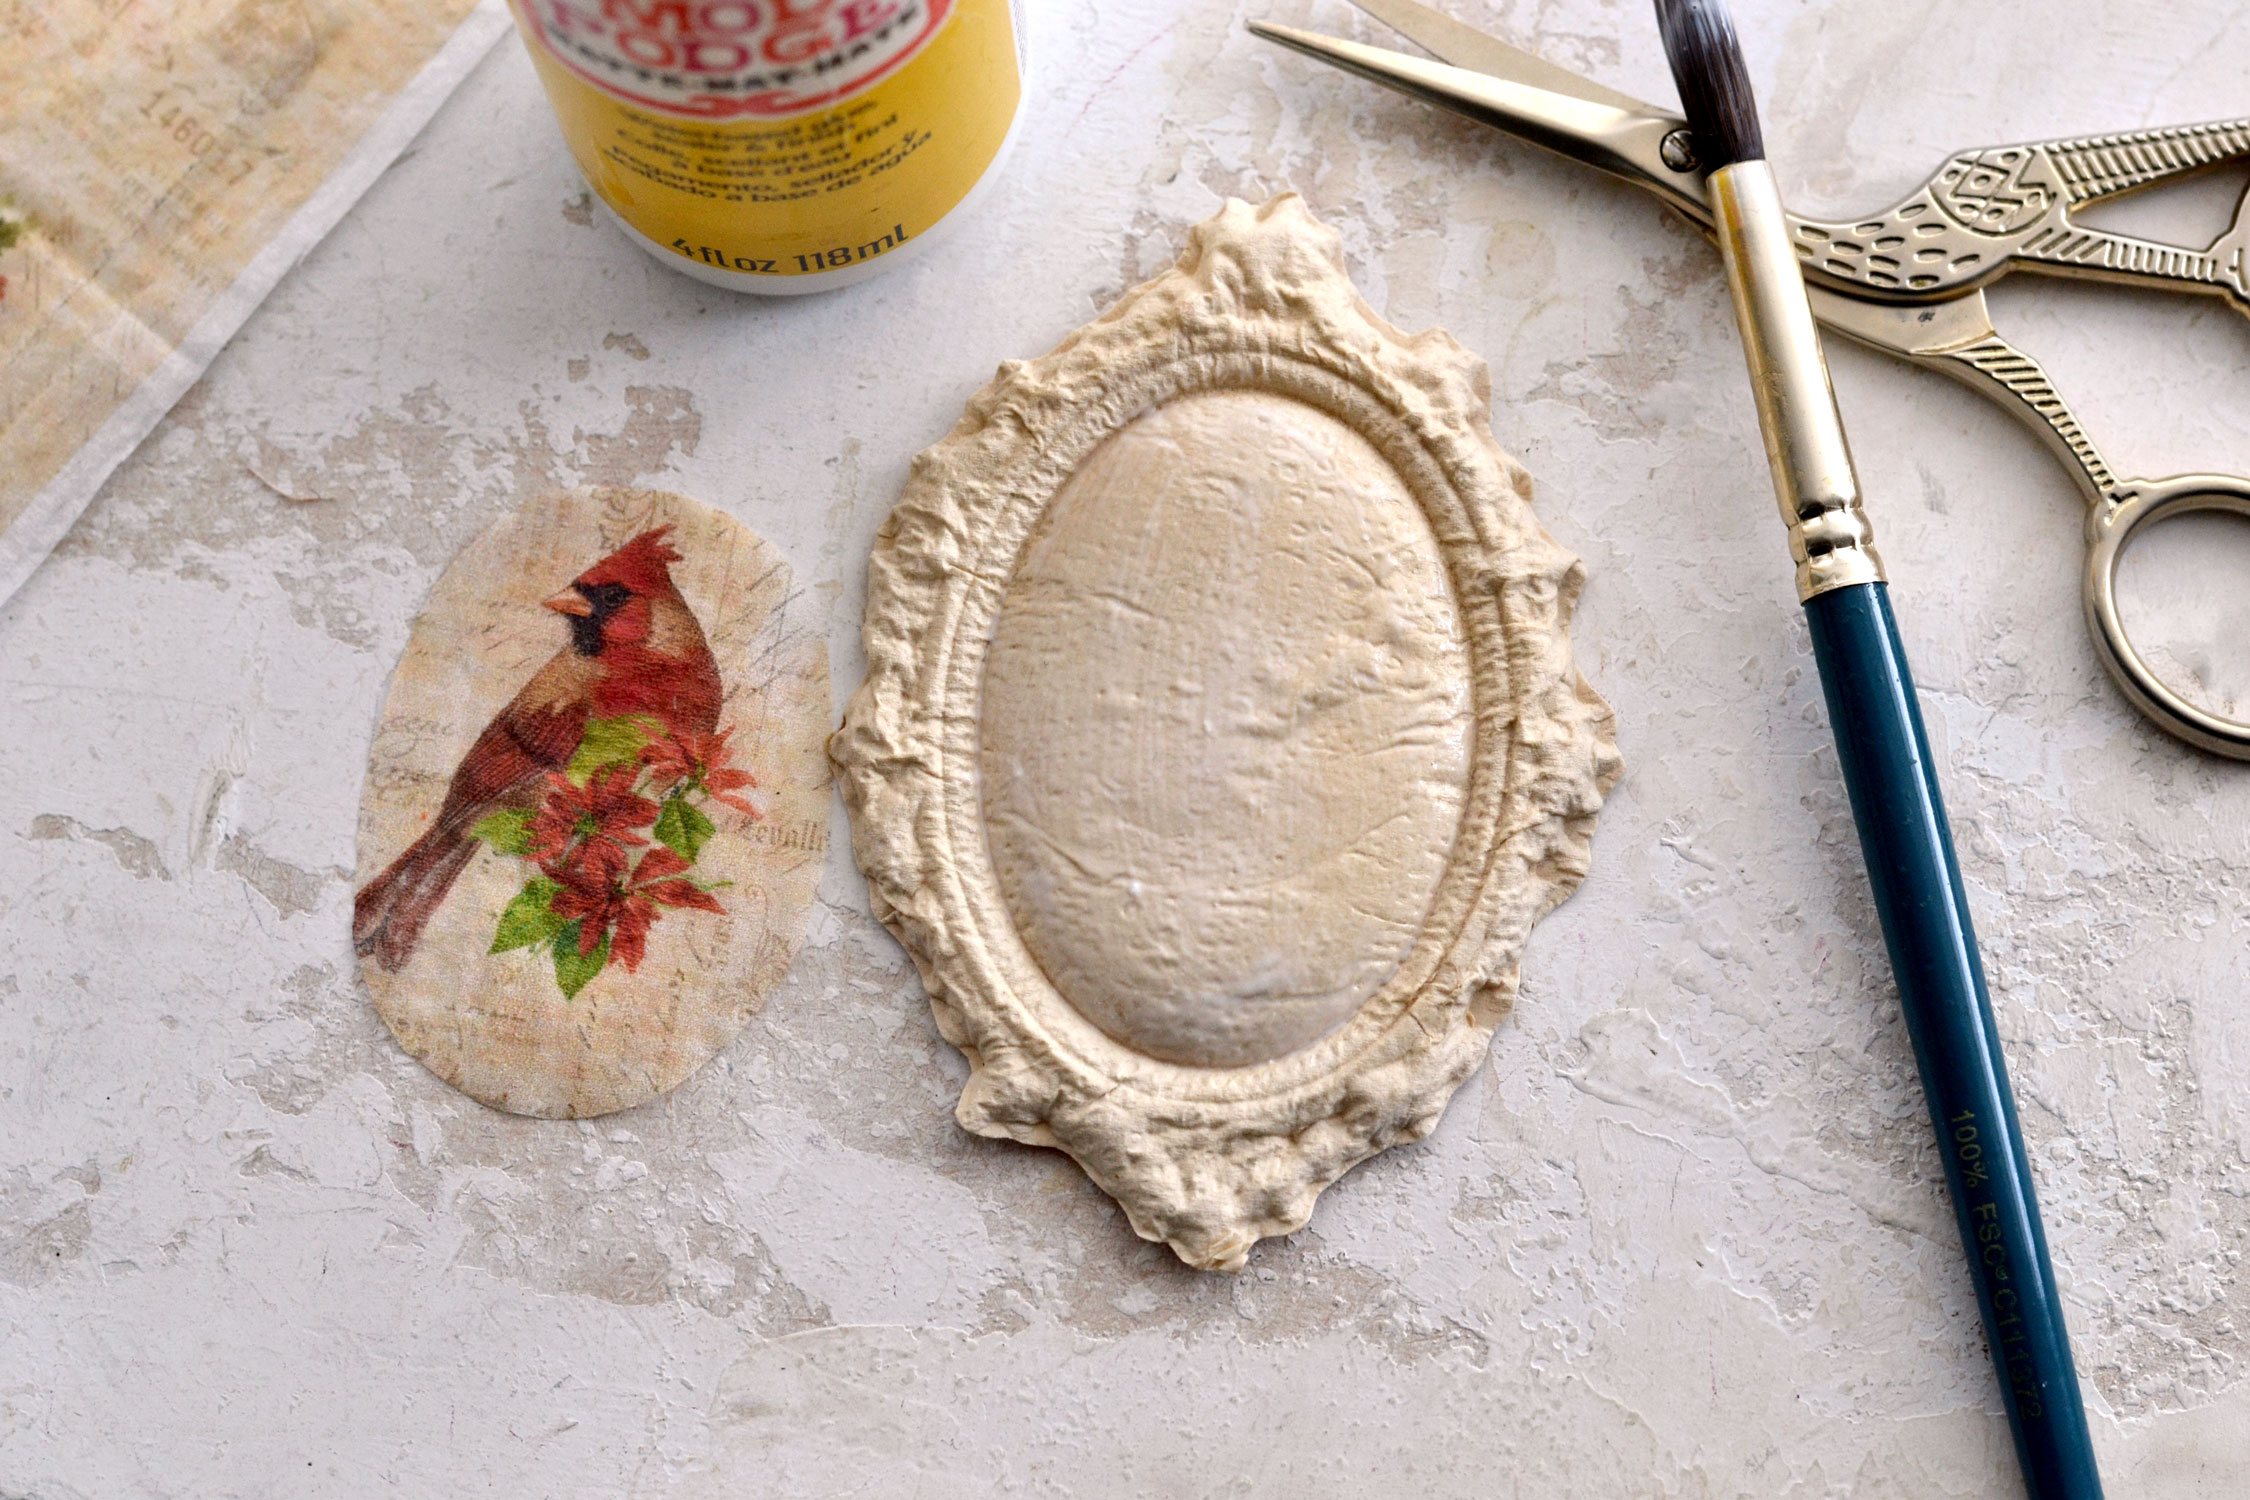
Once you have the paper bases ready, you can move on to decorating them using your favorite images! This is where our beautiful printable comes in place!
As you can see, I created the design having this project in mind. How does it work? Well, the empty area around each image will allow you to adapt it to any size you need, no matter the type of mould you are using. So this will still work if you are not using the same mold that I used!
Place the printed paper napkin on top of one of the shapes and center it as much as you can. The napkin is slightly see-through, so you will be able to reposition and arrange the image on top as needed. When you are happy with it, you can use a pencil to trace it.
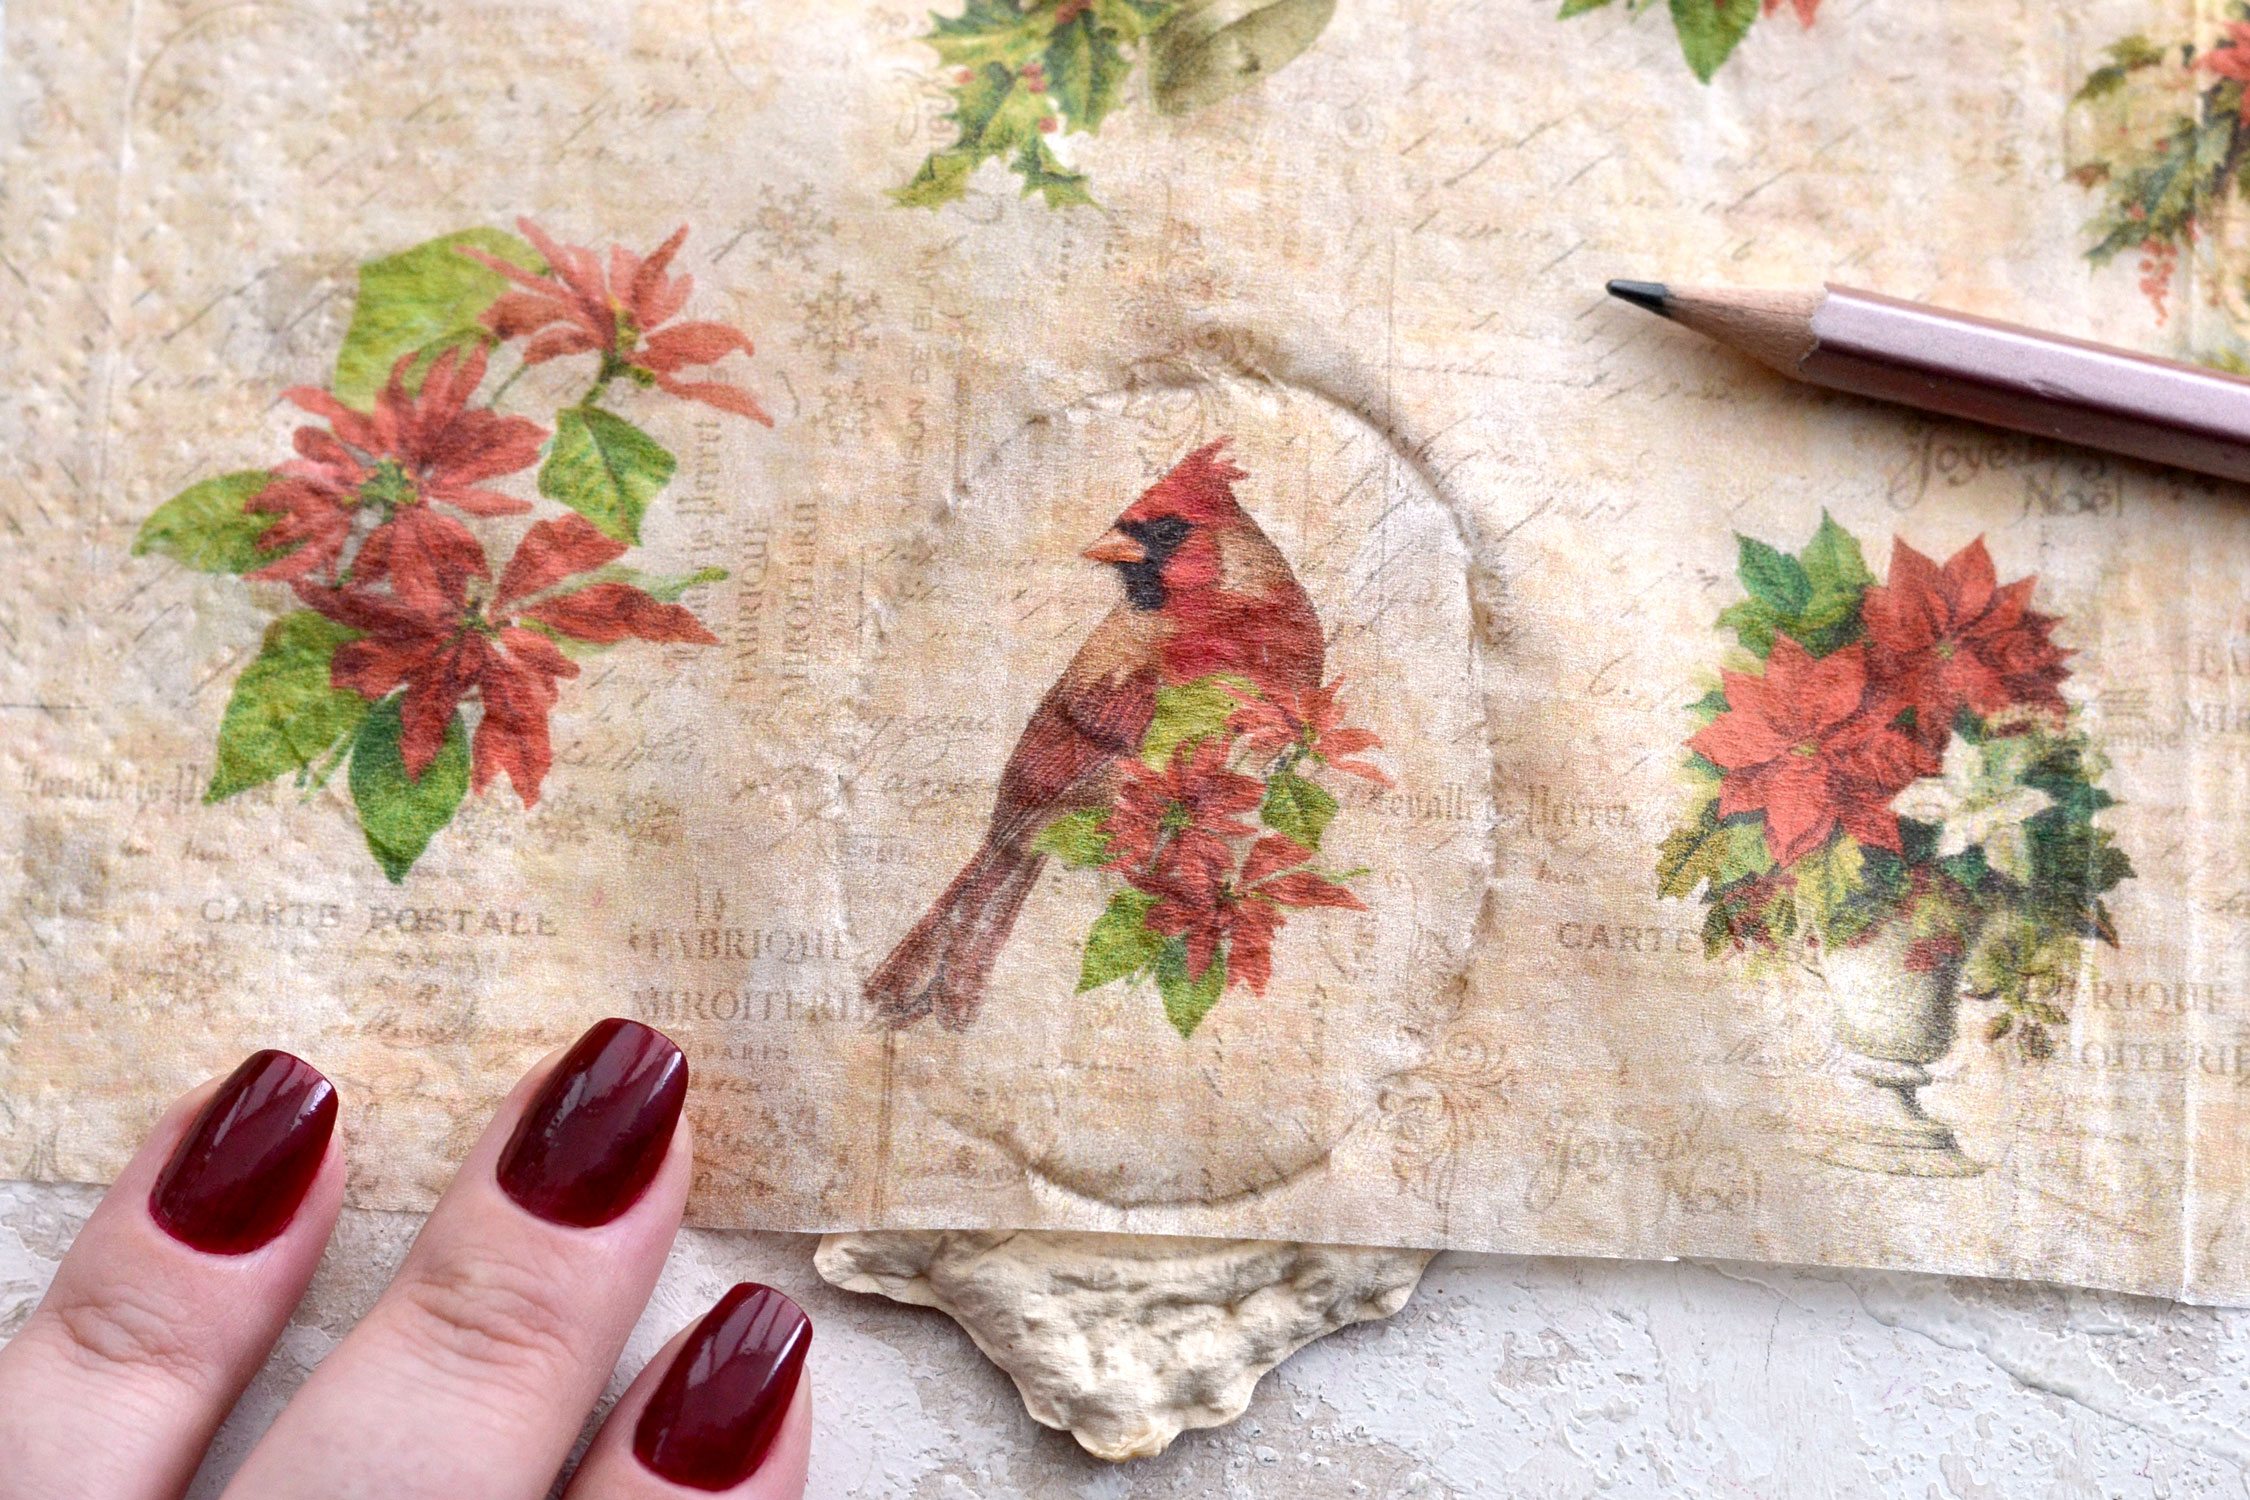
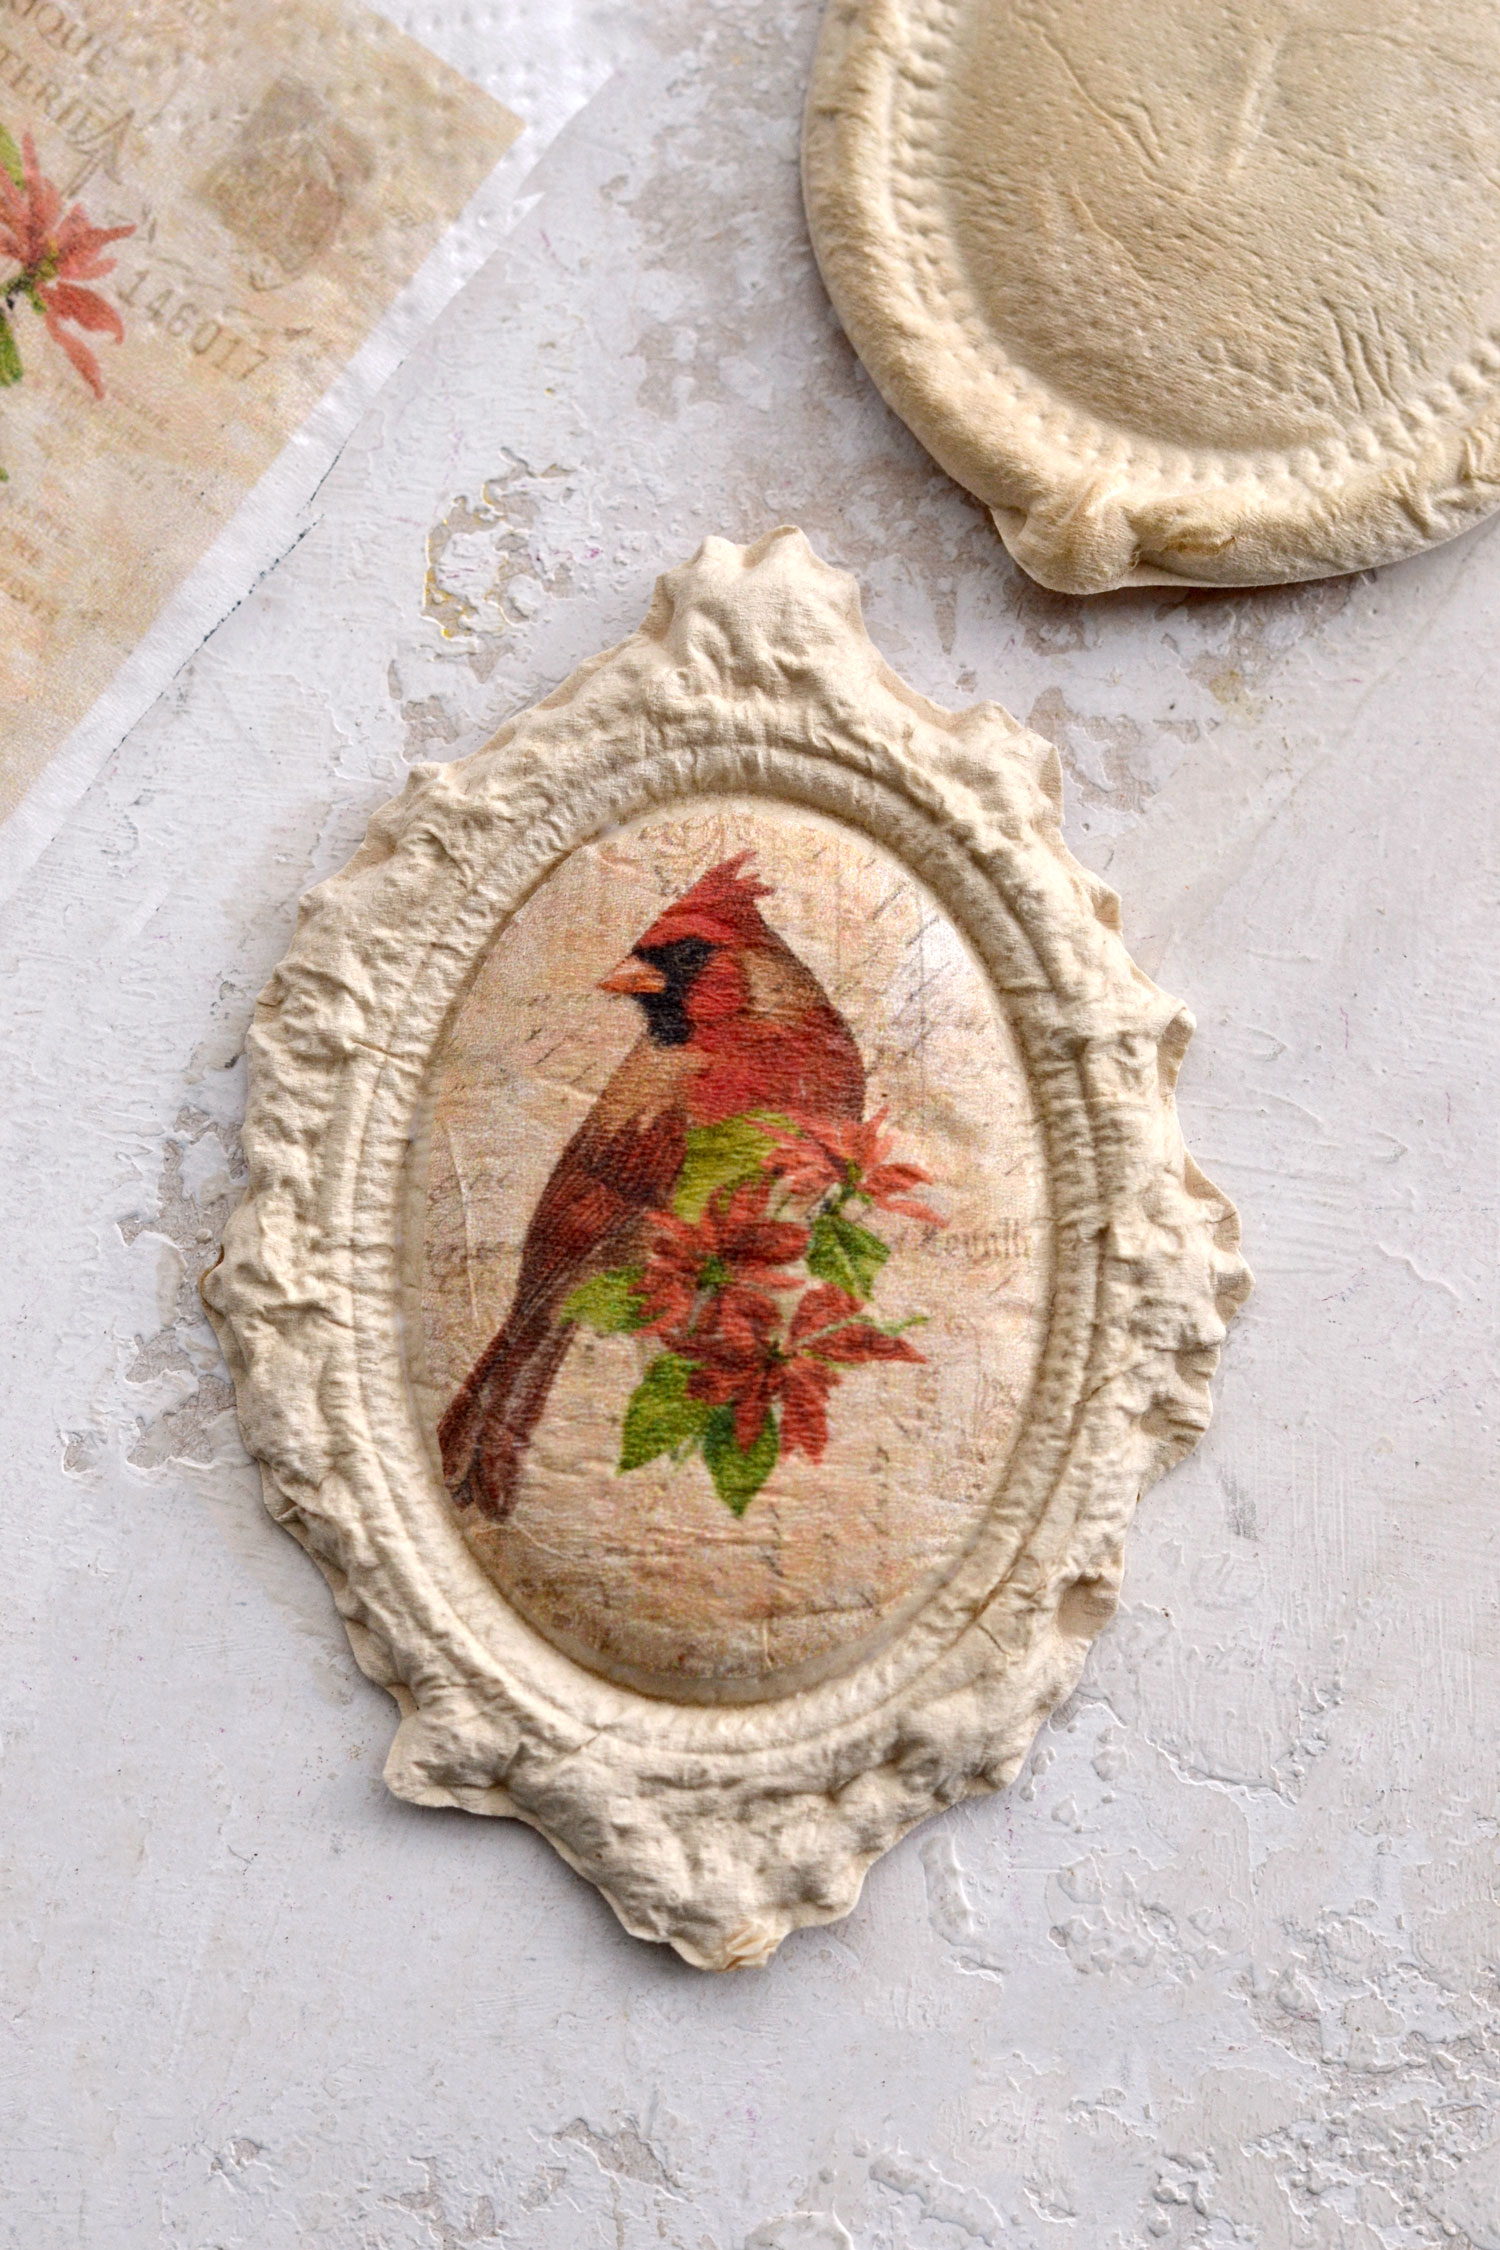
Use your scissors to cut the shape of your design, making sure you cut inside the traced lines, so you can remove them. Then add glue to the paper ornament and place the design on top.
Don’t add too much glue, we need to just cover the surface with a thin, uniform layer. This is really important, especially if using an inkjet printer, as too much glue will make your design bleed. If using a laserjet, that won’t be a problem.
You need to work fast, but be extremely careful while positioning the design. Because the paper is thin and quite fragile, once you glue it, you won’t be able to remove it. So do your best to air center it and then glue it as well as you can, without any wrinkles.
If you want, you can add a layer of Mod Podge on top to better protect the surface. I didn’t because I liked the absolutely gorgeous matte surface and because I was concerned about additional bleeds, as I had used an inkjet printer for this project.
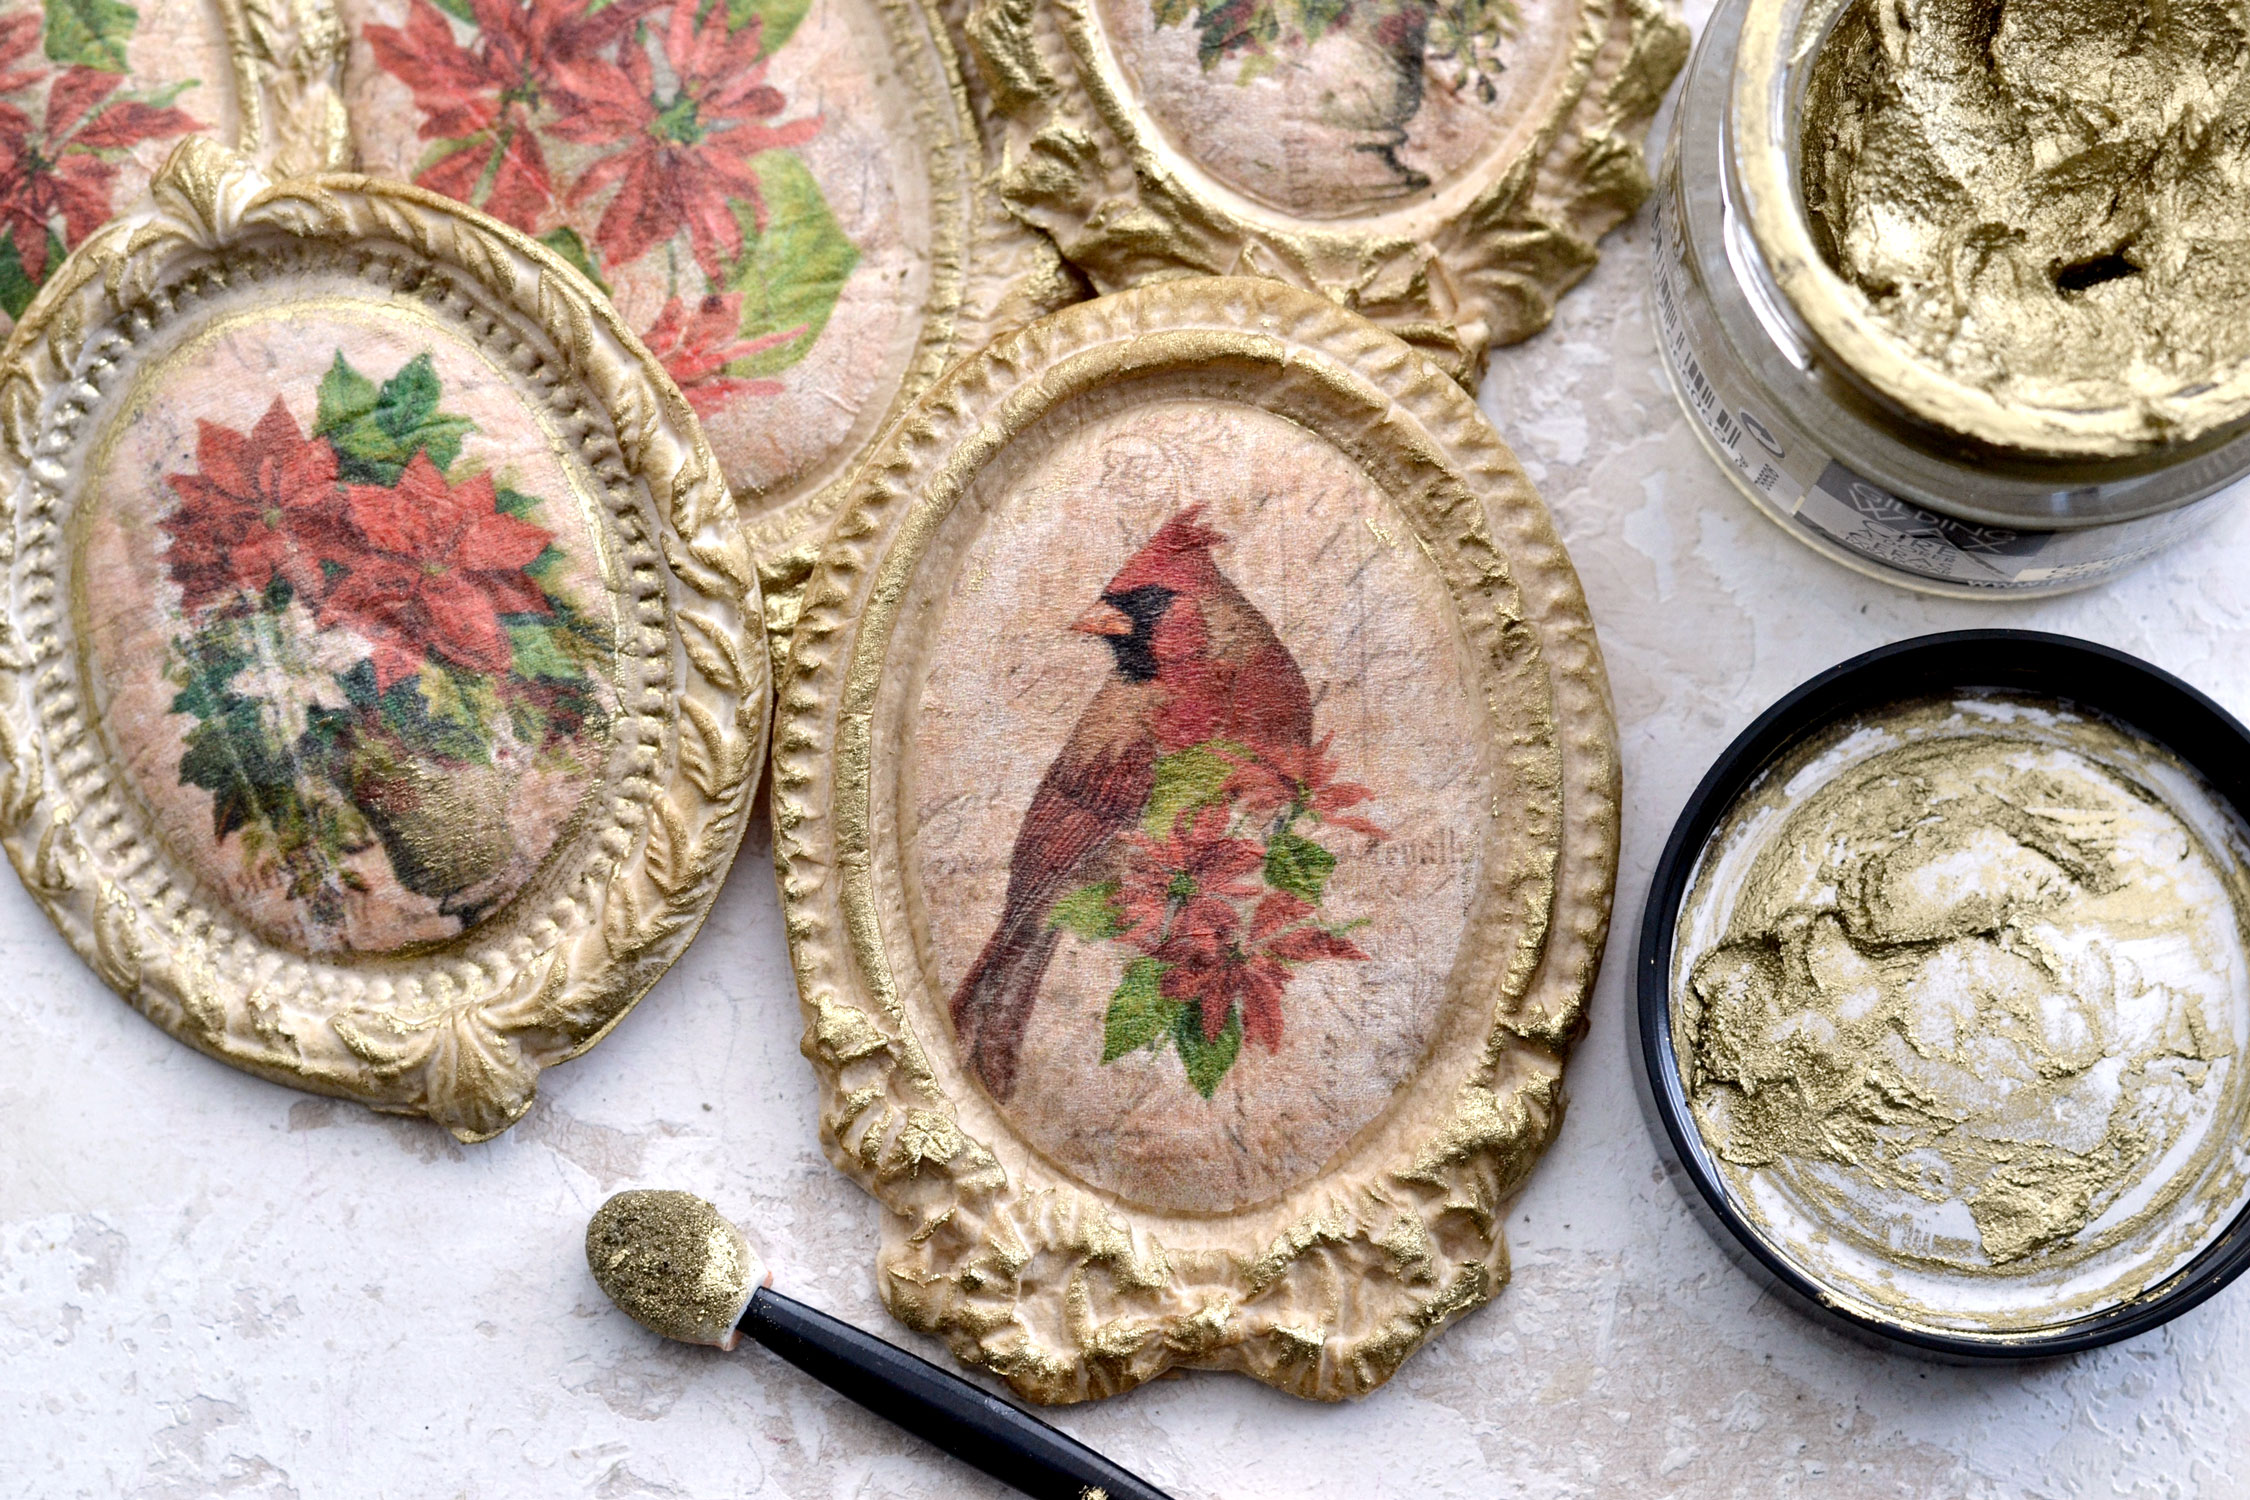
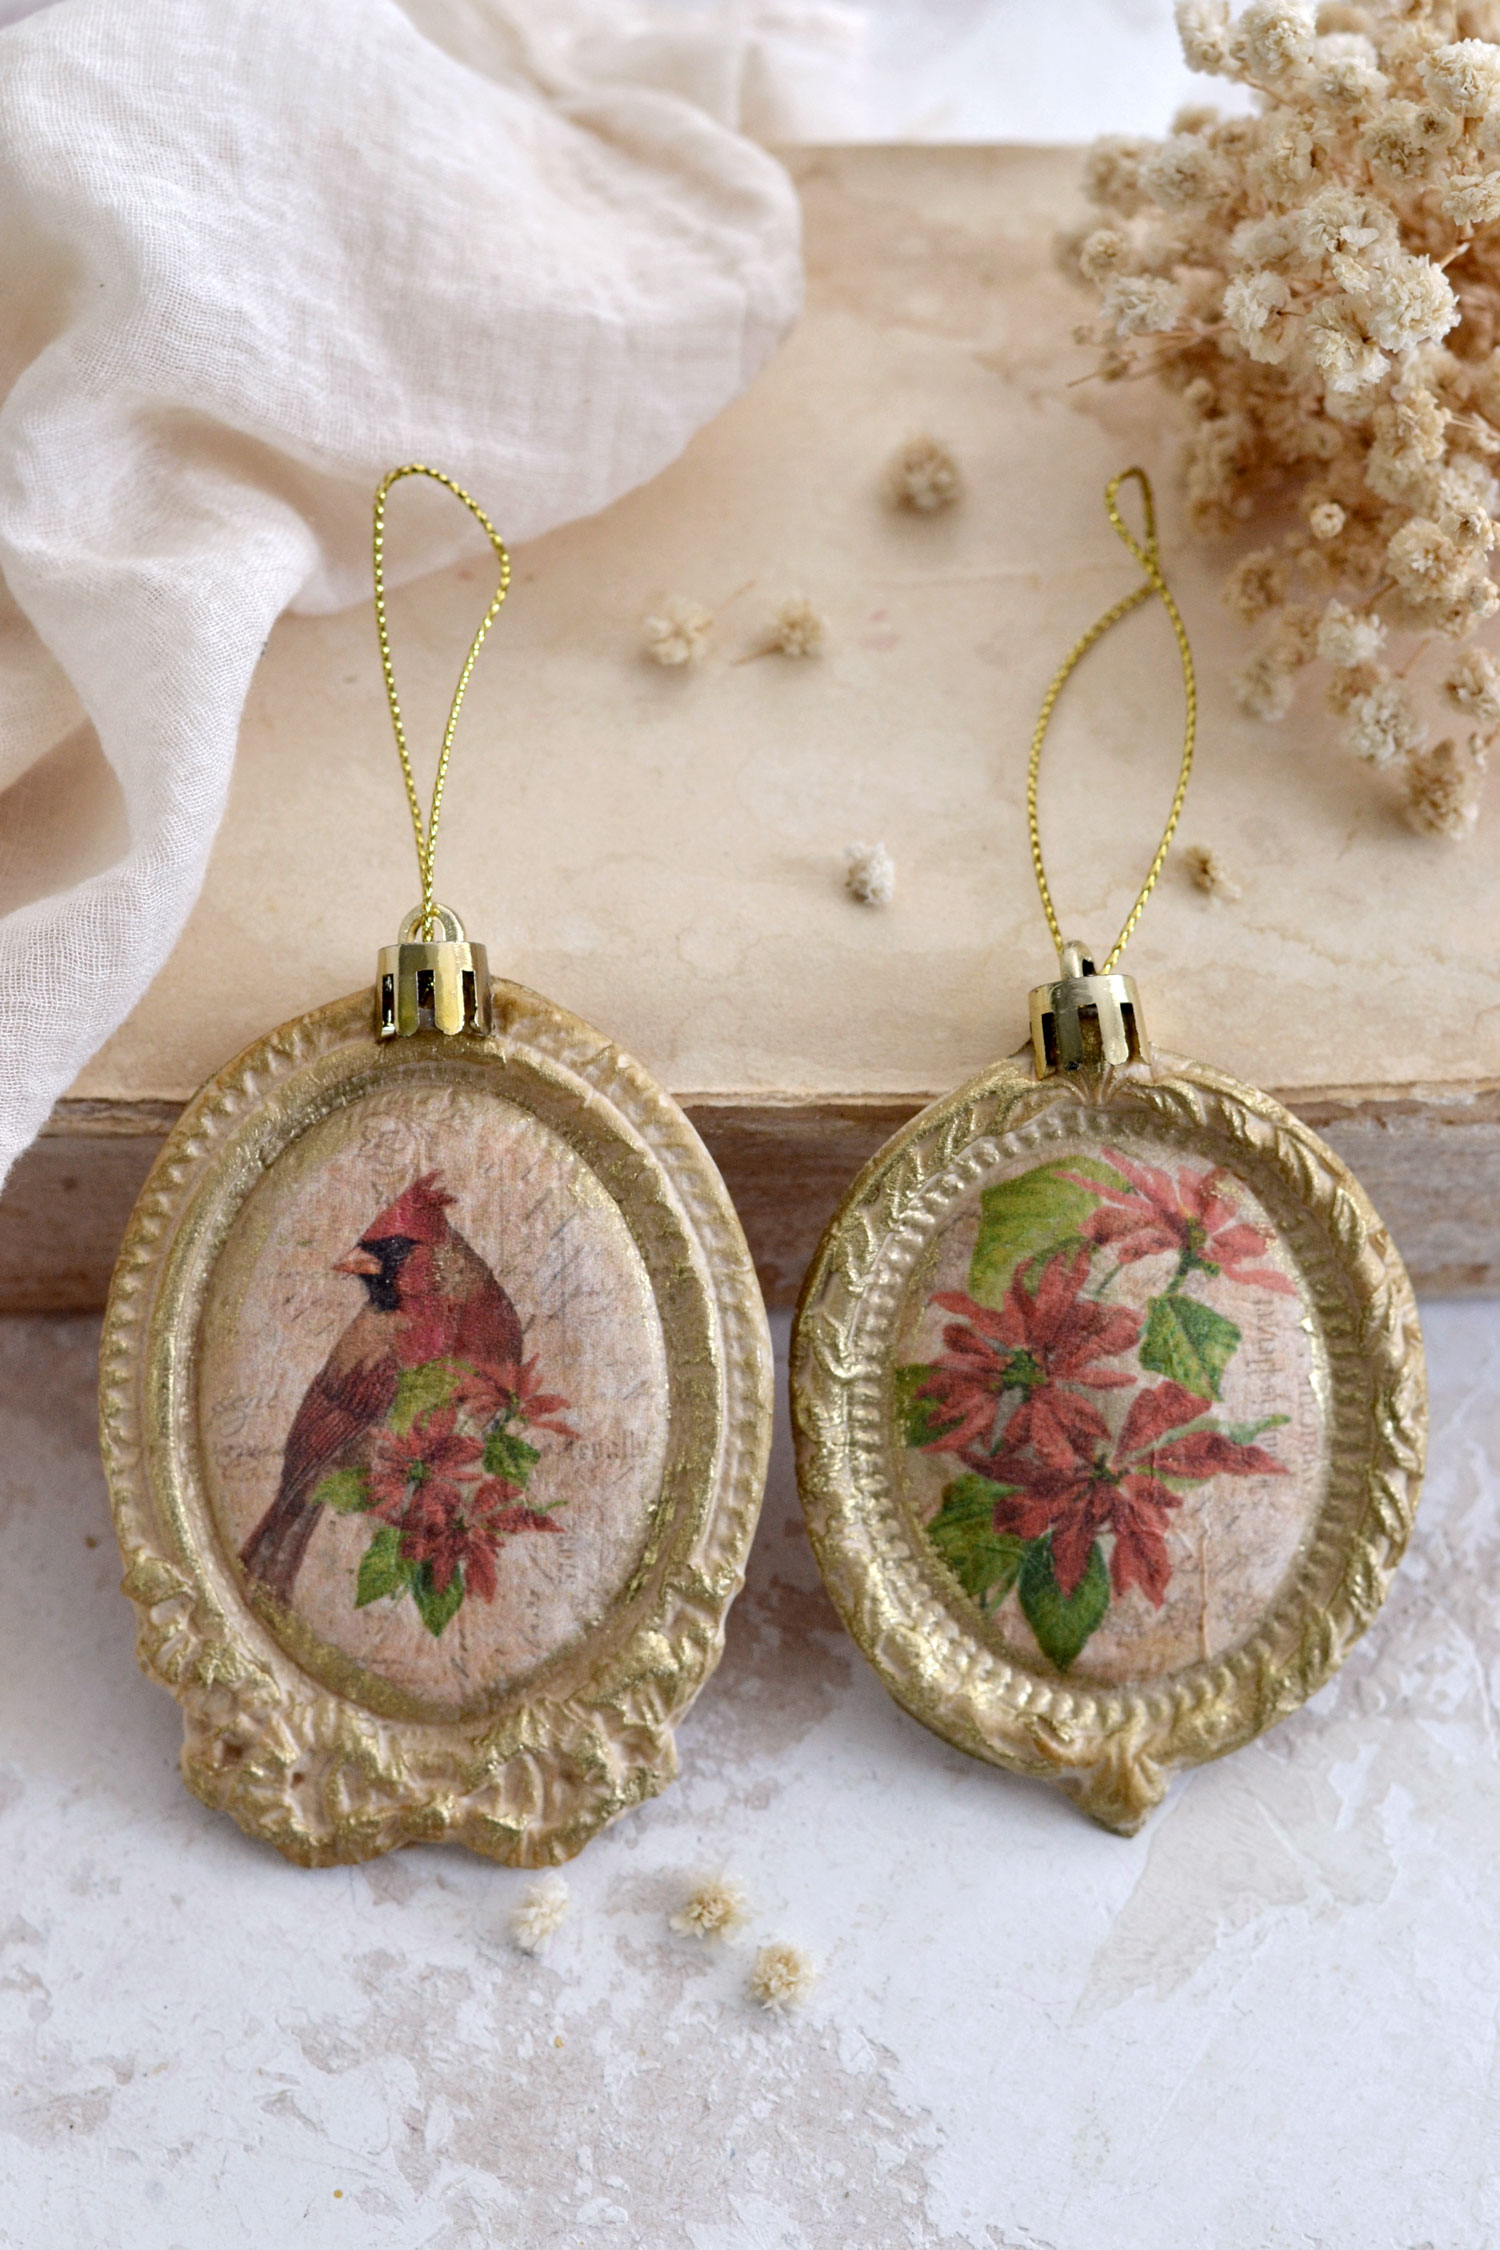
Use distress ink to give the edges even more of a vintage vibe, then add some gold wax if you prefer. I used a small eyeshadow applicator to make sure the wax gets into all the crevices.
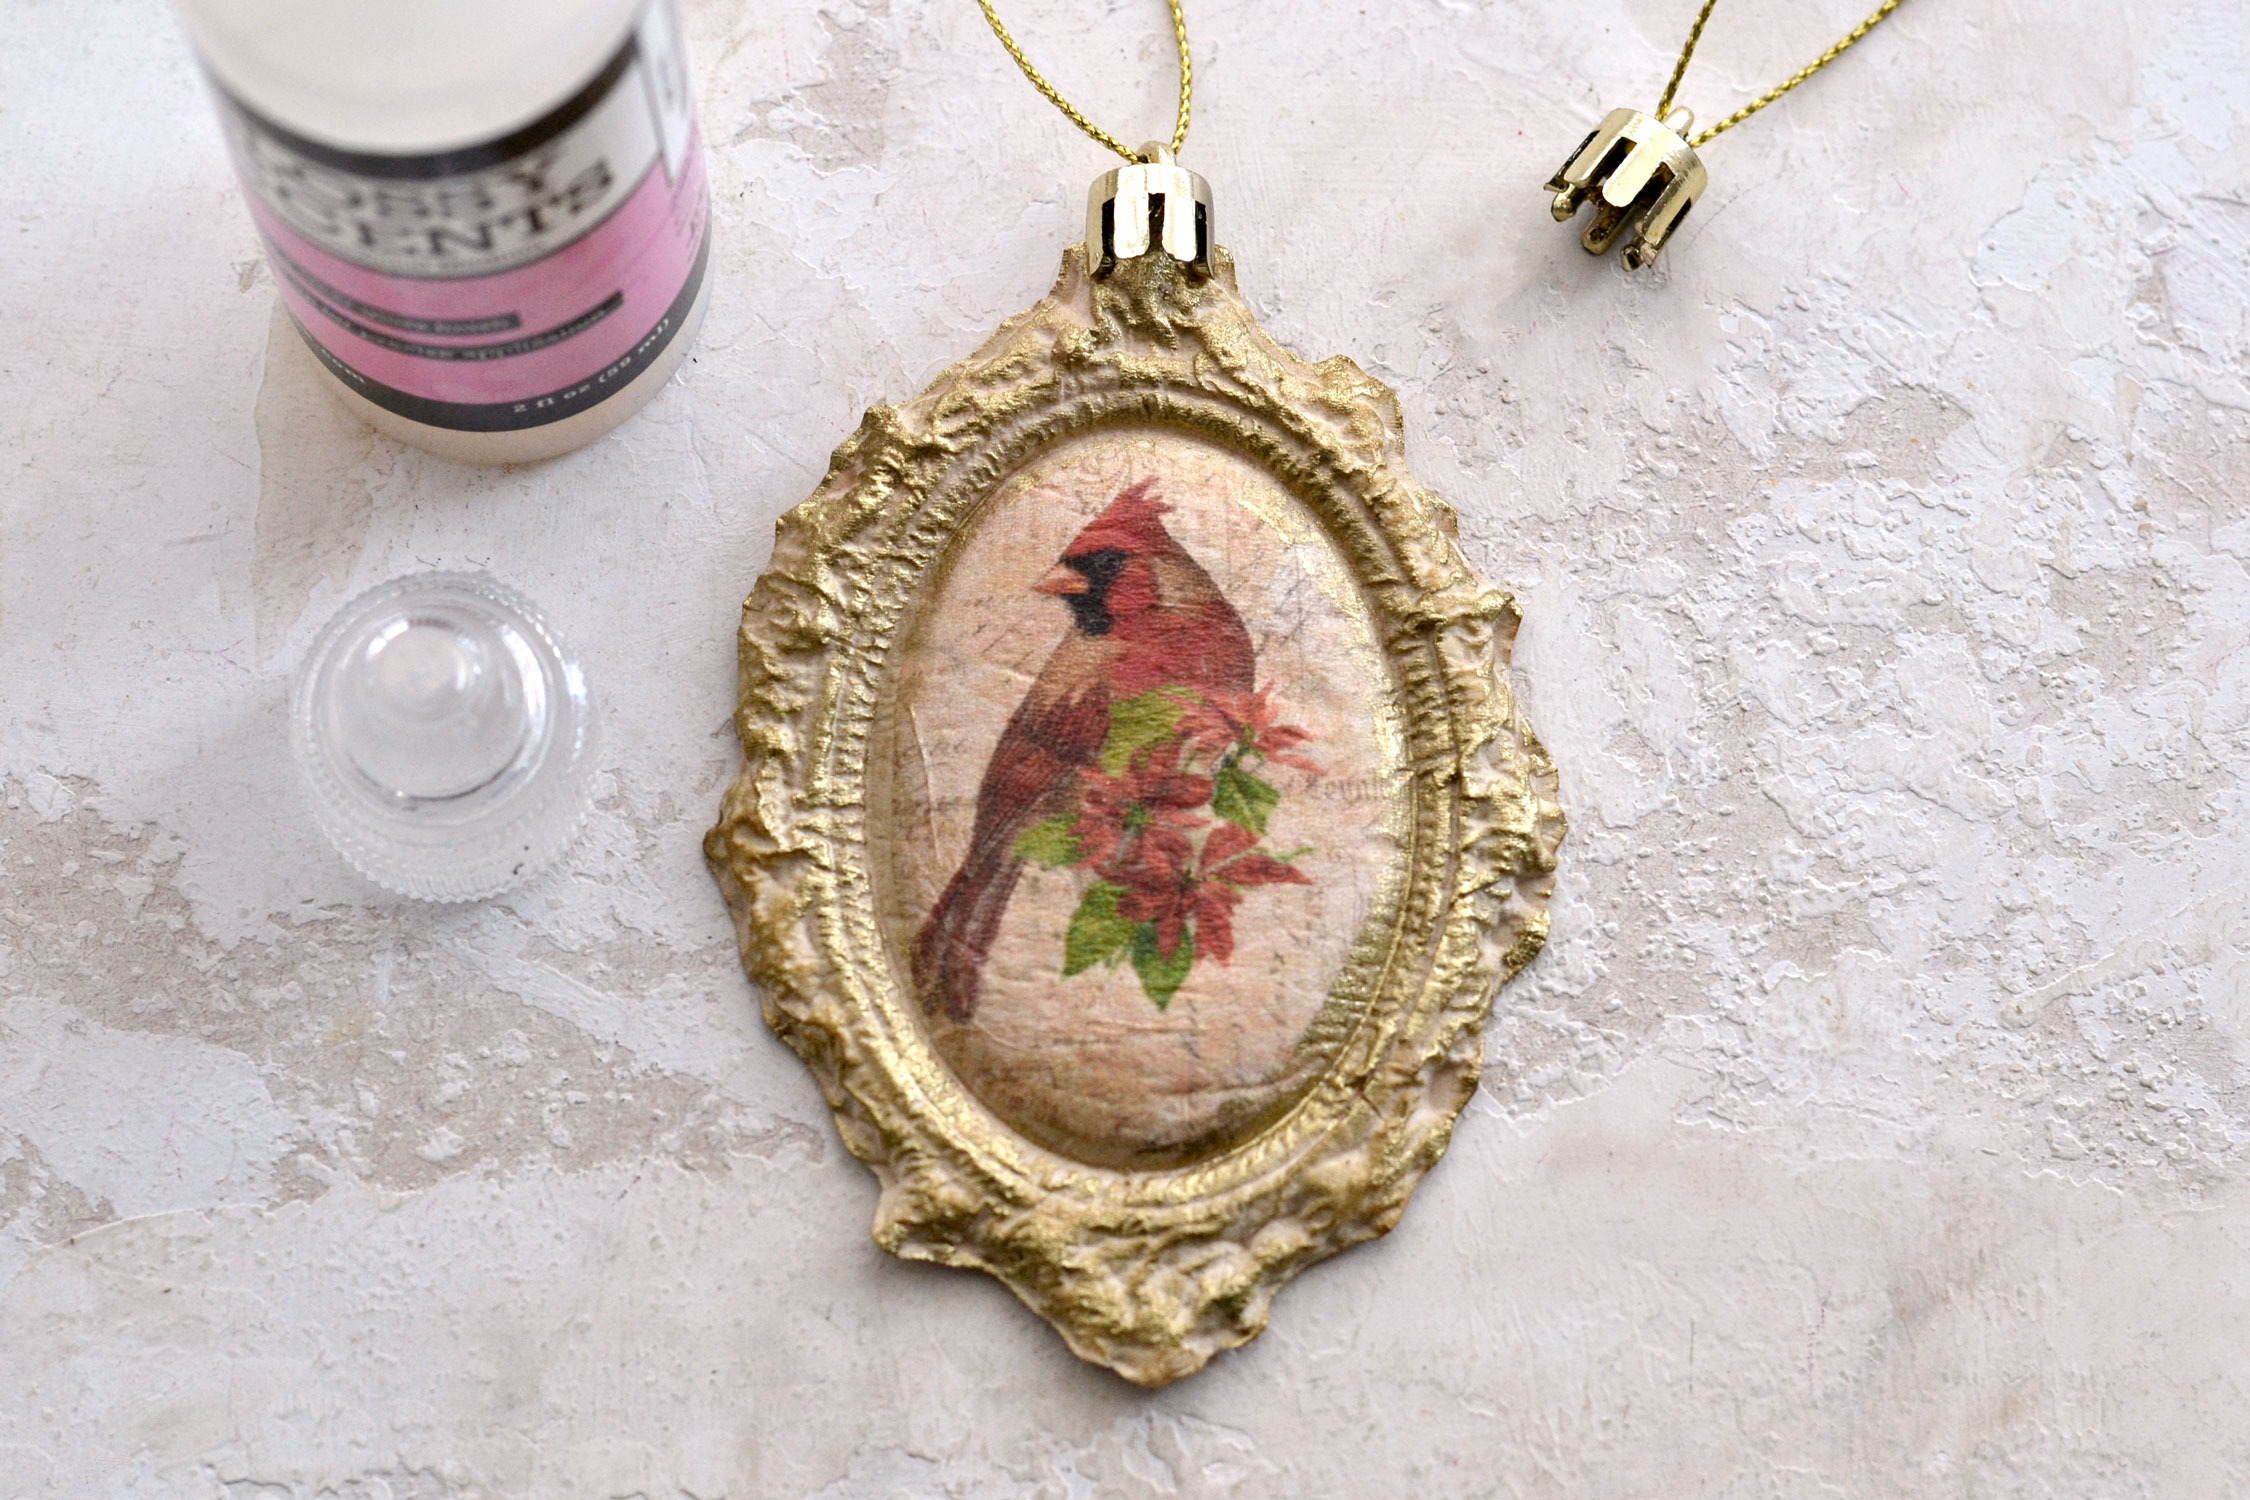
As a final step, you can use tree ornament cap hangers to really turn these into beauties that can be hung on your Christmas tree. Use Glossy Accents or a quick-drying glue that you know works to adhere the caps on top. Since the ornaments are quite 3-dimensional, you might need to make small paper cuts on top to ensure they fit better.
You can also just make holes on top and then use your preferred thread to add some hangers.
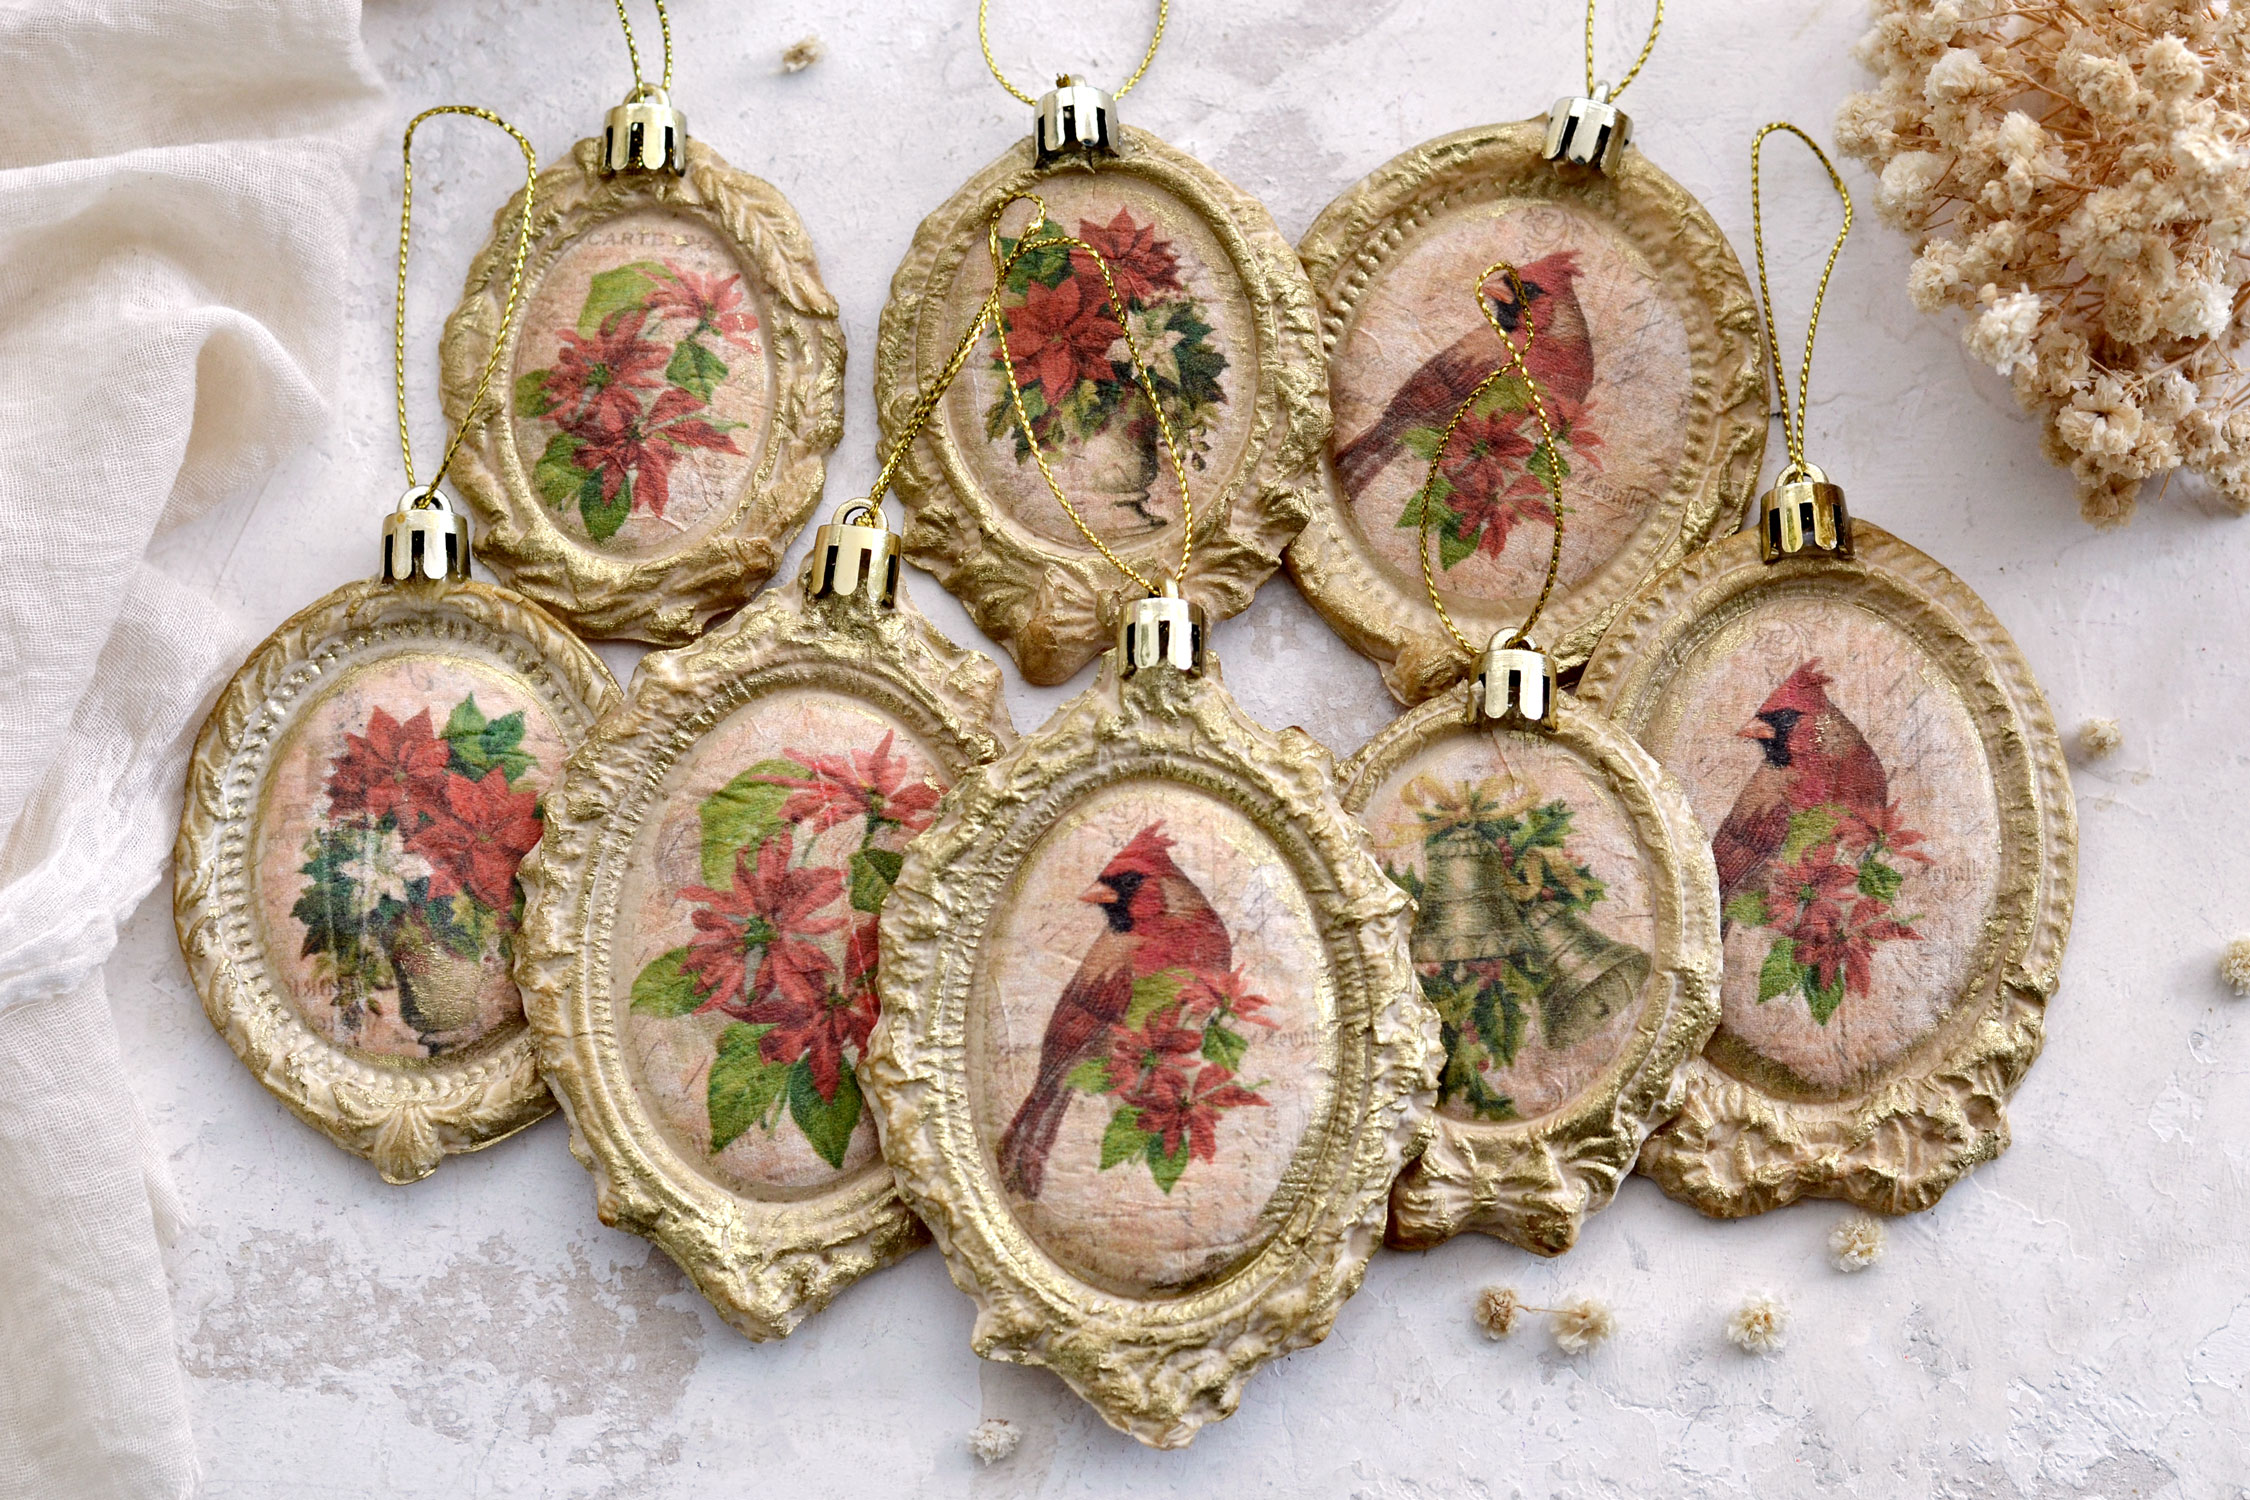
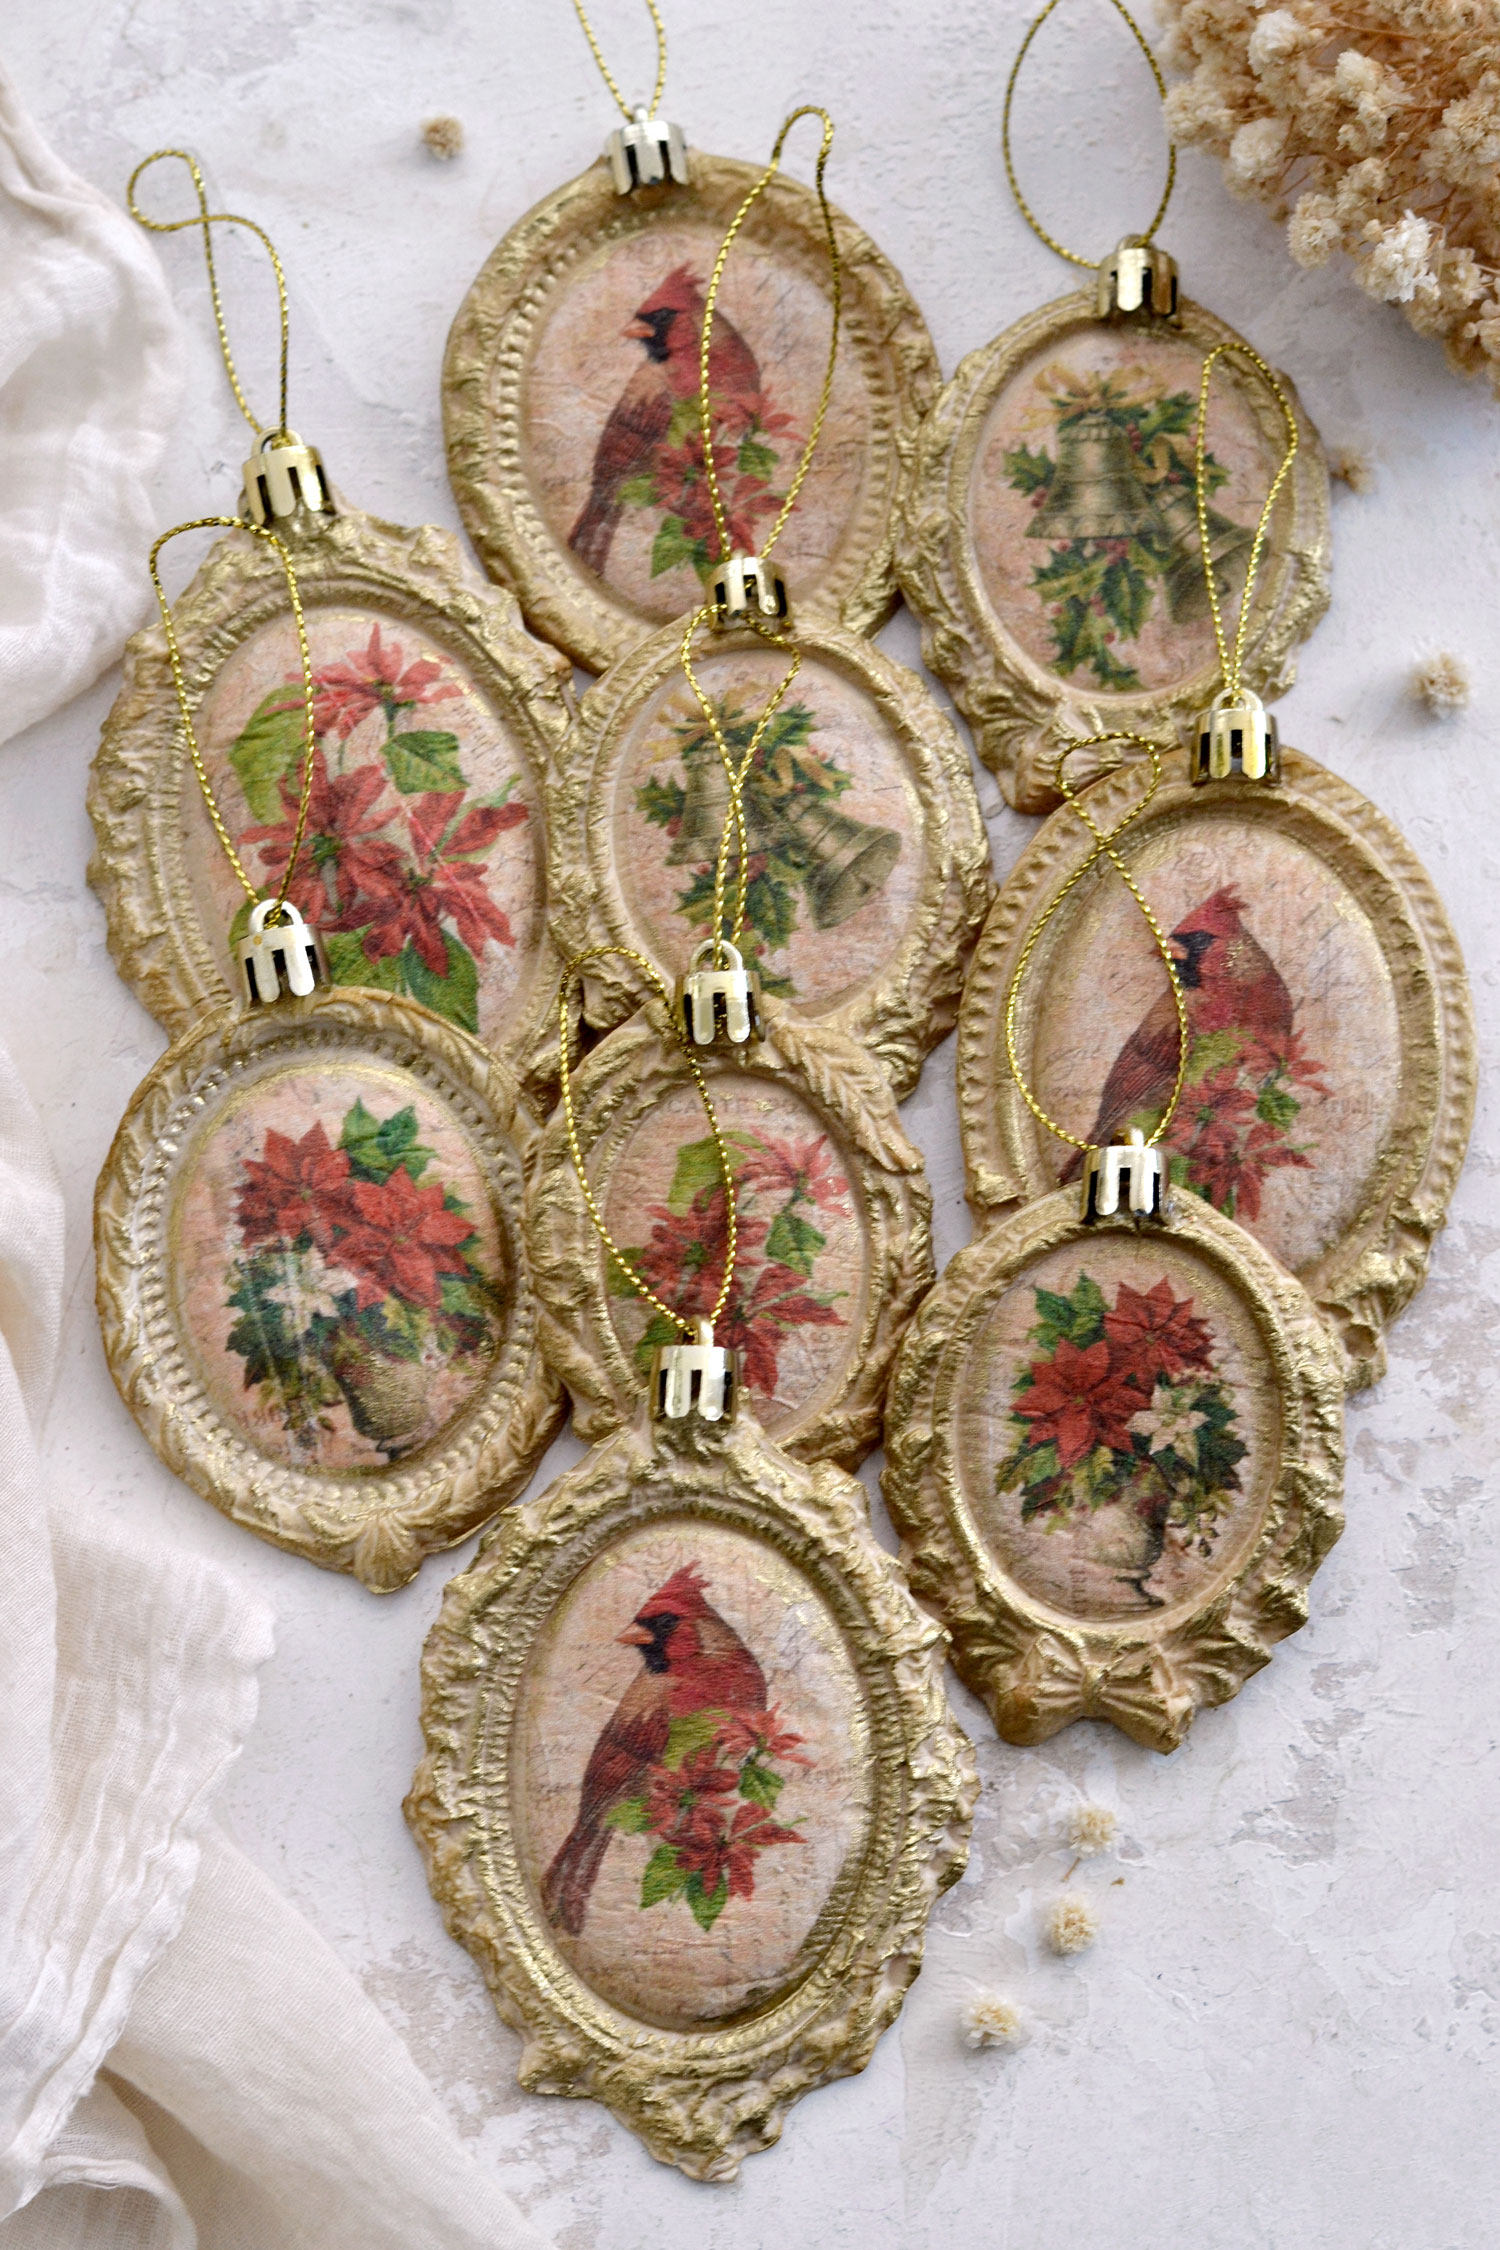
And that’s pretty much it, you can make as many paper casting Christmas ornaments as you like!
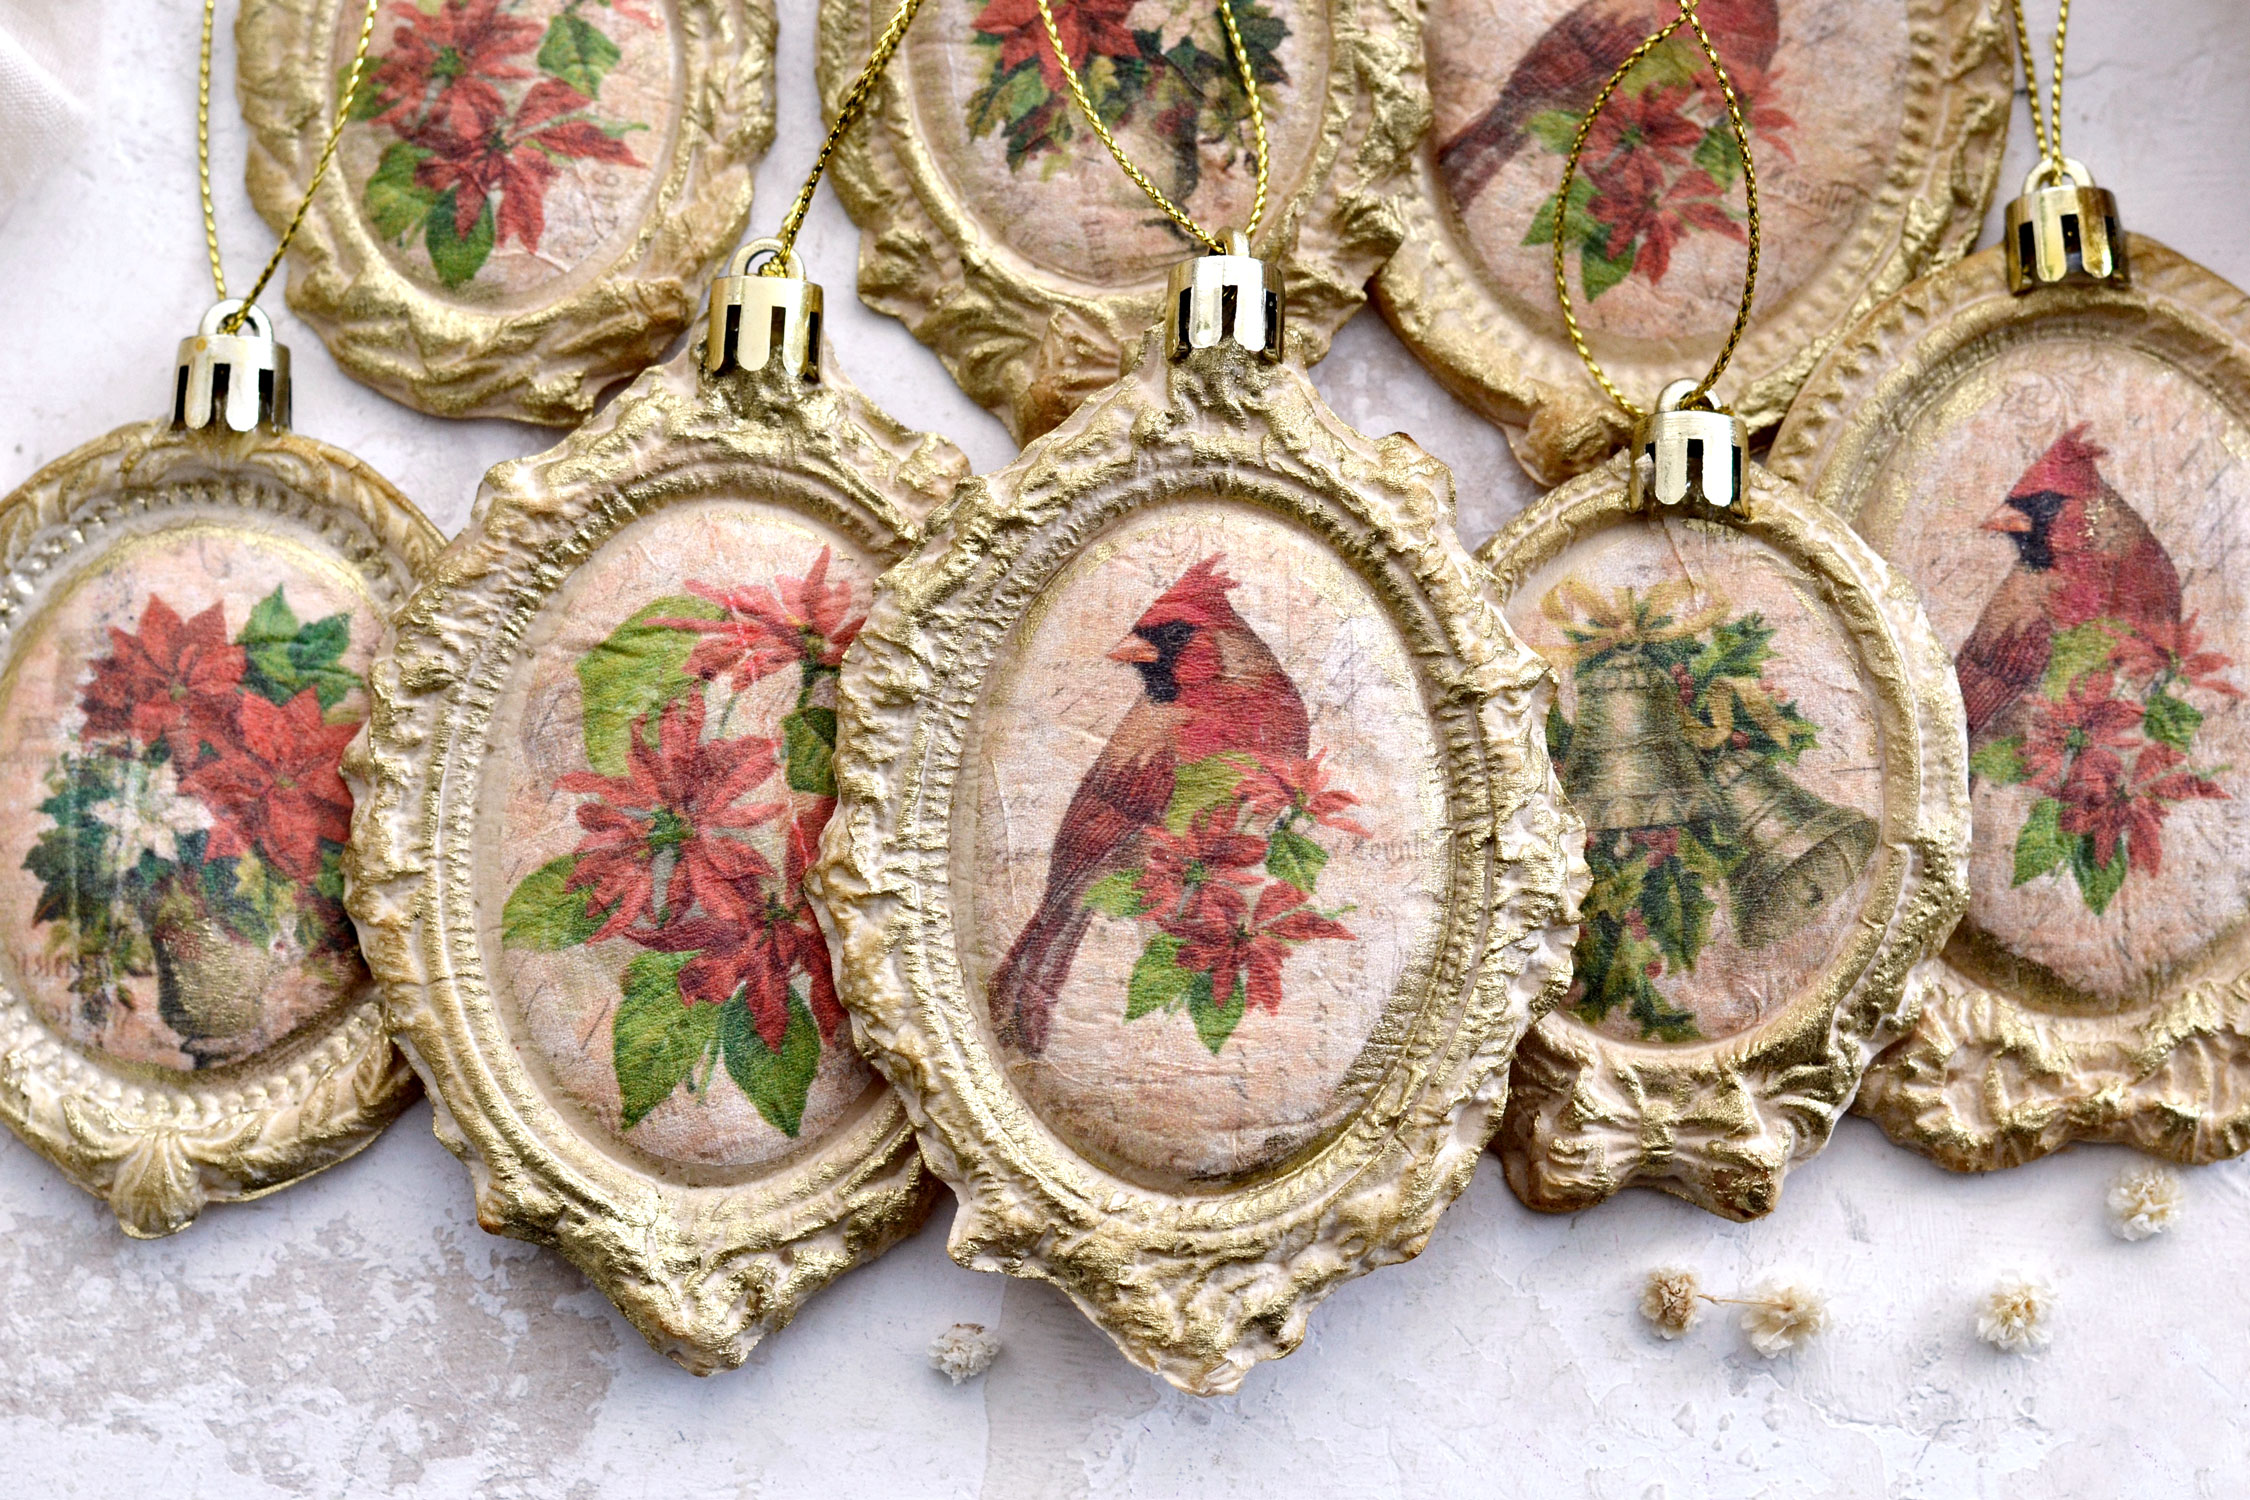
The details on these beauties are absolutely amazing, you’ll just want to admire and touch them all! Because they don’t only look good, they also feel great to the touch. Especially the printed designs on top, their surface is quite soft and delicate and it almost feels like an exquisite fabric.
Who would have thought coffee, toilet paper and glue could give such amazing results?
And yes, maybe some of the details are not perfect, but the fact that these are handmade and let’s be honest, quite affordable, really makes up for everything. If you look closely at the poinsenttia ornament on the left, you will see there is a noticeable line on top of the printed design. That happened while printing the paper napkin, as the napkin was not completely smooth. I didn’t mind this small imperfection, but if you want to prevent it, you can iron your napkin before printing it. You could also use some colored pencils and try to cover as much of it as possible afterwards.
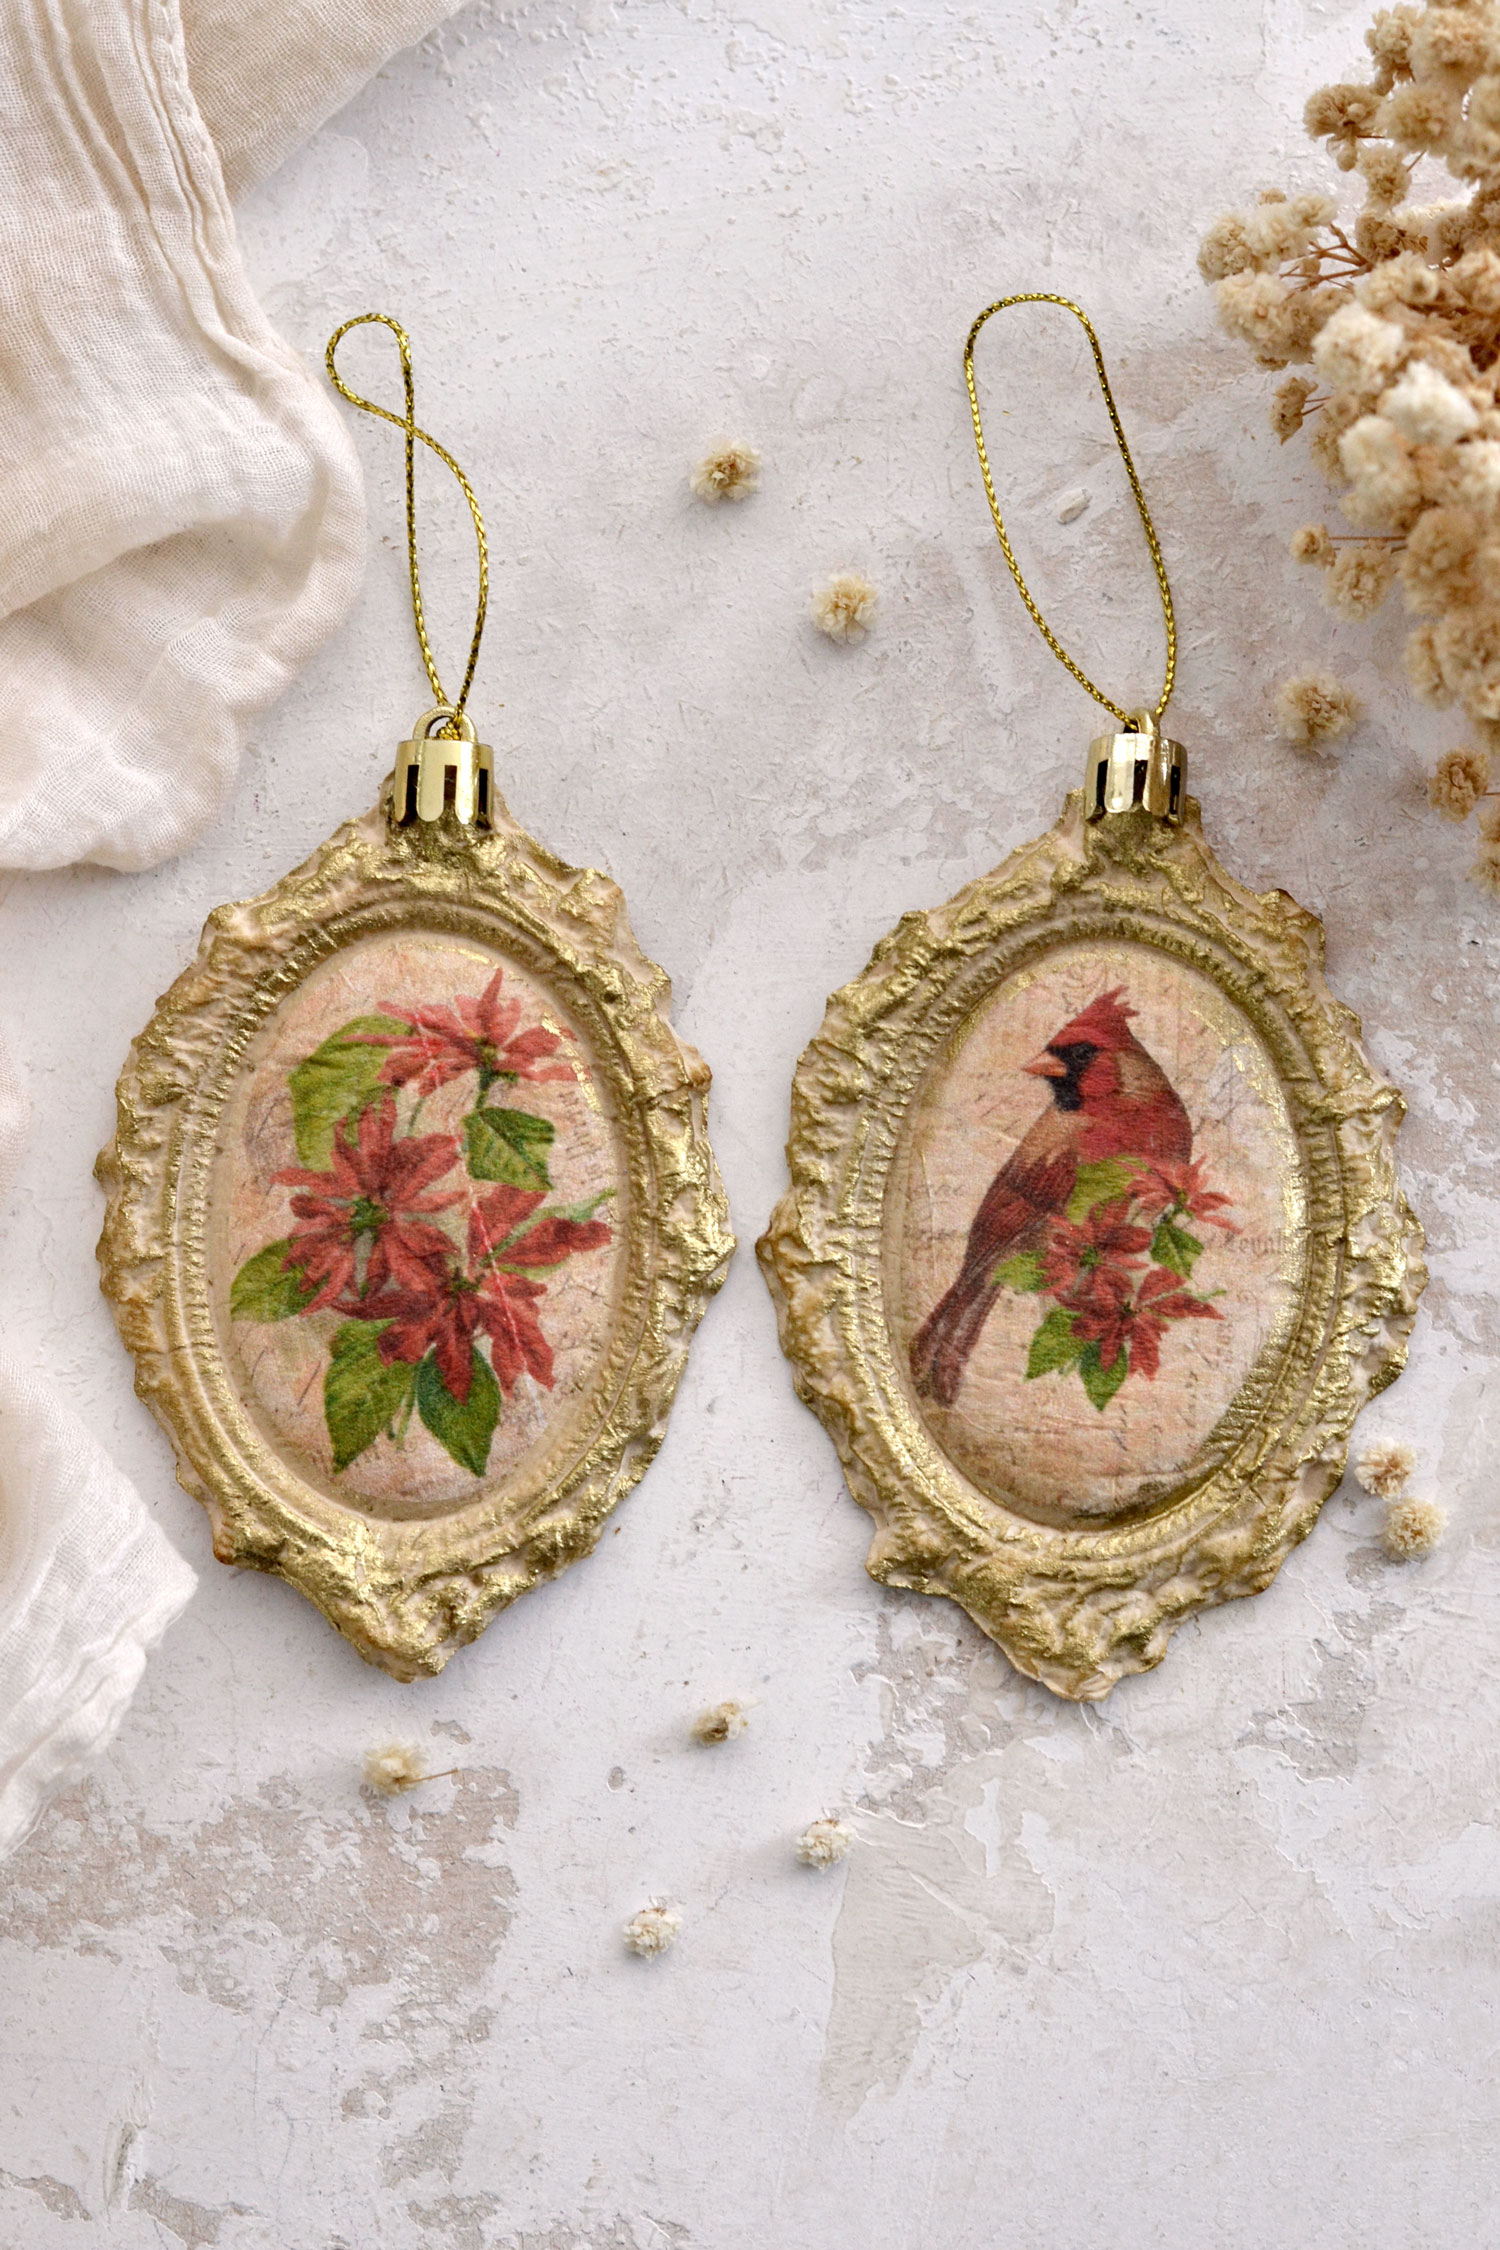
The ornaments with the red bird definitely turned out to be my favorites, they look absolutely charming!
You can make different paper casts and use the same design if you want to create some lovely sets. These would be great for gifting or simply to hang in your tree. 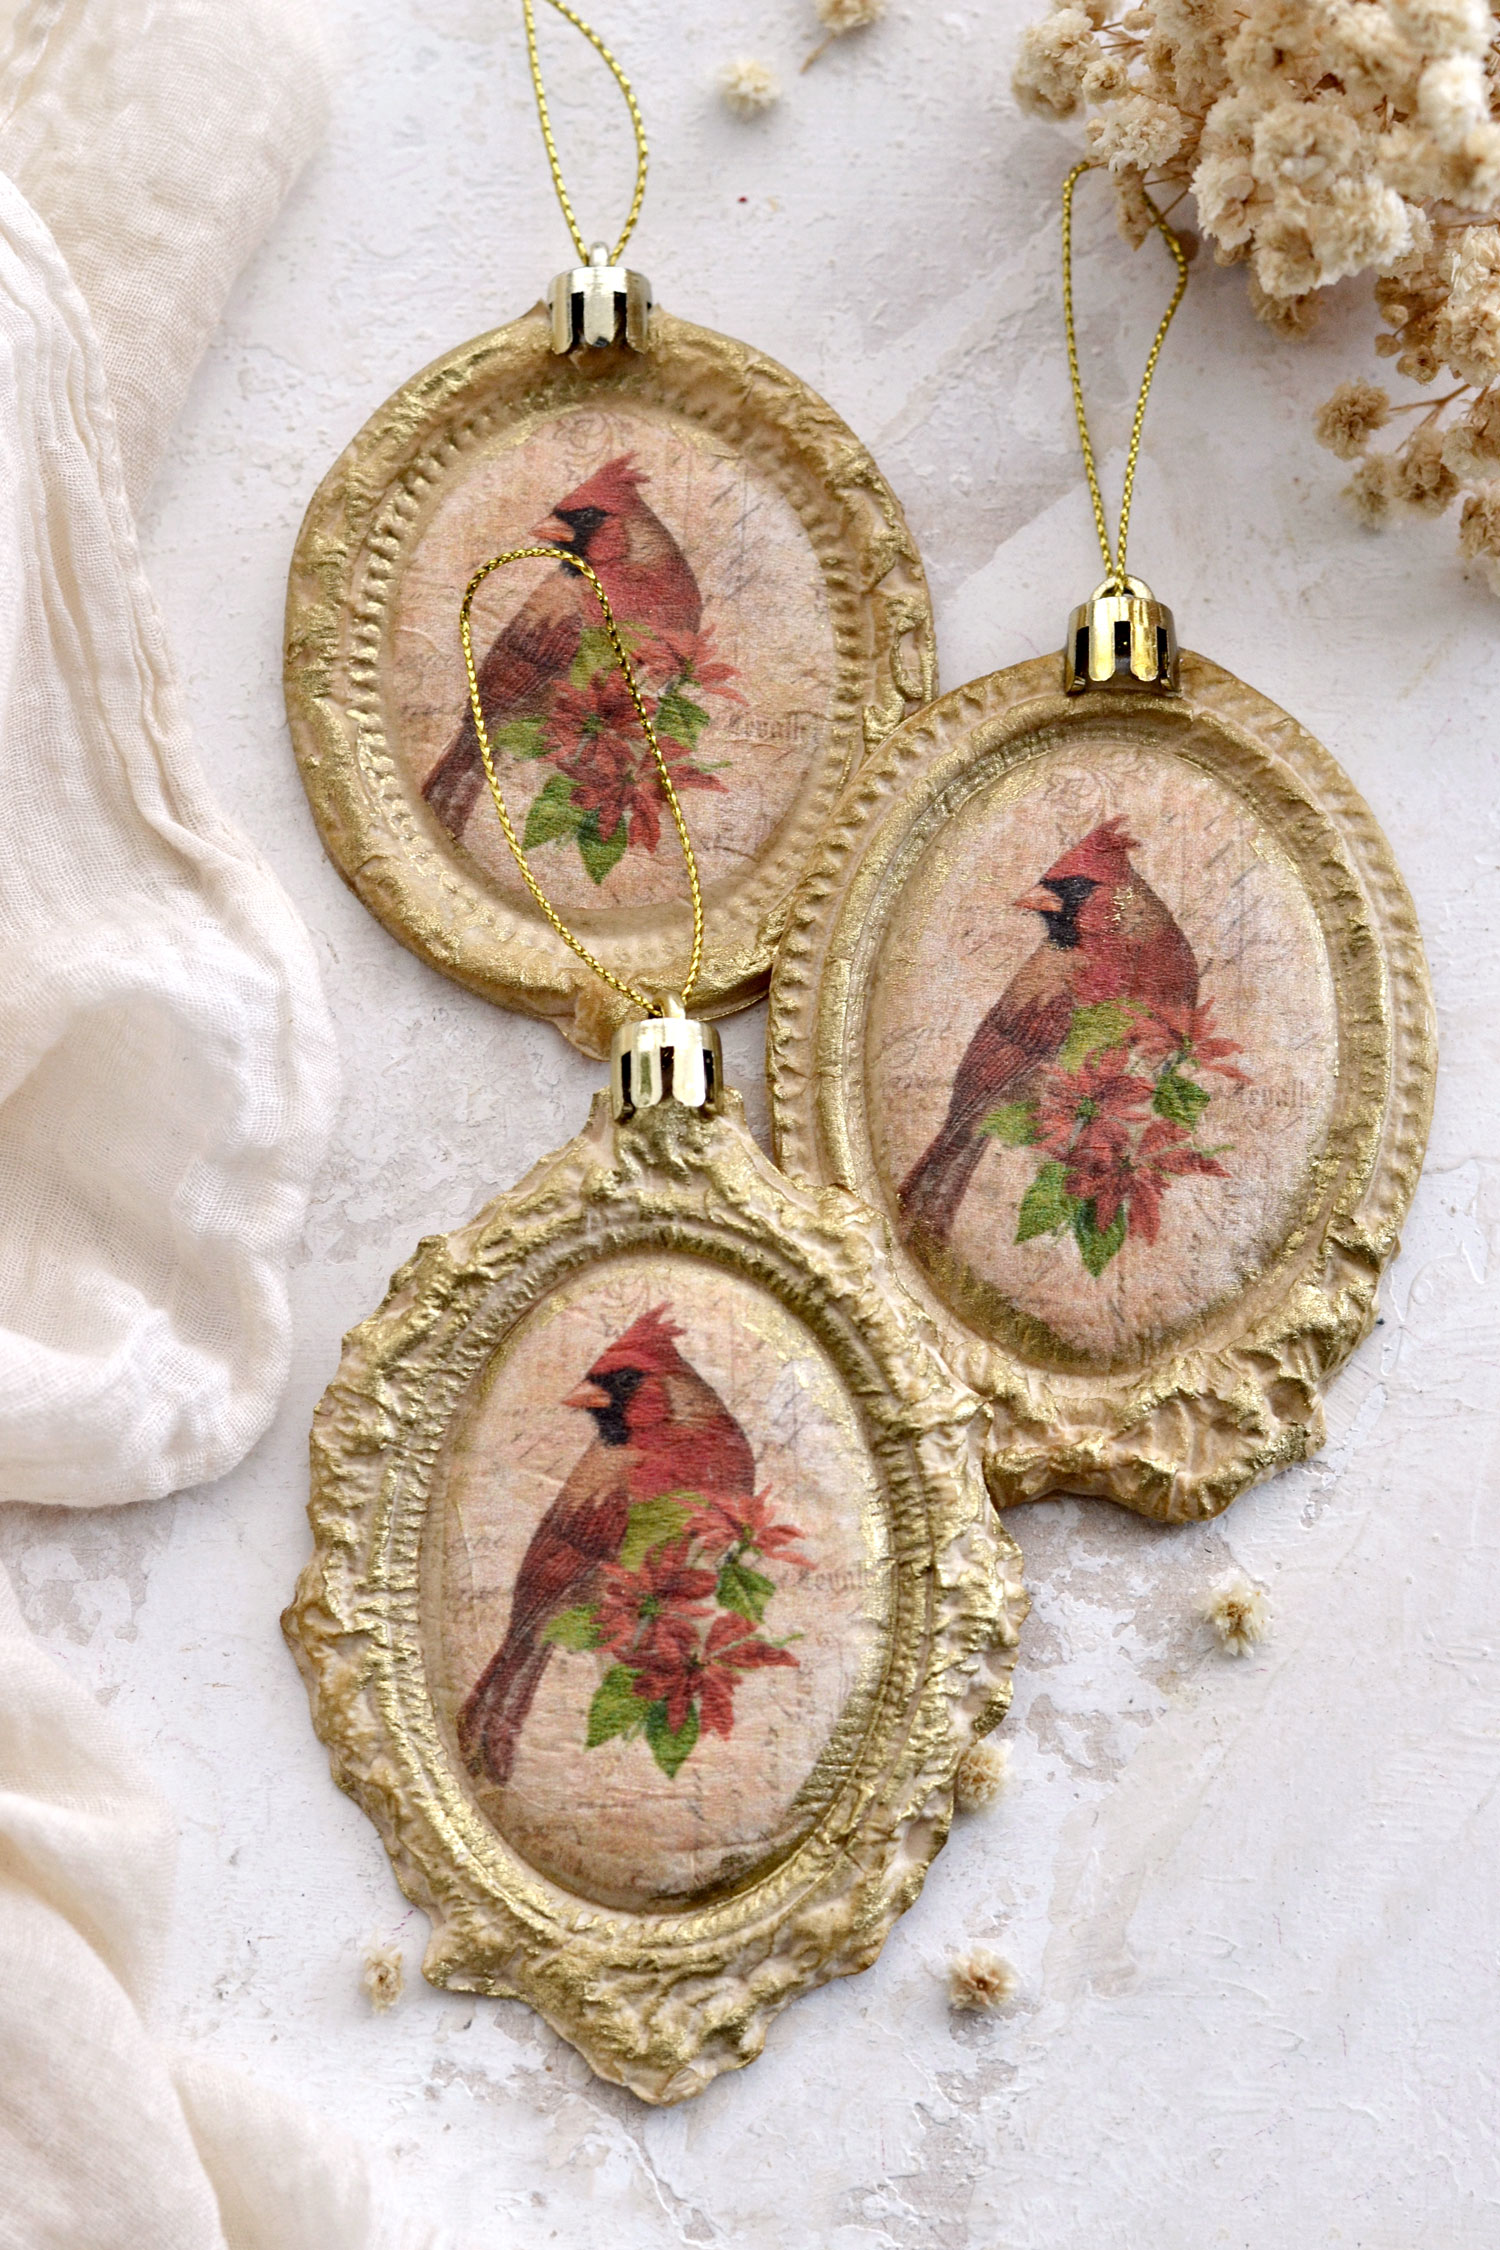
I knew I wanted to find a way to hang these beauties right when I first started envisioning them. So I intentionally rotated the paper casts that had details like ribbons on top and moved them to the bottom. This way, it was so much easier to add the hangers on top.
This paper casting technique is quite amazing and I feel like it’s one of those things that once you’ve seen it, you cannot unsee. It will always remain in the back of your mind as a solution to make cheap and affordable paper casts using all sorts of molds. Or even as a backup plan if you ran out of air-dry clay, plaster of Paris, or even your silicone gun, which, by the way, can all be used for this project if you prefer. This toilet paper, coffee and glue concoction creates a unique papier-mache finish that is both durable and pliable at the same time. It can be used on other projects too, the possibilities are simply endless. As are our ornaments, which will make the best frames or embellishments for so many other projects, no matter the season!
I hope you will love this paper casting technique and decide to give it a try! You can make as many of these beauties as you want using this technique and then find unique ways of using them in your home or gifting them to your friends. They can be hung on your Christmas tree or on drawers and cabinets. They can be easily turned into tags to uniquely decorate your Christmas gifts, the sky is the limit. They will instantly bring a little bit of that special Christmas vibe that we love to surround ourselves and our families throughout the holidays.
And don’t waste the Toilet paper tube! You can use it to make these Christmas Crackers HERE. You might also like my Sheet Music Angel Ornaments DIY HERE.
Happy crafting,
Diana | Dreams Factory


Leave a Reply