DIY Exploding Valentines Box!
I am in the Valentine spirit….BIG TIME!! I am going to create a DIY Exploding Valentines Box filled with Candy for this week’s tutorial. I stumbled upon the over the moon cute Retro Valentine collections here on The Graphics Fairy – Retro Valentines with Animals and Colorful Retro Valentines with Children. It took me straight back to my childhood exchanging Valentines with classmates. I loved to make and decorate an old shoe box to capture my Valentines. It was such an exciting time for me. I love these old cards and the warm, happy greetings.
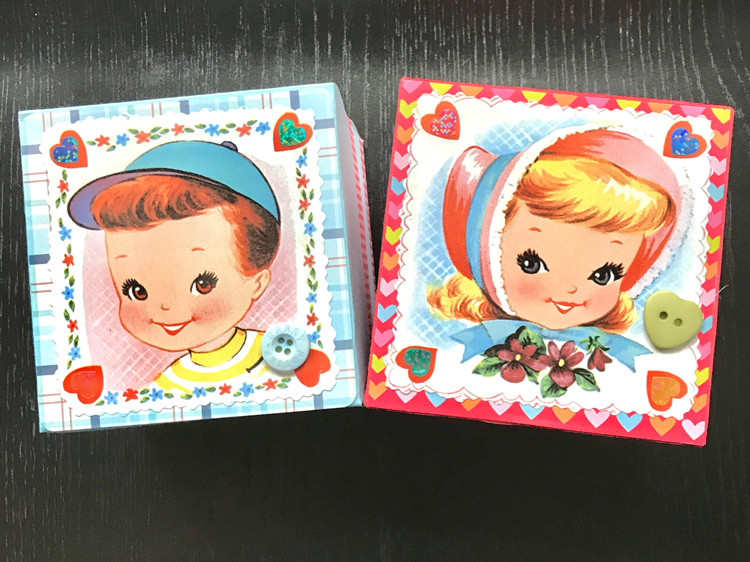
Sooooooo, I decided to do a sweet and fun craft with y’all reflecting that memory. I will be sharing an DIY Exploding Candy Box Tutorial below using most of the images from those collections. I am making two – one for my granddaughter Addie and one for my grandson Jax. They each have two layers of retro Valentine card goodness, which will be filled with candy. Come on into my daughter’s beautiful studio and create this two-layered box with us.
What is an Exploding Box?
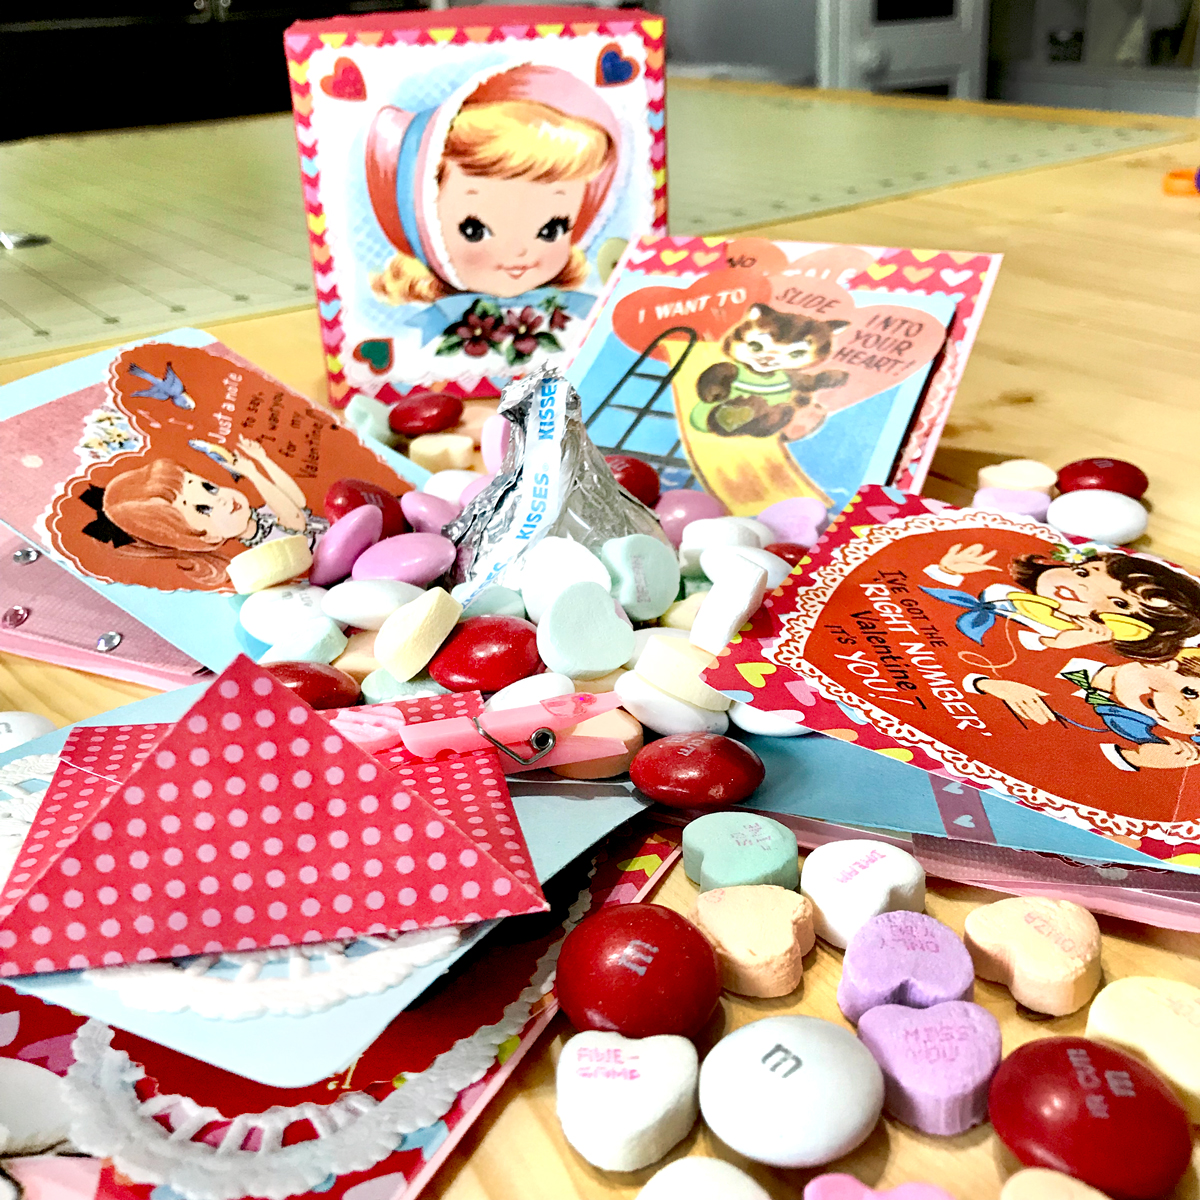
The Exploding Box or Explosion Box is rooted in modern bookmaking techniques. It is layered card or book structure. The structure itself is the gift! When the lid is removed, the sides explode outward showing 17 different sides of cute interactive imagery…plus candy! So many cards to decorate and embellish. Wowzers!!
Not to worry, I have an easy and quick technique that will have you impressing your family and friends in no time. I am borrowing some junk journal pockets, envelopes, and gate and flip cards just for more fun. It is the cutest way to deliver a tiny gift or some Valentine treats. Let’s jump in and make this gift package.
Supplies for DIY Exploding Valentines Box
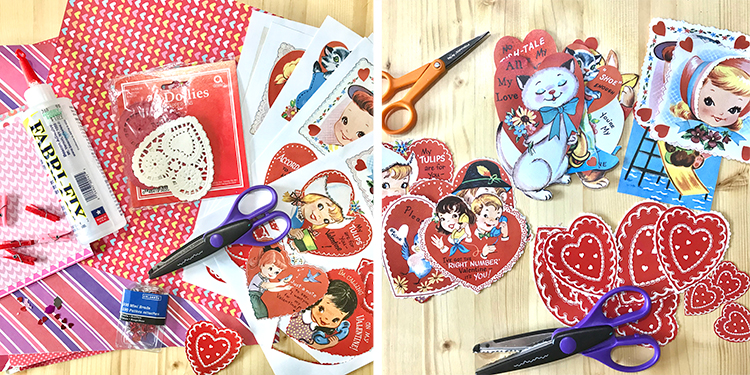
TGF Retro Valentine images printed, cut, and trimmed (remember to keep them under 4″ wide)
Retro Valentines with Animals and Colorful Retro Valentines with Children
3 sheets of 12′ x 12″ square cardstock in complementary colors
Embellishments–Stickers, Ribbon, Paper Scraps, Lace, Buttons, etc. (whatever you have on hand)
Scissors and/or Craft knife
Paper Glue – I like Fabri Fix
Ruler
Round Circle Punch
Paper trimmer – optional
Bone Folder or something to burnish with
Tutorial:
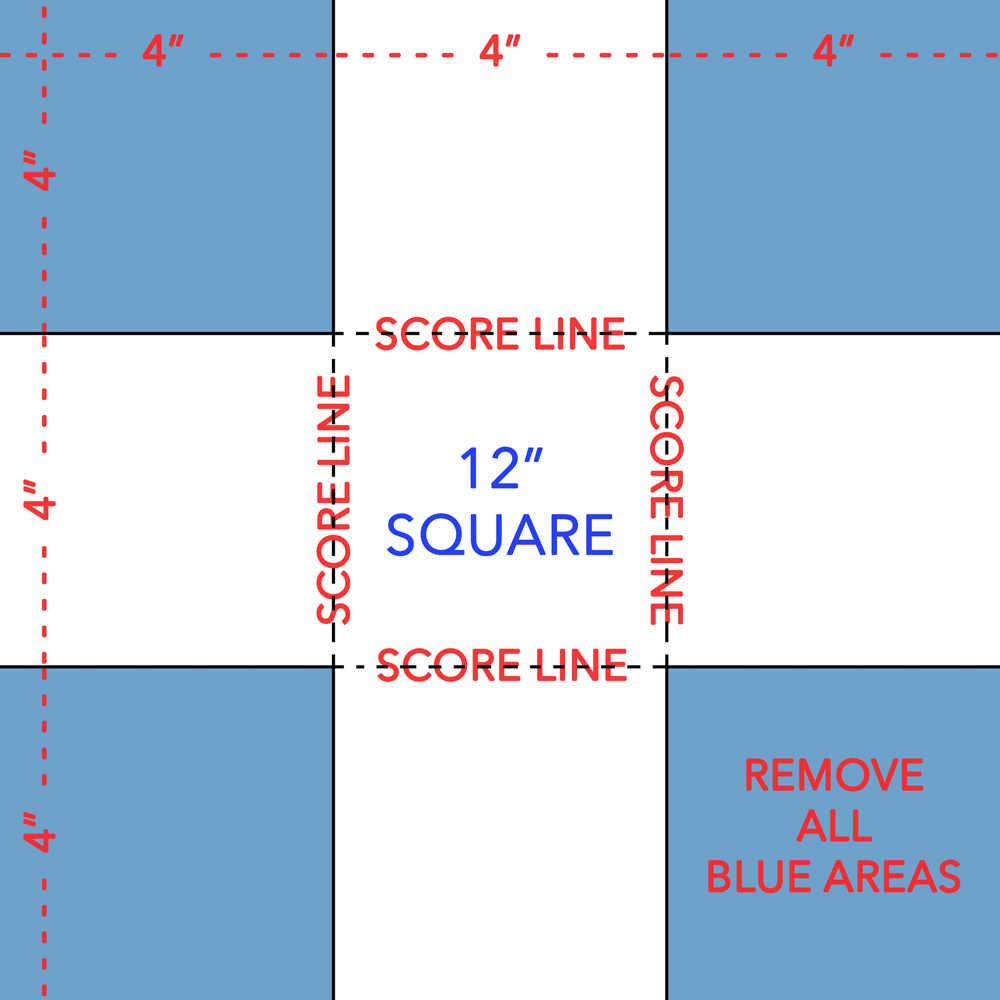
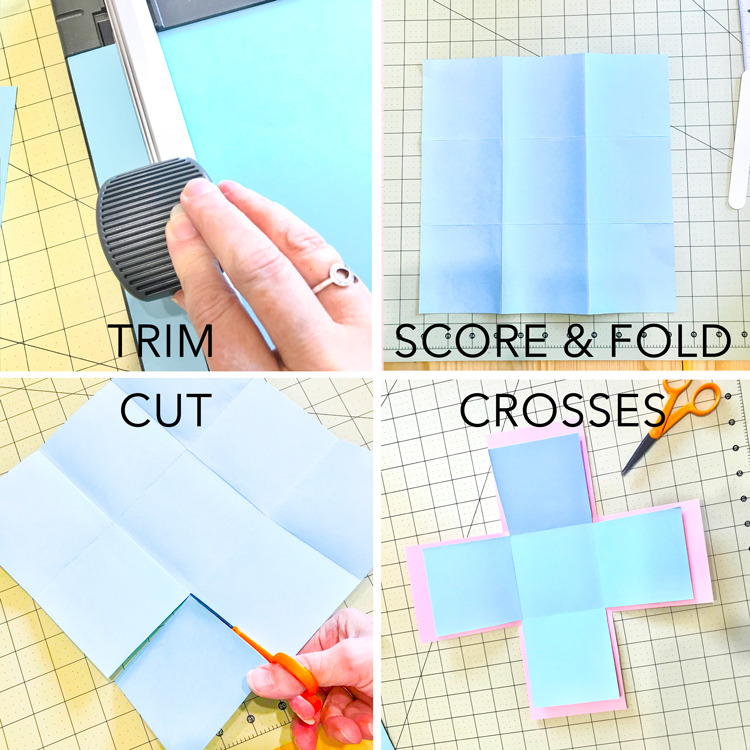
Outer Box Layer: Following the diagram below, measure and score lines 4″ from every side on the cardstock that will be your box outside color. Fold in all sides, one at a time, and burnish the edges. It should look like a Tic Tac Toe Board.
Cut away the corner squares (solid blue areas in the diagram) created by the scoring. You will be left with a cross or + shape card. Fold all the edges in once again and see if everything is square. This is the time to tweak anything that is off.
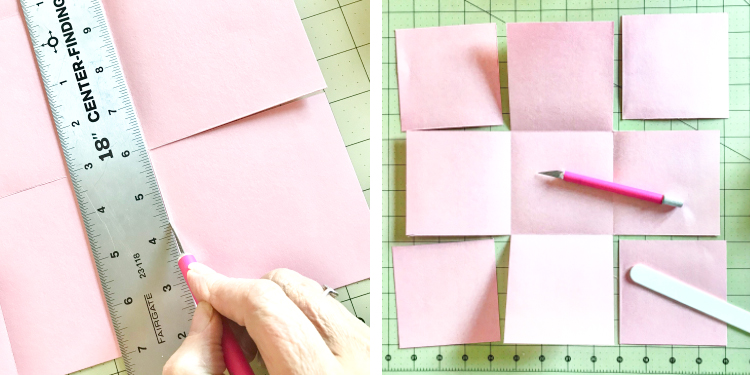
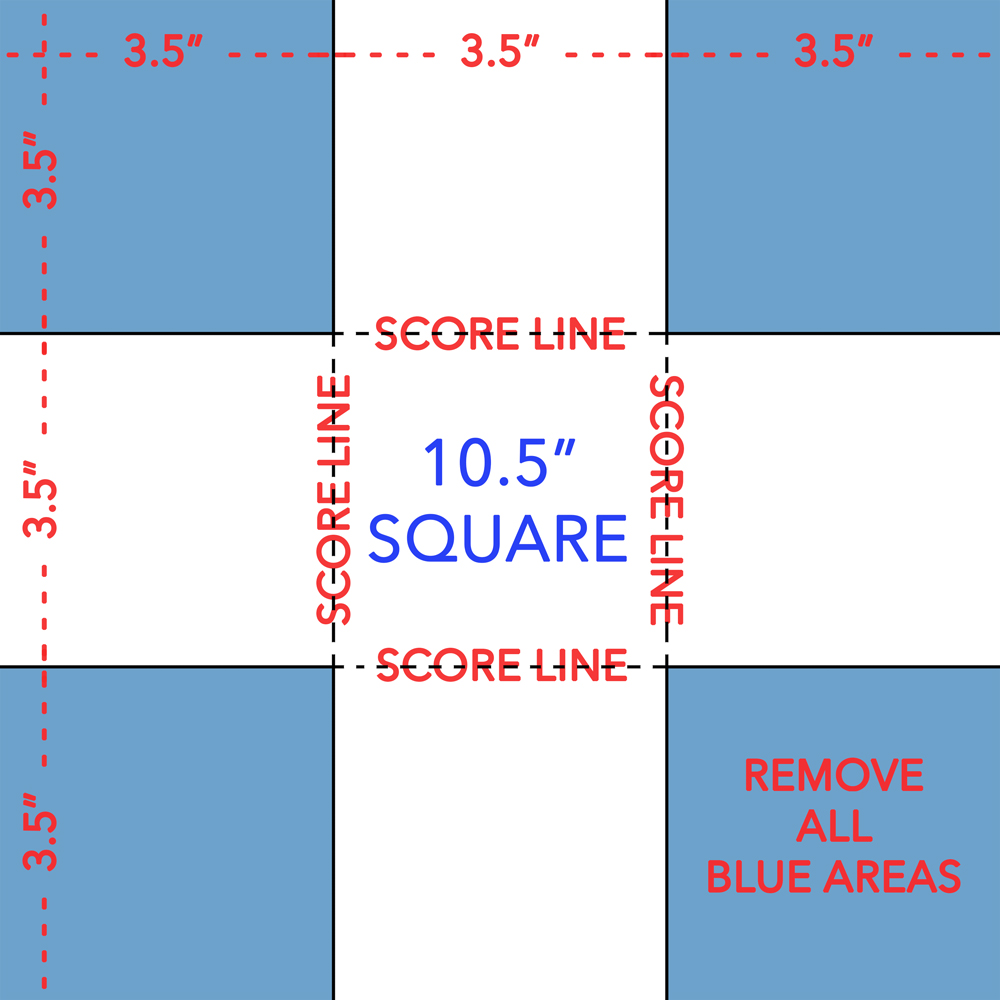
Inner Box Layer: From your second sheet of 12″ square cardstock, trim away 1-1/2″ strip from two adjoining sides. This creates a 10-1/2″ square piece of cardstock. (image 1) Following the diagram below, measure and score lines 3-1/2″ from every side on the cardstock.
Fold in all sides, one at a time, and burnish the edges. Cut away the corner squares (solid blue areas in the diagram) created by the scoring. You will have a smaller cross or + shape card. Fold all the edges in once again and see if everything is square. This will fit nicely inside your larger cross.
Create The Exploding Box Lid
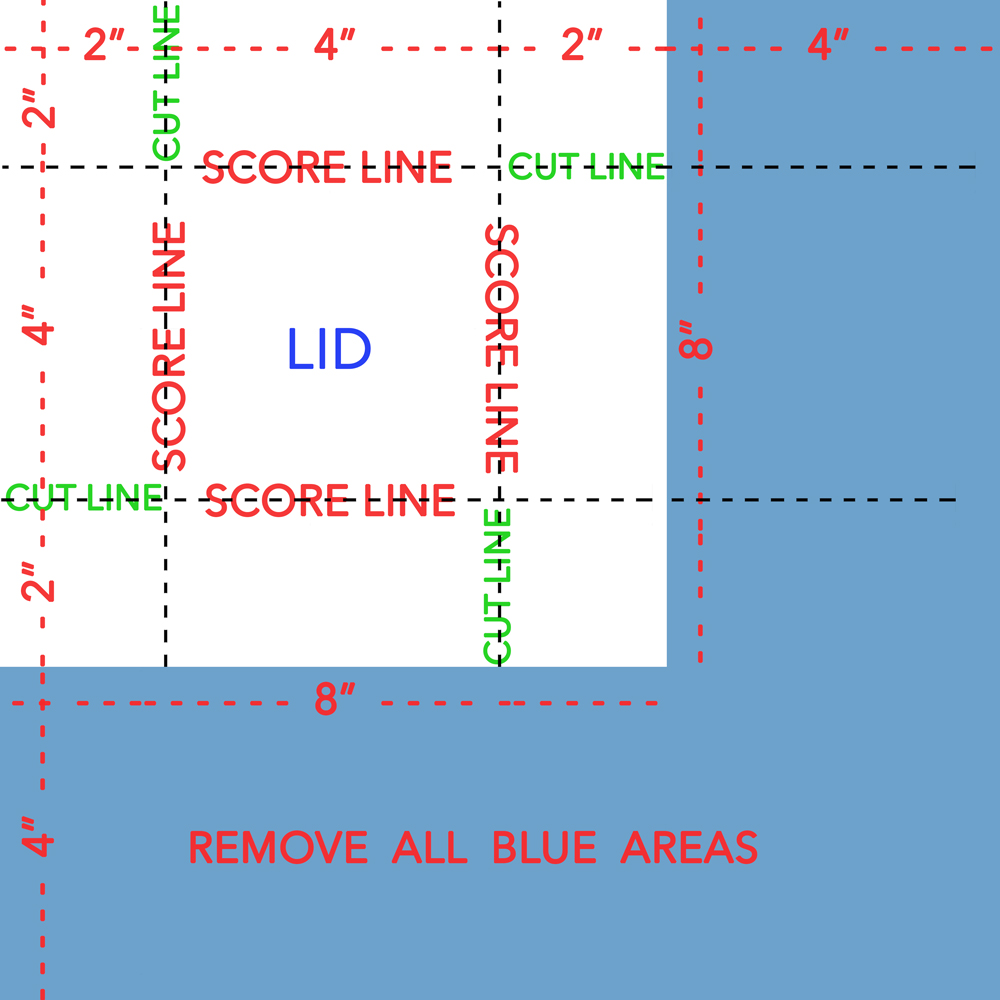
From your third sheet of 12″ square cardstock, cut an 8″ square. Following the diagram below, measure and cut away 4″ from 2 adjoining sides on the cardstock. These are the solid blue areas. This will leave an 8″ square piece of cardstock. NOTE: You could of course use a smaller piece of cardstock to begin with. Just make sure your final size is 8″ square.
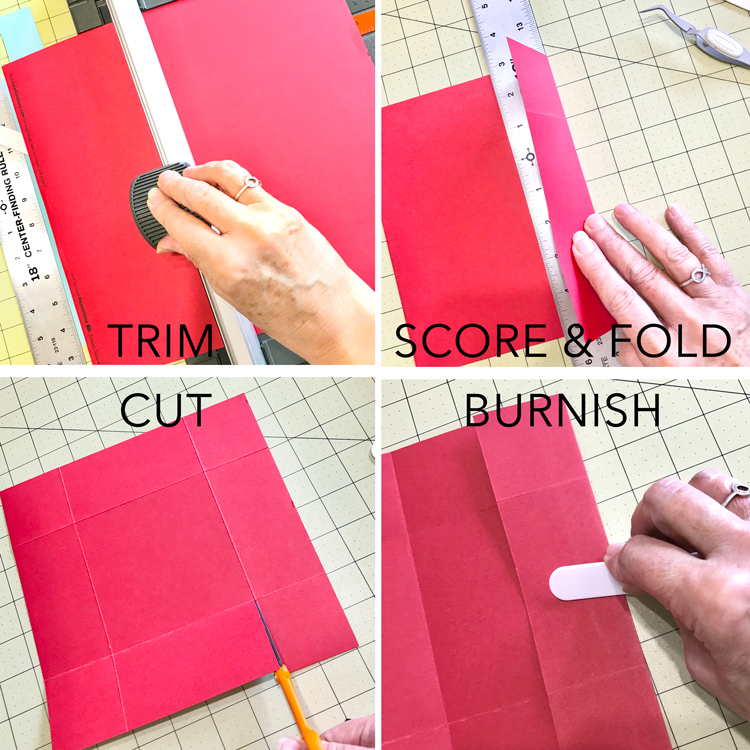
Once you have the 8″ square, measure and score 2″ from each side as shown below. Fold in all sides, one at a time, over the edge of a ruler. Then burnish the edges. Cut a line from the edge to the score line as indicated in green on the diagram. NOTICE We are not removing any paper, just cutting 4 lines in it. It is easy if you place the paper down in front of you and cut the line to the right. Rotate the paper a quarter turn and cut the same line on this side. Repeat with all four sides.
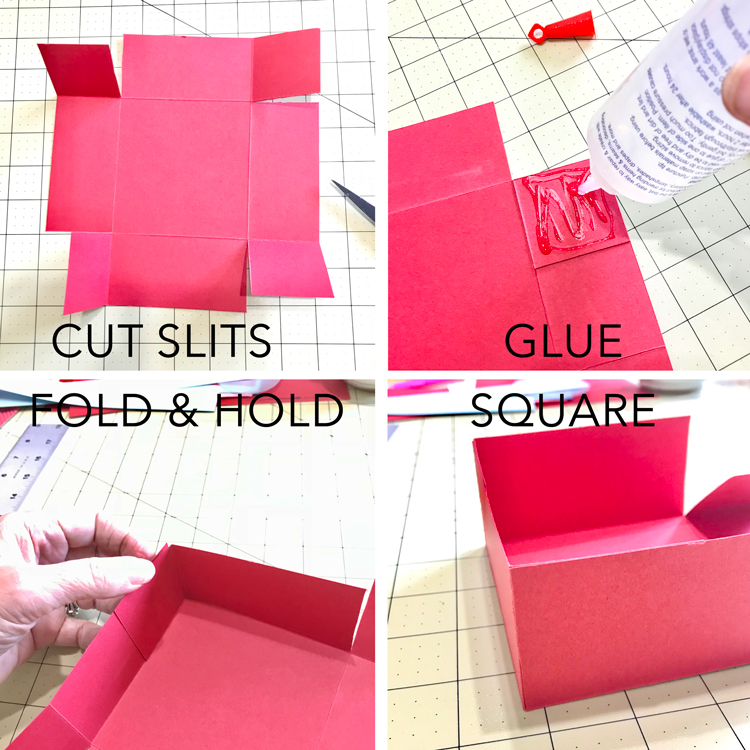
Once all four cuts are made, place the lid top side down on your work surface. Fold each of the sides in and burnish all folds really well. TIP: This firm burnishing will ensure the top is square and the sides are straight. That is important for the explosion to work. 🙂 When you fold the sides up, the little glue flaps should go on the inside. Carefully glue the flap pieces to the adjoining side as shown below. Hold a few seconds to secure. Check the edges are square!!
Fold the sides of the large cross in toward the center to form a box and place the lid on it just to make sure it fits. Our Retro Valentine Exploding Box won’t explode if we don’t have it right at this point! WINK
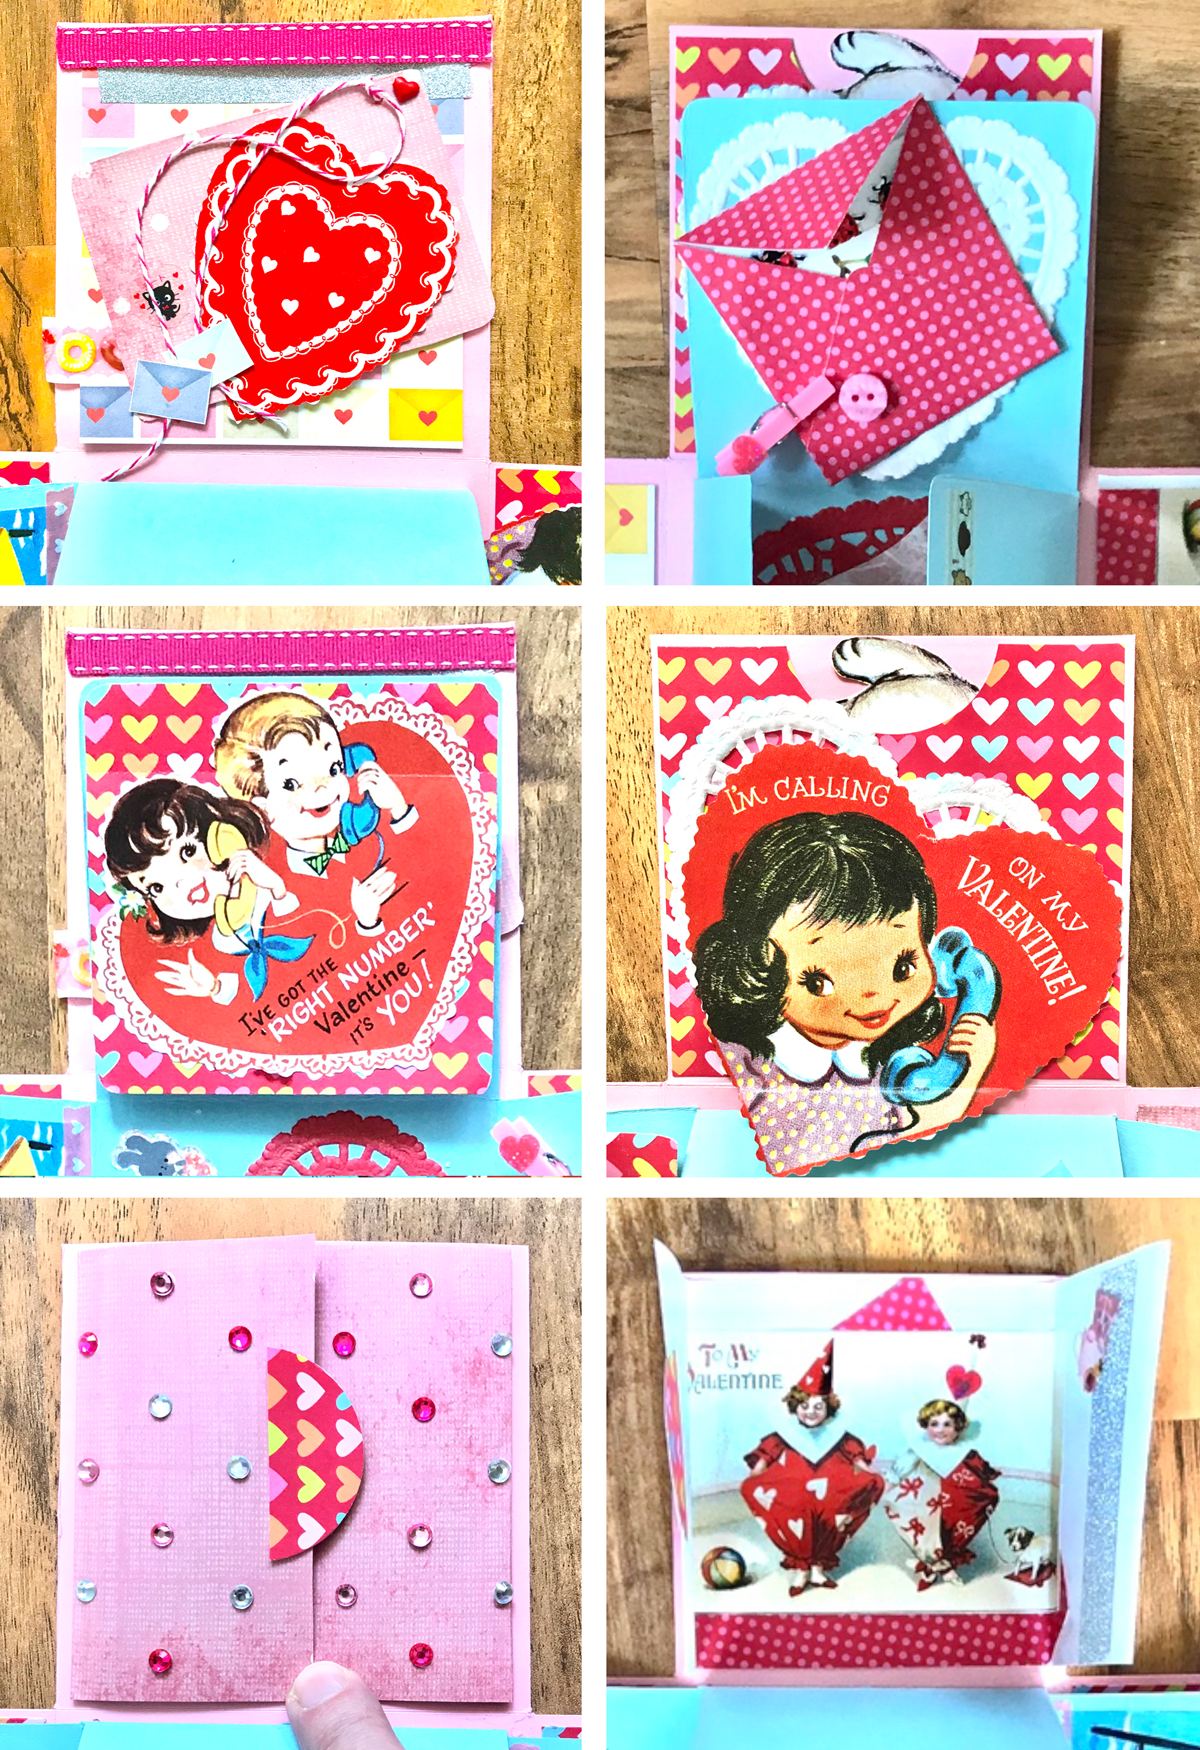
Decorate and Embellish the Interior
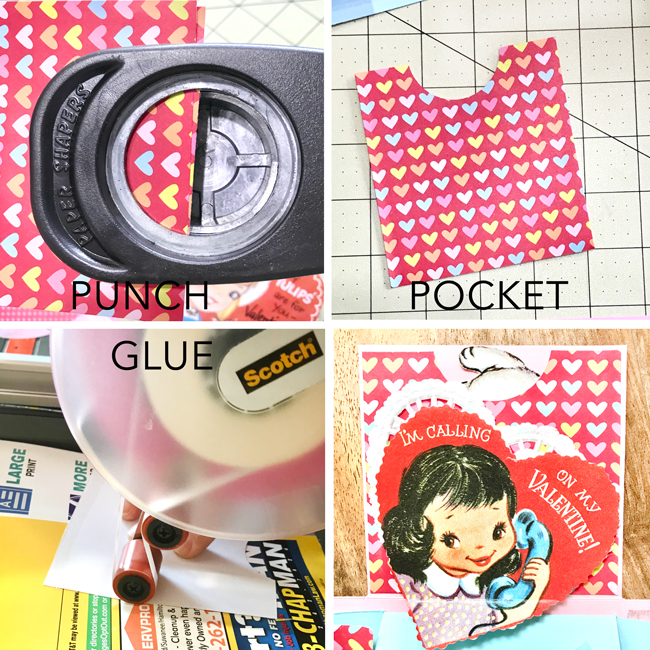
Pockets
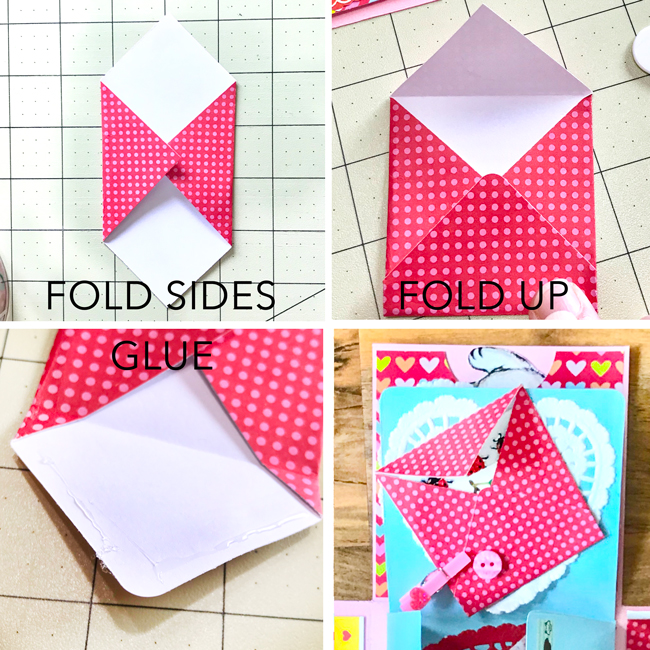
Envelope
Finishing
After you have decorated all 17 sides, we need to assemble the box. Take the largest cross shape and put double sided tape or glue in the center square ONLY. Lay the center square of the smaller cross shape onto the top of the glued area ensuring that the sides are even and straight. Once dry, fill the center with treats or a gift. Fold up the sides and place the lid on.
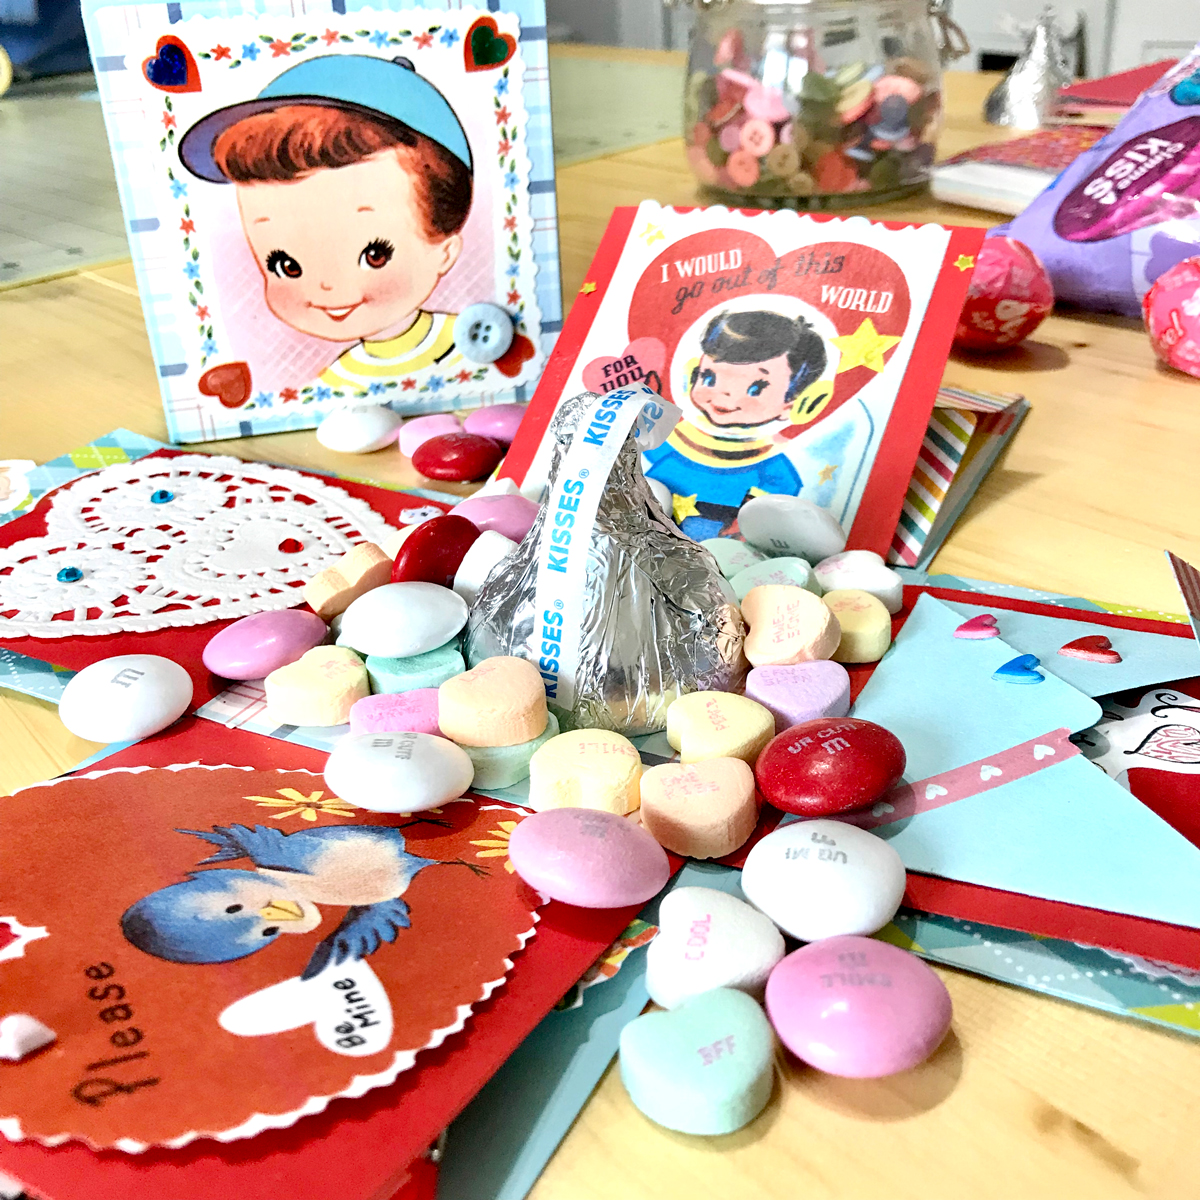
Here is a look at the explosion of Valentine treats…
I hope you enjoyed creating this DIY Valentines Exploding Box with my daughter and I. Designing this project for you was so much fun. You might also like another cute Valentine Craft Project HERE.
I also create Photoshop Elements tutorials over on The Graphics Fairy Premium Membership site. You can find even more of my art, DIYs, and whimsical shenanigans on my site Cre8tiva.





Sharon says
I too, remember these vintage Valentines from my youth. I can’t wait to try this project next year. I’m going to make one for my 3 sisters-in-law also. Thanx for bringing us such an awesome project!
Karen Watson says
Hi Sharon, what fun gift this will be for your sister in laws! You may want to Pin it so that you don’t forget next year. I’m glad you enjoyed Rebecca’s project!
Kelly L.-S. says
This is absolutely ADORABLE!!!!!! Thank you so much for sharing. I can’t wait to try this!
Karen Watson says
Yay! Have fun making these cute boxes Kelly!