Easy No Wax Batik
Hello to all the Graphics Fairy makers. It’s Rebecca with a fun way to create beautiful Easy No Wax Batik Art! The colorful and relaxed fabric patterning looks complex but is fairly easy to do. It is a layering process where layers build on and mix with the layers below. I will share how to re-create the look of batik at home without wax. We will be using a resist technique of washable glues and flour paste. But I must warn you that it might be habit forming as the results are stunning. Plus, it is a family and child-friendly art form that encourages creativity for all ages. 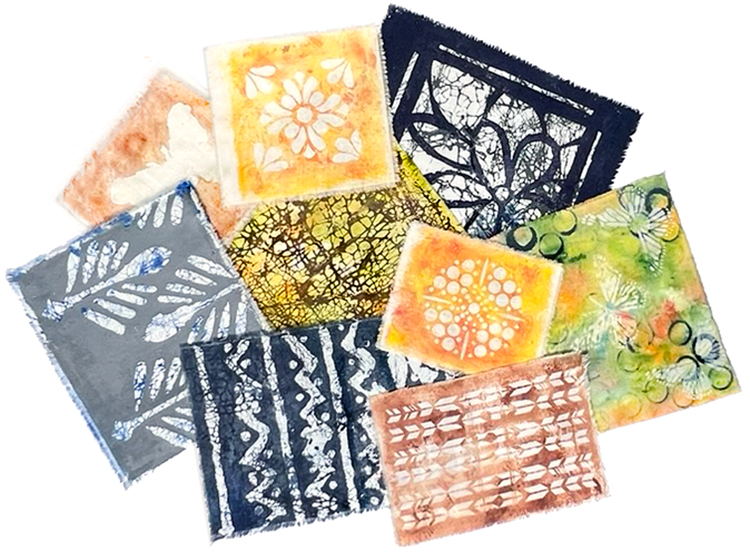
What is Batik?
The Batik process was invented on the island of Java in Indonesia centuries ago. Batik can be considered both an art and craft, which typically involves decorating cloth by using wax and dye. Fabric surfaces like cotton, silk, linen, rayon, and hemp are most commonly used but wood, paper, leather, and ceramic surfaces are also sometimes chosen.
This post may contain affiliate links which won't change your price but will share some commission, you can find our privacy policy here.
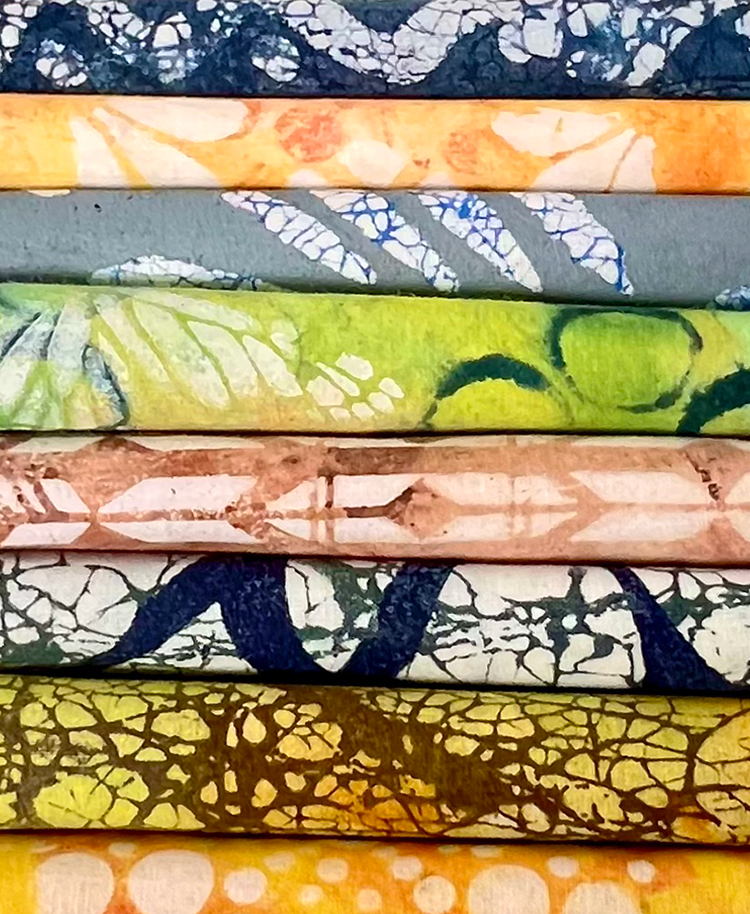
Batik is considered a ‘resist-dyeing’ craft using the wax and dye to create highly detailed patterns by first painting or stamping hot liquid wax onto white cloth by using tools like a pen called a canting, a brush, or pre-made stamps to block specific sections from color. The fabric is then dipped into a dye ‘bath’ where the waxed parts resist the color being used. The third step is called ‘cracking,’ which involves crumpling of the fabric and producing small fractures that allow the dye to seep through, leaving web-like colored veins. The final step is ‘dewaxing,’ where the wax is boiled or ironed out once the final layer of color is set in place. Repeating the wax and dye procedures enables artists to create complex multi-colored designs. This is known as ‘layering.’
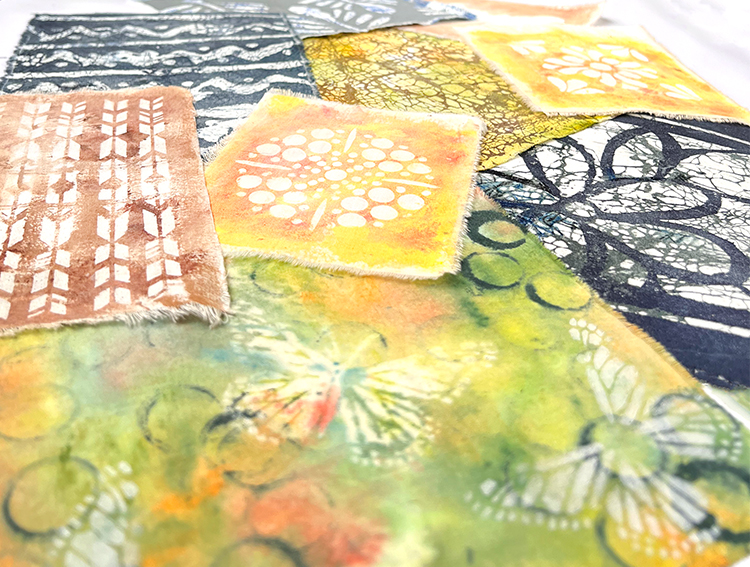
There are many quite interesting cultural traditions in the use of Batik. For example, Indonesia is acclaimed for royal Javanese ancestral patterns and African Batiks often feature musical and dancing related scenes. Pictorial wall art is prevalent among modern artists using free-form brush painting with multiple colors on stretched fabric. That is where our tutorials come in. We will be simulating batik art by using common household and craft tools and materials. No wax will be used. Washable glue takes the place of wax. So let’s dive in and make some fun. colorful fabric creations.
Step by Step No Wax Batik Art Fabric
Please read through all the instructions below before beginning your designs. It will help you imagine the colors and the patterning you want to create. Batik Art is a ‘let-the tools-do-their-thing’ process and the outcomes are organic in look and feel. My best advice is to let go of control and allow the paint, dye, and glue do what it is meant to do. Embrace the nuances of the art form and celebrate happy accidents. It will look beautiful if you use the right color combinations.
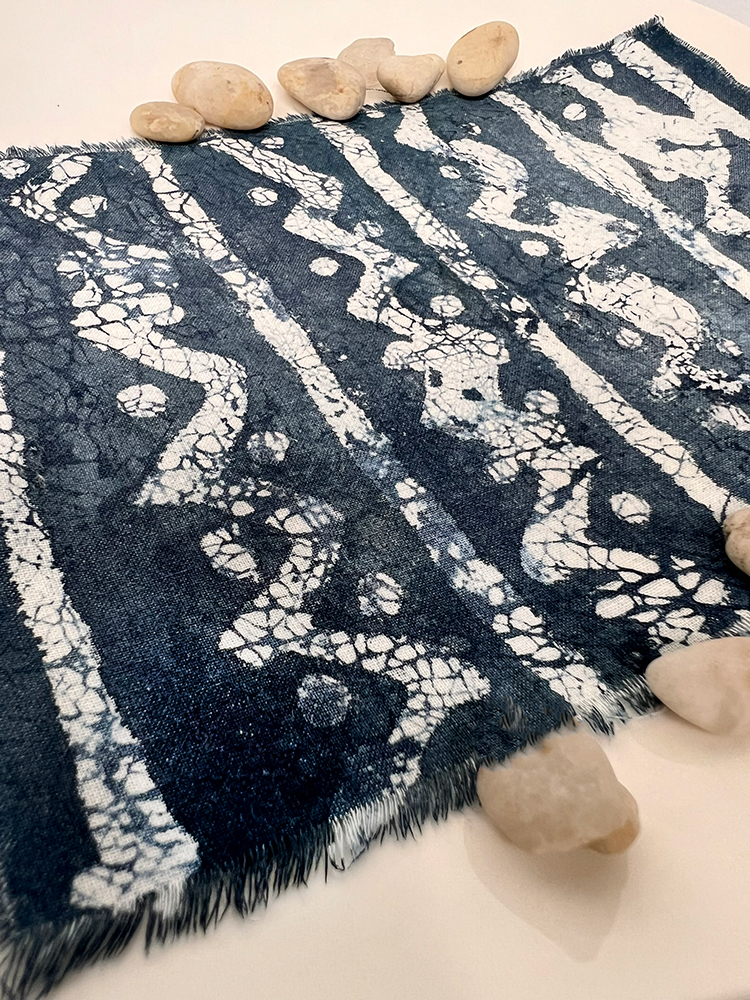
Batik takes patience because resist layers and paint layers need to dry ‘completely’ between steps. If you try to rush it, you most likely will not be pleased with the results. The biggest issue is that the first layers of color can disappear after the necessary repeated rinsing. I learned the hard way! So plan on it being a several day project. I was creating several different designs, so I was able to keep busy while waiting. It is so worth the time!
HINTS:
- As always when working with fabric, please prewash, dry, and iron. If you skip this step, the paints will not hold. The sizing in purchased textiles will repel the paint and prevent proper adhesion. The paint can peel off. UGH! Wrinkles will cause you grief and interfere with the designs.
- I prefer natural fabrics like cotton, linen, and silks. Synthetic fabrics do not work well.
- I like to use white or light colored fabrics as they create the most contrast and depth.
- I place fabrics to be painted on an old cereal box – printed side up.
- Larger textile pieces need to be taped in place or they will slip and slide and frustrate you.
- When you first try these techniques, it is best to layer paint colors from light to dark. We use translucent painting techniques and it is challenging to cover dark colors with light colors.
- I don’t like to use pure black in my batik art. I prefer a dark blue or purple or brown that has been darkened with a touch of black.
- Dry the paints for the amount of time the manufacturer recommends. Trust me!
- Heat set all painted fabric.
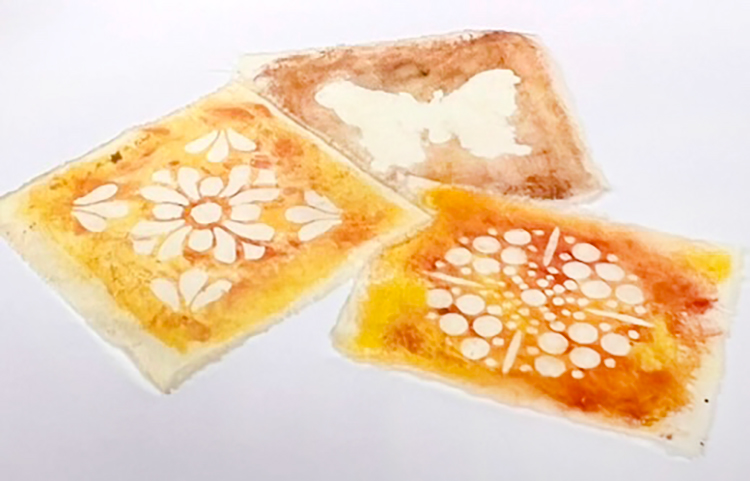
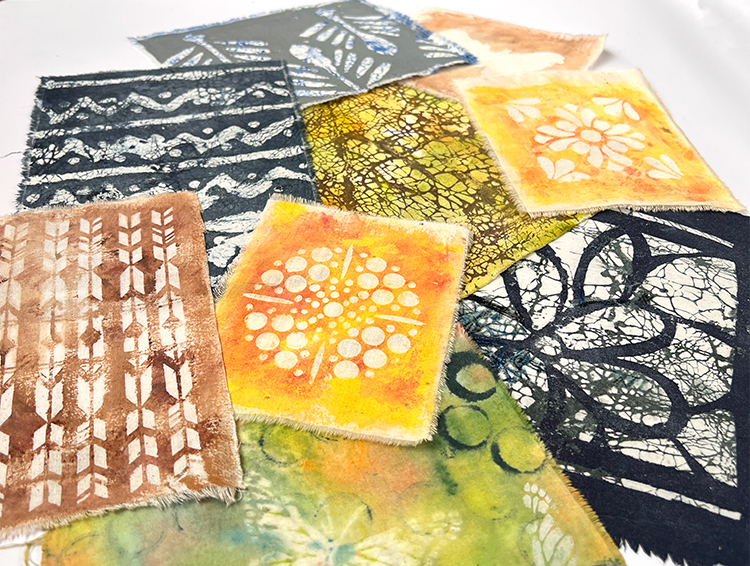
- Generic glue stick works as well as name brand as you can see in the two yellow samples below.
Here are my test batik art prints. I learned a lot while doing them.
The Paint
I prefer to use fabric paints for batik. It is specially formulated to stick to the cloth and dries leaving the cloth flexible. Paints need to be fairly liquid for this technique. No Puffy paint for batik. I used Fabric Creations by Plaid and Dye-Na-Flow by Jacquard for these tutorials. They have a wide variety of colors available and can be mixed to create other colors. Make sure you shake the bottles thoroughly before using. Allow the paints to dry as recommended by the manufacturer. That could mean 24 to 72 hours. Just do it! And heat set the paints following manufacturer’s directions.
You can use watered-down acrylics or acrylics mixed with fabric medium, but the results can be hit or miss. Often the multiple rinses used in batik cause the acrylic colors to fade. That is not a good thing in batik art. You want to see the colors! You will find the flow and consistency that you like. If using acrylics, I suggest good quality professional grade paints like Golden Fluid Acrylics and Liquitex Soft Body Acrylic. These are fully pigmented and work well for batik. They are best when mixed with fabric medium according to the manufacturer’s guidelines.
The Glue
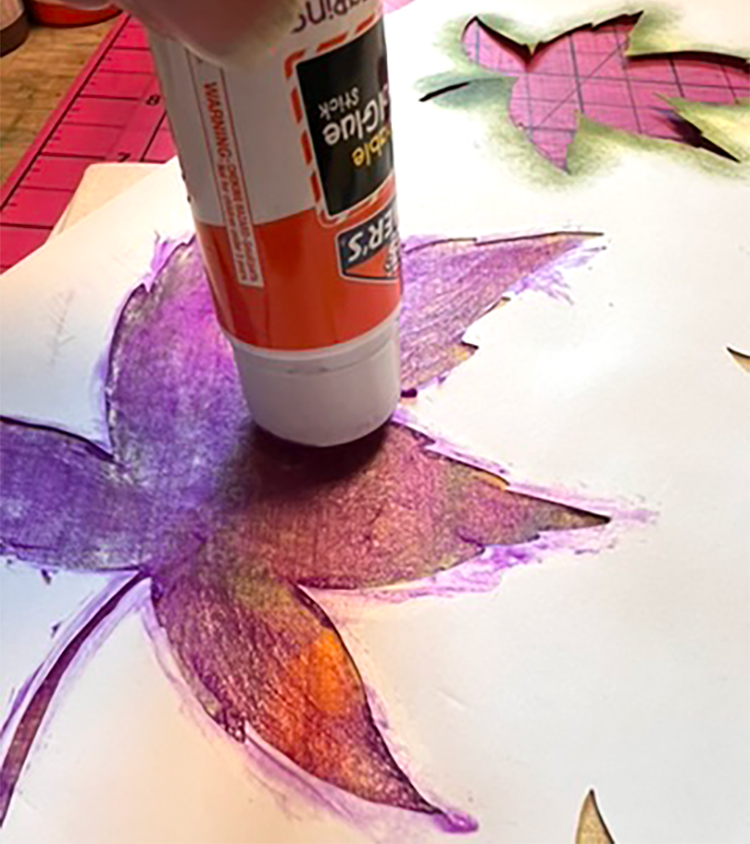
The glue used for the resist must be washable! For my experiments, I used Elmer’s Washable Glue Stick, a generic Glue Stick, and Elmer’s Washable Clear School Glue. The Glue Sticks are purple when applied, but dry clear. This really helps you see where you have missed a spot and to know when the glue is dry. The glue must penetrate the fabric completely. If the glue resist does not penetrate the fabric fully, the thin paint can cause uneven spots or splotches to appear underneath the resist. The nature of batik allows for this to happen, but you can reduce the number by making sure that the glue went all the way through the fabric and is fully dried.
The Brushes
Soft, firm synthetic brushes work best for batik art. Flat, round, and stencil brushes are my go to for this technique. They move well across the fabric without damaging it. You can also use sponge brushes for many of the steps. I use old stencil brushes to make sure the glue is in place and penetrates the textiles.
Crackle Batik Art Tutorial
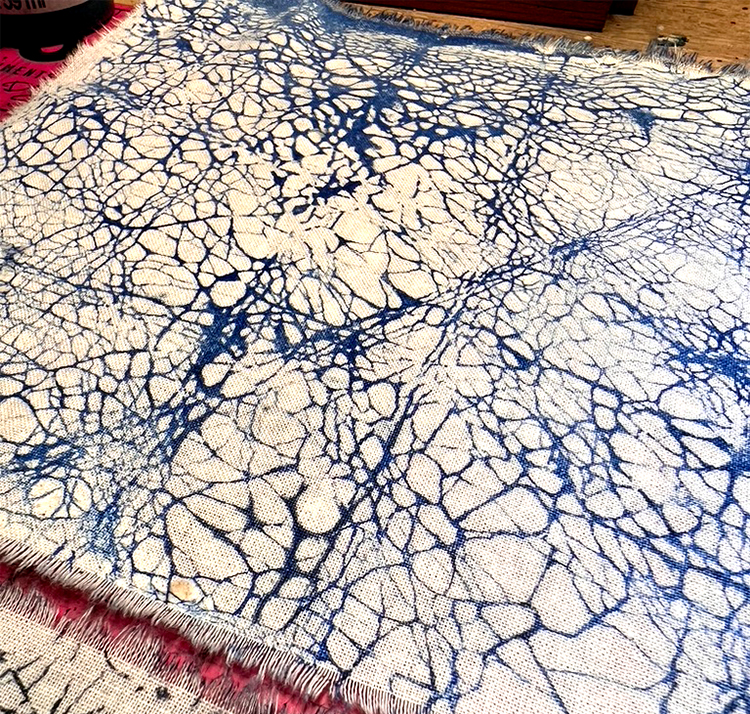
I like to begin with this one because it is my favorite batik method and it just plain fun to do. I love the tiny cracks running randomly across the fabric. I also use my crackle fabrics as a background for other patterns with the Other Resist Techniques shown below.
Supplies
Fabric – washed and ironed
1/4 Cup flour (white flour works best)
1/4 Cup cold water
Old credit card
Sponge or Artist Brush
Fabric Paint or Dye (no Puffy paint) in dark color
Container with water for removing flour mix
Iron
- Protect surface with plastic or cardboard. I use old cereal boxes cut to size.
- Cut fabric according to your design. I used 6″ to 10″ squares of 100% cotton fabric to practice.
- Mix flour and water in bowl until smooth. It makes a paste. You might need to add a few more drops of water to reach the consistency you like. For finer cracking make the mixture more watery. For large cracks make the mixture stiffer. Play with this part to see what you like and what works with your design ideas.
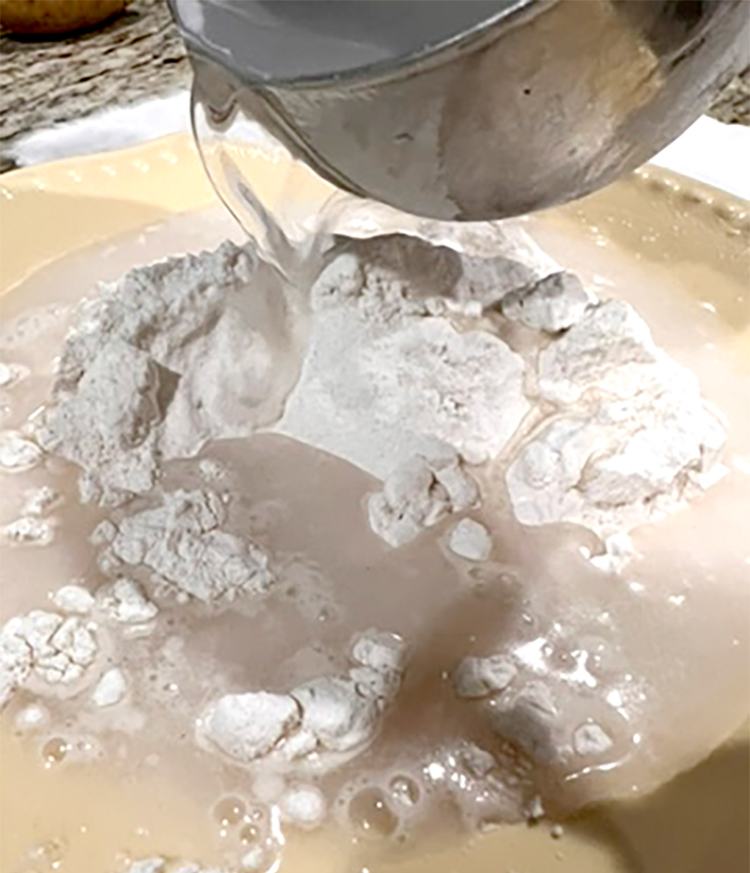
- Pour a puddle of flour mixture in center of fabric.
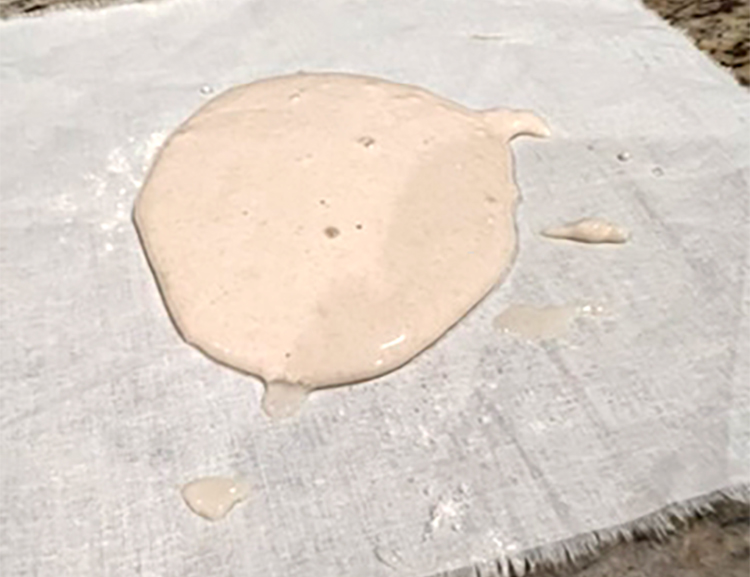
- Spread toward edges with the credit card.
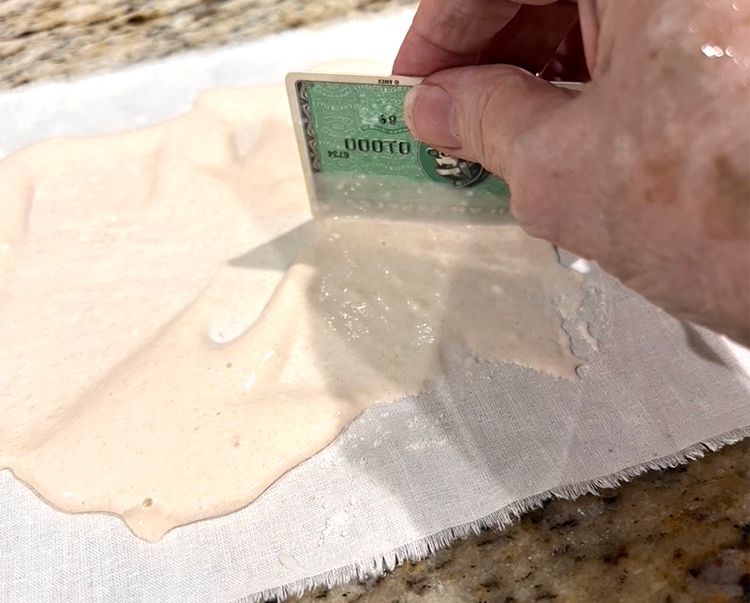
- Allow to dry completely. It will turn a brownish beige color.
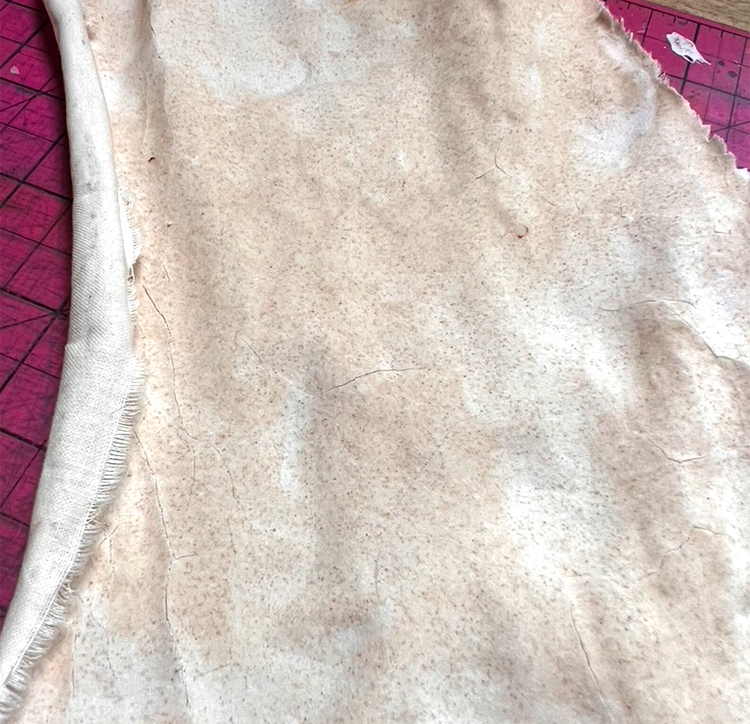
- Once fully dry, roll, crumple and crease the fabric. The more you do this, the more cracking you will get. But be careful not to go too far or the flour mix will start to fall off the fabric.
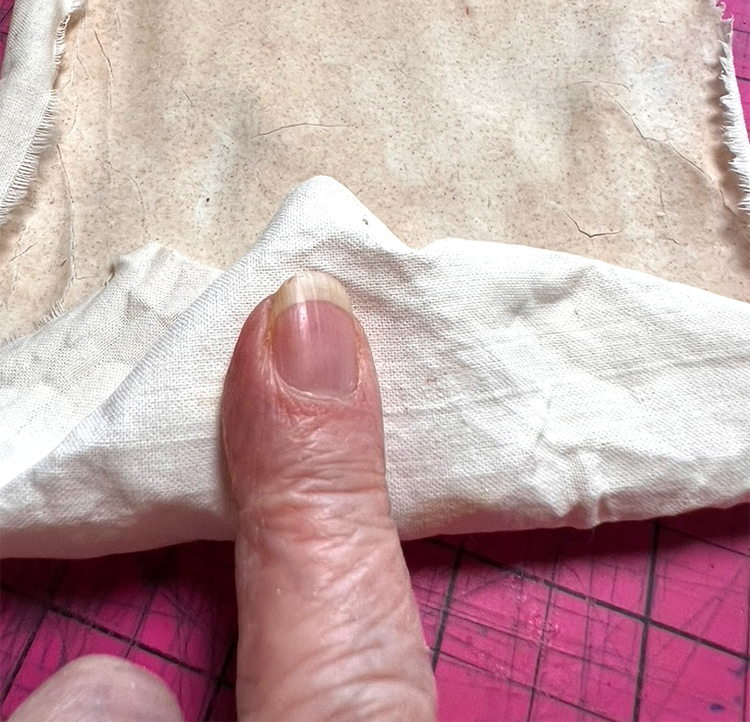
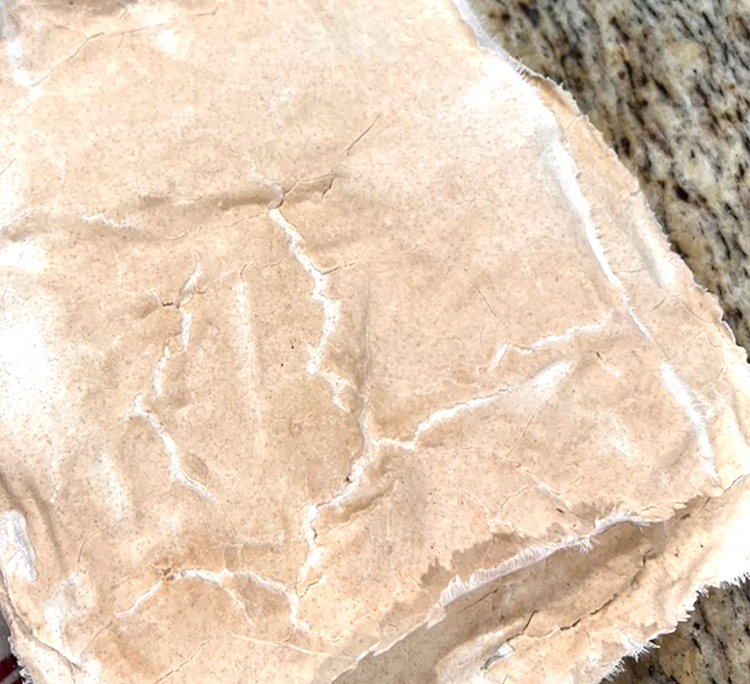
- Here is an example of fine cracks with thicker paste.
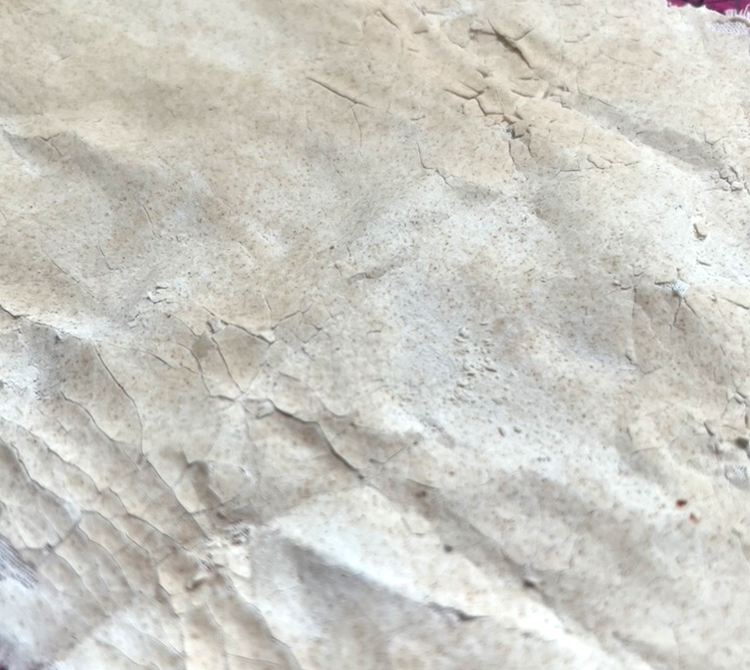
- Here is an example of fine cracks with thinner paste.
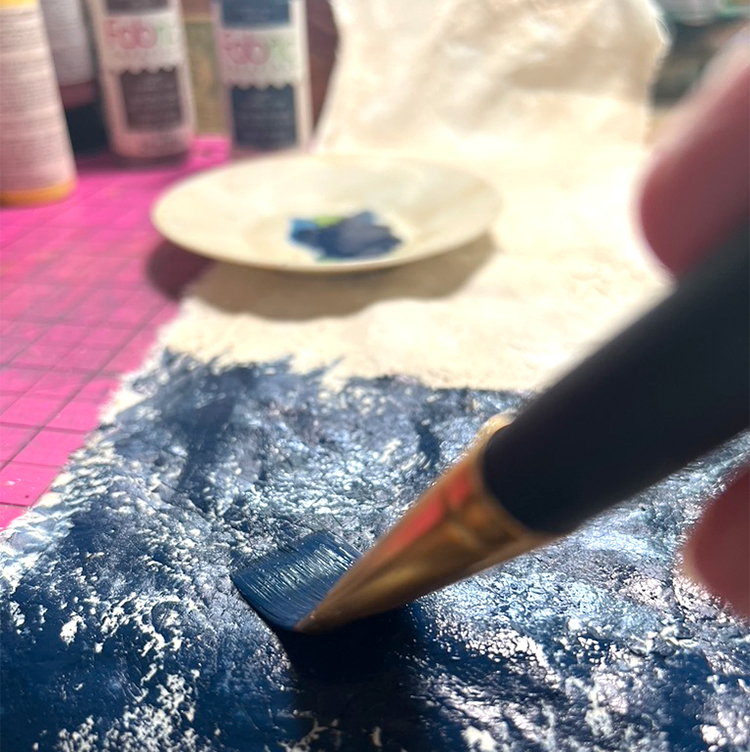
- Lay the fabric flat. Brush fabric paint or dye over the entire surface. The paint will seep into the cracks. Check the back often to make sure the paint is getting into the cracks. If it is not going into the cracks, you may need to thin the paint with just a few drops of water. Too thin and it will cover the entire cloth with big splotches of paint. Allow to dry.
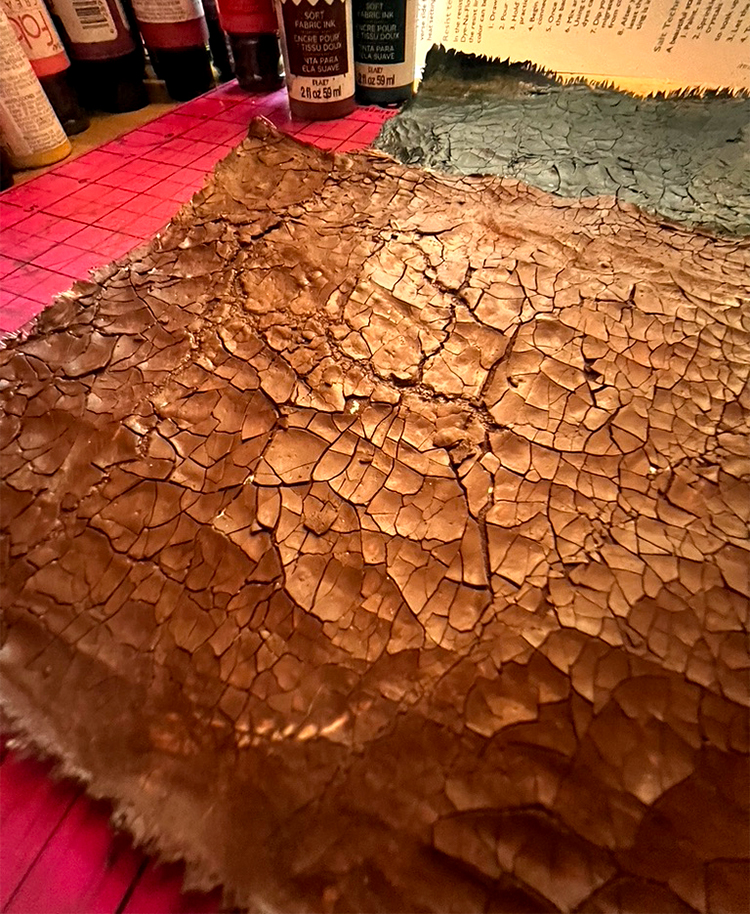
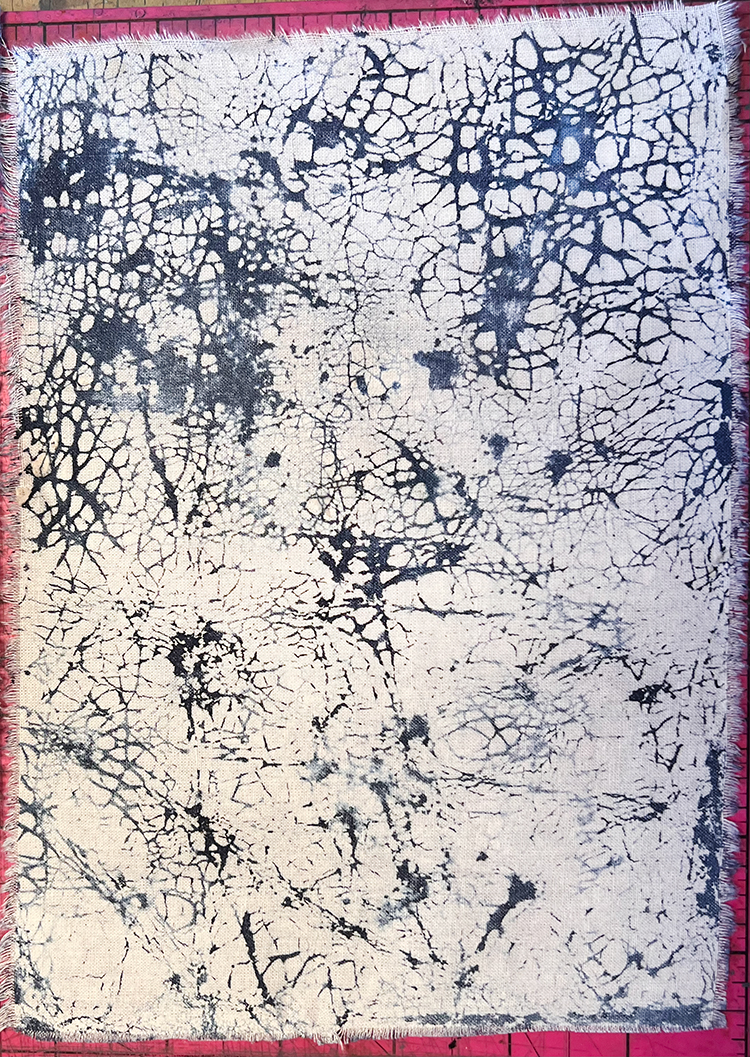
 Below is the completely paint covered cloth when dry. It kind of looks like old, worn leather.
- Place fabric in basin of cool water for a few minutes. The flour mixture will begin to soften and lift. Rub gently until all paste is removed. Rinse a final time.
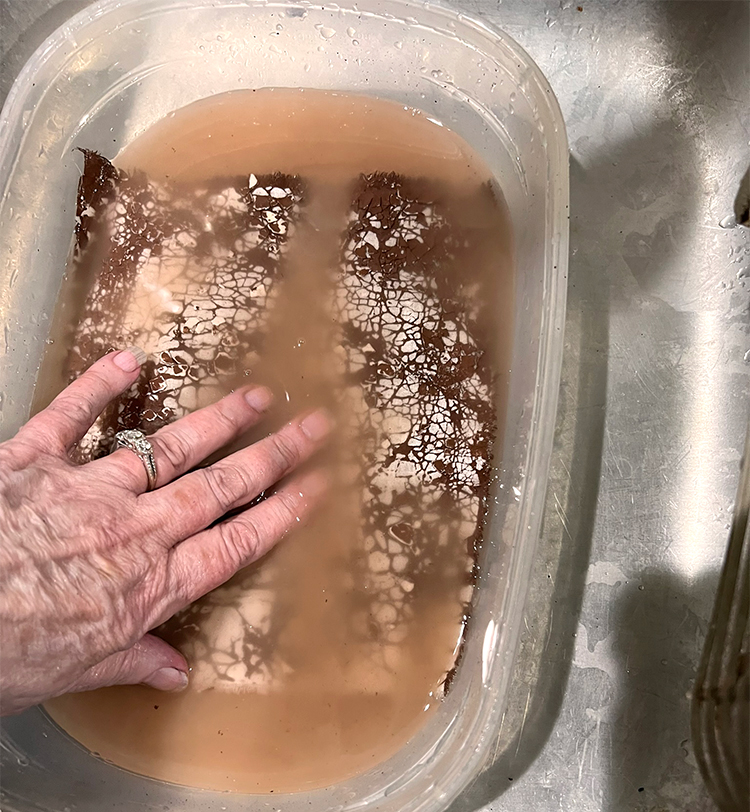
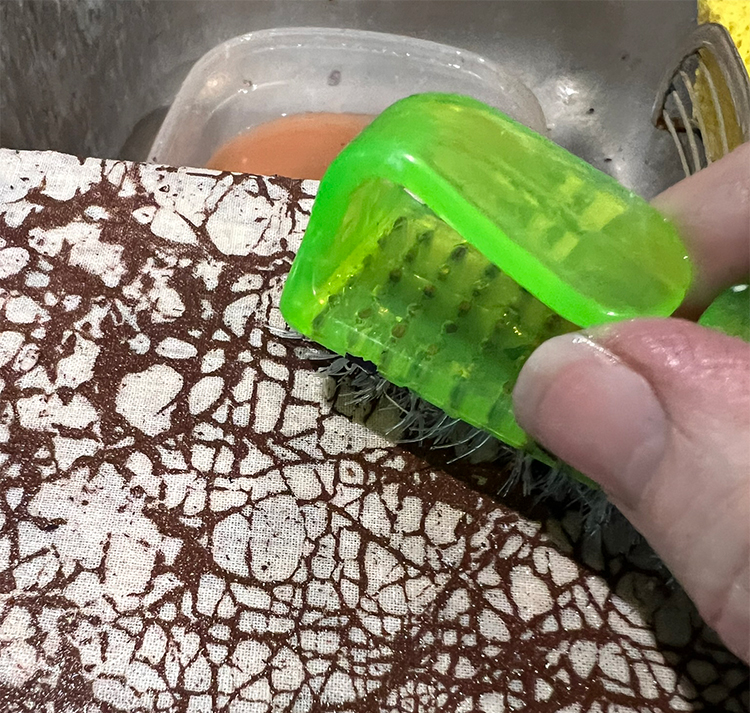
- If there are any stubborn spots of flour paste on fabric, use a nail brush to scrub them off.
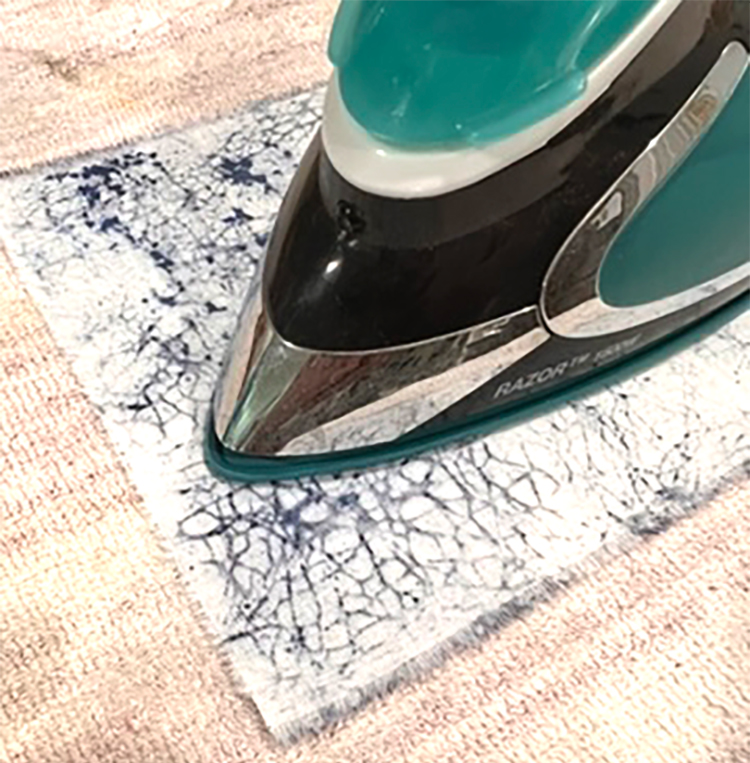
- Iron the fabric on the back side using a pressing cloth. (The photo below shows ironing without a pressing cloth.) If there is any flour mix left on the fabric it can stick to your iron. Be careful.
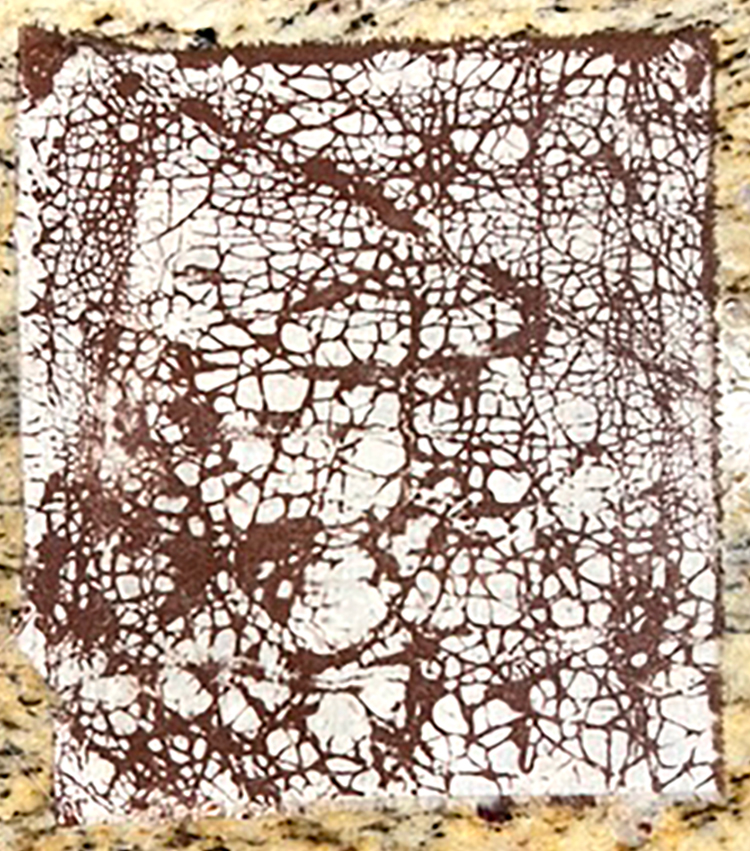
- Enjoy your beautiful creation!!
No Wax Resist Batik Art with Glue Stick Tutorial
This is the heart and soul of the batik process. Areas where the glue is applied will become the pattern as they resist the paint/dye and the color underneath will show through the top layers. Our design for learning purposes has a white background. We use a simple stencil for our design. You can cut your own stencil, of course.
Supplies
- Fabric – washed and ironed
- Glue Stick
- Old Stencil Brush
- Sponge or Artist Brush
- Fabric Paint or Dye in desired colors
- Stencils
- Tape
- Container with water for removing glue
- Iron
- Decide on a design and the tools you will use. TIP: Plan your design first to decide how much fabric you need.
- Protect surface. This is a messy technique.
- Cut fabric according to your designs. I used 6″ squares of 100% cotton fabric. Tape larger pieces of fabric in place on a flat substrate. I use old cereal boxes.
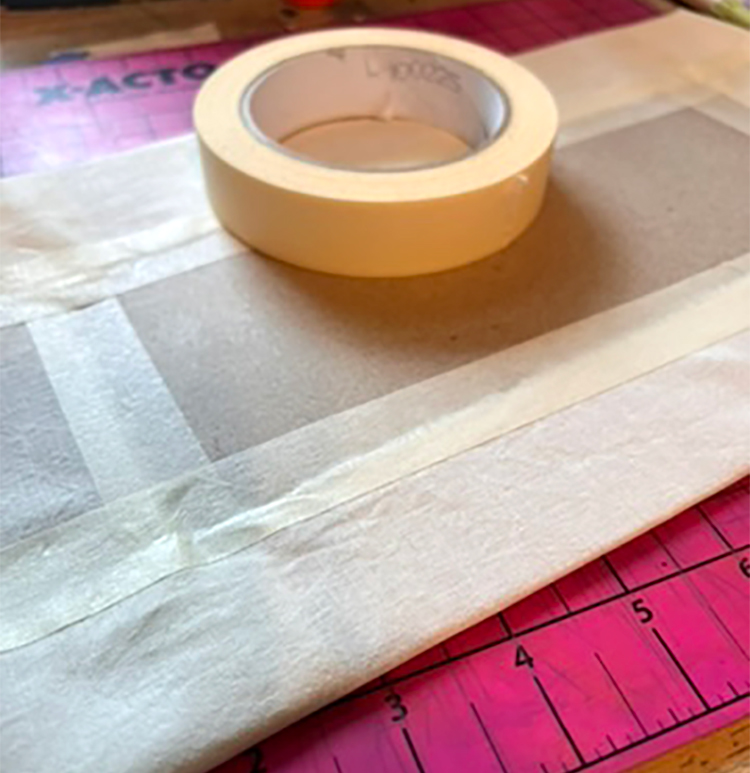
- Place the stencil into position on the fabric. Tape in place if desired. Rub the glue stick inside the stencil openings being careful not to push it under the edges. TIP: I use a slightly damp stencil brush to move the glue into corners and tight spaces. Cover all areas thoroughly. Take your time and make sure you have penetrated the fabric to the back side.
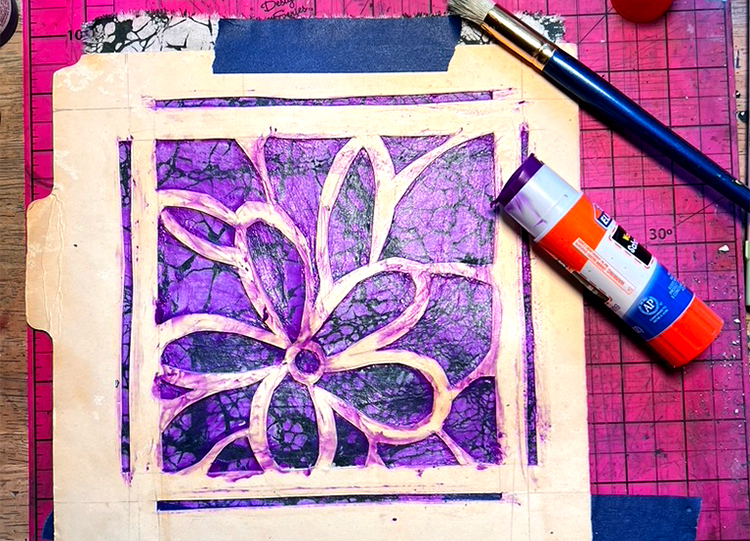
- Remove stencil. Set the fabric aside to dry. This can take several hours or overnight depending on how much glue you applied. Wait until the purple color has turned clear! If you rush this step, the resist will not be solid.
- Once fully dry, apply the chosen fabric paint colors over the glue resist and surrounding areas as we did in the crackle technique. Move quickly and do not rub too much. If your paint is very liquid, the glue can begin to open. Set aside to dry according to manufacturer’s directions. Do not rush this step or colors will fade. Make other pieces while you wait.
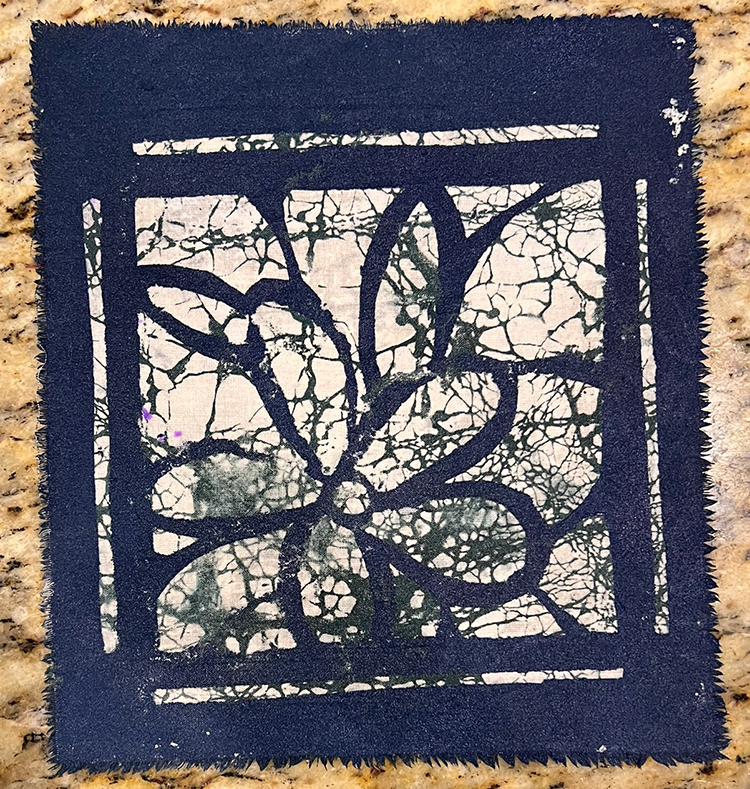
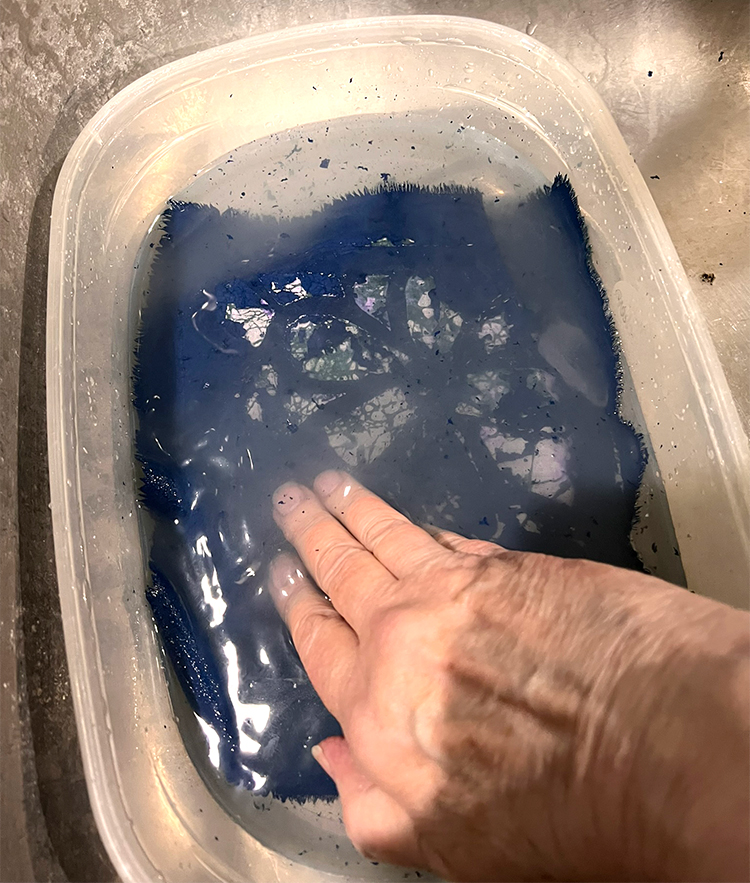
- Once dry as recommended, place fabric in basin of cool water for a few minutes. The glue will begin to re-liquify and lift. Rub gently until all glue is removed and fabric does not feel sticky. Rinse a final time.
- Iron the fabric on the back side using a pressing cloth. If there is any glue left on the fabric it can stick to your iron. Be careful!
- Enjoy your beautiful creation!!
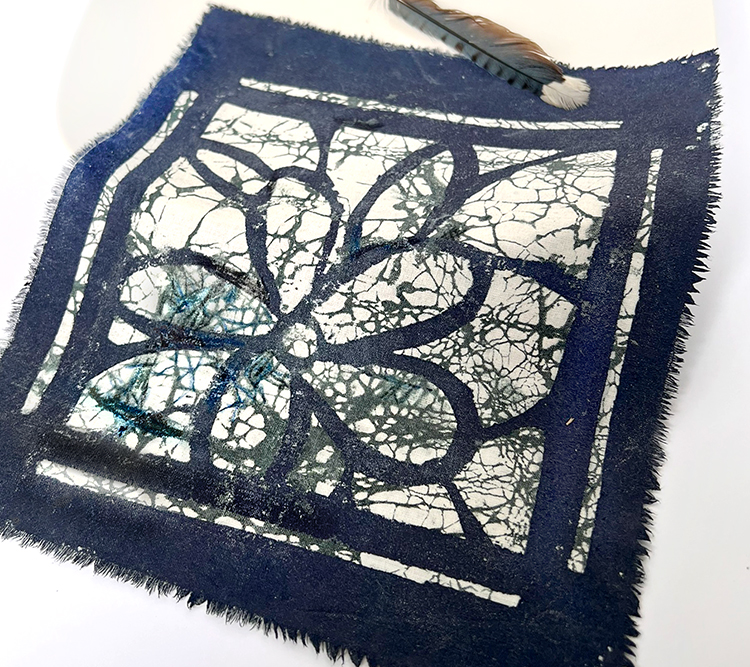
No Wax Resist Batik Art with School Glue Tutorial
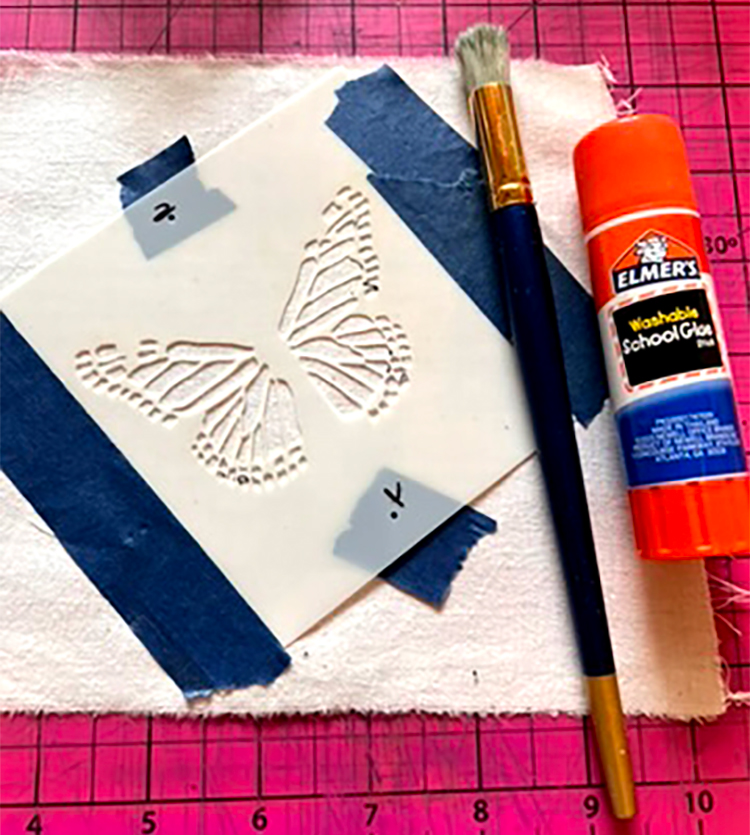
Another method for creating a resist. Areas where the school glue is applied will become the pattern as they resist the paint/dye and the color underneath will show through the top layers. Our design for learning purposes has a white background. We use a simple butterfly shape stencil for our design. You can cut your own stencil, of course.
Supplies
- Fabric – washed and ironed
- Clear Washable School Glue
- Old Stencil Brush
- Sponge or Artist Brush
- Fabric Paint or Dye in desired colors
- Butterfly shape Stencil
- Container with water for removing glue
- Iron
- Decide on a design and the tools you will use.
- Protect surface. This is a messy technique.
- Cut fabric according to your designs. I used 6″ square of 100% cotton fabric. Tape larger pieces in place on a flat substrate. I use old cereal boxes.
- Place the stencil into position on the fabric. Tape in place if desired.Squeeze the glue inside the stencil openings being careful not to push it under the edges.
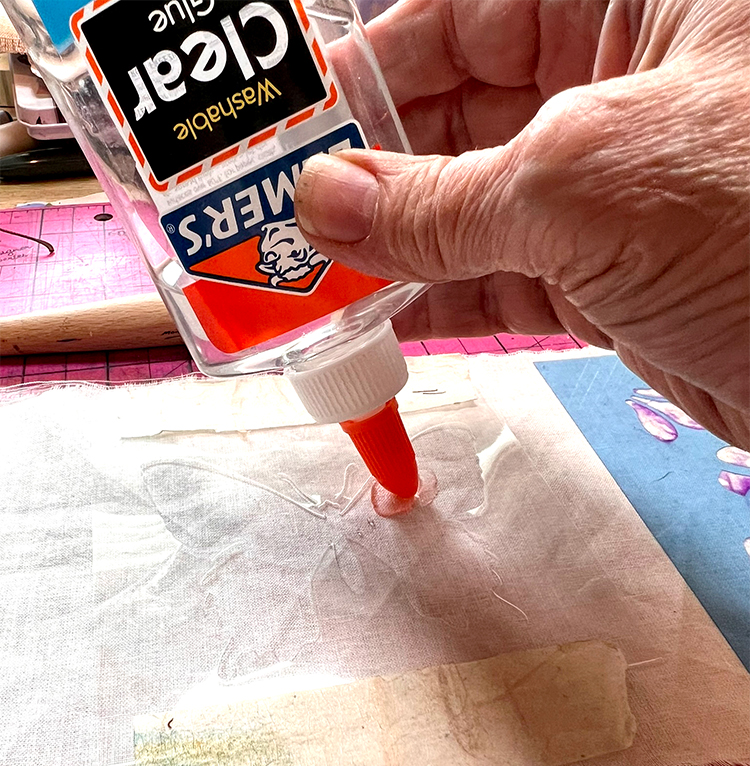 TIP: I use a stencil brush to move the glue into corners and tight spaces. Cover all areas thoroughly. Take your time and make sure you have penetrated the fabric to the back side.
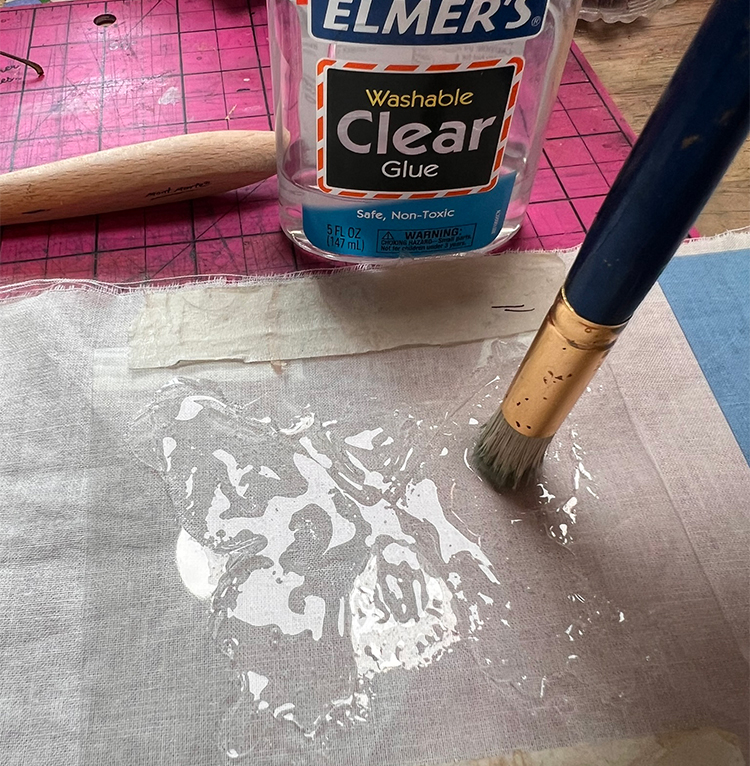
- Set aside to dry. This can take several hours or overnight depending on how much glue you applied. Wait until the purple color has turned clear! If you rush this step, the resist will not be solid.
- Once fully dry, apply the chosen fabric paint color(s) over the glue resist and surrounding areas. Move quickly and do not rub too much. If your paint is very liquid, the glue can begin to open. Set aside to dry according to manufacturer’s directions. Do not rush this step or colors will fade. Make other pieces while you wait.
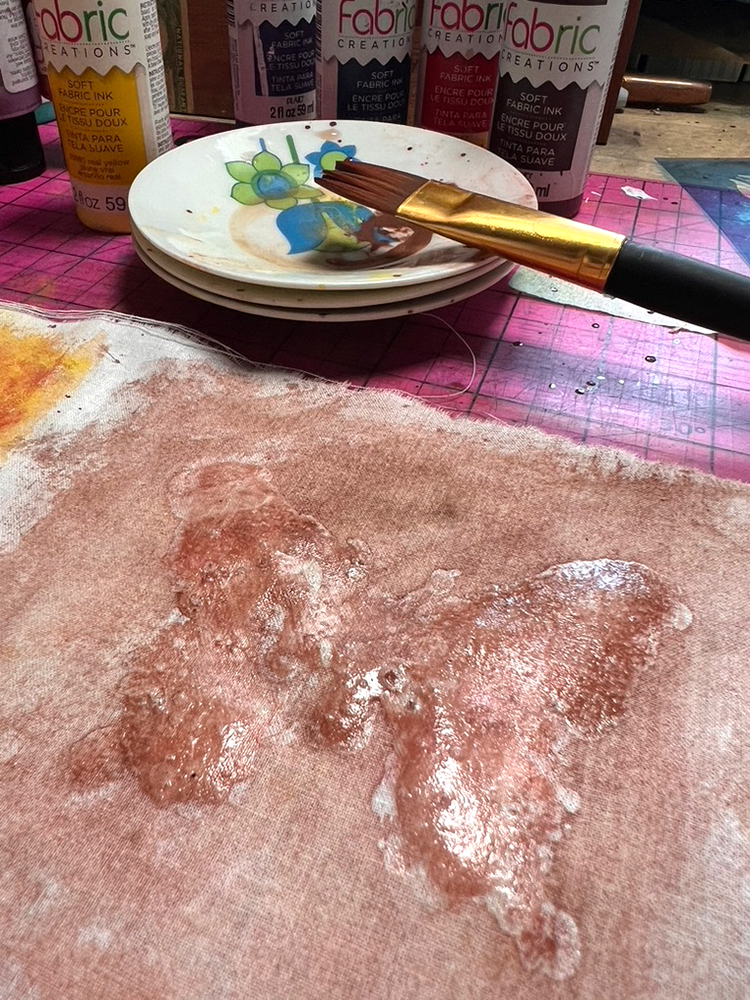
- Once dry as recommended, place fabric in basin of cool water for a few minutes. The glue will begin to re-liquify and lift. Rub gently until all glue is removed and fabric does not feel sticky. Rinse a final time. It is really sticky and needs several rinses to remove all the glue.
- Iron the fabric on the back side using a pressing cloth. If there is any glue left on the fabric it can stick to your iron. Be careful!
- Enjoy your beautiful creation!!
Other Batik Art Ideas
Stencil over Crackle Batik
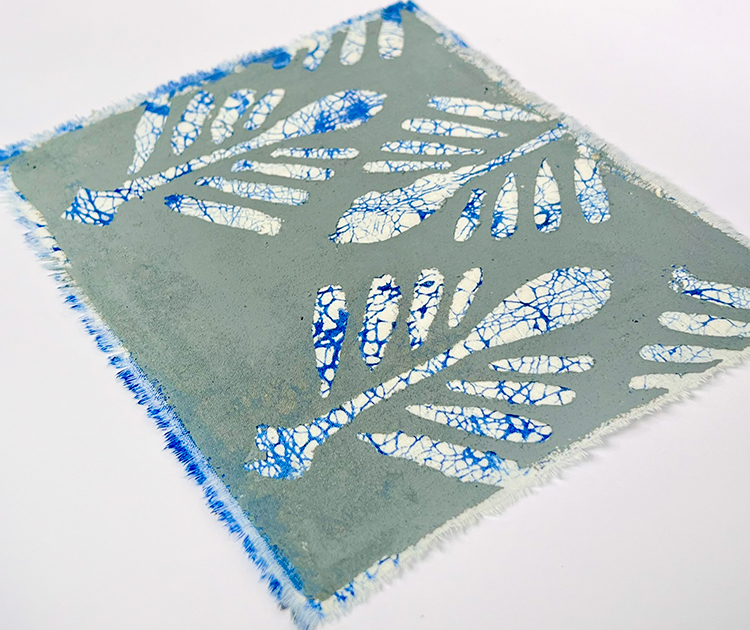
I used a palm leaf stencil for this one and used the glue stick resist method. After glue dried for several hours, I used gray Fabric Creations paint to stencil over the glue resist. It was allowed to dry overnight and the paint removed as directed above.
Hand Drawn Design
For this sample, I used a navy blue crackle batik art piece as the background fabric.
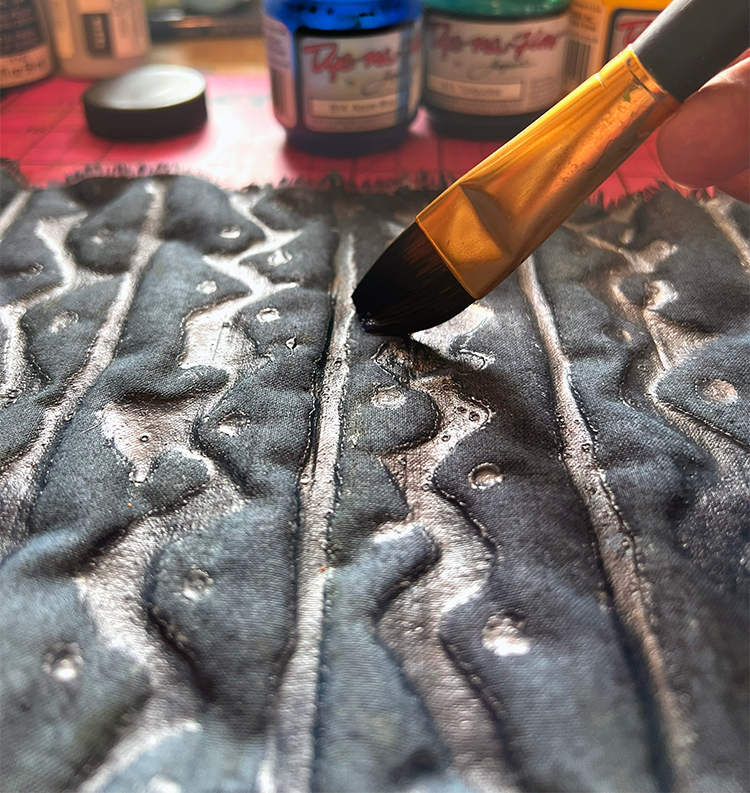
I drew my design with Clear School Glue, straight from the bottle. You can see the nuances of the pattern in the photo below. The glue has a way of moving in unexpected ways. So be open to the process. Once dry, I used gray mixed with blue Dye-Na-Flow paint over the entire surface.
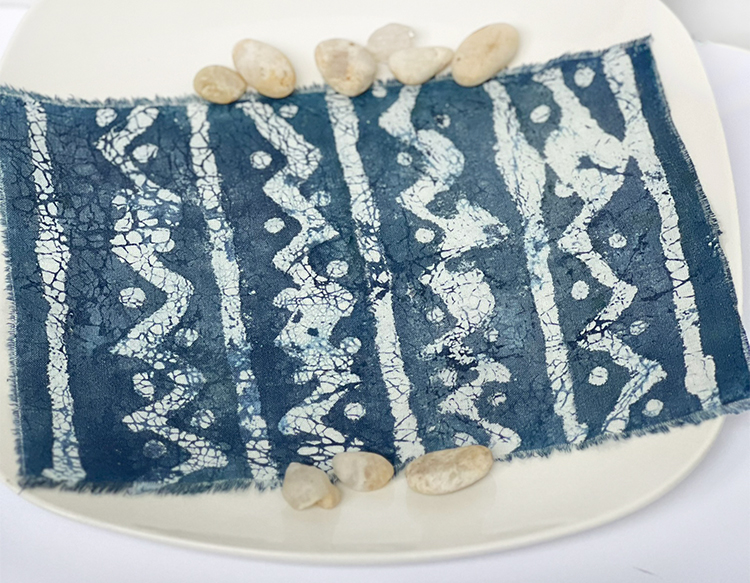
 I let the paint dry overnight, and removed the paint as directed above. Here is the stunning result. This just makes me smile.
Stained Crackle
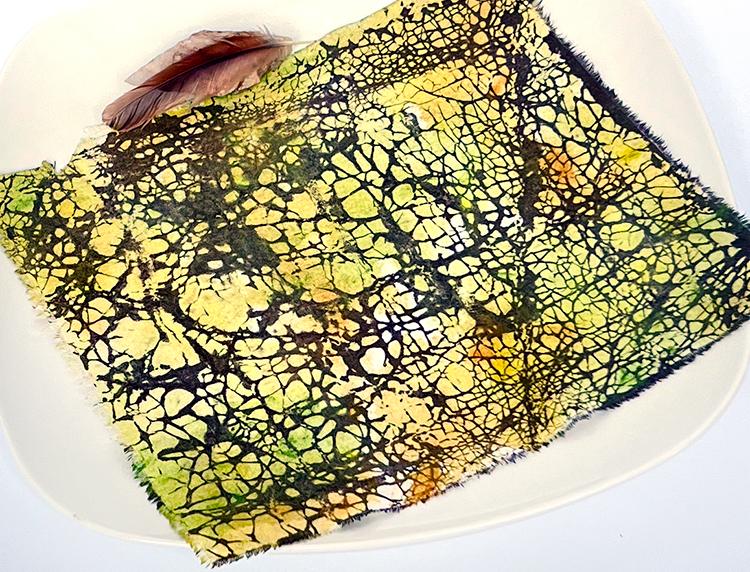
The crackle was done using the technique above. When dry and ironed, I applied washes of several colors of watered-down fabric paint over the brown crackle batik. It dried overnight and was heat set with an iron.
Distressed Stain Over Stencil
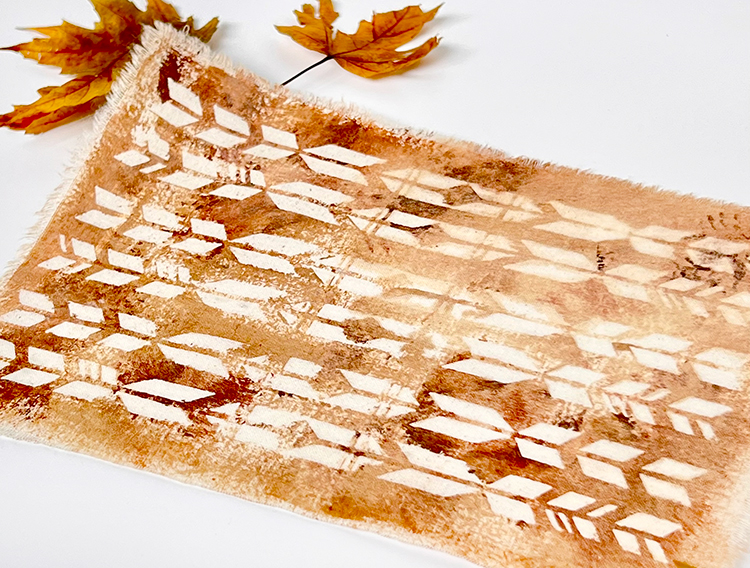
The arrow stencil resist was Clear School Glue applied with a stencil brush. After drying overnight, I applied watered-down brown fabric paint with a sponge leaving some areas lighter than others. I then applied a second coat in some areas to darken. It dried overnight and the resist was removed as in directions above and heat set with an iron.
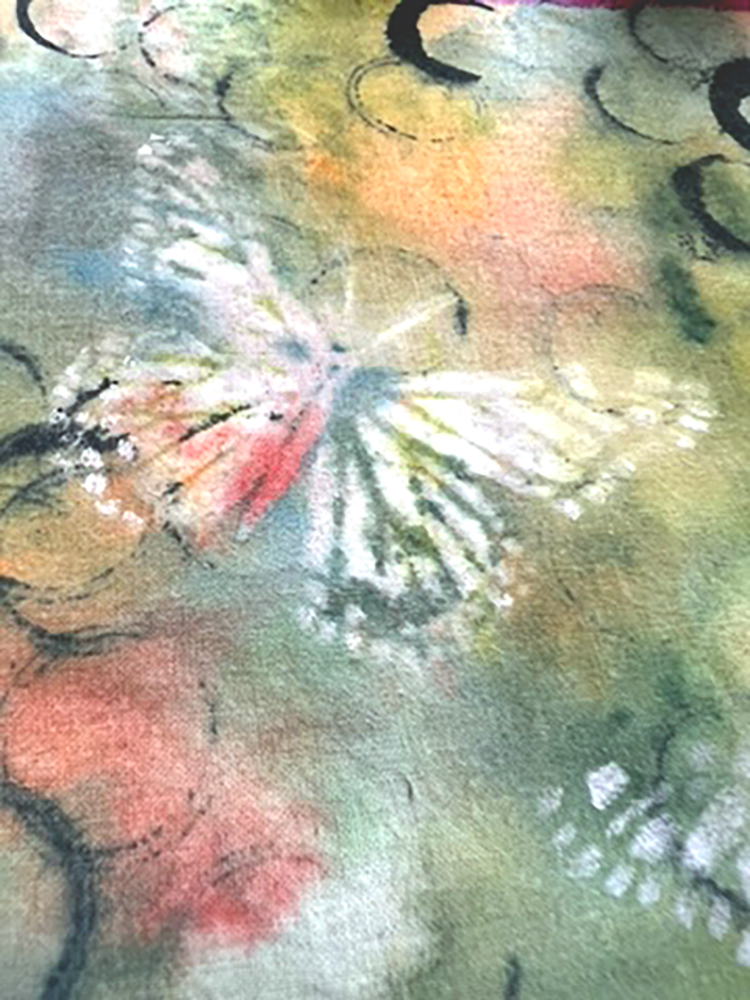
Layered Paint Over Stencil Butterfly
An intricate butterfly stencil was used with the glue stick resist method.
After glue dried for several hours and was clear (no purple left), I used several watered-down Fabric Creations paint colors to wash over the butterflies. I added some dark blue circles created with a bottle cap dipped in Dye-Na-Flow paint. When dry, I heat set it.
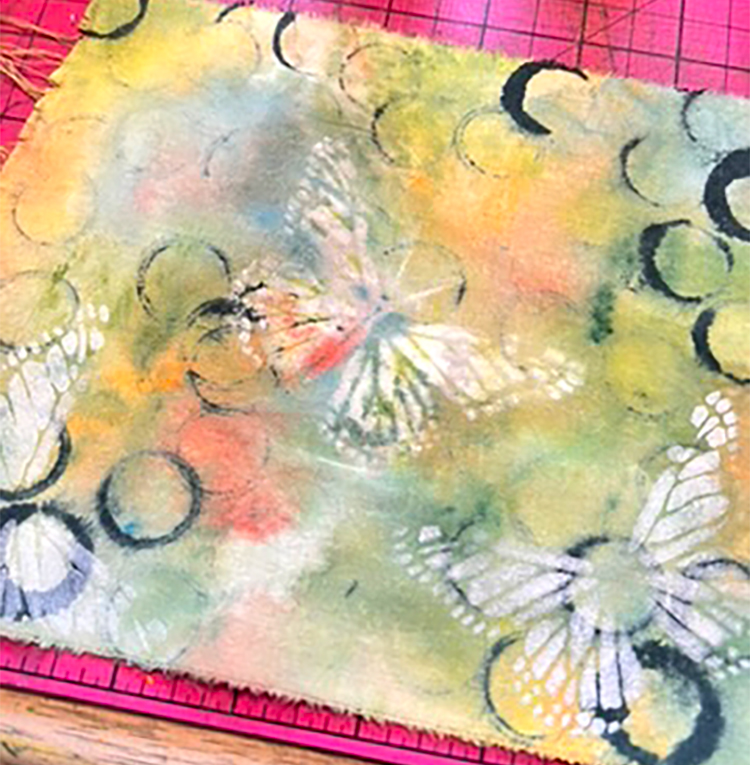
It was allowed to dry overnight and the resist was removed as above.
Multi-Layered Resist
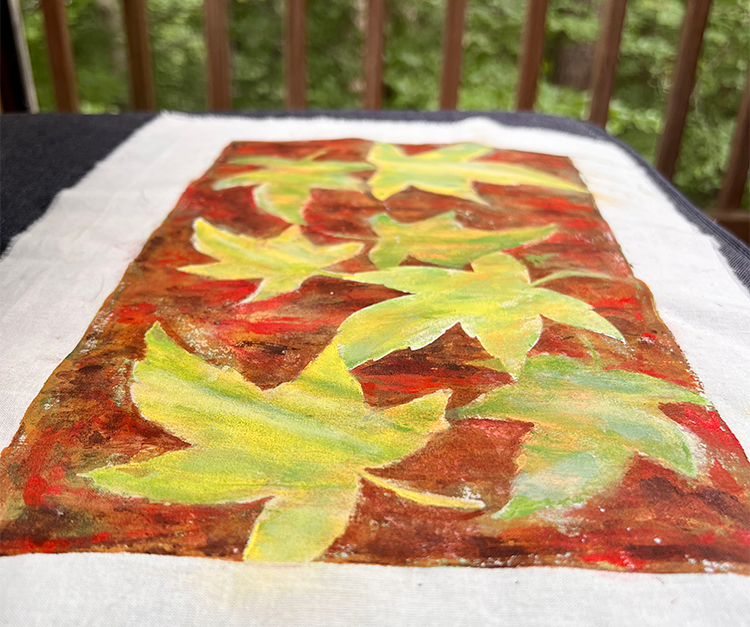
I used leaf stencils that I cut for this piece. I painted a layer of yellow, green, and orange acrylic paint over the white cloth. After drying to touch, I stenciled three leaves with Glue Stick. Allowed to dry. Then I painted another layer of darker green and orange over the entire surface. After drying, I applied 4 more leaves with Glue Stick resist. After it dried, I applied a final layer of orange yellow and brown fall colors over the entire surface. Allowed to dry overnight. The resist was removed as above and the final piece ironed to set the paint colors.
 The no was method of batik art on fabric is a fun and the results are spectacular. I will use these techniques for my art, mixed media, book and journal making, scrapbooking, and card making. I am sure there are many other ways to use batik in your art.
I hope you enjoyed learning how to create your own Easy No Wax Batik Art. I can’t wait to hear your thoughts on the process! When I am not creating for TGF, I also create Photoshop Elements tutorials and craft project videos over on The Graphics Fairy Premium Membership site. You can find even more of my books, art, and whimsical shenanigans on my website – The Bookery.
May joy be with you all,
Rebecca


Leave a Reply