Faux Leather Paper Technique
Hey there! It’s Heather from Thicketworks…here with an awesome Faux Leather Paper Technique. The basics of this technique have been around for awhile, but I have a twist I’d like to share with you. If you like making Faux Leather Crafts this paper technique is a great first step!
Supplies for the Faux Leather Paper Technique
To achieve this look, you’ll need the following:
- Kraft cardstock (I use Recollections 8 1/2″ x 11″ 65lb Kraft Cardstock from Michael’s)
- Glycerin from the drug store
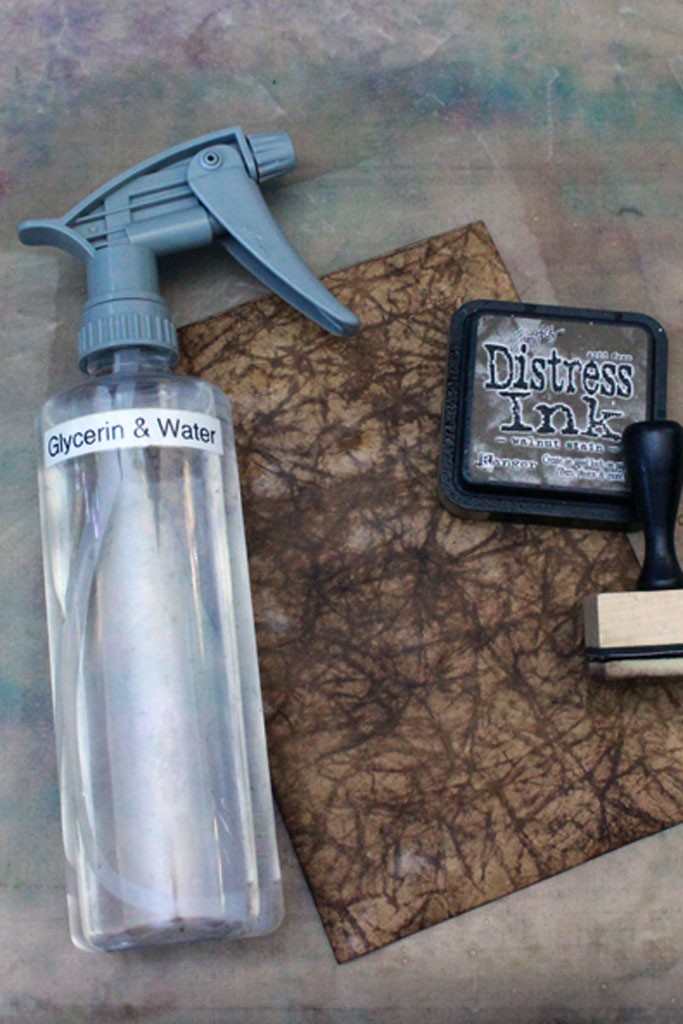
- Spray bottle of water (I add some Glycerin to mine)
- Old gift card or similar
- A Non-Stick Craft Sheet by Ranger, or similar impervious surface
- An iron
- Tim Holtz Distress Ink Pads. The colors used in this project are:
- Brown Leather Look: Vintage Photo
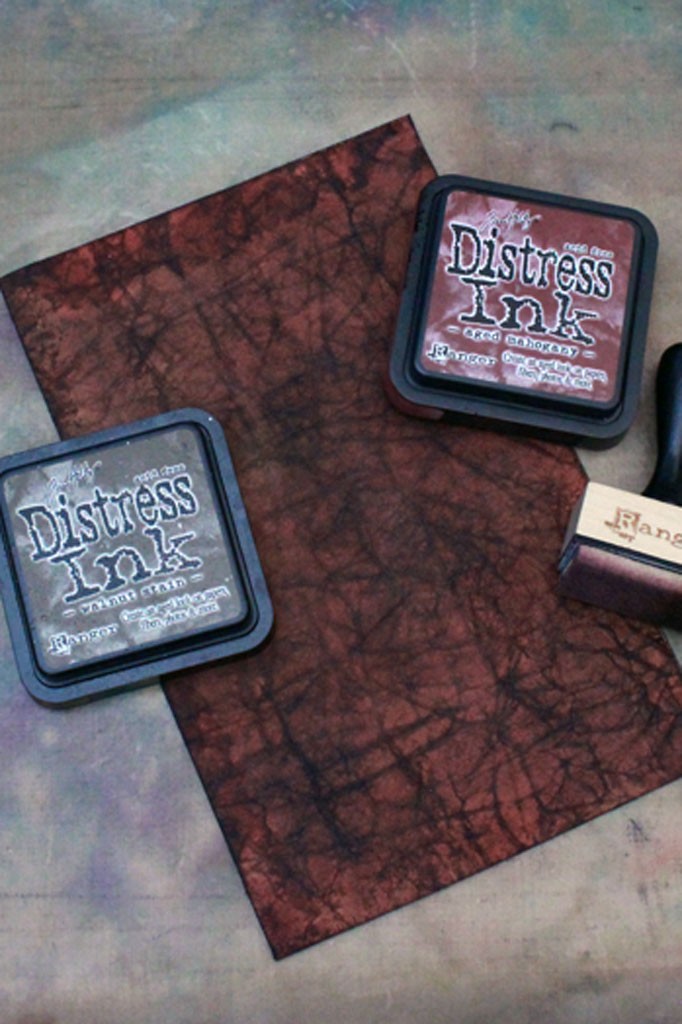
- Red Leather Look: Walnut Stain & Aged Mahogany
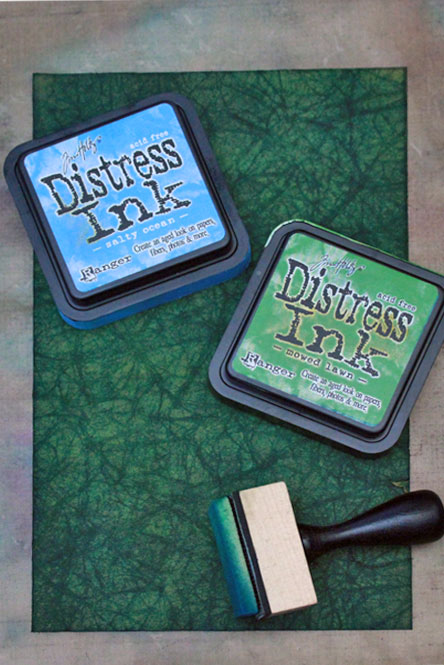
- Green Leather Look: Mowed Lawn & Salty Ocean
- A Ranger Inkssentials Ink Blending Tool, and 3 Blending Foam Pads
- Embossing Folder: Damask
- Red Leather Look: Inka Gold – Old Gold
- Green Leather Look: Inka Gold – GreenYellow
- Brown Leather Look: Inka Gold – Orange
- Optional: Rustoleum Ultra Cover Gloss Clear
Technique Instructions:
- The first step is to dampen your cardstock with water
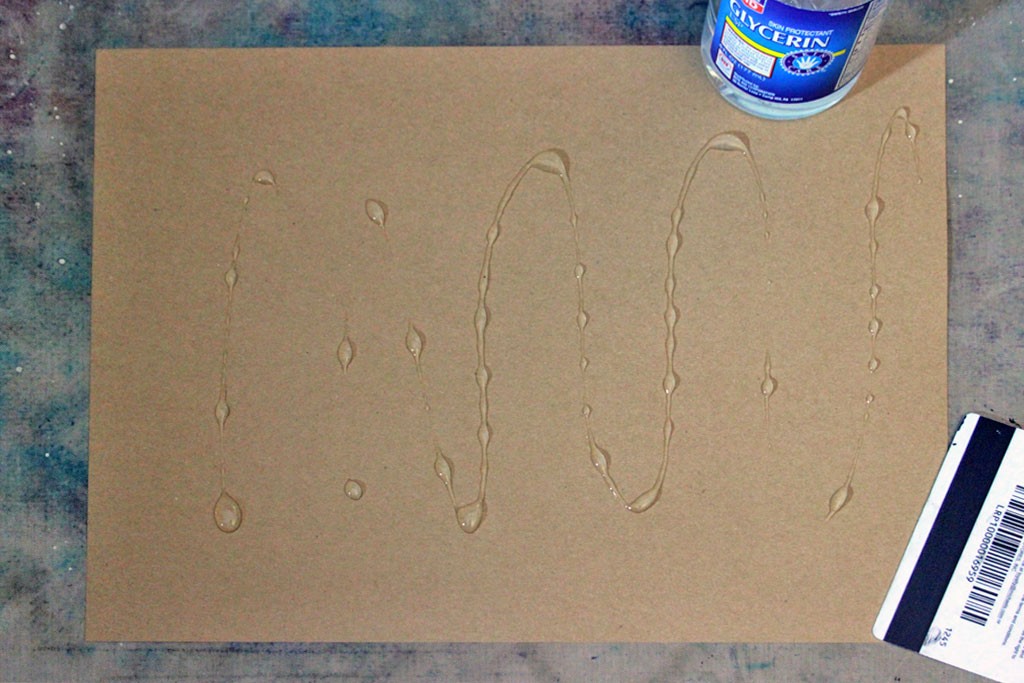
(I just use a spray bottle) - Pour a generous amount of Glycerin onto the surface of the damp paper
- Swipe the Glycerin across the surface with your gift-card, making sure the entire surface is coated.
- Repeat these steps on the other side of the paper
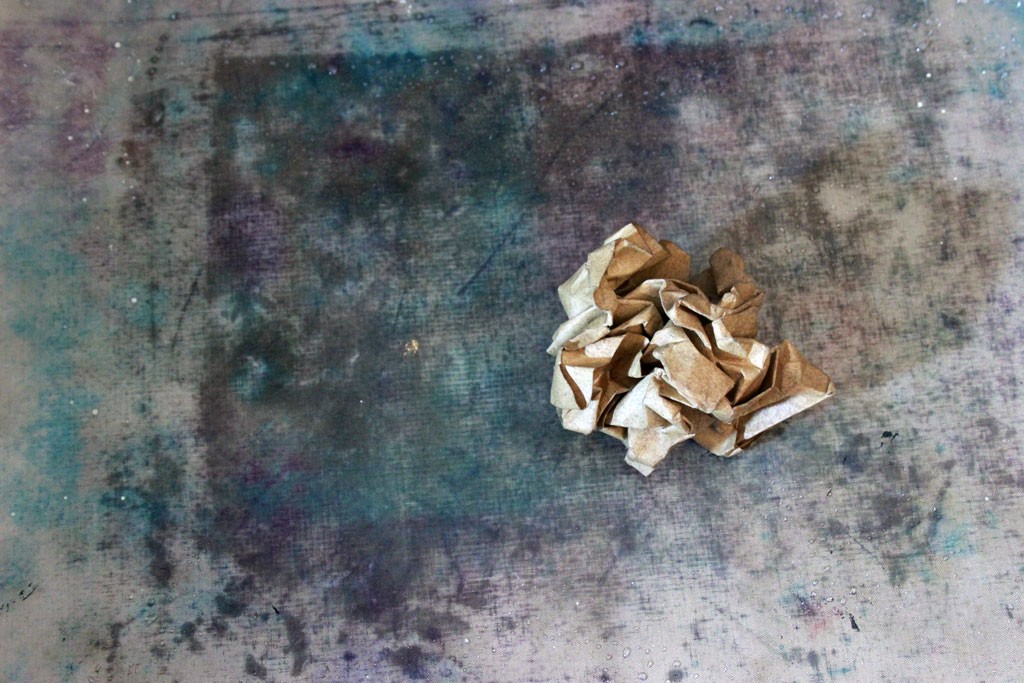
5. Once the paper is thoroughly coated with Glycerin on both sides, carefully begin to crinkle it up.
6. When it feels fairly flexible, gently wad it up into a ball.
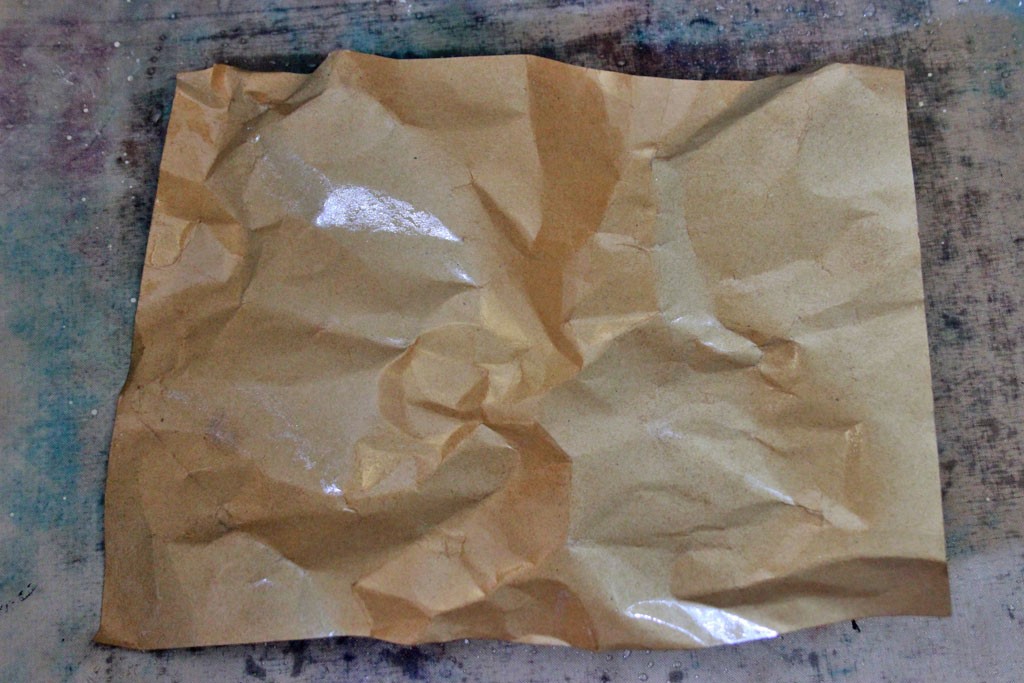
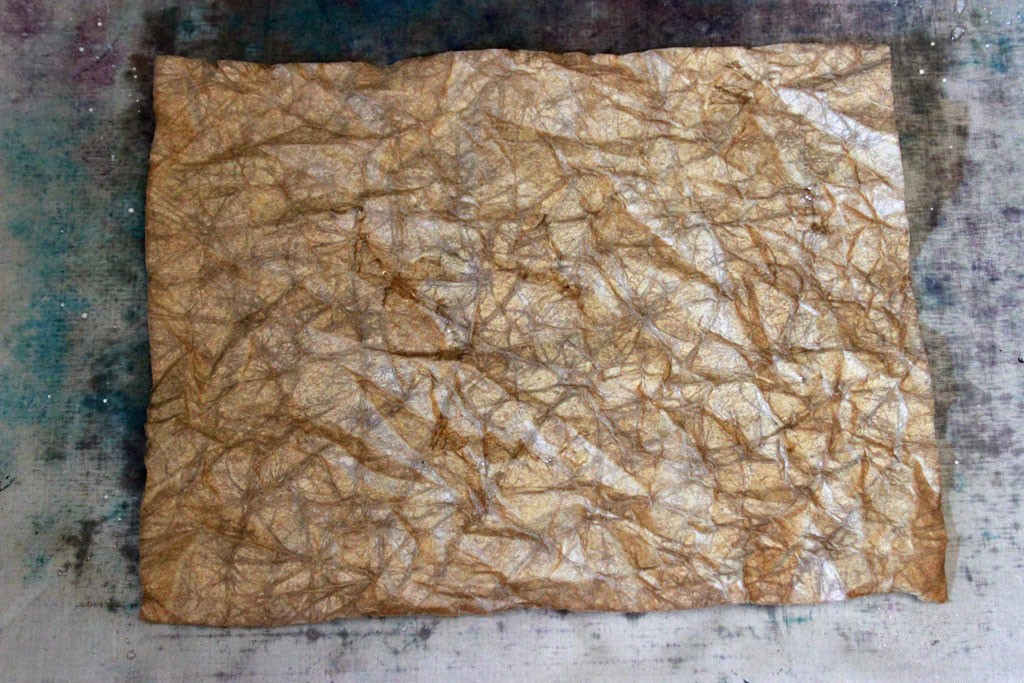
7. Repeat this process of wadding up, then gently smoothing out the paper several times, until the creasing looks something like this:
8. When you’re satisfied that you’ve abused the poor thing enough, smooth it out one more time, and gently fold it in half, creating a 5 1/2” x 8 1/2” ‘card’.
9. With your iron set to ‘no steam’, and on the ‘Wool’ setting, press the folded paper repeatedly until it’s dry and as smooth as it’s ever gonna get after all our crinkling…(when your iron cools down, make sure to wipe the surface with your favorite cleanser, or expect weird stains to appear when you iron the next time)
10. Now we’ll add some depth with Distress Inks. Load up your Blending Tool with ink and swirl it all over the surface of the paper.
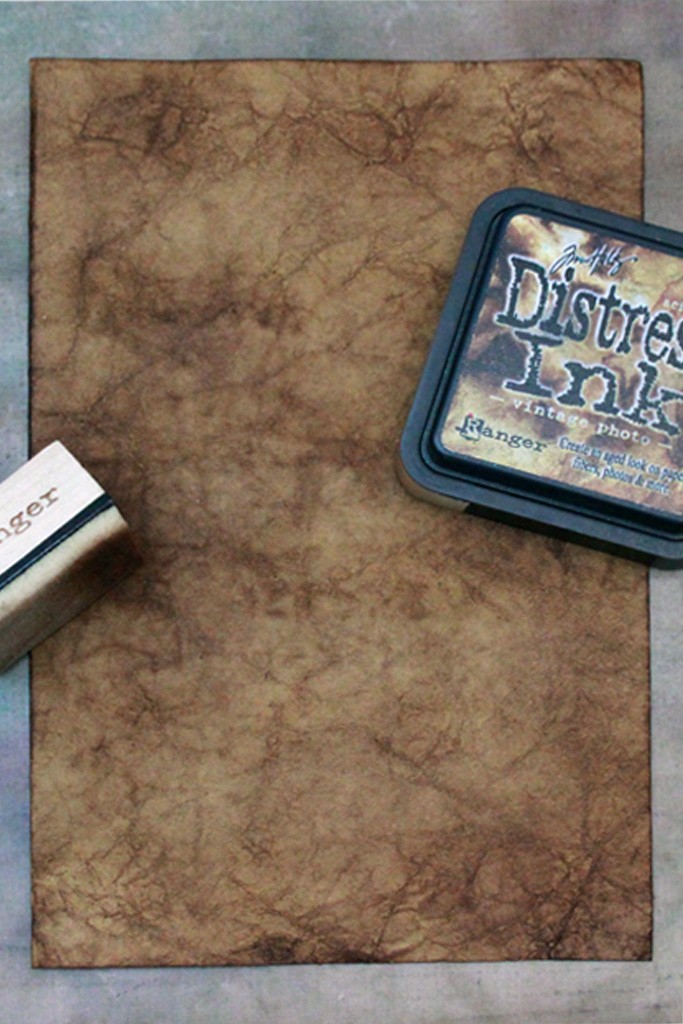
11. It will gather in the creases and you may think that it looks way too dark – don’t be alarmed. As the ink dries it will lighten in tone. If you still don’t like it, you can soften the look by spraying it with a light mist of water.
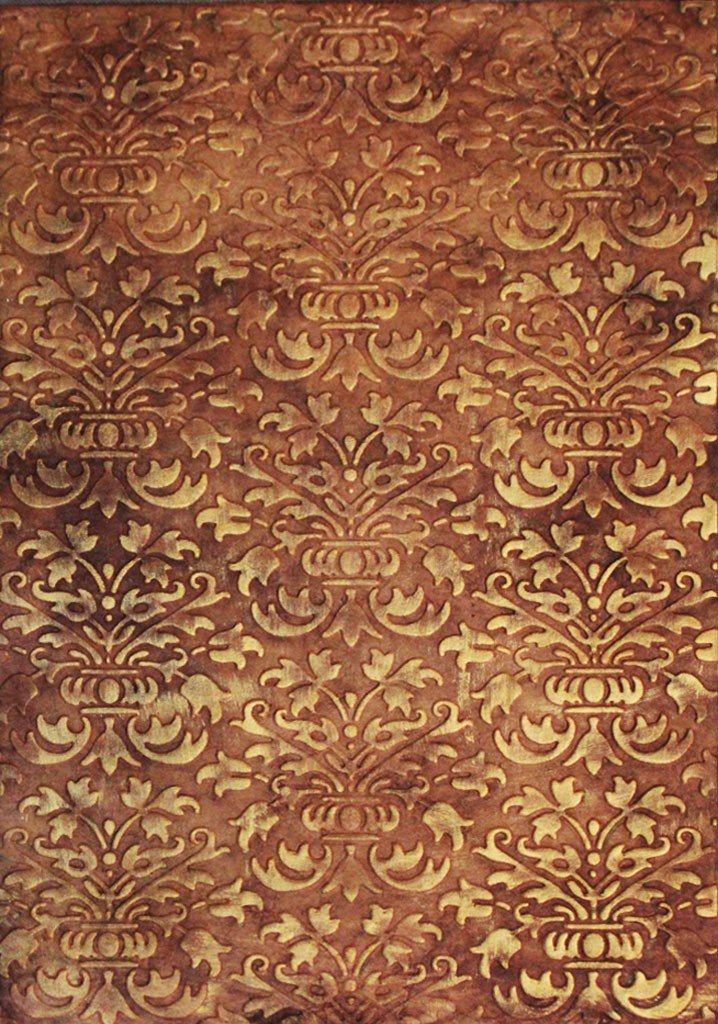
For a classic Brown Leather look, try using Vintage Photo:
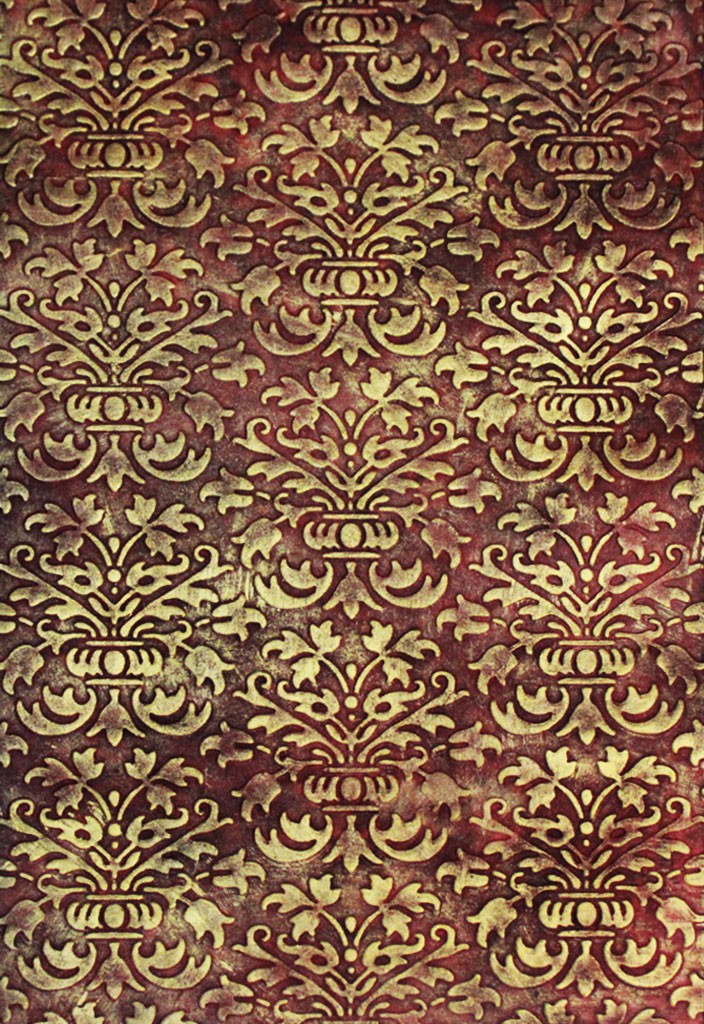
If you’d like to try the Red Leather Look, begin by swirling Walnut Stain Distress Ink over the entire surface of the crinkled Kraft, then follow it with Aged Mahogany.
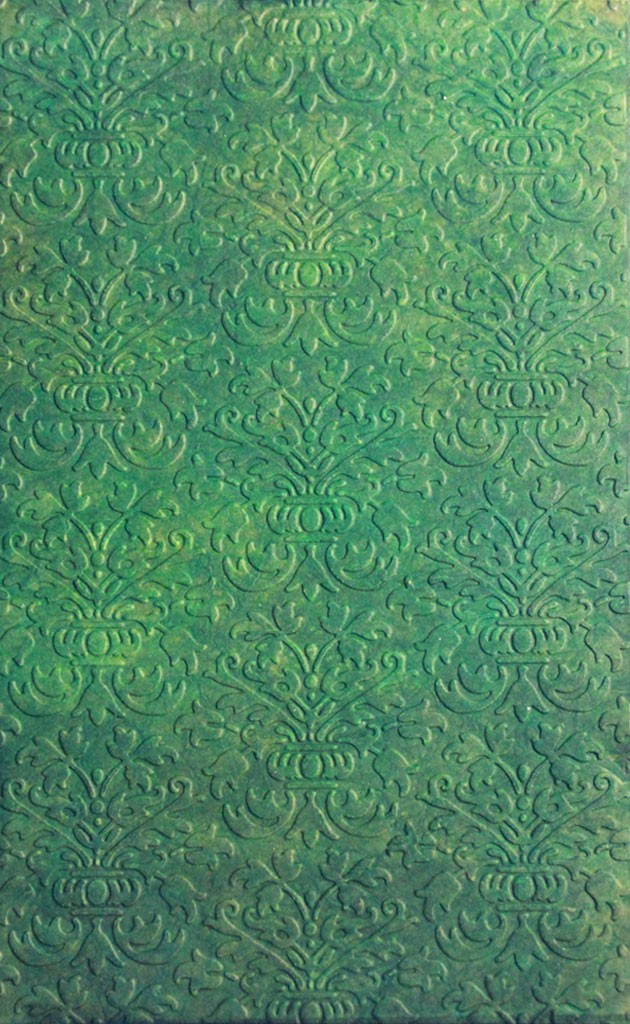
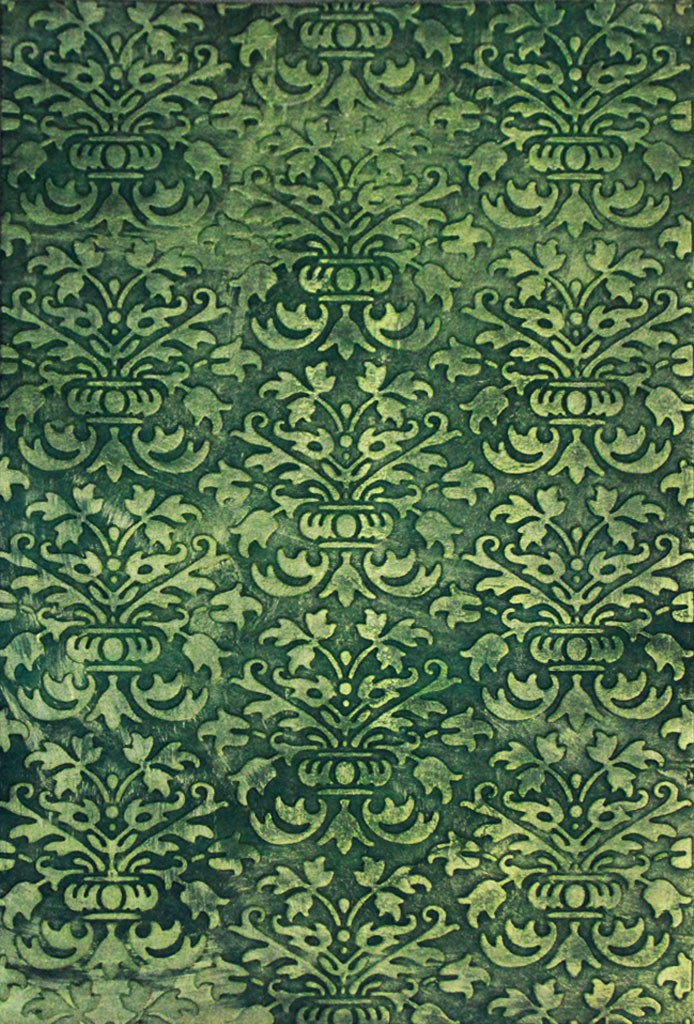
For the Green Leather Look, begin with Mowed Lawn Distress Ink, followed by Salty Ocean.
12. Iron your inked-up papers until they are almost, but not quite dry. Note: The paper will be ‘limp’ even when dry, due to the effect of the Glycerin. I can think of a ton of ways to use the Faux Leather, even without further tampering. BUT…if it’s possible to tamper, tamper I will. If you feel like tampering – read on:
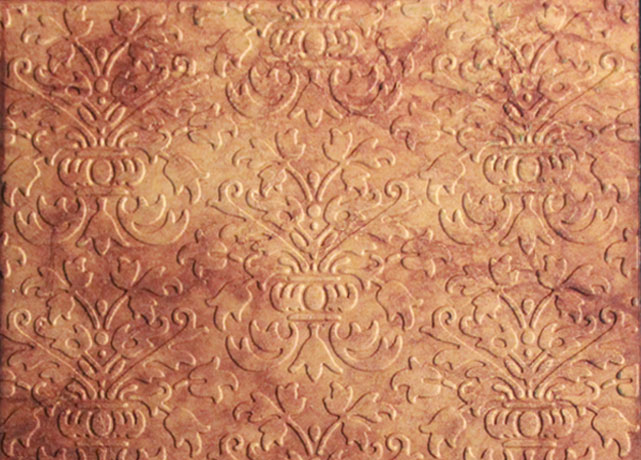
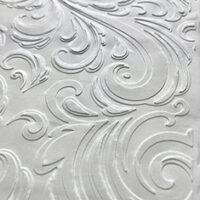
13. Place your folded paper into your favorite embossing folder, and crank it through your favorite die cutting machine. I used the Damask Brocade embossing folder by Cuttlebug (This folder is no longer being made, you can find a similar Embossing folder HERE), and a Sizzix / Vintaj Big Kick).
Note: Between each embossing process, it’s a good idea to wipe the interior of your embossing folder to remove any ink or moisture that transferred to it during the embossing process.
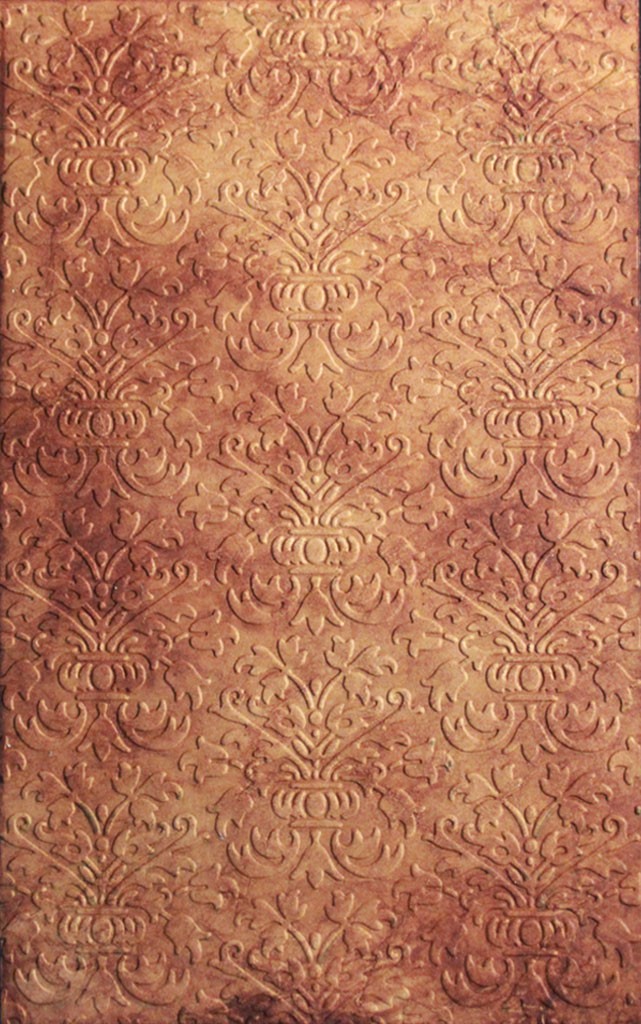
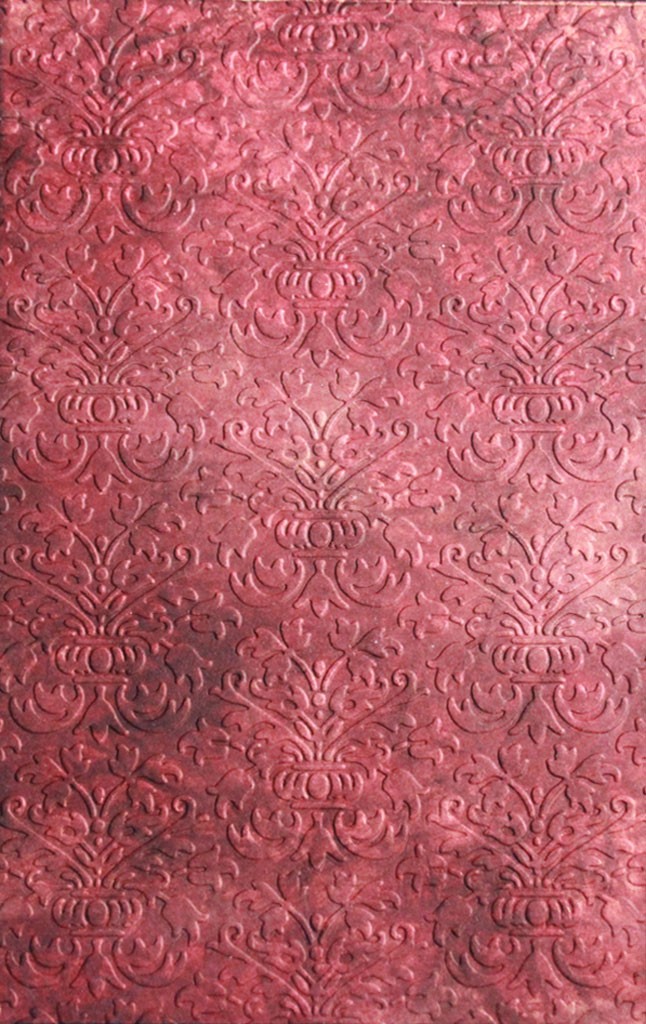
Here are examples of the glycerin soaked, crumpled, ironed, inked and embossed cardstock:
Vintage Photo Distress Ink + Damask Brocade pattern
Walnut Stain Distress Ink + Aged Mahogany
+ Damask Brocade pattern
Mowed Lawn Distress Ink + Salty Ocean
+ Damask Brocade pattern
If you’re a ‘too much is never enough’ kind of person, then you’ll understand that I found it necessary to add another layer of richness to all this lovely embossed ‘leather’.
If you’re more reasonable in your outlook, then I envy your restraint – you can just skip over the next section…
I loved the look and feel of the project so far – the depth of the colors, the classic pattern of the embossing. However, if it’s worth doing, it’s worth finding a way to add Inka Gold to it. So I did. The twist to this project? Yep, here it is:
Because I didn’t want a slap-dash application of the metallic sheen, I decided to re-purpose my Blending Tool.
This is a little secret that has helped me many times. When you just want to add color to the raised portion of an embossed surface, using your fingertips can be a really bad choice.
More often than not, the color will get into the crevices of the design and cause a less than pristine outcome. I’m okay with that most of the time. In fact, messiness is my forte.
But for this project I wanted more control – the Blending Tool is ideal for this job.
I like to dig out a small dab of the Inka Gold and smear it on my Non-Stick Craft Mat. Then I spritz it with a bit of water, and blend until there’s a smooth and thin layer.
14. Drag the blending tool over the gold mixture, then carefully smooth the blending pad along the surface of the embossing. This will transfer the gold only to the raised portions.
For the Brown Leather Look, I chose Inka Gold in Orange.
For the Red Leather Look, try Inka Gold in Old Gold.
For the Green Leather Look, Inka Gold in Green/Yellow adds just the right touch.
15. Once the Faux Leather has dried thoroughly, seal with your favorite top-coat. Keep in mind that Inka Gold and Distress Inks are water soluble, so adding a top-coat with a brush may ruin the metallic effect. To seal these beauties, I chose Rustoleum Ultra Cover Gloss Clear spray, which I pick up at Home Depot.
Well, there you go – Faux Leather Paper, suitable for book covers, faux leather crafts or whatever your feverish imagination can conjure! You might also like the Ancient Parchment Paper Technique HERE.
Thanks for joining me for this little jaunt! If you enjoyed this technique, stop by Thicketworks some time and join in the mayhem.
Take Care,
Heather
Are you interested in learning more fabulous Techniques from Heather Tracy? We have an amazing Mixed Media Video Course in the works! You can learn more about it, and sign up to receive updates, HERE.


phinner says
I’m so totally late to this party, but ohmydogger! I love this technique!!! Thank you for the tutorial!!! I’m off to buy some glycerine (I don’t want this, remember that, I’ll never forget where you’re at. Don’t let the days go by…Glycerine.”)
graphicsfairy says
Ha ha, thanks Phinner and good luck 🙂
AdelindAnne says
Hi there! This is fantastic and I’m using this technique for the inside of a storage box I’m making (my goal is to make it look like the box is lined with this fantastic “leather”)! What to you think would be the best way to apply it and make it stick? I’m just starting my crafting career and your site has been a tremendous help! Thanks again! 😉
graphicsfairy says
That sounds amazing AdelindAnne! Mod Podge is a fantastic product that works much better than glue 🙂 Good luck!
Janis Spear says
This is a wonderful technique. I actually attended a class a few weeks ago where they showed us this, but your technique is ever so slightly different. May I link this on Facebook on our local craft supplier page?
Thank you for sharing, I continue to be amazed at how generous everyone is at sharing knowledge.
XxX
graphicsfairy says
Thanks Janice! Sure, feel free to share 🙂
Chris Broussalian says
Hi, I really like this look and have a need for this in a packaging design for an envelope – but I don’t want to make the paper – I want to buy the paper that looks like weathered and engraved leather – I will create the envelope with that paper… who makes this in semi- large volumes (like 100 – 8.5 x 11 sheets – to begin then much higher volumes… can you point me to someone / company that does this…
Heather Tracy says
Hi Chris, unfortunately I’m not aware of any commercial sources for paper like this. I wish I could be of help, my friend. Good luck on your quest! xox
Jen says
This is such an inspiring resource, thankyou 🙂
Heather Tracy says
Hi Jen – so happy you found it useful! Thank you for visiting!
Candi Harris says
I had to back away from my keyboard before it shorted out from all the drooling I’m doing over this – gorgeous! Restraint? WTH is that??? 🙂 BTW, Amazon owes you a big, fat thank you – I got a Vintaj Big Kick because of you & I’m loving it! I used it to emboss paper to cover the sides of my last little fairy tale piece, then covered it in resin. I even made a bookmark out of some of the leftover paper ’cause I like it some much! You are such an inspiration! Can’t wait to use it to make faux leather now!
Tried posting & got a message – “You’re trying to post too quickly – settle down.” Well, I never! Actually, that’s pretty darn funny…
Heather Tracy says
Hey! It’s Candi! Hello, there you enthusiastic creative…I’m stoked that you got yourself a Big Kick – that is a LIFE changing tool acquisition, my friend. Faux Leather is drool-worthy…I love the supple nature of the result. Isn’t transforming ordinary stuff the MOST fun? Thanks for chiming in, and I’m looking forward to seeing your Faux Leather! (oh, I’ve had that SAME warning when commenting – always makes me giggle…)
robin patrick says
I LOVE this. And I appreciate the clear instructions and multiple photos you gave. I feel like I just might be able to pull this off myself!
Thank you
graphicsfairy says
Go for it Robin! You can do it 🙂
mare williams says
OOH, LA LA!! HOW GORGEOUS IS THIS UPDATED TECHNIQUE, HEATHER!! THANKS, AND CAN’T WAIT TO TAKE YOUR GRAPHICS FAIRY ONLINE COURSE, SOON!
Karen Watson says
Yay! We’re excited about the course too Mare!!
Ginny says
I don’t know what the inka gold is. an ink pad, a paste? Please advise. Love this look. I made something like it for a faux animal skin years ago, hitting the high crinkled spots with dark brown or black – it looked like leopard or some cat, I can’t remember.
Thanks!
Heather Tracy says
Hi Ginny – uh oh, once you discover Inka Gold you’ll be hooked! It’s a wonderful beeswax based metallic ‘paste’ that you can apply with your fingers, or use a water-dampened brush to add just a lovely metallic sheen to your projects. It’s made by Viva Decor, and you can find a variety of metallic colors on Amazon. Unlike Rub N Buff, this is a water soluble product, and cleans up easily. Have fun!
Lisa Leavitt says
I knew glycerin and paper had some great potential, just didn’t know how to use it — thanks for such a picture perfect tutorial 😀
Heather says
Hi Lisa – Yay! I’m so glad you found it useful. Hope you have fun with this technique!
rk says
I have seen a few people online make these but your tutorial is excellent! I can’t wait to try this!
Heather says
Hi rk – thank you for being so kind! I apologize that I didn’t see your generous comment until just now. I hope you have as much fun with this as I did!
Barbara says
I have made several of these pages into notebooks as gifts. If you line the inside with fabric, using a good strong glue, it gives the notebook extra strength. Also made a holder for an ipad and lined it with micro-fleece fabric, using a loop of elastic and a very large button as a fastening. They don’t last forever but you can get a few months of use from them.
Heather says
Hey Barbara – Those sound like great projects you’ve made…wish we could see them!
I’m incorporating the batch made for this post into a project right now. I love the way the paper becomes so flexible and soft!
Lori says
Pretty cool
Heather Tracy says
Thanks for taking the time to check it out, Lori. If you like rich texture, you’ll enjoy creating these!
Diana / Dreams Factory says
Heather my friend, you are a genius! 🙂
I love the look and all the colors both with and without the embossing part.
Any idea if this method works only with Kraft cardstock? Have you tried it with any other types?
Diana
Heather Tracy says
Hi Diana, coming from you, that is the highest praise…(it’s not true, but it’s so sweet)! I do a variation on this technique that results in really cool background papers just using printer paper, but no glycerin. Maybe I’ll do a quick tutorial on that one of these days…Hope all is well at the Dreams Factory!
IKE says
Ooooh – how wonderful that looks. Thank you for this Tutorial 😀 xxxxxxxxxxxxxxxxx
Heather Tracy says
Hi Ike, give this one a try…you’ll love the results! It looks even better in person.
dana says
I made this out of brown ink and a brown paper bag. The brown paper bag stinks to high heaven when it’s wet, but I was even able to sew around the edges to a fabric liner, added a snap, and it ended up looking like a leather wallet I was able to put money in for the grandkids. (who were only interested in the money, but the adults liked it) LOL
Heather Tracy says
That sounds so cool, Dana! I love how glycerin changes the properties of paper, making it much more fabric-like. I will definitely be experimenting with sewing these gorgeous papers. Thanks for the inspiration!
Willow says
I would have appreciated a pic of when you added the gold. But it does look nice.
Heather Tracy says
That would have been best, Willow! I can’t recall why that moment wasn’t captured, my friend, but I apologize for the omission. Have an awesome day! xox