How to Make Mini Envelopes
Hello, Graphics Fairy friends! Diana from Dreams Factory here, happy to share another DIY Papercraft project with you! Today I’ll teach you How to Make Mini Envelopes, a super chic and lovable project! These mini envelopes have that perfect amount of French elegance, a little bit of a vintage flair and a chic touch of gold, that will guarantee a total success in the crafting room, where magic happens. As you already know, I usually welcome imperfections in my projects and I hope you do too, because these mini envelopes won’t turn as perfect as the ones you can find in stores. But I believe it’s these small imperfections that add so much character and make our work unique, while infusing that lovely handmade feel to an ordinary object. Maybe it’s a little bit of our energy that goes through, I’m sure you will agree with me that all handmade items have THAT something special that cannot be easily described in words.
Even though these mini envelopes are relatively easy to make, they will open new, basically endless possibilities of getting creative in your own terms. Of course I will be sharing the free printable so you can make these beauties at home in no time, but the idea behind these envelopes is quite intriguing. So be prepared to be amazed, I will be showing you how easy it is to make envelopes in any size! The starting point of our mini envelope project? The French ephemera square shapes that you can find below!
The starting point for any other envelope projects? Square shapes in ALL the sizes that you want! I have to warn you that this is one of those projects that you simply cannot unsee. Once you realize how easy it is to make, your mind will automatically learn to store it and you might find yourself in the position of looking at square scrap pieces of paper with different eyes from now on. Just saying…
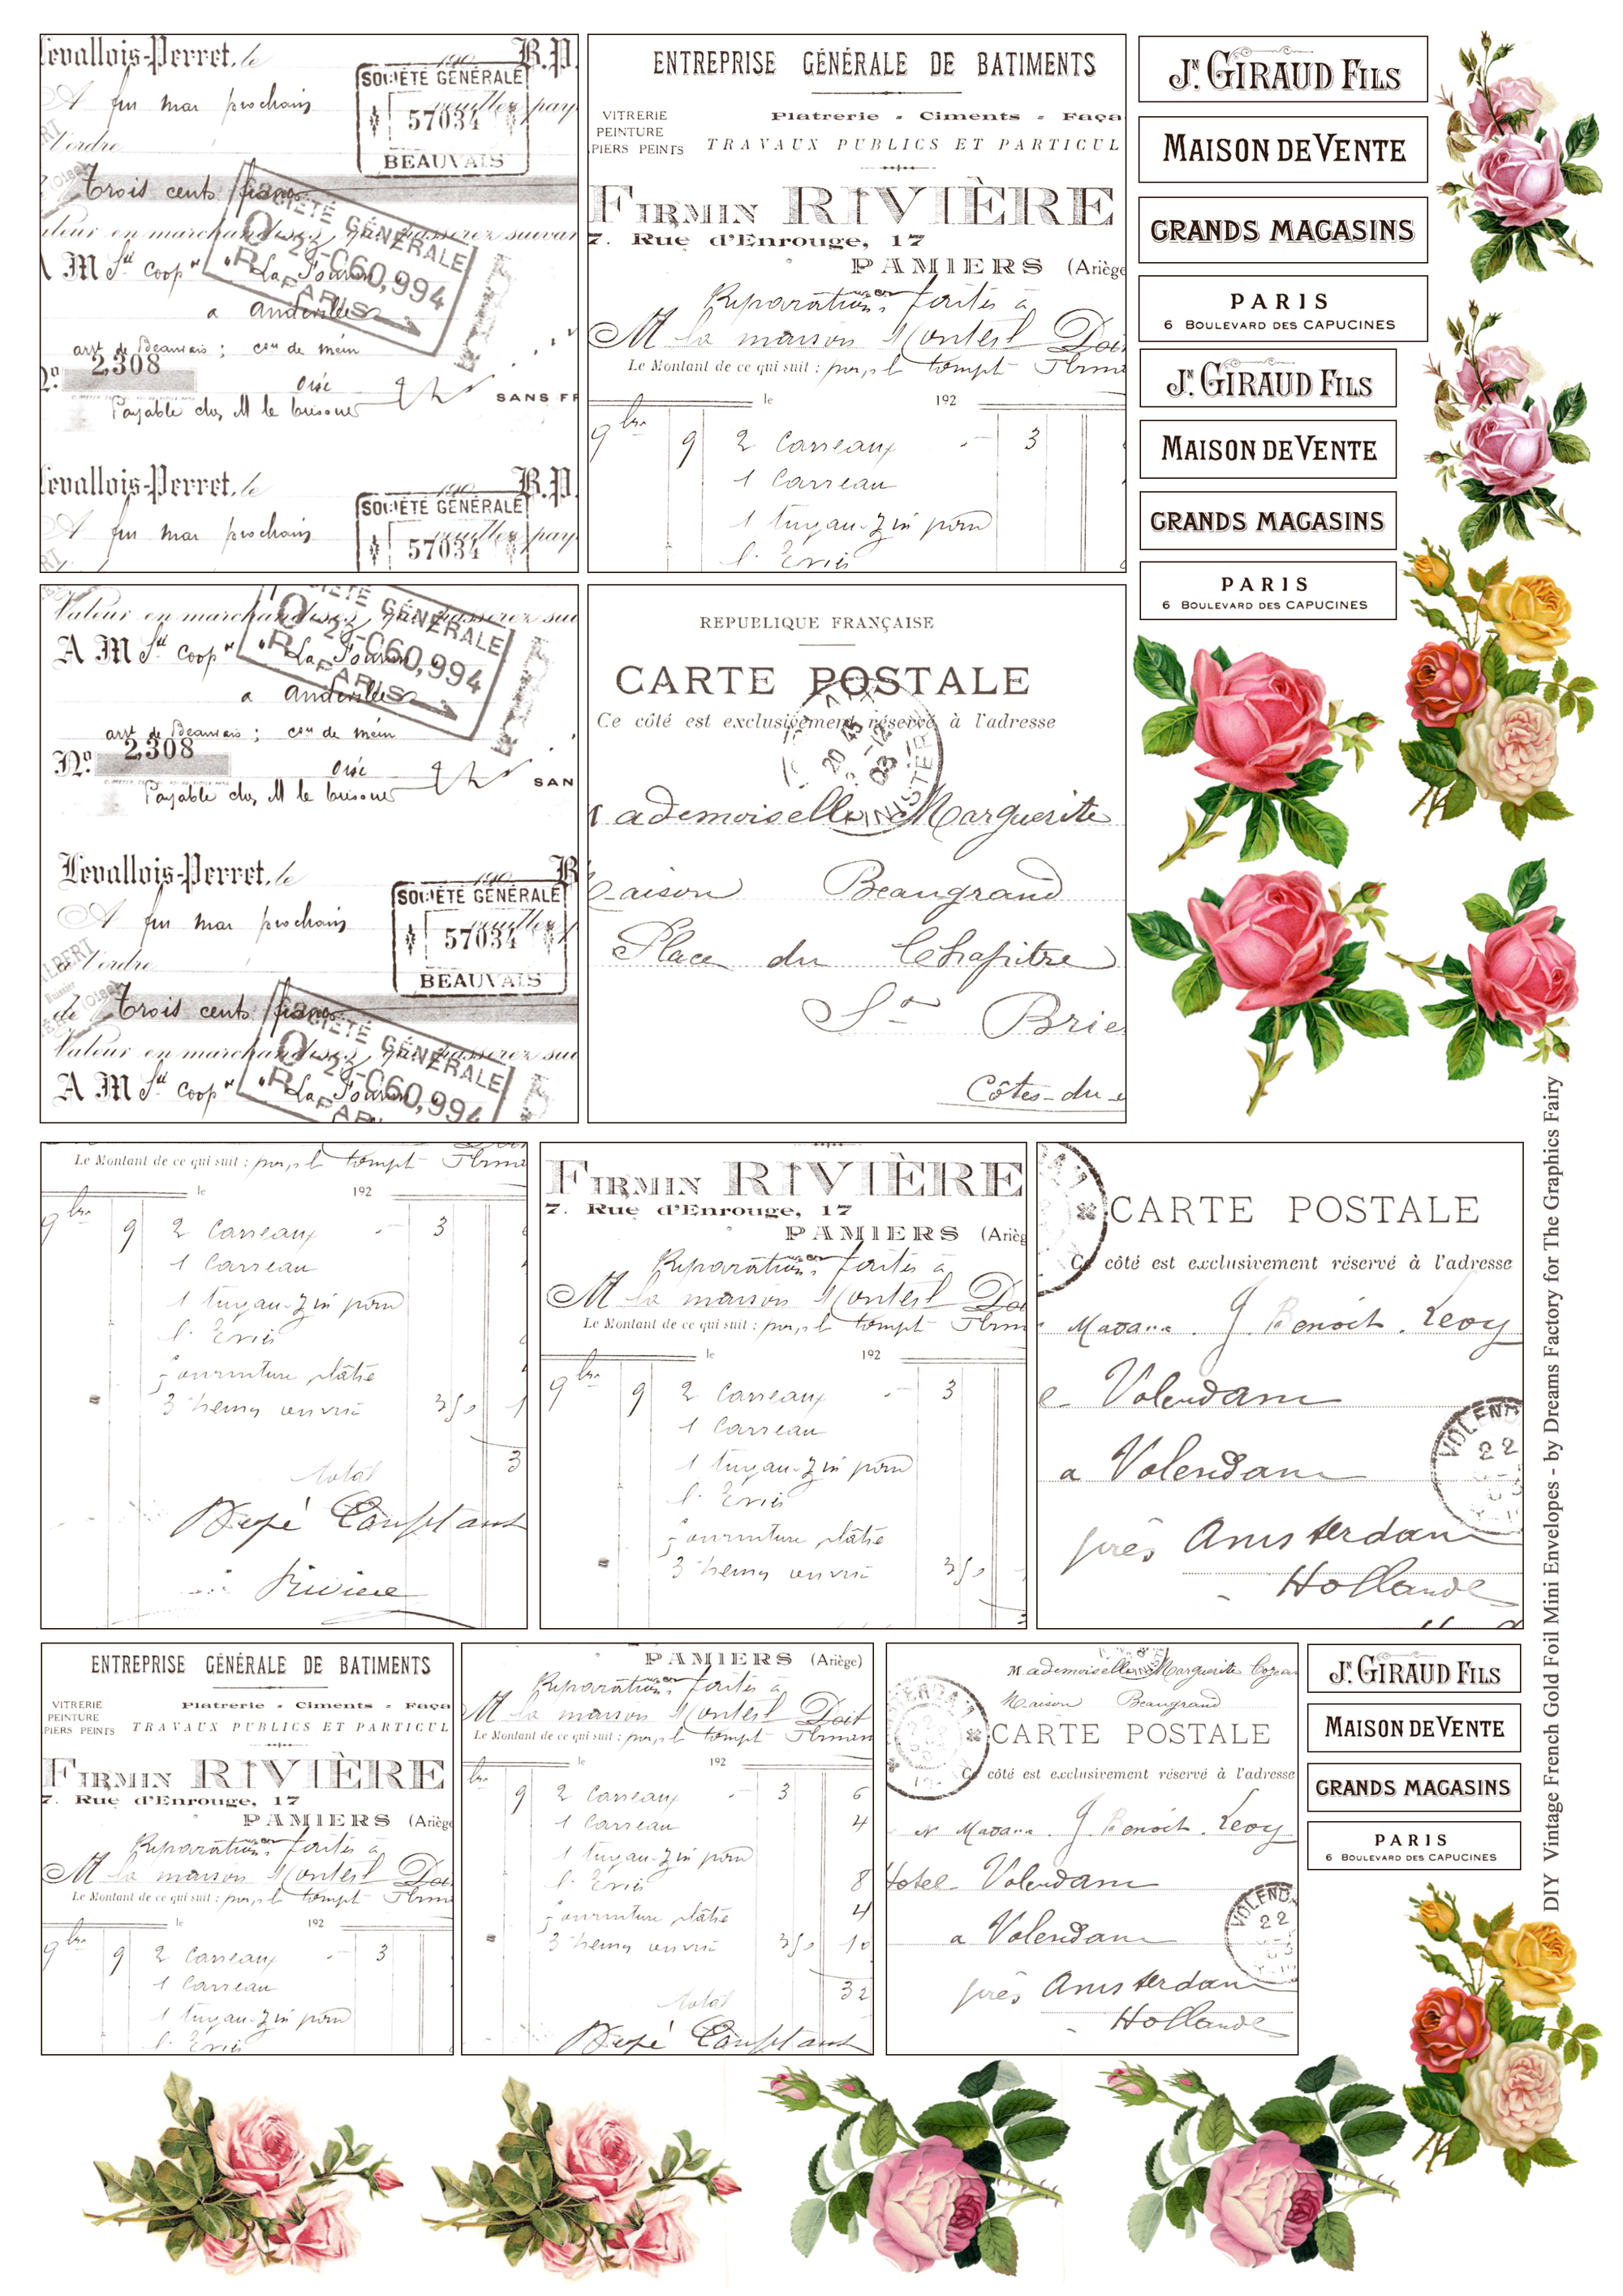
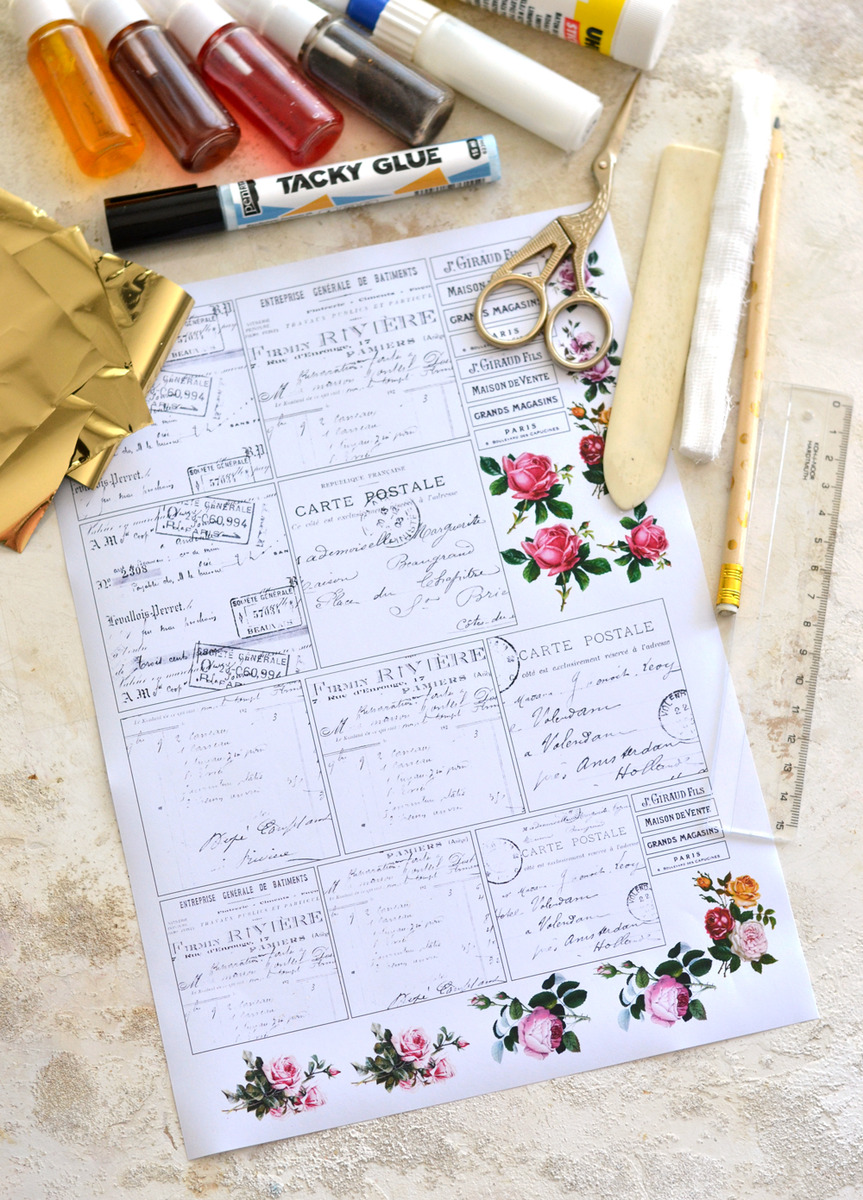
I wanted to design something chic but simple for our mini envelopes, so I started with these chic French ephemera squares that come in 3 different sizes and will be the base for creating the envelopes. They will be quite charming on their own, but you will also be able to decorate them and add your own personal touches. I also included a few French ephemera small tabs, that can be used to further embellish the Vintage French Gold Foil Mini Envelopes after assembling them. I also wanted to add a pop of color and I thought these Shabbylicious roses would be superb. You will see that all these options will give you even more options and you will be able to mix things as you go. Getting creative but also having a lot of fun – who could ask for more!
Free Printable How to Make Mini Envelopes
—-> Click HERE to Download the Full Size Printable PDF <—-
NOTE:
If you are not familiar with gold foil (which is different than gold leaf), I would suggest checking these projects first:
DIY Gold French Rose Tags and
Easy Gold Foil Decor
You will find more valuable information about what to take into consideration while working with this type of foil.
How to Make Mini Envelopes supplies:
- the lovely printable
- regular printing paper or cardstock paper (I used regular)
- home printer
- scissors
- ink sprays – I used yellow, magenta, orange and brown
- ruler
- regular pencil
- a plastic sheet or a non absorbent surface (to protect your working area)
- paper towels
- a bone folder (somehow optional)
- cheesecloth or fine muslin (optional, for further embellishments)
- FOR APPLYING THE GOLD FOIL:
- gold foil
- gold foil pen OR gold foil glue and a fineline glue applicator OR a small brush and Mod Podge
- FOR GLUEING THE ENVELOPES
- paper glue or Mod Podge again
Cutting and coloring
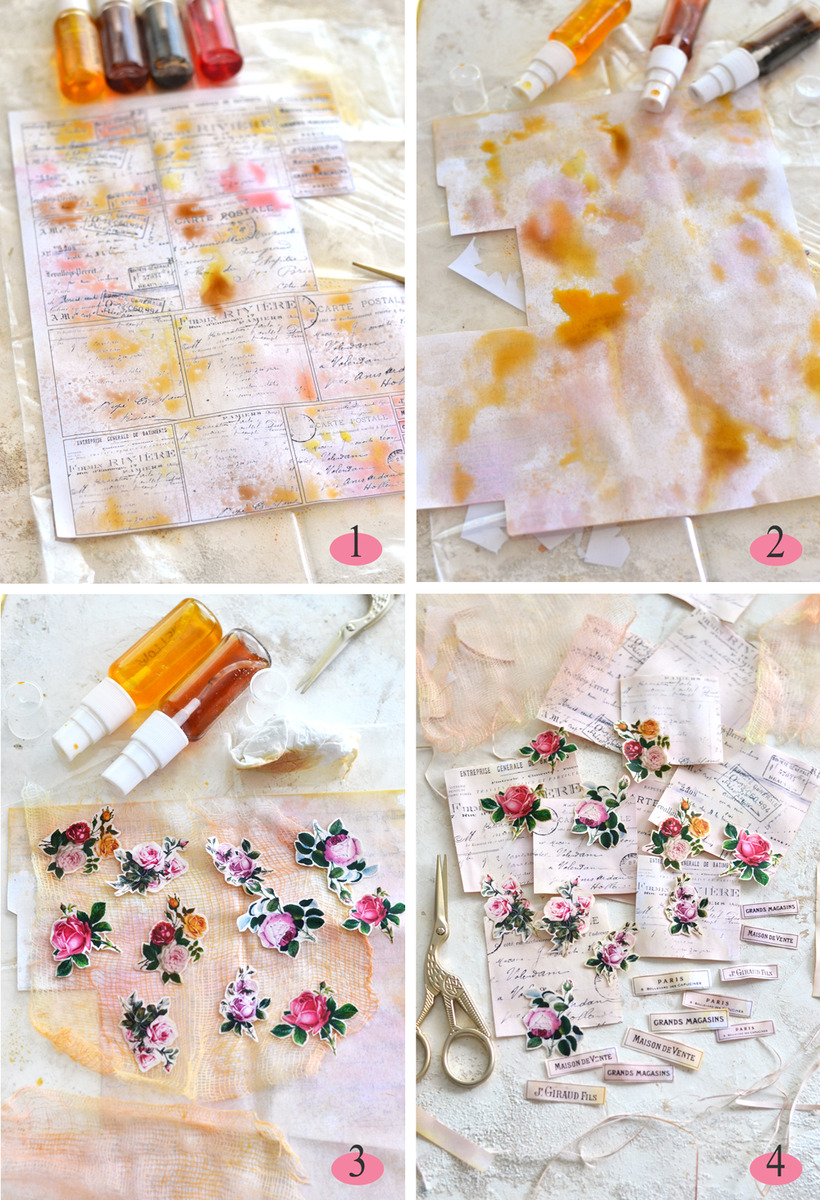
I decided to go with ink sprays again, I just love how easy this process is and how it always gives beautiful, quite unexpected results. I used a little bit of yellow, magenta, orange and brown and sprayed them onto the paper here and there. Easy-peasy! You can use other colors too, even other mediums – try this watercolor technique, this avocado dye, this coffee technique, highly diluted acrylic paint, distress inks, etc. I didn’t use colors that were too intense, I just wanted to give the paper a sheer, vintage, more playful look.
1. Start by cutting the Shabbylicious roses out of your printable and place the printable on your (already protected) working surface. While you let the paper dry for a bit, fussy cut the roses and keep them close by.
2. Flip over the printable and spray it on the back too.
3. Cut and add pieces of cheesecloth all over the wet paper, so that the fabric soaks some of those gorgeous colors too. Add the roses on top of the cheesecloth and spray some more with one of your lightest colors, to also give the roses an aged look. You can use paper towels to remove some of the excess ink, but also to create interesting effects on your paper, moving colors around.
4. When dried completely, use your scissors to cut the French ephemera squares and the small tabs – I removed the dark border on the squares but left it on the tabs, remove it completely if you want. As you can see, the colors will be less intense, but will be perfect for the overall vintagey finish that we are looking for.
P.S. The lovely French ephemera squares can be included at this stage in many beautiful projects, don’t they look amazing with the roses, the tabs and the sheer cheesecloth ?
Drawing, folding and assembling starting from a square
Now let’s move to the next fun part – creating the envelopes from a square shape! You will LOVE how easy this part is! I bet you’ll just want to adapt it to all the scrap paper that you have around and just use this technique over and over again!
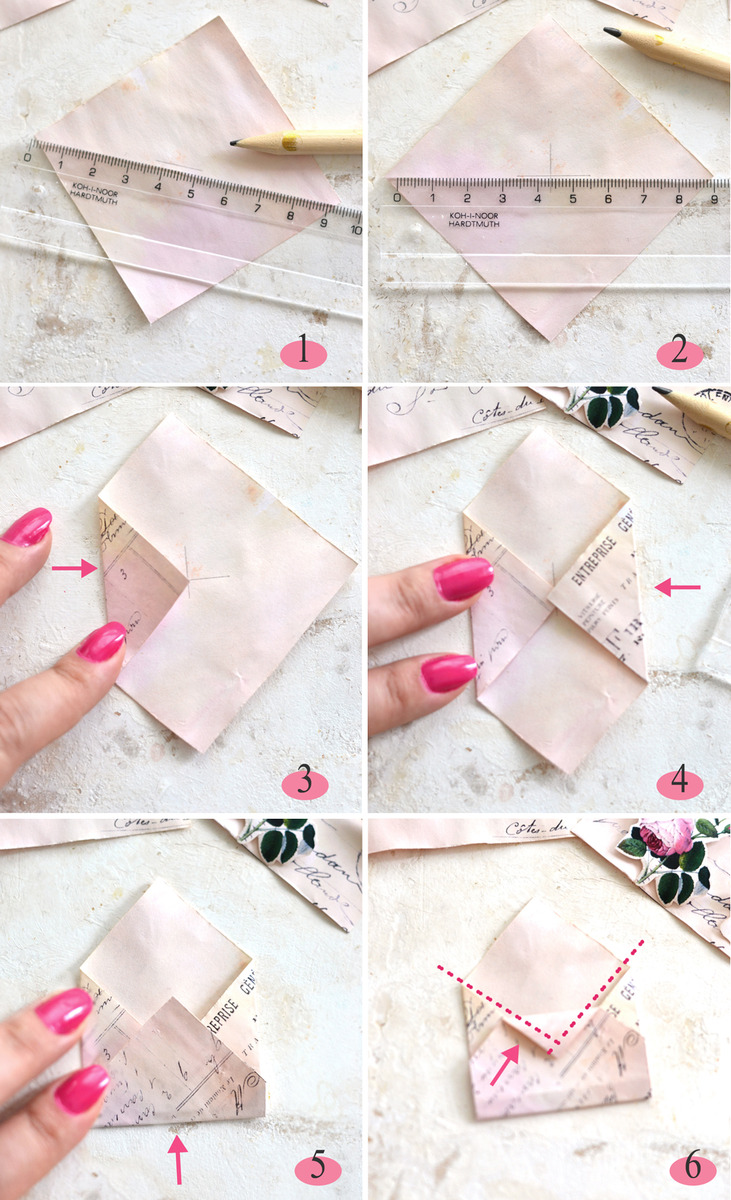
1. Start by flipping your French ephemera squares over. Place your ruler on two of the opposite corners and using a pencil, draw a small line somewhere in the middle. You can measure the exact middle, for a more precise outcome, but I didn’t do that and the envelopes turned out just fine.
2. For our next step, we will rotate the square once and will draw another line in the middle, just like we did before. This new line will create a cross over the first one and their point of intersection will determine our exact center, without doing any measurements! How cool is that?!
3-4. Fold and bring the left and right flaps towards the center, making sure they are slightly overlapping – use the lines that we drew earlier as guidance.
5. Bring the bottom flap upwards as much as you want, making sure the inside lines are not visible after folding. You can also bring the top flap downwards, if you want, but if you are planning on using the envelopes opened, I would skip that step for now.
6. As an optional step, you can also fold downwards the pointy end of the bottom flap until the fold lines are perfectly align with the other edges. I completely folded and scored this pointy end only on one of my envelopes, but decided not to score the others. Instead, I used my index finger to roll that pointy edge and add a little bit of dimension to my envelopes.
Once you get used to all these steps, things will go really smooth and you’ll be able to create mini envelope after mini envelope, one more perfect than the other! Because of the small size of the envelopes, I didn’t use a bone folder to score, I just used my fingers to go all over the edges. Don’t glue the envelopes just yet, we’ll need to unfold them again for our next step.
Adding the gold foil
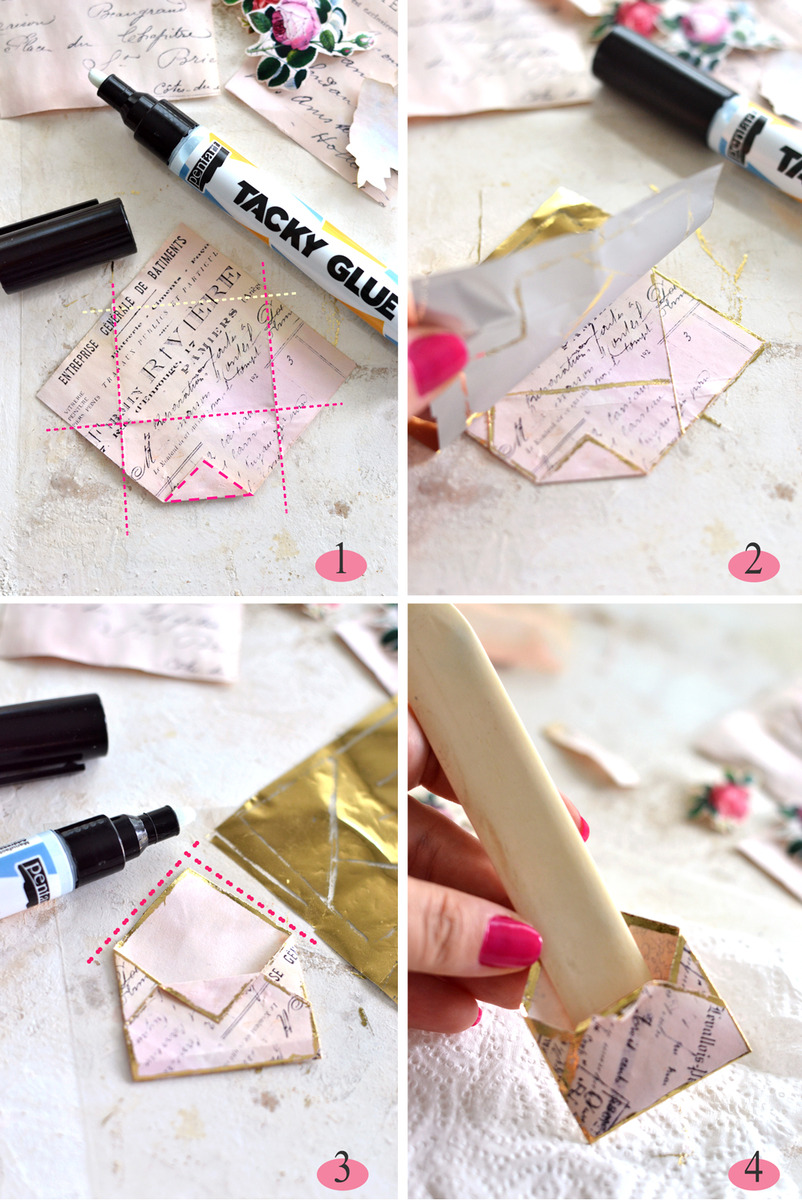
For adding that chic gilded edge all around our mini envelopes, I used a metallic gold foil and a gold foil glue pen this time. If you don’t have a gold foil pen you can use a special gold foil glue and a small brush to apply it. You can also use gold foil and Mod Podge, just like I did here with these stunning Gold French Rose Tags. No matter what you are choosing, be aware that things will get messy! The gold foil glue has a certain double sided tackiness that … well, makes it tacky unique!
1. Unfold one of the envelopes that we created earlier and place it on the table facing up (the French ephemera will be on top). Use your special gold foil pen to draw lines all over the folds and also all around the edges. The lines don’t have to be perfect – more imperfect only equals more charm here. Depending on the gold foil pen you are using, you might need to let it dry for a few seconds, but if it’s really hot outside, you might be able to immediately move to the next step.2. Place a piece of gold foil on top of the paper so that it would completely cover it. Burnish with your fingers (not your nails) all over the gold foil to maximize the adherence and lift it when done.
3. Fold the mini envelope again and use tiny bits of paper glue to assemble it – I put some where the left-right flaps were overlapping and some on the inside edges. Press everything with your fingers to ensure a perfect adherence. Then add more gold foil glue (and gold foil) to all the ungilded edges. You can always come back to the gold part, just check to see if you missed some spots here and there.
4. Place your bone folder or your ruler inside the envelope and move it left-right to make sure you don’t have any unwanted sticky parts in there. This will also create some volume.
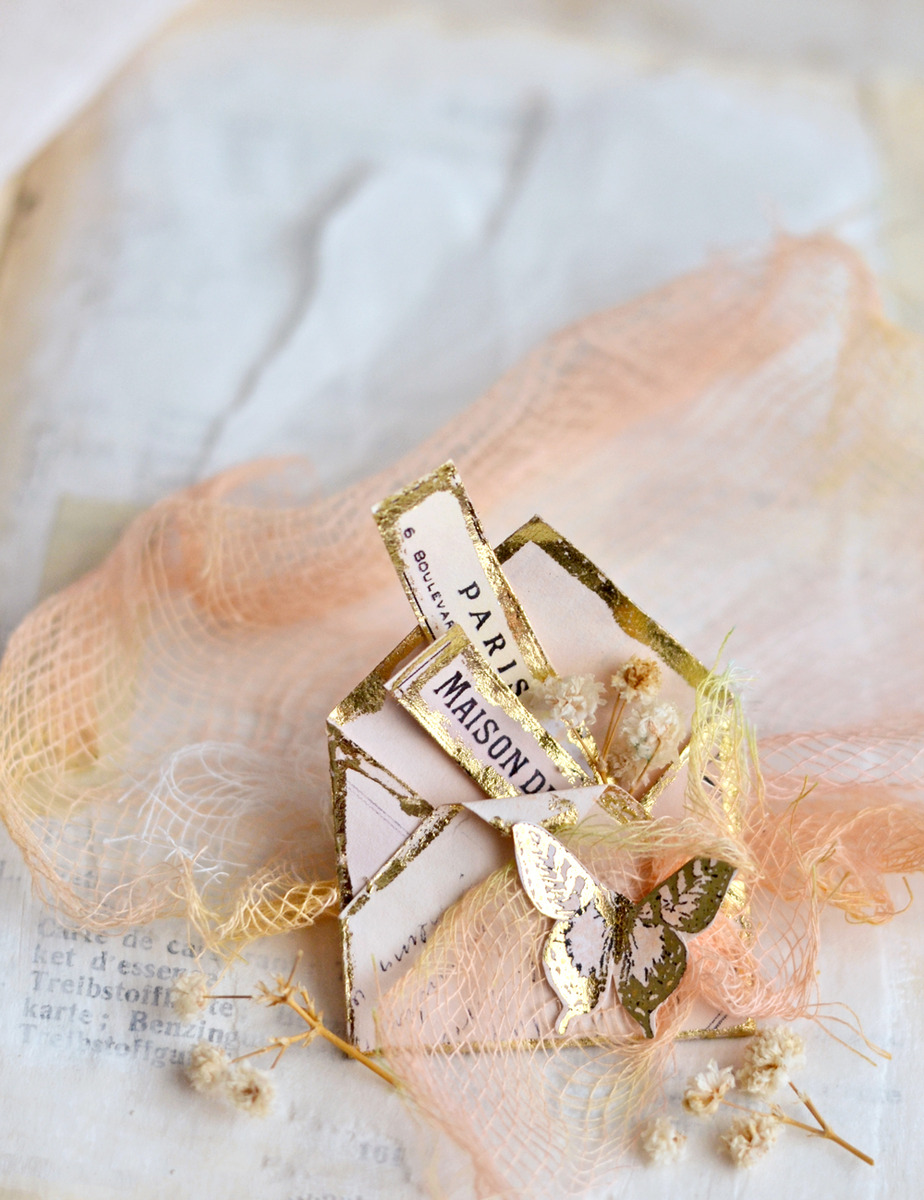
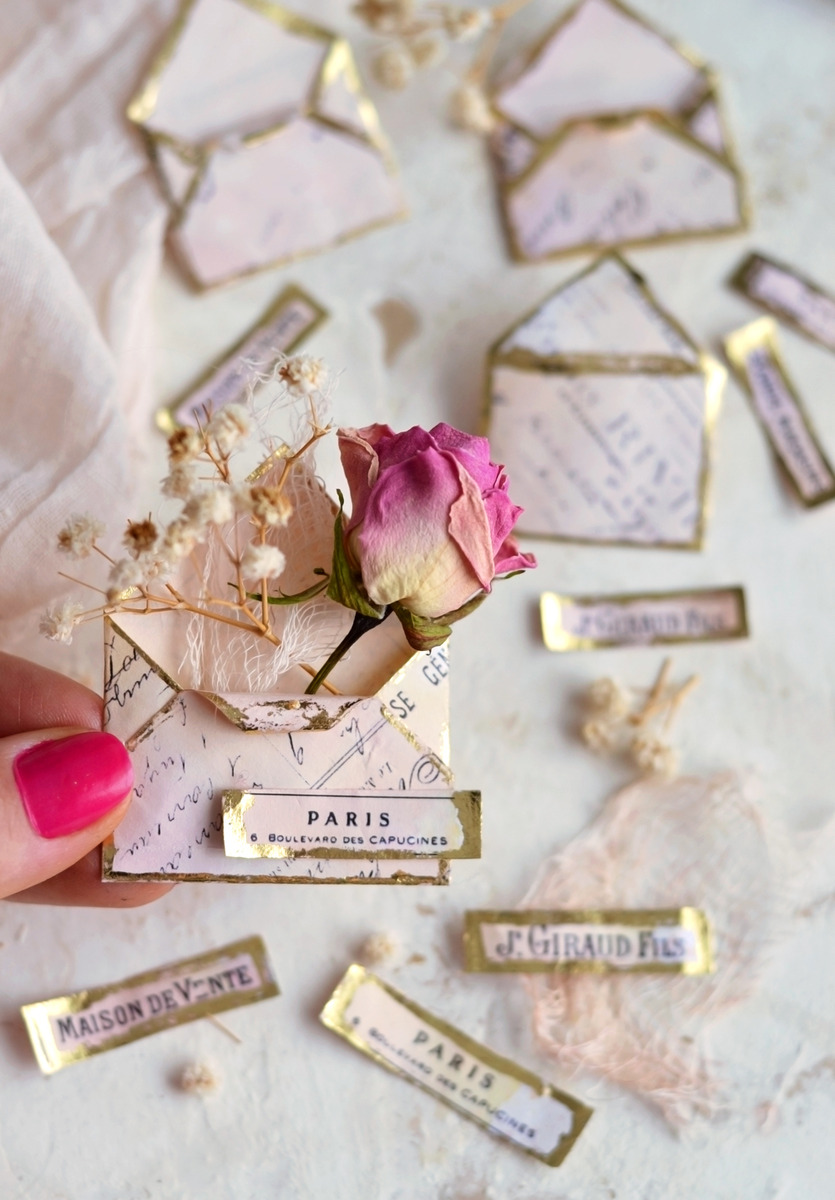
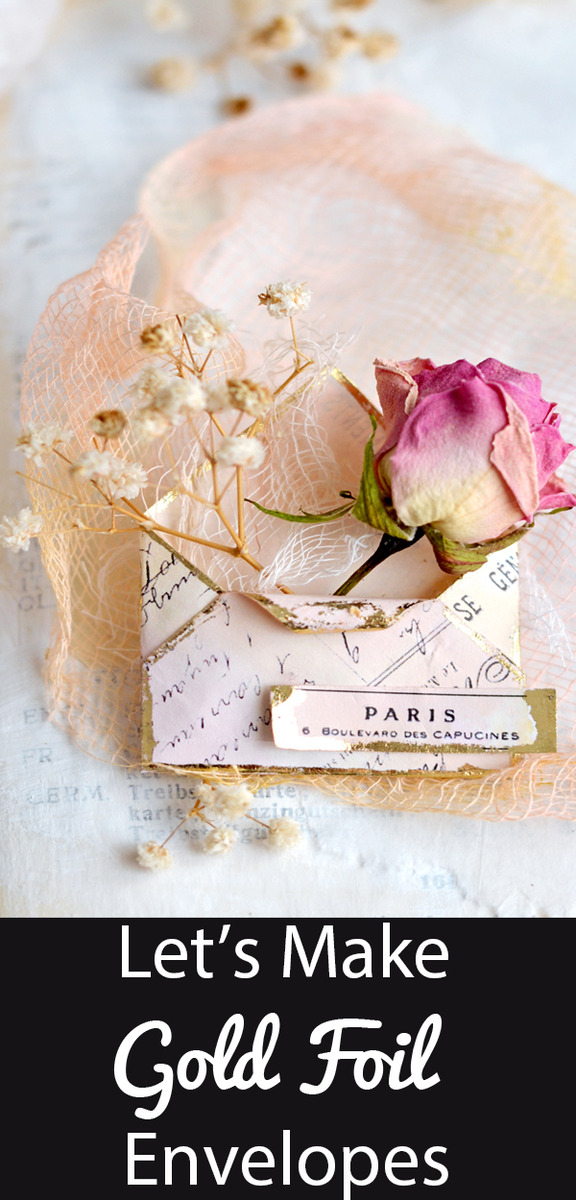
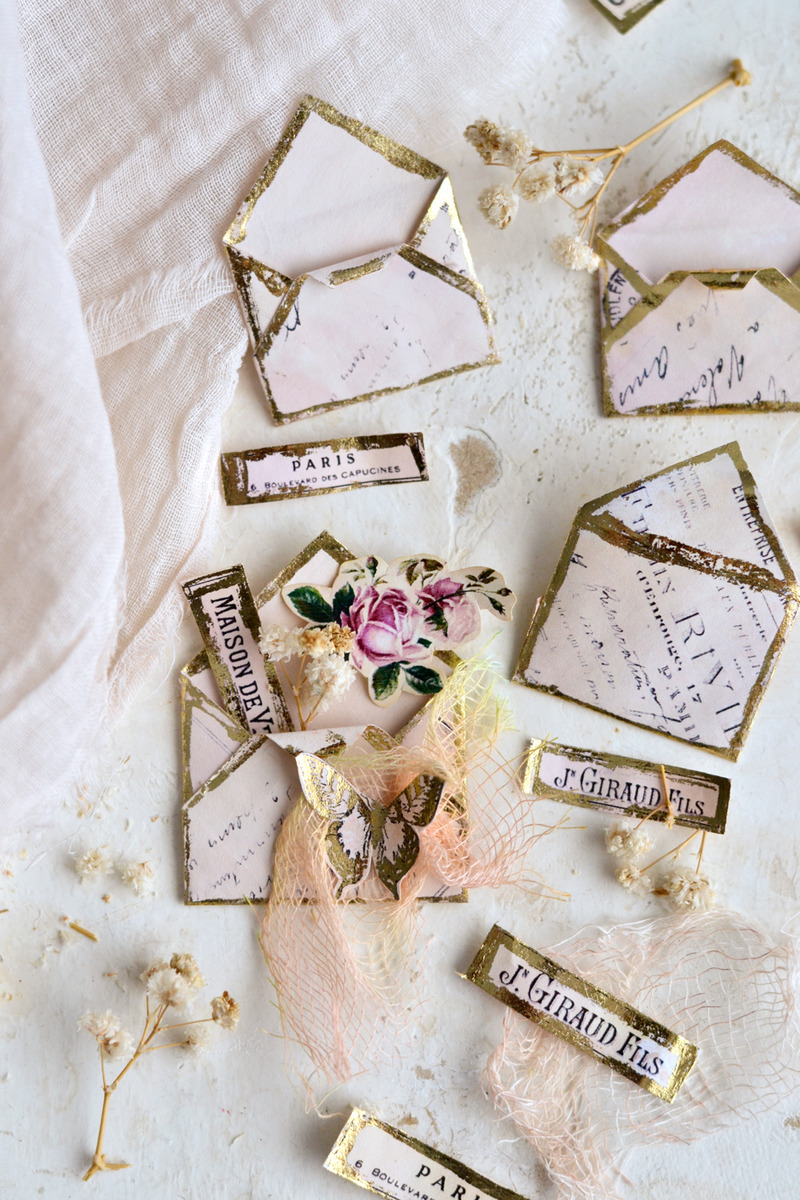
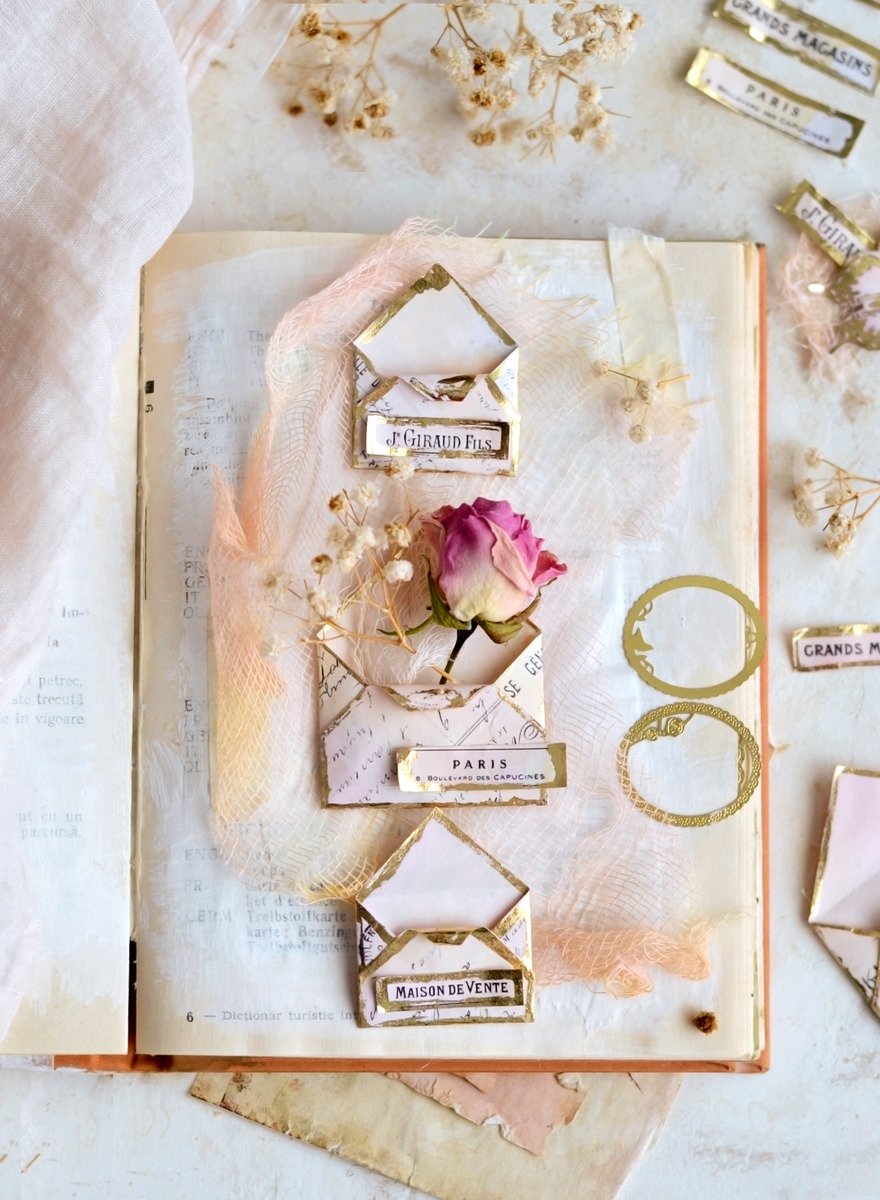
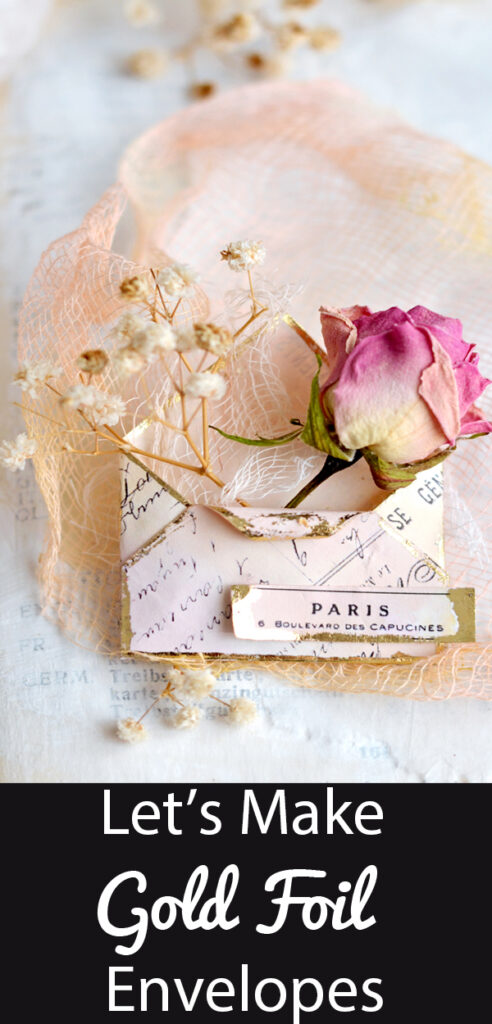
You can also add a small gold foil border all around the French ephemera tabs to get a more cohesive look and … you are pretty much done! Your new imperfect, but totally gorgeous How to Make Mini Envelopes are now ready to be used! You can use the Shabbylicious roses and the tabs to decorate the mini envelopes on the front, on the back, you can add them inside, the sky is the limit. Here I tucked them inside with some dried flowers! I even used a small piece of that lovely rainbowy cheesecloth that we stained earlier and glued it on the envelope, along with a chic Gold Foil Butterfly Sticker – another fun project that you can try!
How gorgeous are these?! The gold foil really adds a unique finishing to these beauties, don’t you think? And how about those rolled pointy ends, they bring so much dimension and uniqueness to each and every one of these lovely mini envelopes! I would probably not curl the pointy ends if using the mini envelopes as part of a junk journal page, but then again, why not?! You do your thing!
My creative friends, this ‘improvised’ cheesecloth staining technique is something that you REALLY have to try! Can you believe how gorgeous these colors are and the effect I was able to get simply by layering everything, while the ink was drying? I need to make more, I’m officially obsessing over it!
Hope you’ll love this project and decide to give it a try! You’ll have so much fun learning How to Make Mini Envelopes, I promise! And I’m sure you’ll find millions of ideas on how to include them in your creative adventures, gifts for special occasions and many, many more. But don’t forget that you can also use this DIY envelope making technique with all the scrap paper that you have around! Start with a square shape and you will be able to create the envelopes of your dreams in any size … because let’s face it – you can NEVER have enough envelopes for ALL your dreams!
 You might also like how to make Envelopes with a template HERE and how to make Envelope Glue HERE.
Happy crafting,
Diana / Dreams Factory


CAROL says
Thank you for your wonderful graphics and ideas.
I look forward to getting your emails.
Thank you and blessings
Karen Watson says
Thank you Carol! I’m so glad you are enjoying the images and the projects here!
Sharon Madson says
Loved this! I didn’t gold foil, but still made the cute little envelopes. Thank you for sharing the free digi, and for the instructions. I put my project on my blog, (Foxy Stamping) and linked to the home page of The Graphics Fairy. Mine wasn’t as pretty, but I was happy with it. 🙂 I plan on making more, and maybe adding more gold butterflies and gems. Yours are just gorgeous!
I love getting my weekly letter! Thank you again.
Karen Watson says
Thanks for sharing Sharon! We’re glad you enjoyed this project.
Lisa Ann Hirschbuhl says
You are truly amazing! Thank you so much for not only the free printable but the idea and inspiration to complete the idea.
graphicsfairy says
I am so glad you enjoyed it Lisa 🙂 Have fun!
Julia Sandvoss says
Such a gorgeous post with equally beautiful projects! We thank you for using our Deco foil for these and would love to share with our fans if you’d allow. Please drop me an email giving permission.
Karen Watson says
That would be great! Thanks so much Julia!
Kim Rayko says
Fabulous tutorial!! I cant wait to create a bunch of these…I can see why they would be addicting to make. GORGEOUS!!!
graphicsfairy says
Thank you Kim, So glad you enjoyed it and will give them a try 🙂 Have fun!
Cynthia Murphy says
The envelopes are beautiful. I plan to make these today. Thanks for the idea.
graphicsfairy says
Oh yea! I am so glad you are going to give them a try, have fun!!
Ginny says
Beautiful – I just made some – thanks for the tutorial and the downloads!!!!!
graphicsfairy says
Oh yea!! So glad you gave them a try, how did they turn out?