Glass Painting: Easy Tutorial
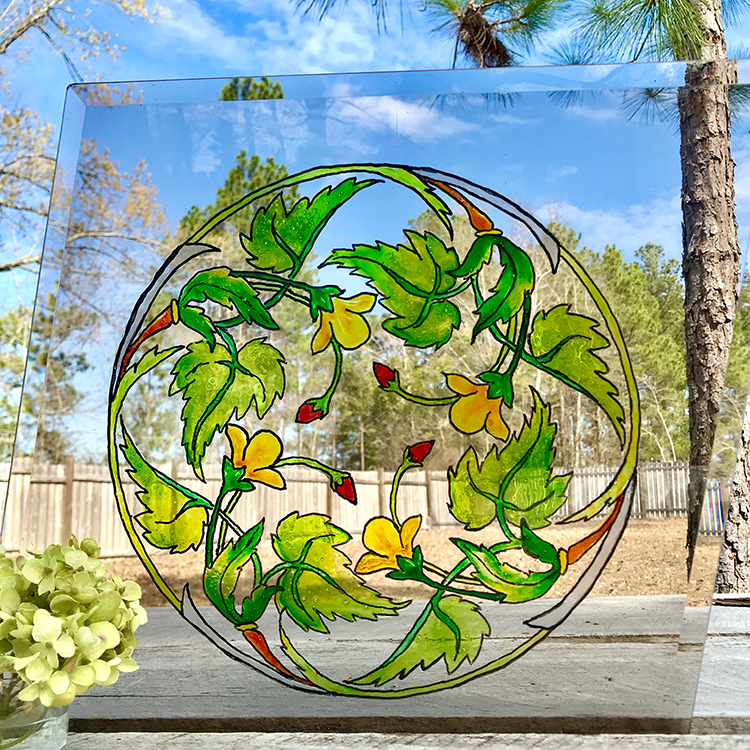
Hello sweet Graphics Fairy Paper and Mixed Media Artists and Artisans. It’s Rebecca, aka Cre8tiva, back today with an easy step-by-step tutorial all about Glass Painting! In this in-depth article we will create a one-of-a-kind glass painting of a Sun Catcher with a beautiful design from The Graphics Fairy Image Archives. I will teach you everything you need to know to make this stained glass artwork or any other pattern you like. I will share my very best Tips For Applying Custom Glass Paint to a Smooth Glass surface. Easy to follow instructions are included. I hope you enjoy this DIY Glass project and have fun making your own masterpieces.
You might want to check out my Best Paint for Glassware article to see everything there is to know about Glass Paints. You will learn all about glass paint, how to prevent peeling, and what materials to avoid below. For fun, I show you how to paint a drinking glass in an elegant French style along with a sweet glass jar in the tutorial.
Easy Glass Painting Tutorial
OH what fun we are going to have in this lesson. I will be teaching you how to achieve a translucent, stained glass look and feel with acrylic paints and/or food coloring, of all things! I experimented for over two weeks to determine the best technique steps to follow. In practice, I used many different methods and materials for both the leading and the colored areas of the design. I must note that photographing clear glass is not so easy. All backgrounds show shadows that can make the image seem blurry.
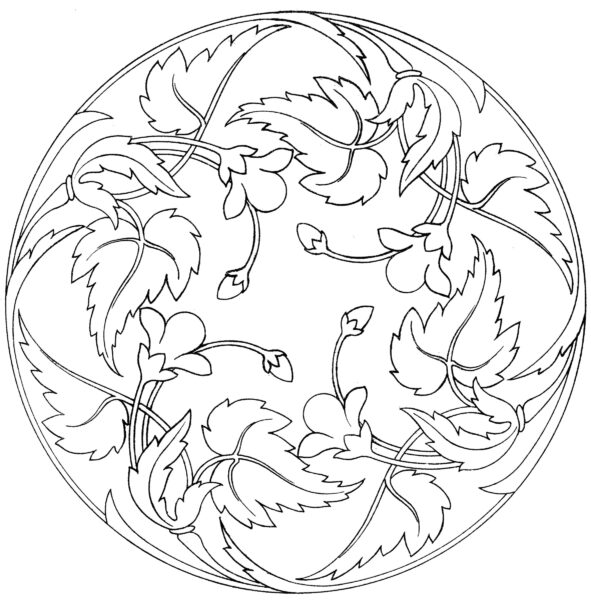
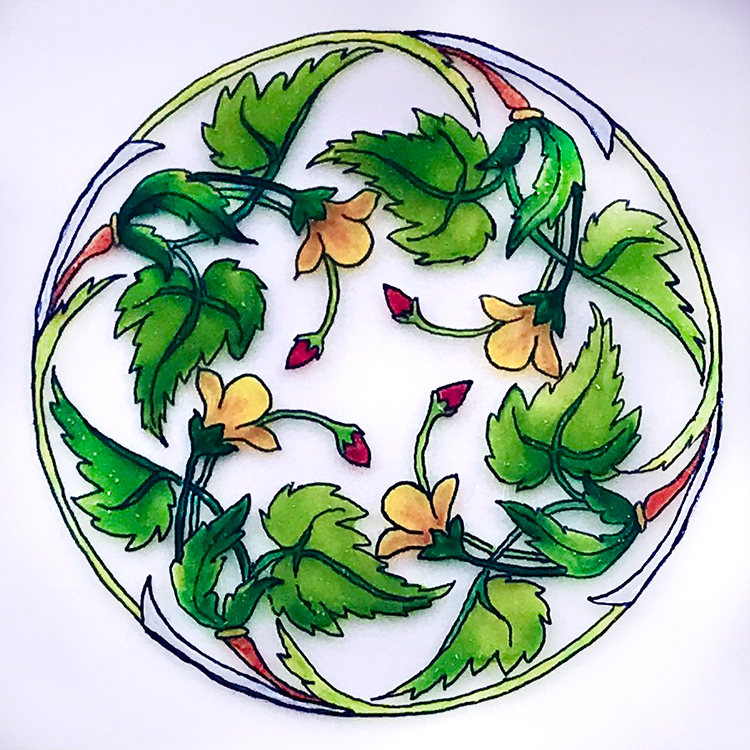
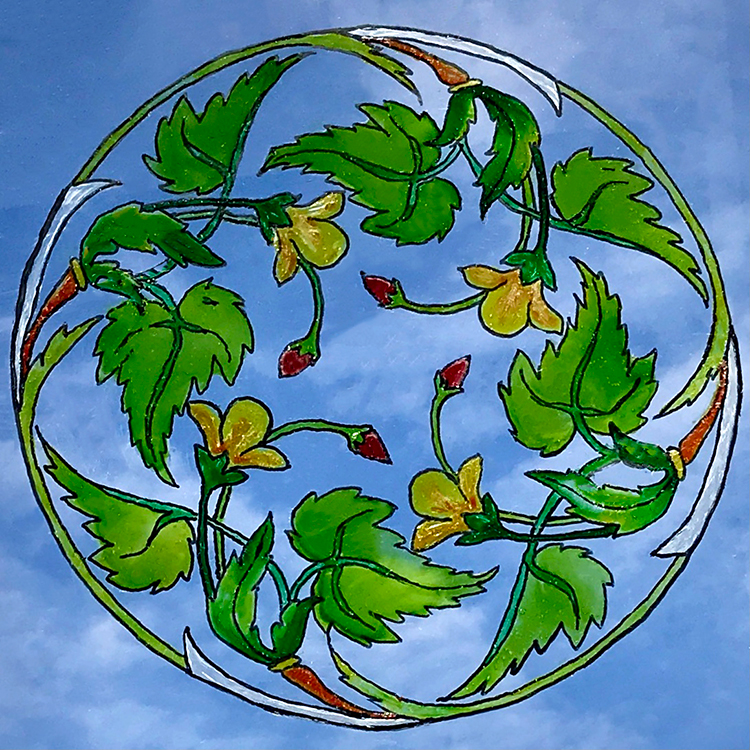
This amazing Glass Painting Floral Design by The Graphics Fairy has been adapted to use specifically for this project and tutorial. I adore the acanthus leaves, which are the focus of the design. The tiny little buds in the middle give it a pop of colorful joy. I enlarged the pattern to 12″ and printed it on 2 sheets of legal size paper. In my opinion, this design is more of an intermediate to advanced pattern, but you can use any design that you like. TIP: Beginners might want to start with a simpler design. Let’s get started painting, shall we!
Supplies
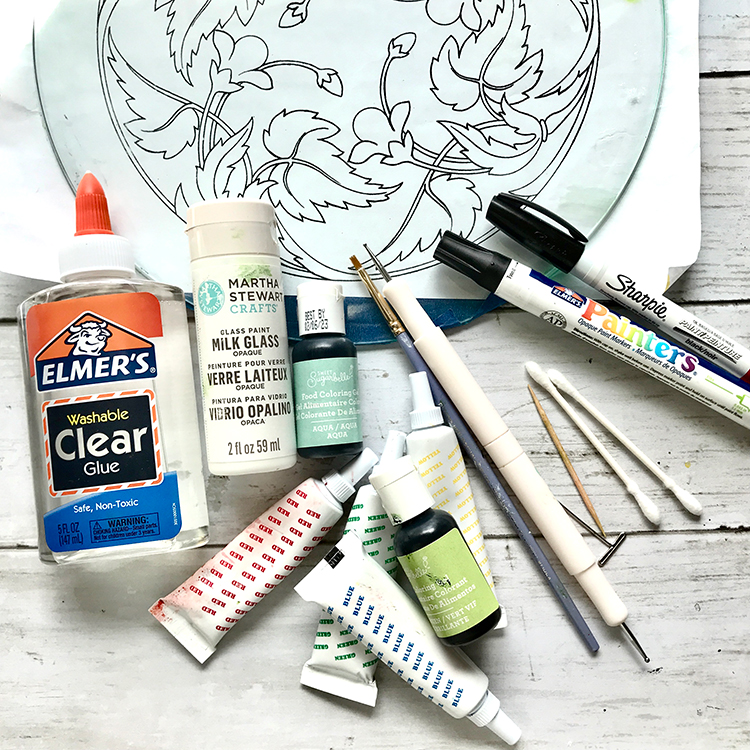
We need just a few supplies to accomplish our project. A NOTE About the Surface: For my glass surface, I used a 15″ x 15″ piece of recycled glass with a beveled edge. I found the old tabletop in a thrift store. You could absolutely achieve the same look on a round, square, or rectangular piece of glass, or even plexiglass – new or old. CAUTION: Make sure that the glass you choose is thick enough to withstand painting without shattering. We do not want you cutting a precious finger.
TGF Glass Painting Floral Design
Glass Surface – thick enough not to shatter while painting
FINE TIP Black Painter’s Pen or Oil Based Sharpie for the outlines (leading)
Elmer’s Clear Glue
Gel Food Coloring in Greens, Yellows, Red, Blue
Martha Stewart Milk Glass Paint
OPTIONAL: Acrylic Paints in your favorite greens and yellows
Stylus – mine has two ends, different sizes
Small Plastic Palette with enough holes for each color
Wooden dowel or small spoon to mix paint
Soft Artist Paint Brushes (small)
Light Box (optional)
Tooth Picks
Basic Painting Supplies: Water Container, Paper Towels, etc.
Preparing Your Surface
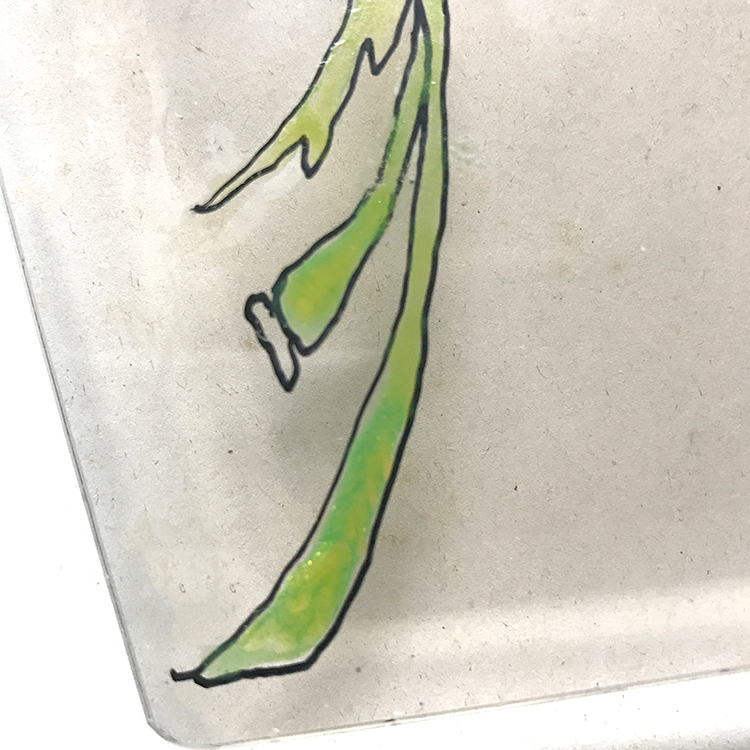
IMPORTANT STEP – Wash & Clean Glass Surface: We want to remove all dust and dirt from the glass before we begin, and we certainly don’t want any grease film on our piece. Use soap and warm water to clean the glass. Rinse the soapy water with hot water and allow to air-dry. Hot water will prevent fewer spots from forming. Always handle your glass with a lint-free kitchen towel. When in place over the template, use rubbing alcohol or white vinegar on a lint free cloth or paper towel to wipe the area to be painted. Allow to dry for approximately 3-5 minutes before painting. TIP: DO NOT TOUCH THE AREA AGAIN! Oils from your fingers will prevent the paints from adhering. Glass should be sparkling clean as shown below.
Choose Your Pattern
Keep It ‘Simple Silly’ is the best advice I can give you for this technique. Especially while learning the ins and outs of this technique. When selecting a design for your faux stained glass project, look for a pattern or picture with fairly open spaces and strong, solid outlines. Simple designs are best in general. They actually look quite beautiful once the painting process is complete. Overly complicated and intricate designs with small openings between lines can frustrate even well-practiced glass painting pros. So do yourself a favor and stick to simple. TIP: Coloring book images are a great place to look for ideas.
Place Pattern Under the Glass
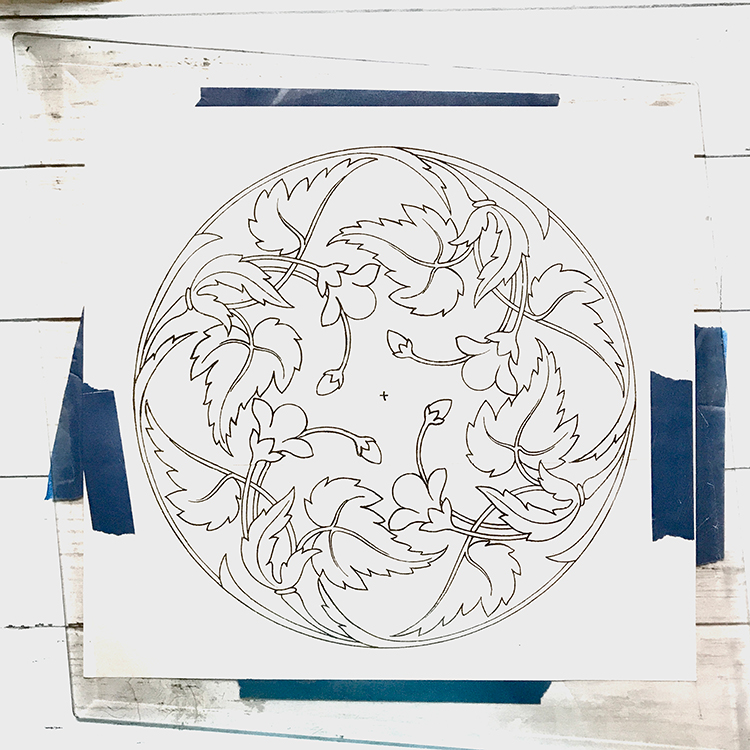
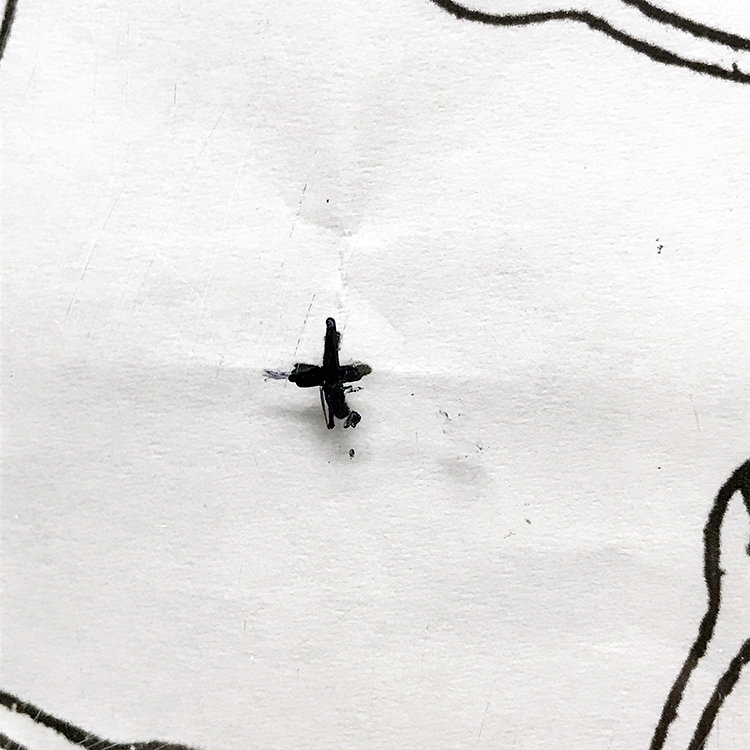
If your pattern is in more than 1 piece, tape it together carefully, making sure it matches perfectly. Measure to find the middle of your surface and your pattern. Make a + mark on both. Next place it under your glass surface matching the +. Tape the pattern to the glass securely.
Draw Your Outline (Leading)
There is nothing more important to faux stained glass than the leading!! I found that it was helpful to draw and paint with a Lightbox underneath my work. For this design, I determined that drawing the outlines with a fine tip paint pen was the best way to go. There are a few areas in the stems and edges where the lines are very close together. Of course you can use other methods that work for you. Some options are shown below.
OPTIONS: Painting the lines with black or gray acrylic paints. Gallery Glass Liquid Leading by Plaid.
Practice Drawing and Painting
As Yoda says, “There is no try. You do or do not!” Practice with your pen until your lines look smooth and uniform. I use my glass surface to practice. You can wipe the practice stuff off with a wet soft cloth or cotton swab. PRO TIP: Practice the outlines until your hand is steady!! Also practice your color mixes to make sure you have enough coloring added to the clear glue. Let them dry as the color will change a bit. Greens are hard to get just right. PRO TIP: I added a tiny speck of red to the bright Kelly green for a more muted green. Be careful as too much red into green will make brown!
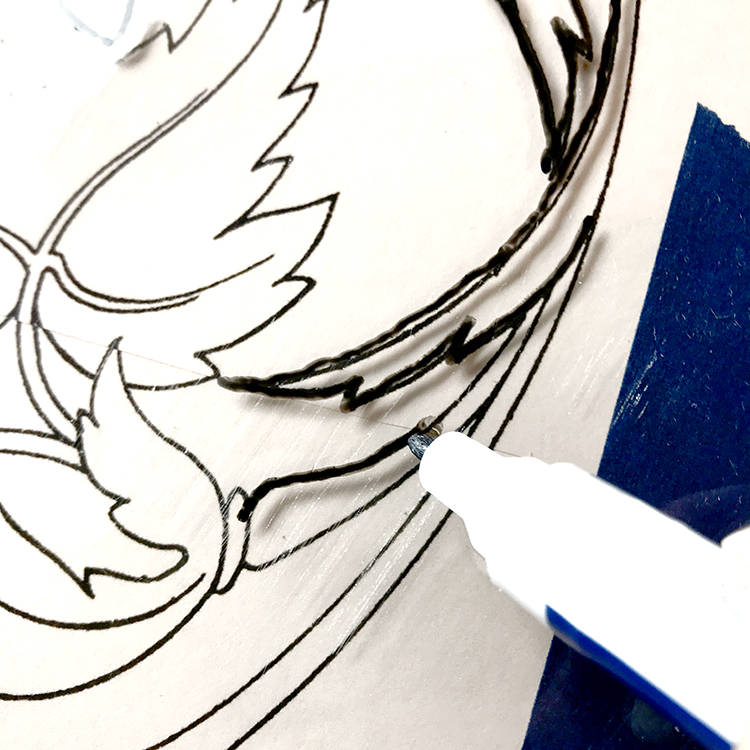
Step 1 – Activating the Paint Pen: I say activated because the paint pens and oil Sharpie must be shaken and pressed against a hard surface for a few minutes until the paint flows. Just be patient. Follow the manufacturer’s directions. TIP: Do not bang the tip on a surface. That can bend or mash the tip!
Step 2 – Outlining: Follow the pattern with your paint pen. TIP: I find it best to pause and plan each line from start to end before I actually draw. You will want to be able to see the pattern as you move the pen. Trust me, sometimes your arm gets in the way. Continue filling in the entire pattern.
Step 3 – Drying: Allow your outlines to dry for at least 4 hours before you add paint. I allow mine to dry overnight. DO NOT RUSH THIS!!! If you start too soon, the paint mixture will activate the outline and cause them to lift from the surface.
Messy lines: Uniform lead lines are achieved by practice. Messy lines are part of the process. Don’t be overly critical. It is amazing how beautiful the lines will become once the color is added. WINK
Choosing Your Stained Glass Colors
I will be using gel food coloring mixed with clear school glue to paint the glass. For the leaf areas on this piece I use greens and golden yellows, but you can use any colors you like! Be creative. For a pop of color, I will use red for the flower buds and mixed with the yellow in parts of the design. I also added some Milk Paint at the perimeter area. It is more opaque and gives some added dimension. Again, please practice with your colors and paints on glass before you go to the glass surface.
A Word About Paints: The gel food coloring has a load of pigment, so it takes less than the liquid type. This is just one method for painting glass in a translucent manner. You can use any paint that is designed for glass plus many enamels and paint pens/markers. Some are more opaque than others. Make sure you practice with them on glass before deciding on your look and feel.
Filling in Your Picture
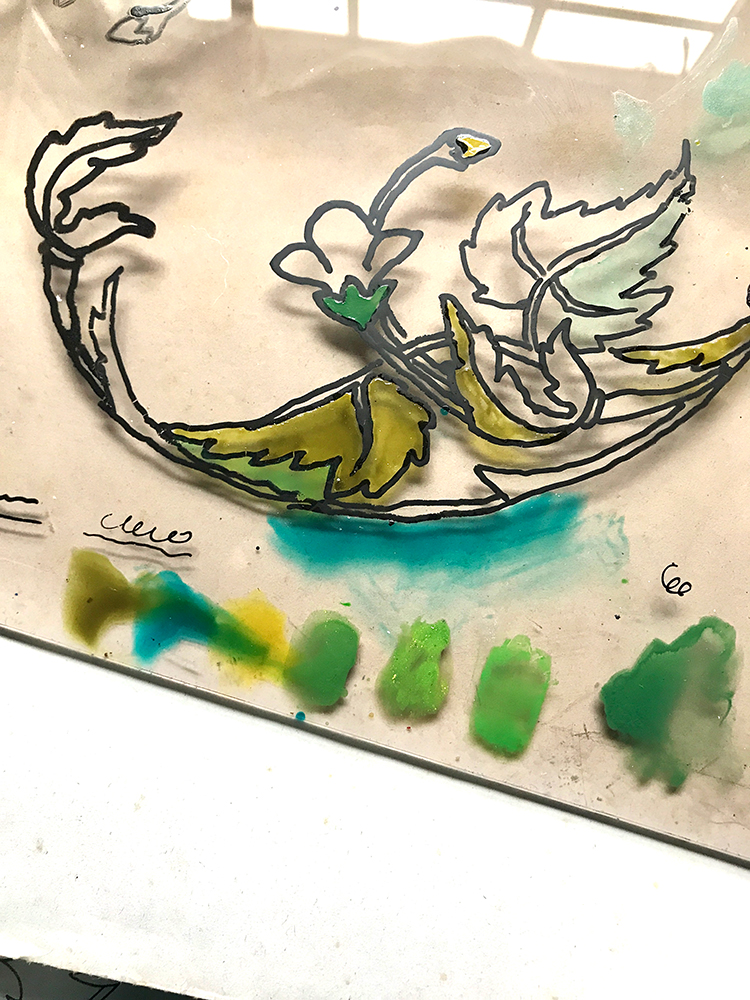
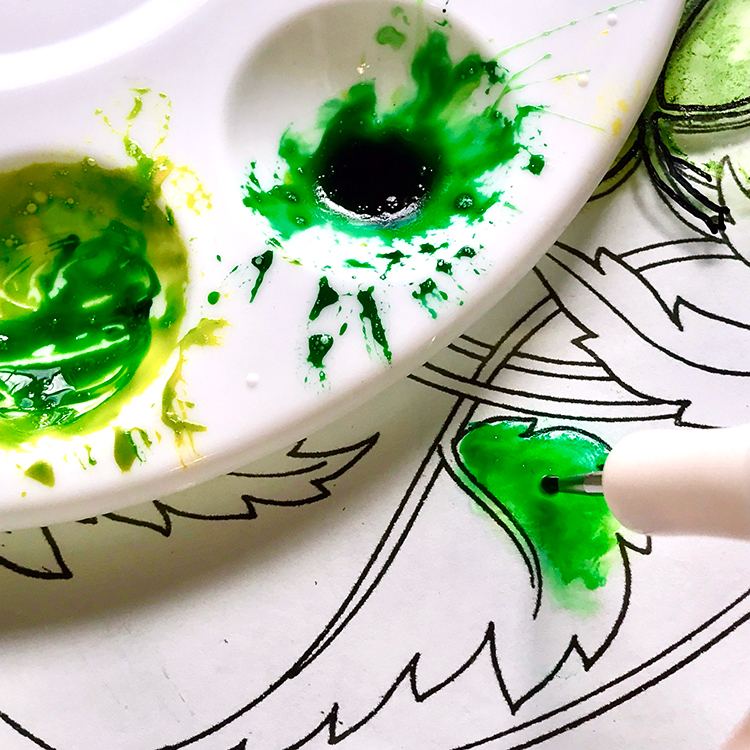
Step 1 – Mix the colors: I use a small plastic palette to mix my colors. You don’t need much as it will dry fairly quickly. Pour a small dollop of glue into the well of your pallet. Apply one dollop for each color you will use, plus one that is just clear glue. Place a few drops of gel food coloring into each well. Mix with a dowel, chopstick, or small spoon until you have an even color.
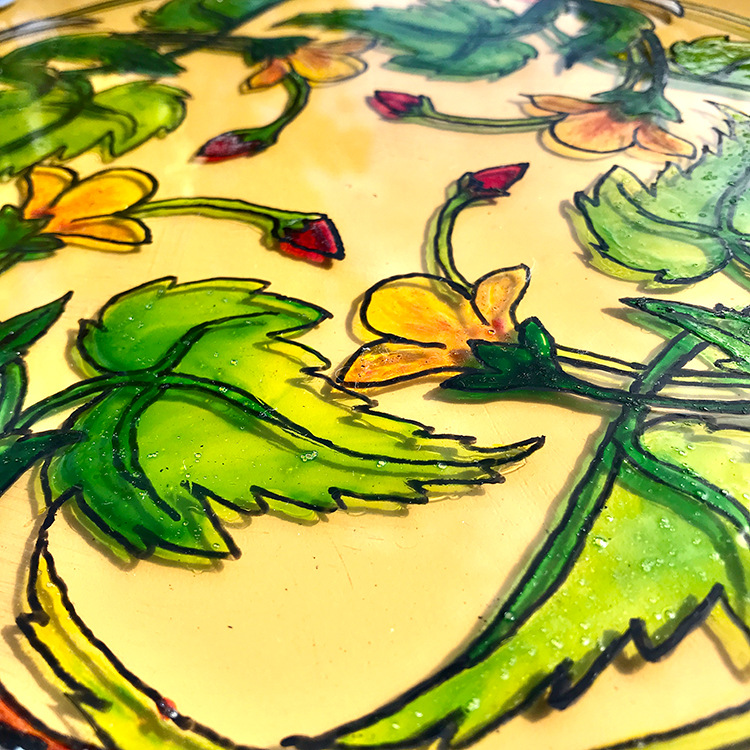
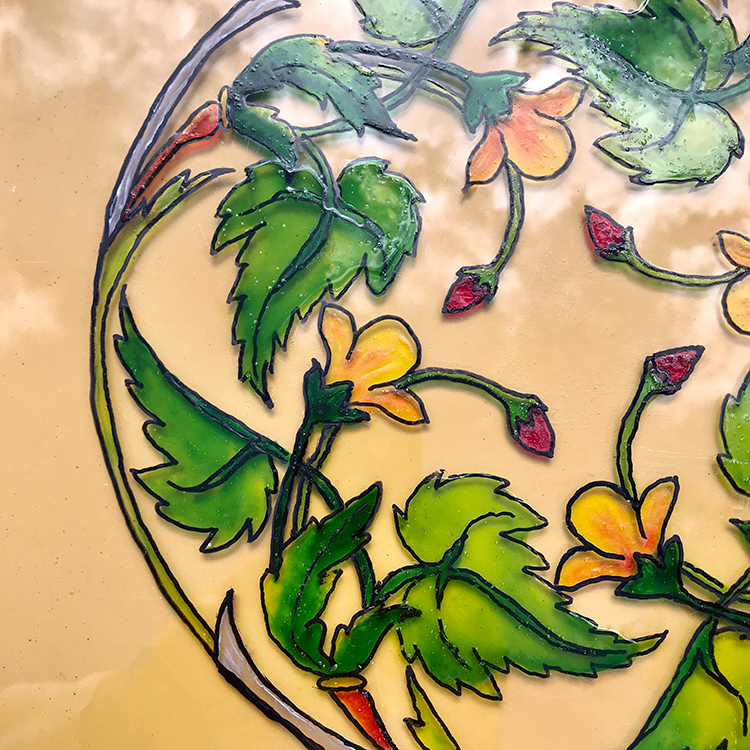
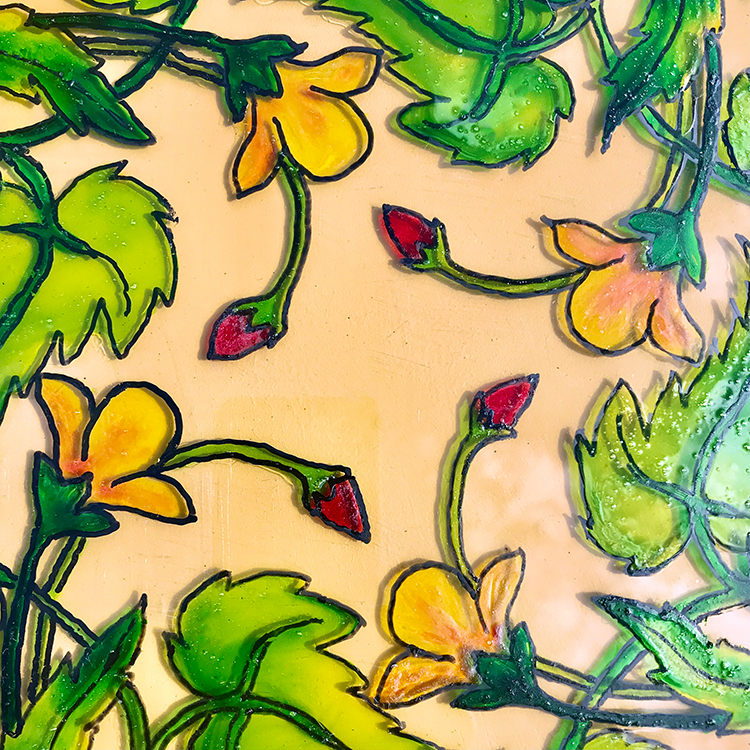
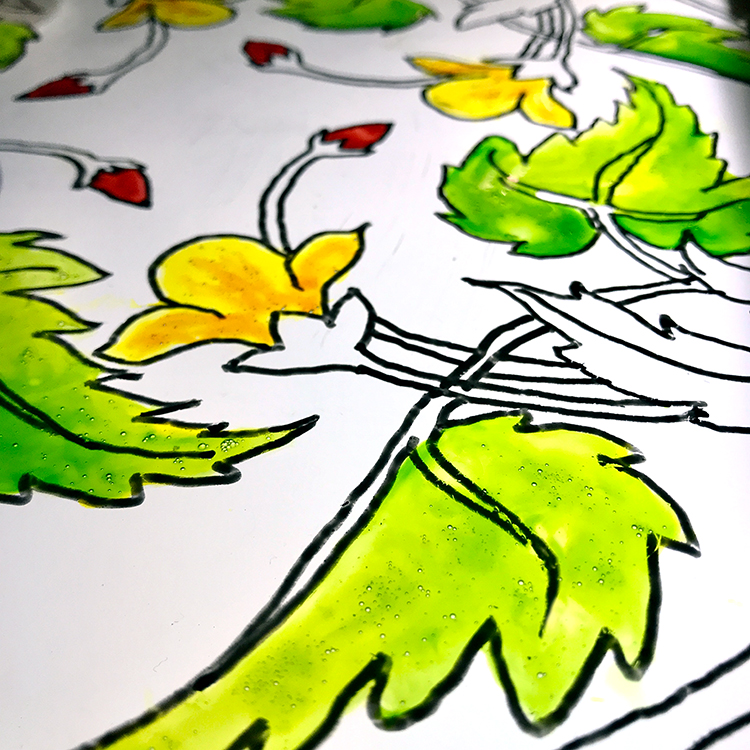
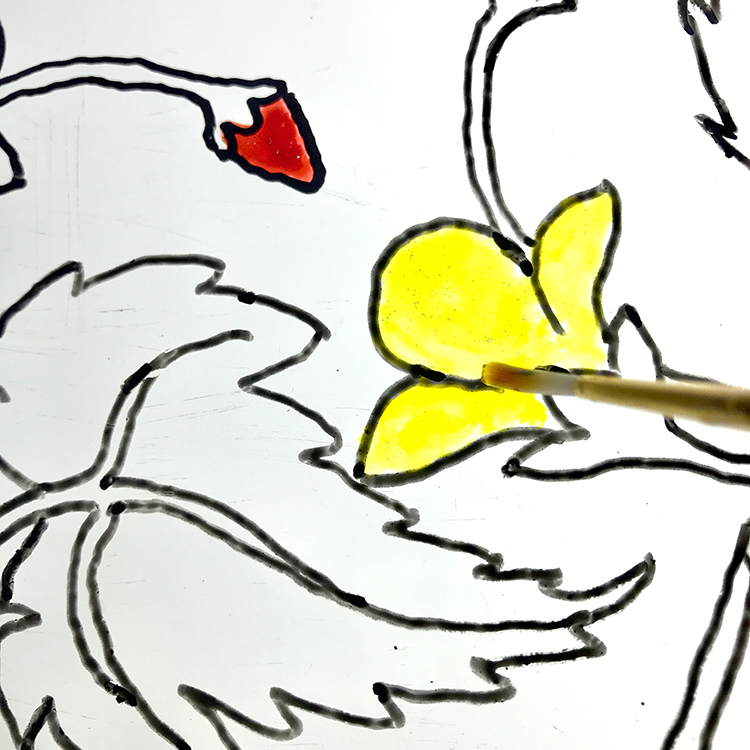
Step 3 – Apply Paint to Glass: Use a soft paintbrush, a flat brush or round will do, to apply paint inside the leading lines. Angle the brush as needed. I found that painting the design in quarters worked best. I like to vary the color in the leaves by using 2-3 colors, to add highlights. (see photo below).
There will be visible brush strokes. Use a stylus or toothpick to blend the colors and the brush marks. I did the flower in yellow and rust for some contrast. Apply red to the flower buds in the same manner. Allow to dry overnight.
Touch Up: If any of your lines have disappeared or fractured, just touch them up with the paint pen. Easy peasy!
Bubbles
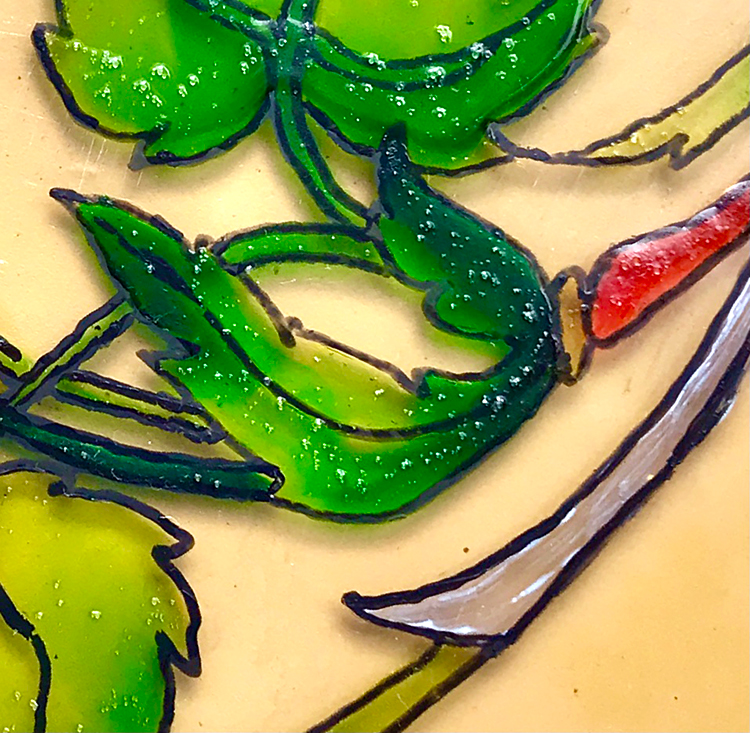
There will be tiny bubbles that form as you paint, it’s not a perfectly smooth finish. I actually quite like the effect as it adds a little shimmer and texture as well!
Suggestions for Hanging and Display
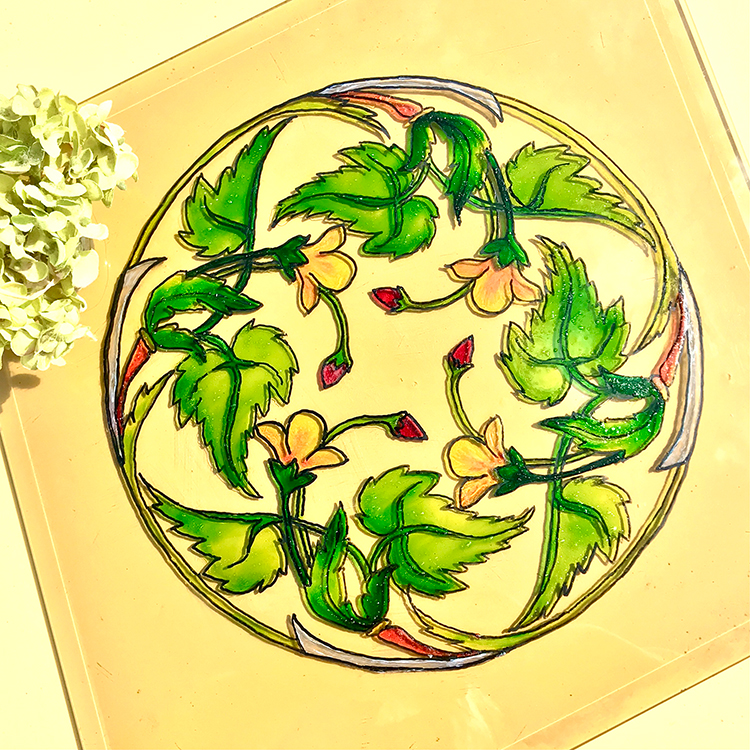
Since this is designed to be a sun catcher of sorts, it is best displayed with some sort of light source behind it. I just leaned mine up against a window. It is fairly large, so it works well.
Here are some display ideas:
- Use an easel to display smaller works.
- To hang it on a window, use heavy duty suction cups designed for glass. Add a drop of glass glue to make sure they hold.
- A see-through frame is an easy way to achieve the sun catcher look.
- You can make a stand out a sturdy piece of wood that has a groove in the middle. Make sure it is heavy enough to hold the weight of your piece.
I hope that you had fun discovering the Glass Painting: Easy Tutorial! You can create simple designs or stretch yourself with more intricate designs with these simple techniques. So have fun making your own glass painting project. When I am not exploring with new and old Techniques, and craft projects, in my Graphics Fairy sandbox, I also create Photoshop Elements tutorials and craft project videos over on The Graphics Fairy Premium Membership site. You can find even more of my books, junk journals, mixed media art, classes, and whimsical shenanigans on Rebecca E Parsons Dot Com.


Connie McDowell says
Can you do this for a real tabletop that can be used for eating? Is there a way to seal it to make it more durable?
Karen Watson says
Connie, I’m not sure that you could seal it well enough to eat off of it. But I’m thinking you could turn it upside down so that the painting is underneath the table and then the surface would just be glass. You would have to make sure that the table legs, or people legs, don’t rub against the paint. I think if it’s a small side table it could be doable. Please let us know if you give it a try!
Katie Cautela says
This is so beautiful! You have inspired me to want to do this!
Karen Watson says
Yay! I’m so glad you were inspired by this one Katie! 😊
LG says
So pretty, Karen. And an easy simple crafting project too. Anyone can do this. Thank you!
Karen Watson says
I’m so glad you enjoyed Rebecca’s beautiful tutorial LG! I selected the image for this project, but of course you can use any image that you like! 😊