Cup of Tea Mother’s Day Card
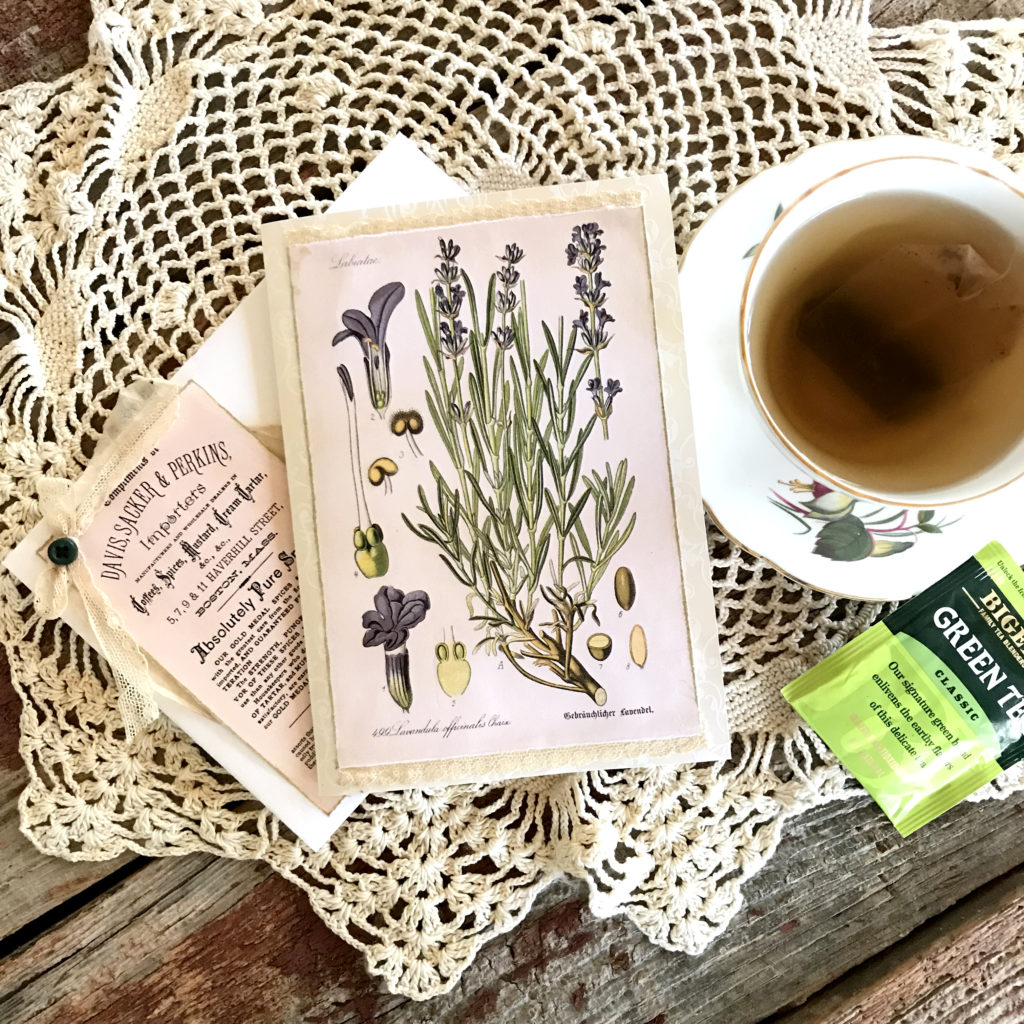
Hey y’all – it’s Rebecca. I cannot wait to share this delightsome, handmade Cup of Tea Mother’s Day Card with you. Inspired by the dreamy illustrations in the Best Vintage Herb Images here on The Graphics Fairy, I had a vision – a beautiful card that is also a gift. My desire was to feature Tea and Art, make it pretty, and a keepsake. I am enamored with the current trend of tiny watercolor leaves and flowers, each one fussy cut and assembled into bouquets. {It is all over Instagram and Pinterest.} I wanted to create the same ambiance with TGF images and make a special gift holder! Et voilà, this gifting card project was born.
Mother’s Day or Spring Gift Card
The first Day of Spring is one of my favorite days. It is my beloved Grandmother’s Birthday. So the idea came to me to create a beautiful card, where I could tuck in a teabag, gift card, or packet of seeds as a gift. Tea and coloring is a great way to spend some relaxing ME time. What a great way to celebrate Mother’s Day, Spring, or a Birthday with something created with love. Incorporating some junk journal techniques is the process is just plain fun to do!
Handmade Gift Card Tutorial
Supplies:
You just need a few things to create this card. You probably have most of them in your craft room already.
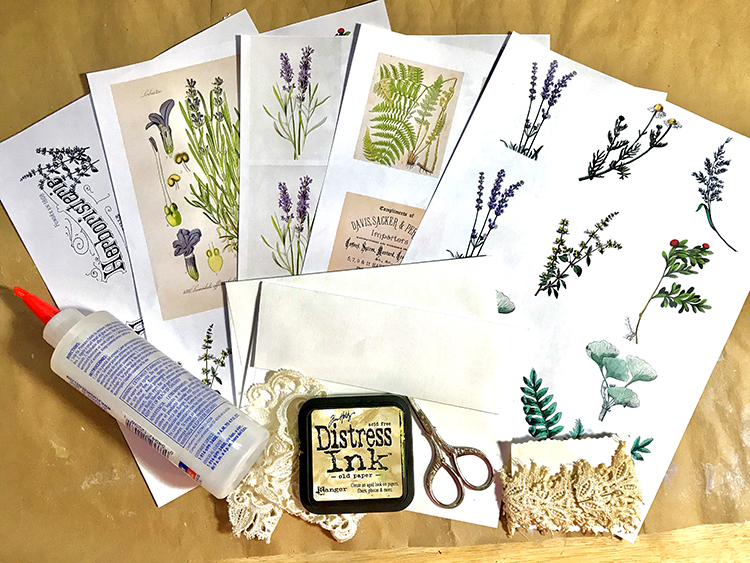
Herb images from The Graphics Fairy (reduced in size to around 3″ tall)
Floral Coloring Pages from The Graphics Fairy (reduced in size to around 4″ wide)
1 – 12 X 12″ Sheet of Cardstock (I used a damask pattern)
1 Envelope to hold a 5 X 7″ Card
Favorite Transfer Medium (I use Golden Fluid Matte Medium)
Distress Ink Old Paper (or your fave)
Corner Rounding Punch
2 Tea Bag papers (saved from making tea)
Tea Dyed Antique Lace
Adhesive
Tape Runner
Scissors
Gift – Tea in Packets
Embellishments from your stash
How To Tutorial
PREP: As a little gift for you, I created this Mother’s Day Card PDF Printable. The Graphics Fairy Images are sized perfectly for this 5 X 7″ Card project. Print images on cardstock or heavy paper. I used a Laser printer, but you could use an InkJet for this project. Just seal the images before you use glue or other wet media with them.
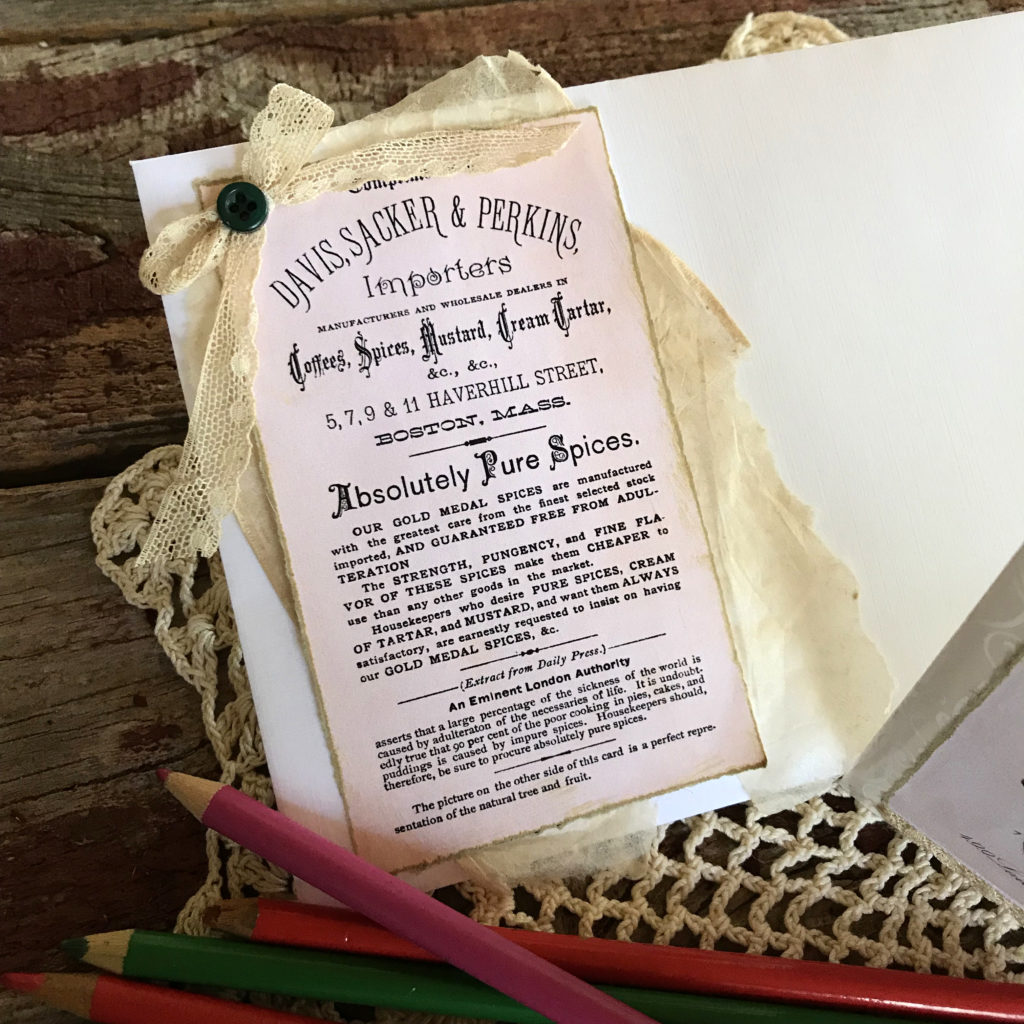
Trim the rectangular images for the cover (Lavender Botanical print) and the envelope (Davis, Sacker & Perkins Advertising image). I like the look of carefully tearing the edges, but you can trim. After trimming, age the edges with your favorite technique. I used Distress Ink Old Paper to slightly stain the torn edges.
 Trim Coloring Page images and round the corners. Trim close around the Herboristerie image. Fussy cut around each of the herb images leaving a tiny white edge.
ASSEMBLY: Trim the 12″ square cardstock at 7″. This leaves a 7 X 12″ piece and a 5 X 12″ piece. Trim 2″ from the short side of the 7 X 12″ piece. This leaves you with a 10 X 7″ piece of cardstock, which when folded in half on the short side, becomes your 5 X 7″ card.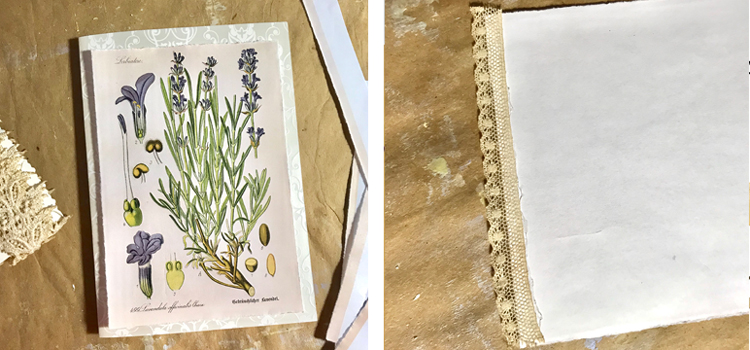
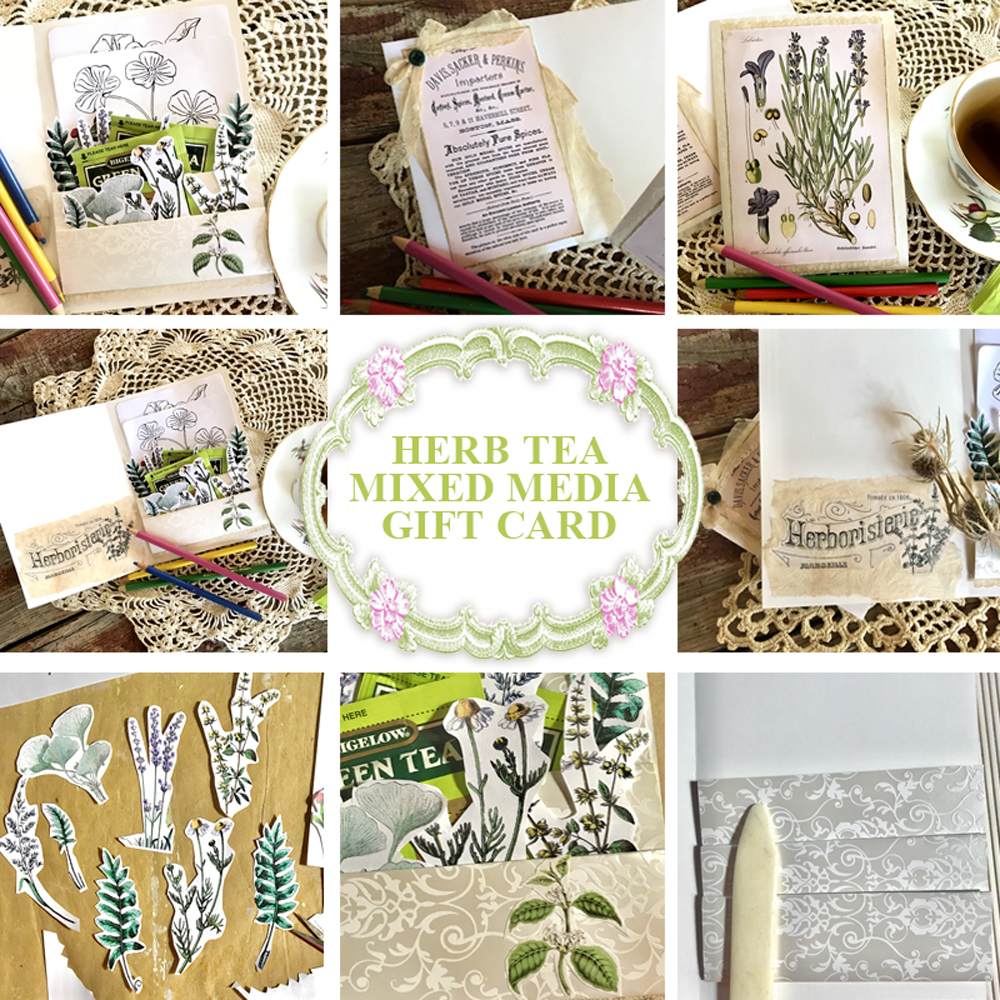
Front of Card: Add antique lace to the top and bottom edge of the Beautiful Vintage European Lavender Botanical Print with adhesive. Attach the image to the front of card with tape runner at the edges.
Inside Card
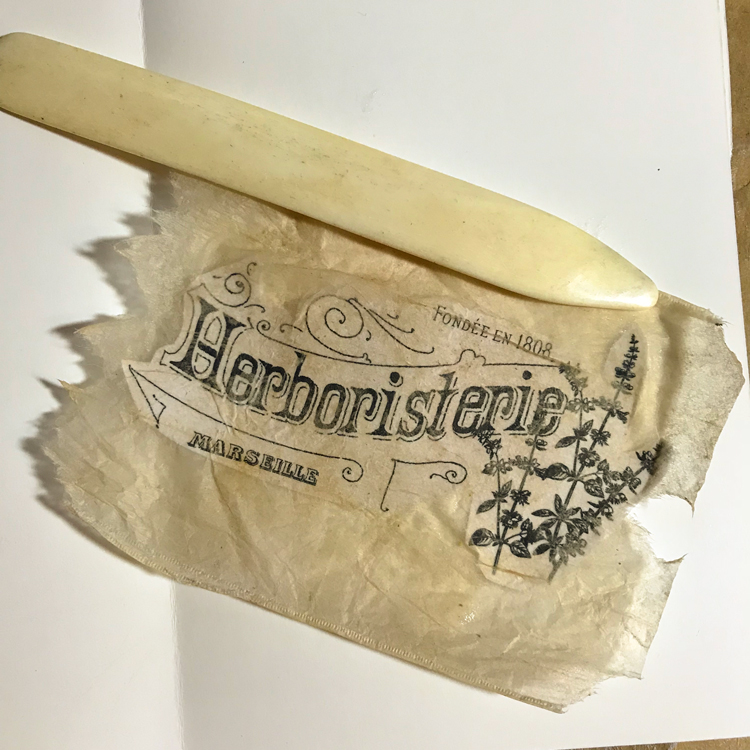
Left Side: Attach the French Herbal Shop Transfer Herboristerie image to a tea bag with liquid matte gel. Glue the front of the image to the tea bag. When dry, tear the tea bag into a pleasing shape that fits inside the card. Glue in place on inside left of card.
Easy Folded Pockets
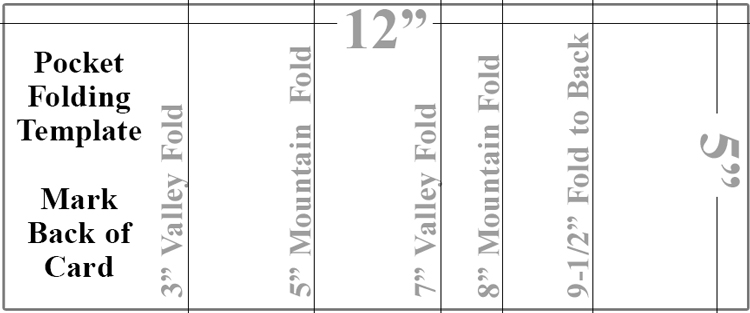
Right Side – Folding Graduated Pockets: The 5 X 12″ piece is folded in an accordian manner to form graduated pockets, which will hold the goodies. Fold it using the guide below – we will make 2 pockets. The back of this structure will also become a pocket. This is where you place the coloring sheets.
- Mark 3″ from top. A valley fold – front sides of card face each other.
- Mark 5″ from top. A mountain fold – backsides of card face each other.
- Mark 7″ from top. A valley fold.
- Mark 8″ from top. A mountain fold.
- Mark 9-1/2″ from top. Fold around to back.
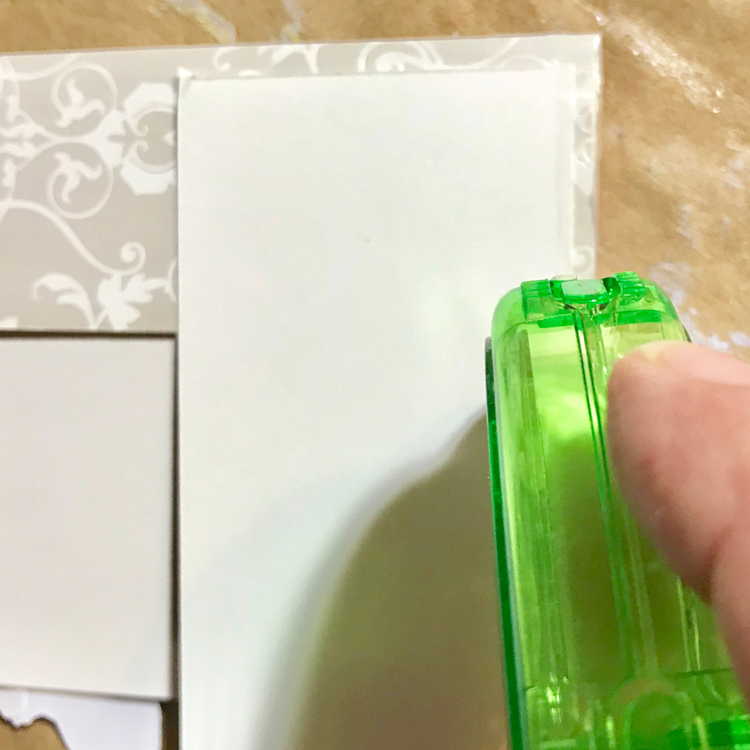
Carefully glue the edges of the pockets with the tape runner. TIP: Sometimes the tape glue is too wide for my liking. To solve this issue, I use a scrap of cardstock as a mask. I place it where I can run the Tape Runner on the surface and the scrap at the same time, thus making the adhesive strip thinner. Add a little lace to the bottom edge with adhesive. Glue the pocket structure to the bottom right side of the open card using a tape runner strip on 3 edges. Leave the top edge open to form a pocket for the coloring sheets.
The Gift Pockets
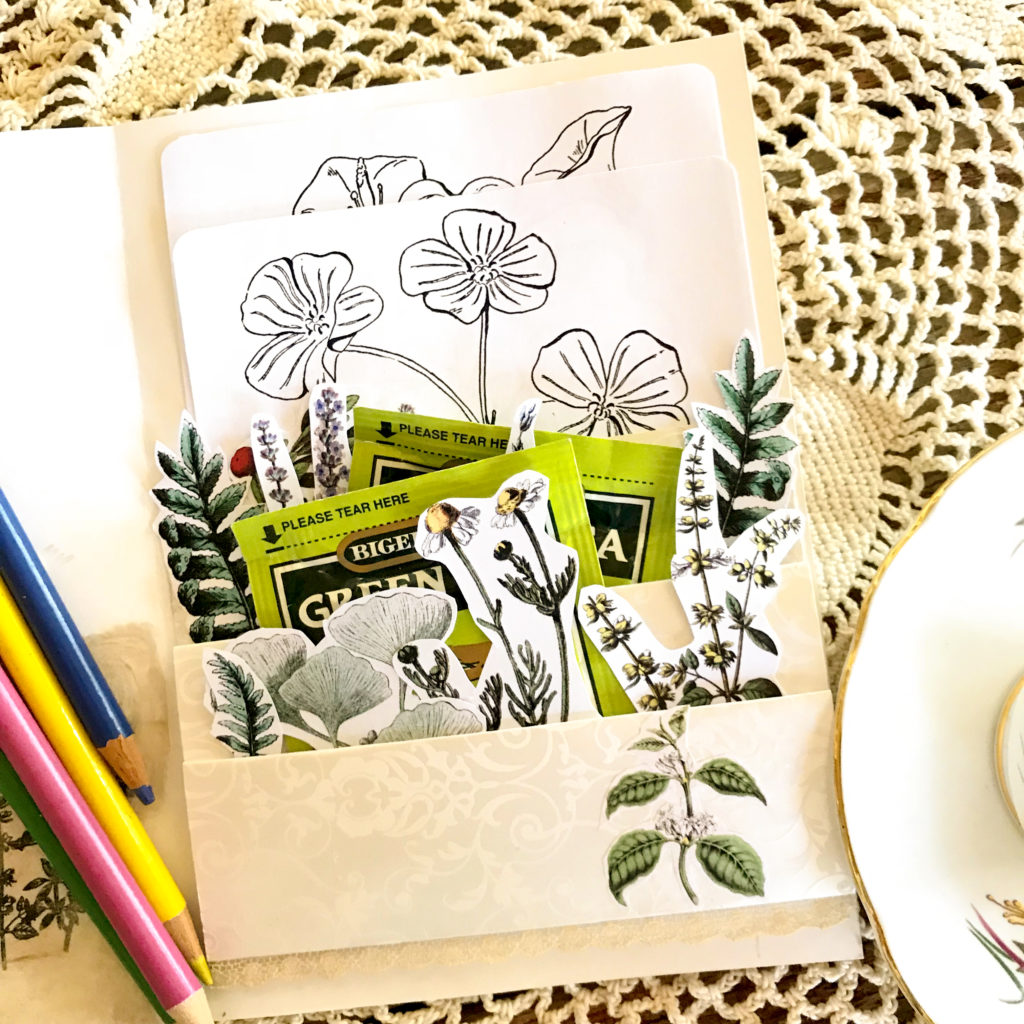
Fill Pockets: Place the Coloring sheets in the back pocket. Place your gift (Green Tea pouches) in the front two pockets. Tuck in your fussy cut herb images around the tea. Glue one of the images to the front of the pockets like a sticker. (I used the coffee image instead of the tea image as a hoot!) Gift the card with a set of colored pencils and the recipient is all set. The tiny herb images will become a little bouquet for the recipient or they can use them in their art. It is a gift that keeps on giving. Tea and Art!
Decorating the Envelope
Glue an open tea bag to the front of the envelope at an angle. Glue the prepared Vintage Antique Trade Card Clove Plant Advertising image (Davis, Sacker & Perkins) in place. Create a bow with the lace and glue to the top of the image. Glue a tiny button or other embellishment in place.
It is my fondest hope that you enjoyed my Herb Tea Mixed Media Gift Card tutorial as much as I do! It makes a delightsome afternoon of crafting and looks so impressive. You will probably find many uses for the easy and inexpensive handmade card. Have fun and let me know how you love it!! Meanwhile, I will be back in two weeks with more mixed media mayhem adventures. You might also like this Mother’s Day Card Making Kit HERE for grandma!
I also create Photoshop Elements tutorials and craft videos over on The Graphics Fairy Premium Membership site. You can find even more of my art, DIYs, and whimsical shenanigans on RebeccaEParsons.com .



Kathy says
So beautiful! Thank you!
Karen Watson says
I’m glad you enjoyed Rebecca’s pretty project Kathy!
karen gleeson says
I love all your beautiful images. Do you by chance have images of vintage seed packets that can be transferred?
graphicsfairy says
Thanks Karen, no but one of our readers created her own here, https://thegraphicsfairy.com/printable-seed-packets-reader-featured-project/