How to Make Crackle Paint
A big Hello to my favorite crafters. It’s Rebecca Parsons here. I’m back today with an easy and inexpensive Mixed Media technique tutorial. This week we are exploring … How to Make Crackle Paint! No need to go out and buy crackle medium, as you can make it at home with Elmer’s Glue, and it’s fun and easy to boot! The best part is that there are no expensive potions necessary. It is great for junk journals, books, collage, Mixed Media, DIY projects and just about every art and craft that we make here on The Graphics Fairy. Let’s get started …
Supplies to Make Crackle Paint
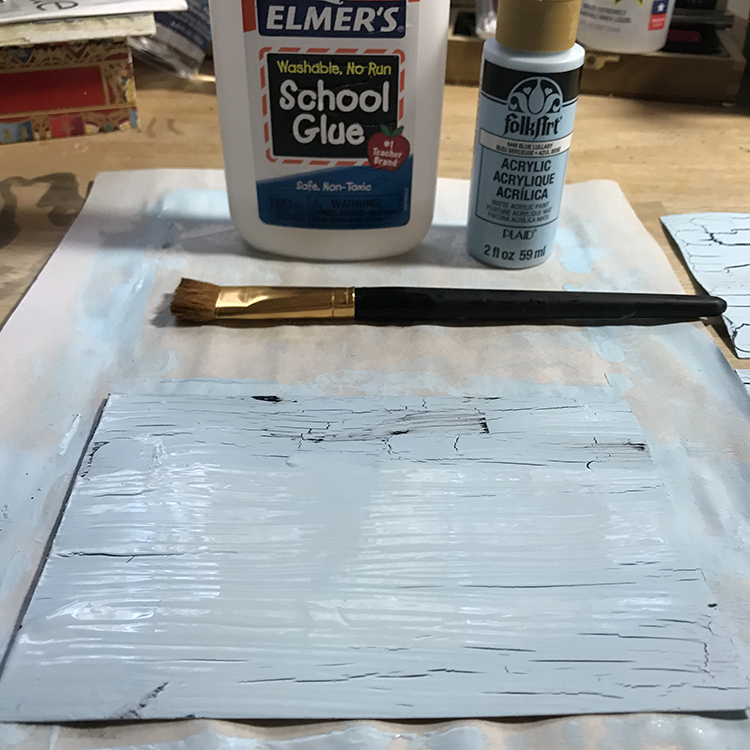
All you need to create this distressed look are a few simple supplies that you probably already have in your stash.
Gesso – I used Black and Clear
Elmer’s White School Glue
Acrylic Paints – I used a Light Blue
Soft Artist Brush(I prefer this over a foam brush)
Cardstock – I used a 4X6″ Index Card
Step-by-Step Tutorial for How to Make Crackle Paint
Step 1: Apply a coat of Gesso to the entire surface, it acts like a primer. I used black so you can easily see the crackling when it happens. Allow this to dry thoroughly 15-20 minutes on my index card. This is important. A damp base will affect they drying time and the crackle. TIP: When it no longer feels cold, it is dry enough. If it feels very cold, it is still drying. Remember: Whatever color you use as a base coat will show through the cracks of the finish. I applied Gesso, because the Index Card is porous. You can apply acrylic paint, but it will soak into your cardstock.
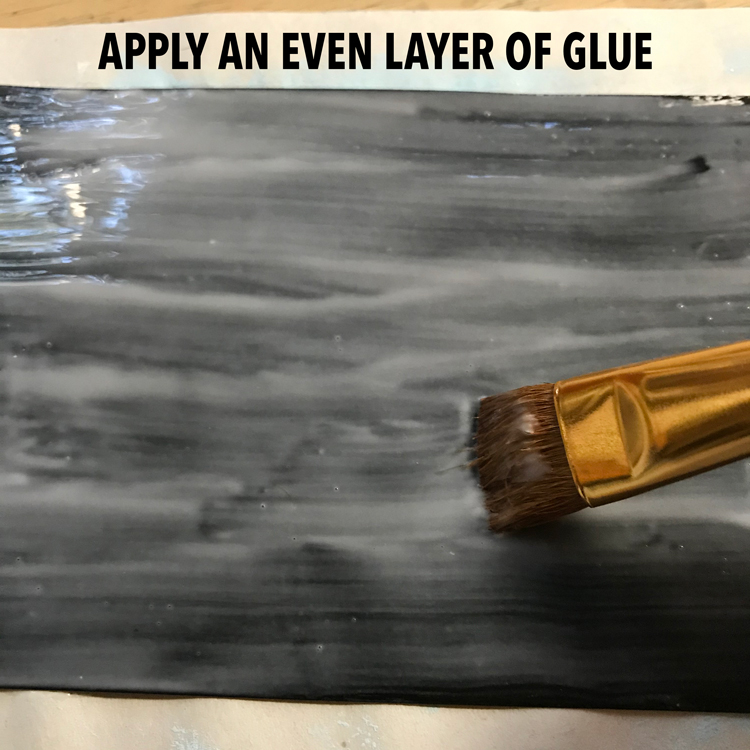
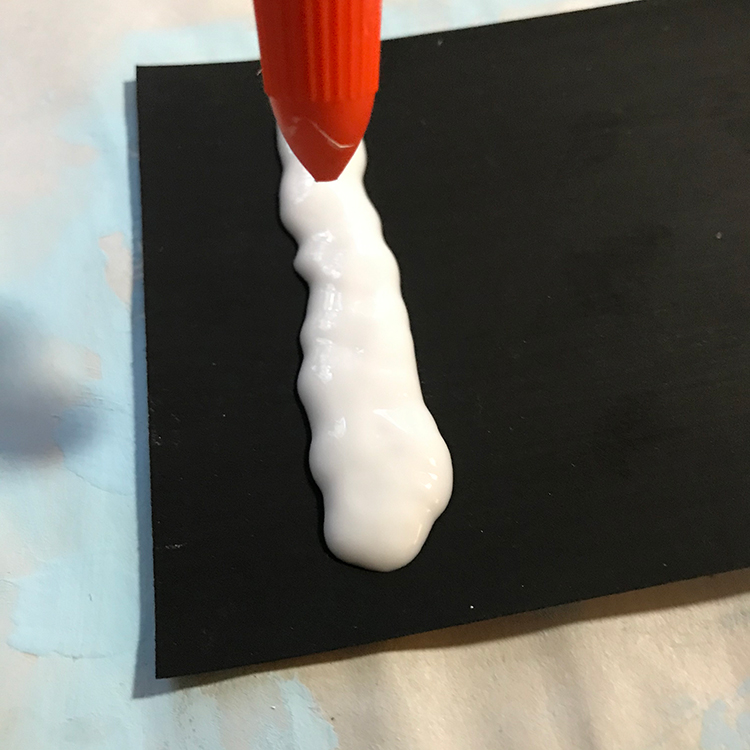
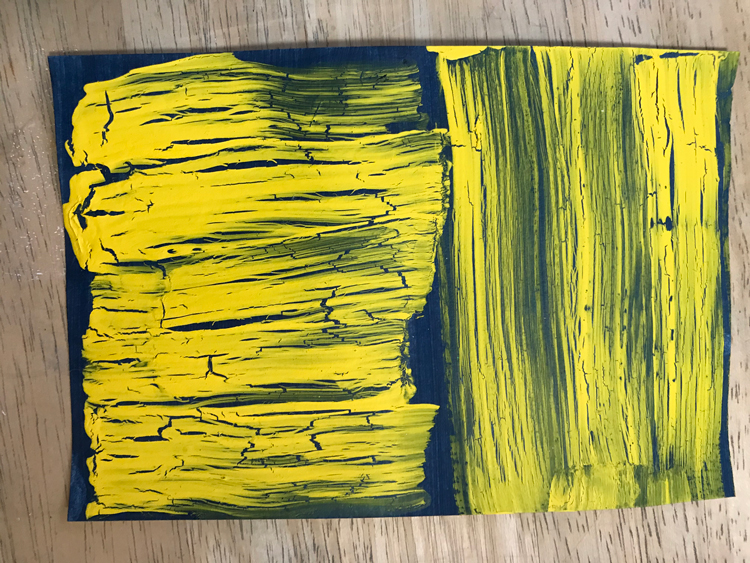
Step 2: Apply a nice, even coat of glue to your surface. I used a soft mop brush. I applied mine in a horizontal manner for testing purposes, but I encourage you to try other strokes. (See Accidental Findings below) Don’t you just love when happy accidents happen during the creative process?!
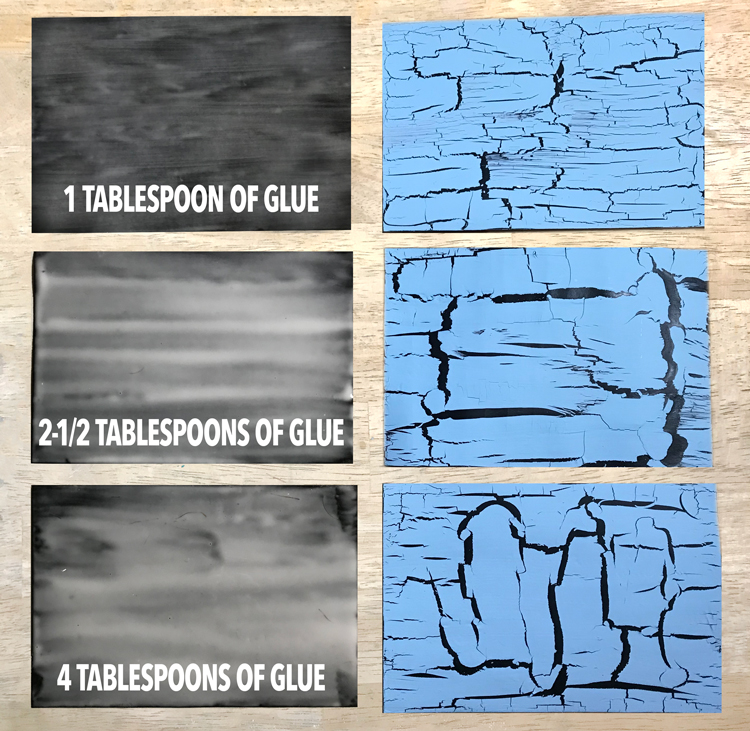
For the 4X6″ Index Card, I used about 1 tablespoon of glue. NOTE: A thick layer of glue results in big cracks. A thin layer of glue creates smaller cracking. So think about which type of effect you want for your project. TIP: A very thick coat can take up to 48 hours to dry completely. So a bit of patience is necessary.
I did several tests, which you can see the results of in the photo below. The top card has the 1 tablespoon of glue. The middle card has about 2-1/2 tablespoons of glue. The bottom card has about 4 tablespoons of glue. It really makes such a difference doesn’t it?
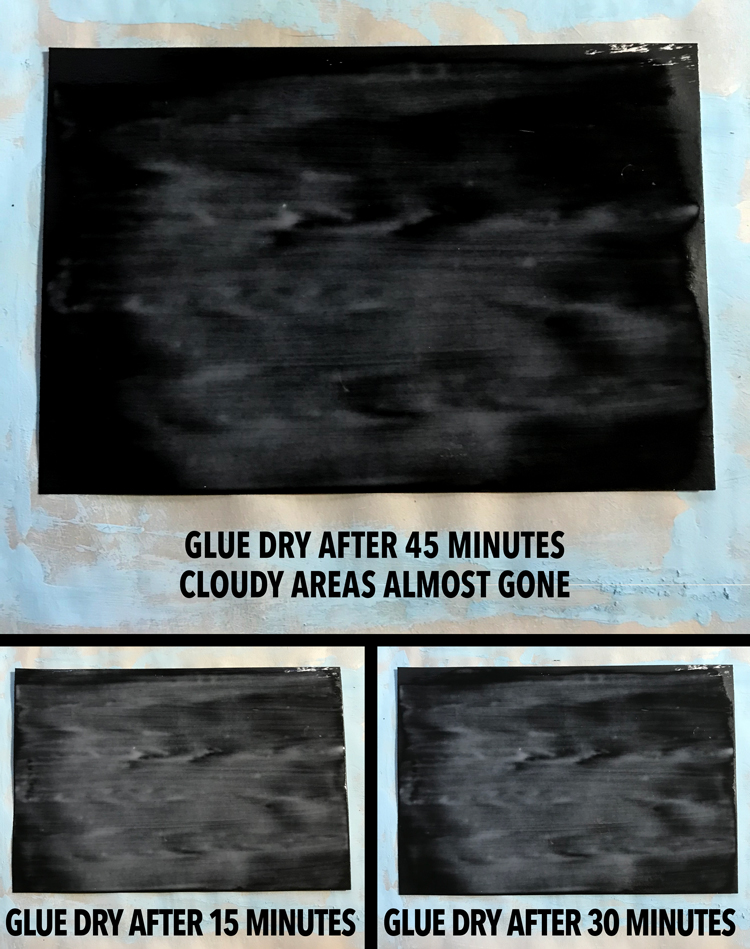
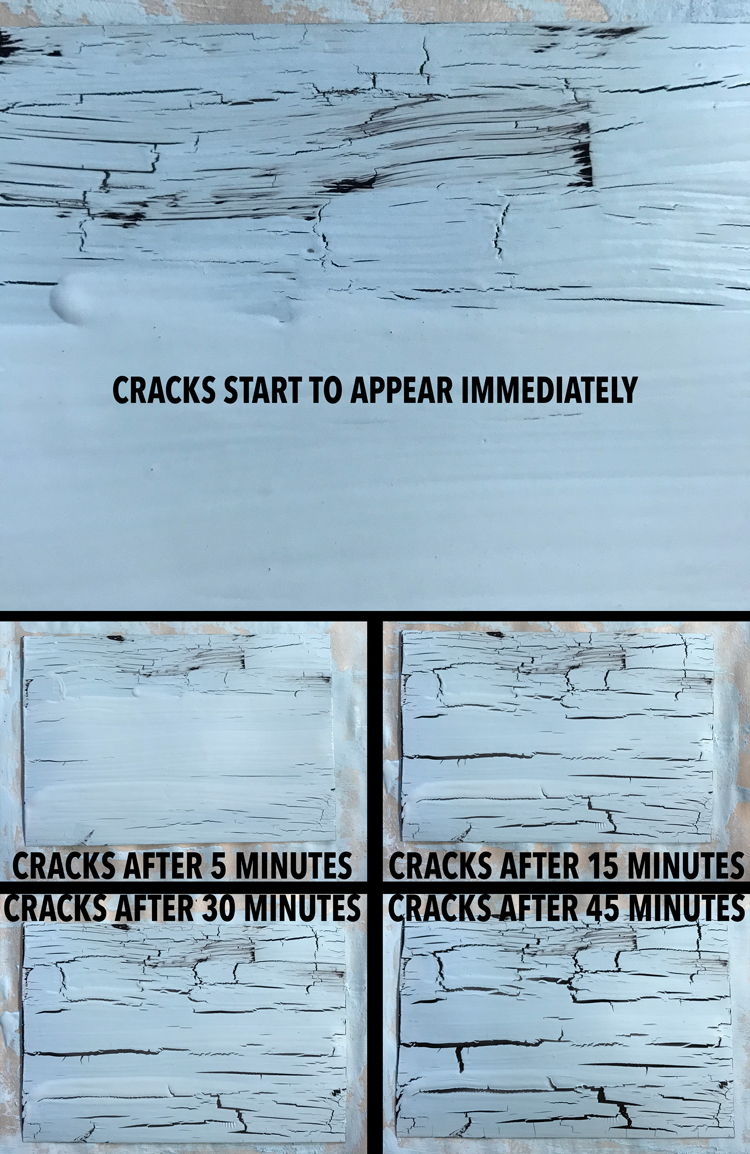
Step 3: Drying Times. Let the glue dry until it is almost transparent and the cloudiness has dissipated. The top image below shows how your glue should look when ready. It will be just a little tacky to touch. NOTE: The times below are for the 1 tablespoon of glue. Times will be longer for greater amounts of glue. Times will also vary depending on the surface and the basecoat. TIP: Take the time to make test samples before you start on any surface!
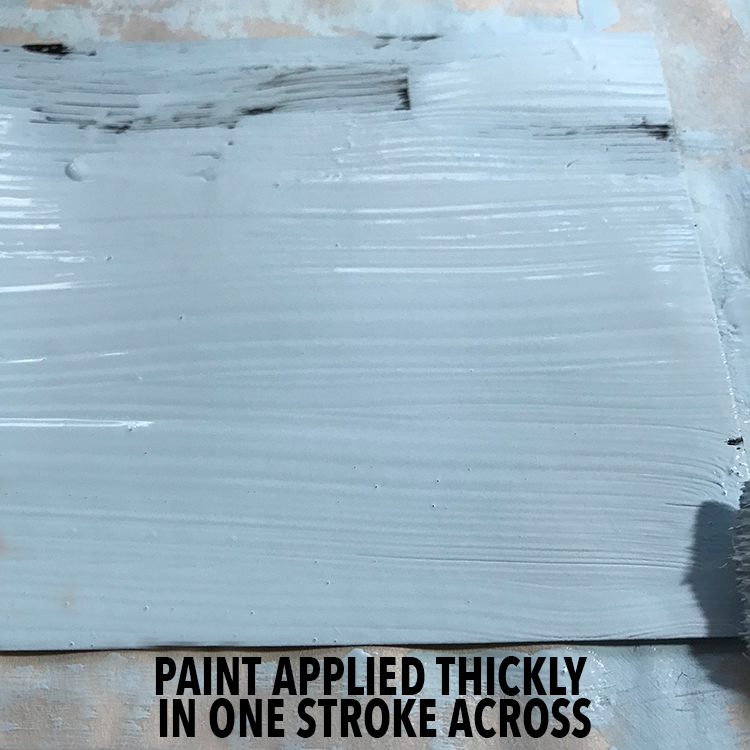
Step 4: Load your brush with a good amount of the top coat acrylic paint. Apply it in even horizontal strokes over the tacky glue layer. You should have enough paint on your brush to be able to spread the paint over the glue in one stroke. TIP: One pass over each section produces the best results. As you can see below, my first pass at the top of the card did not reach the other side of the card. I had to reload and apply more.
Step 5: Tiny crackling at the edges should start to show immediately. The surface will continue to crackle until all layers are dry. TIP: Do Not play with the paint or try to encourage drying with a heat tool. At this point you cannot change the results. You can however, make a mess. NOTE: The times below are for the 1 tablespoon of glue. Times will be longer for greater amounts of glue.
Accidental Findings
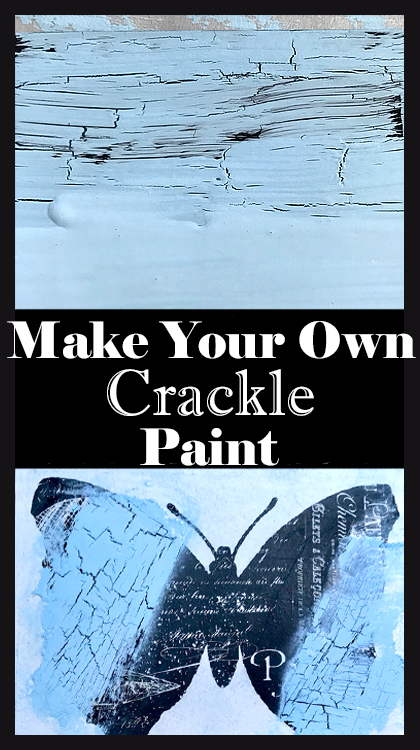
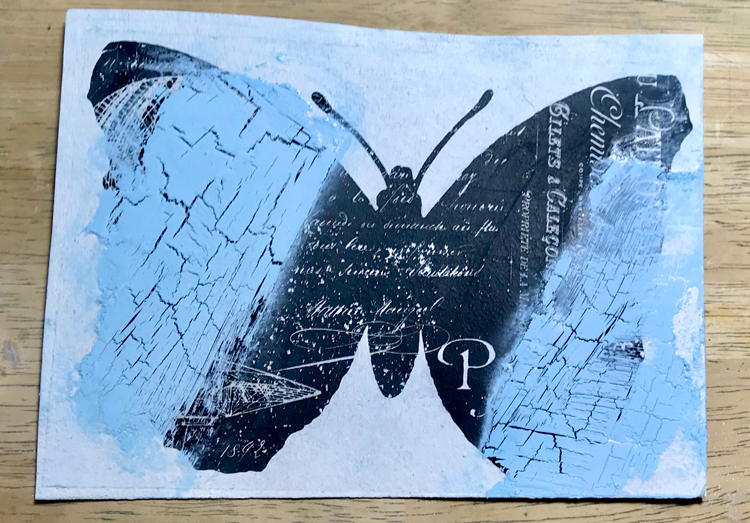
I learned something important when I added this crackle finish to the TGF image below. I applied the glue haphazardly with a credit card, not with a horizontal stroke as I used on the above samples. I also applied the paint layer in different directions, taking care not to overlap. The cracking was more random and fine. It looks like eggshell or hairline cracks! And I love this! So play with directioning of glue and paint! FYI: The image below was transferred to cardstock and coated with a thin layer of Clear Gesso before applying the above steps for How to Create a Crackled Paint Finish.
OOPS!
Below is an example where I watered down the glue. I was able to produce some cracks, but not as much as with full strength glue. I thought it would cause more fine cracking. Not so much! Well you just never know if you don’t try right? It’s always fun to experiment anyway … the more you experiment in your art and painting projects, the more cool effects you will come up with, so totally worth doing in my book.
I hope that you had a blast exploring How to Make Crackle Paint with me!! I hope you will give this a try and that you can use this technique in your creative projects, it creates such a great aged look. You can pin this post to your one of your Pinterest boards, so that you can come back to it in the future, if you aren’t in need of any crackling right now. You might also enjoy our Best Paint for Painting Rocks HERE and Best Paint for Painting Terracotta Pots HERE too.
When I am not playing with new and old Techniques for Mixed Media in my Graphics Fairy sandbox, I also create Photoshop Elements tutorials and craft project videos over on The Graphics Fairy Premium Membership site. You can find even more of my books, art, and whimsical shenanigans on The Bookery




Deb B says
Thank you so much for this information. Can’t wait to try this 🙂
graphicsfairy says
You are very welcome Deb, have fun!
Yolande Bergeron says
You are a wonderful teacher. These pictures guide us throughout the process.
Merci
Yolande
graphicsfairy says
Merci Yolande, you are so kind 🙂
Rebecca E. Parsons says
Thank you so much Yolande! That makes my day!! Hugs, Rebecca
Diane says
This is a keeper! Very helpful! Thanks
graphicsfairy says
I am so glad you find it helpful Diane 🙂
Rebecca E. Parsons says
Thank you so very much Diane. That makes me so happy! Have fun, Rebecca
Jennifer Scull says
this is wonderful! I appreciate the photos showing not only the step out instructions, but also the various amounts of glue used. thank you! 🙂
graphicsfairy says
My pleasure Jennifer so glad you like it all 🙂
Rebecca E. Parsons says
Thank you Jennifer. I was afraid that I would confuse people without that info on the images. Glad it helped you. Hugs, Rebecca
verov94 says
Bonjour, Nous ne pouvons pas acheter cette colle en France.
Peux tu me dire qu’elle sorte de la colle blanche ? à l’eau? ou autre.
Merci. Bon week end.
graphicsfairy says
Je suis désolé mais je ne suis pas sûr de comprendre ce que vous demandez? Je compte sur Google translate car je ne parle pas français 🙂
Rebecca E. Parsons says
Merci Veronique.