How to Emboss Without a Machine
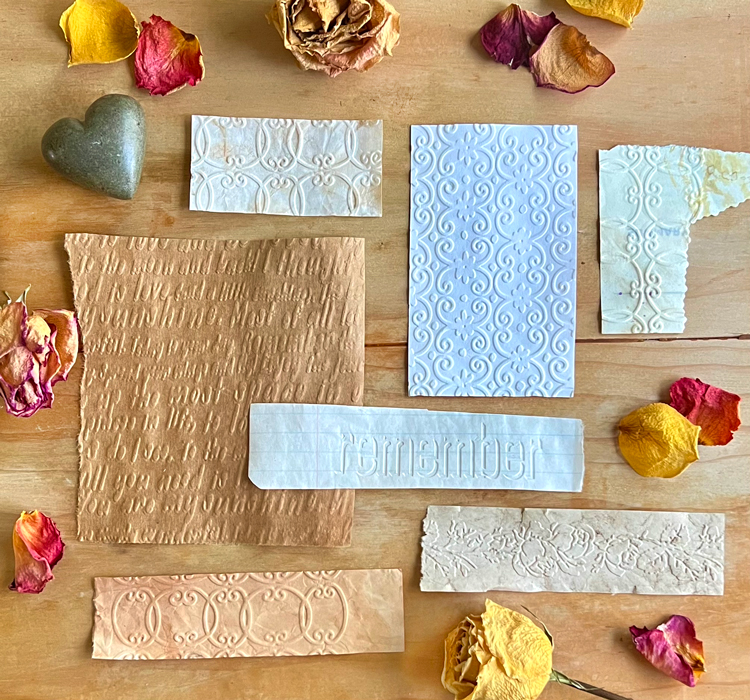
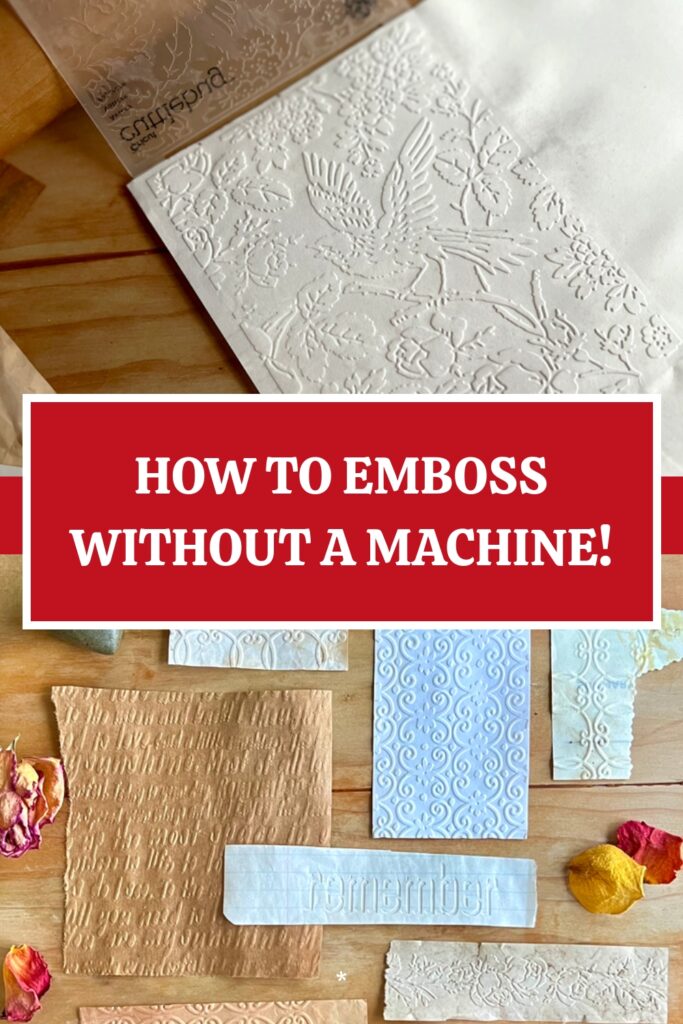
Hello Graphics Fairy friends and fellow paper crafters! It’s Rebecca here today with a fun and fabulous technique tutorial – How to Emboss Without a Machine. This is a grand way to add another dimension to your artwork. I will show you a trio of ways to create decorative relief designs on papers the way I did it before there were die cutting machines available (way back in the day). You will find loads of uses for these exquisite, deeply carved papers as Handmade Gift Tags, Cards, or in Junk Journal, Collage, or Mixed Media projects!!
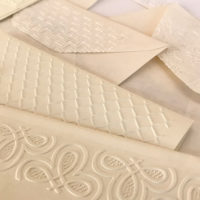
I love adding embossed WOW to almost crafting project and have created some extra fun tutorials for you. You can find my previous embossing tutorials for Embossing Toilet Paper HERE, Embossing Aluminum Foil HERE, Decorative Brown Paper Bags (Embossing), and DIY Embossed Envelopes HERE!
Hand Embossed Paper WOW!
Turning plain paper into a stunning piece of art is easier than you think. Lighter weight papers are easier to emboss. Heavier weight papers MUST be moistened for the effect to happen. If the paper is too heavy, it tends to crack when embossed. And Almost any paper works. My favorite papers to emboss are in the mid – weight range – 28 to 80 lb. papers. I adore papers with some cotton content. They just form so well to your embossing folder, plate, or stencil. But copy paper works in the 20 and 24 lb weights. I also love the rustic look and feel of the plain brown craft paper with an embossed pattern on it. Vellum and Tracing Paper give you an ethereal quality that is just WOW! Even scraps of paper can be turned into wondrous fodder.
I use all types and sizes of papers for embossing, but prefer to use papers without patterns. The patterns seem to make the embossing lose its importance. But that is a personal preference. So experiment with all the papers you have in your stash. For this tutorial, I tested light weight papers (20 lb.) to heavy weight brown craft paper (66 lb.) and light-weight cardstock. They all work… some better than others. Papers with a smooth surface work best. Linen and cotton papers work beautifully, but take more pressure. HINT: I love 100% Cotton Resume Paper for my art. It comes in a wide variety of colors too. Velum and Tracing Paper are magical. Mixed Media paper works well and is pretty tough. Even light weight 140 lb Watercolor Paper works. Marker Paper is fine. TIP: From my research, papers that weigh between 24-80 lb. work best. Scraps work well also, so try them. Again experiment and explore all types of papers.
A word about the embossed designs. To begin this embossing journey, I would recommend a simple design with larger openings. That way you can develop your skill and learn the ins and outs of your tools, the paper, the pressure needed, and the technique. Patience is always a good habit to have when starting any new crafting idea.
Placement of Design: This is probably the most critical step in this process. The design needs to be in the right place. If not, the whole thing looks wonky and sloppy. So take the time to measure! Carefully place the stencil on the right side paper of the paper. This means the side that will be raised when finished. TIP: Make sure that the pattern is straight on the paper. Secure the paper to the stencil with low tack tape in at least two places.
Hand Embossing Techniques – Step-by-Step Directions
Materials and Supplies:
Assorted Papers – plain, unpatterened papers are best
Embossing Folders – all seem to work
Brass Stencils
Stencils – thin mylar stencils take patience. Best is a design on heavy plastic
Low Tack Tape – I like the tape designed to make crisp edges on watercolor paper
Spray Mist bottle for water
Wooden Rolling Pin – I prefer one with handles
Stylus with Round Ball
Optional Light Box
Craft Knife
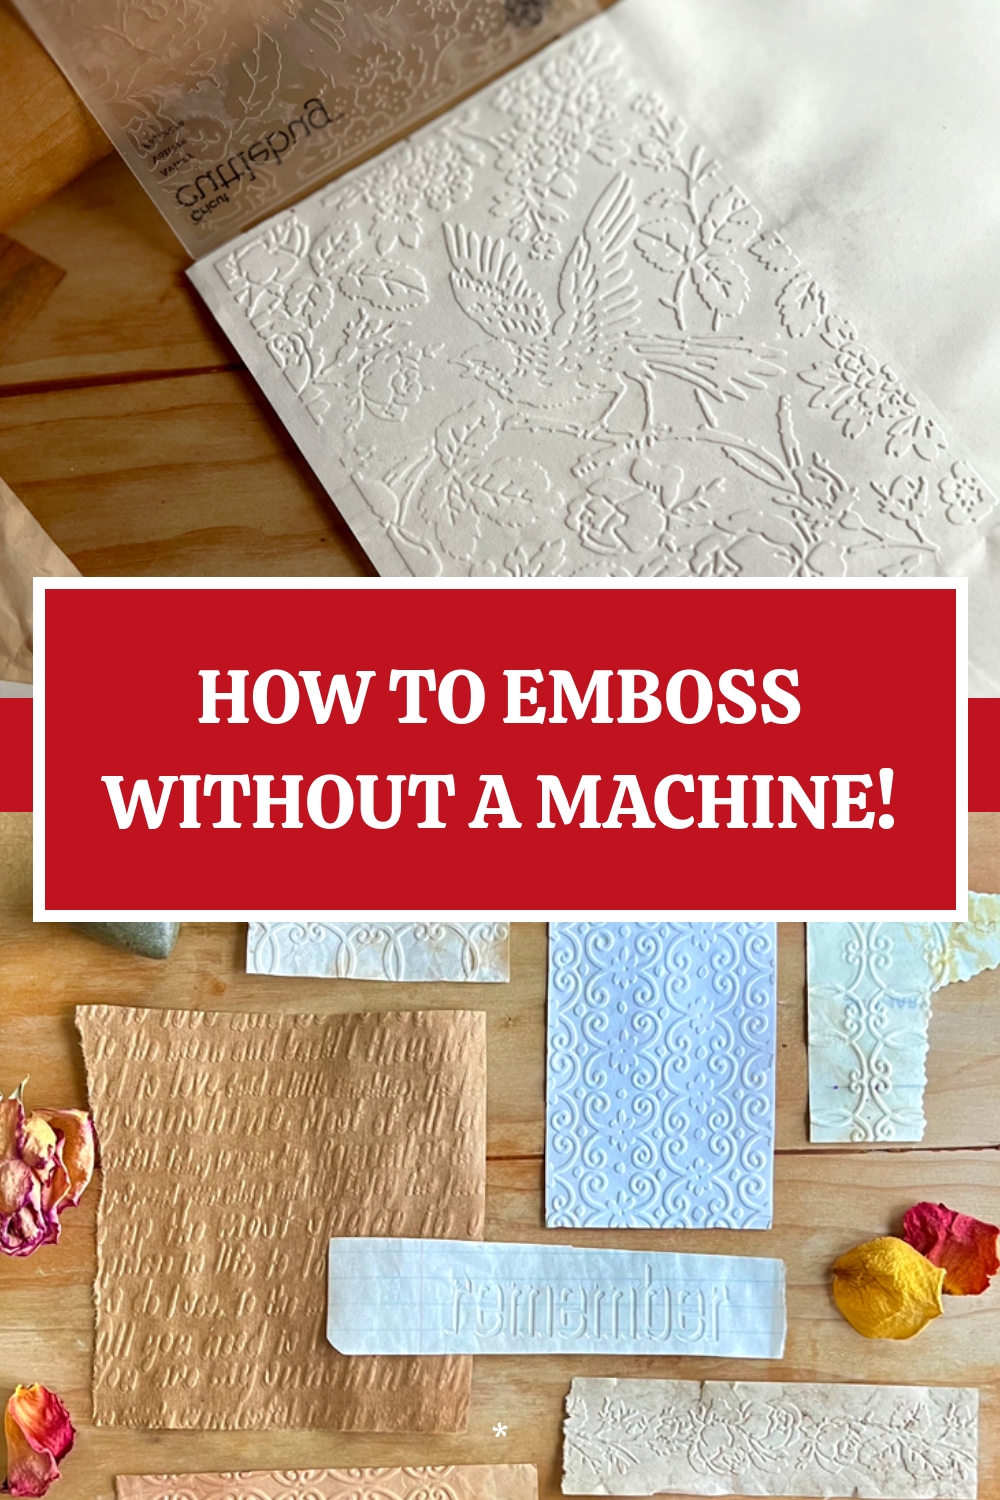
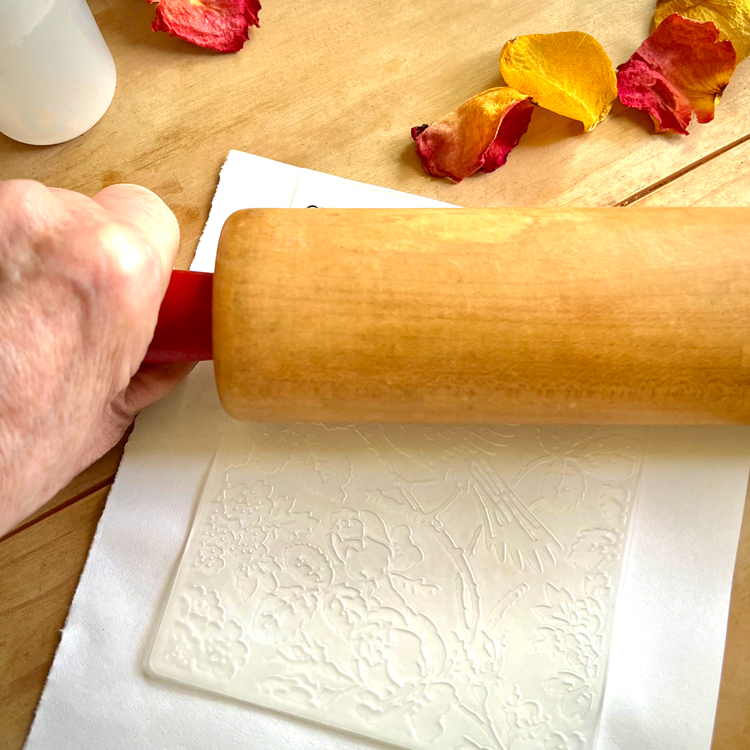
#1 Emboss with a Rolling Pin and Embossing Folders
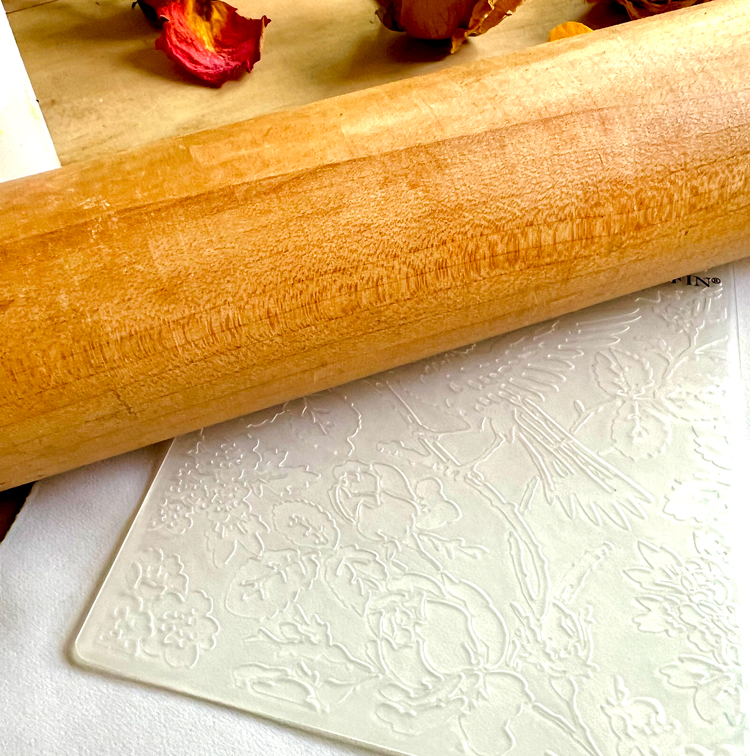
This method works beautifully and is fairly easy to do. It etches the paper well and you don’t need to have super strength to make it work. I like a heavy wooden rolling pin with handles, but you can use what you have. You can even use a heavy glass jar to roll if you don’t have a rolling pin. Just be careful not to press down too hard and break the jar.
Embossing Folders
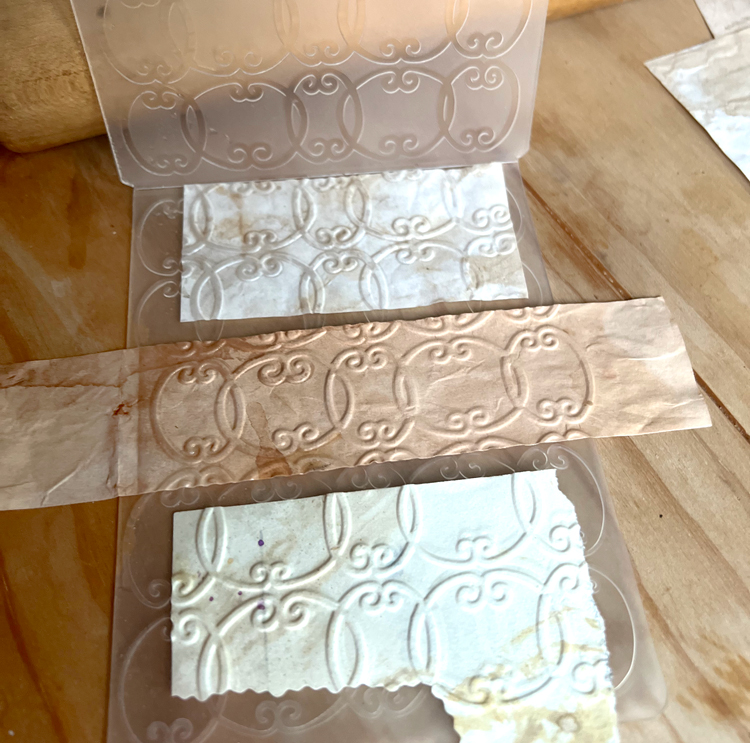
The folders come in many designs and shapes. Any size folder that fits the width of your paper is fine. You can use paper wider than the folder or smaller. Scraps work well too. Use your own judgement for positioning. They come in a few different sizes. Most are designed to fit a standard size die cut machine. The standard sizes are: 4”x 6” and 5”x 7”. I have seen a few other sizes: 1” border designs, 3”x 4” designed for Artist Trading Cards, and a few larger – 6-1/2″ x 4-1/2″, 8” x 8”, and 8-1/2” x 11”designs. I would love to have some of the letter size folders!! TIP: Deep embossing plates also work well in this process. I urge you to experiment and determine what works best for you. Play with the process and see what you like best.
Single Design Embossing You can choose a stand-alone design like a butterfly or a flower or use just part of a stencil for your design. Have fun with it.
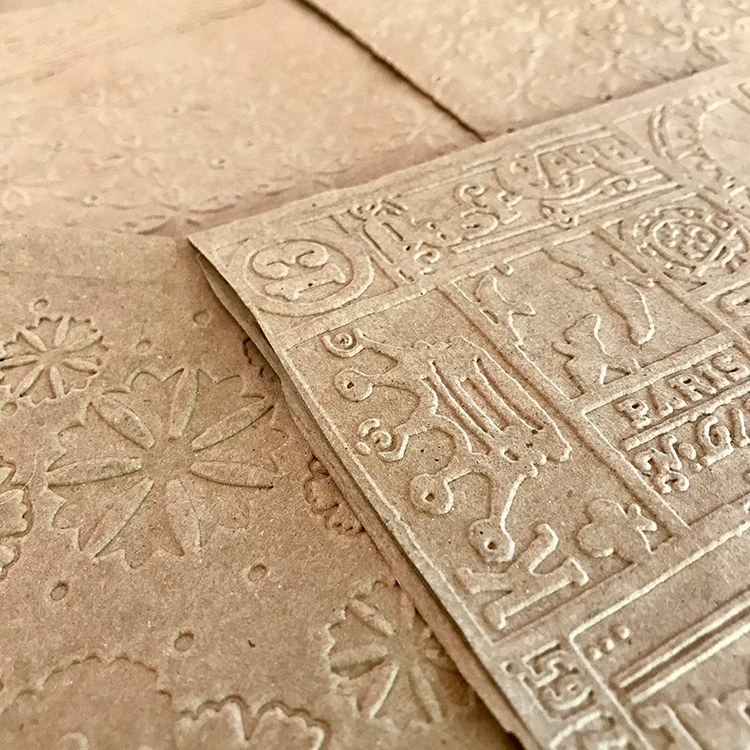
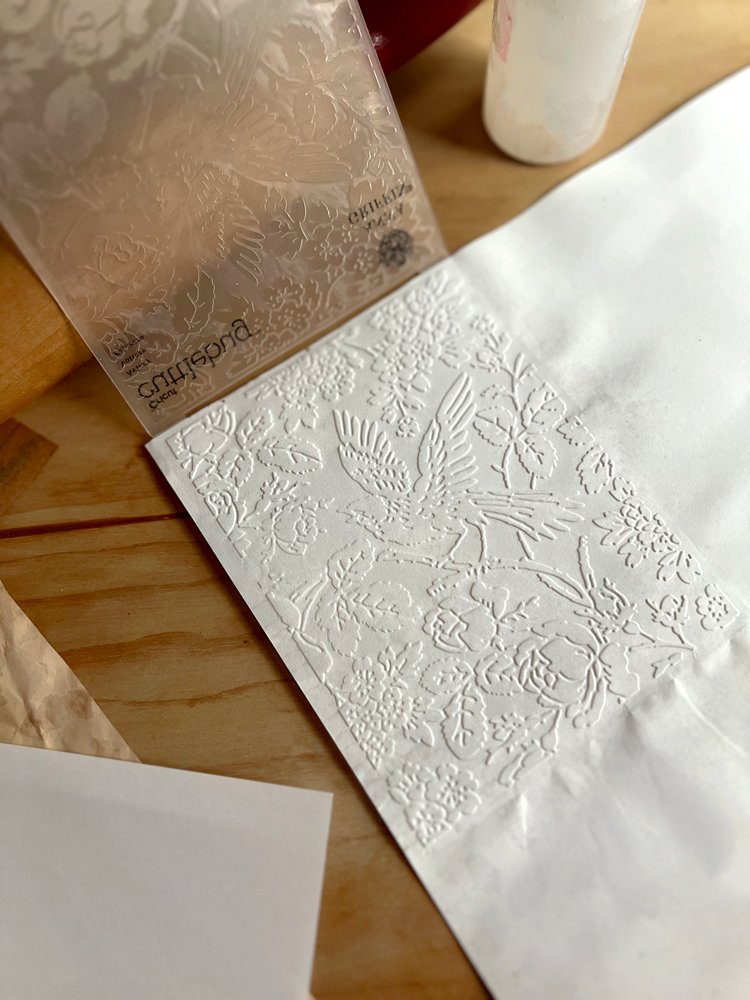
All Over Design Embossing: Here is an all over design on heavy brown craft paper. The embossing is really deep on the paper!! YUMMY! Letters and words emboss beautifully as well.
Step 1 – Place the Embossing Folder Around the Paper: Lightly Mist the Paper! You want the paper slightly damp, not dripping wet! It can tear if too wet. TIP: Heavy weight papers will need more water. Too much water on a light weight paper can make it tear or disintegrate! I have a fine mister. I found that 2-5 squirts of water on one side was good for moistening the paper. TIP: Make sure you move the spritzer around. Don’t just spray on one area. Carefully place the damp paper into the folder in the placement you prefer. Once the folder is closed around the paper, before it is embossed, it can still slip around! ARGHHH! Make sure that the pattern will be straight on the paper. A wonky pattern does not look so good.
Step 2 – Place the Paper and Folder on Hard Surface: Lay the paper and folder on a hard surface – a table top works best. It is the right height (as long as you are taller than the table) and your arms can have some leverage. Be careful as you place it down that the paper doesn’t move. I found that a thin terrycloth towel laid on the surface helps a lot. Place it flat on the cloth. Double check your placement. It can be fussy to get it aligned straight.
Step 3 – Rolling the Design: Roll the rolling pin across the folder with a firm pressure. I roll about 12 times on the horizontal direction and repeat in the vertical direction. TIP: I find that you don’t have to have the strength of a Super Hero for this to work. The pressure for most papers will be just a little stronger than rolling out a normal pie or cookie dough. The heavier the paper the more downward strength you will need to apply. Think about a very stiff dough you need to roll.
TIP: Keep your eye on the sides of the paper as you roll. If the paper is not straight on the folder, it will not look good.
Step 4 – Remove Folder: Open the folder and check to ensure that everything looks good. Hopefully it will be embossed. If not, replace the folder and roll again. Notice how the paper puckers around the folder.
#2 Emboss with a Stylus and a Stencil
I find it very zen to do this technique. For this we will use a Stylus with medium Round Ball. Most stylus’ have two ends. The small round ball tips can tear paper, so go with the medium to large ball end. If you don’t have one of these you can use the back end of a small paint brush, a pointed chop stick, and even a bone folder. HINT: The point of your tool must not be sharp! Sharp tools with tear the paper! You will want to work carefully into the corners of your design and along the edges. That is how the design evolves and looks crisp and finished. You will with practice understand how much pressure you need to get the desired effect. Turn the paper as you need to reach each area. For this technique, I found that white papers work best. Some of the colored papers are more opaque, which makes it difficult to see the design without a light box.
A Word About Stencils: There are several types of stencils out there. You can use them all to create beautiful designs on paper.
- Brass Stencils – These small jewels have some great designs and are created especially for embossing.
- Mylar – Heavy Mylar stencils work best for this technique. Very thin mylar stencils are way more tricky to use. The stylus can slip over the fine edge and make marks that will ruin the effect.
- Plastic Stencils – Plastic stencils are great to emboss. I found that the less expensive, thick plastic stencils do the best job. The higher lip gives you a more stable place to apply pressure and keep the tool in place.
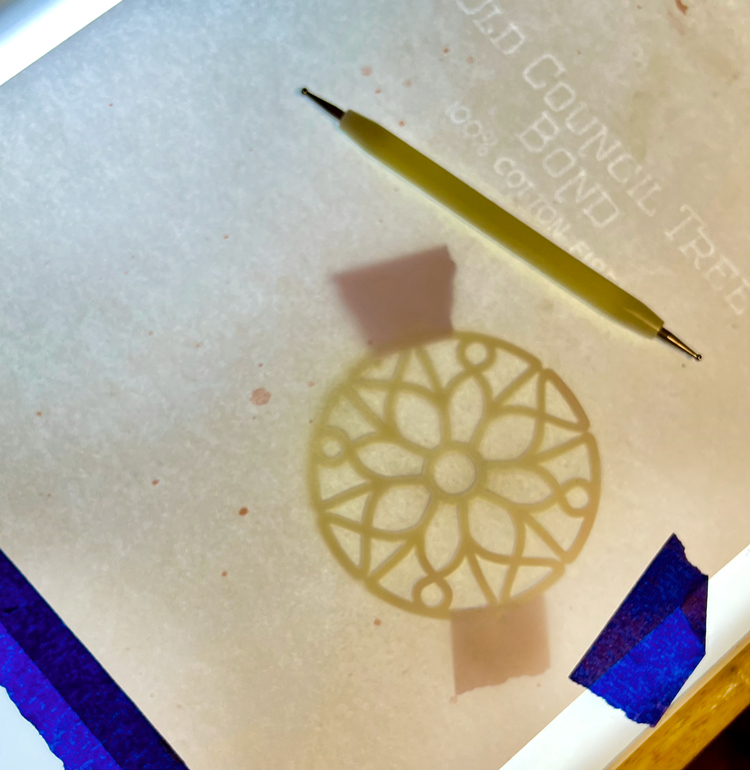
Step 1 – Tape the Stencil in Place: You can use a Lightbox for this technique or a window in daylight will work. Tape the stencil onto the lighted surface. It is important that it does not move while embossing or the design will not look right. (See photo above)
Step 2 – Place the Paper: Lay the paper over the design, right side down. The side of the paper that faces the stencil will be the display side when finished. Tape in place. (See photo above)
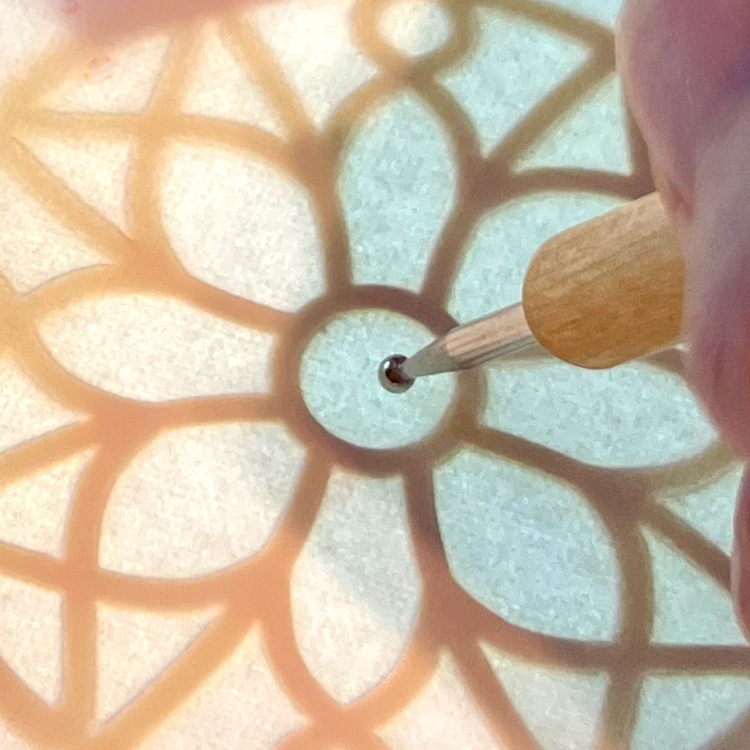
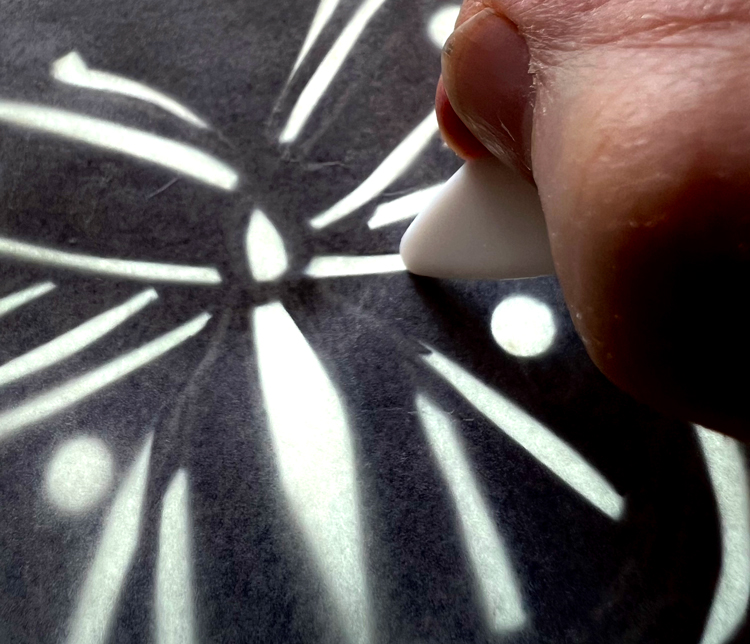
Step 3 – Emboss: Using the larger stylus ball tip, start to rub inside an open area of the stencil working into the edges and the corners. Use a light pressure at first. It is better to build up the embossing than to tear the paper. The pressure will depend on the weight of the paper. The weight of the paper has a lot to do with the amount of pressure you need. Use more pressure if needed. You will get the feel of it in a minute or two. Move on to next area and repeat until all openings are completed.
Step 4 – Emboss Edges: Use the smaller end of the stylus to outline the parameter of each shape. Press along the edges with to make sure the corners and outlines are crisp. Easy does it.
Step 5 – Check the Design: Turn the paper and stencil over to check the design by removing one piece of tape. Look for areas not done, evenness and uniformity of the strokes, and crisp edges and corners. If you see any areas that need more work, retape, turn the paper over and work again until you are satisfied. Remove stencil!
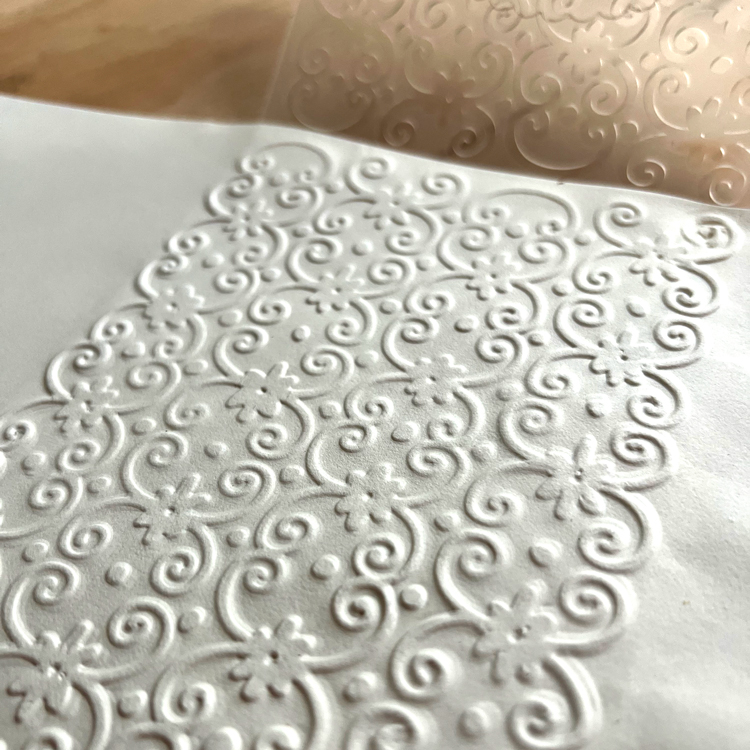
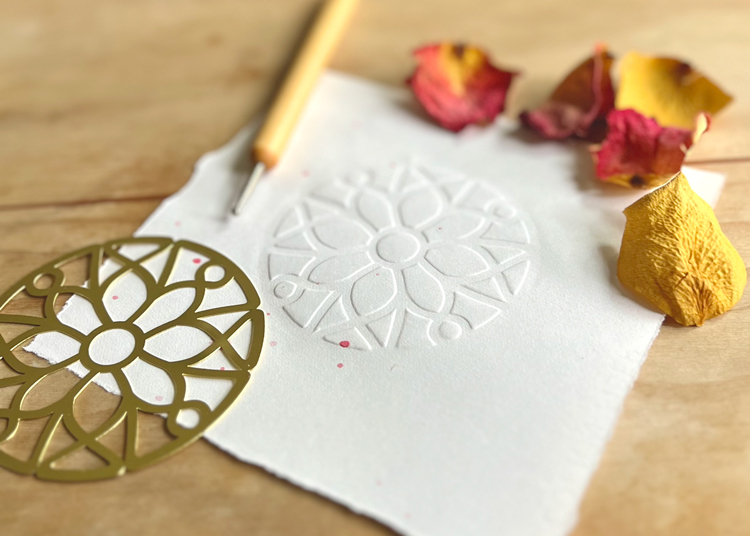
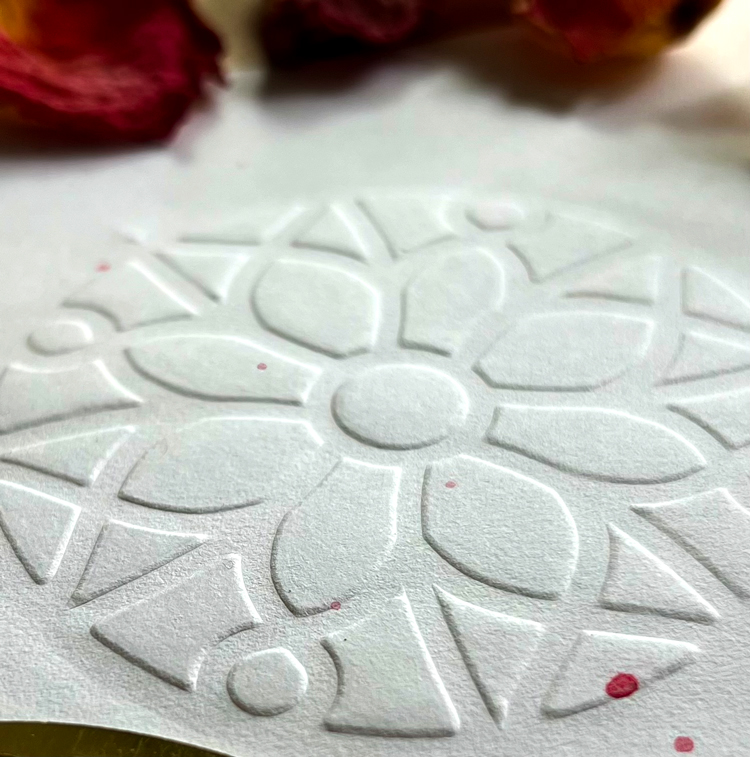
See the detail of the embossing below. Brass stencils give a deep, crisp look and feel. This is on 100% Cotton Paper.
#3 Emboss with a Bone Folder on Vellum
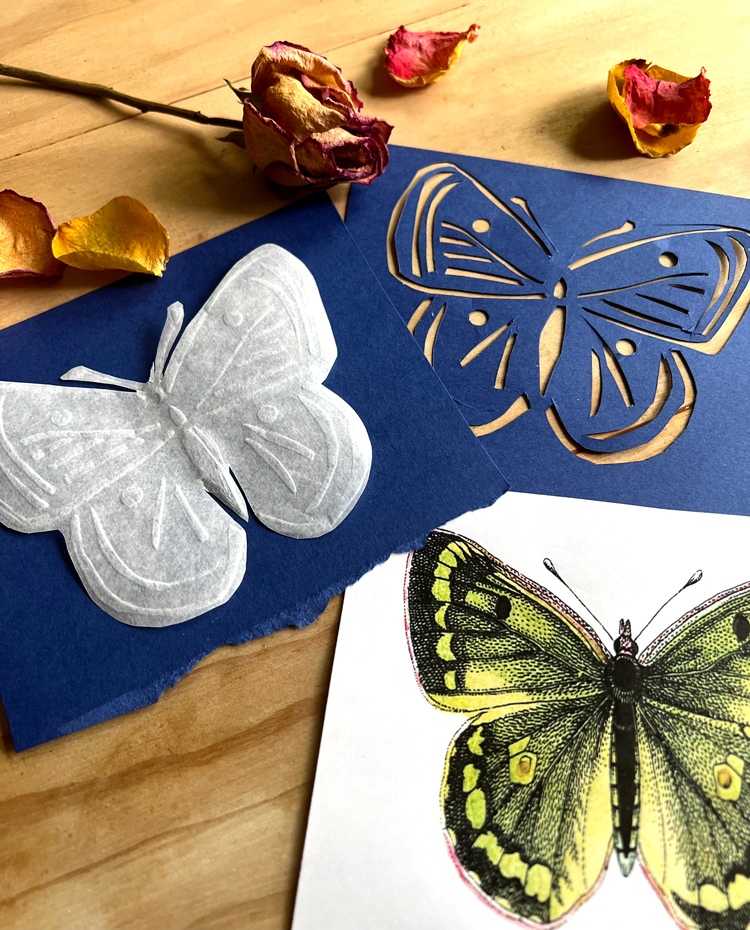
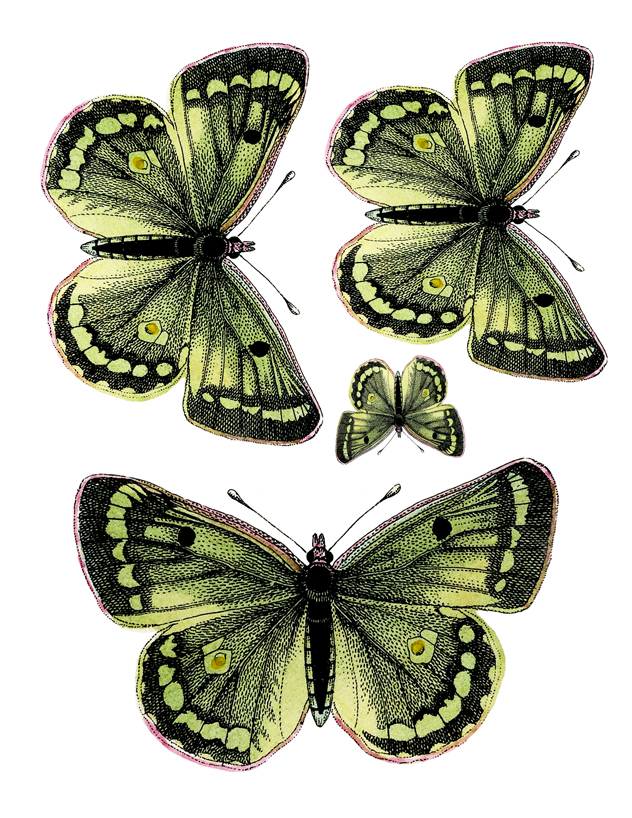
I am going to use a stencil I cut from this beautiful green butterfly image. It is a Graphics Fairy image of course. I adapted it to make the design just right for embossing. You can create your own stencil using some of the designs here on The Graphics Fairy. I like the Antique Ornamental Designs, Black and White Clip Art, simple Labels, even some of the Flower Images.
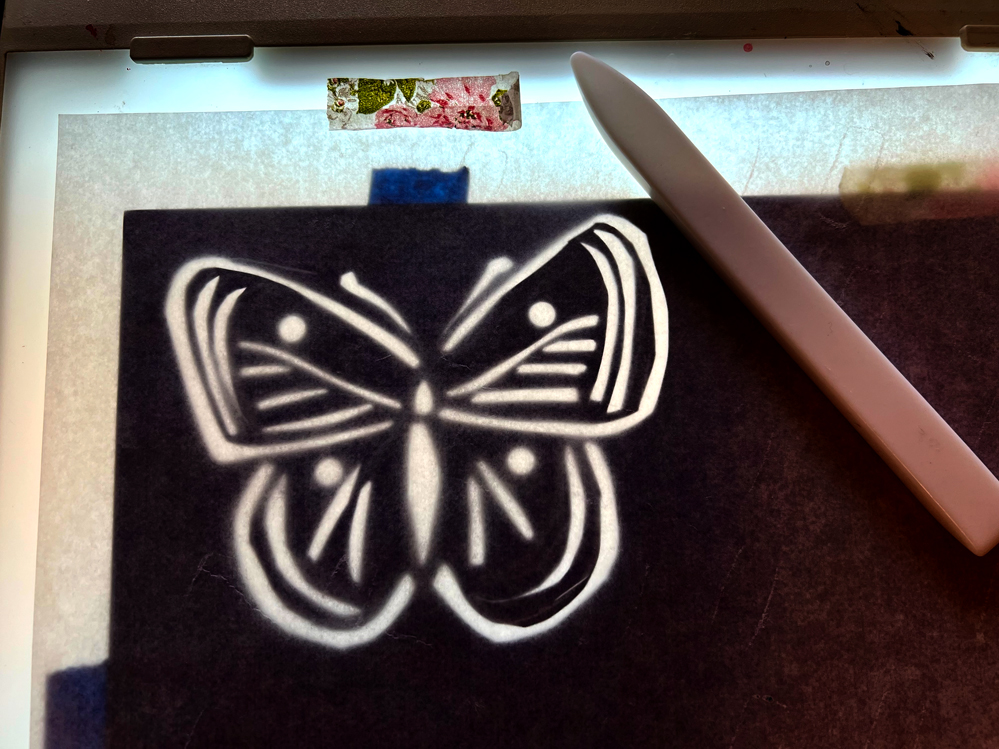
Just find an image you think will work. Print it or trace it on a piece of heavy cardstock. Cut it out with a craft knife. I didn’t get too fussy with detail. I just cut the main details as you can see in the Step 1 photo below. I found that the design works best if the stencil is on heavy, solid, dark cardstock. Then use the stencil on Vellum or Tracing Paper to emboss a beautiful, velvety design. Voila!
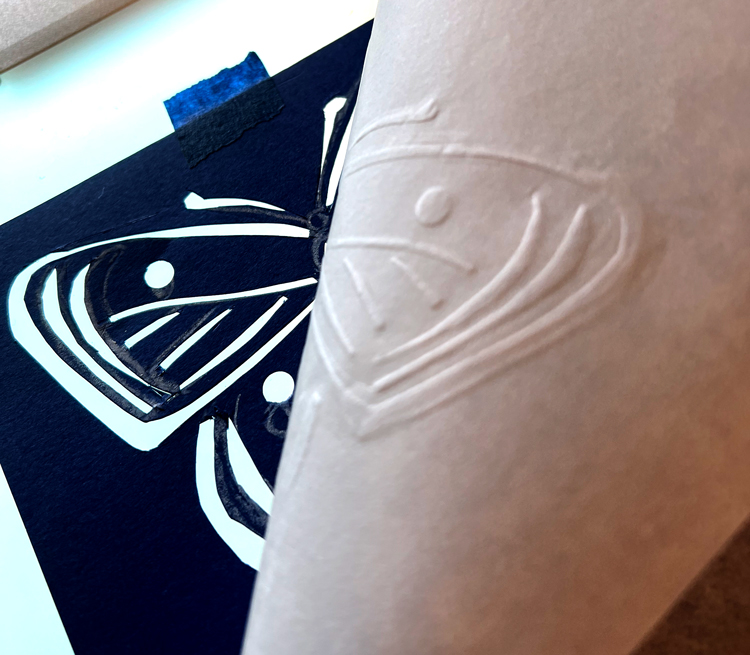
Step 1 – Tape the Stencil in Place: You can use a Lightbox for this technique or a window in daylight will work. Tape the stencil onto the lighted surface. It is important that it does not move while embossing or the design will not look right.
Step 2 – Place the Paper: Lay the paper over the design, right side down. The side of the paper that faces the stencil will be the display side when finished. Tape in place. Be careful as you place it down that the paper doesn’t move. You can not replace the stencil in the exact location once moved.
Step 3 – Emboss: Using the pointed end of the bone folder, start to rub inside the stencil openings. Use a light pressure at first. The vellum or tracing paper can tear if you get push too hard or too much. You will get the feel of it in a minute or two. Be patient! Make sure that all areas are rubbed.
Step 4 – Emboss Edges: Press along the edges with the smaller end of the stylus to make sure the corners and outlines are crisp. Easy does it though as the paper can tear!!
Step 5 – Check the Design: Turn the paper back to check the design by removing only one piece of tape. Look for areas not done, evenness and uniformity of the strokes, and crisp edges and corners. If you see any areas that need more work, retape, turn the paper over and work again until you are satisfied. Remove stencil!
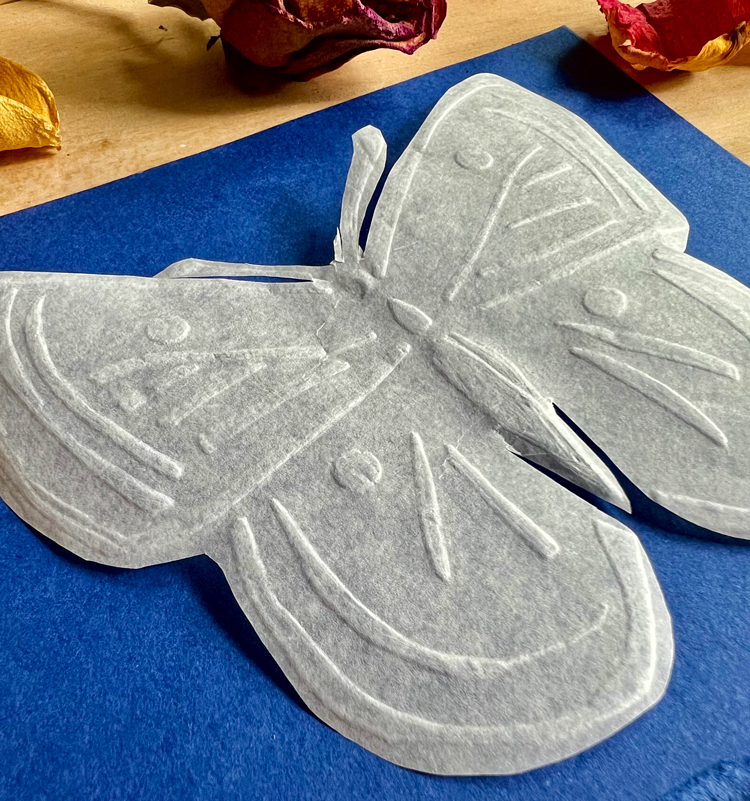
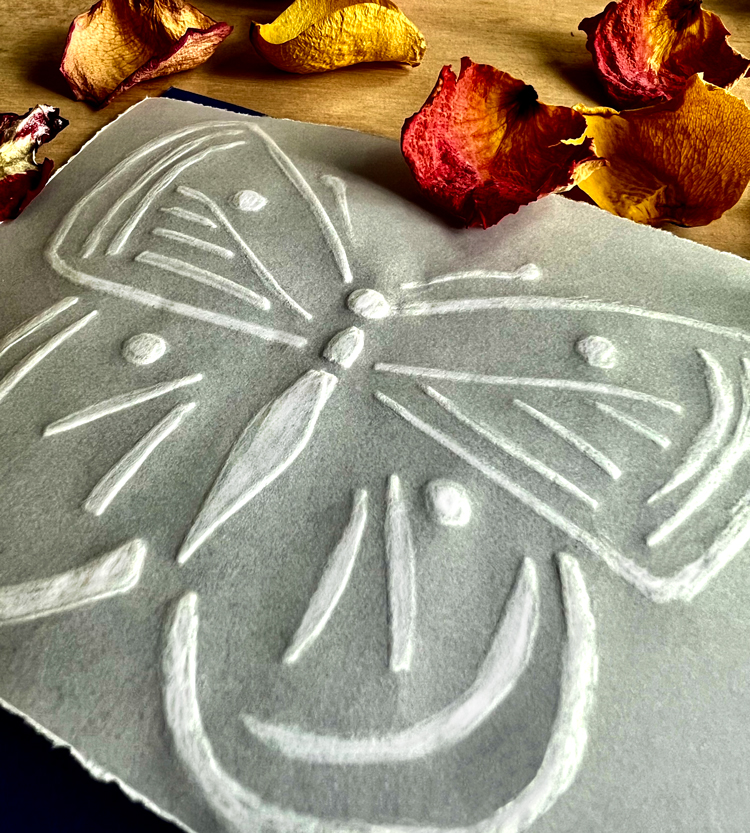
Here is the finished design on Tracing Paper. It really does feel and look like velvet.
This is the butterfly on Vellum. It has more depth and contrast. The paper was firmer.
Finishing Options
When you finish embossing the papers, you can stain, paint, distress (age), ink, or leave it as is. It’s up to you. I love to make tags and pockets for my Junk Journals with embossed papers. Try it and let me know how you like it!
I hope that you had fun learning How to Emboss Without a Machine! When I am not exploring with new and old Techniques for Mixed Media in my Graphics Fairy sandbox, I also create Photoshop Elements tutorials and craft project videos over on The Graphics Fairy Premium Membership site. You can find even more of my books, junk journals, mixed media art, classes, and whimsical shenanigans on Rebecca E Parsons Dot Com.


Diana says
Who knew? Now my rolling pin can become useful, lol! Thank you for all the tips!
Karen says
Haha, right? Your rolling pin’s got a whole new purpose now! 😄
Abby says
Great ideas Rebecca, thank you for this tutorial. I haven’t tried misting the paper before embossing. The embossing folder you used with the bird in the middle is one I haven’t seen. So pretty.
Karen says
Thank you so much! I’m glad you enjoyed the tutorial.