How to Make an Envelope
Hello, my creative friends! It’s Rebecca E Parsons, and I’m back this week with another quick, easy, and oh so fun tutorial as we learn How to Make an Envelope! You might be thinking to yourself, now why would I want to make an envelope when I can just go out and buy one? Well, because The Graphics Fairy has such gorgeous images and plain envelopes are just so very boring…Right?
So why not get creative and make your own? You can create these pretty paper pieces, to go with the current season, or for a favorite holiday, or pick a favorite theme of the person you are sending it to. I will show you how to make an envelope with printer paper and a DIY Envelope Template is included. 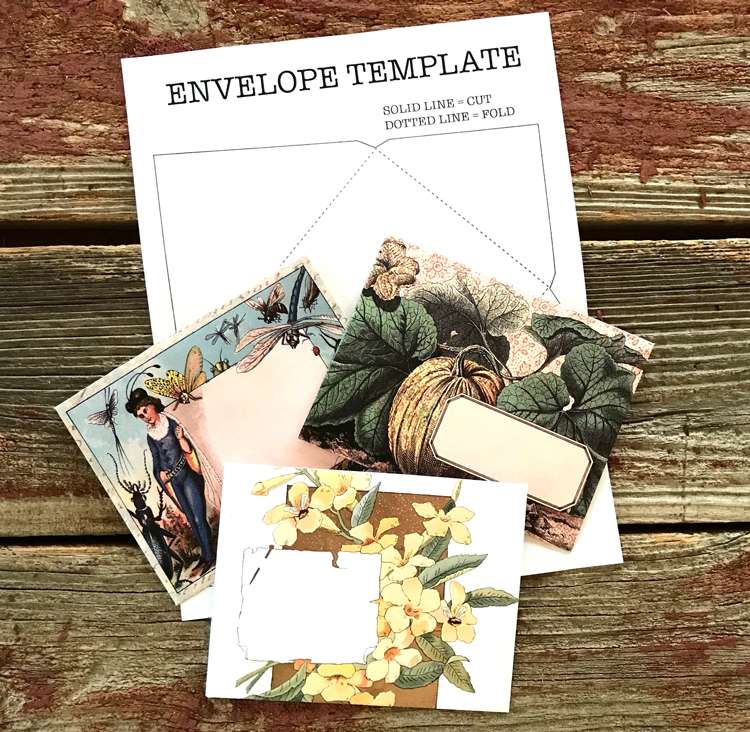
There’s no end to how you can customize these and what a lovely thing to send out to your friends and family. I’m sure they would feel very special receiving a letter, invitations, or birthday card or Christmas card, from you mailed out in something that you created just for them.
Handmade Envelopes
Happy Mail, Snail Mail, and Pen Pals are super popular! Artists and crafters are exchanging art, papers, junk journals, and handwritten notes all over the world. The DIY envelopes that hold this correspondence are works of art in themselves. Plus, you can tailor your envelopes to a holiday, special occasion, or season. How cool is that?
Materials
Colorful or Patterned Paper (Printable PDF)
Tape Runner (0r a good glue stick will work too)
Ruler or straight edge
Bone Folder
Scissors or Paper Trimmer
Optional – Corner Round Punch
Step by Step Tutorial Instructions
How to Make an A2 Envelope with DIY Envelope Templates
This technique creates a standard size A2 envelope. If you would like a smaller version, you can print this template and the custom designs at a smaller size if your printer allows it. They still look good at even 50%.
Custom Envelope Designs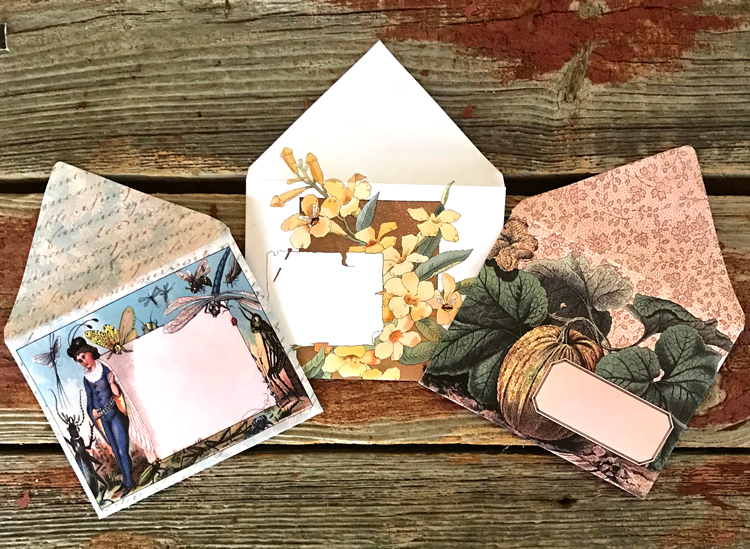
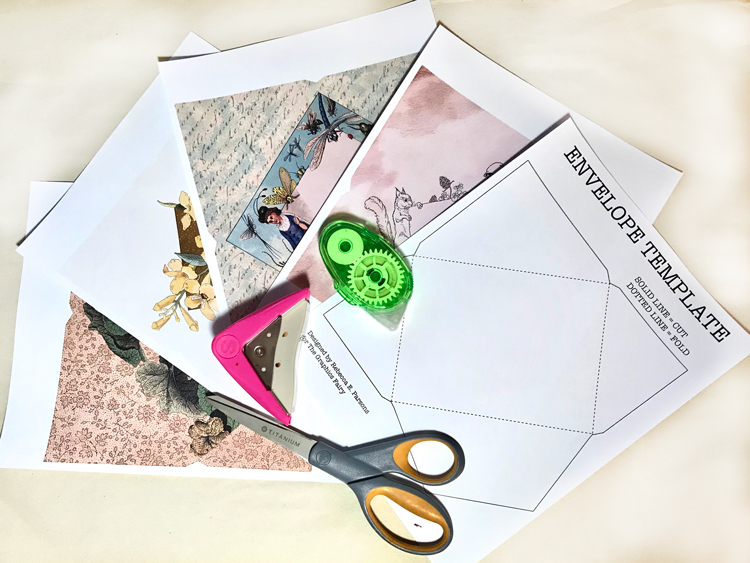
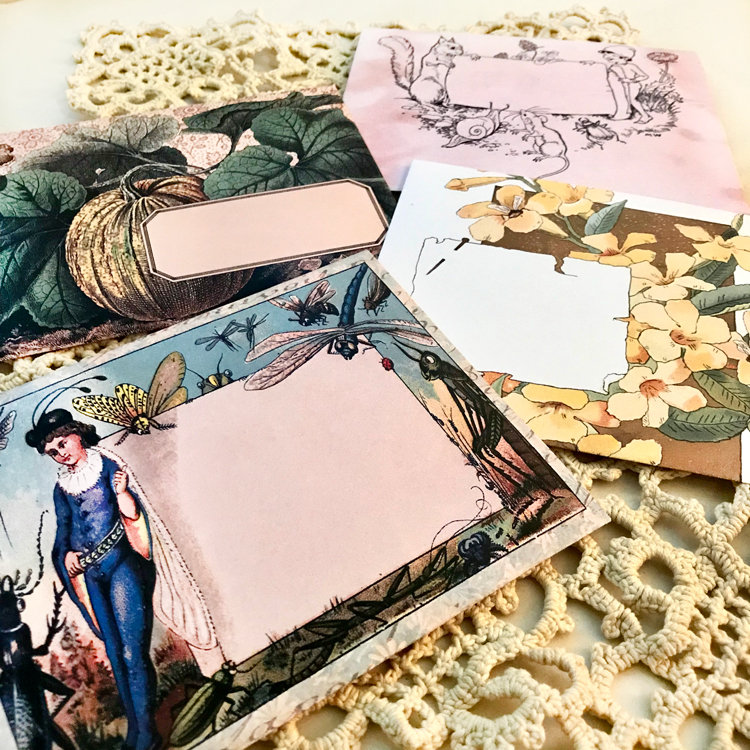
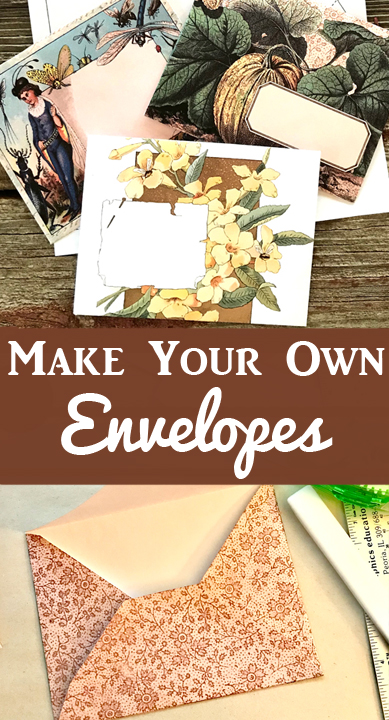
PDF Printable. I created a Printable PDF with the A2 Envelope Template plus 4 Custom Envelope Designs, just for you! Download the DIY Envelope Templates TGF Printable HERE! I hope you love the designs.
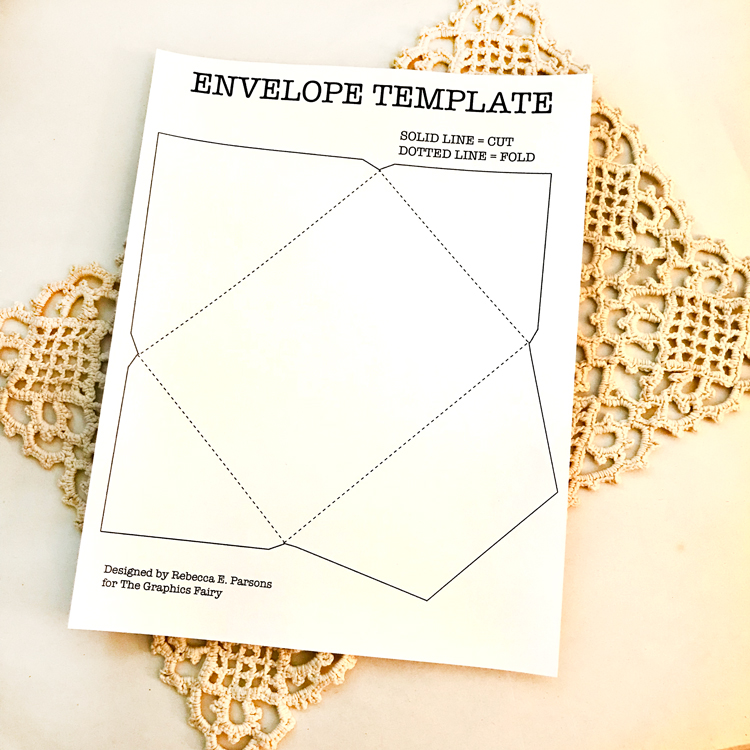
The Template. The A2 Envelope Template works great on paper. TIP: If you plan to create a lot of envelopes, it is a nice idea to make a more permanent template. You can print and cut a sturdy template out of cardstock, a manila folder, a transparency sheet, or even a cereal box.
Print the Template(s). Print your envelope template and custom envelope designs from the Printable PDF. TIP: The kind of paper to print on 24 lb. printer paper because I want my envelopes to have more weight than regular 20 lb. printer paper. But you can make an envelope with printer paper of the standard weight if you like, especially to practice.
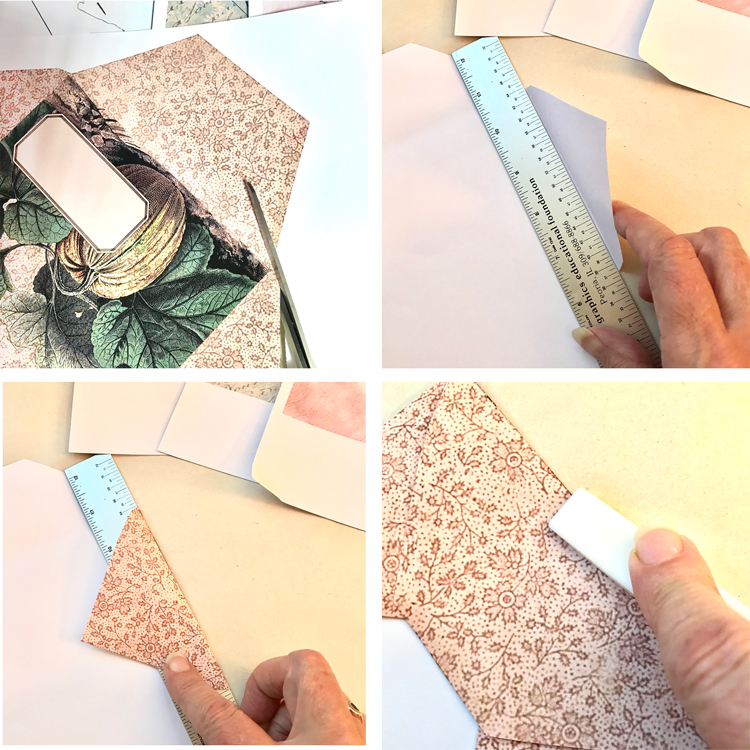
Trimming. Trim the outer edges of the design carefully. You can use a paper trimmer on the straight lines. (tracing first is fine if you prefer) It is fairly easy to cut with scissors, even for the scissor challenged like me! TEE HEE. (top left)
Folding the Sides. Lay the paper image side down on a hard surface. Place a ruler or straight edge carefully on the fold line, matching the top half and bottom points. (top right) Fold the side over the ruler and crease with your finger or bone folder. (bottom left) Repeat with the other side. Fold the bottom section flap up in the same manner. Crease with bone folder or your finger, to make score lines. (bottom right)
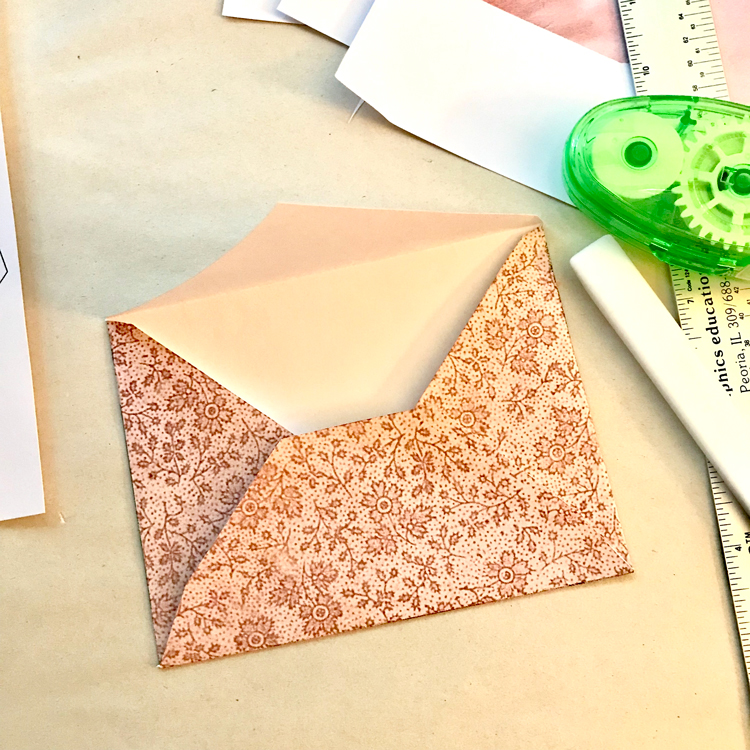
Make sure that you check the square of the corners before you glue them. There should be no gaps at the edges. It is easier to reshape it now that after you glue. A wonky envelope does not hold a card very easily!! WINK!
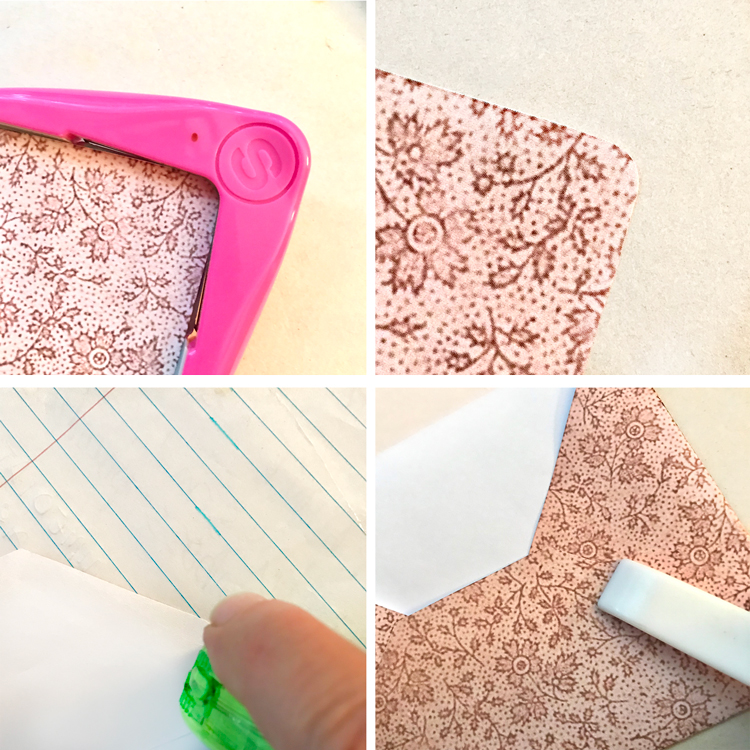
Optional: Rounding the Top Flap. If you like, you can round the top point with a corner round punch. (top) Of course, you can leave it pointed. It looks just as nice.
Glue Edges. Run a thin tape runner along the two outer edges of the bottom flap. (bottom left) TIP: Take your time with this step. You want to be careful here to ensure that there is no sticky spot on the inside of the envelope. Press along the glue edge with a bone folder to secure. (bottom right)
That is all there is to it. I’m so that glad I could show you my tips and tricks for this easy paper craft. I make these all of the time, especially for my handmade books and junk journals!
Glue for Top Flap. You might want to take it a step further and create a lickable adhesive, just like you would find on a store bought envelope. Luckily we have a tutorial for that!! Use the Glue Recipe from our post on How to Make Envelope and Sticker Glue HERE! You can also use any good paper glue if you prefer.
Patterned Paper Envelope – You can create an envelope with patterned paper; scrapbook papers and wrapping paper are good choices. (And embellish with washi tape!) Place the template over your patterned or image paper. Trim along the solid lines with scissors. You can also draw the lines around the template onto the back side of the paper and trim with a paper trimmer. Follow the above directions to create your envelope.
Smaller Envelope Template – If you would like a different shaped envelope and a smaller one, I created another envelope template in my How to Make a Junk Journal Series HERE!
You can also check out this TGF video showing How to Make a No Measure Envelope as well!
Thank you for visiting The Graphics Fairy! I hope you enjoyed playing with paper crafts with me today and learning how to make an Envelope with printer paper… this is so quick and easy to do. Plus it is quite versatile. And now you have your own DIY Envelope Template to play with! I also create Photoshop Elements tutorials and craft project videos on The Graphics Fairy Premium Membership site. You can find even more of my art, DIYs, books, and whimsical shenanigans on My site HERE


Patricia Mayne-Schlachtun says
I love the envelope tutorial! I have several tools for making envelopes but this tutorial provides more versatility for me. I love making the small 3×3 cards with leftover scraps of cardstock and plan to make my own cute envelopes now! Thank you for sharing this Karen and Rebecca!
graphicsfairy says
Oh yea! We are so glad you enjoyed them and that you will be making some 🙂
Evangeline Schawo says
Thank you so muhRebecca. I love customizing my envelopes. How about creating a slimline envelope that would be perfect for those traveler’s sized journals?
Karen Watson says
Thanks for the feedback on Rebecca’s tutorial Evangeline! We also have lots of envelope templates on our Premium Membership site, in all different sizes. You can find that site here https://members.thegraphicsfairy.com/
Jacqueline Hale says
Thank you for the templates and the tutorial.
Karen Watson says
I’m glad you enjoyed it Jacqueline! 😊
Sue Walsh says
Thanks so much for this share! Your envelopes are very pretty and sure to be appreciated by all receiving one. I think your template will come in very useful for my Journal making. 🙂
Karen Watson says
We’re so glad you can use this template Sue! Great idea to use them in your journals! ????
Rebecca E. Parsons says
Oh Sue, the envelopes are so much fun for journal making. That is one of my favorite hobbies. Enjoy them. I would love to see your work sometime. XO Rebecca
Teresa Davis says
Thanks so much for sharing these templates.
I will enjoy using them. ????
Karen Watson says
We’re so glad you can use them Teresa!
Theresa Fredrickson says
Thank you for sharing your great templates. I have signed up for your newsletter.
graphicsfairy says
That is wonderful Theresa, I hope you enjoy it 🙂