How to Age Paper
Hello Graphics Fairy friends! I’m Diana from Dreams Factory, happily sharing another DIY project with you! Today I will be showing you how to age Paper! I’m really excited about this project because this is my fool-proof, all time favorite method of antiquing paper! Forget special tools or really any tools at all, we won’t be needing any of those today! With this method you will be able to turn regular paper into these gorgeous antiques that look like they’ve been around for years … even decades.
I’m sure you have already tried several different methods of distressing paper, you might even have a favorite one. Either way, I really encourage you to give my method a try, I will be sharing all my distressing secrets with you, even how to apply a ”special treatment” to the edges of the paper, to make the whole concept even more realistic and authentic.
My preferred distressing ingredient for today is coffee, I believe it adds so much character to the whole concept! And a subtle, yet amazing fragrance! Along coffee, you can also use tea, if you want to keep things natural. Highly diluted acrylic paint, inks or watercolors will work as well.
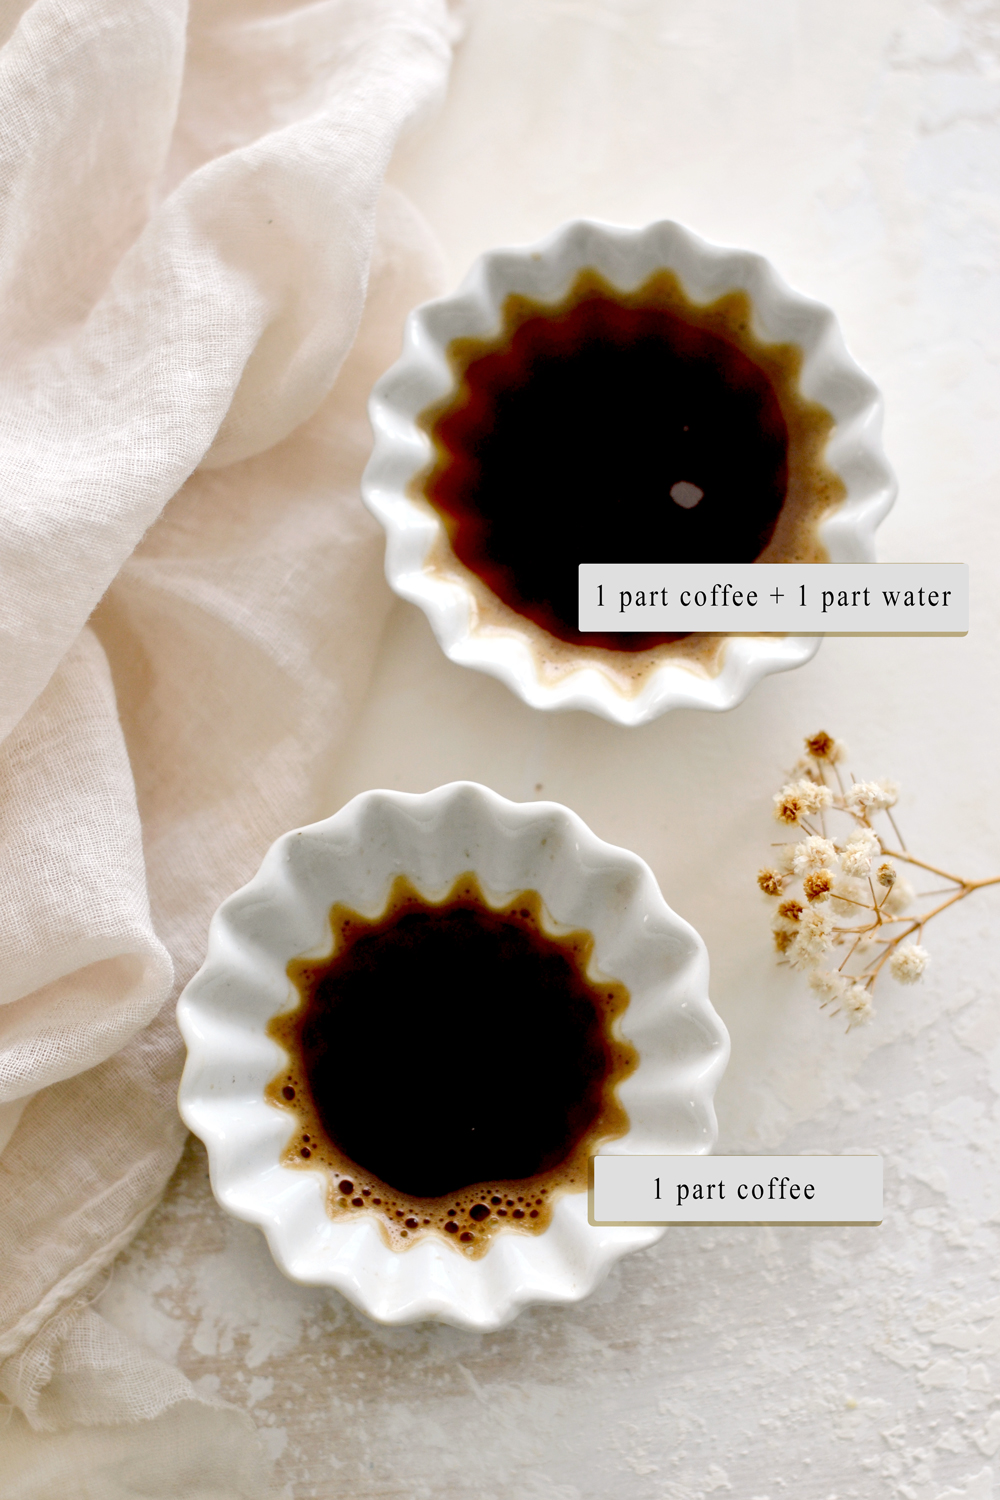
This method – my method – consists in using coffee in two different degrees of concentration, so start by making a strong batch of coffee first – I used 1 cup boiling water + 2 tbsp coffee grounds to make this magical liquid. And a French press…to keep this French theme going on.
After making the coffee, pour the liquid as it follows: 1 part coffee into one of the recipients, then add 1 part coffee + 1 part water into the other recipient.
It’s best to start this adventure with a stronger liquid coffee so you have room for experimenting, just make a few tests on scrap pieces of paper and add more water if you want to achieve a different dilution.
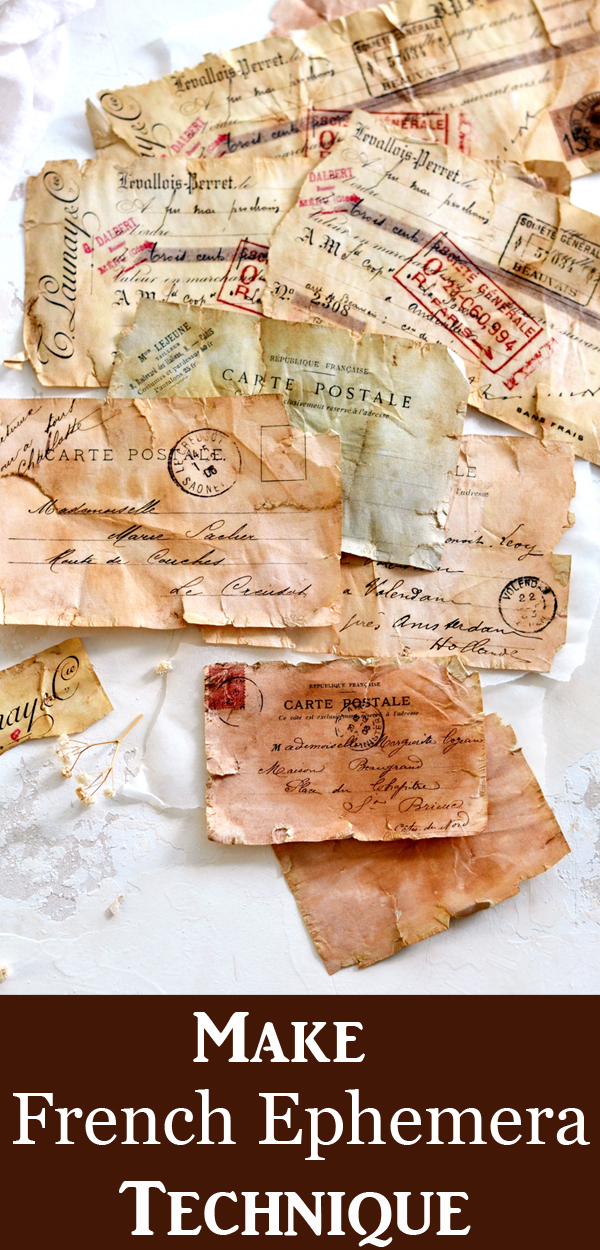
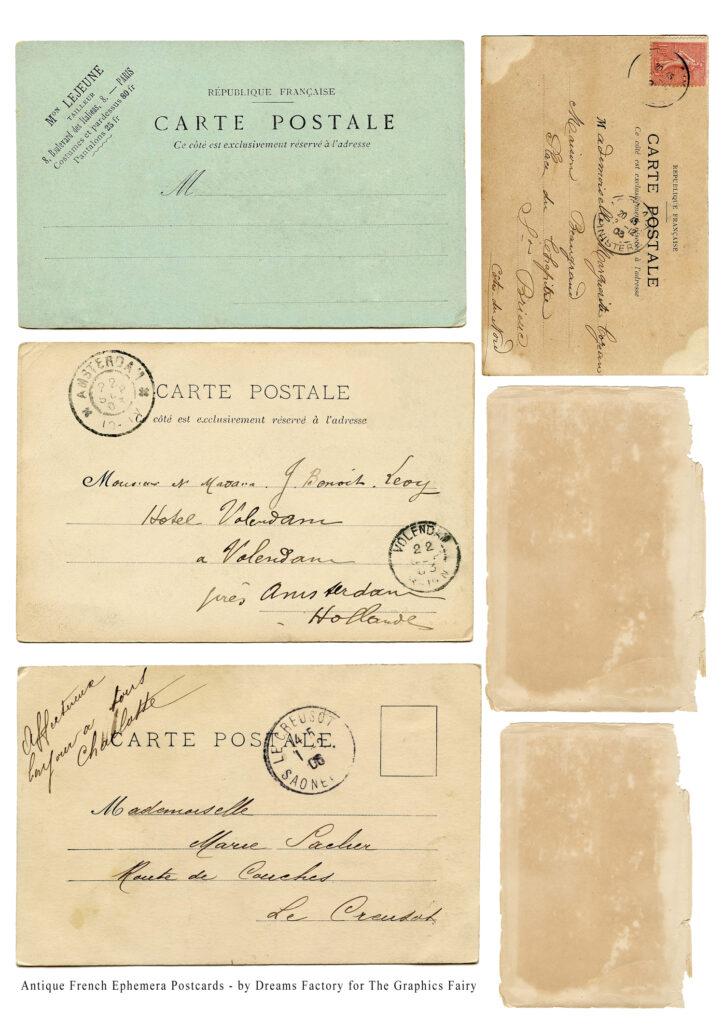
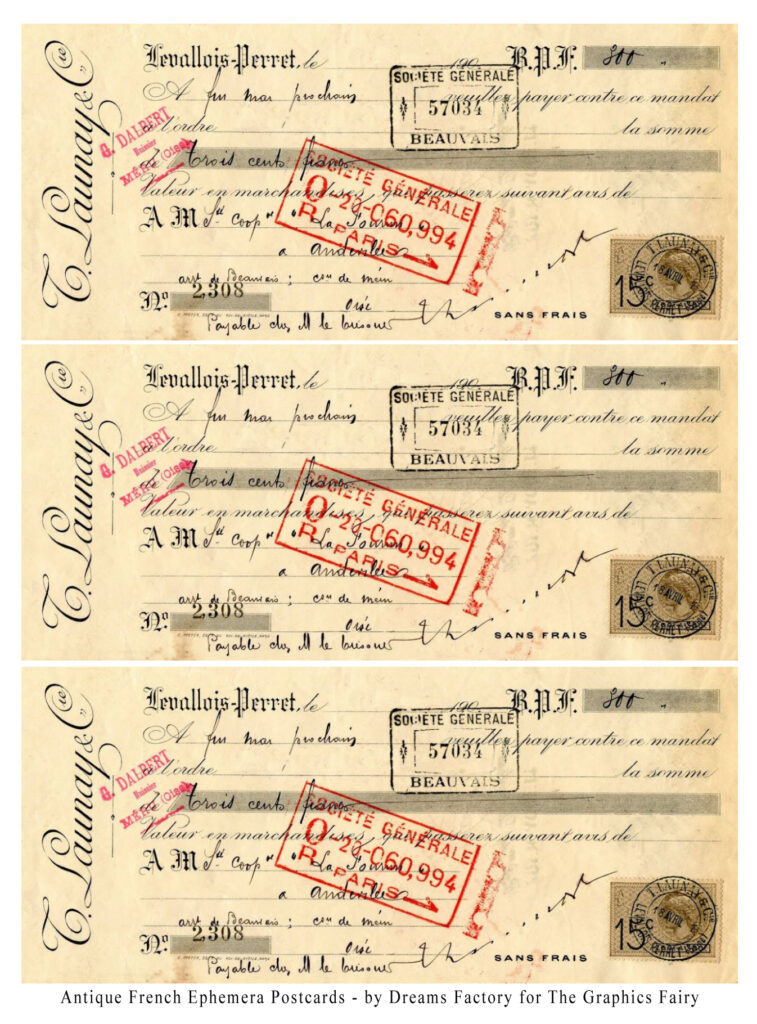
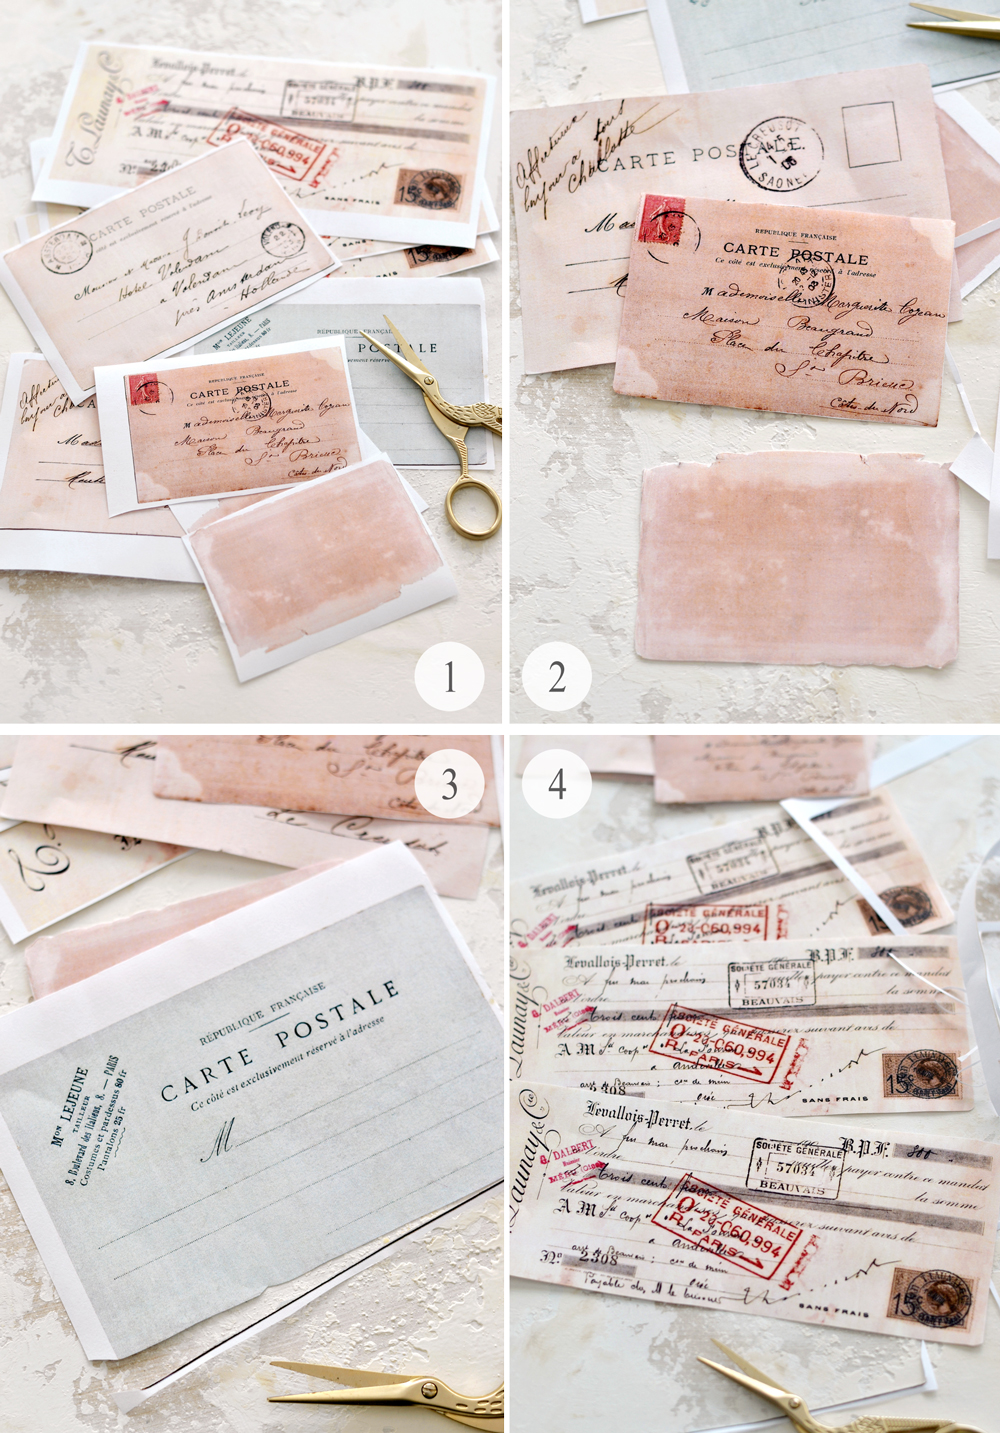
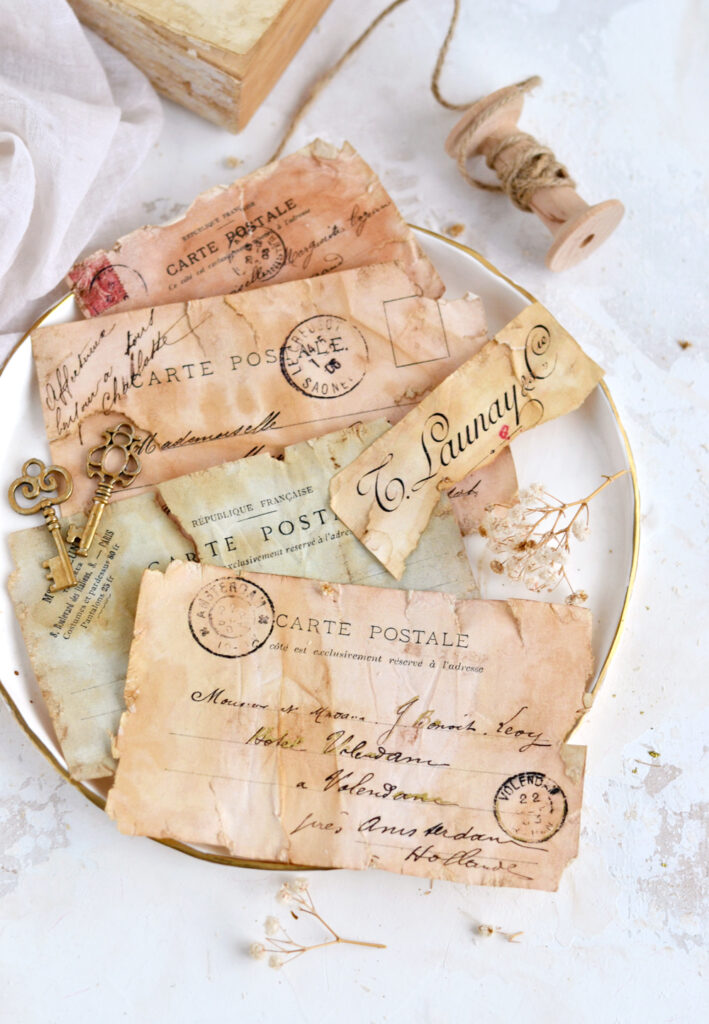
For the printables, I decided to go with these beautiful French ephemera postcards and these stunning French ephemera checks (I believe they are checks). As you can see, the images are already colored, this will add even more character to each final piece. The handwritten details on these are simply gorgeous! I also included 2 smaller blanks backgrounds, just in case you want to get further creative with these!
Free Printable How to Age Paper Ephemera:
—-> CLICK HERE TO DOWNLOAD THE FULL SIZE PRINTABLE PDF – POSTCARDS<—-
—-> CLICK HERE TO DOWNLOAD THE FULL SIZE PRINTABLE PDF – CHECKS<—-
Supplies:
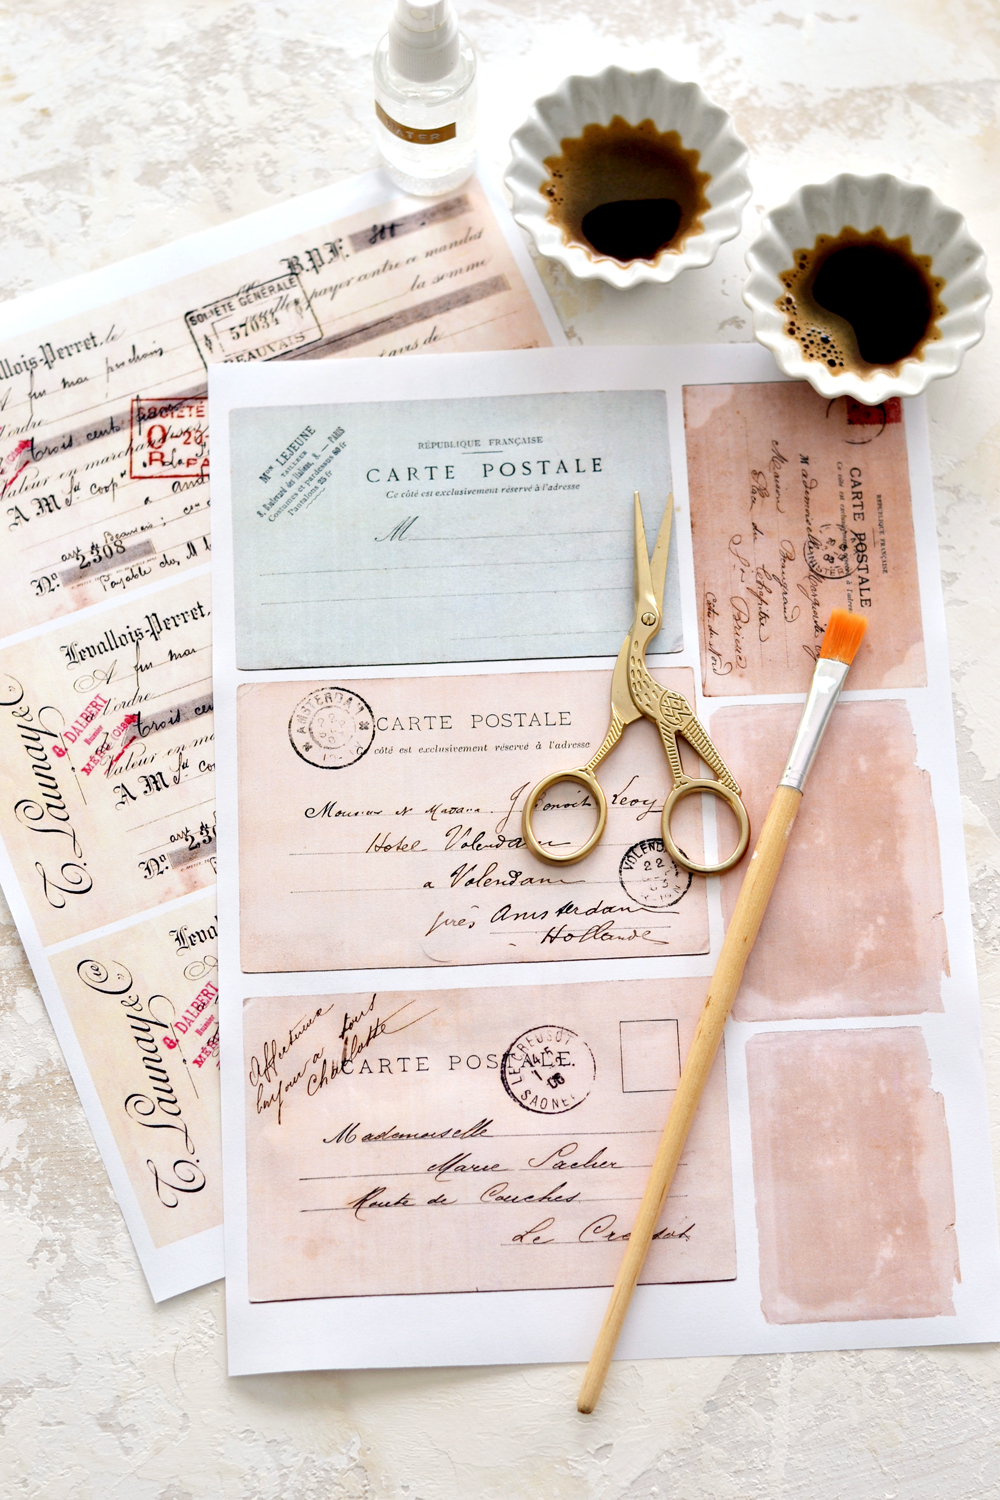
- regular white paper
- laserjet printer (if you don’t have one, print the images at a copy center)
- scissors
- coffee (1 recipient with 1 part coffee & 1 recipient with 1 part coffee + 1 part water)
- a brush
- a plastic sheet, a teflon sheet or a non absorbent surface (to protect your working area while using the coffee) – really important!
- paper towels
- heat gun or hairdryer – optional
P.S. Your images might have slightly different colors than mine, I need to replace a cartridge on my printer so the colors were a little bit quirky.
Make Antique French Ephemera Paper – cutting the paper
1. Start by roughly cutting your beautiful French Ephemera images.
2. Cut each image and try to remove as much of the white paper as possible. It’s preferred to cut a little bit from the image, rather than having a white excessive space around the image.
3. Some of the postcards have a black border on some of the edges, make sure you completely remove that part too.
4. Also, try to slightly round the corners while cutting the images, this will make the Antique French Ephemera Paper look more authentic afterwards.
Make Aged paper – dry distressing the edges
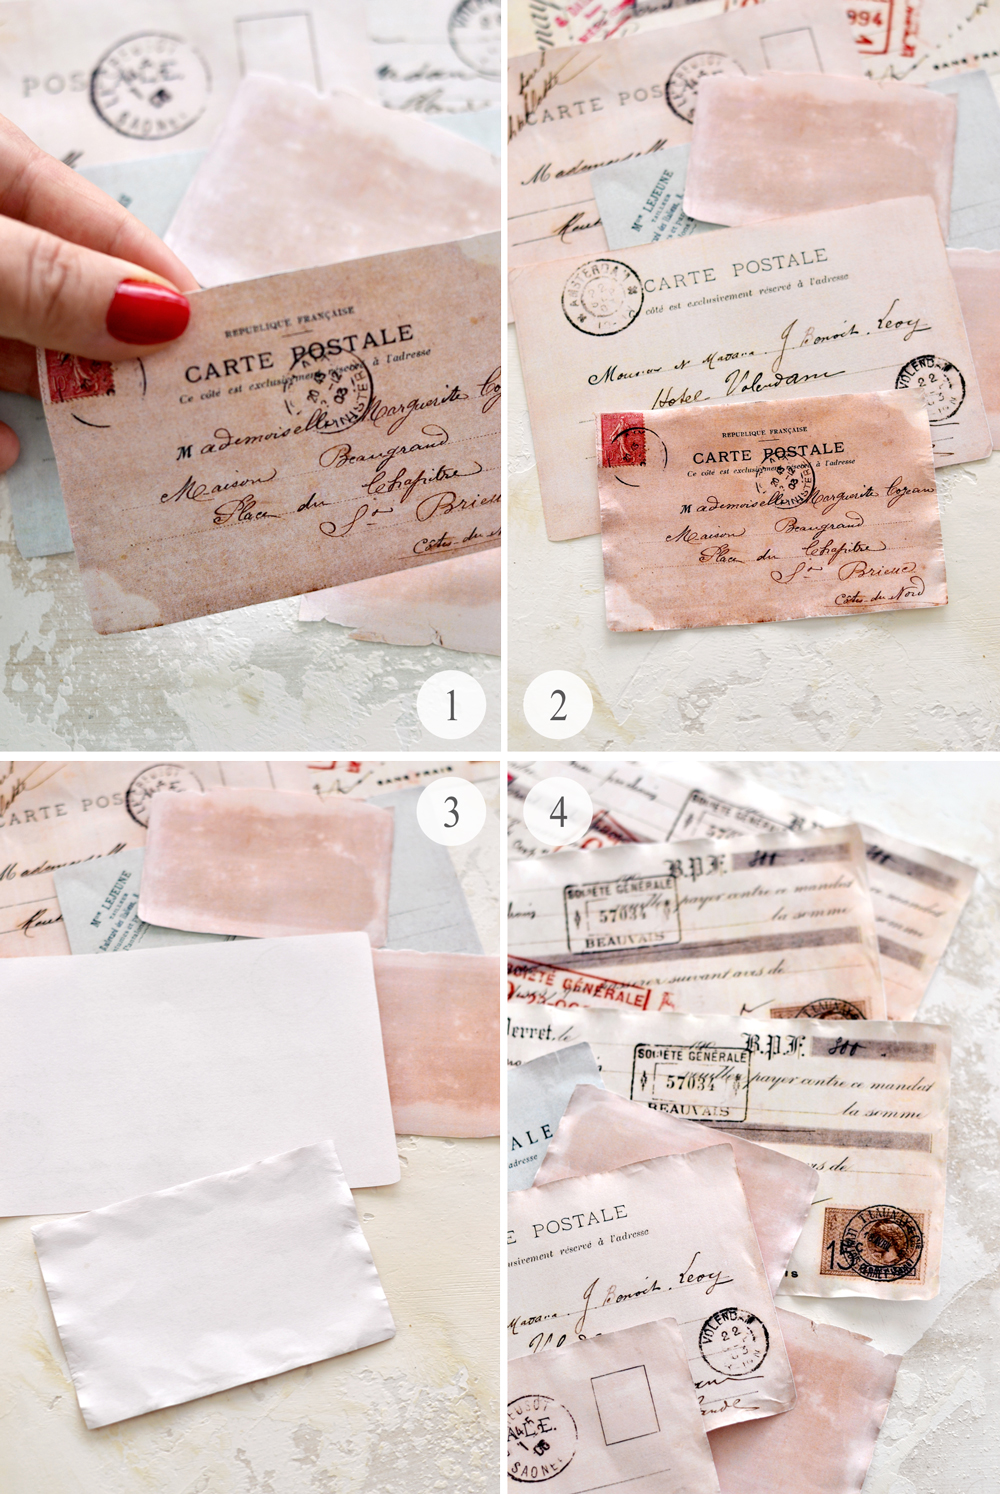
1. Now for our “special tool” for dry distressing the edges, we will be using our … thumb nail and our index finger! I mentioned we won’t be needing any special tools, our fingers will do the job! The idea is really simple, you just keep your paper between your index finger and your thumb, then you use your thumb nail to scratch all the edges, while gradually rotating the paper in your hand.
2. Move your fingers and scratch all around the edges, applying quite a lot of pressure. Make sure that all the edges are scratched! We don’t want to tear the paper at this stage, only to break some of the fiber in the paper. You will know that things are going into the right direction when the edges become wavy and curly.
3. If you flip your image at this point, you will see the transformation even better – especially when compared to an unaltered piece of paper.
4. Apply the same ‘scratching technique’ on all the edges of each image.
How to Make Ephemera – wet distressing the edges
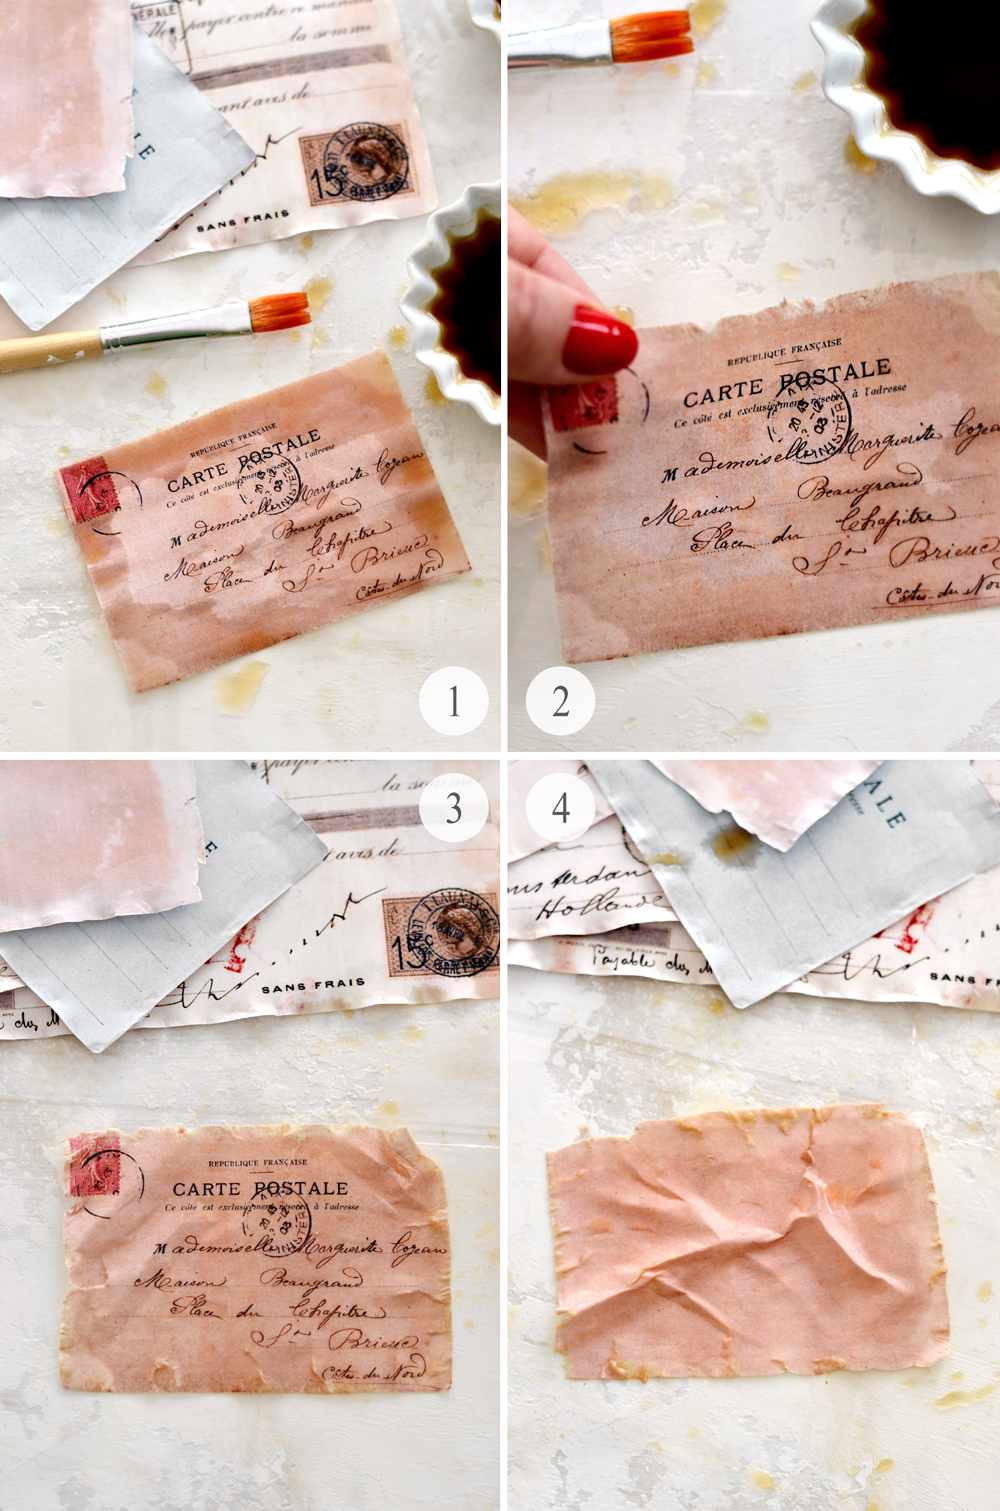
1. For the next step, start by protecting your working surface first. Then use the coffee + water diluted concoction and generously brush it all over the image.
2. Pick up the soaking wet paper from your table, now it’s time to repeat the scratching of the edges again. Don’t apply too much pressure this time, but rather let the wet paper do its thing. You will see that the scratching part will be quite different at this stage as the paper is quite fragile. But that’s a good thing, we will use that gentleness to our advantage. This time, while scratching, the paper will naturally tear in some places, creating unique, irregular effects.
3. To create other interesting effects, you can even crumple some of the edges of the paper, then gently unfold them.
4. Along with the edges, you can even crumple the interior of the paper, this will create naturally looking folds and creases. After finishing one image, gently peel it from your table, place it on a paper towel and move to the next images.
5. Now it’s the time to get really creative … and just have fun with your paper! This is where you get to experiment and create your own Antique French Ephemera Paper effects! Partially tear the images here and there.
6. Make smaller or larger creases and add more coffee over them, as you go.
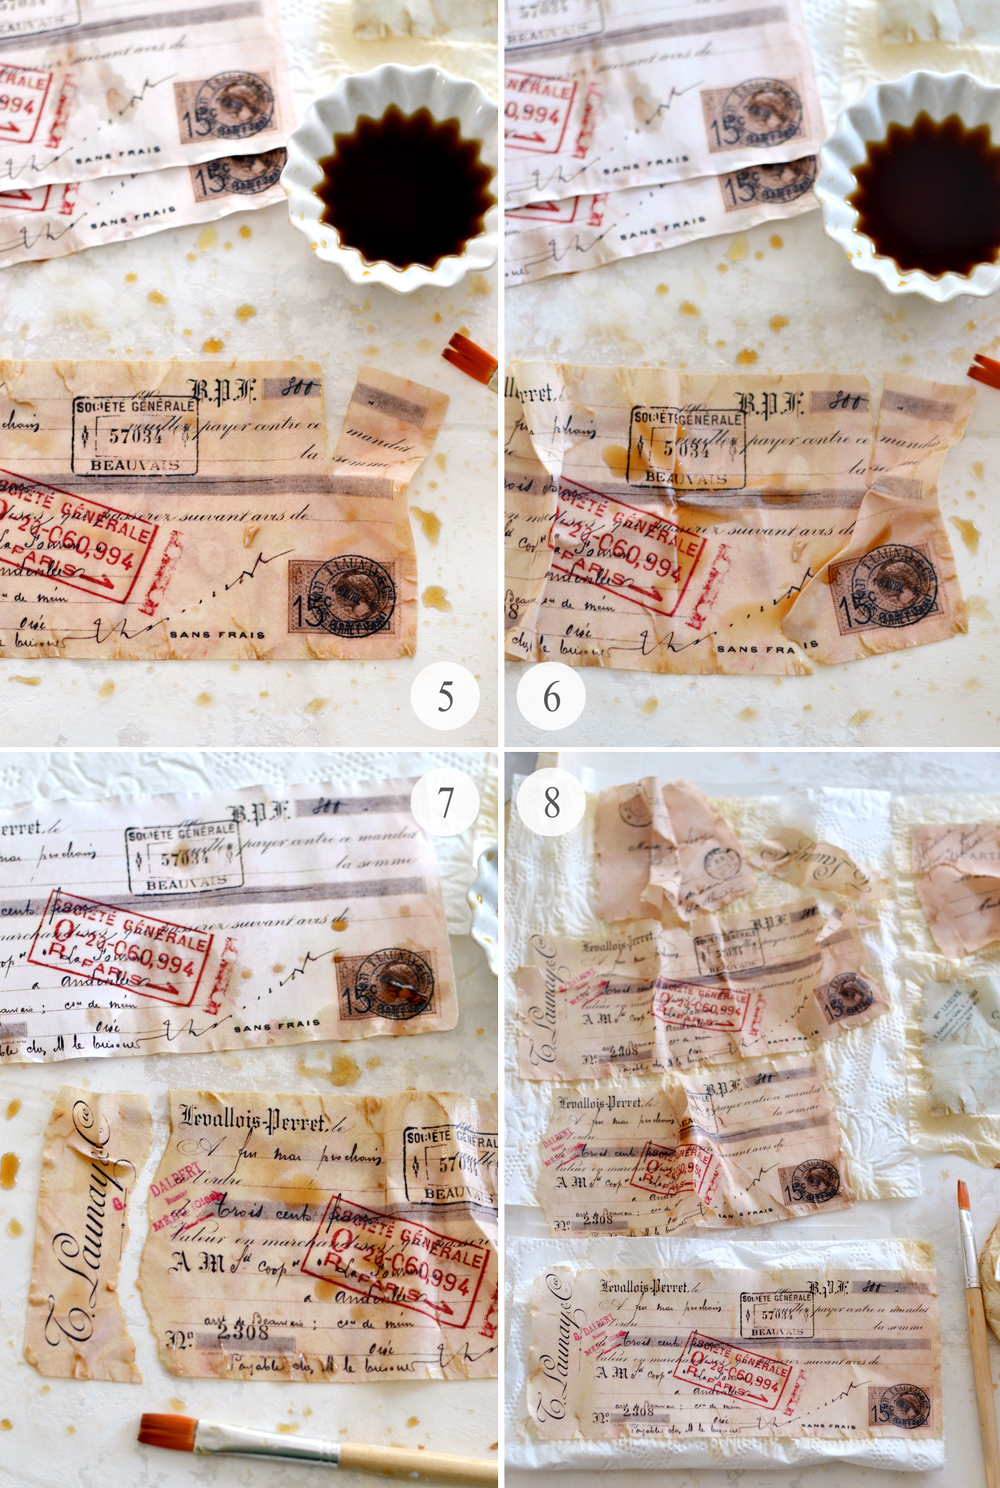
7. Completely tear some of the paper to see what you get. Go as crazy as you want, this will only make your antique paper truly unique!
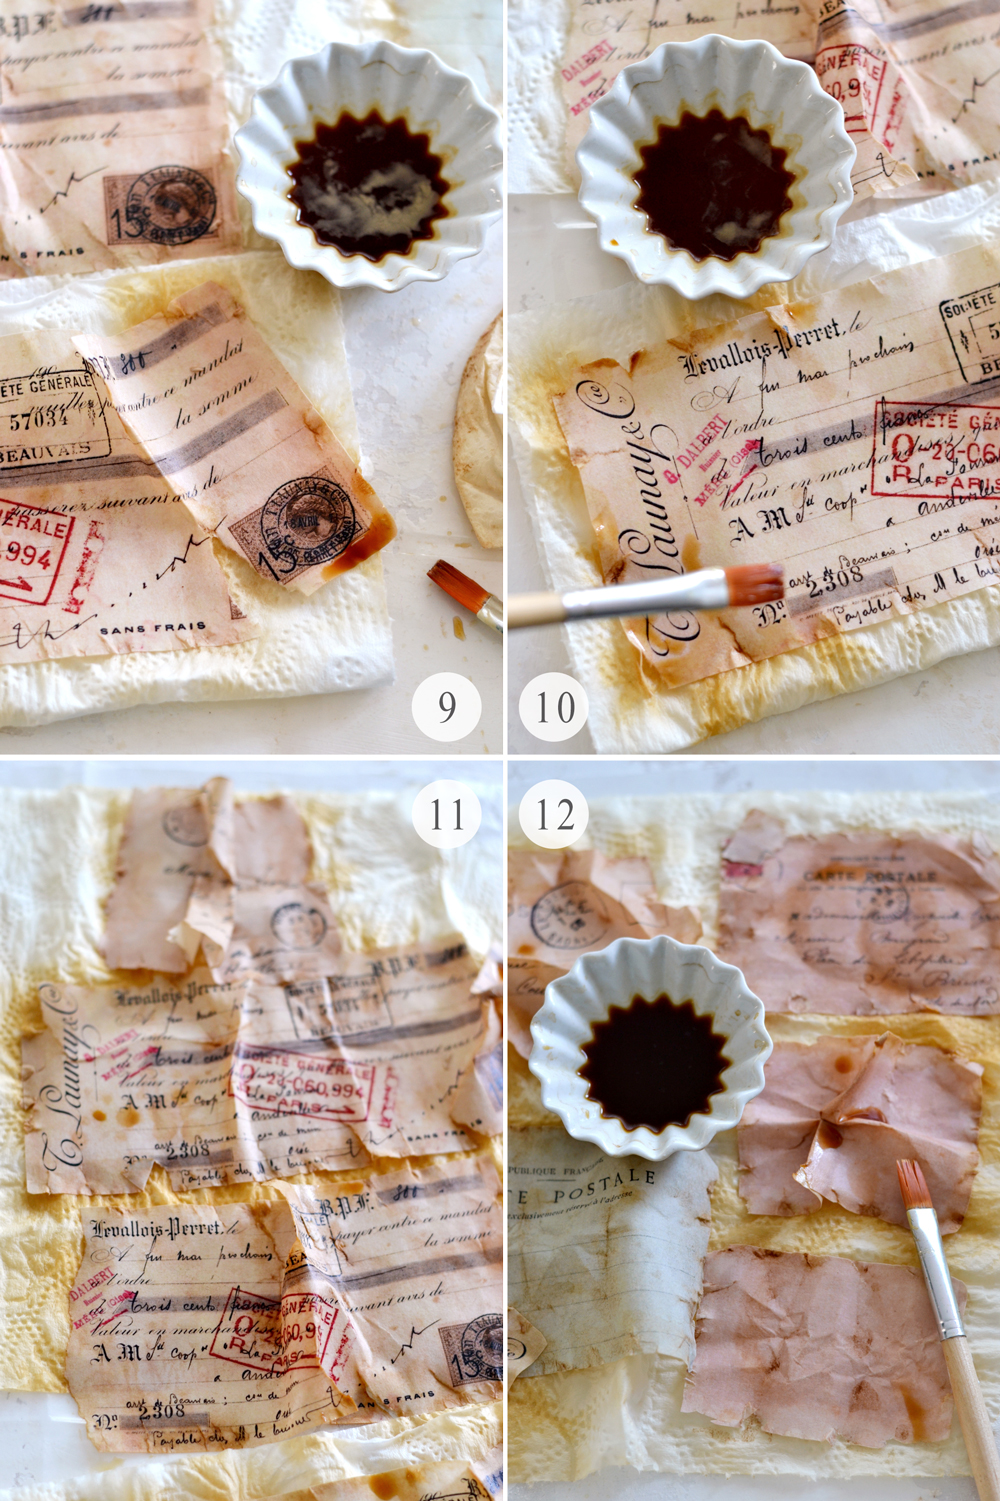
8. Then place each image on some paper towels and put it aside. Don’t just lay the images flat on paper towels, but rather try to crumple them a little bit (or a lot, like I did) to create more creases.
9-10. Now it’s the perfect time to start using your strong coffee and your brush! Make splashes of strong coffee here and there, but also add it on the edges and on the tears (following the lines of the tears) . This will create a beautiful contrast with the diluted coffee that we already brushed earlier and will add a new dimension to our work.
11-12. The strong coffee will soak up into the paper and into all the tears and crumples and will create some gorgeous effects. You can let the paper dry for 5 minutes, then come back and add more strong coffee on the edges and on the creases again, to create more and more interest. When you are happy with the results, let your Antique French Ephemera Paper air dry on the paper towels or use a heat gun (or a hairdryer) to speed things up.
As you can see, things are getting pretty messy at this point! But I would say that the messier the better, especially in this case!
P.S. Because my paper towels were absorbing all that coffee, I thought it would be fun to also use them afterwards. So keep an eye on these hidden gems and intentionally brush some coffee on those too!
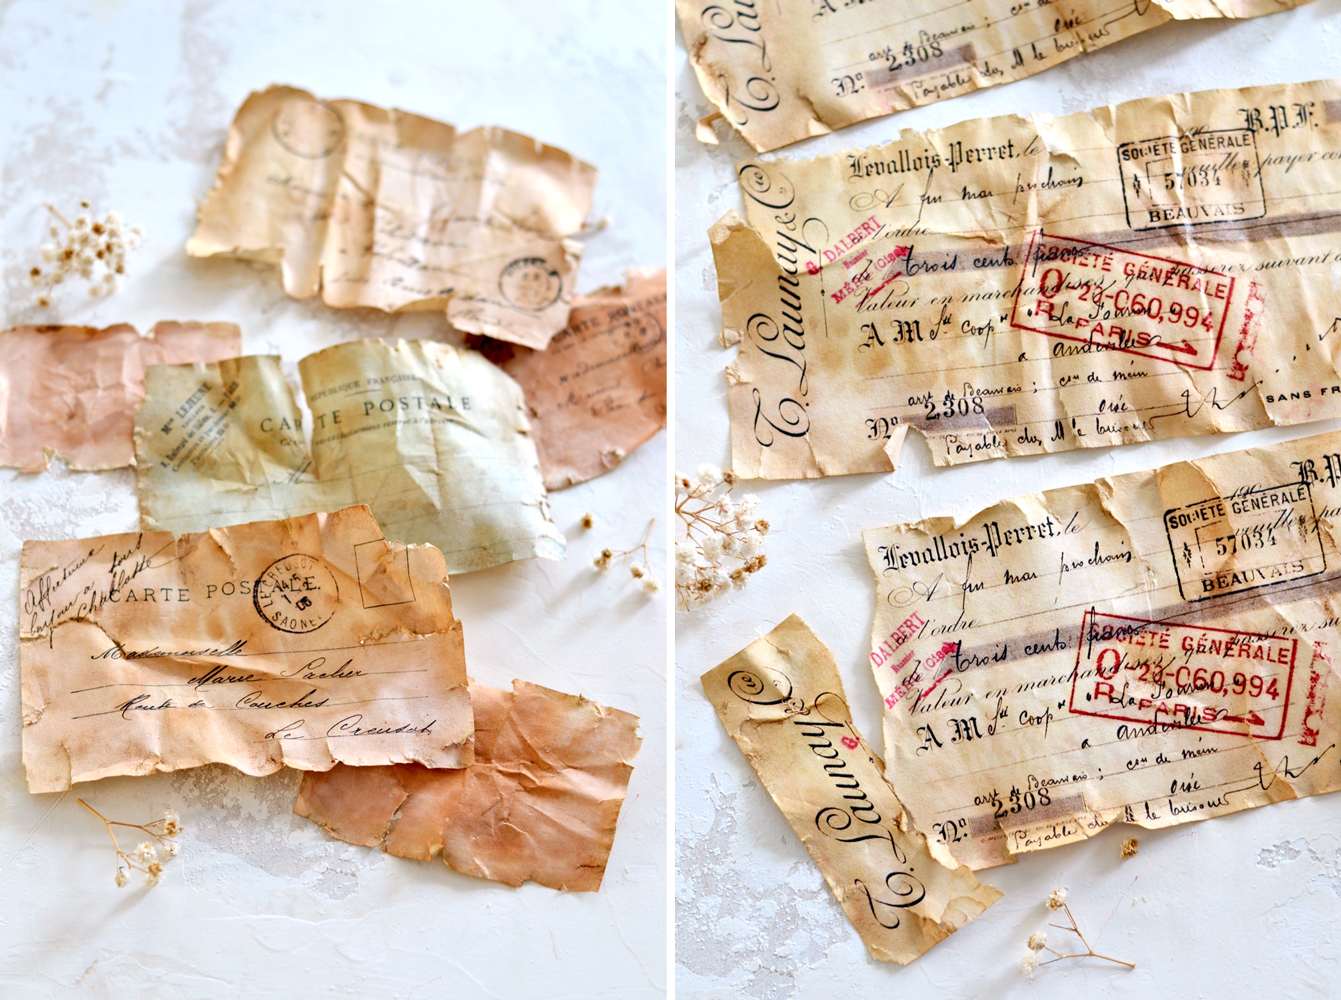
And that’s it! Your gorgeous Antique French Ephemera Paper is ready! Well, almost ready, because after drying, each piece will be quite wavy. You can totally leave it like that or put it between the pages of a book to flatten it. You can even use your iron if you want, just use some parchment paper on top so you don’t burn it.
I tried both methods and I liked using the book pages better.
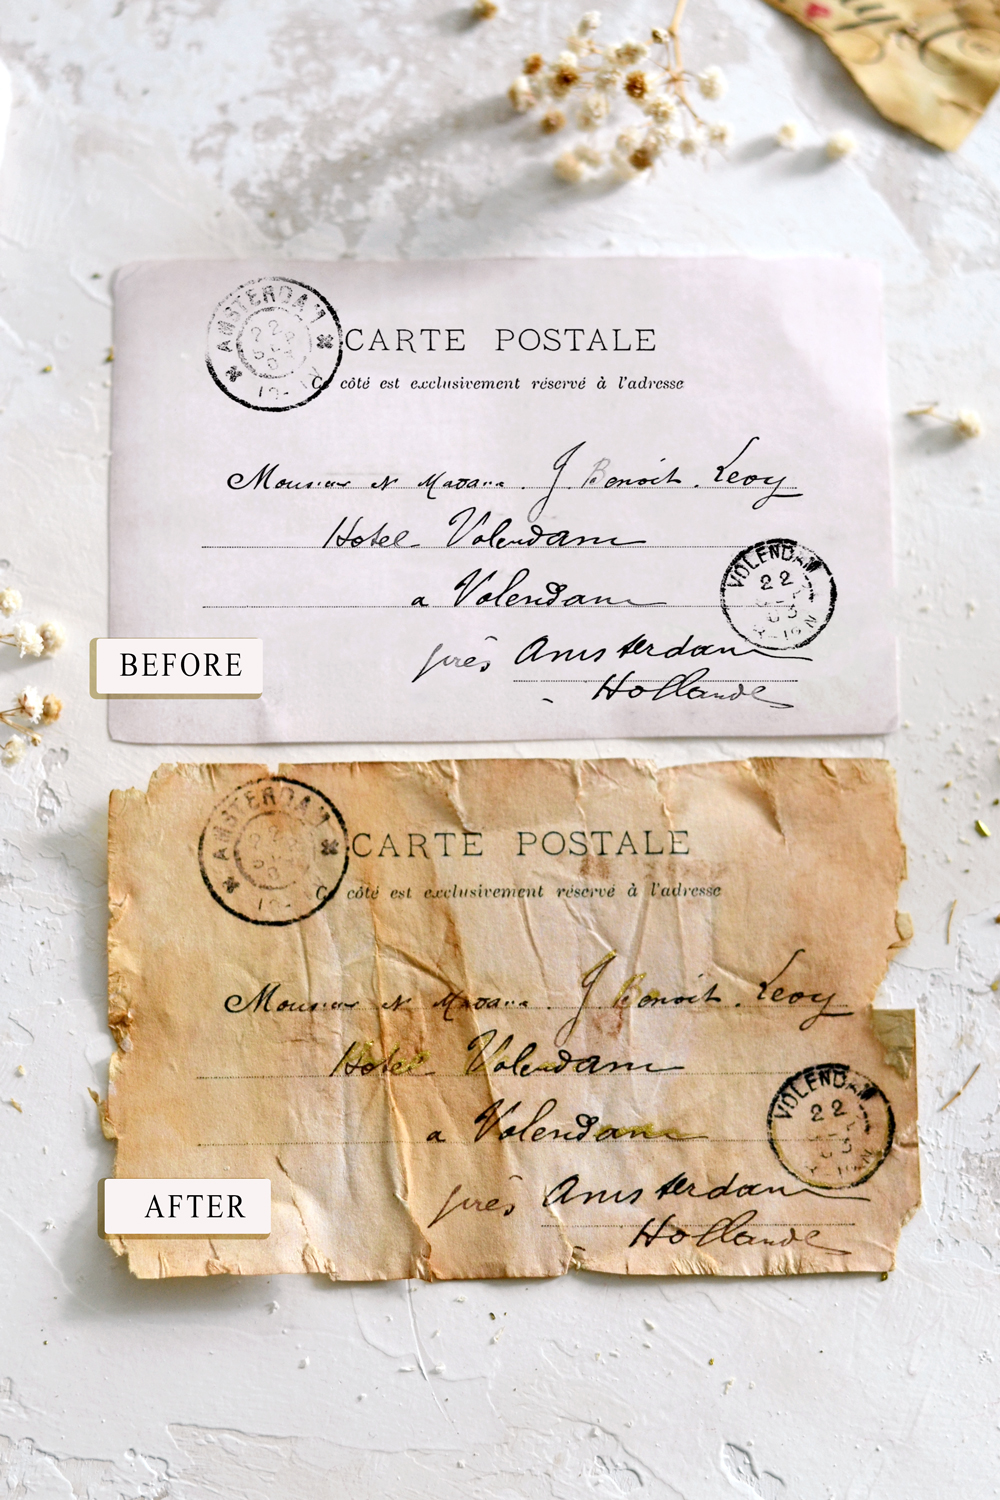
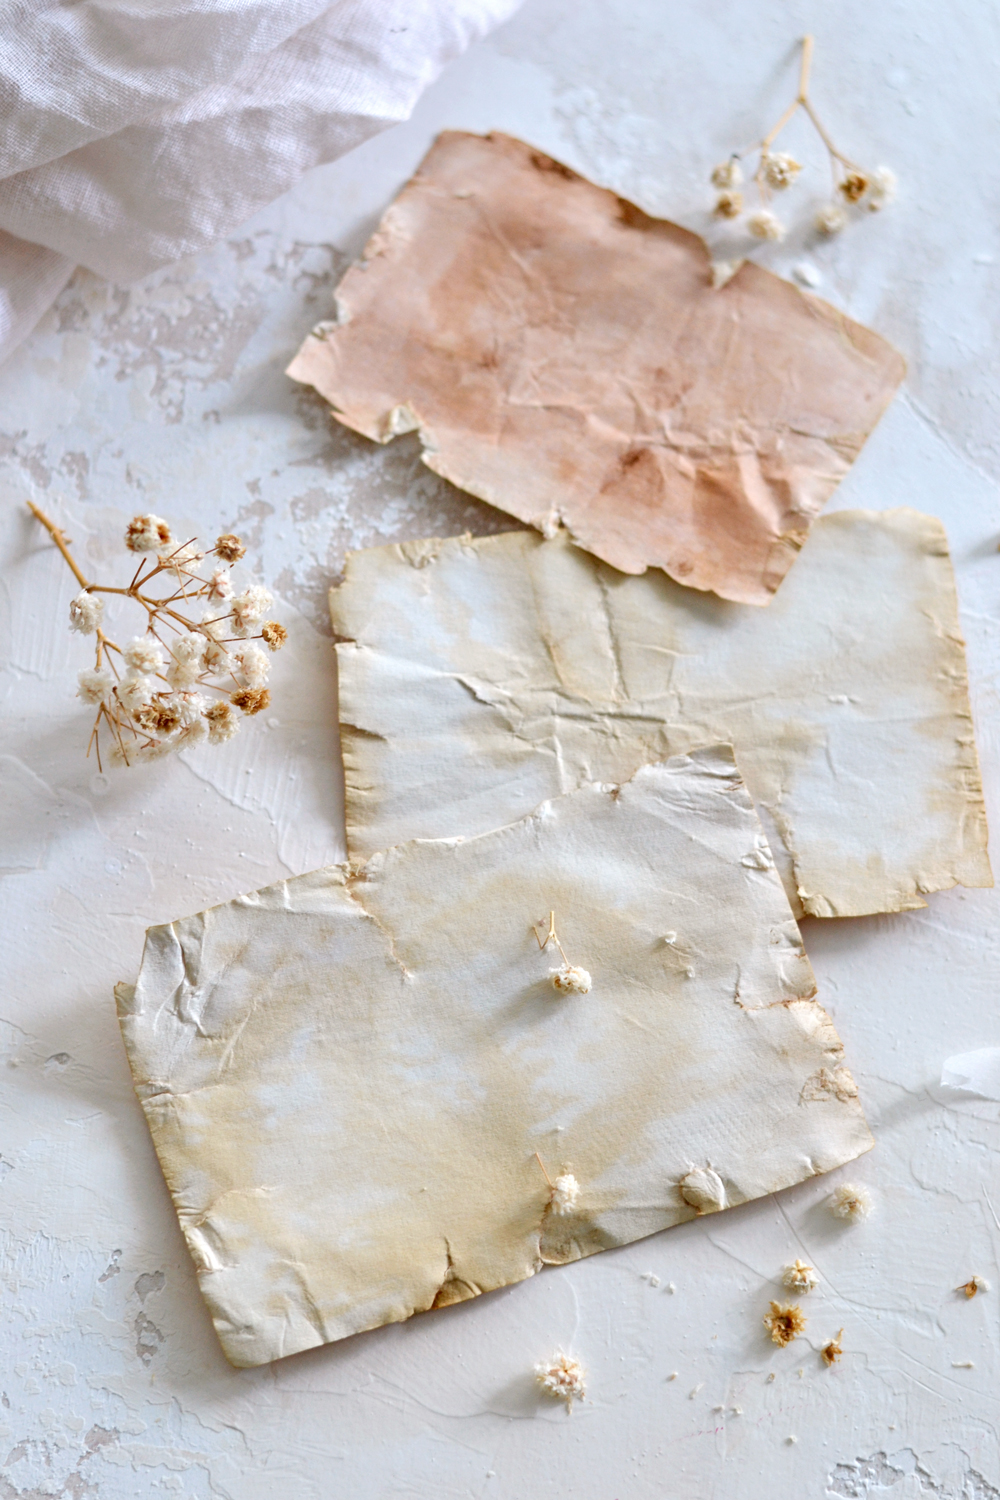
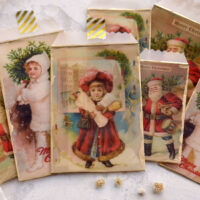
You guys , all the ‘efforts’ that you will be putting into making these AH-MAZING Antique French Ephemera Paper will definitely pay off! You will now have your perfectly aged and distressed paper to use when in need. The details on these are simply stunning, it’s like finding that special and precious treasure that has been kept hidden for decades! This project could have also been called – revealing the true personality of paper! You will see how each piece of paper will react differently while distressing it and will be filled with so much character! You won’t find two similar pieces, each piece will be truly unique on its own! It’s almost hard to believe it all started from regular paper only a few hours ago! But here is a small before and after reminder, so you can better see a comparison. The transformation is quite striking, don’t you think?
It’s always good to have a few pieces of these antiqued beauties around for whenever inspiration strikes. Antique paper can make the most amazing backgrounds for many of your creative projects and/or can easily add that special something to your art work! Maybe you feel like decorating a few pages in your junk or art journal, making some unique tags or vintage cards to embellish presents, there are endless possibilities when it comes to actually using it.
Look at all these gorgeous small details on my Antique French Ephemera Paper! And this paper not only looks real, but also feels real – it gets some sort of a crispness that you can only see in old paper. And it smells heavenly! 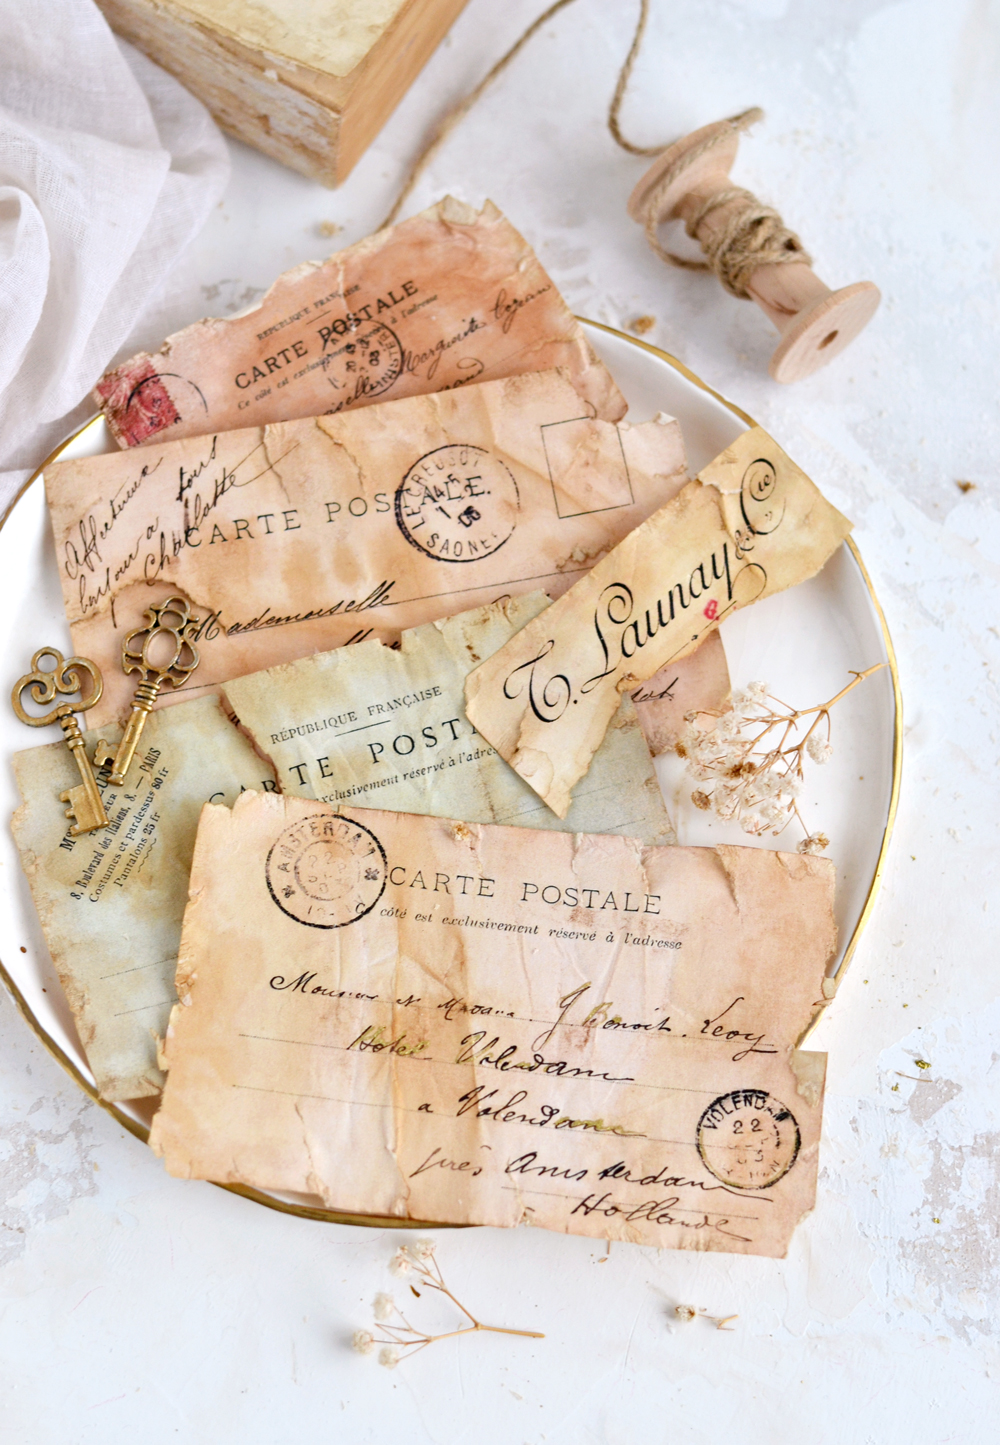
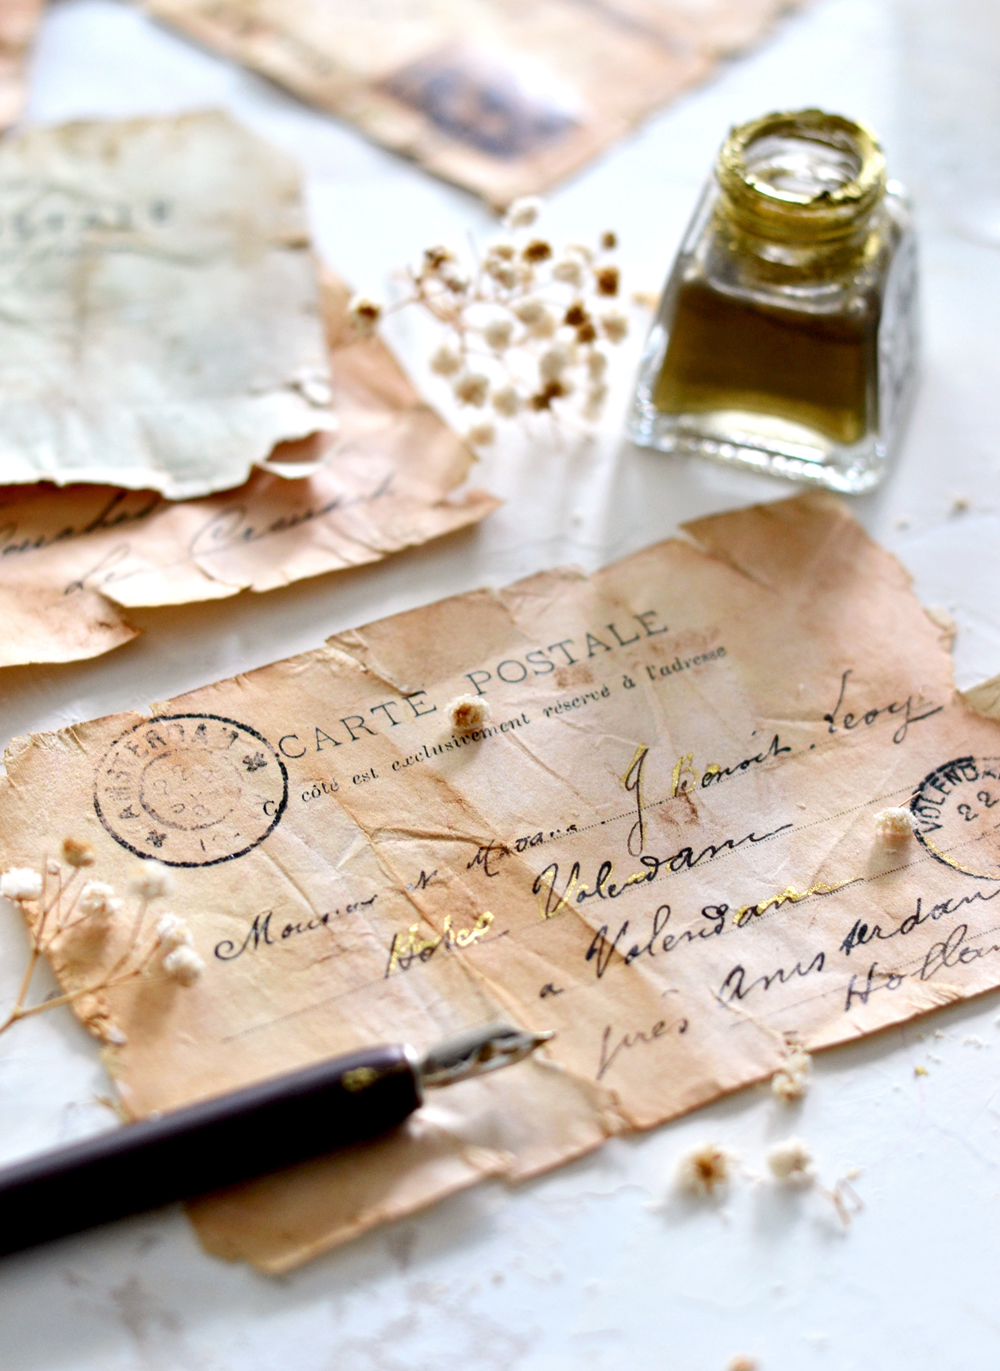
I sometimes feel the need of adding a few golden touches here and there, and this time I used my calligraphy pen to highlight this beautiful handwriting on one of the postcards. I only wish my handwriting would look this good, I’m always mesmerized by the fact that people used to write like this in the old days!
I really love making my own Antique French Ephemera Paper and even though my initial postcards and checks were printed in colors, please keep in mind that you can apply this method to pretty much ALL the regular white paper that you can find! Dictionary pages, sheet music, just try this method on everything!
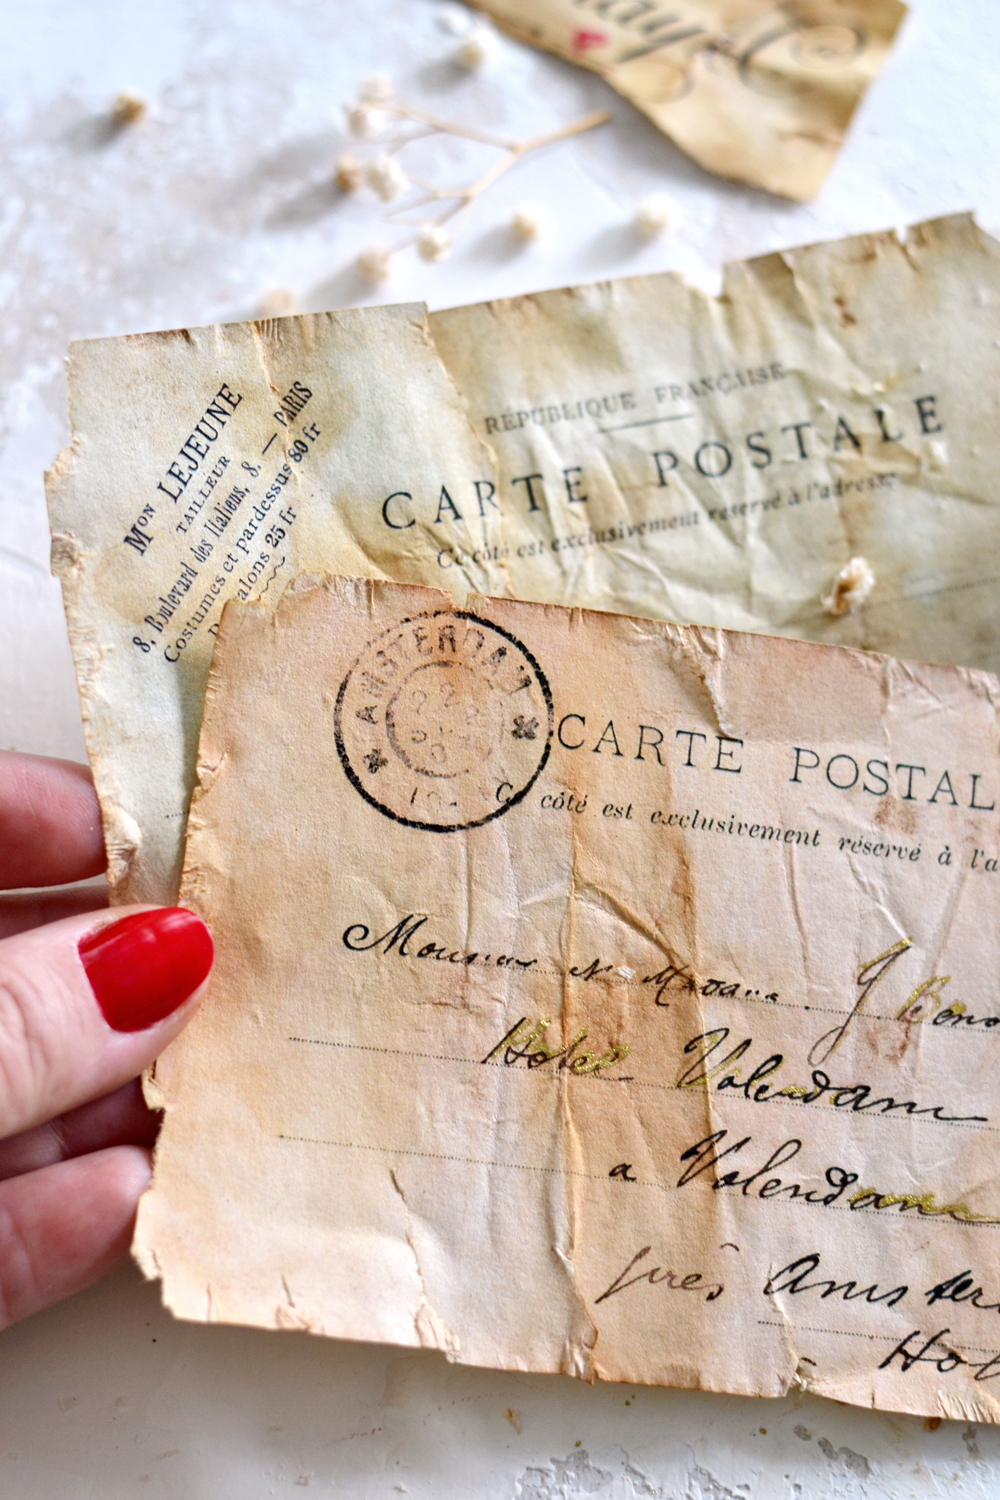
Here is the back of some of the postcards, just to see what to expect. Oh, such beautiful details and so many possibilities!
Fair warning on using my method of antiquing paper – this method is HIGHLY addictive! You’ll love it so much, it might even become your favorite method of making antique paper!
 You might also like my Aged Terra Cotta Pots Technique HERE.
Happy crafting,
Diana / Dreams Factory


Dawn says
Why only use a laser jet printer? Wouldn’t an ink jet work?
The only last jet I have is black and white ink only…
Thank you for the free downloads and the tutorials!
Karen Watson says
Hi Dawn, you can totally use an ink jet printer, but you may need to seal the ink first so that it doesn’t bleed. We have tips for that on this post https://thegraphicsfairy.com/make-inkjet-prints-waterproof/ I hope that helps!
Jeri Aronowitz says
Thanks so much for the tutorial. I have got to try this. Can’t wait to experiment.
Karen Watson says
Have fun playing with this technique Jeri!
Connie Griffin says
So cool, thanks!
Karen Watson says
I’m glad you enjoyed it Connie!
Michelle H says
Wow, this is great. Such a huge difference. Thank you so very much.
Karen Watson says
Isn’t it great?! Have fun making new paper look old Michelle!
Abigail says
Can I use your free ephemera in my Mystery Boxes on Etsy, or do I have to pay for them? Thank you!
Karen Watson says
Hi Abigail, you can use the free images for Etsy products as long as you follow the terms here https://thegraphicsfairy.com/terms-copyright/
Isabelle says
Magnifique!!!! I really love your ideas!! I follow your blog in Belgium 🤩. ( sorry for my english I speak french in my country )
Karen Watson says
🙂
Gayle says
Wait – at first I thought “add one part coffee into one of the recipients” meant you got to drink coffee while you’re playing! That strength would certainly keep you alert!
graphicsfairy says
LOL, too funny Gayle 🙂
Debbie Sultemeier says
Thanks so much for this informative and easy to follow tutorial. This is making me wonder if I can use coffee or tea and rubber stamps to decorate fabric. I have been using distress inks to dye fabric strips that I wrap around the outside of gift boxes.
graphicsfairy says
Glad you liked it Debbie, give it a try and let us know!! 🙂
Debbie says
So lovely! I didn’t know how to flatten my creations, but you nailed that problem down for me. Thank you soooo much!
graphicsfairy says
Thank you Debbie and I am so glad it was helpful 🙂 Have a great weekend!
Lark Robart says
All my plans for the day have now been totally derailed. But trying out this technique will definitely be more fun than what I’d planned to do . . . so thank you!!
graphicsfairy says
LOL, sorry about that Lark, I hope you had fun!!
Judi Gullett says
Love this tutorial. Thank you for sharing your technique.
graphicsfairy says
Thanks so much Judi. I am so glad you enjoyed it 🙂
Teddee Grace says
How fun. Now let us see how you use these in a project. I’d love to see that.
graphicsfairy says
Thanks so much Teddee, I may just need to do that 🙂
Ruth A Bryant says
Very informative and beaautifully written. Thank you.
Karen Watson says
We’re glad you enjoyed Diana’s tutorial Ruth!