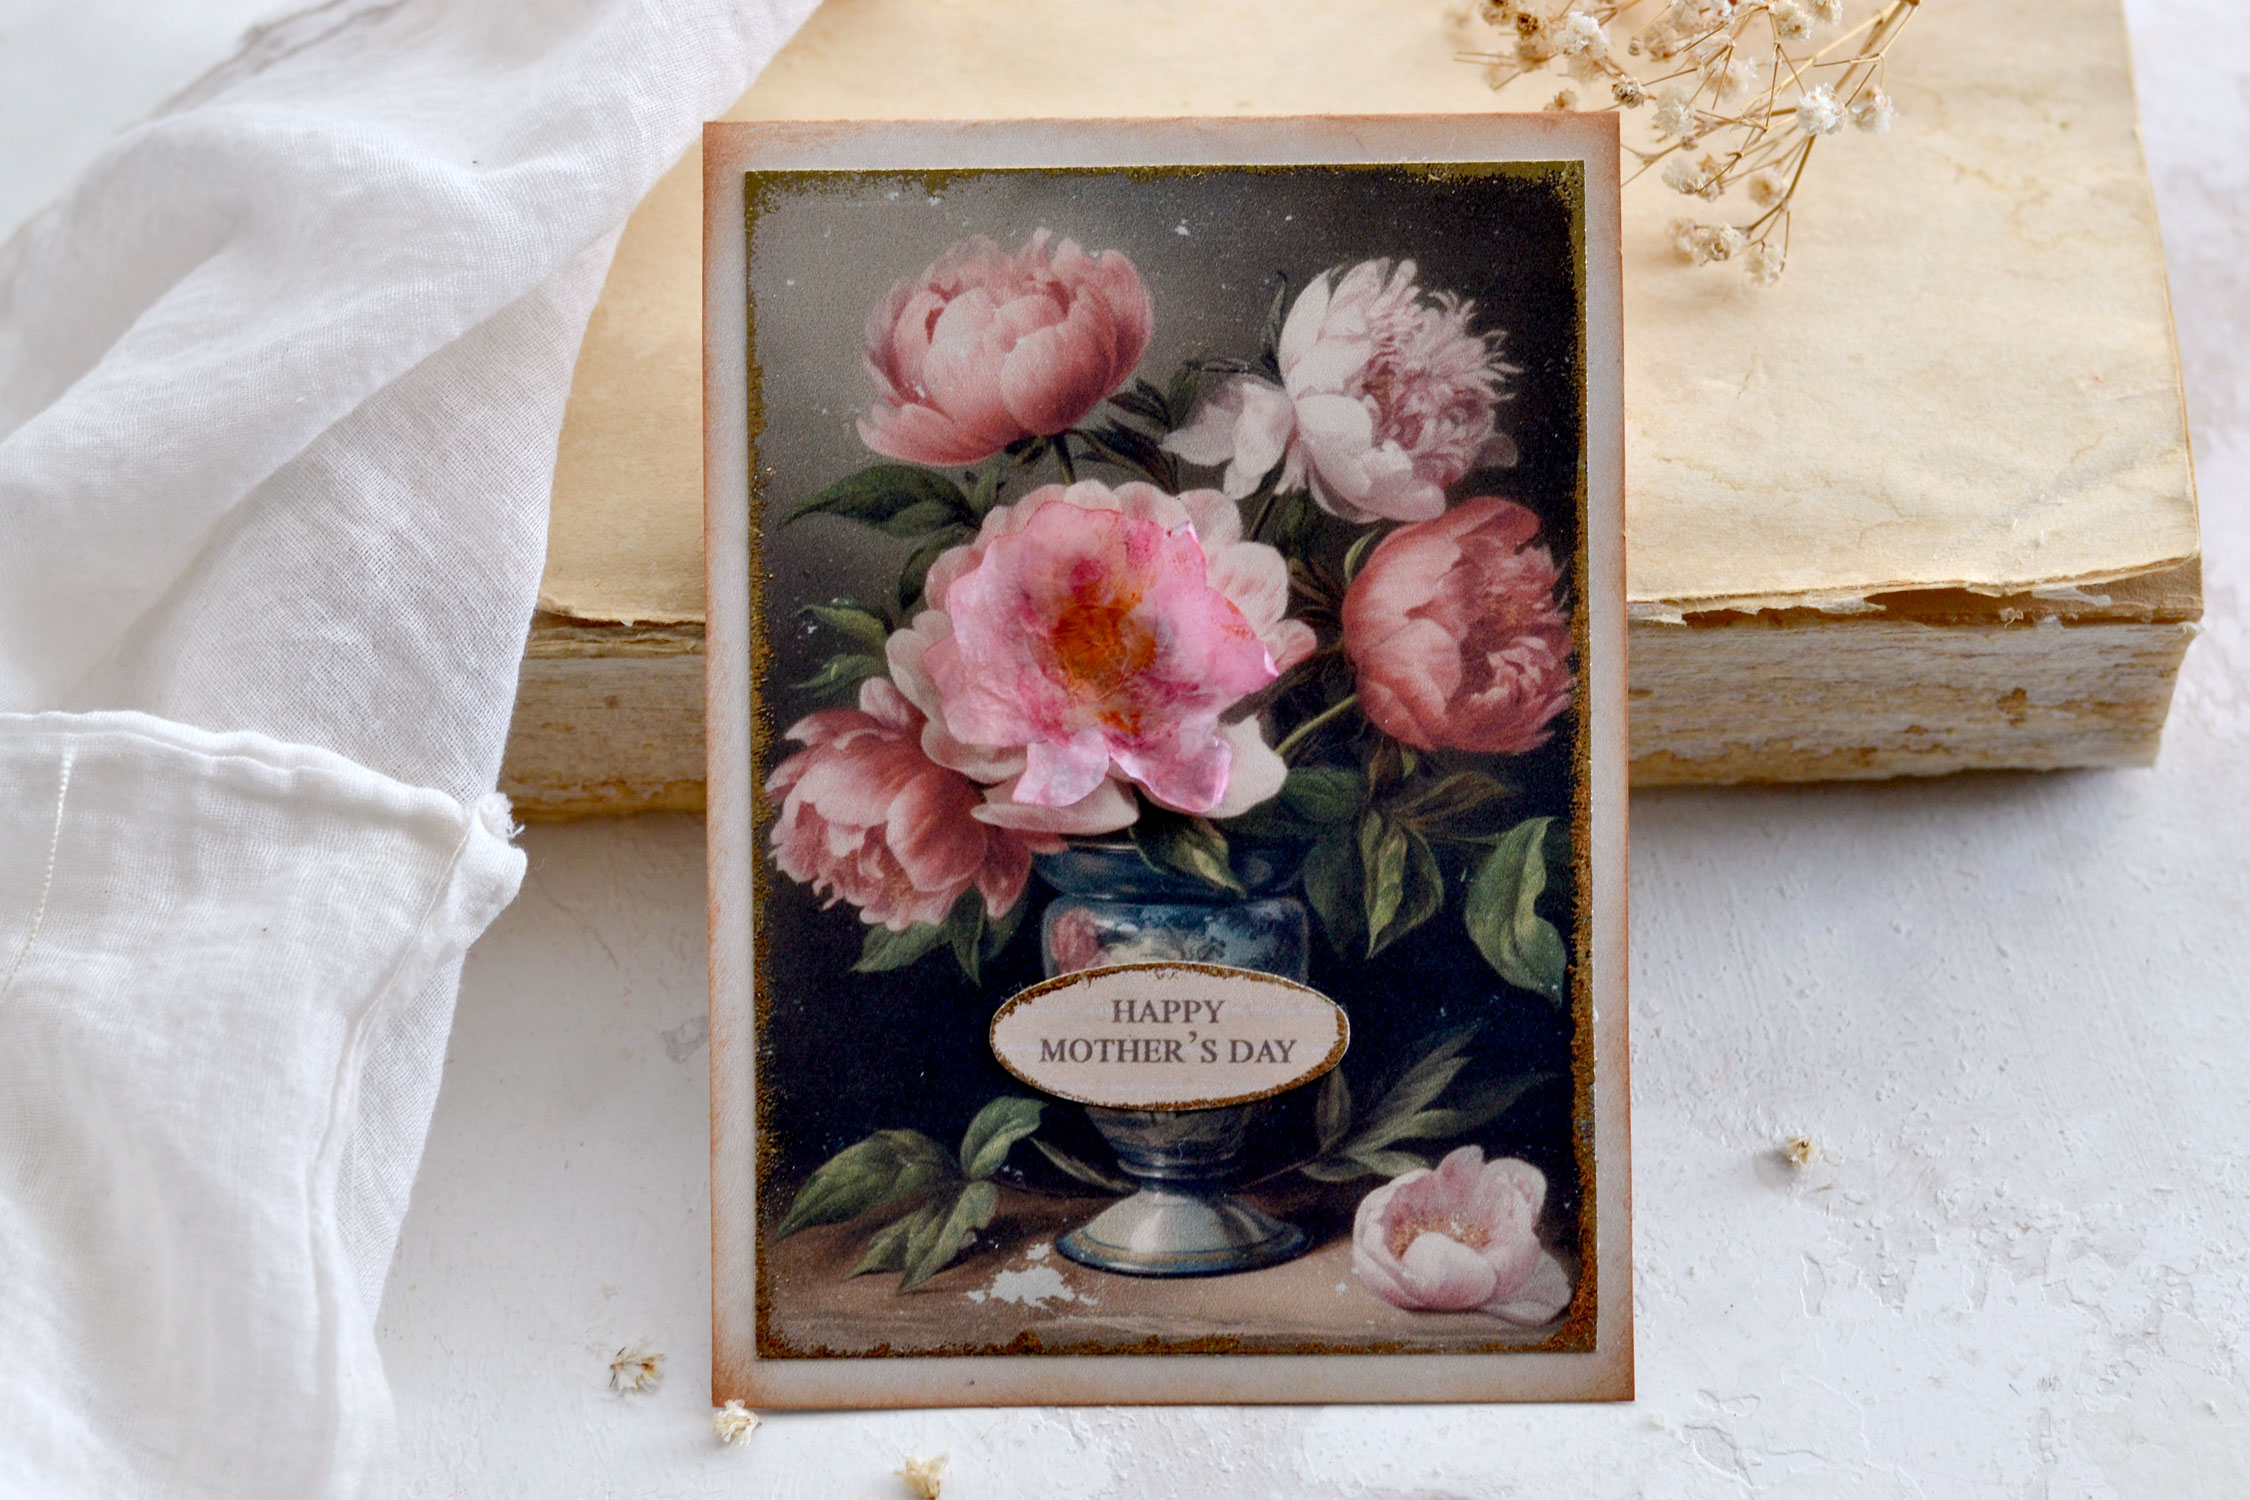
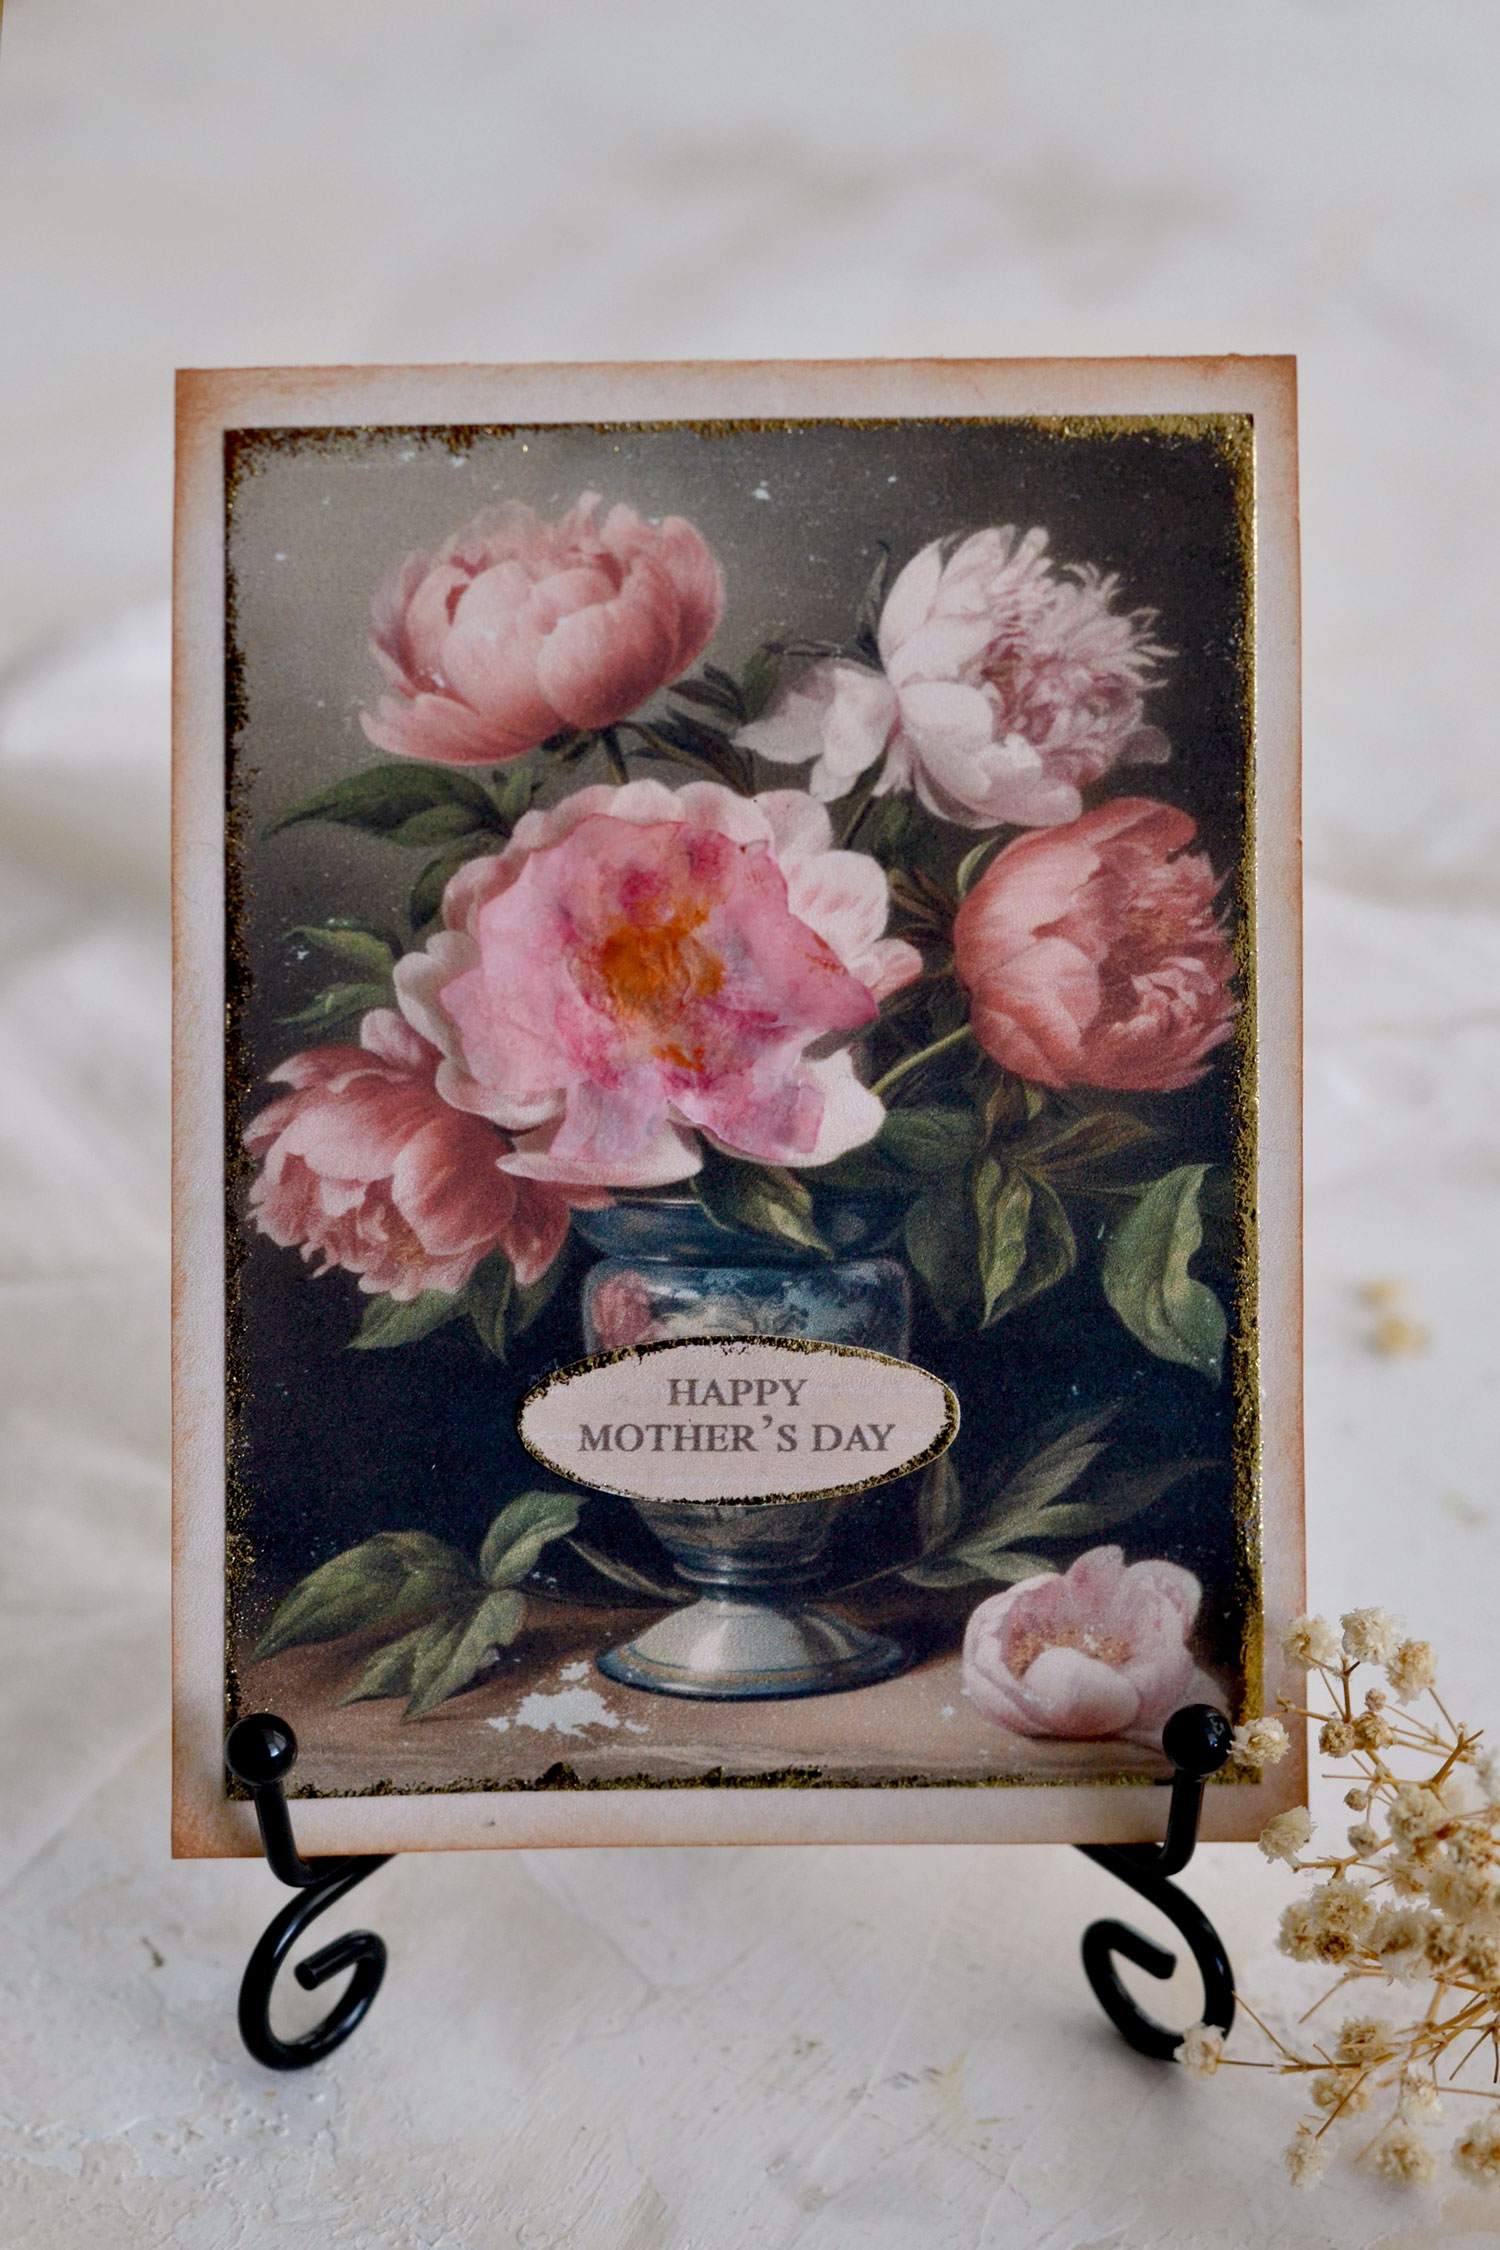
Printable Mother’s Day Card Kit
Hello Graphics Fairy friends! I’m Diana from Dreams Factory and I’m happy to be here again to share another DIY project with you! Today I will show you how to make this beautiful DIY Printable Mother’s Day Card Kit with peonies and some super chic gold touches. We’ll use the usual supplies to make the card, but we’ll also squeeze in a special type of paper that will allow us to create a small 3D effect on our focal point flower.
I wanted to keep things fairly uncomplicated with this project, but also add that personal, handmade touch to make it truly unique. The special type of paper that I mentioned is tissue paper! We’ll add some lovely watercolors to it, and I will show you how to create that raised 3D effect while also keeping the shape of the flower. This paper is quite delicate, so we’ll be able to use its sheerness to our advantage.
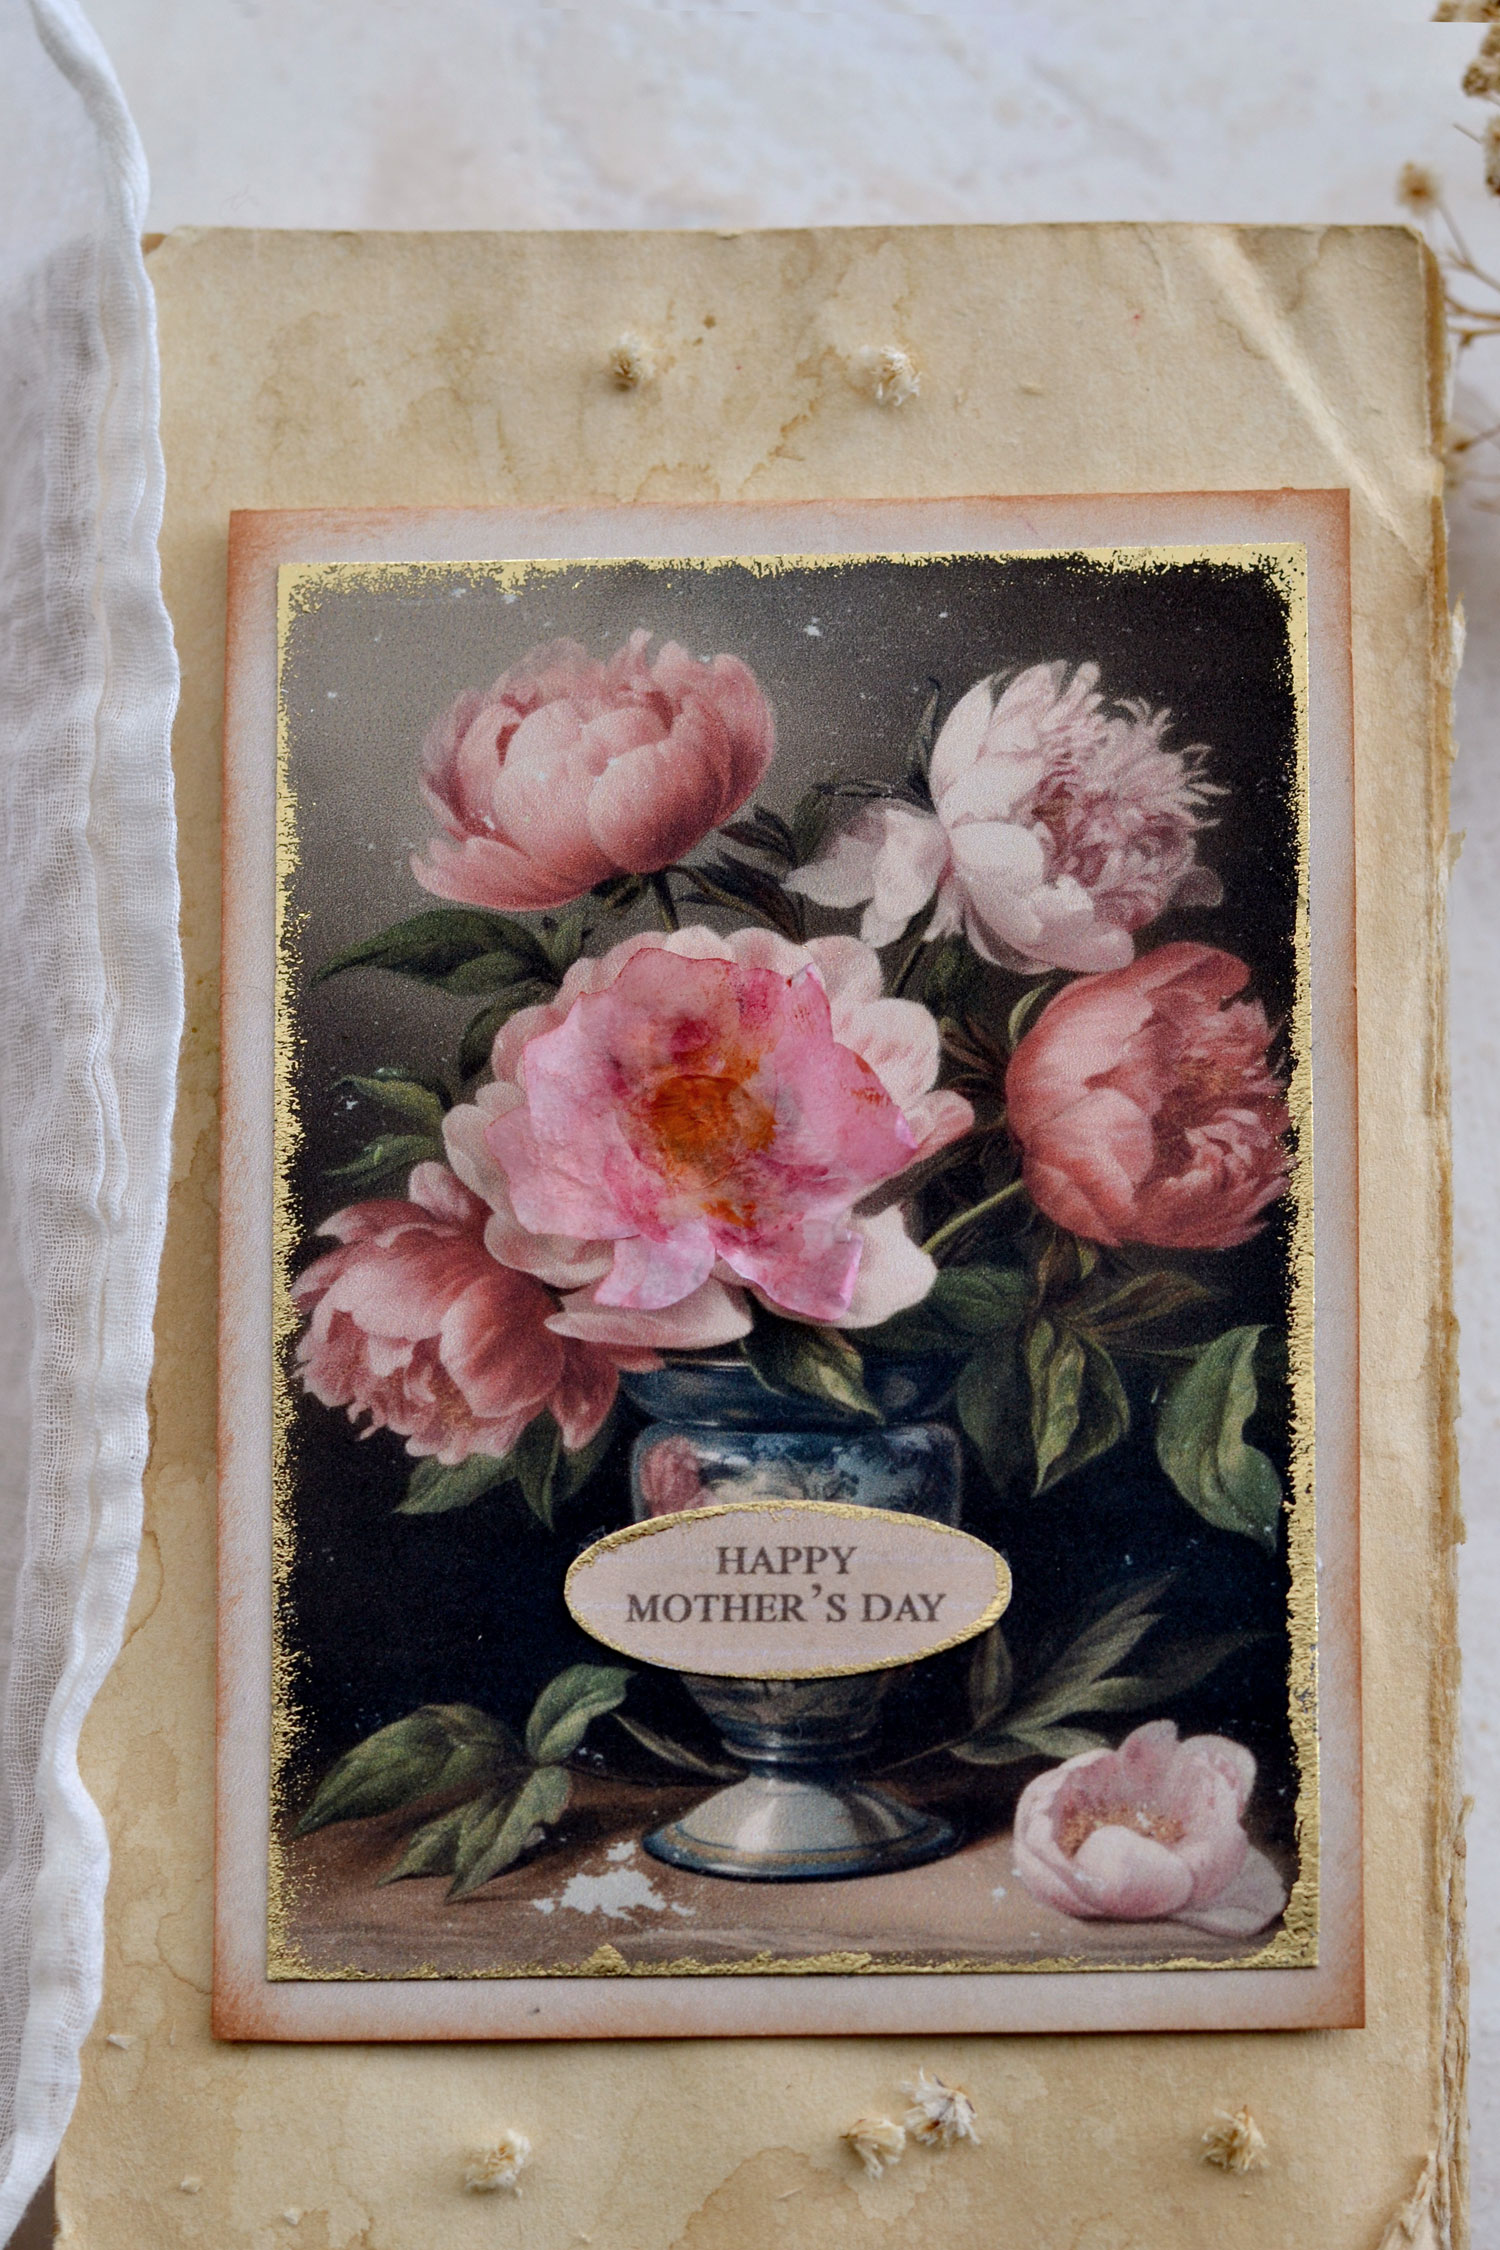
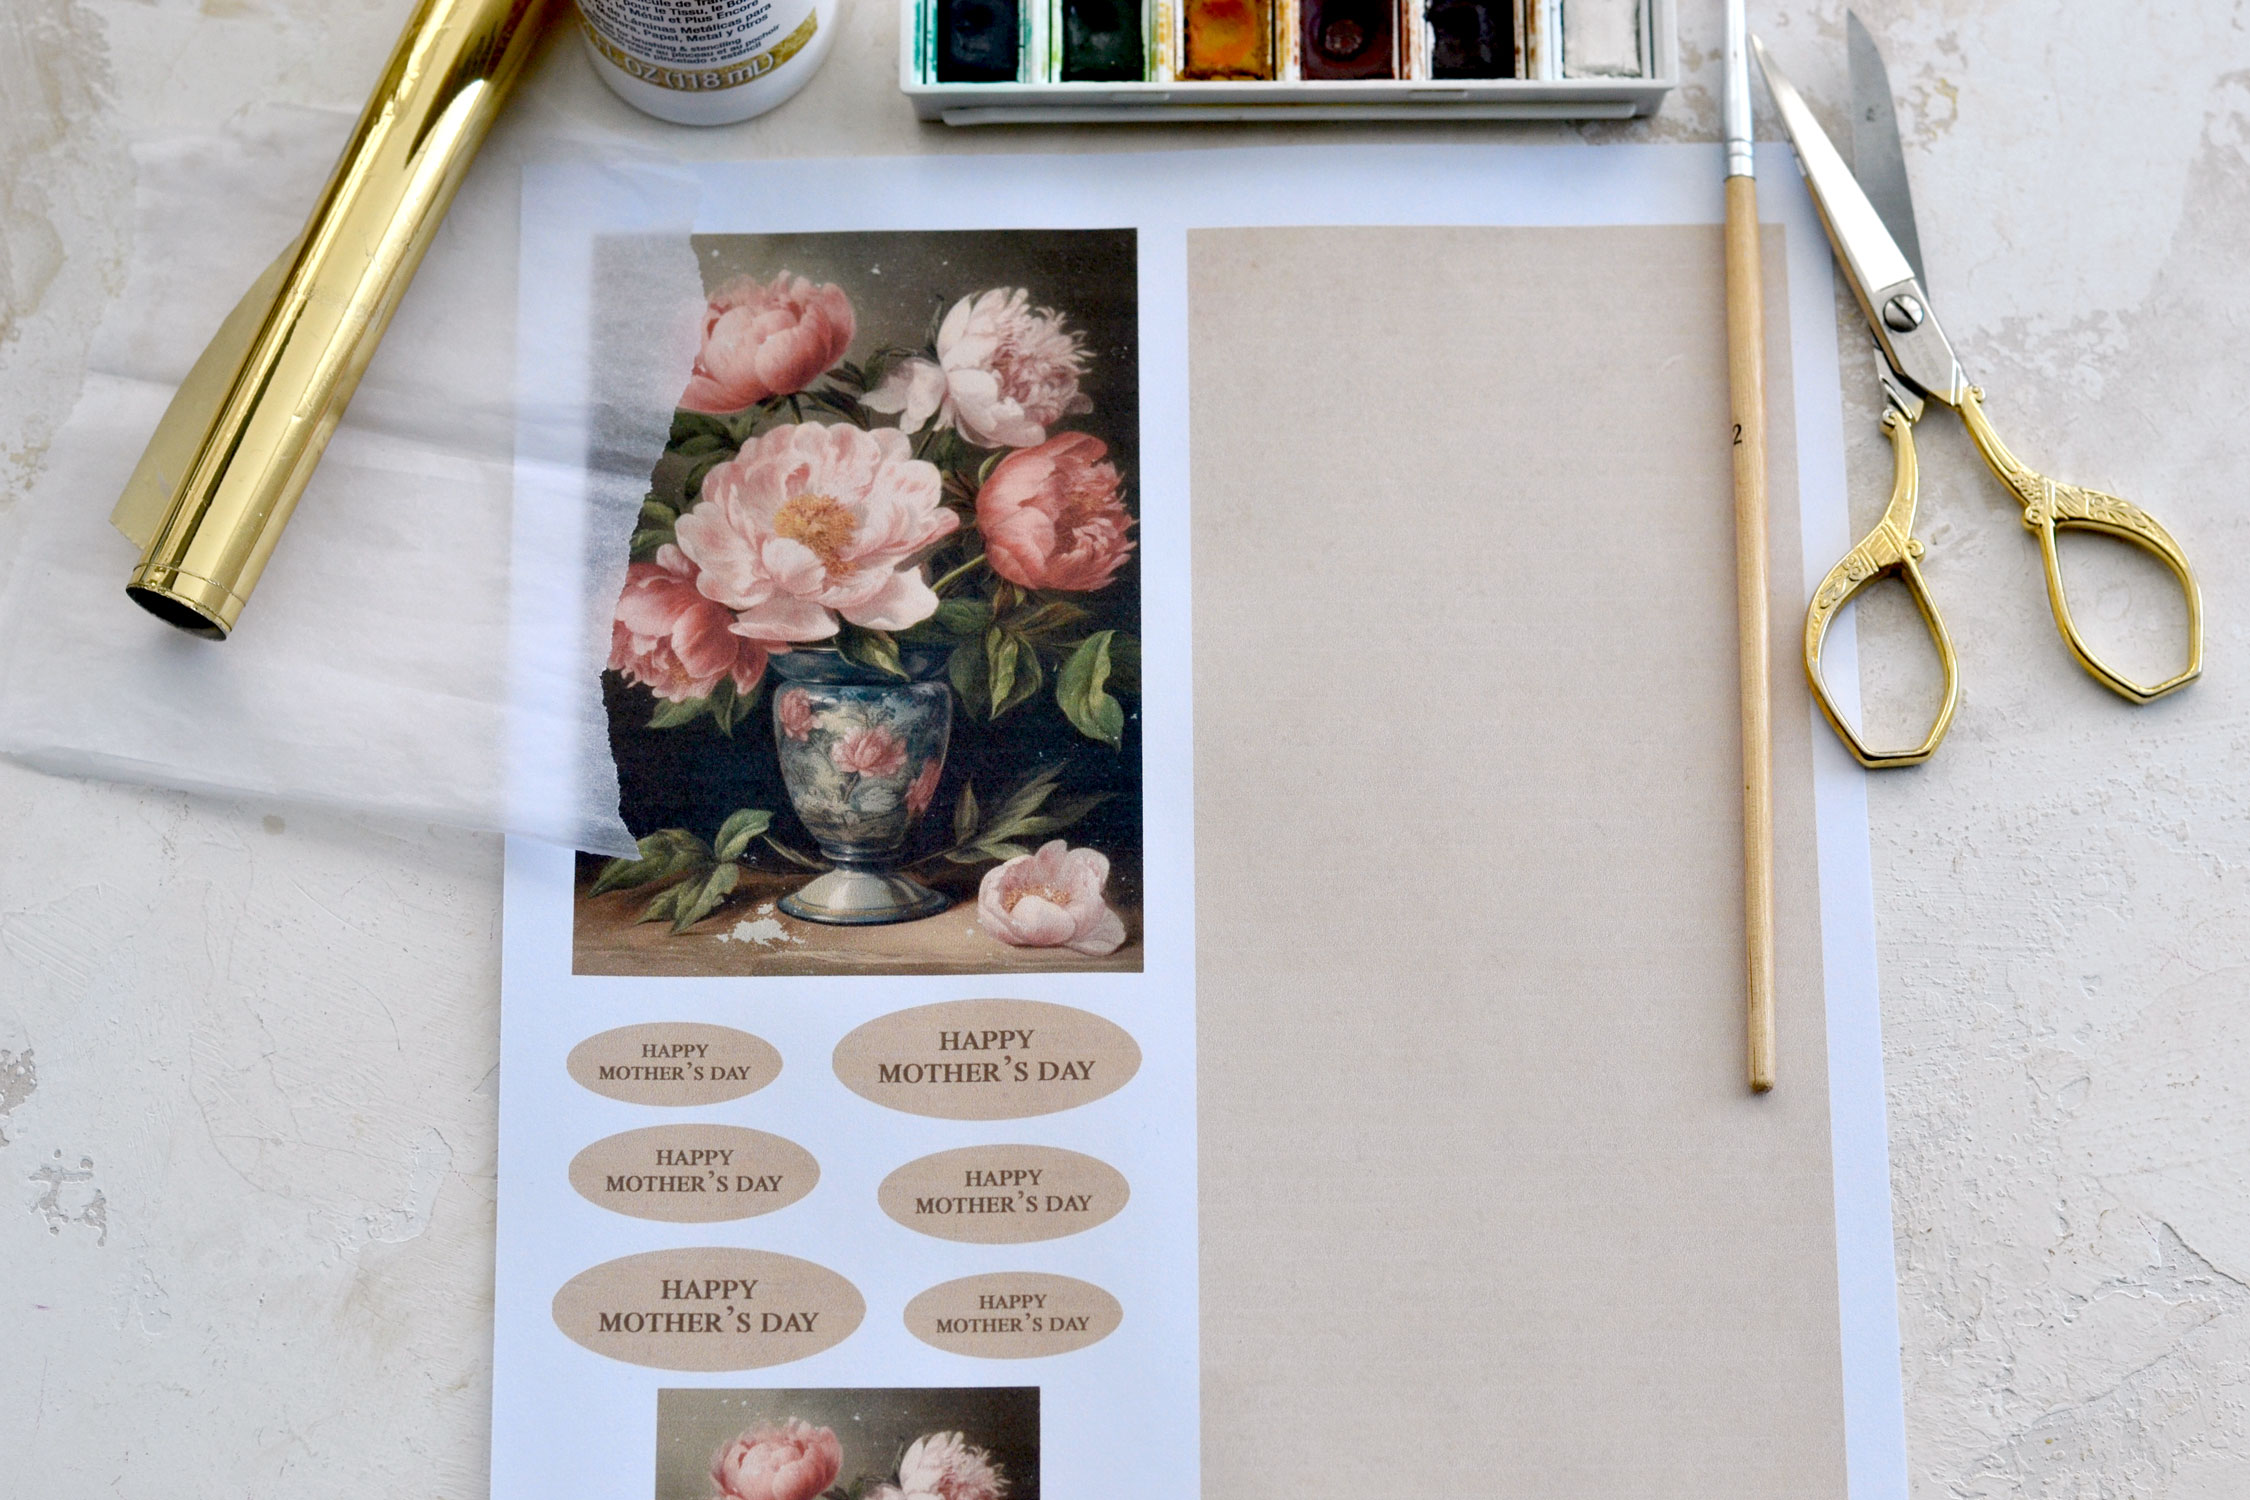
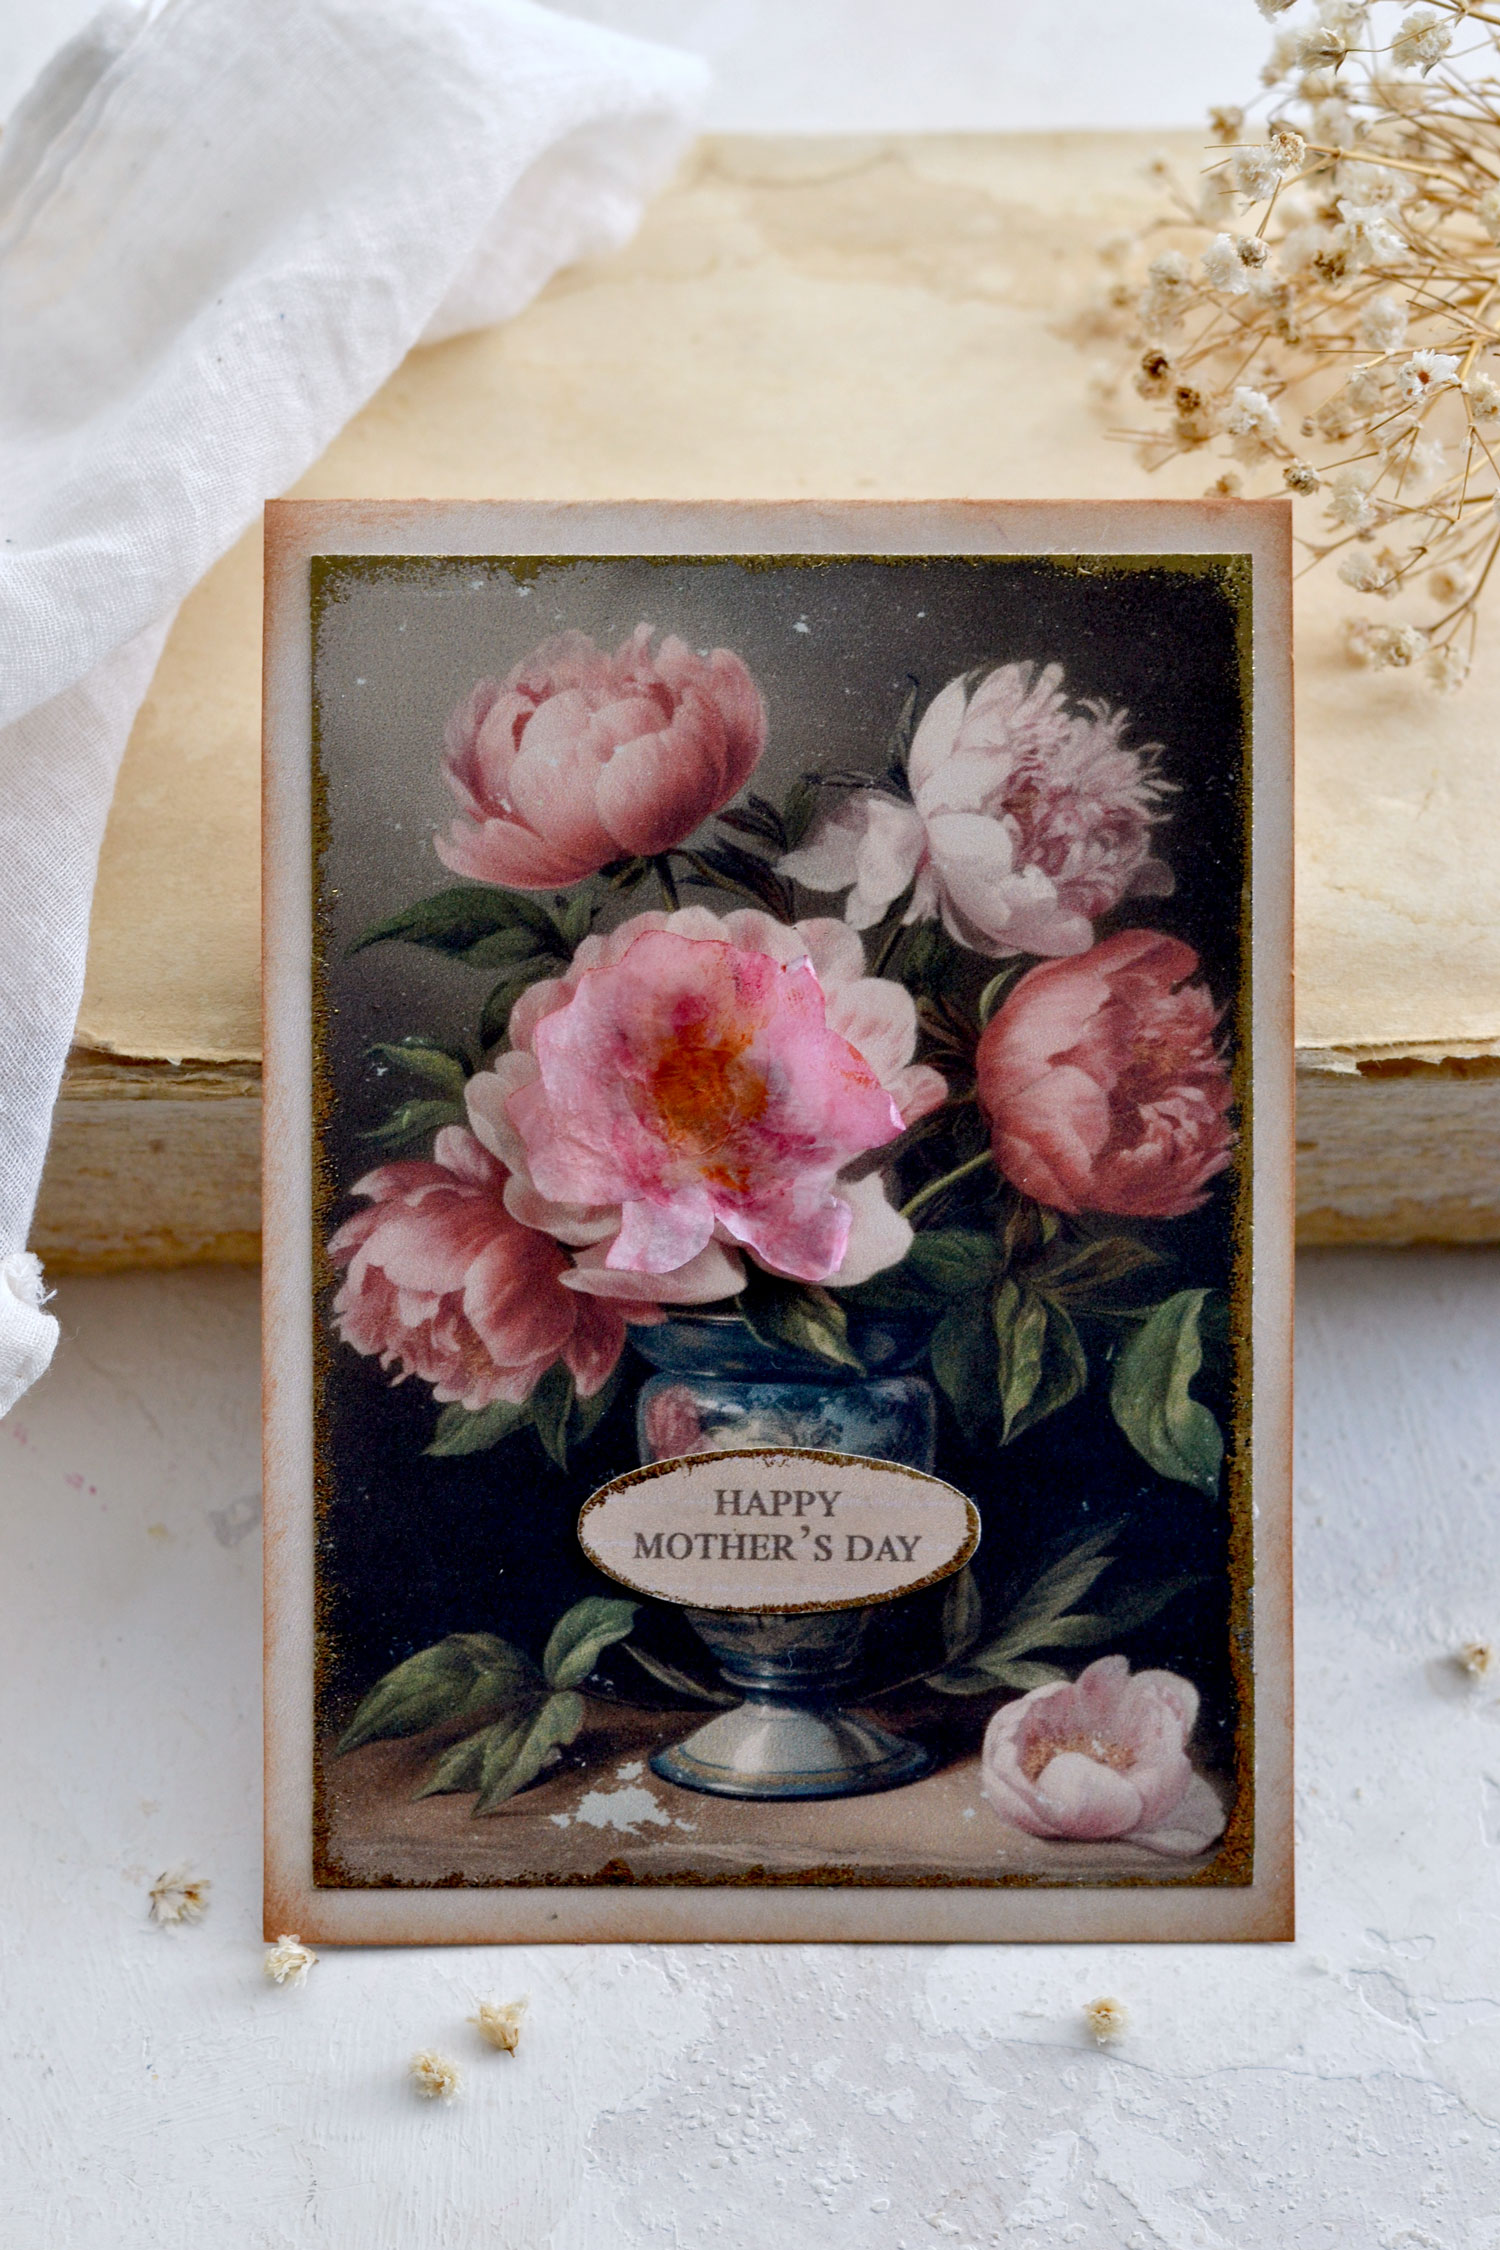
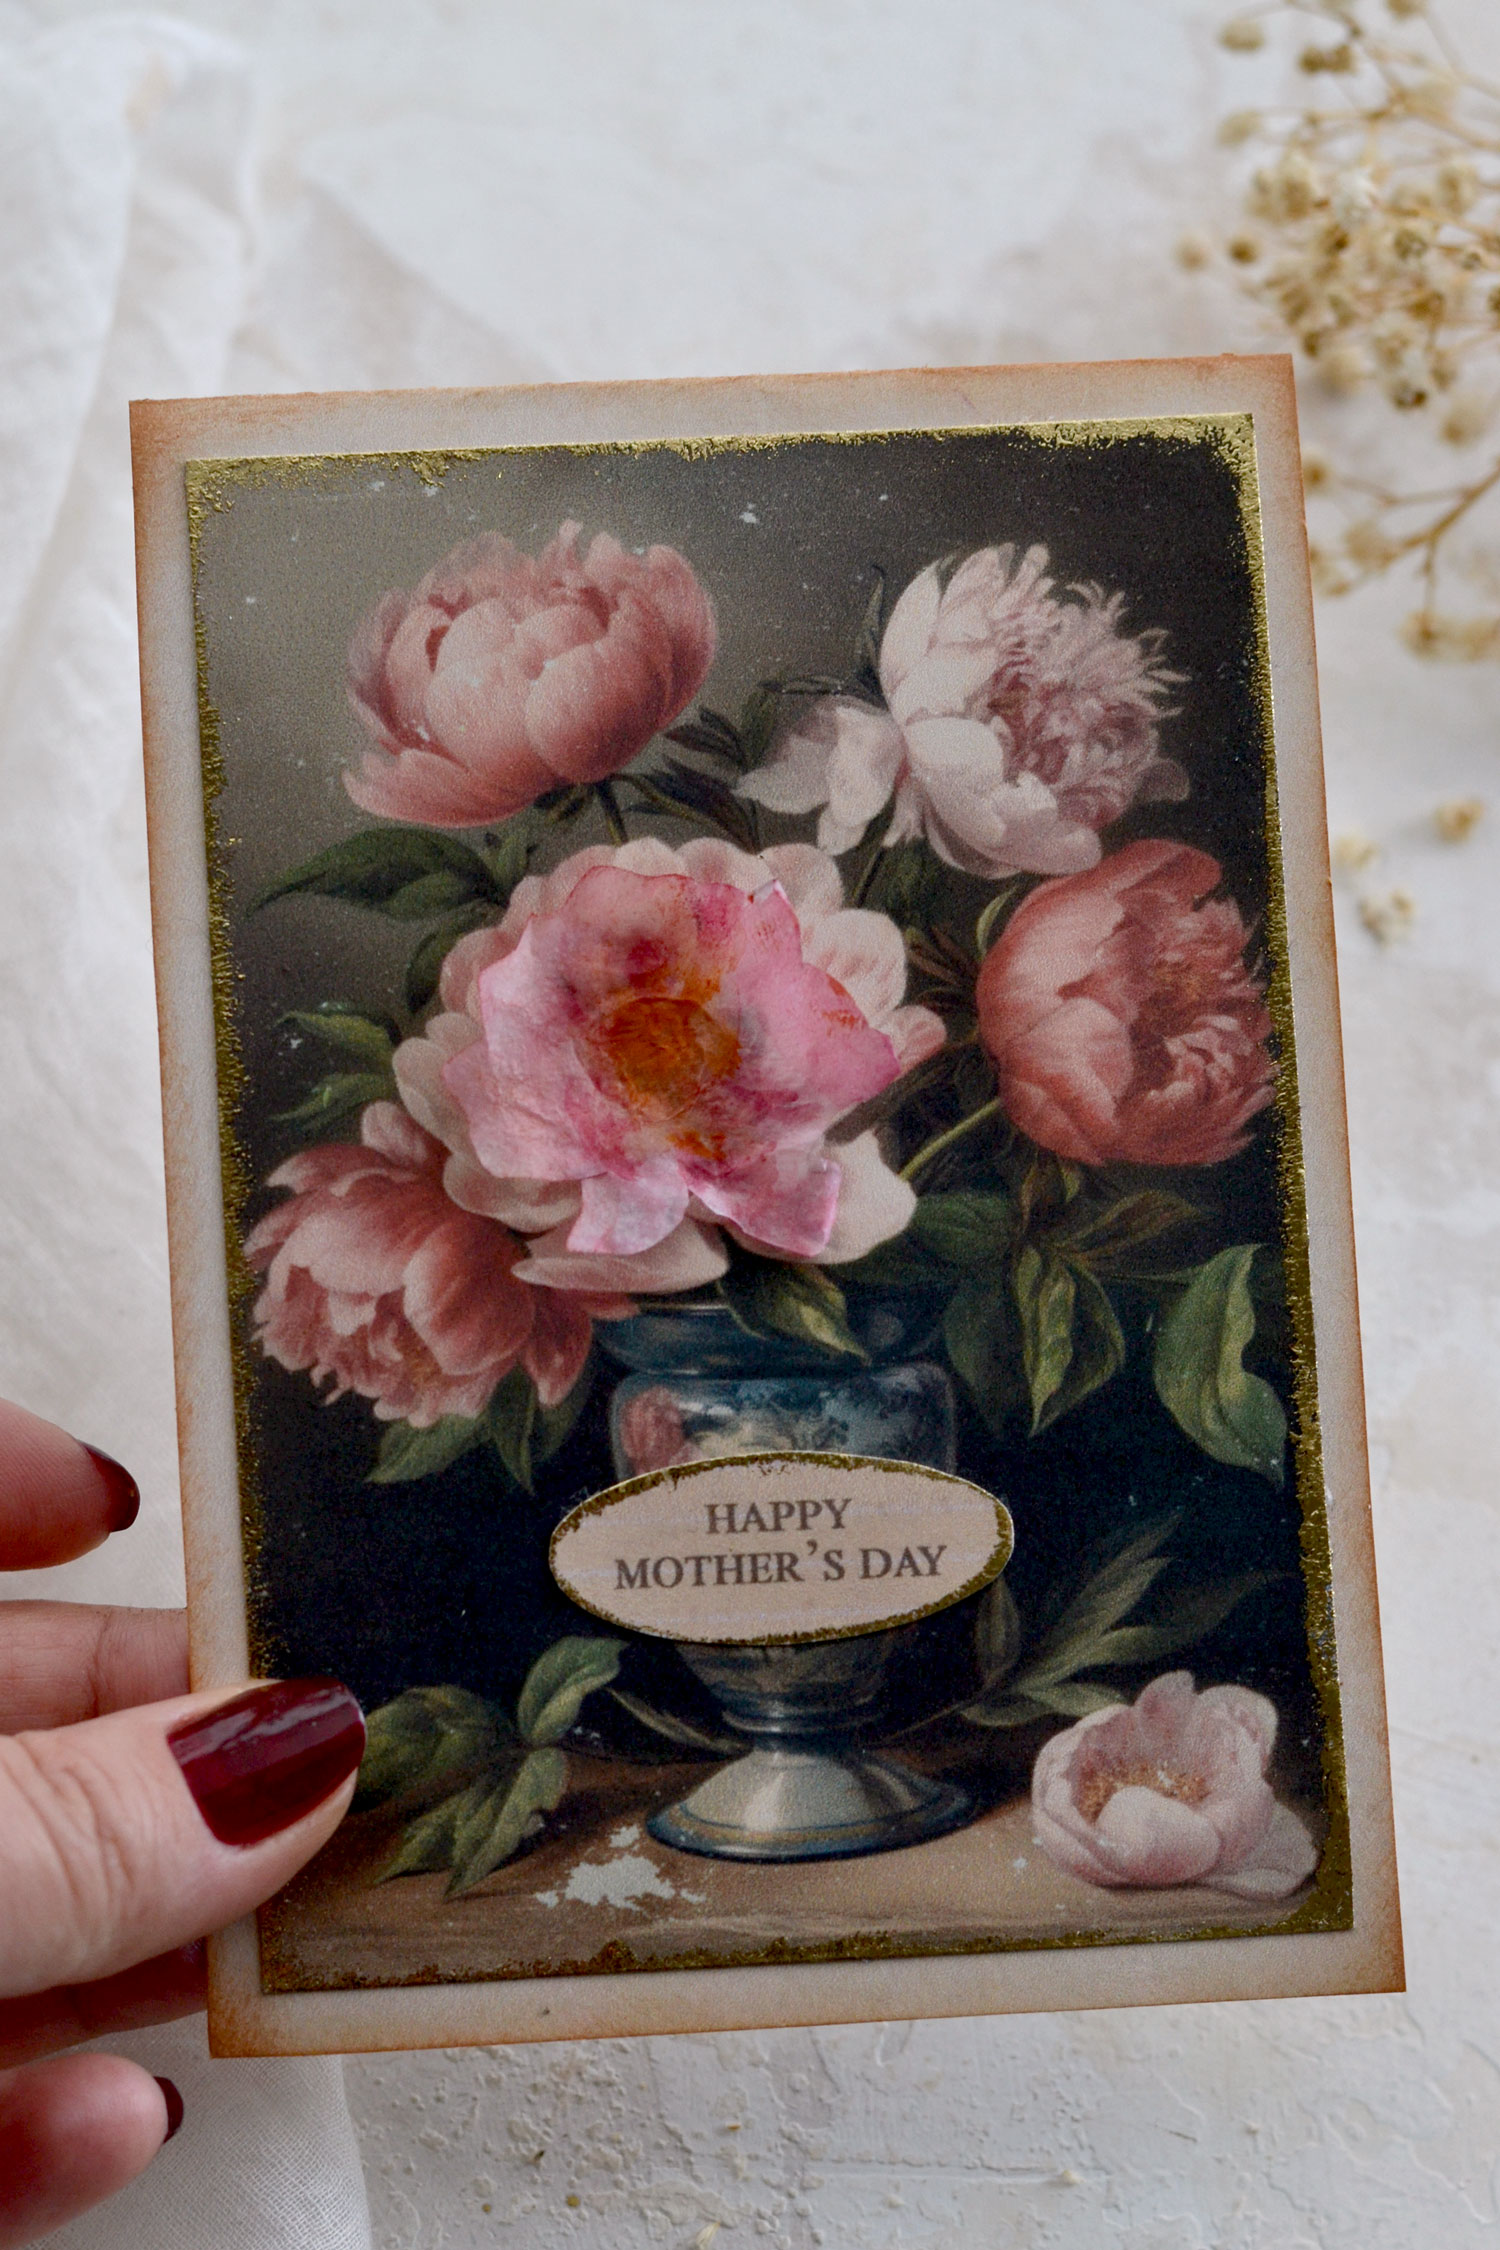
Here is the printable with the absolutely gorgeous peonies that I created for this project. You will find the card base, the top and a few ‘Happy Mother’s Day’ cutouts. I intentionally designed the base to be folded and then opened vertically, so the card could stand on its own. I also included a miniature version of the top of our card, just in case you want to make a matching tag to perfectly complement it. You will be able to make one card and a tag with this beautiful printable. If you want to make more, simply print it as many times as you need!

—-> Click HERE to Download the Full Size Printable PDF <—-
Supplies:
- cardstock paper
- home printer
- scissors
- bone folder
- mini distress inks
- blending tool with foams
- gold foil
- gold foil glue
- glue stick
- a scrap piece of clear plastic sheet
- pencil
- watercolors
- small brush
- tissue paper
- plate stand (for displaying the card afterward)
Step by Step Tutorial:
Start by printing the printable on cardstock paper.
Use your scissors to cut all our lovely paper elements. I included ‘Happy Mother’s Day’ sentiments in three different sizes, you can choose the one you like the most. At this point, I cut them all out, but then I decided to go with the middle-sized one.
P.S. If you have a guillotine, a trimmer or a paper cutting machine, you can use them instead.

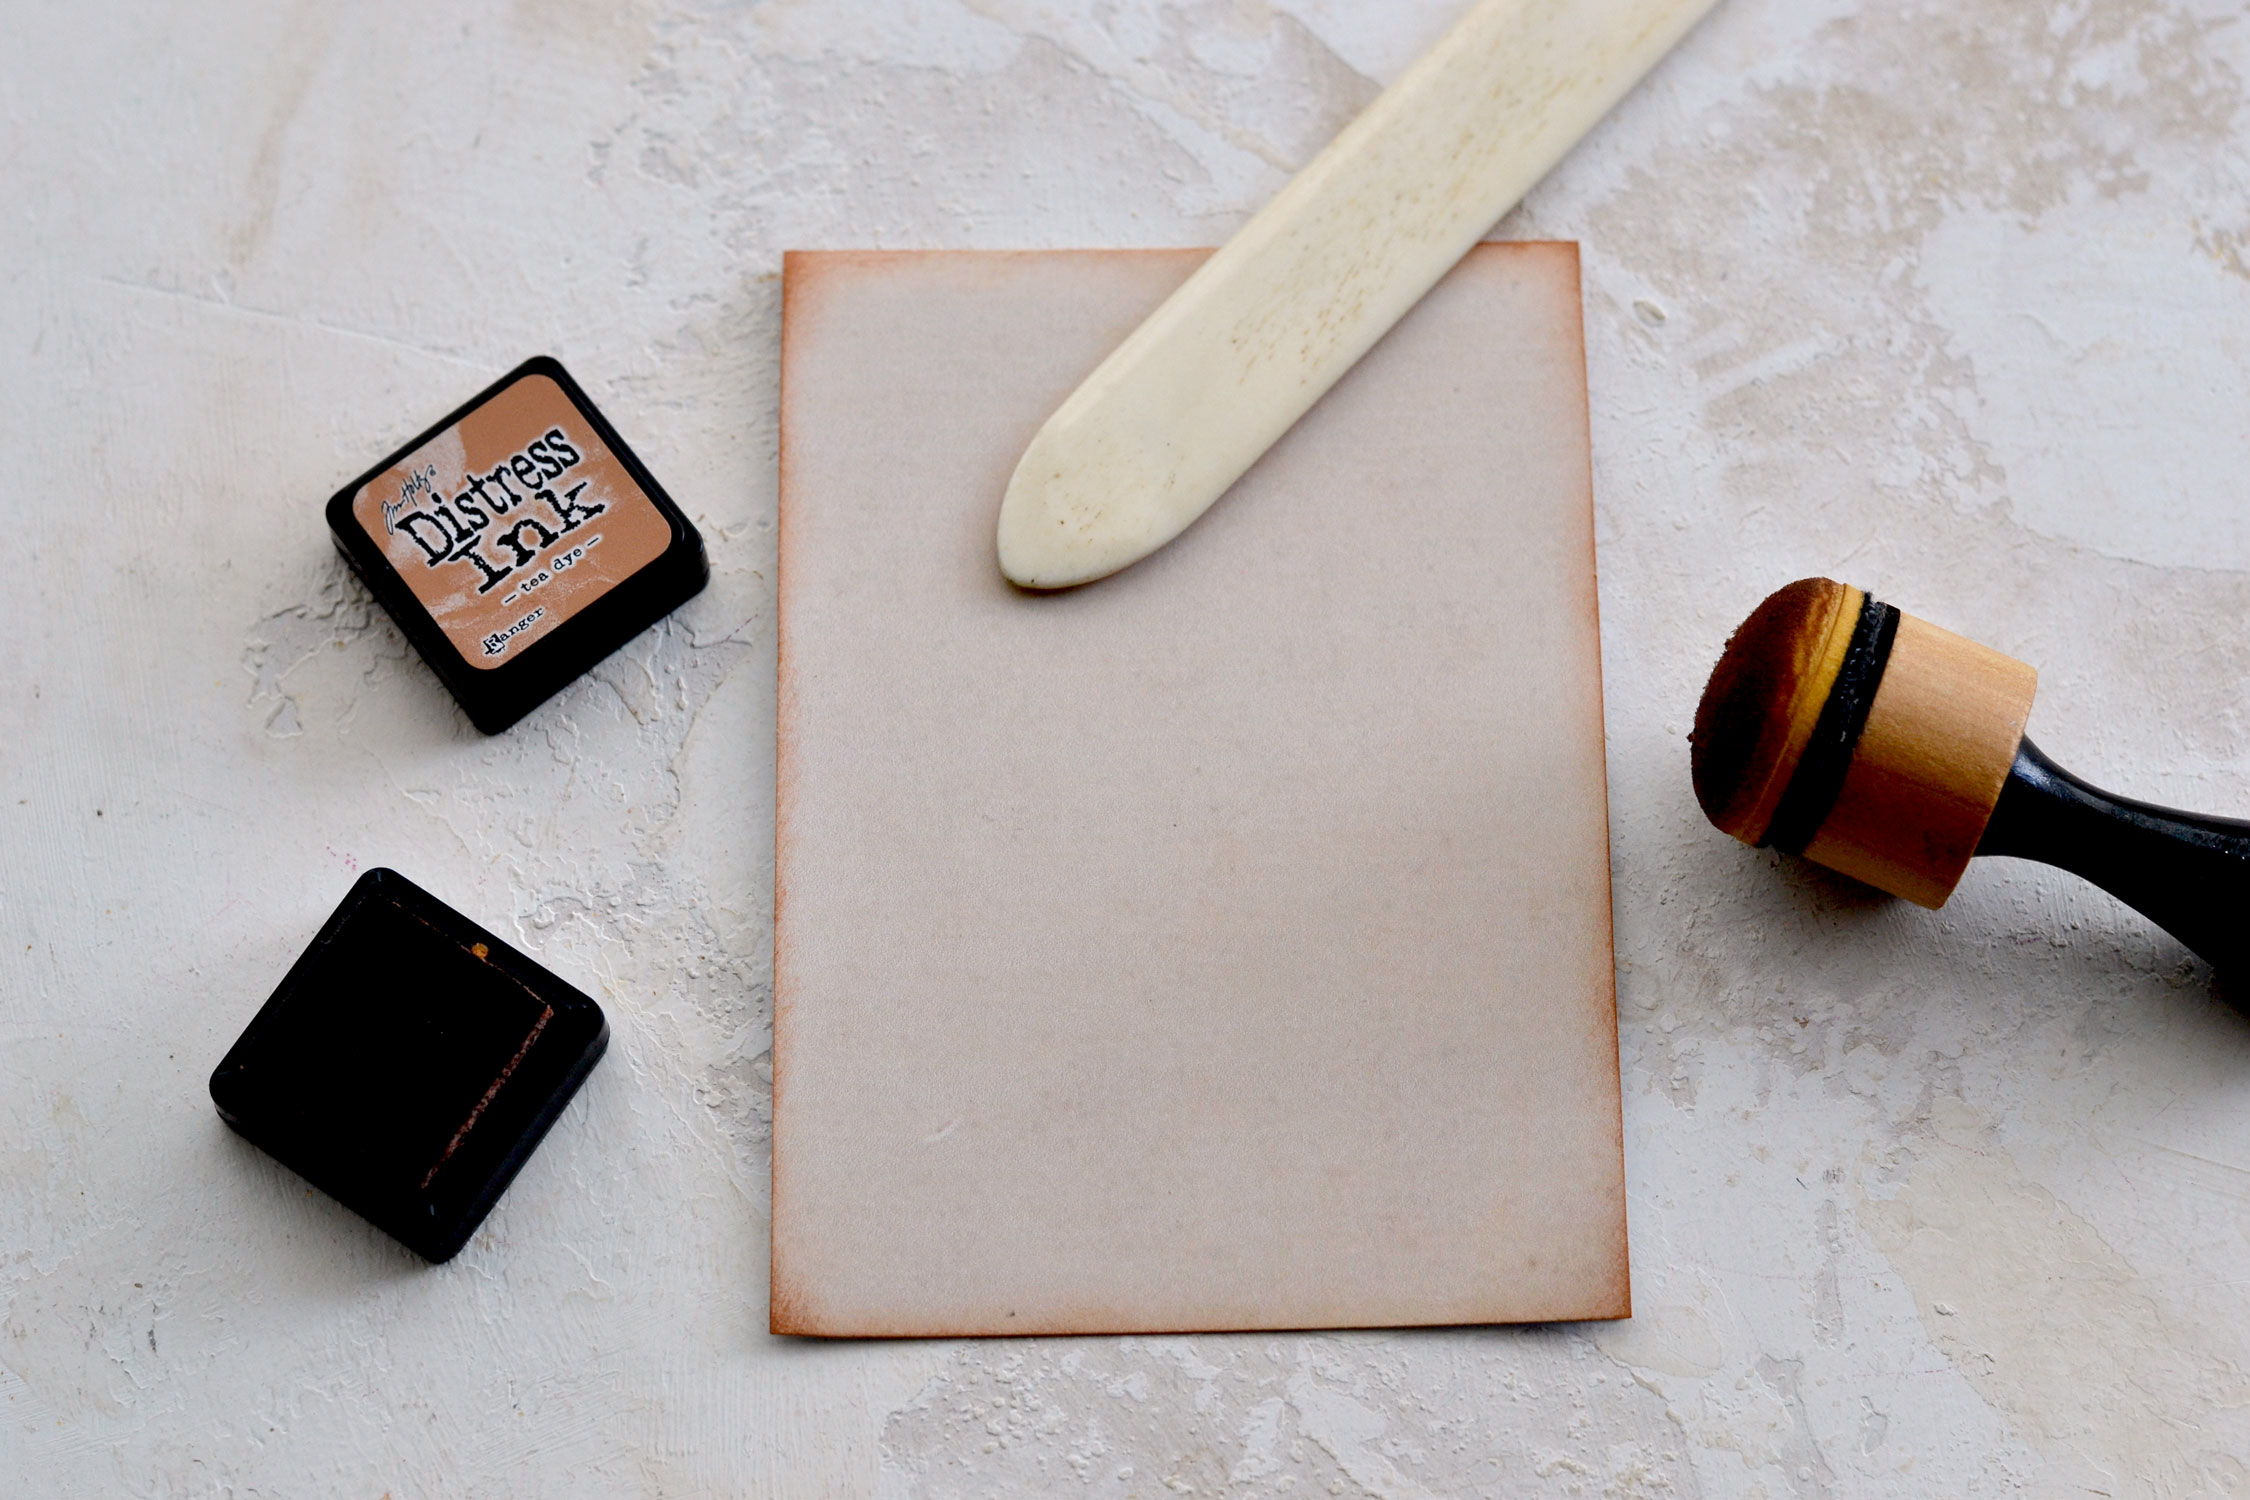
Use your fingers to partially fold the card base in half, then use a bone folder to make it perfect.
If you want, you can use a little bit of distress ink around the edges, after closing the card base. This will give the paper even more of a vintage vibe.
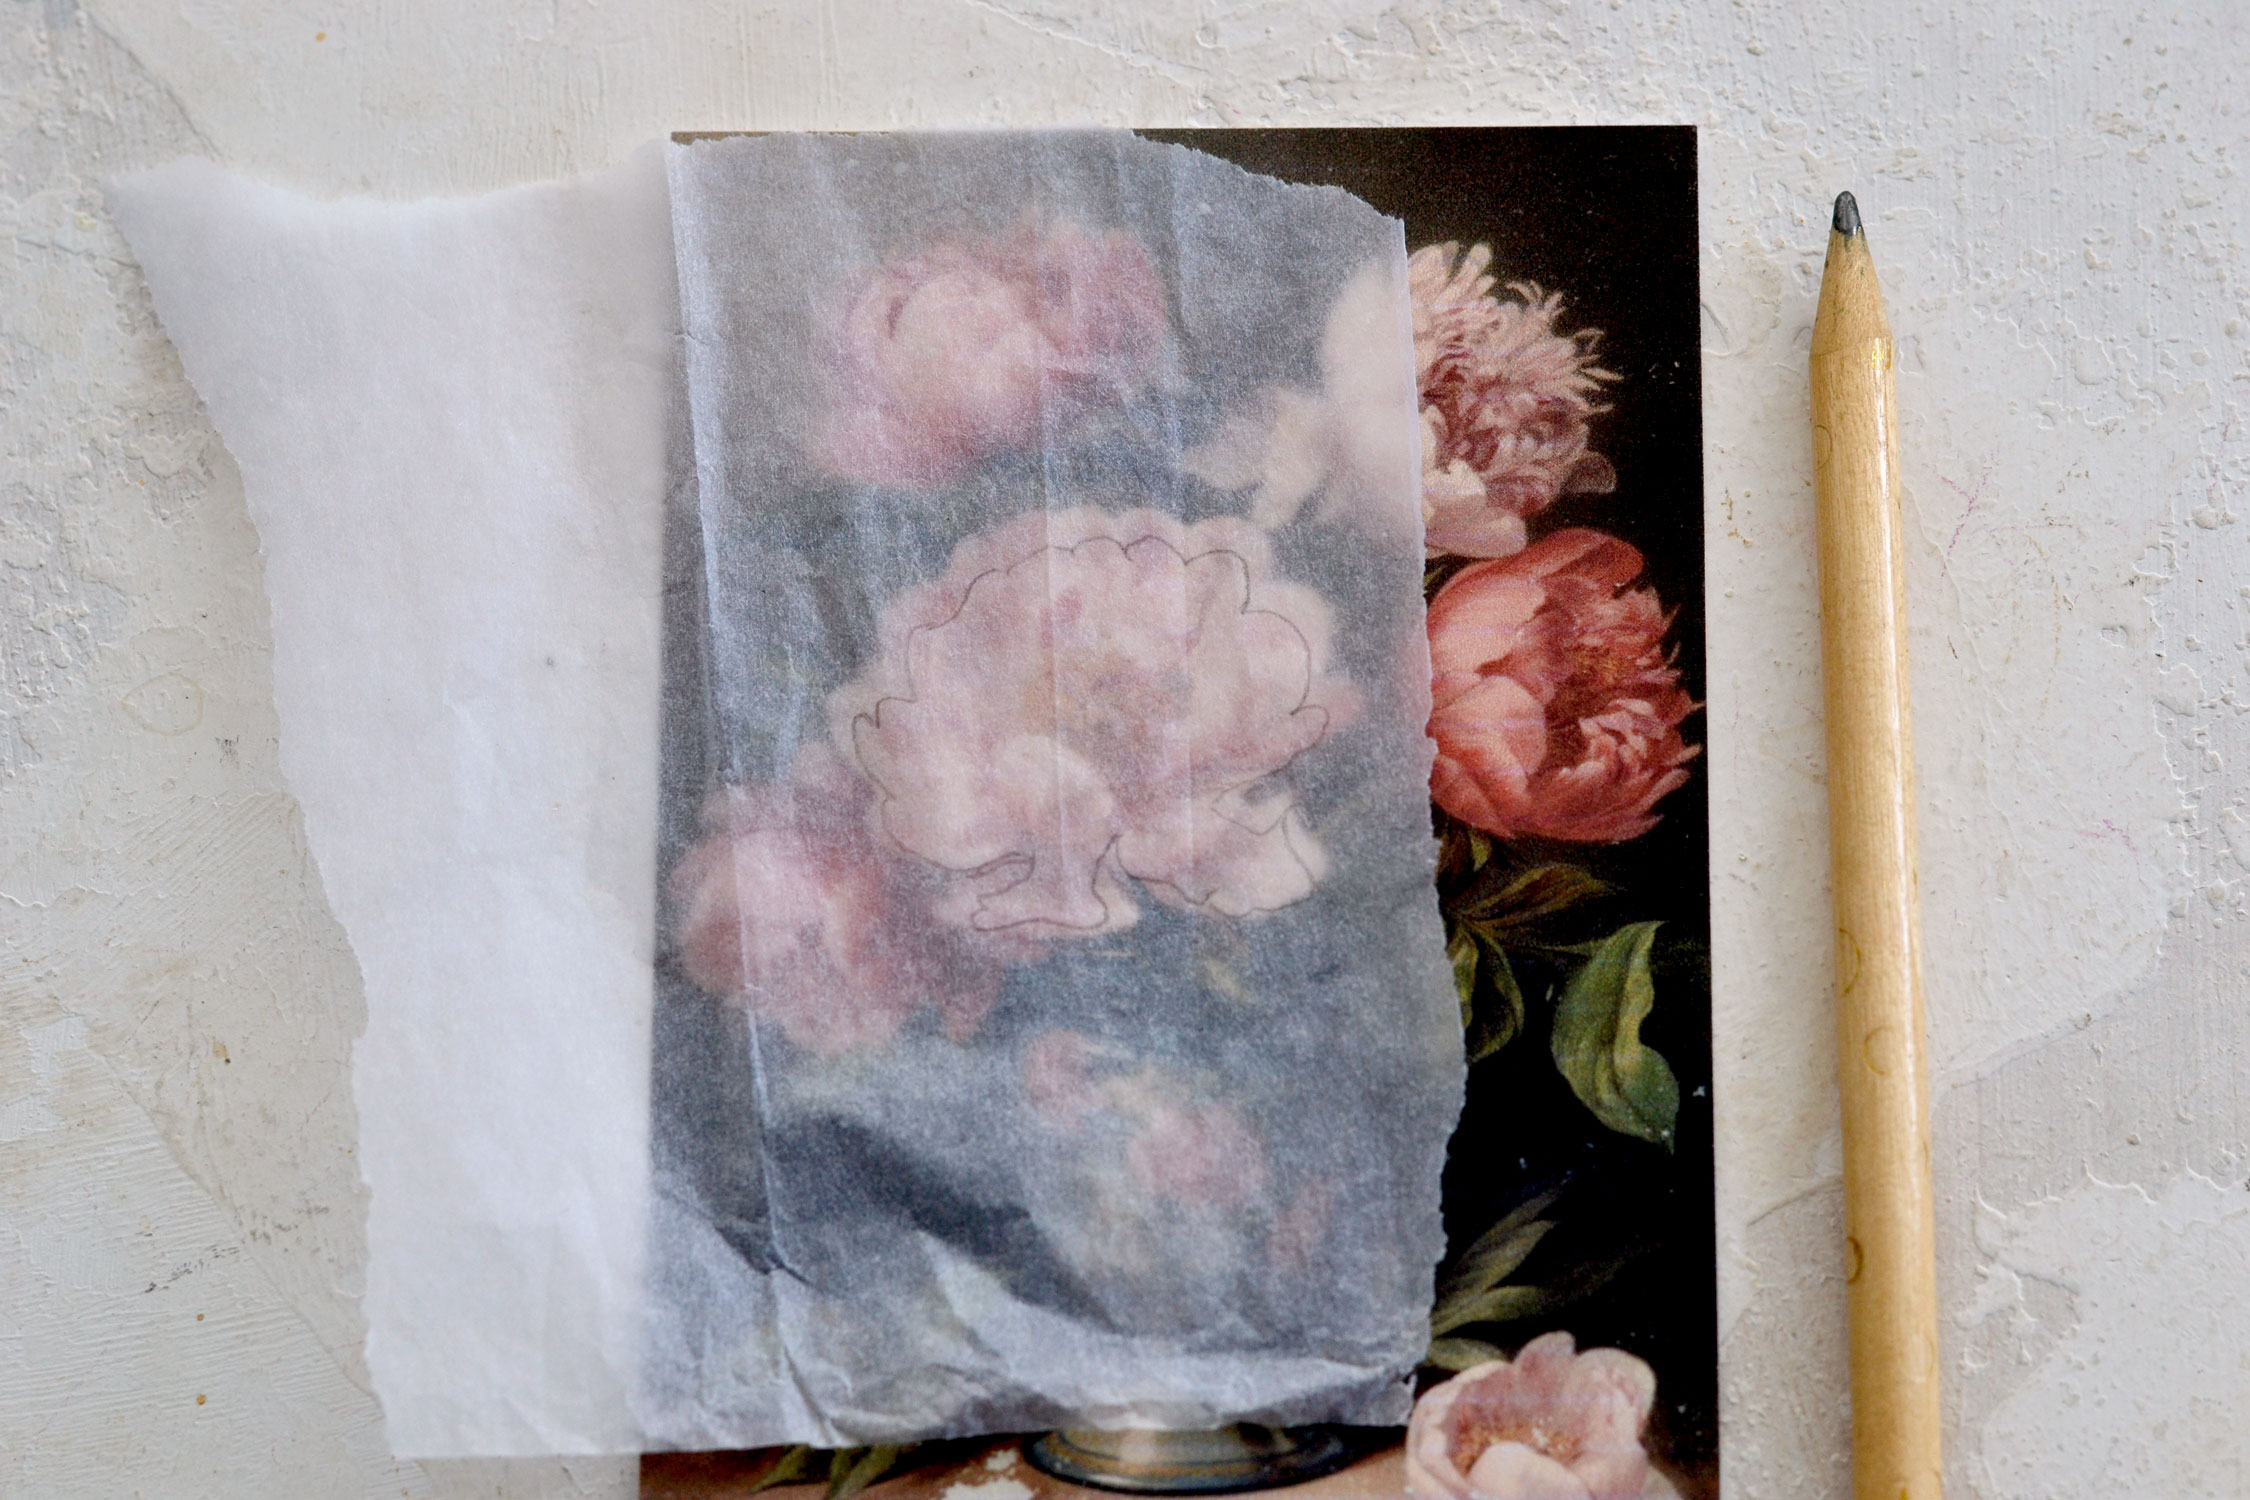
Place a piece of tissue paper on top of your card and use a pencil to trace the shape of our focal point peony. You can make the trace slightly smaller than the peony itself, as I did or you can trace the actual shape.
Use your scissors to cut the shape, making sure you leave out the pencil marks. The shape doesn’t have to be exactly the same, so don’t worry about making it perfect.
Place a piece of a clear plastic sheet on top of your card, then place the tissue paper flower on top.
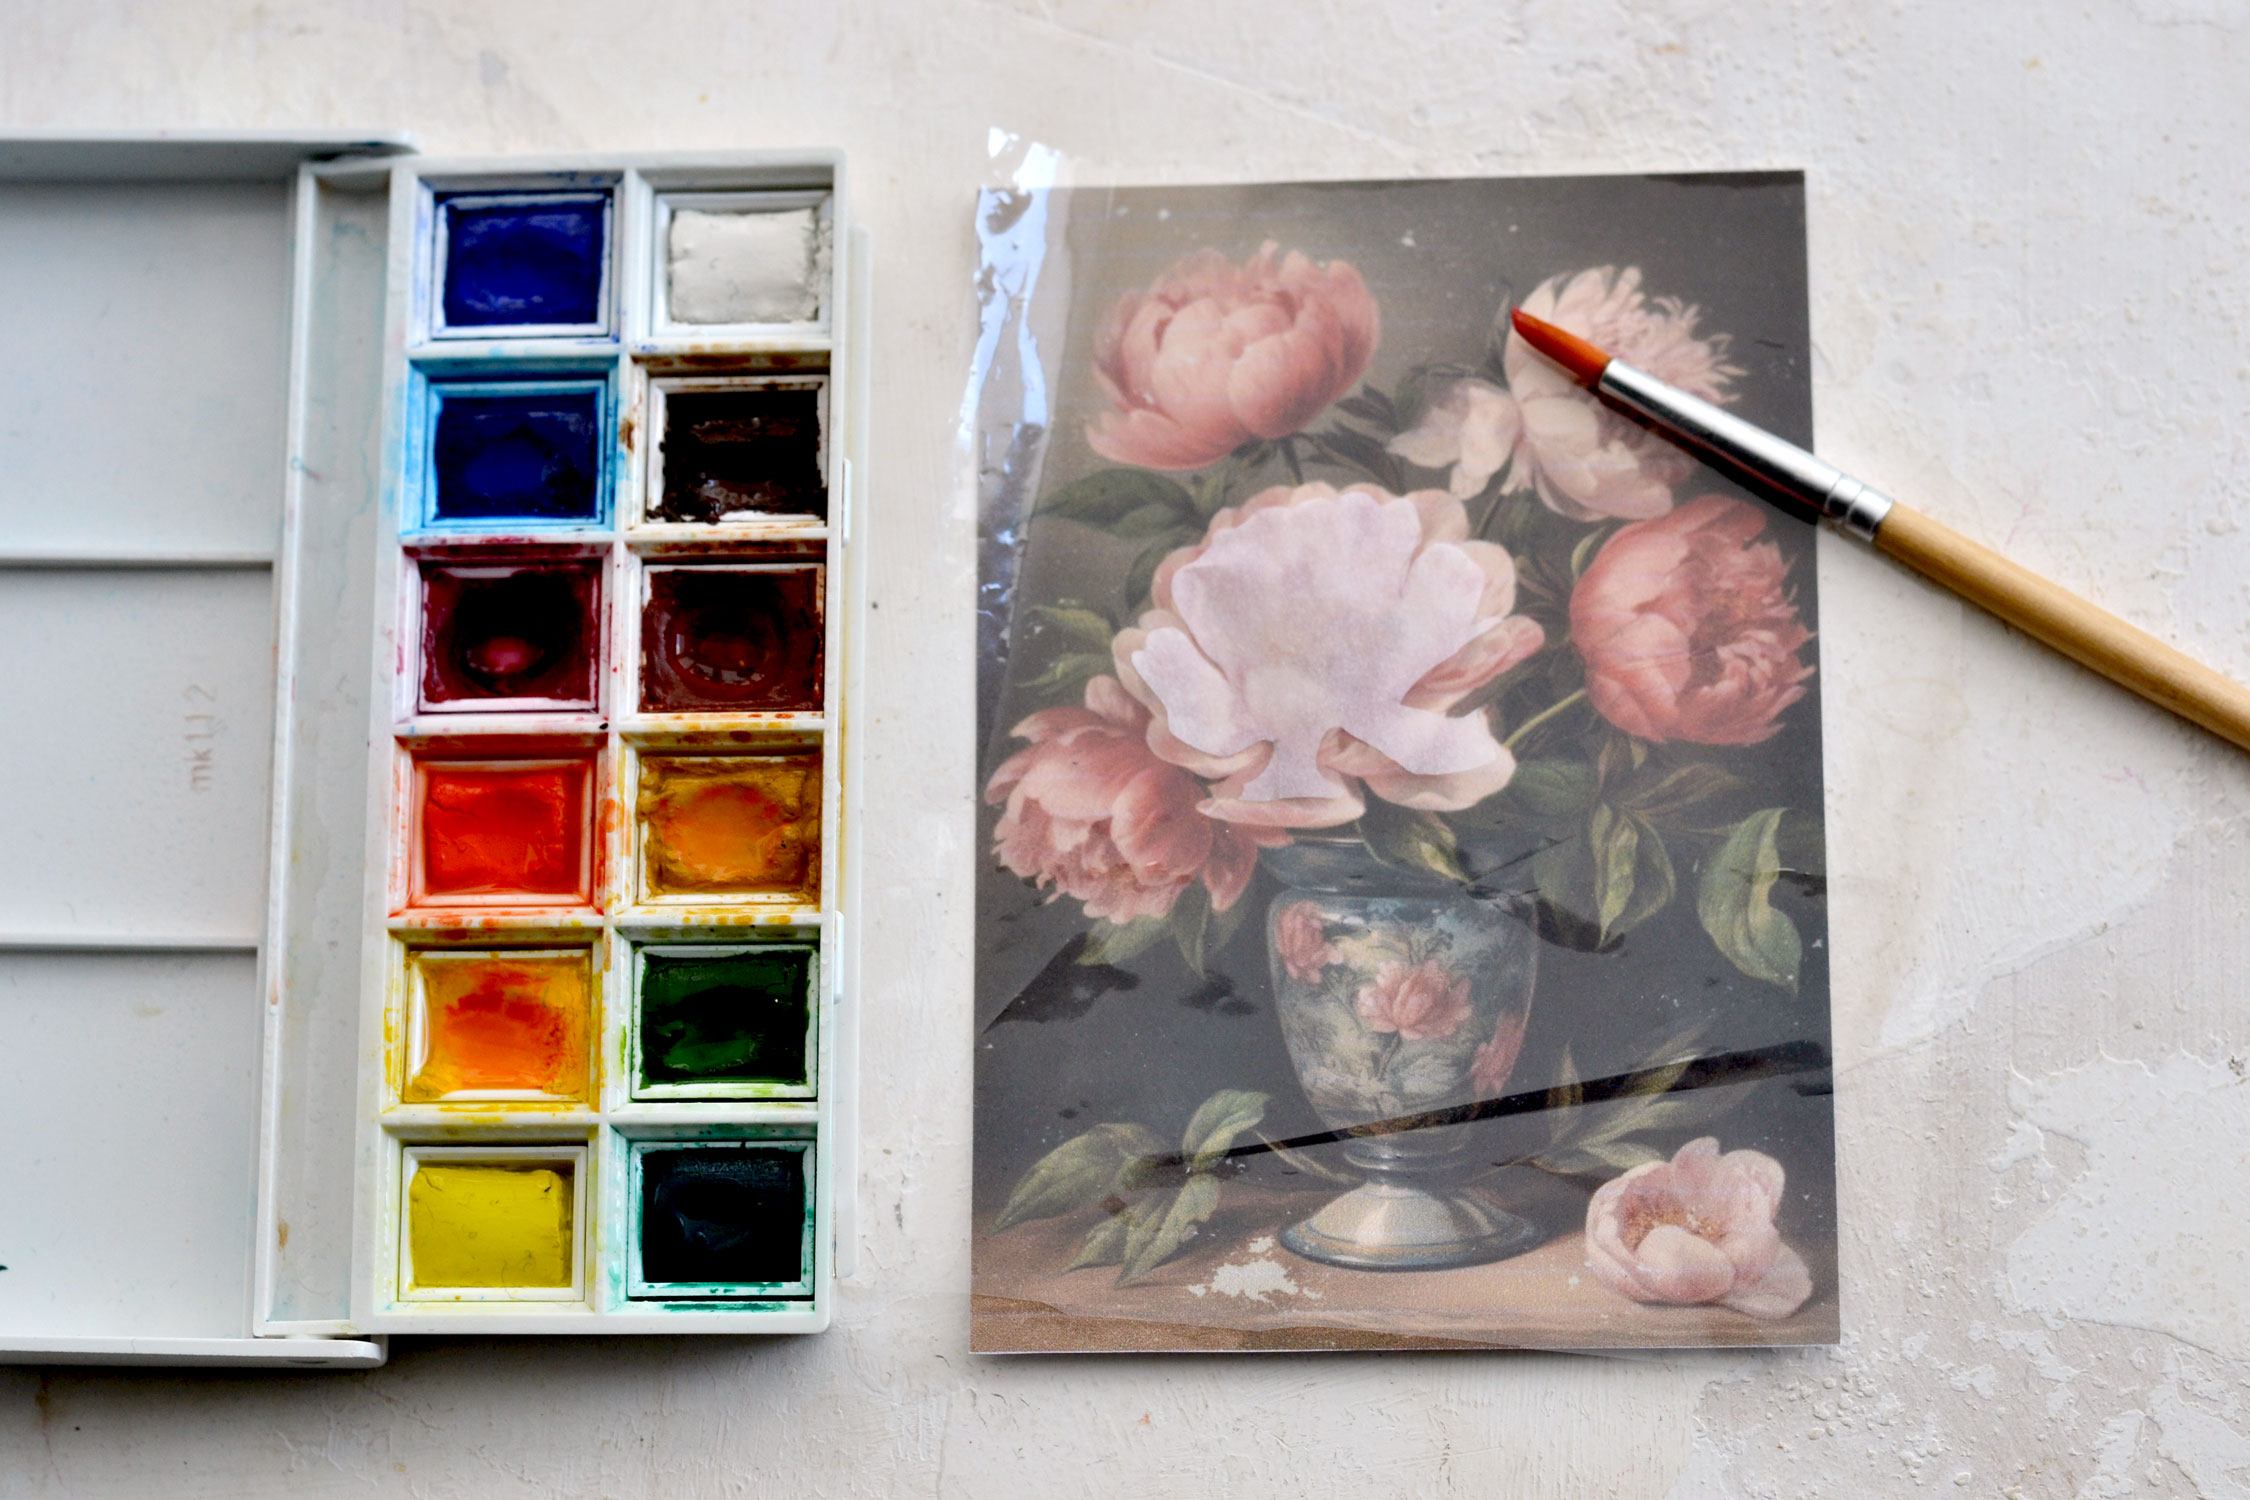
Use a toothpick to hold the tissue paper in place while painting it with pink or a light red first. Then add some darker highlights here and there, trying to mimic the darker areas from underneath. You can move the plastic sheet with the flower from time to time if you want to take a better look at the peony on your card.
I used watercolors for this step and my choice of color was Alizarin Crimson. If you want, you can also use acrylic paint, just make sure you use it highly diluted, we don’t want to completely cover our design.

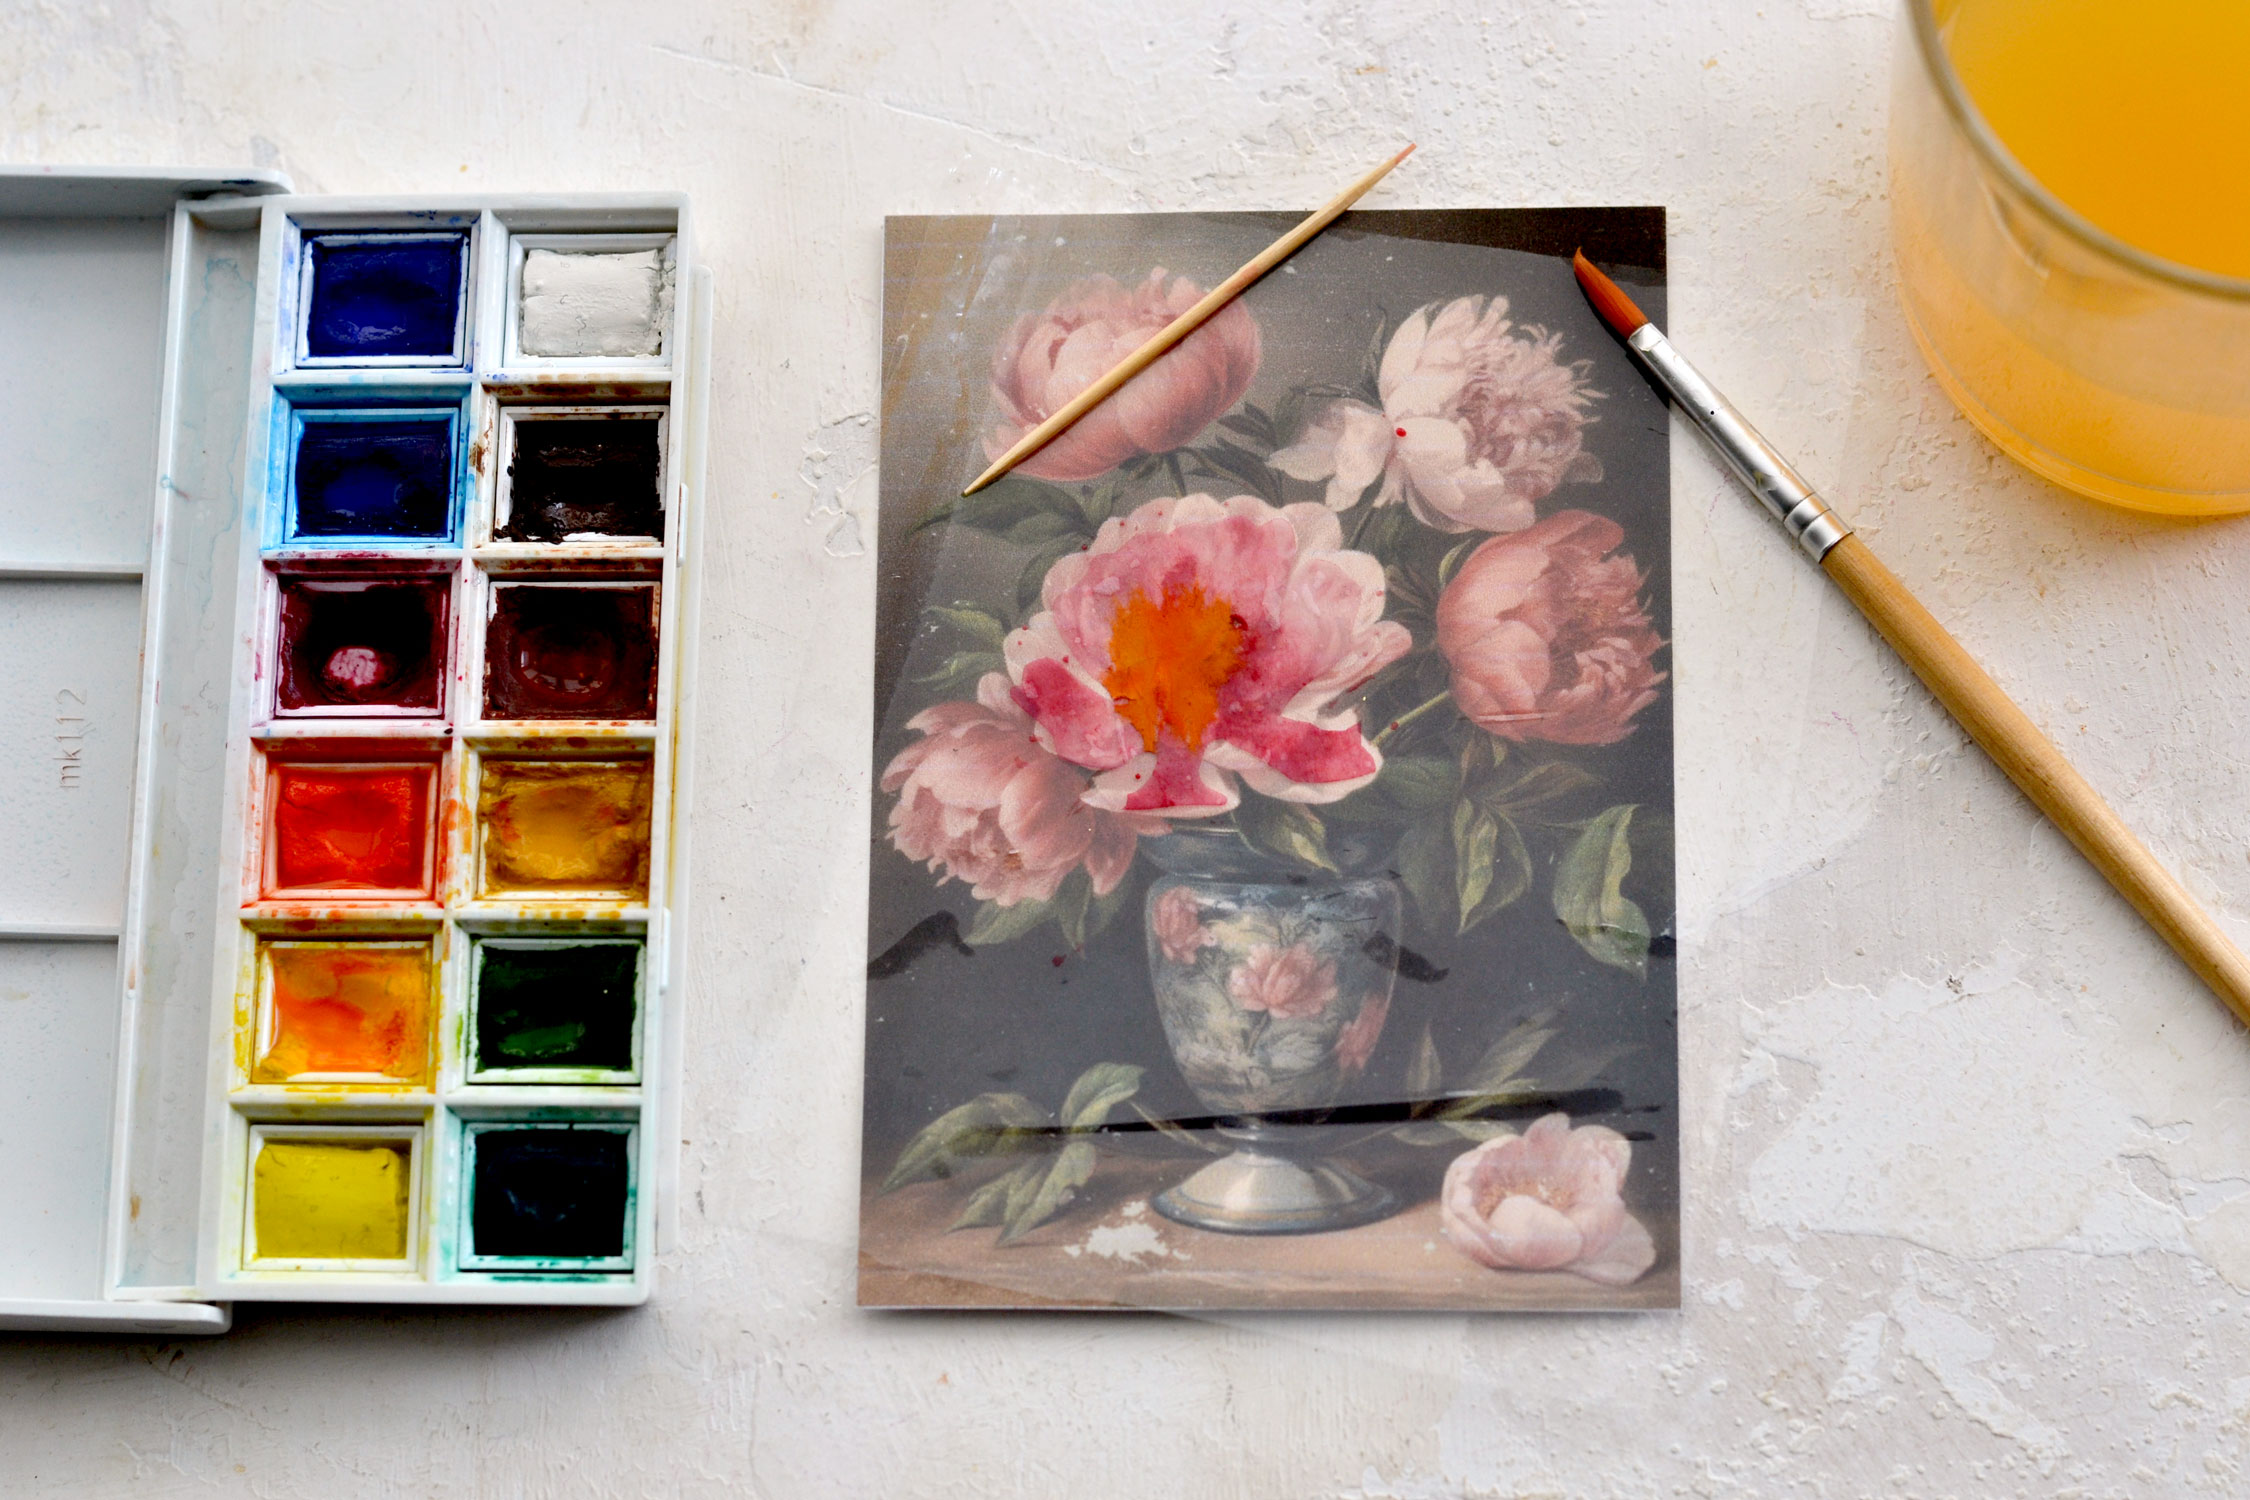
Use a mix of orange and yellow to paint the middle section of our flower. You can mix the colors prior to painting or you can apply and let them blend on the paper. Try to only add a small amount of these two colors. As you can see, I added too much at this point and had to pick up the color using my brush. One of the best things about using watercolors is that you can actually pick up the color if you add too much. Just rinse your brush and use it to take off the excess paint.
One thing to keep in mind, though, is to be careful not to tear or fold your delicate paper while painting it. When you are done, take the plastic sheet with the flower and put it aside. Let the flower air dry on the sheet and only move it when it is completely dried.
Moving on to adding the gold touches!
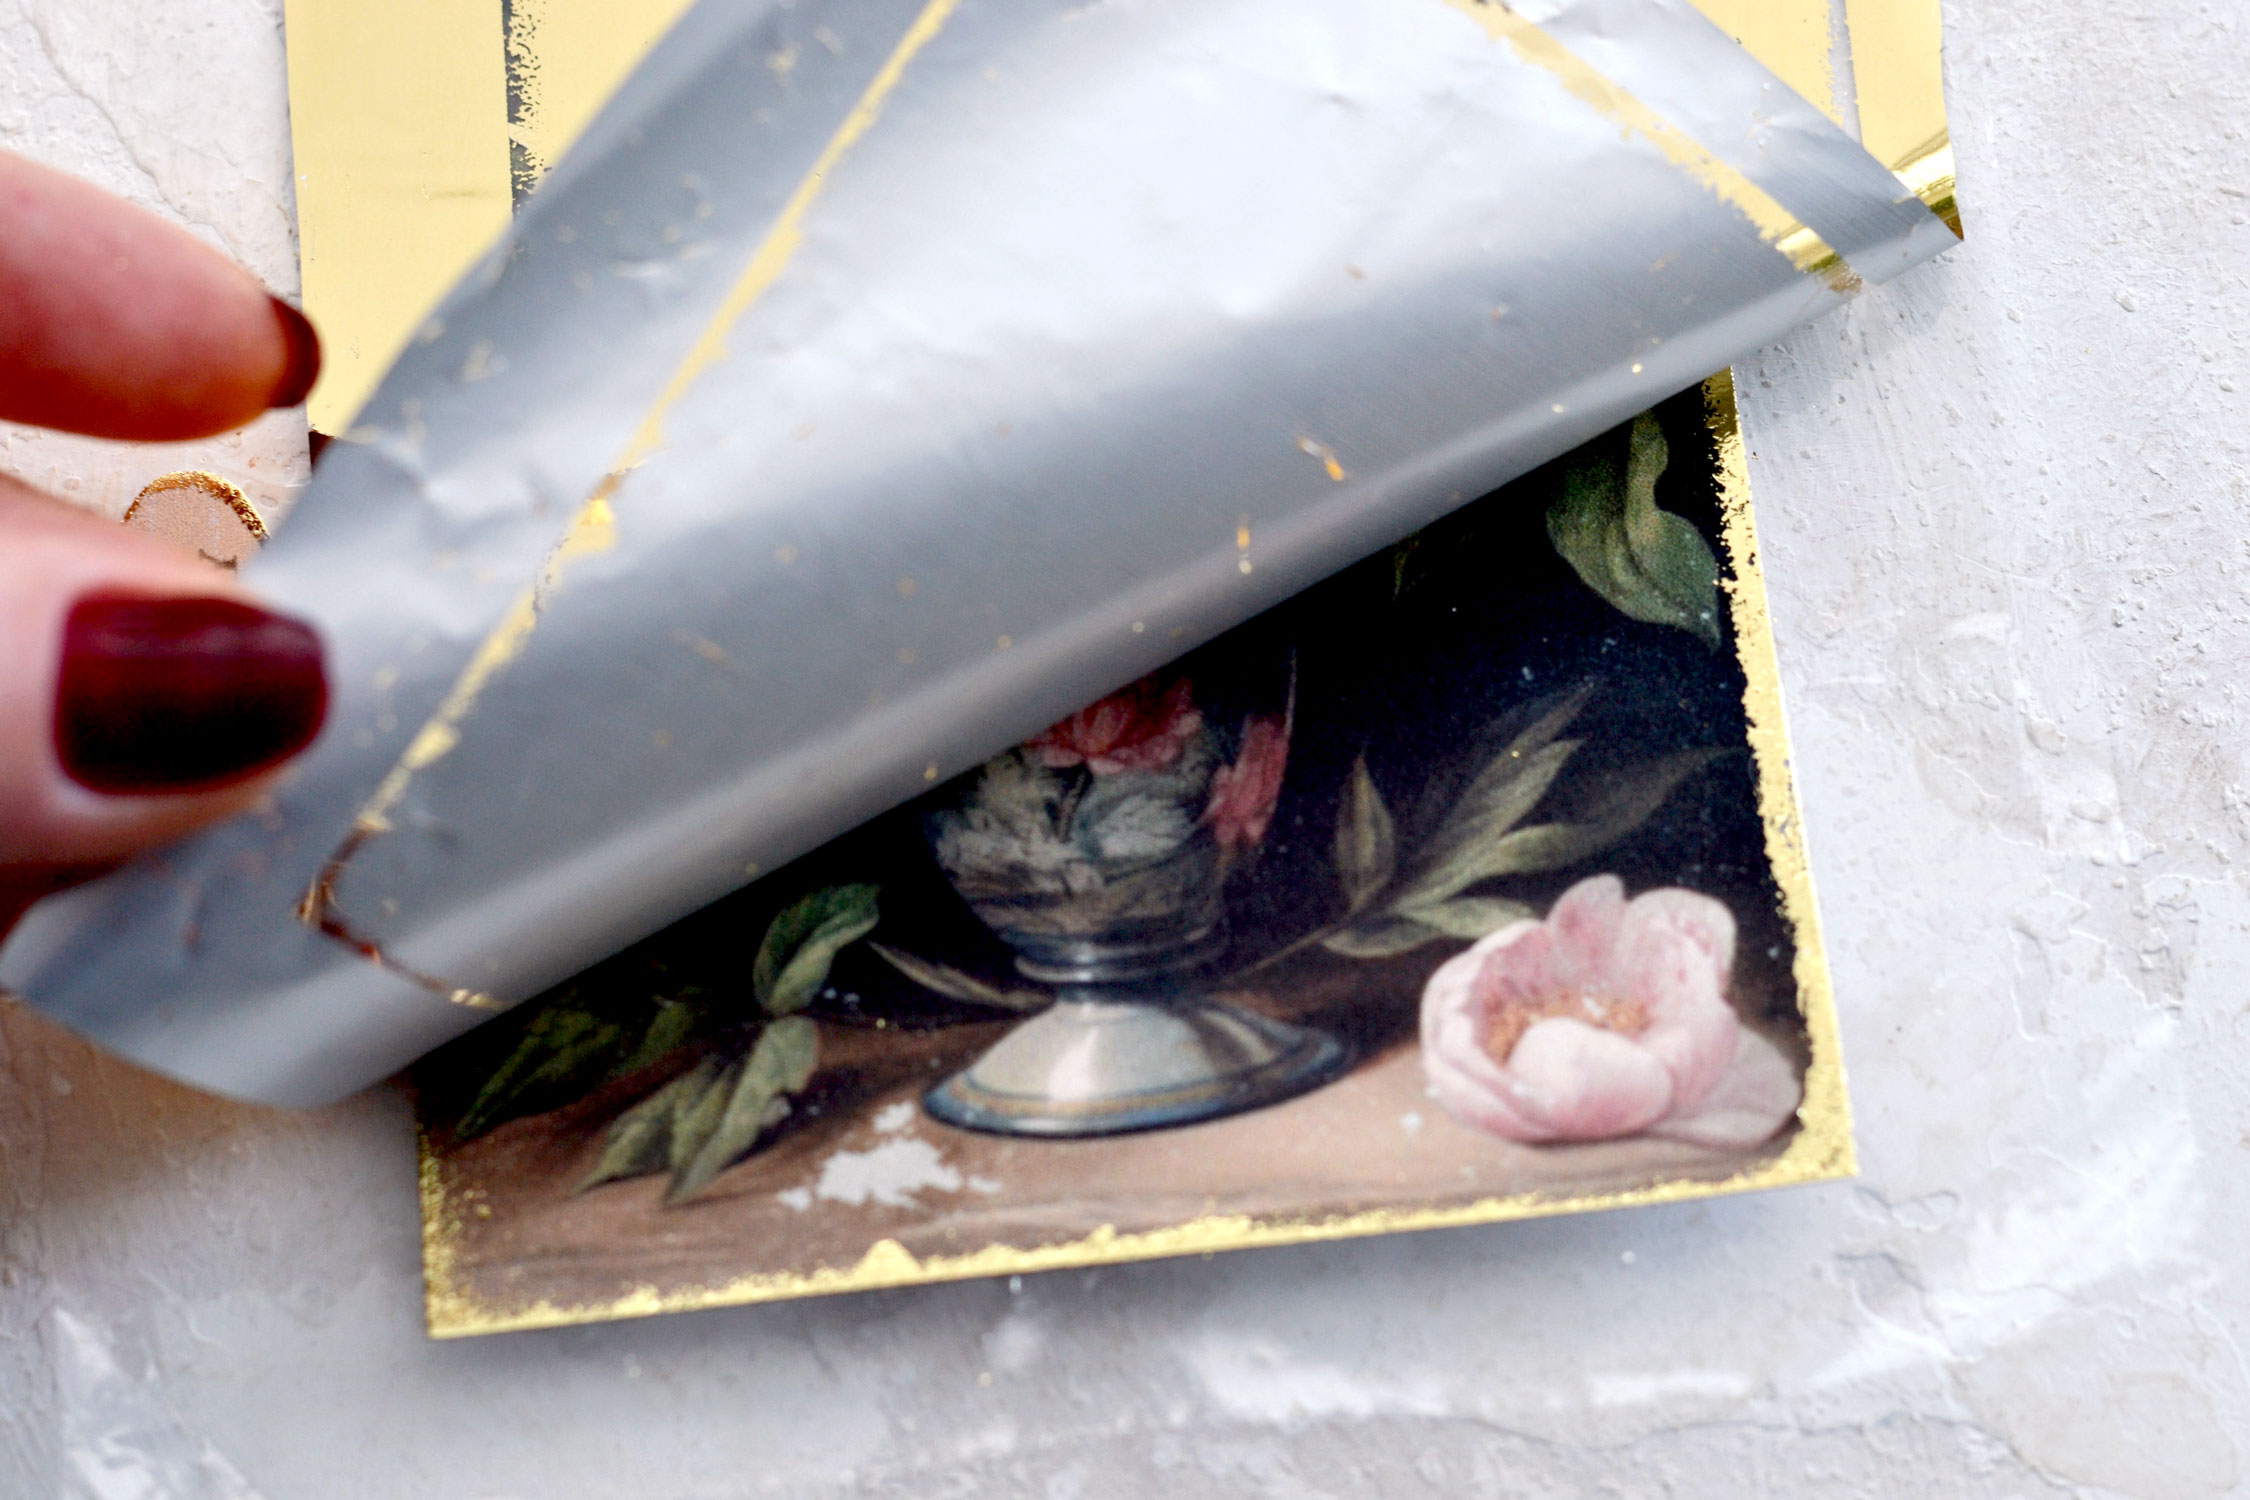
I used gold foil today as I did on so many of my other projects because I simply adore the super chic gilded effects you can create! I used some special gold foil glue (the one from Aleene’s) that is specifically made to be used with this type of metallic foil. This glue dries clear and becomes tacky after drying, so you can just add the gold foil on top. But what I did differently was to use an old blending sponge to apply the gold foil glue! I kept the card in my hand while gradually rotating and applying a small amount of glue all around the edges. I noticed that if I slightly tilted the paper, I was able to better see what I was doing.
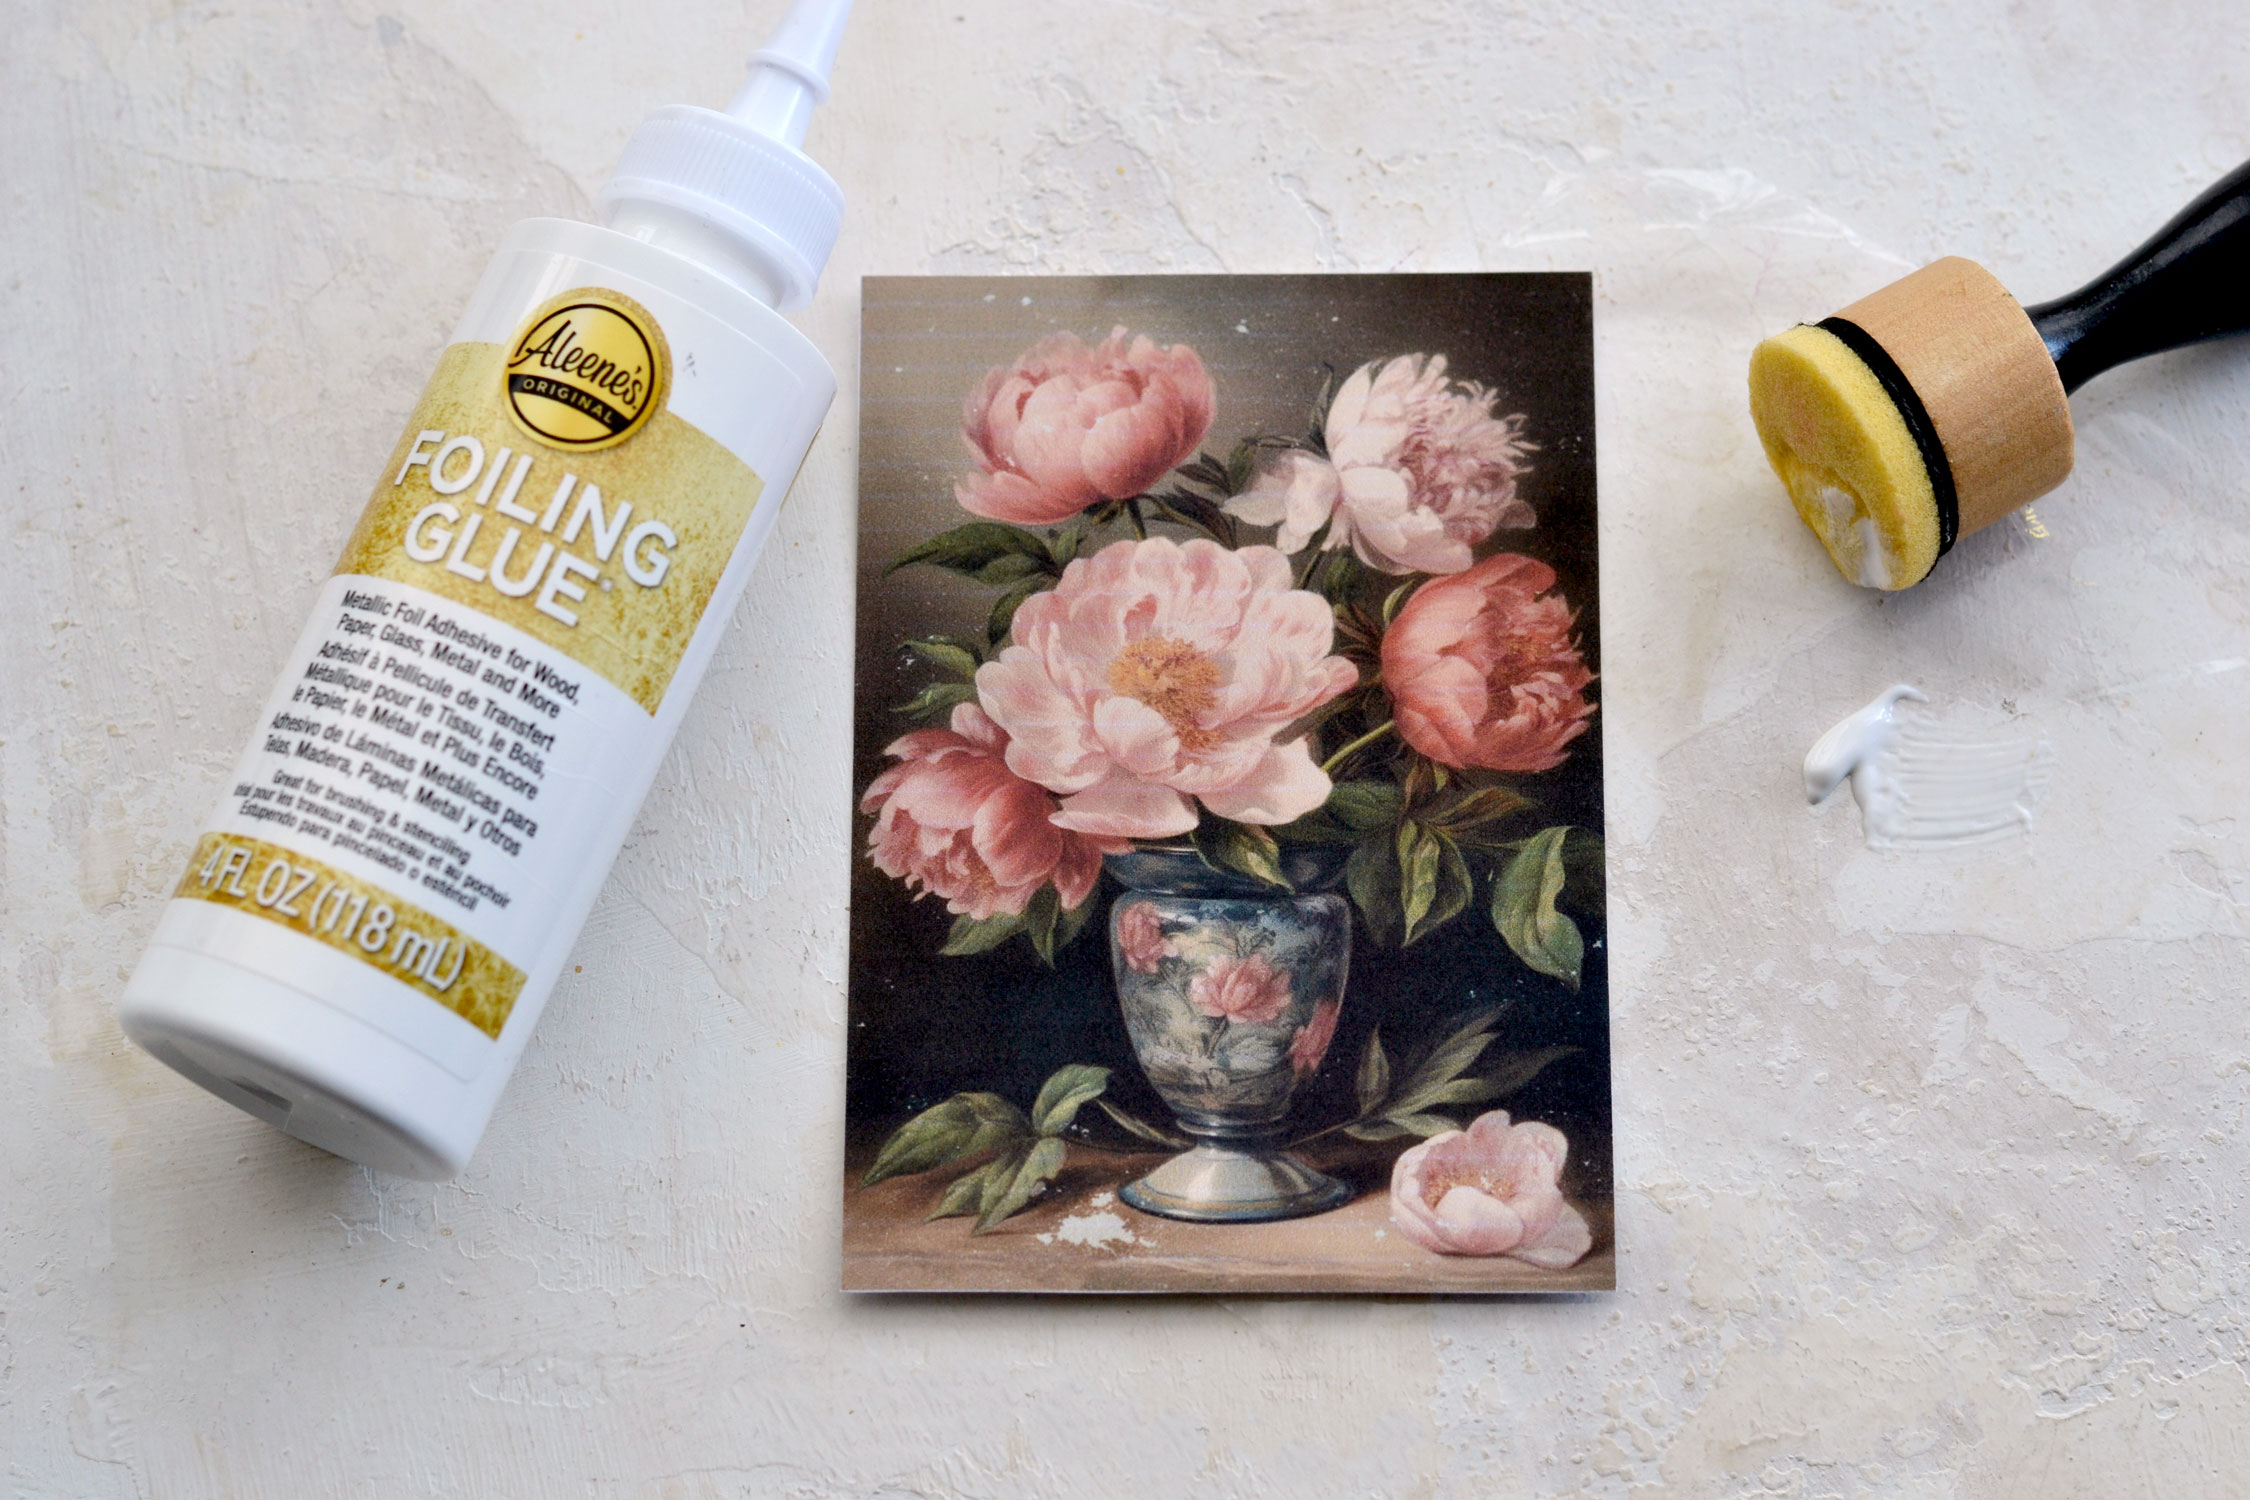
Because I only added a tiny bit of glue, it dried almost instantly. But I did leave it for a few more minutes, just to be sure it was completely dried and tacky. You can then apply a piece of gold foil on top that is larger than your image. Firmly press all over the edges with the top of your fingers (not your nails) to give the gold foil the chance to perfectly bond with the glue.
Unpeel the foil and admire your super chic gilded edges!
You can follow the same steps to add glue and then gild the smaller peony image and the sentiment. You will be able to create an interesting gold foil edge that also has a beautiful vintage vibe!

And then you can assemble everything and glue the tissue paper peony on top! You might notice that my tissue peony is slightly different, that’s because I already made one yesterday, just to make sure I have one ready to speed up the whole photographing process. It’s like in one of those cooking shows when the host shows you all the steps to make a pie, puts it in an oven, and then immediately pulls an already-baked pie from under the counter. Hehe!
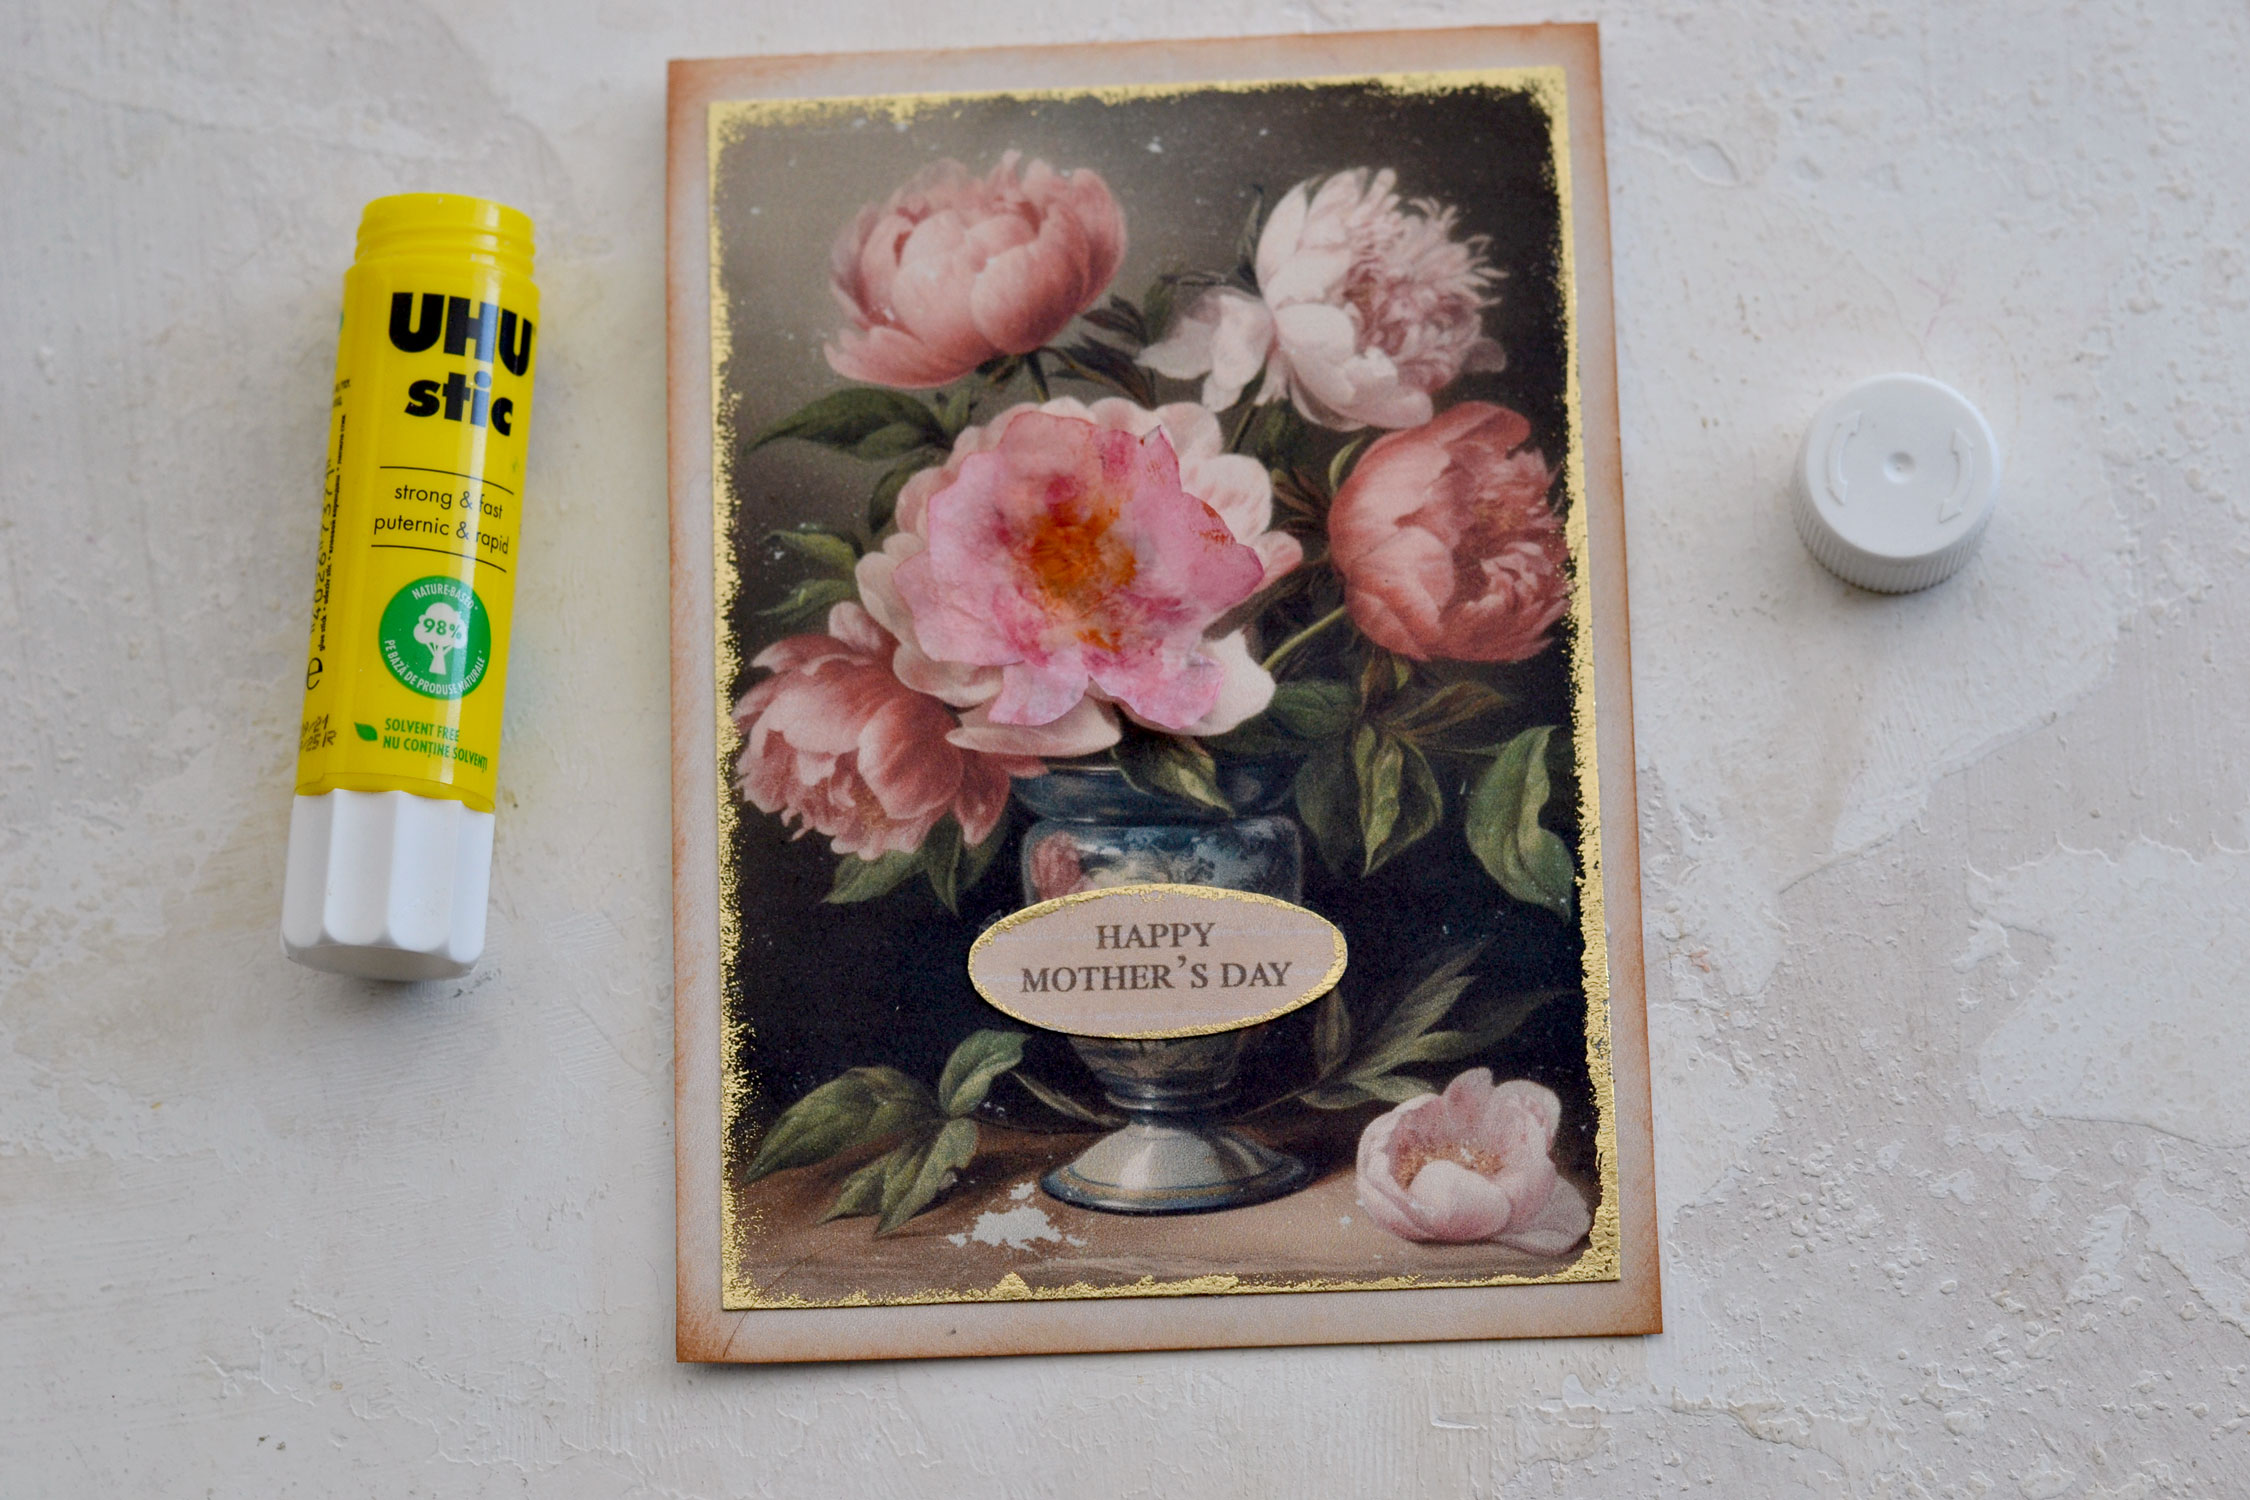
Add a small amount of glue in the middle of the tissue paper and leave the edges unglued, so you can create that lovely raised, 3D effect.
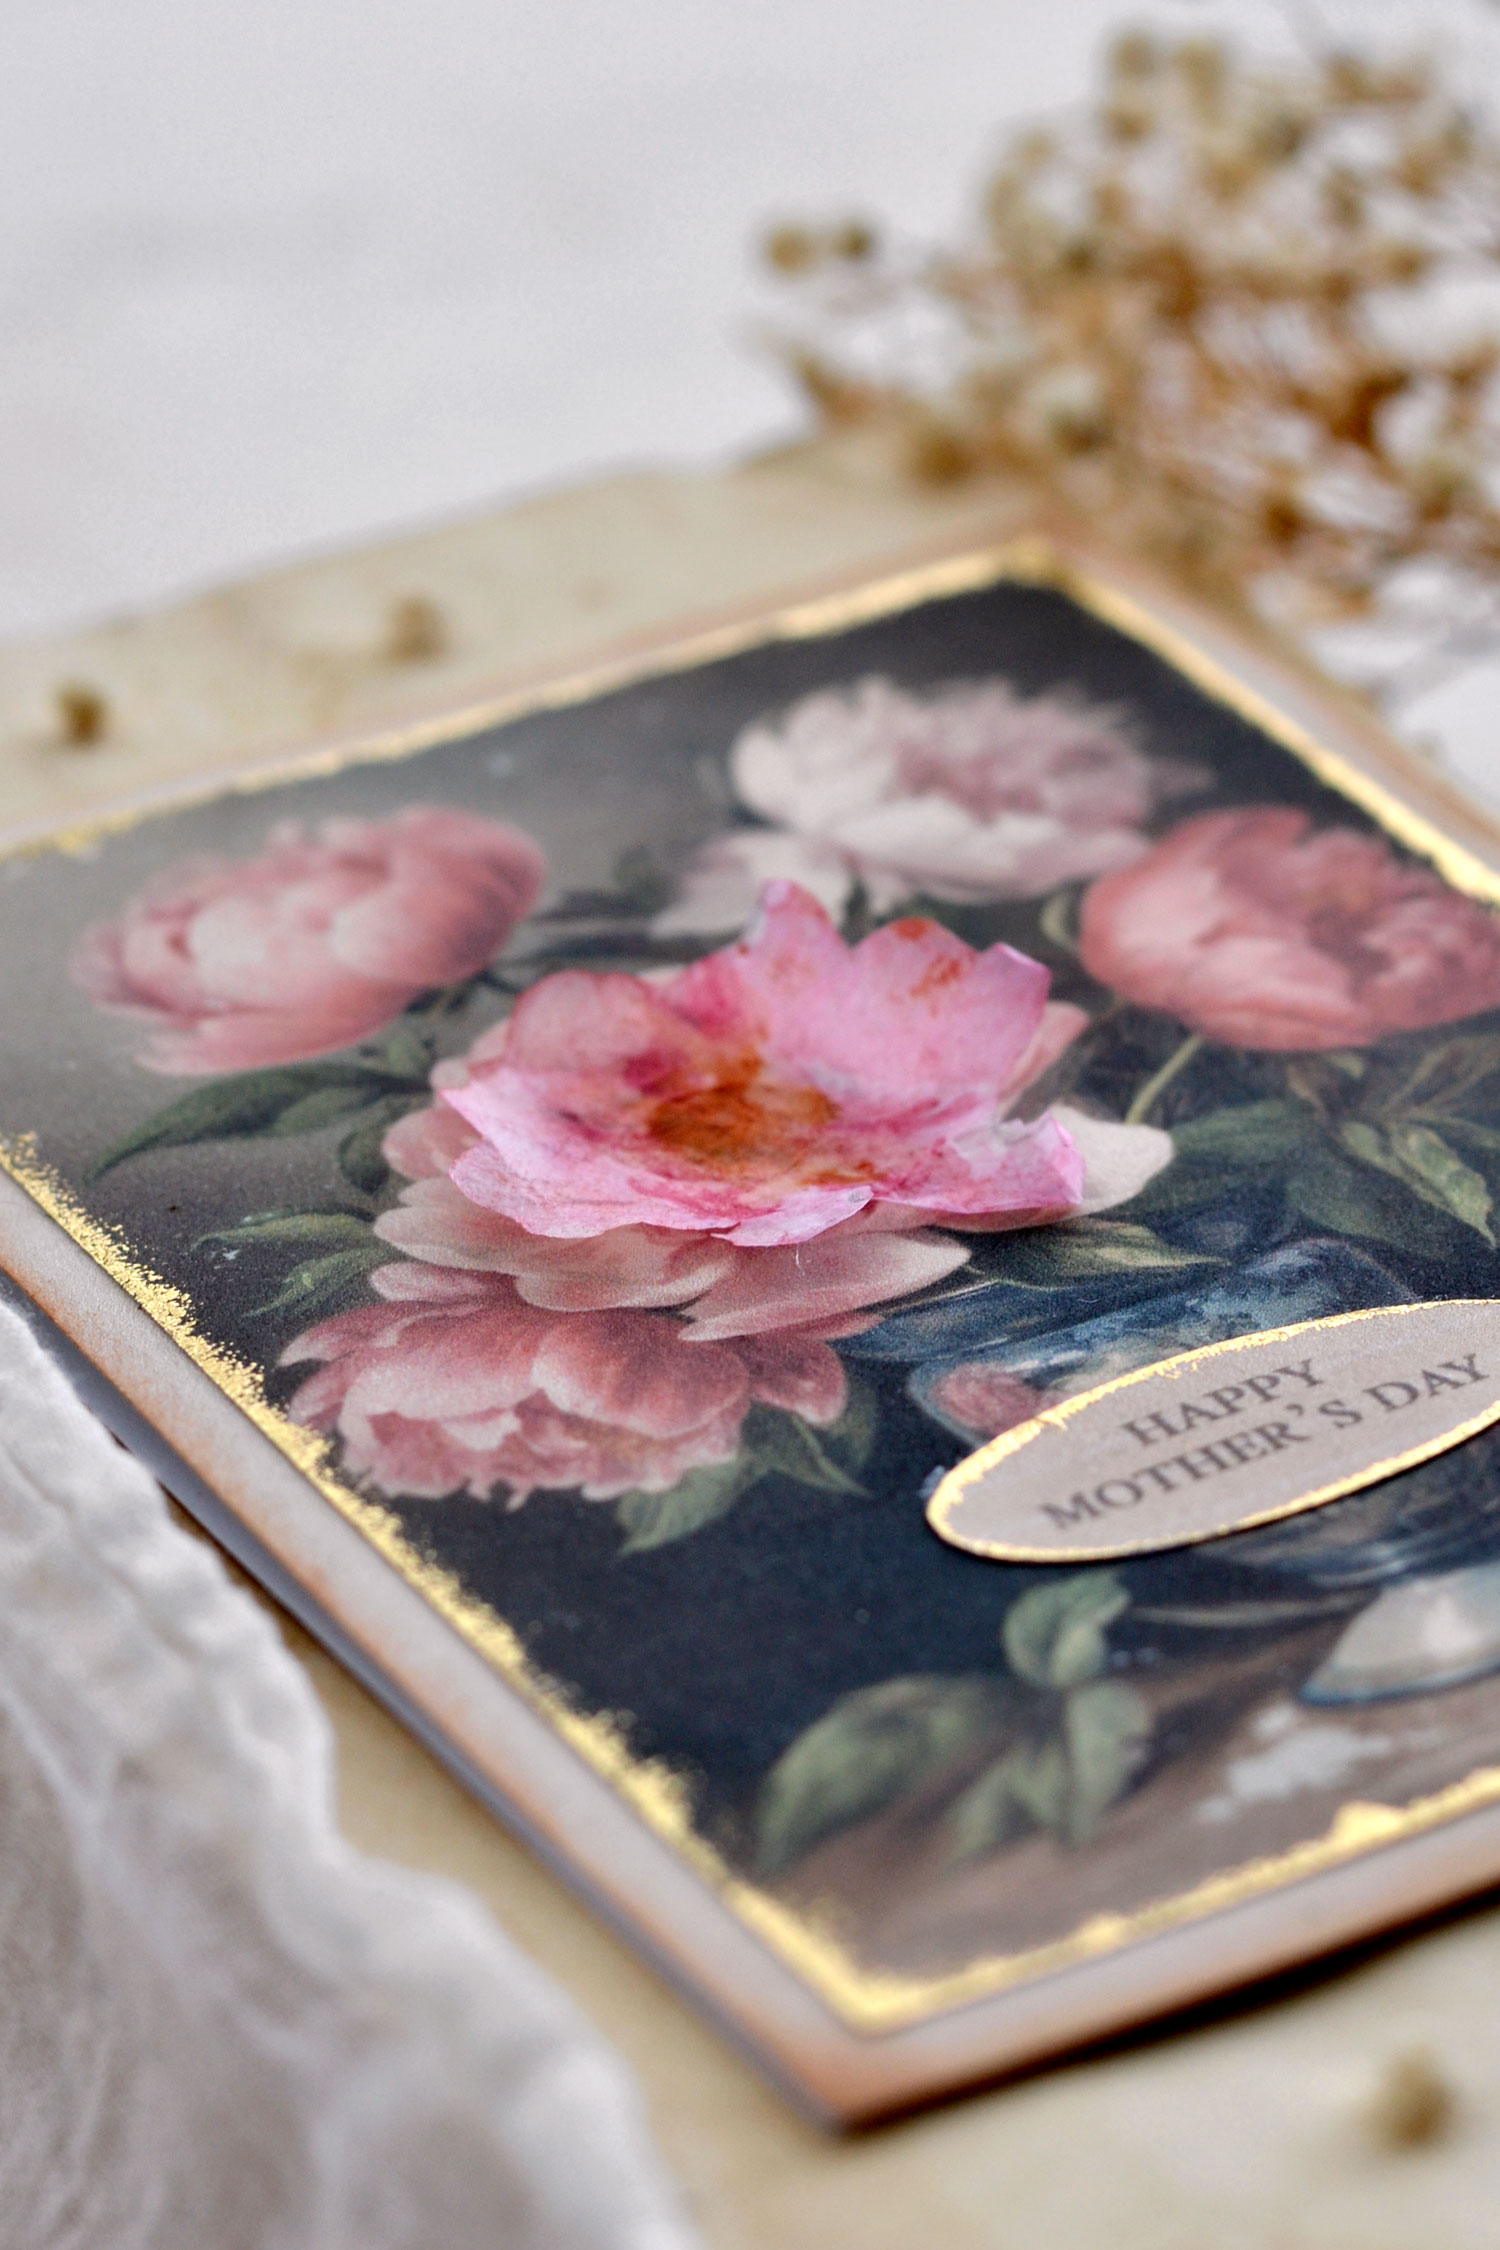
Remember that I mentioned I specifically designed our gorgeous peony card to be opened vertically? This will work to our advantage because the card will stand on its own if placed on a flat surface! So cool, right? Your mom will be able to display it in her home like a mini painting and admire it all day long!
Of course, you could also include a small stand and gift it with the card to take things to the next level and make everything even more special. I found a plate stand that has a lovely vintage vibe, I think it will perfectly complement our beautiful peony card!
You could also add your mom’s favorite flowers to the mix, a lovely bouquet will go wonderfully with our gilded peony tag! I added a little bit of coffee-died crinkle ribbons to the tag, and I love how beautiful it turned out!
Of course, both the tag and the card can be used for other special occasions, too! Leave out the Happy Mother’s Day message and use one that serves that purpose instead. Or leave the messages out completely and include these beauties in your junk journals, or any other creative projects you can think of!

I hope you will love this project and decide to give it a try! Your mom or grandma will surely appreciate such a thoughtful gift. As an idea, if we were to think outside the box for a second, you could also give this to one of your friends or even your daughter, who recently became a mom! Your handmade Mother’s Day card with a touch of gold will be equally loved and appreciated!
 You might also like this Printable Birthday Card Kit for Dads!
Happy crafting,
Diana / Dreams Factory


Shay says
What size cardstock did you use? The 8.5 x 11 size cuts part of the graphic as does the 12 x 12 size. I’m probably missing something. Can’t wait to make this.
Karen Watson says
Hi Shay, all of Diana’s printables are made to fit 8.5″ by 11″. Just make sure that you save the PDF by clicking on the words underneath the picture of the printable, so that you get the right size.