Best Paint for Rocks
Hey all my Graphics Fairy artsy and crafty friends – it’s Rebecca here to share some of my best tricks and tips as well as the Best Paint for Rocks! Have you ever wanted to paint on rocks but could not figure out how? Well, I am going to demystify the rock painting process for you and, hopefully, give you some ideas about designs and patterns along with the tools to make the process easy. Then I will share two, fun 3-Step Dot Flower Painted Rock Tutorials to get you started. I’ll also share my favorite rock painting supplies to get you started.
Rock painting has become a fun hobby for people of all ages. If you know me, you know I love rocks and have collected them, and painted them, for many years. Perhaps the best thing about rock painting is that none of the materials needed are costly; rocks, paint (usually acrylic), water, simple tools, and paper towels are typically all you need to enjoy this craft. There are numerous types of rocks which can be painted, such as sandstone, limestone, slate, granite, and marble. Let’s explore the fascinating world of painted rocks.
Finding Rocks to Paint
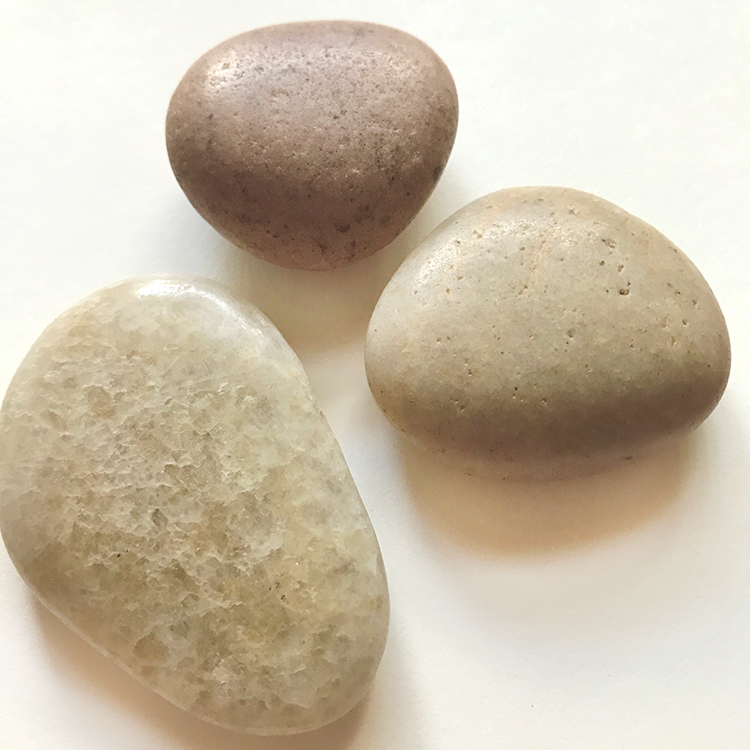
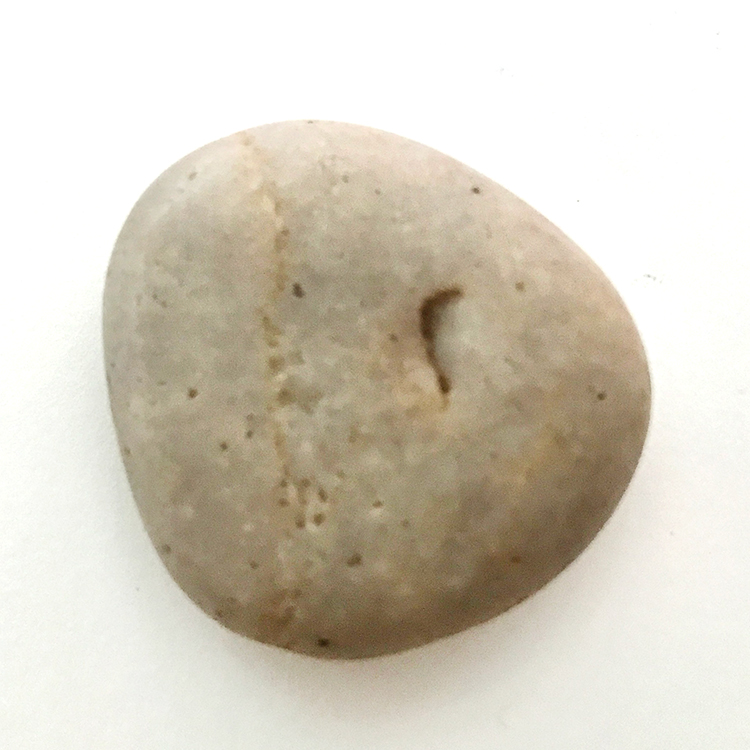
Rocks can either be found, purchased, or handmade using materials like clay, cement, and/or gypsum. Select smooth stones without holes, cracks, or a bumpy surface (see below). Raw stones are usually porous and can absorb paint differently than polished stones. Gently polished stones provide the best surface. They will feel smooth but have a little roughness to them. They feel much like satin paint on walls. Avoid highly polished stones. These look beautiful when painted, but the paint tends to chip off easily. I would hate for you to create a beautiful design and have all the paint fall off.
Best Paint for Rocks
Although numerous types of craft and water-based paints can be used, the most common and practical method for painting rocks is to apply craft acrylic or fluid acrylic paint using a thin brush. The paint needs to have a fluid consistency. Acrylic paint has a thin consistency, which allows for painting with easy, smooth strokes. I would avoid heavy body acrylics. Thick paints make for uneven, imperfect dots. If using a thicker acrylic paint it will need to be thinned down first with a few drops of water or an acrylic medium.
One of the benefits that acrylic paint offers is that it dries quickly, and a second coat can be applied after only a few minutes. It is available in a wide variety of colors and is relatively inexpensive. There are other paints to try as well:
- Chalk Paint. Chalk paint is recommended for the base coat because it is lightly absorbent.
- FolkArt Multi-Surface paints.
- Latex House Paint. The sample pots are great.
- Fabric Paints. Thin with a fabric medium.
- Nail Polish. A little more complicated to use than paint.
Best Paint Pens
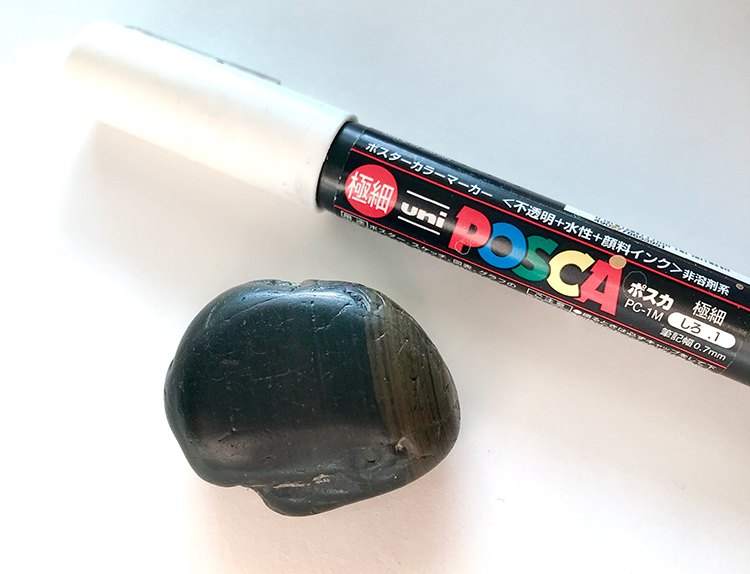
Beginners may find it considerably easier to use acrylic paint pens filled with acrylic paint instead of a brush for painting the surfaces of small rocks. Even experienced rock painters often prefer using paint markers for extra fine detailing since this combines the paint’s texture with the benefit of high precision provided by a fine-tipped pen. There are many choices of acrylic paint kit brands available for rock painting that can be found at craft stores, walmart, Amazon etc. A few superb options include:
- Elmer’s Paint Pens
- ARTEZA Acrylic Paint
- POSCA Pens
- FolkArt Multi-Purpose Acrylic Paints
- Sharpies
Brushes and Tools for Painting Rocks
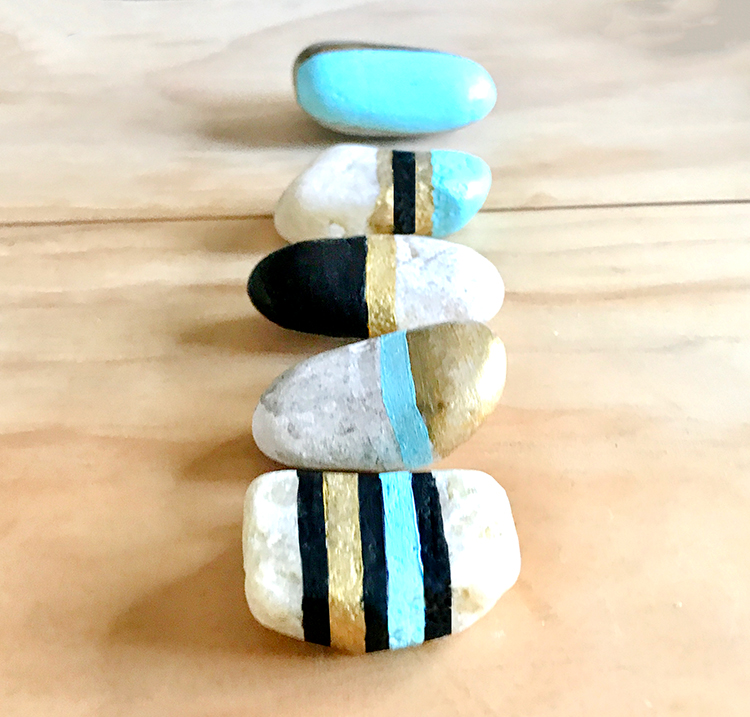
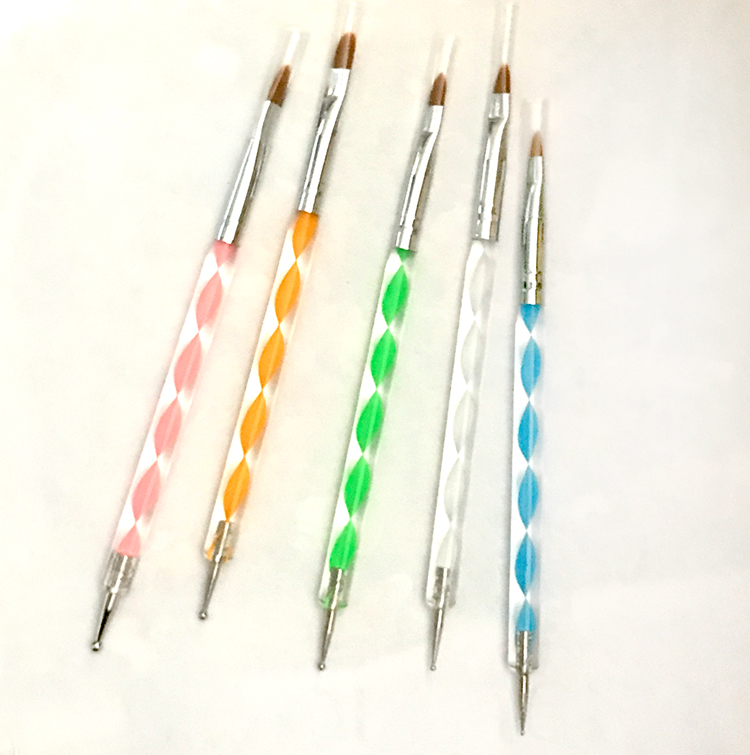
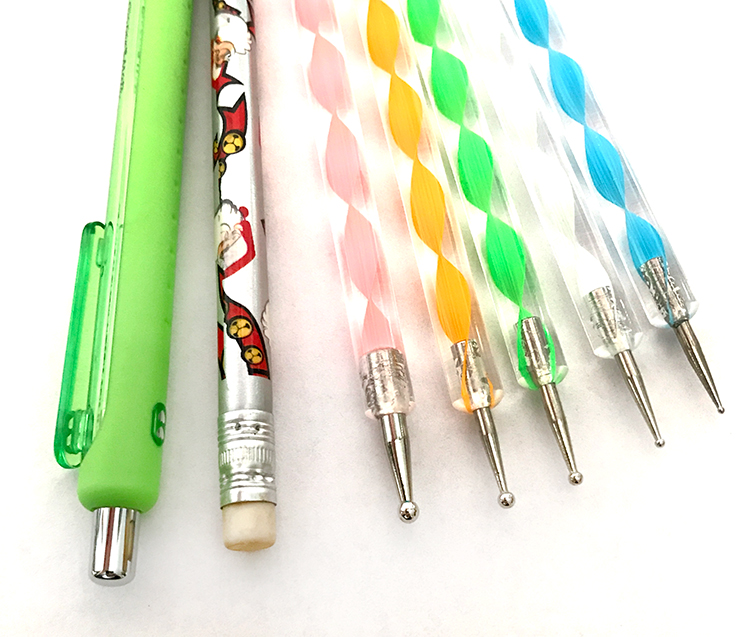
Believe it or not, there are brushes and tools available for painting rocks. Tiny, fine detail artist brushes and tools (see above) made for nail art are my faves for this process. Nail art brushes work beautifully as well. Larger brushes can be used if painting big rocks, but a thin brush is necessary for creating small details. There are kits available with tools, brushes, and even stencils. Most of the kits are stylus based tools. Any stylus will work as dot tools for the dot painting decoration technique.
The Rock Painting Process
Cleaning Rocks
The process of rock art always begins with proper preparation of the rock itself. A rock that you pick up off the ground should be washed and brushed with soapy water to remove dust and dirt, then thoroughly dried before painting. If the rock is smooth and has an even surface, it is already in good condition for painting. If, however, you find one that is chipped, scratched, or bumpy, it will need to be primed prior to painting.
Priming Rocks
The application of primer prior to painting rocks or varnish to seal the paint is considered optional. It really depends on whether the texture of the stone will securely hold the paint in place over the long term. Priming the surface before painting leaves the surface smoother and less porous, but porous enough still to absorb and hold the paint well. Rougher surfaces that aren’t primed can quickly wear out the nibs of your paint brushes’ bristles, leaving the round tips flat and scratchy. There are different options available for primers. I prefer clear gesso or matte Mod Podge.
Hopefully this doesn’t cause confusion, but it should be noted that rocks can be primed by actually sealing them prior to painting. Mod Podge is one popular method but other clear brush or spray sealers can be applied. Some artists prefer priming rocks with white paint to produce more vibrancy to the colors painted over it. Conversely, clear coats produce the appearance of darker shades of color. Priming rocks before painting can really help to get paint to stay on the rocks.
Sealing Rocks
If you decide to seal your rocks painted with acrylic paint, spray sealers are the best option to make them more weather resistant. Clear protective coatings and sealants such as varnish or acrylic are ideal since they have archival benefits like anti-yellowing, sunlight protection, and waterproofing properties. Some examples are Krylon Kamar varnish spray, DecoArt DuraClear gloss varnish, Krylon UV-Resistant Clear acrylic coating, and Rust-Oleum Clear topcoat. All provide a shiny, gloss finish. Mod Podge Matte is sometimes used for a pretty, matte finish. Importantly though, some acrylic paints are actually self-sealing, and do not require a sealer. Two splendid examples are FolkArt Outdoor paint and FolkArt Multi-Surface paint.
Easy Rock Painting Ideas
This art form is fun, relaxing, and can be meditative. Just move slowly and thoughtfully. Painting rocks can be a zen like experience if you use tangle patterns and designs.
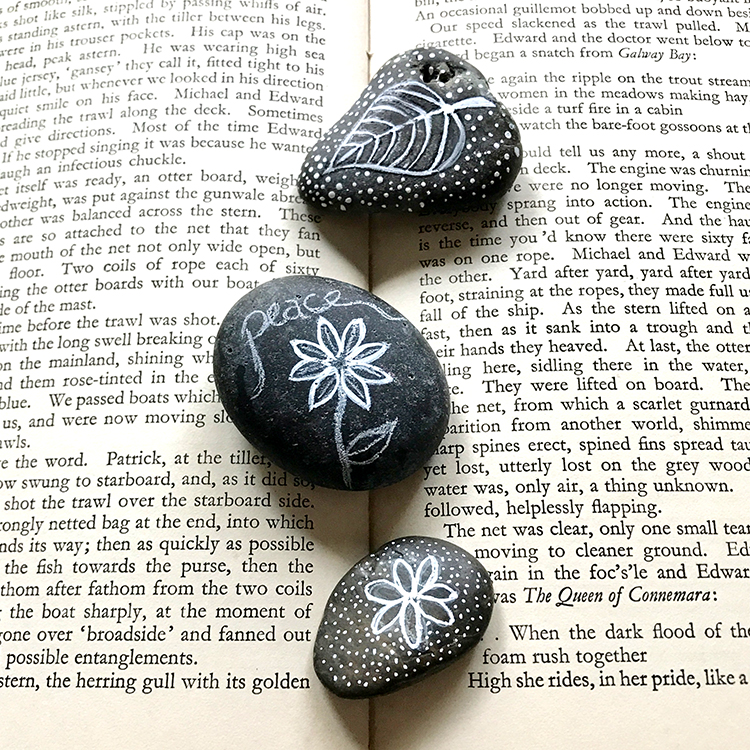
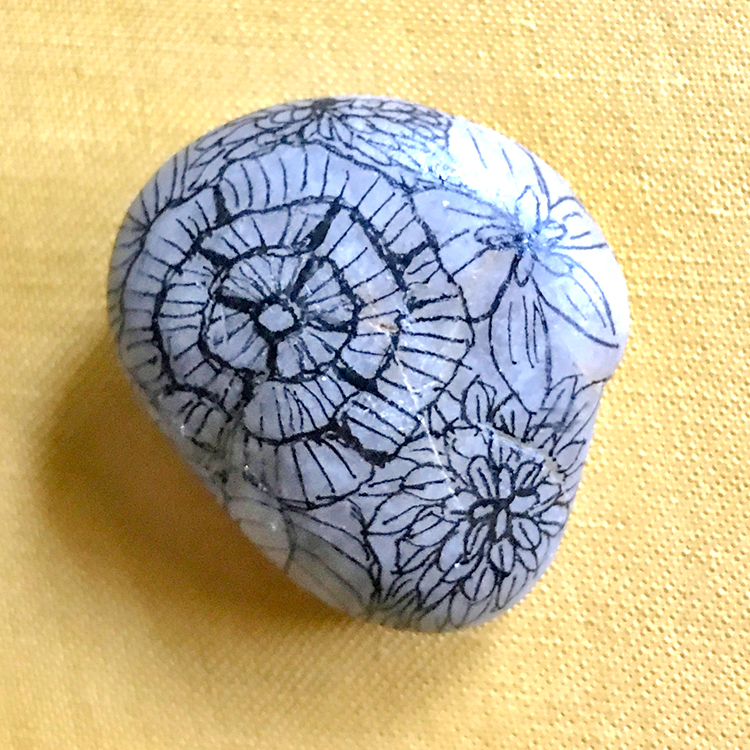
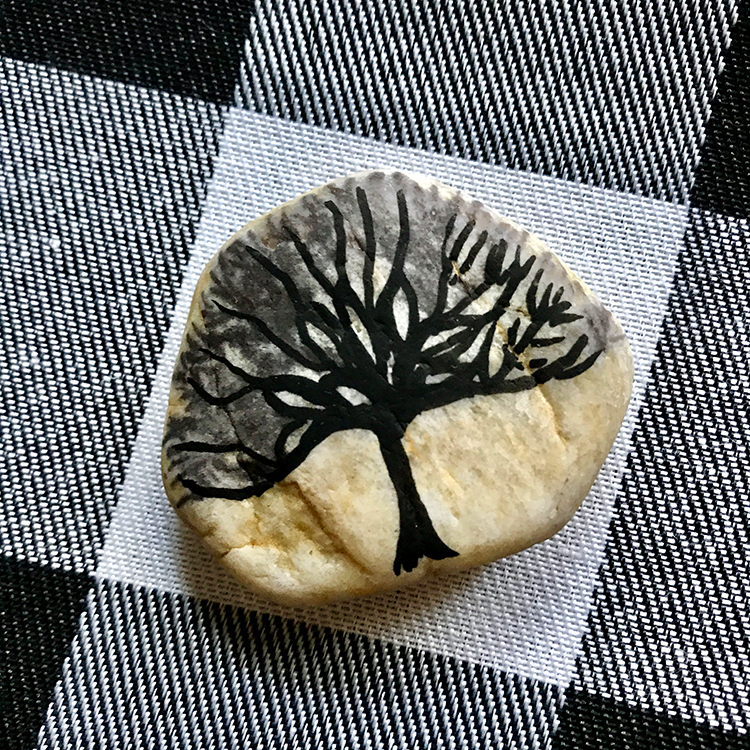
Doodling is also fun to do on rocks as you can see in the image above. Some people create Mandalas, while others paint flowers and animals. I adore little houses painted on odd shaped rocks. There are many books written on the subject providing loads of visual ideas. Just search for rock painting on Pinterest to open up a world of ideas and creativity.
Sketching
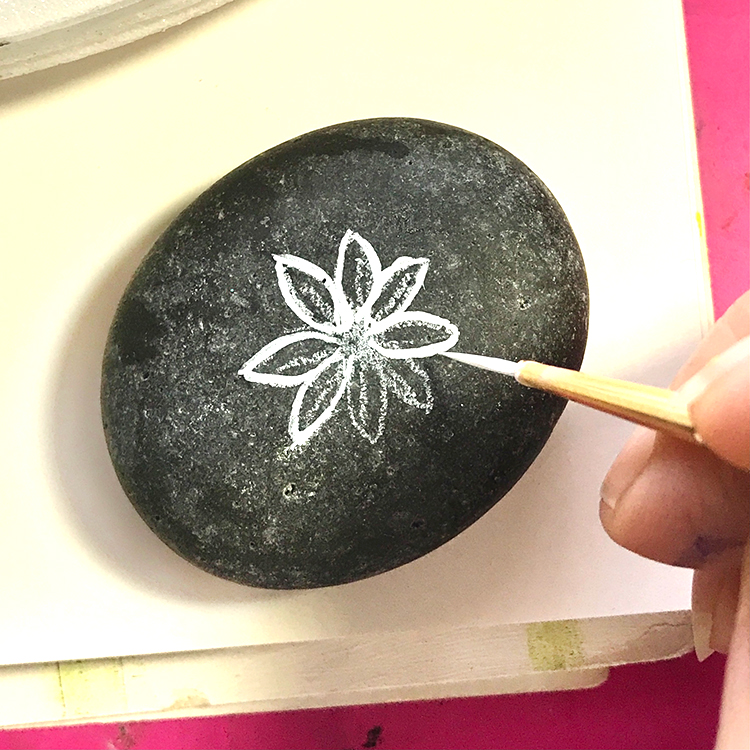
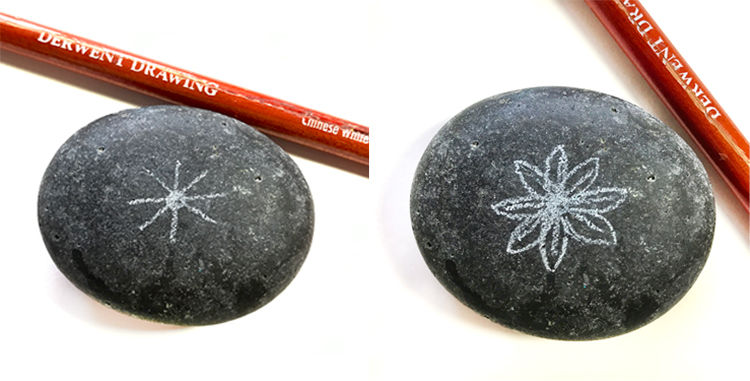
Before painting a rock, it is beneficial to draw a sketch with a pencil for accuracy. This is especially true for beginners, while this may not be necessary more experienced artists. Additionally, drawing the contour lines (outlines) of the image will aid with precision. On a very small rock, you may not be able to do a complete sketch, but you can always at least draw the contour lines. Tracing the outline with a black marker is ideal for highlighting a drawing by adding volume and enhancing fine details. I use charcoal pencils, both white and black, that have a sharpened point.
Mistakes
Mistakes happen to even the most experienced and careful painter. You have two choices: 1- Embrace the odd mark, or 2- Remove the paint. You can quickly remove acrylic with water and a cotton swab. I usually dab at the spot with a small paintbrush that I have dipped in water. It should not be dripping wet, just damp. Then I dab the water paint with a cotton swab. You might need to repeat this process a few times to remove the paint. TIP: You can make a big mess while trying to remove paint in a compact design. Just be careful and move deliberately. If you mess up the whole design, you might need to wash the rock, let it dry, and start the design again.
Simple 3-Step Dot Flower Painted Rock Tutorial
For this design I will be using a POSCA .07mm Paint Pen to create the three petal flower. I sketch the flower shape on the rock first with a white charcoal pencil. You can also use the back tip of paint brushes to make the dots. In a pinch, a tooth pick with the point cut off can be used. Practice on paper before you work on the rock. This helps you understand the pressure and rhythm of your dot making. TIP: If you press too hard and too long with a Paint Pen, you can create a big puddle of paint. That will make a mess on your rock.
- Sketch your petal design onto the rock with a charcoal pencil. (top left)
- Shake the Paint Pen, with the lid one, vigorously for a few seconds. Do this several times during the process. If it is a new pen, activate it according to the manufacturer’s directions before you begin. Hold the tip of the marker at a 90 degree angle to your rock. Press firmly then lift straight up away from surface. Do not wiggle it in the paint, just press and pull up. (top right)
- Follow your petal and stem pattern making dots, working slowly and thoughtfully around the design. Take your time and space dots equally as you can.
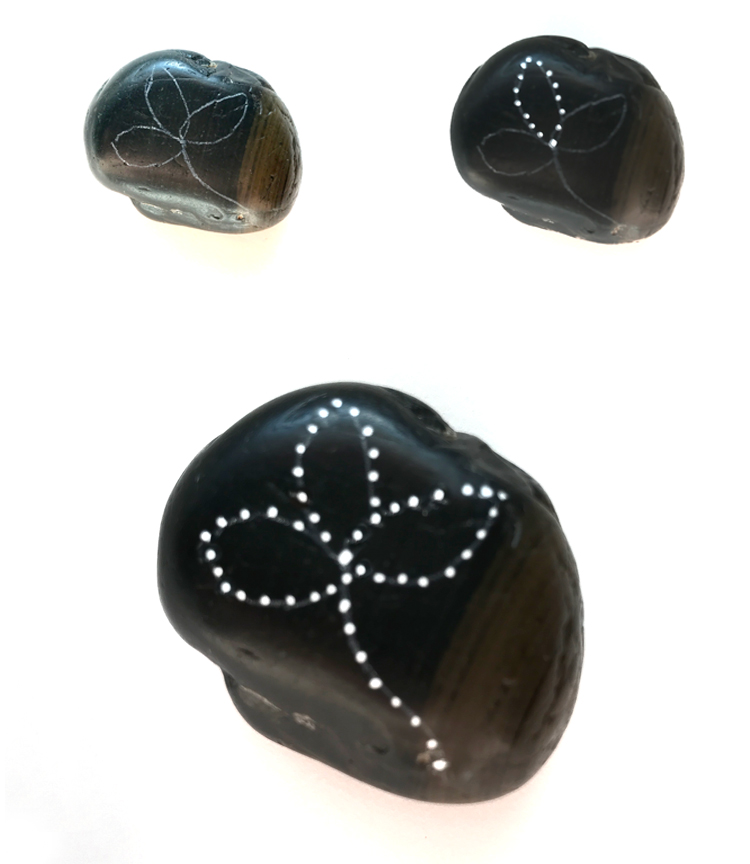
There you have a very simple dot flower. A single color looks beautiful on a contrasting rock.
3-Step Dot Multi-Color Flower Painted Rock Tutorial
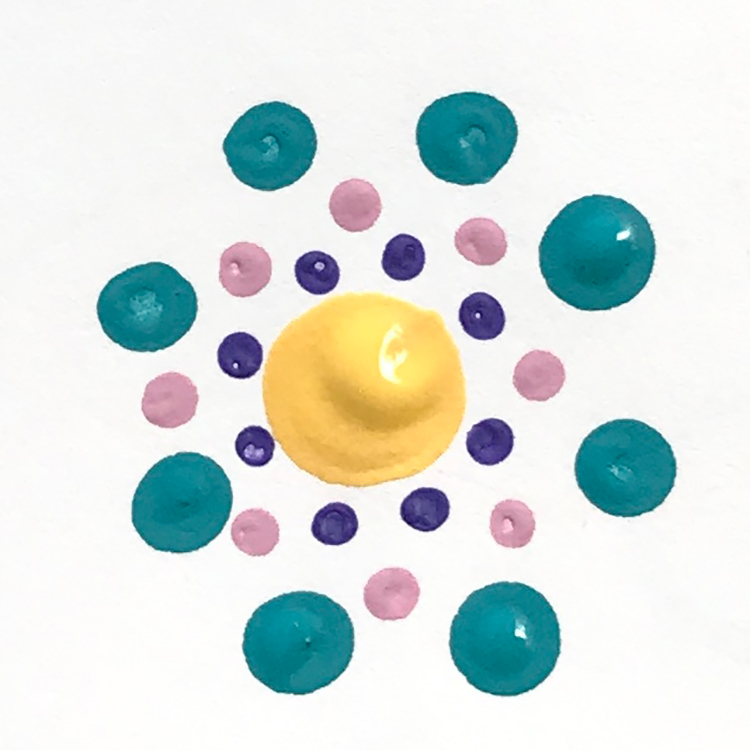
For this design I will be using a set of stylus’ made for nail art, plus a pencil eraser and the tip of a pen. You can also use the back tip of paint brushes to make the dots. In a pinch, a tooth pick with the point cut off can be used. A cotton swab with the cotton removed is also an option. I use craft acrylic paints. You can also use paint pens if you have them.
Practice is always a good idea. It is a dip, dot, and done technique. Fairly easy to master, this is a great art technique to share with the whole family.
- Try out new patterns on paper before you attempt to paint the rock. This will also help you understand the timing of lifting the tool. Lifting too quickly can result in splatters.
- Make no more than 2 dots per load. At first, I recommend that you dip and dot and dip.
- Make sure you have enough paint on the tool.
- Start in the middle of your design and move out.
- Push the tool down firmly on the rock.
- Once you are comfortable with the process, move to a rock.
- Make sure to clean the tool frequently. Do not allow paint to dry on the tool. Keep a damp paper towel or rag close to wipe away paint frequently.
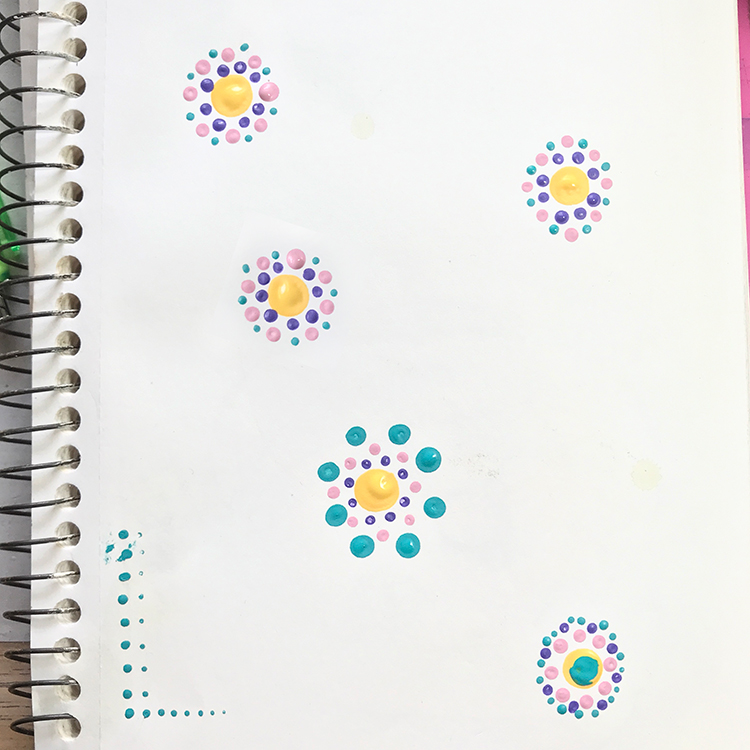
Here is a close up of the dots. You can see they puddle and have differences, yet they look beautiful when complete. Don’t sweat the small stuff.
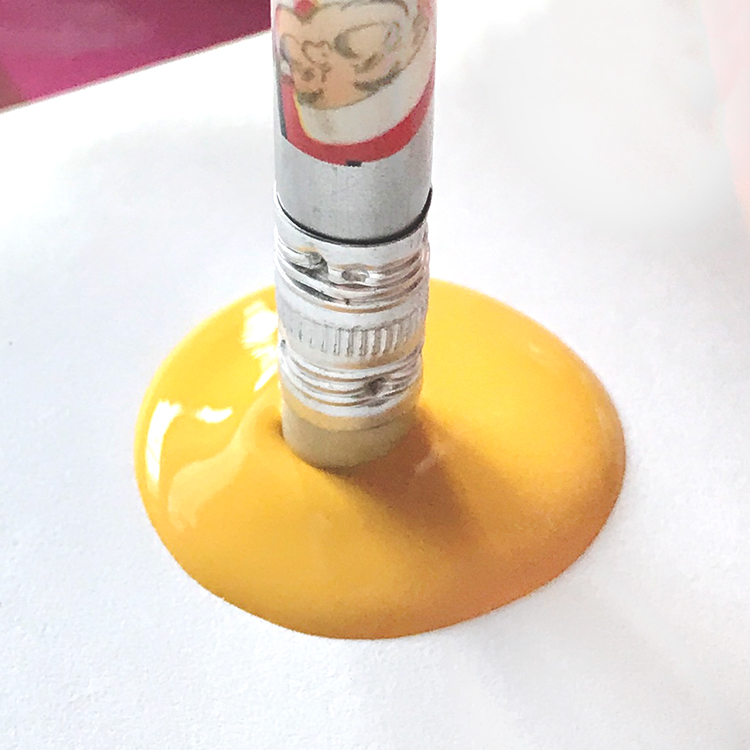
- Place a puddle of craft paint onto a palette about the size of a quarter. Dip only the tip of your tool into the paint at a 90 degree angle as shown below. You do not need much paint. Do not wiggle it in the paint, just dip it and pull up. TIP: Do not scrape or shake excess paint off the tool. That will result in imperfect, odd shaped dots.
- Hold the tool like you would a pencil, close to the tip for the most precision. Hold the tool at a 90 degree angle, perpendicular to the surface of the rock.
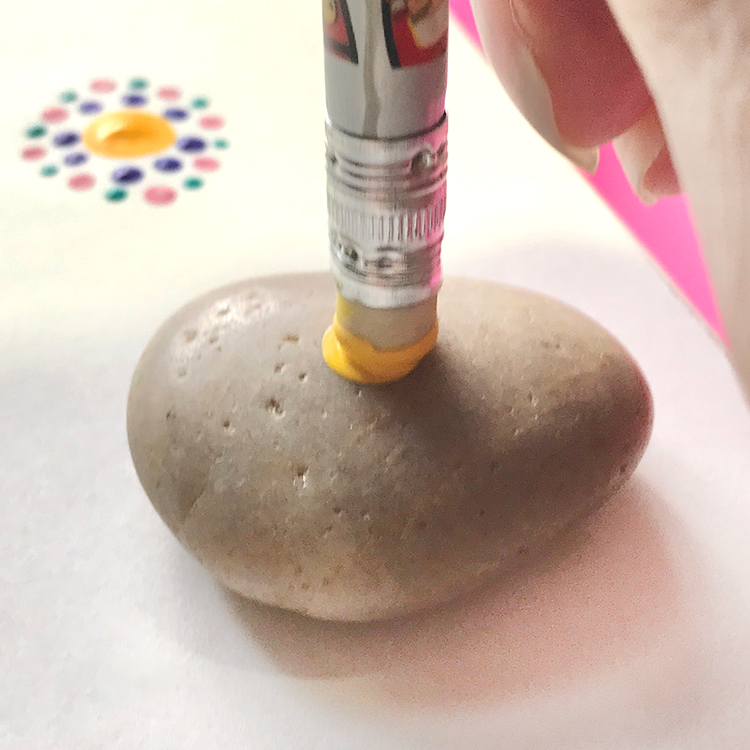
3) Press the tool straight down once, count to three, and pull straight up away from the rock. If you pull the tip off the rock too quickly, it might spatter the paint. TIP: Do not wiggle or roll the tool on the surface. Clean the tool after each use, especially when changing colors. To paint a simple flower, follow these steps:
-
- Load a pencil eraser with yellow paint and apply to the center of a clean rock. (top left)
- Load the tip of a pen with teal paint and make 8 dots around the yellow center. Re-load the paint again for each dot. Do north and south, then east and west, then fill in the spaces in between. (top right)
- Load a smaller stylus with pink paint. Make a dot in between each of the teal dots. Re-load the paint again for each dot. (middle left)
- Load the same stylus with yellow paint. Make two dots over each of the teal dots. Re-load the paint again for each dot. (middle right)
- Load a larger stylus with purple paint. Make a dot in over each of the pink dots.Re-load the paint again for each dot. (bottom)
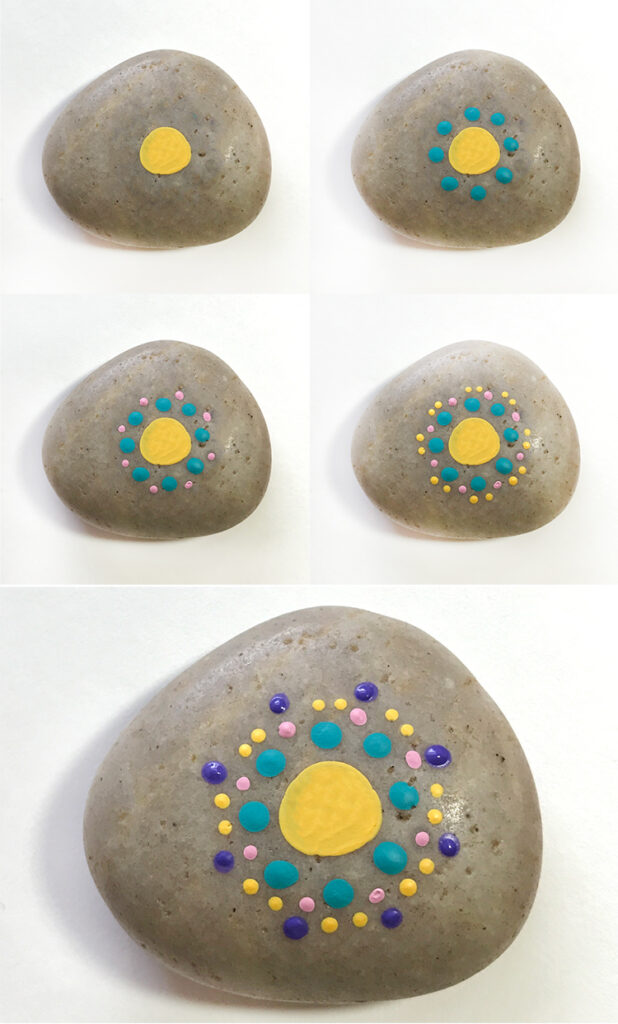
4) There you have a simple multi-color dot flower. You can use different colors if you wish. A single color looks beautiful as well. There are many ways to make a flower and many patterns to follow.
Patterns
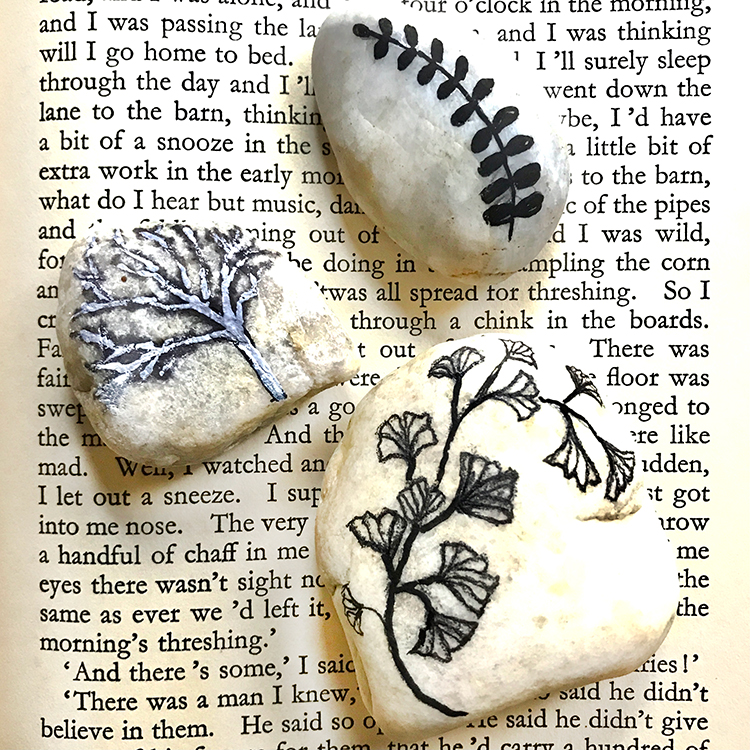
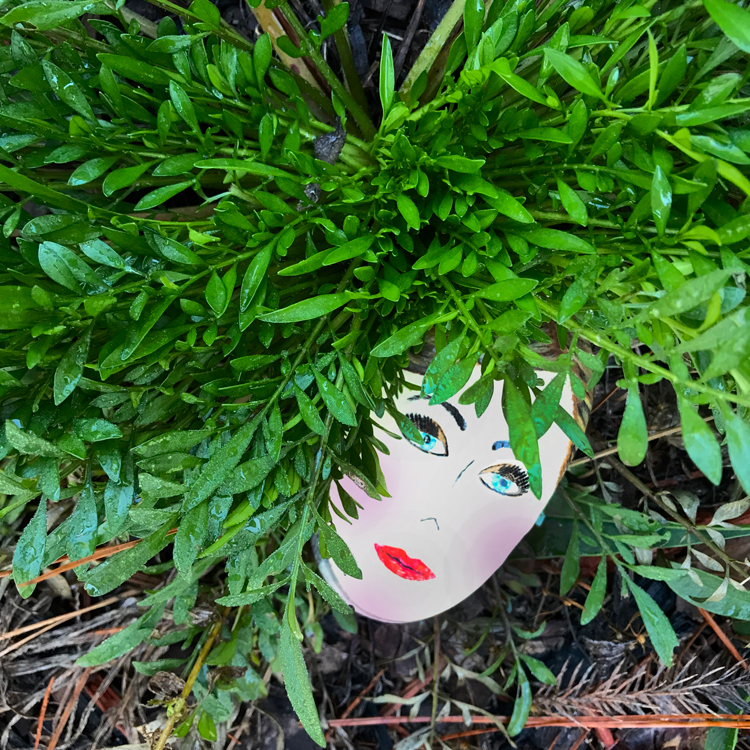
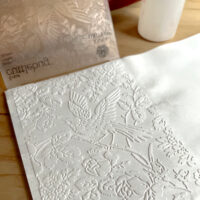
Luckily, there are many resources to guide you and give you inspiration. I love nature patterns as you see on the rocks below, but there are hundreds of other designs and patterns available. Some can be found in other art forms.
If you need inspiration, check out these patterns on Pinterest:
- Punched Tin
- Rhinestone Designs
- Candlewicking
- String Art
- Paper Stitching
- Embroidery
- Henna
What to Do with Painted Rocks
A popular activity that you may be familiar with involves hiding painted rocks (with messages included) in nature for others to find. I think it’s so fun to find one of these so-called “hide and seek stones.” There is actually a kit called “Hide and Seek Rock Painting Kit” for both kids and adults that includes ten rocks, eight waterproof colors, transfer designs, and a brush. It is popular today to also post a picture of your special rocks online for people to find. It’s like hunting for hidden treasure!
There are so many other things you can do with your specially painted rocks in and around your home. (Pinterest is a great place to go for ideas.) A few examples include:
- Adding them to a garden (e.g., a ladybug rock)
- Gluing a magnet to them and placing on the refrigerator door
- Filling a glass vase
- Displaying in a wooden or silver bowl
- Making an ornament
- Using as a paperweight
- Using medium-sized rocks as a children’s educational tool by adding things like colors, numbers, or letters
- Playing the ‘hide and seek’ game indoors or outdoors
- Making jewelry
- Spreading inspirational messages with kindness rocks
I hope you enjoyed our fun and inspiring guide about the “Best Paint for Rocks!” I had so much fun writing this and sharing my rocks with you. You might also like my Best Paint for Glassware HERE or my Watercolor Supplies a Comprehensive Guide HERE!
When I am not creating for TGF, I also create Photoshop Elements tutorials and craft project videos over on The Graphics Fairy Premium Membership site. You can find even more of my books, art, and whimsical shenanigans on my website – The Bookery.
May joy be with you all,
Rebecca
